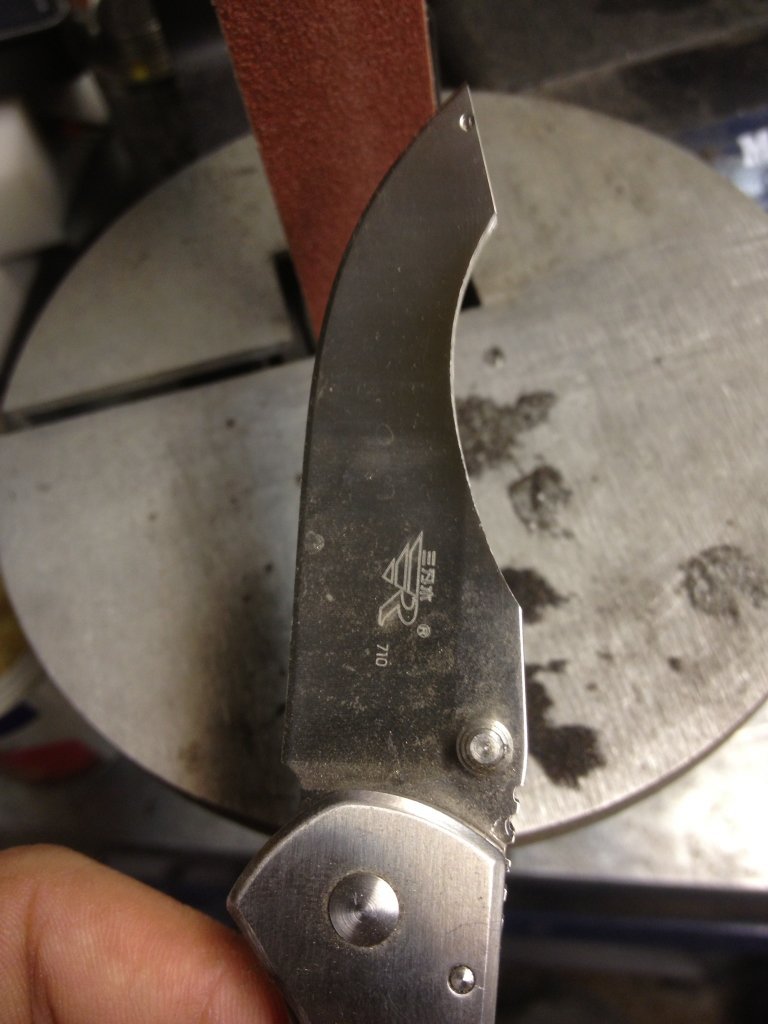
dubiously Been a little while since I’ve posted a build log, a LOT of working going out the door. So, this is an older mod but one worth posting, it is a modification of one of my favourite budget knives, the hotly debated Sanrenmu 710. Sanrenmu is a knife and tool manufacturer based in China and is one of the largest contracted OEM producers for such companies as Spyderco, CRKT and some other larger companies.
As such, they are tooled up to produce their own knives and tools.
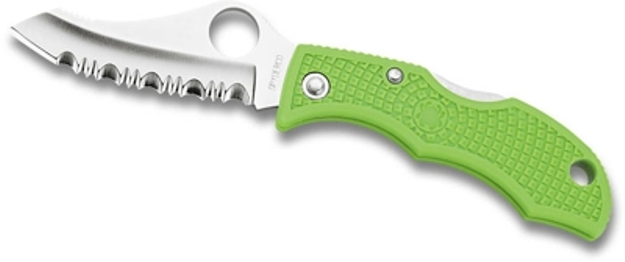
This is an experiment to mimic the use and ergonomic situations of a knife I don’t currently own, mostly because it is fairly expensive and it’s discontinued, The Spyderco Jester. A stout knife, the Jester is based off the keychain line of knives and uses the same frame as the Spyderco Lady bug, but has a much more useful shape and ergonomics. The forward sloping blade, finishing off into a semi Wharncliff style blunt edge can be used like a scalpel with a series of small jimping grips for an index finger. This is feature is found exclusively on the Jester and no other knife (that I’ve come across).
Since I liked the ergonomics of the Jester, I wanted to see if it transferred well to a larger knife. The SRN 710 is a near perfect match for a scaled up version of the Jester.
Here we go.
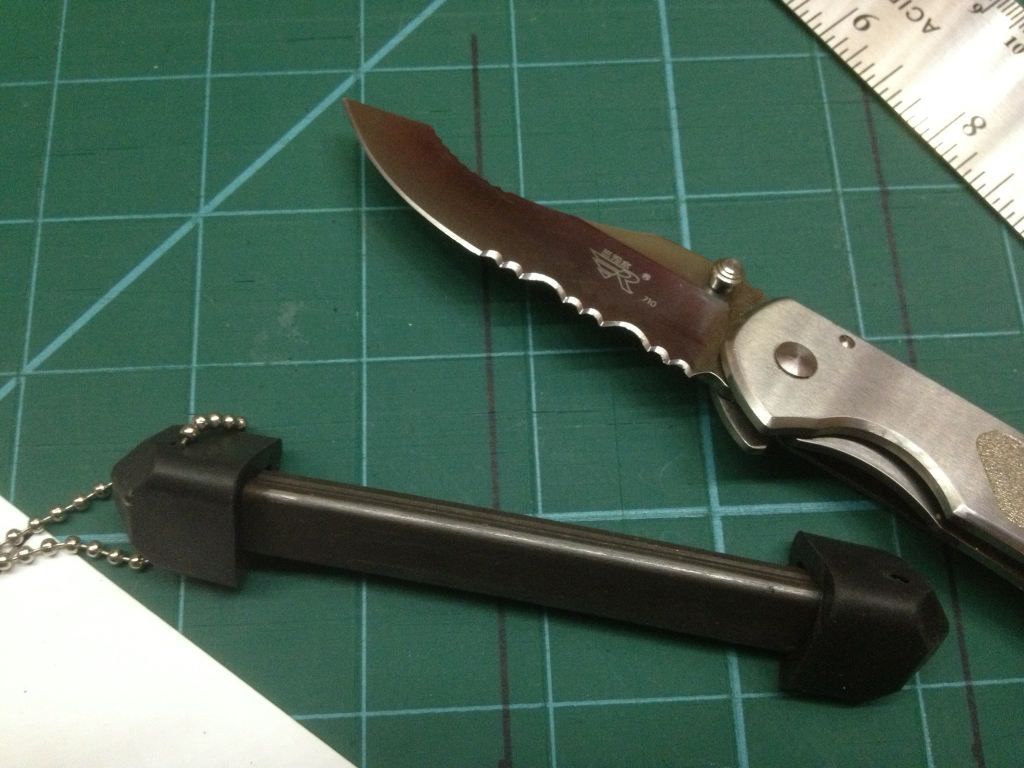
First…mark where the steel will be removed. I went with a generous curve to follow the blunter sweep of the forward blade edge, and then shape projects straight back into the spine.
Using a 80 grit 1×30 belt sander (the radius portion of it) the spine is slowly ground away with lots of water dunking breaks to keep the knife cool.
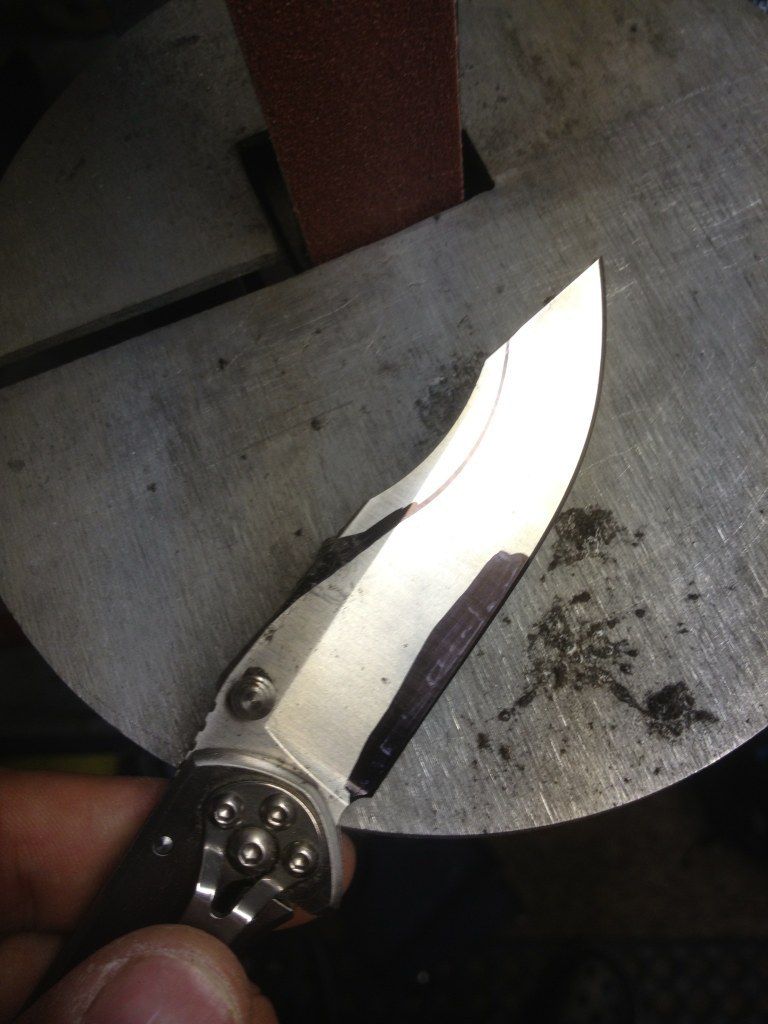
When the final shape is achieved, I switch the belts to a 320 grit to get a nice surface finish.
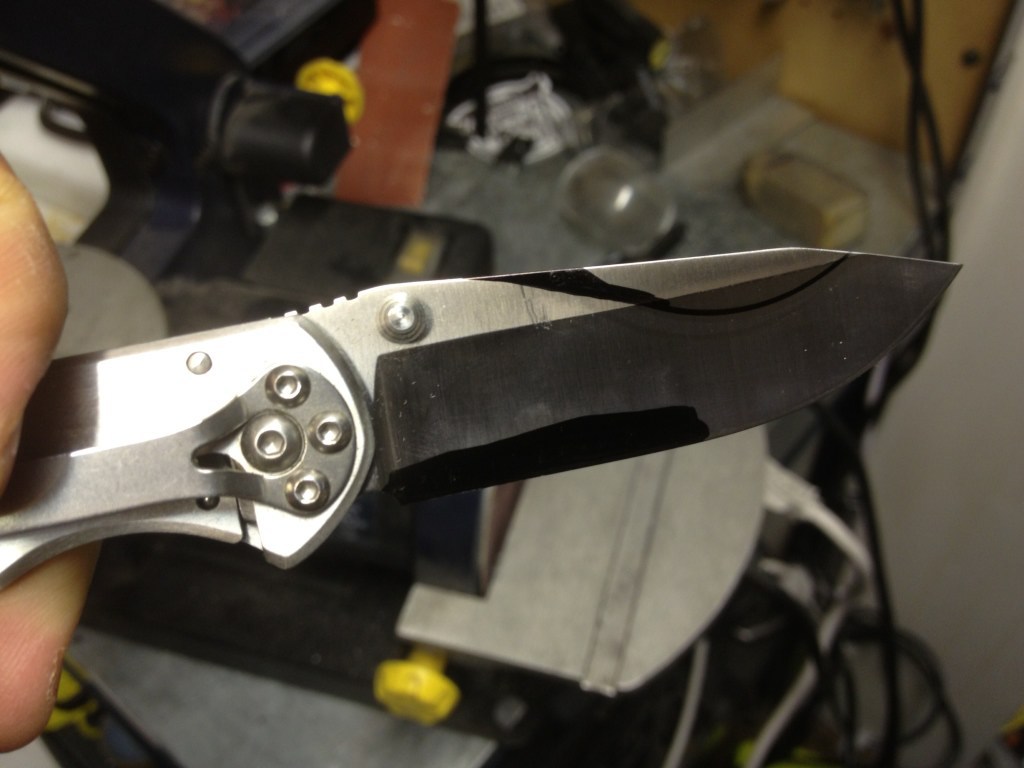
This part I forgot to take a mid way pic, but basically I use a Sharpie marker as marking fluid and space out evenly a row of 1/16″ scalpel grip jimping.
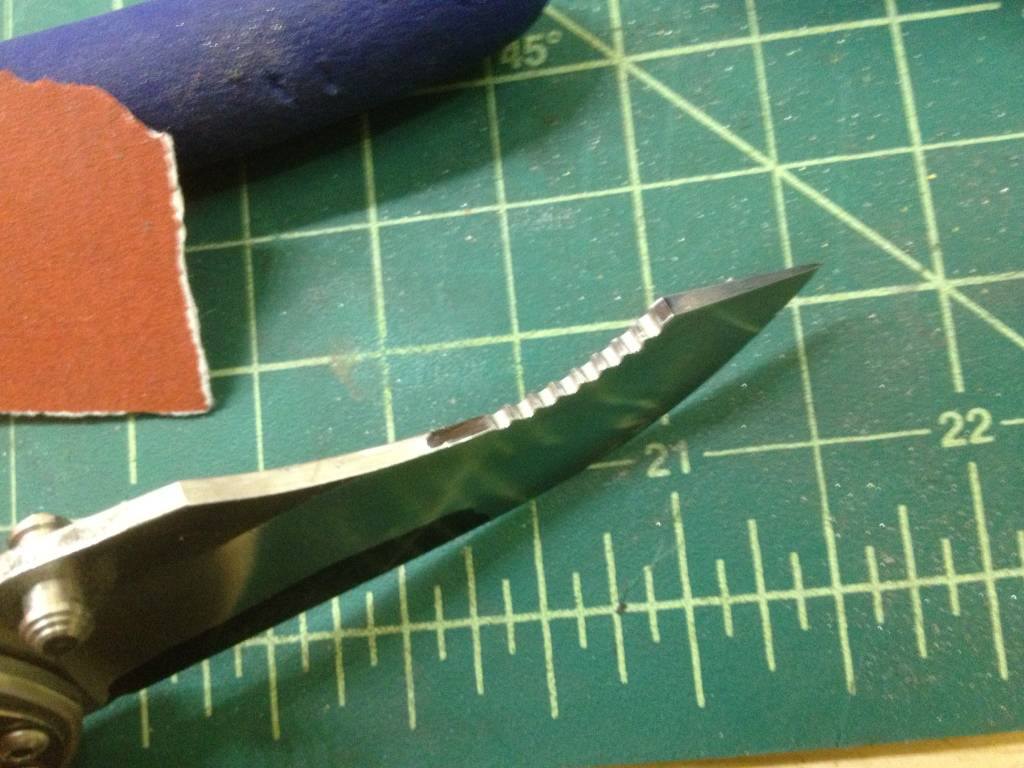
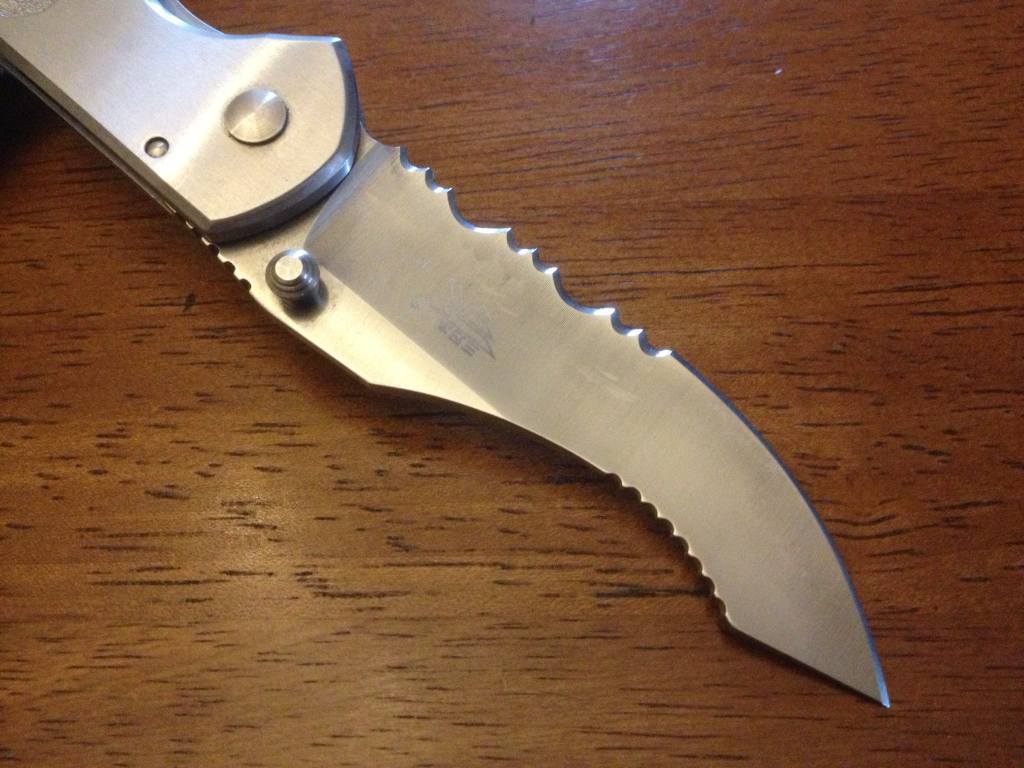
Once I was satisfied with the forward grip, I moved on to the business end of the knife, the serrations. I took a standard pattern approach to this, using a 2-1-2-1-2 pattern. Marking it again a with sharpie and spacing this small serrations at 1/8 and the large ones at 1/4″.
Here’s the fun part, carving the scallops. The small rounds I used a 1/8 rough diamond bit, sinking in only about 2/5 of the way. If you do them all at once, you can adjust the depth of the as needed, getting these even is crucial for the angle grinding.
The large scallops I used the small stone bit and went in the same depth as the small scallops.
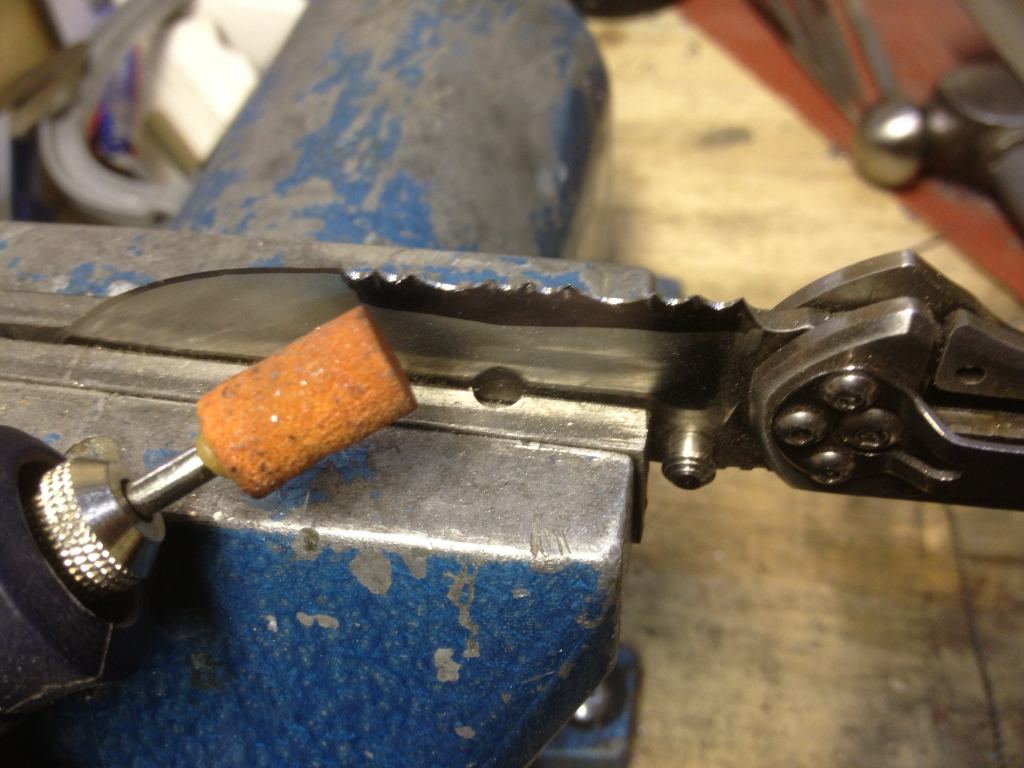
Now….the hardest part of the game…grinding the edge of the serration. If you’ve done your prep work, did some ghost movements with your hands you can really easily repeat the same motion, I have done this a lot and I can get a pretty good natural 20 degree grind. I found painting the scallops first with sharpie helps show how much material and shape of the grind to aid in matching them up.
The small edges I used a fine grit diamond 1/4″ bit, moving it up and down as it contacts the steel to get a nice uniform finish. With 6 of them, it’s tough to match them all up.
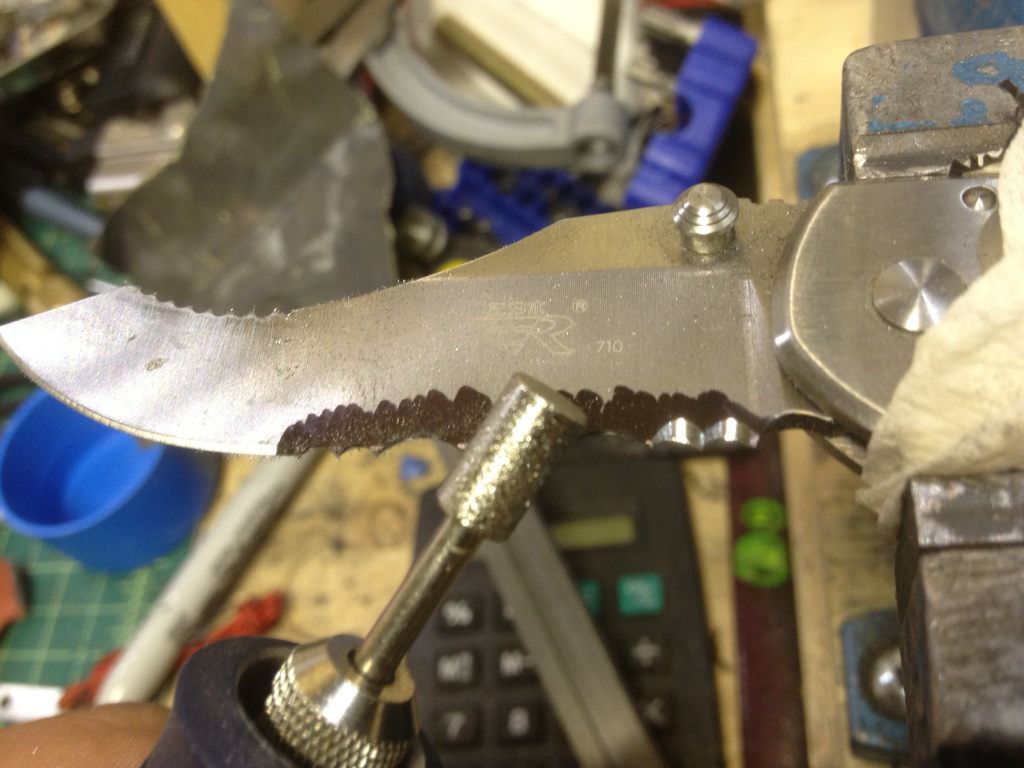
For the larger serrations I used a 5/8″ fine grit diamond bit, again moving up and down as I grind away.
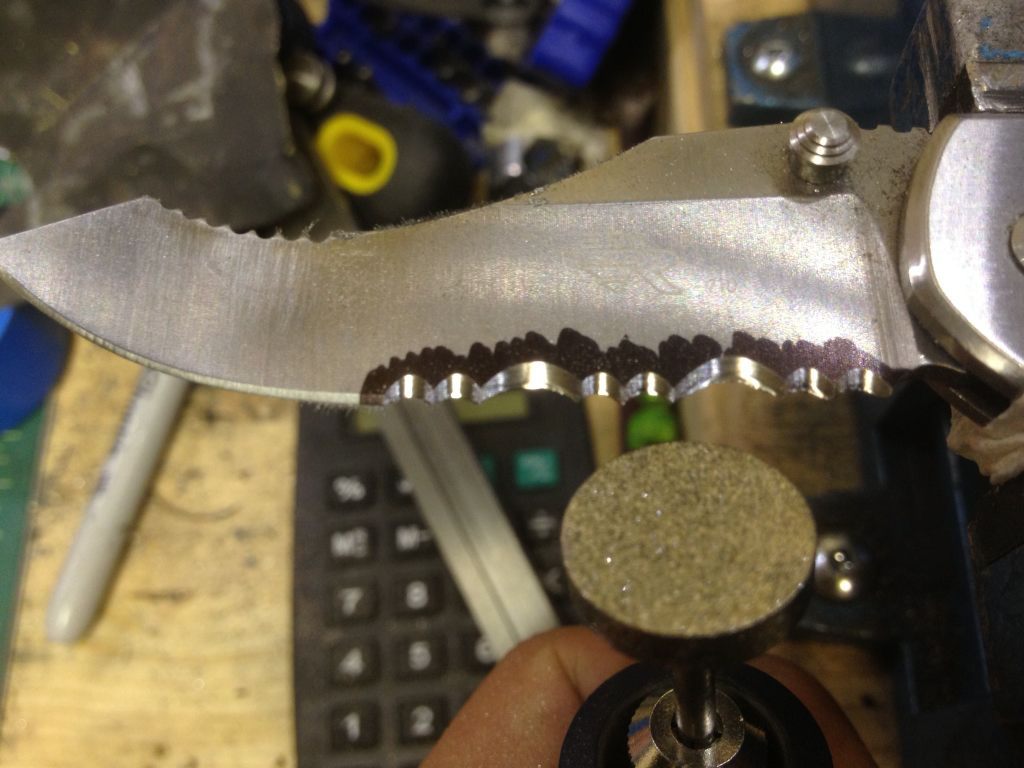
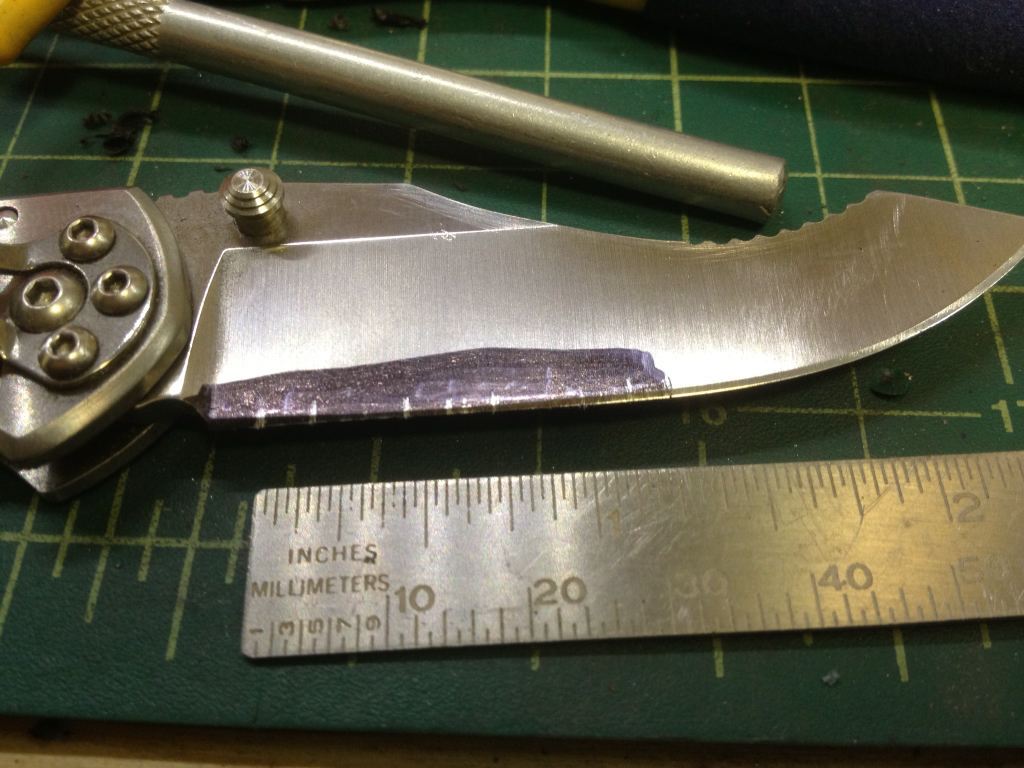
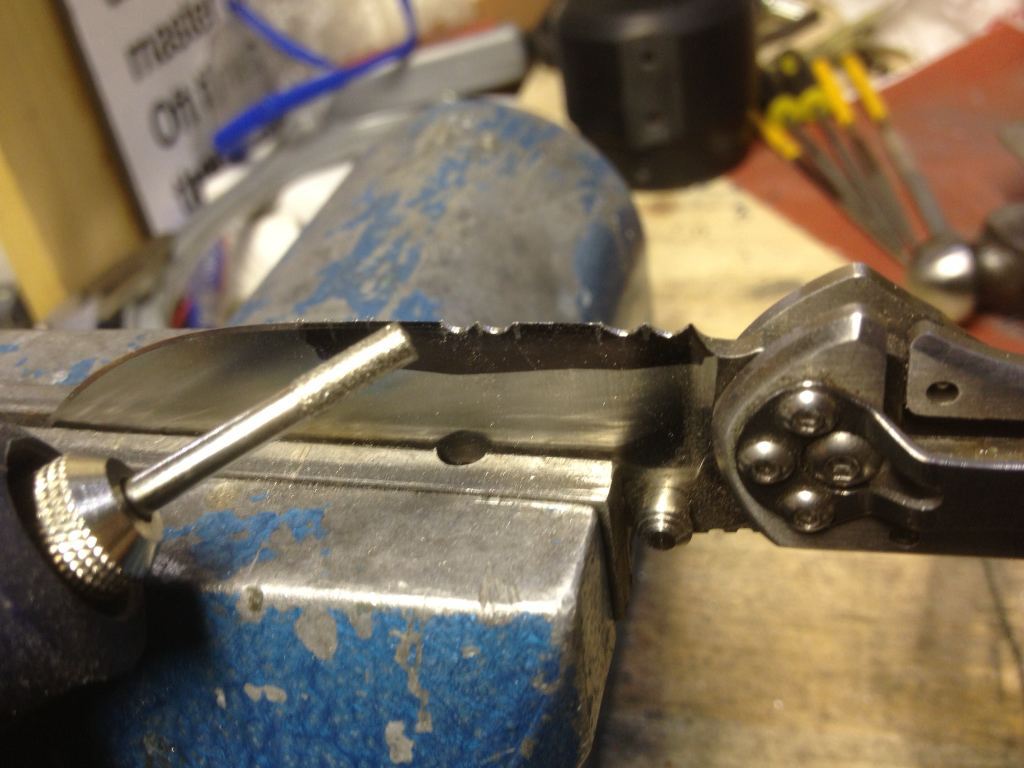
The result is a nice even row of neatly placed serrations that look factory (after some burr removal via a piece of wet 600 sand paper). I buffed out the scratches and buffed the surface of the new serrations with a very hard cone buffing wheel I chucked up on my lathe.
Finally, using my Tri-Sceps sharpener, give the SE a crazy sharp edge.
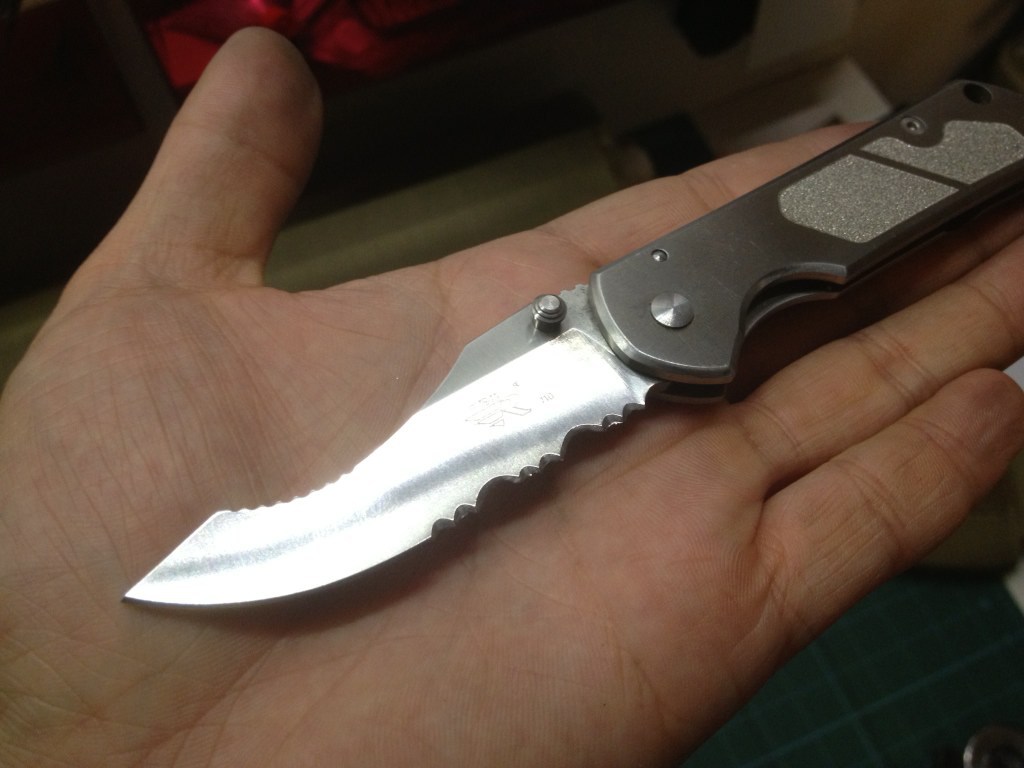
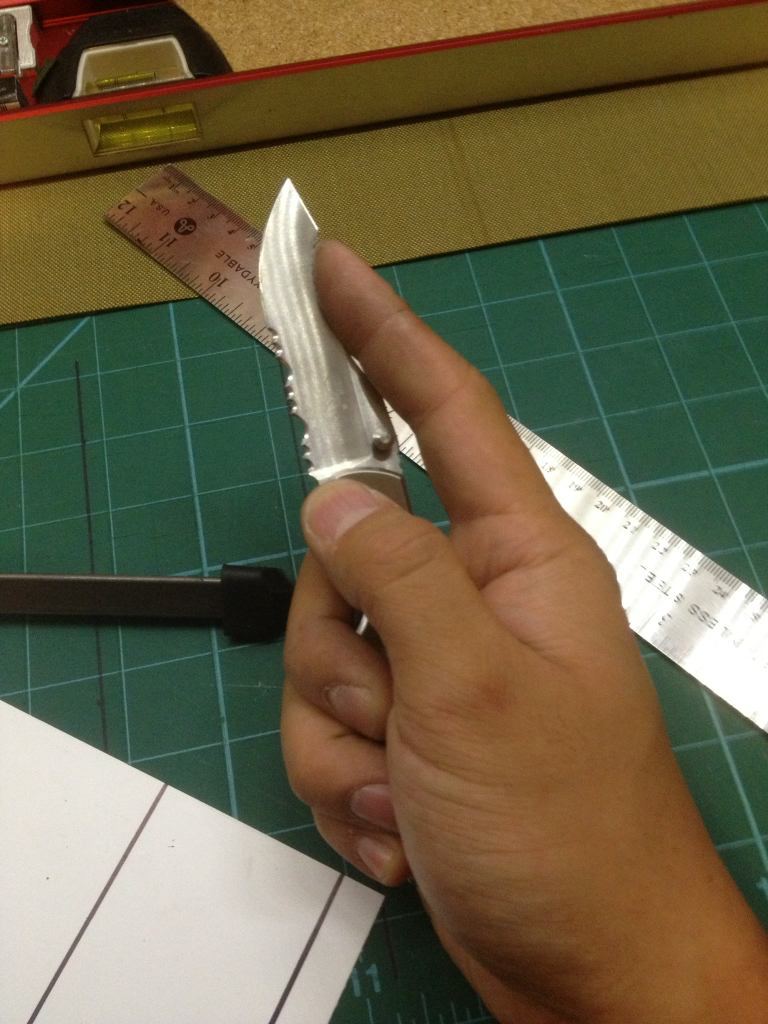
Testing out the scalpel grip….nice.
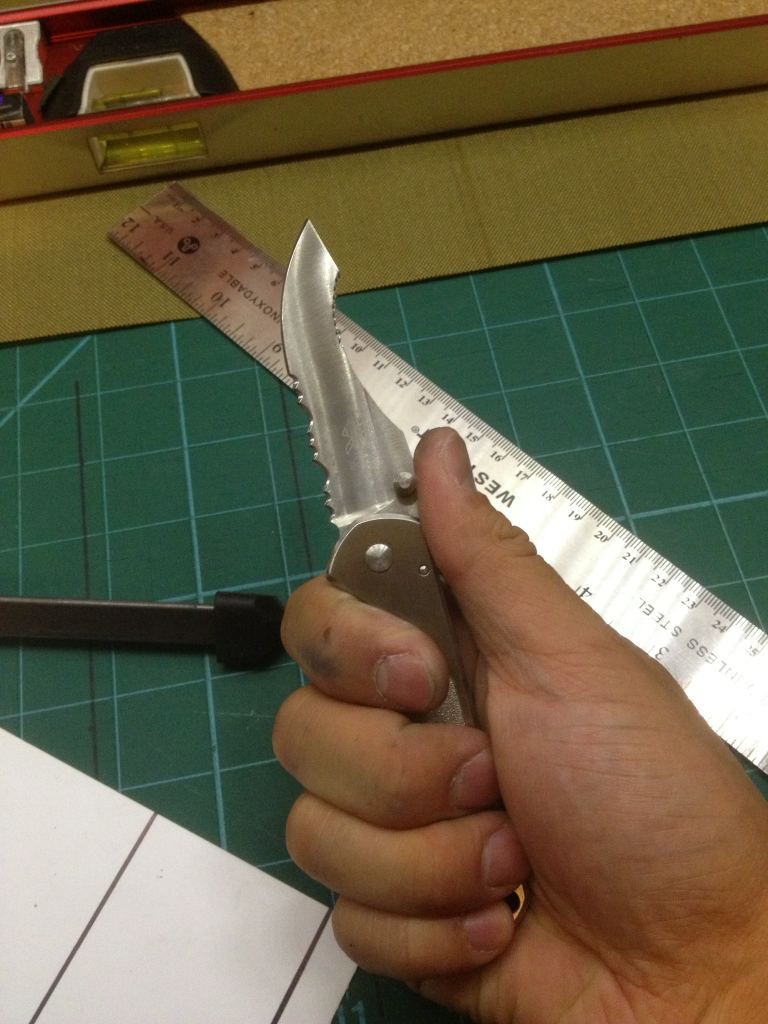
And the saber grip…classic
That’s how I did it, for a $7 knife, it was worth trying it out, if I failed…it would of only been a small price to pay.
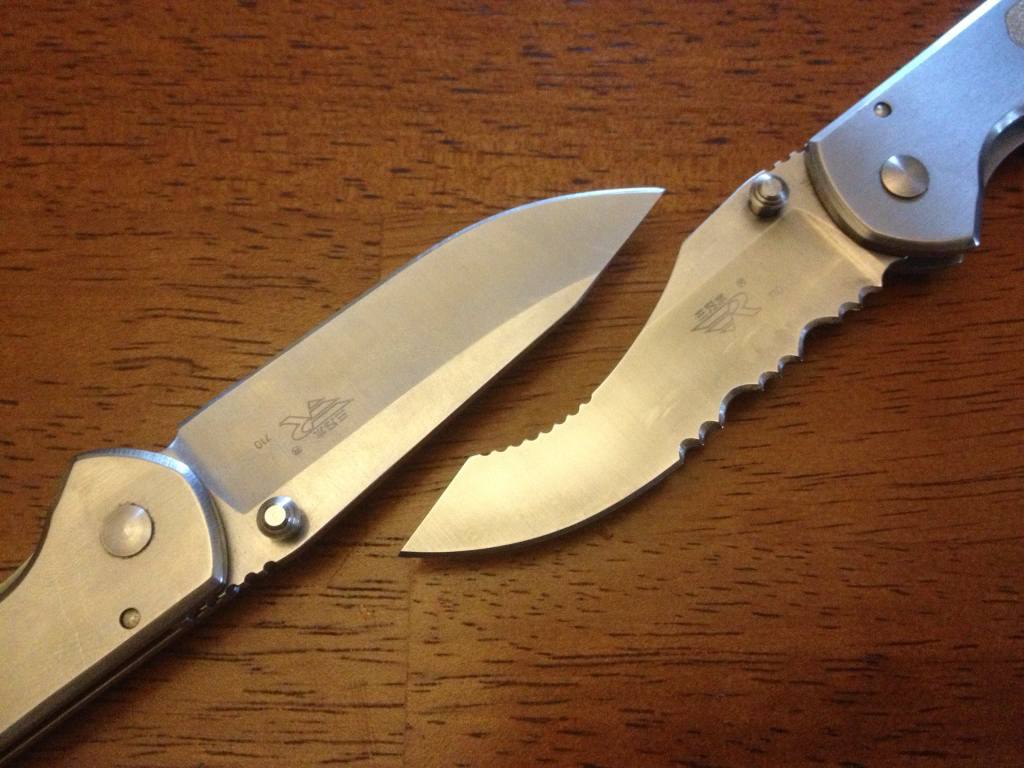
Here are some more shots of the modding knife next to a factory fresh one.

One big added bonus is that the blade is now a tad bit lighter, which makes deploying the already really fast deploying edge even faster!

A closer look at the scalpel grip jimping, they cleaned up very nicely after a quick buff on the hard cotton wheel.
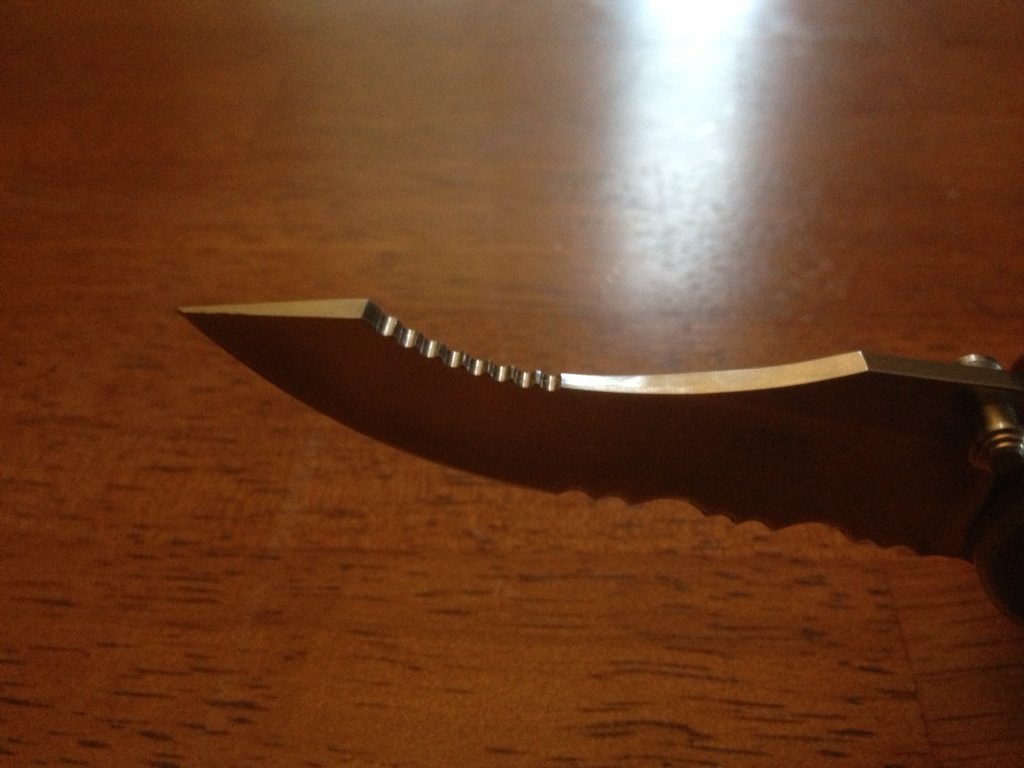
Another look at the final blade, I feel that it’s enhanced the look of the blade why still maintaining the lines of the original knife.

The DIY serrations are only chisel ground which isn’t the BEST option for edge retention, but it makes for easy touch ups and sharpening.
Thanks for reading and hope you can invest some time and try it out for yourself, no tools in this Metro Made post were out of reach, so all it takes it some time and patience.
Stay True.
-Eric