The hotly debated PFS (Pickle Fork Shooter) is a slingshot made popular by Youtube user pfshooter, whose skills with ANY slingshot let alone the one he prefers (PFS) are legendary. Abandoning the traditional concept of gap in the forks for the ammo to pass through, the PFS is a minimalist style slingshot that is shot over the top and flip style.
There is little to no gap between the forks and with the right technique, practice (LOTS of practice, practice, practice) and patience can be even deadlier than most advanced slingshots. They are extremely popular because they are simple to make and usually very small, making it a very easy slingshot to carry in your pocket. The PFS style shooter has been used over and over again since it’s conception but the concept is always the same, a simple, narrow gap fork with bands tied to it.
The wrap and tuck method of band attachment produces a less than desirable aesthetic appeal. I desired a more clean approach, a more Metro Grade approach.
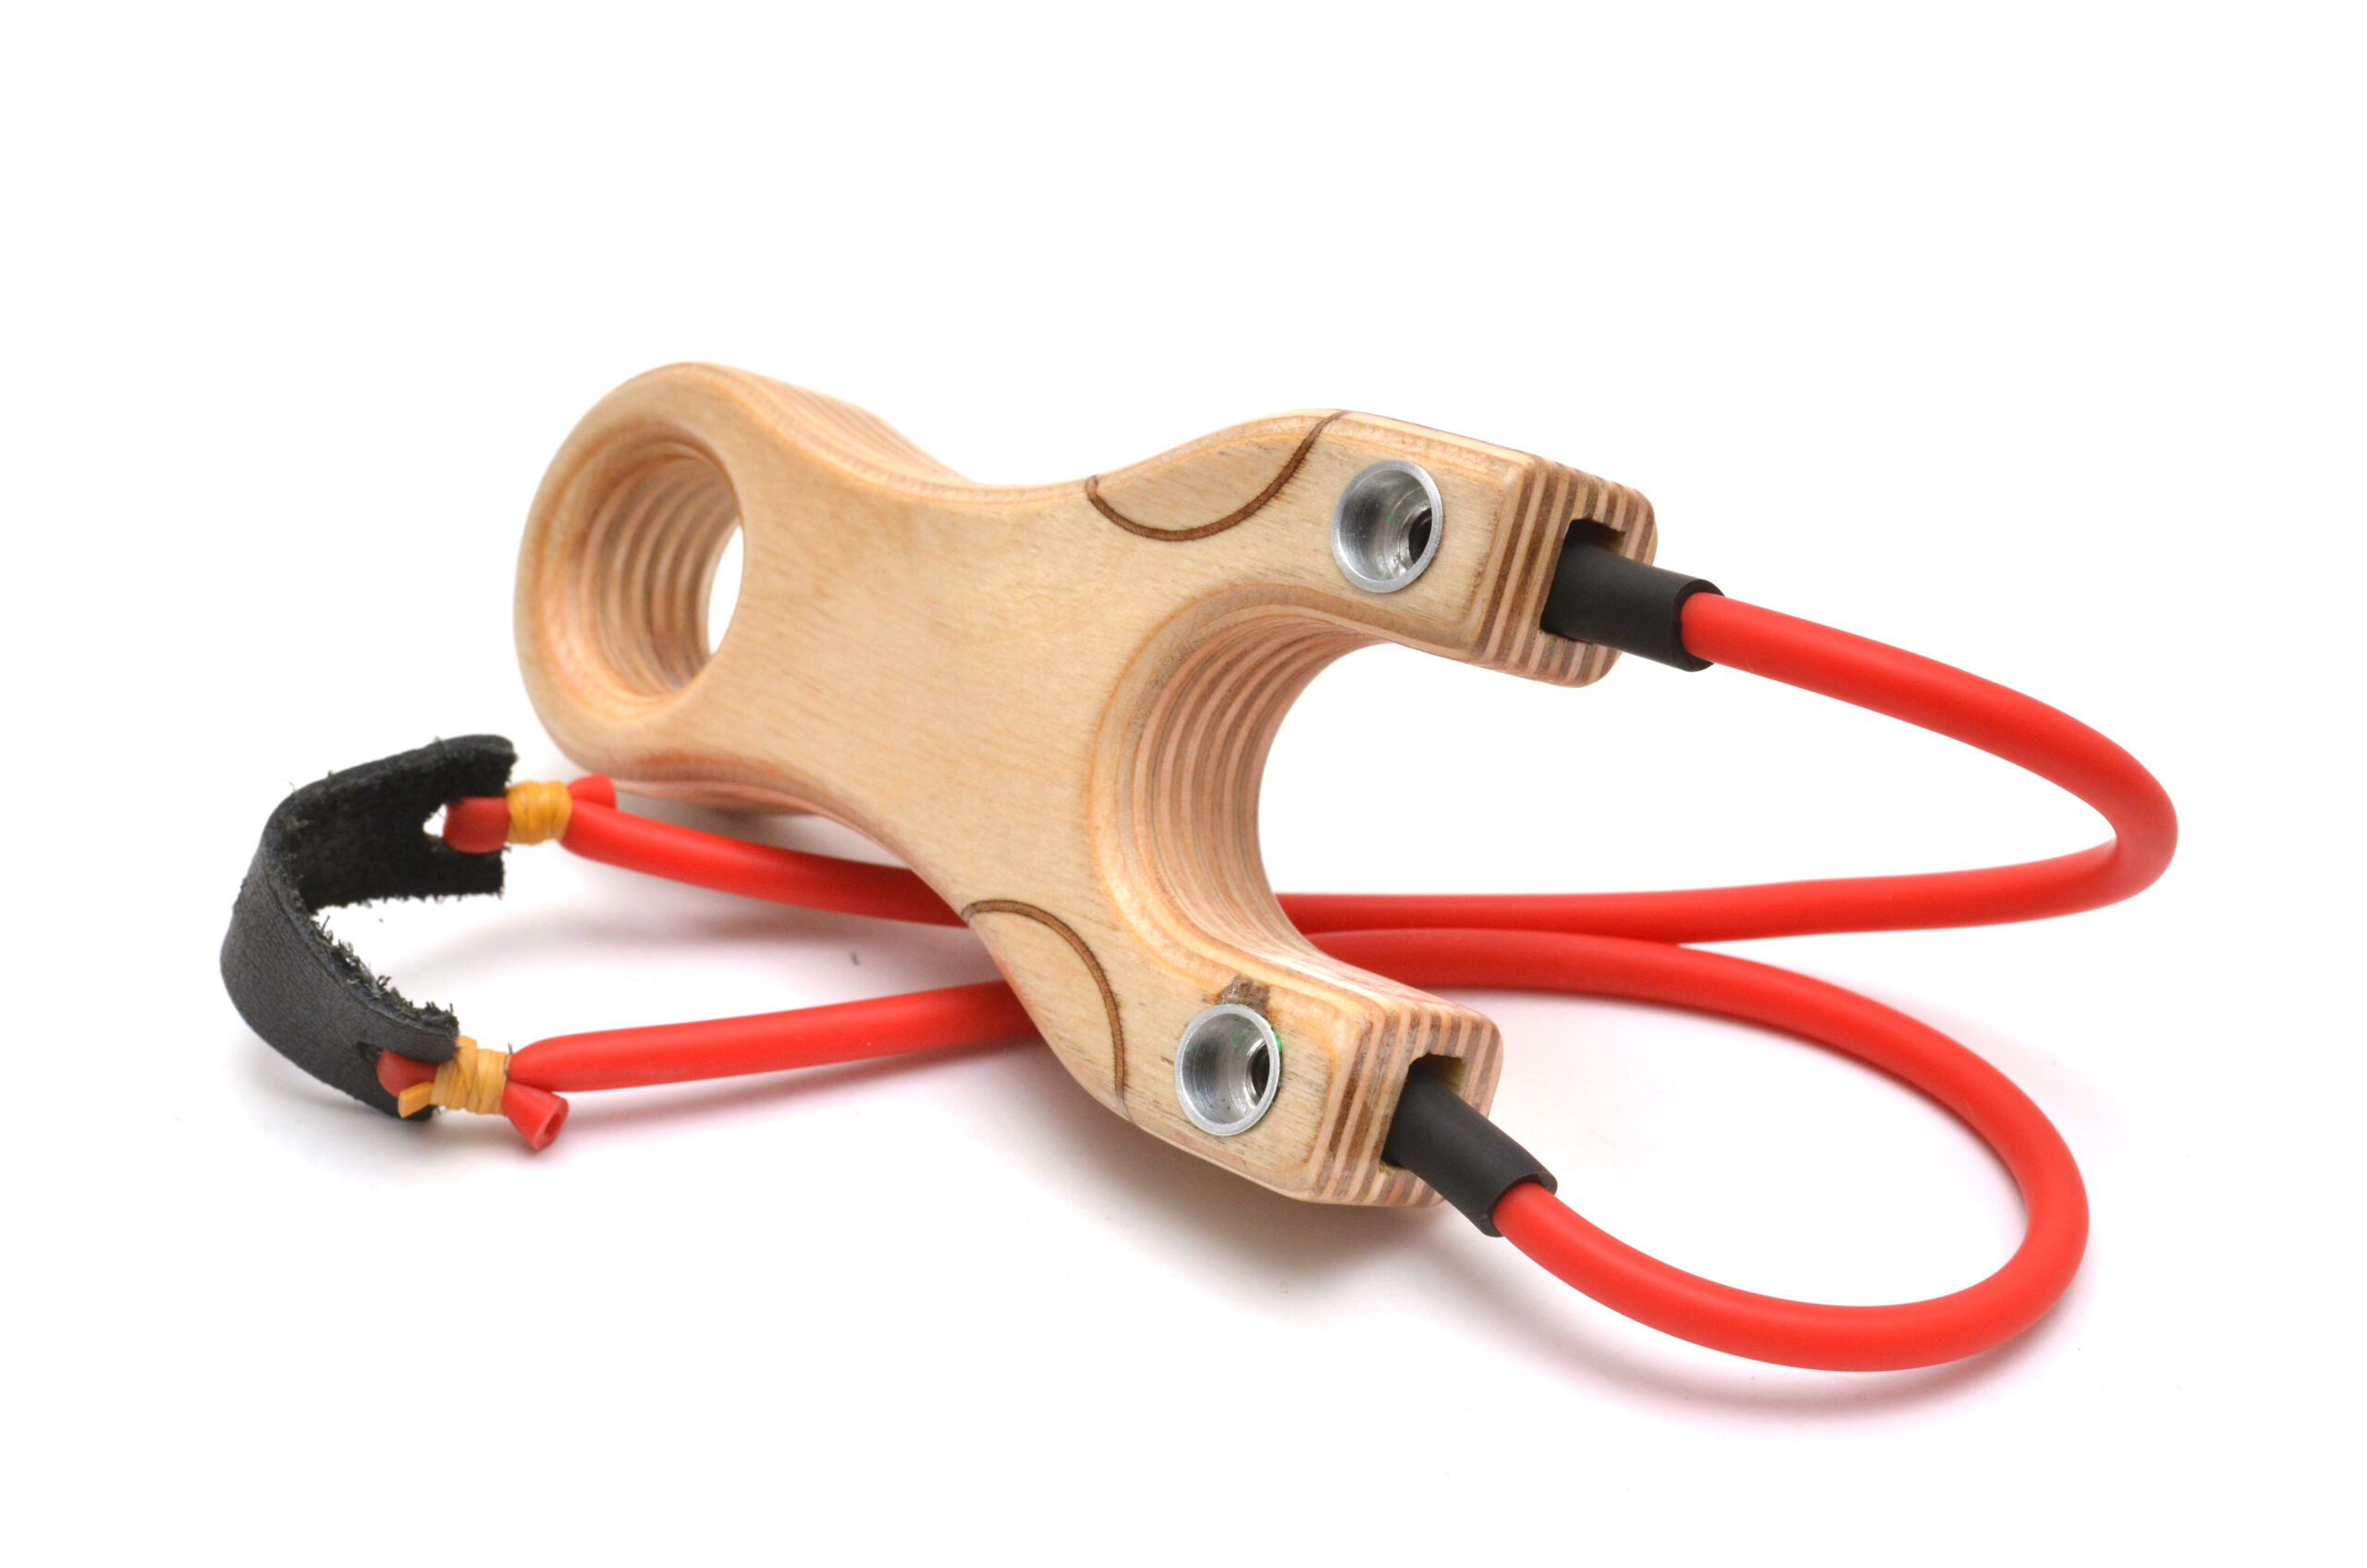
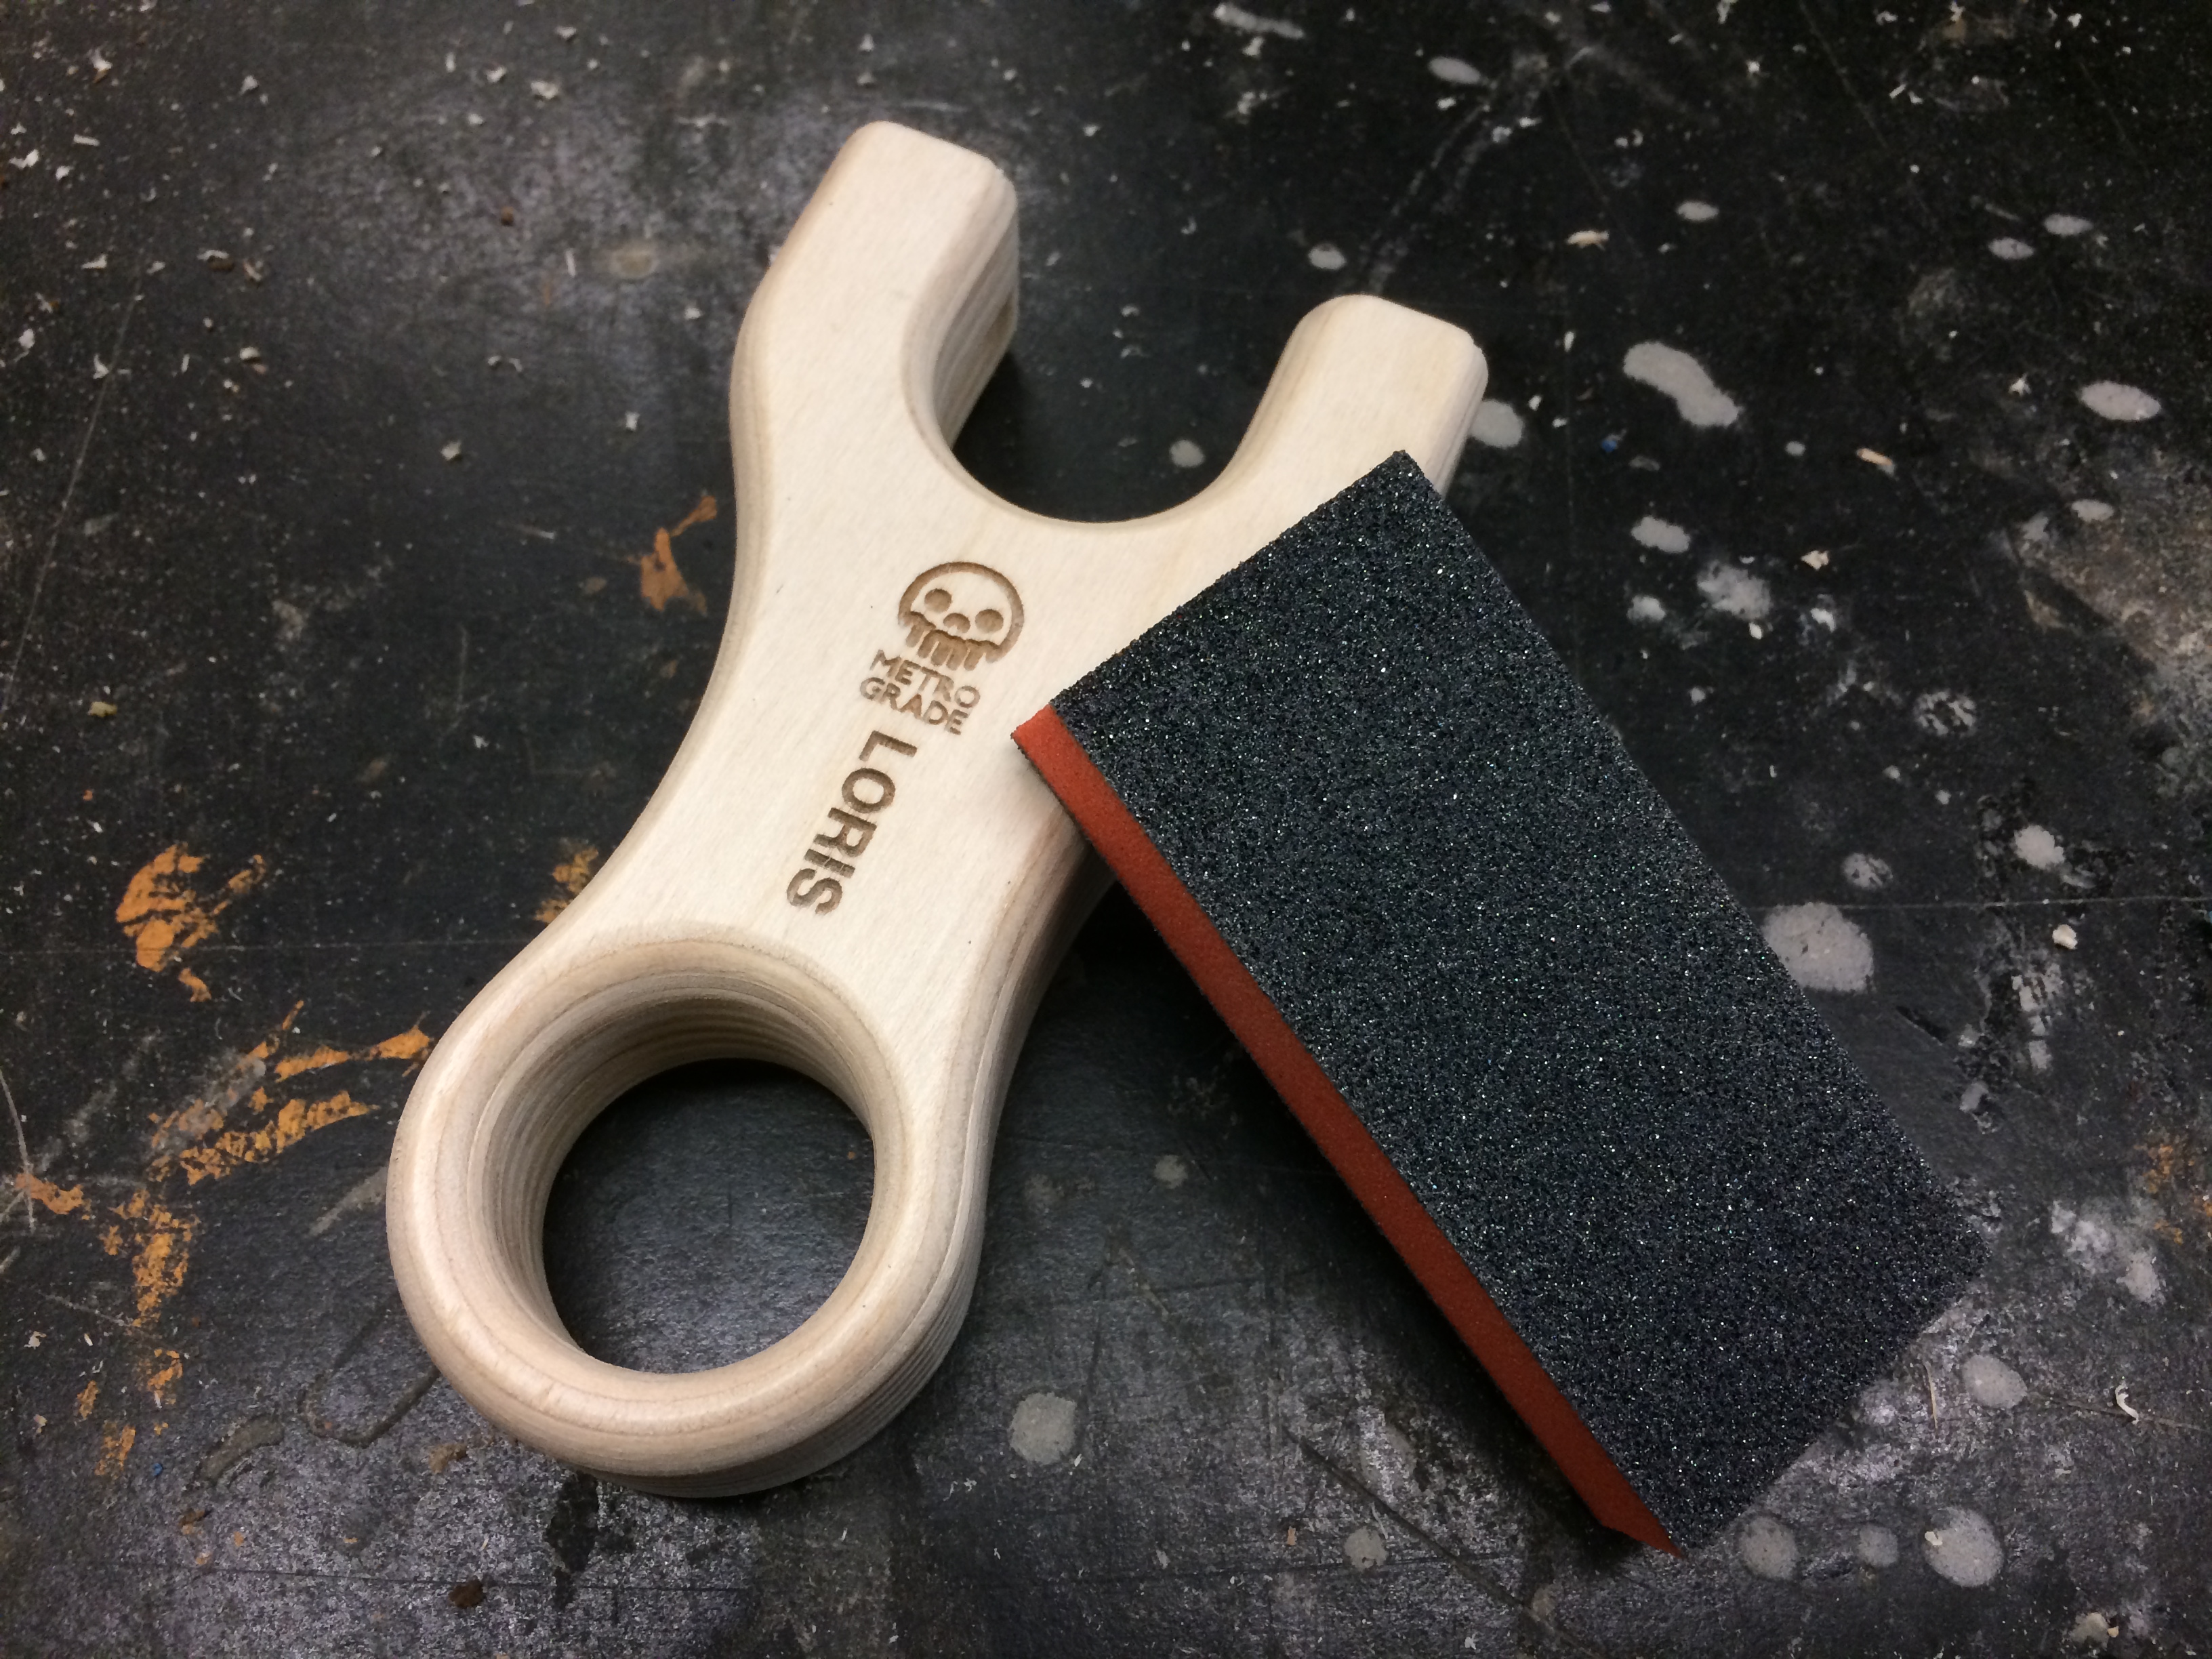
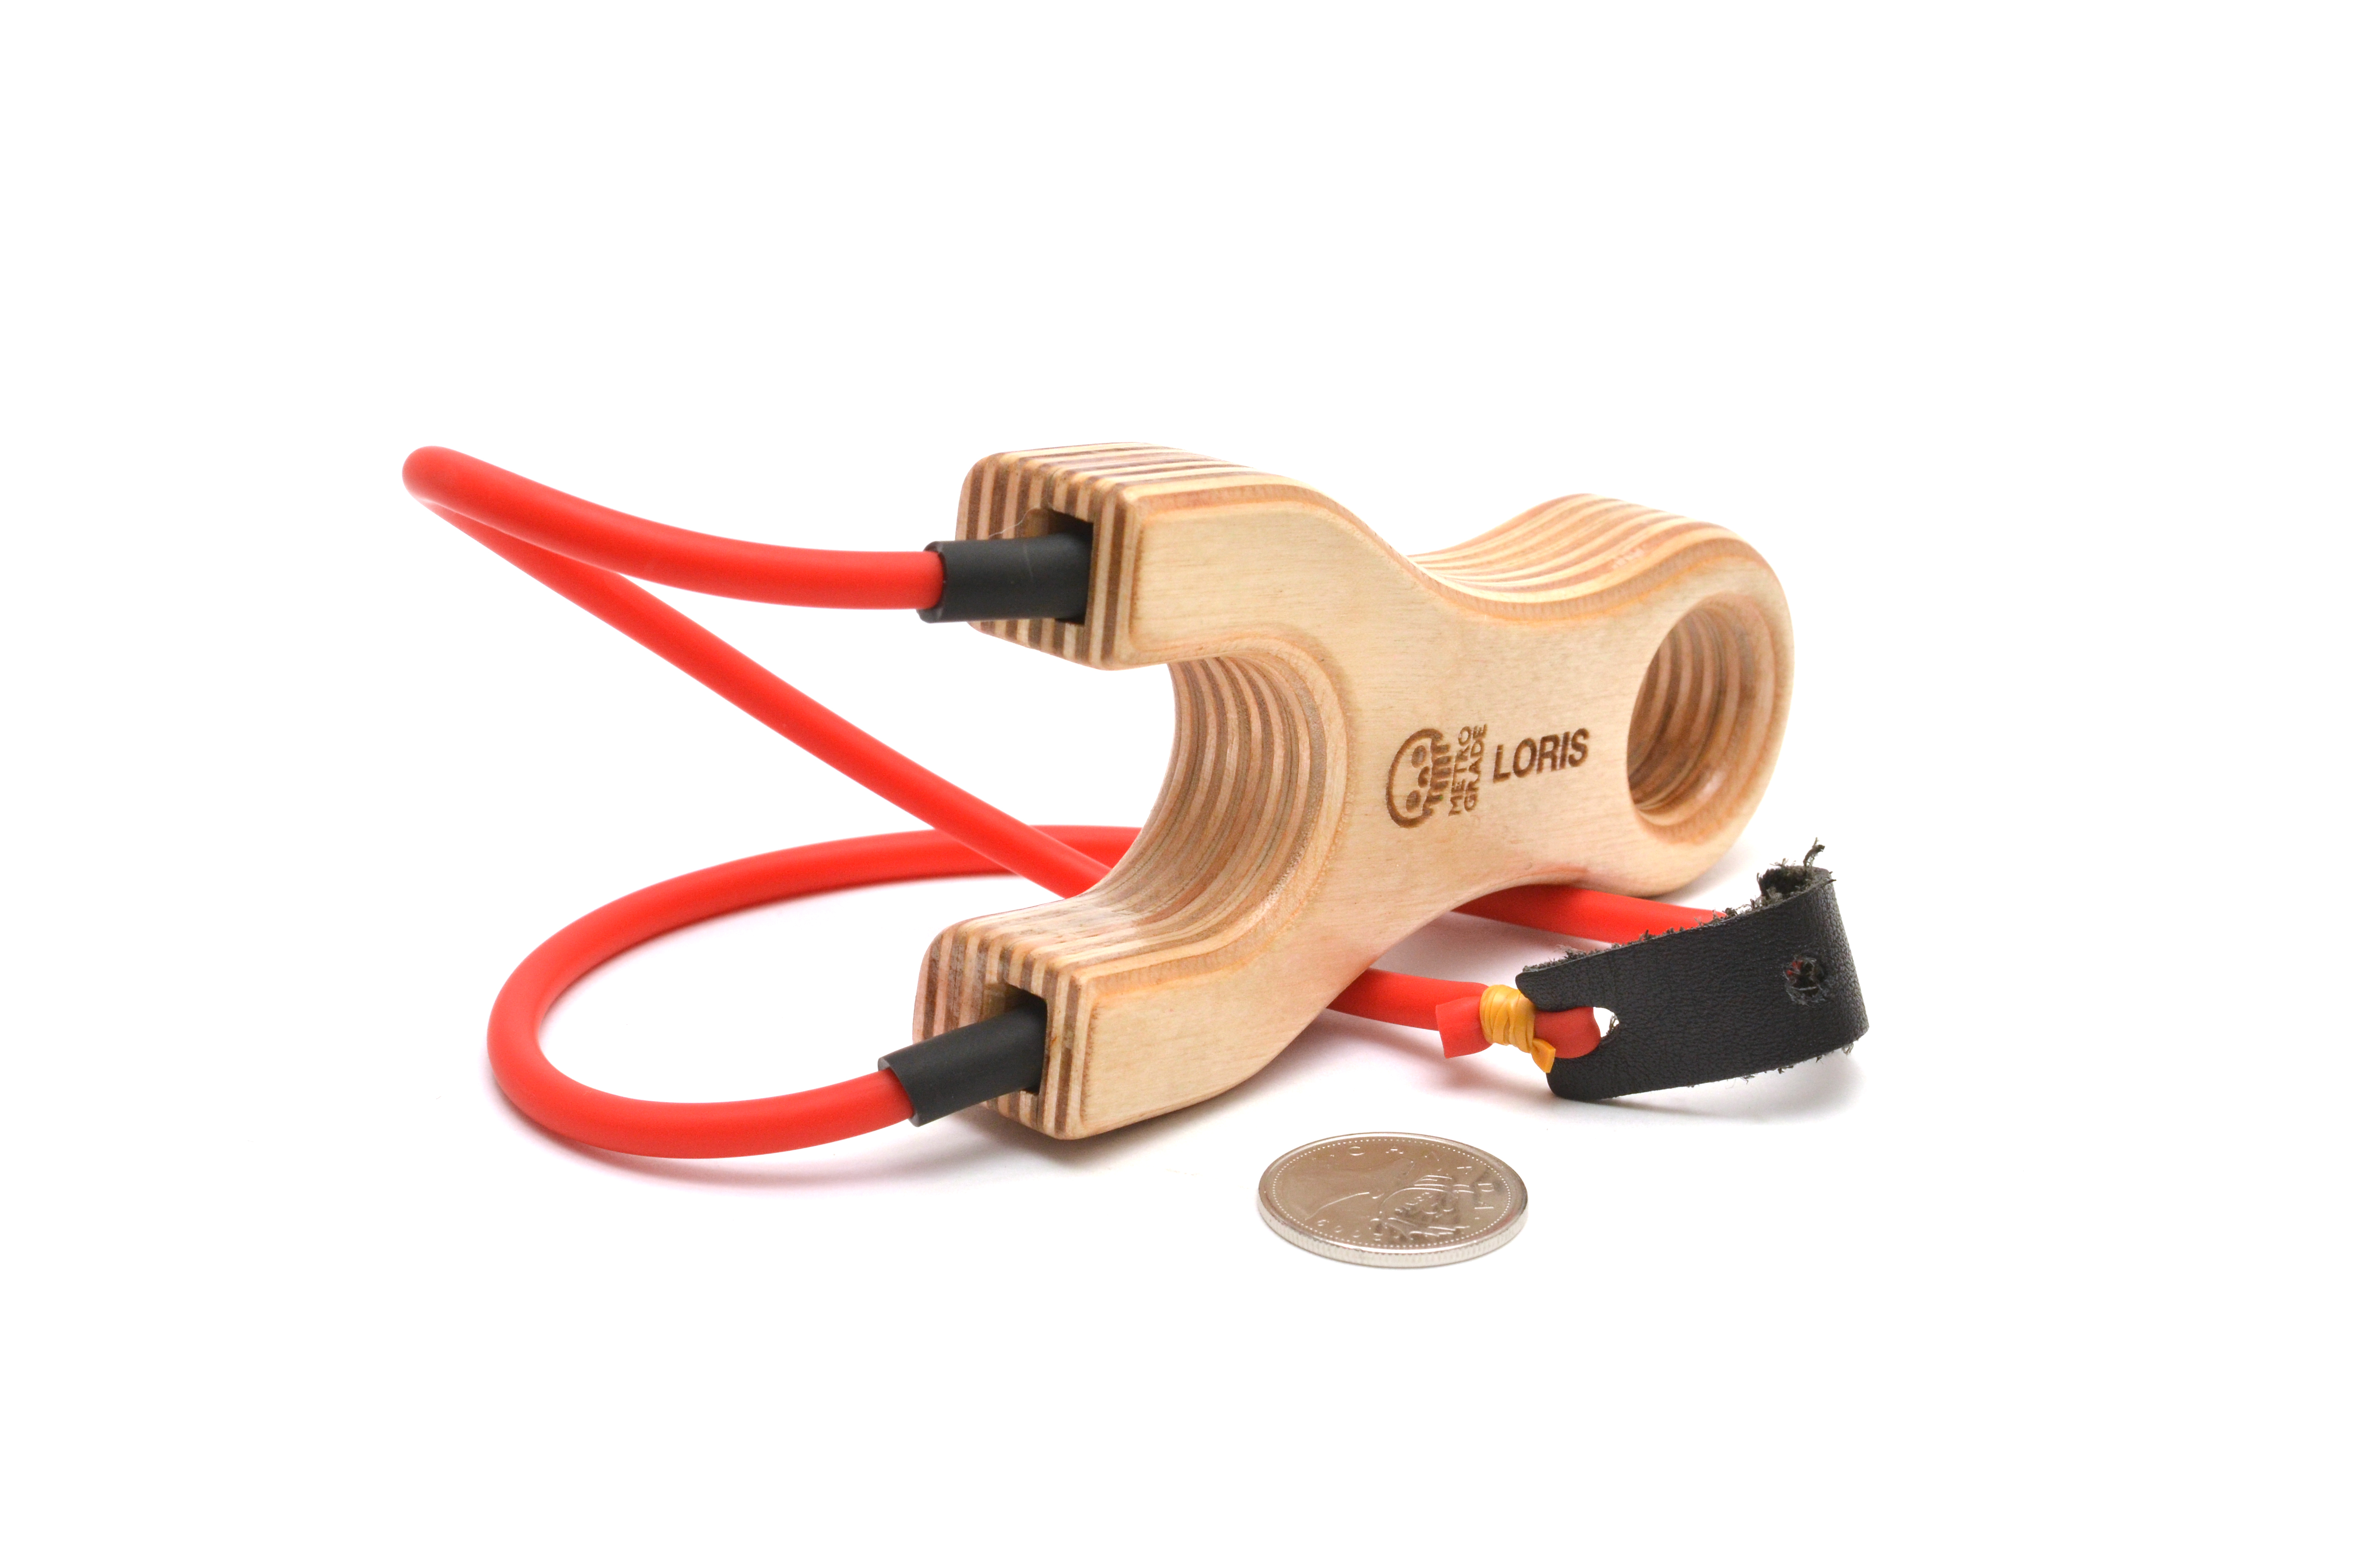
This is how we designed and made our version of pfshooter’s PFS, the http://ramblingfisherman.com/?p=643/ Metro Grade Loris PFS. After rolling the idea in my brain bucket for some time, I finally decided to use a threaded insert and some set screws to pinch the band into the frame.
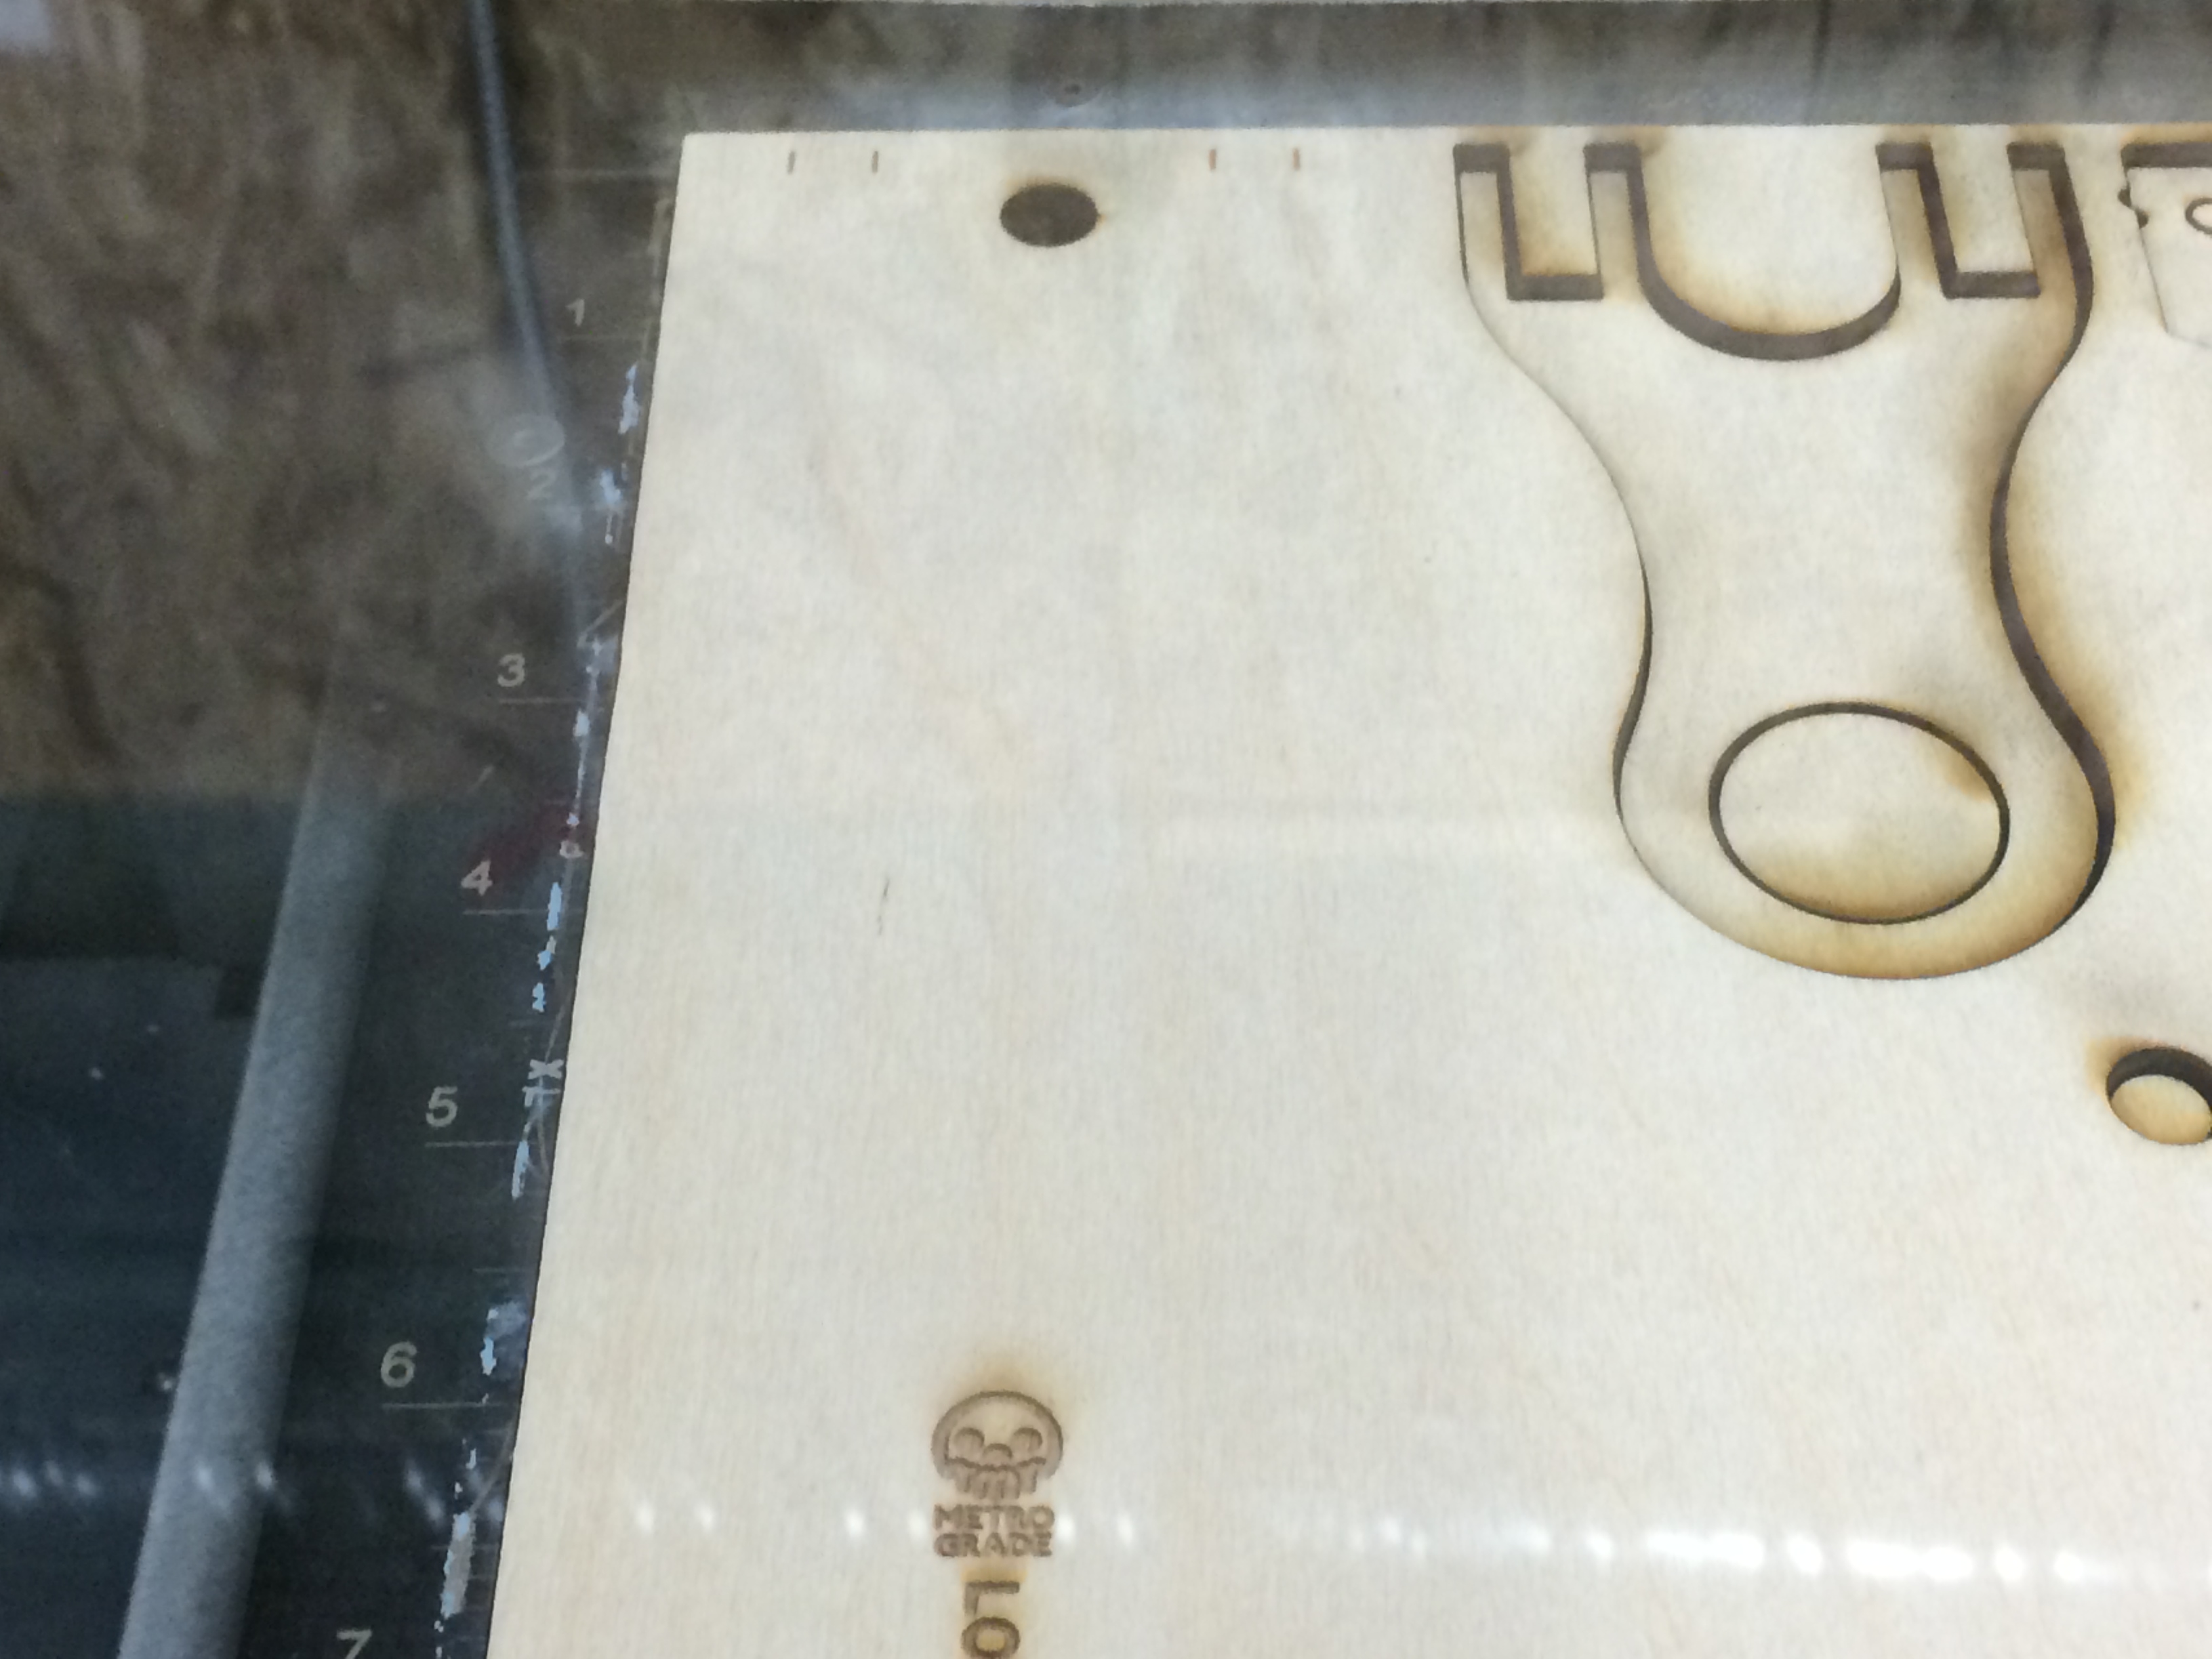
I started in Adobe Illustrator, building simple shapes and staying within the boundaries of the Original PFS dimensions (about 2″x4″). Also using some of my favourite scripts: Round-any-corner & Metaball (ARC)

Then it was off to the laser, which you can see here. One day, robots will rise up and rule the earth, but for now, they are happy to do our bidding.
The result is a nice set parts ready to be processed and glued up, the material is a 1/4″ Batlic birch plywood.

Before I glued anything together, I had to process the internal mechanisms. Like I had mentioned, I have been thinking about this for quite some time so it all came together pretty quickly and I had a lot of operations layed out in my head. The first operation was to roll the edge of the inside layer so that the bands would not be stressed out by a sharp corner. I had already marked where the edge needed to be taken down. A file and some sand paper made quick work of this.
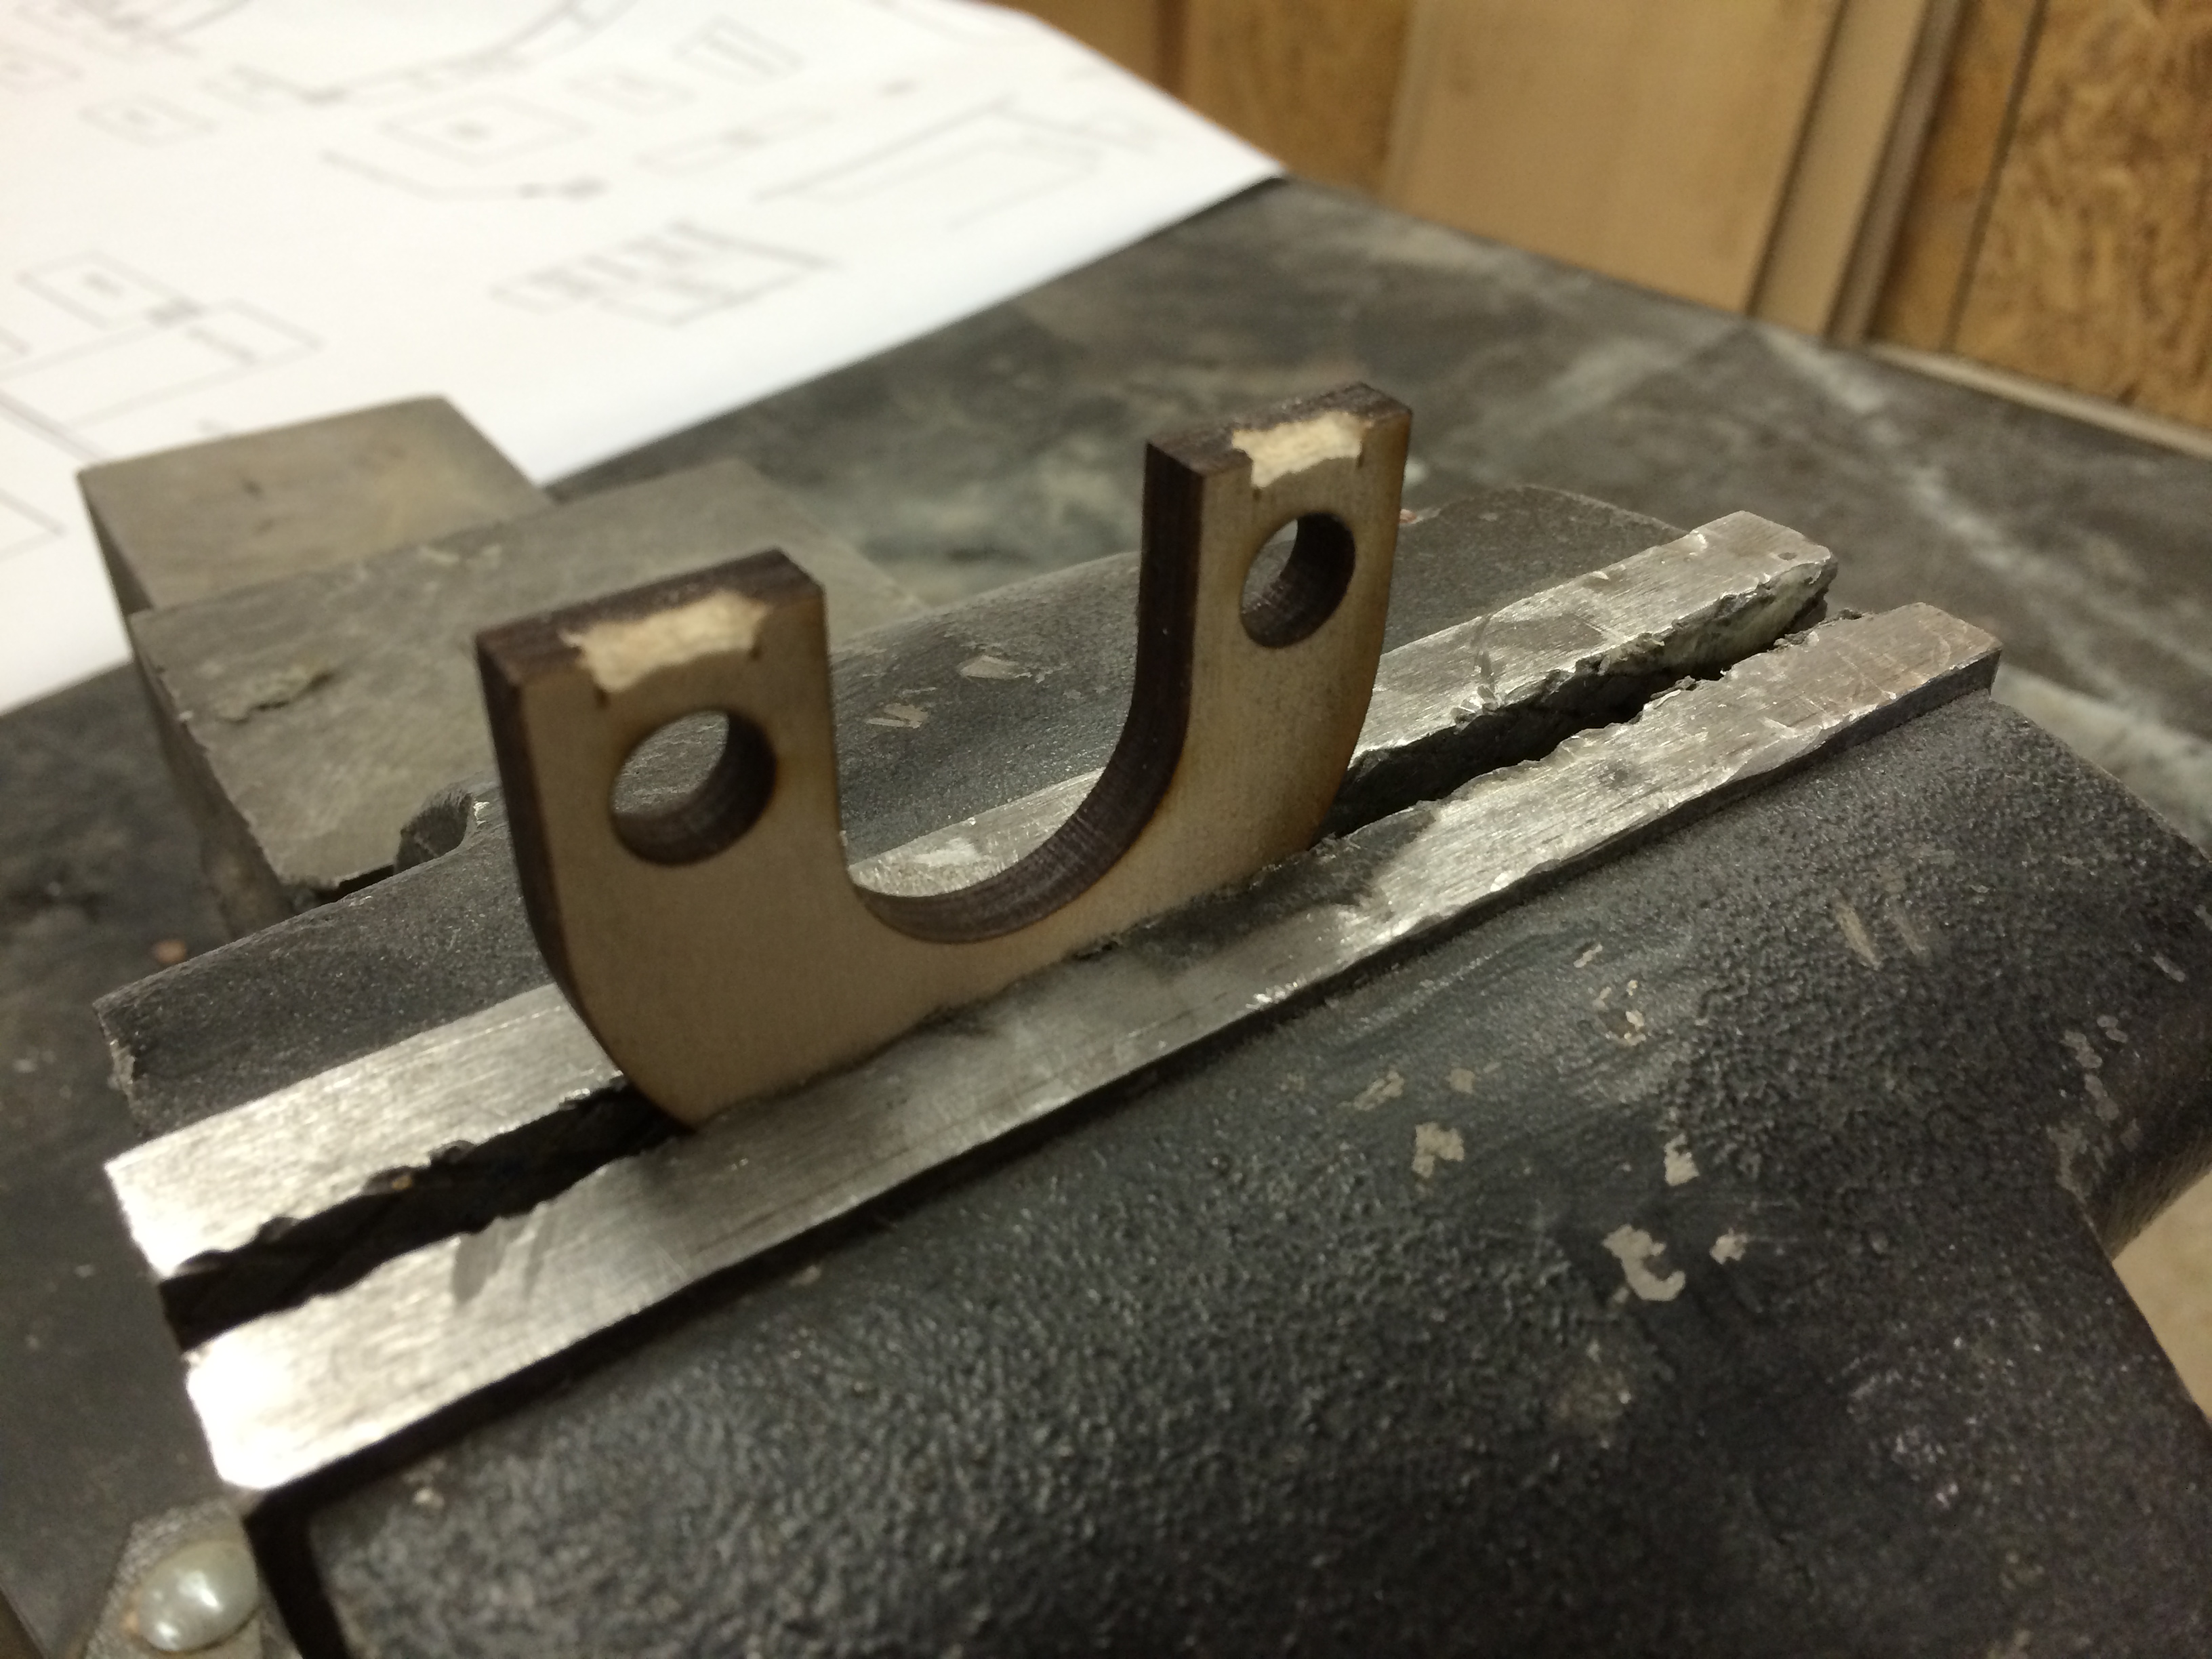
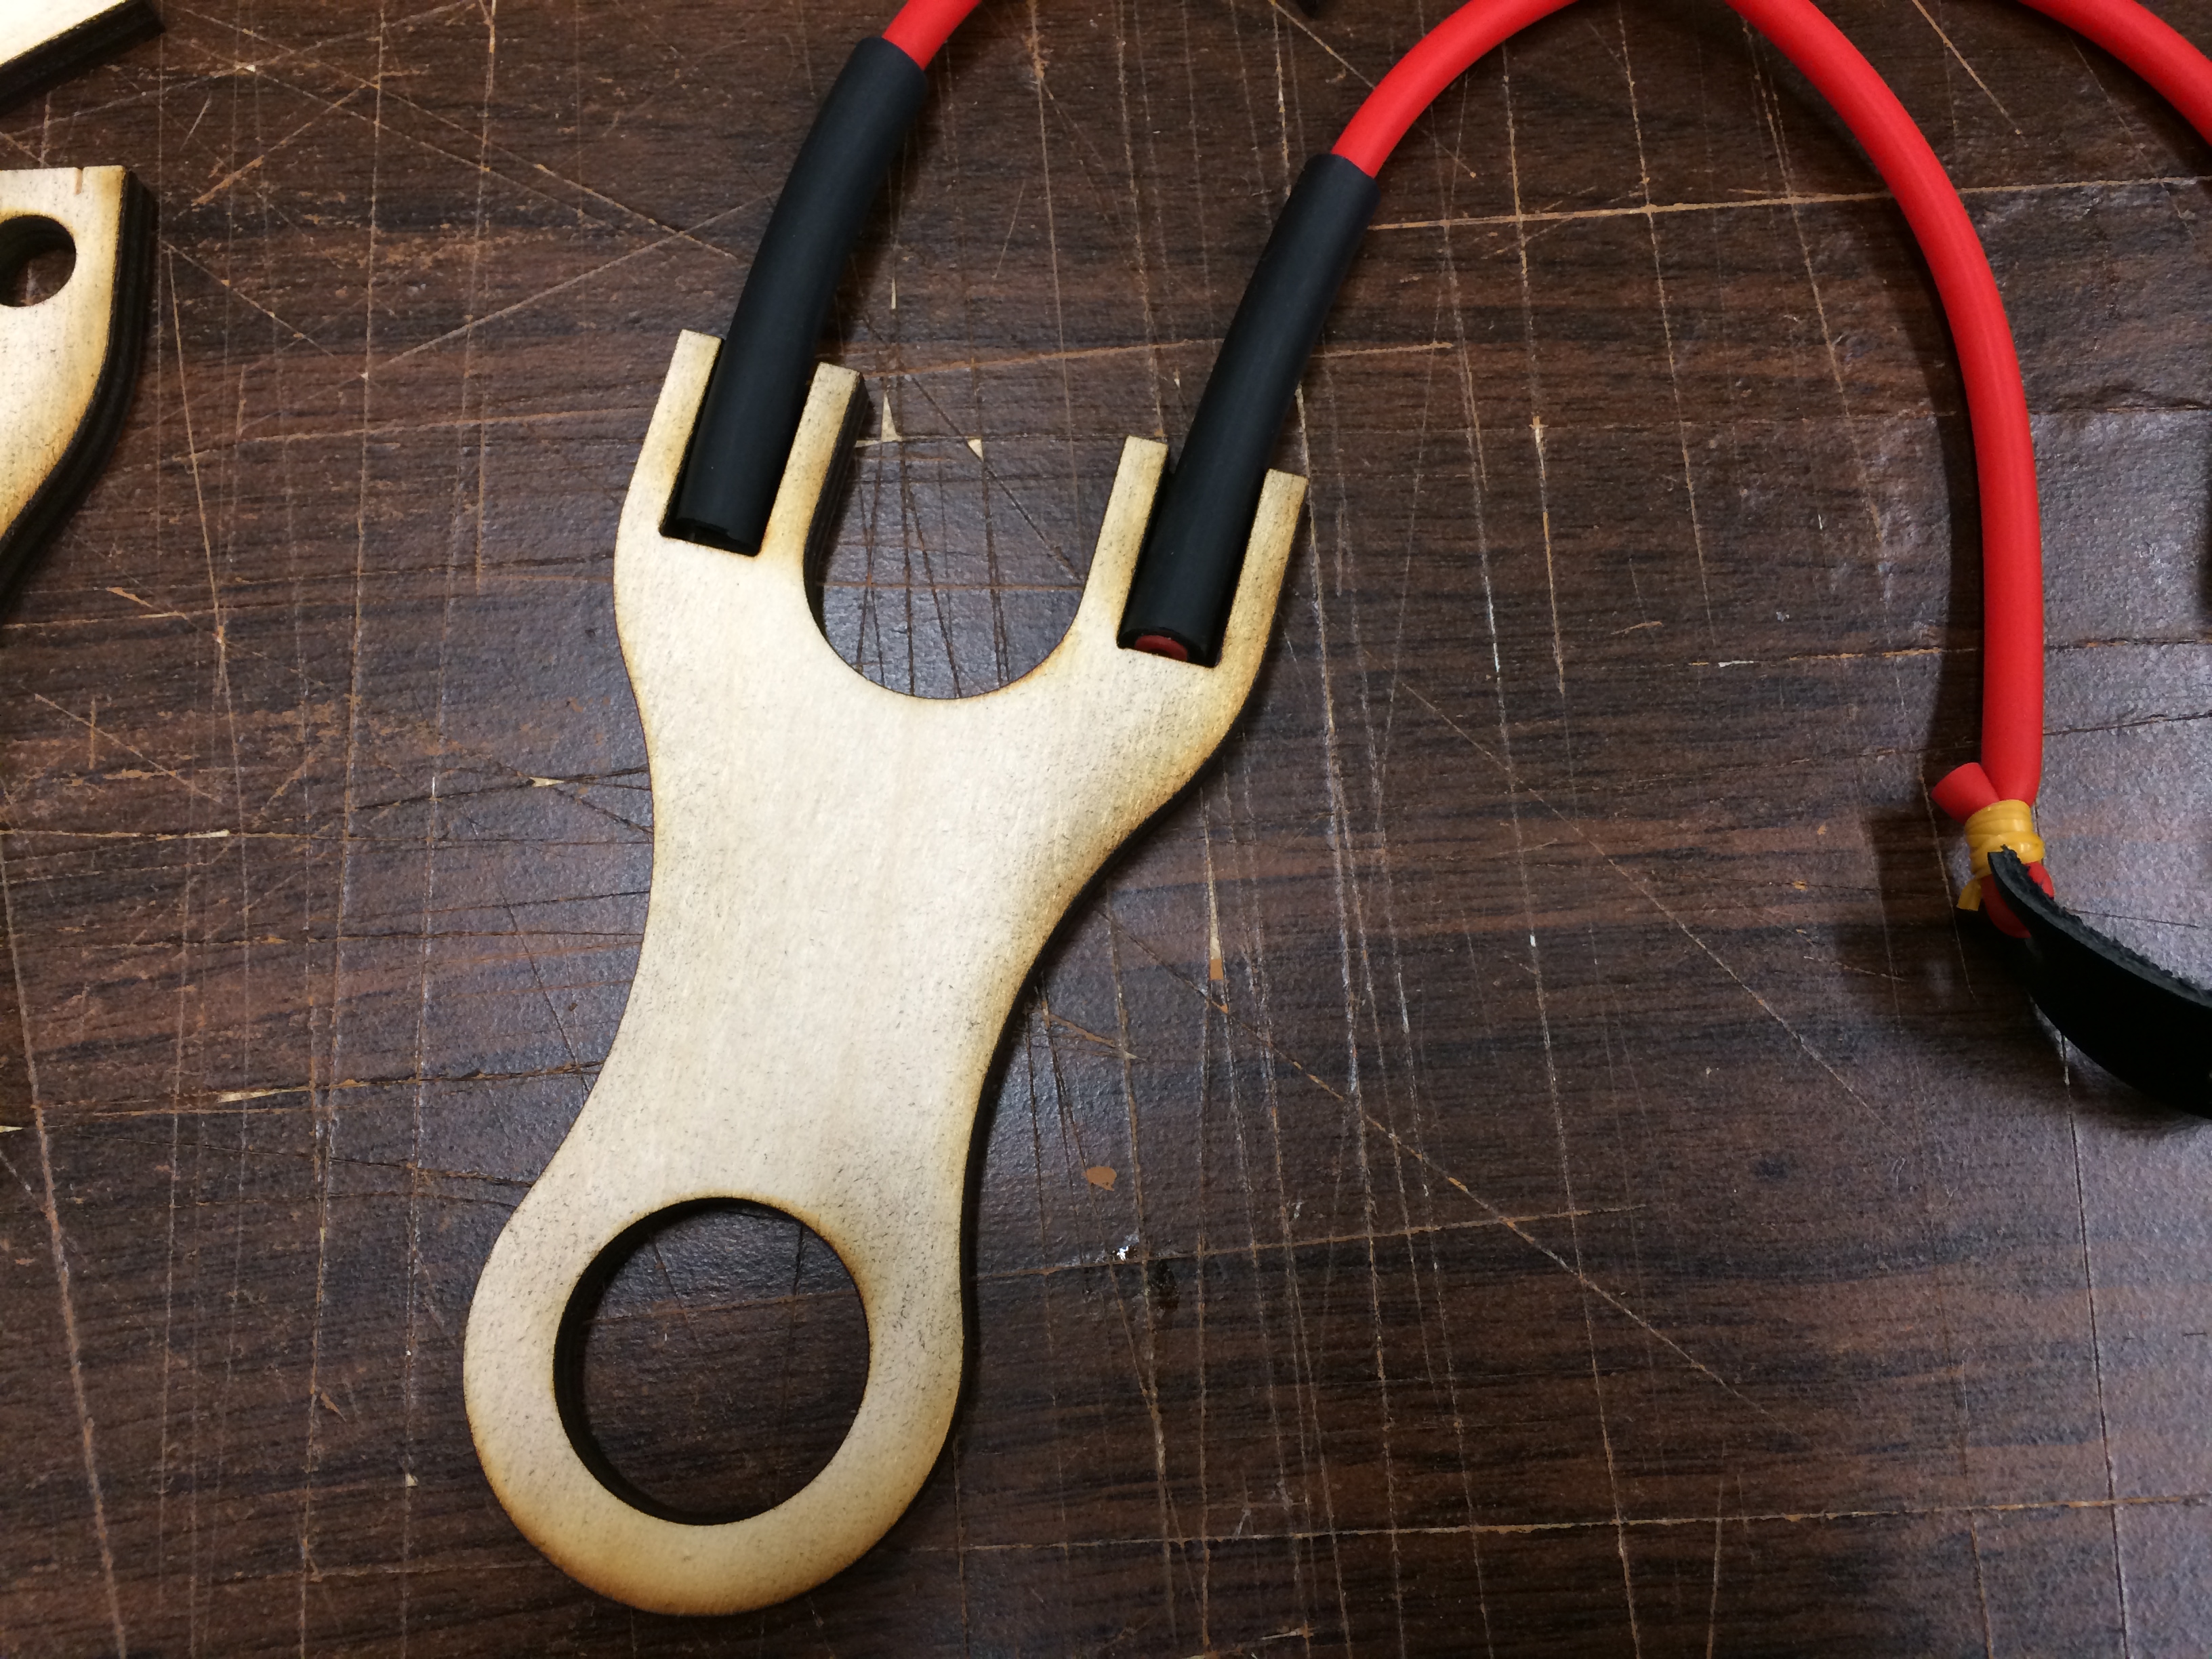
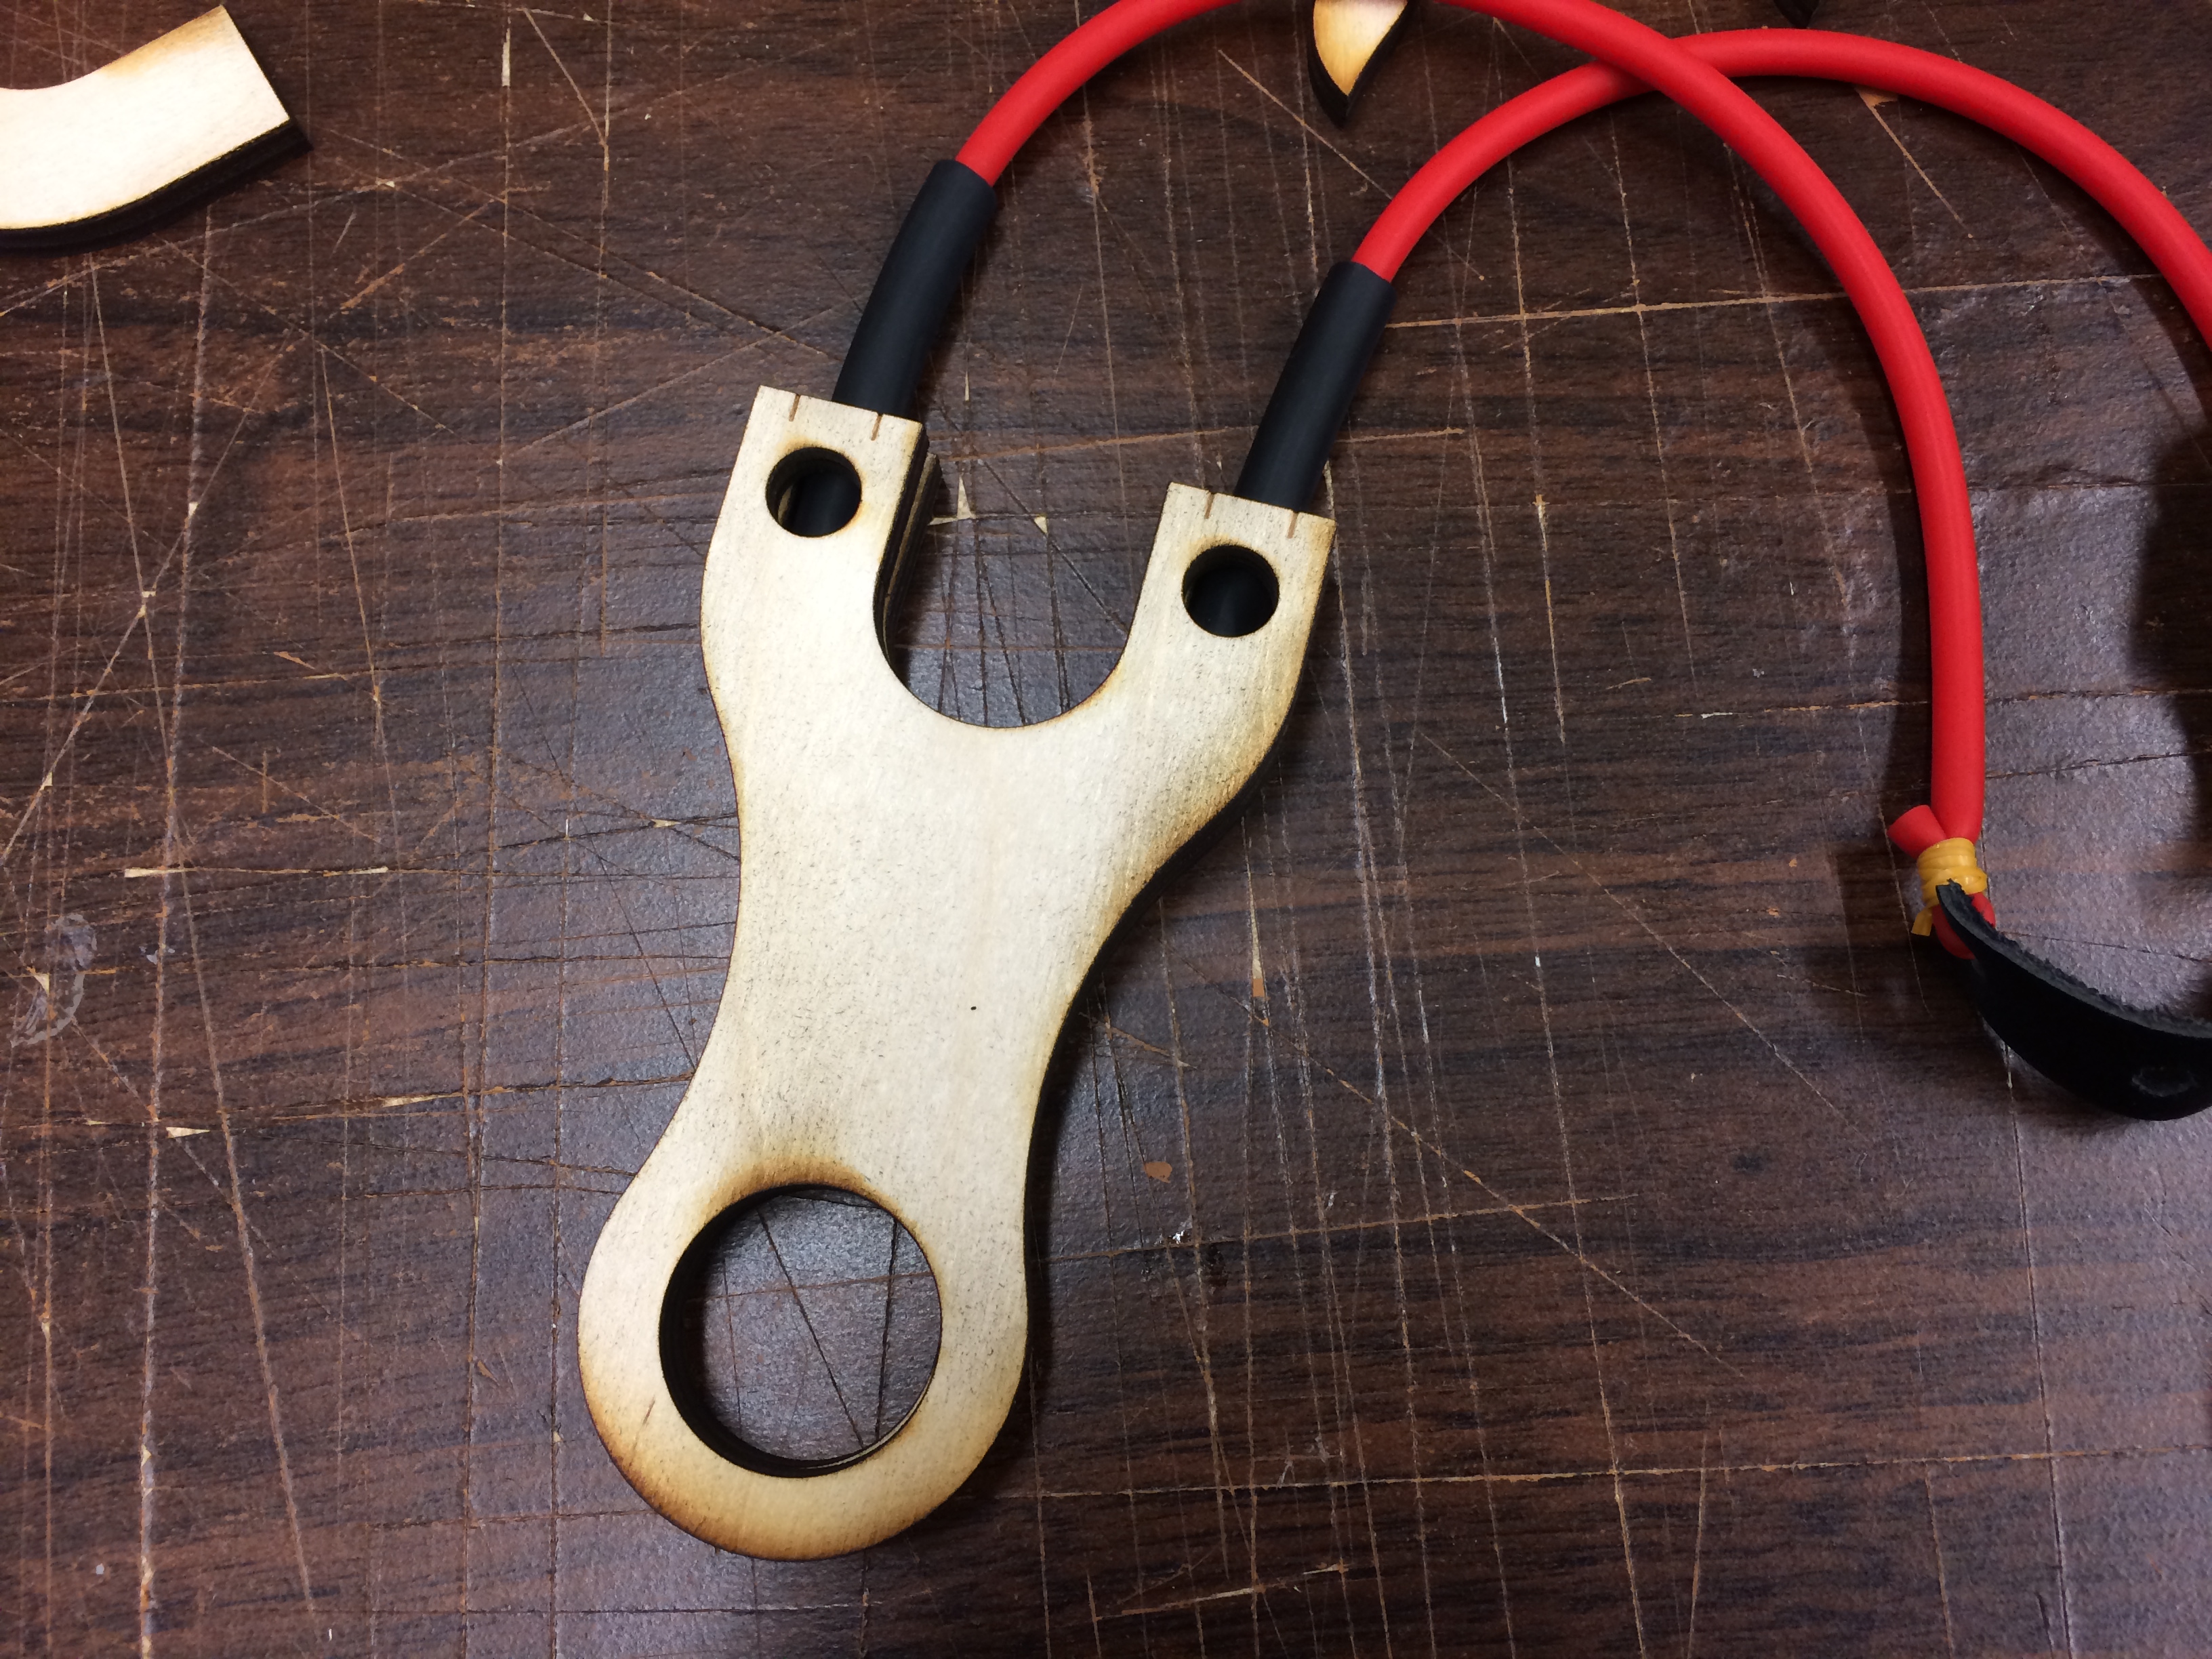
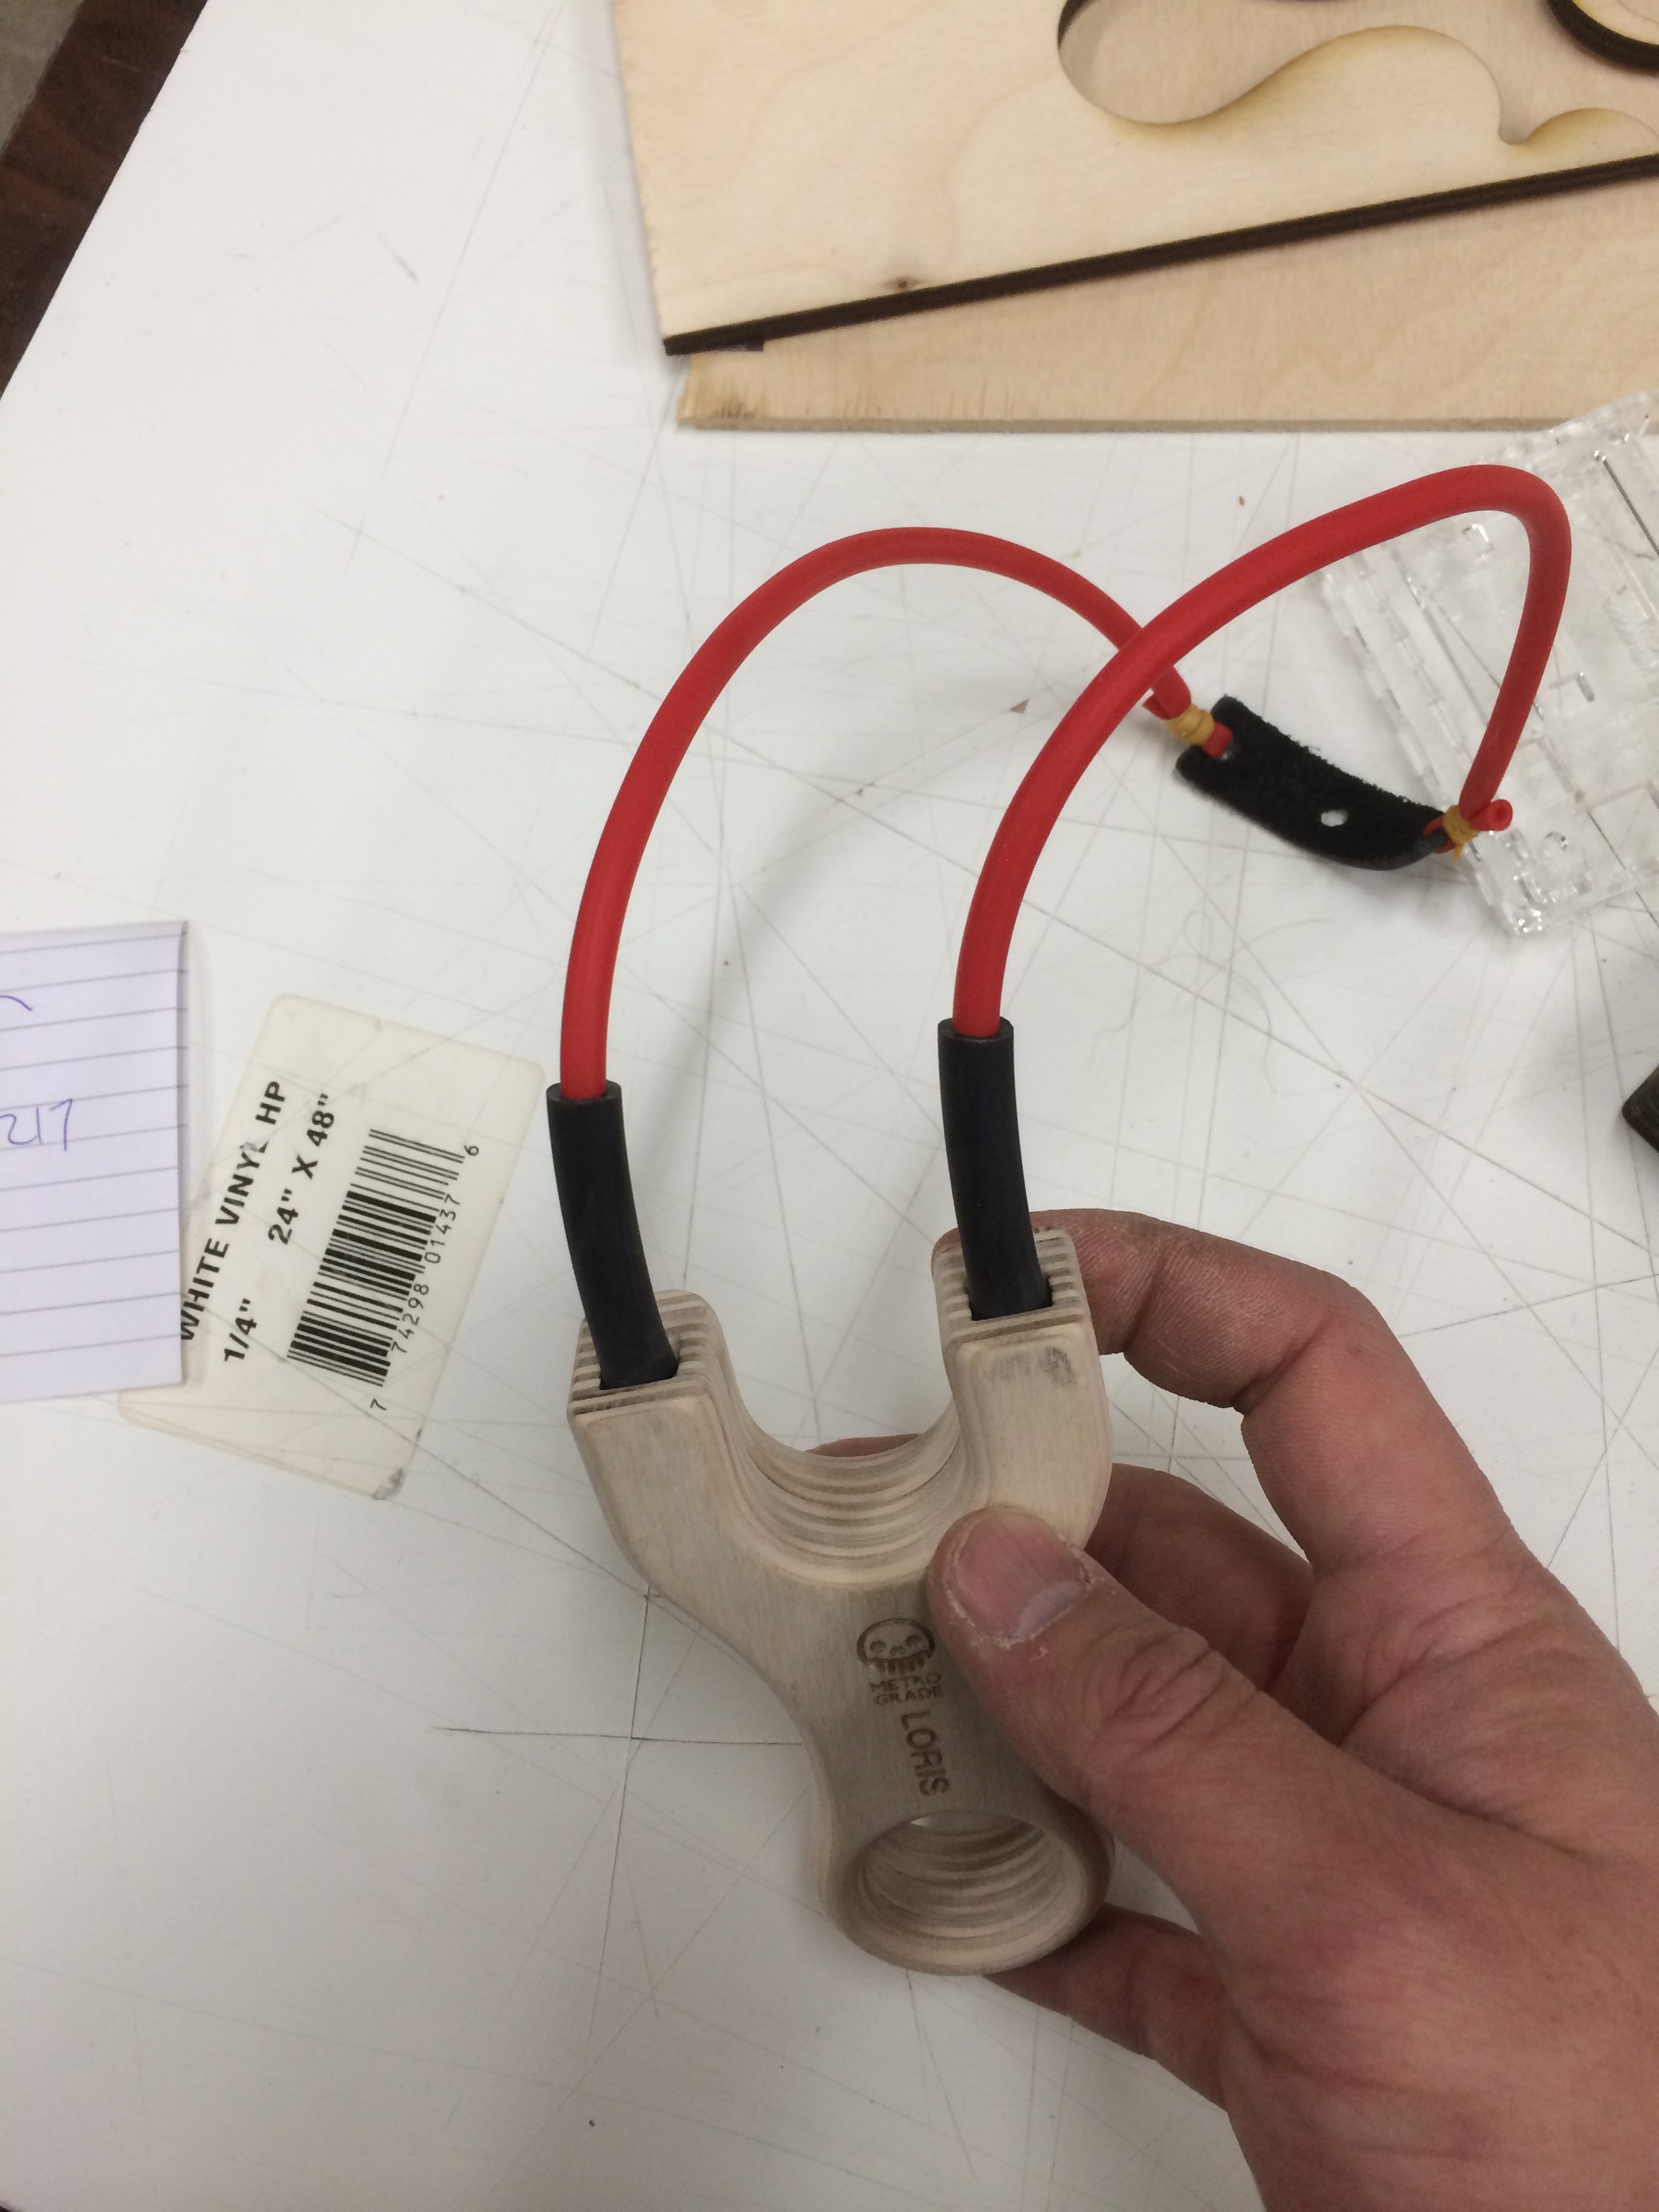
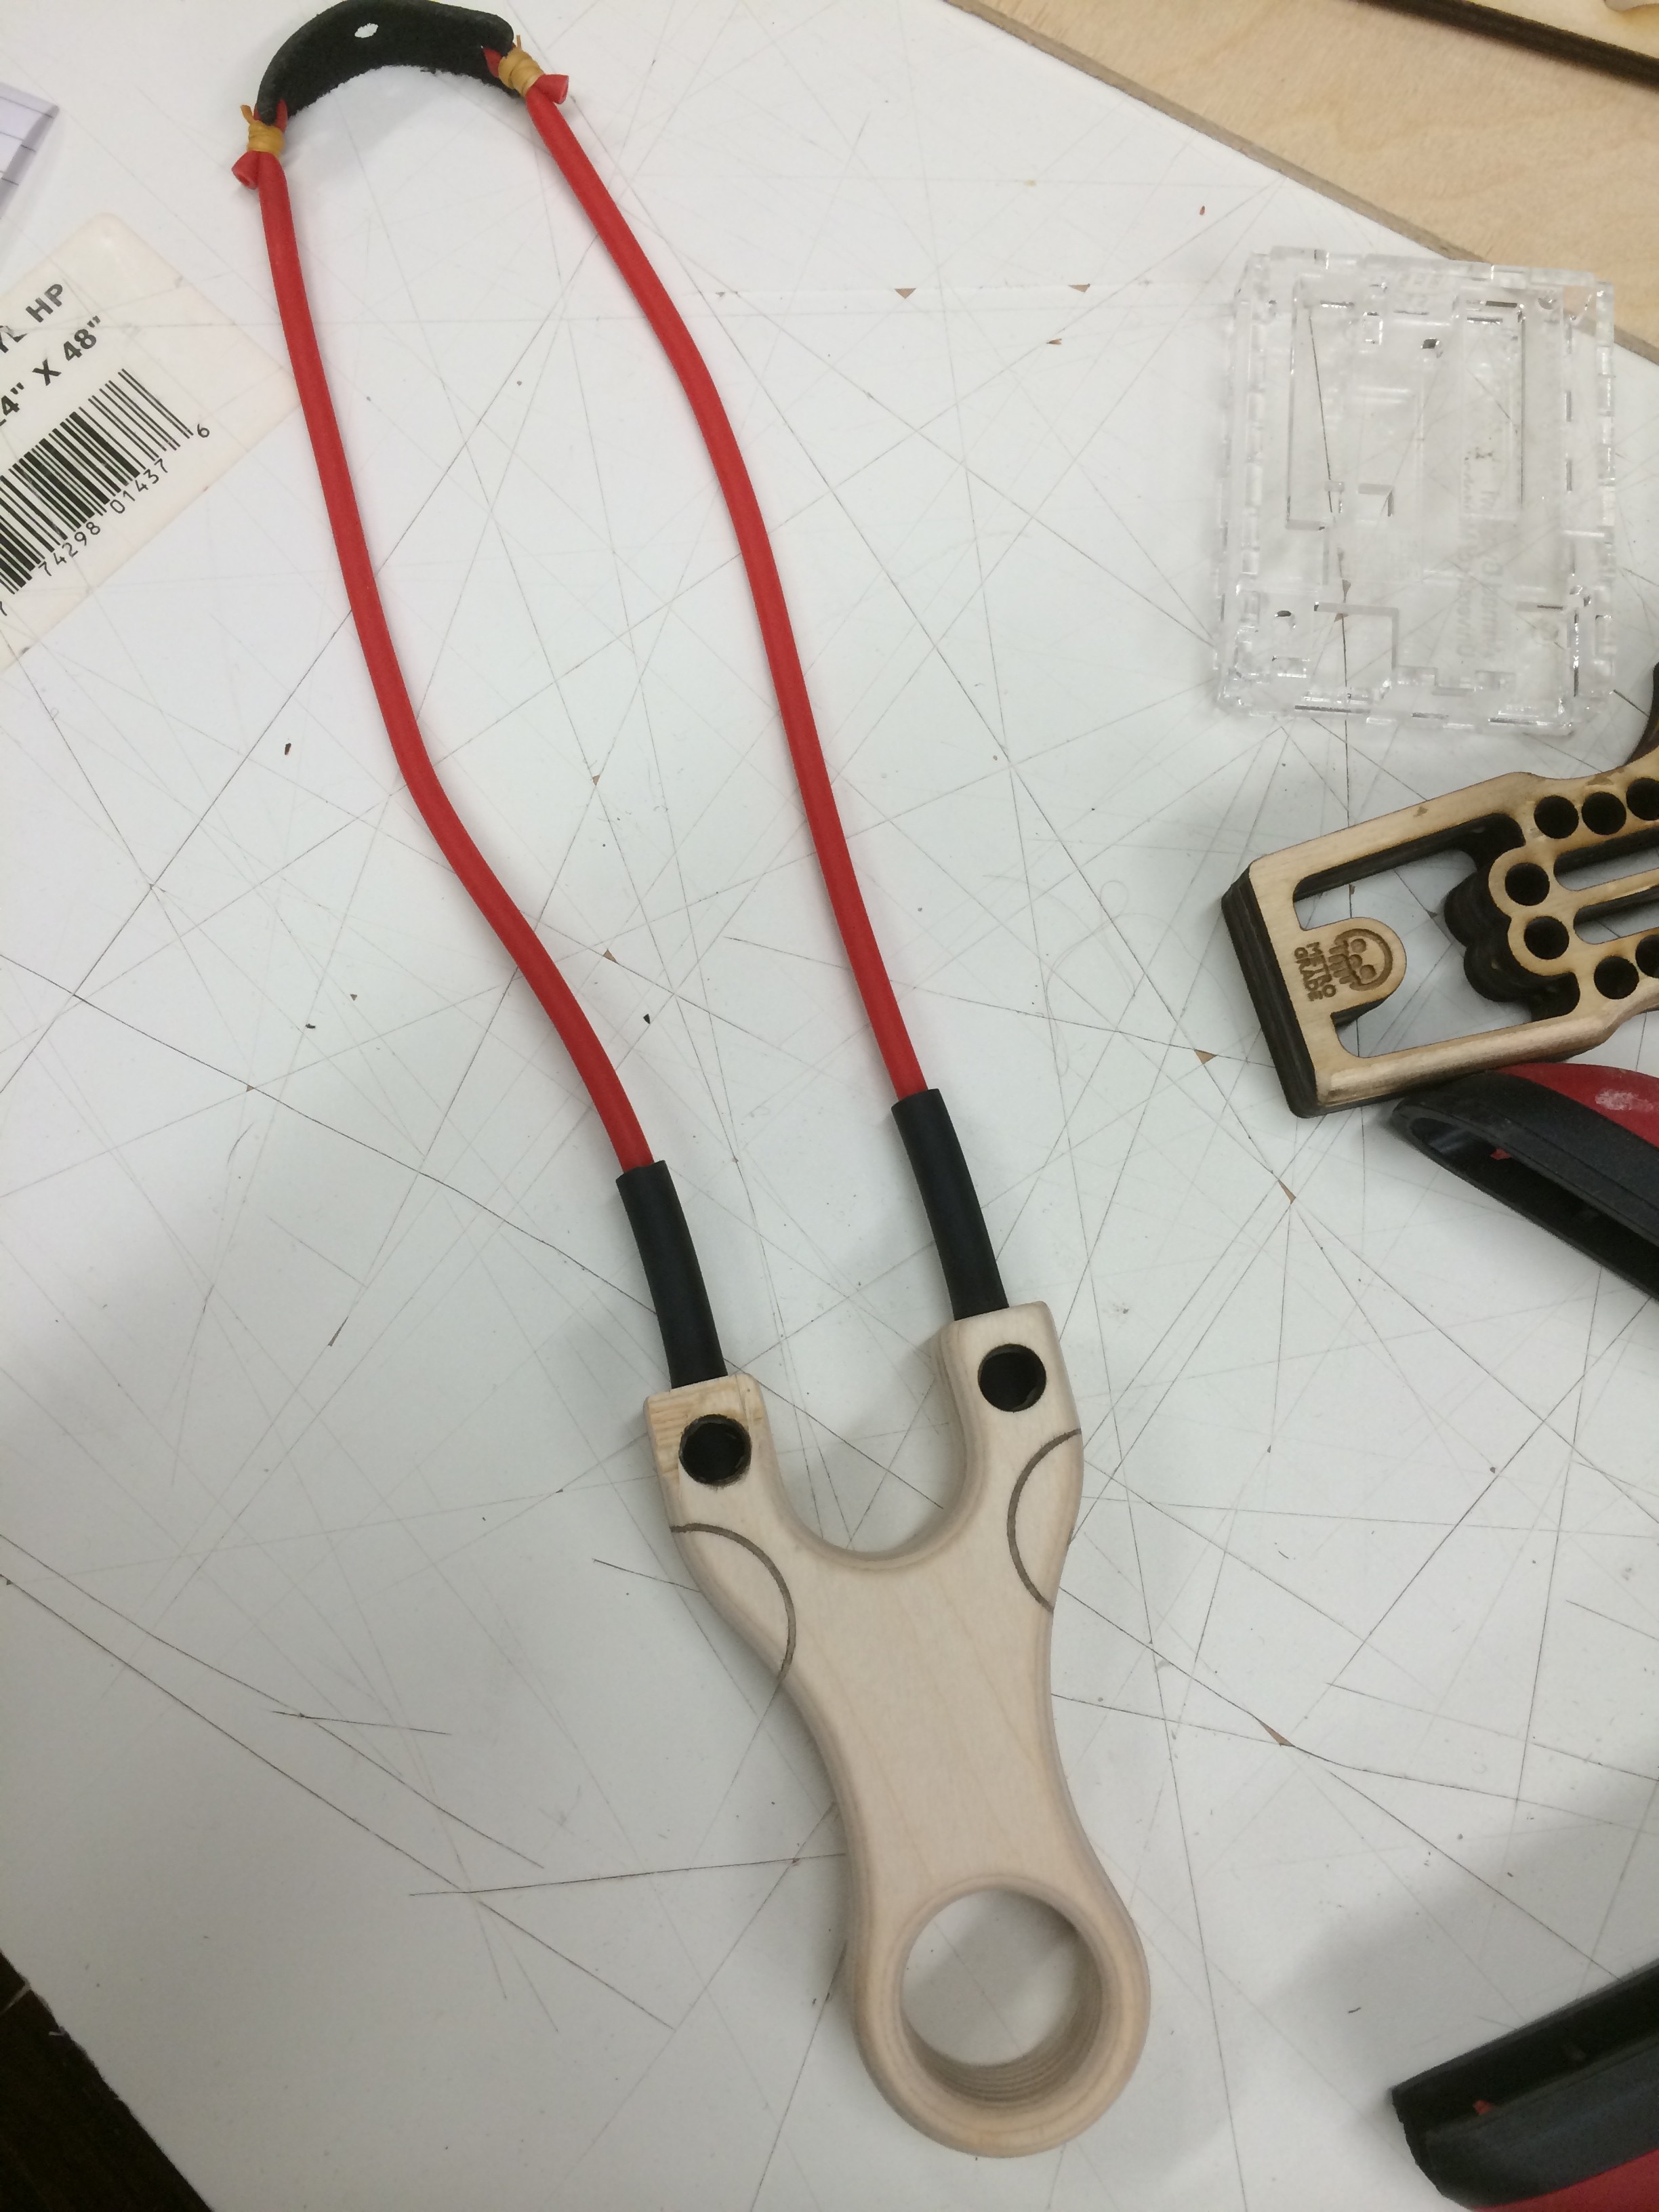
The rest of the internal slots got a quick 320 grit sanding so it would be smooth, the laser cutter sinters the wood so its generally smooth but just to make sure. My original plan was to use a band set I made up with red 2050 tubing with a 5080 sleeve, but I later changed the sleeve to a 4070 since it was a bit tough to get the 5080 into the slot after it was assembled. Here’s how the tube set would sit into the fork tips, and a dry fit of the other parts.
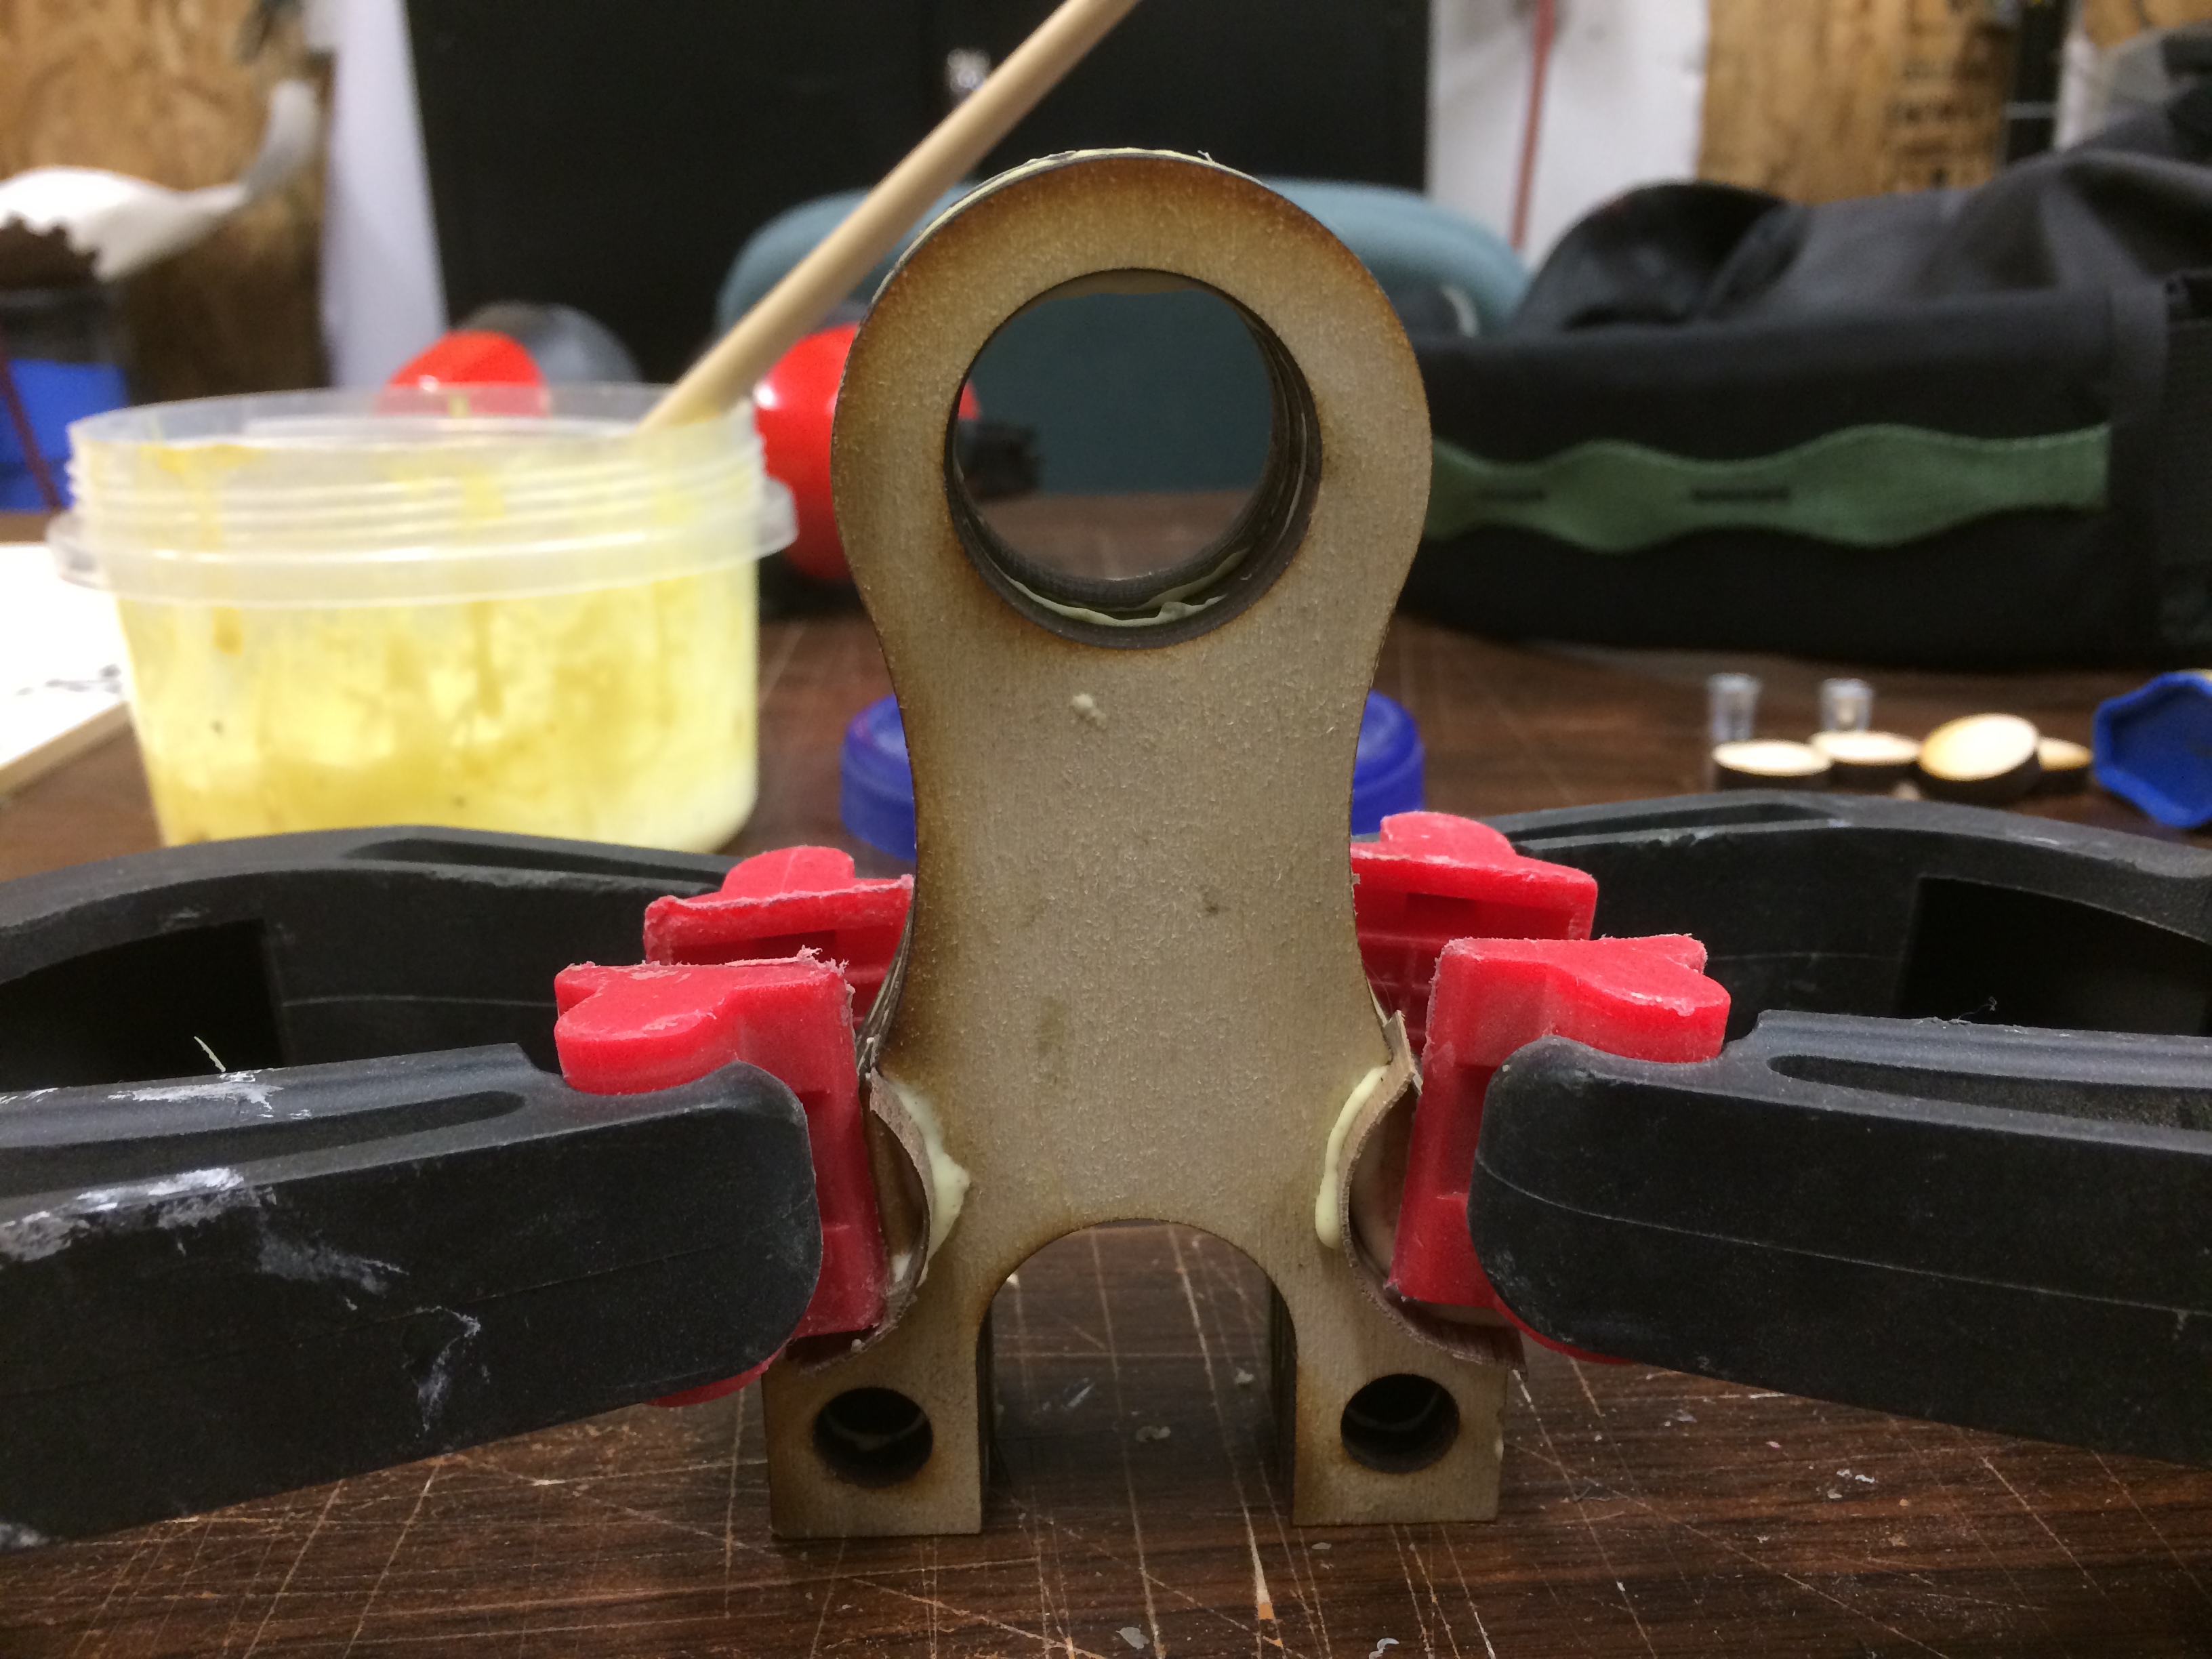
All of the layers were carefully glued together, take care not to have excess glue squish into the tube slot. This was clamped for about 10 mins for the glue to set up.

Then the scallops were adorned with an inlay shim of oak (cut cross grain to make it bend easier).
Once it set up for another 10-15 minutes, most of the finishing steps aren’t that much different than any other MGG slingshot.
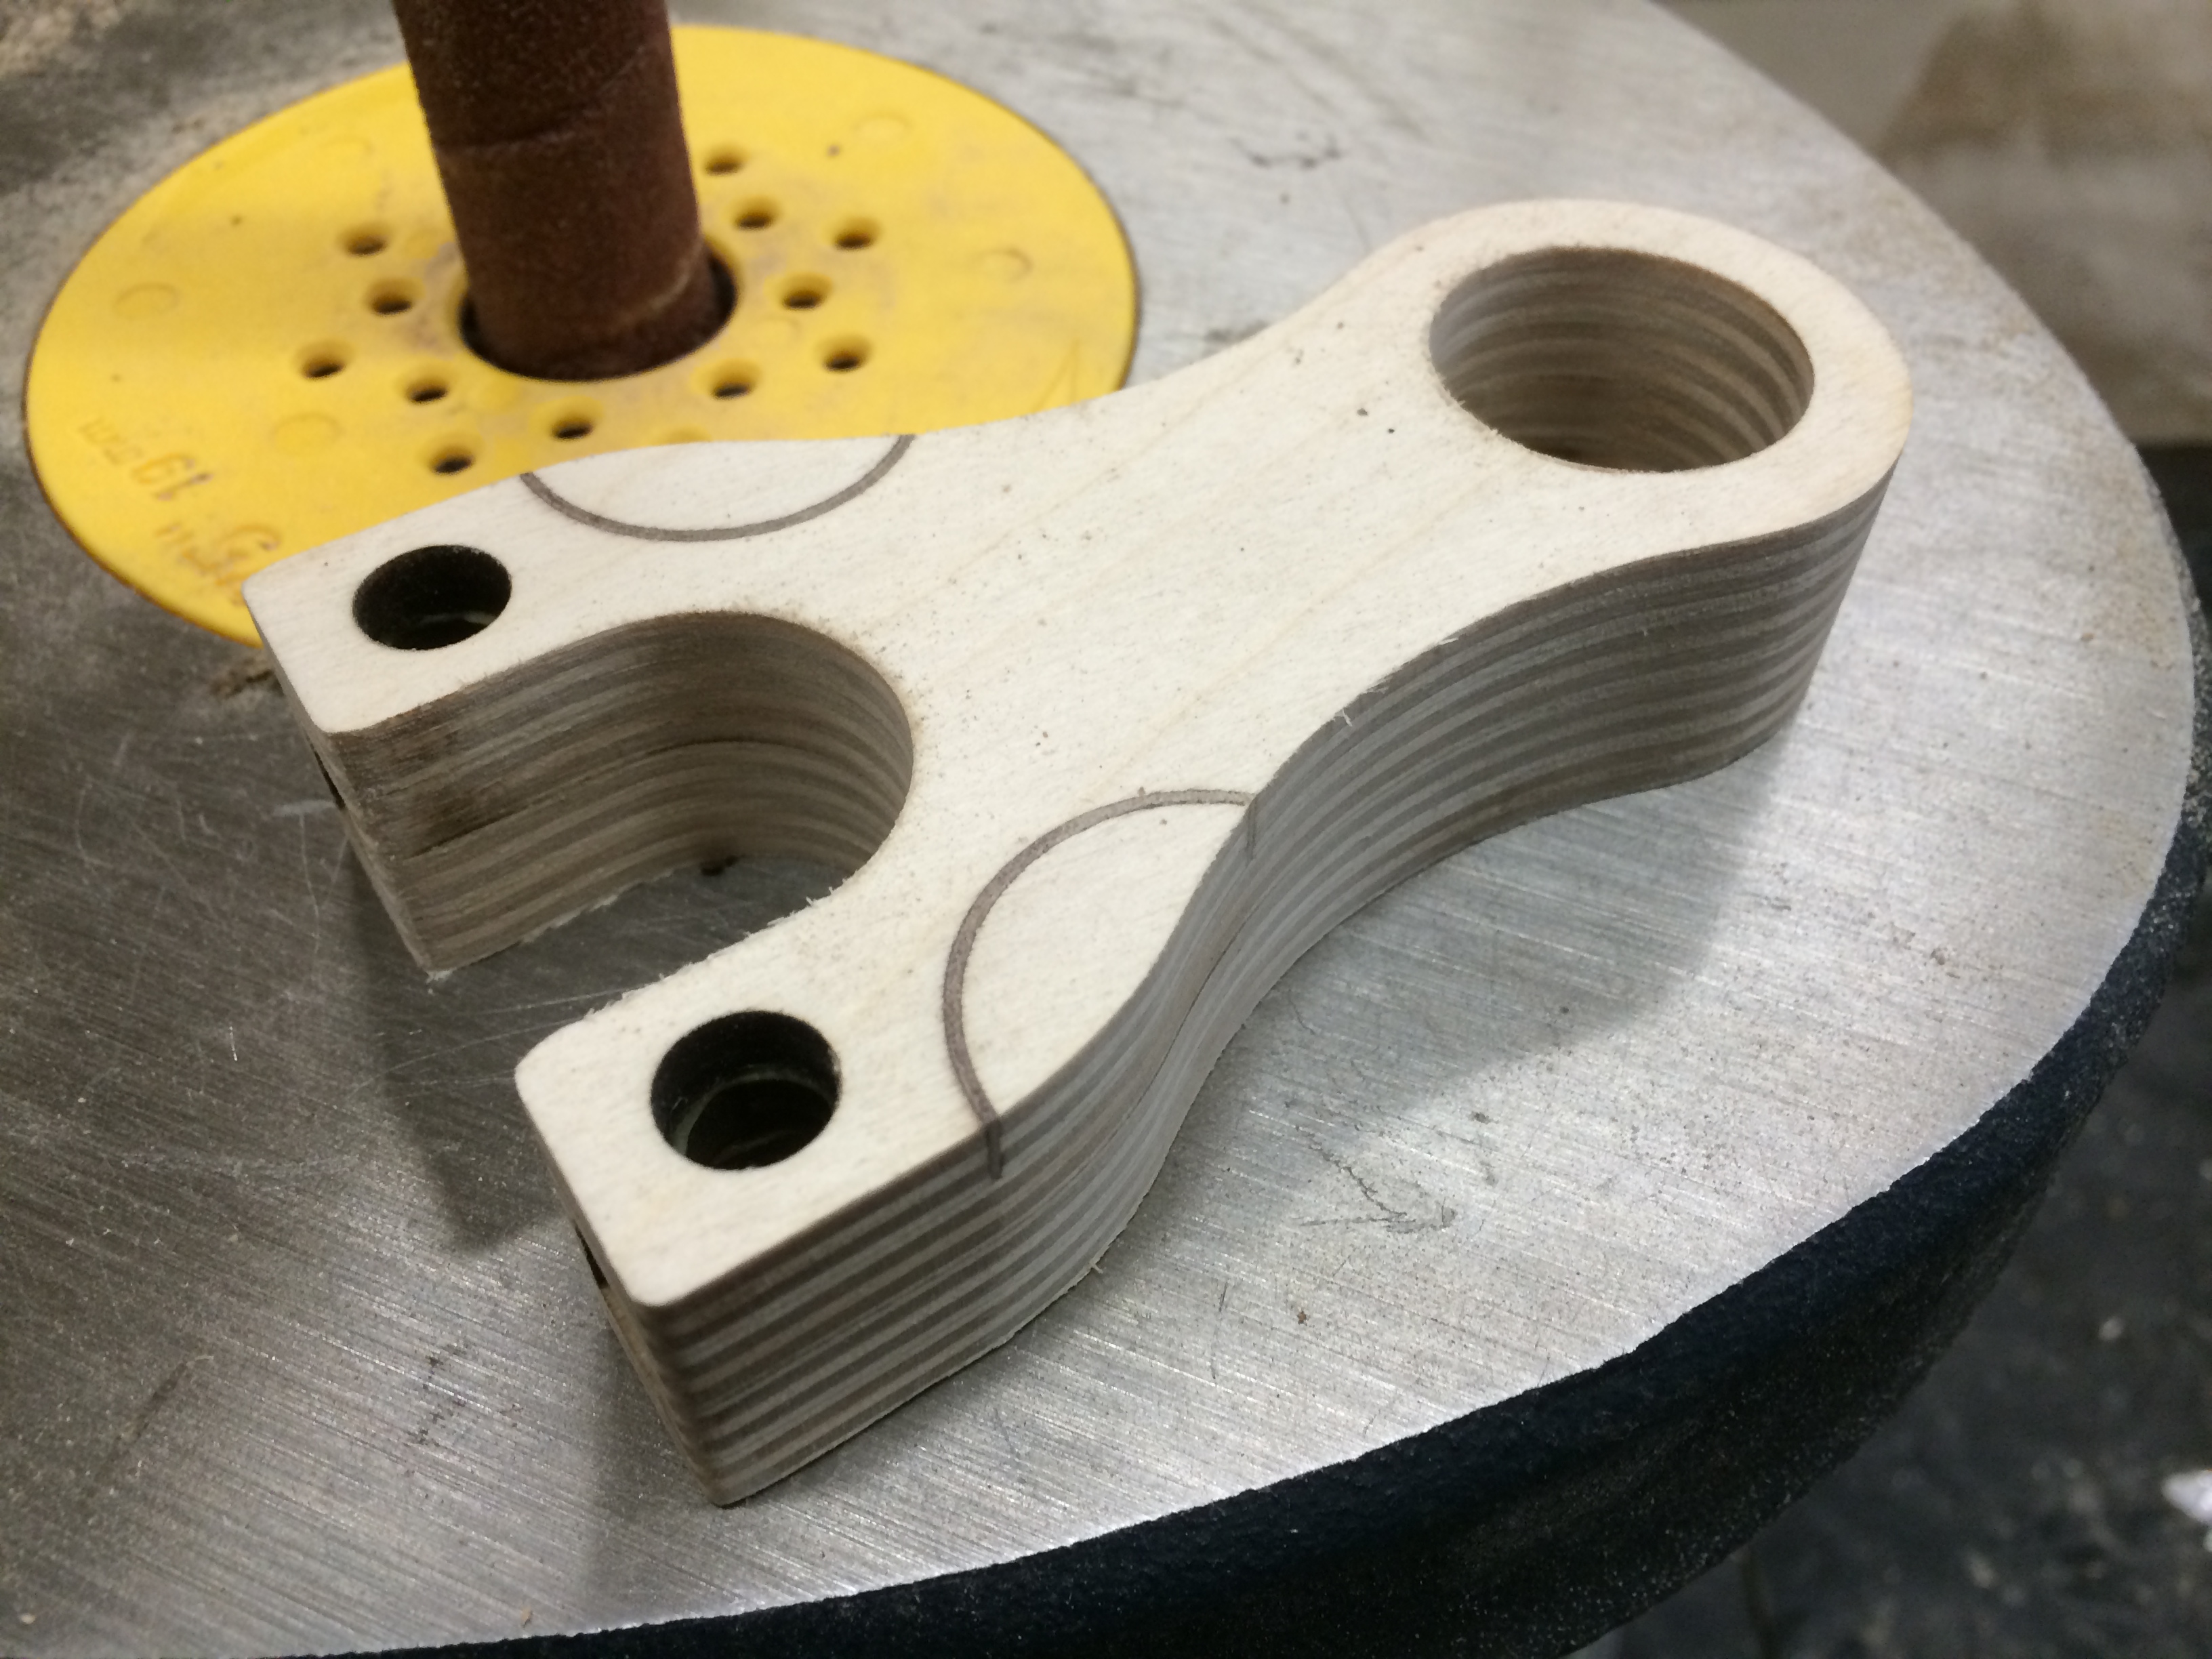
Flush sanding all the sides and faces (my favourite state of a slingshot)
![]()
Then router the edge to 1/4″ (except the top) and edge sanding with a 100/140 block:
Dry fitting the tubeset.
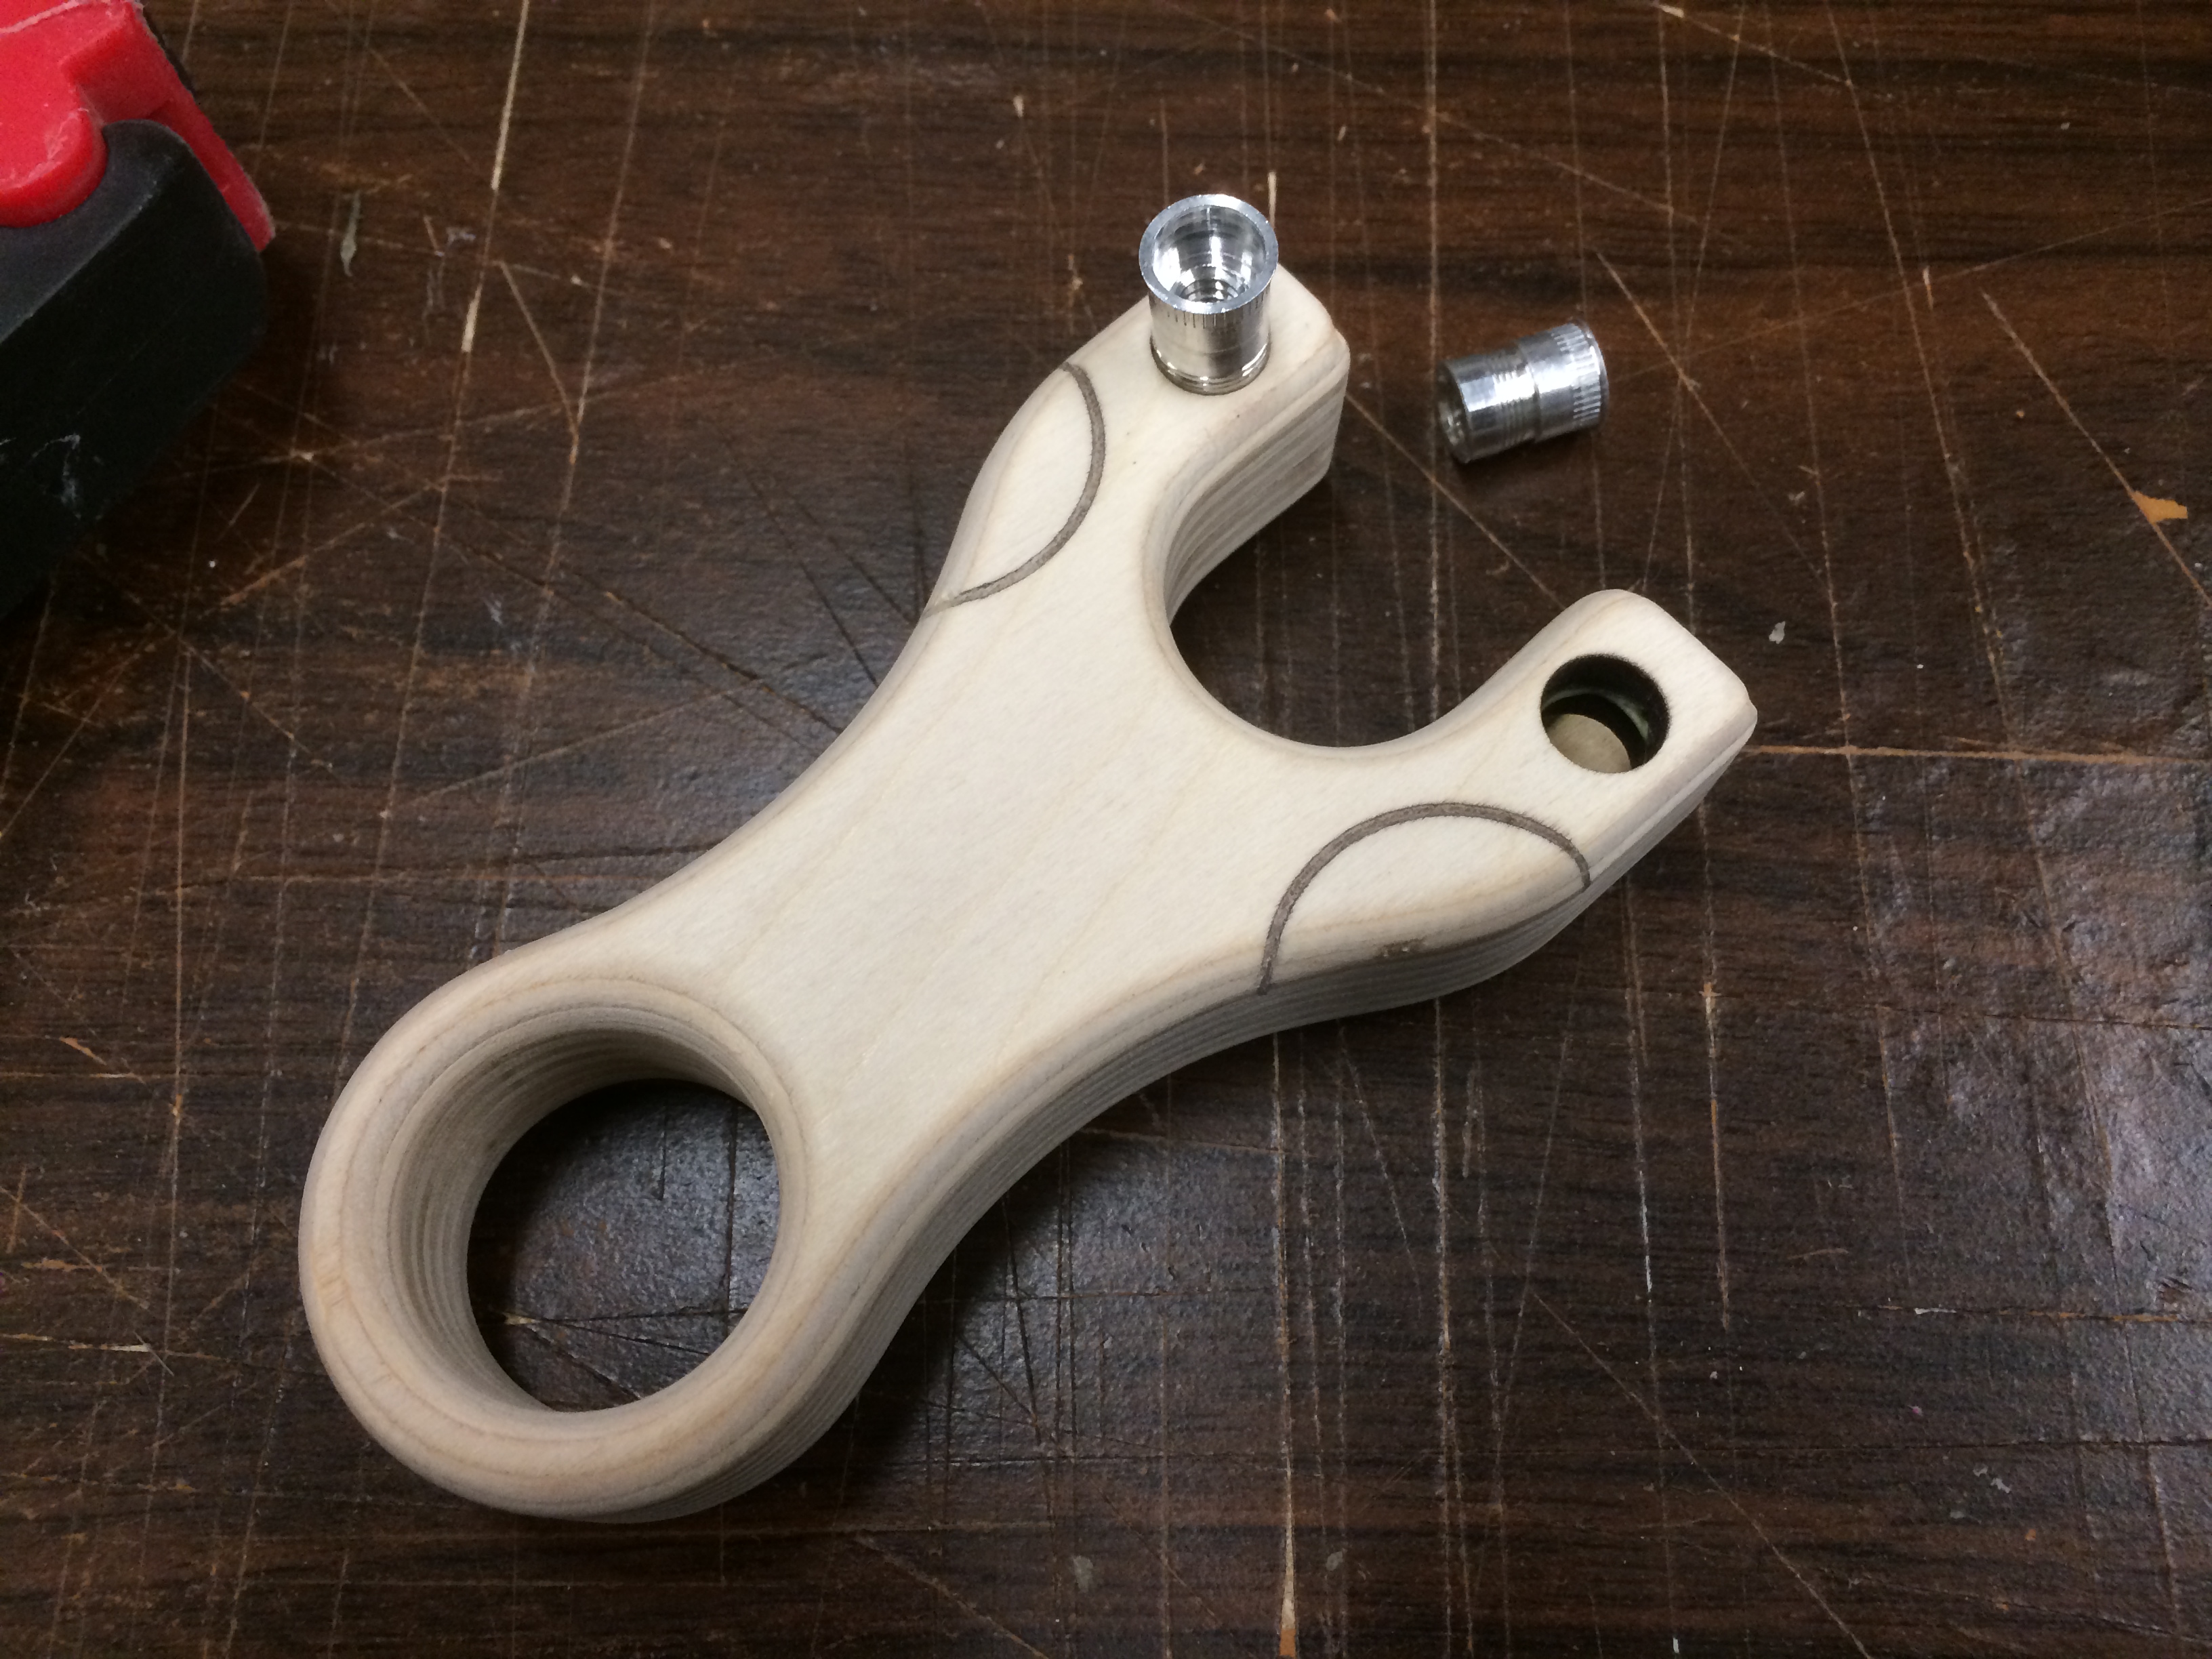
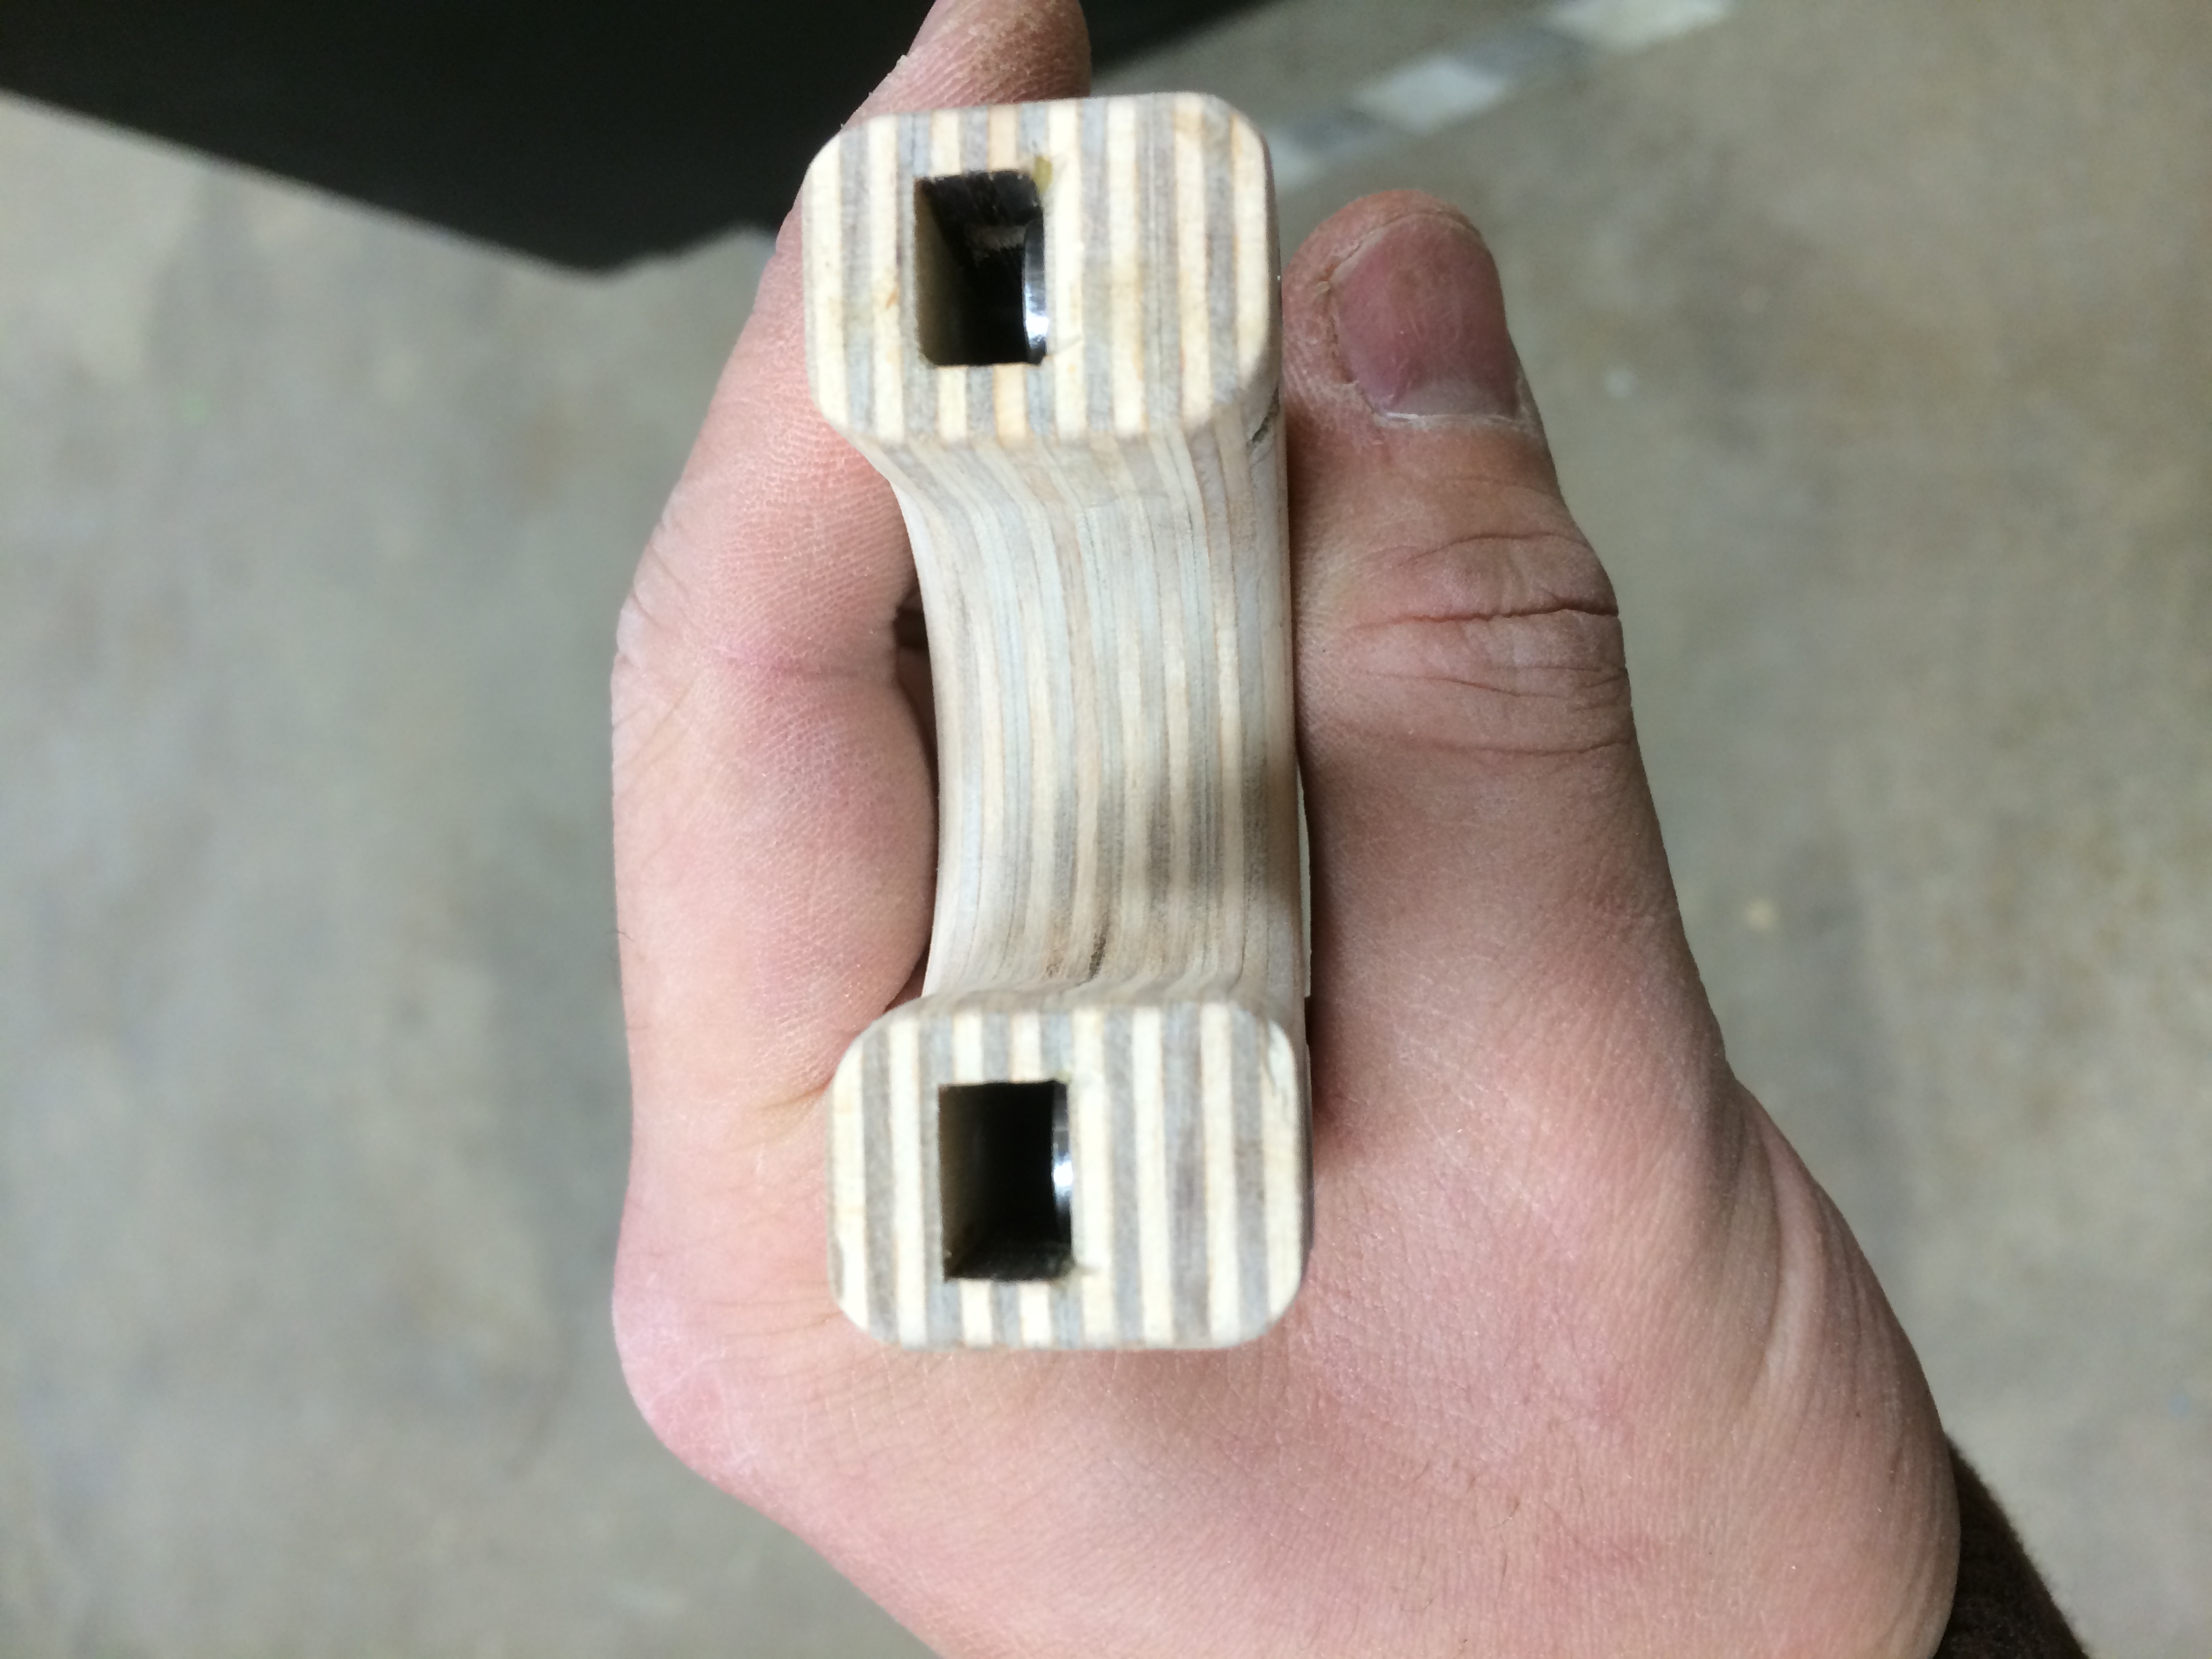
Dry fitting the aluminum 1/4-20 threaded inserts (I have brass ones on order, but for this prototype and proof of concept, these work great).
Then finally supergluing the inserts into their home.

Check for grip and admire the pre-finished state: check.
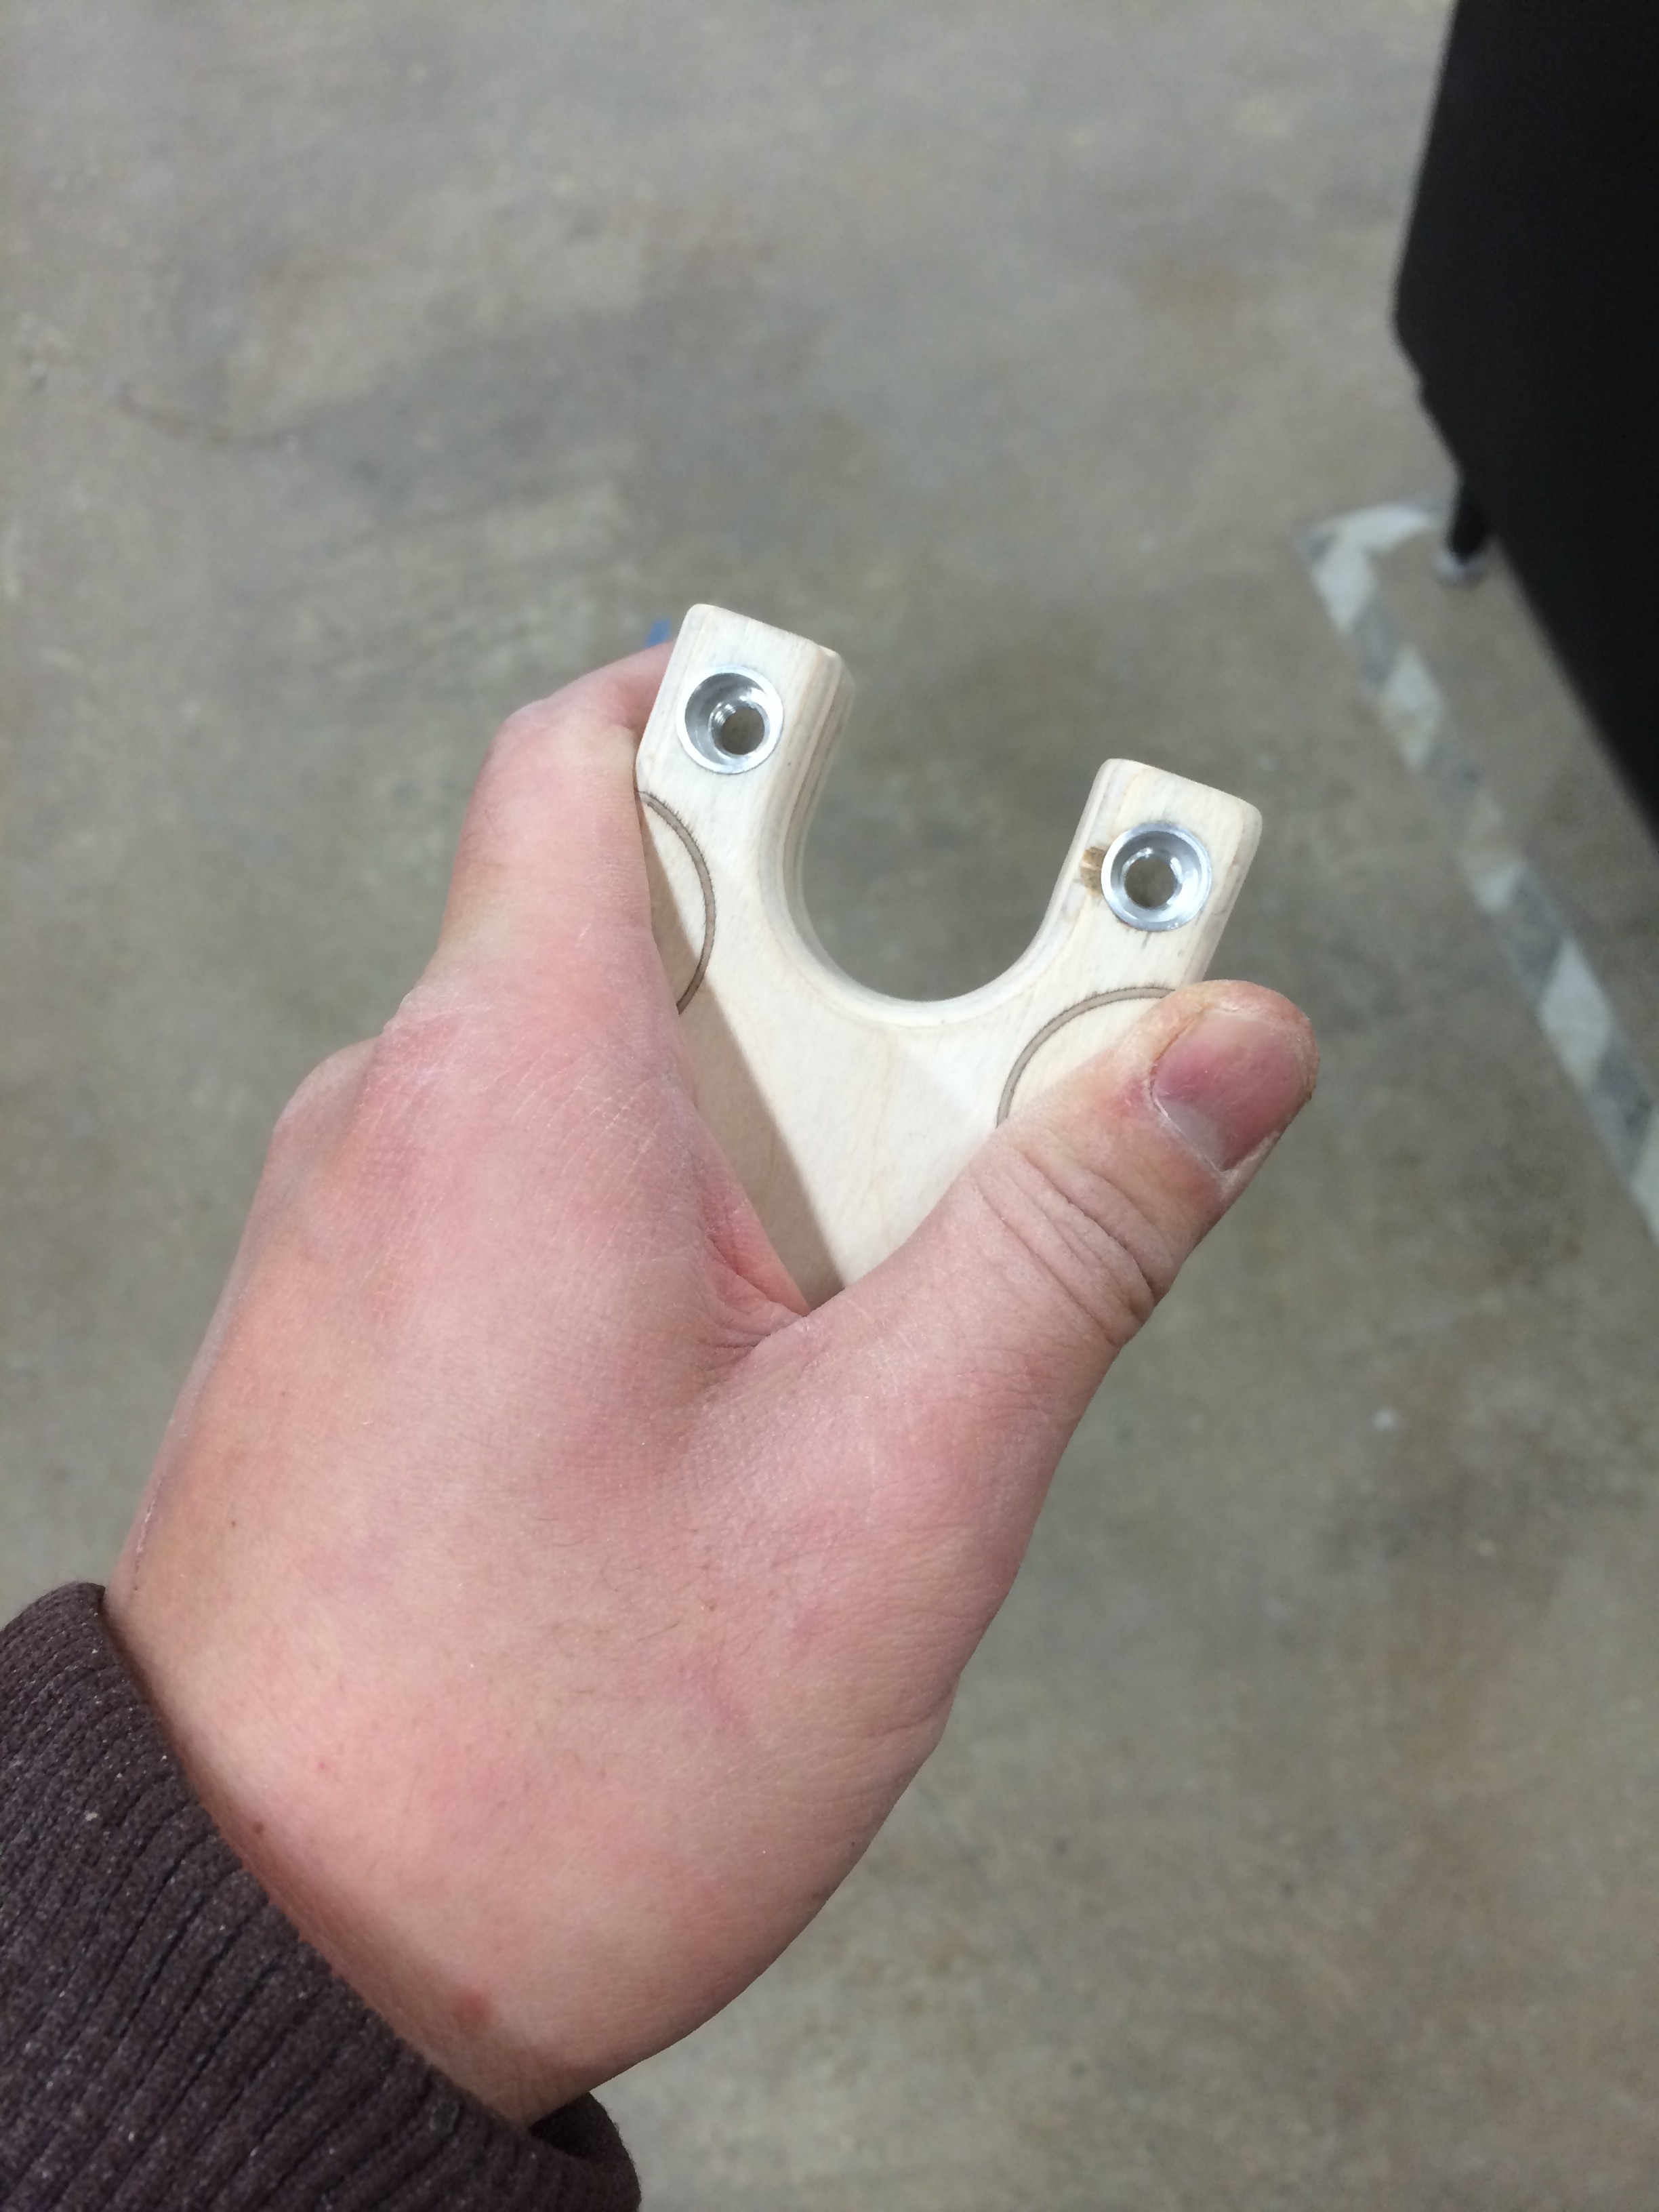
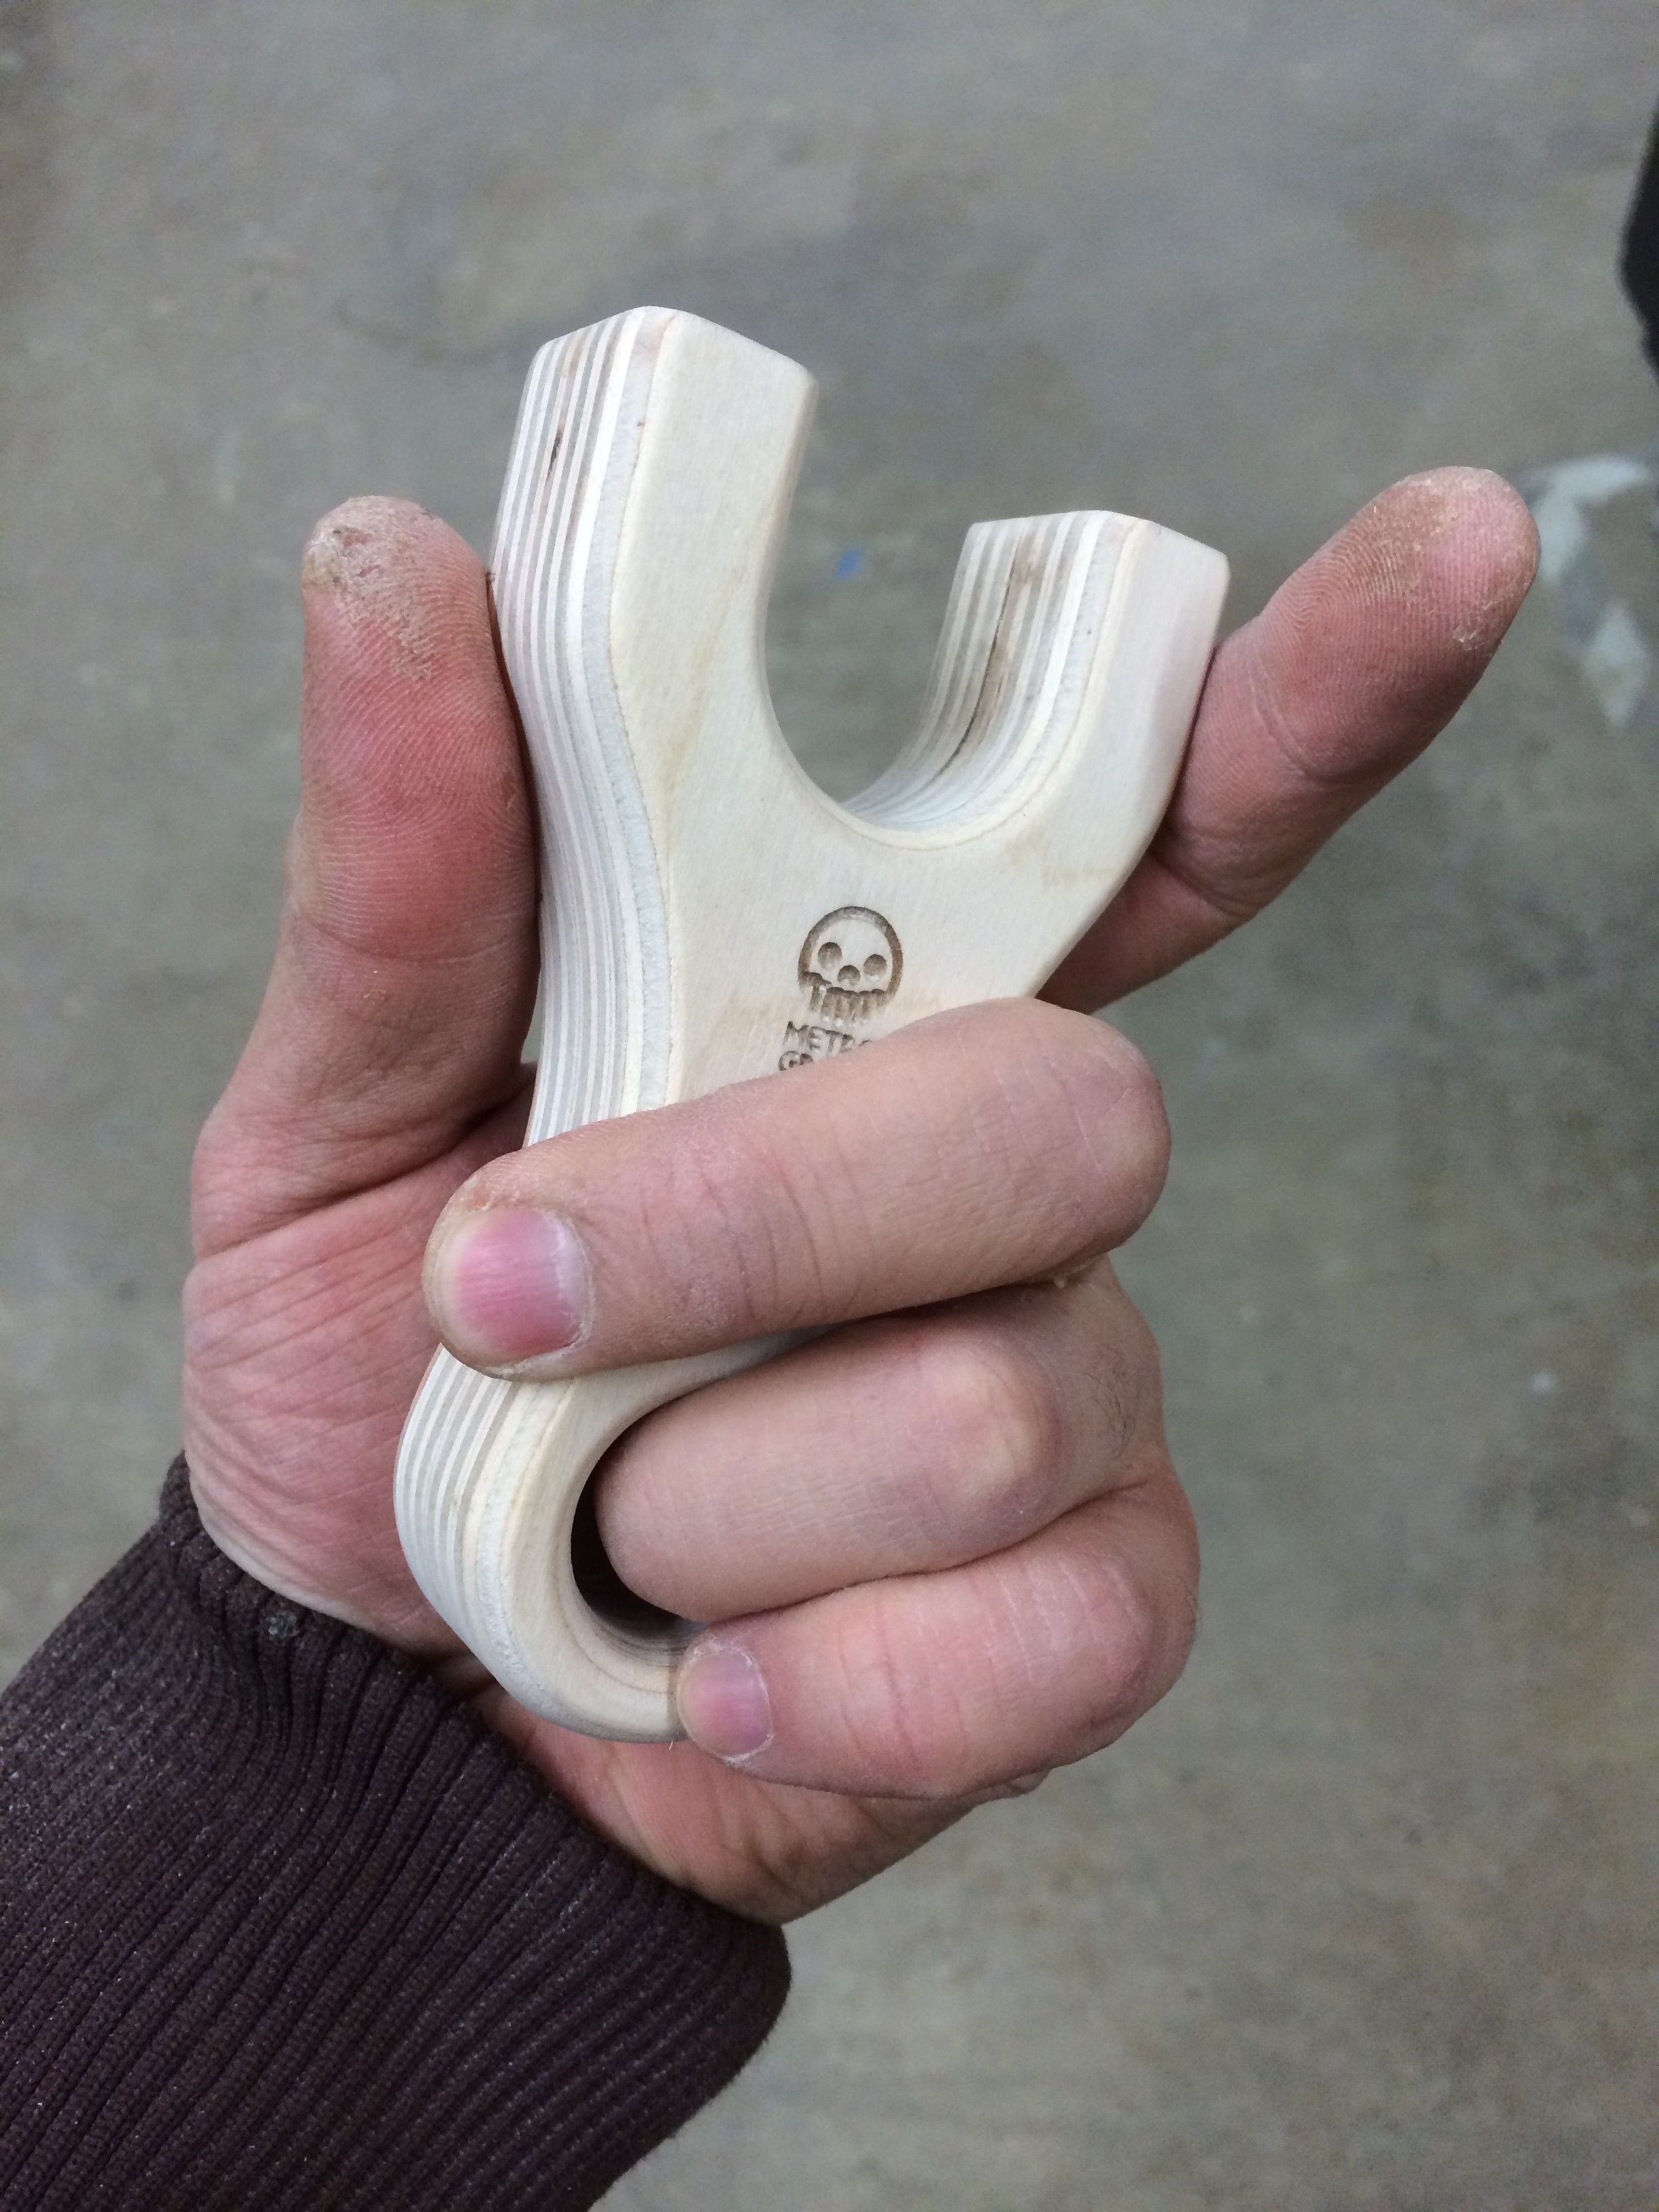
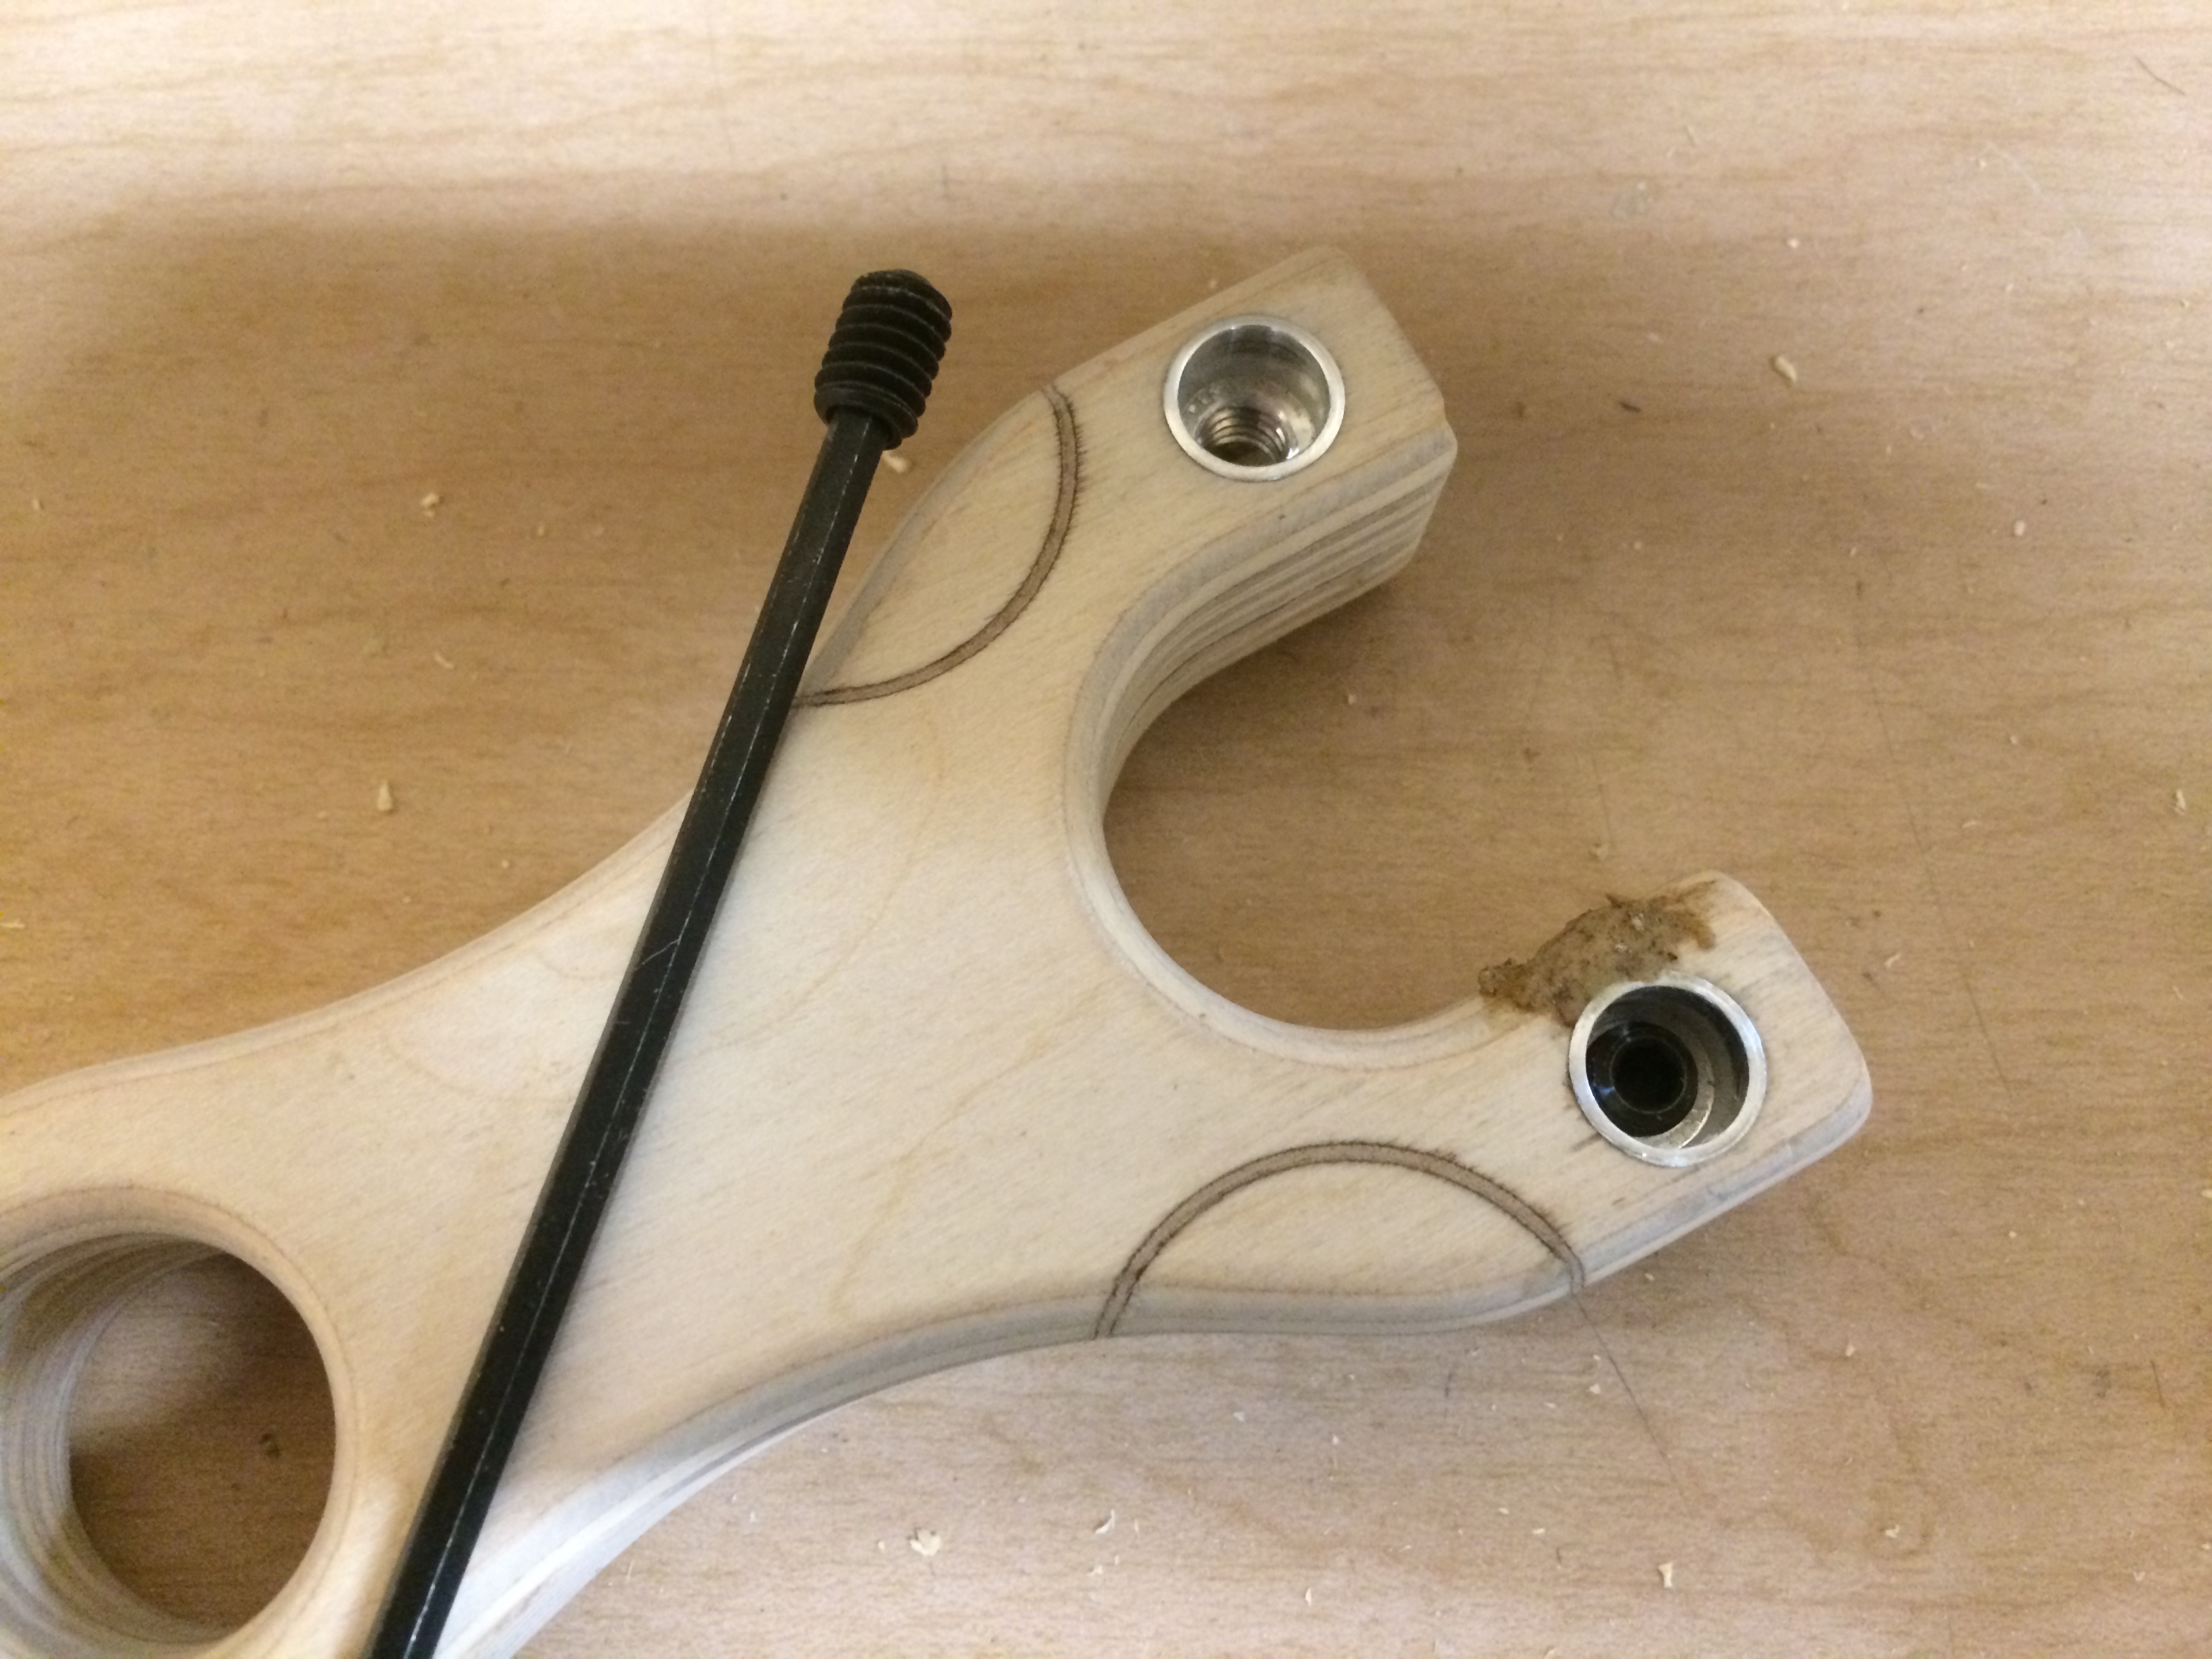
Check if the 3/8″ long, 1/4-20 set screws go in far enough…yup. The snot you see on the bottom fork is some glue and sawdust to fill in a chip that happen when cleaning out the hole with a drill bit.
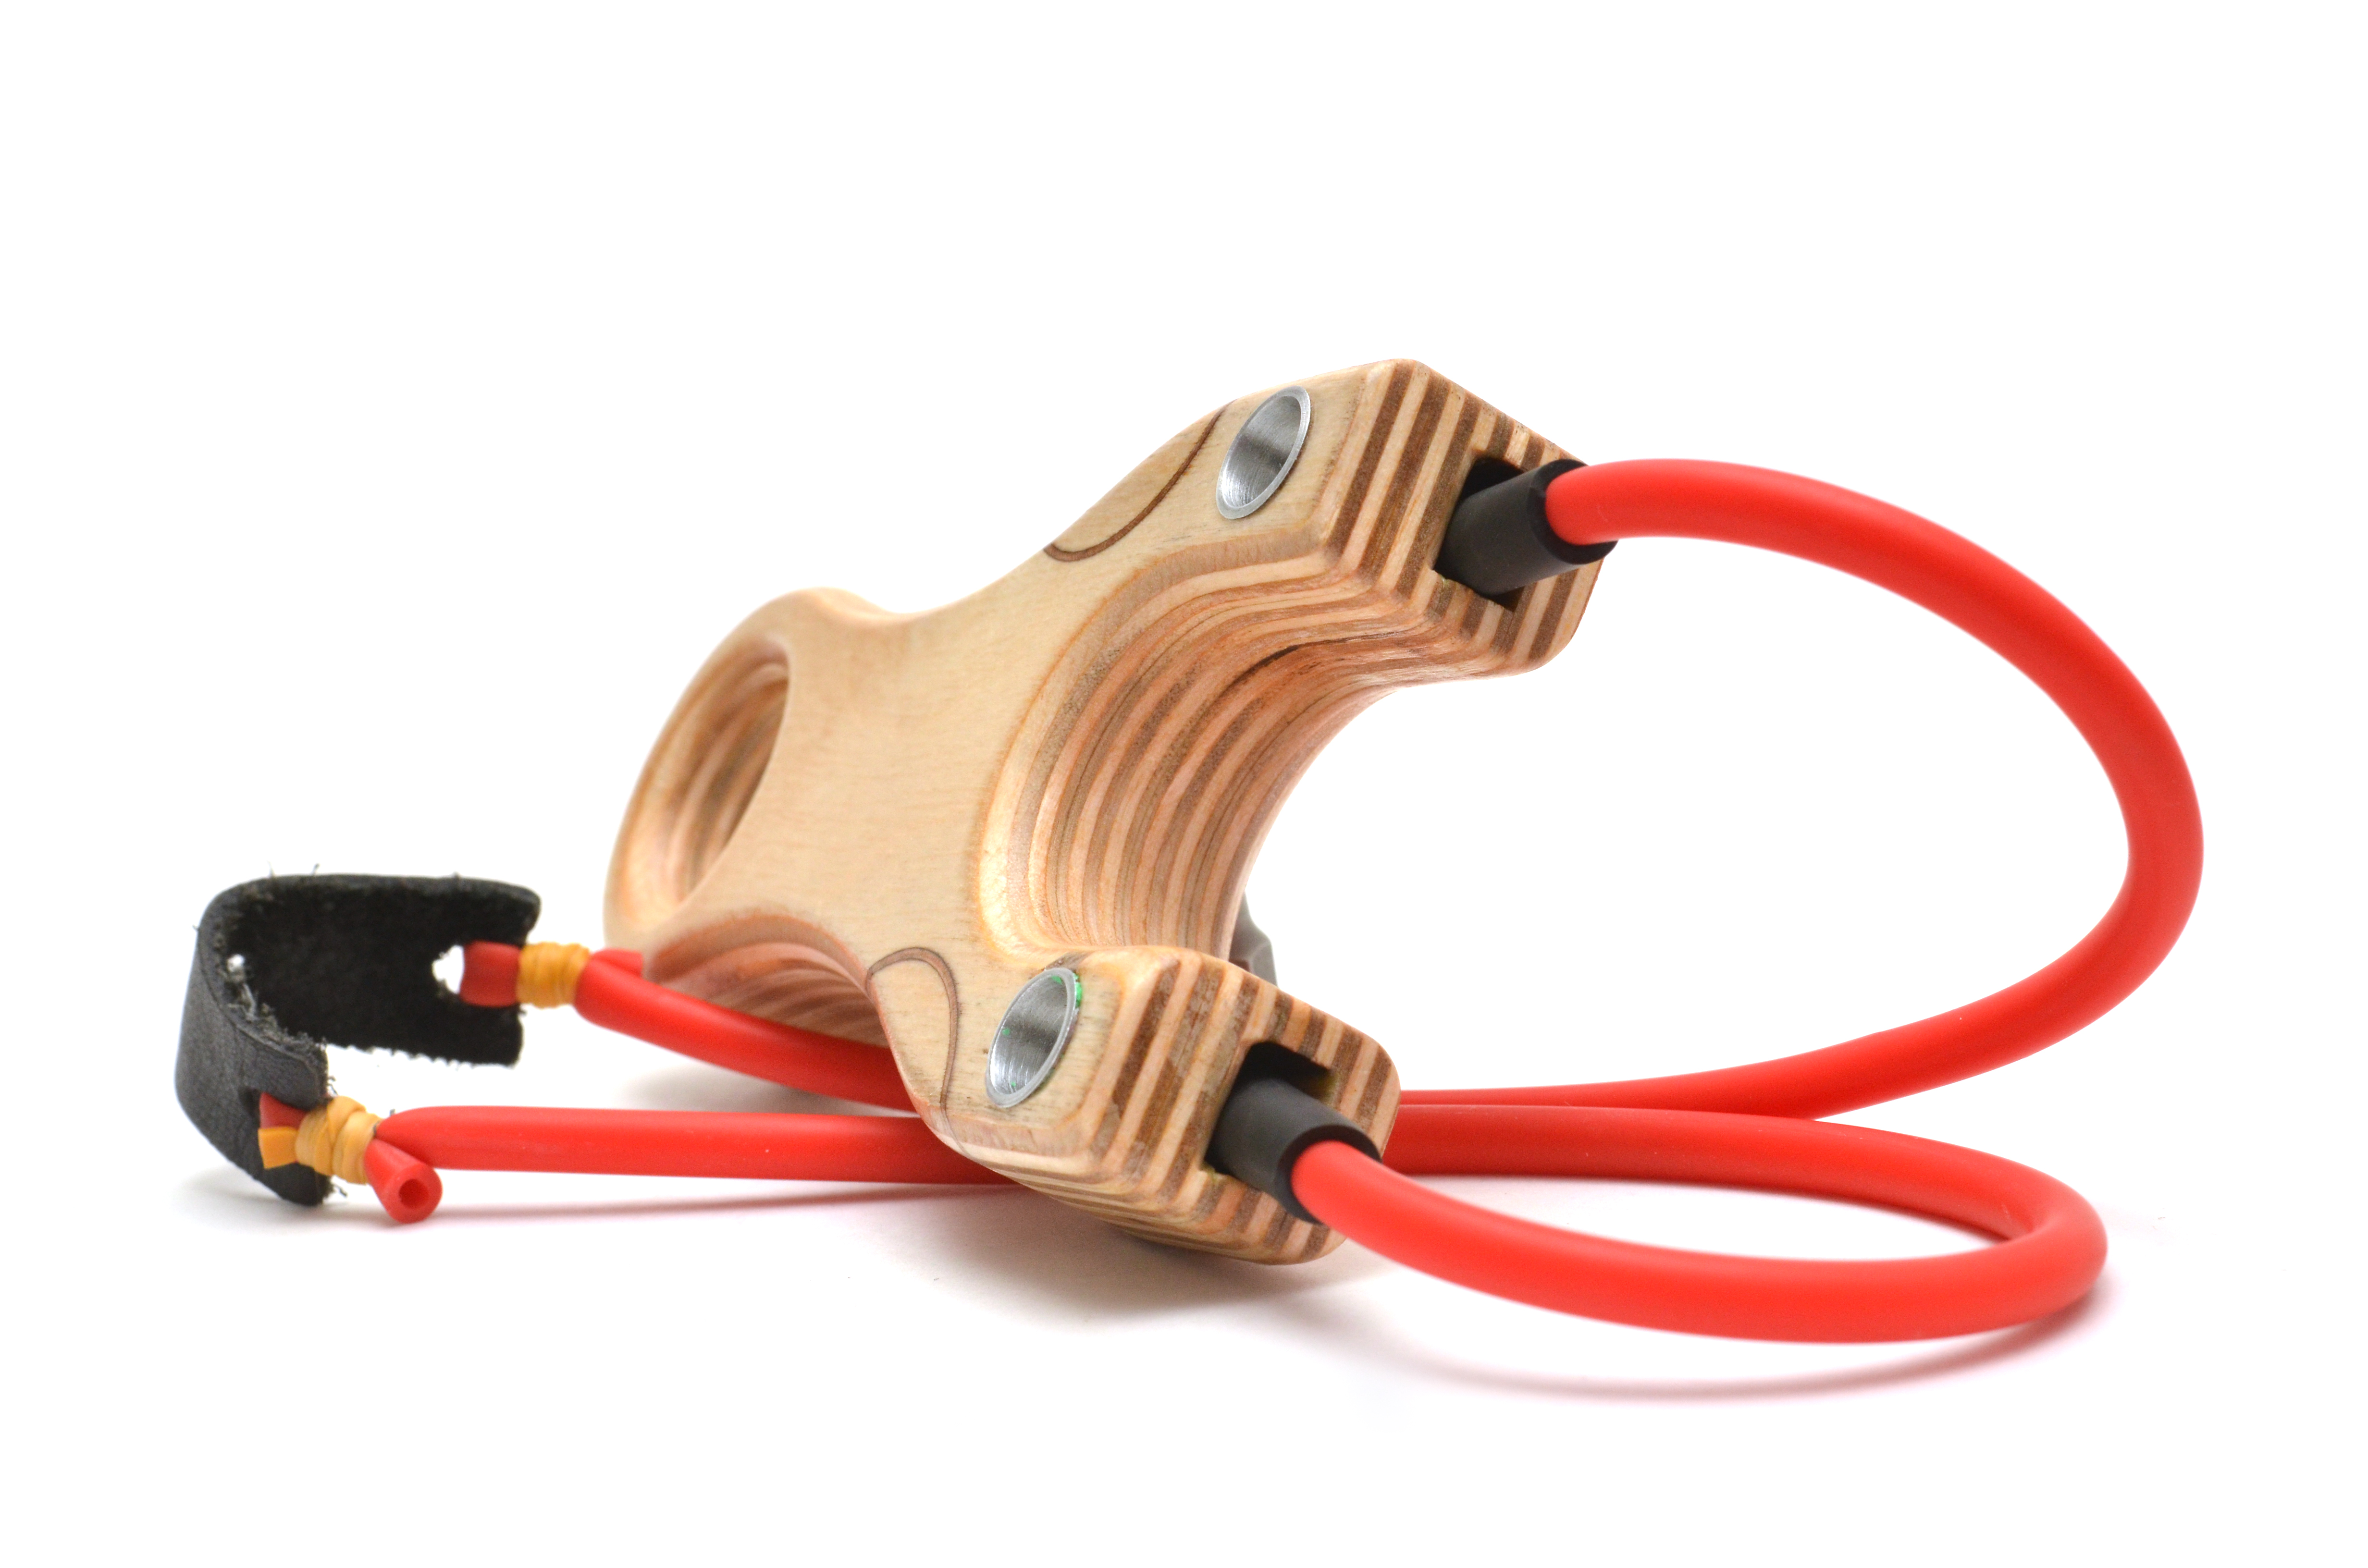
Then throw some bands on it to see it actually works, it’s here you can see the 4070 tubing for the sleeve. Seasoned shooters will know why but for those reading about PFS’s for the first time, the sleeves do two things: 1. Protect the inner bands from receiving too much punishment when they retract back to their active state at the fork tip area and 2. They help protect the bands at the tube attachment area since they are bring compressed by a set screw.

![]()

Shoot 2 coats of acrylic spray on it, then sand with a nail buffer to get a nice flat finish. Then hit it again with ONE more final light coat. Then it’s off to the photoshop.


This was such a blast to make, and thanks to a LOT of forethought, no time wasted on a second prototype. The Loris PFS has so many layers of wood that it is getting a little past what the original intent of a PFS (extremely pocketable, thin shooter) but the clean band attachment and overall finish makes up for the beefy thickness.
Stay tuned for a more complicated, hardwoods version soon!
buy pre Latuda Thanks for reading!
-Eric
That looks awesome I can’t get enough of shootingmy PFS and I will have to pickupone of these
This is Great, it’s like the Porsche Model of The PFS. The way the tubes are secured is just Smart.
pfshooter
Very cool. Anything like this one for sale? Thanks.
Hey Stacey!
No, we longer sell these. We have other slings that are similar in shape. It will be time to revisit these soon!
Thanks, Eric!