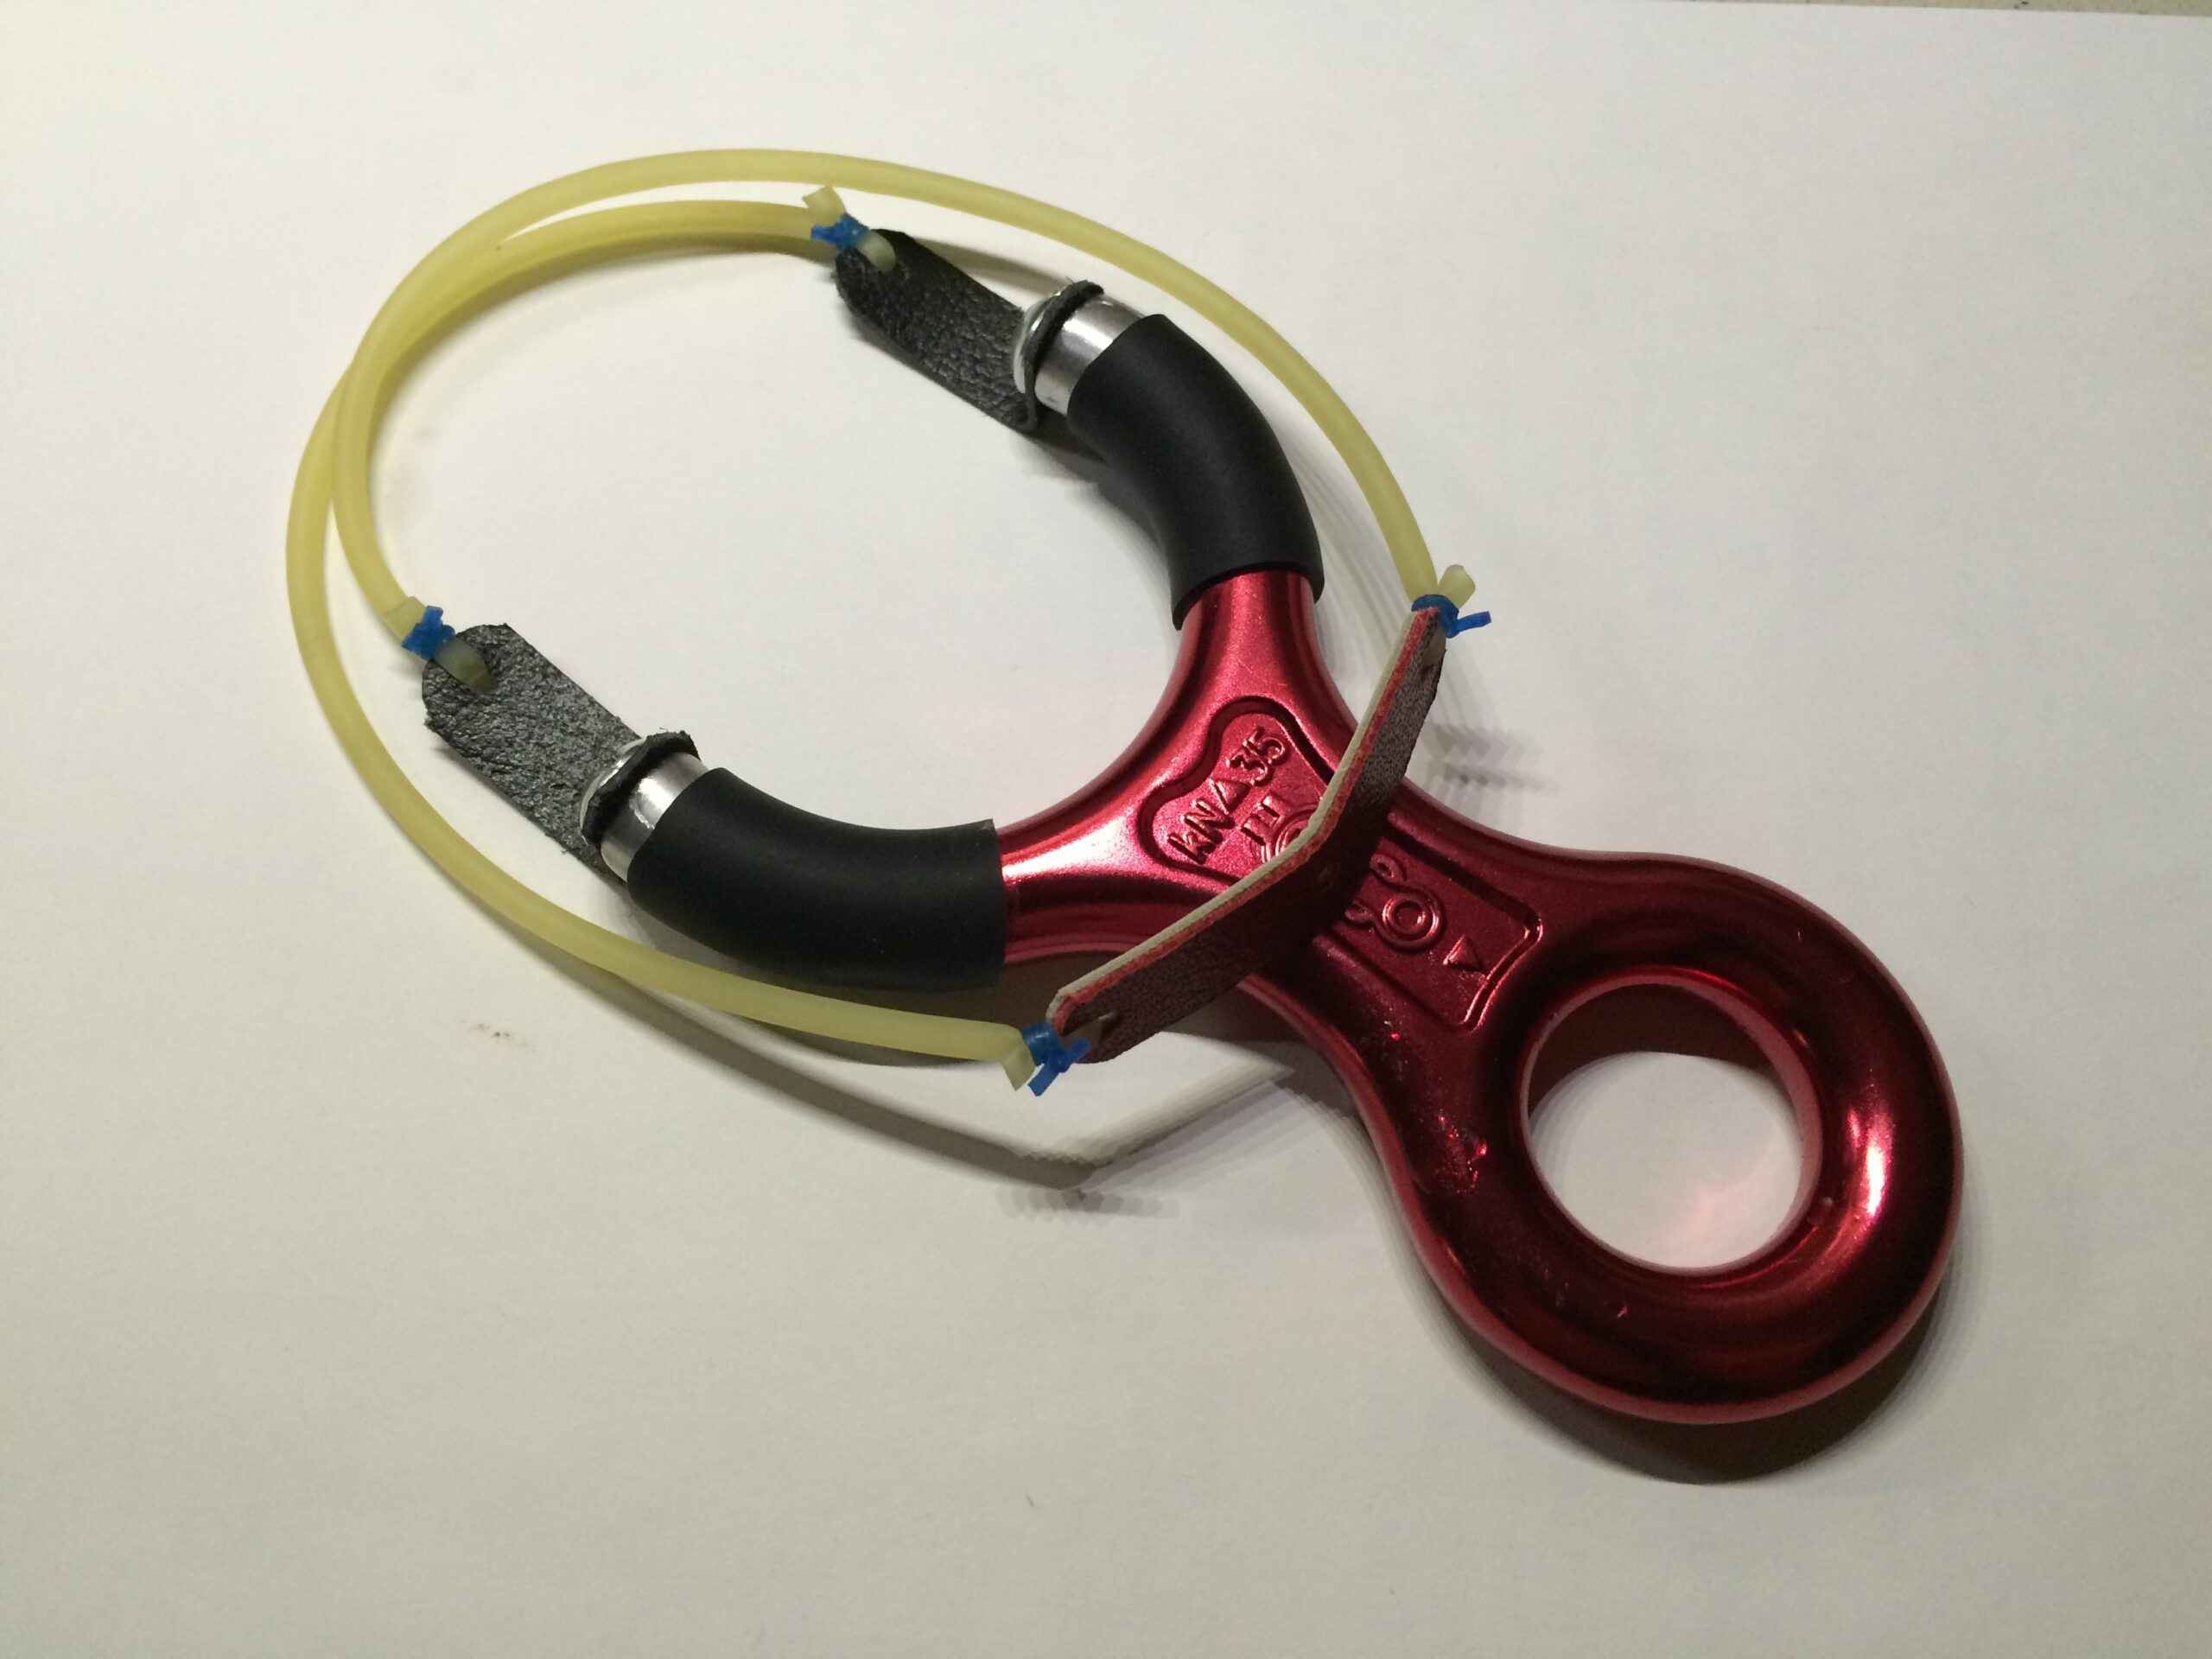
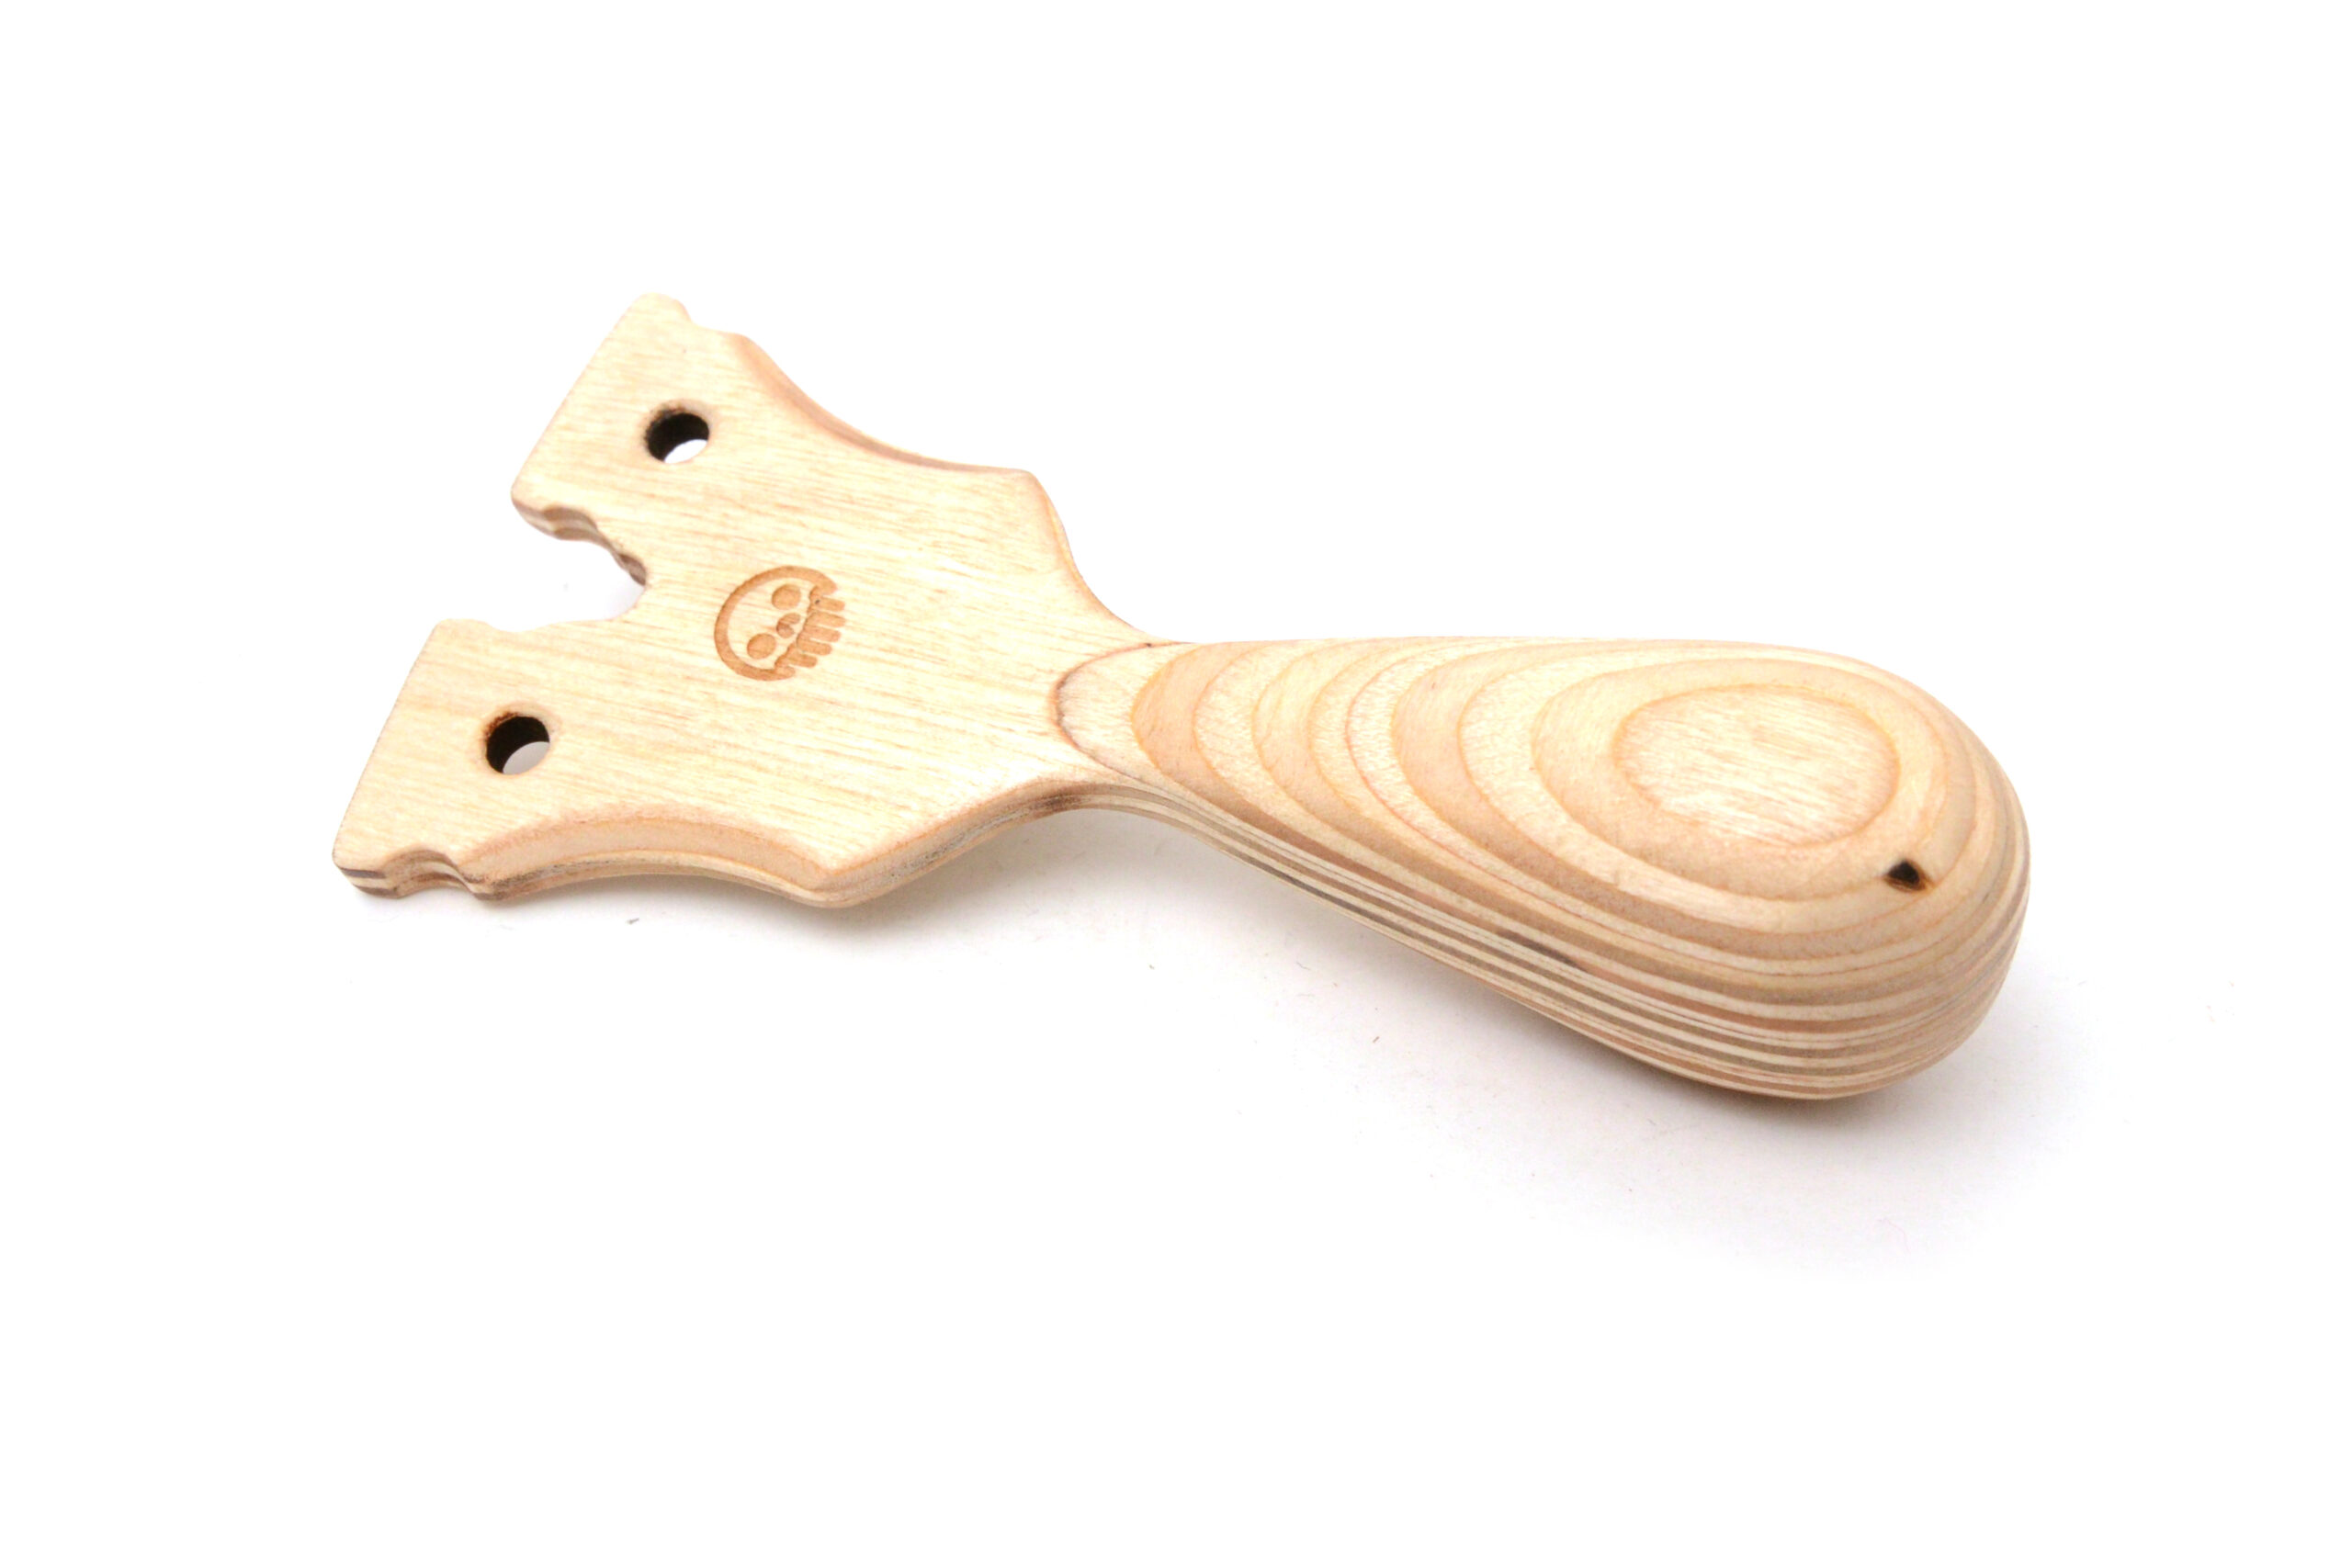
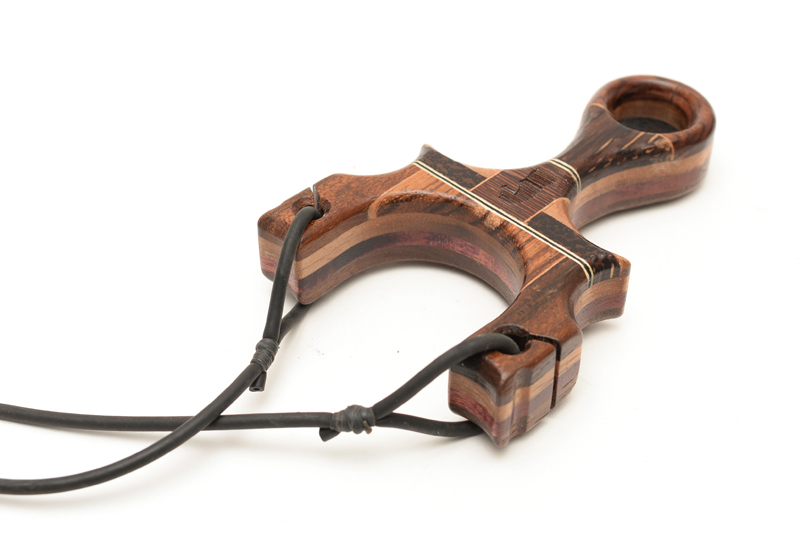
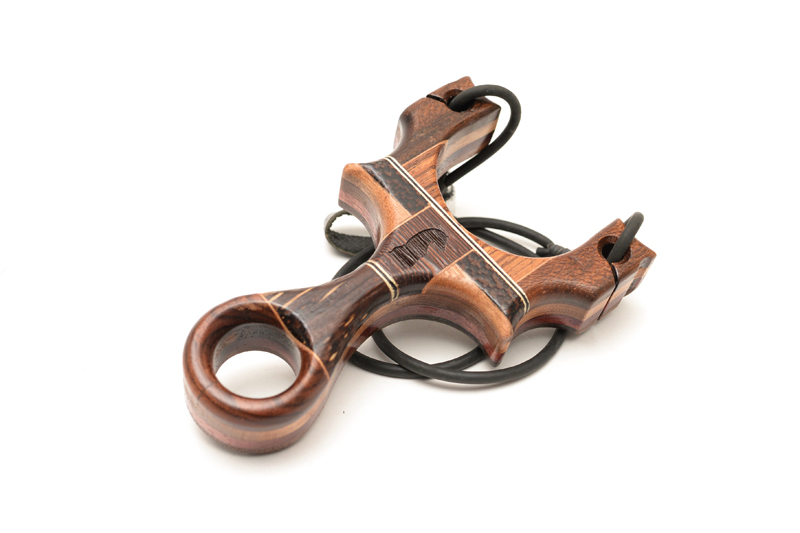
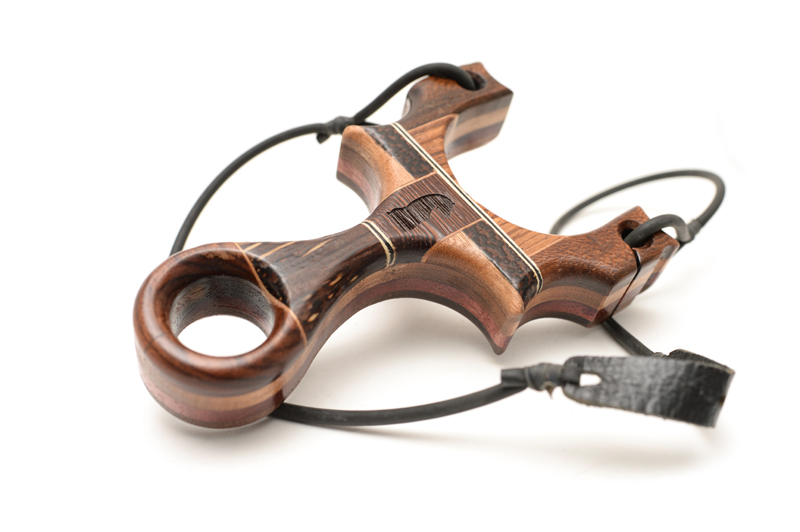
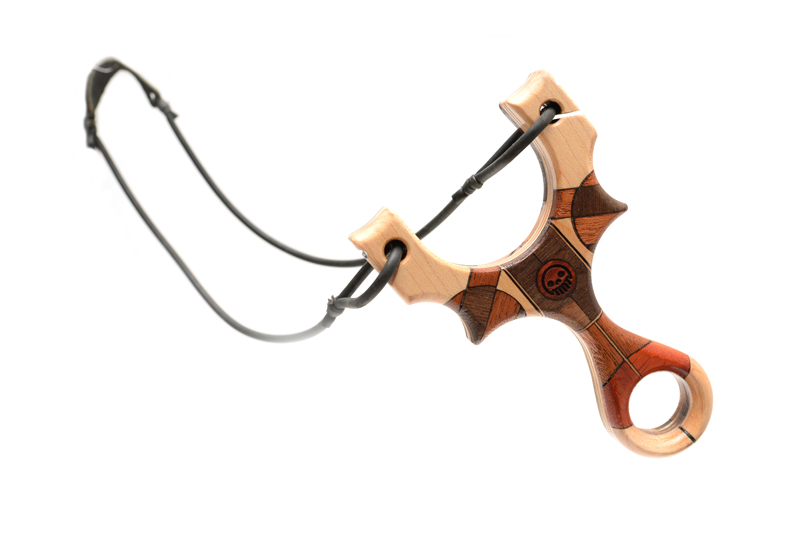
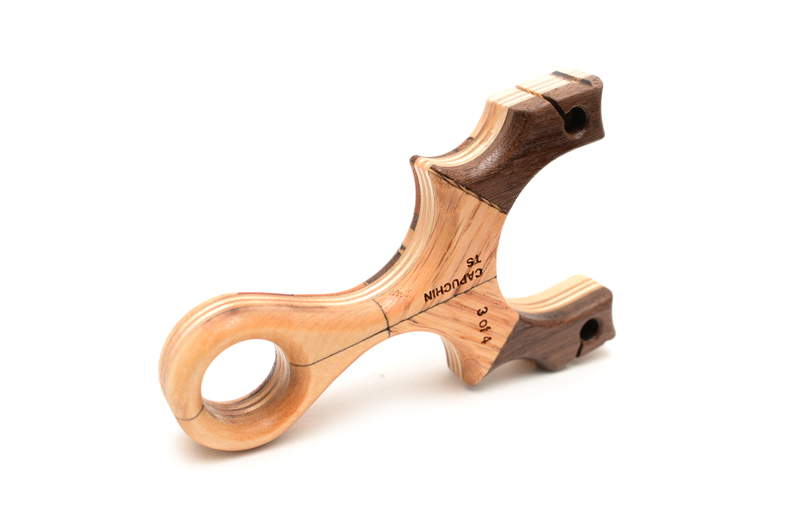
After what feels like an eternity, I return to the shop for a short build and an alternative take on the popular climbing figure 8 descender hardware. The last time I tackled one of these, it was more of a TTF, tubes affair. This time around, I do a little bit more machining to achieve an even more refined version of the classic slingshot shape.
buy Seroquel in the uk It was time to try something new, something exciting, something….with moving parts. Slingshots aren’t known for moving parts, but it was time to try it out. Rotating fork tips aren’t something I came up with but I did want to take a stab at it and try to make a deadly accurate BB shooter.
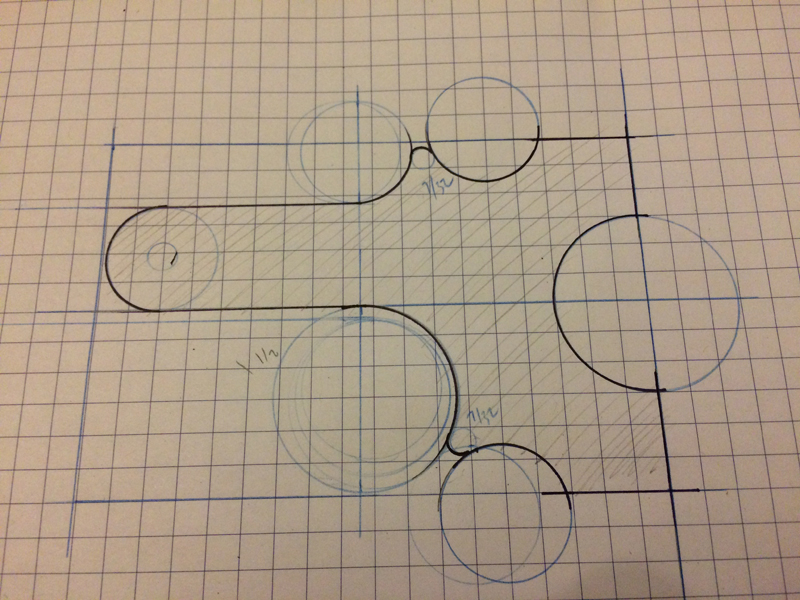
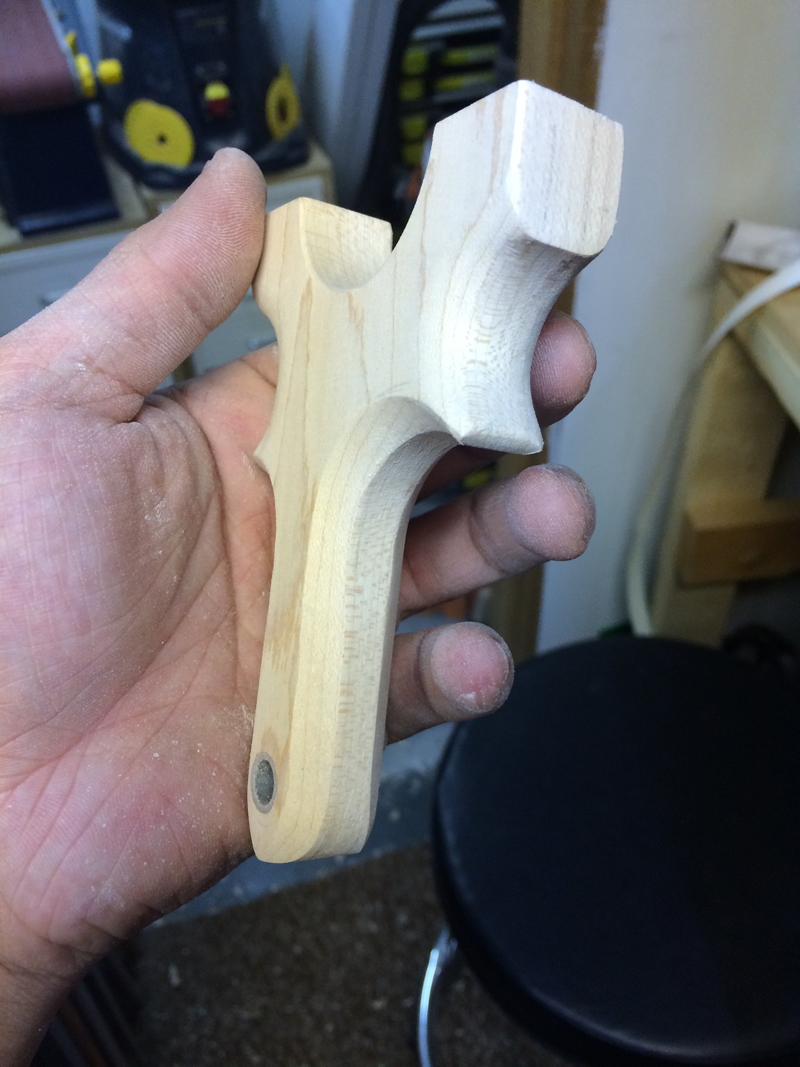
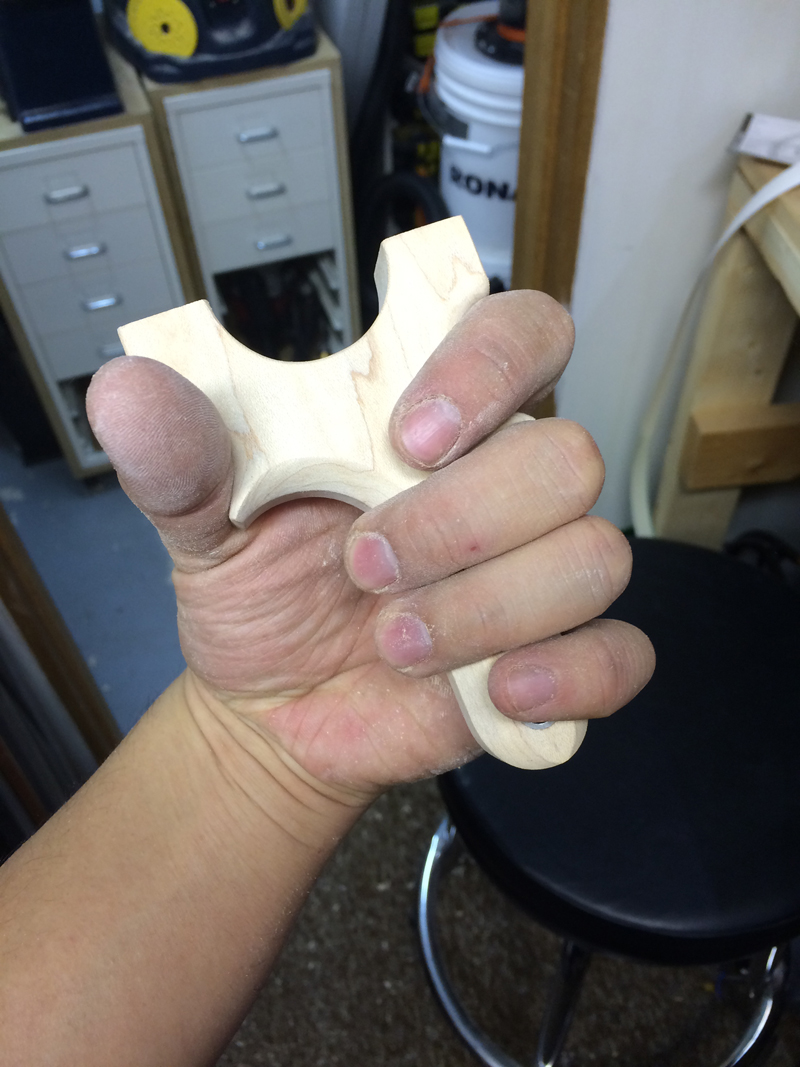
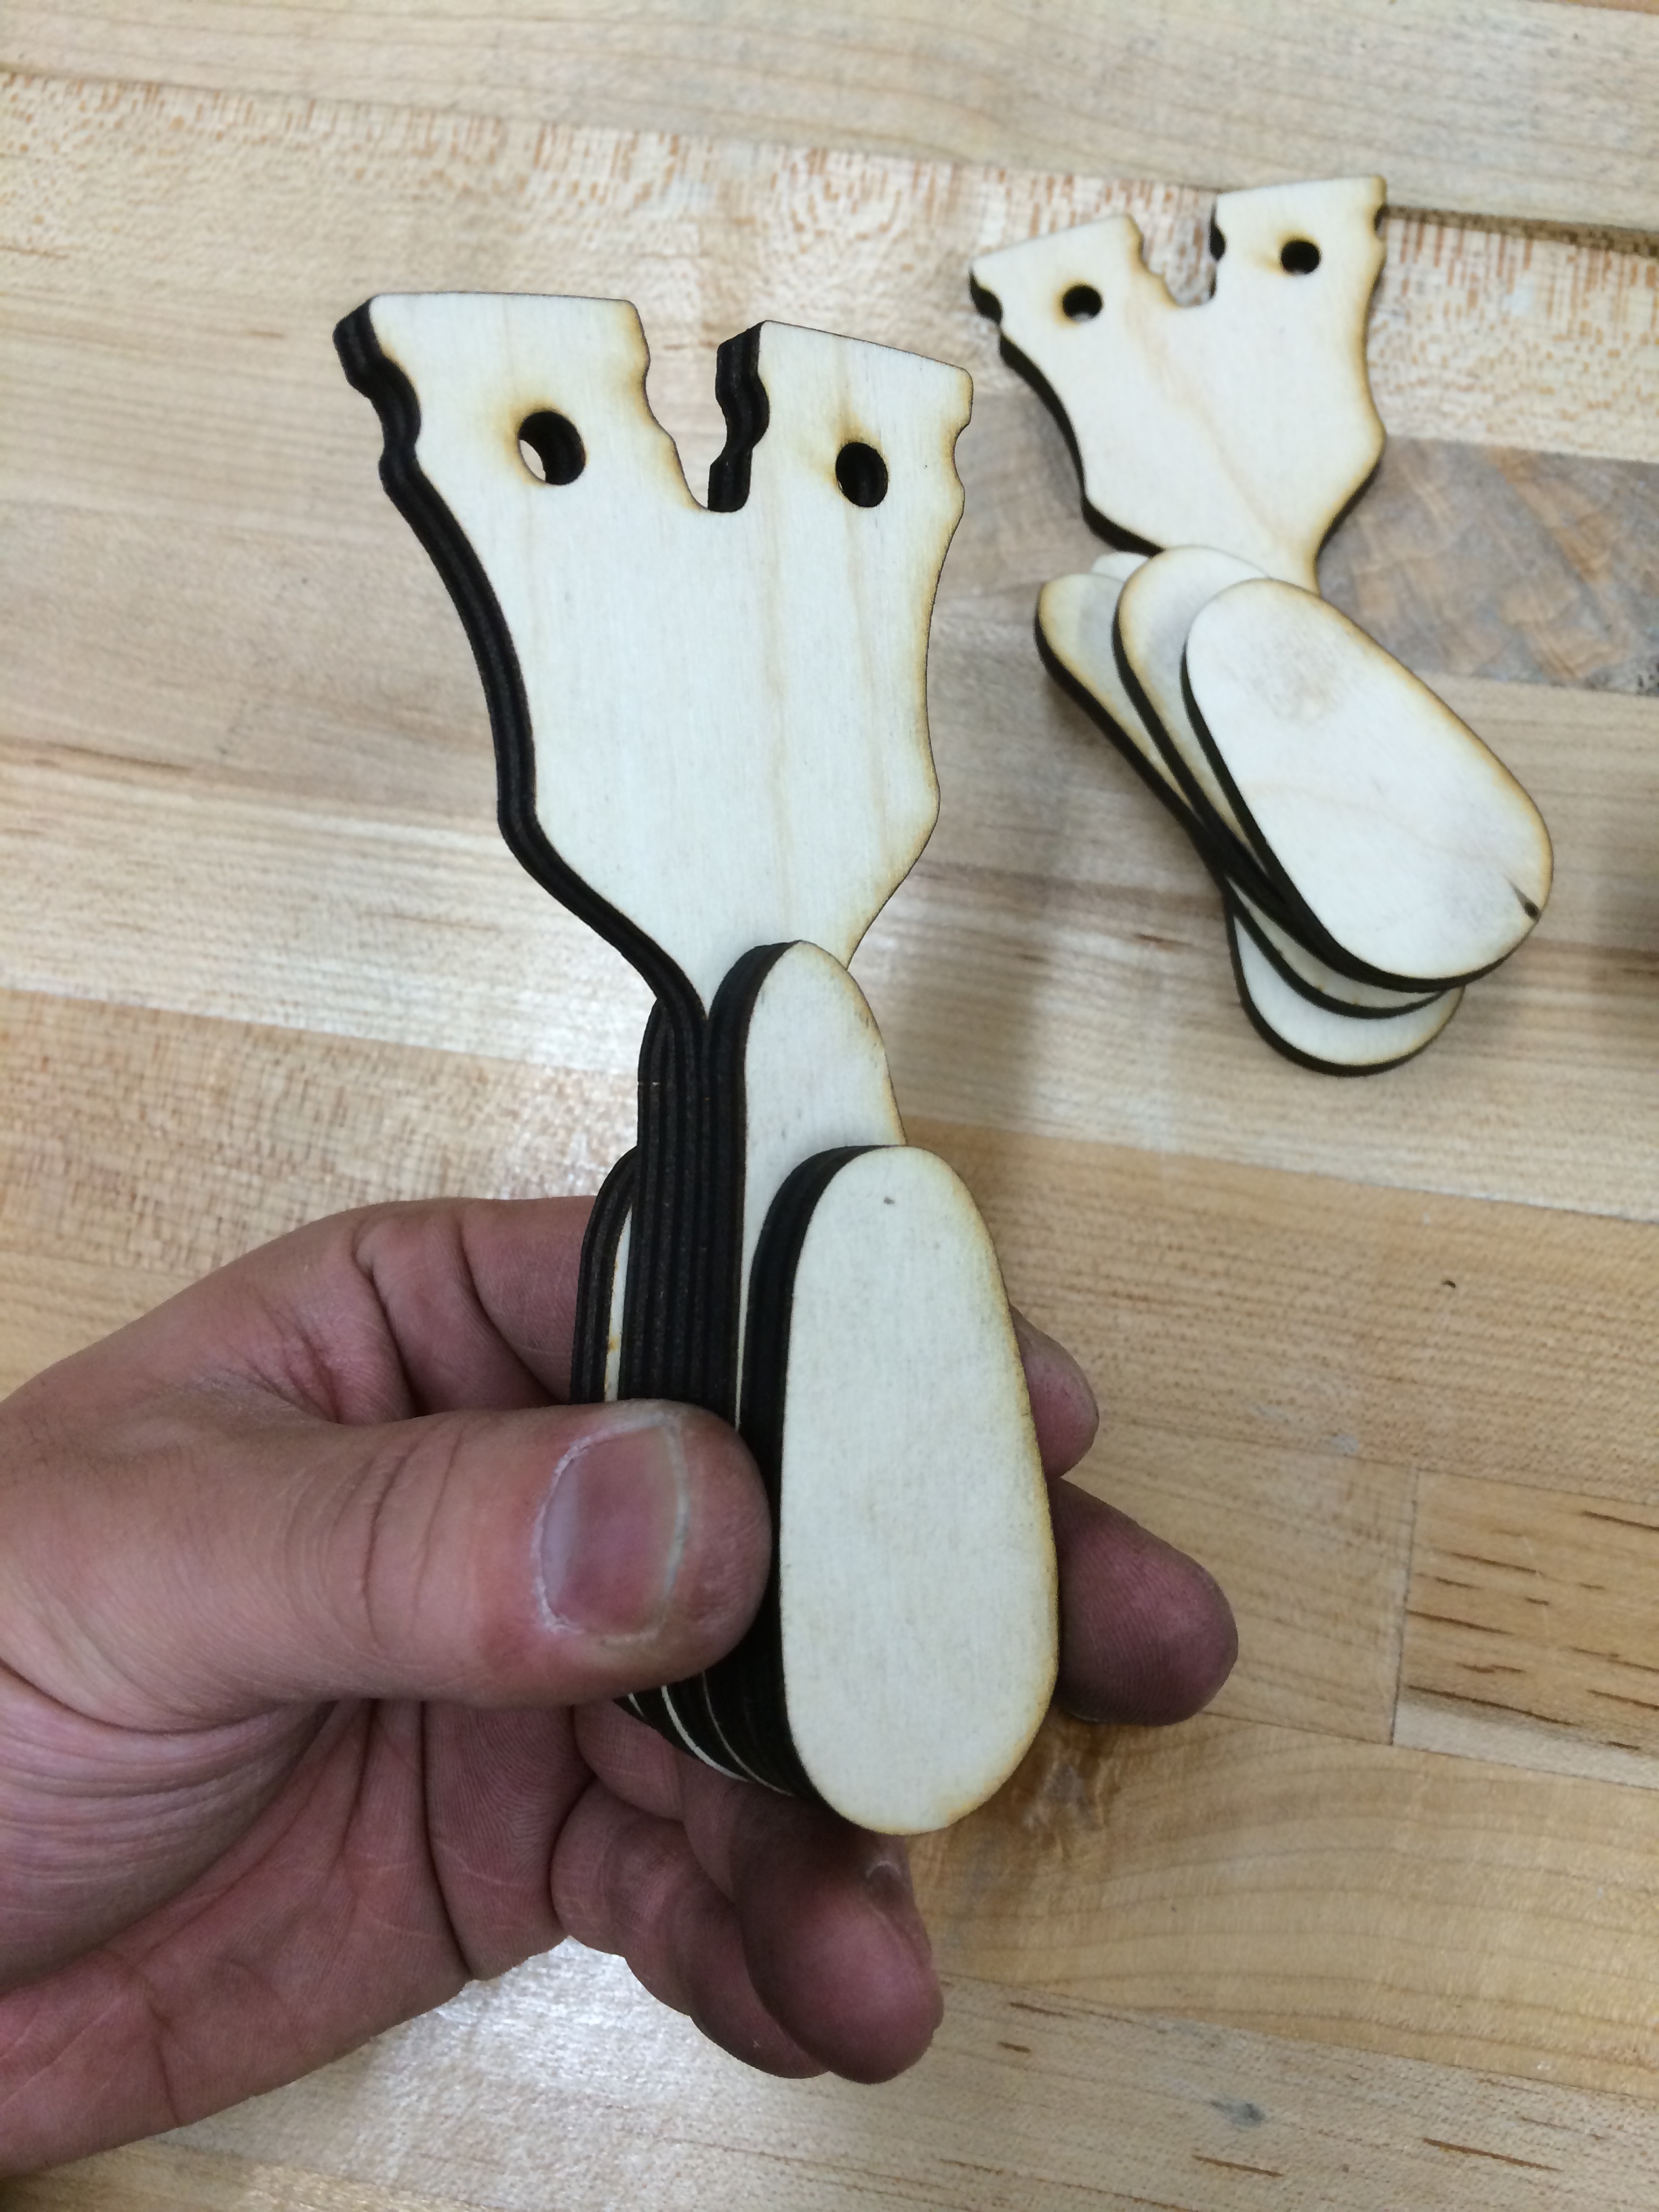
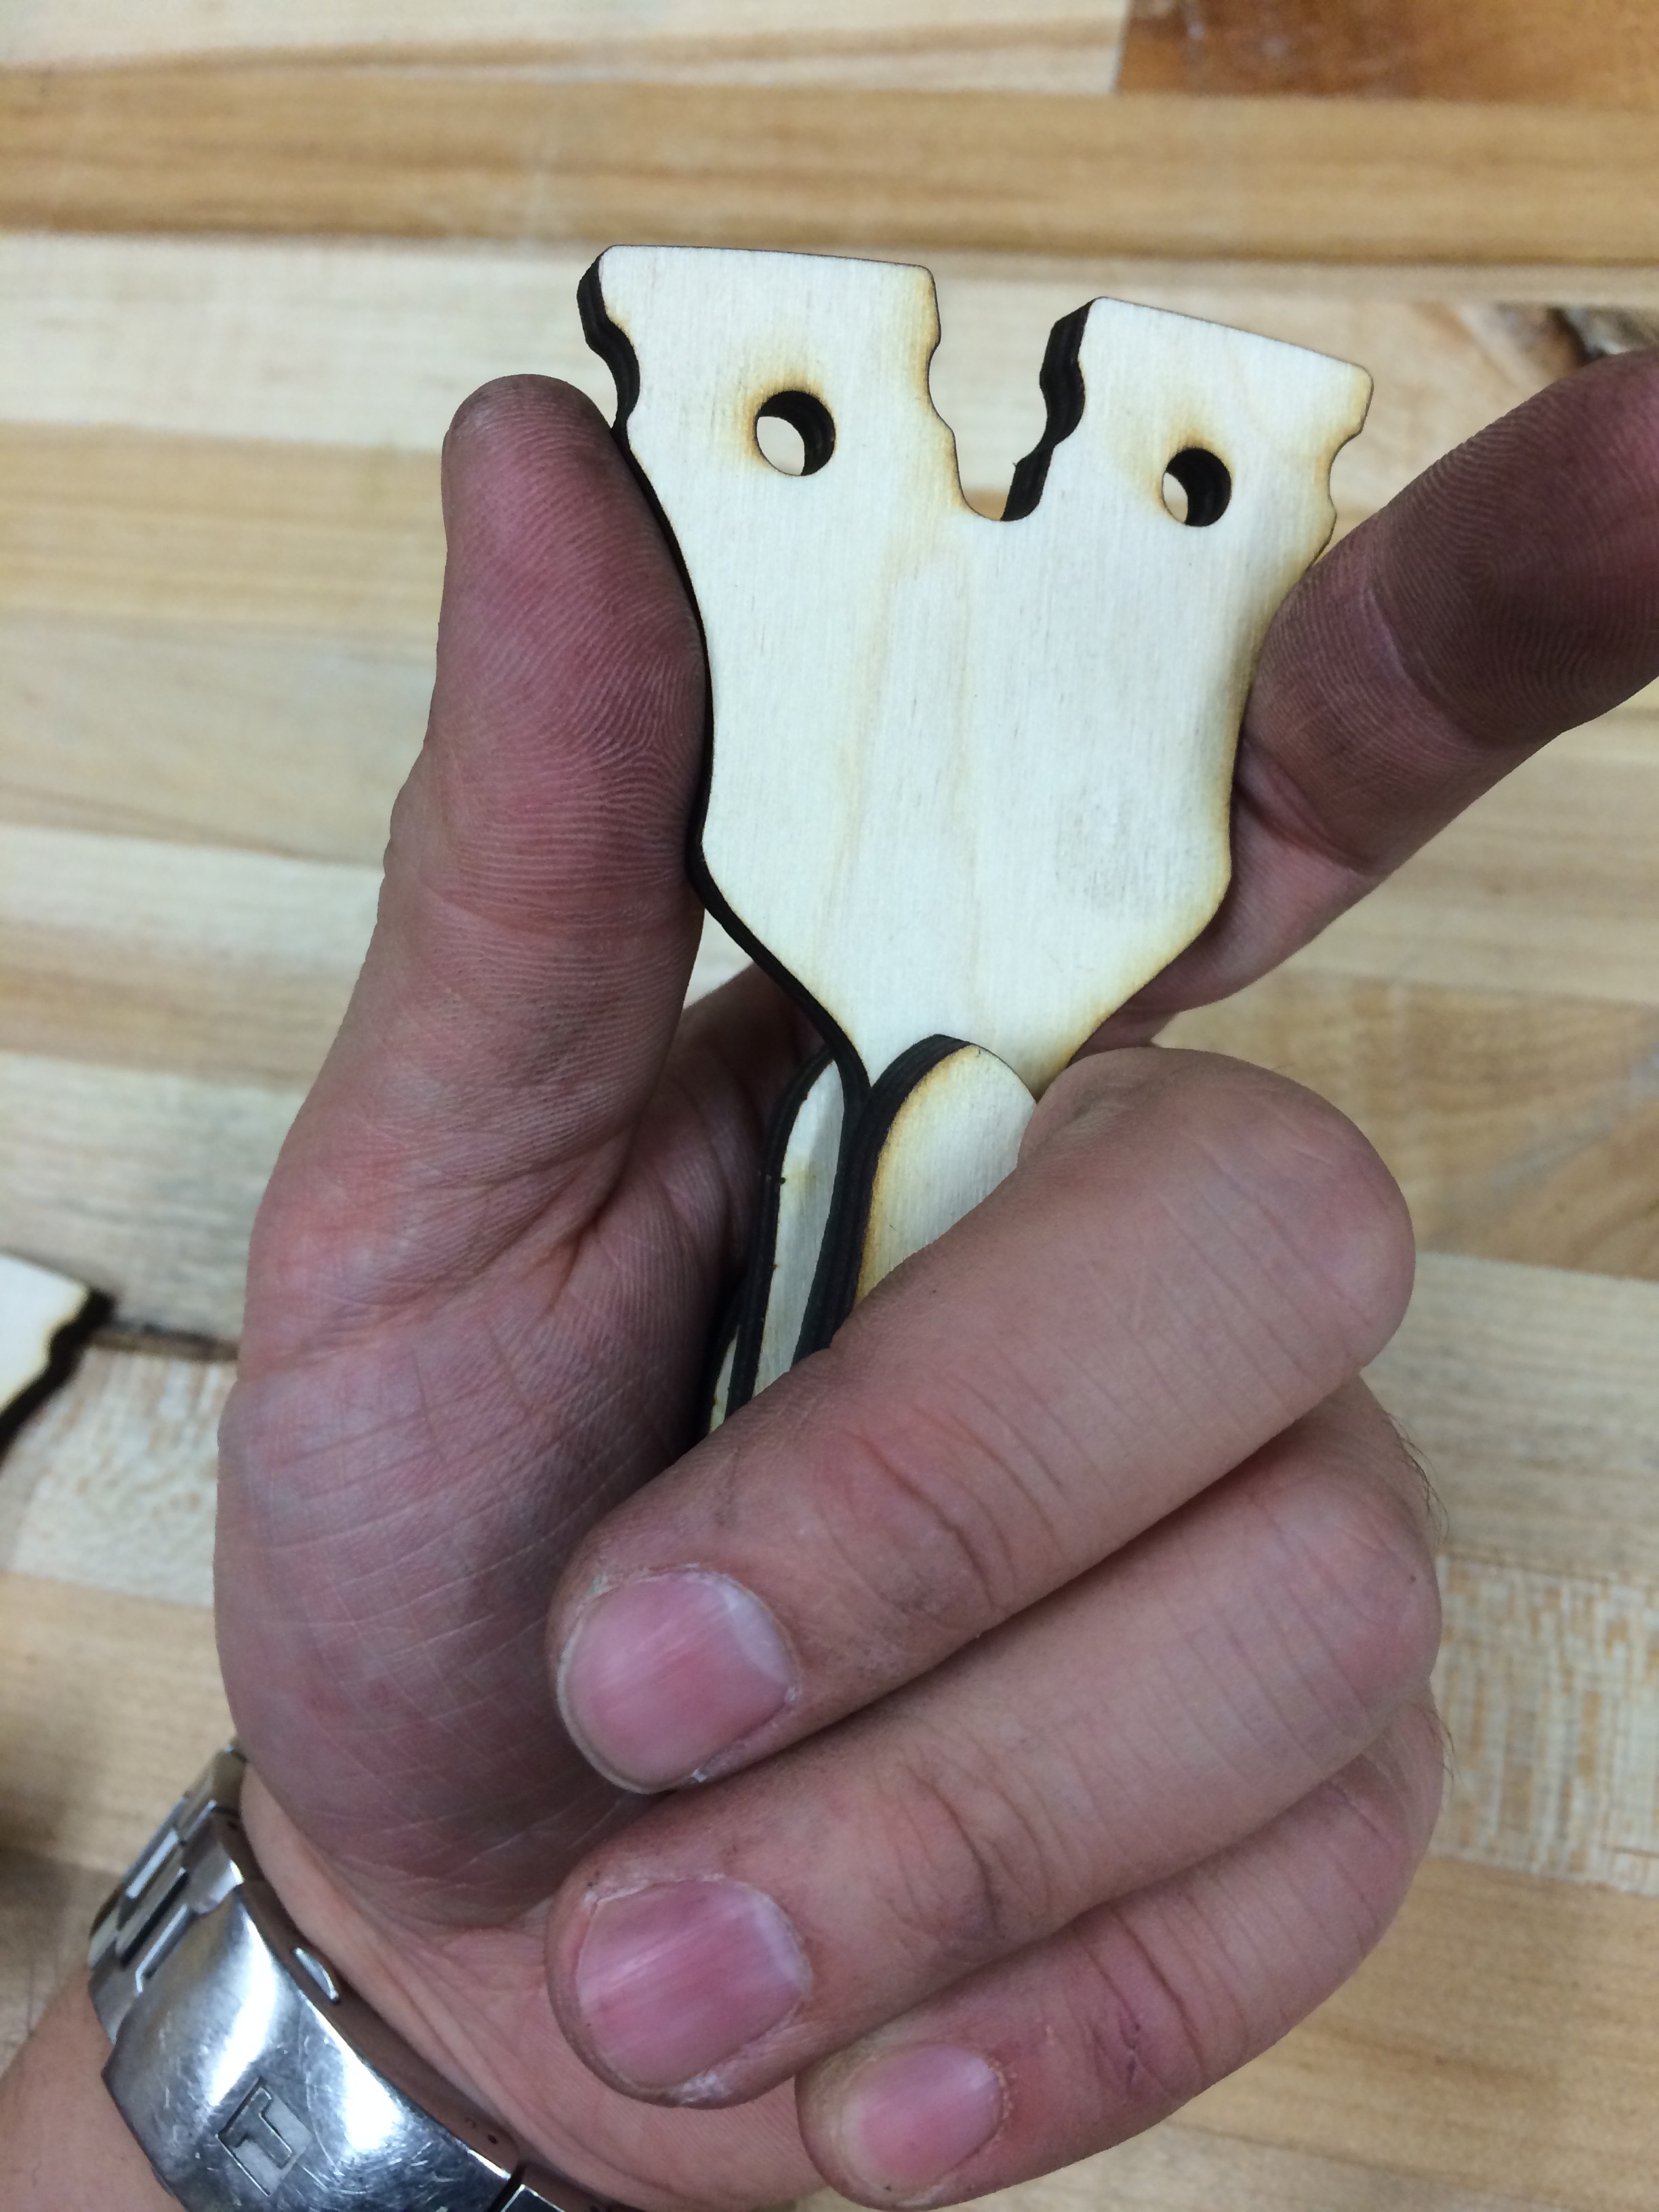
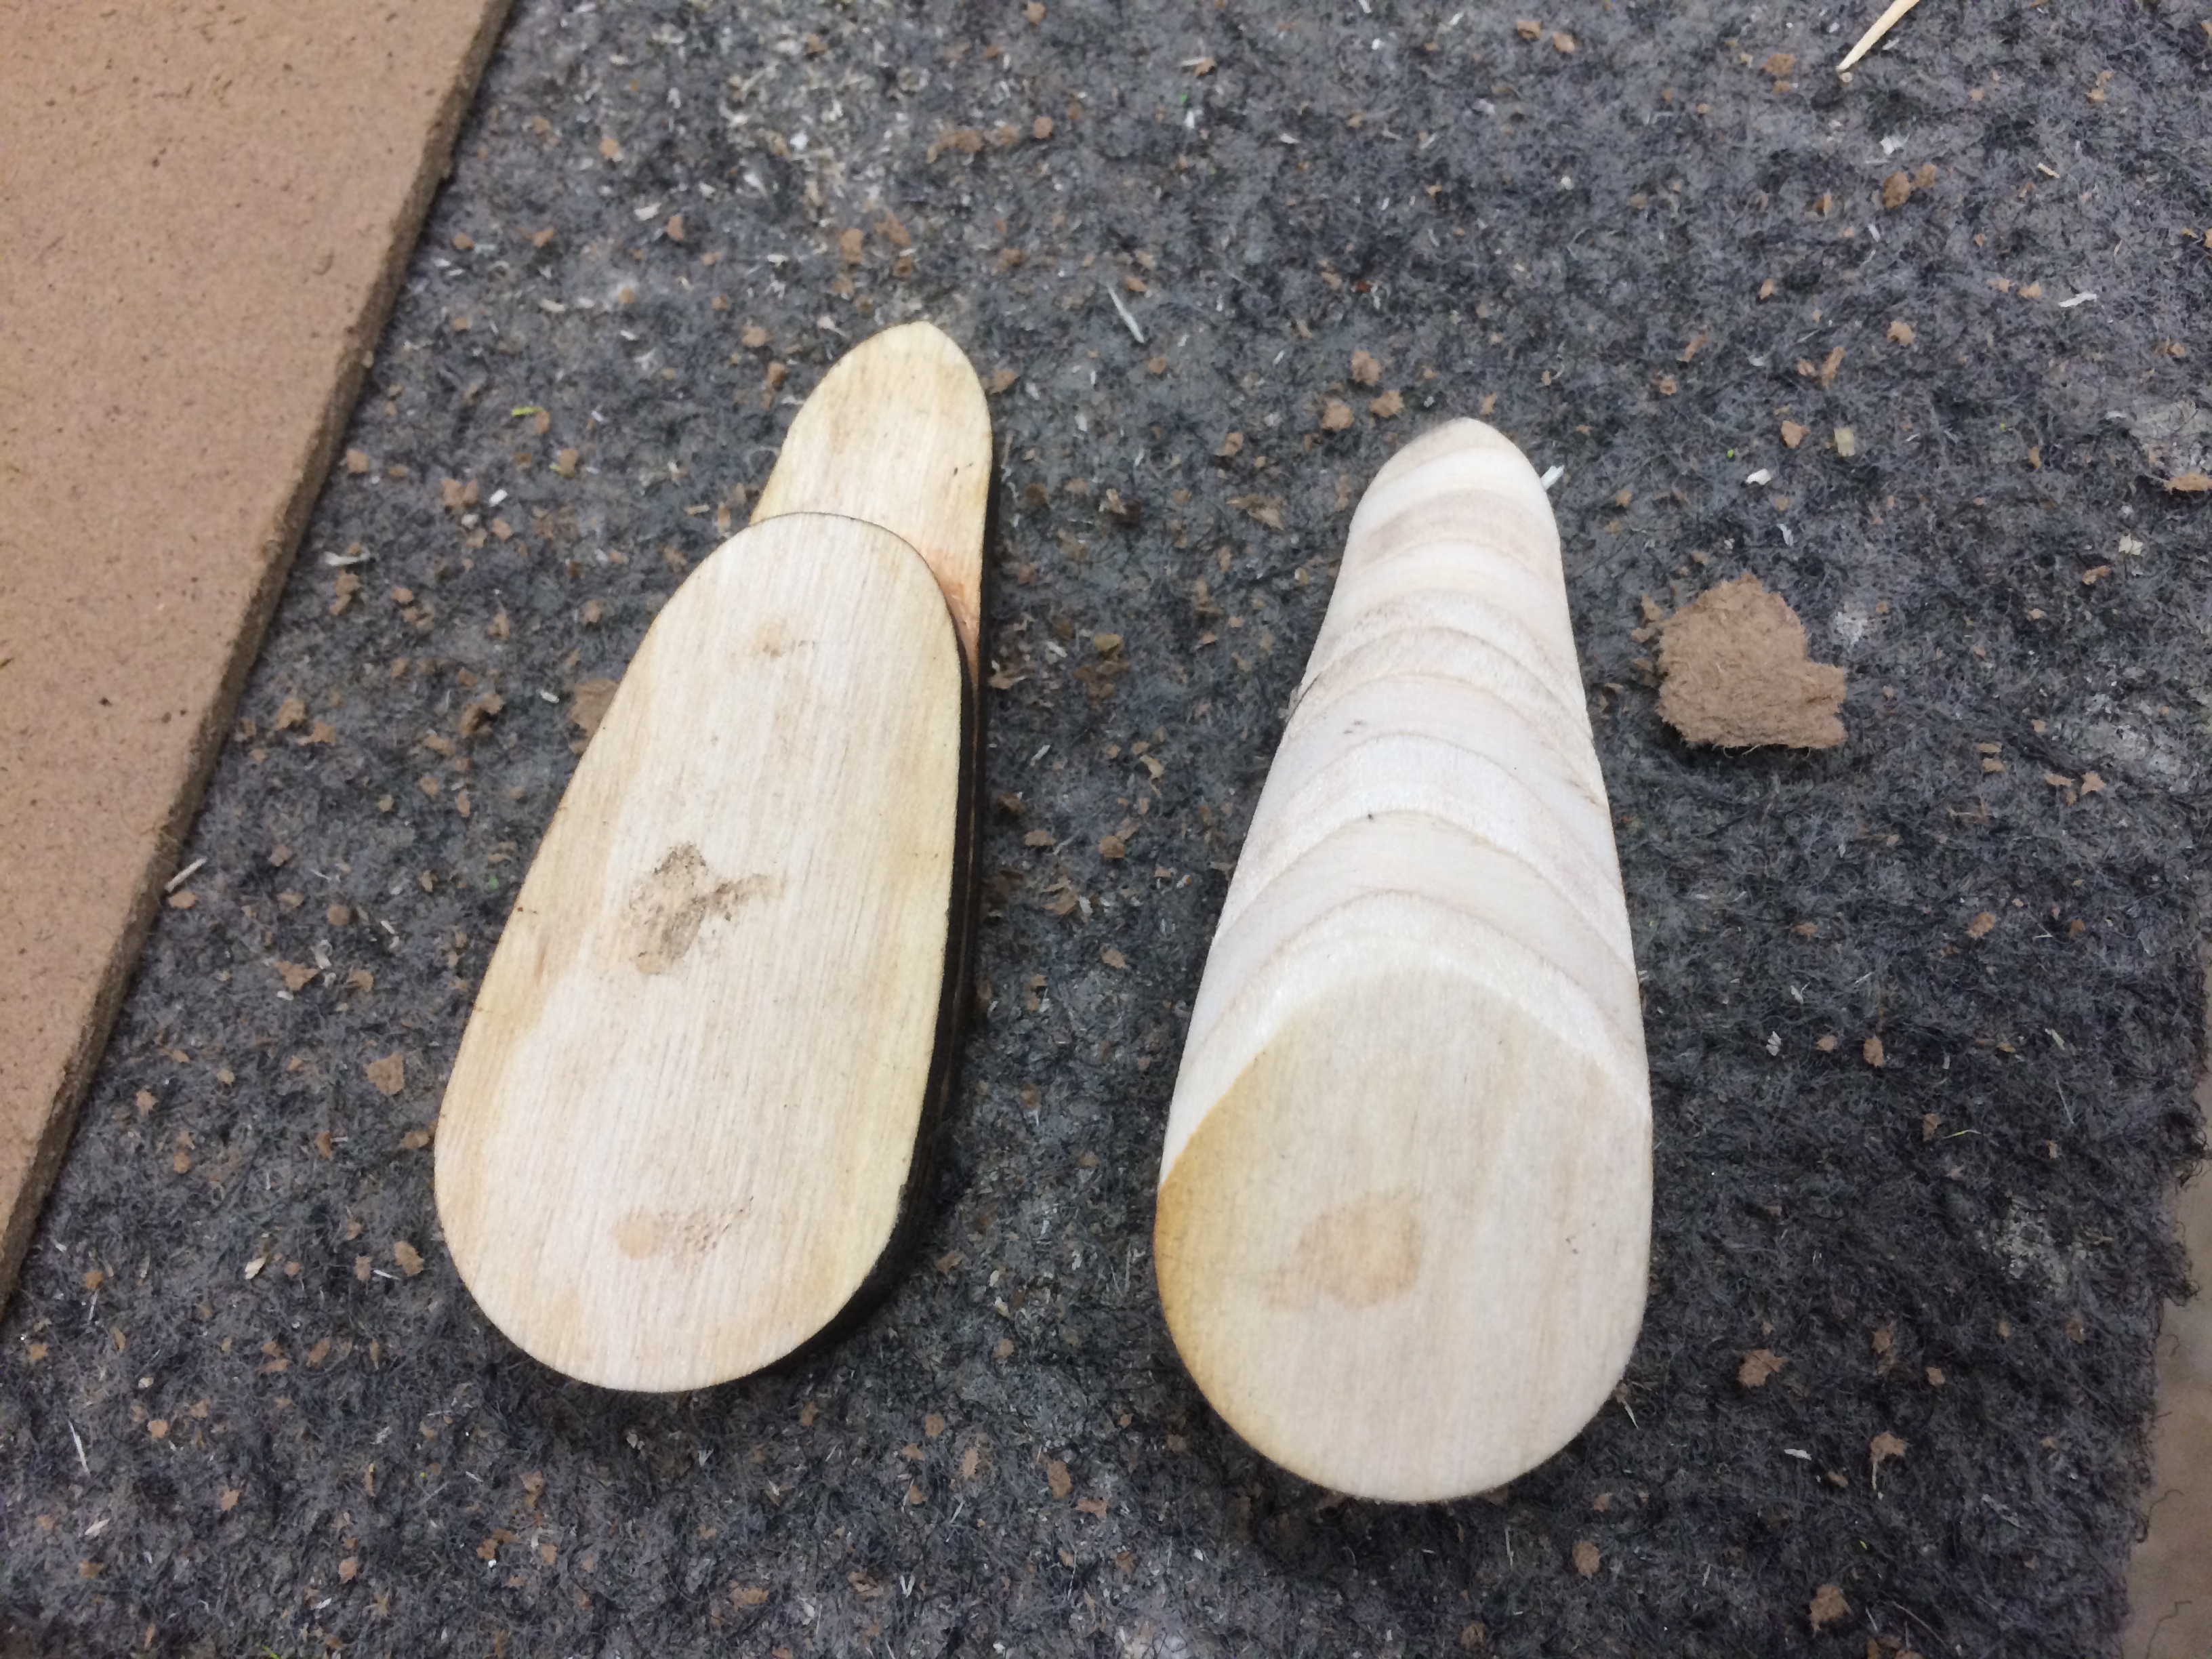
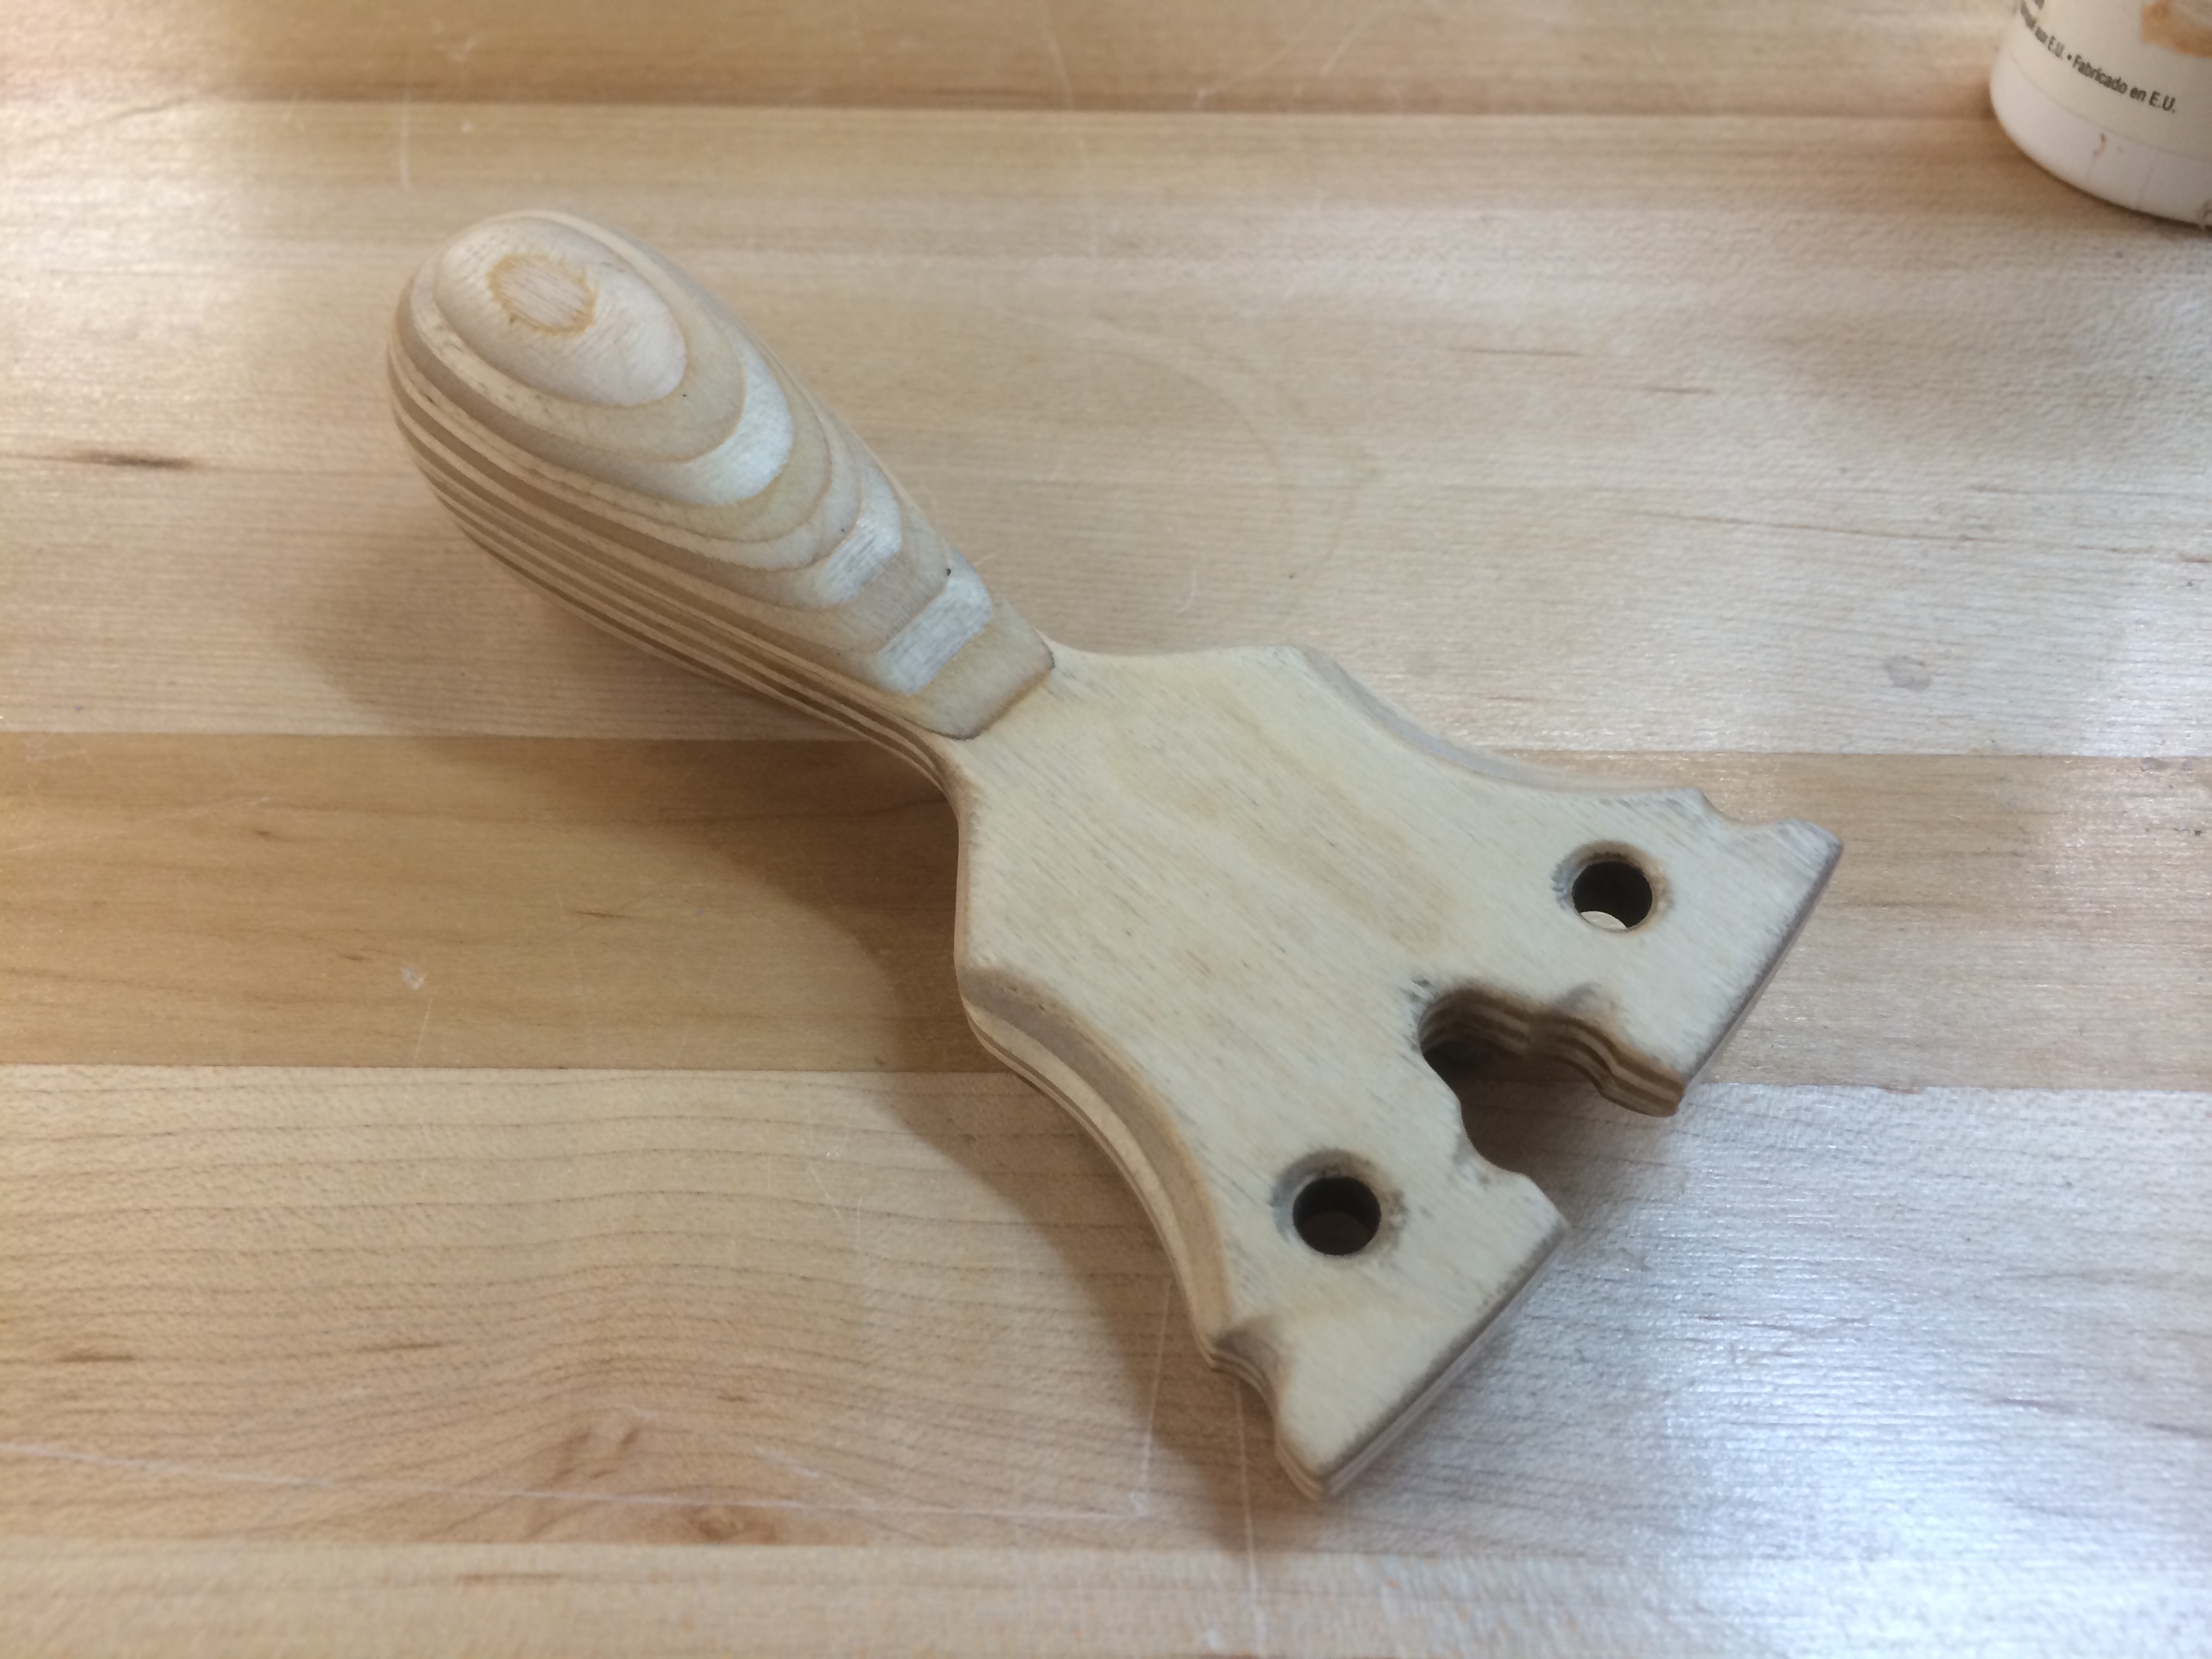
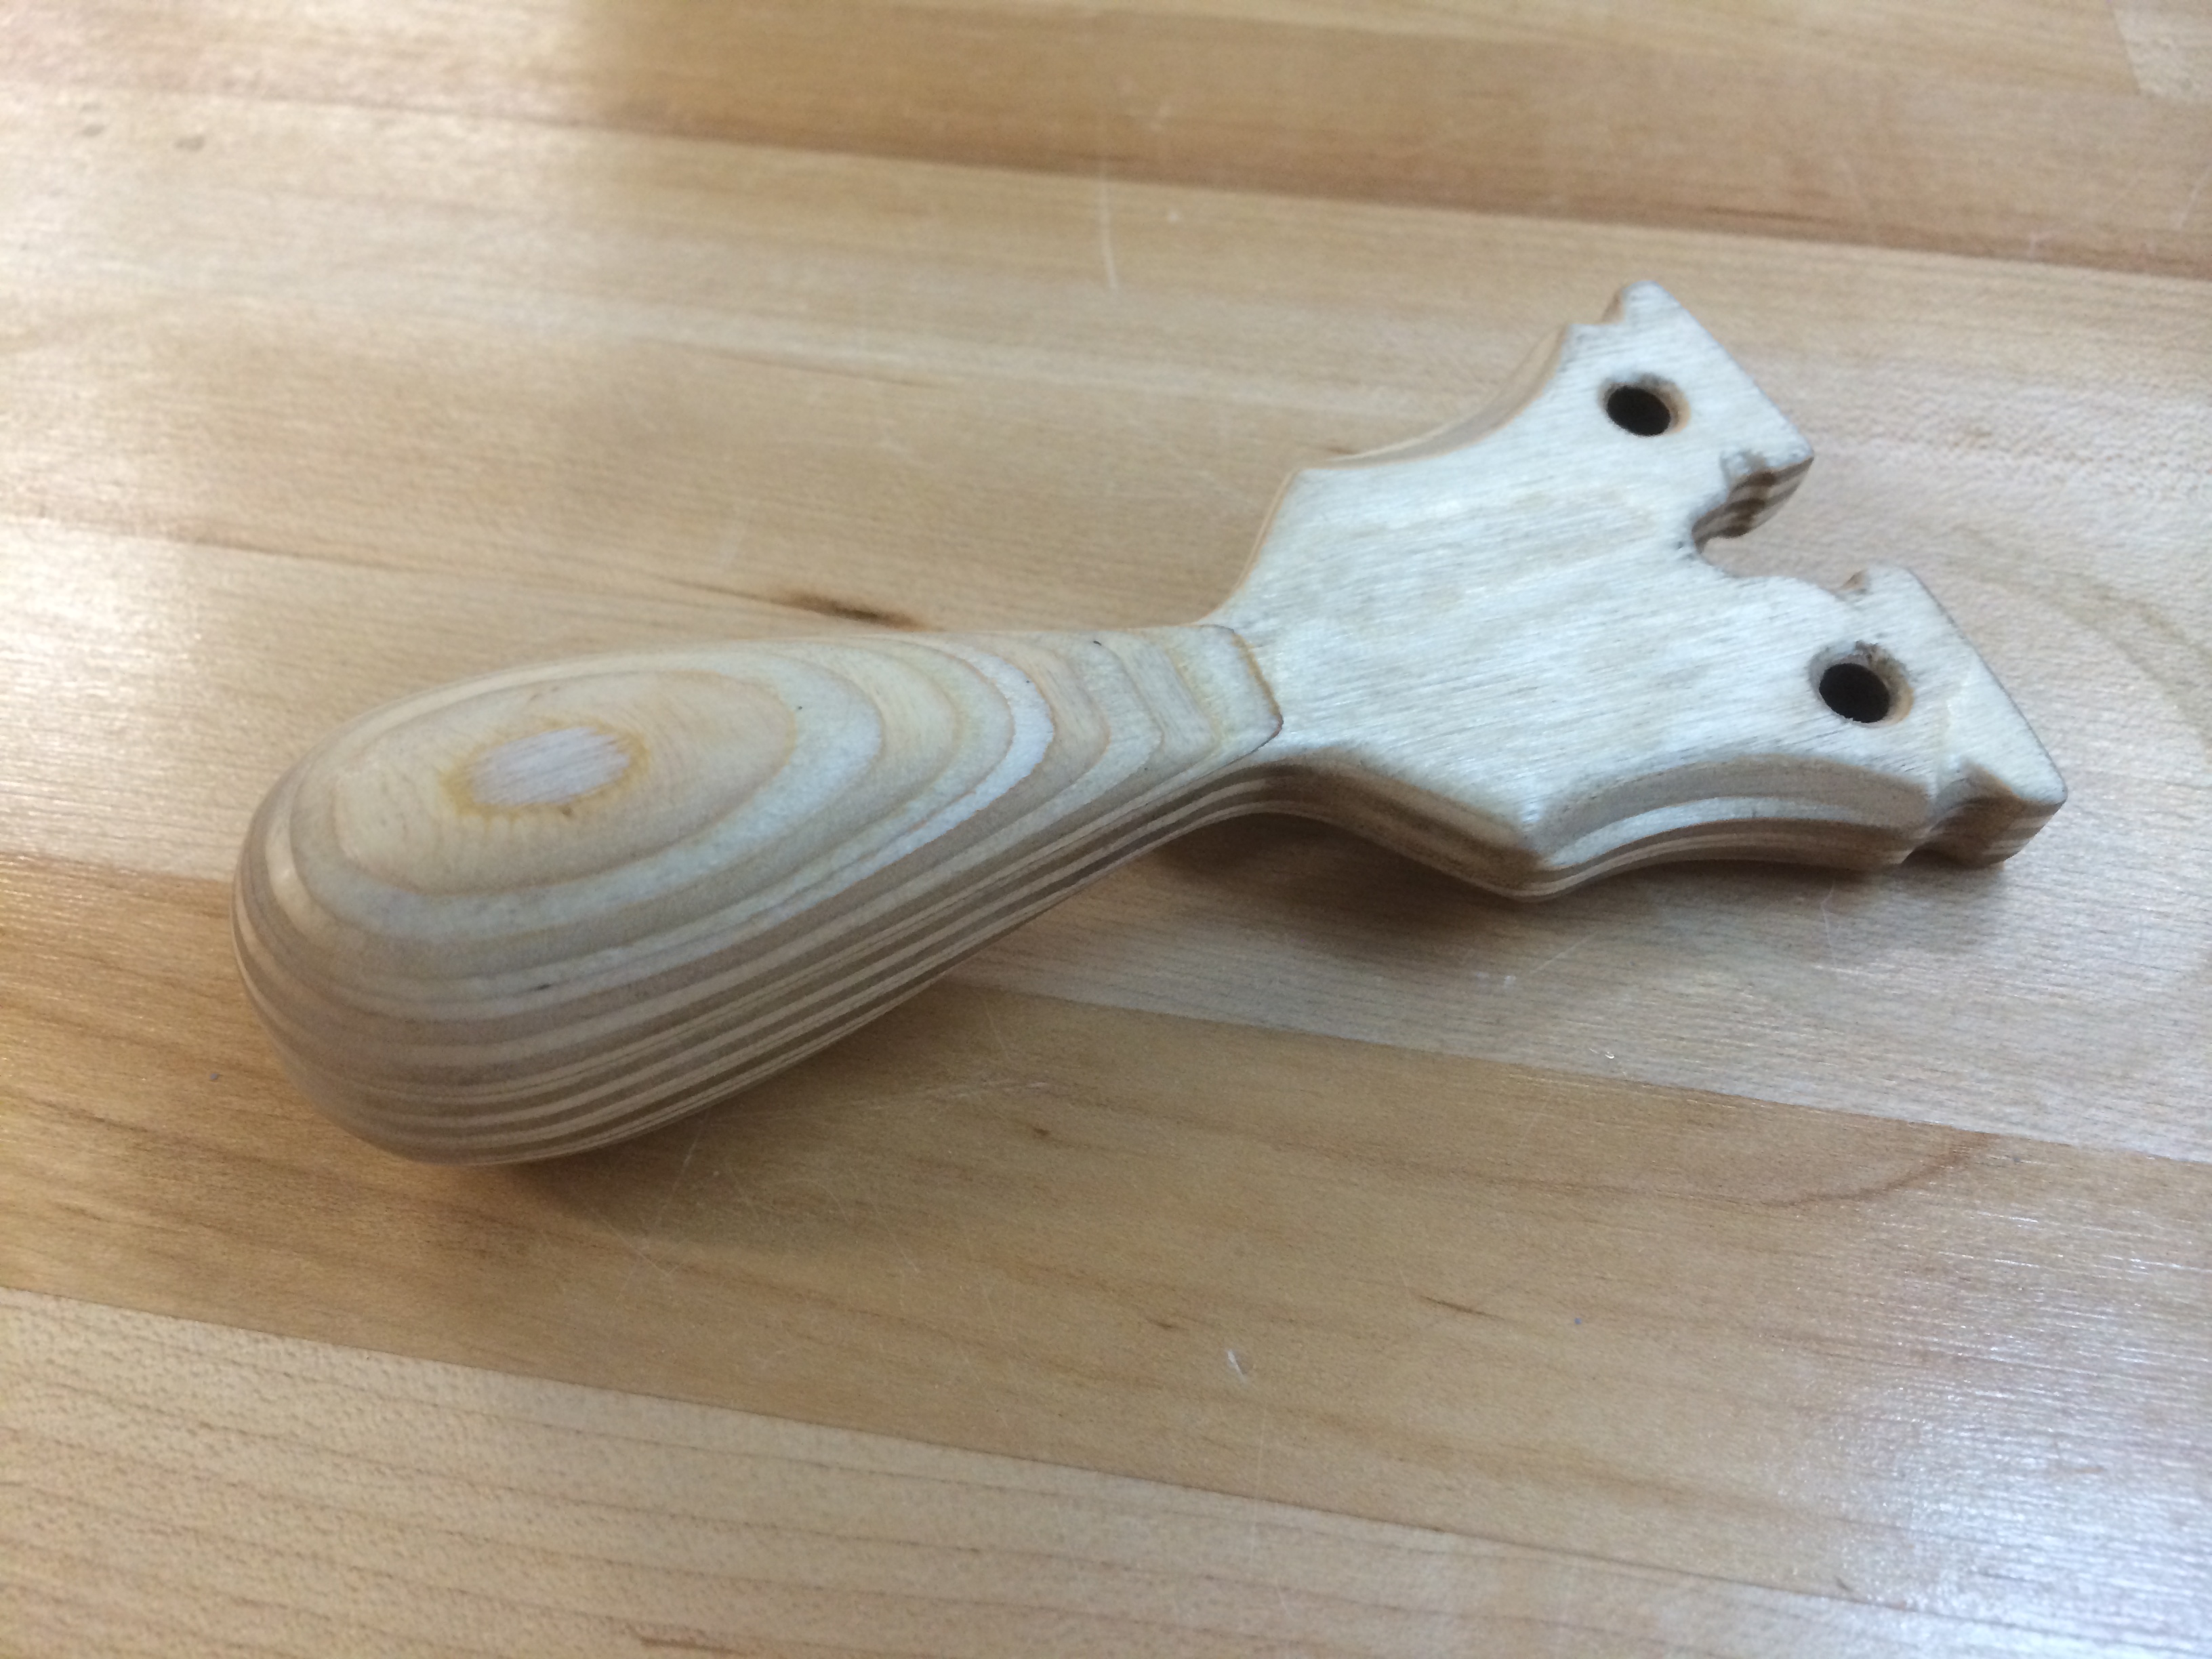
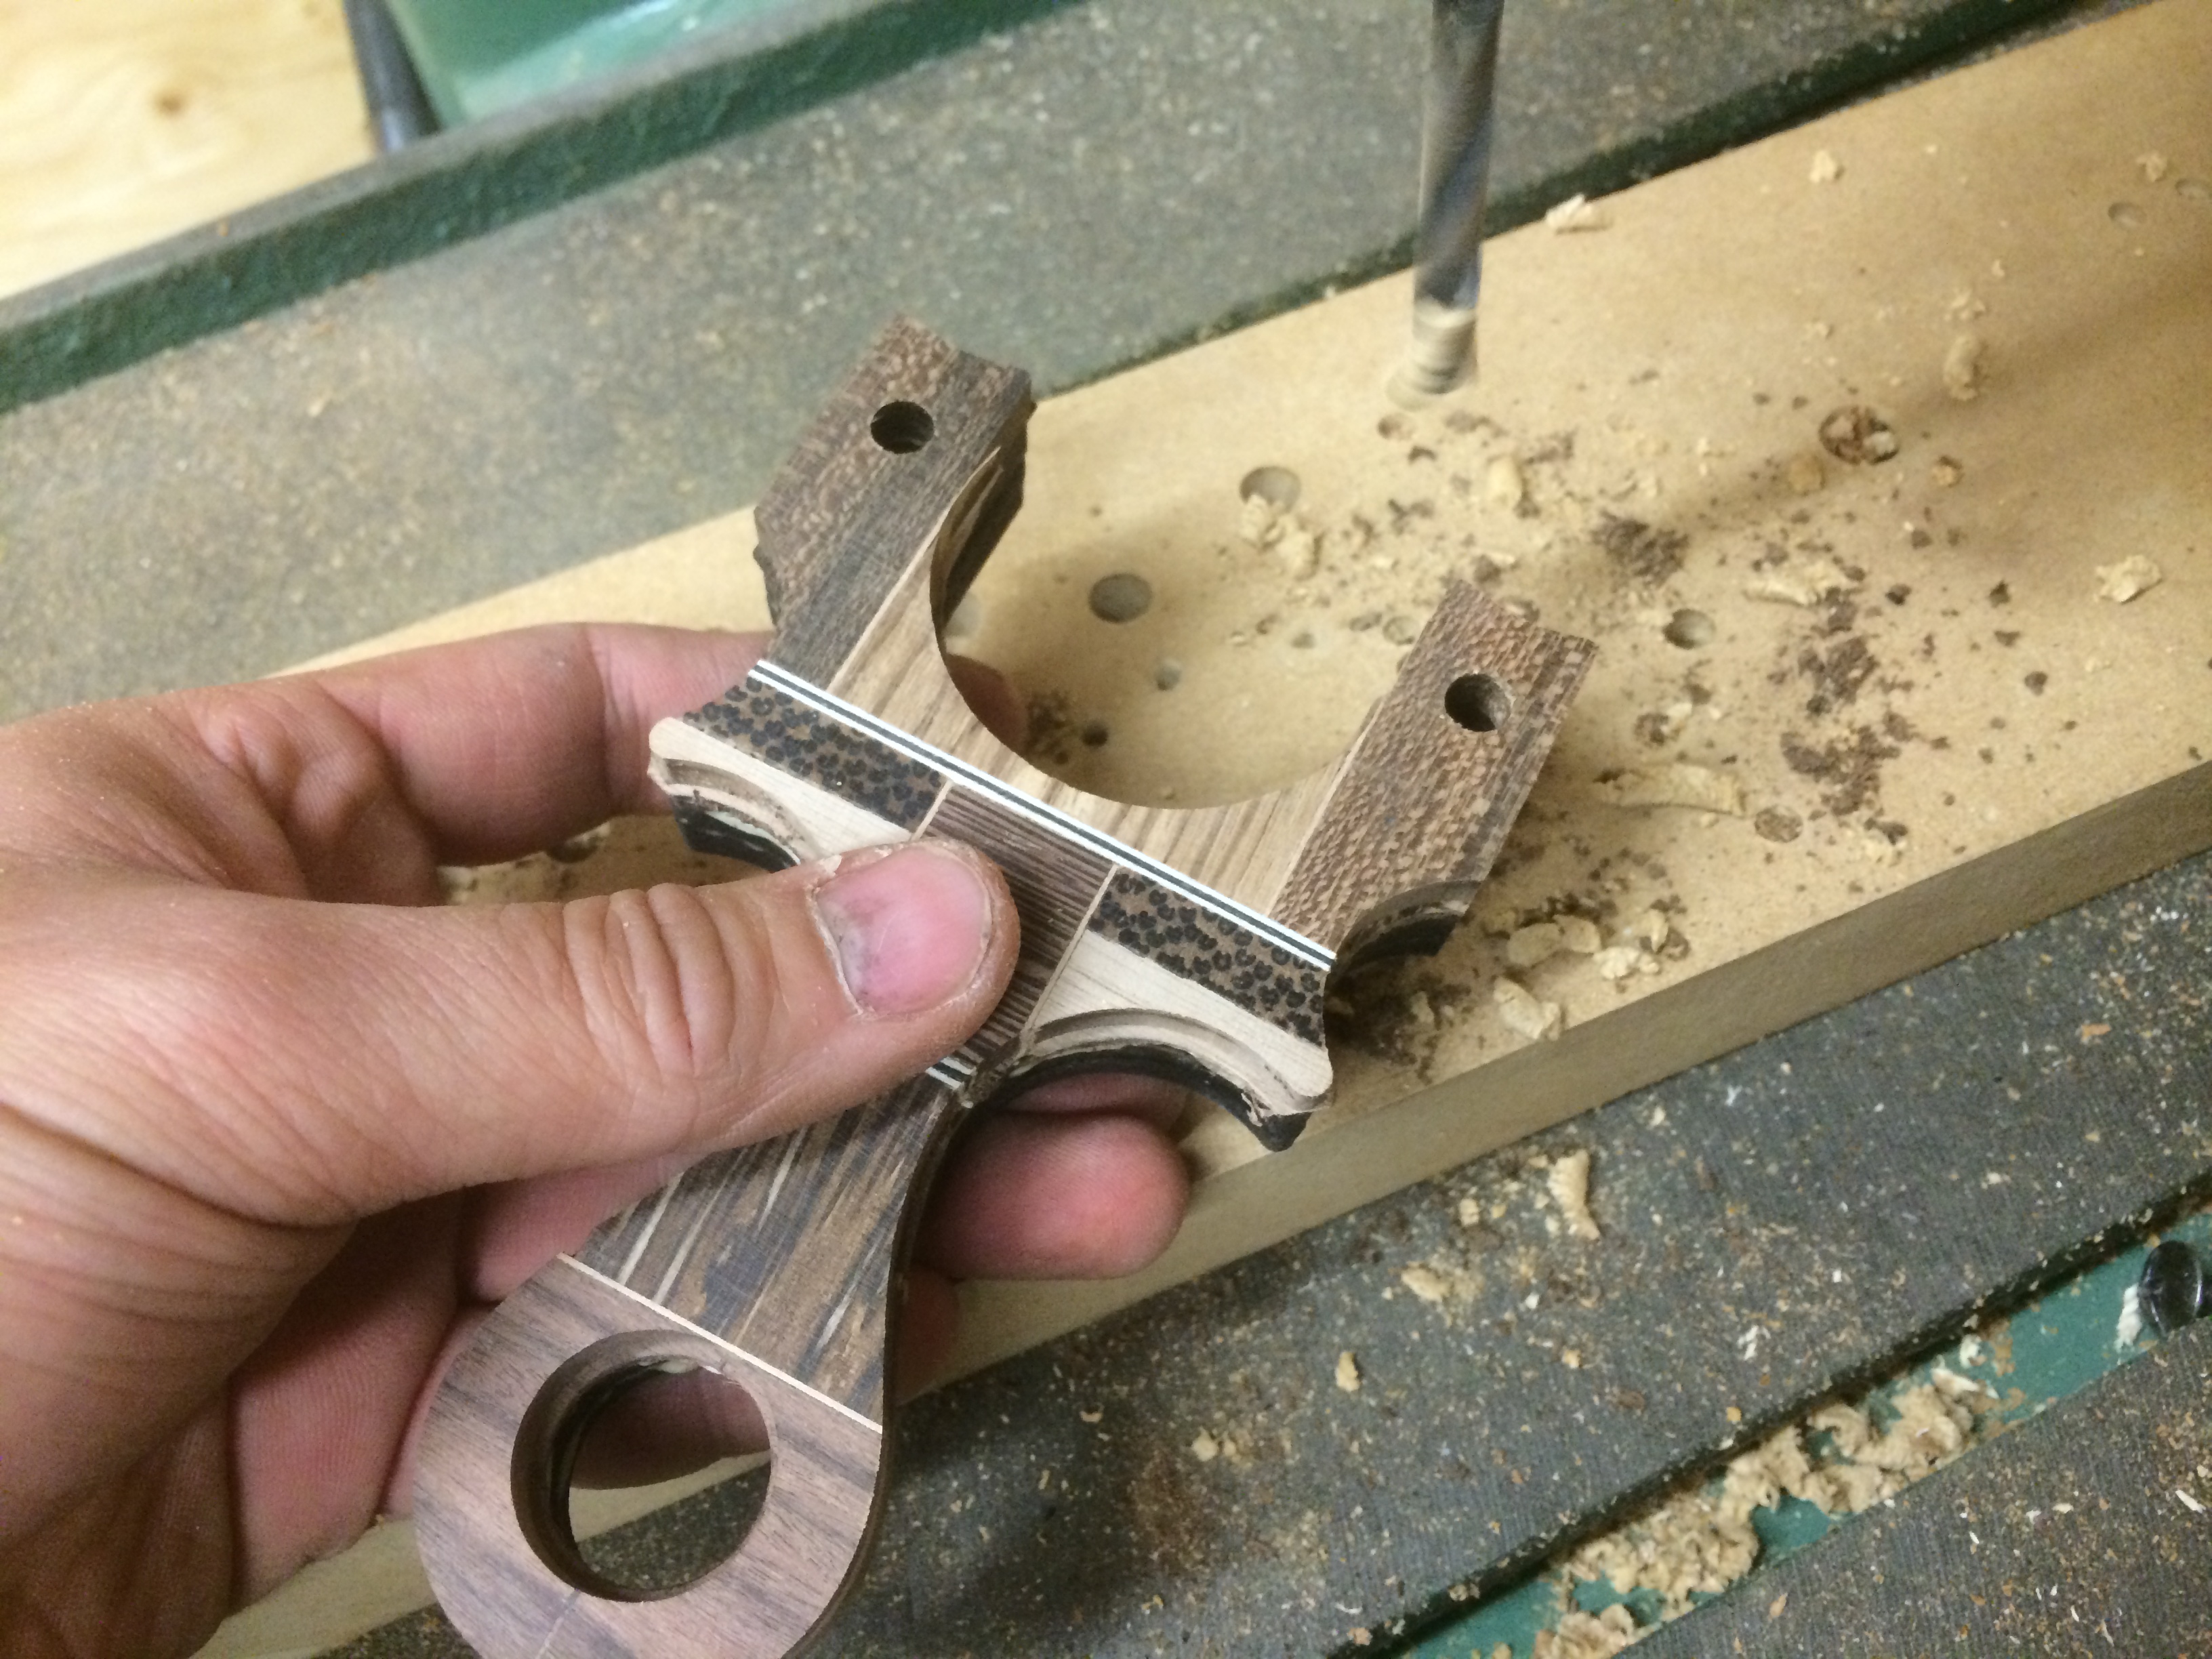
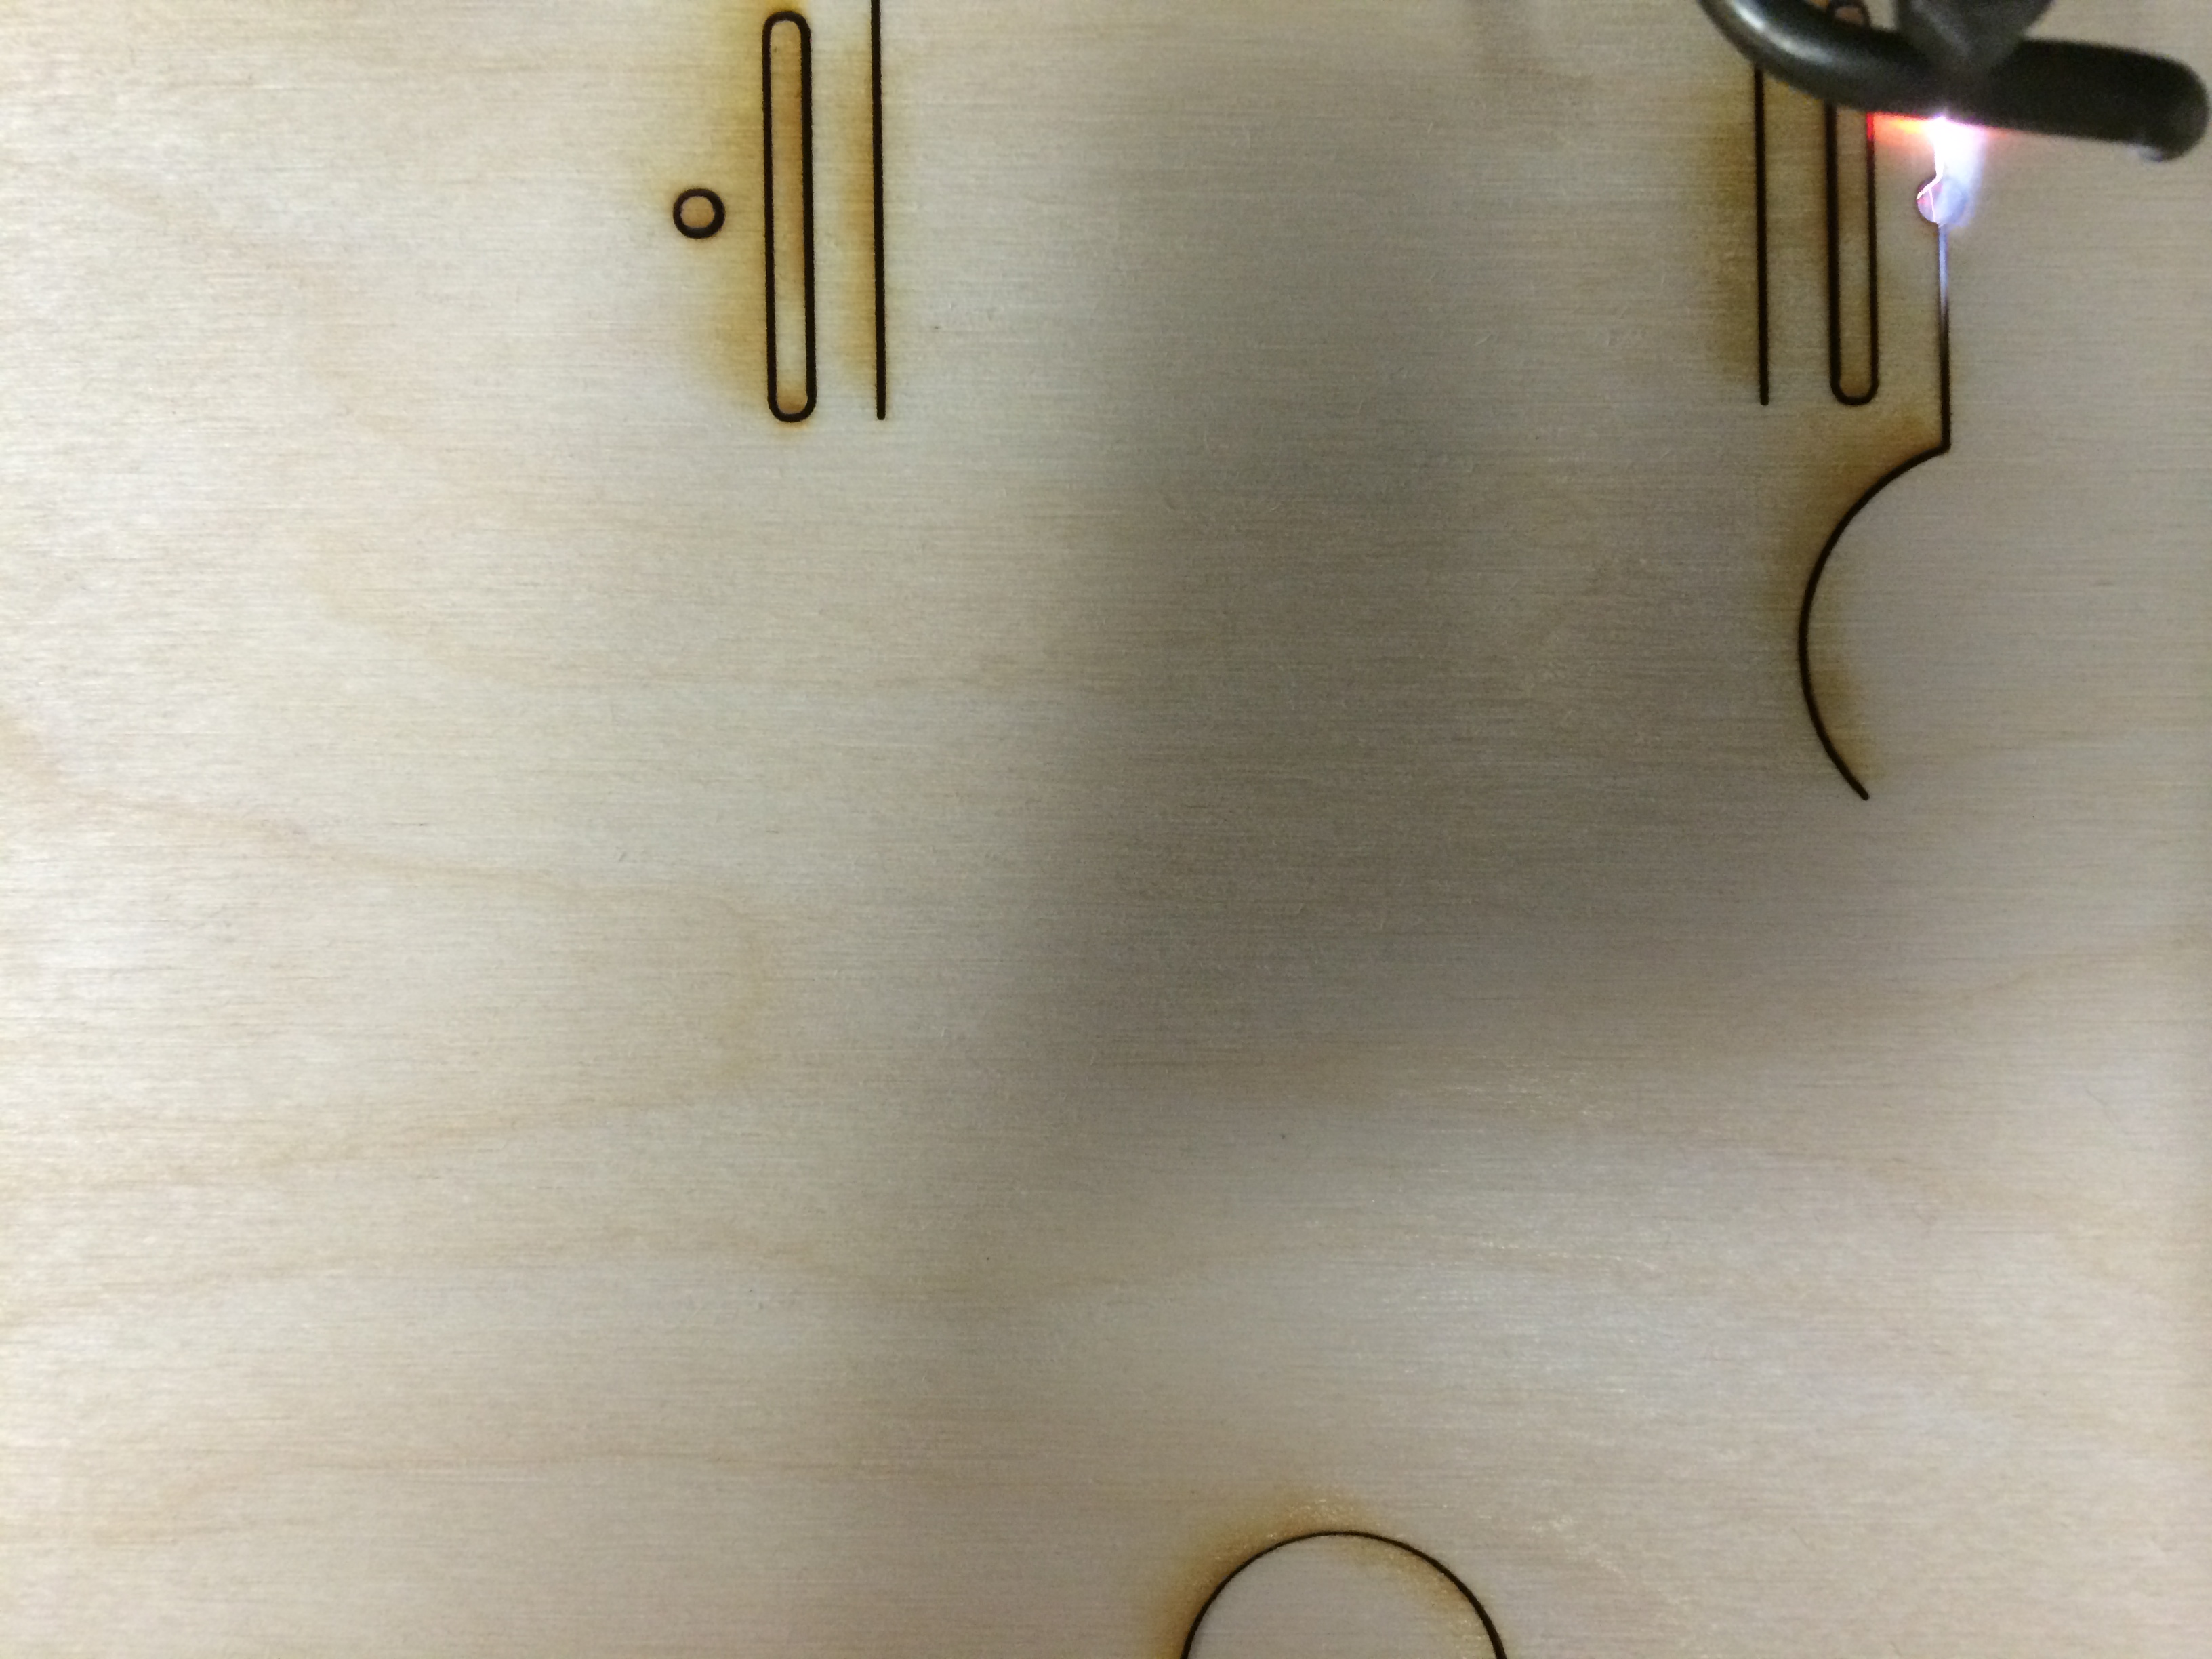
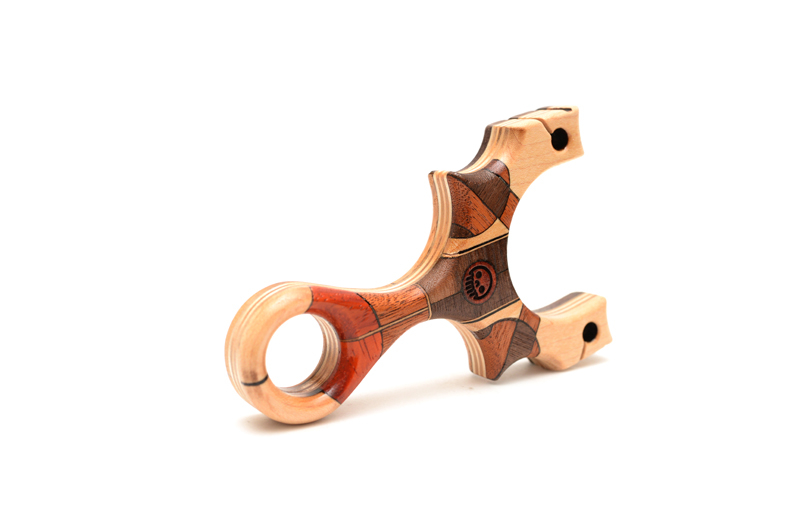
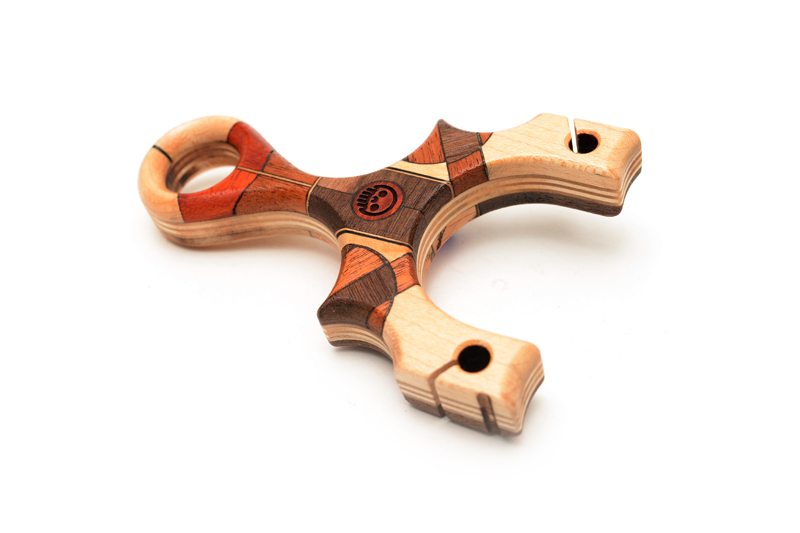
I started by designing a shape that is a smaller frame than usual. A pinch grip style with some beefy fork tips. This would be cut from 3/4″ maple so I knew it wouldn’t be a problem for structural integrity. The plan is to drill a hole straight down into the fork tips, tap it when a thread and screw in some machined sleeves.
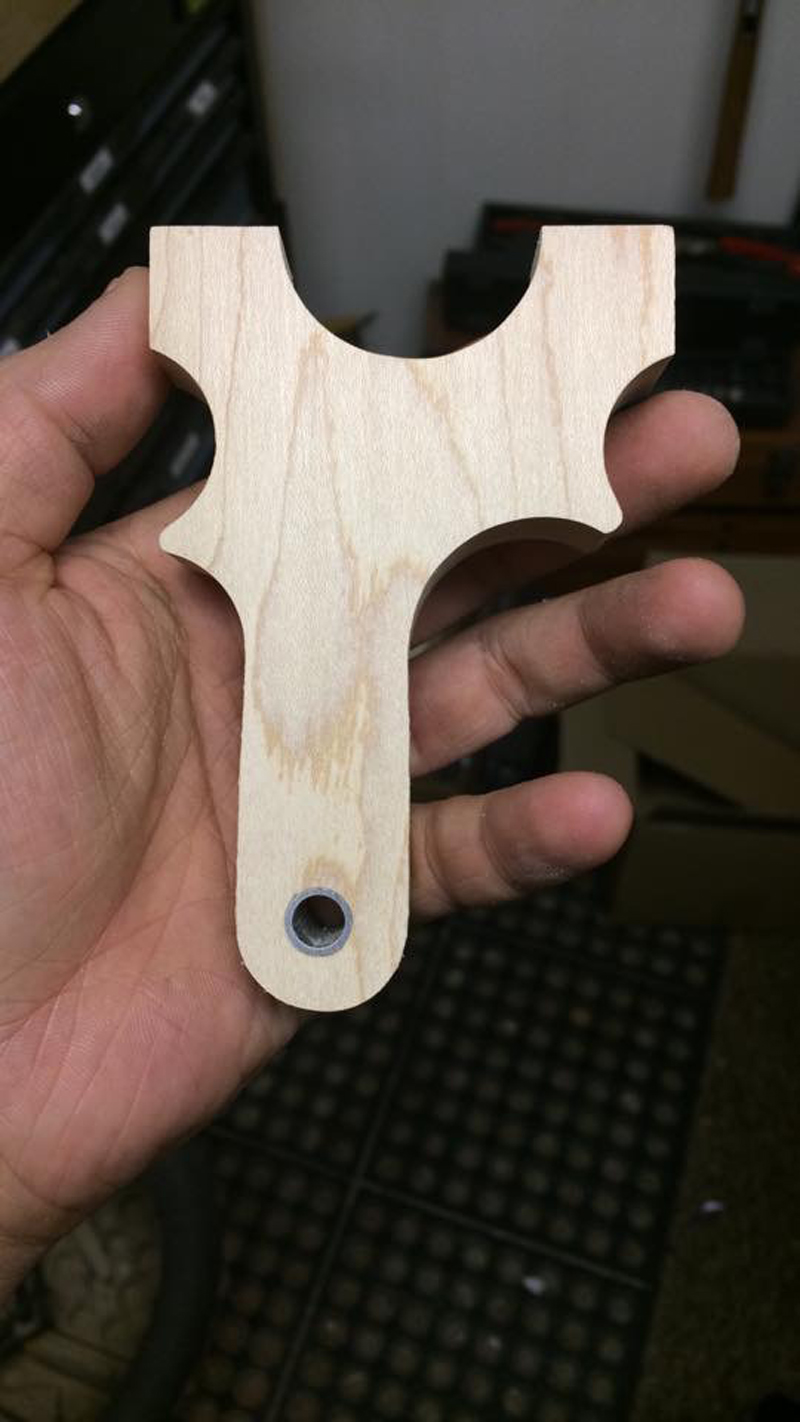
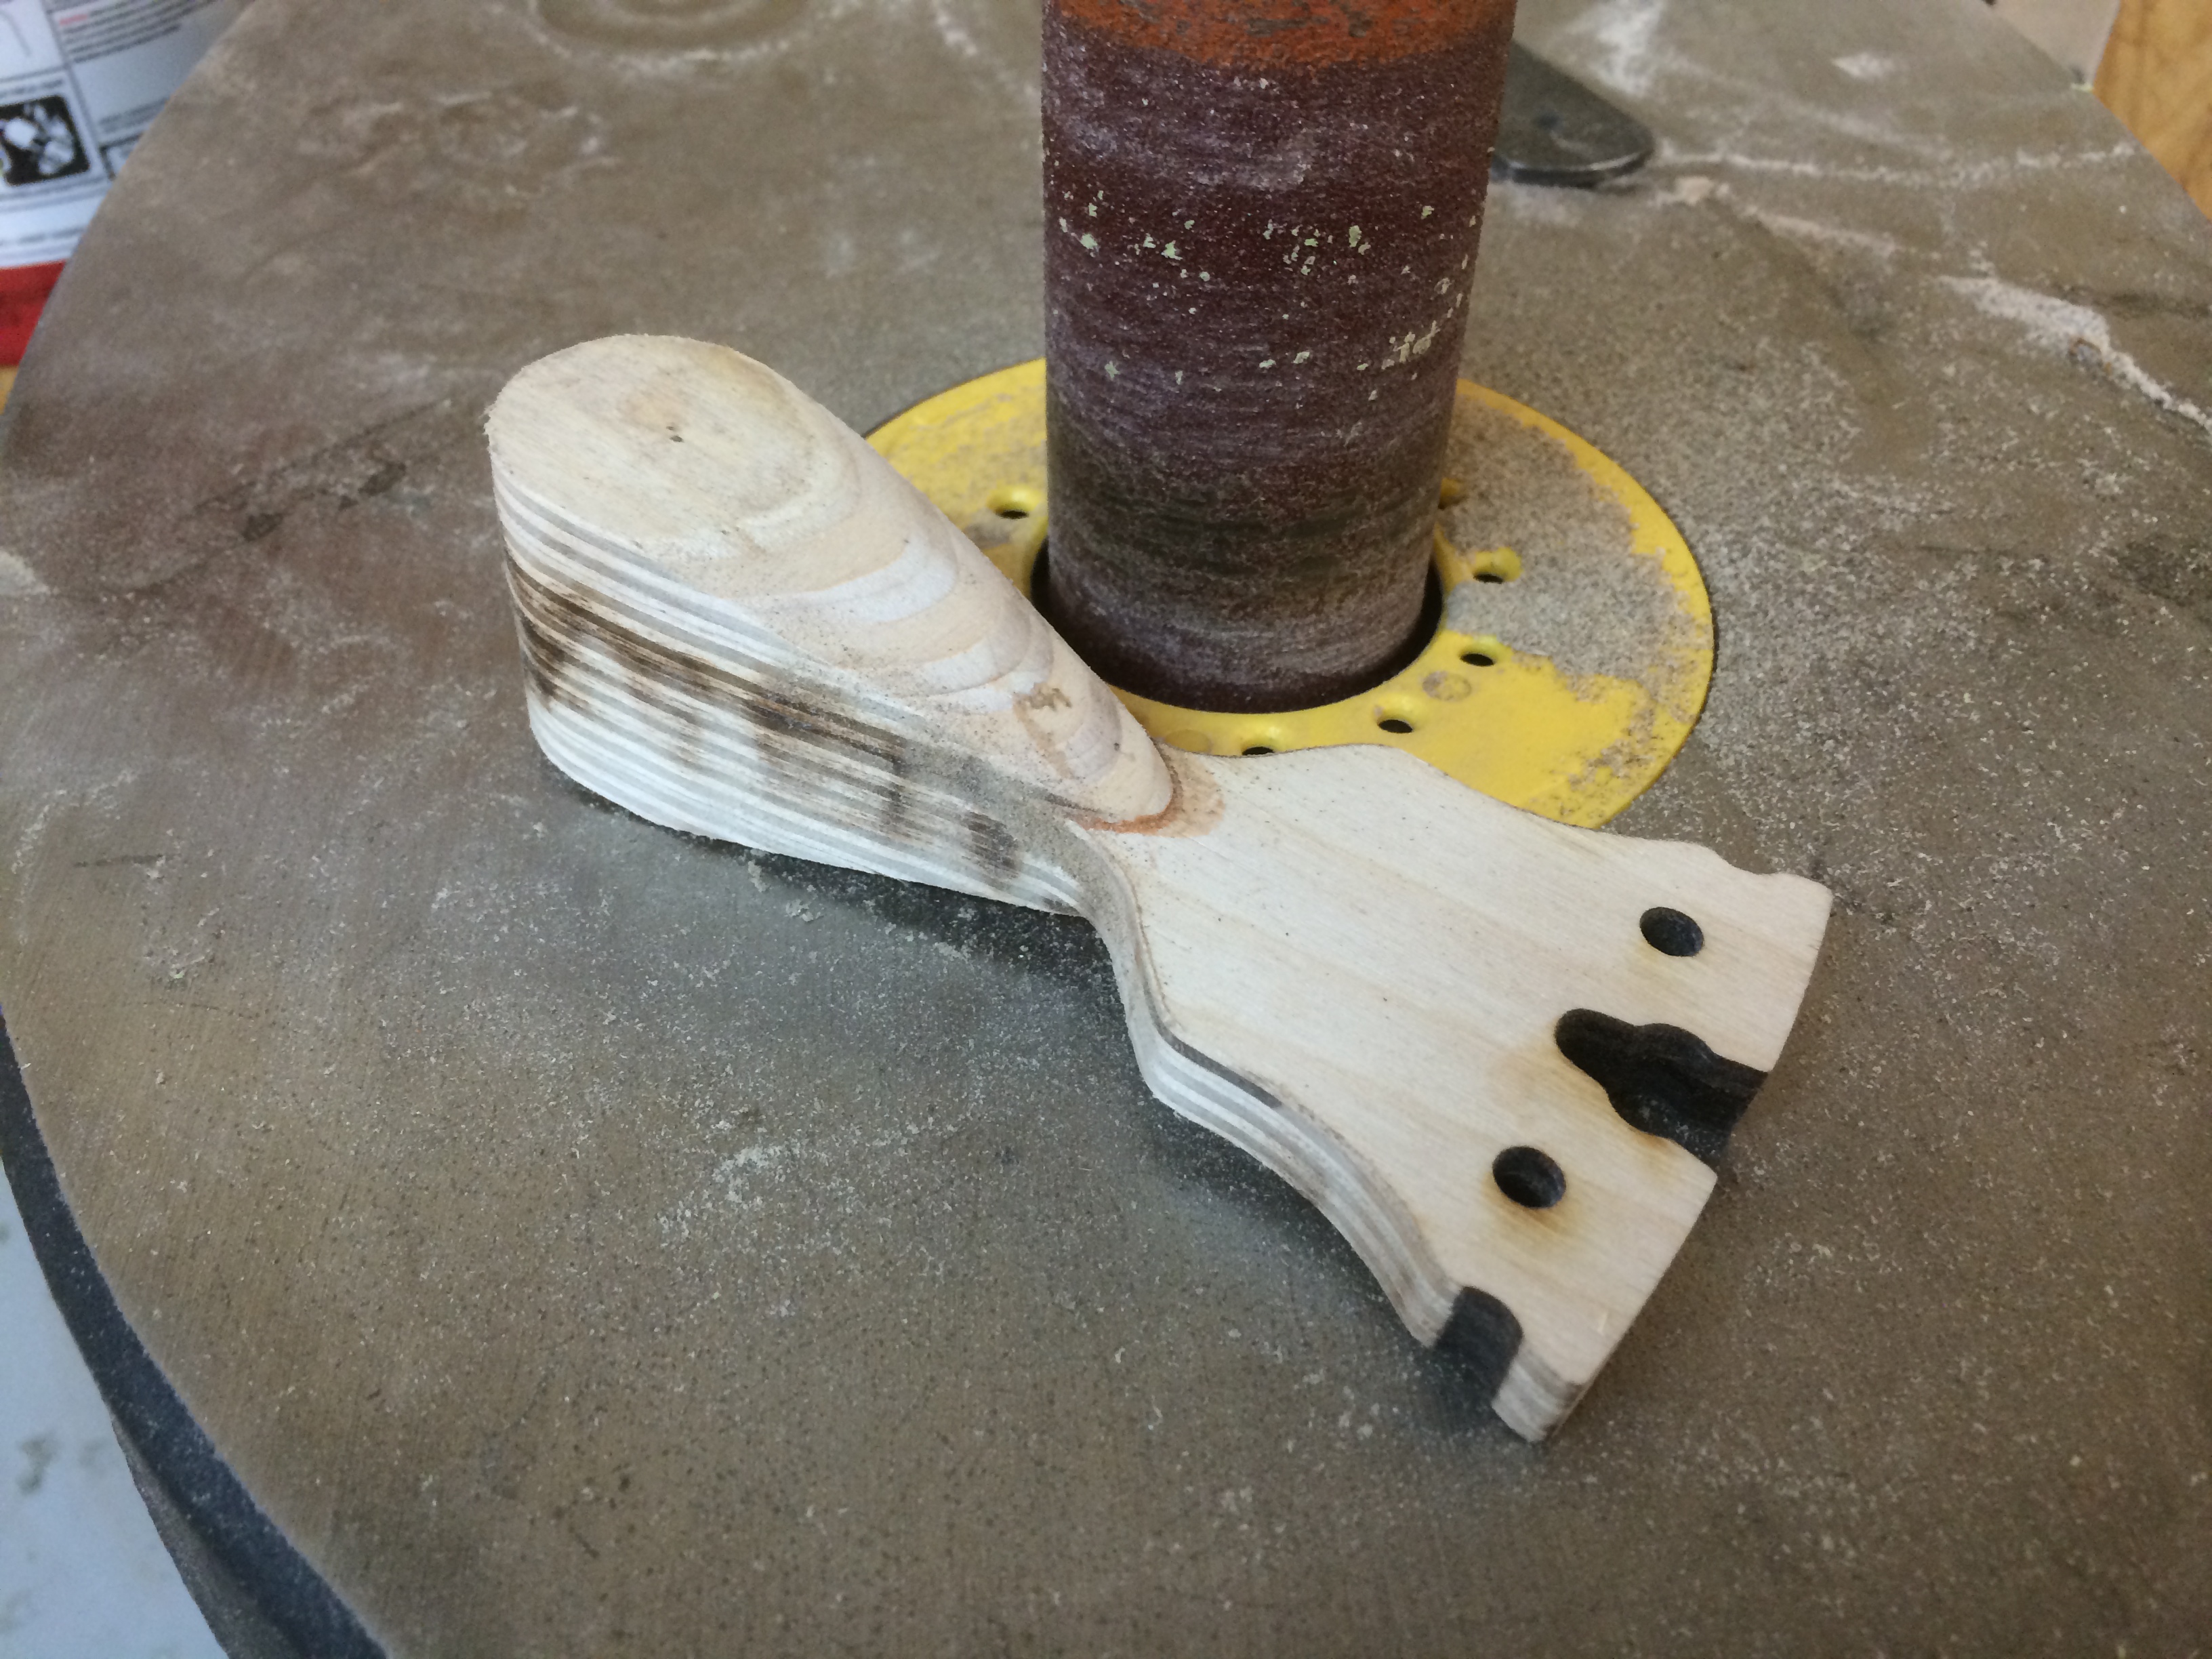
After transferring the pattern onto a 3″ wide board of maple, it was cut out and sanded to the profile. A 1/2″ aluminum lanyard hole was epoxied into place.
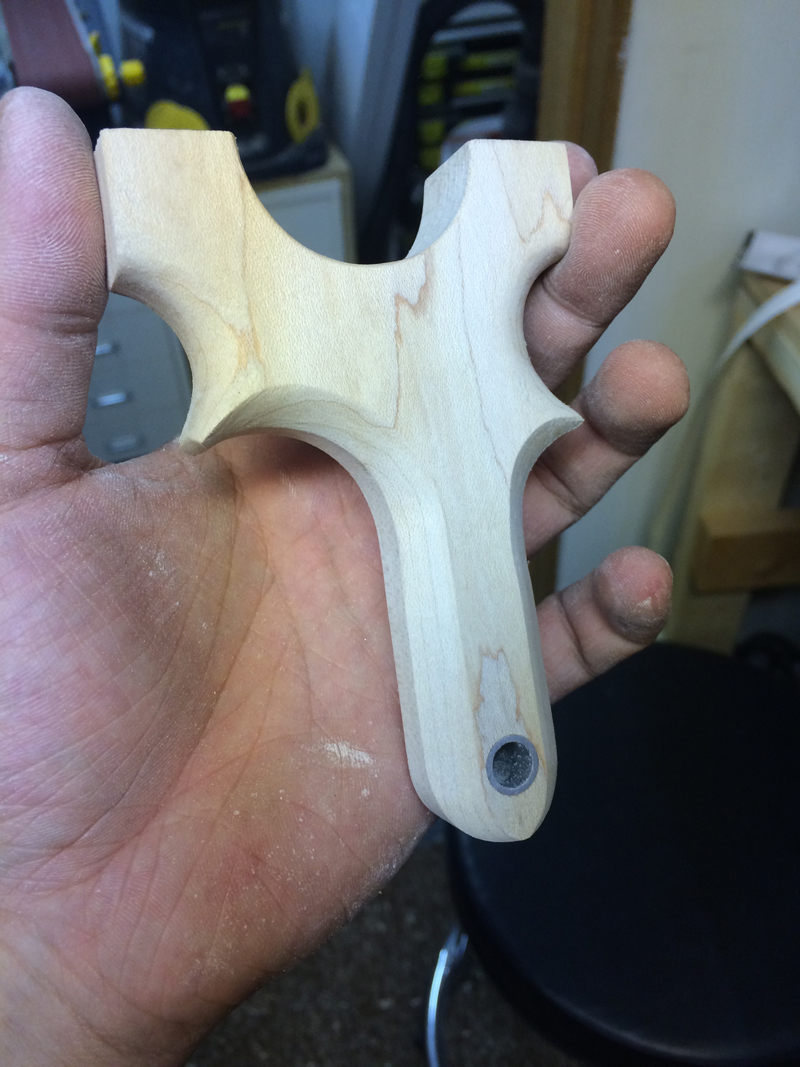
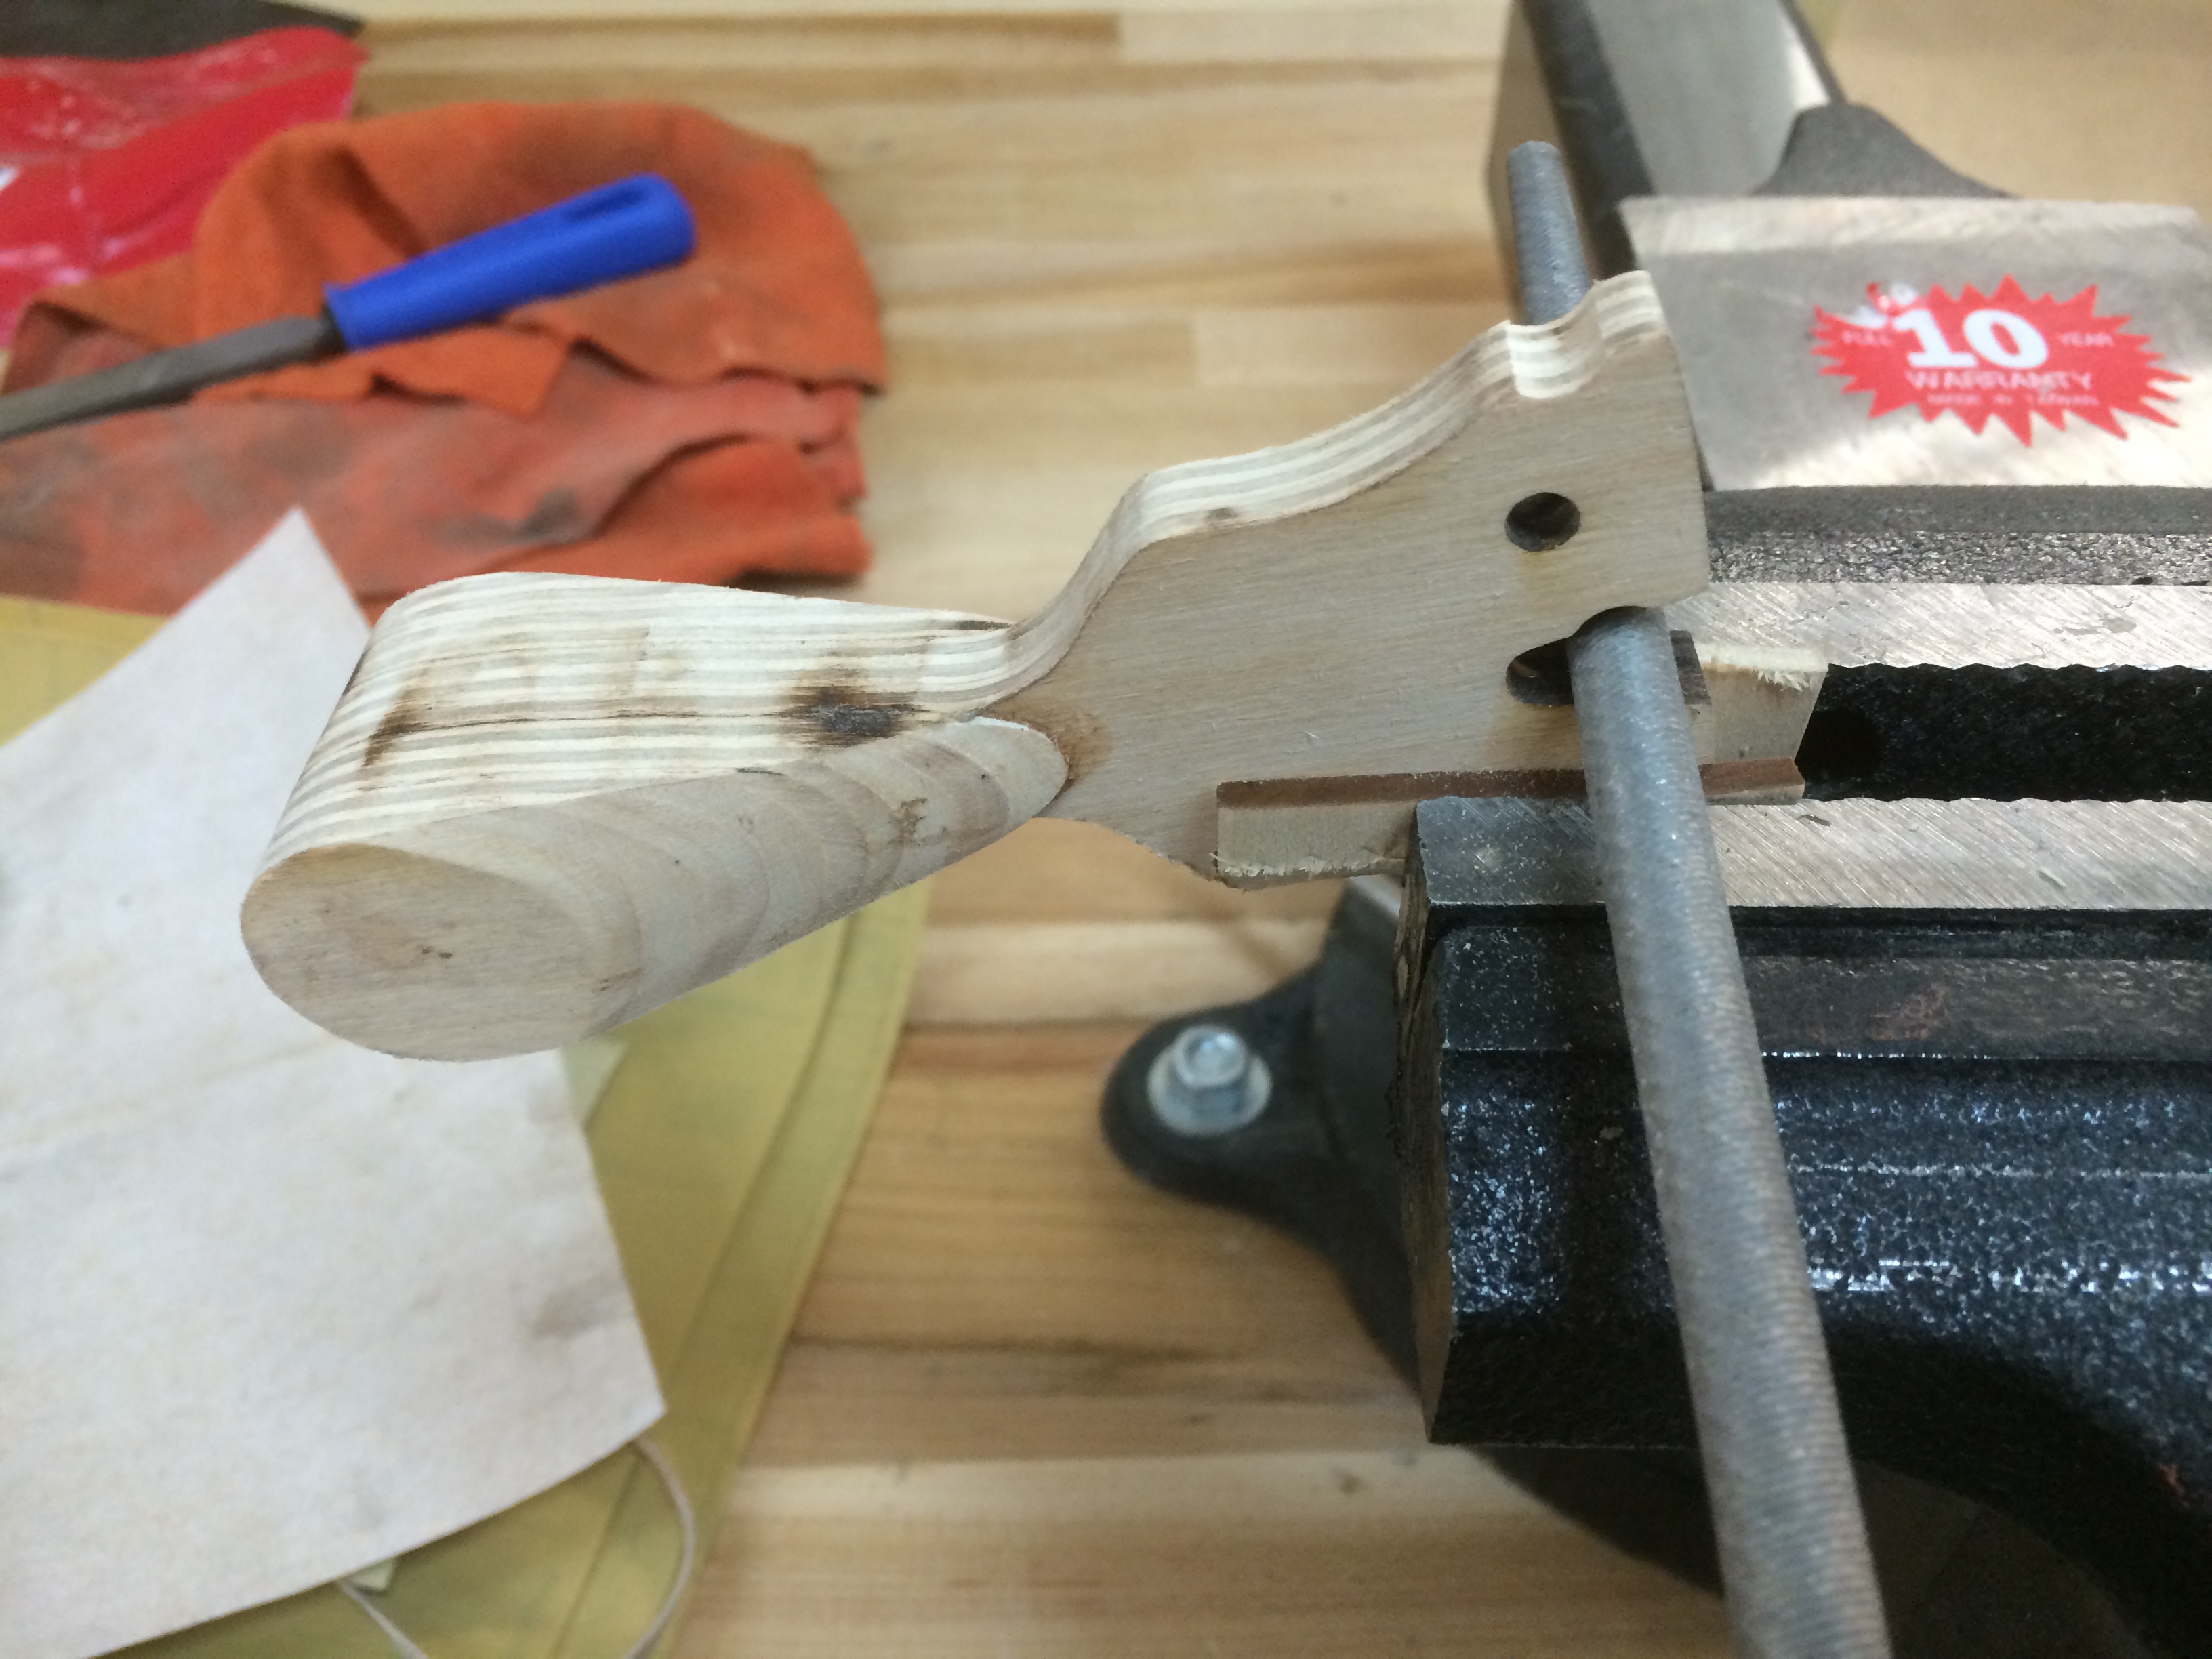
After shaping the grip area with some generous curves, the handle was shaped with some nice crisp chamfering.
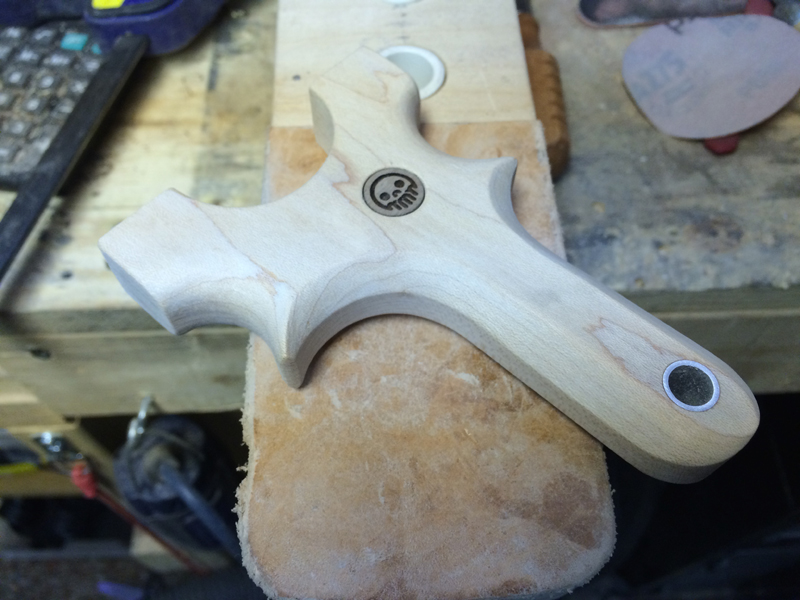
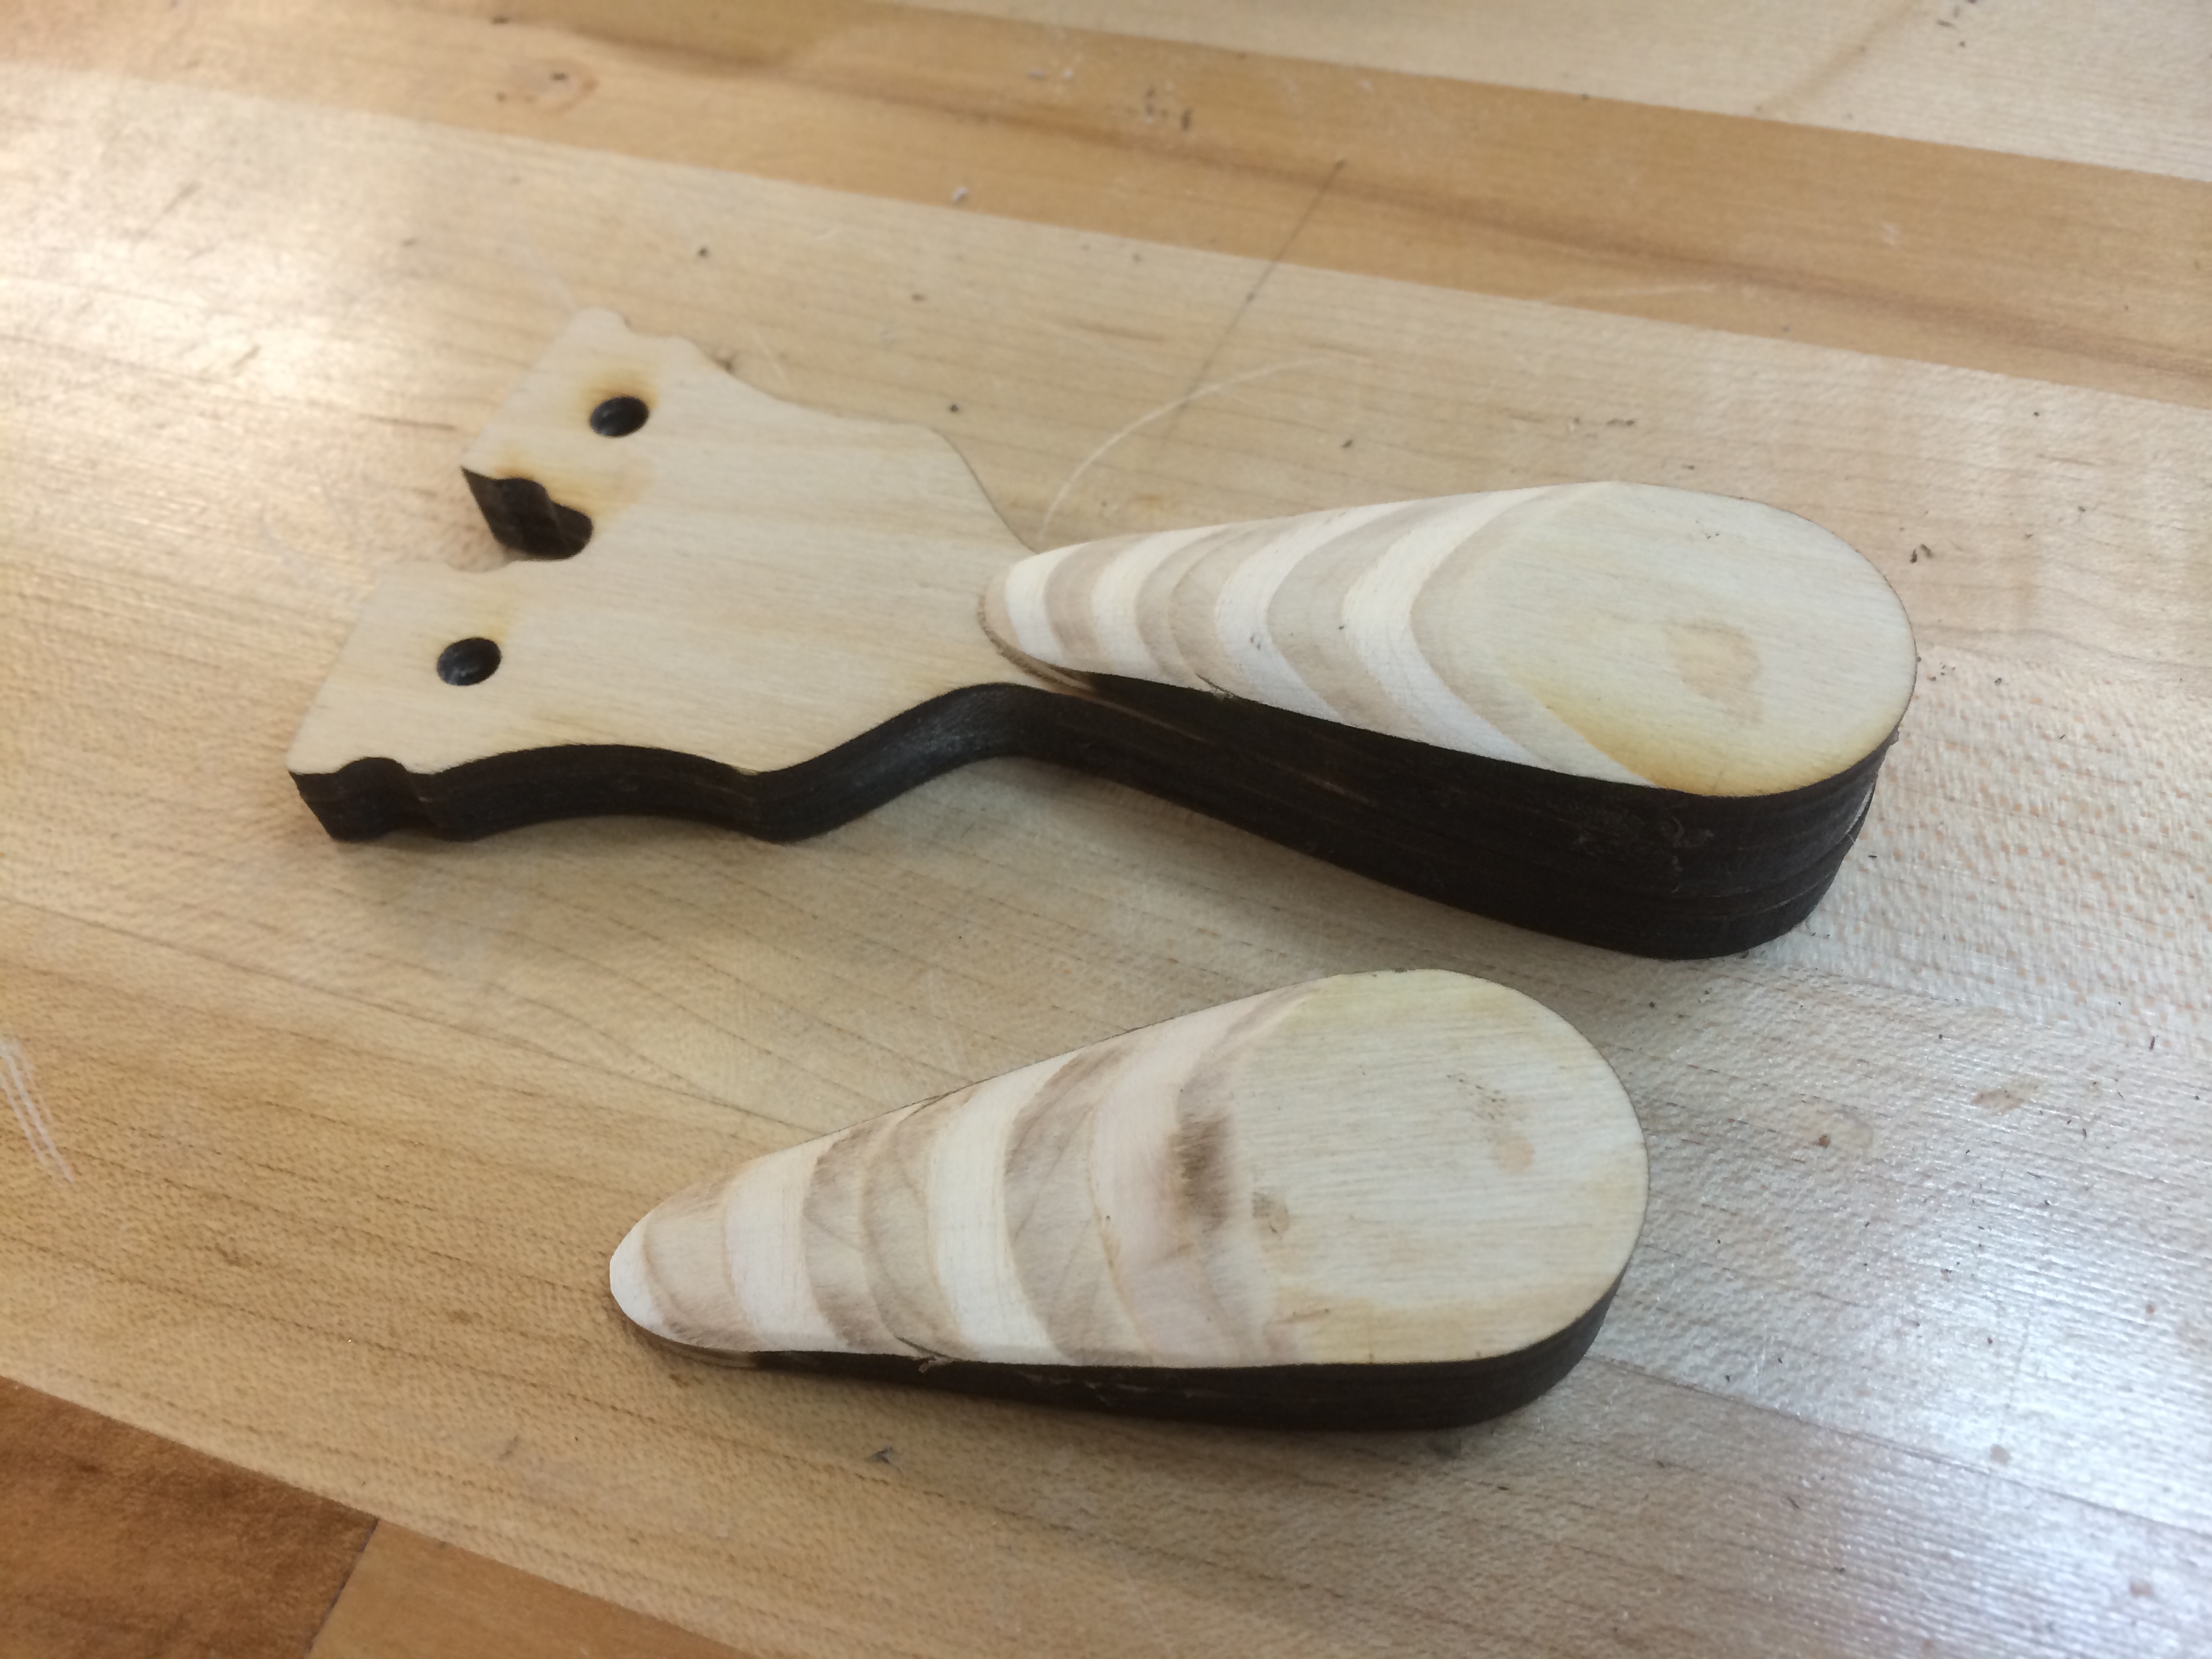
A 1/2″ pocket was drilled into the face with a Fortsner bit and a walnut maker mark button was pressed and glued into place.
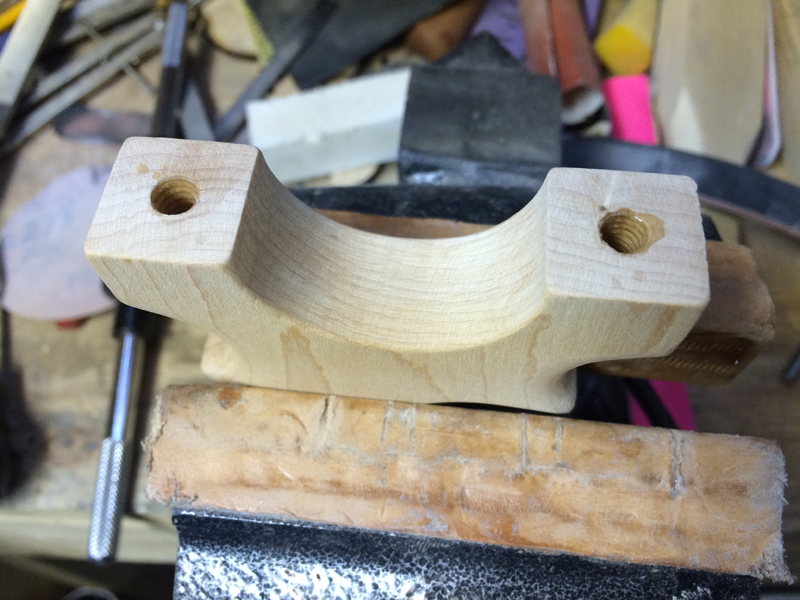
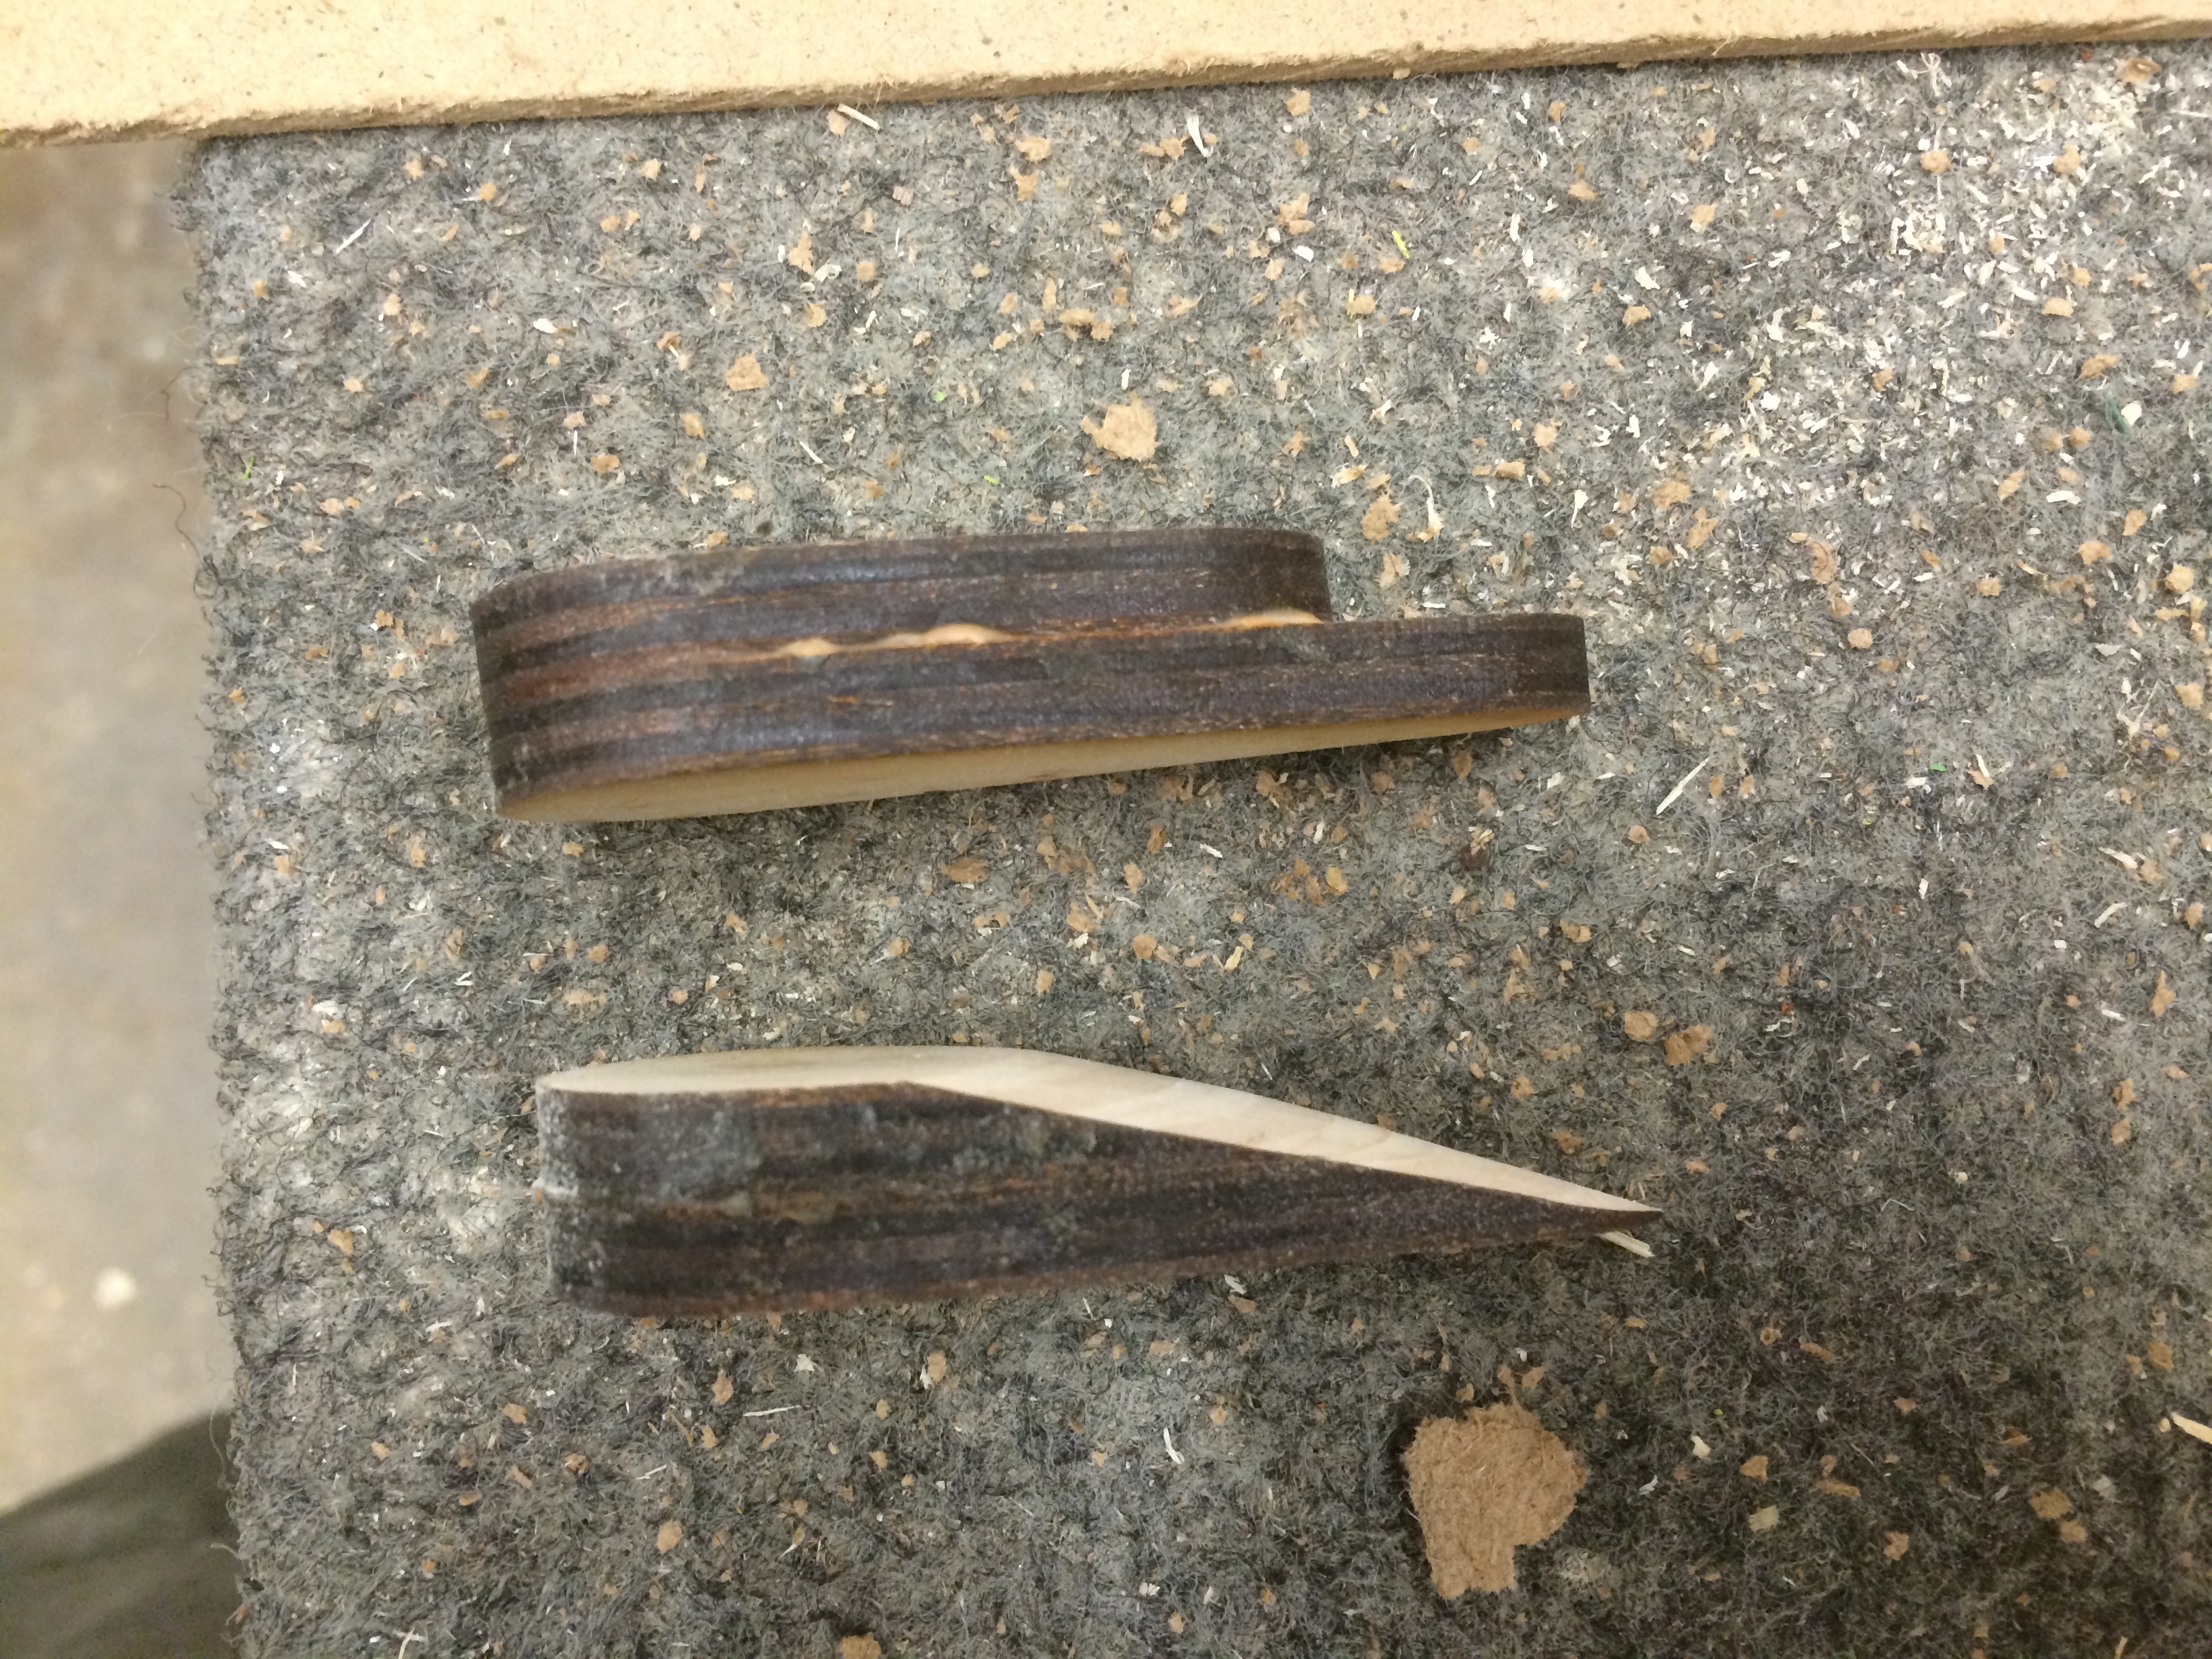
Now the tricky part, holding the frame in a drill press vice two 7/32″ holes were drilled into the tips. These holes where then tapped with a 1/4-20 tap. After removing the tap, thin cyanoacrylate glue was dripped onto the threads to strengthen them. After the glue cured, the threads were chased with the tap again and more glue was dripped in.
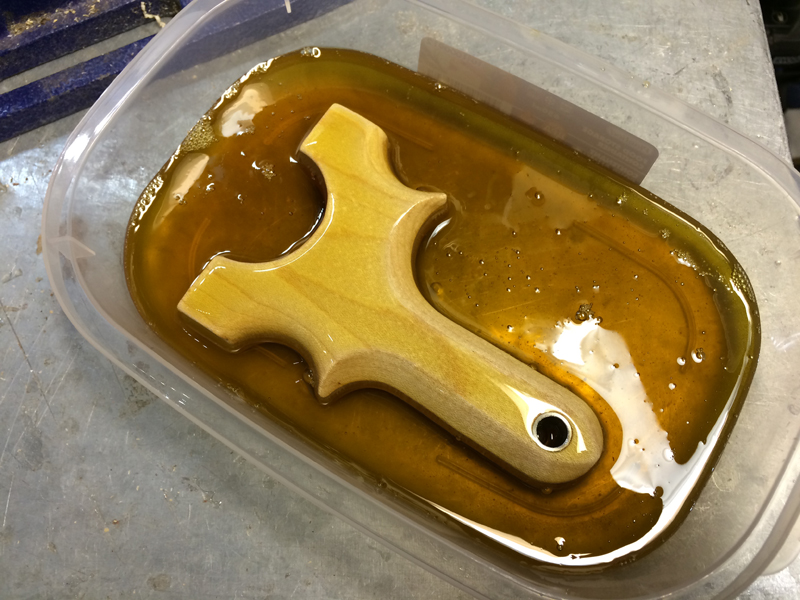
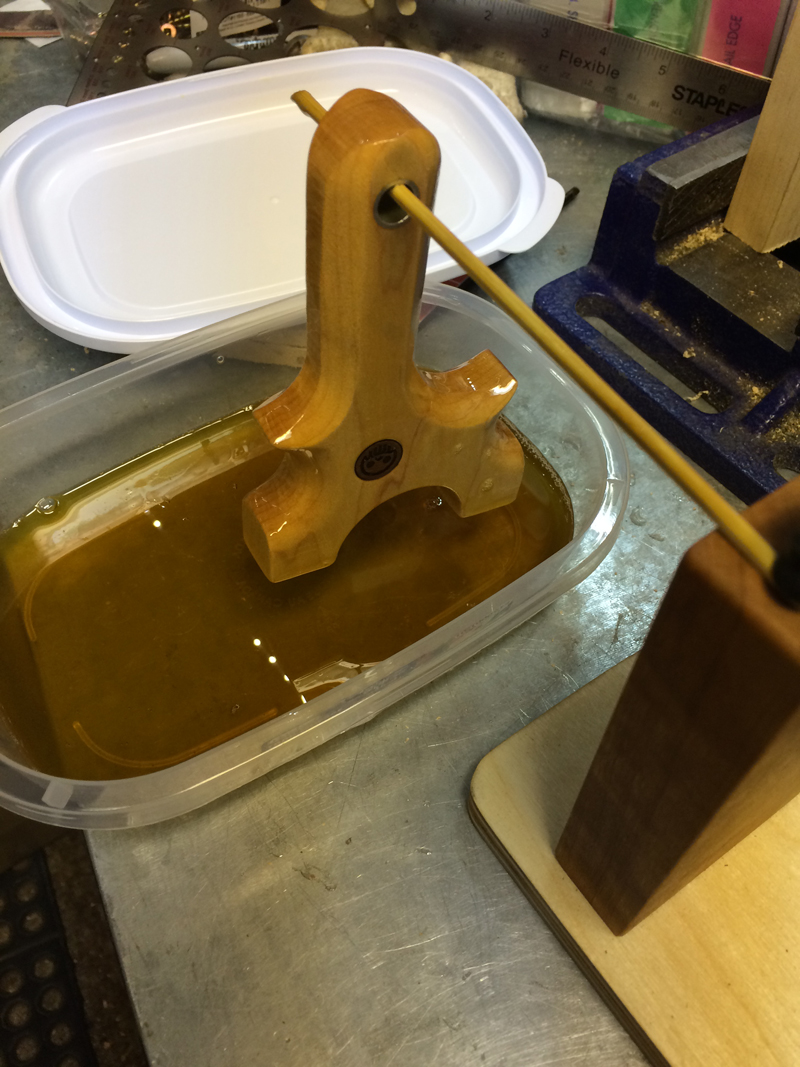
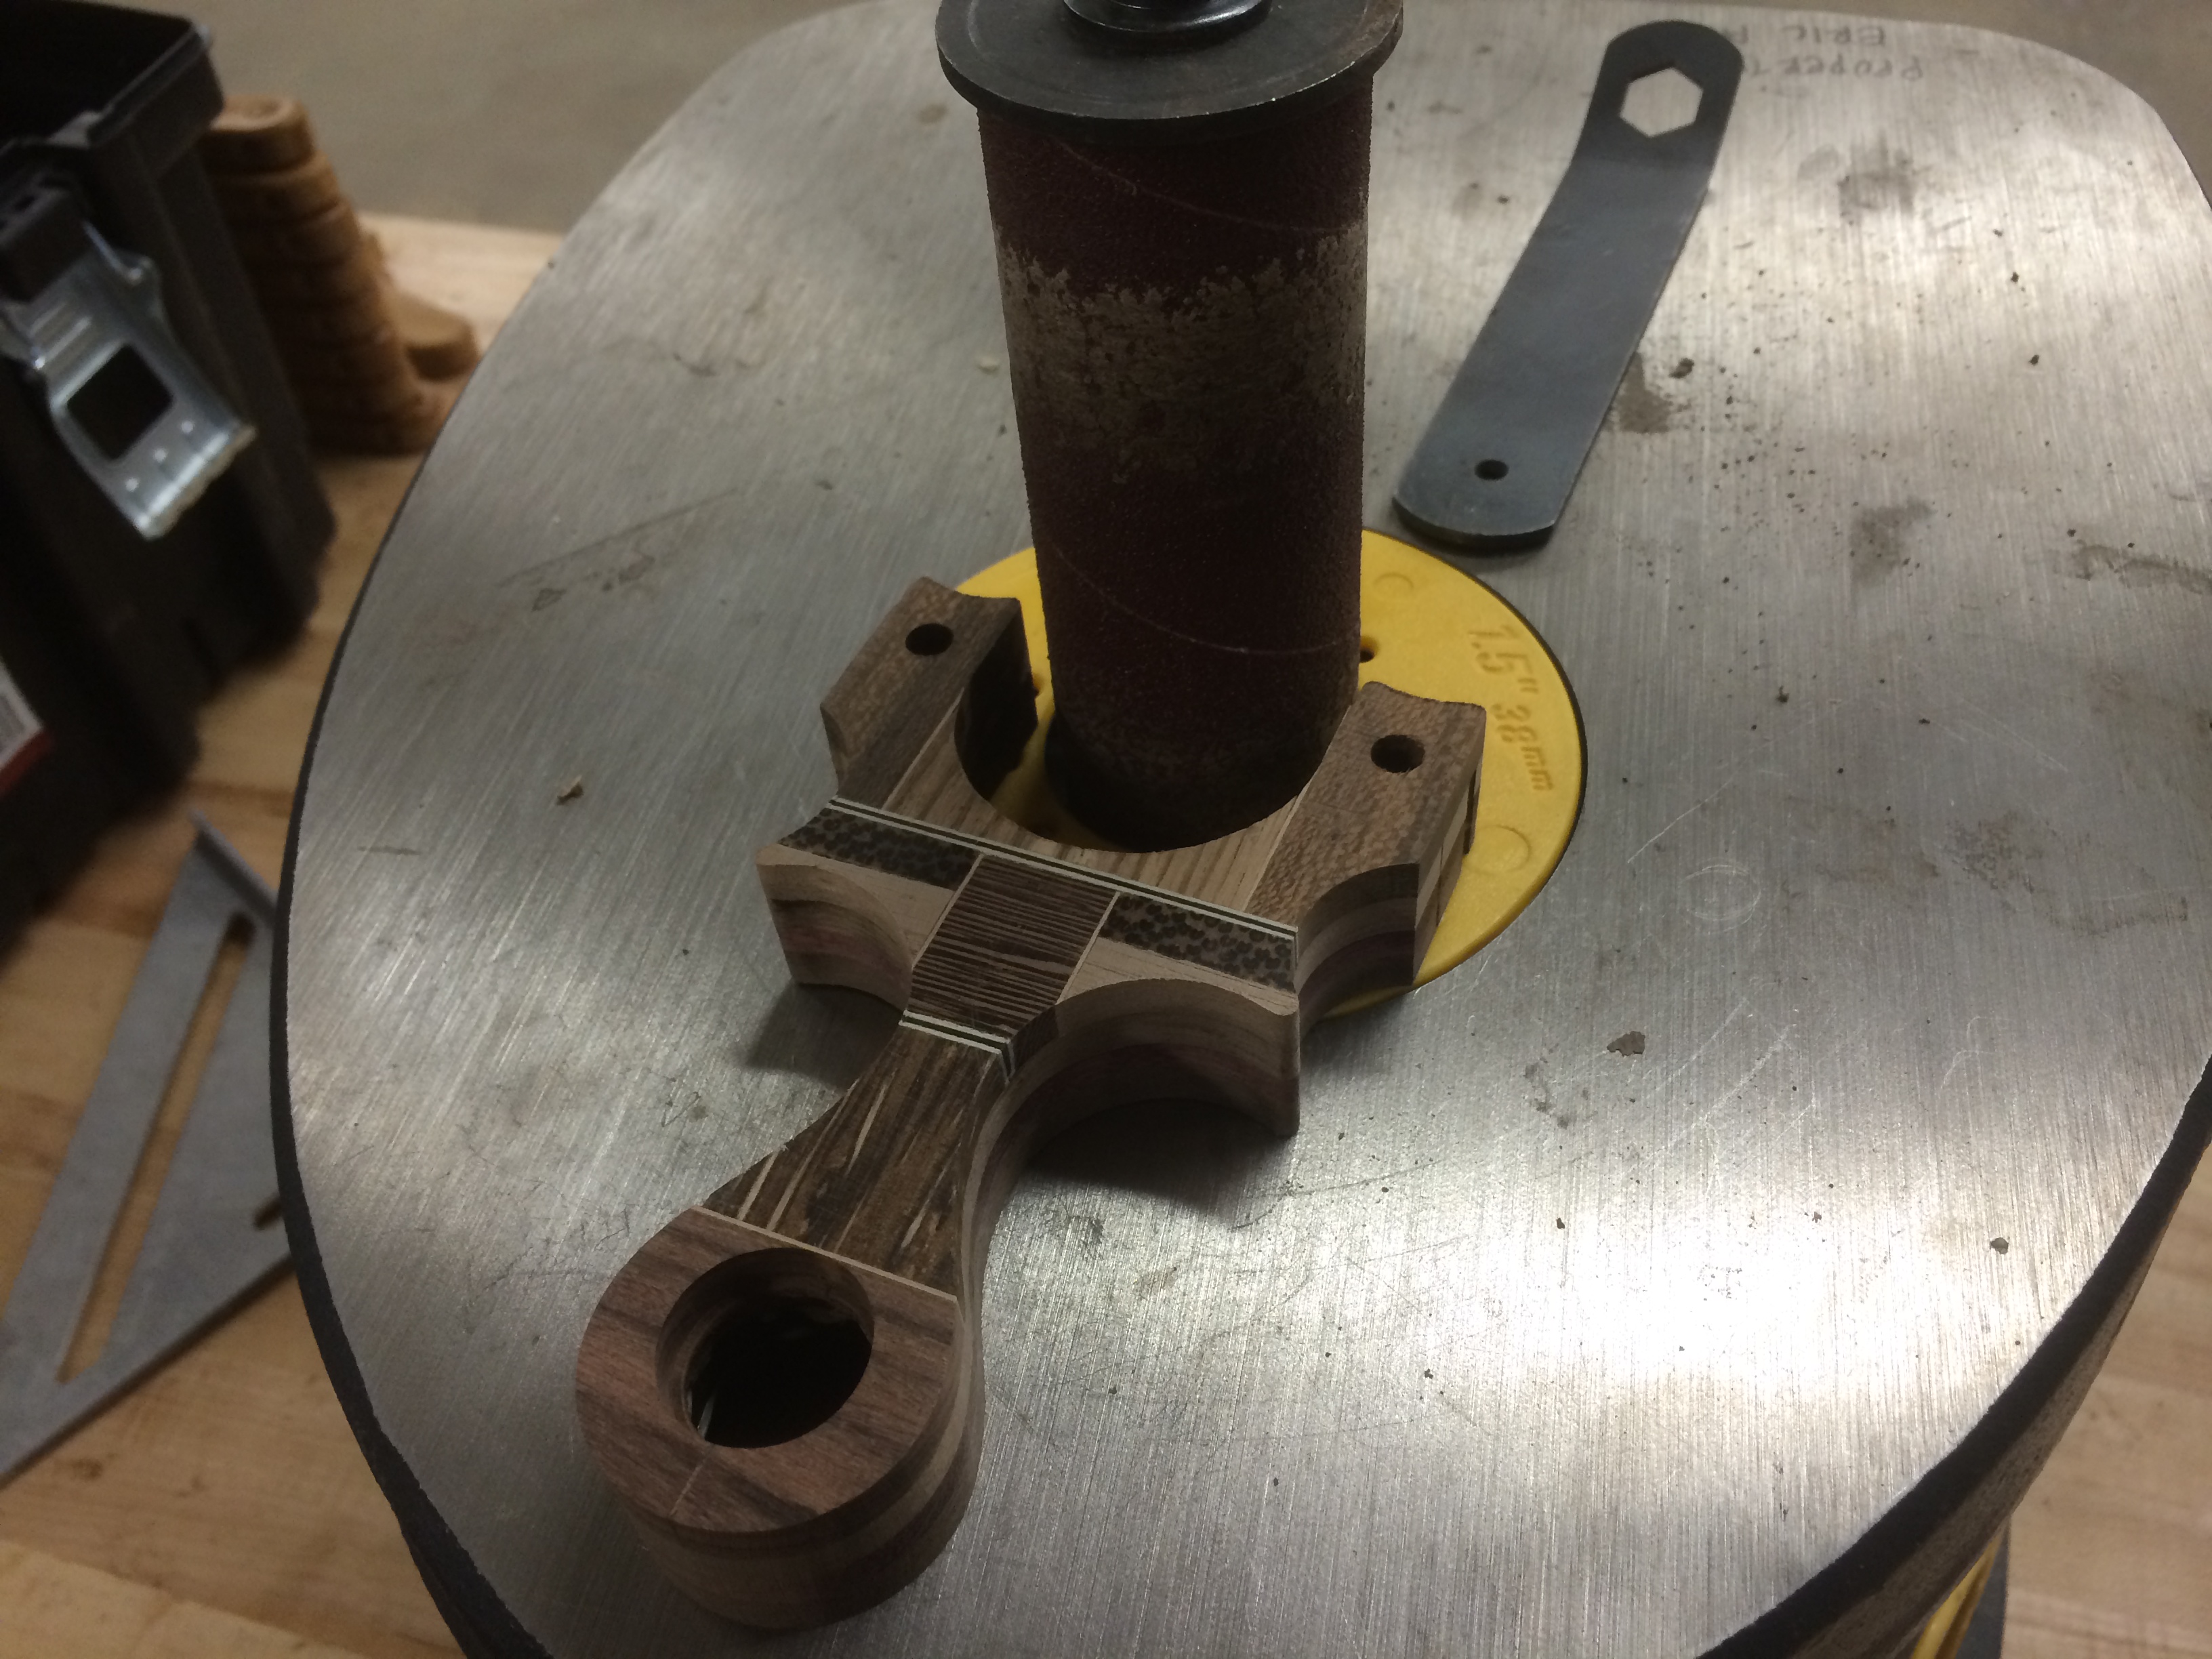
After the glue was fully cure, the frame was dropped into a bath of boiled linseed oil for a 25 minute soak.
Two coats of light polyurethane sealer was wiped on. This was left to dry for some time.
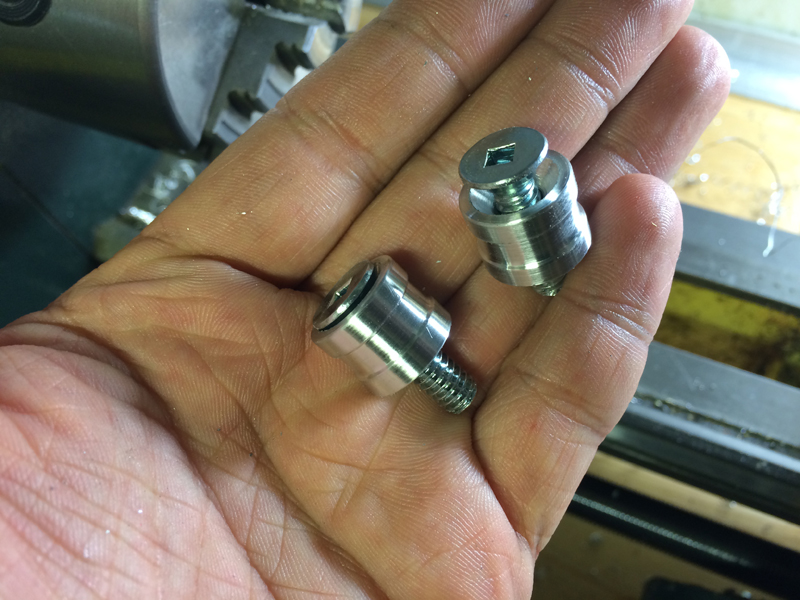
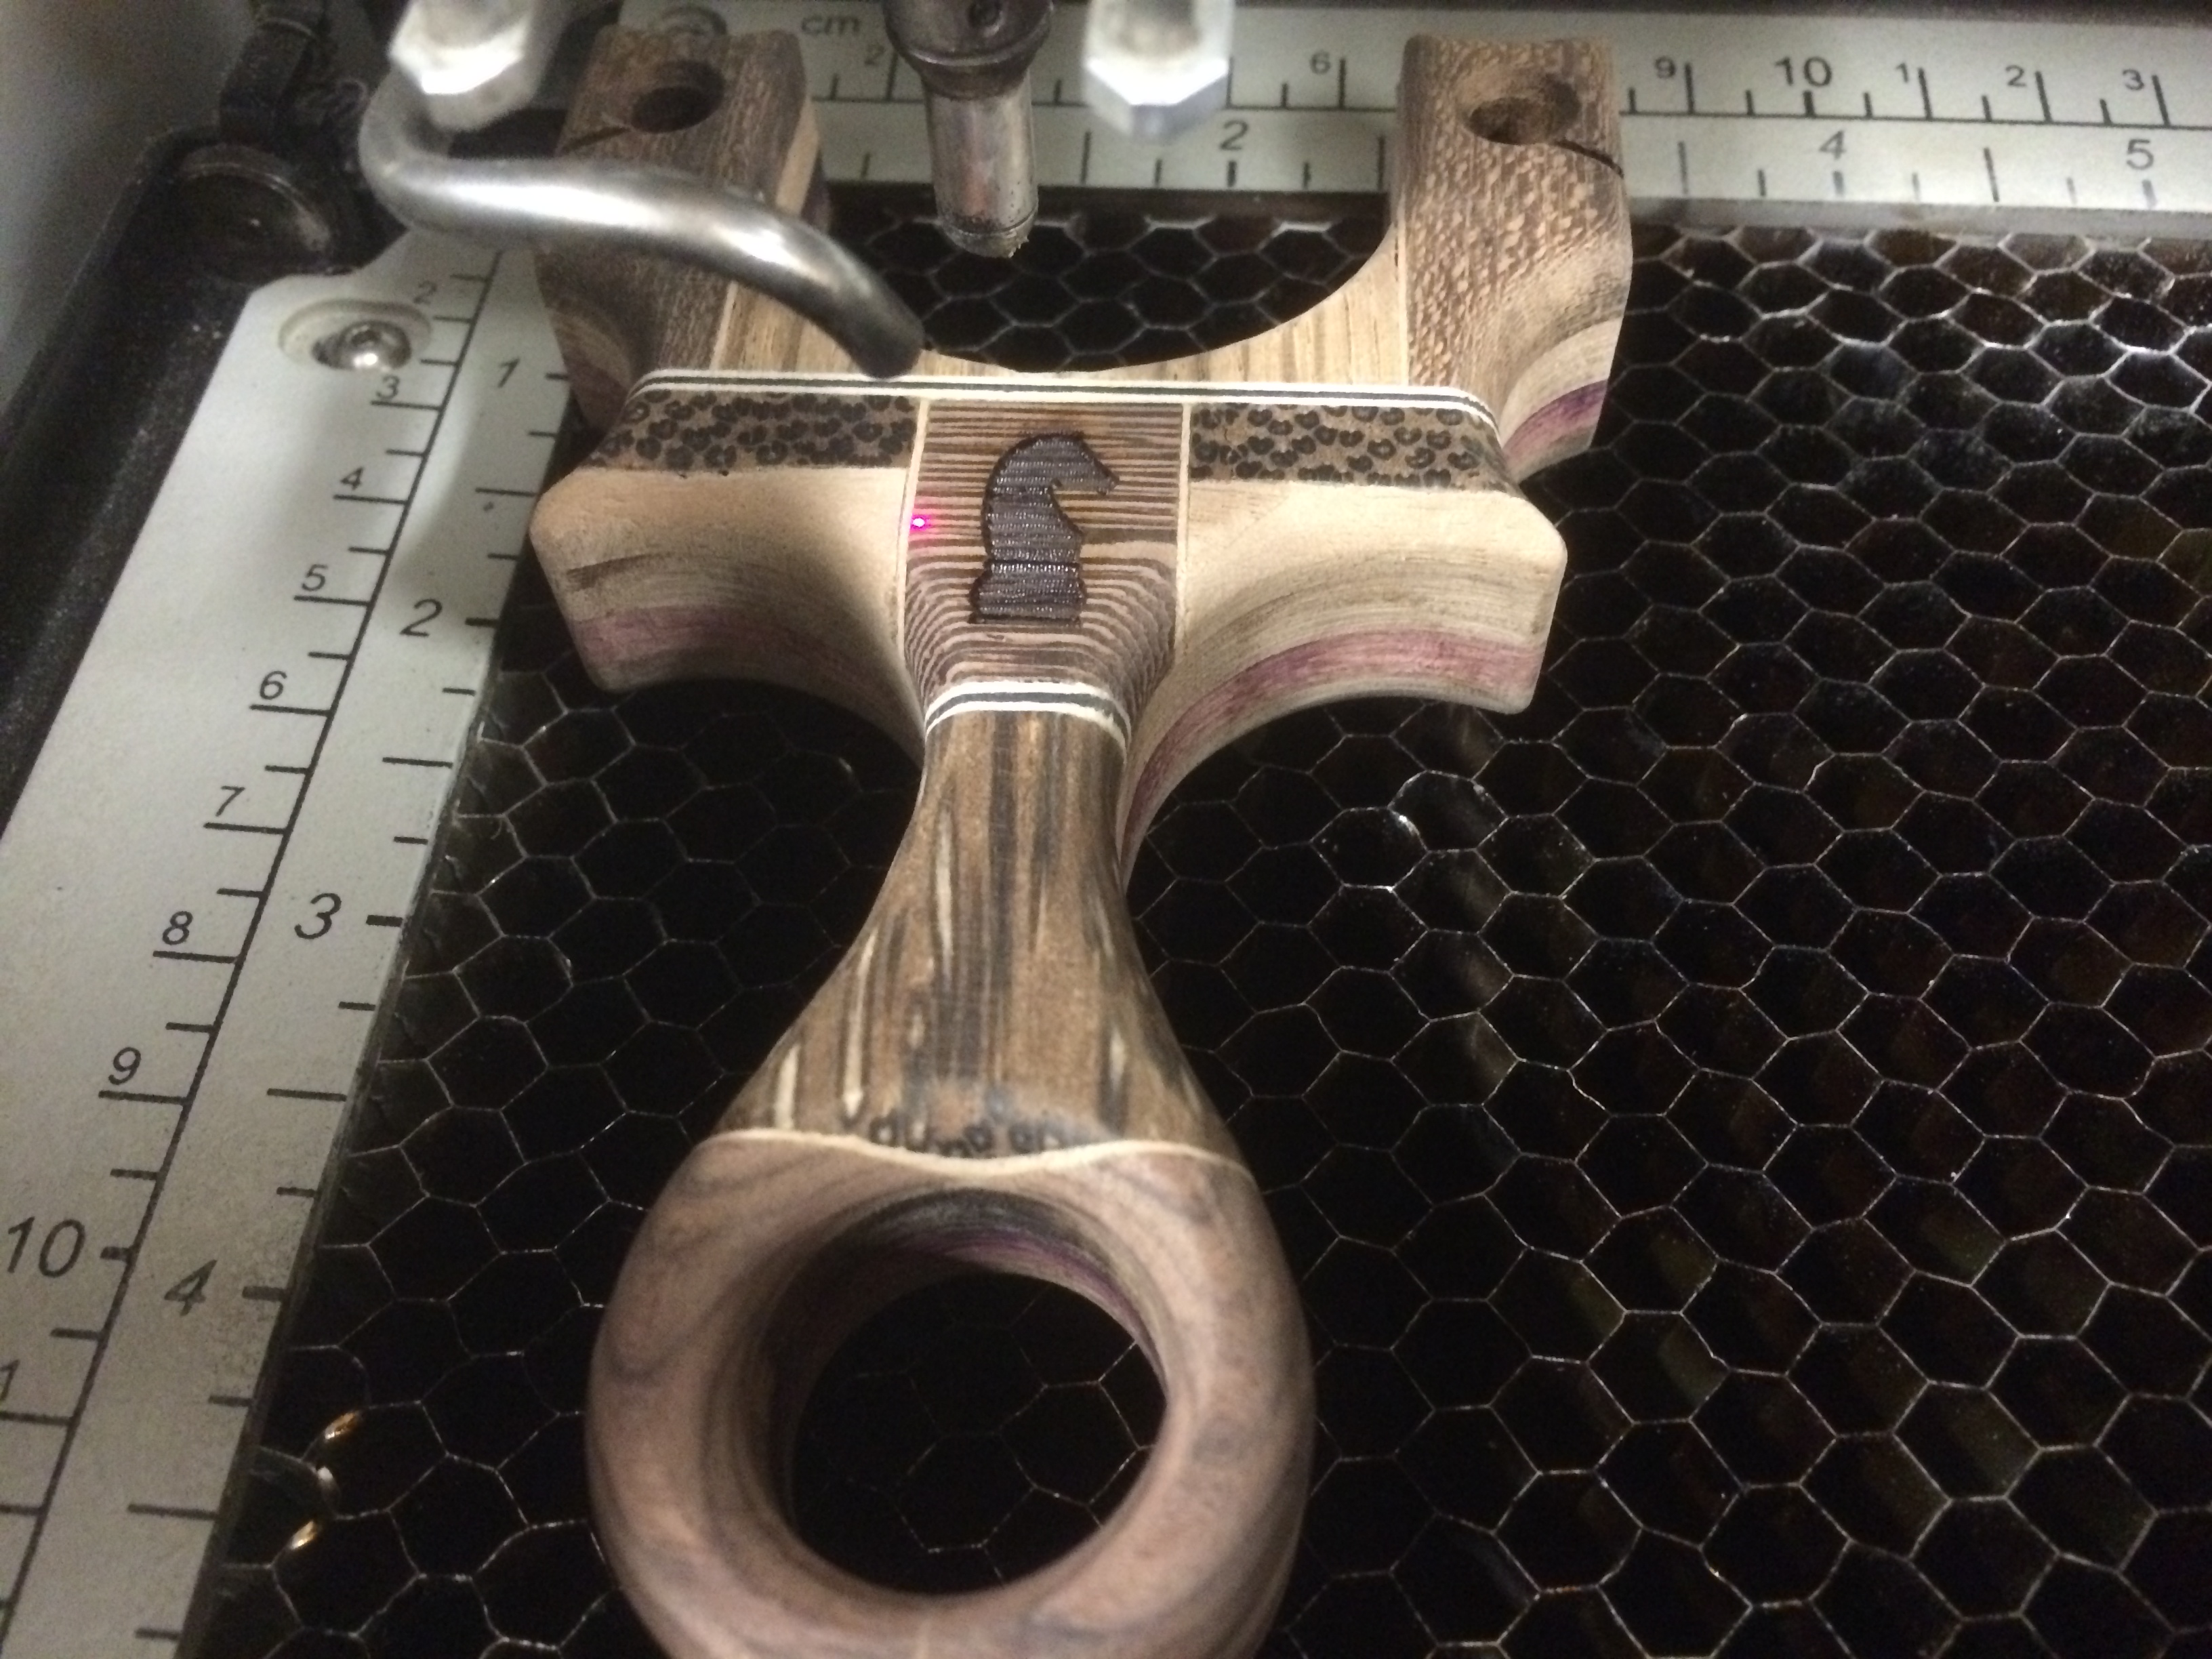
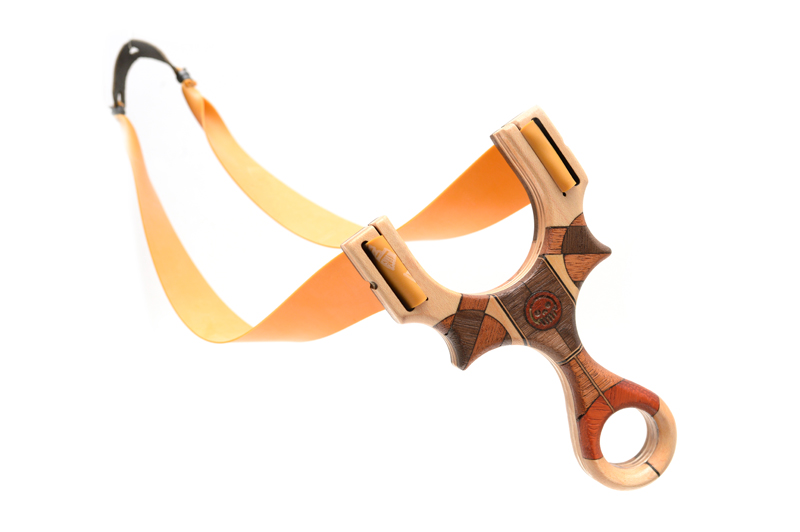
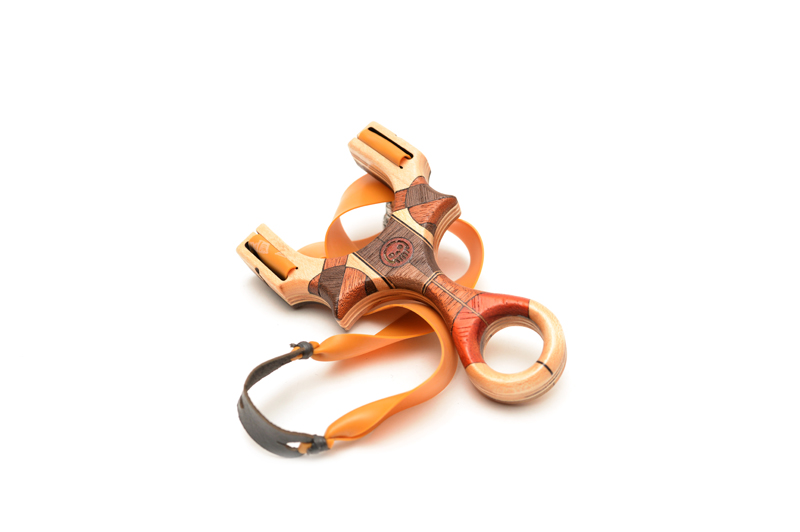
Now that the frame was done, it was time to make the business end of the slingshot, the rotating tips. The rotating tips’ concept is that the bands would rotate on the axis of the fork tips, eliminating the abrasion it would normally experience when the rubber retracts into the frame.
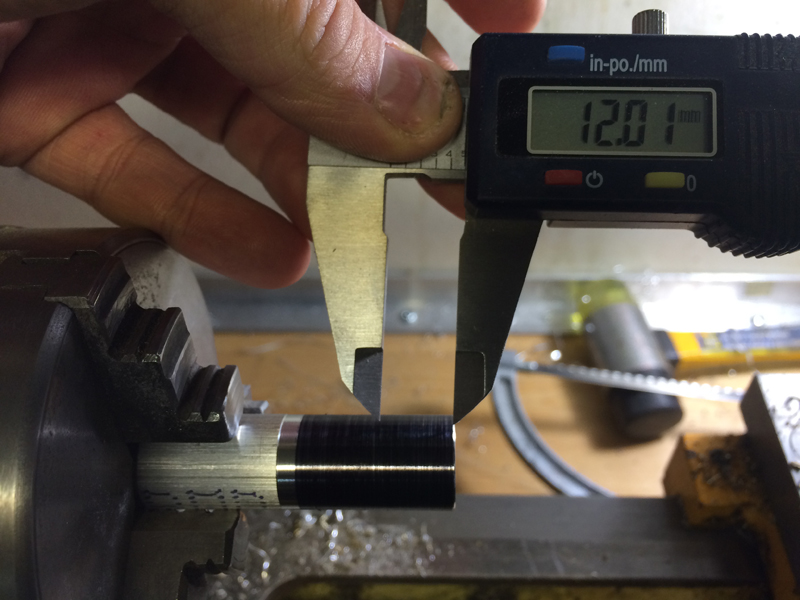
We start by facing some 5/8″ 6061 aluminum.
The tips are going to be 12mm high with a groove of 4mm to help the bands seat themselves nicely on the center.
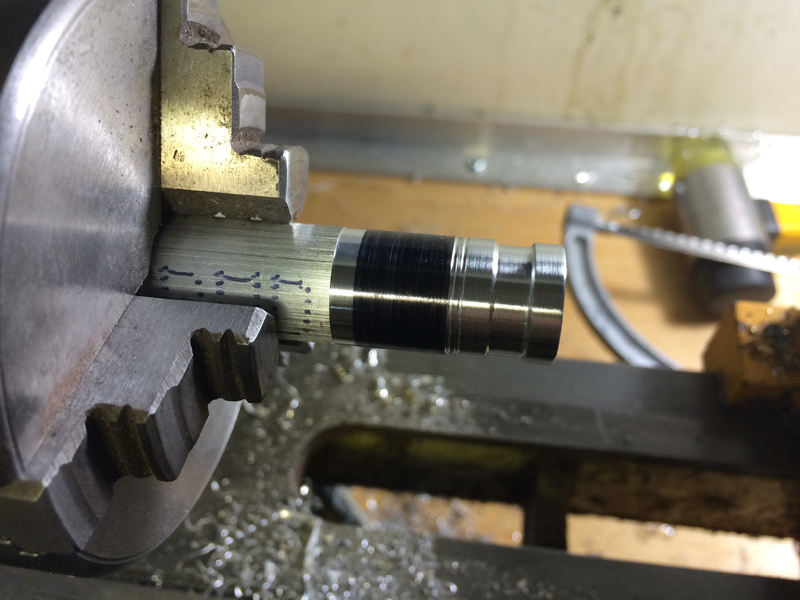
The toughest part about making rotating tips of this kind is making two identical ones.
Rechucking the tips after parting them off the stock, it was faced and the a centerdrill was used to help start the hole.
Then a 1/4″ hole was bored straight through the tip.
Using a big single flute counter sink, the tips were chamfered so that the machine screws would nest inside for a cleaner look.
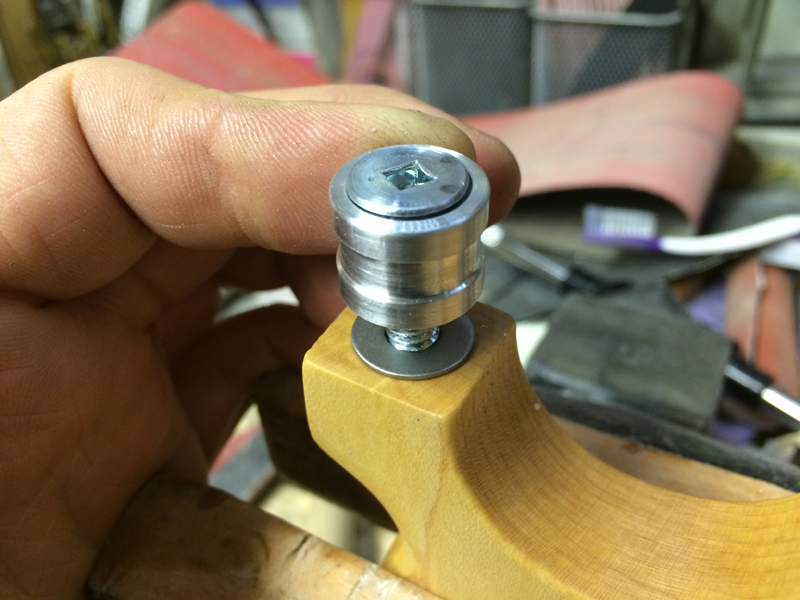
Exhibit A…machine screw seated and clean look achieved.
Rinse and repeat.
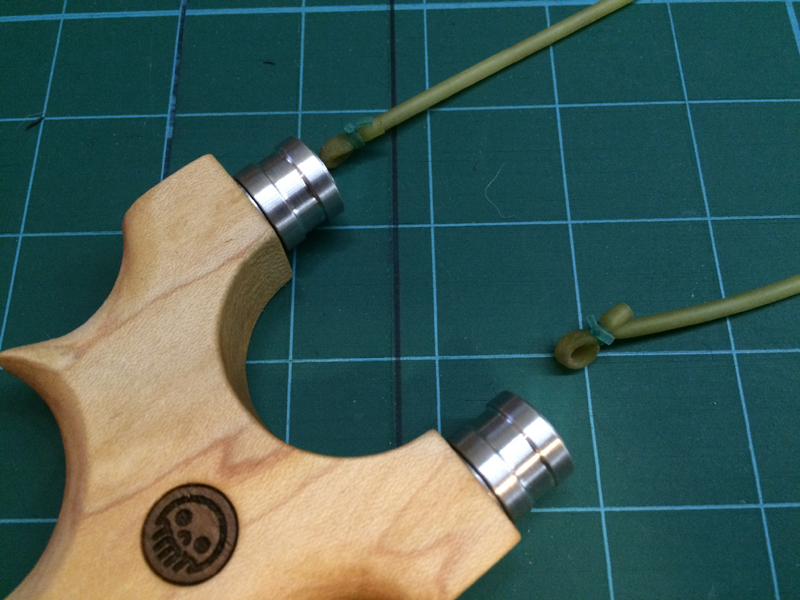
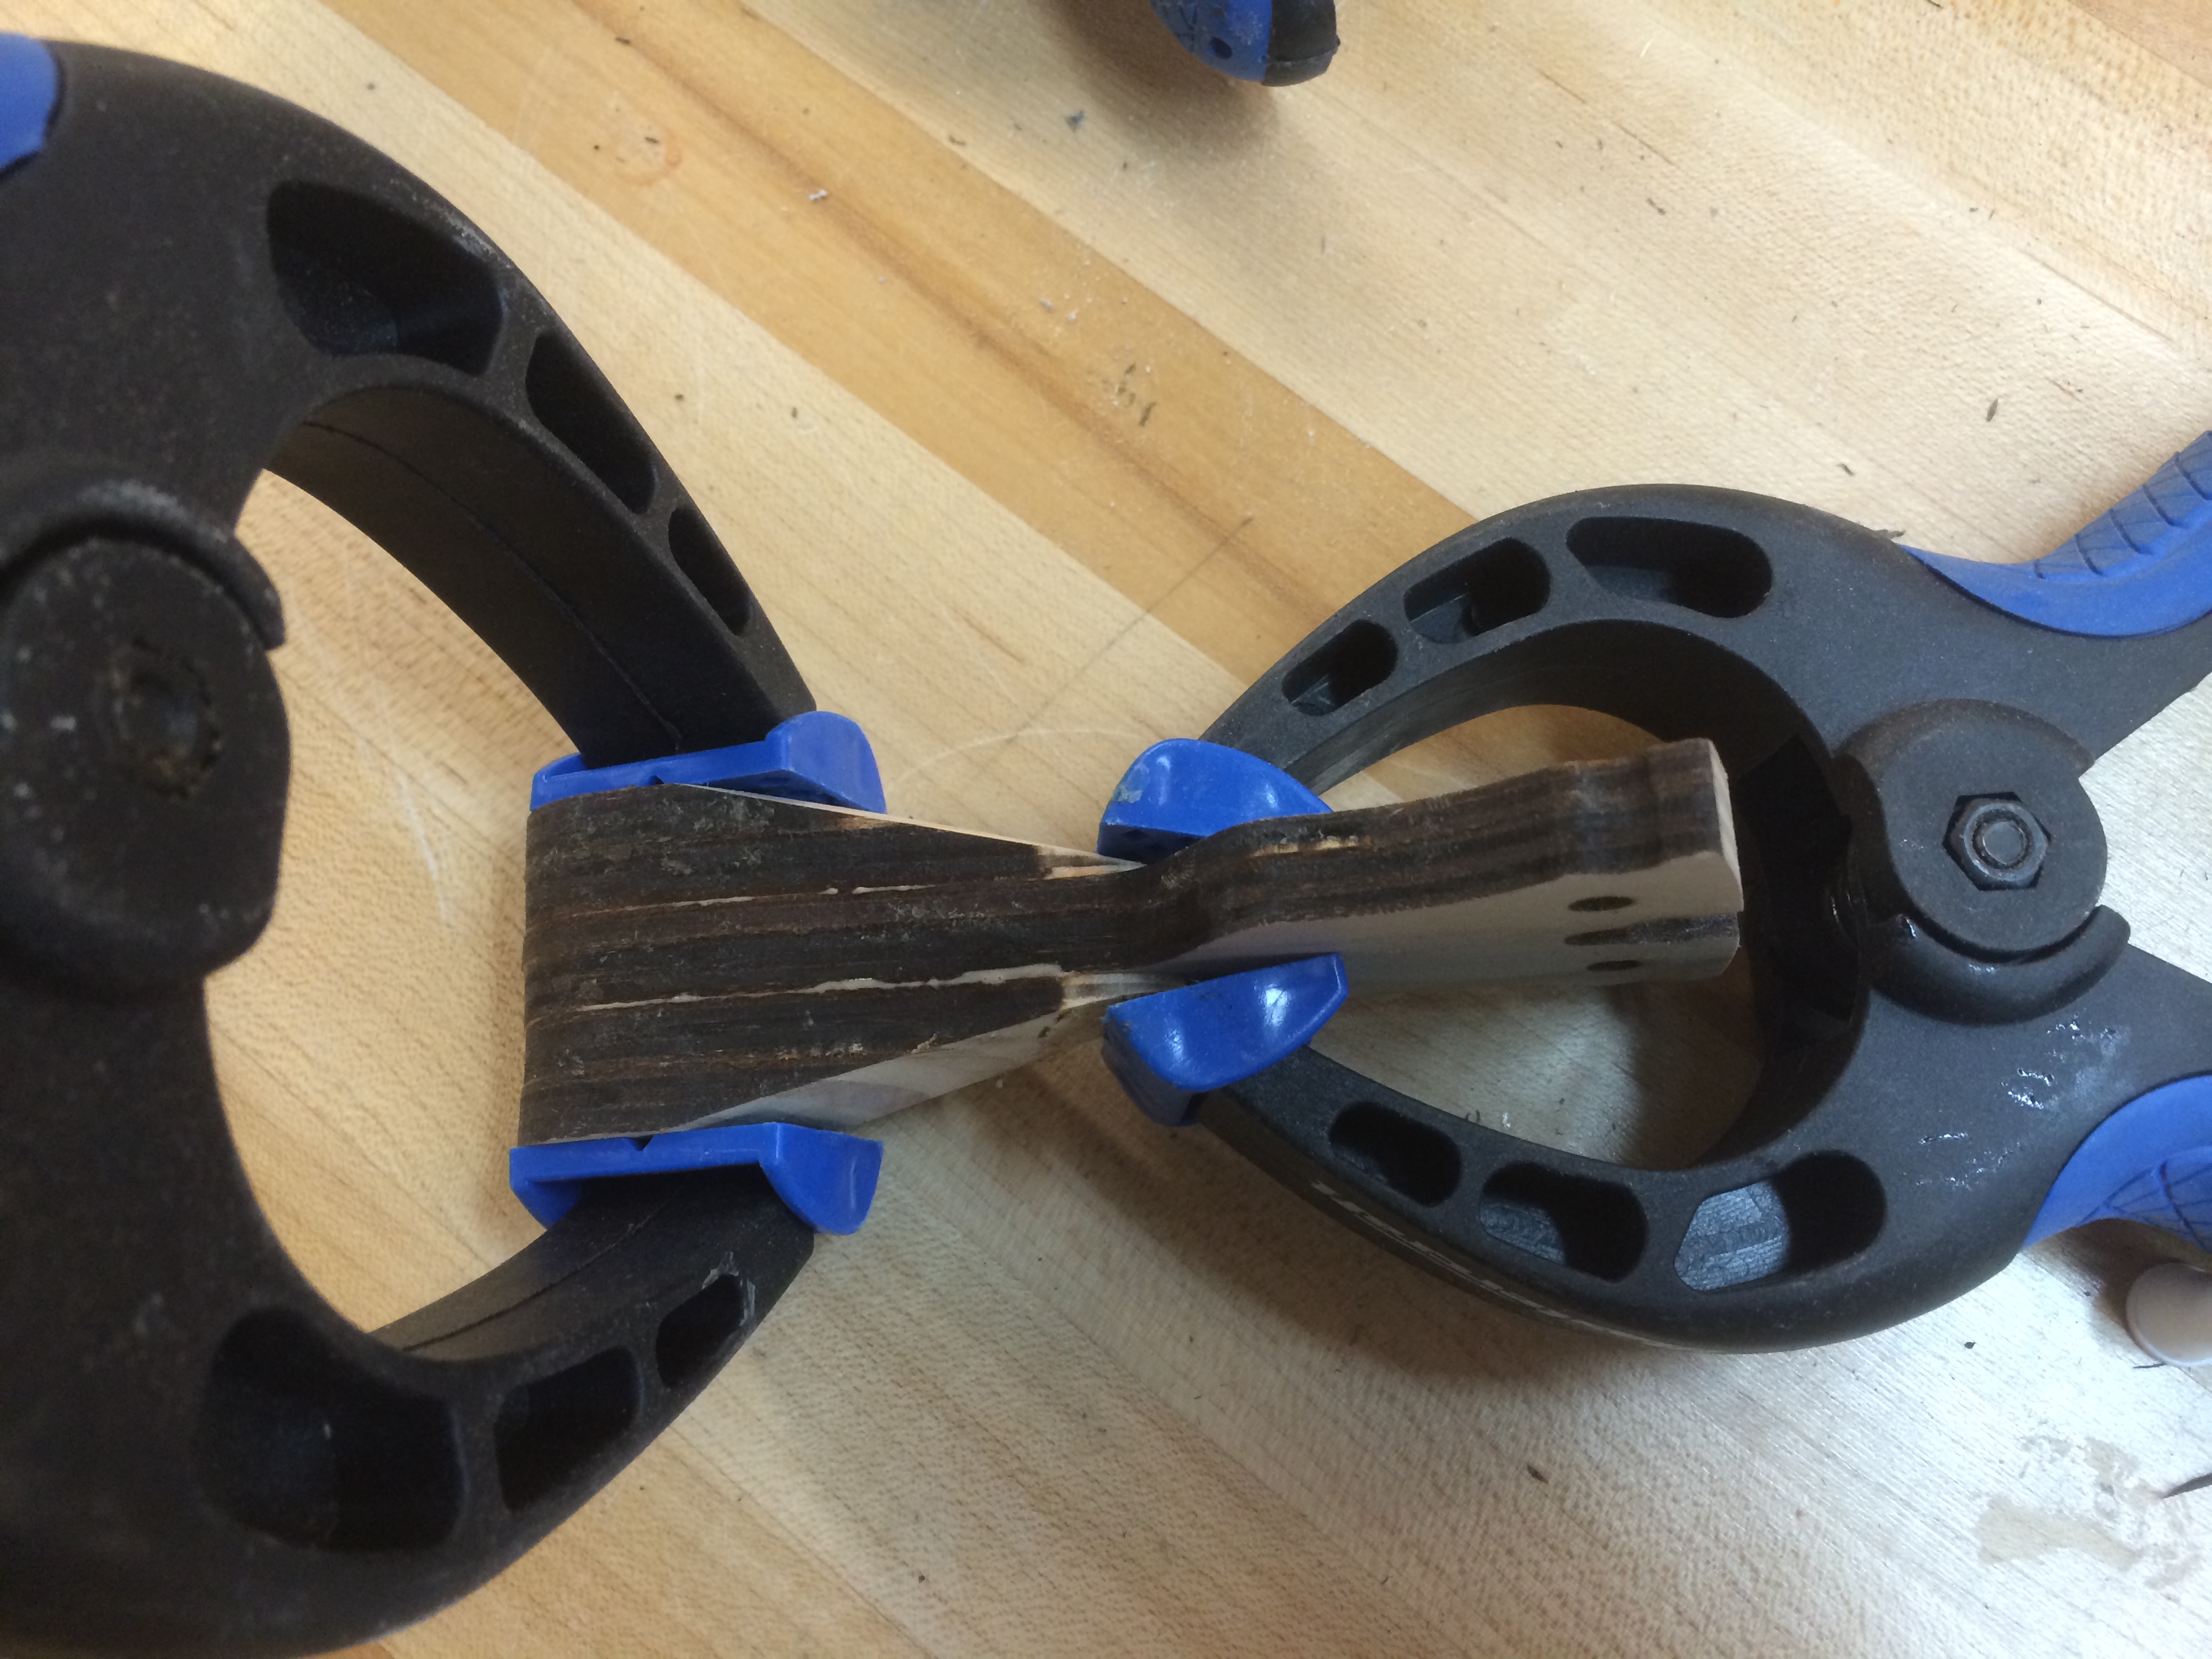
Now it was time to screw tips into place, adding a drop of super glue into the threads to make sure the machine screw would not back out again. A thin washer was added to decrease friction and make the action smoother. The screw’s pressure was tuned so that the tips would rotate but not wiggle.
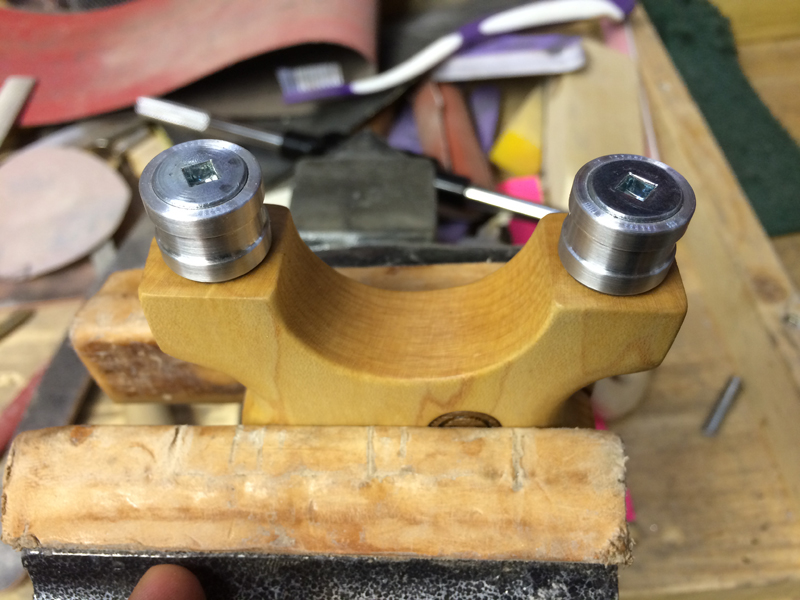
Again to the other side. In case you were wondering, the screws screw into the fork tips about 5/8″.
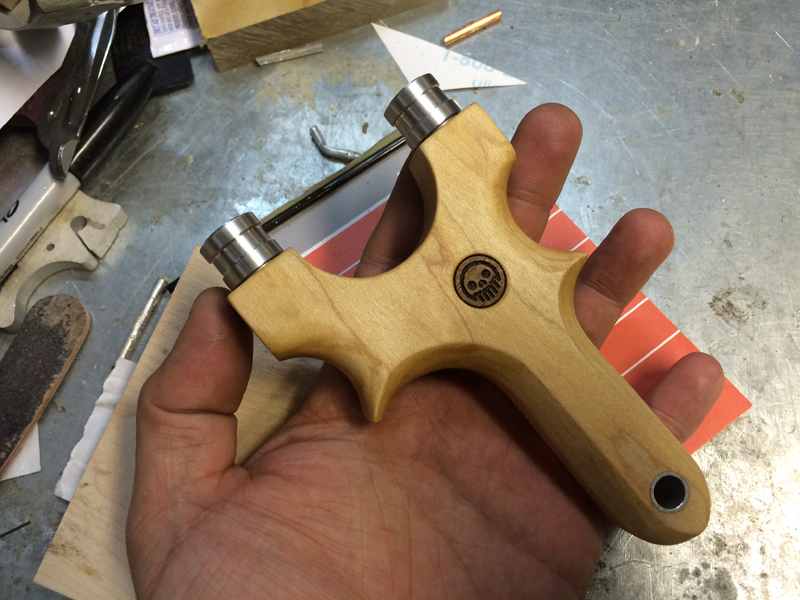
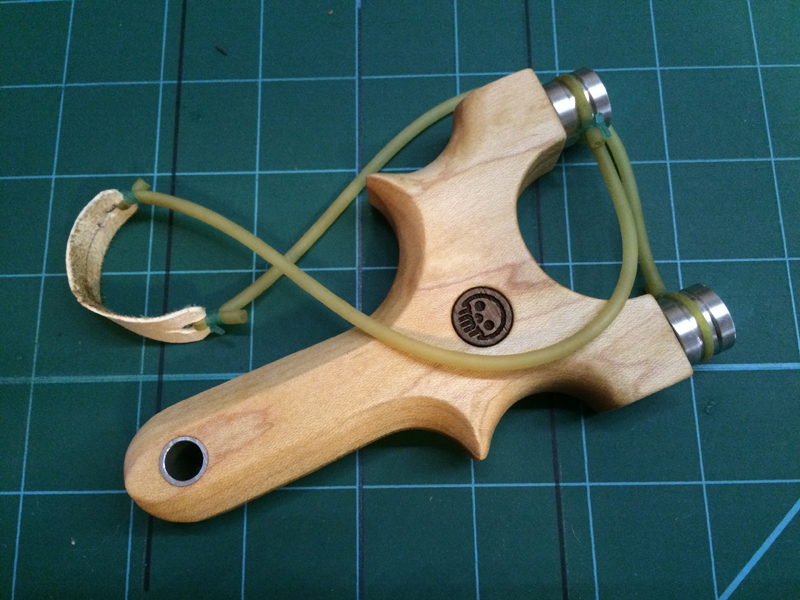
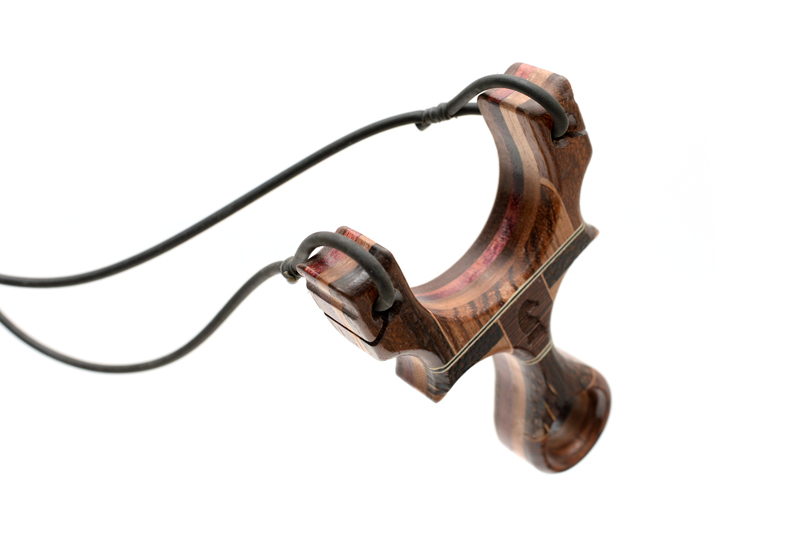
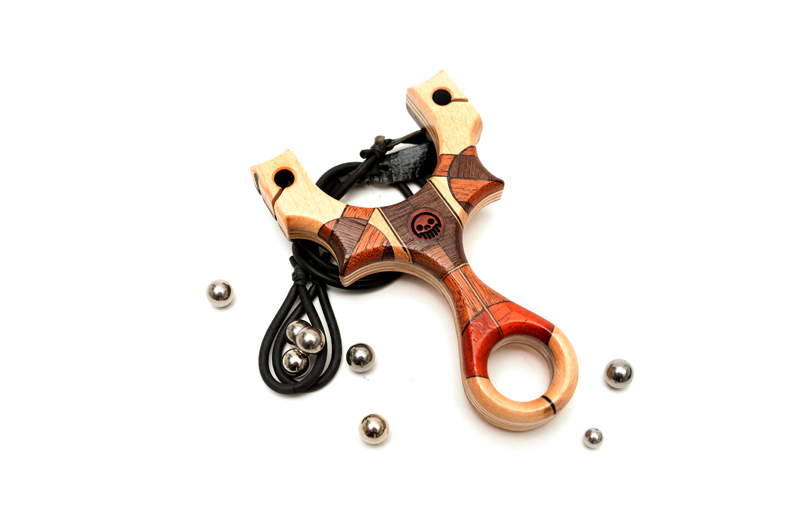
And we are done! Time tom make up some bands.
A band set with some very small loops made up…
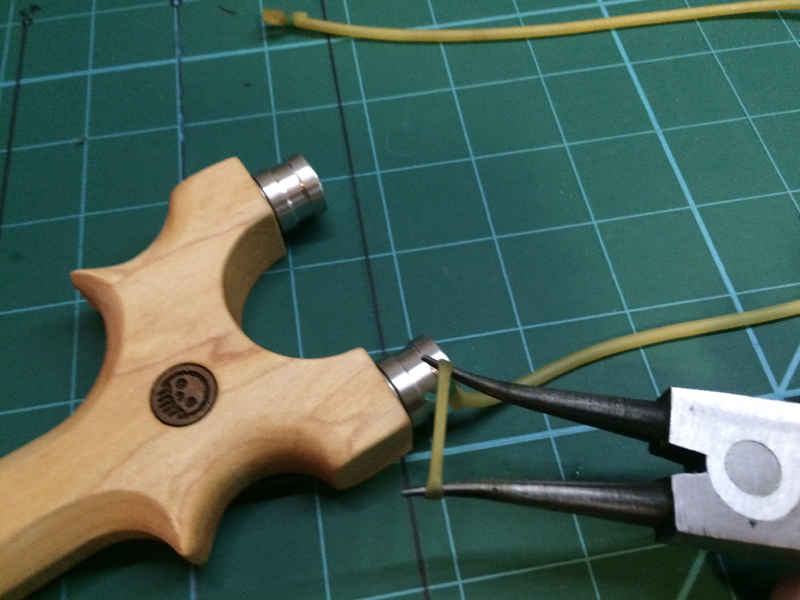
A pair of ring expander pliers help stretch the loop out so they could be fixed over the tip.
And we are done!
I am happy to report that the rotating tips not only look super cool, but they also work REALY well.
Some quick shooting of the Capuchin RT with the same aluminum rotating tips.
While showcasing at the Toronto Mini Maker Faire, we got asked time and time again “how accurate are these slingshots?”. I always answered, it’s as accurate as you want it to be, meaning you have to put in the time in practicing and training. The best slingshot in the world is the one you have in your hand. Proper pouch grip, pouch draw, pouch position and pouch release are among the most difficult thing to master, but there are still things you can make to help you shoot more accurately.
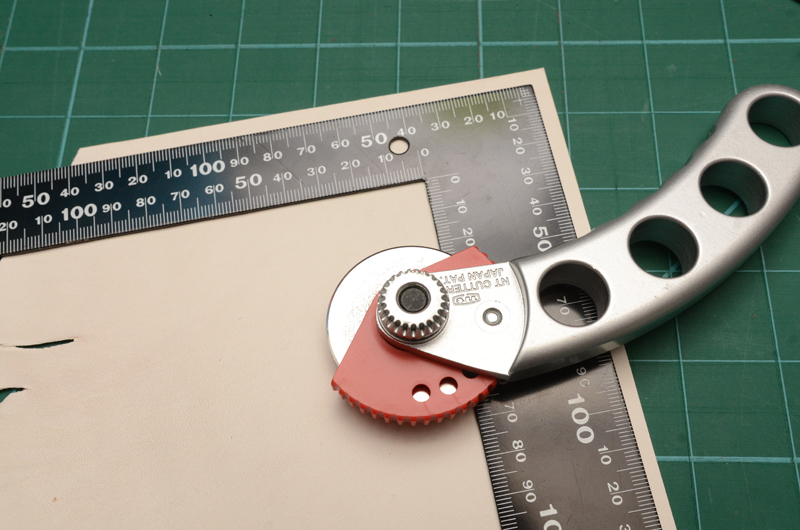
This Metro Made is about pouch making. Not the kind that you put stuff in, but the kind you tie rubber to and whip through the forks of a slingshot loaded with your ammo of choice.
Let’s start off with the tools and materials. You will need:
Sacrificial surface to punch into (mine is a 4×6 piece of UMWPE)
Self healing mat
Steel ruler
Thin line pen (ball point is best)
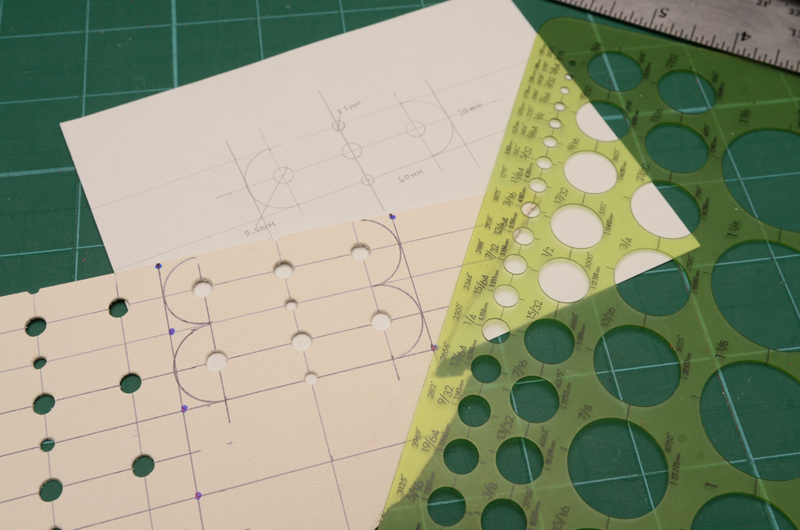
A large and a small hole punch (I use a 5.5mm and a 3.5mm)
Once we’ve gathered all the materials and tools, it’s time to design a pouch. There are a few factors to consider when designing a pouch:
What kind of rubber is going to be tied to it?
What ammo is going to be used?
How big are your fingers?
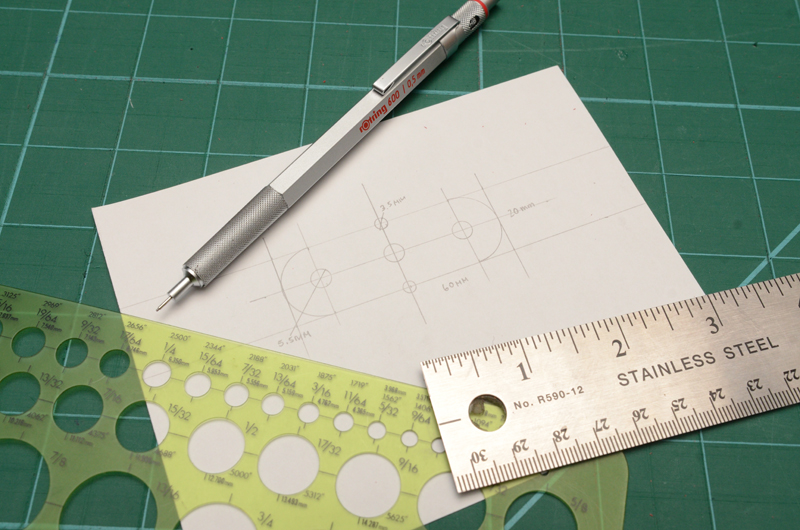
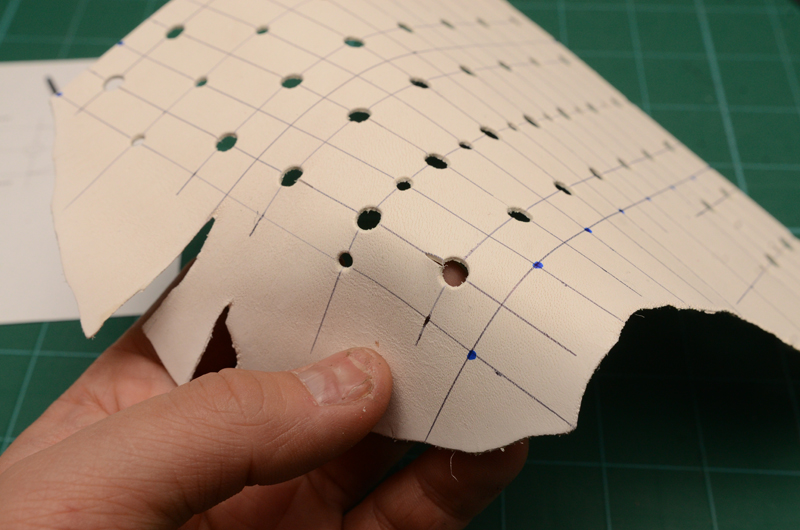
I’ve chosen 3/8″ steel balls as my ammo, and to shoot the heavy 3/8″ ammo, you need to use a medium amount of rubber which means there will be a lot of pressure around the tie hole. The ammo needs to sit inside a folded pouch nicely, not to spill over the sides but also not too much leather since the more weight there is in the pouch, the slower the shot. As mentioned, there will be at least one layer of medium weight rubber attached to these pouches, so the area surrounding the pouch tie hole needs to be beefy enough not to blow out. Also, the thickness of the rubber needs to be taken into consideration.
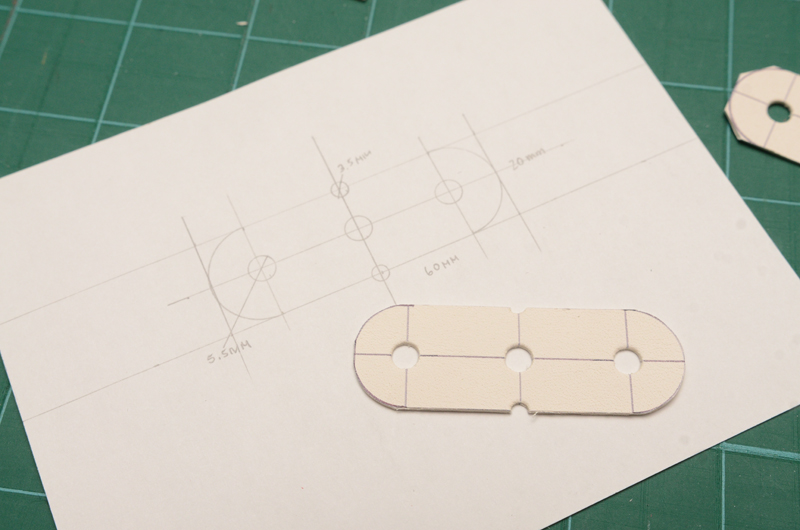
This all translates into the design on paper. The length is 60mm, which when folded in half nests the 3/8″ steel ball nicely and my fingers would be just touching the rubber ties. The width is 20mm which is a balance between cradling the ammo and allowing for a beefy rubber tie hole. To make this simple, the ammo centring hole is the same as the pouch tie holes on either end. The two smaller holes will be made with the smaller punch which aids in the memory of the leather to be folded in the right way.
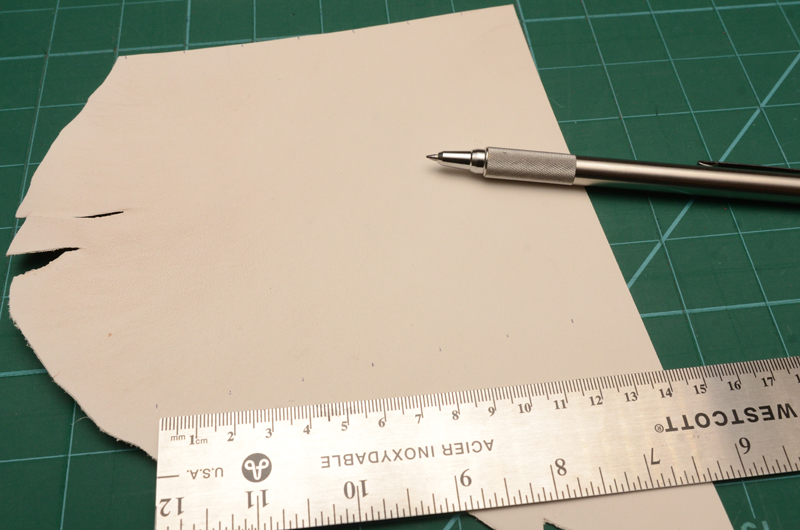
Now that the design is setup, it’s time to select a leather. It has to be a balance of good stiffness, but also supple, not too thick, not too thin and has to be low stretch. I have selected a nice white kangaroo section, which is known for it’s low stretch, high strength properties. Single sides, chrome finish cow hide is also good. Leather finished for upholstery is also good, you want something in between 1.5-2.5mm in thickness. Here I’ve used a right angle square to give myself two edges to work from.
Leather has grain and depending on where it came off the animal, will stretch more or less. Belly cuts stretch more while leather from the back will stretch much less. What you want to do is test your leather and pull it slightly to find you which direction you want your pouches to be laid out on. The direction with the less stretch should be the LONG side of the pouch, this will make the pouch last longer and deform less as it is used.
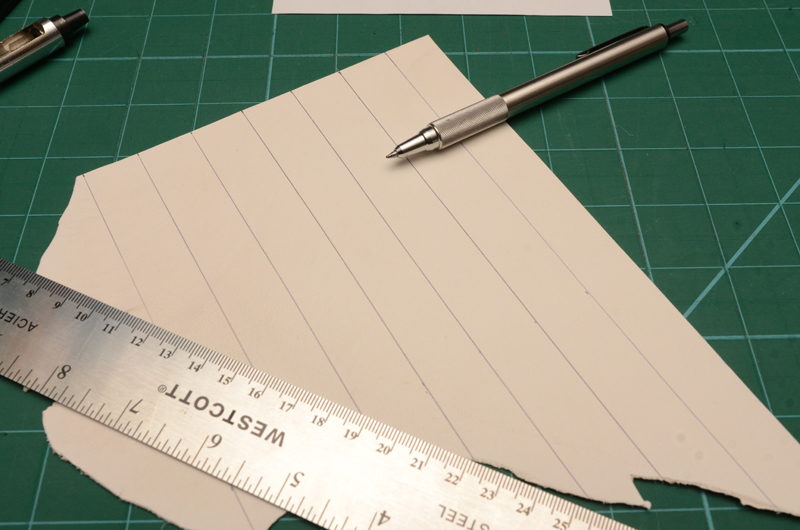
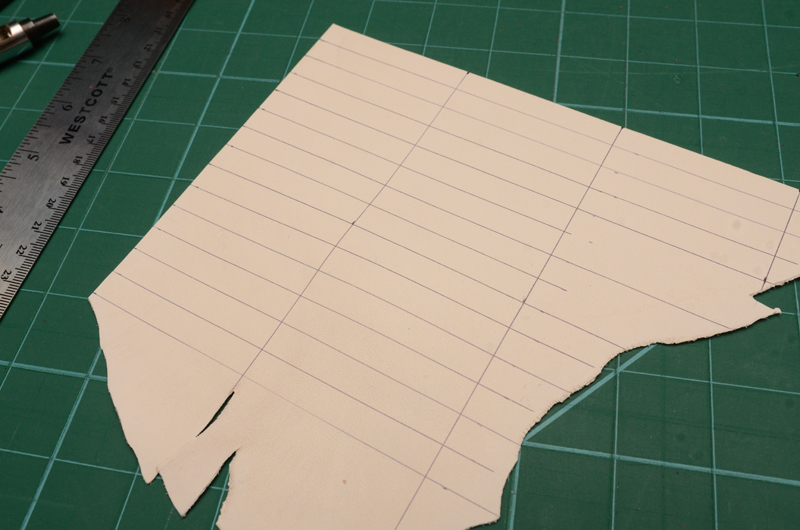
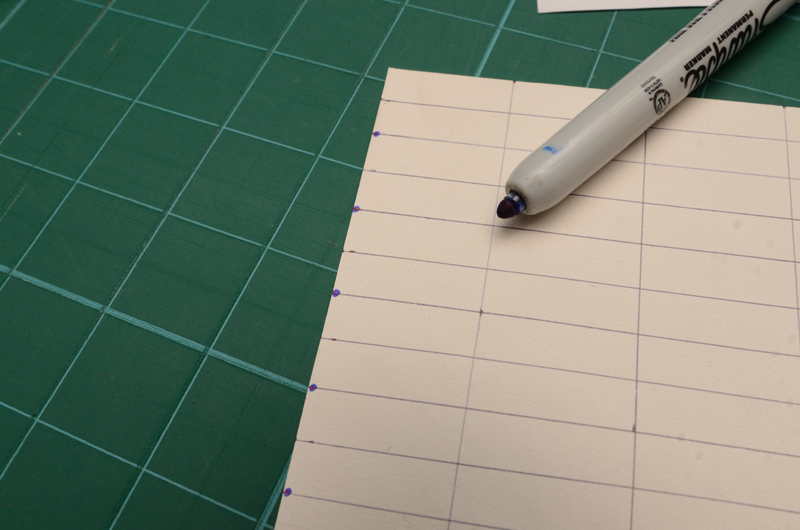
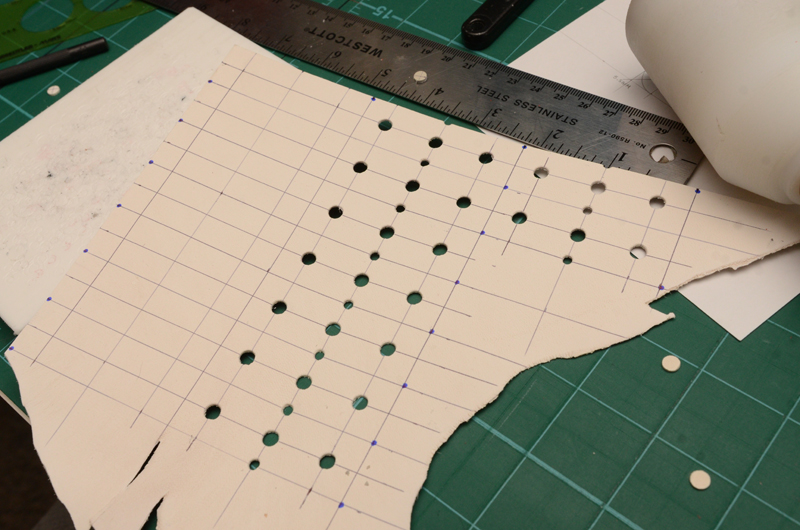
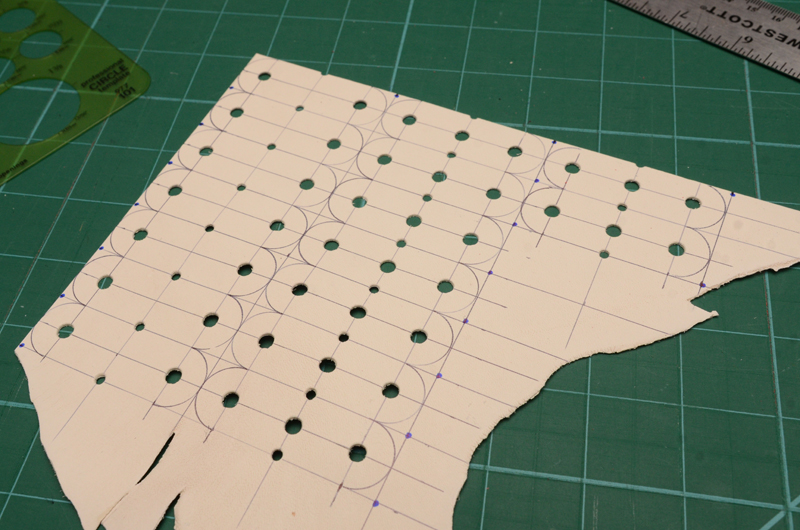
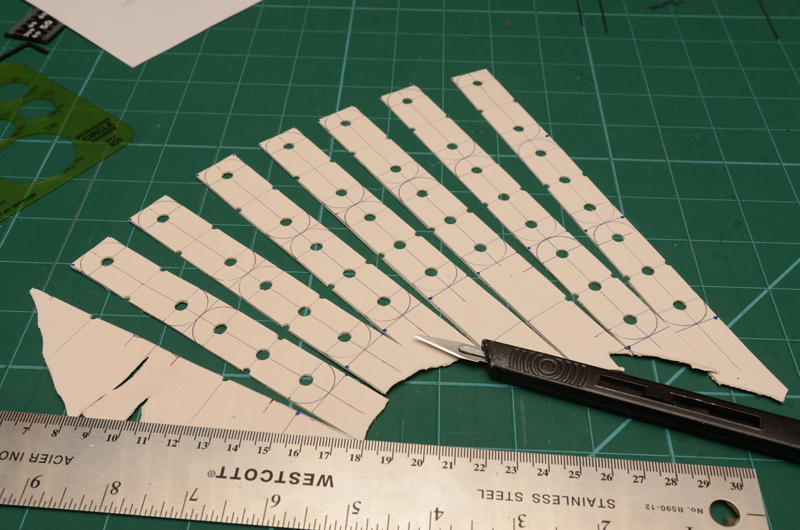
I’ve already tested this leather and started to mark out the first lines, the ticks are spaced 20mm apart. This will form the height of the pouch.
Taking great care to line up the ticks, lightly draw in the lines so they are accurate and straight.
Now to measure out 60mm increments, these will divide the leather into rectangles.
Again, carefully scribe in the lines.
Now to divide the 20mm into 10mm/10mm. This is how the center hole and the pouch ties holes will be located. Sample process, measure out, carefully trace the line in.
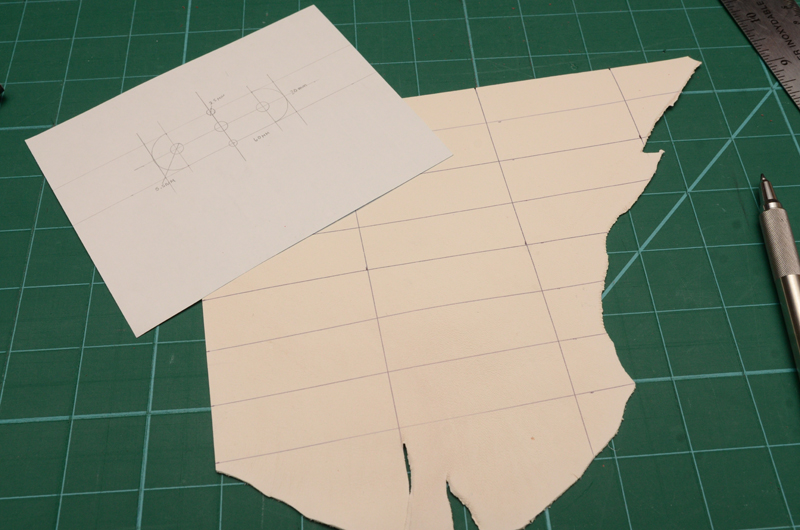
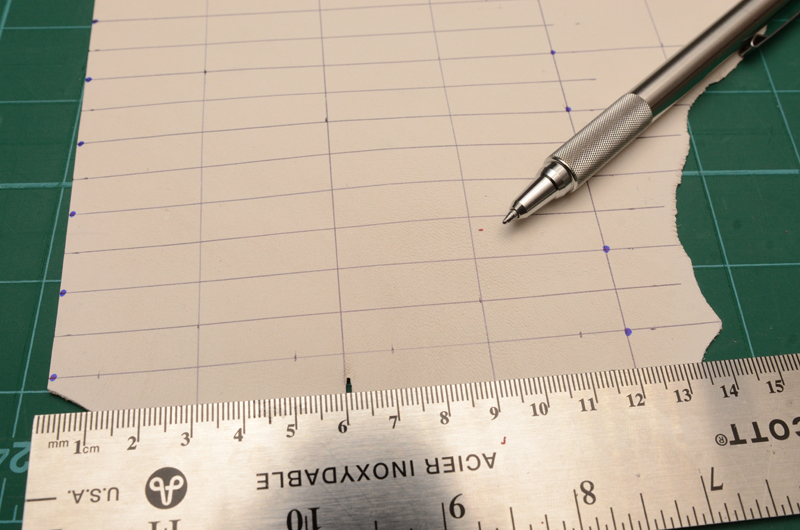
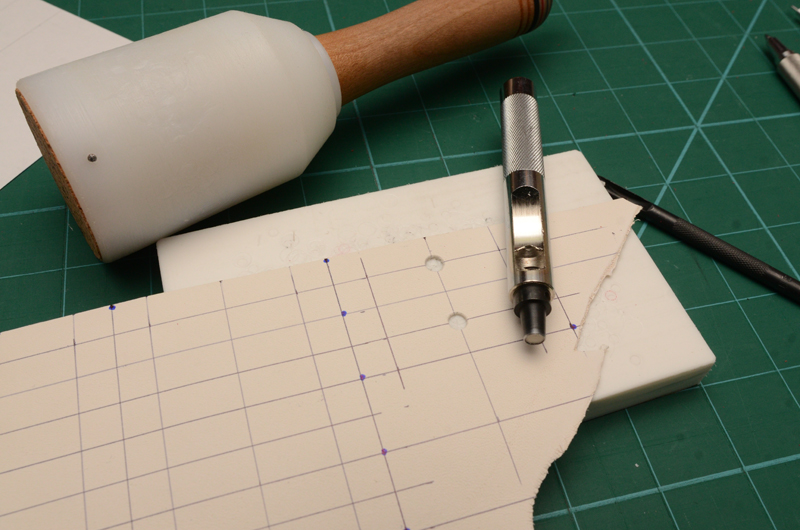
At this point, it’s going to get messier as more lines are put down. So use a marker to put dots on the lines you will use to cut. They differ from the registration/location lines.
Marking the vertical cut lines.
On the initial drawing, the center of the pouch tie holes are 10mm from the edge, so mark, align and draw in those center lines. The same goes for the center hole, it is 30mm from either end.
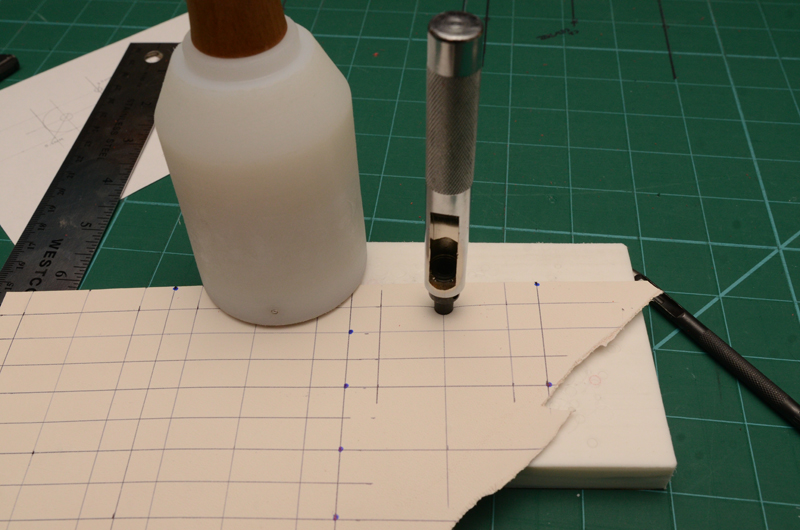
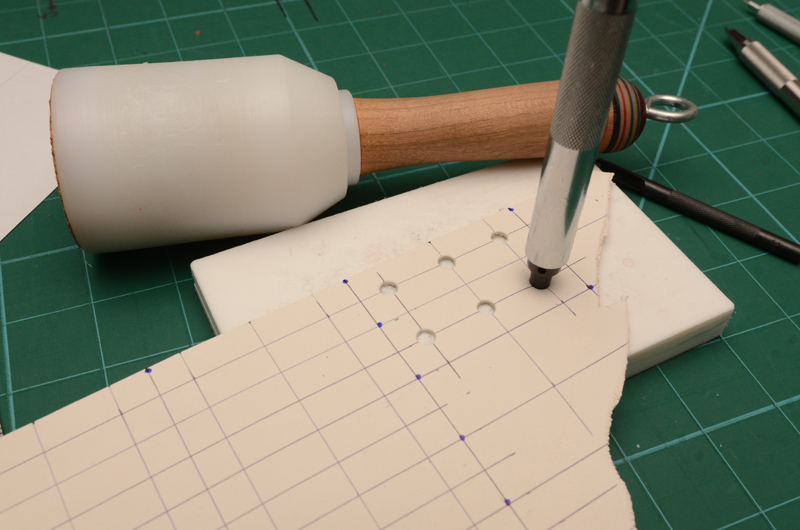
Now comes the hardest part, punching the holes. Using the lines like cross hairs, line up the punch and wack away. This is the center hole.
The center holes punched on the two.
Now punch the outside tie holes.
After punching out the outside tie holes, take the small punch and line it up in the other cross hair that was made. This will form the little divot to aid pouch folding in half.
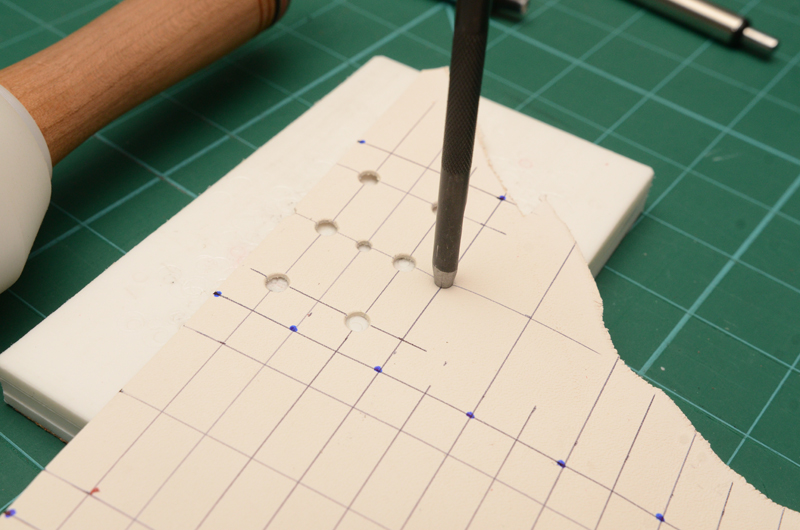
For the outside edges, just line up half the punch and wack. This will cut a semi circle out.
Repeat until the whole thing is punched out.
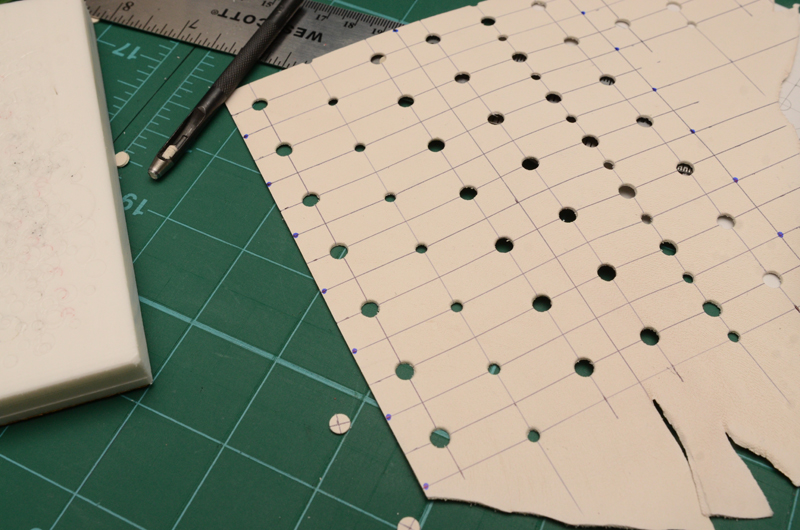
I chose not to put center holes in this line, but I still put the side divots in.
The hole sheet done now.
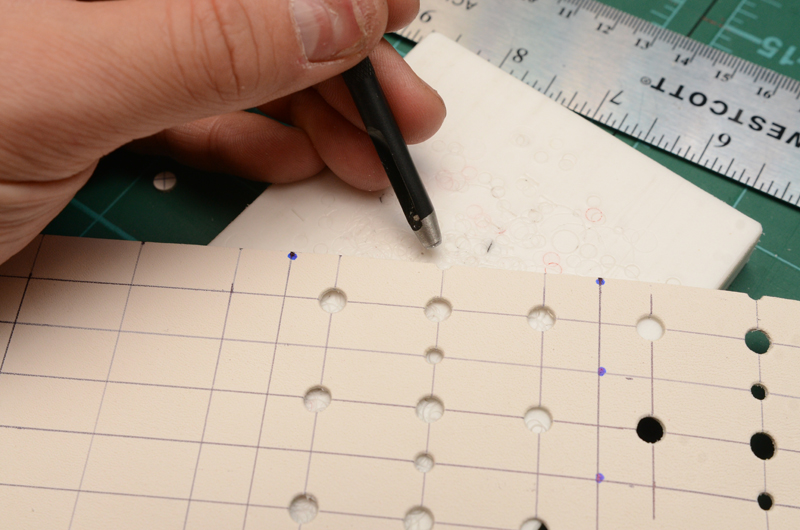
This is an optional step, using the scalpel/Xacto blade, cut into a slot on the inside line of the pouch tie hole. This will make pulling the folded bands or tubes easier.
As seen on the hole closest to the camera.
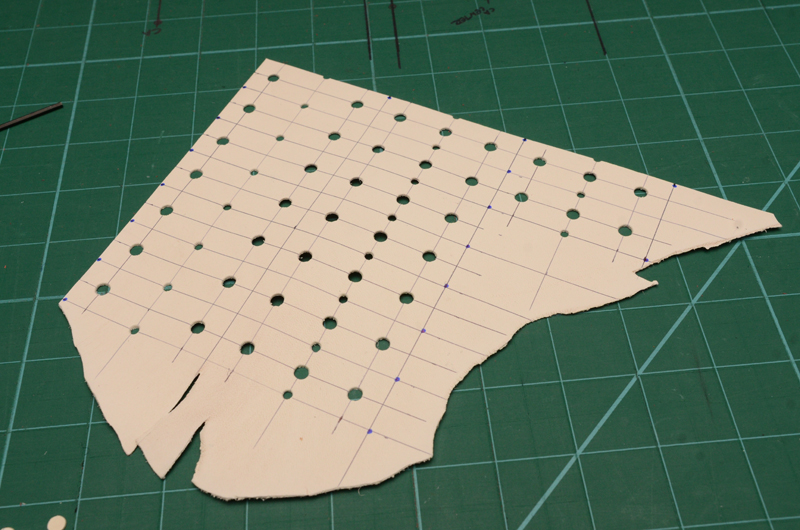
This step is also optional, but makes the pouch that much more clean in the end. Use a drafting circle template to mark a half circle on the outside of the pouch, like the original drawing.
Repeat until all of the circles are drawn in.
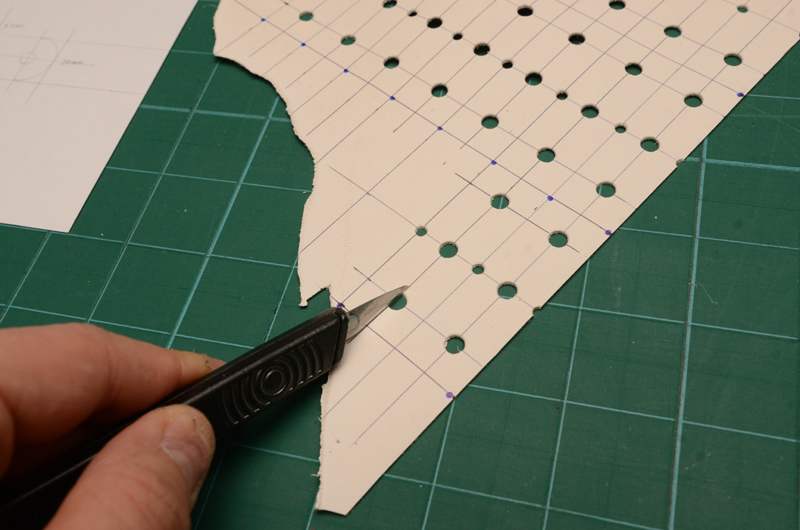
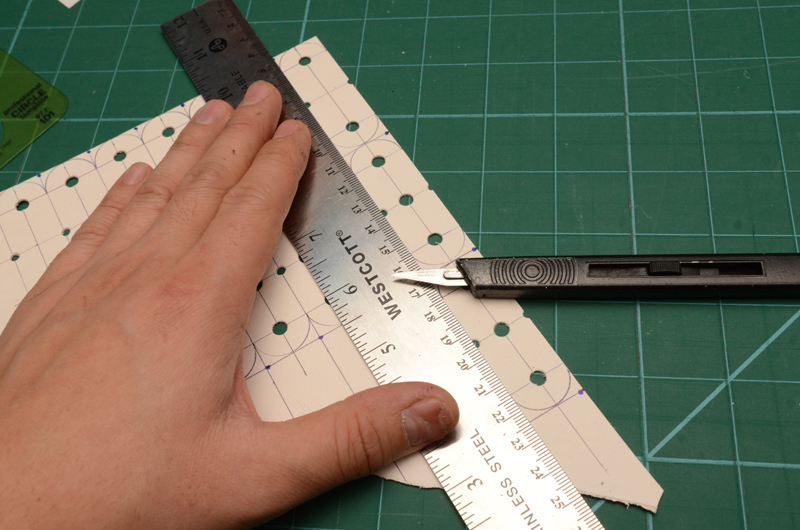
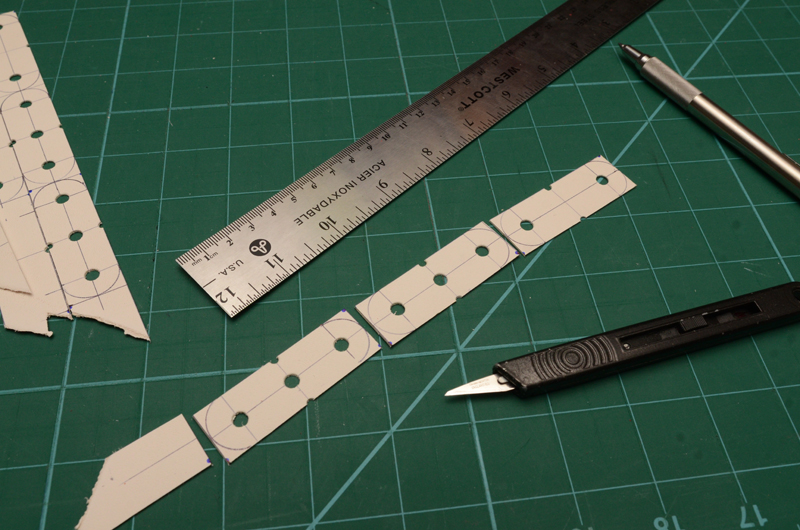
How, using the knife, carefully cut the pouches in to length wise strips. This allows for a more accurate cut.
After slicing them into strips, each pouch can be separated into sections. This can be done with a knife or scissors.
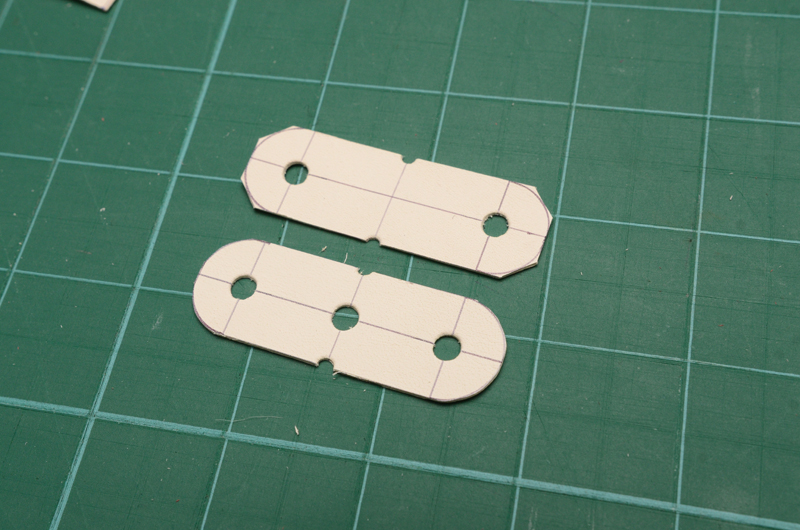
After all that careful planning, the left over scrap and the semi finished pouches. At this pouches are serviceable, but it’s nice to have them finished on the edges.
There are two different ways to do this…I am sure there are more but these are the simplest ways. The first way is to cut using sharp scissors, the semi circle that we drew on the pouch.
The 2nd way is even simpler, just cut off the corners at 45 degrees.
Comparing the drawing to the real thing.
So that’s the short and tall of how to make a slingshot pouch. This obviously isn’t the ONLY way to do it, but I encourage you to try out different shapes, lengths, thicknesses etc until you find what works for you. I still prefer the precision of a laser cut pouch, but not everyone can get access to such high tech equipment.
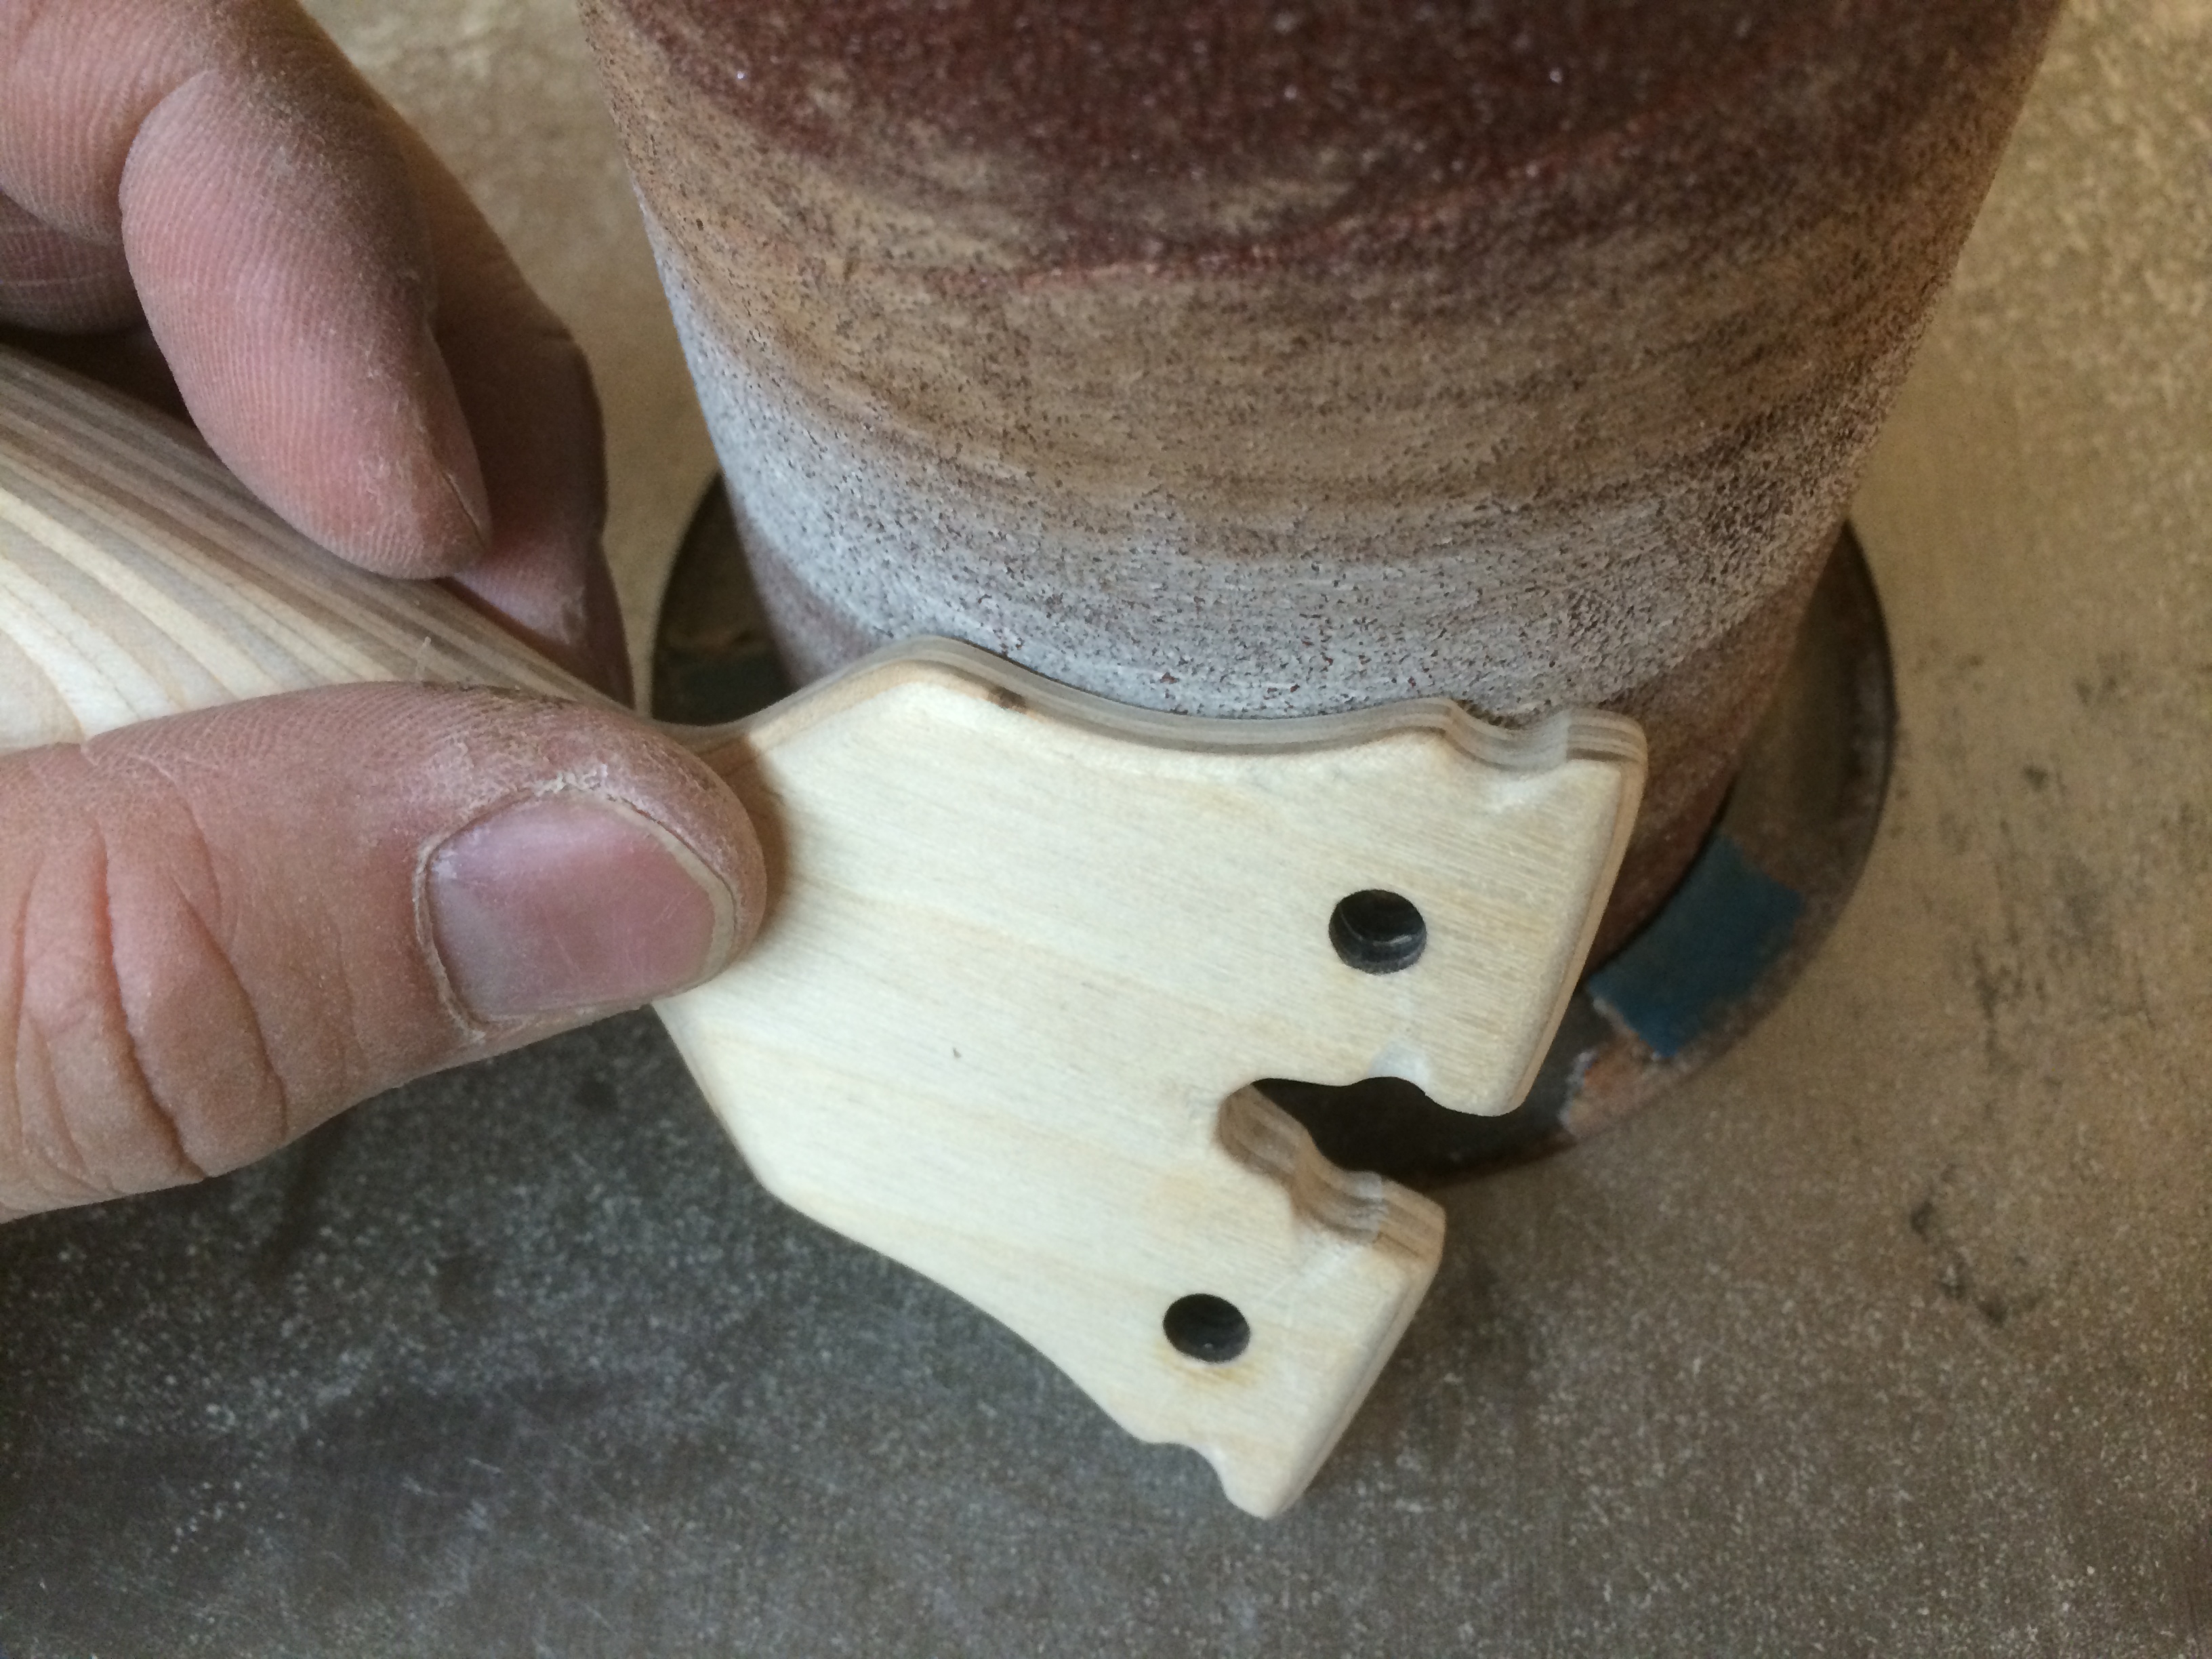
Been a little while since I’ve posted a Metro Made, so there is no reason why NOT to post one. Fresh from the laser cutter to your workshop, this is a tutorial on how to assemble and finish your Wasply PFS Maker Kit. Don’t have one? You can get yours here: Wasply PFS Maker Kit
In the kit, you’ll have two cores, and two sets of palm swells.
First things first, glue up the core, and two palm swells.
When they are set up, I used a belt sander to start to shape the palm swells. This make life a lot easier later if you take off the bulk of the material first.
Once the swells are partial shaped, time to glue up the swells on the body core.
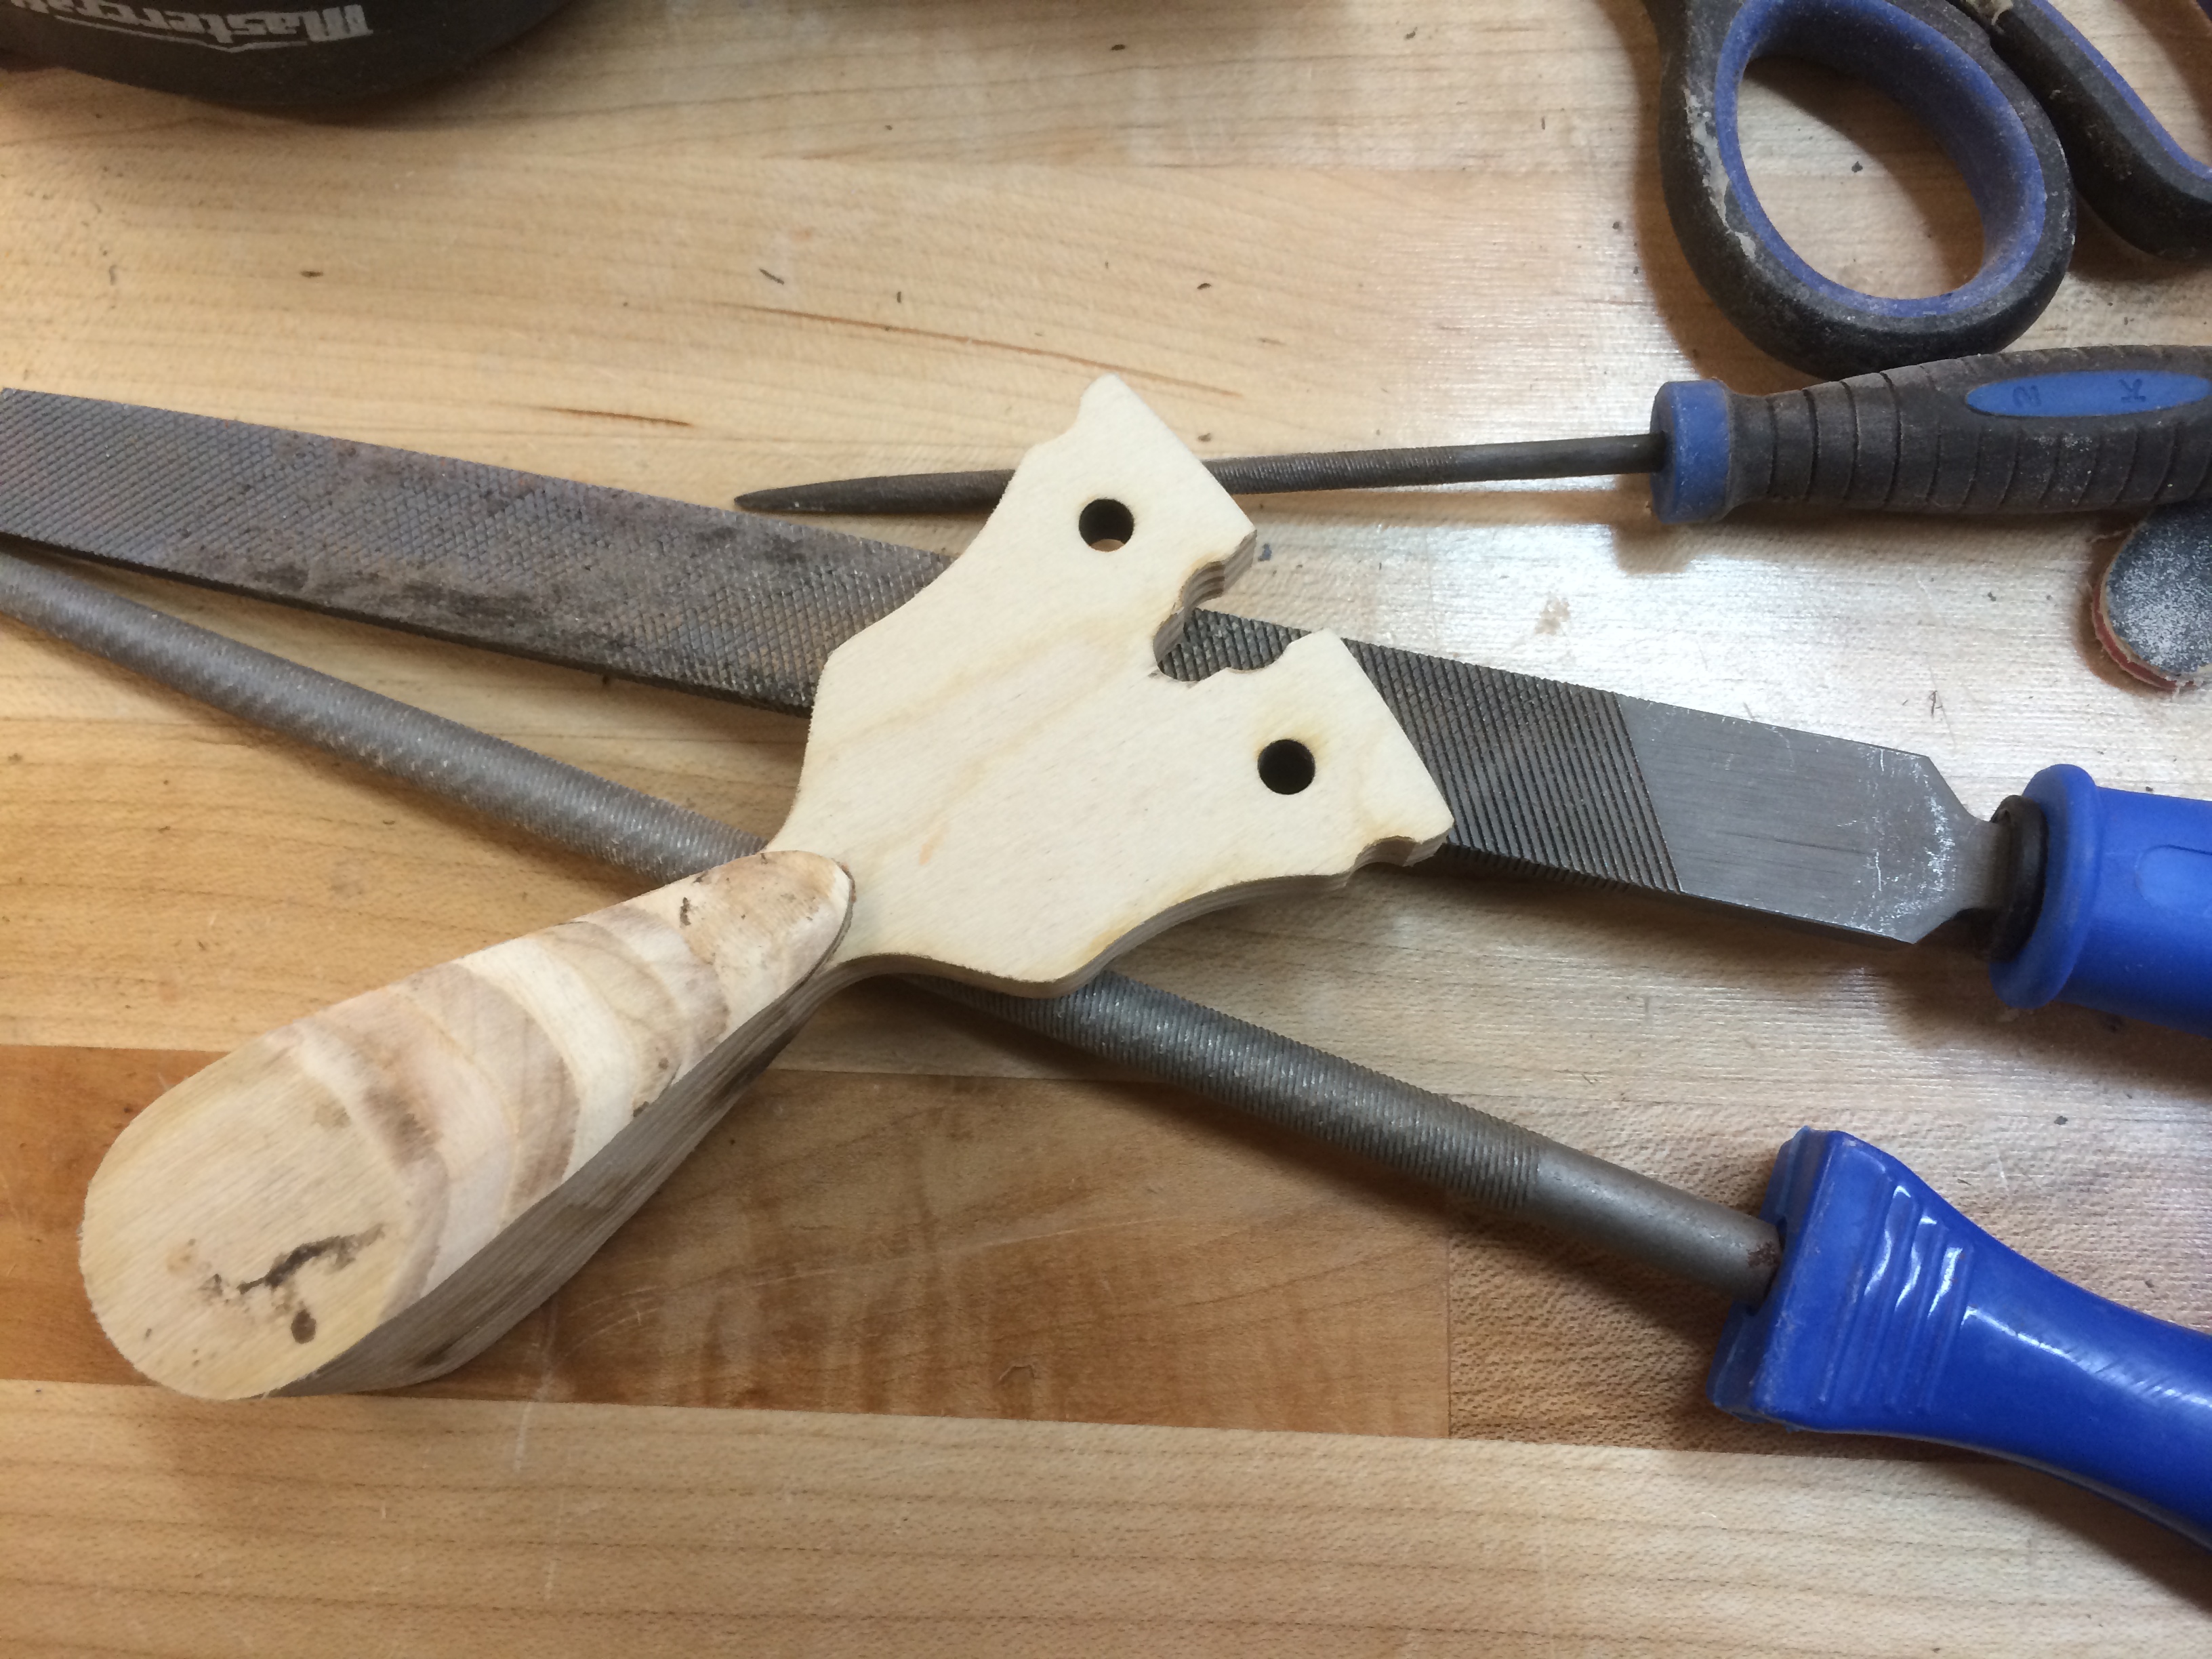
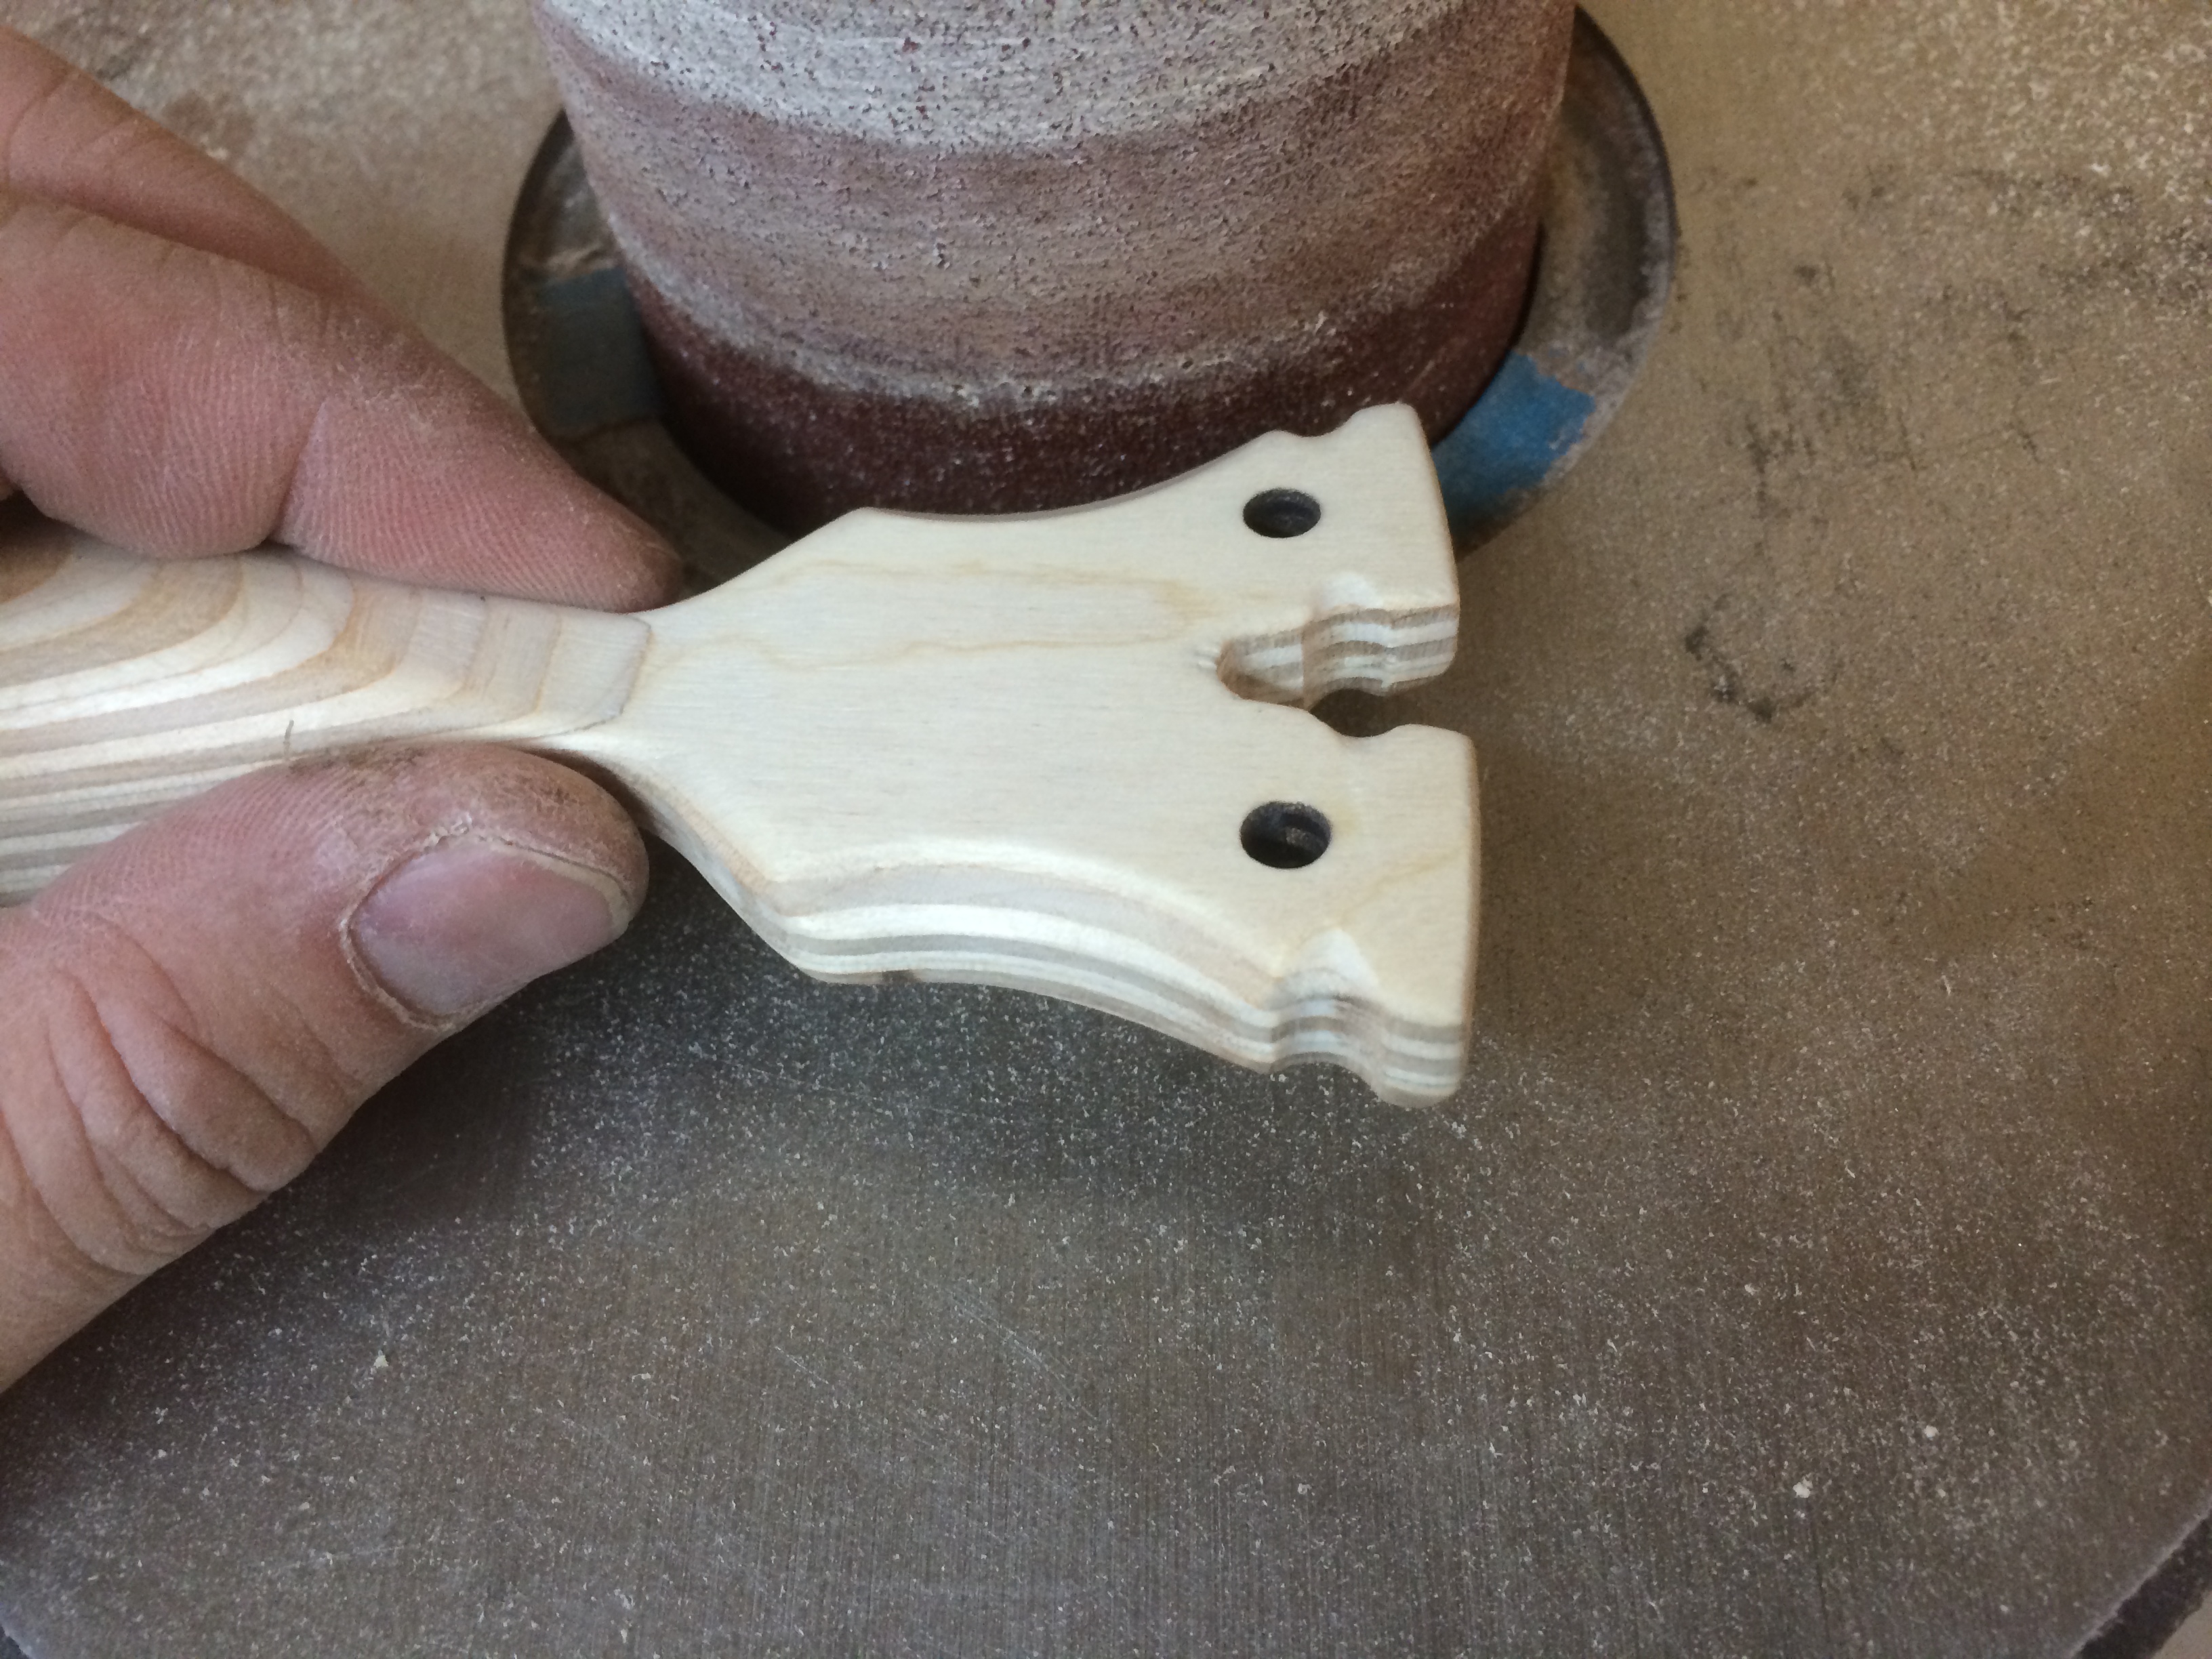
I used a spindle sander to remove the laser burned wood but this can be done with files and sandpaper.
A round file expands and refines the band grooves.
A few more swipes with a first cut file and the inside of the forks is cleaned up.
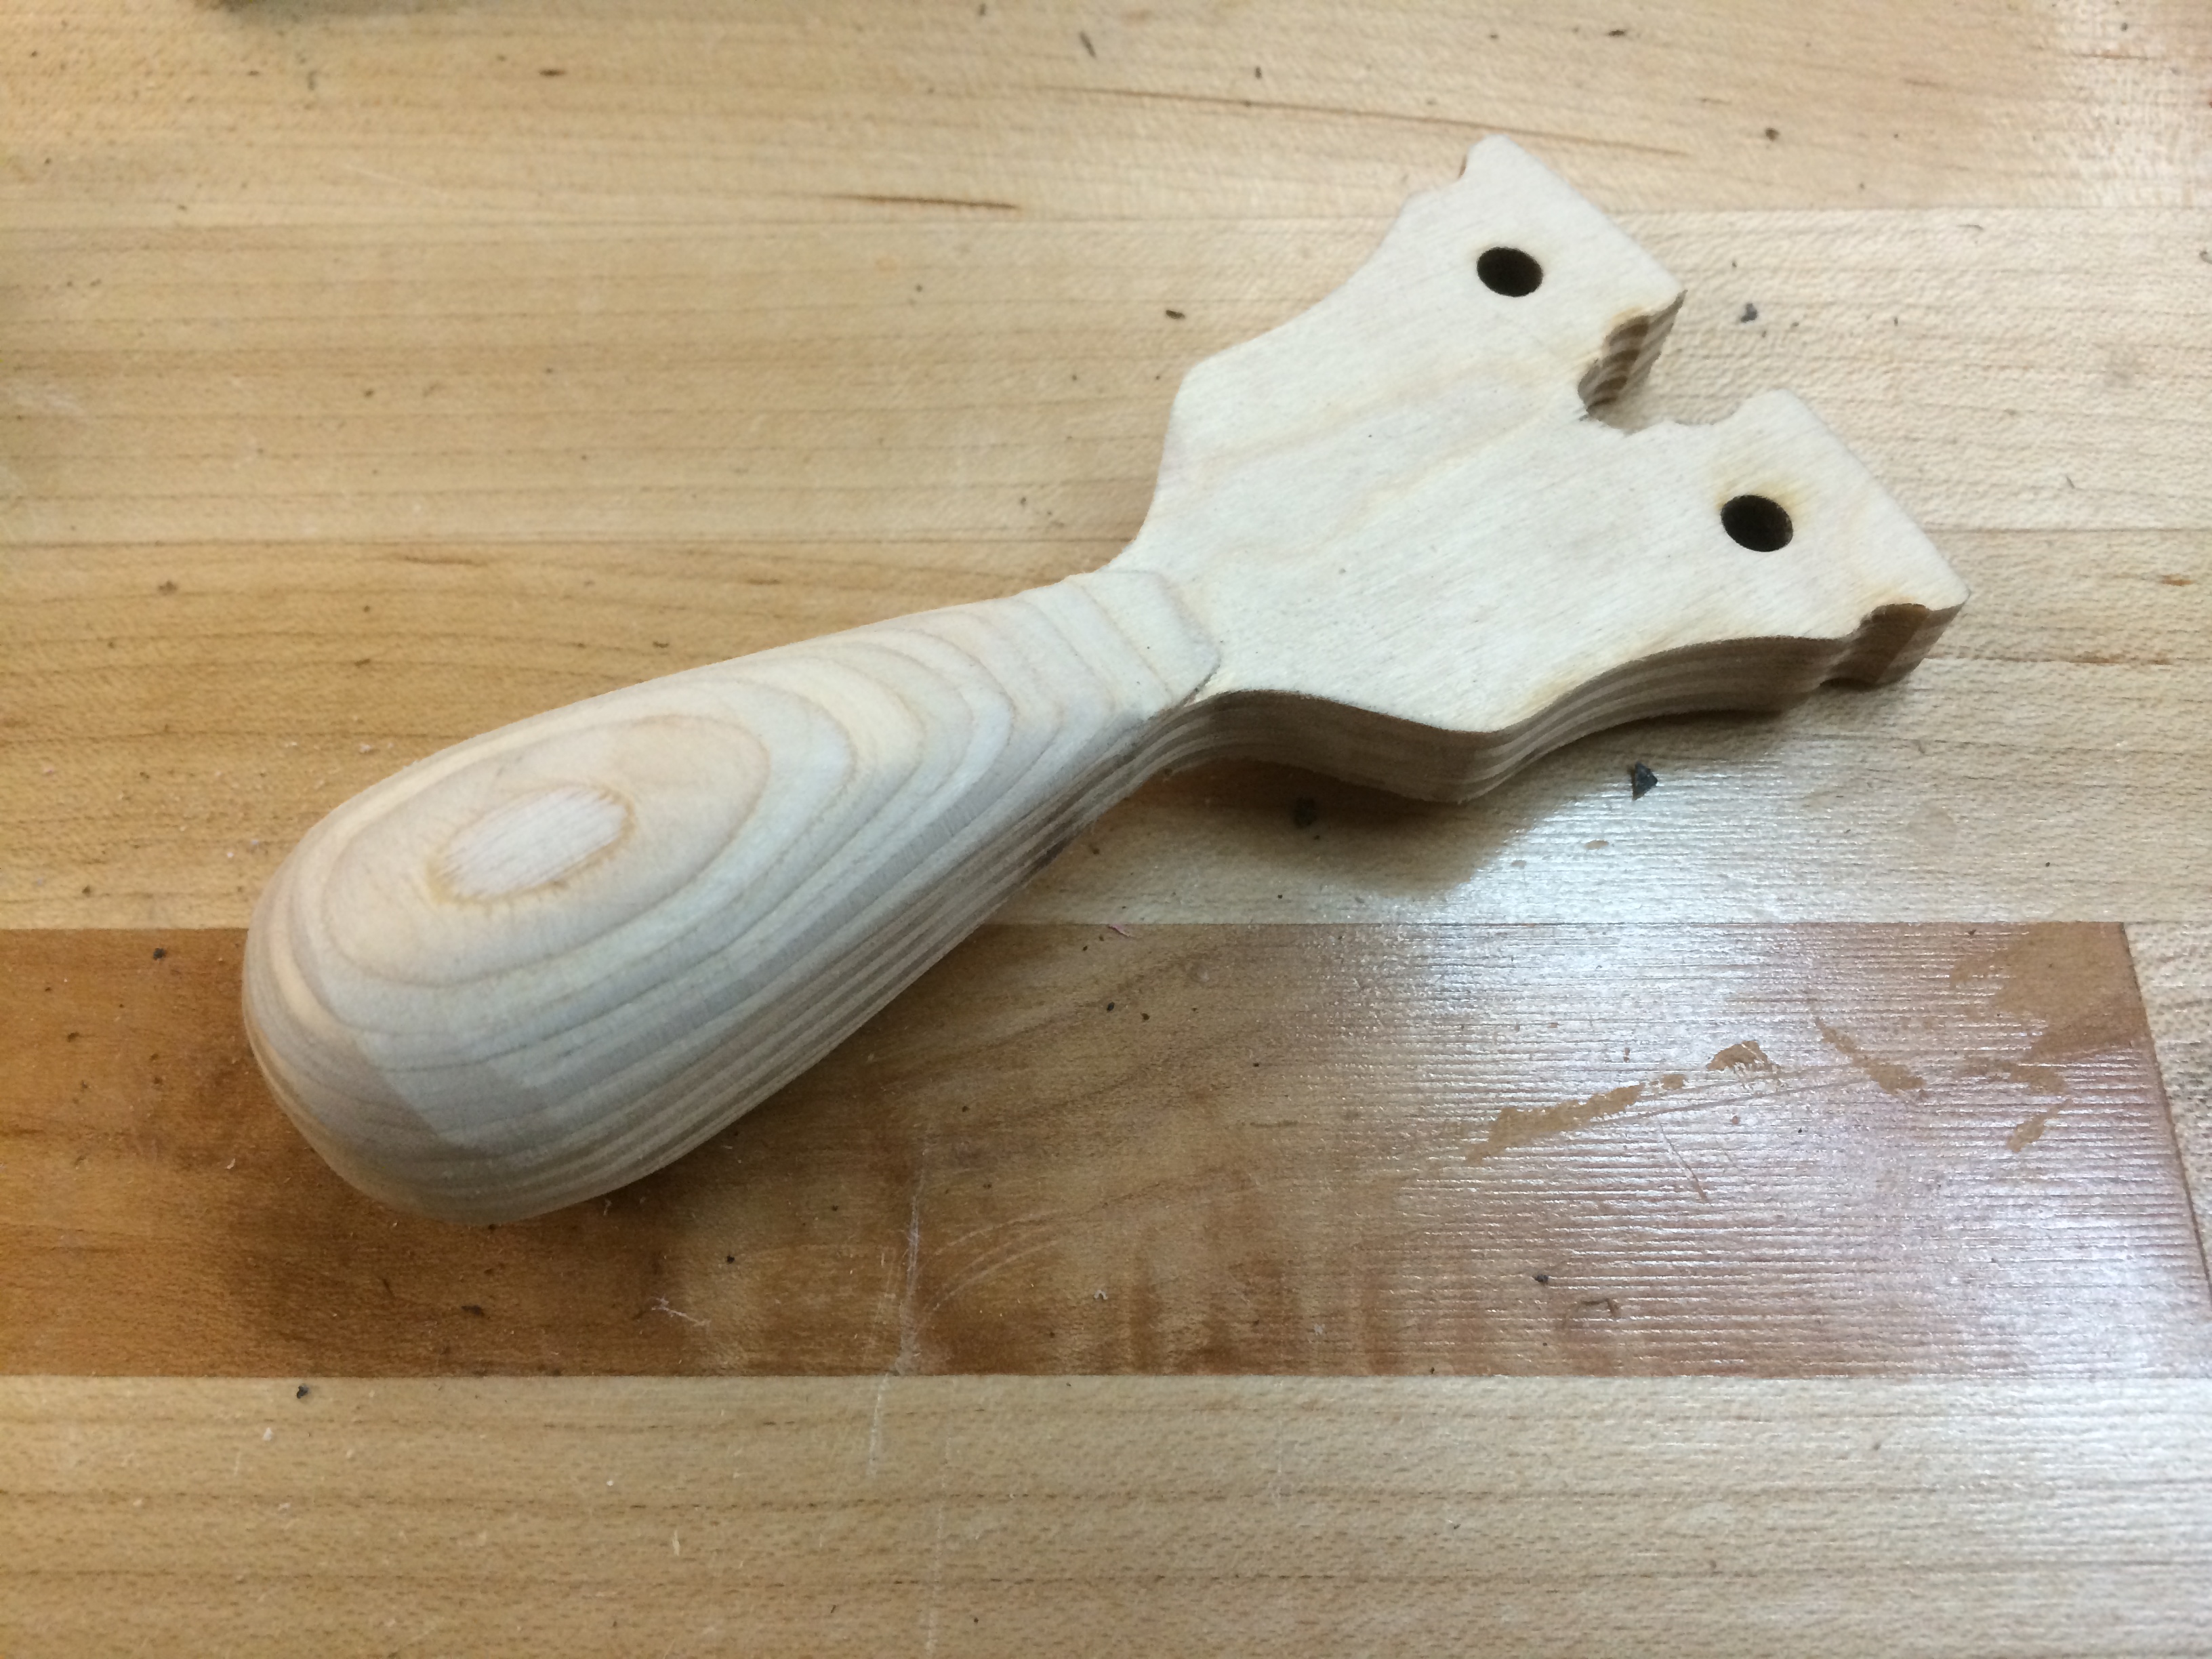
The hardest part of the build is shaping the palm swells so they are perfectly round. I used the belt sander again, rotating it like a drum stick. Rasps, files and sandpaper will do the same job.
Using some 100 grit nail files, the palm swell is blended into the core, making a seamless joint.
An optional machining step is to cut some scallops with a big 3″ drum into the finger grip area, but this can be done with a 1/2″ round file.
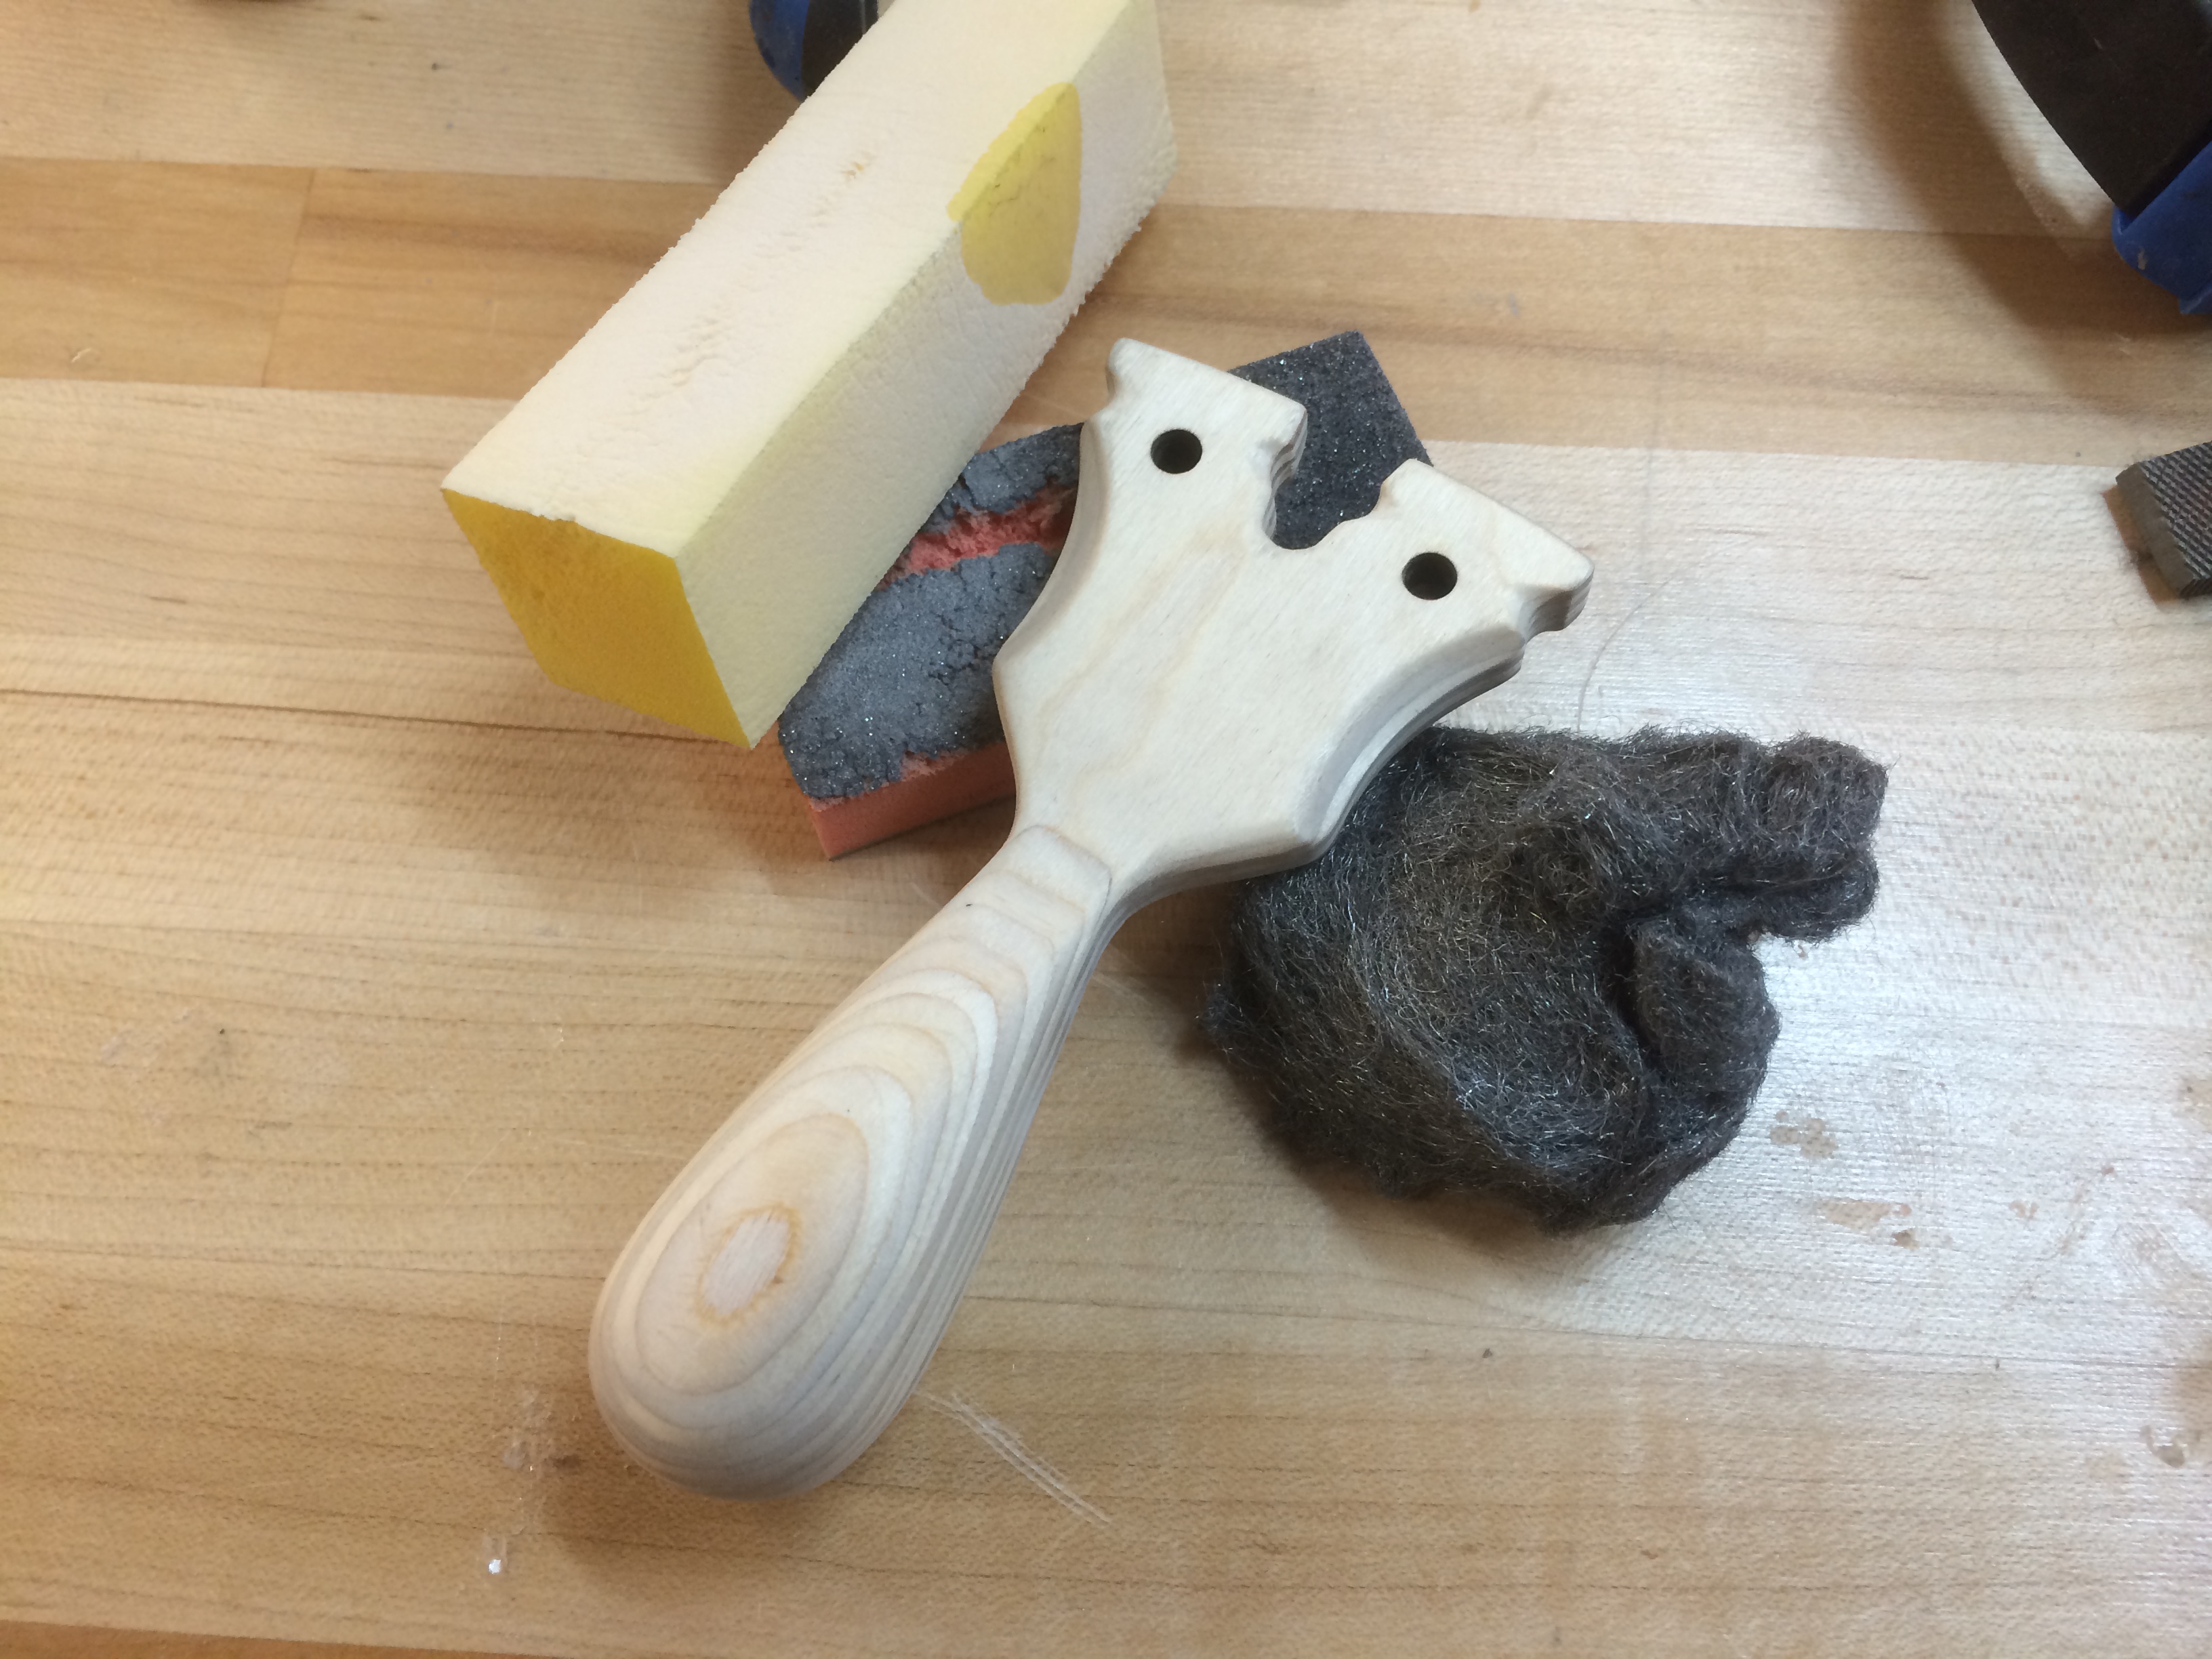
Now to finish it! A variety of 100 grit, 320 grit foam blocks and a final swipe with some steel wool to prep the surface for clear coat or oil.
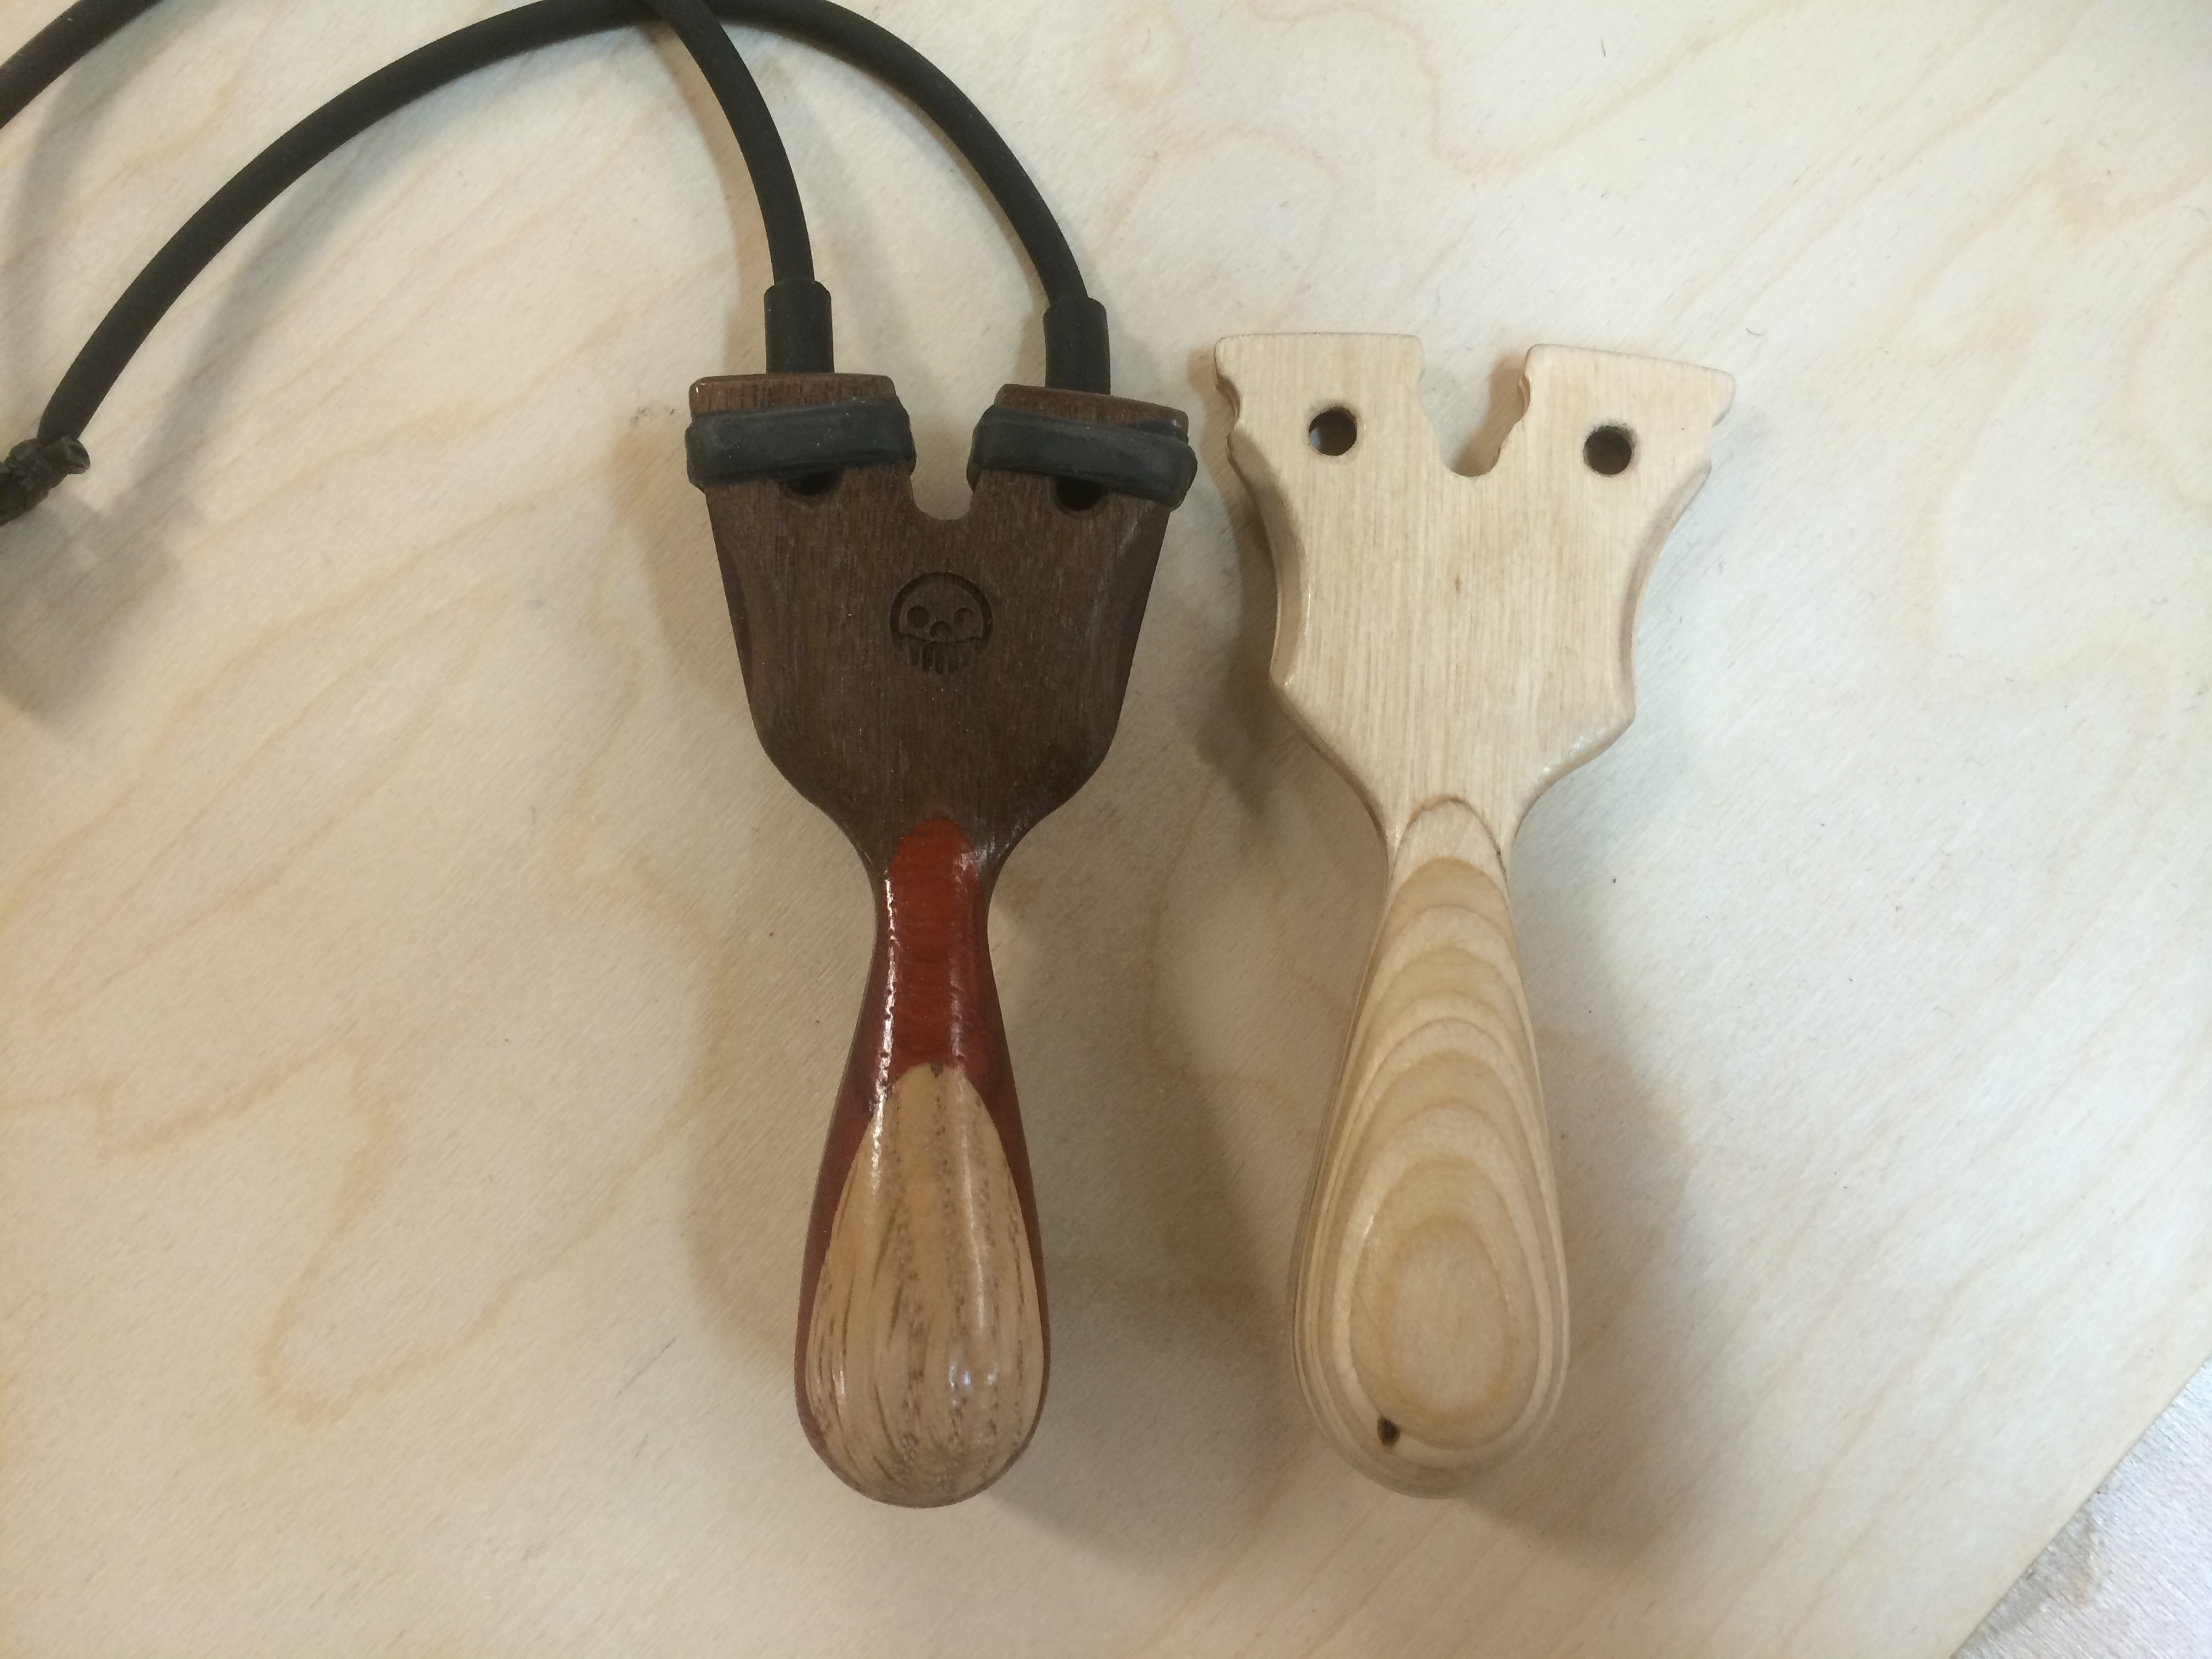
The one on the left is one designed by Magpie Slingshots and I replicated it to test out the scale. We worked in collaboration to come to the final design of the Wasply PFS.
After a couple of coats of clear and some light buffing with the wool to get it a more matte finish, the Wasply PFS is done!
Thanks for reading and in case you missed it, you can get your Wasply PFS Maker kit at our store.
Sometimes, a nice long, complicated project is all you need to really get over your creative slump. Carefully calculating how things go together, taking the time to properly do clamp things down and lovingly polishing your new creation, it’s all in the details.
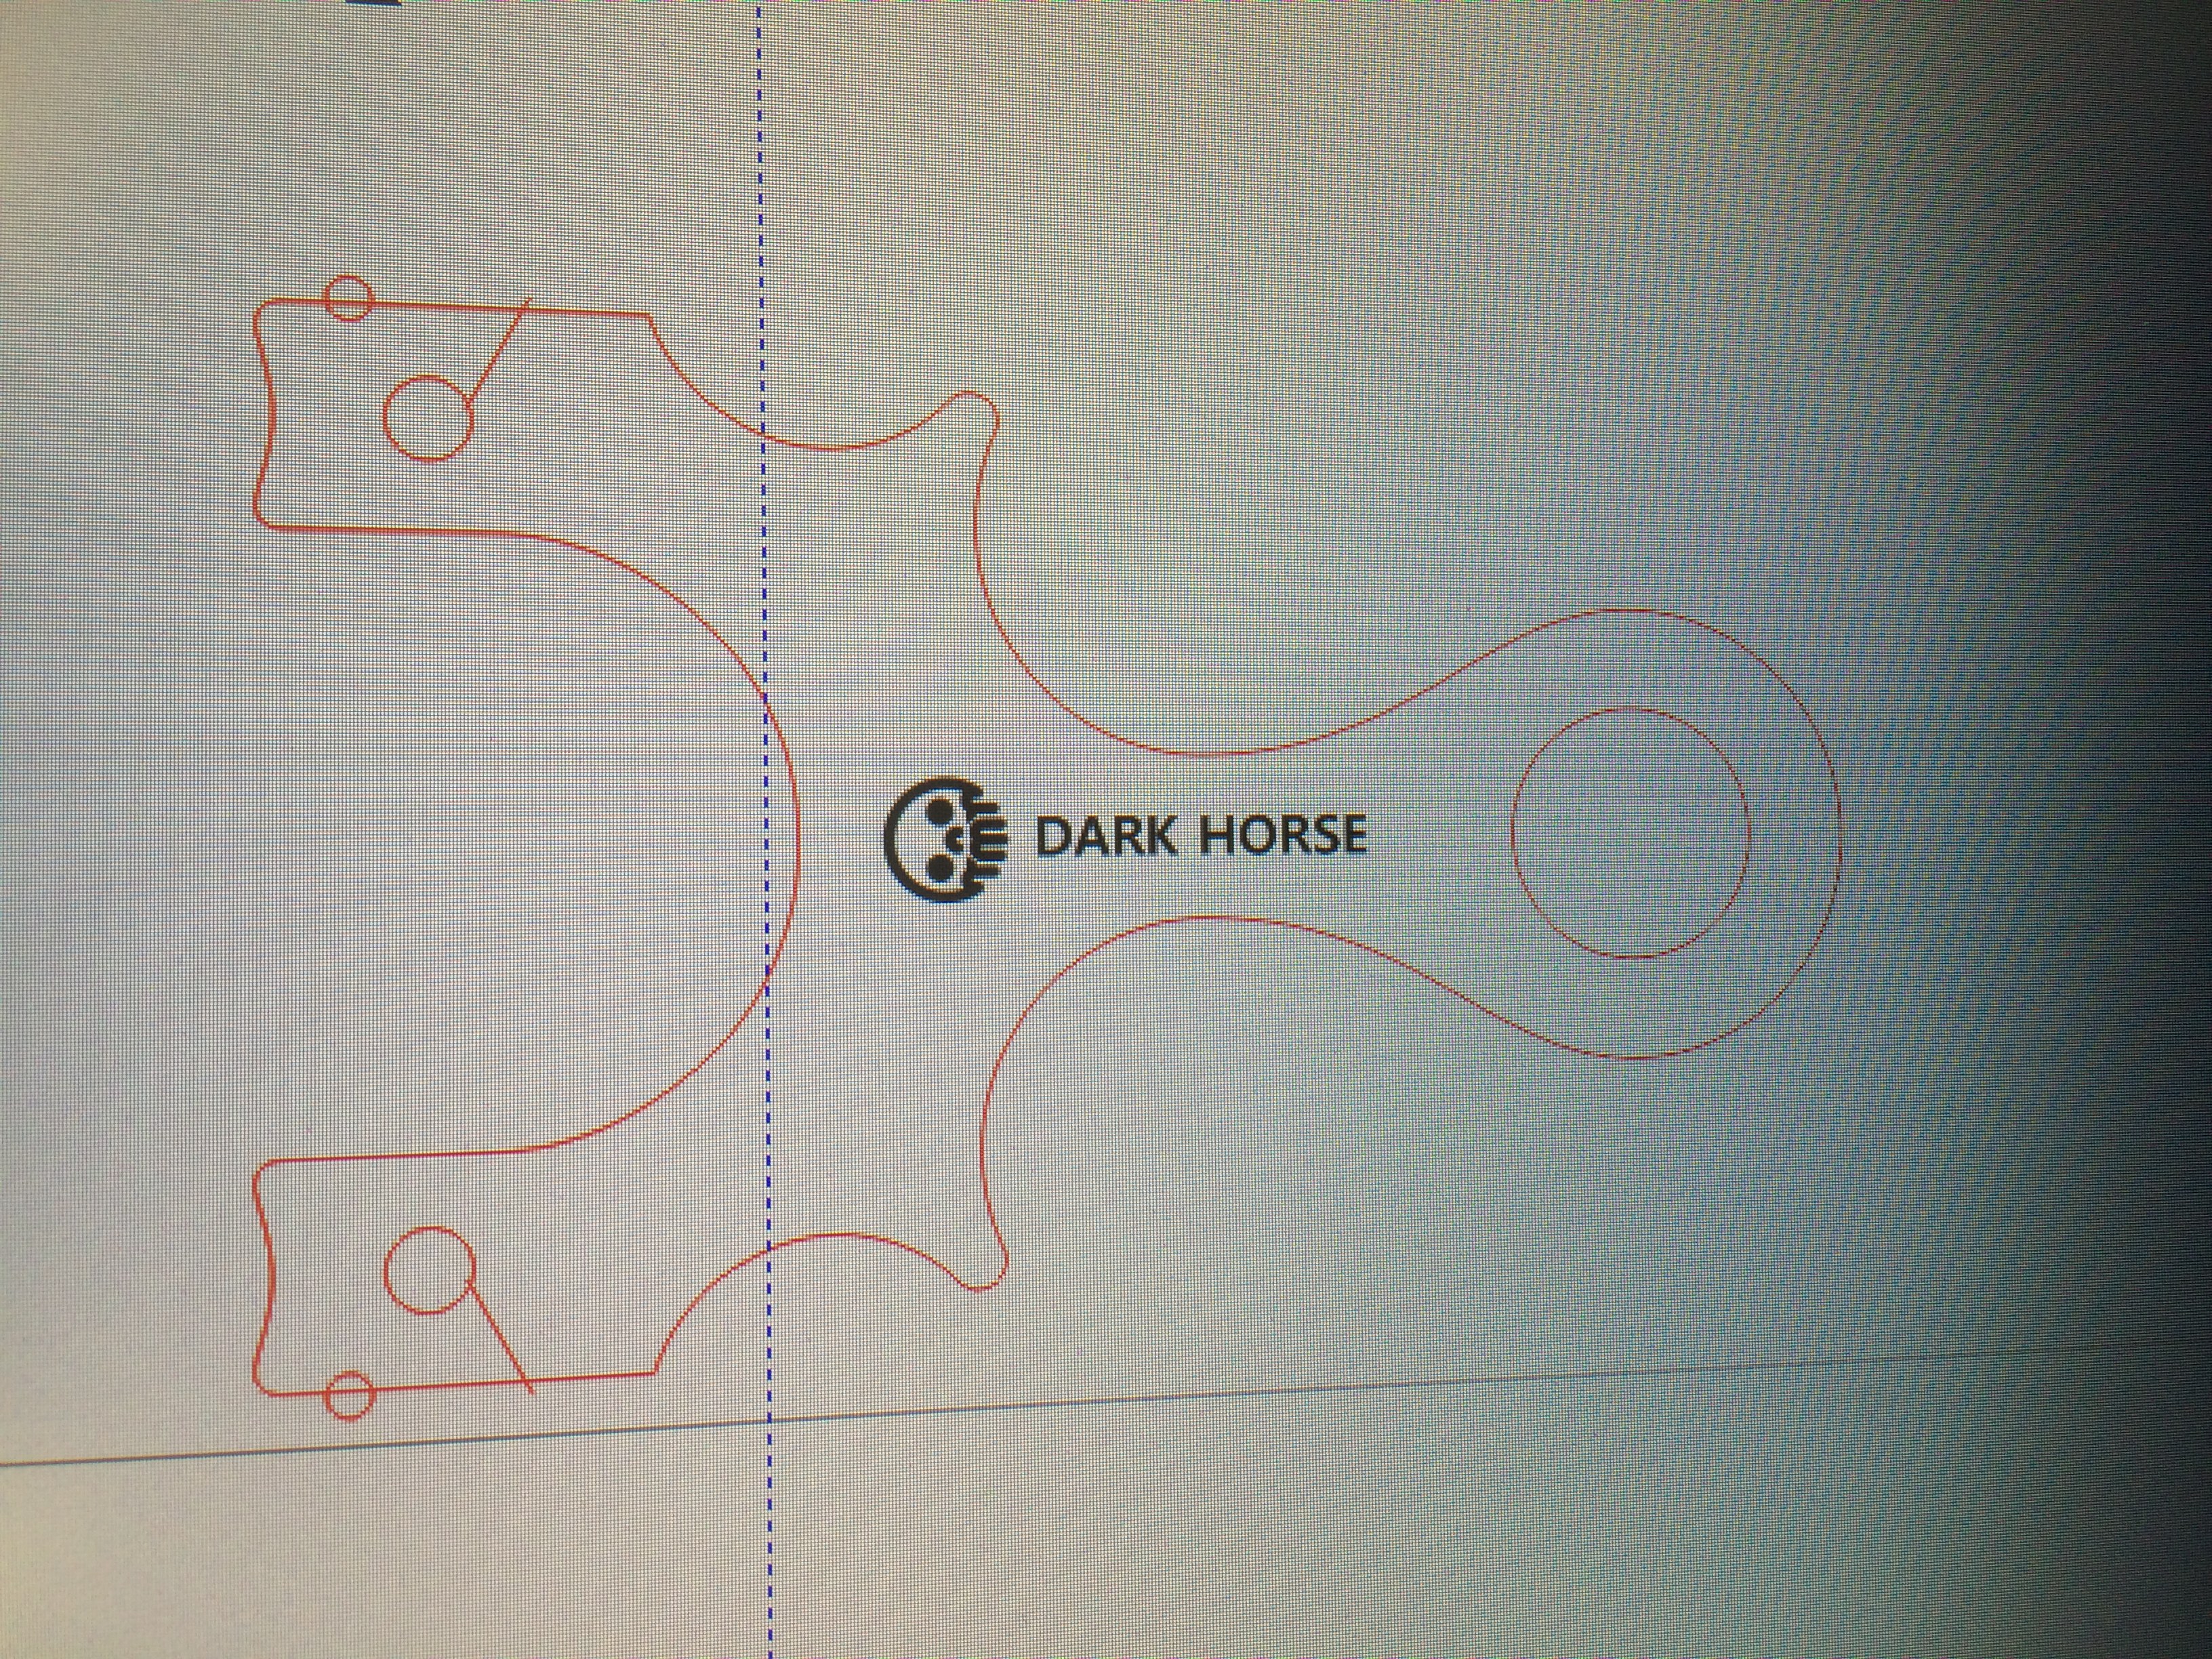
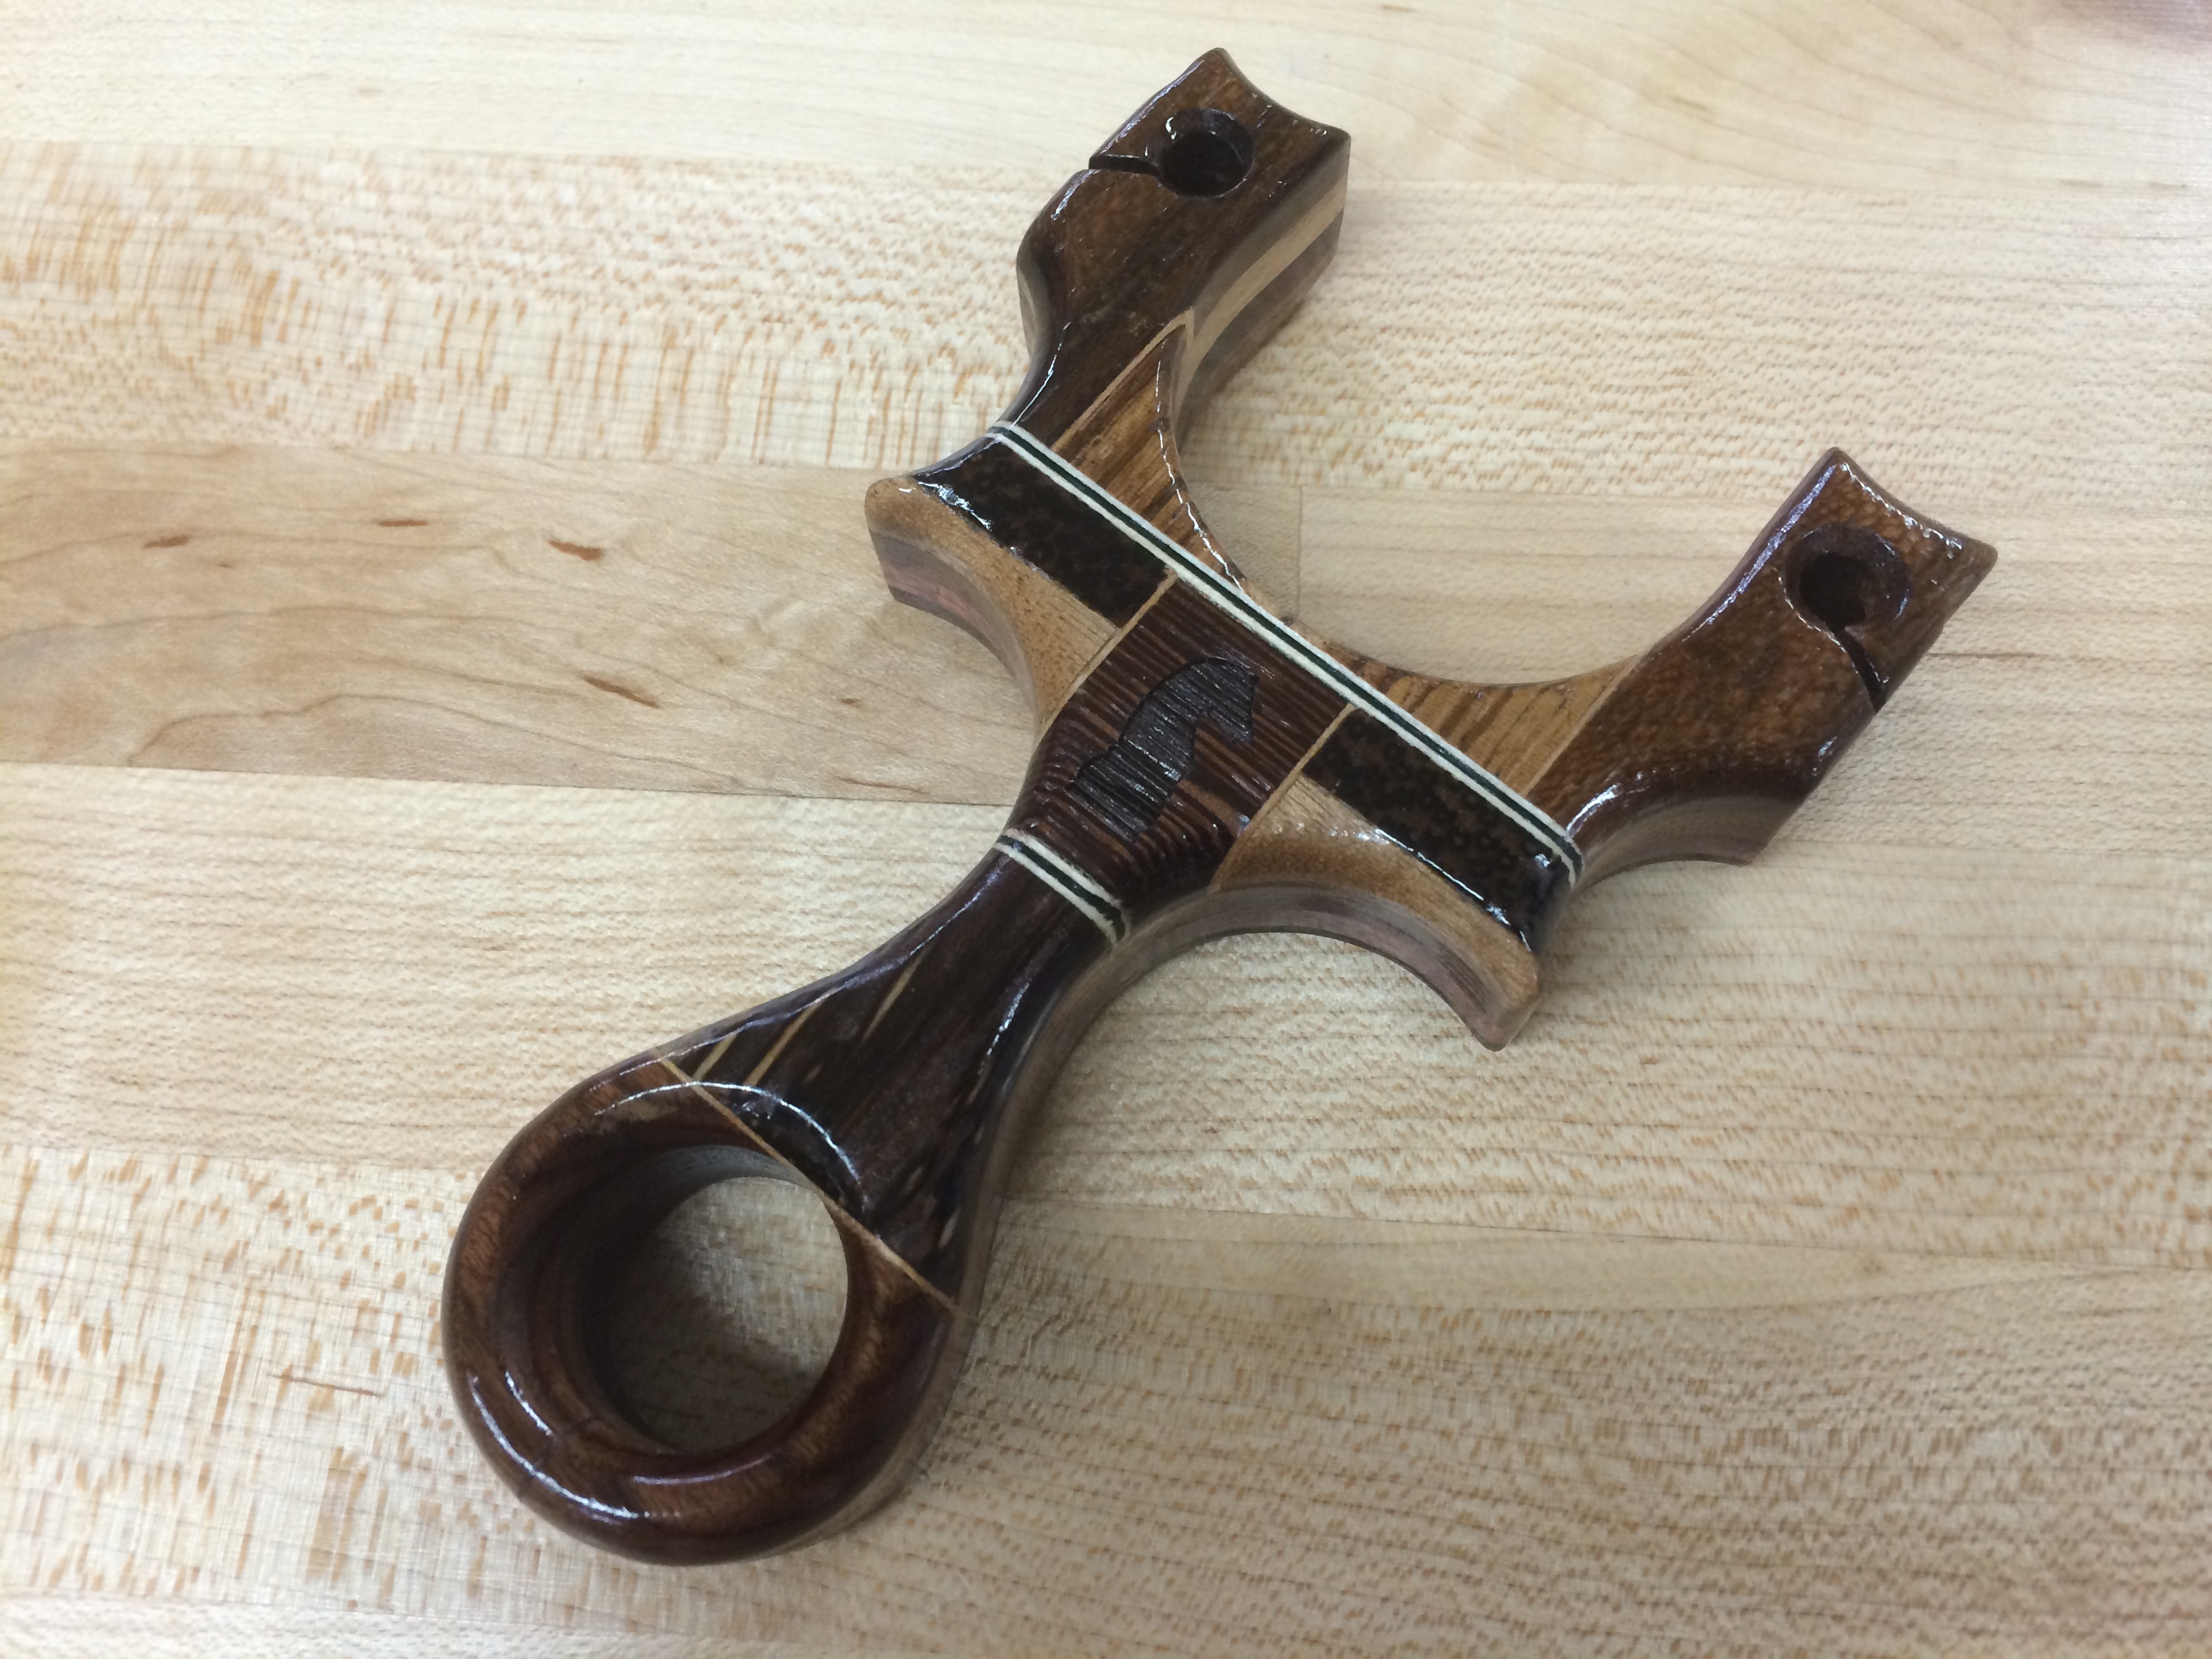
The Dark Horse is exactly that.
After doing some tests, all the dark woods that I had selected for this project absorbed too much heat to be cut so the result was a very burnt and singed edge and surface. So, switching to manual navigation!
I could at least start with a couple of cores and and a back side scale. This time around, a 1/4″ slab of purple heart, a 1/4″ slab of American Walnut and a back side scale of Black Walnut. The walnut laser cuts and etches nicely so the name Dark Horse and the MGG skull was etched on it prior to assembly.
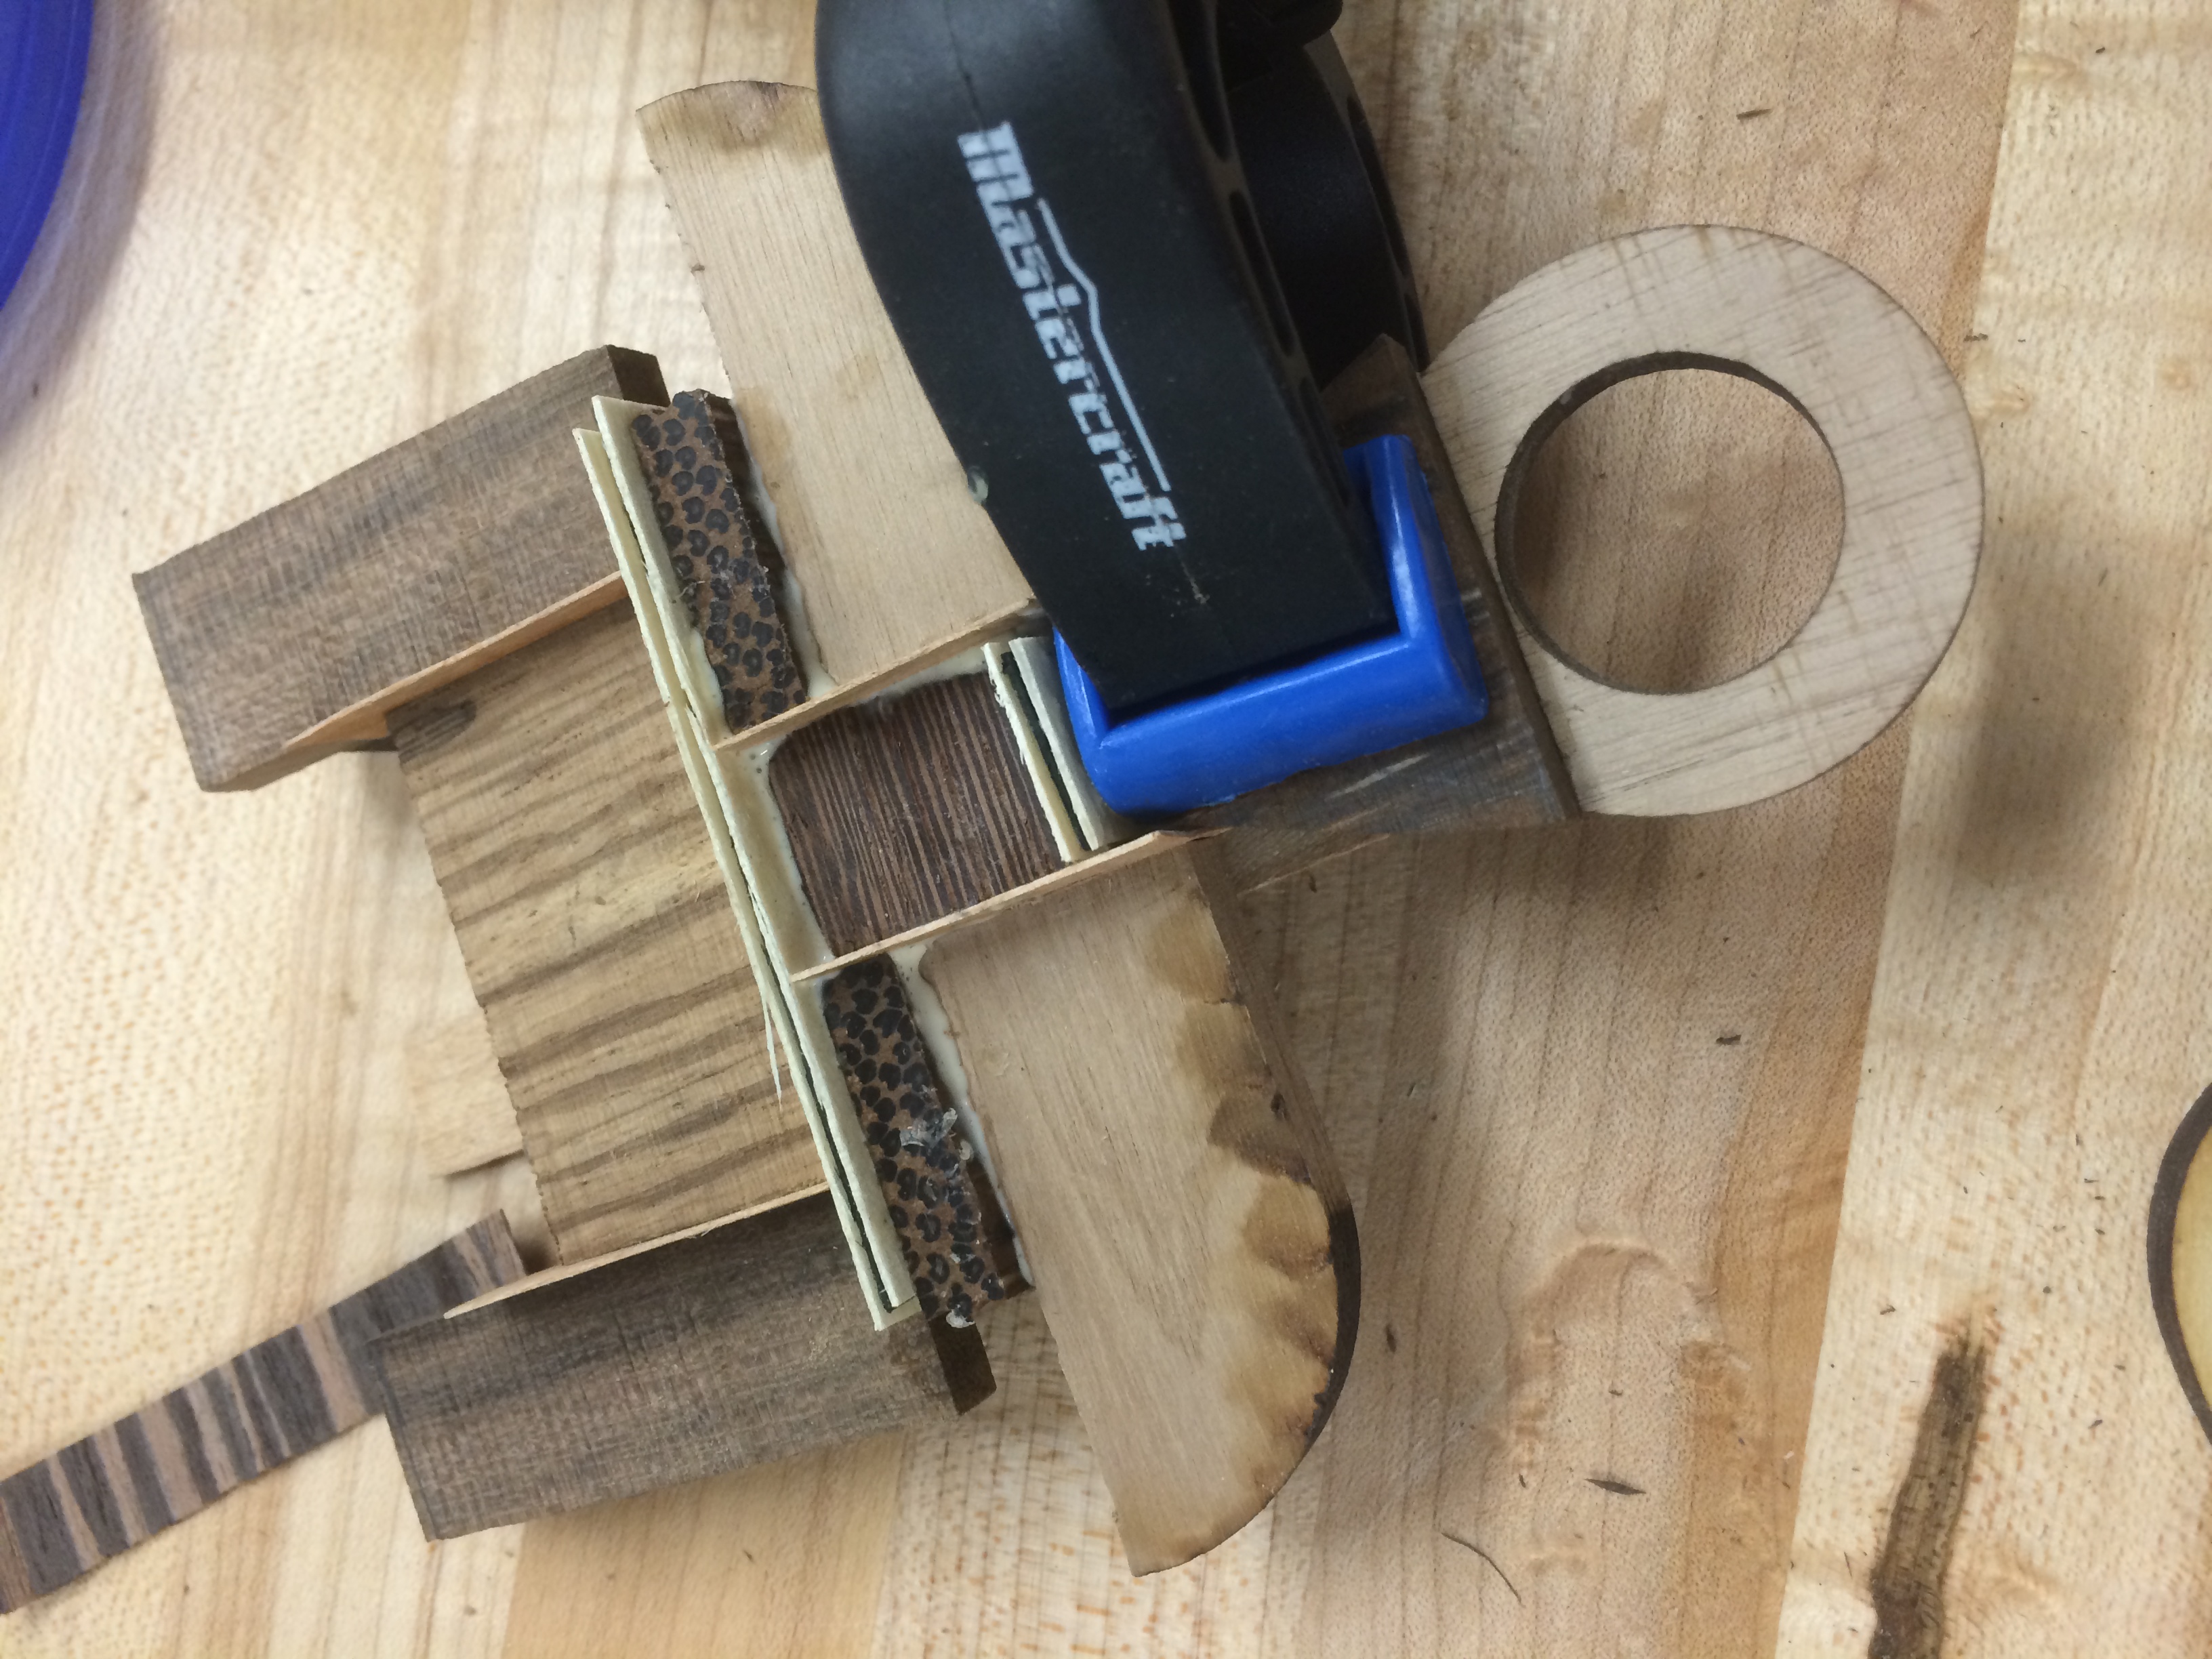
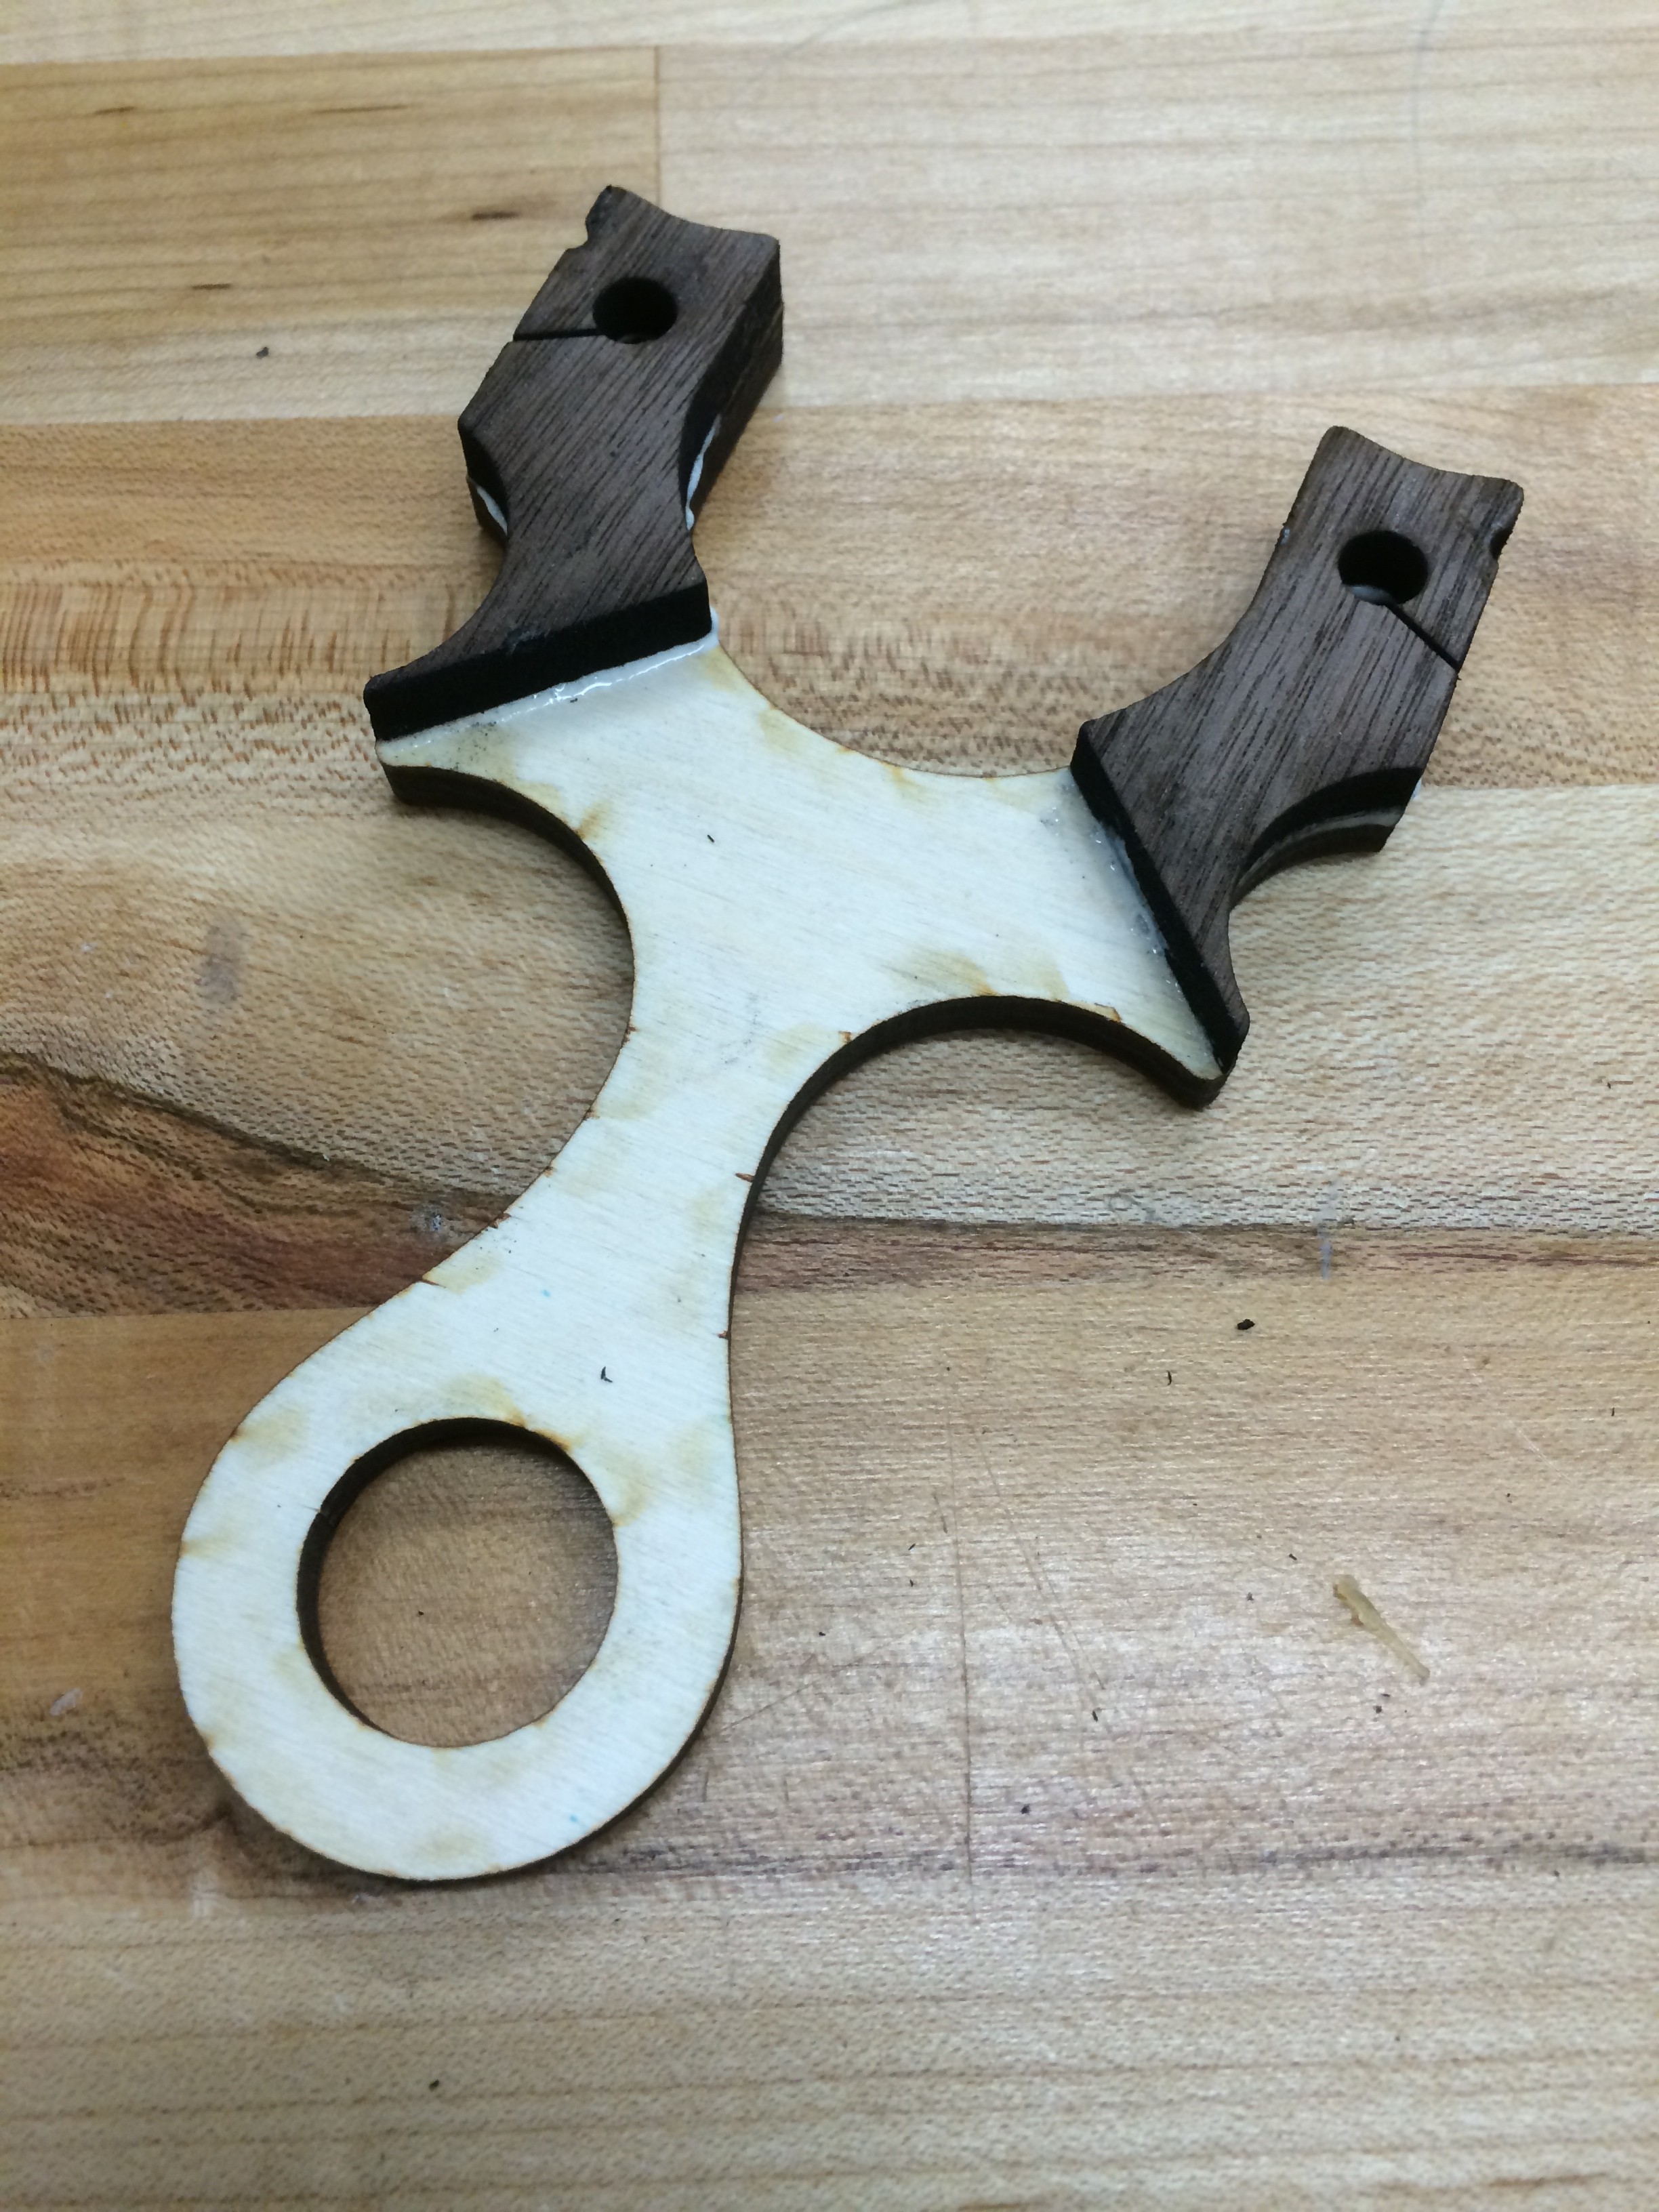
After the cores where cut, it was time to lay up the bits of wood. Tackling this like a Tetris game, sanding slowly to fit the blocks into place, delineating the layers with a triple stacking of contrasting veneers (maple, ebony, maple). The inside core is American Walnut, which is much lighter than the Black Walnut used for the backside.
Always choose a hard wood for the fork tips in case of a fork hit, in this case, Zircote. It has a VERY interesting micro texture and is hard as nails. Sandwiched in the middle and will eventually make the scoop of the yoke, is Zebrawood. Below that is the aforementioned triple stacked veneer. In the center is rectangle of Wenge (this was purposeful), the Wenge is flanked by Black Palm end grain and some more of the American Walnut.
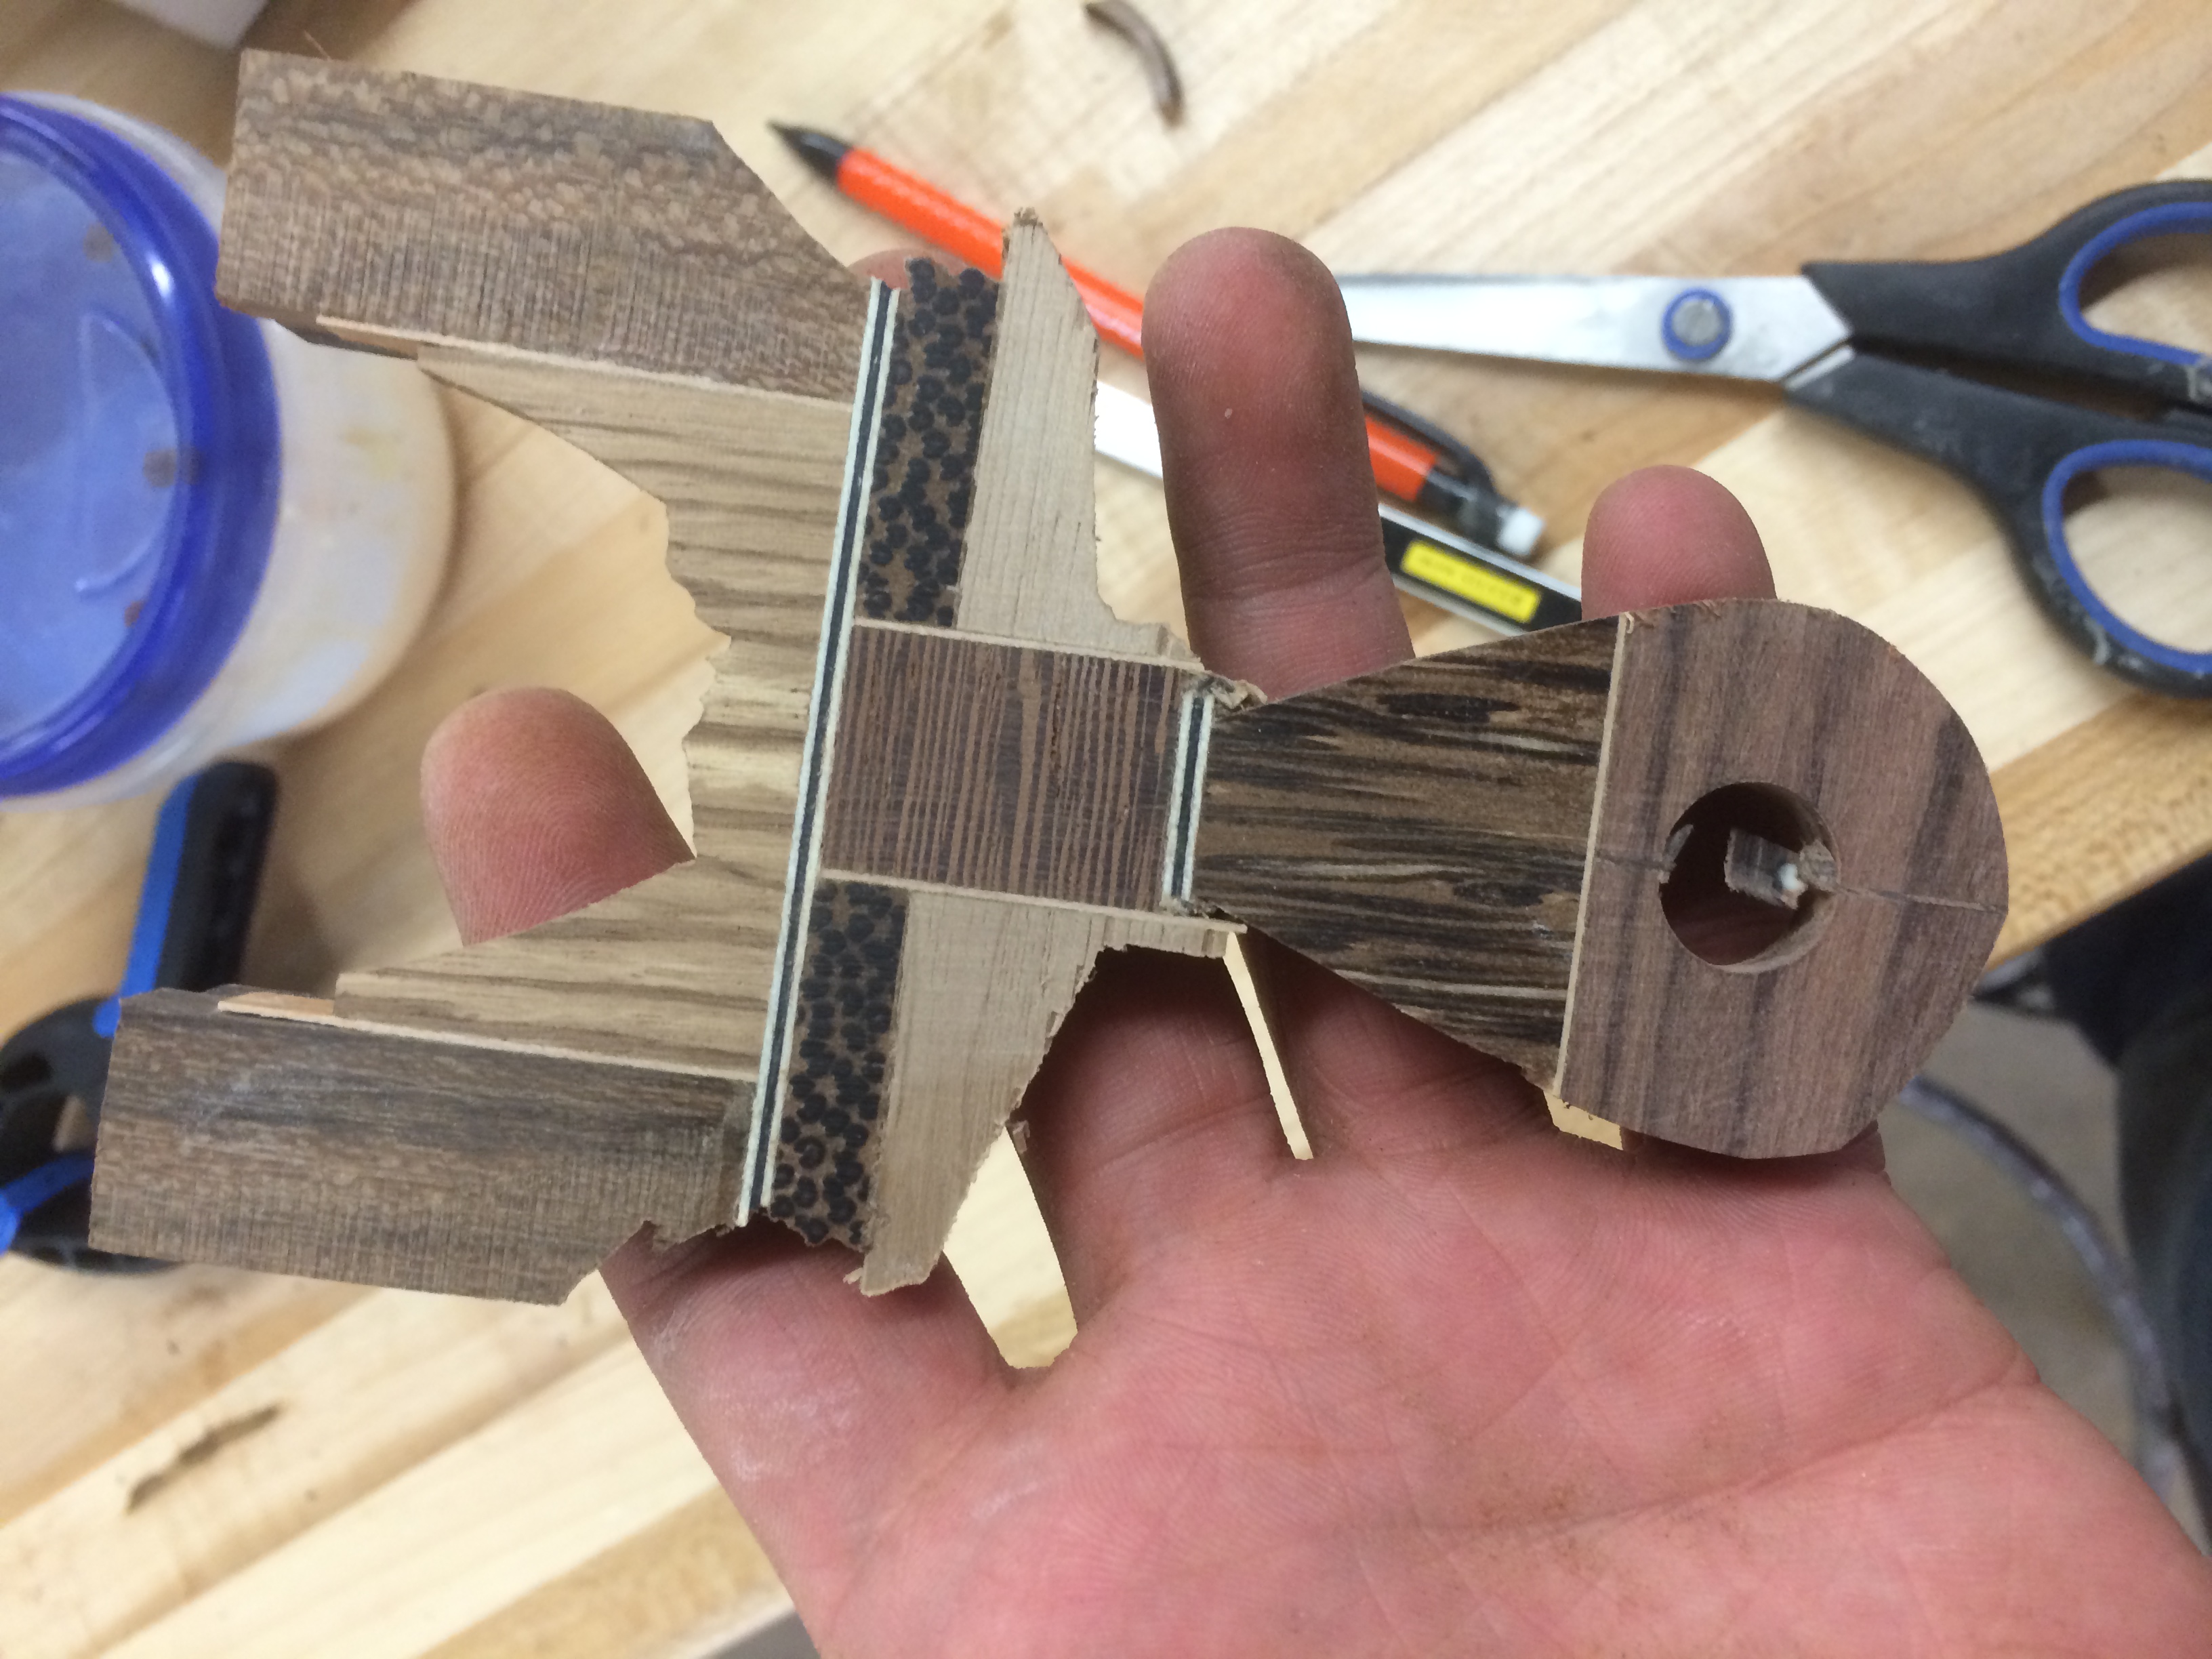
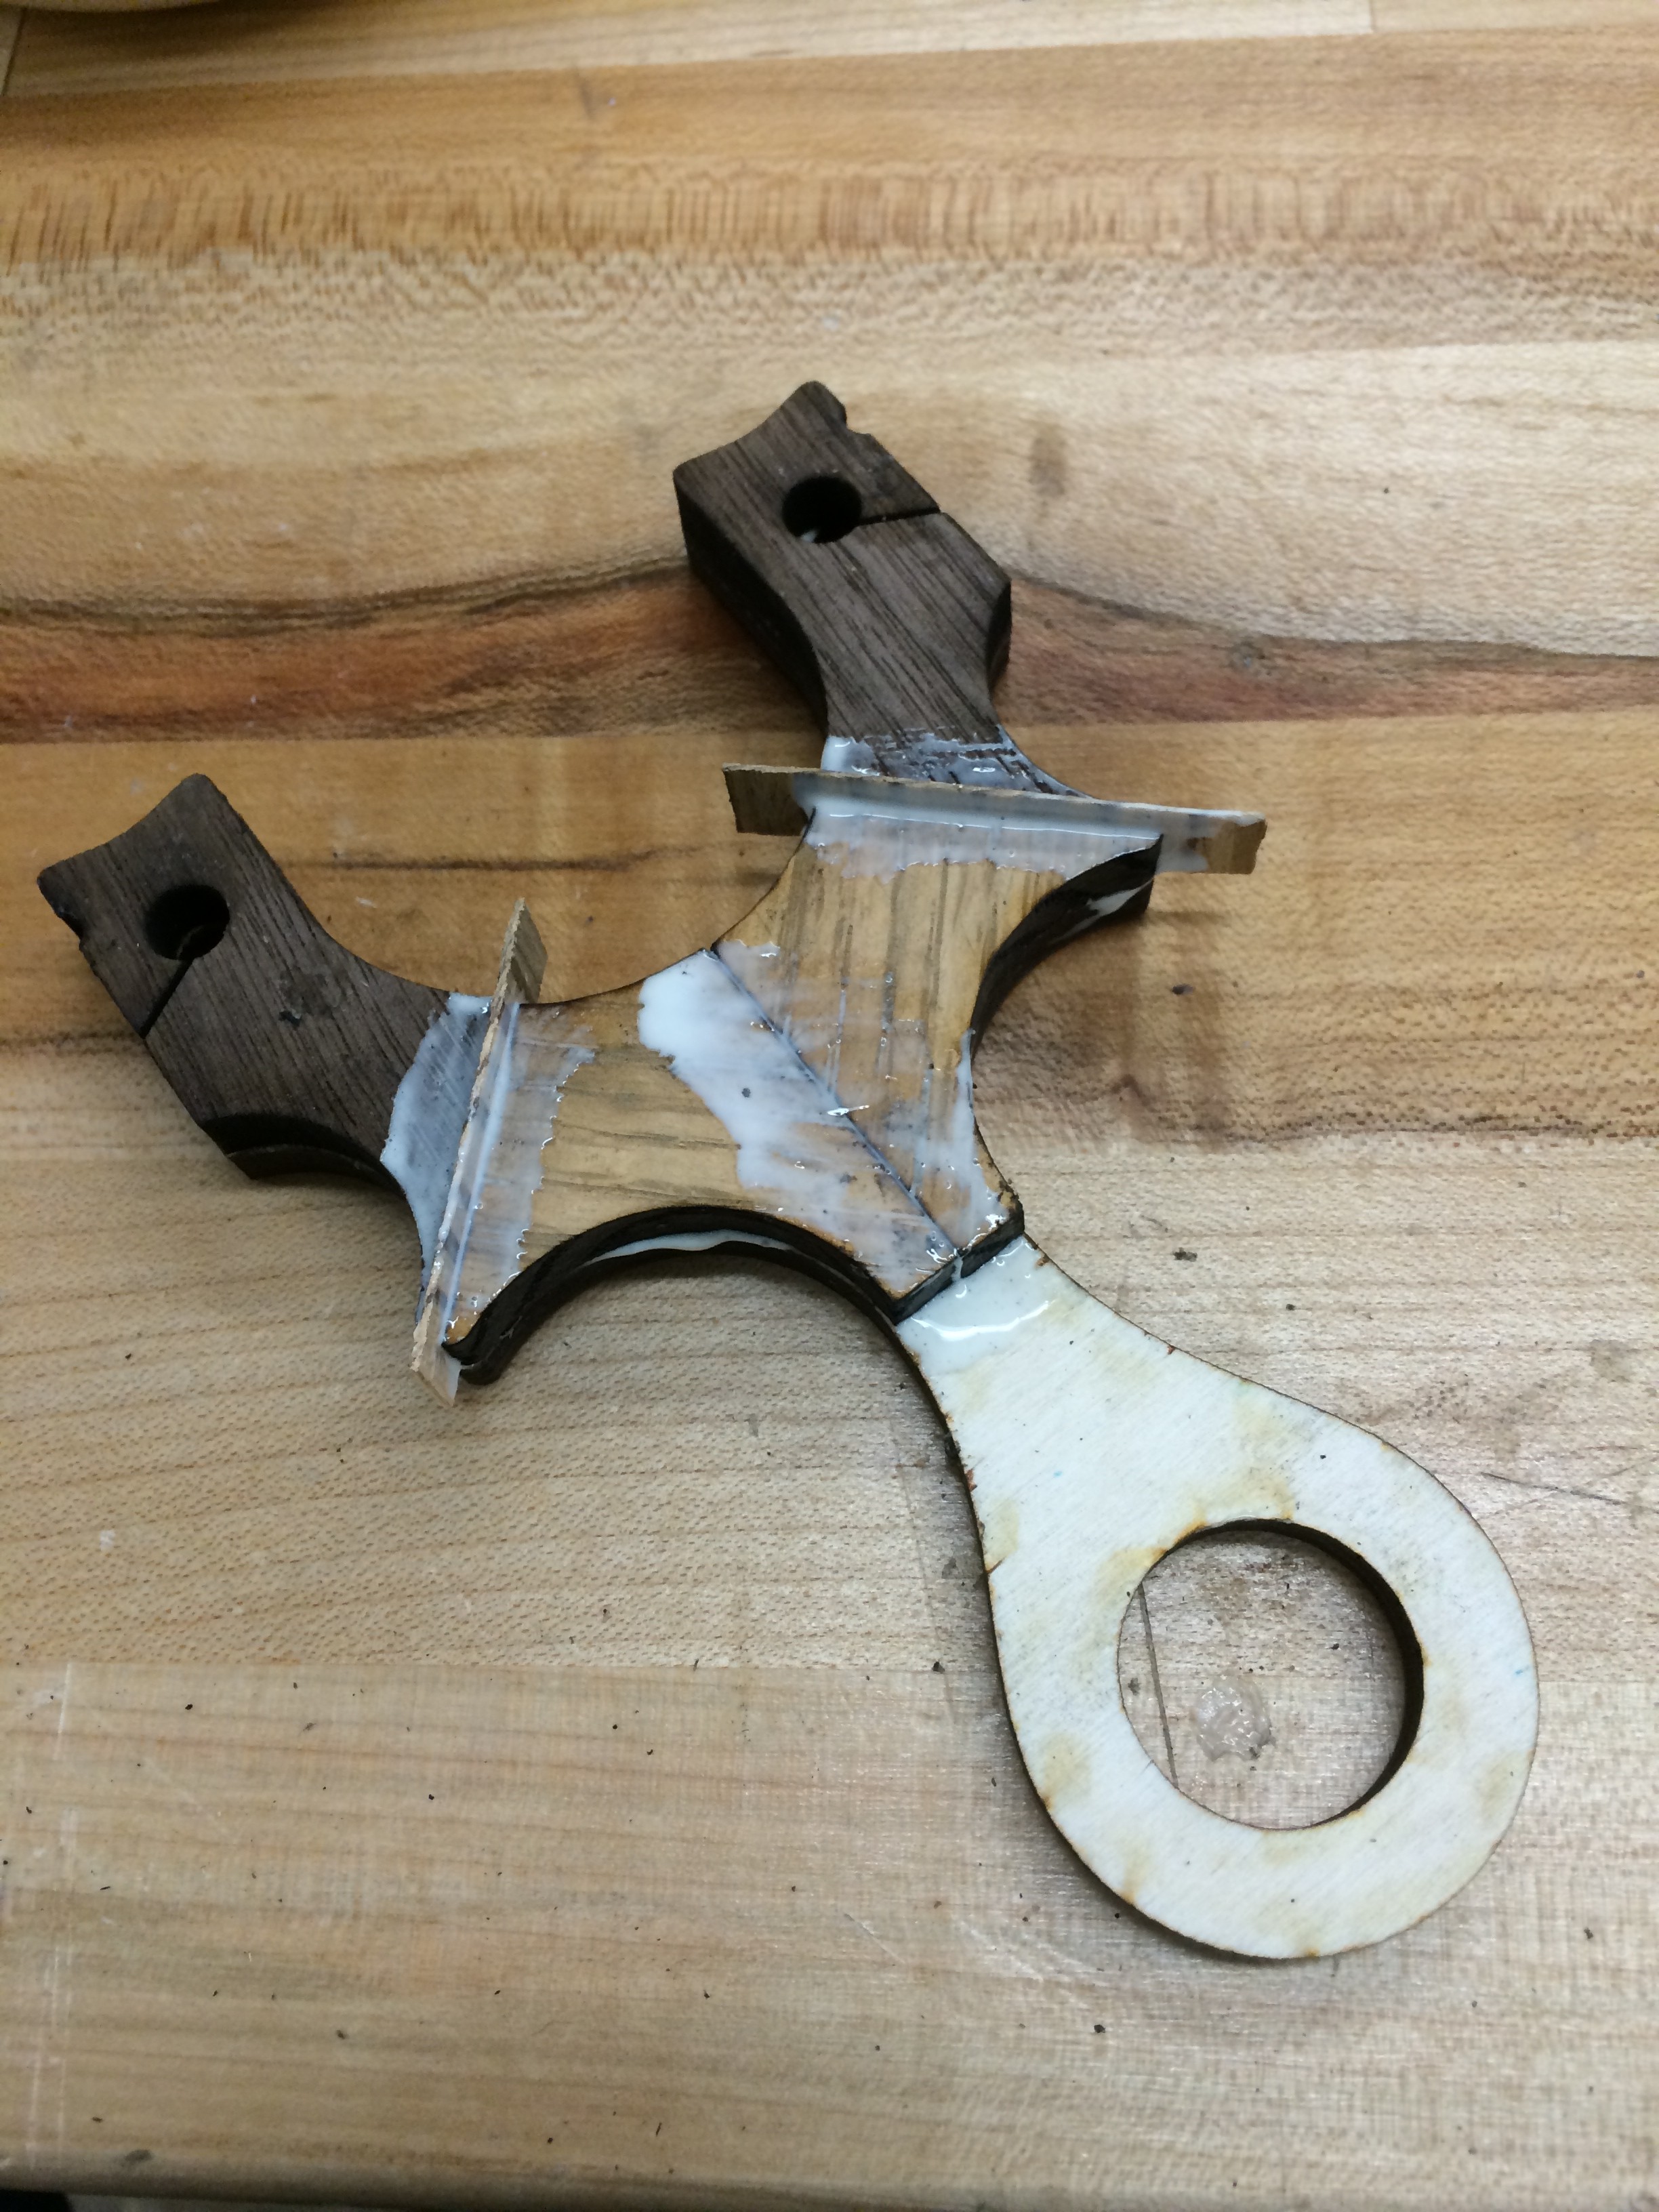
After gluing up the final bits, Black Palm and Pau Ferro for the pinky hole, the excess was cut off with the band saw. The whole face was then flush sanded to reveal the nice geometric dark wood pattern.
Once that was done, it was time to trim up the new hardwood face so that it conformed to the shape of the rest of the body. Using a 1/4″ flush router bit, the final trim was quick and easy because I built the pattern on a laser cut blank. I’ll make note here that going at a steady pace is more important than speeding through the pass on the router, hardwoods chip really easily.
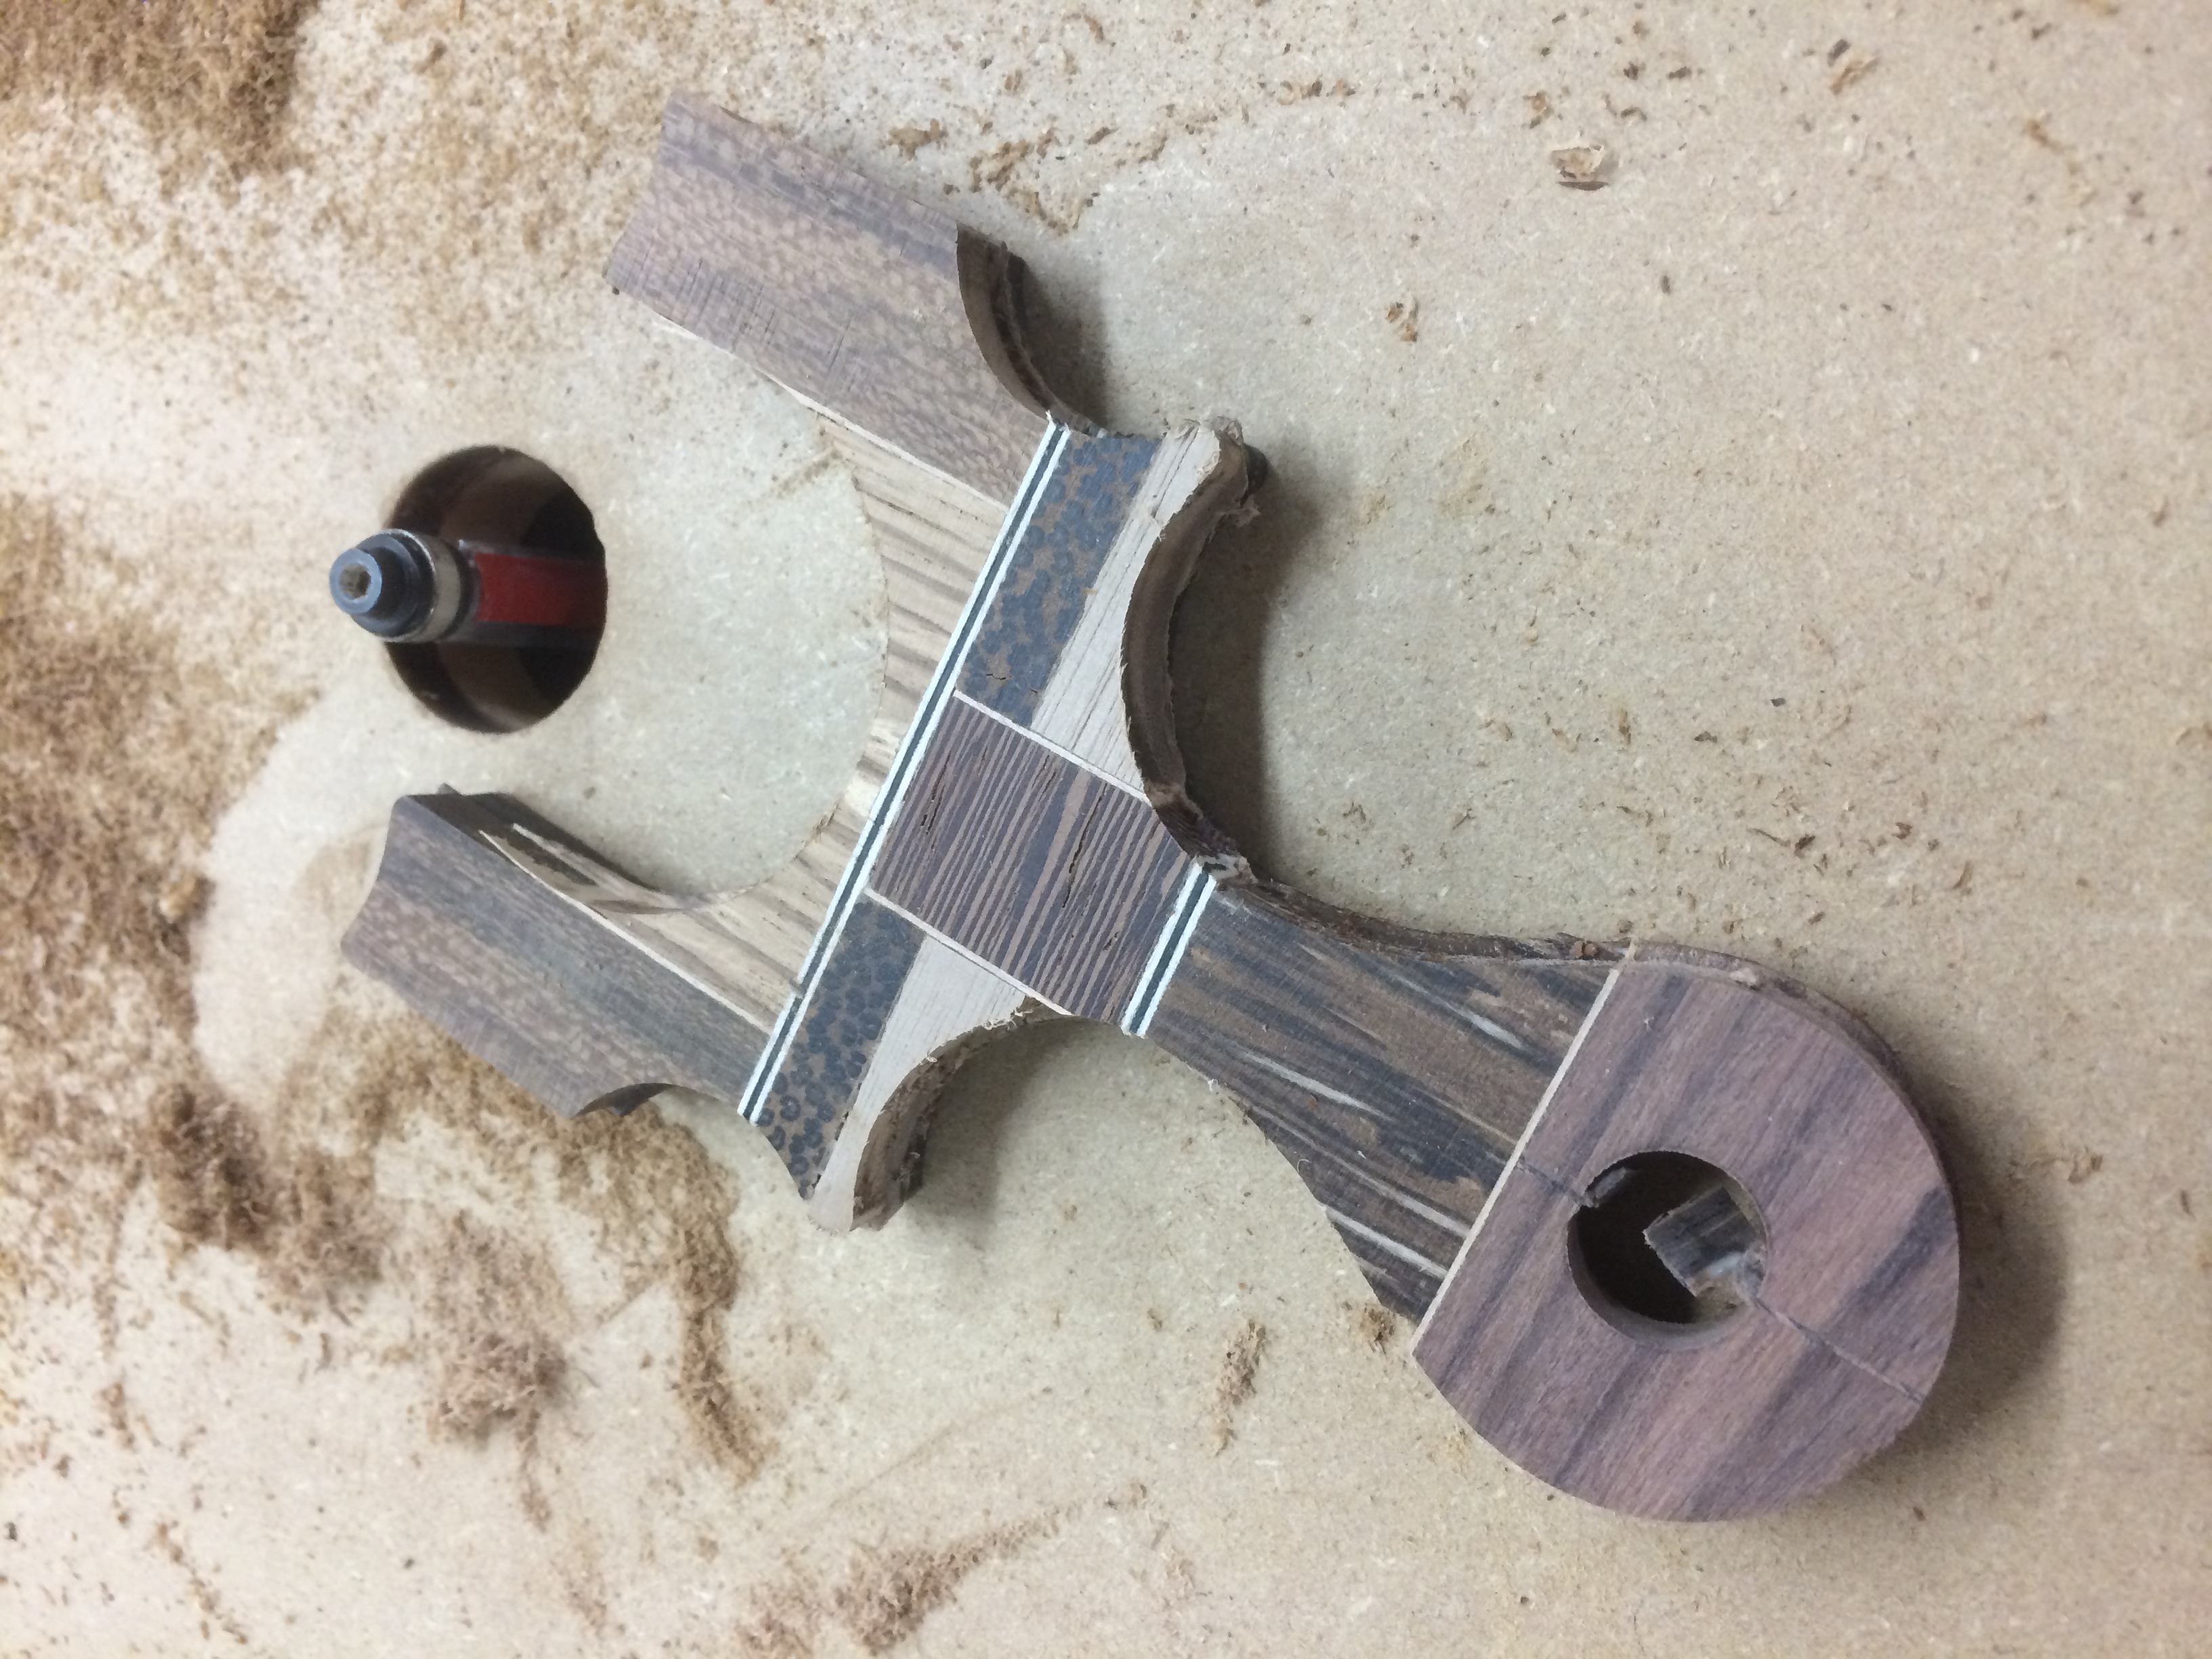
After laminating the cores to the new trimmed face, the hole for the tubes needed to be drilled. 3/4″ of existing hole as guide made locating the holes pretty easy.
Moving over to the spindle sander to clean up the laser marks on the sides of the Purple Heart, American Walnut and Black Walnut cores. The Zircote is already showing its amazing stepped grain.
Switching bits to a 1/4″ round over, select edges were taken down, mainly the parts where the hand hits. The Black Palm is now showing its very unique, vascular bundle texture. The Pau Ferro (on the pinky hole) is also showing it’s wide, dark streaky grain. The other edges were knocked down with a 1/8″ round over bit but no photos were taken of that process.
I wrote before that the Wenge was placed in the heart of the face for a reason. Wenge is exceptionally hard but it also has a differential density between the grains. This means each vein of wood will react differently to laser etching, aka heat. Knowing and understanding this material property, I scaled a knight chess piece vector to be etched into the Wenge. The etching gave a pleasing wavy texture to the graphic and the outcome was as expected, a textural difference between the wood’s sanded surface and the etching. This would be further enhanced when the polish is applied.
Despite taking precautions and a steady hand, there was still some chipping that occurred at the wood’s mating joints. Some ghetto wood filler, glue and saw dust, filled those gaps easily and blended back into the wood work.
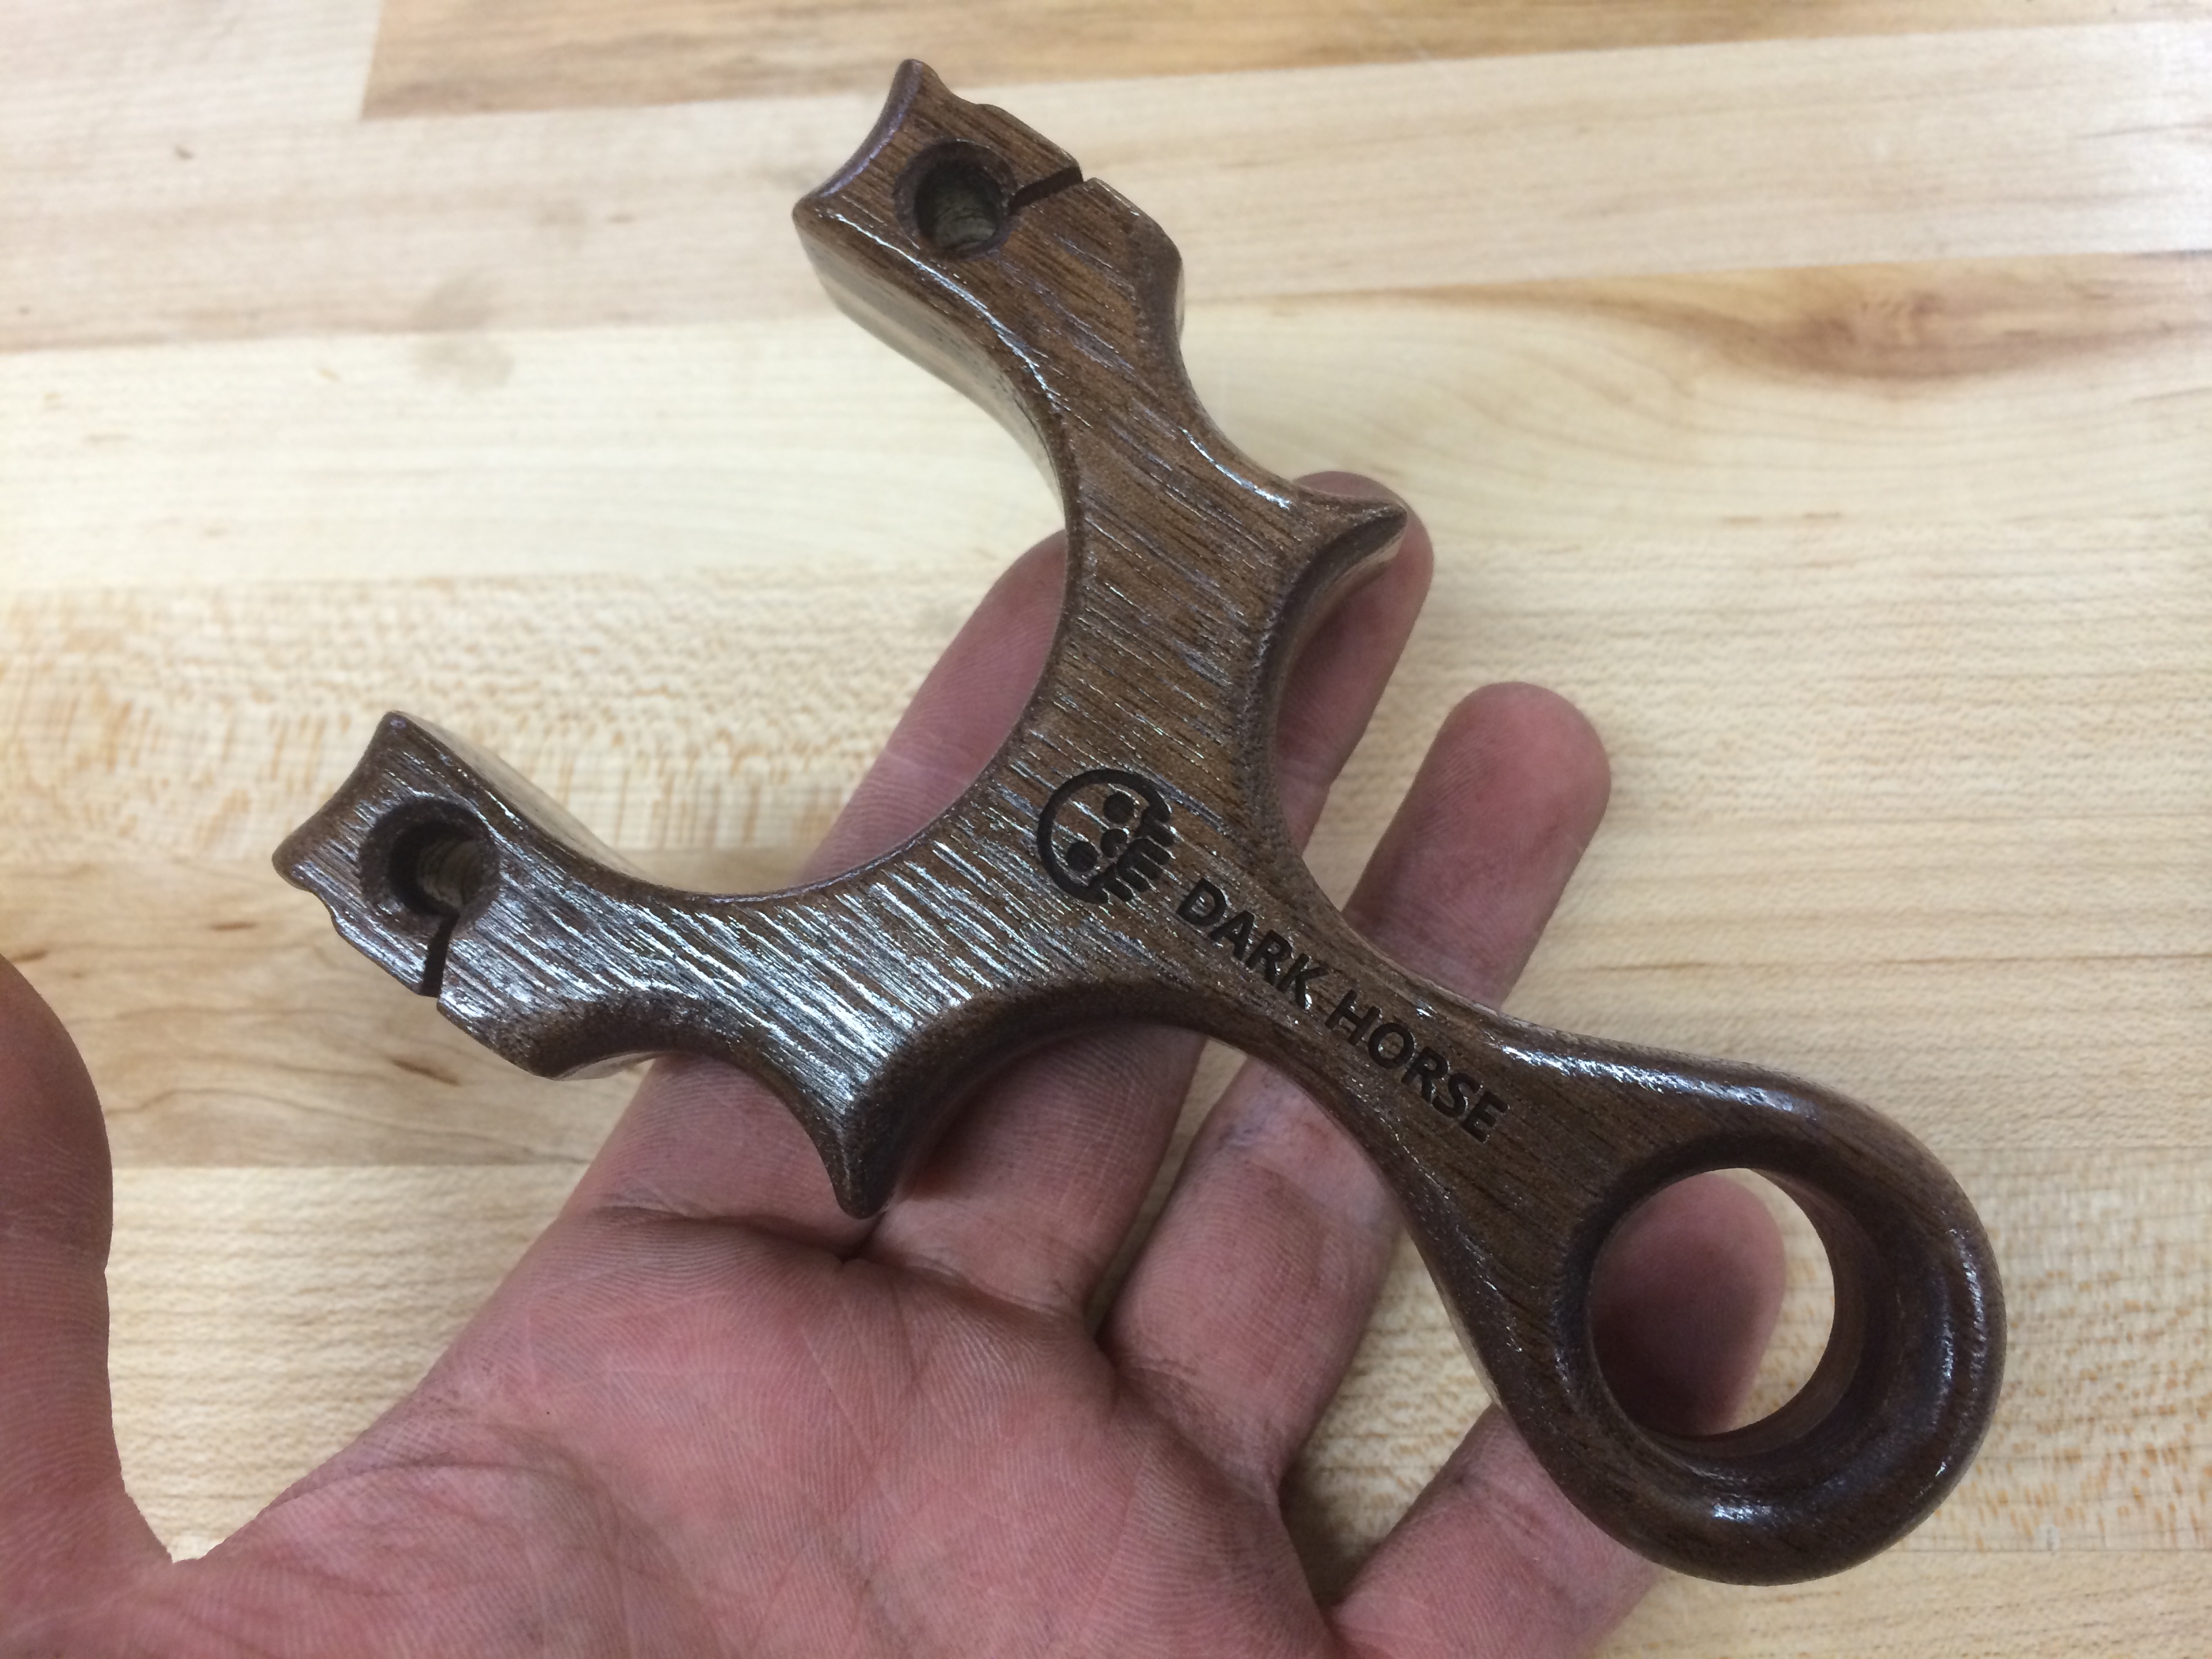
I took extra care in sanding and prepping the surface to accept the acrylic spray, going from 100 git foam blocks, to 240 grit nail files to 600 grit paper all the way to 1000 grit strips. Then it was off to paint, 4 coats of spray with a light buffing in between to smooth out the overspray marks. If you look closely, you can see the laser etching detail is much more clear once the clear coat hit it, the ridges of the etch, surrounded by the smooth surface.
45 minutes later, the coating is now ready for a polish using my super secret sauce, the nail buffer. A 4 step foam block backed with progressive grits, close to 10,000 grit in roughness rating.
A couple of minutes of buffing and its off to the photoshop!
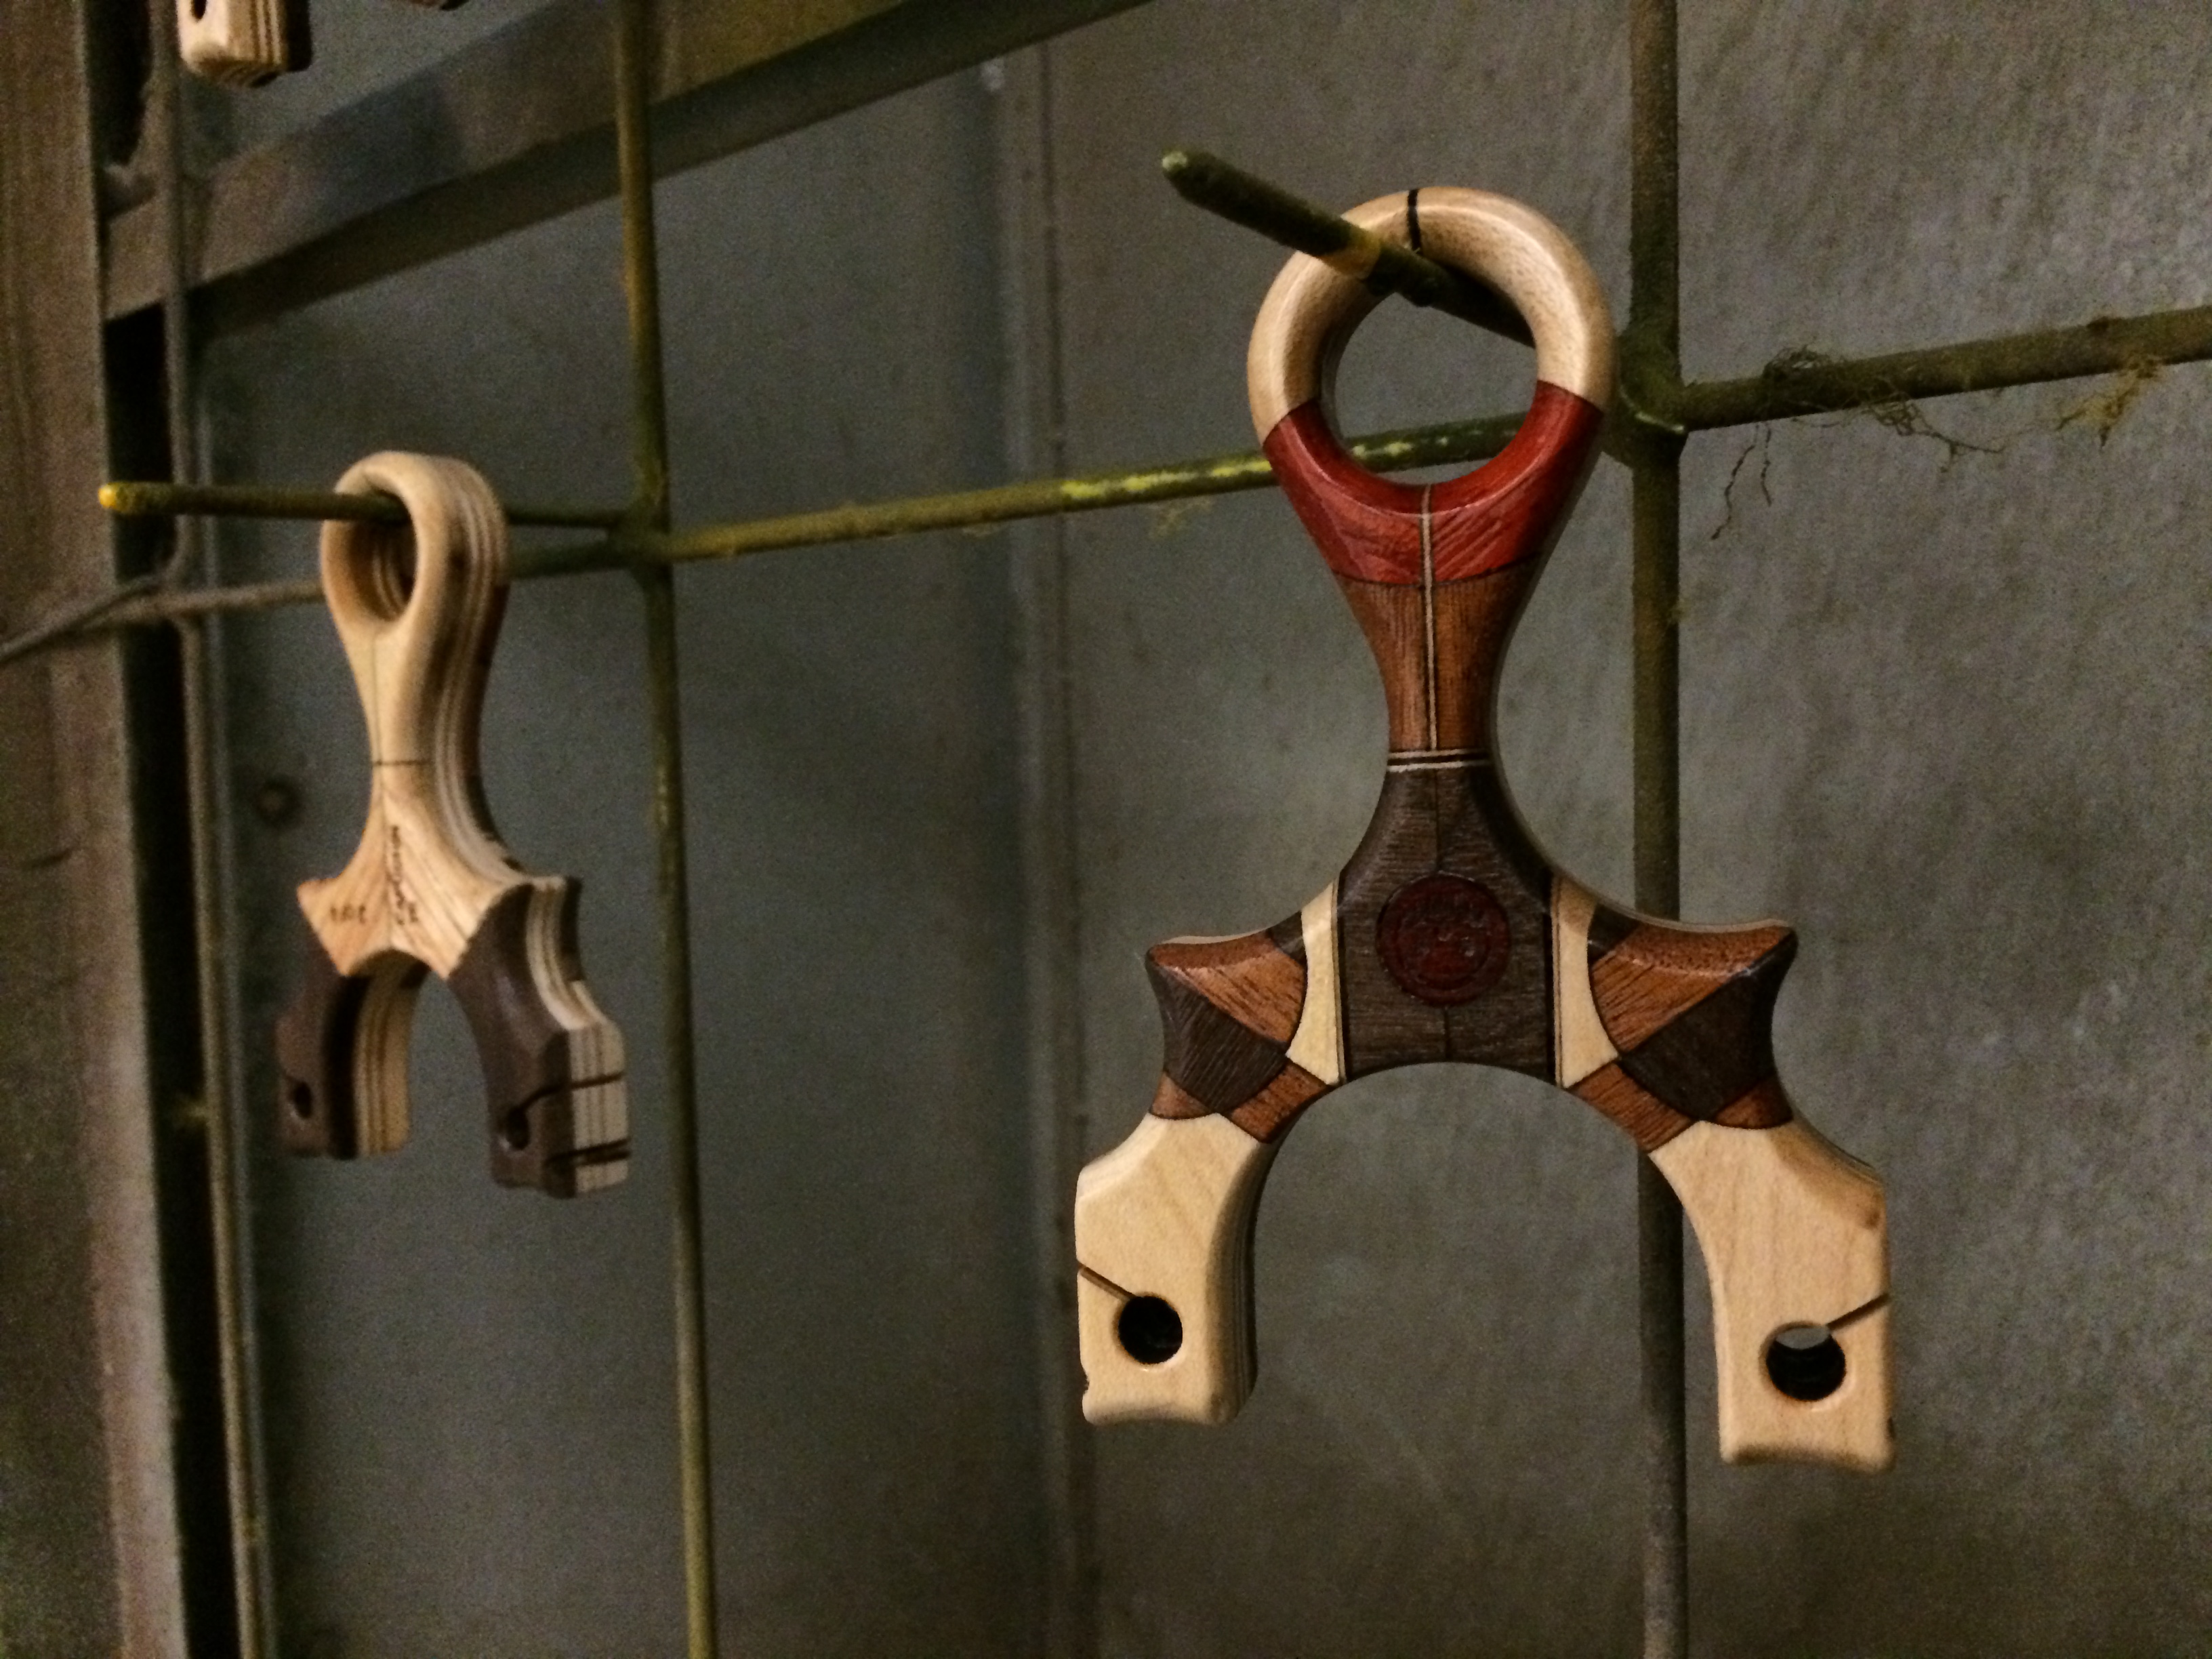
It’s been far too long and it’s time for another Metro Made post, this time around, something familiar to you returning Metro Made readers. If you are tuning in for the first time, welcome! Metro Made is the blog of Metro Grade Goods and how I turn raw materials in the stuff you see on the site. It is my way of letting you know where things come from and how they are made. Besides, who doesn’t love a good behind the scenes.
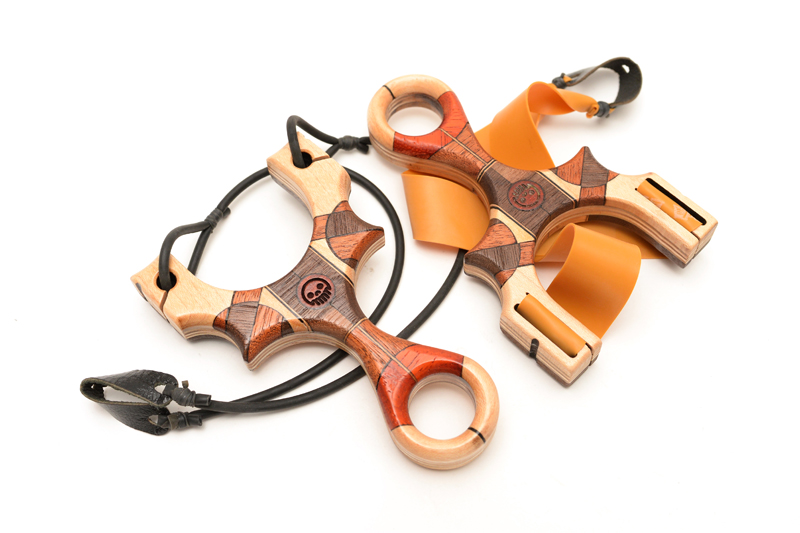
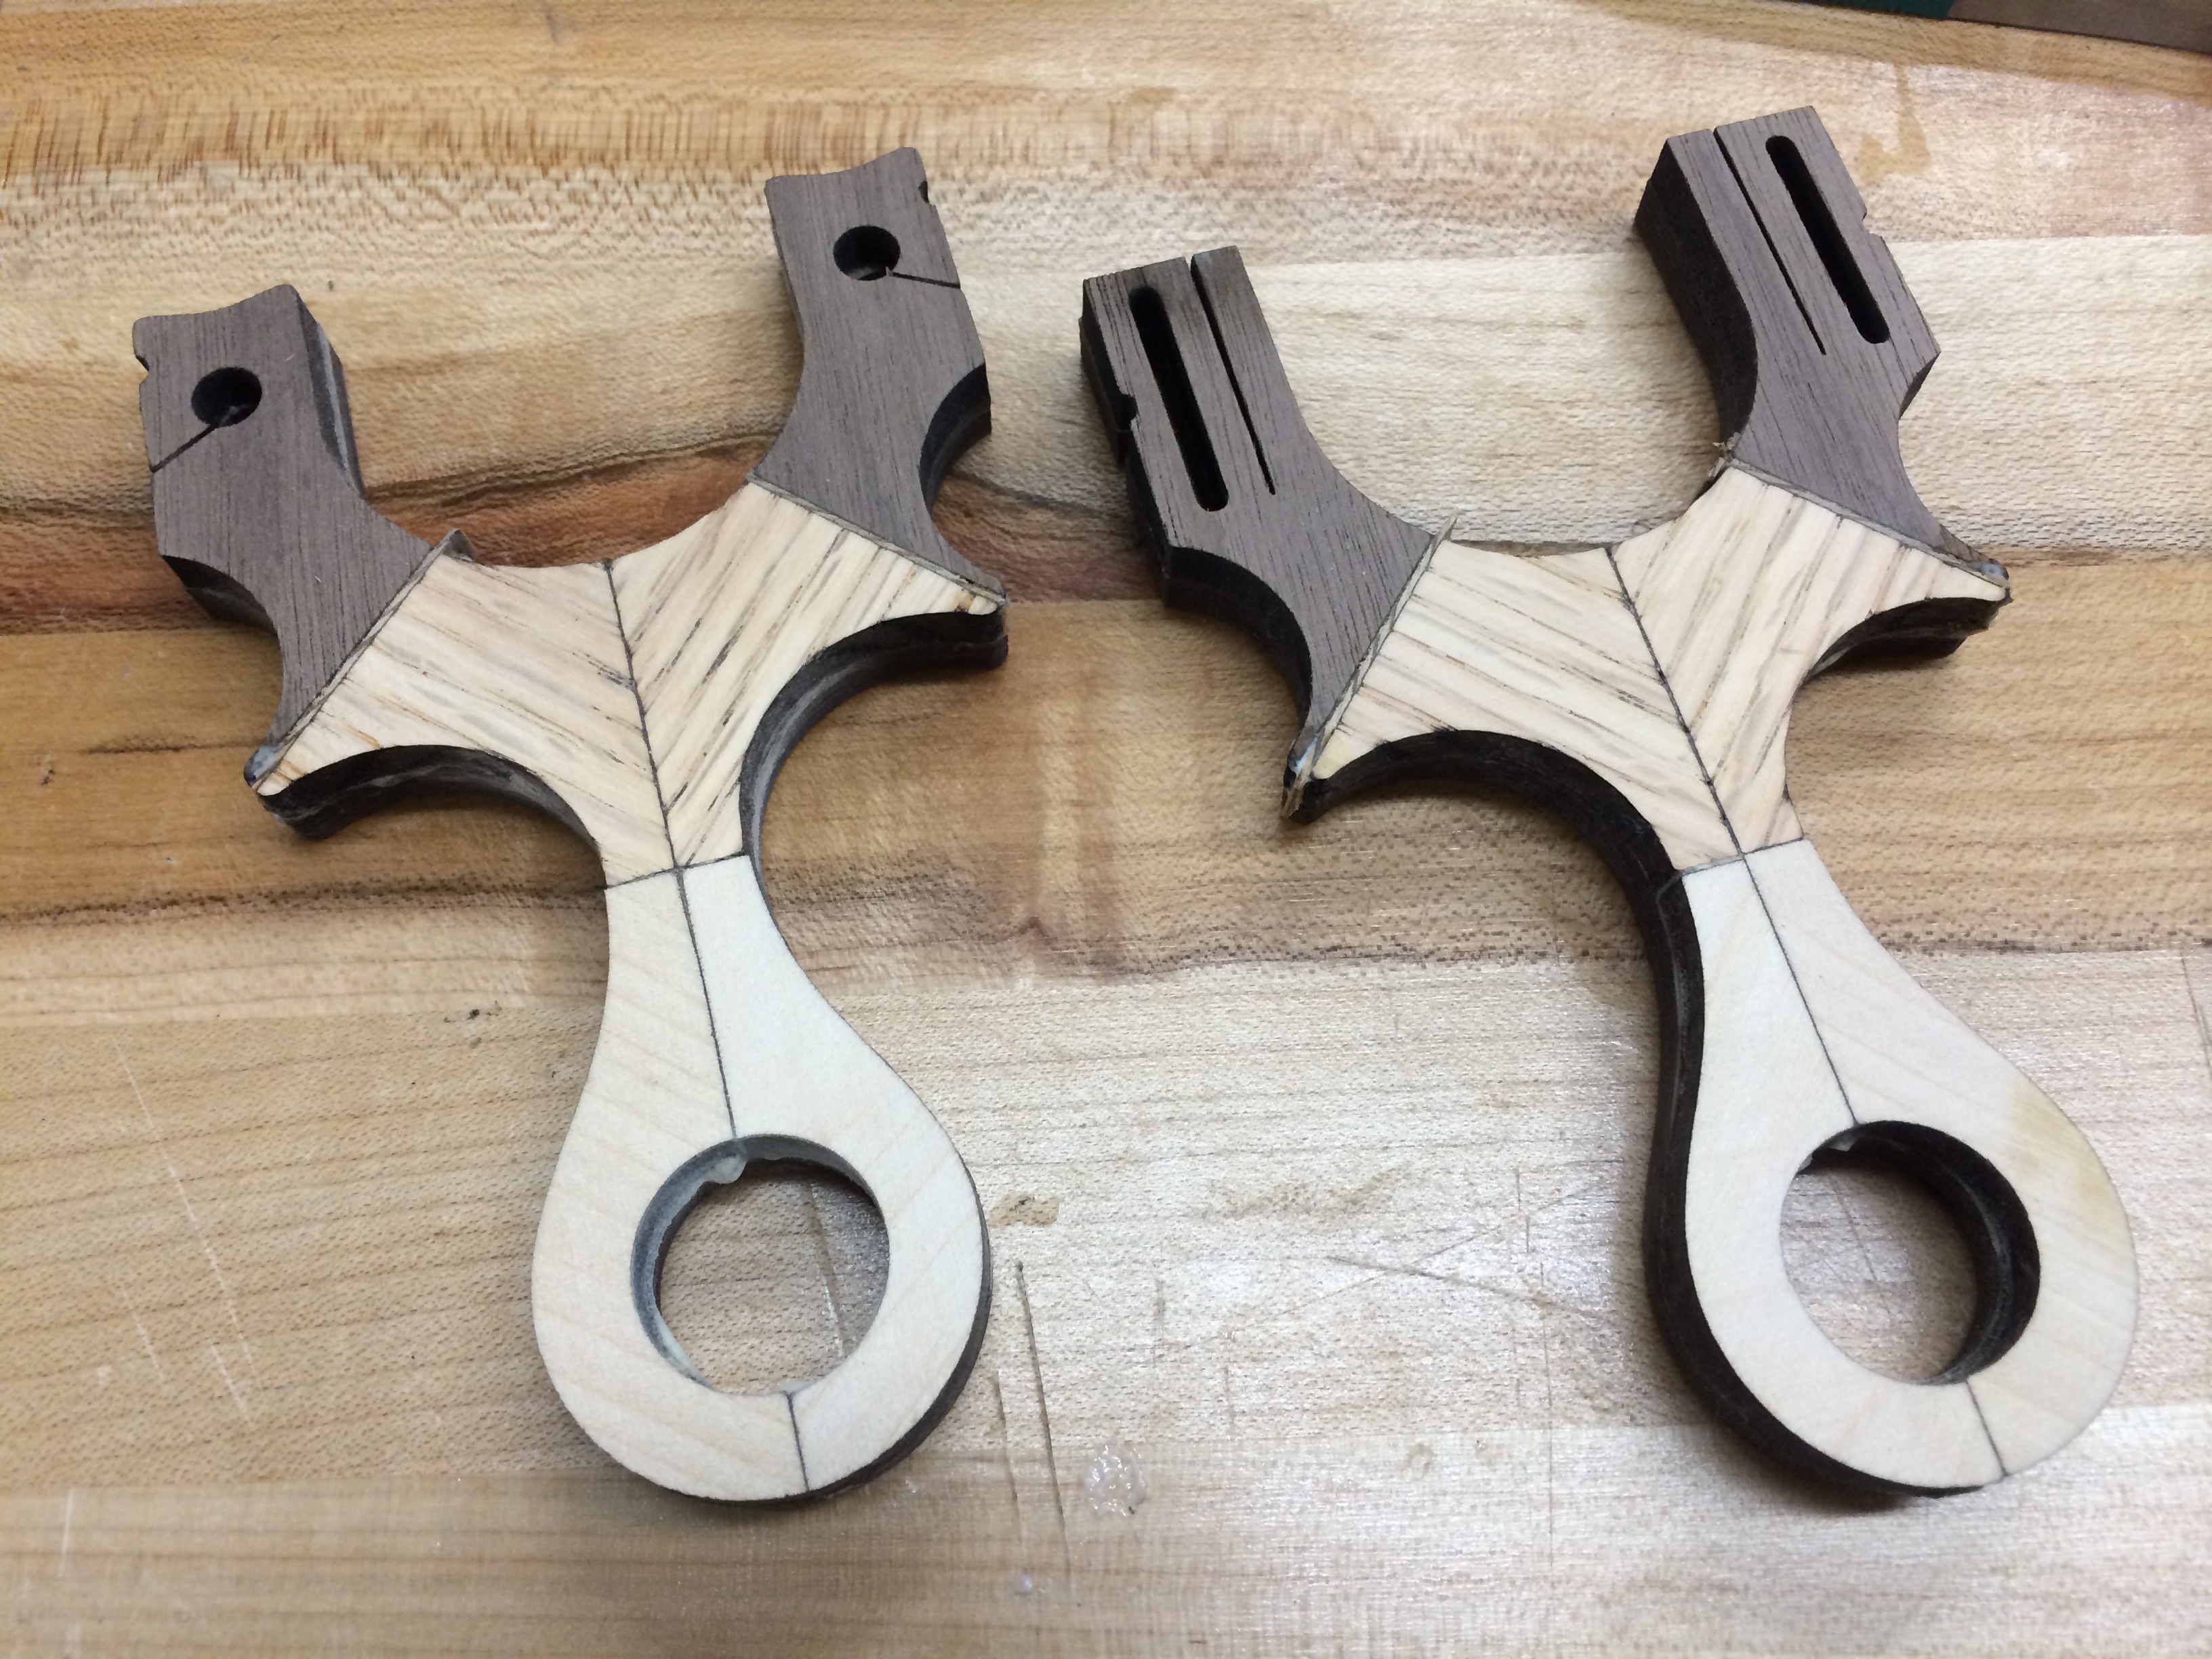
In this installment of Metro Made, we take a look at how I took the plunge and crafted 8 super laminated slingshots in one weekend. A pretty daunting task since a single unit took 5 hours to complete. If you are at all familiar to scaling up production, you don’t just take your unit’s build time and multiply it by the number of units you are making. There are always ways to save time. Despite the time savings, this oct-build still took 15 hours to complete. This one is a long one so take a potty break if you need to now, those of you joining me DURING a potty break, I commend your multitasking mindset.
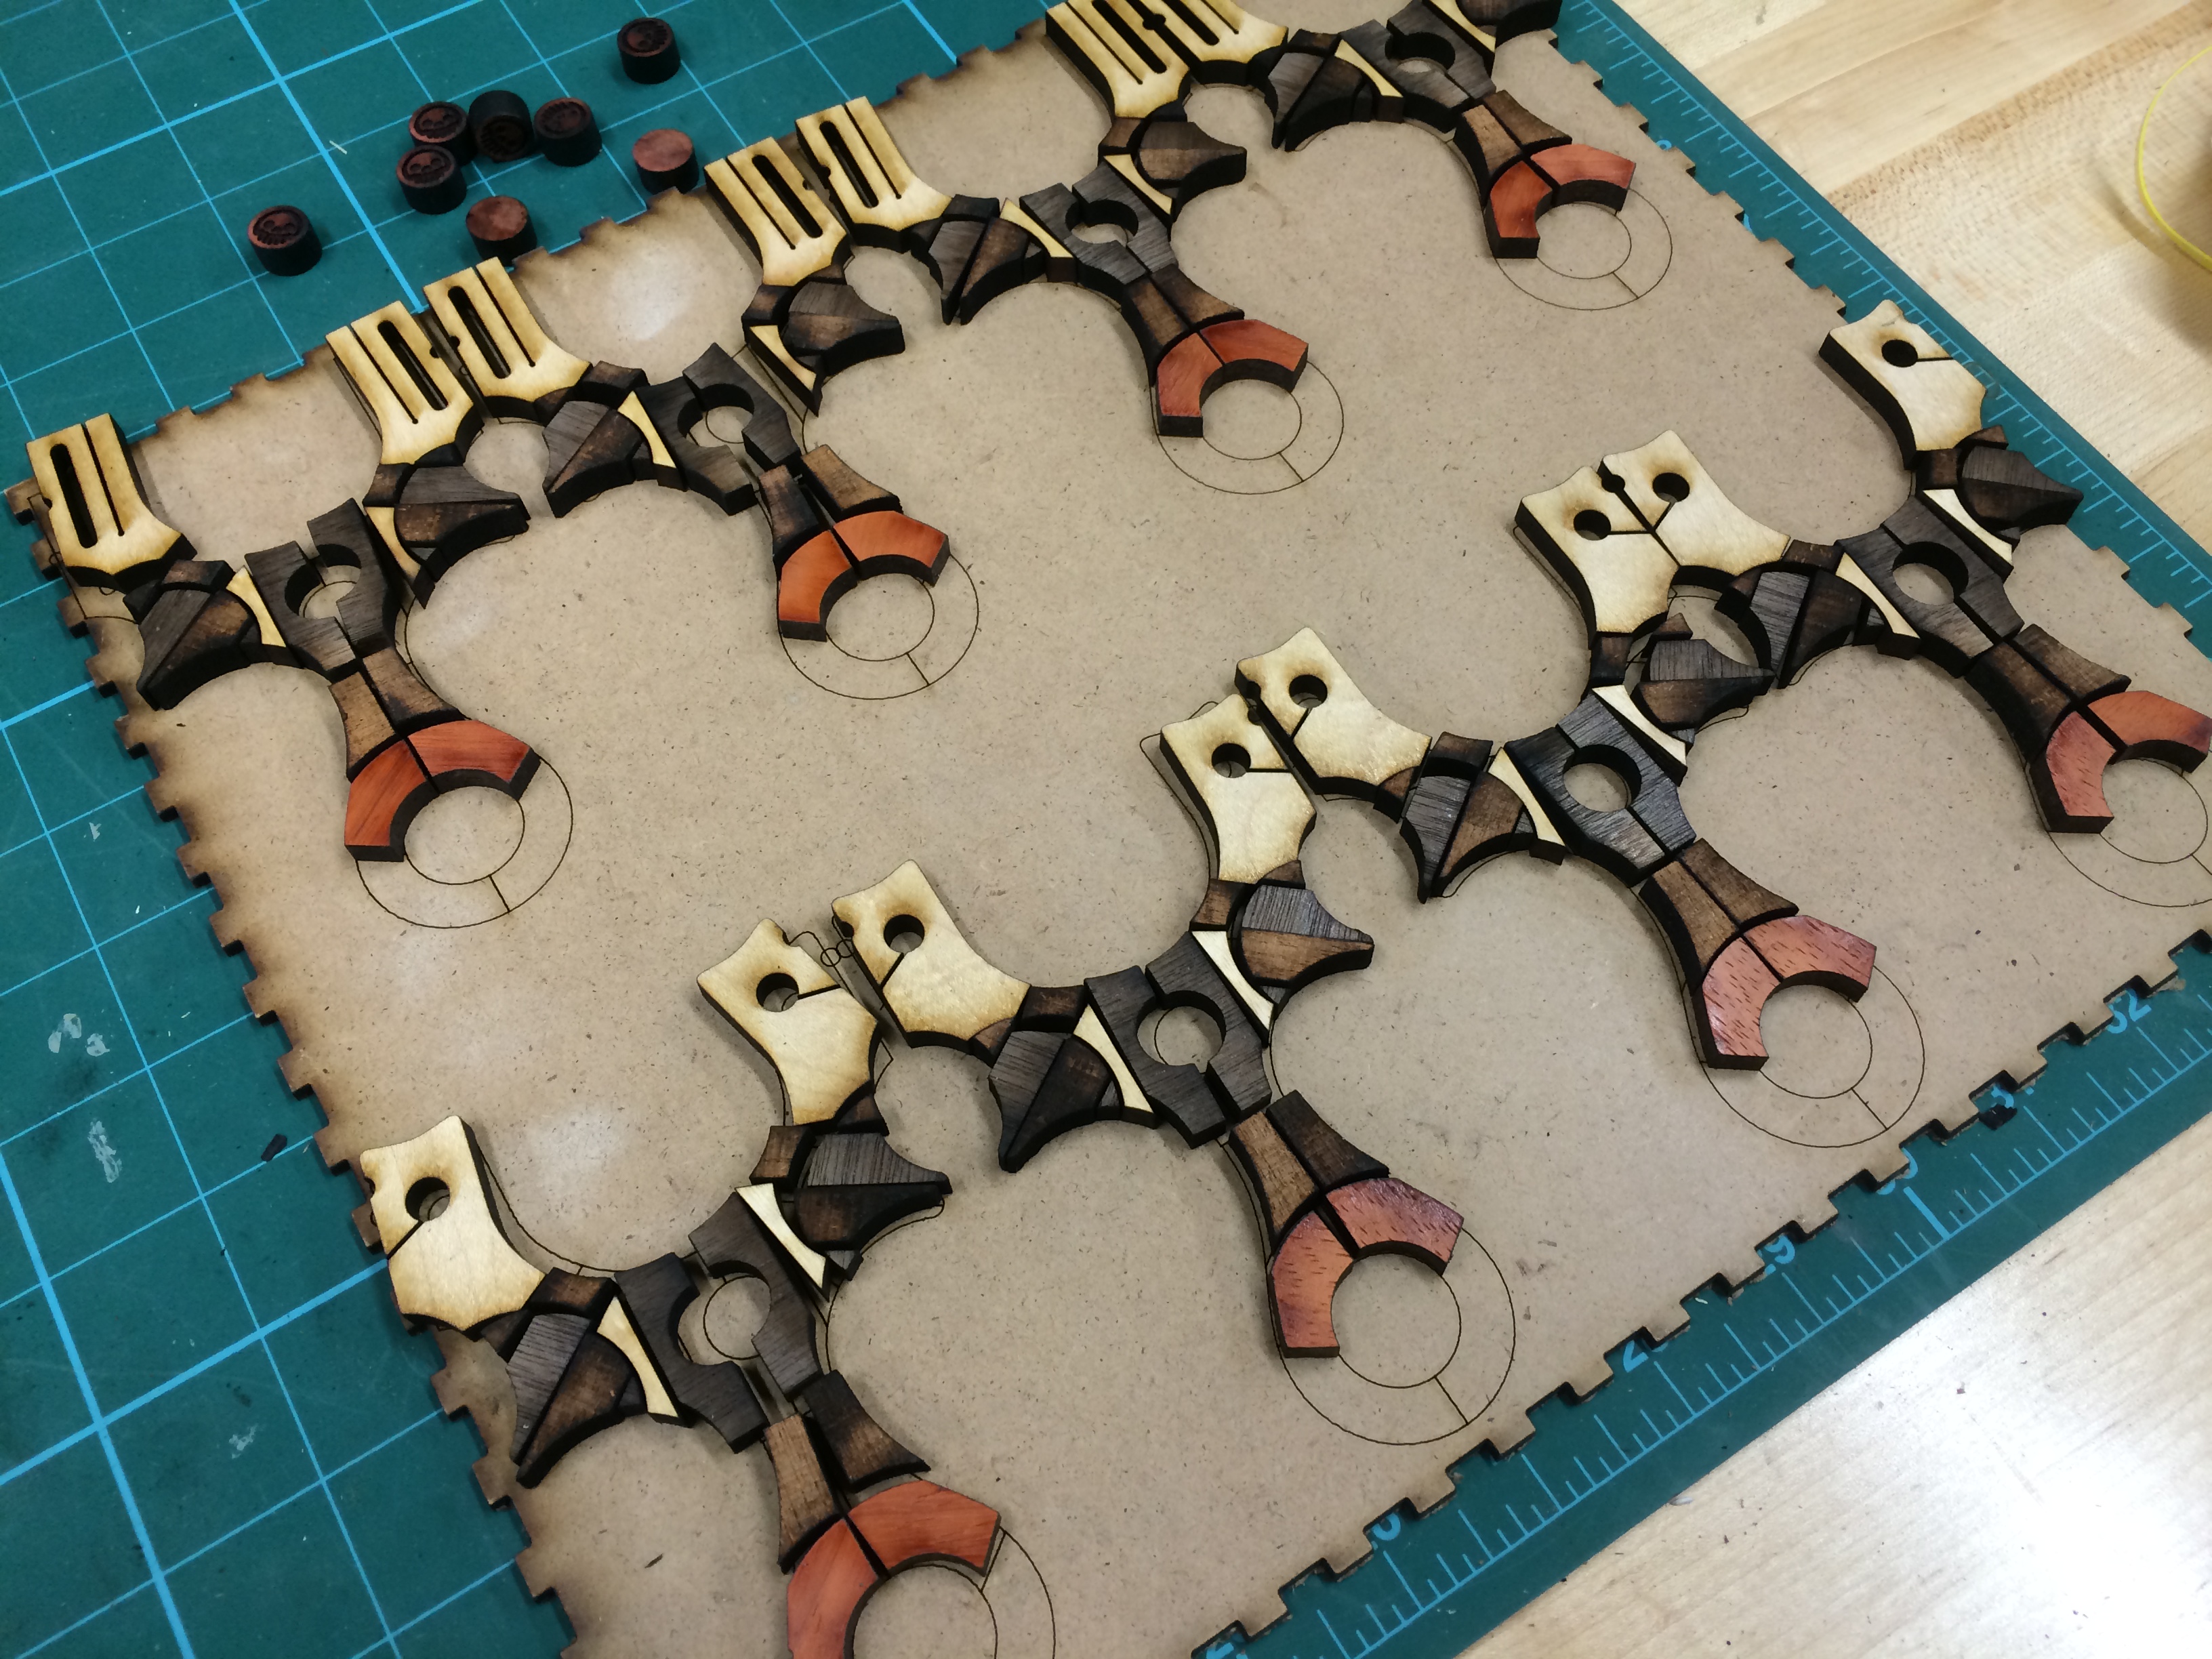
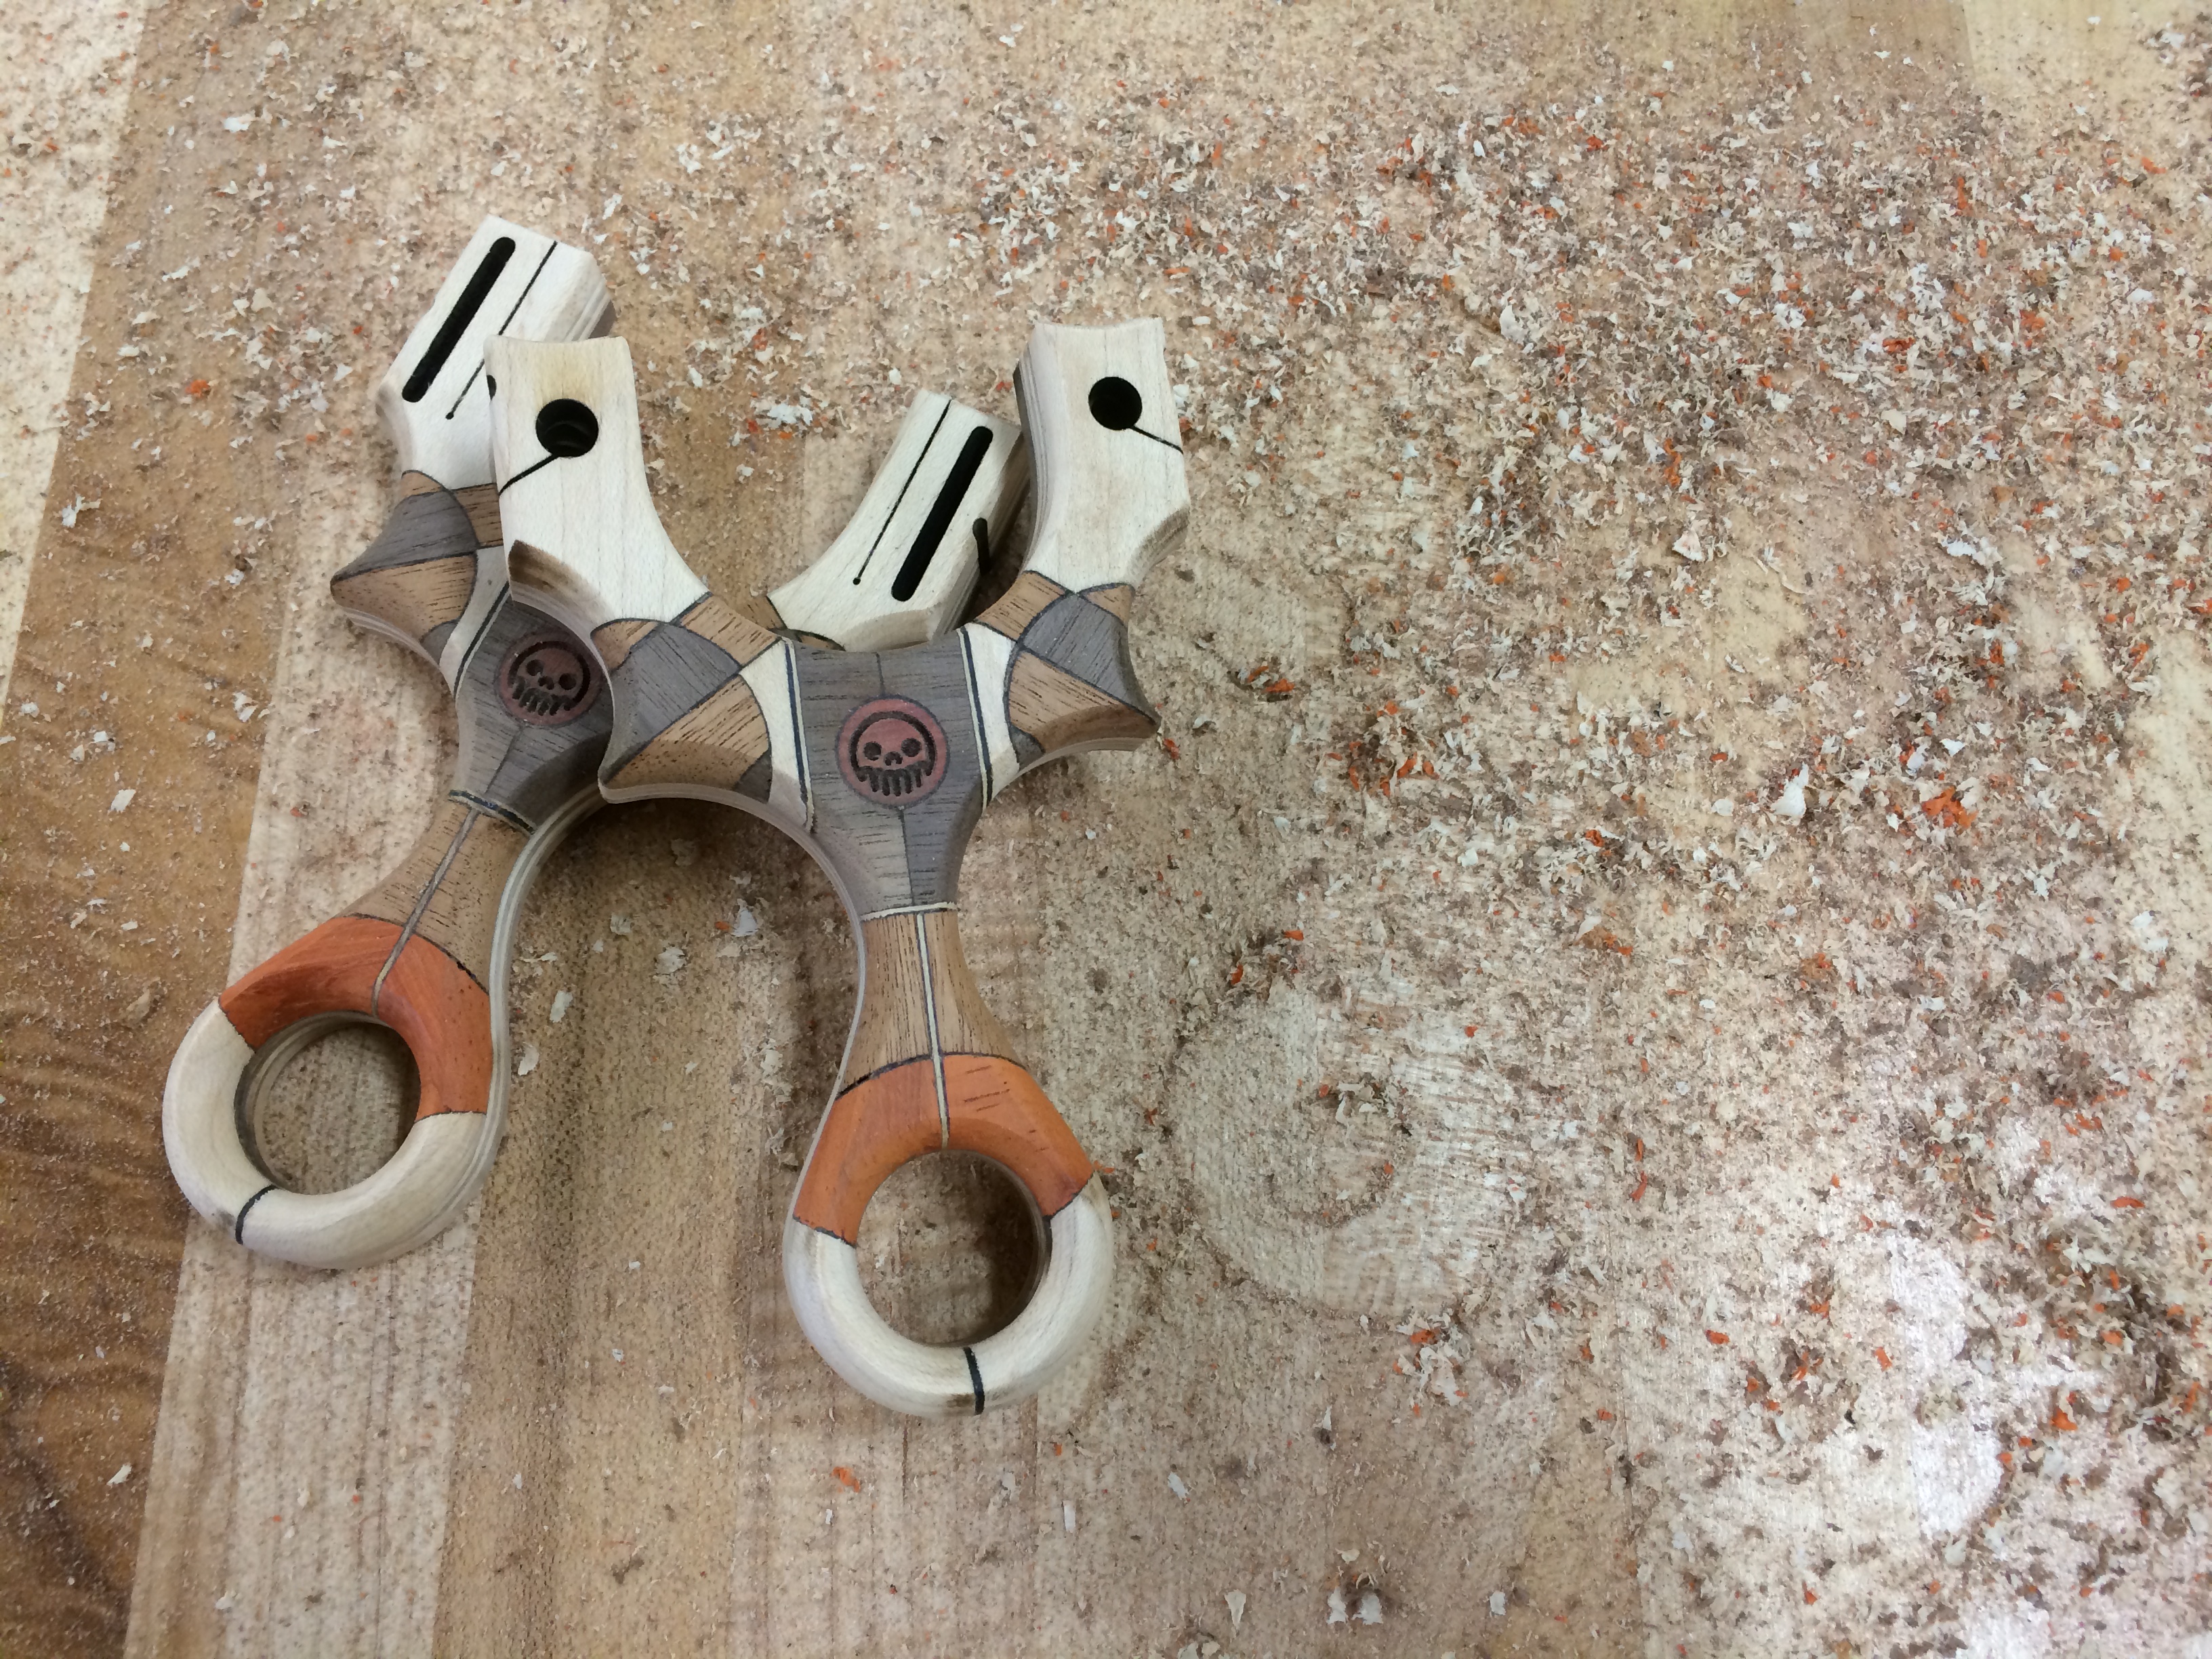
The Harlequin pattern is something I developed when I made another Metro Made project, the Art Deco Loris. It was my ploy to use up a lot of small, left over wood ‘sprues’ generated when laser cutting full frames from planks of hardwood. The results where a stunning selection of hardwoods arranged in a very pleasing Art Deco style.
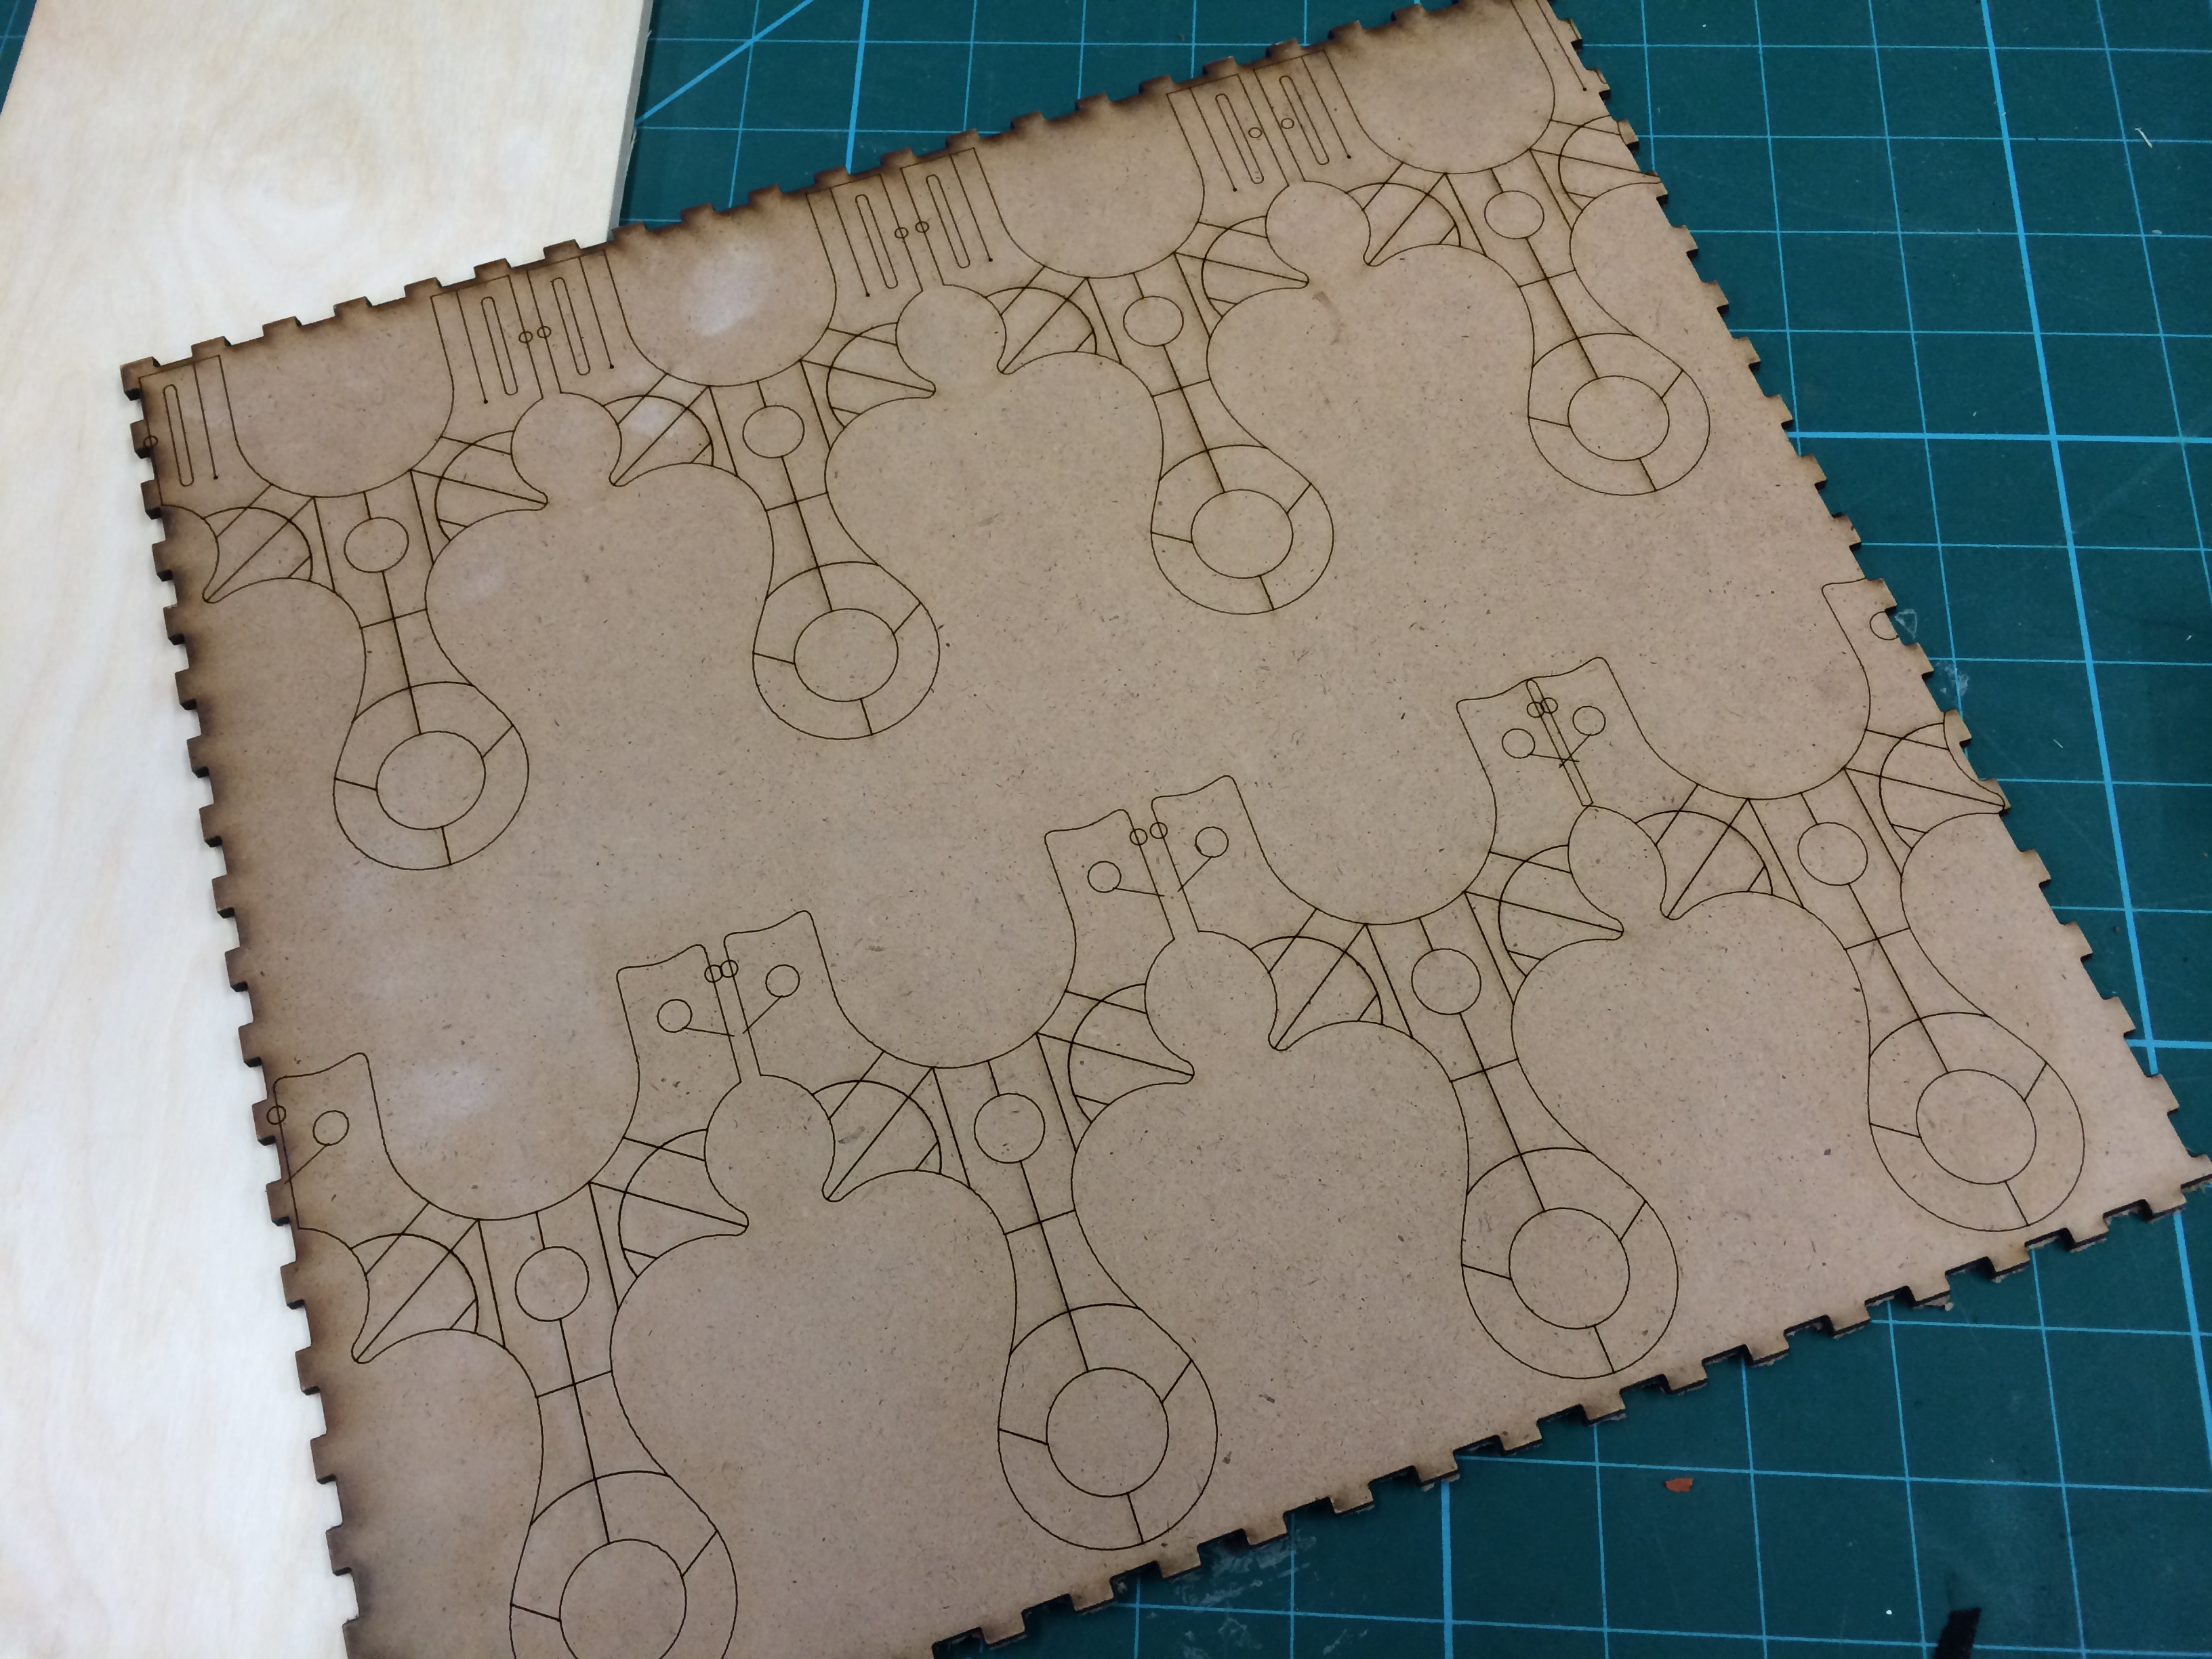
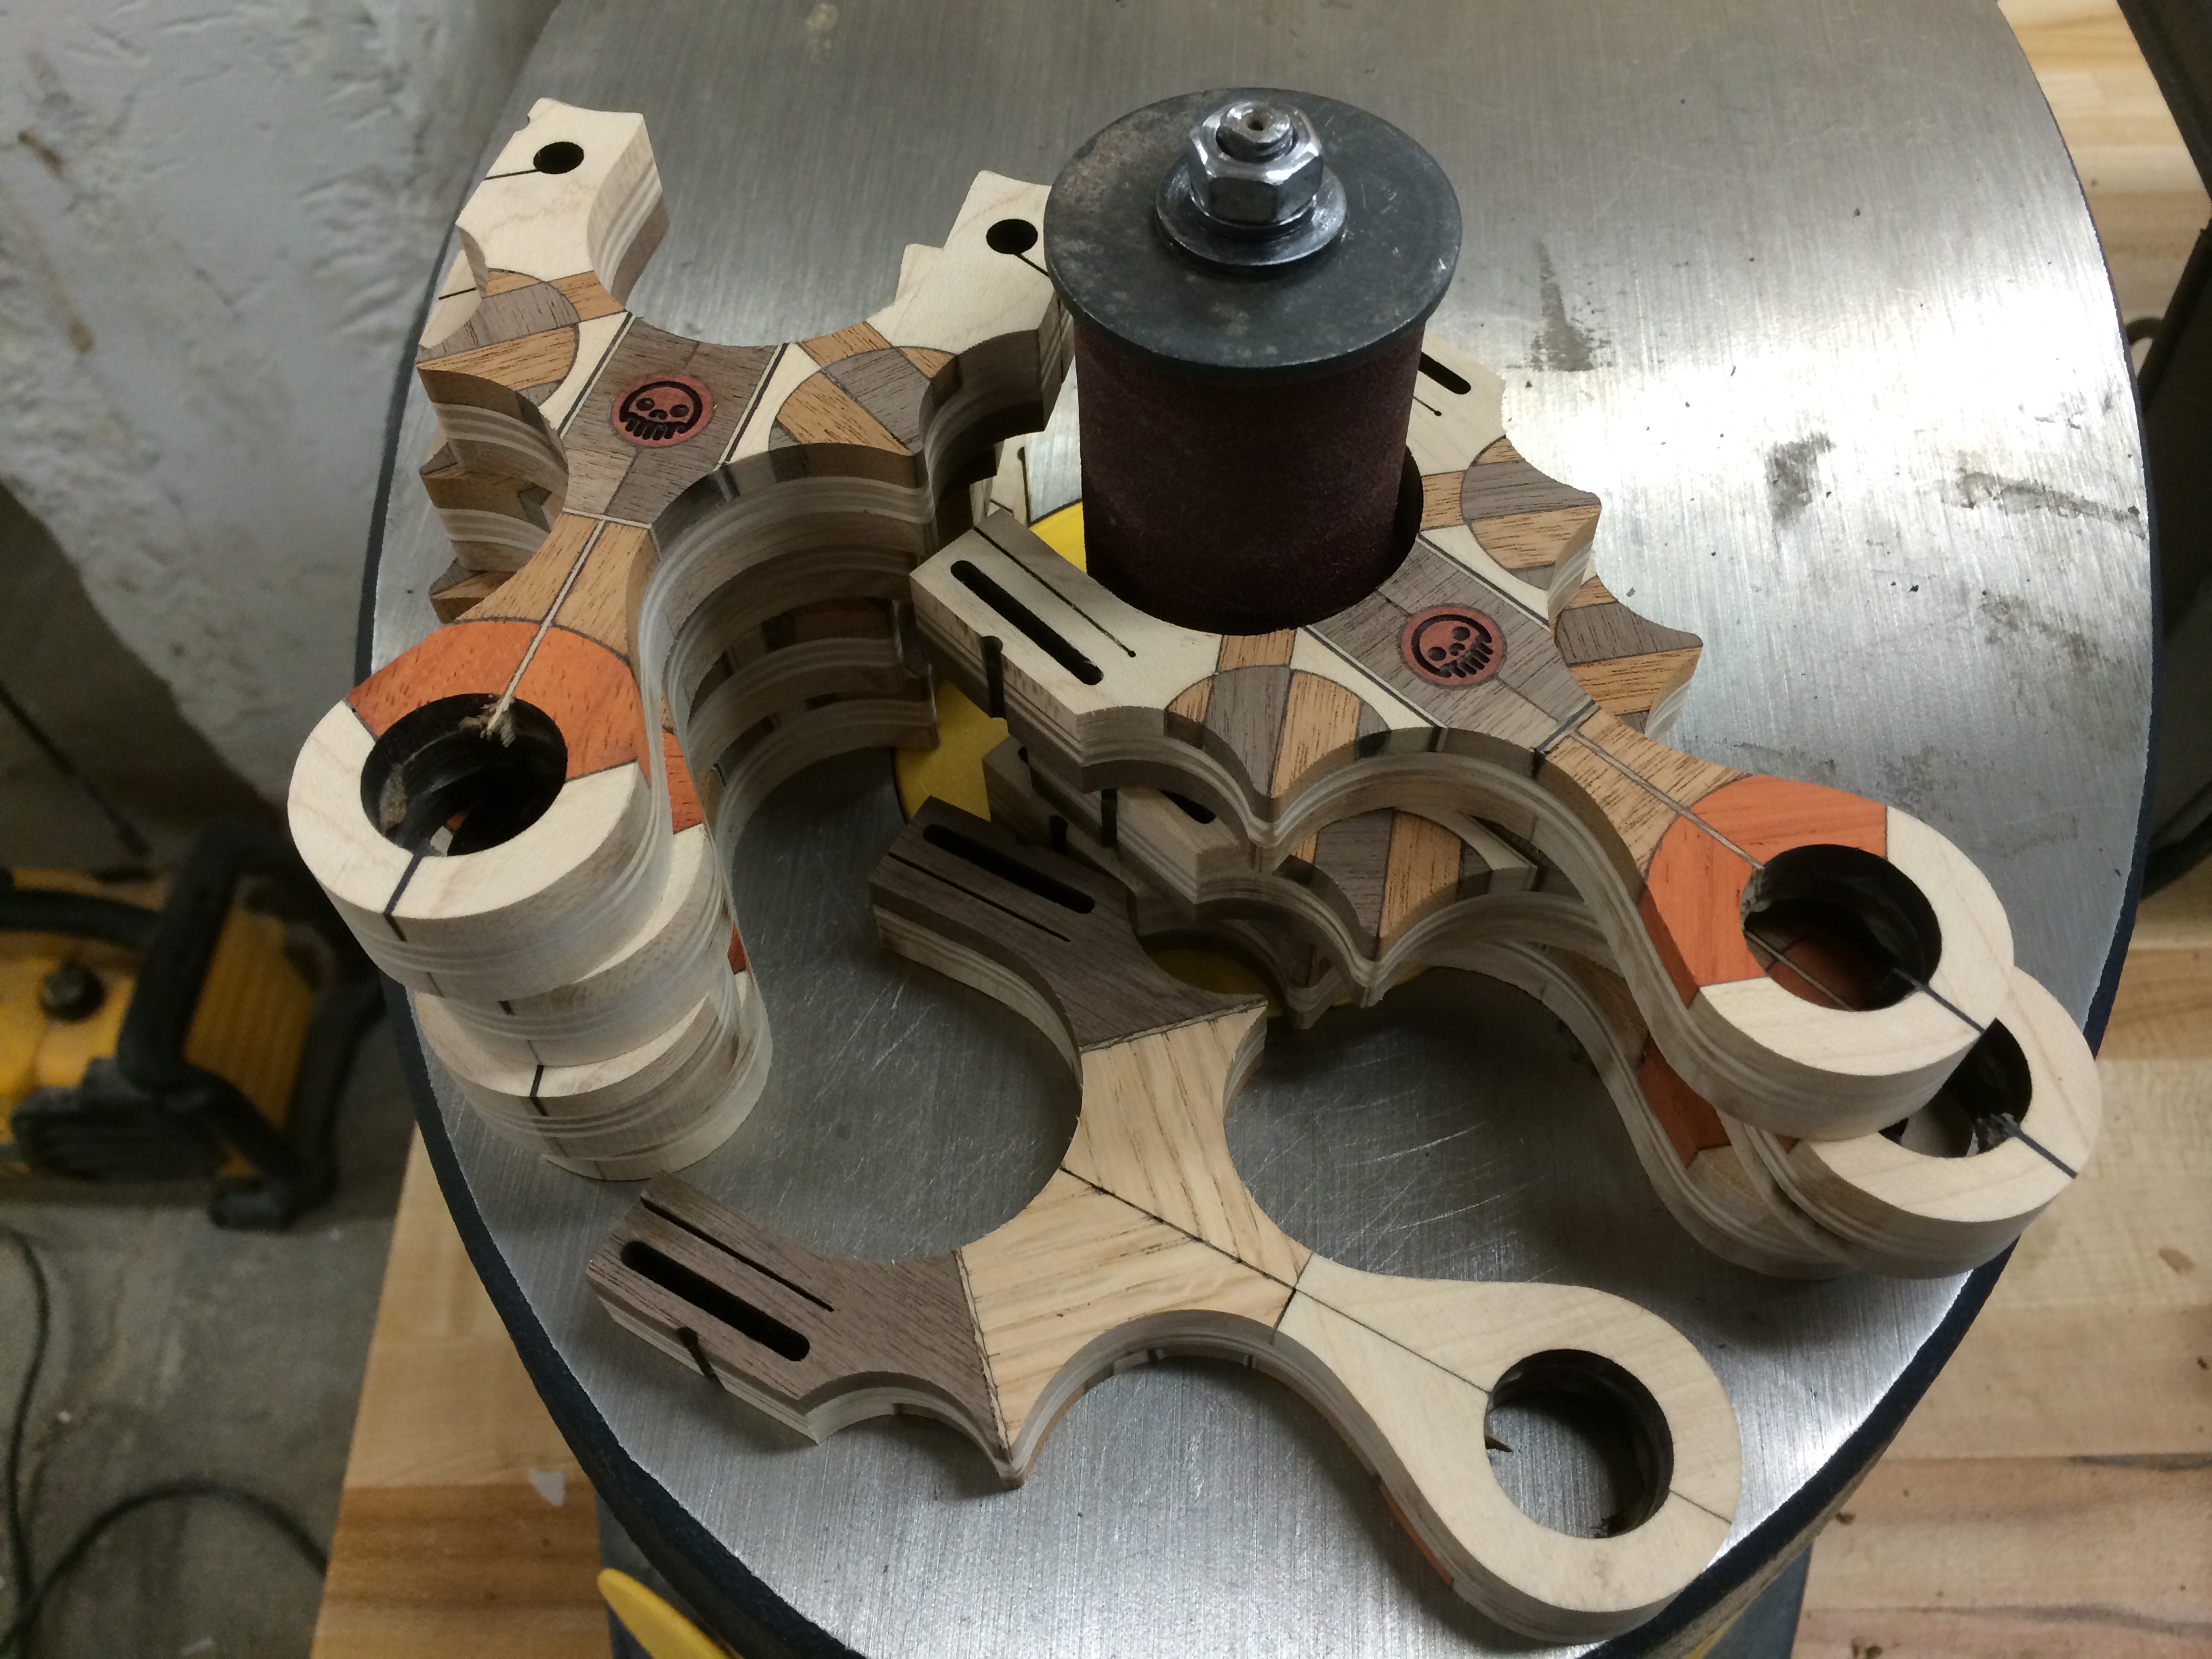
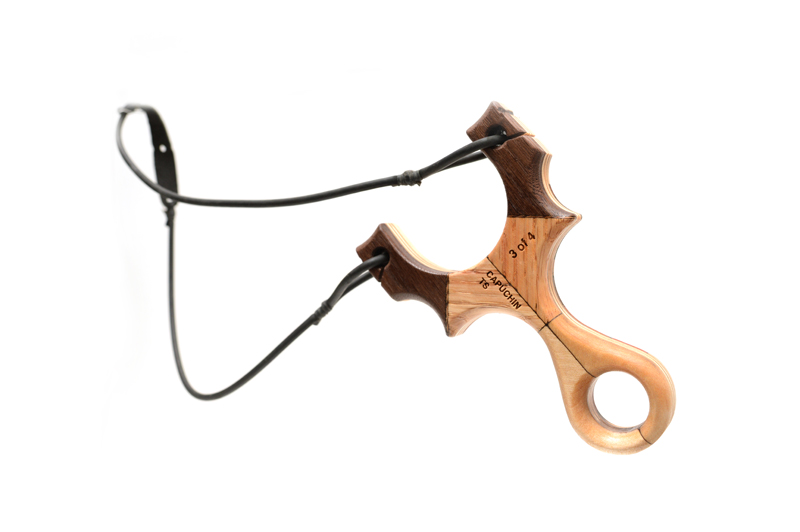
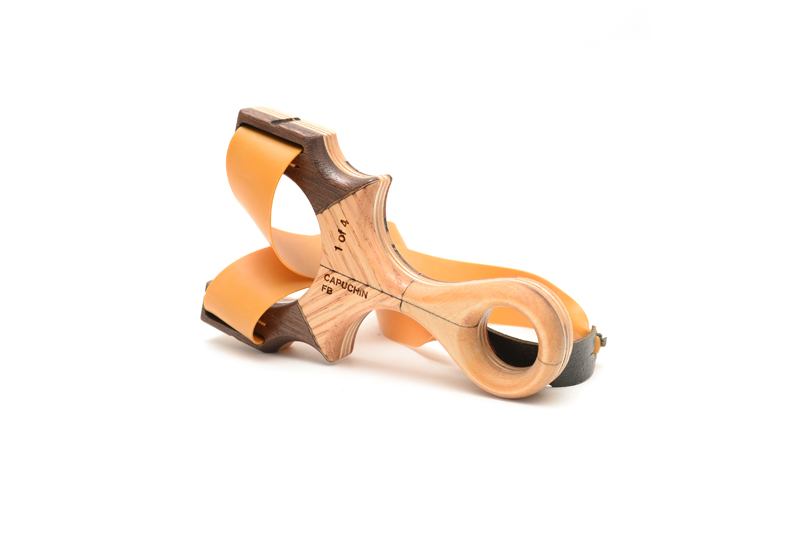
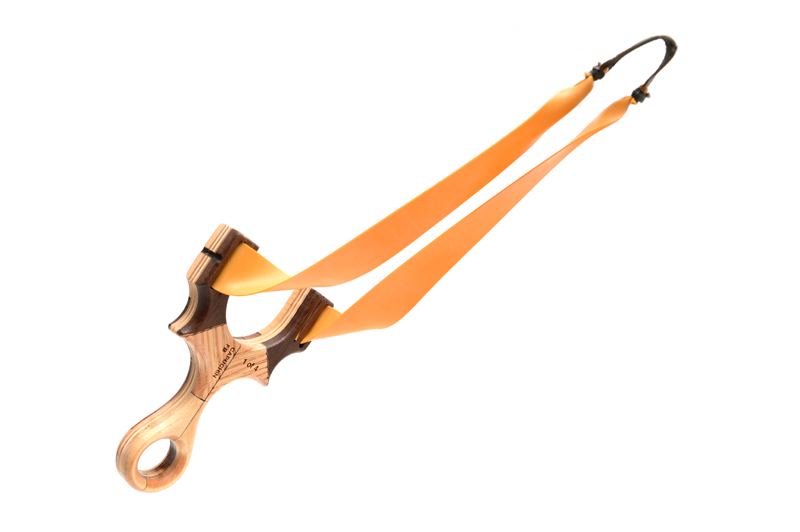
There were a lot request to have this available but the Loris was not the most popular slingshot to begin with, so I decided to go with a more universally appealing frame, the Metro Grade Capuchin. A smaller frame with a lot of potential for slicing and dicing for the Harlequin pattern, I went ahead and did that. I started by laser cutting the 1/4″ Baltic Birch plywood cores. I planned to make 4 Harlequin Capuchin TS’s (Tube Shooter) and 4 Harlequin Capuchin FB’s (Flat Band).
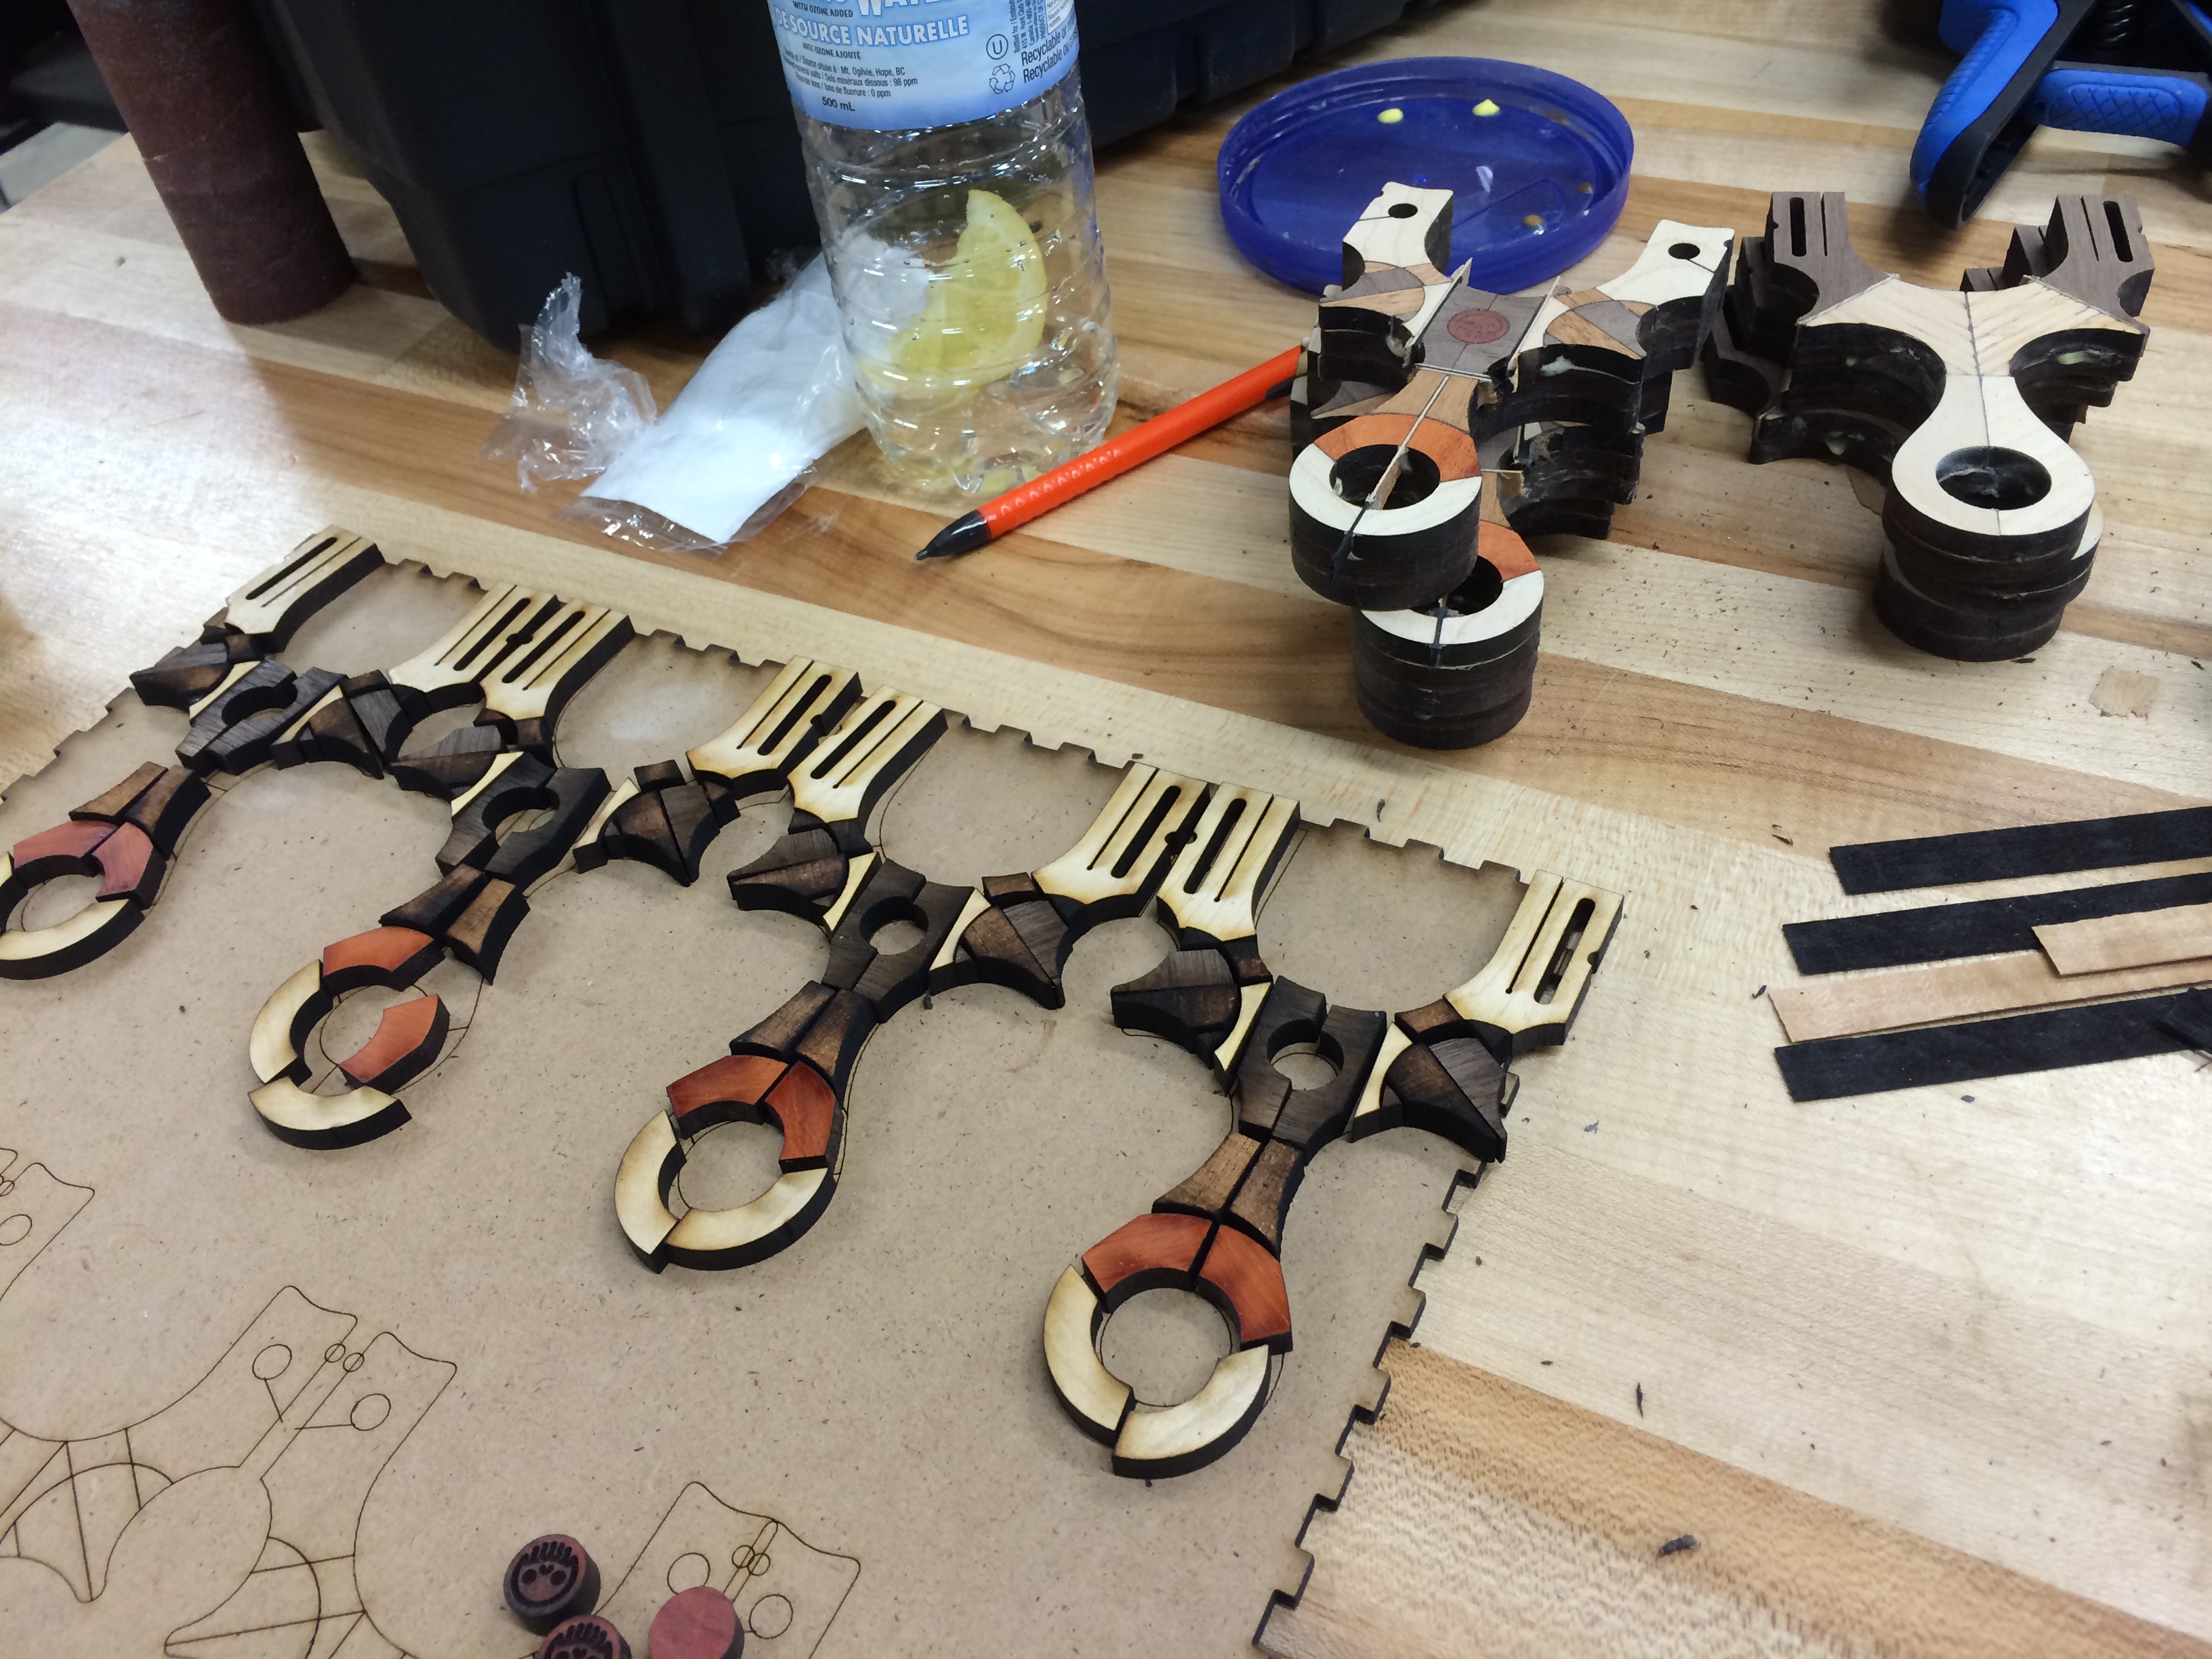
The biggest difference between making one of these versus eight is parts management. With 8 sets of near identical micro bits of wood (close to a 30 some odd part count per slingshot) something to keep them in order was necessary. Here’s what I used:
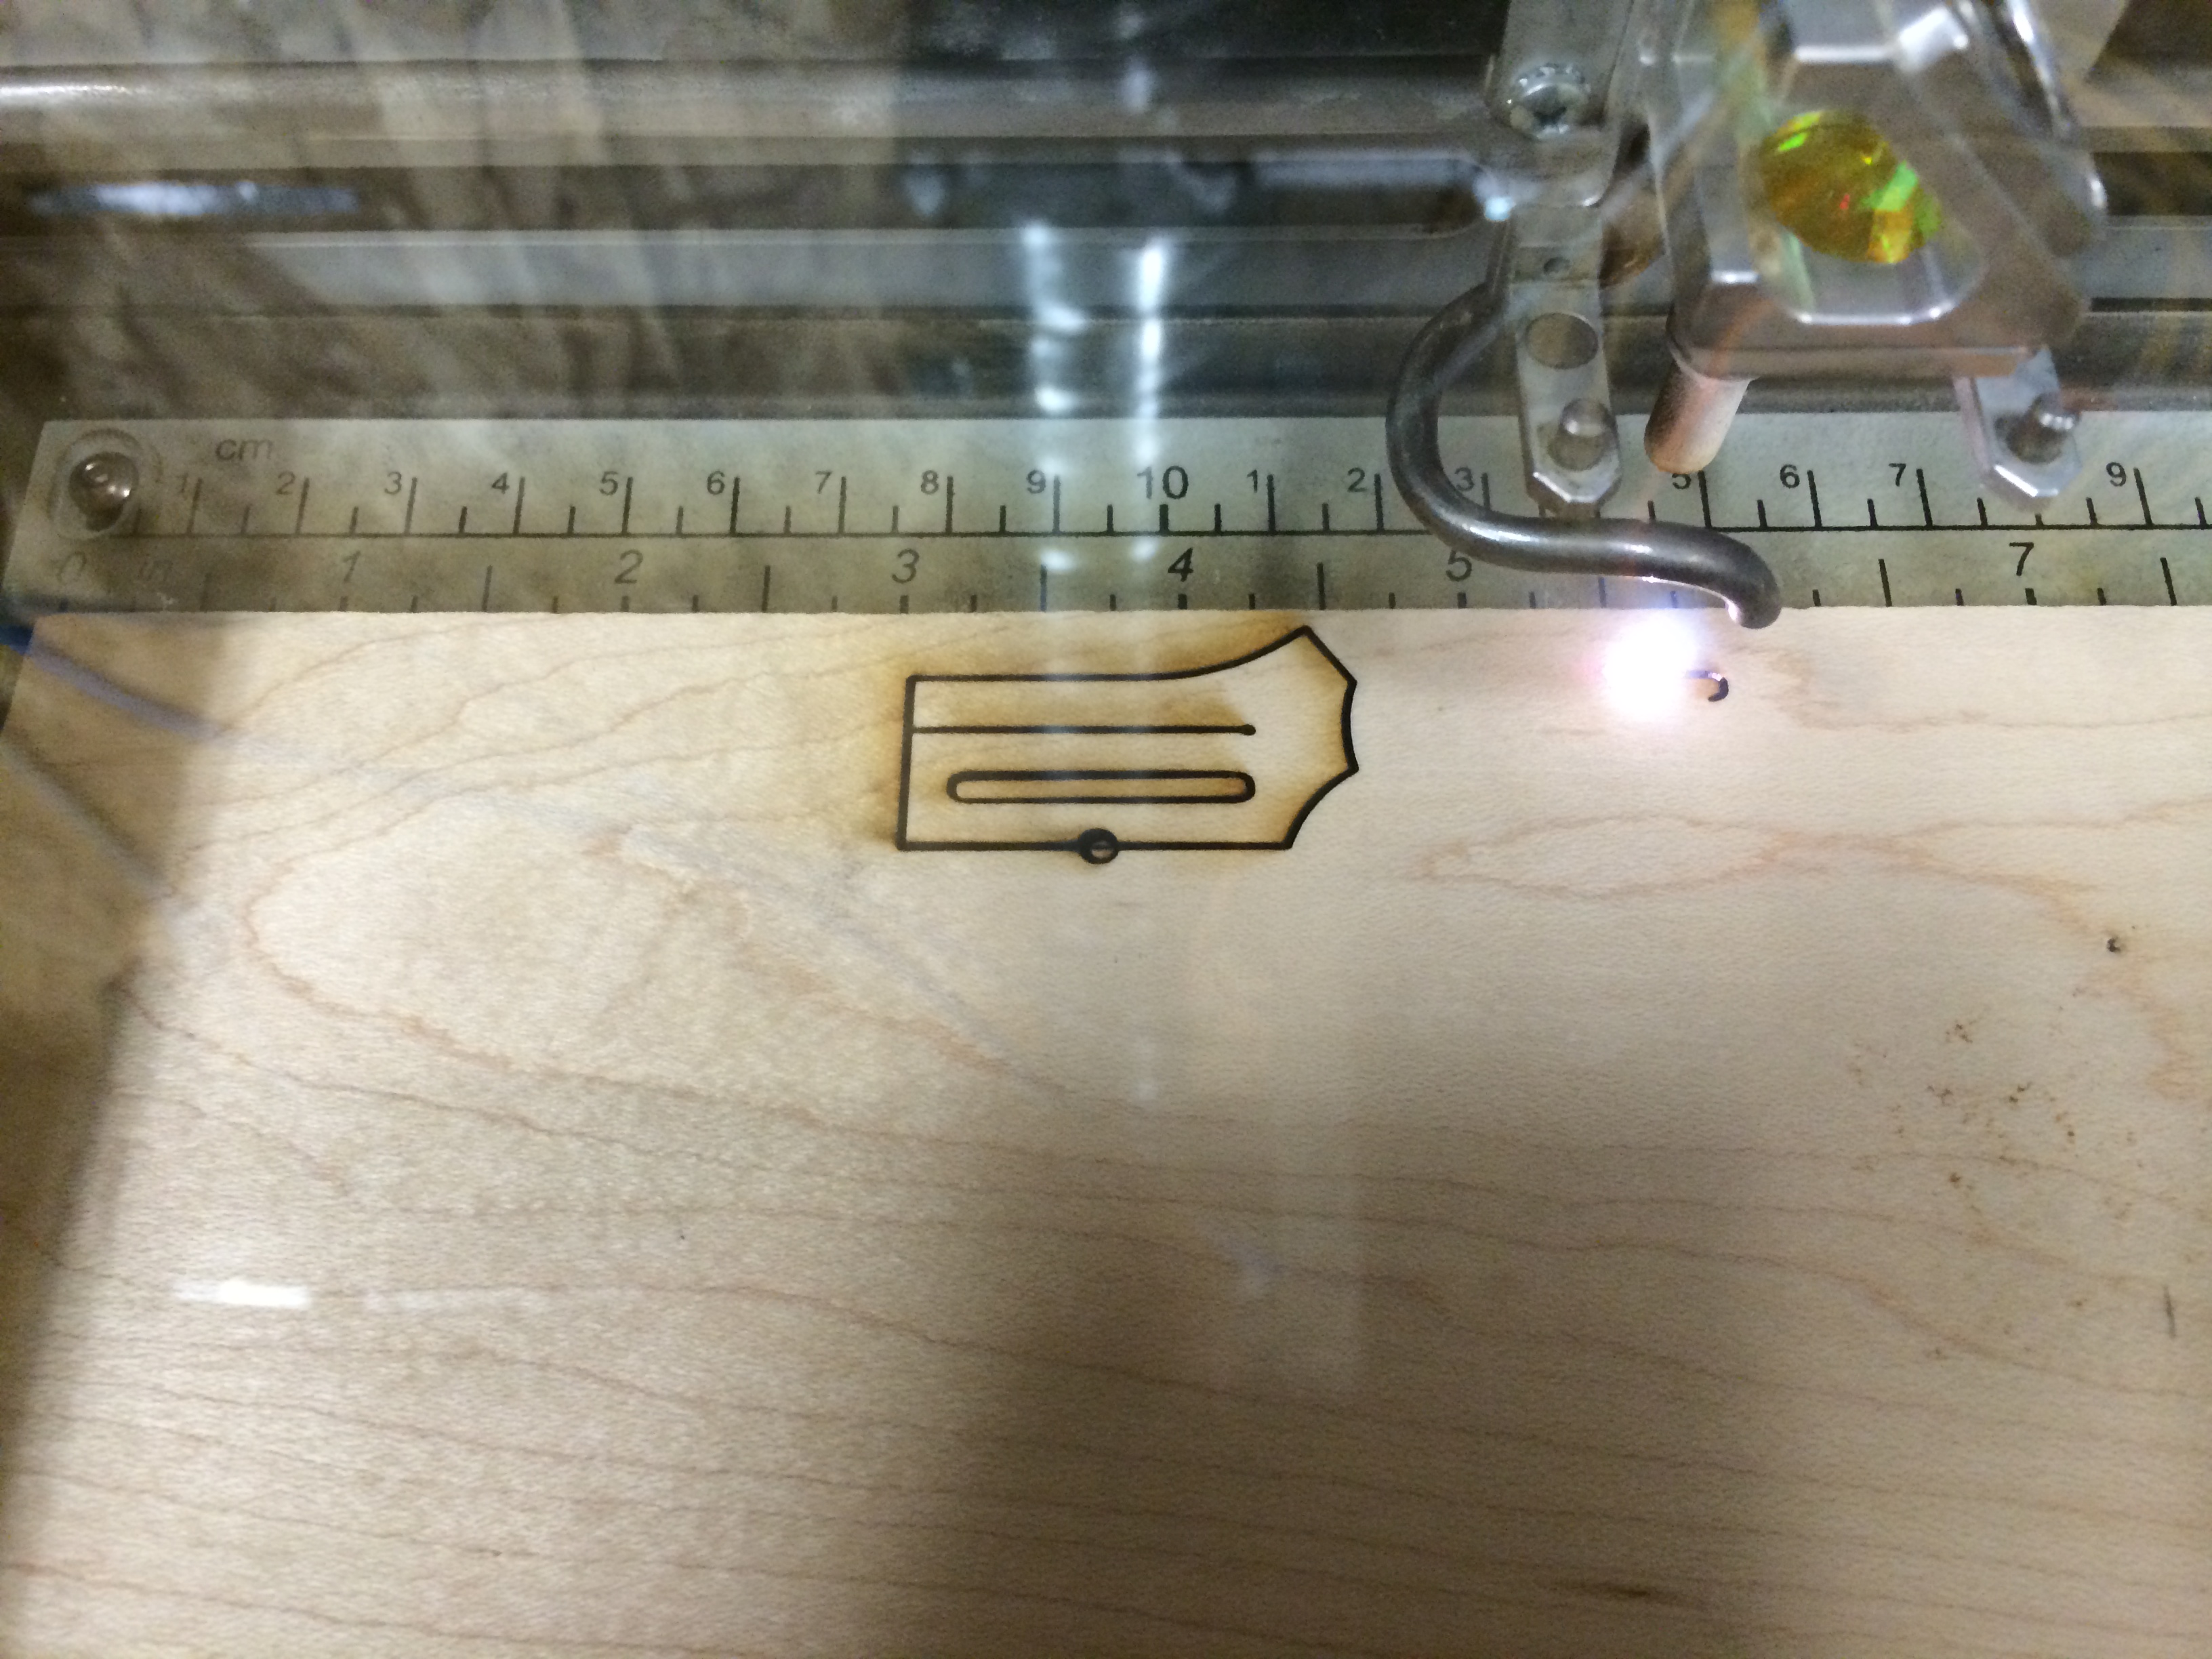
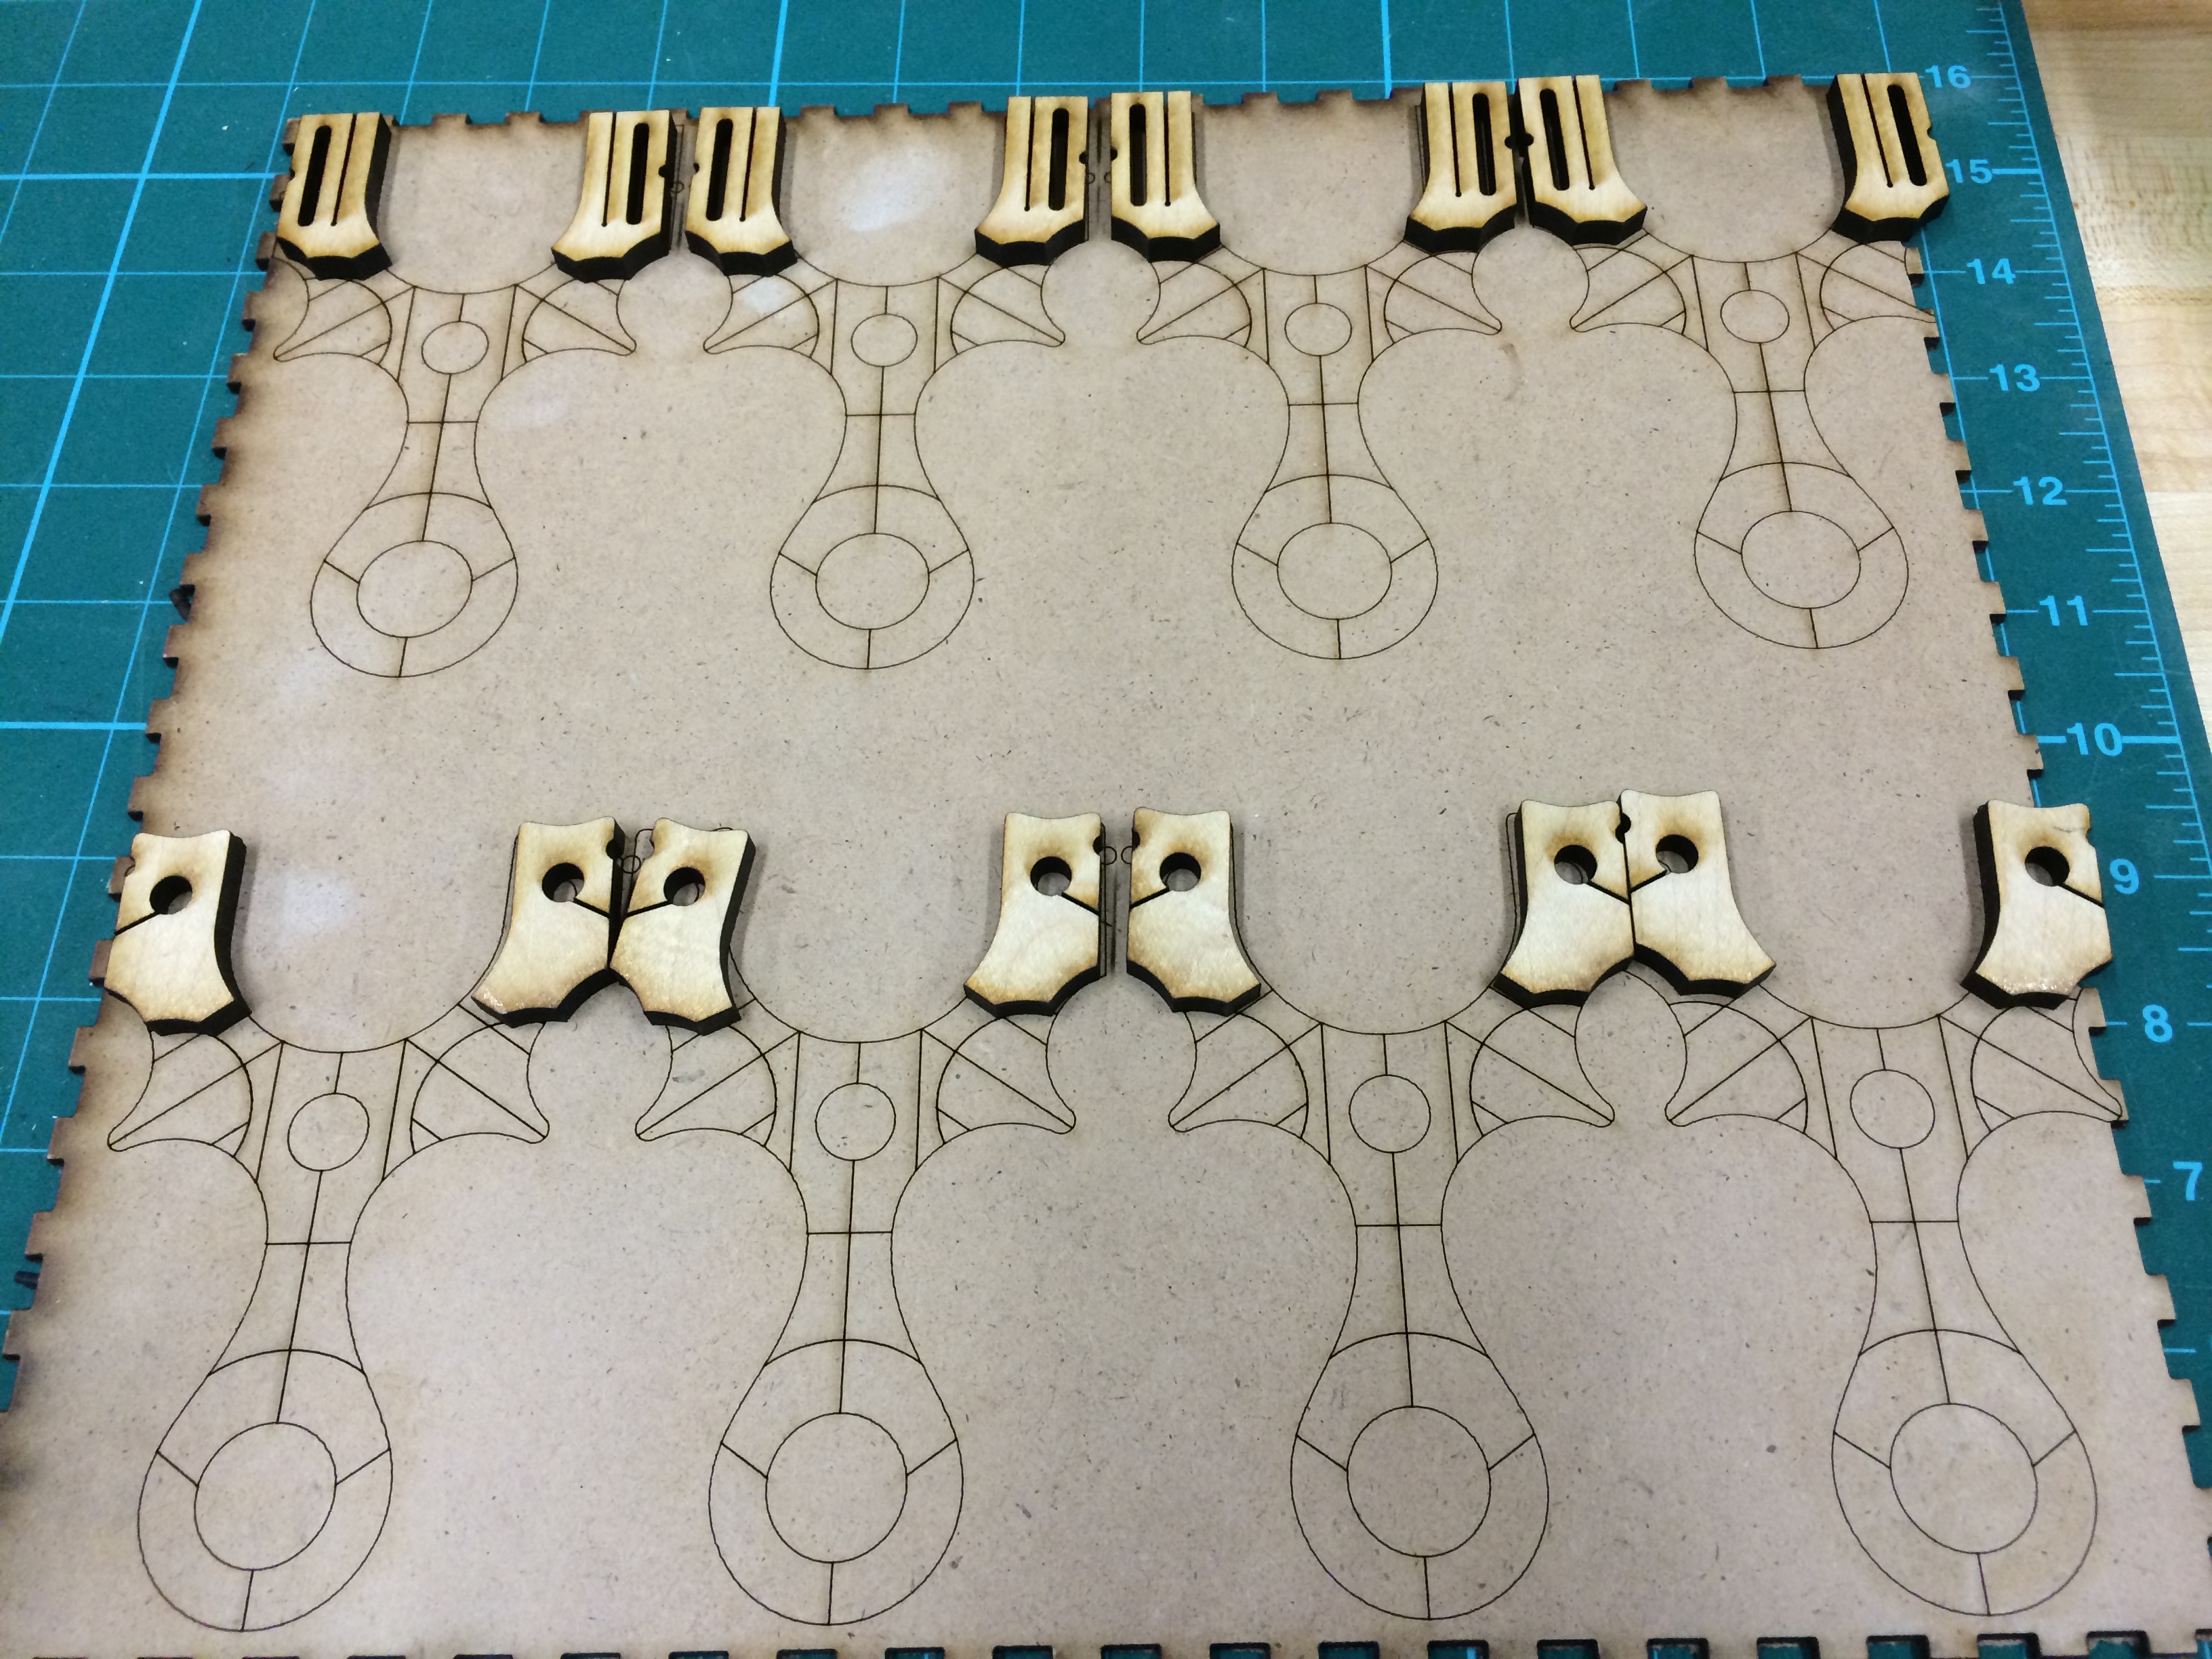
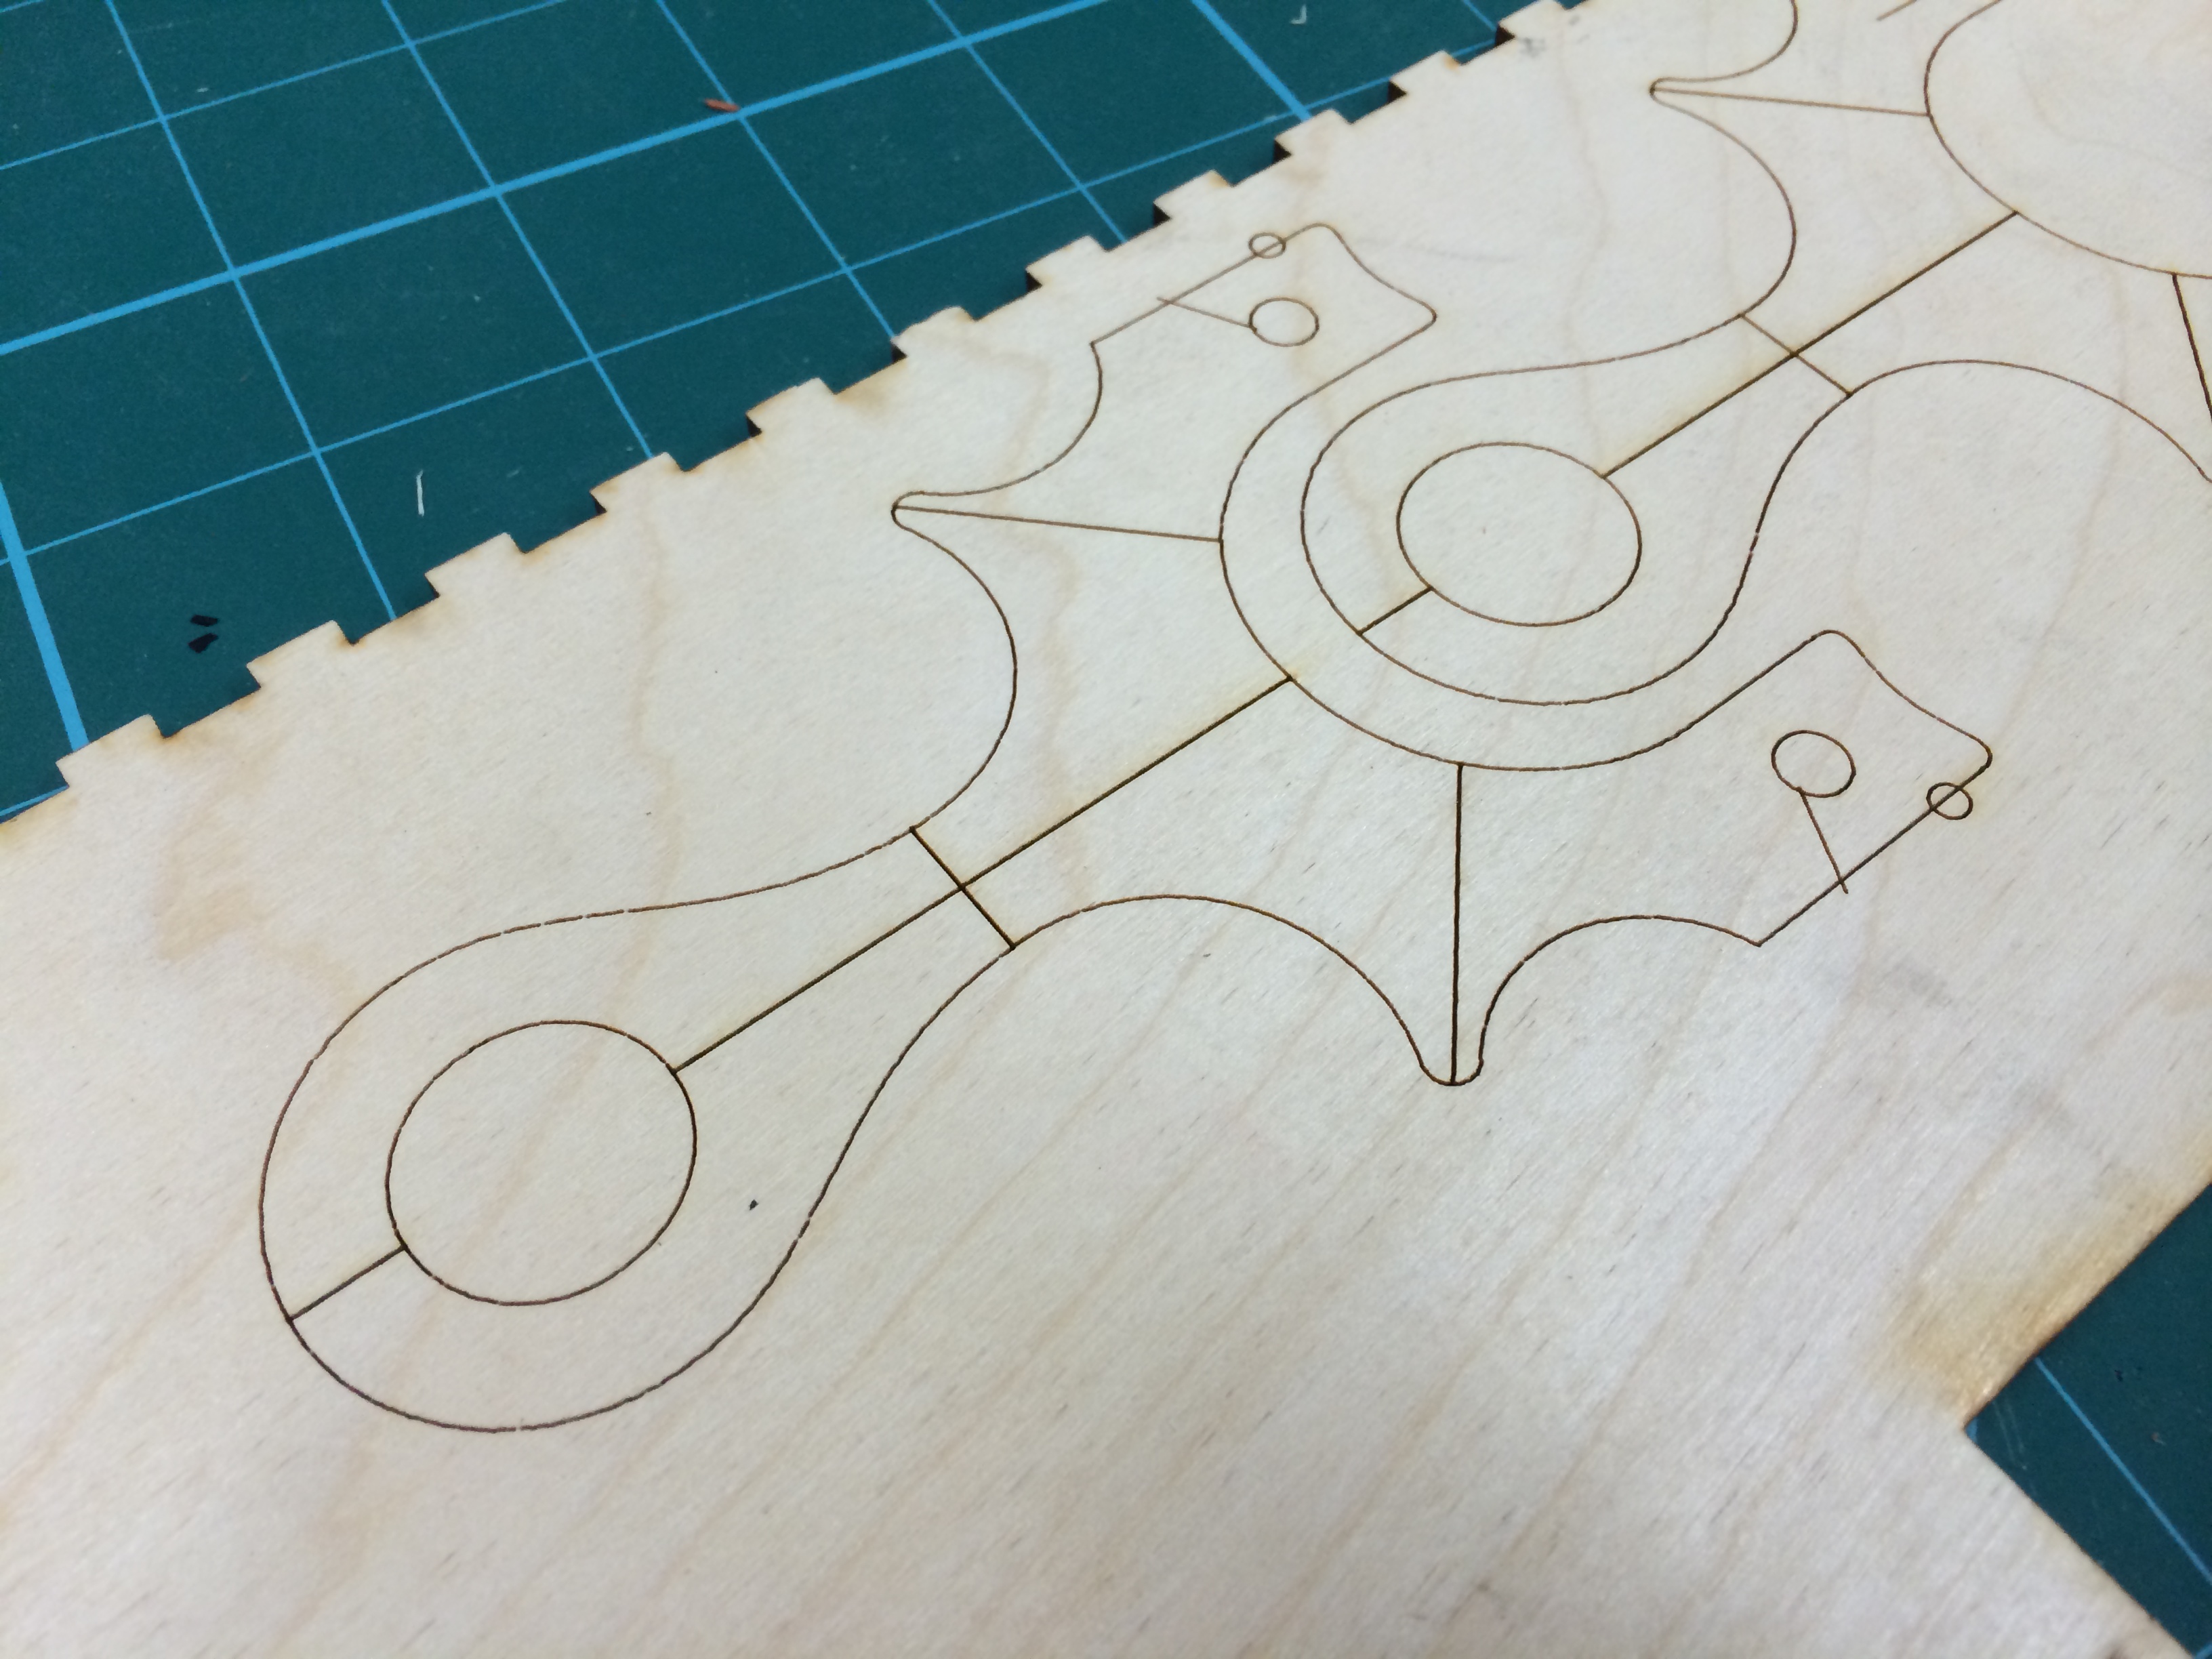
Adjusting the laser so it would only shoot out 50% of it’s 75 watt beam and speeding up to a max velocity, I made a template to organize the parts as they came off the laser cutter. The material is a scrap piece of hardboard. The next few photos show how the parts started to fill up the puzzle grid. I chose to go with rock maple for the fork tips since it is one of the hardest woods that can be laser cut and it is also readily available.
Not long after, the Honduran Mahogany, Black Walnut, Paduak and some more maple was laser cut and placed in their respective spots. You can see how the puzzle board is necessary now, and this is just one side.
The final pieces for that side were cut from maple, here’s the video to prove it.
Here are some shots of the backside puzzle board. That’s some Walnut and a piece of vintage Oak reclaimed from an ‘old’ friend (who is young at heart!). Meet Mervin, the most brilliant guy I know.
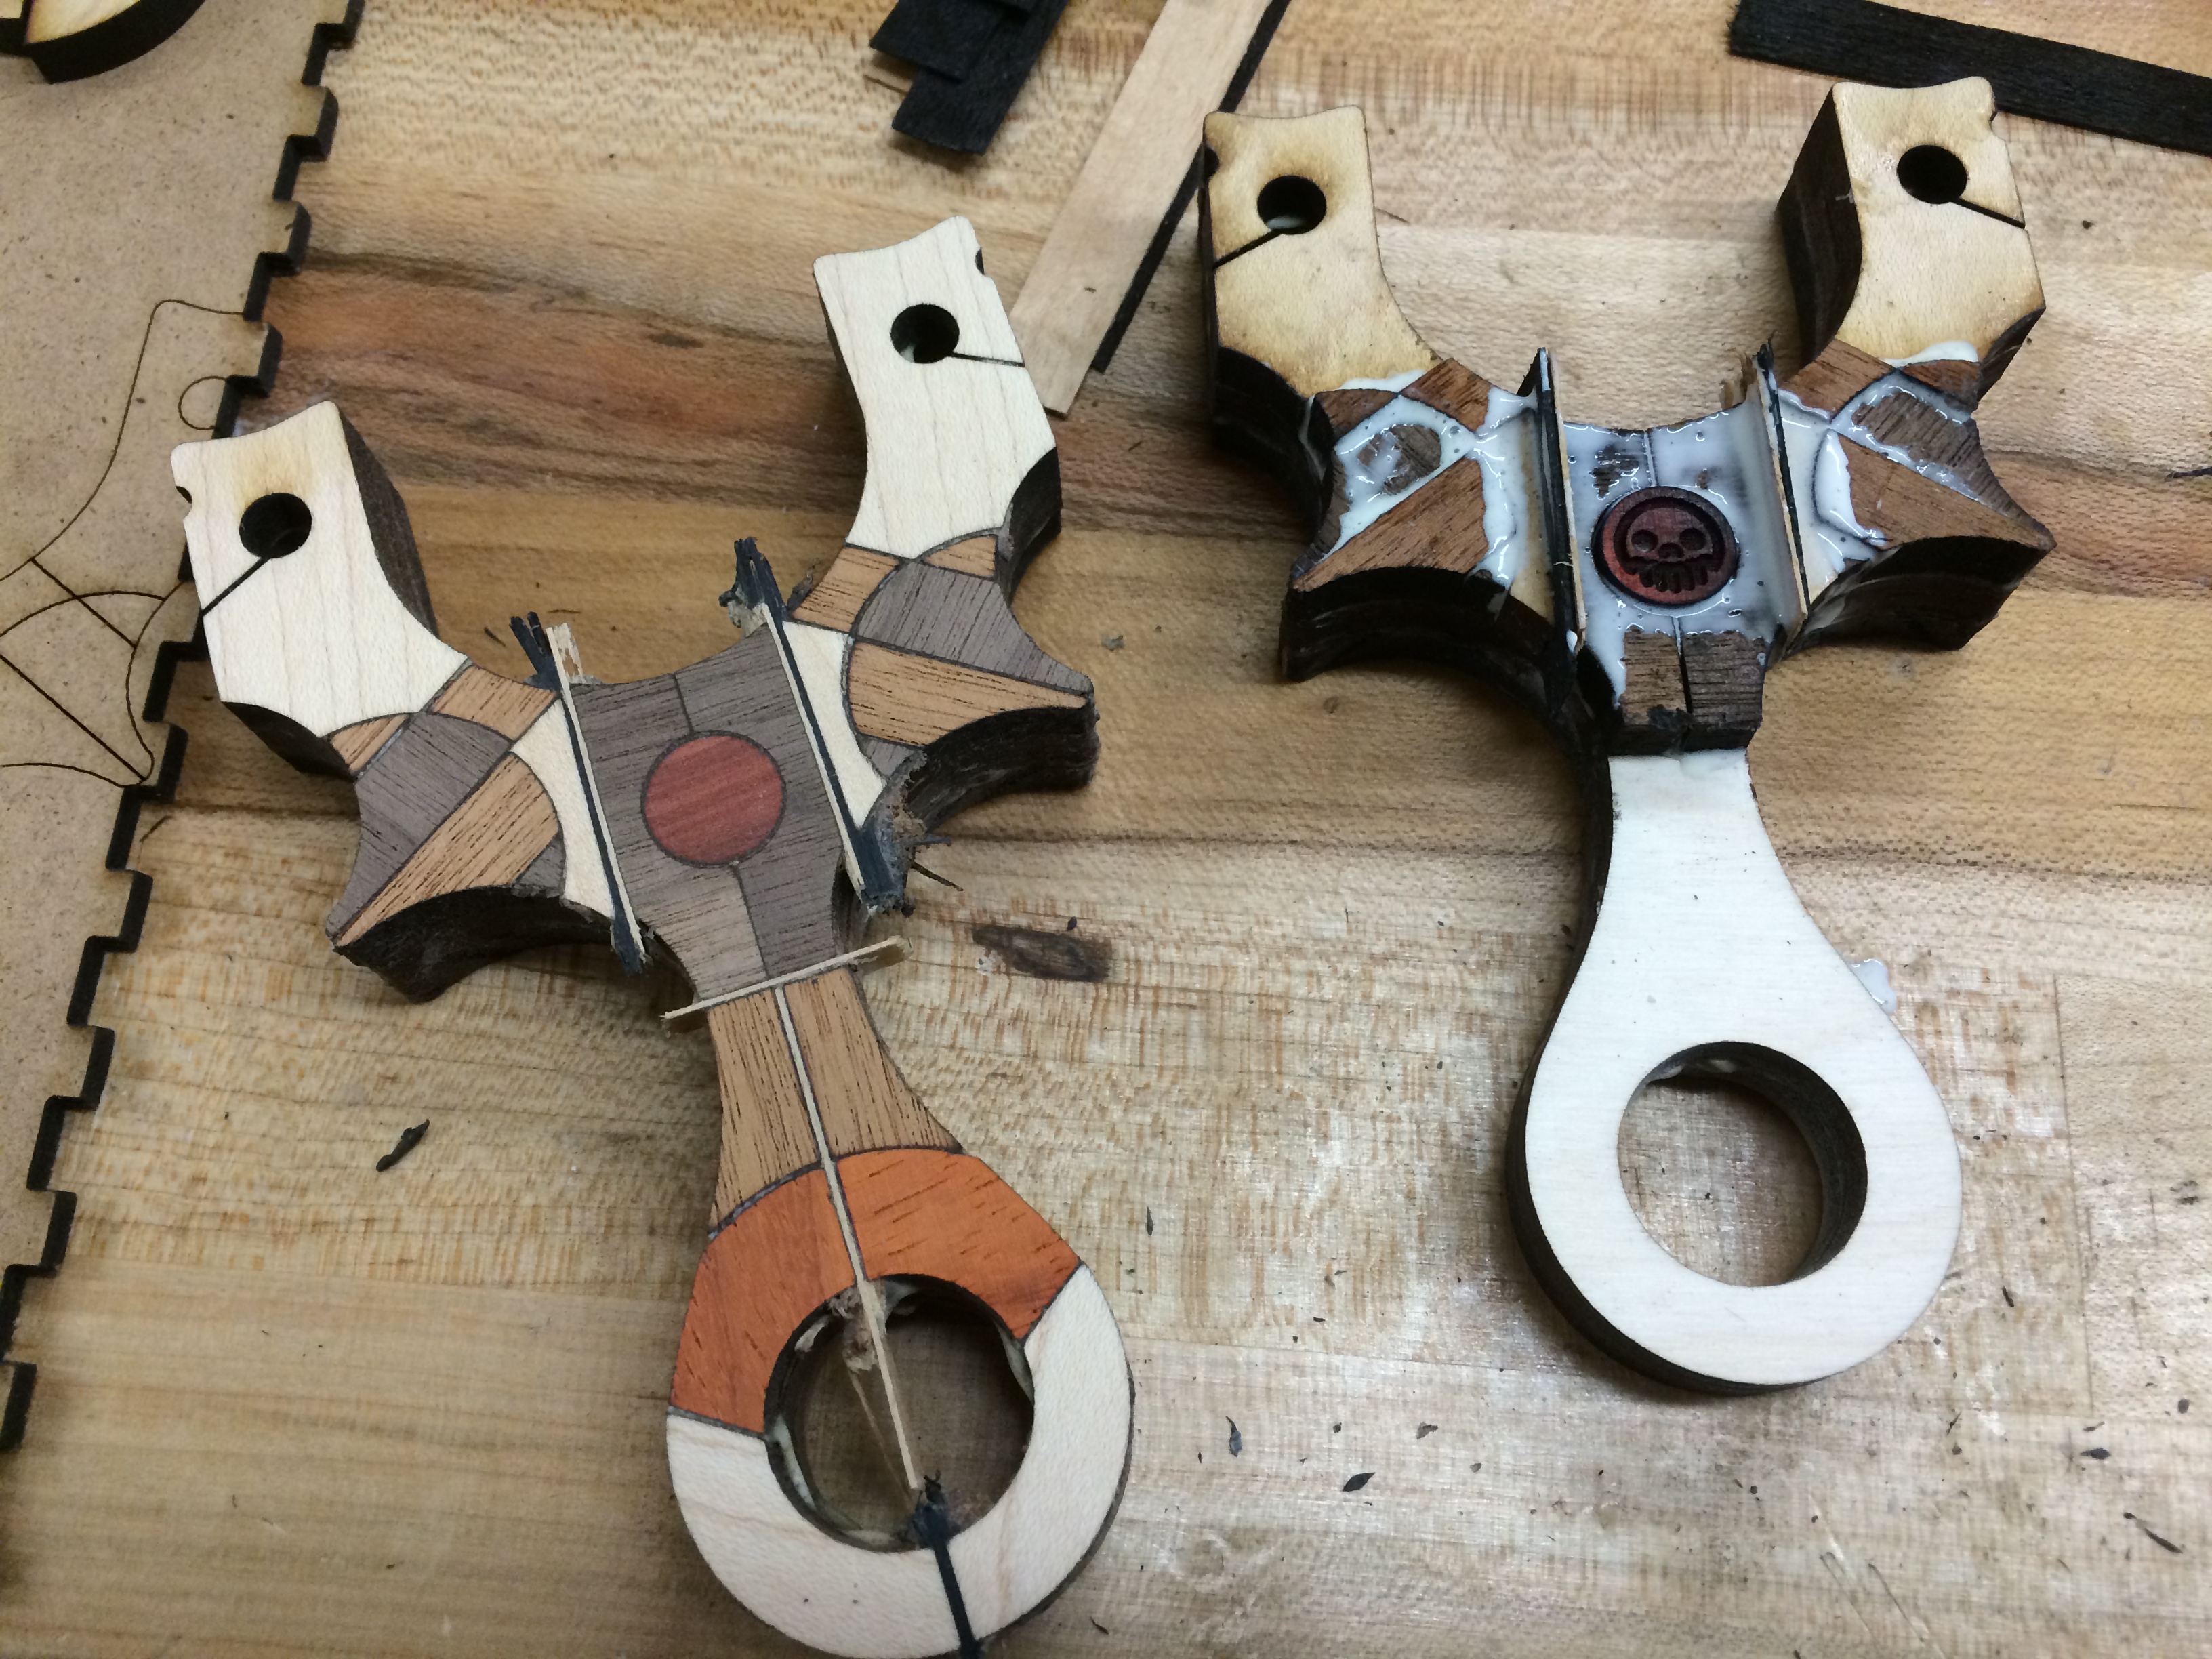
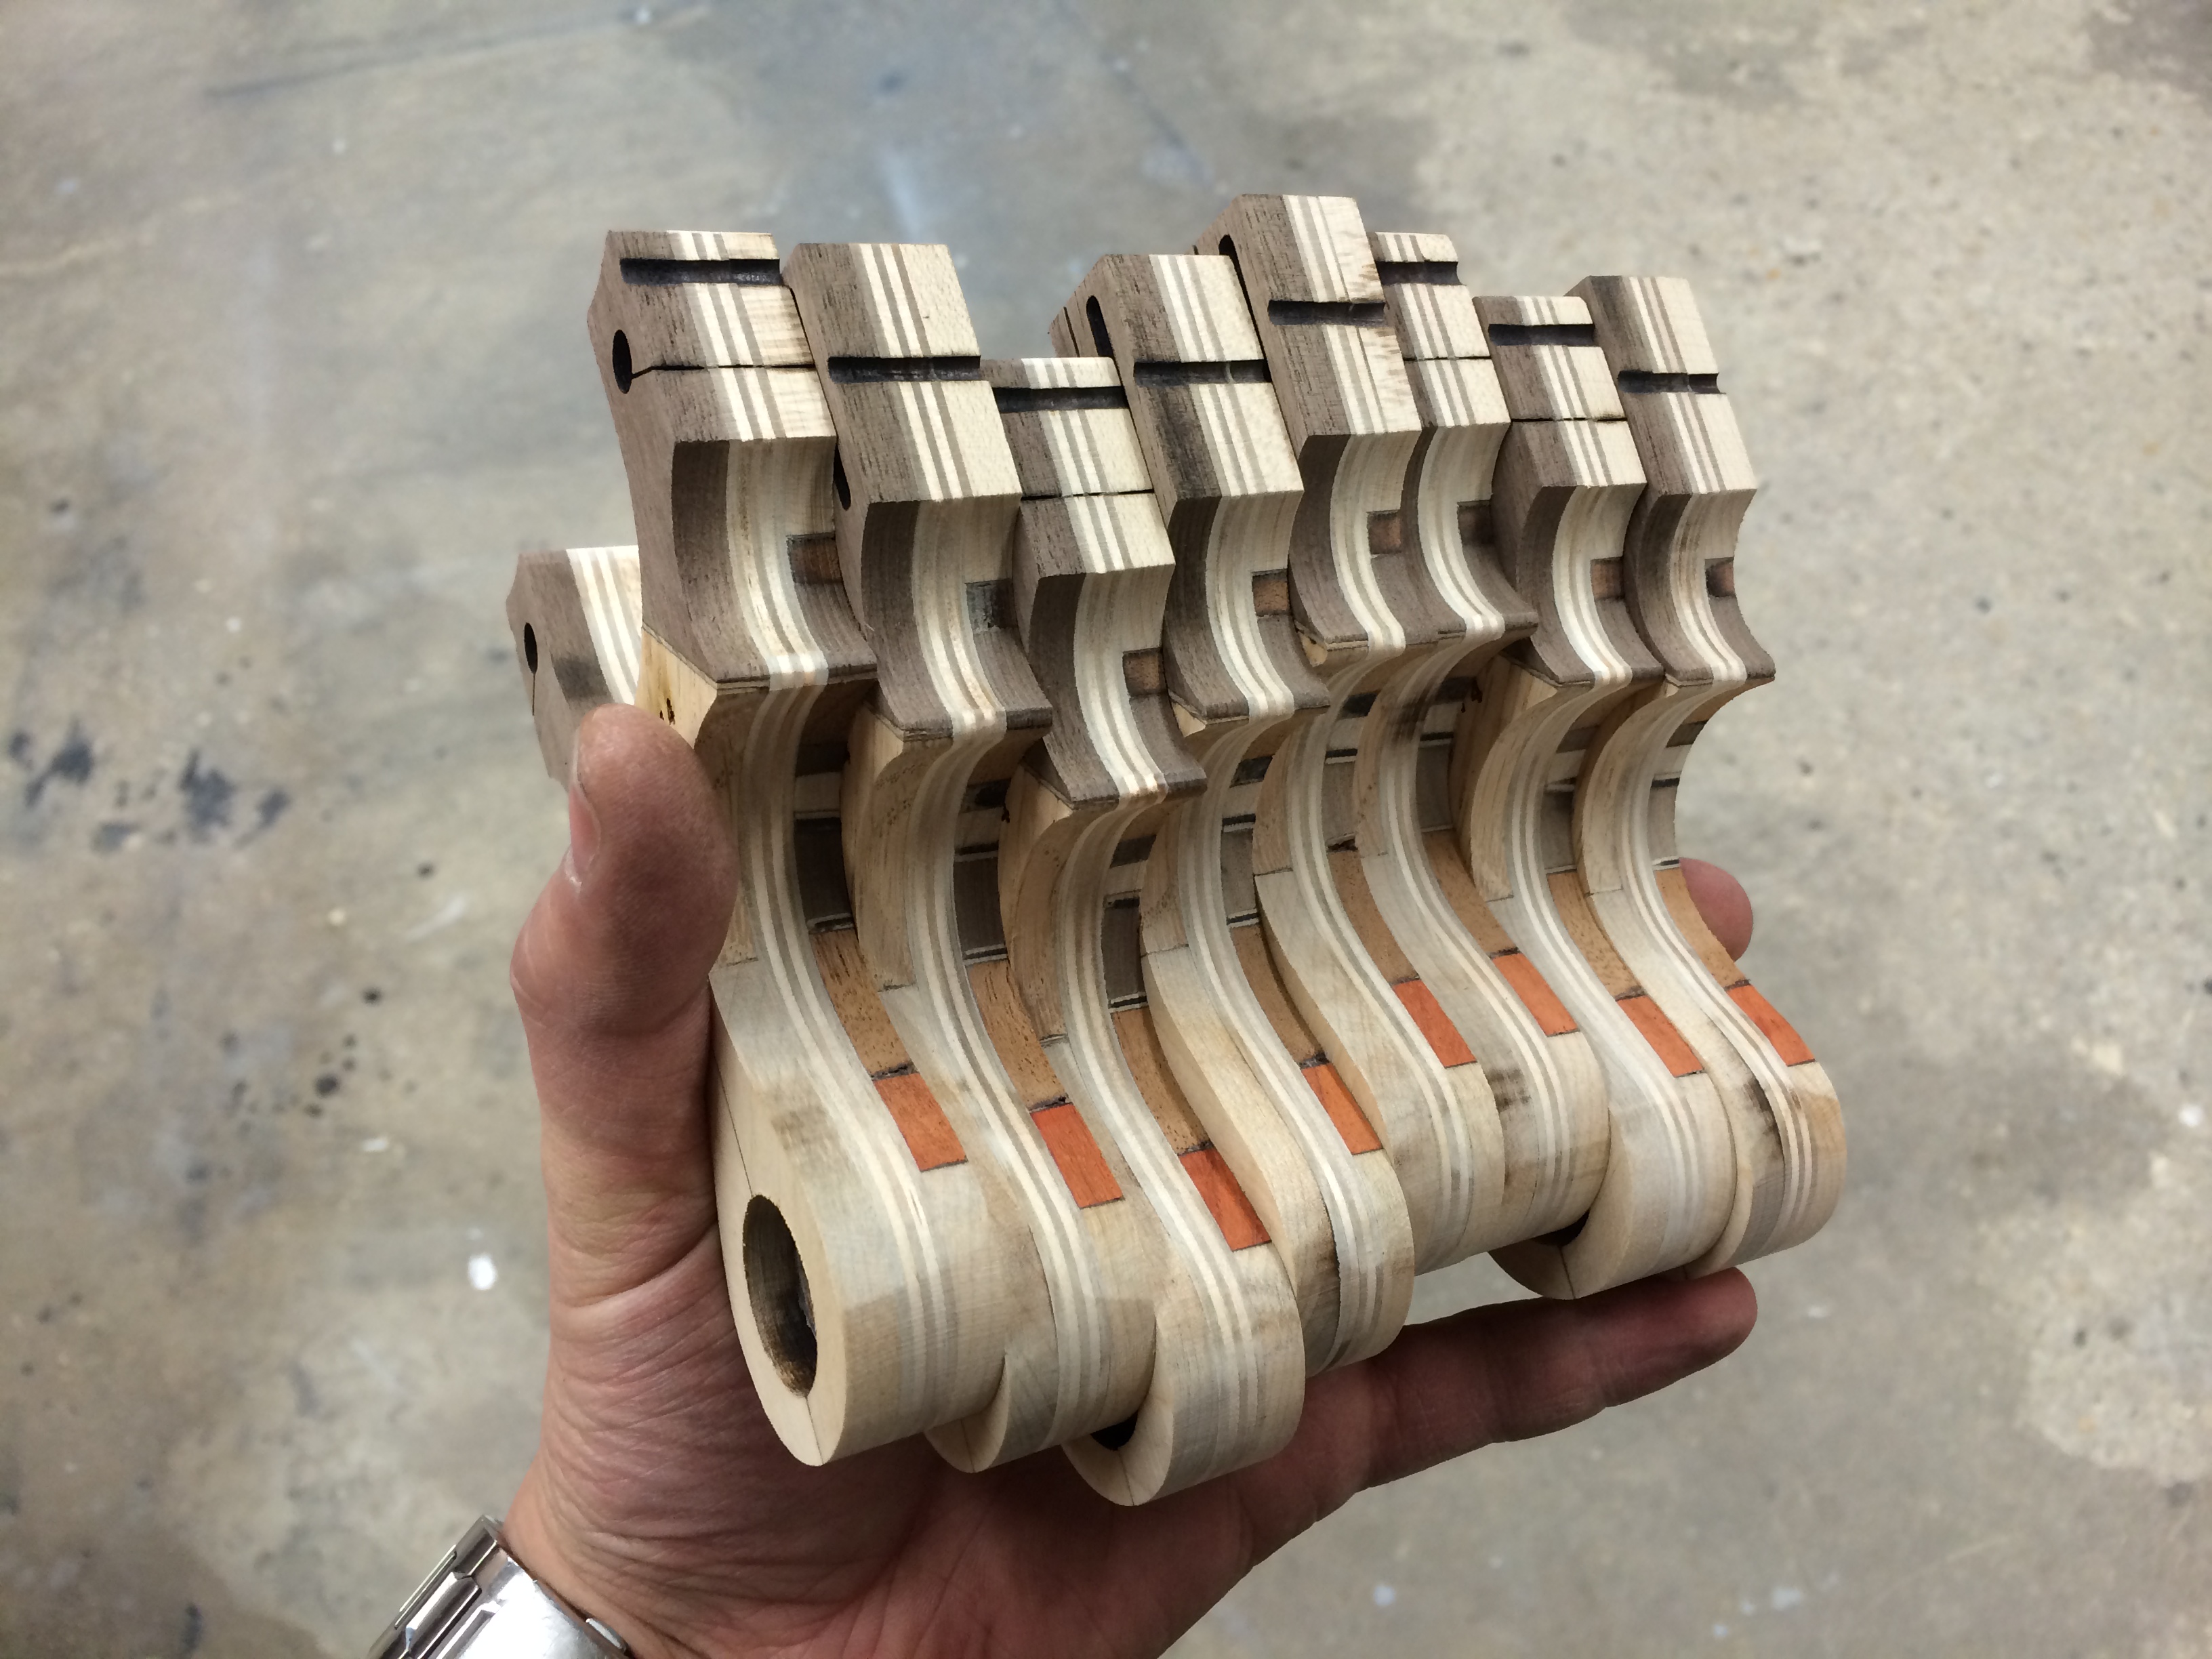
Once all the parts were cut out, it was time for the hardest and longest part of the build process; the lay up. I wanted to start positive so I began with the back side. With less parts, I would feel like I was accomplishing more and carry me through to the more complicated side. The forks get glued on first, since they are the only parts that need critical alignment, especially on the flat band version. The tips were clamped for 10 mins to ensure a good bond.
Here the Oak goes on but with a Zebra Wood spacer to fill in the laser beam kerf, this only fills the gap, but lens a little bit more pizzaz and detail.
The final bottom pieces were added (solid Birch) and left to set up a bit. Once they were more solid, the whole thing was flush faced on the belt sander. This is one of my favourite states of a slingshot build, revealing a built up pattern is pretty great.
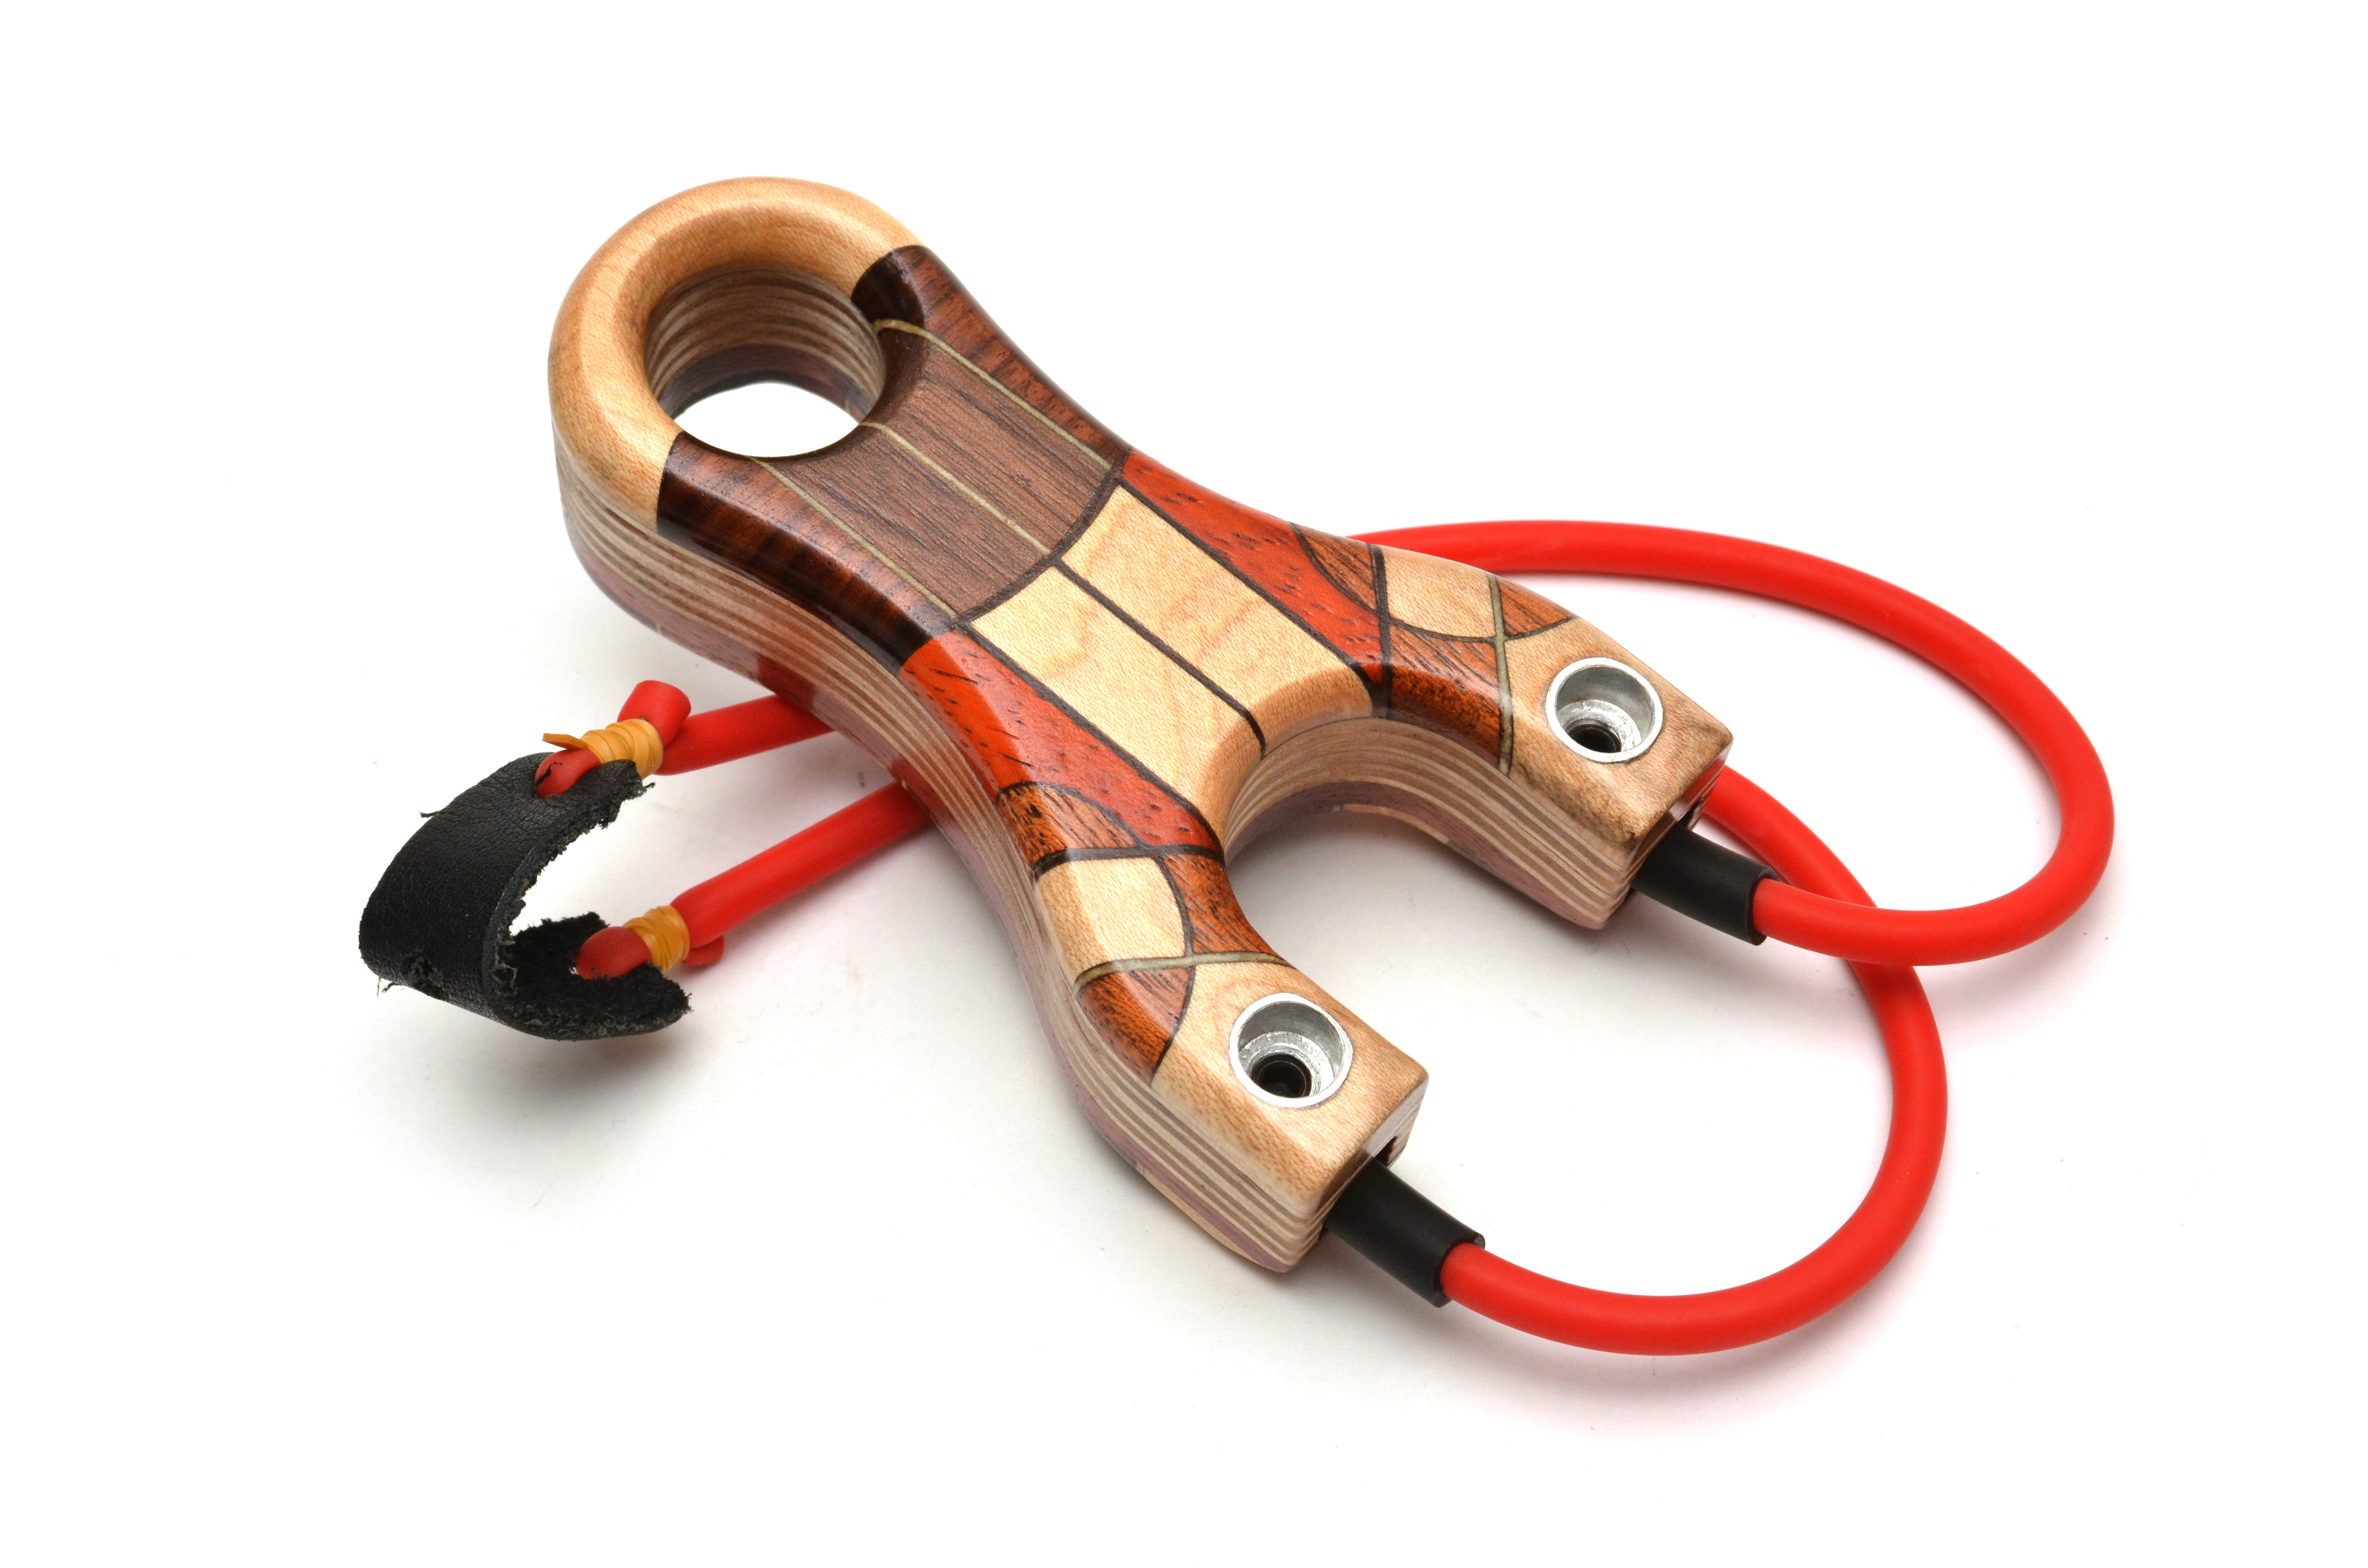
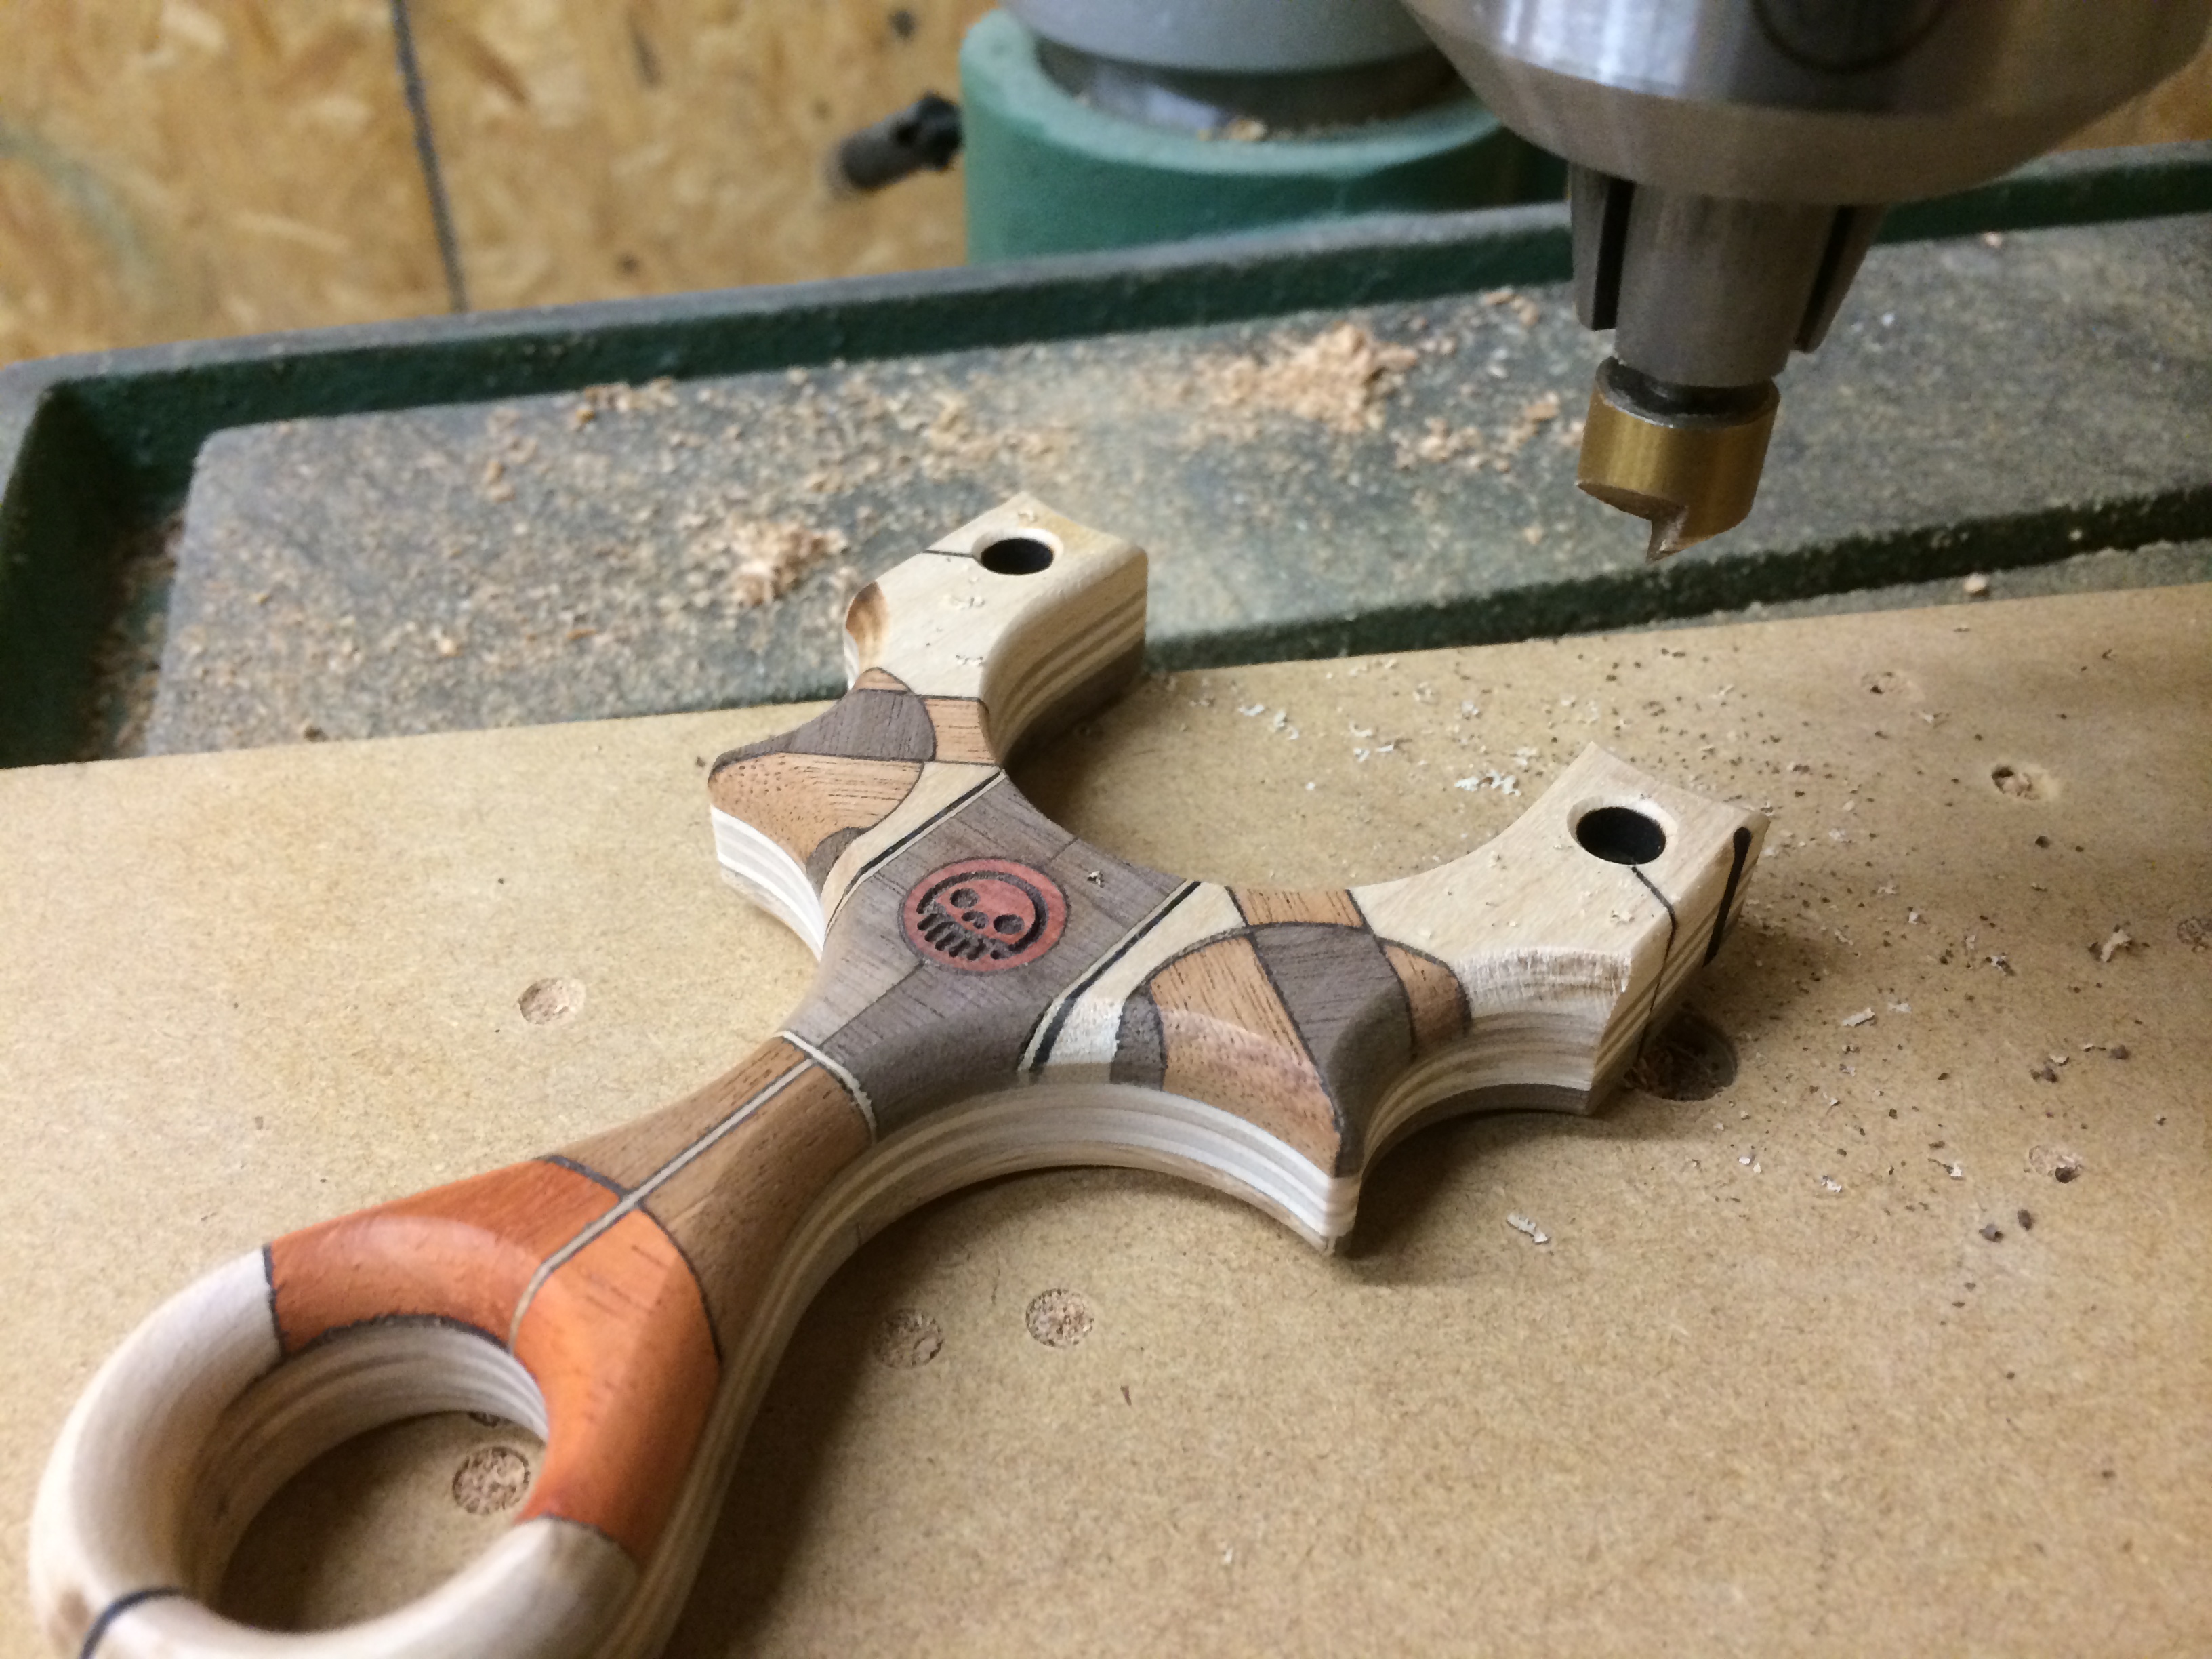
Now, the painful but rewarding part, gluing up the 30 some odd parts that make up the pretty face side. I didn’t take to many photos of this process but as you can see, this part required a lot of attention to detail. The detail I particular enjoy is the red heart wood (Chakte-Kok) I used for the Metro Grade skullthulu logo. Even though I know that the red will deepen in colour once it hits UV rays (natural properties of the wood), the dramatic red splice in between the slabs of Walnut are really something else.
You’ll notice the face sanded frame has the Metro Grade skull sanded clean off, this was a mistake on my part since the Chakte-Kok wood was thicker thank some of the wood so the etching came clean off. No worries, I had a plan to return the etching back on the face the Capuchin.
After many, many cycles of this gluing, sanding, fitting and more sanding, the result was a respectable stack of work, worth of calling it a good day’s work.
—
*One night later*
—
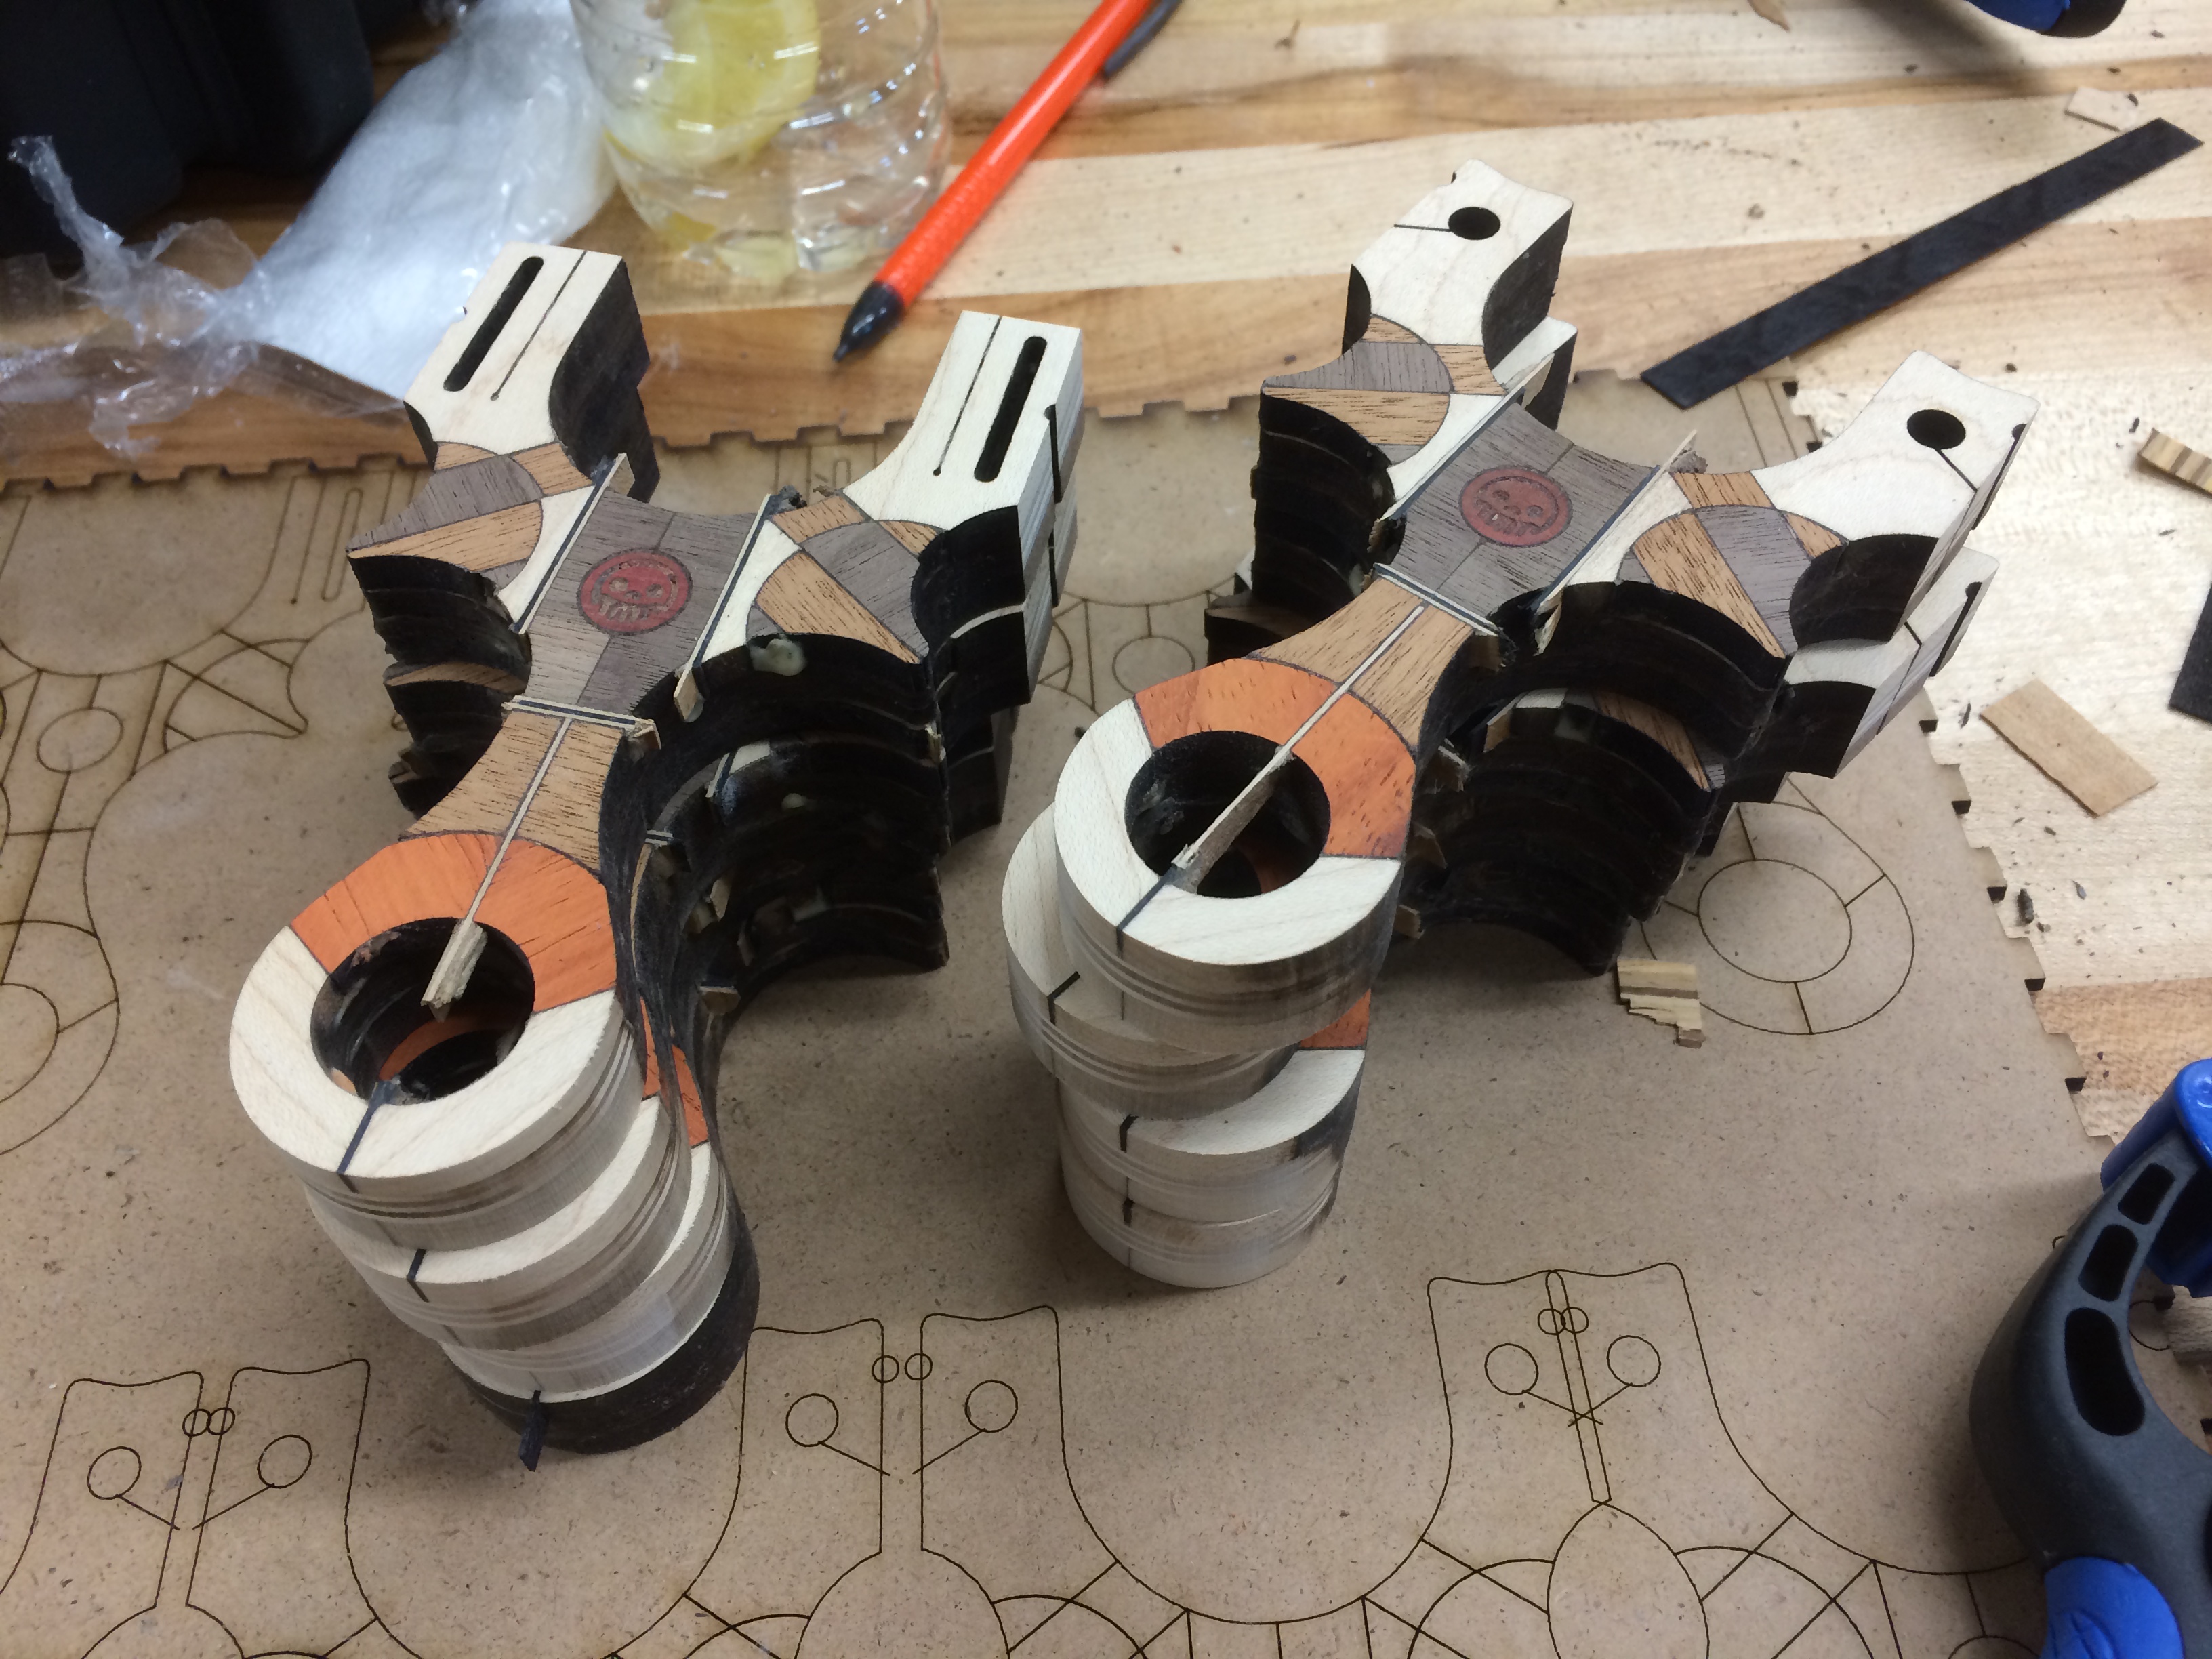
The next morning, it was time to get cracking, knowing the project would have some finality to it. First order of business, flush sand the sides of the Capuchins and remove the burned laser cut edge. Thanks to a fresh 80 grit spindle sanding drum, this was a mere 30 min job for all of them.
This next photo represents 10 hours of time, kind of crazy to think. I call it ‘Fist full of Awesome’.
Remember when I said I had a plan to return the Metro Grade skull back onto the Chatke-Kok wood circle? This is that plan. I knew I wanted to mark on it that this was a limited edition of 4 (4 TS’s and 4 FB’s) so I again used a scrap piece of wood and quickly etched the outline of the slingshot so I could realign the already assembled and glued slingshot back onto the laser bed. This technique is also what I used to realign and re-etch the skull on those slings that had the face sanded off.
Now the most dangerous part of any slingshot build, the router. Things can go VERY badly here and the entire sling could go to waste if there are any slip ups. Thankfully, I’ve had lots of practice with this model having made a limited edition of 10 plywood ones and various other hardwood versions. Despite my comfort level with this pattern and frame, I treat every time I turn on a switch to a machine a chance to die. It works, seriously.
This photo doesn’t show anything new, but I wanted to grab a pic of the router shavings. Such beautiful array of colours.
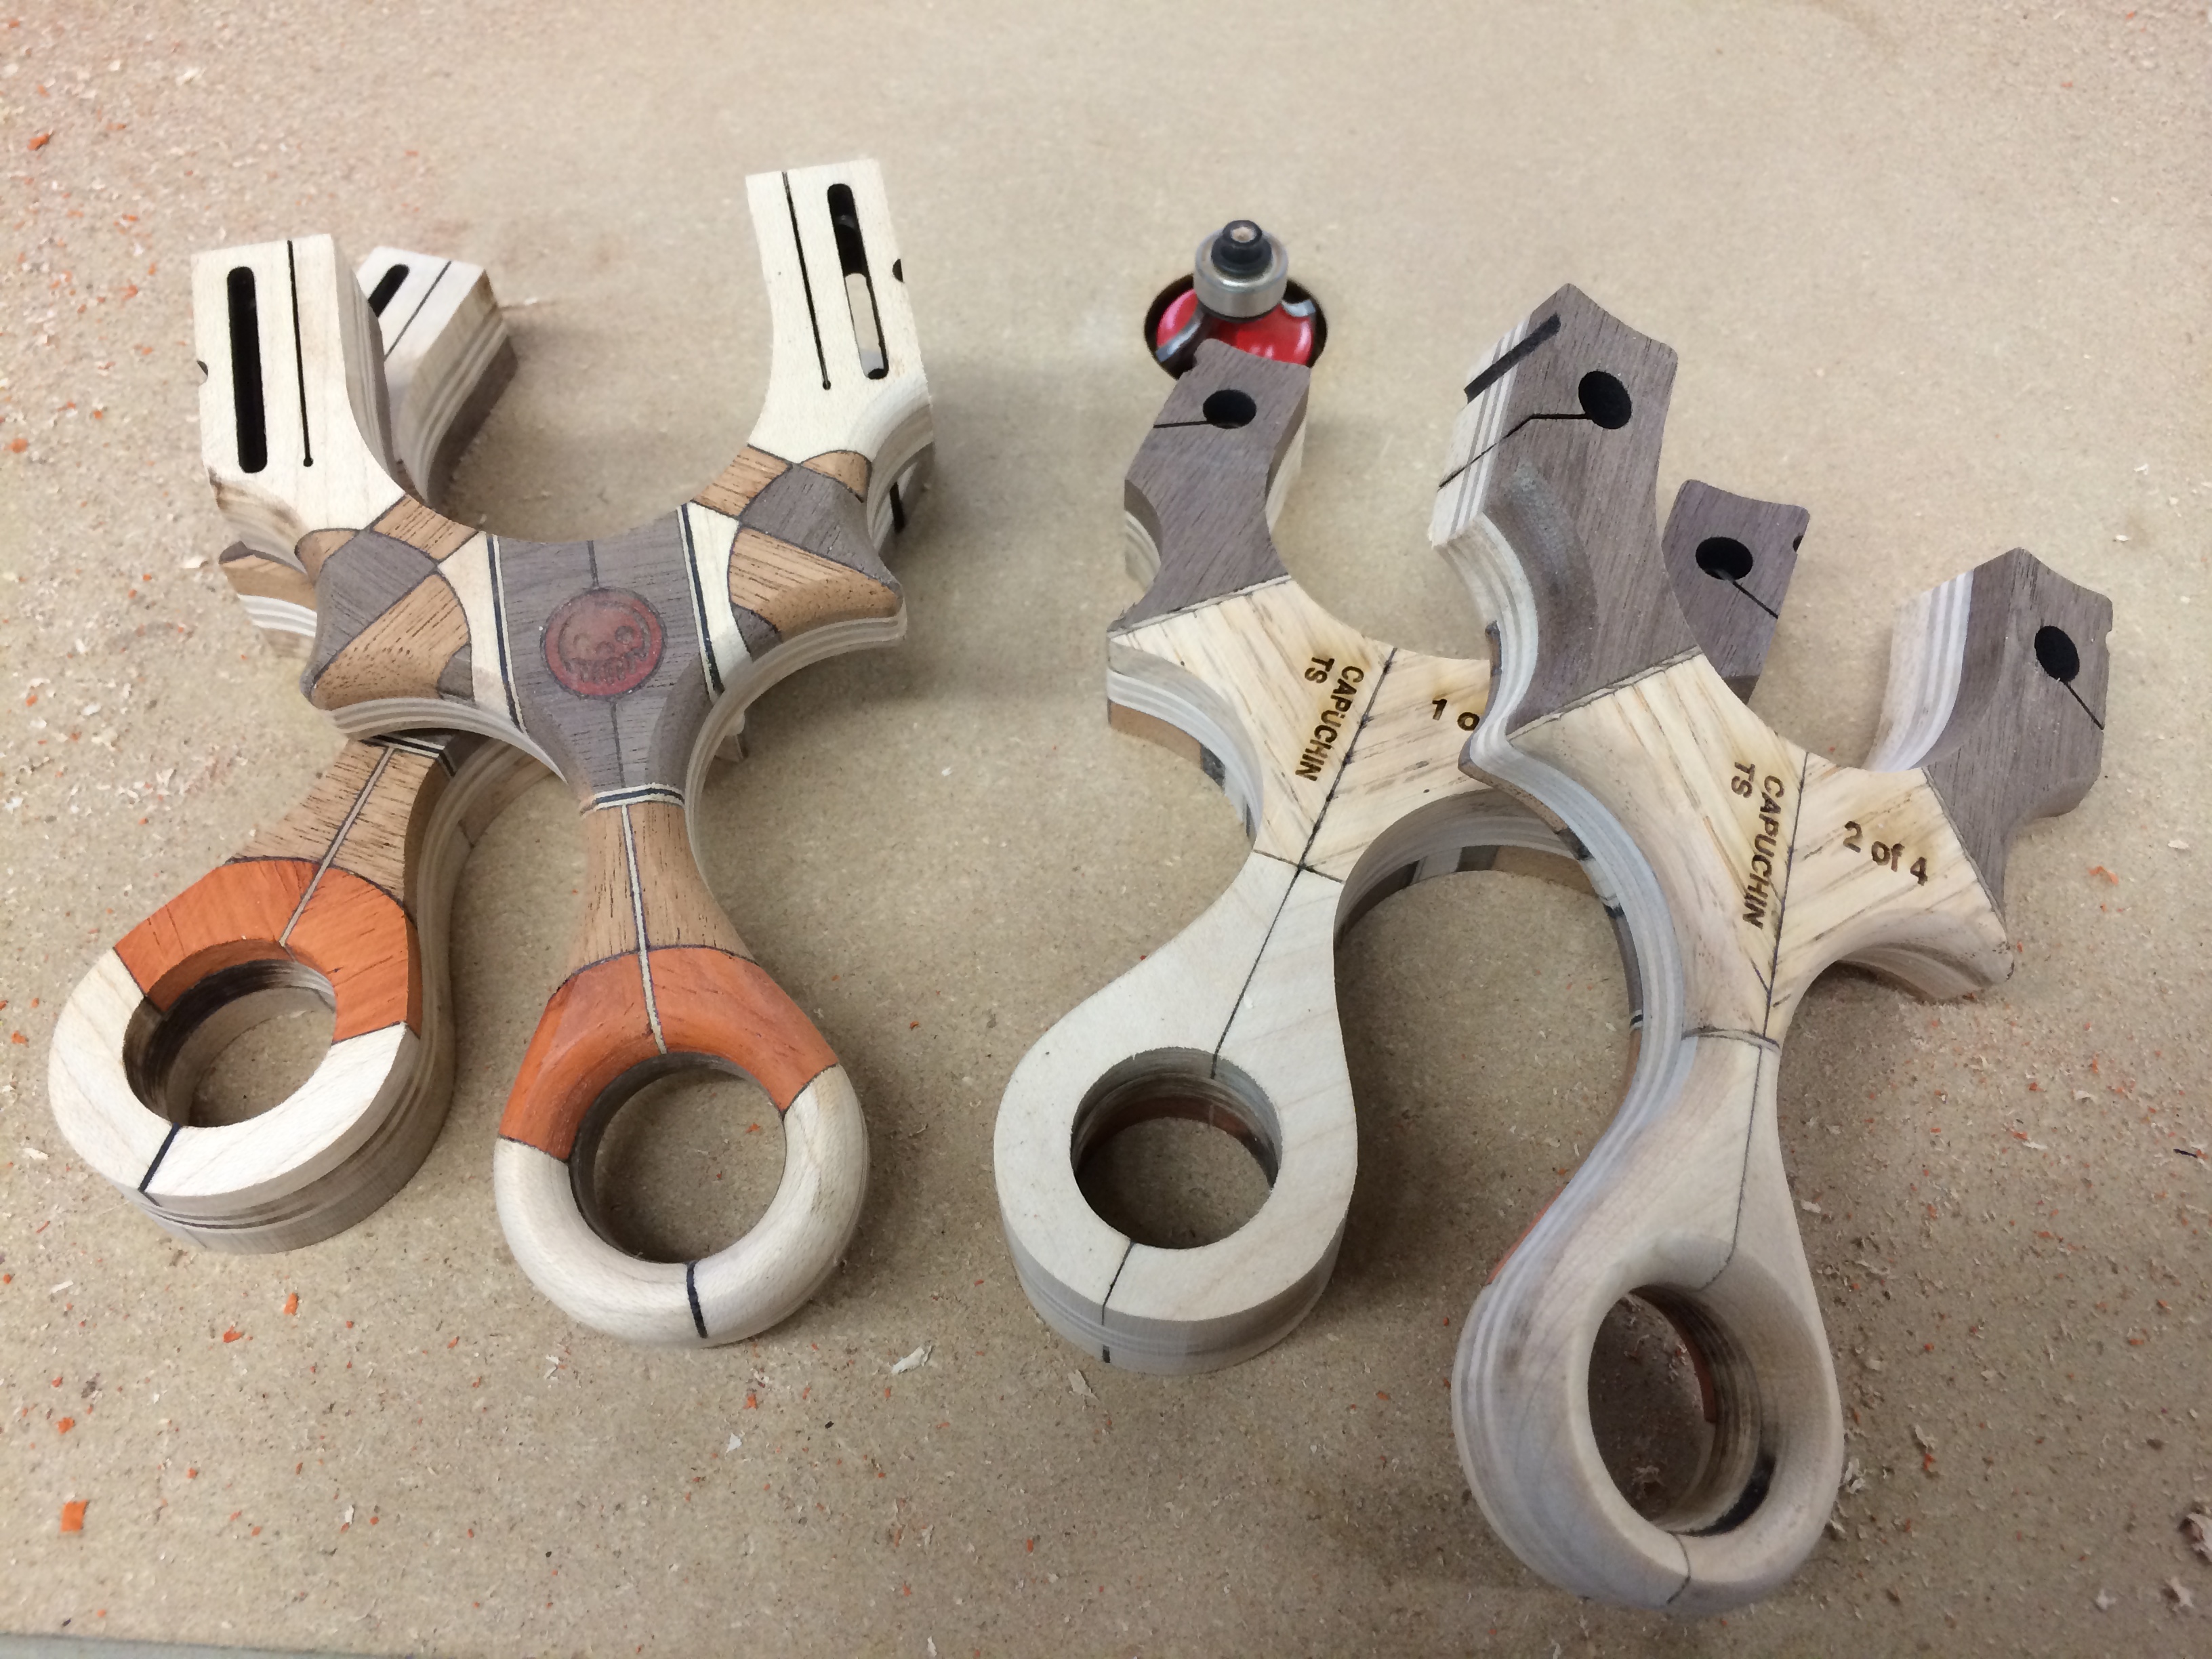
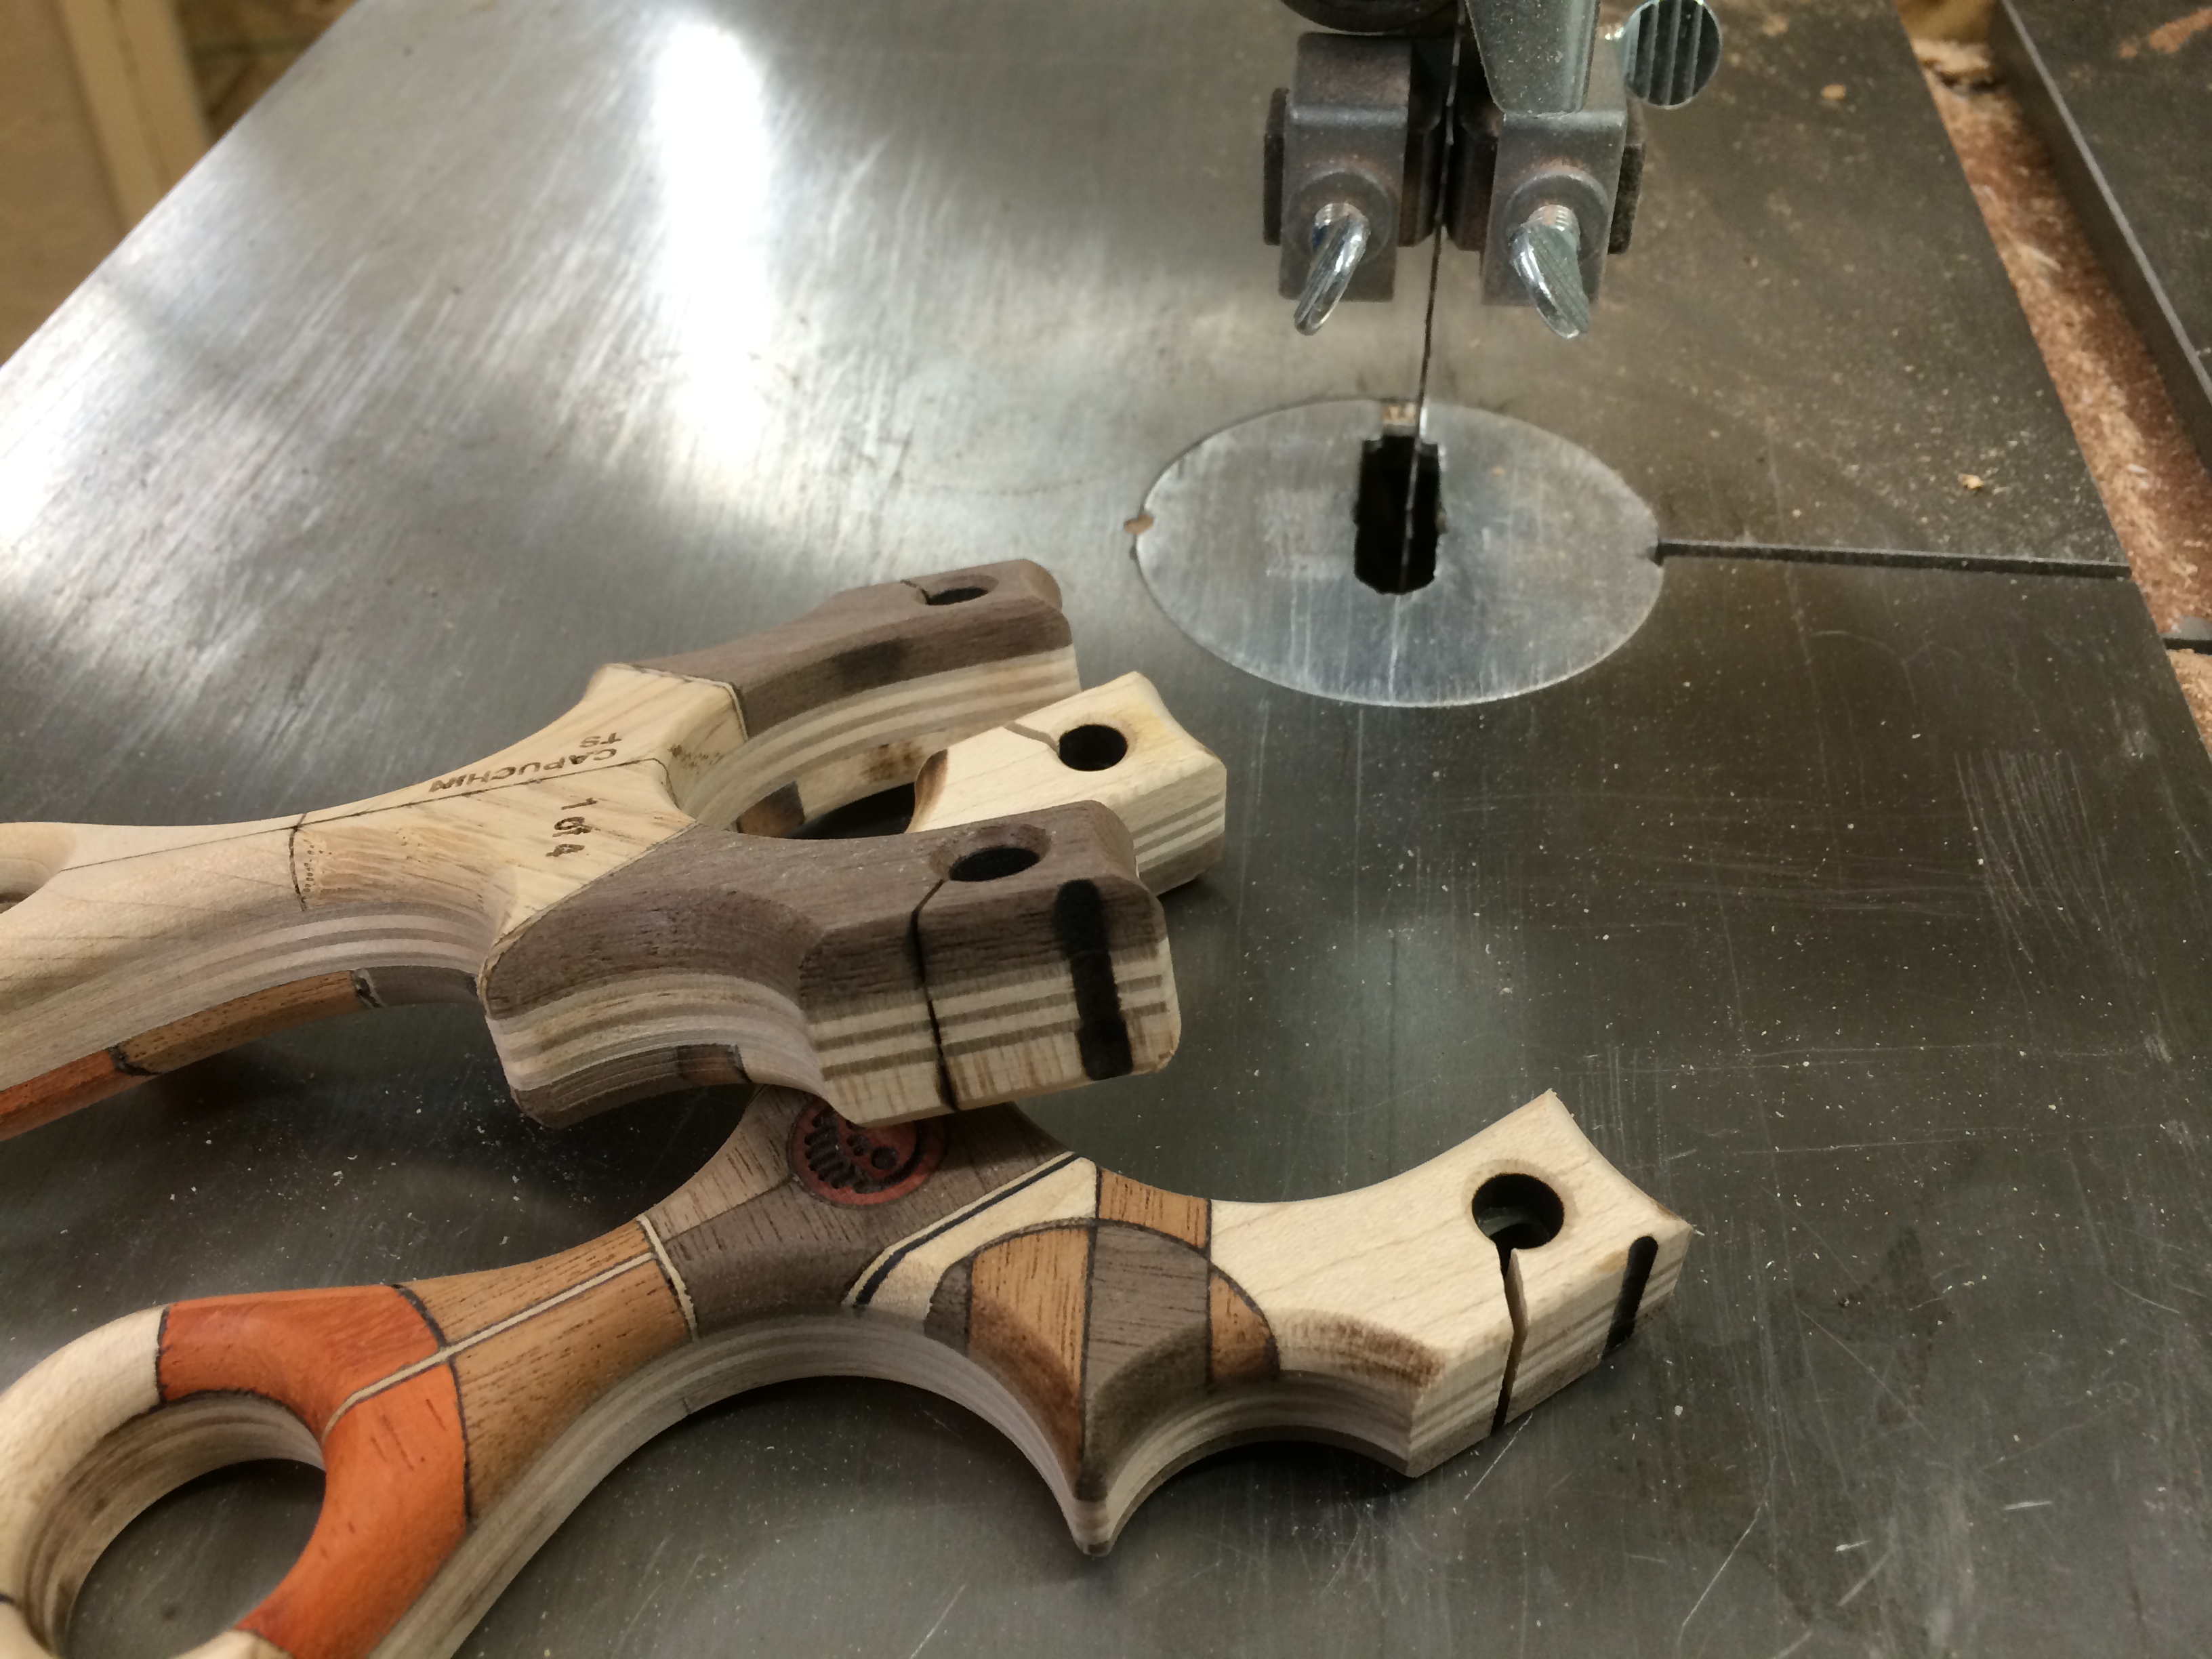
The Capuchin TS and the Capuchin FB both have things that still need to be done with them before the band attachment area are operational. The TS’s tube slot needed to be widened but not before the edges of the hole are chamfered with a 1/4″ counter sink.
Then it’s off the band saw with a fairly narrow, 1/2″ blade, the tube slot gets widened to a saw width. The existing tube slot was not really a tube slot at all, it was merely a guide for the alignment when gluing up the layers and subsequently, a guide for the band saw to slide into.
Then the notched ‘iron sight’ needed to be cleaned up too, so a round rat tail file comes to the rescue. Under the TS is one of sanding blocks used to sand the surfaces of the sling. These are 80/120 grit mini blocks meant for manicurists, but for those tight curves and hard woods, they are perfect.
I didn’t take any photos of the FB slot finishing as it’s a bit of a secret but essentially it just needed to be sanded out to improve the consistency in the width of the slot for Theraband Gold and pure Latex bands. Once they were all sanded with 600 grit paper, it was off the paint booth to shoot 3 coats of acrylic sealing spray.
Once they were cured (acrylic spray only has a 30 min cure time), they were buffed to a shine with another manicurist tool; the nail buffer. It was time to hit the photoshop.
BUT before you go ahead to the final product and images, I want to list the woods used in these slings:
– Baltic Birch plywood core
– Rock Maple
– American Black Walnut
– Honduran Mahogany
– Chatke-Kok
– Maple Veneer
– Ebony Veneer
– Zebrawood Veer
– Birch
– Paduak
– Oak
…ok enough stalling.
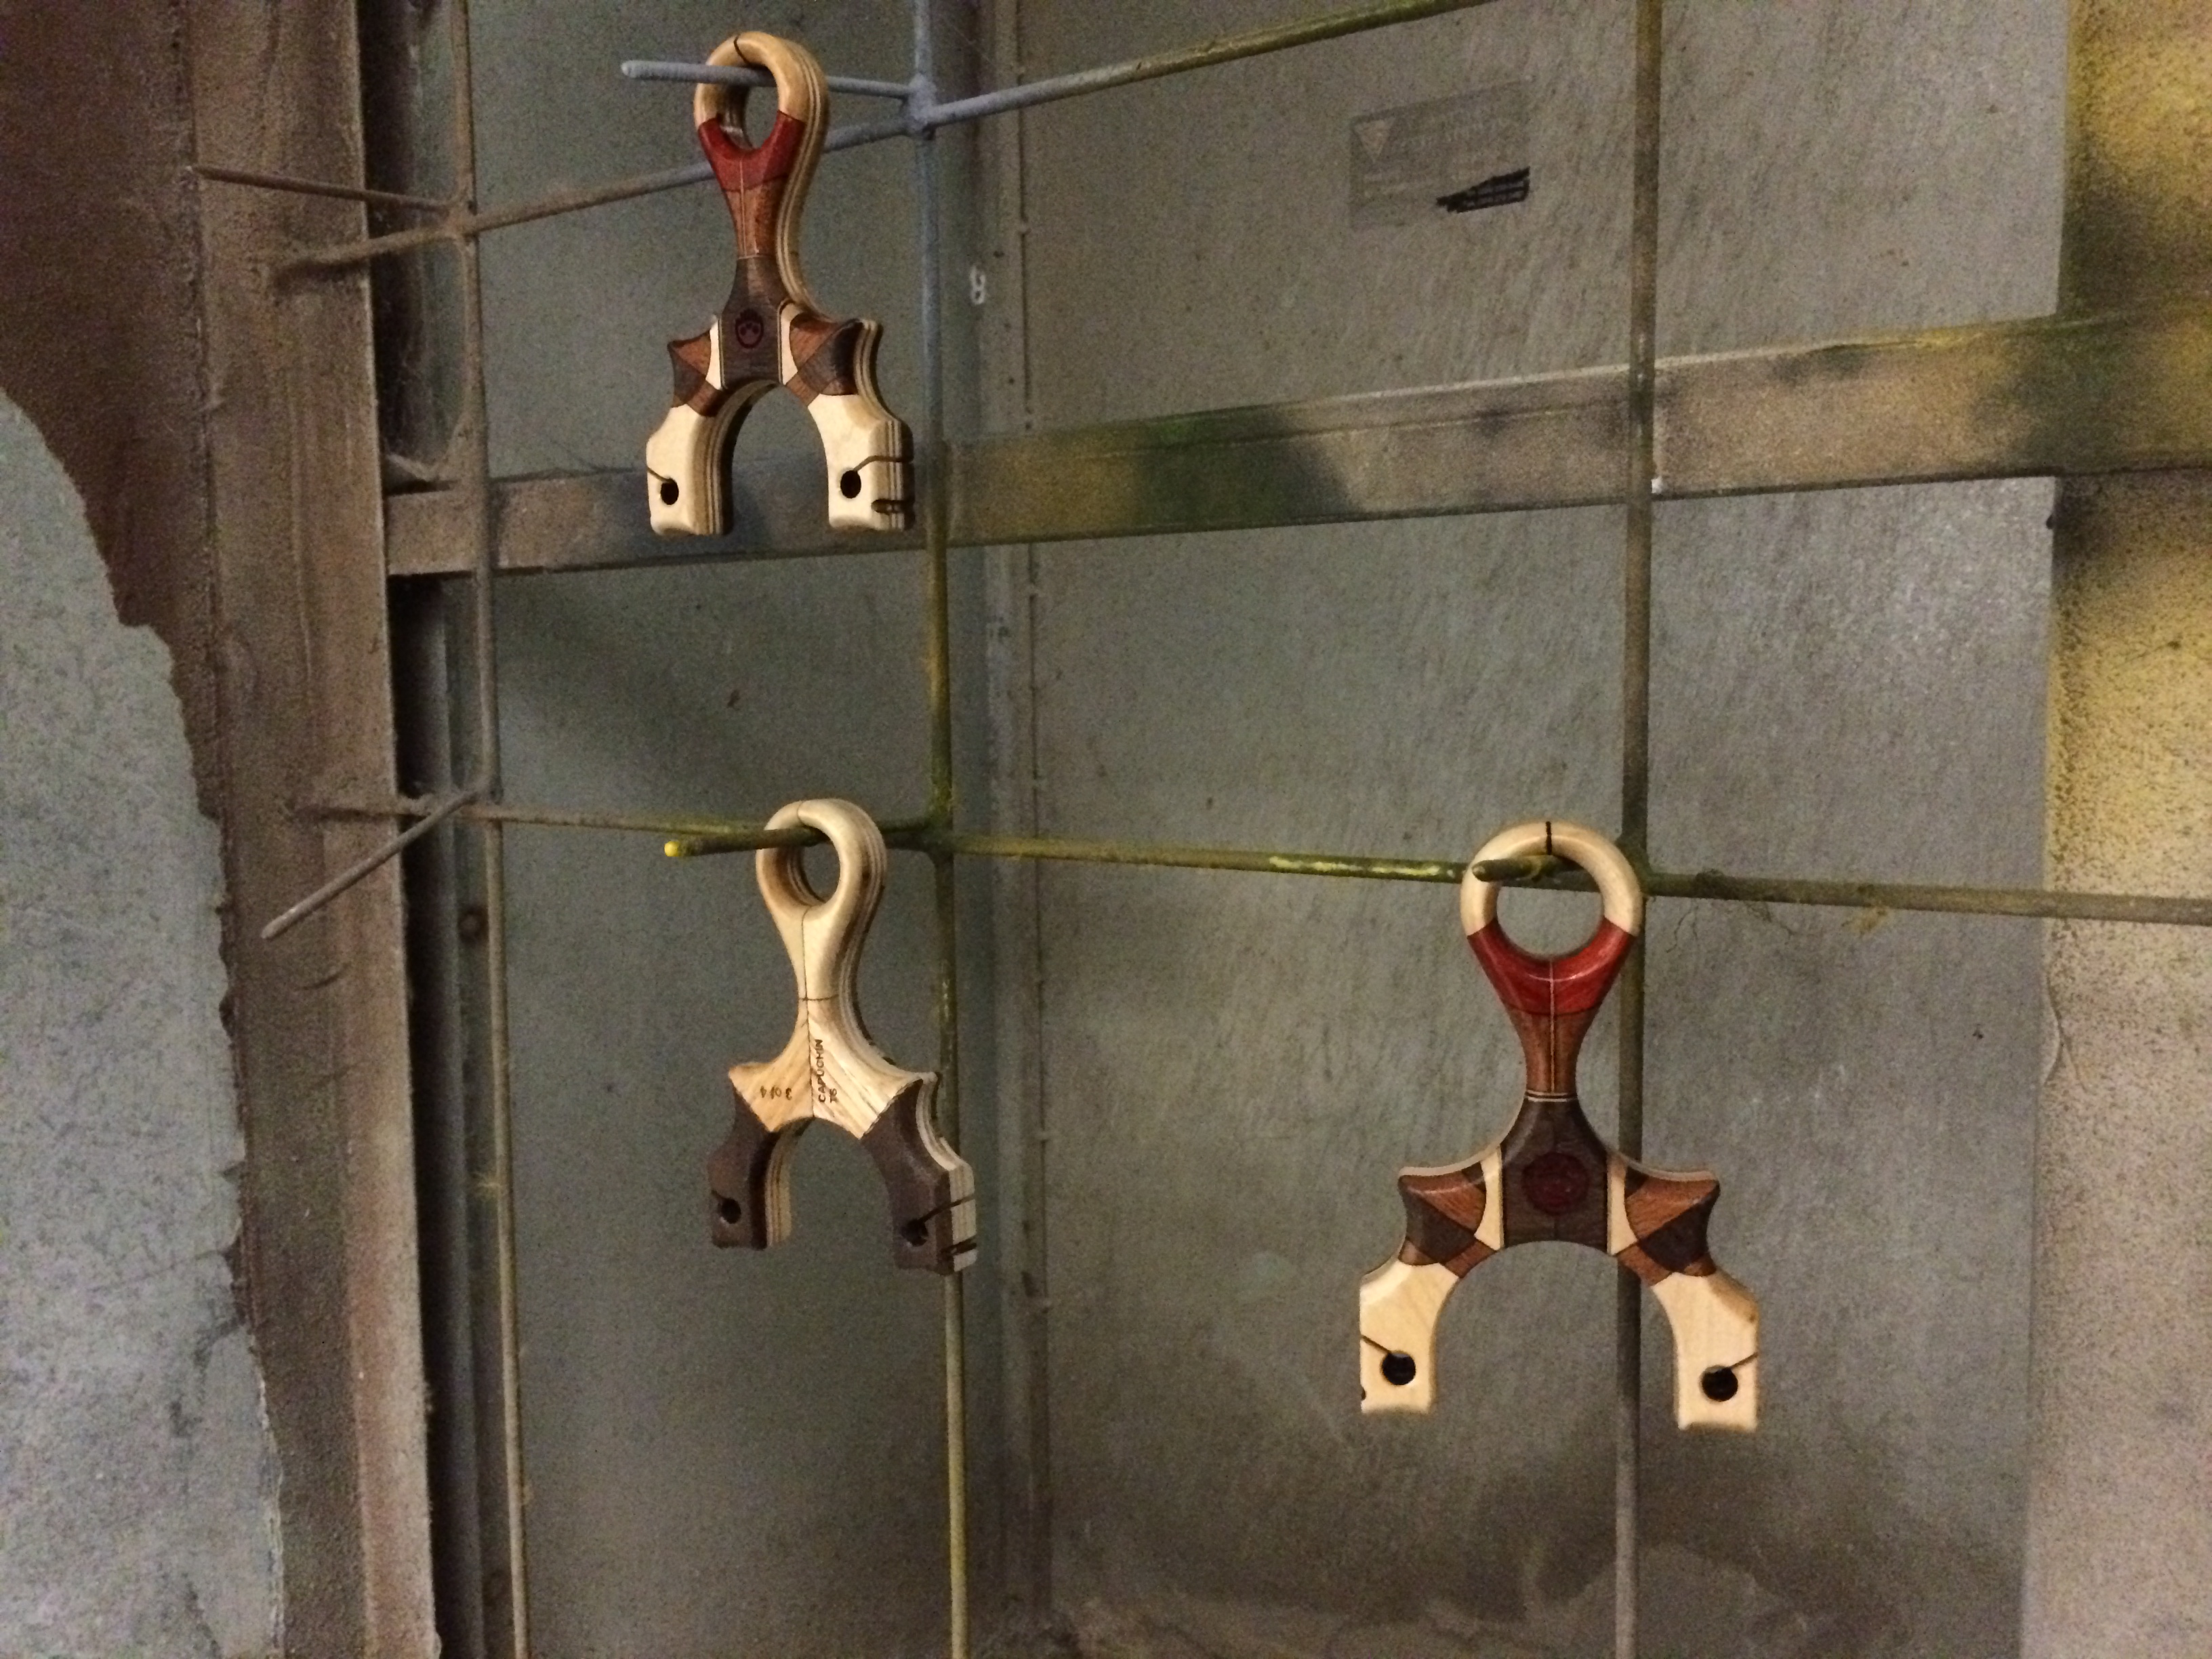
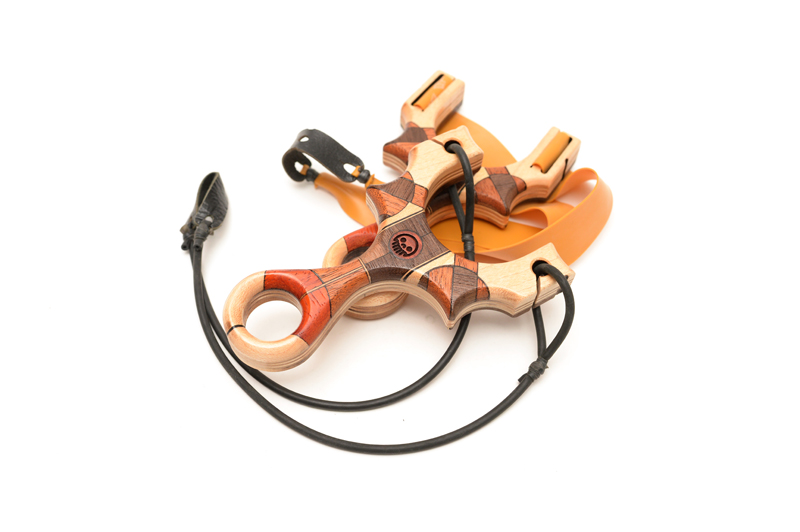
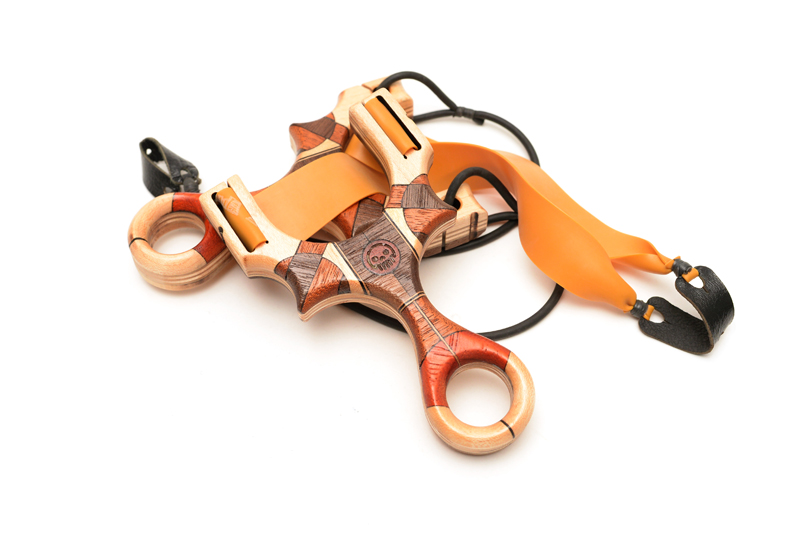
I am pleased to present the Harlequin Capuchin TS and FB.
Thank you for reading to the end, it’s not often I get to spend this much time writing about my process and methods, but I know it’s always worth looking back on projects like these.
I am also really happy (but with begrudgingly) to announcing that Metro Grade is now on Twitter, you can follow and reach me at @MetroGradeGoods
3 of each Harlequin TS and FB will be available at the Metro Grade Shop.
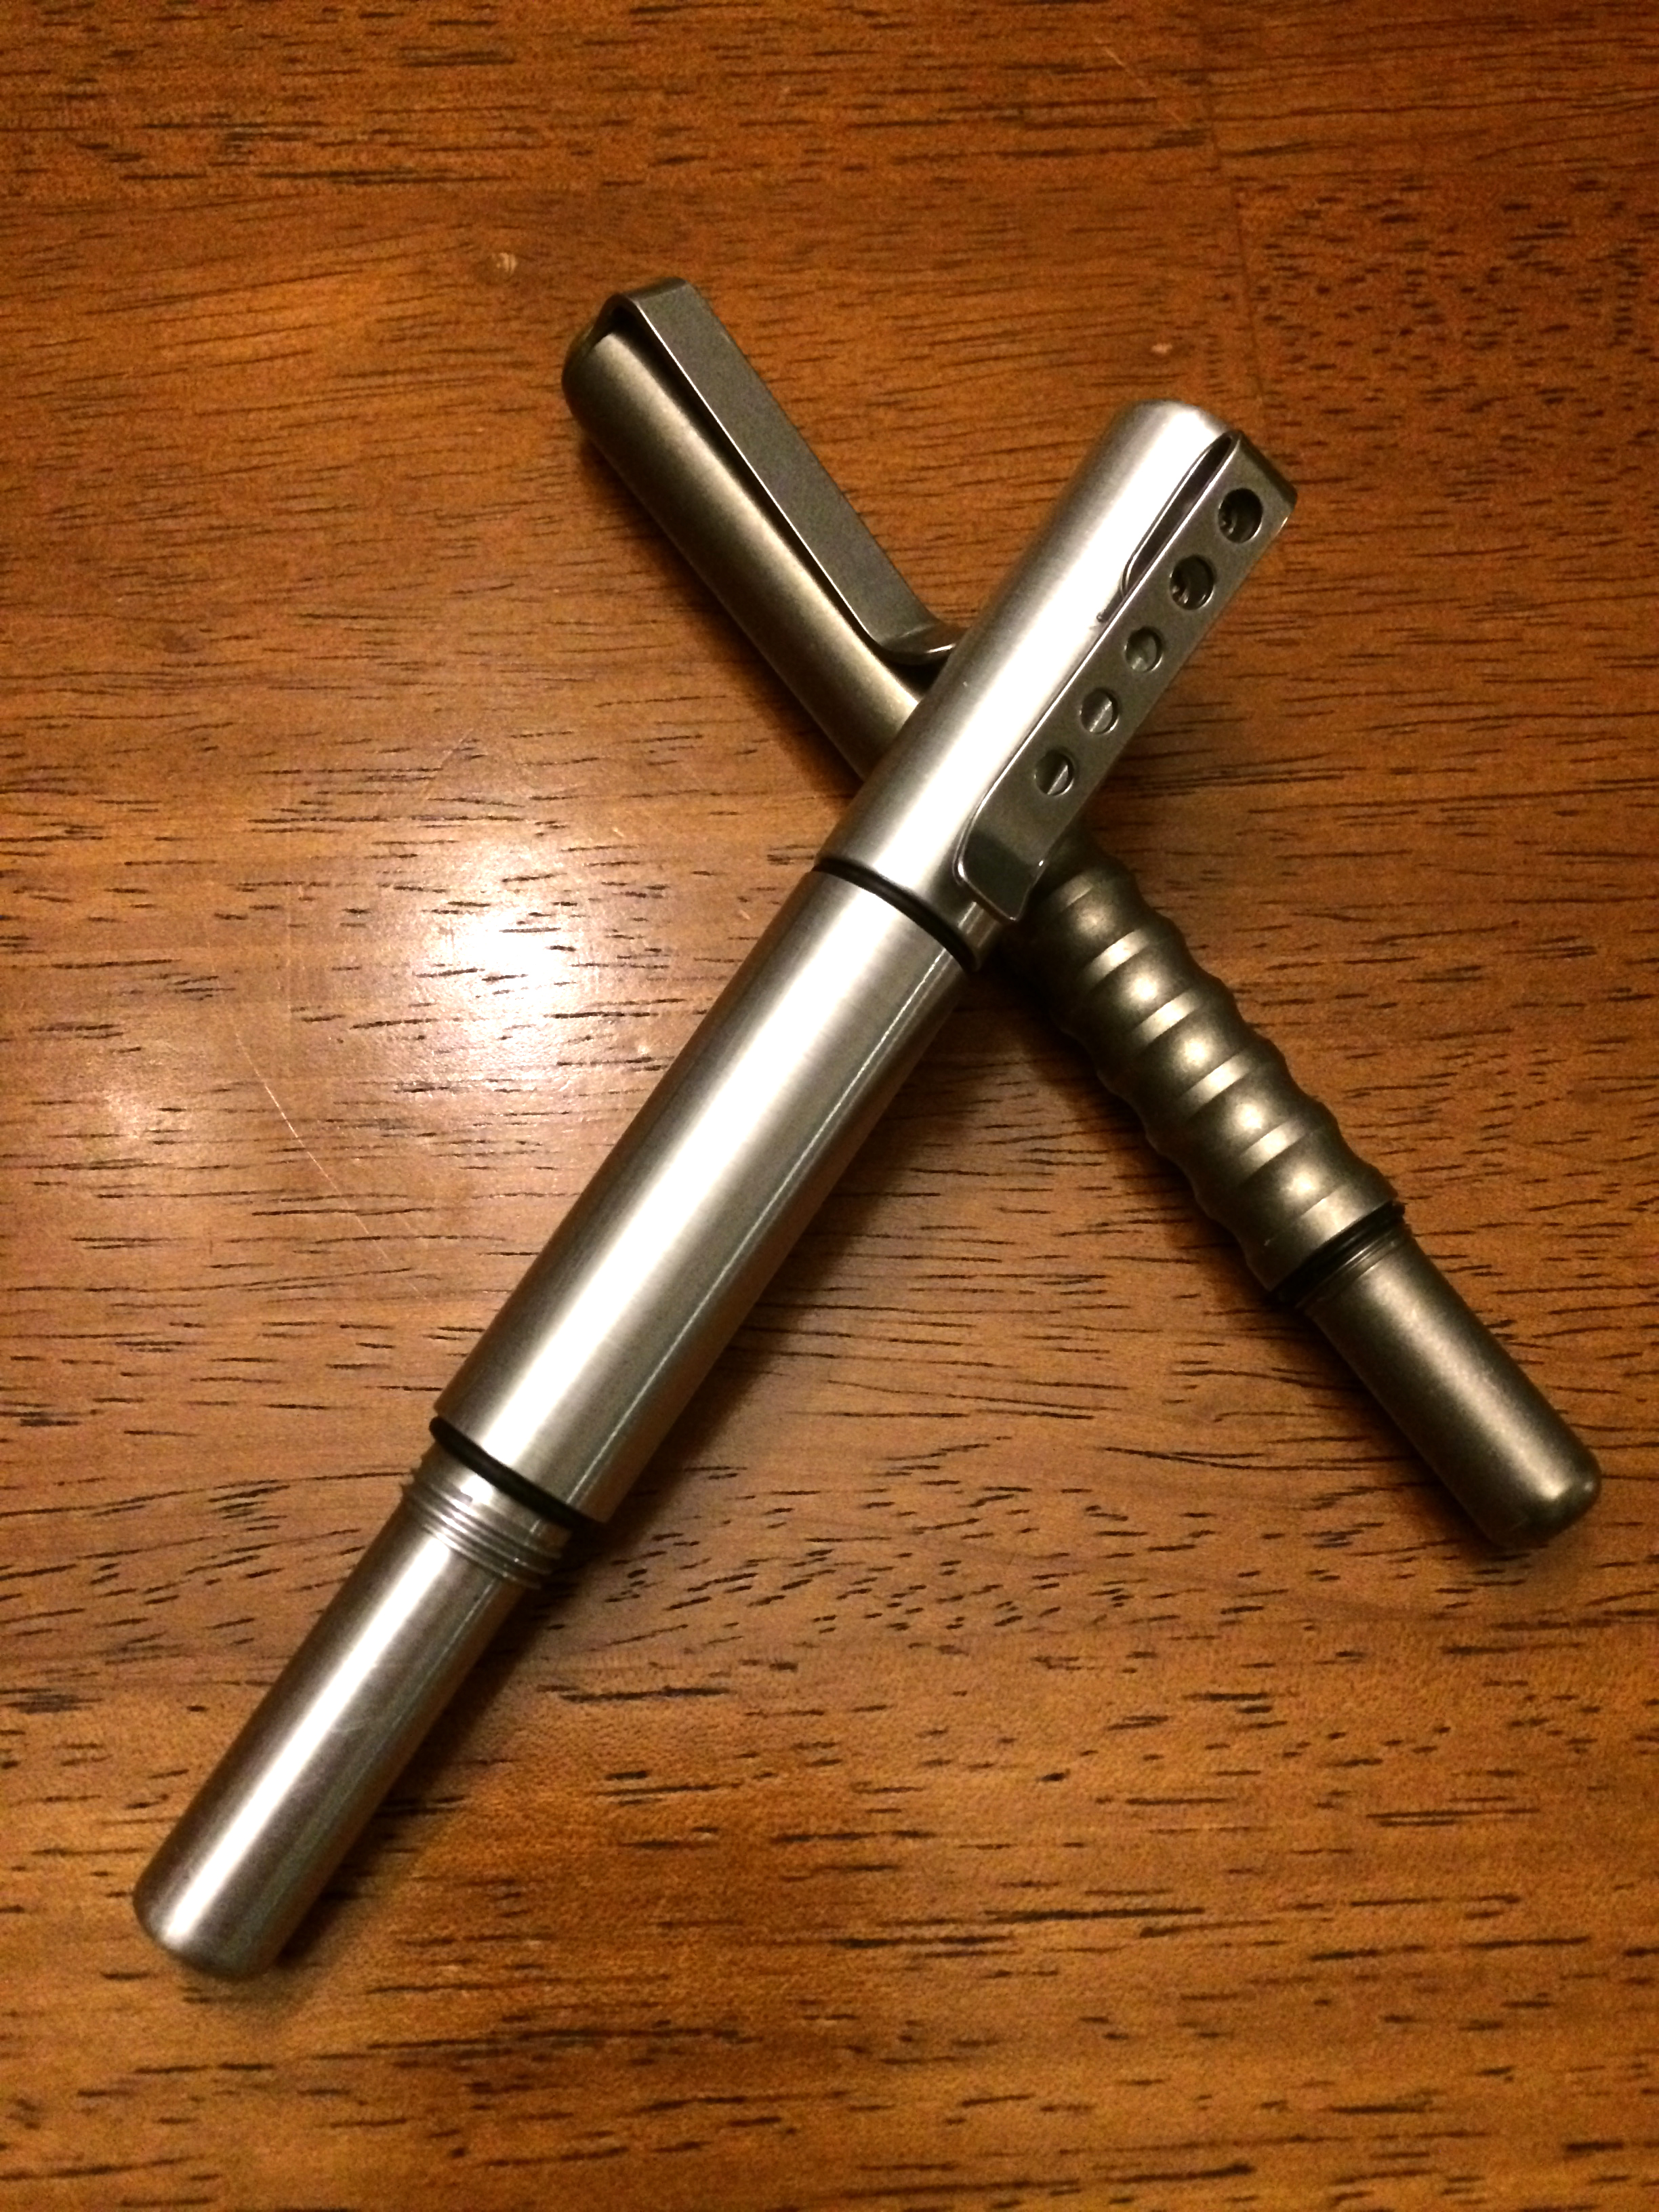
In my day to day, I carry a pen and a Sharpie marker. I don’t remember when I started doing this but as soon as I wake up in the morning and get my day started at the shop, I always put those two things my my left pocket. I feel weird not having them and they really make up the core of my EDC items.
My most recent acquisition is the beautifully made titanium version of Jason Hui’s Alpha pen, which was a successfully funded Kickstarter project. Jason’s an insanely crafty guy, designing and manufacturing flashlights under his moniker, Darksucks. His low volume, high quality produces ooze style and class for the discerning gear guy/girl. His Alpha pen uses the finest of refills, the Mont Blanc felt tipped fine liner. At $4-5 each, the pen matches the pricey and beautifully writing capabilities of the refill.
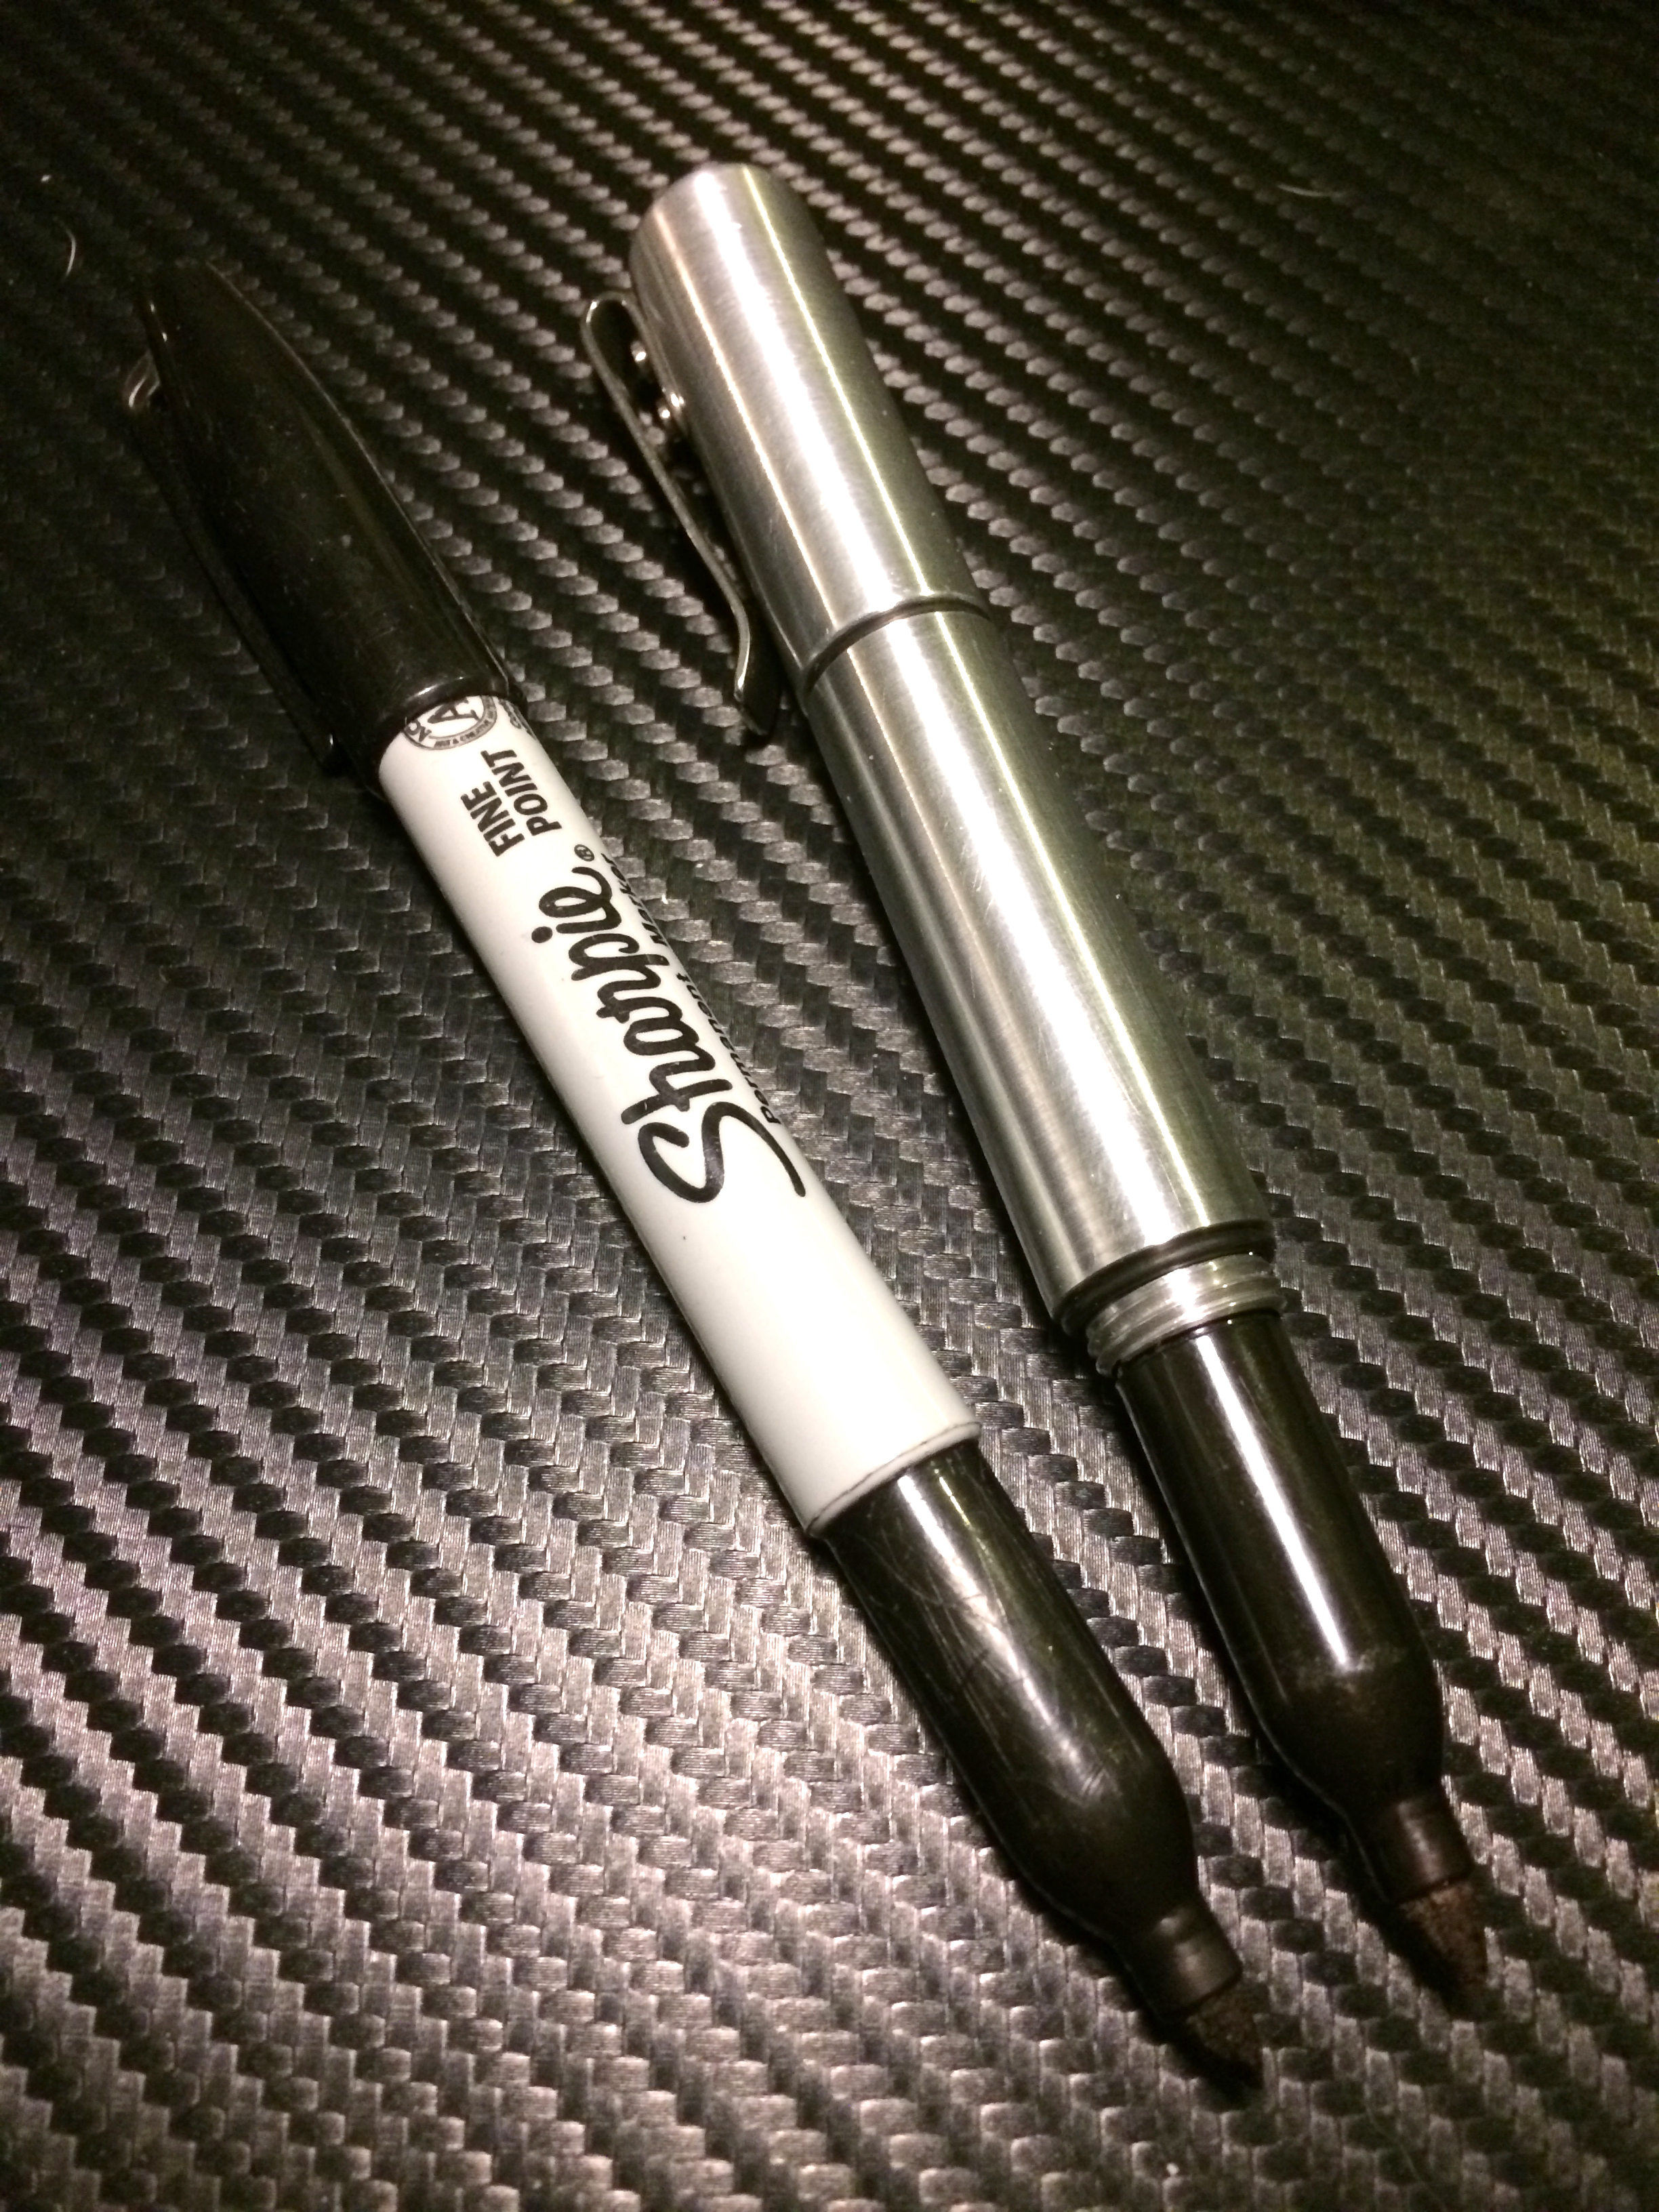
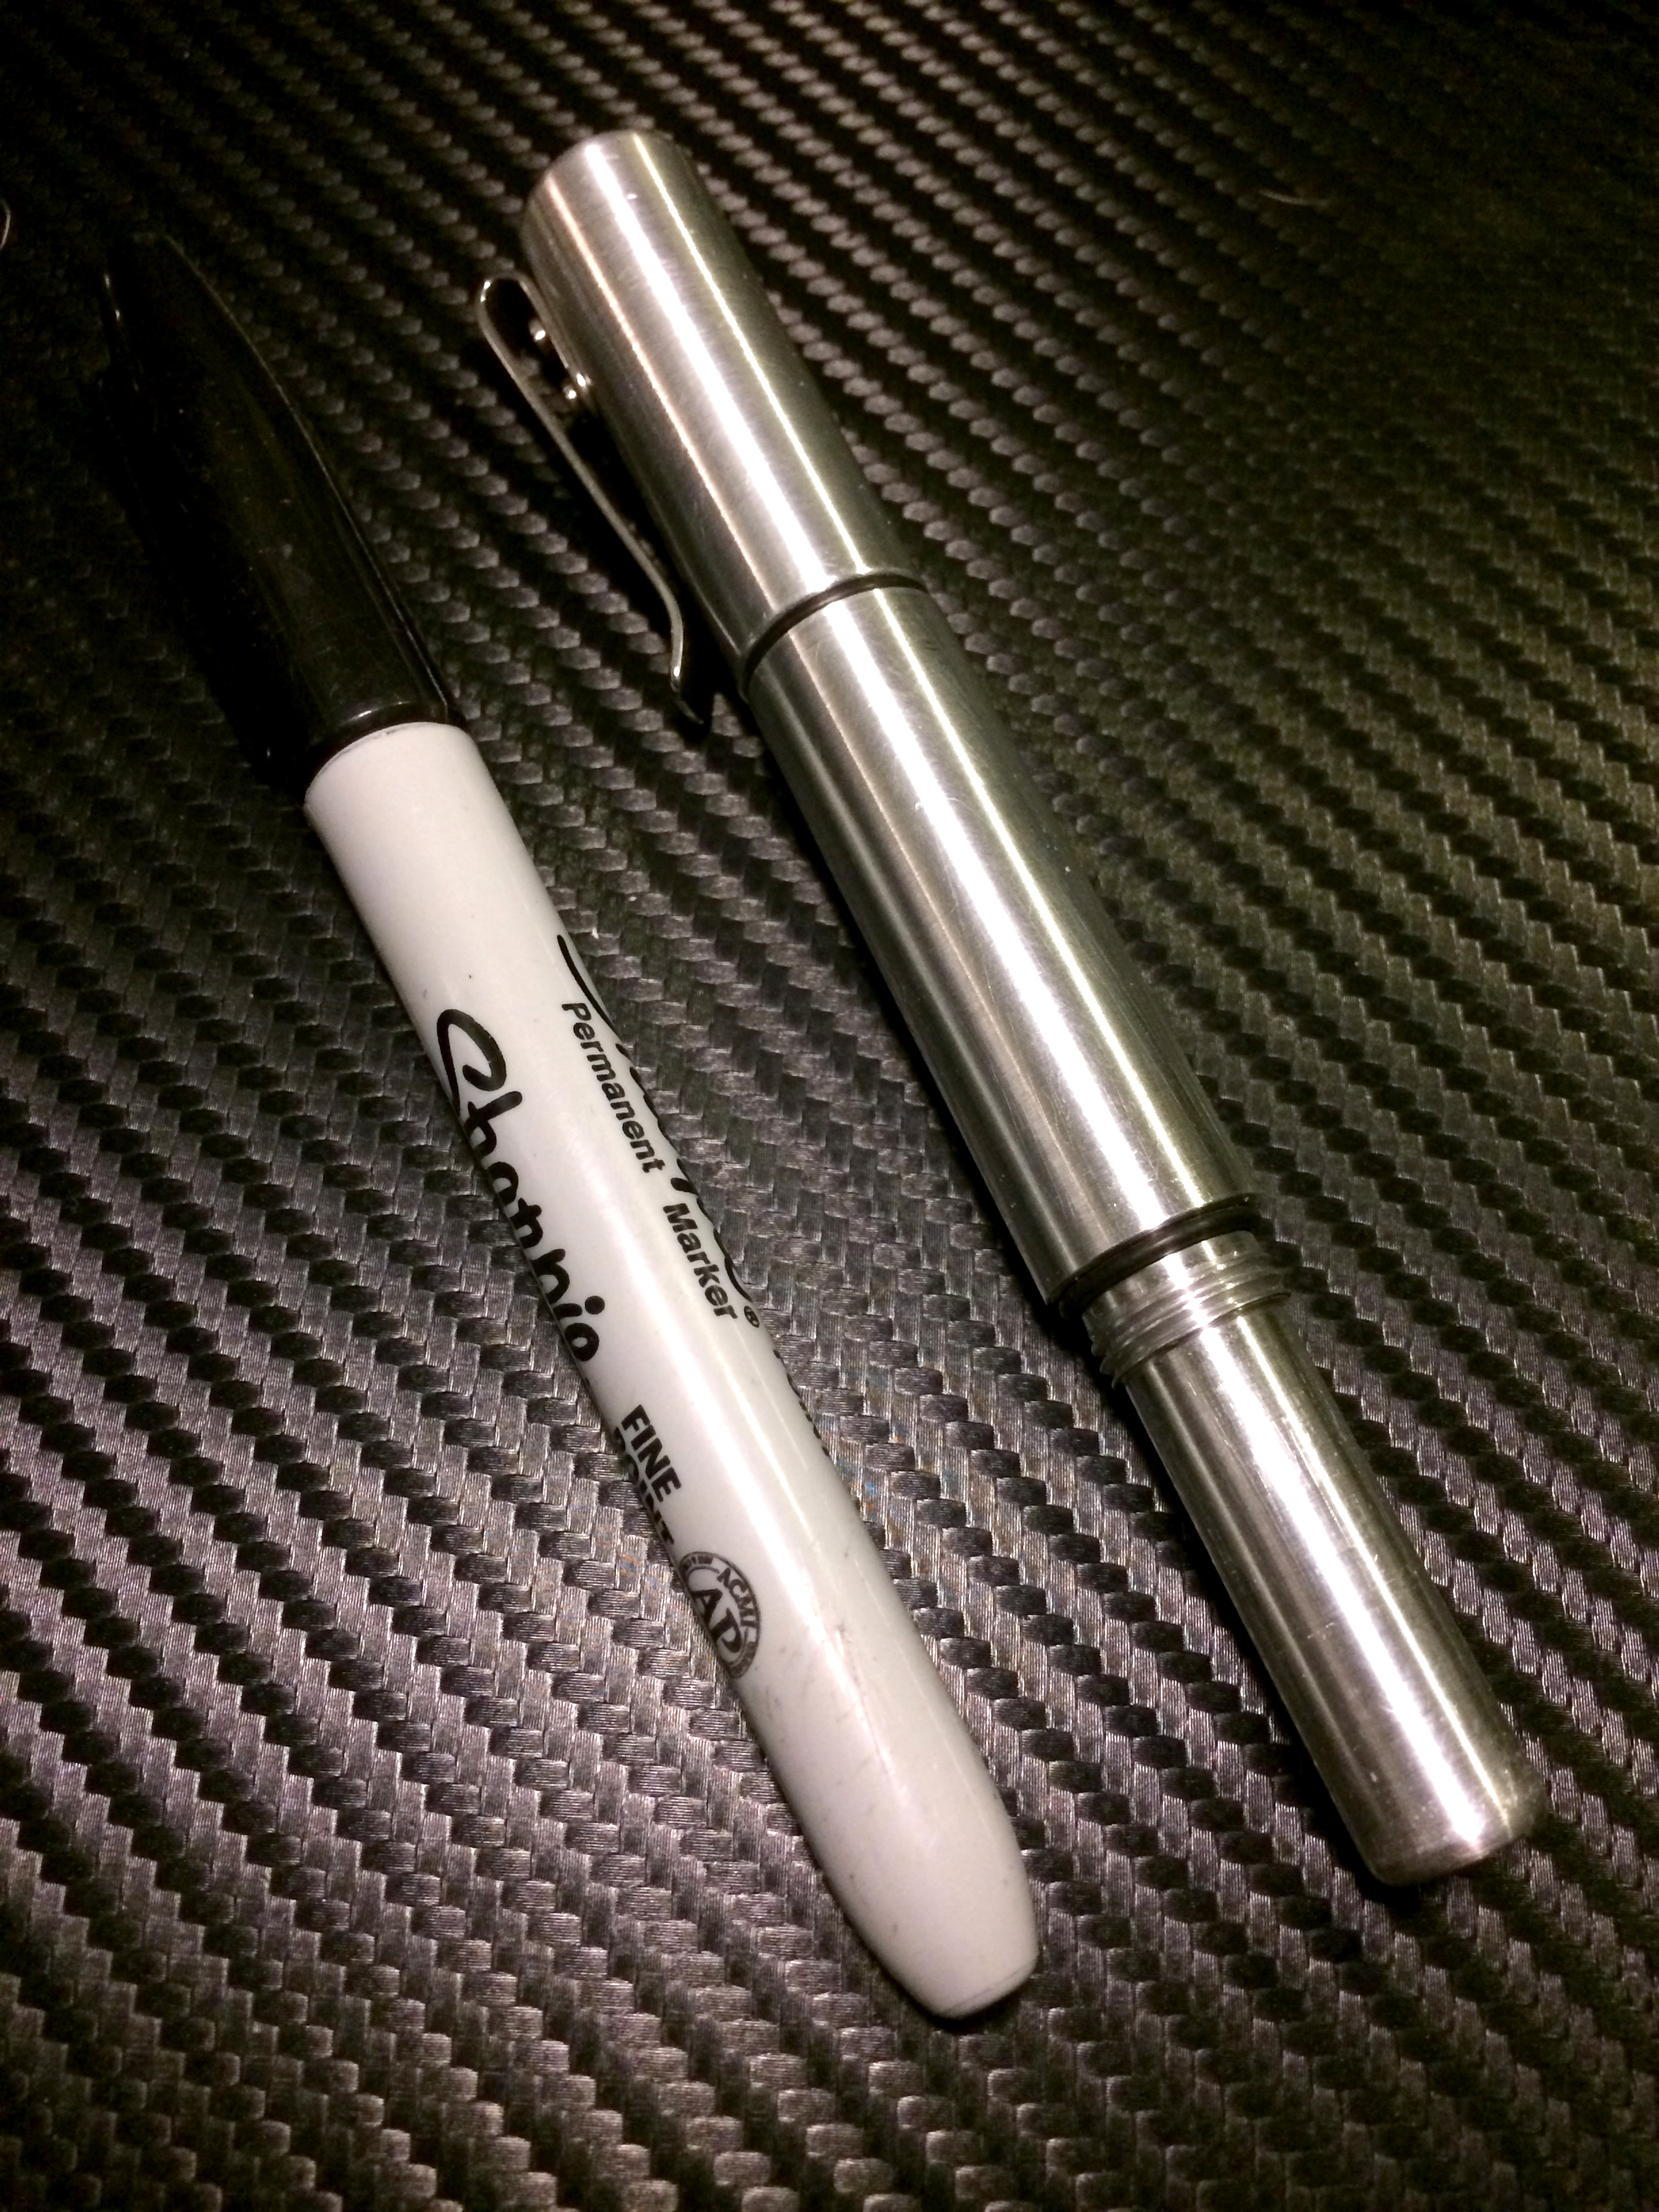
Having a medium size collection of higher end custom pens, one of my greatest wishes was for someone to make a beautiful Sharpie marker holder. I’ve been waiting for someone on Kickstarter or other crowdfunding platform to make one, but no one seems to want to take up the challenge. Sharpie does make a stainless steel marker but the design leaves so much to desire and the refilled are fairly expensive given the relative short lifespan of a marker.
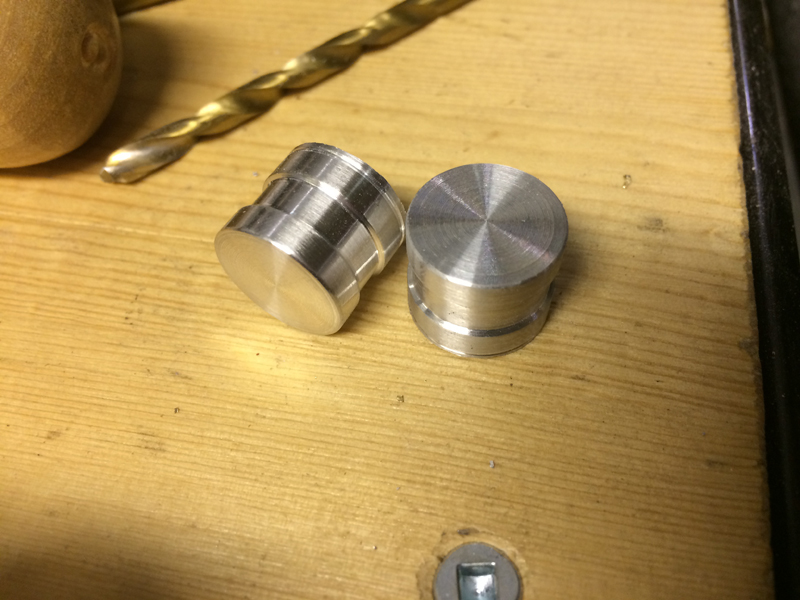
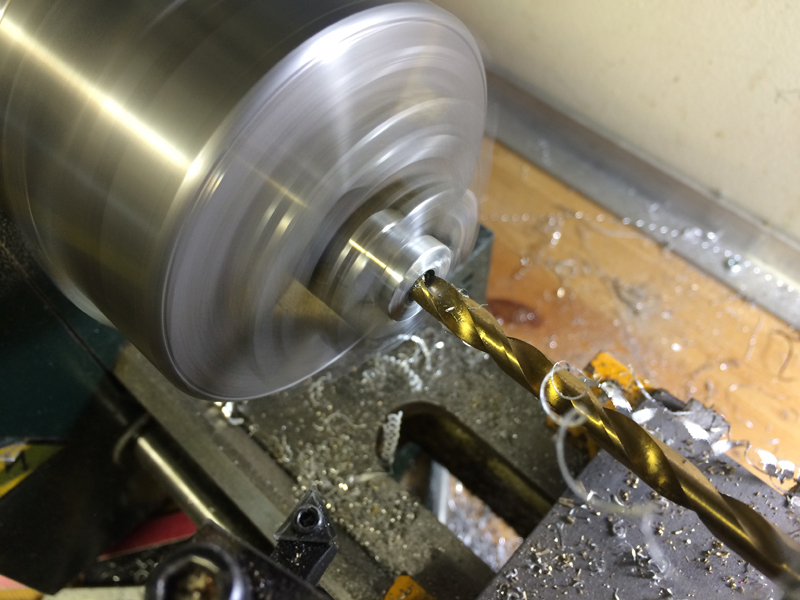
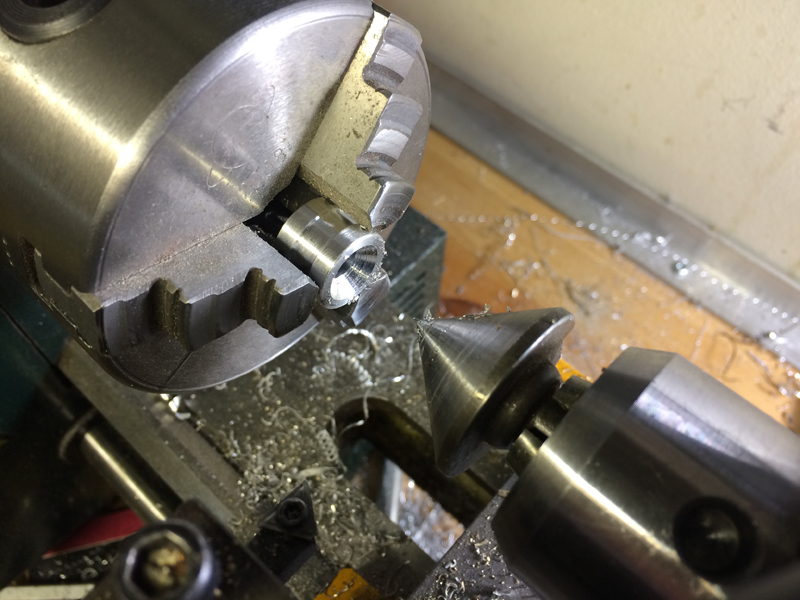
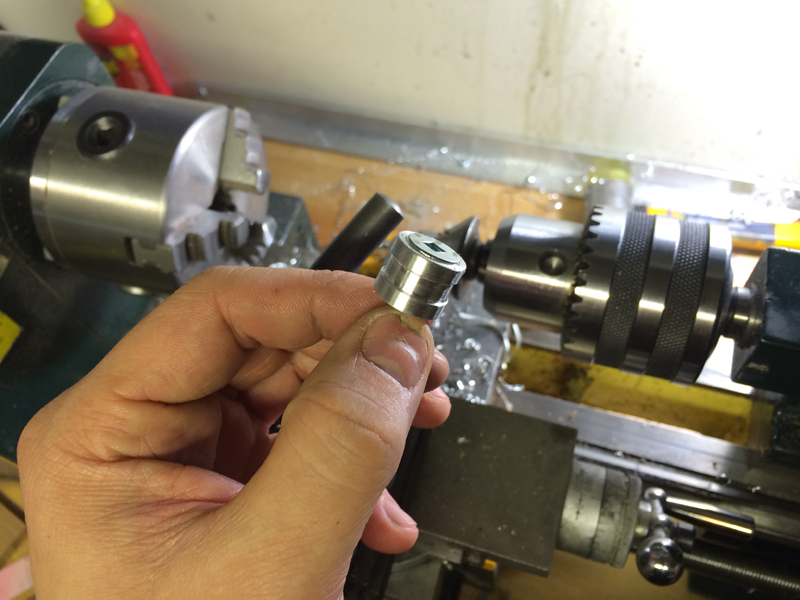
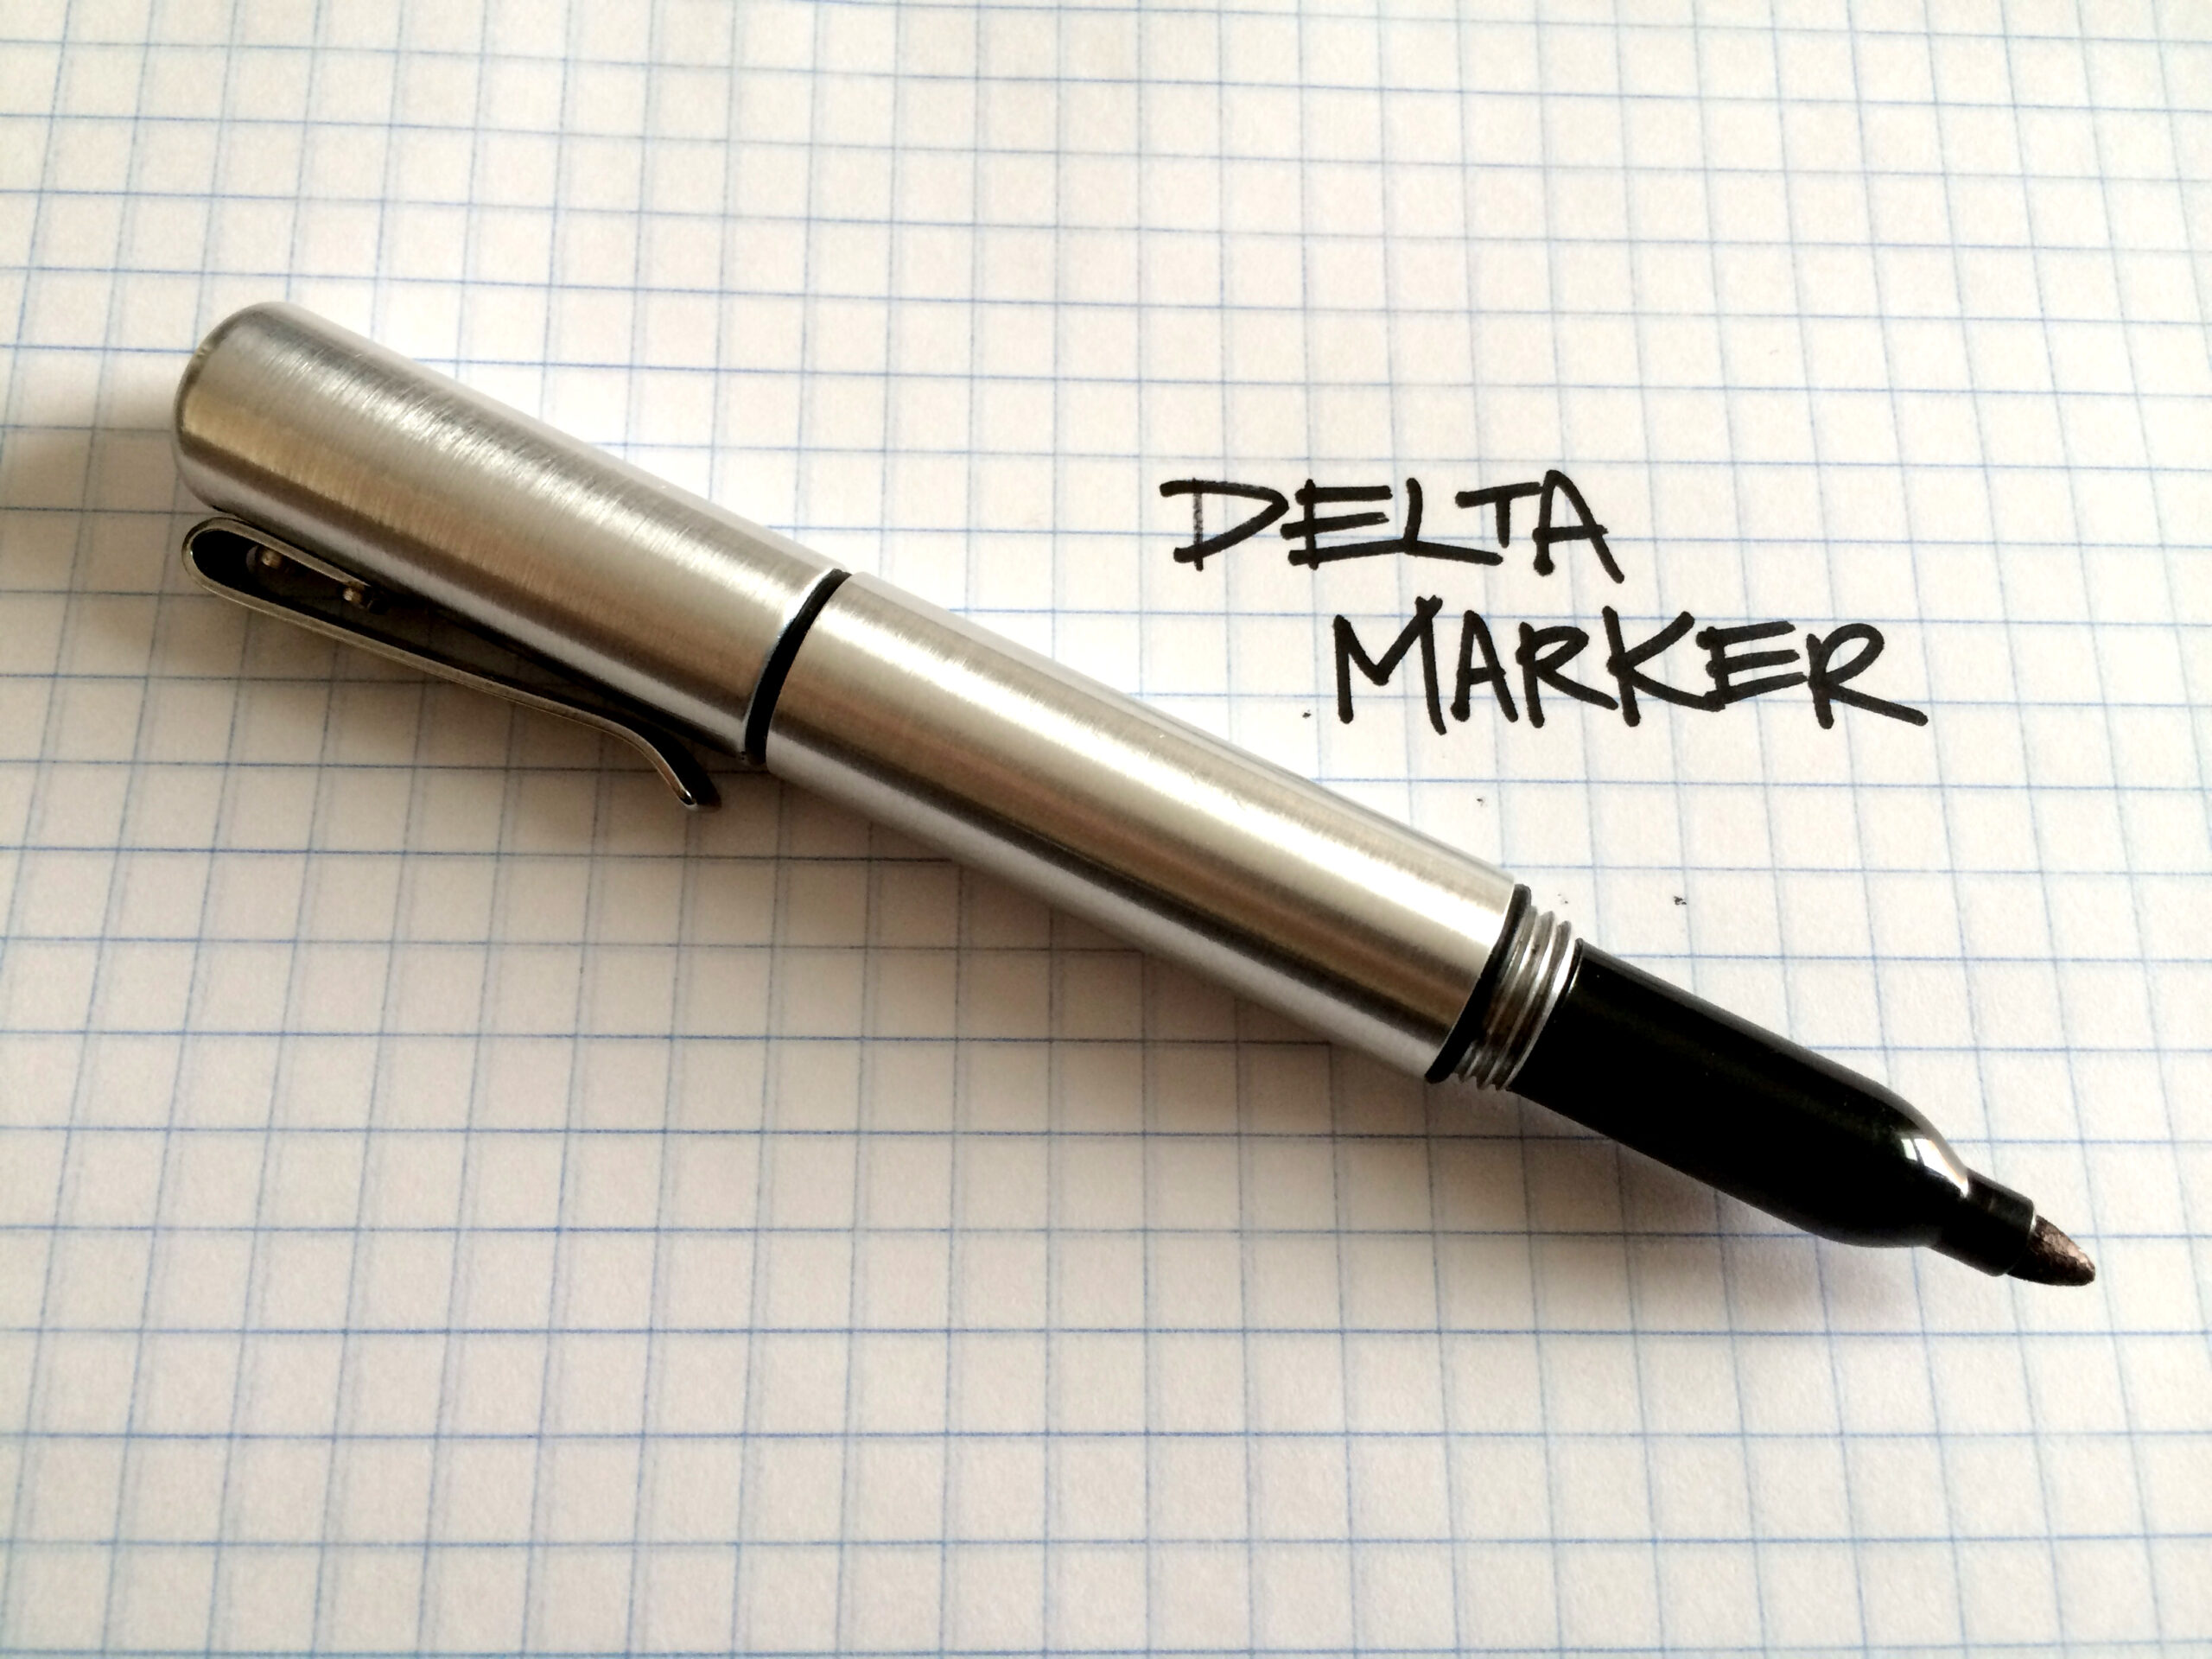
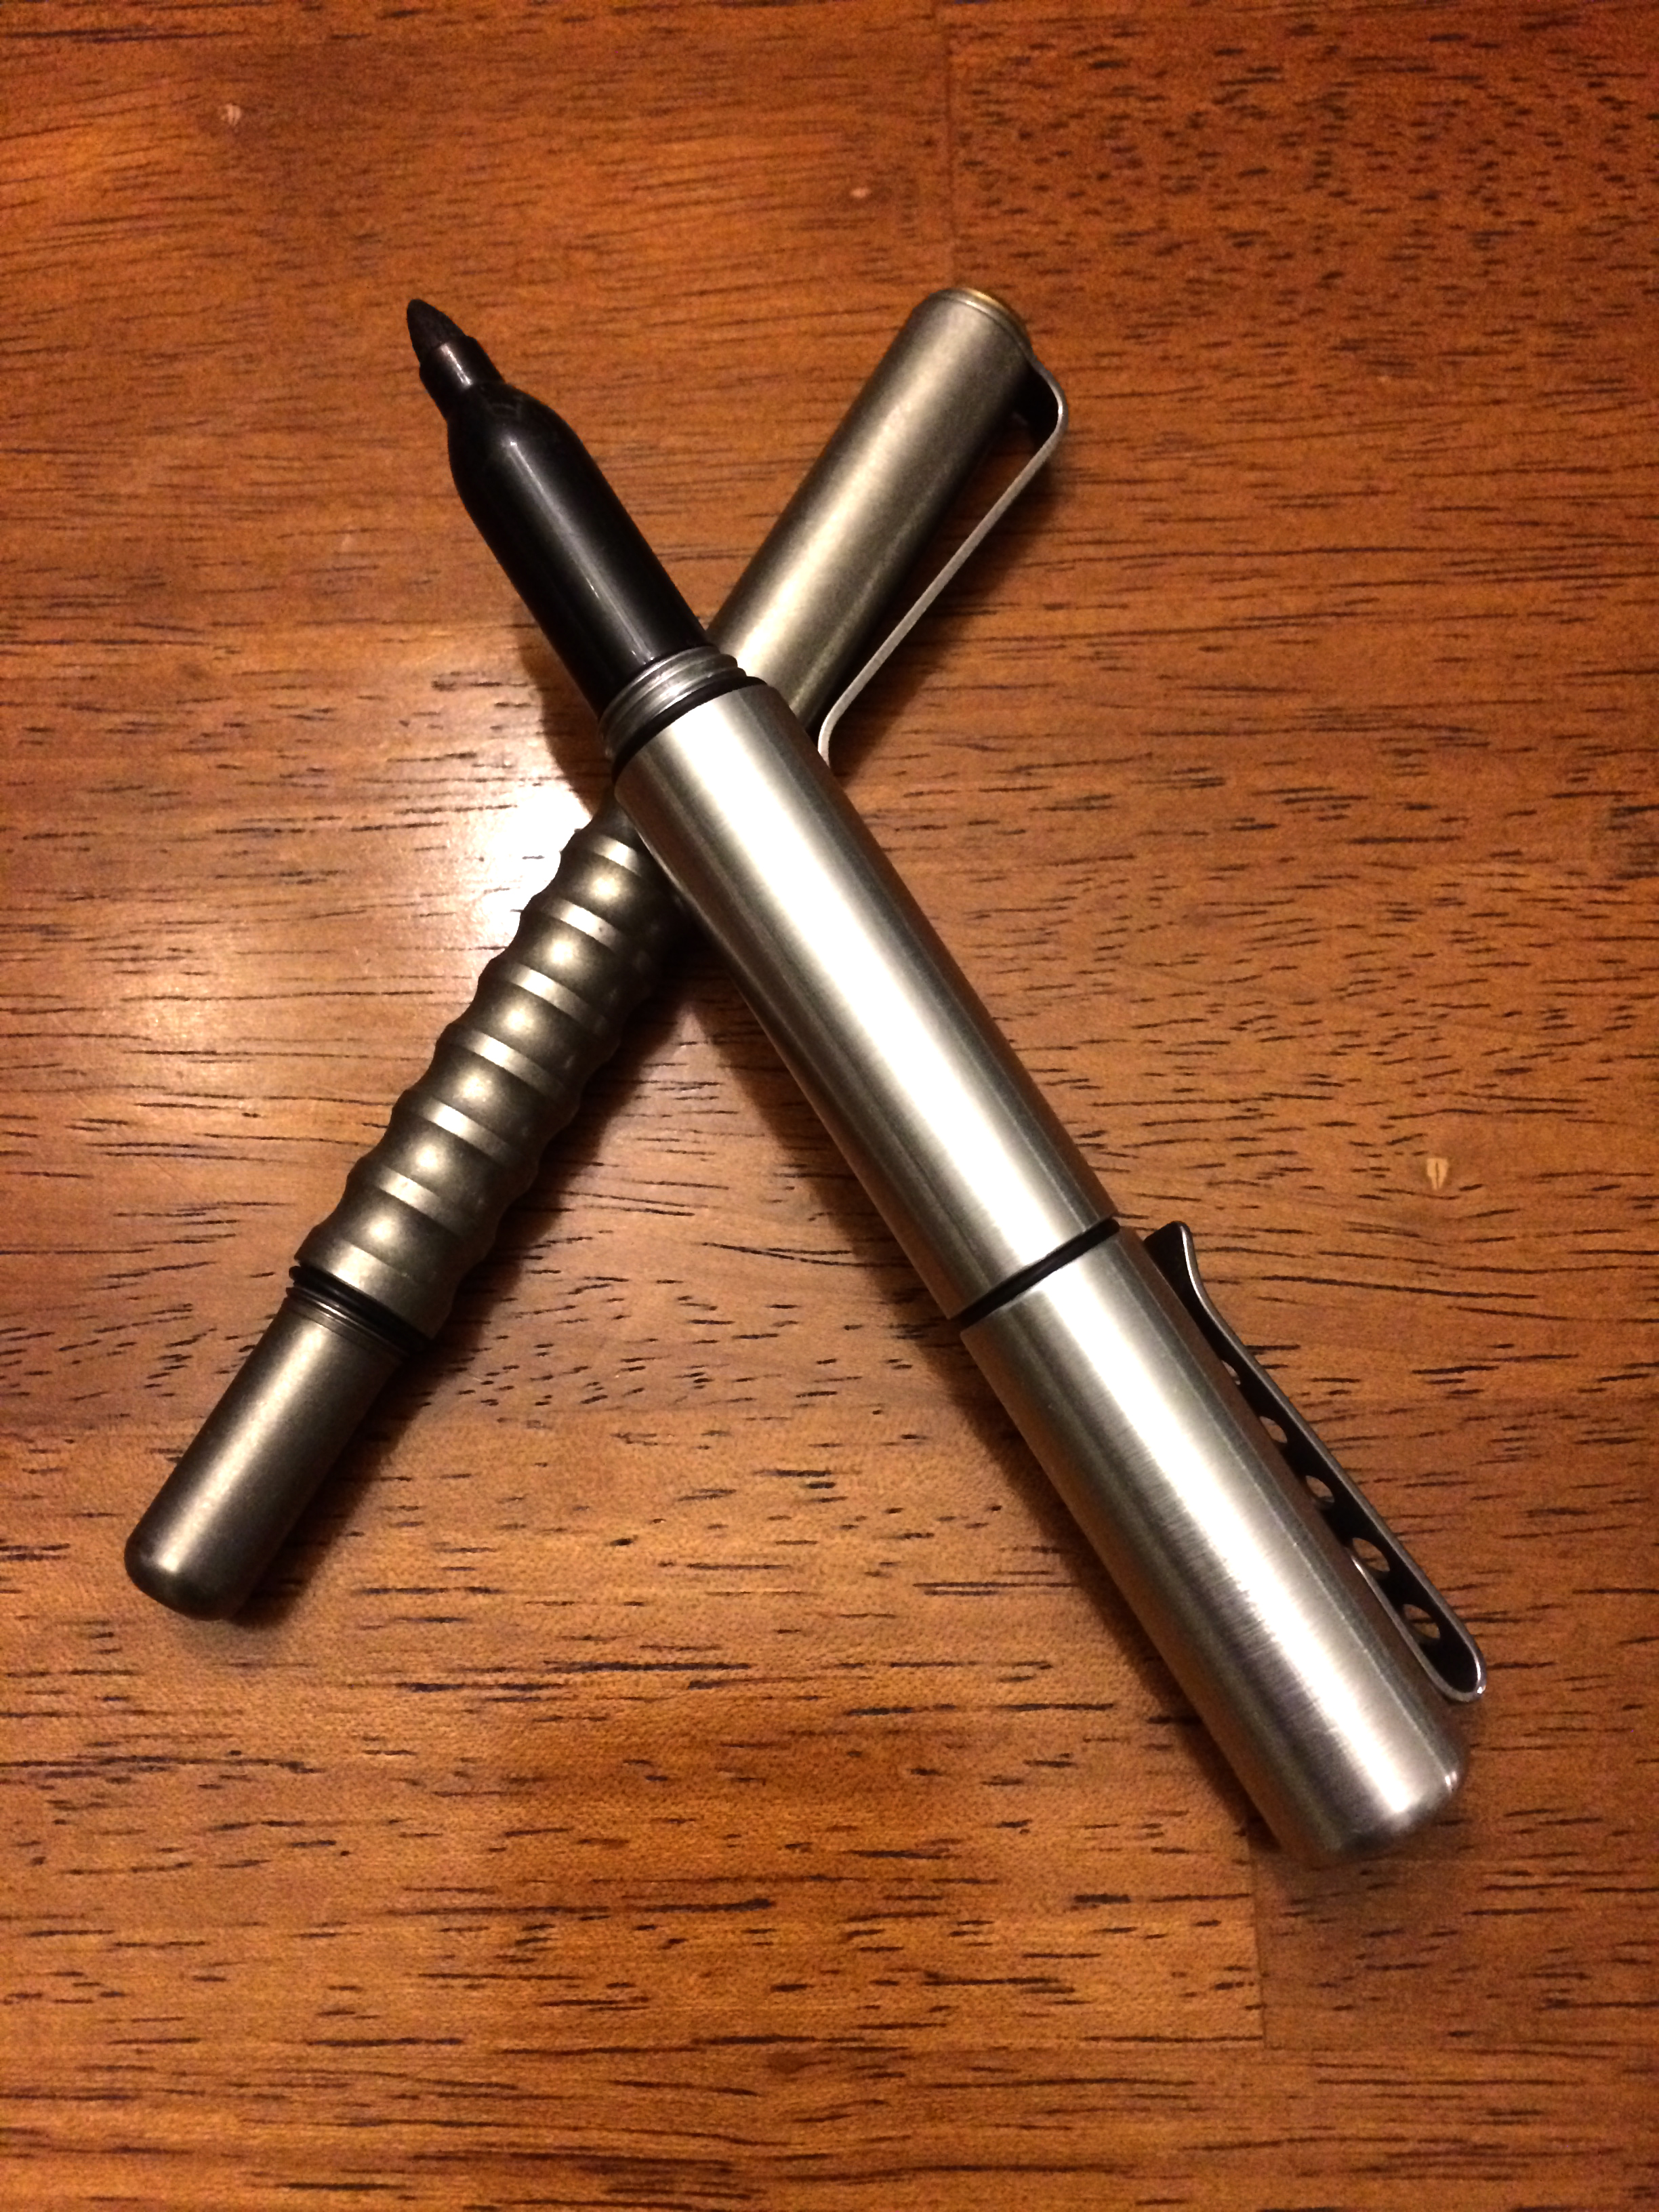
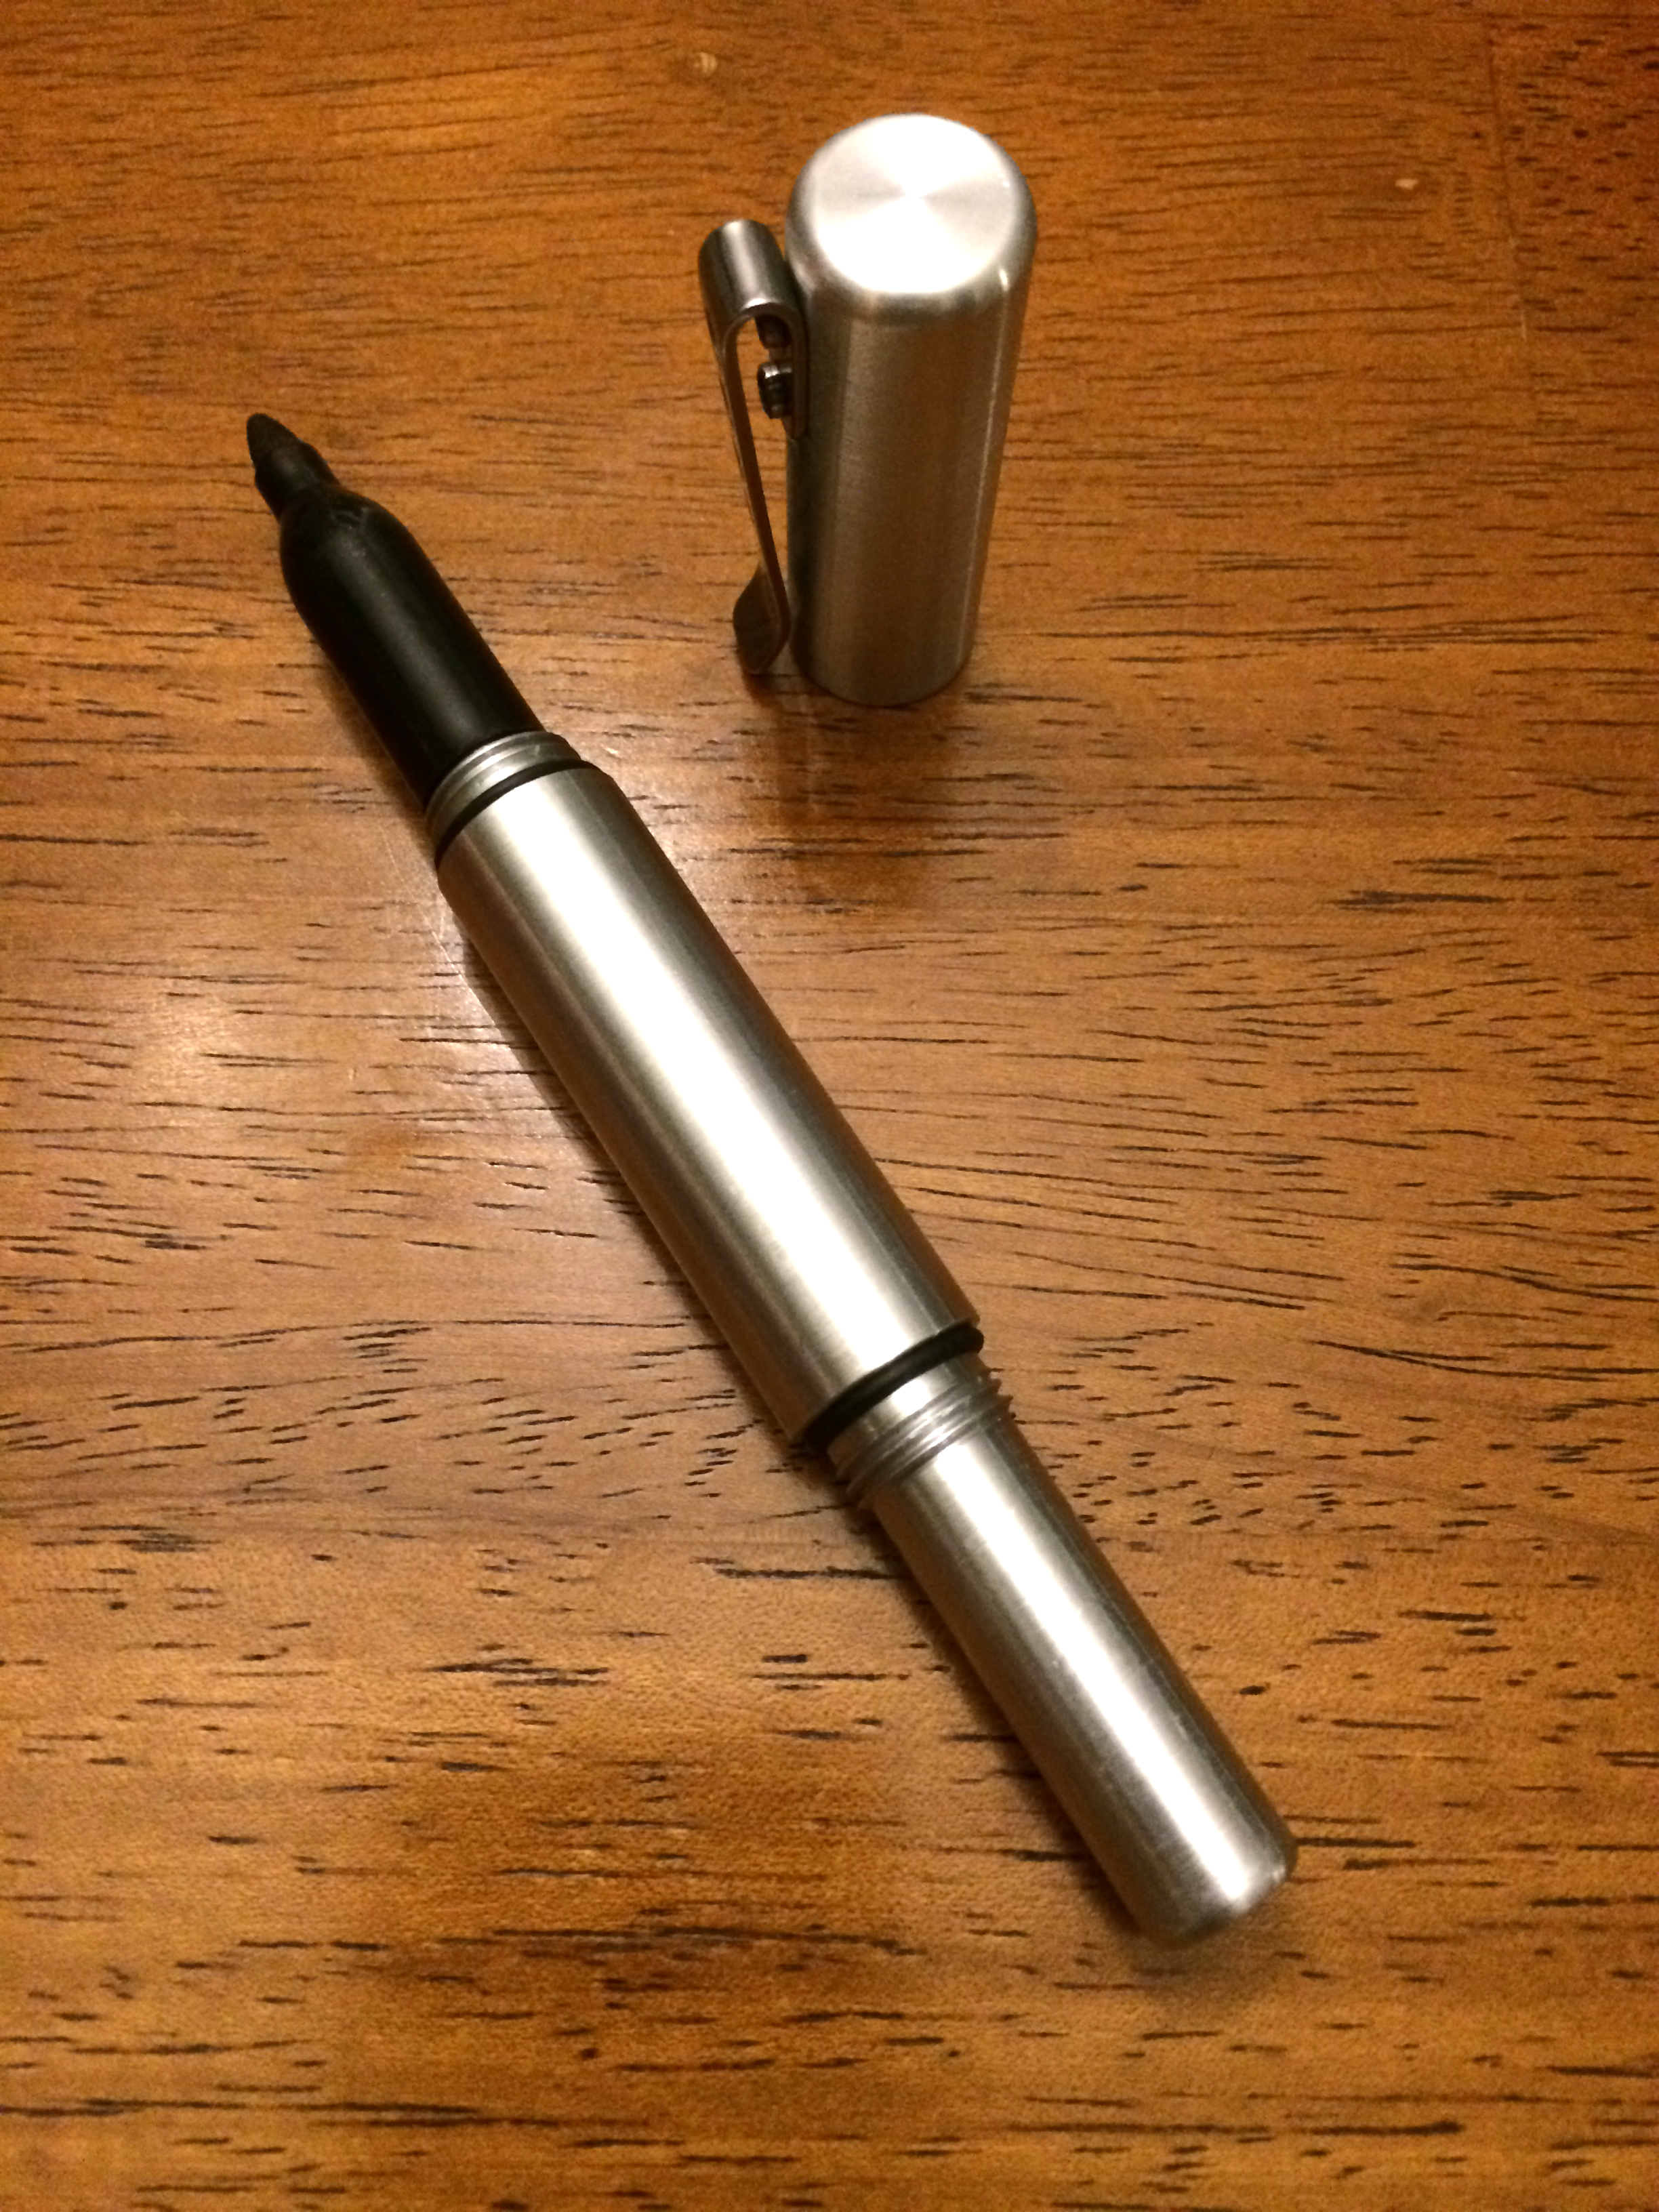
I finally broke down and spent some time in front of my lathe and made one. This is turned entirely from 5/8″, 6160 aluminum bar stock and using very commonly sized imperial HSS drill bits. The clip is from a Sanrenmu knife that seats itself into a flat spot milled into the face of the cap.
Basically, it’s a sleeve that accepts the grip, tip and ink well sponge of a regular sized Sharpie fine tipped marker. Extracting this is pretty easy, just bend the plastic body of the maker till the body separates from the grip. Then slide it into the Delta body and press down with the plastic cap. This seats the “refill” fully into the new home.
I call it the Delta Marker.
Why Delta?
Well, it’s no match for The Alpha pen, and it’s not refined enough to be a Beta so, it’s the Delta marker. It is also based off of Jason’s design, using his cap posting design ad well as the capping design, so it’s only natural to follow his naming convention. The only thing missing is the shallow scallops on the body, to do this I would need a round insert holder, which I broke some time ago.
I also wanted it to seal, so I added a groove at the base of each 1/2 fine thread for an o-ring. This did two things, it won’t allow the nib from drying out, but it also engages the cap when torqued on a bit so it won’t accidentally come apart in my pants or shirt pocket. I actually came about this epiphany when the Alpha pen came apart in my pocket a few times, so I put a few, really small o-rings meant for a AAA flashlight seated at the base of each thread. Lucky for me, Jason designed a relief for the threads, which meant there was a groove for the o-rings to seat. Mine are much less precise, but they don’t need to be since the o-rings I used are much thicker to generate a better seal.
Just a quick note, these are not for sale, it was a personal challenge and this blog is a place for me to present final, in progress, experimental as well as failed projects. It’s not often something comes together so nicely on the first try, but thanks to Jason’s design, a lot of the guess work is done for me.
Here are some table top shots, under the Delta Marker is the Alpha pen.
Thanks for making it all the way to end of another long winded, designer rage fuelled build. I am really happy with the Delta Marker and it will serve me well until I can get this design in CAD and possible CNC this.