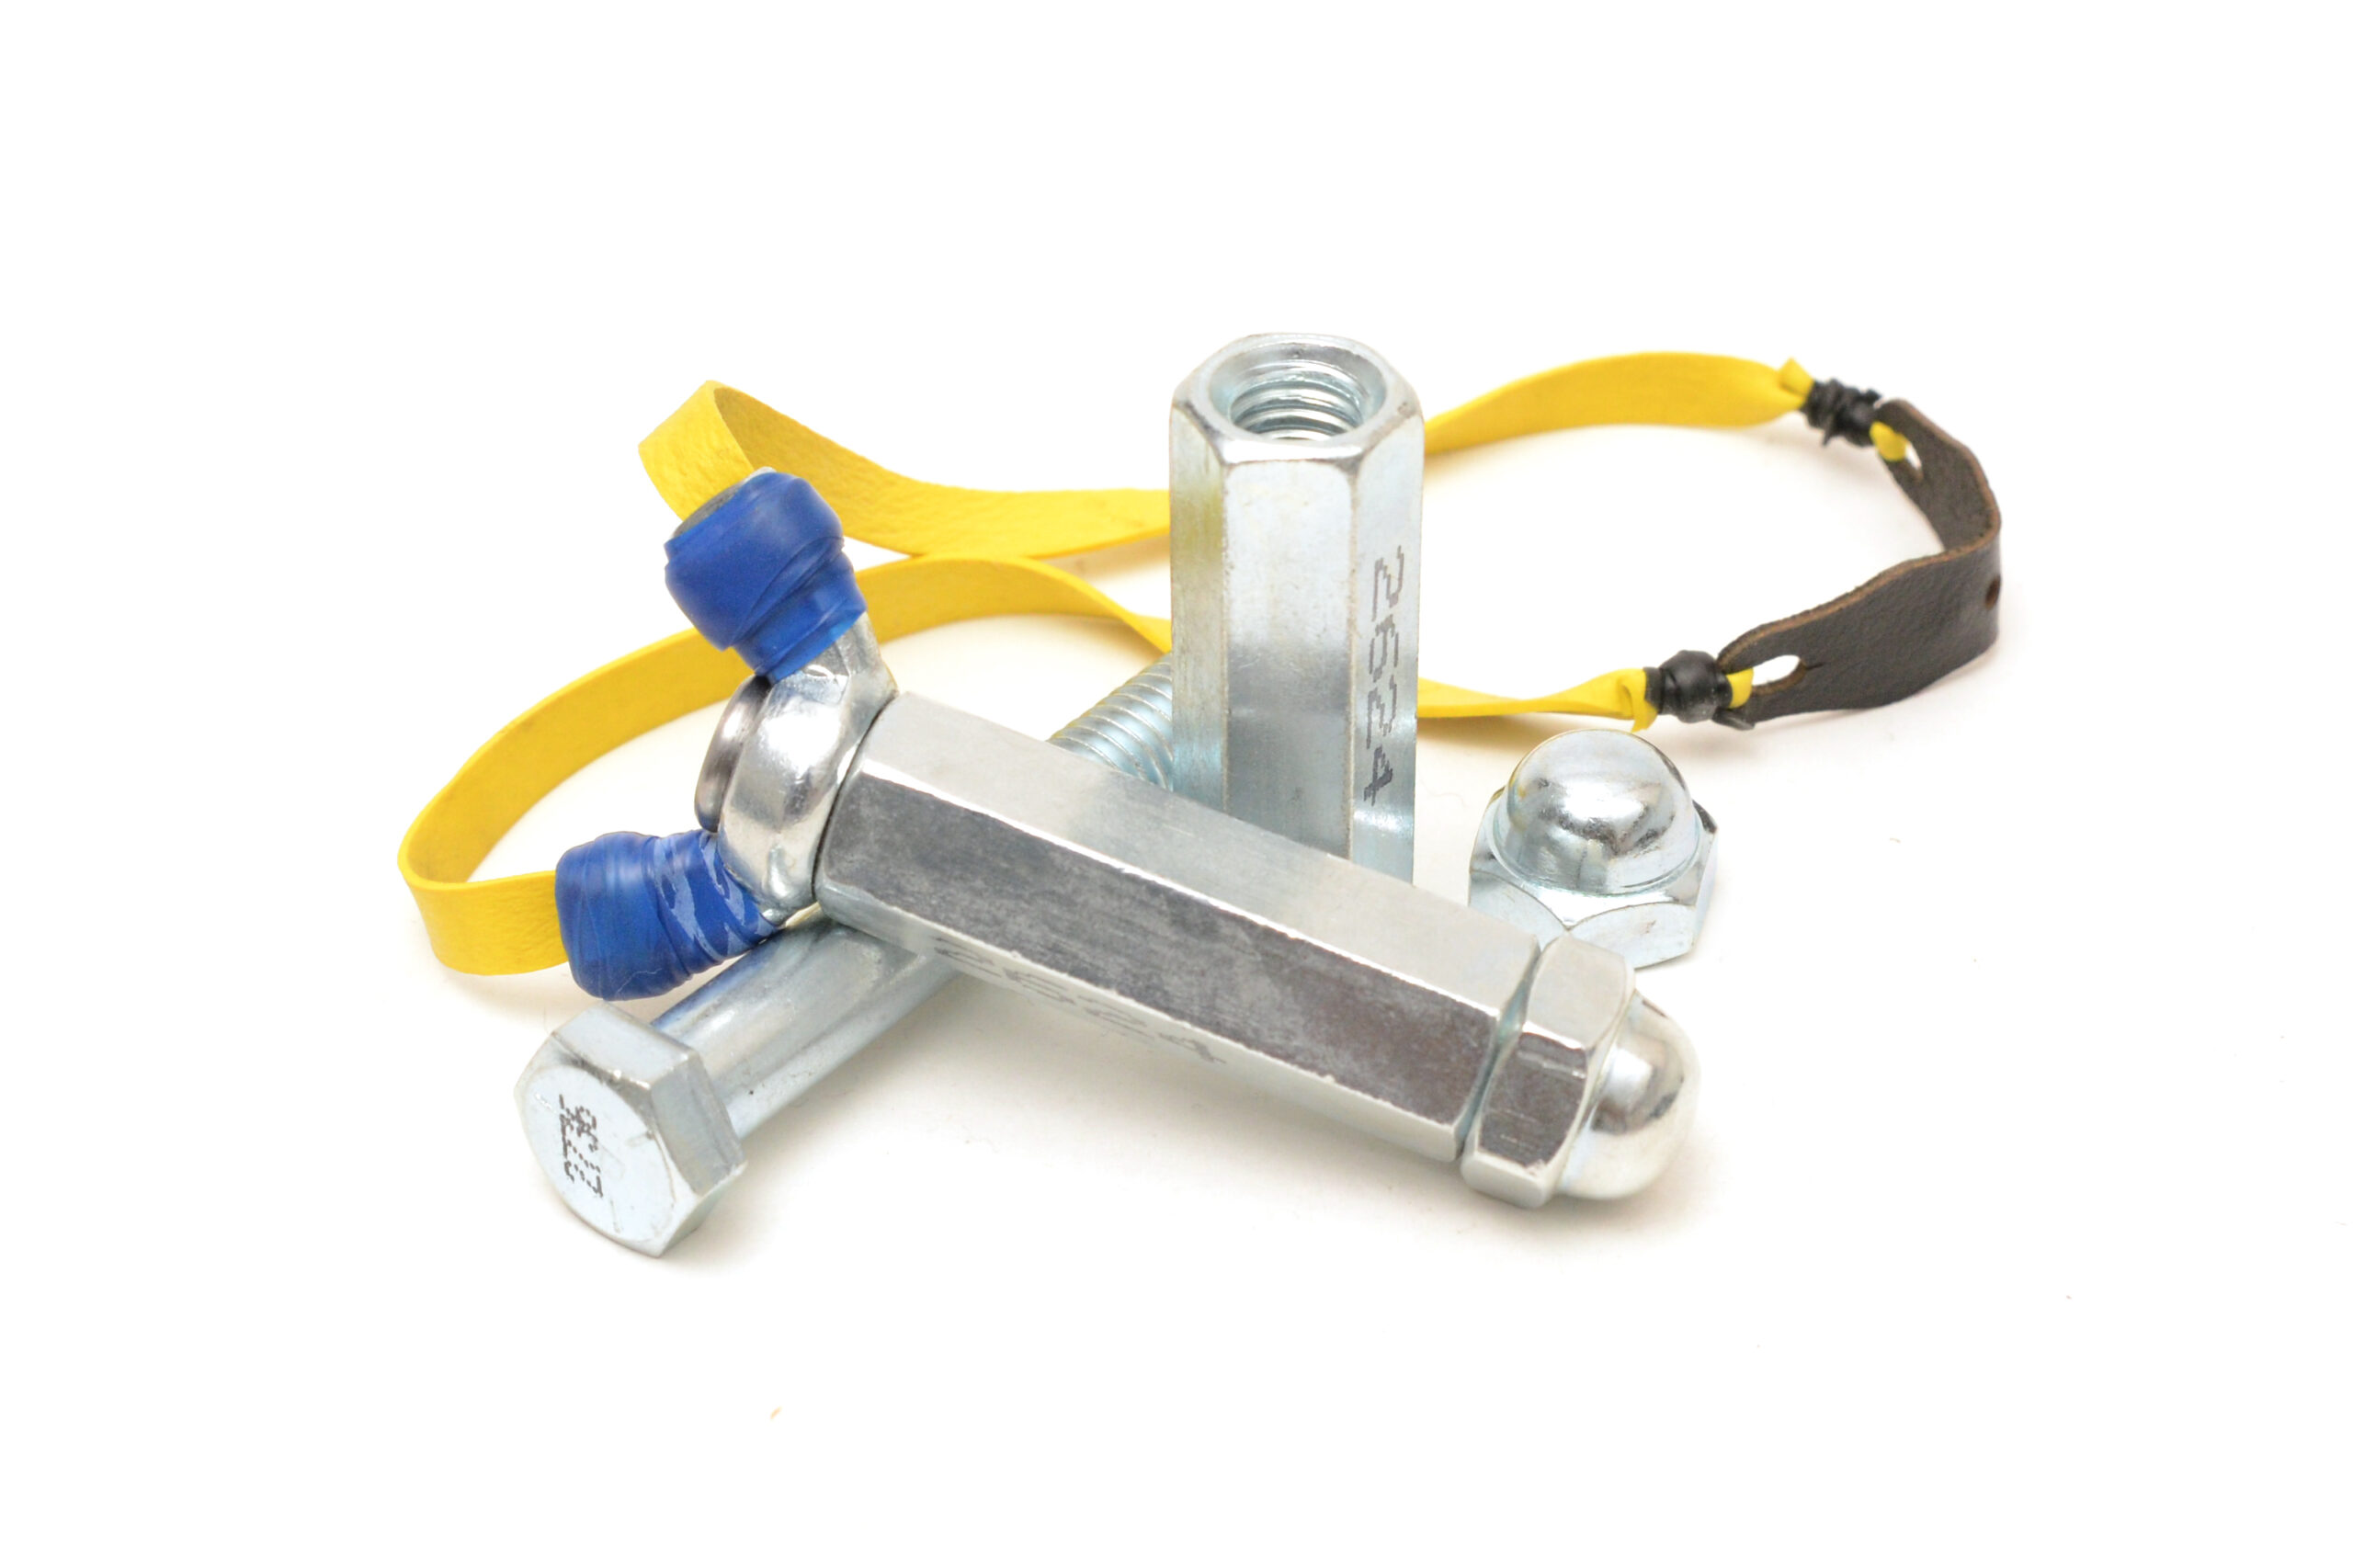
http://midequalitygroup.co.uk/events/list/?tribe-bar-date=2028-12-29 Happy Father’s Day! In this Metro Made instalment I make a little BB shooter from the nuts and bolts isle at your local hardware store. A recent post over at the Slingshot Forum sparked the inspiration for this quick project. Literally taking all of 15 minutes, this little BB shooter is actually quite accurate once you dial in your sights. The Bolt Cutter is a hard as nails with looks only a Father can love.
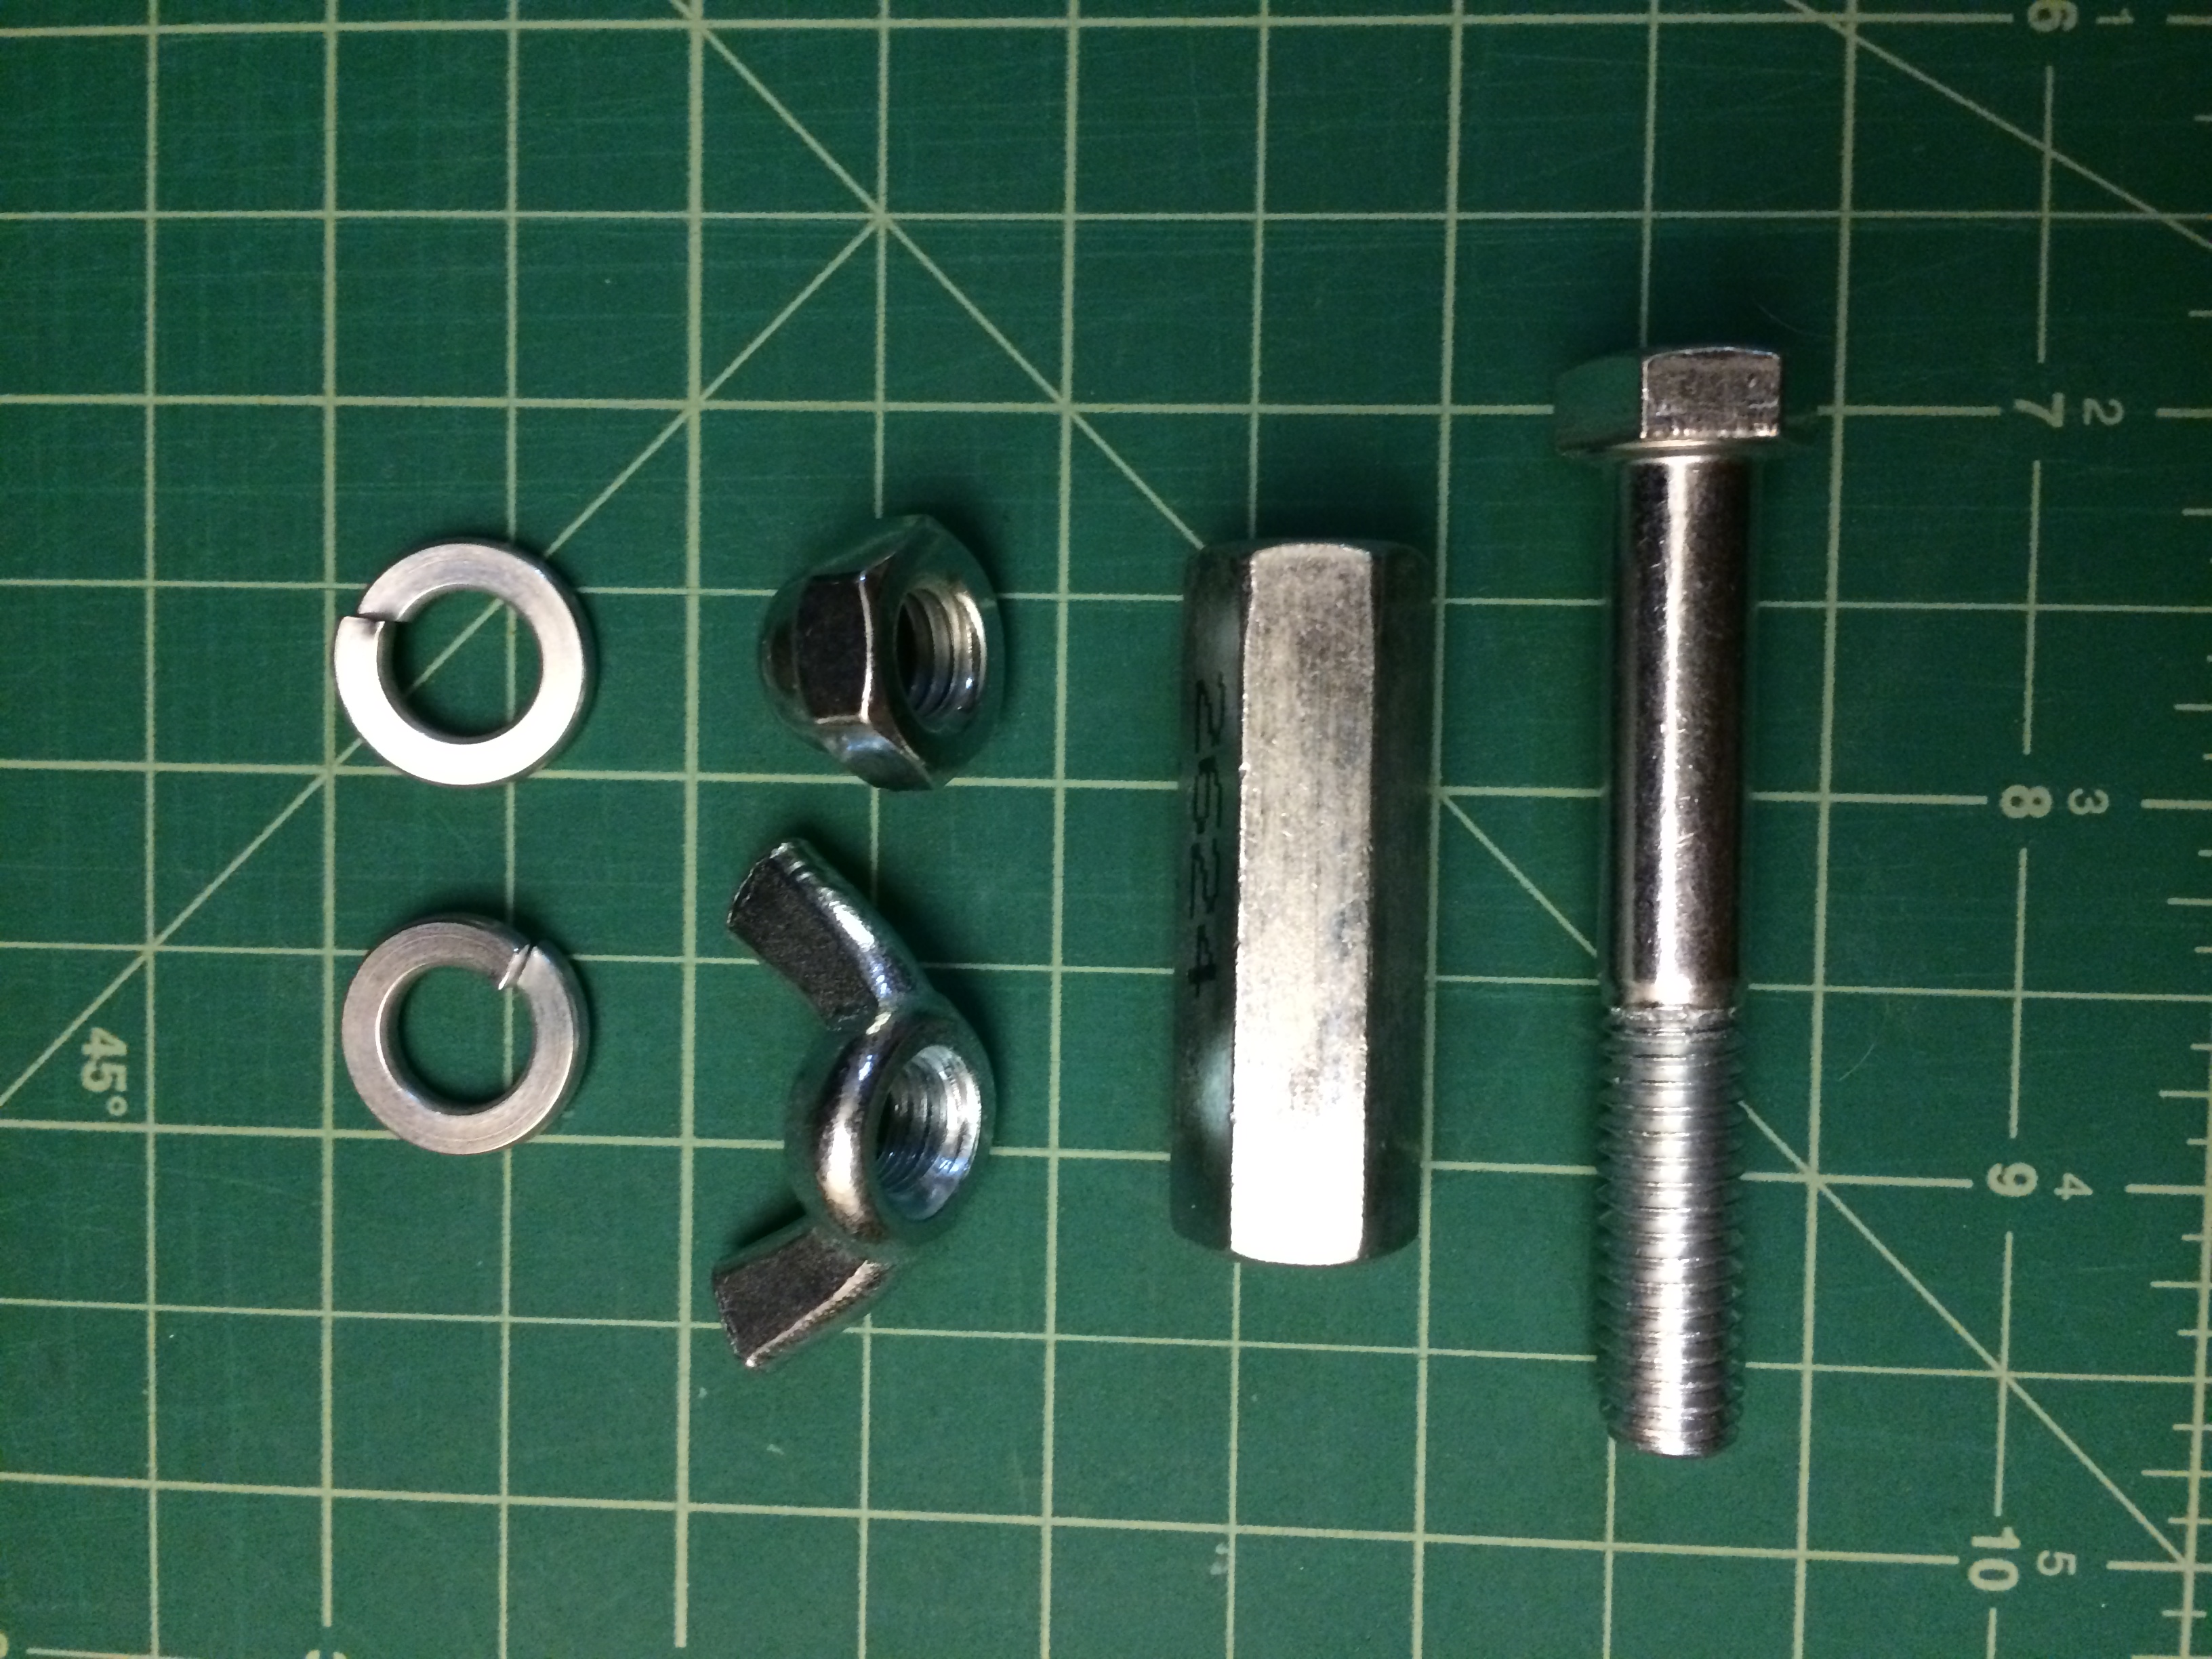
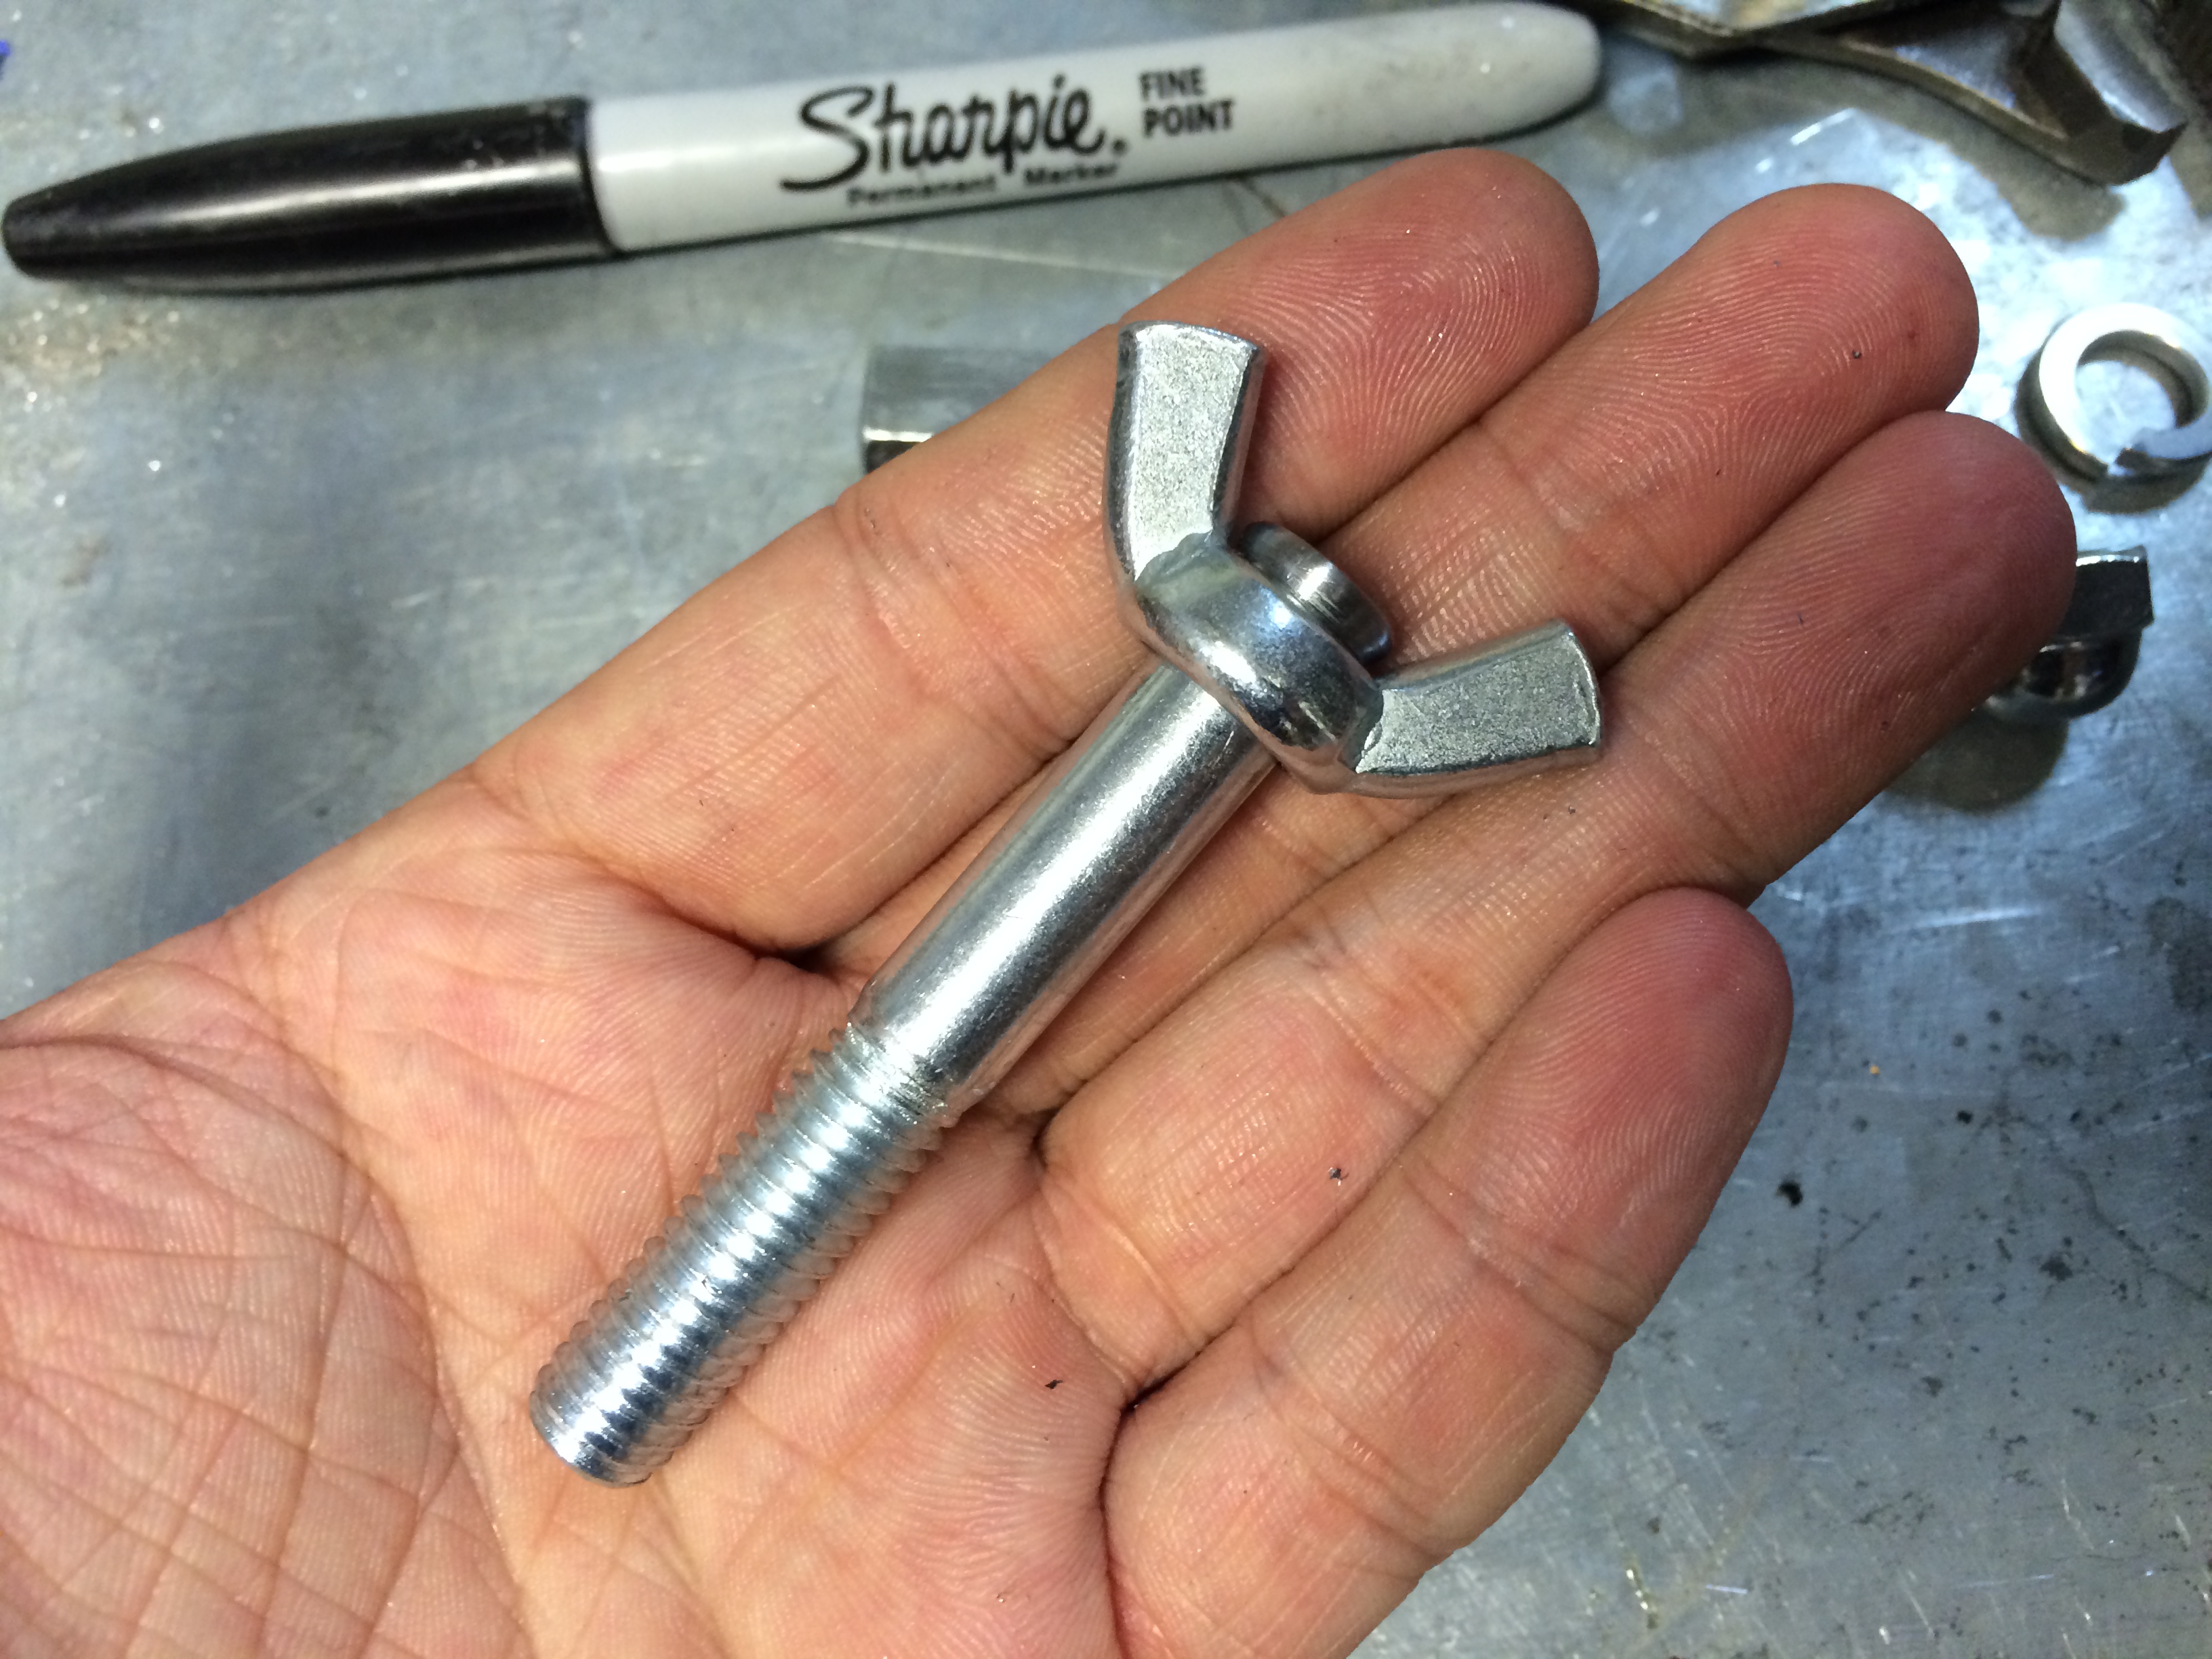
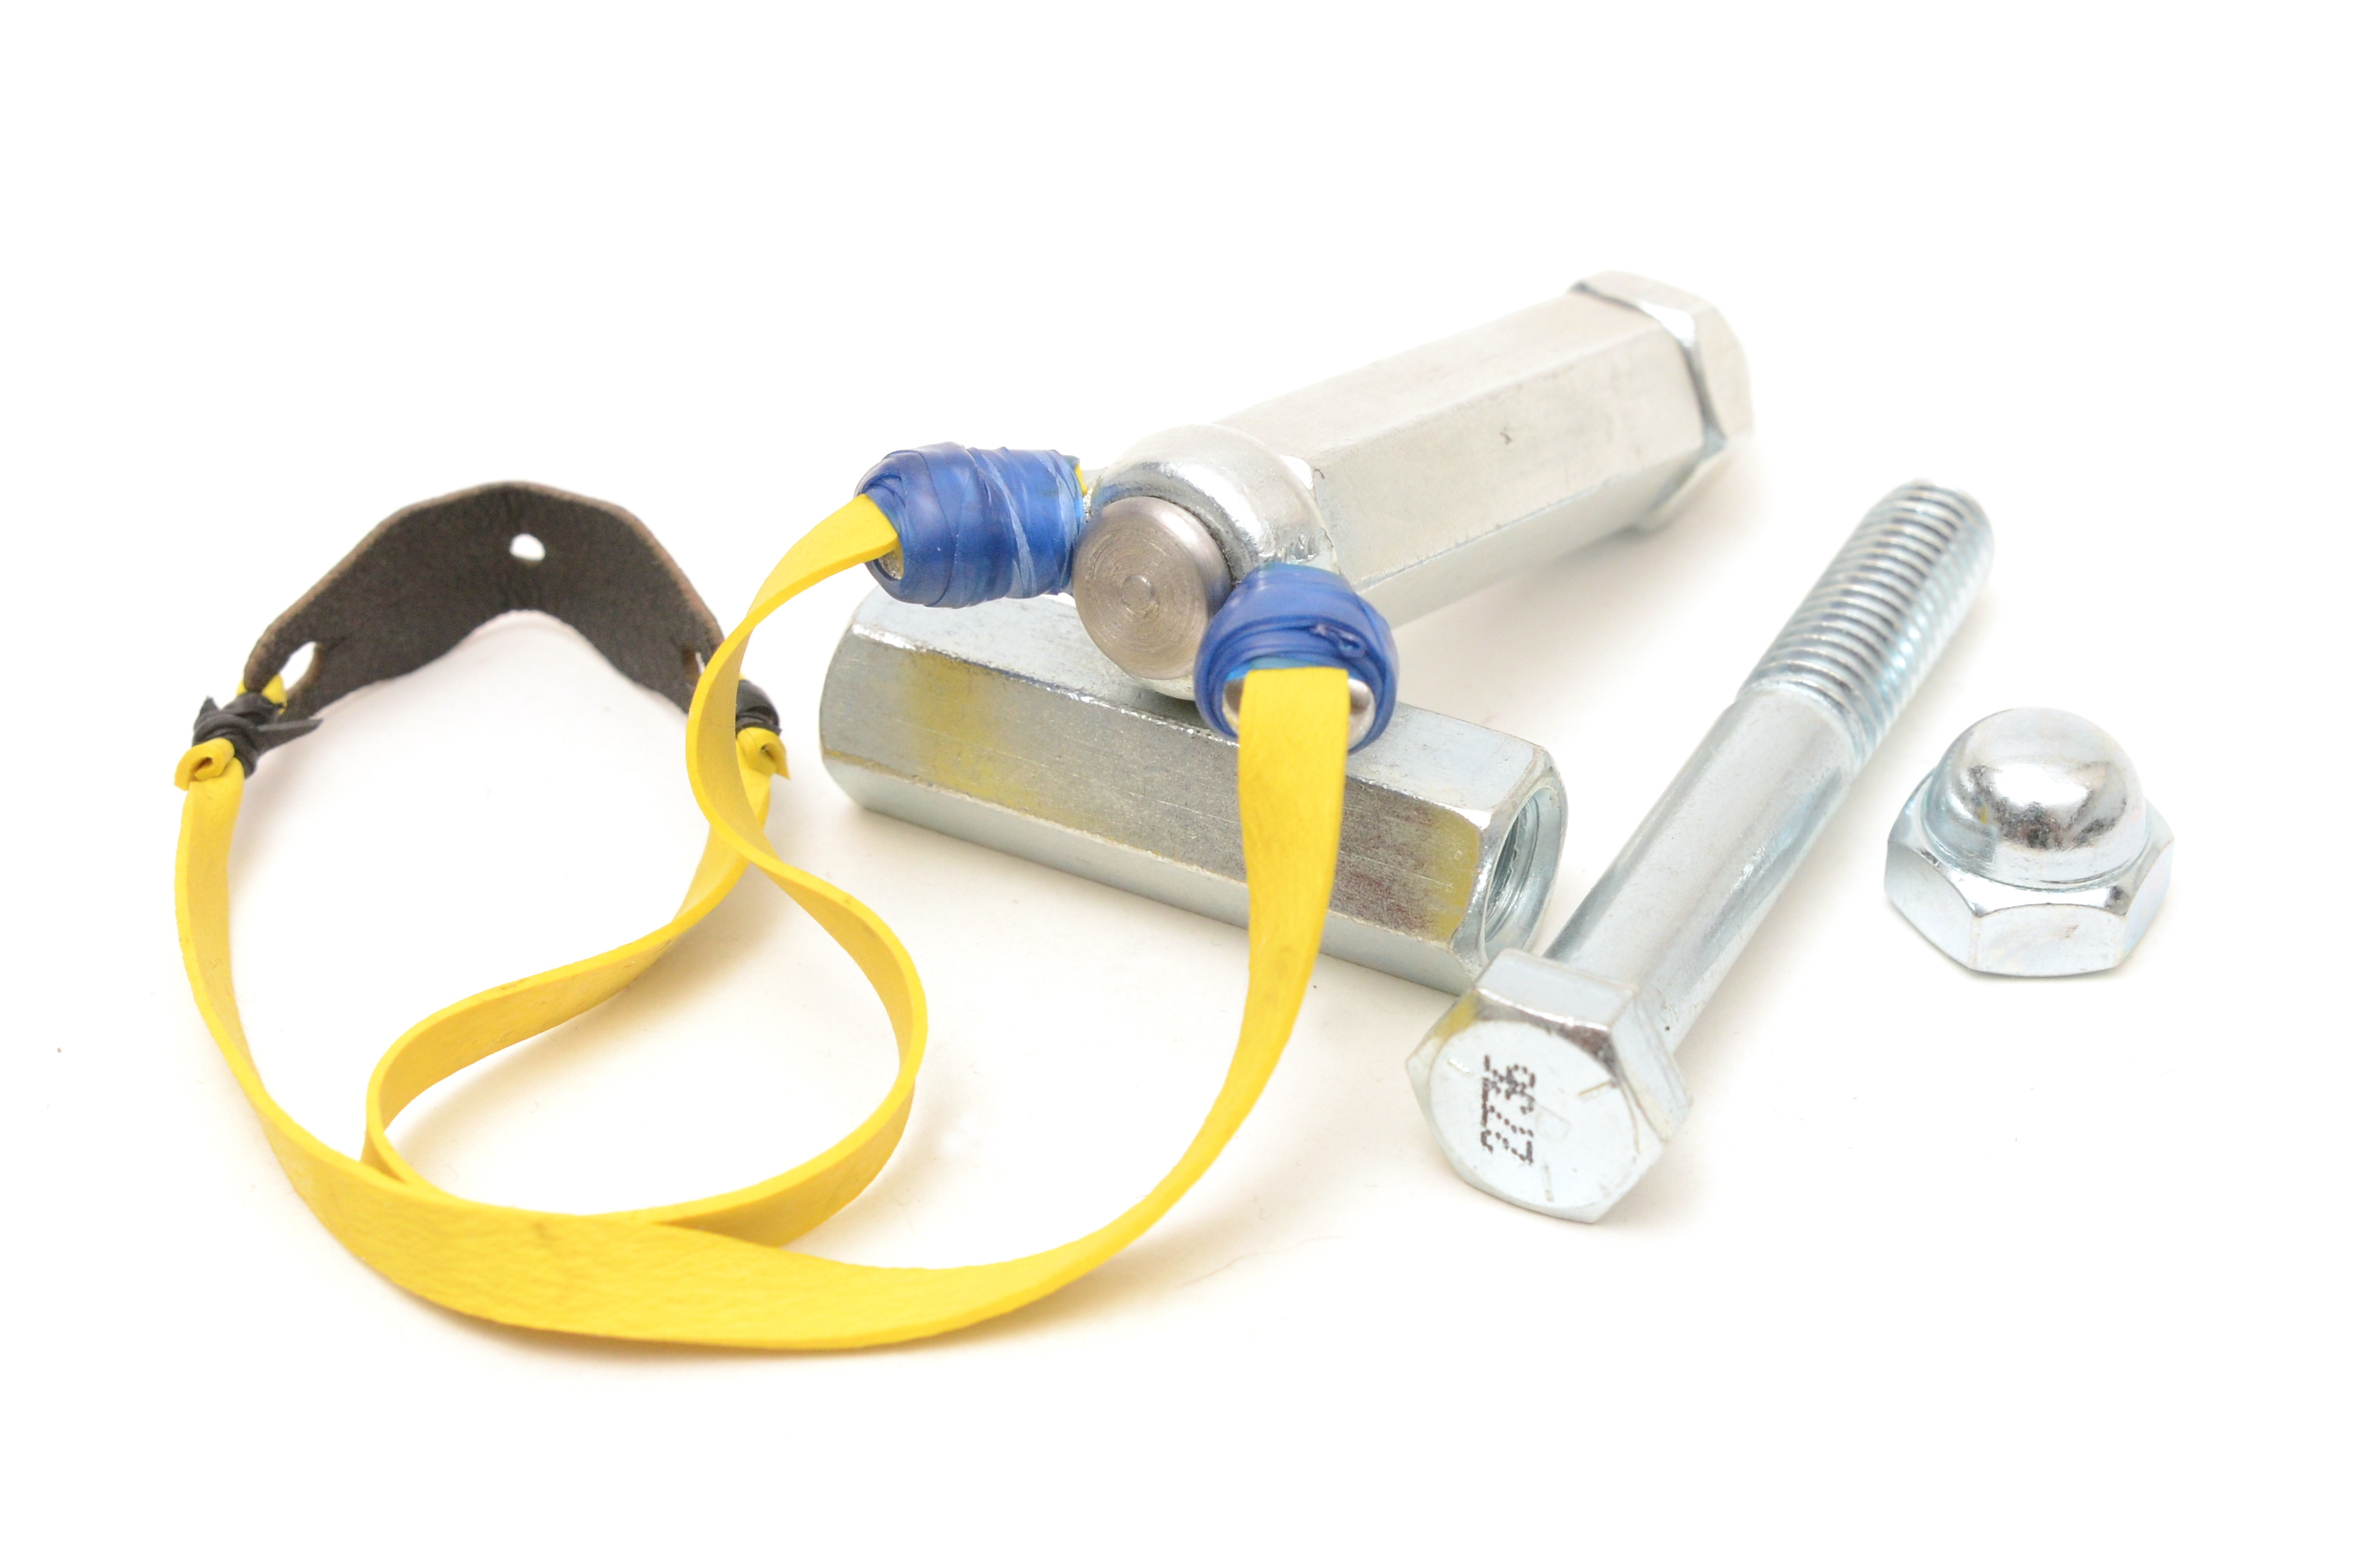
First, I gathered the parts. A 2.5″ long 3/8″ bolt, a 2″ long 3/8″ coupler nut, a 3/8″ acorn nut, a 3/8″ wingnut and some 3/8″ spring washers (I didn’t end up using them but I wanted to have them just in case)
First, since the threads on the bolt don’t go all way to the head, the female threads of the coupler nut need to be drilled out so that the shaft of the bolt can ride free. The left over 3/8″ thread will be plenty to hold the nut on.

Second, mark the 3/8″ drill bit. Since this isn’t stainless steel, a nice sharp TiNi HSS 3/8″ drill bit will do. I used some oil to smooth out the cutting.
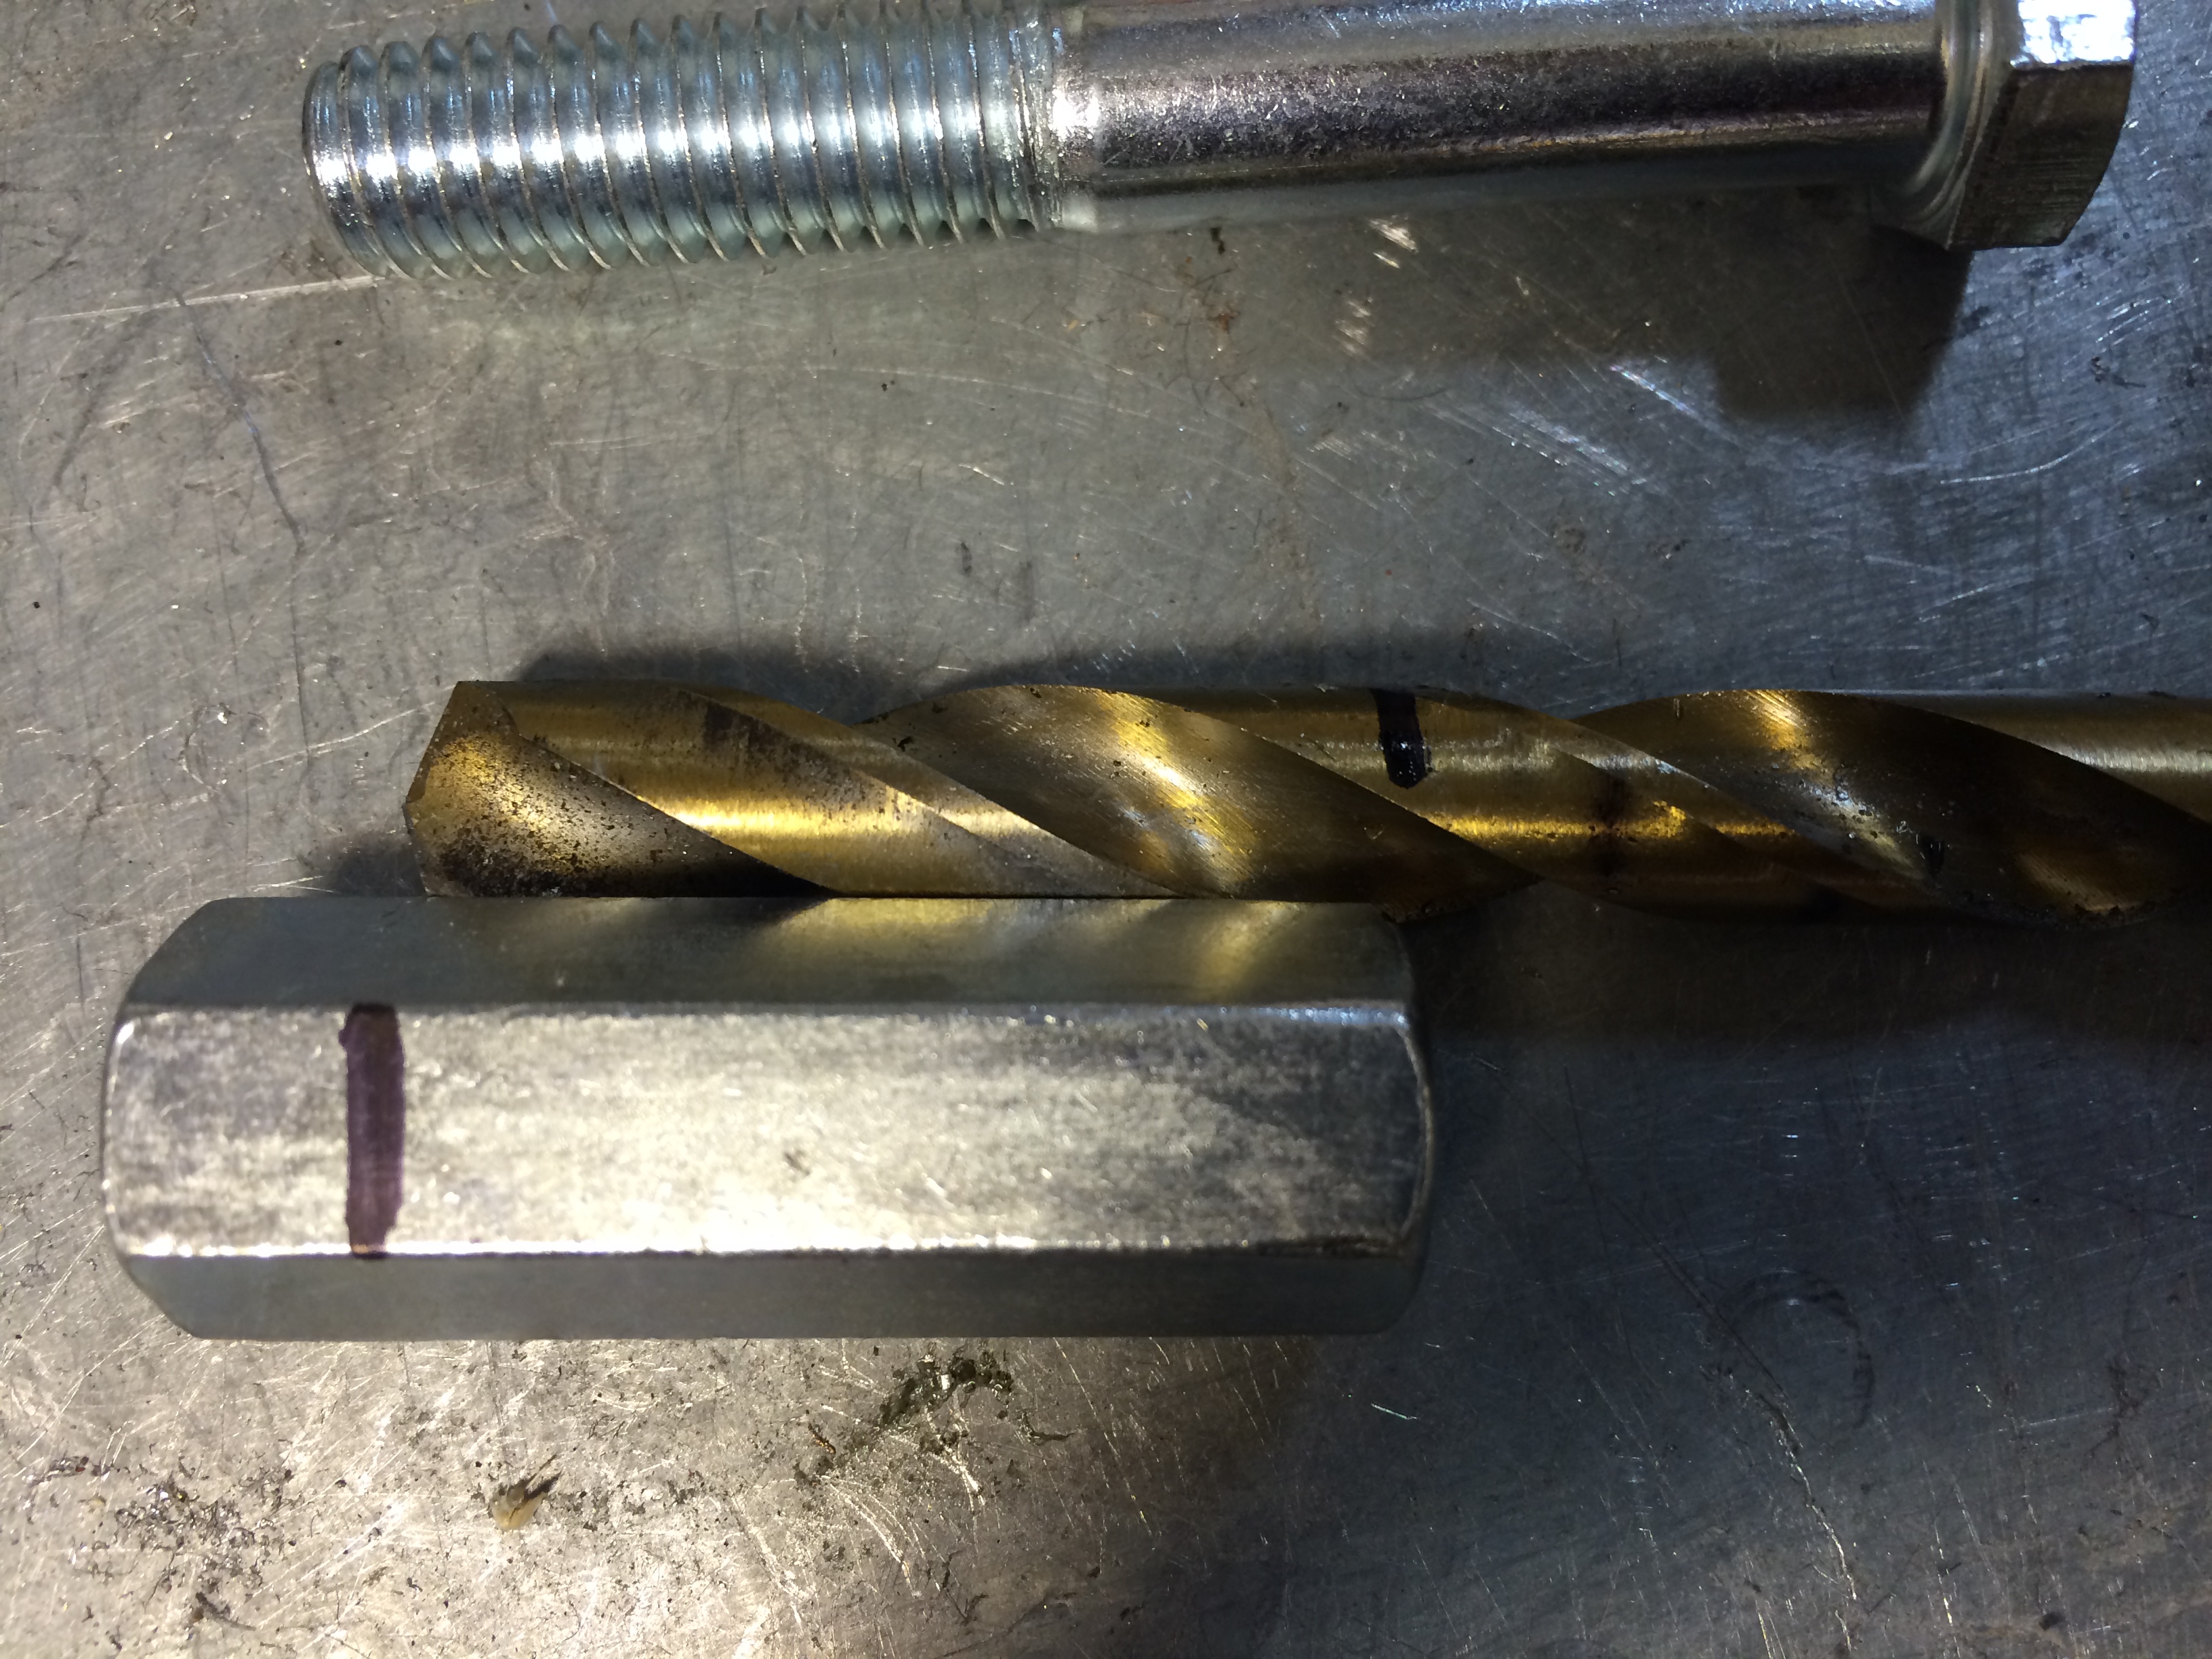
I chucked up the coupler nut into the 3 jaw chuck and mounted the 3/8″ drill bit into the holder. I drilled all the way to the mark.

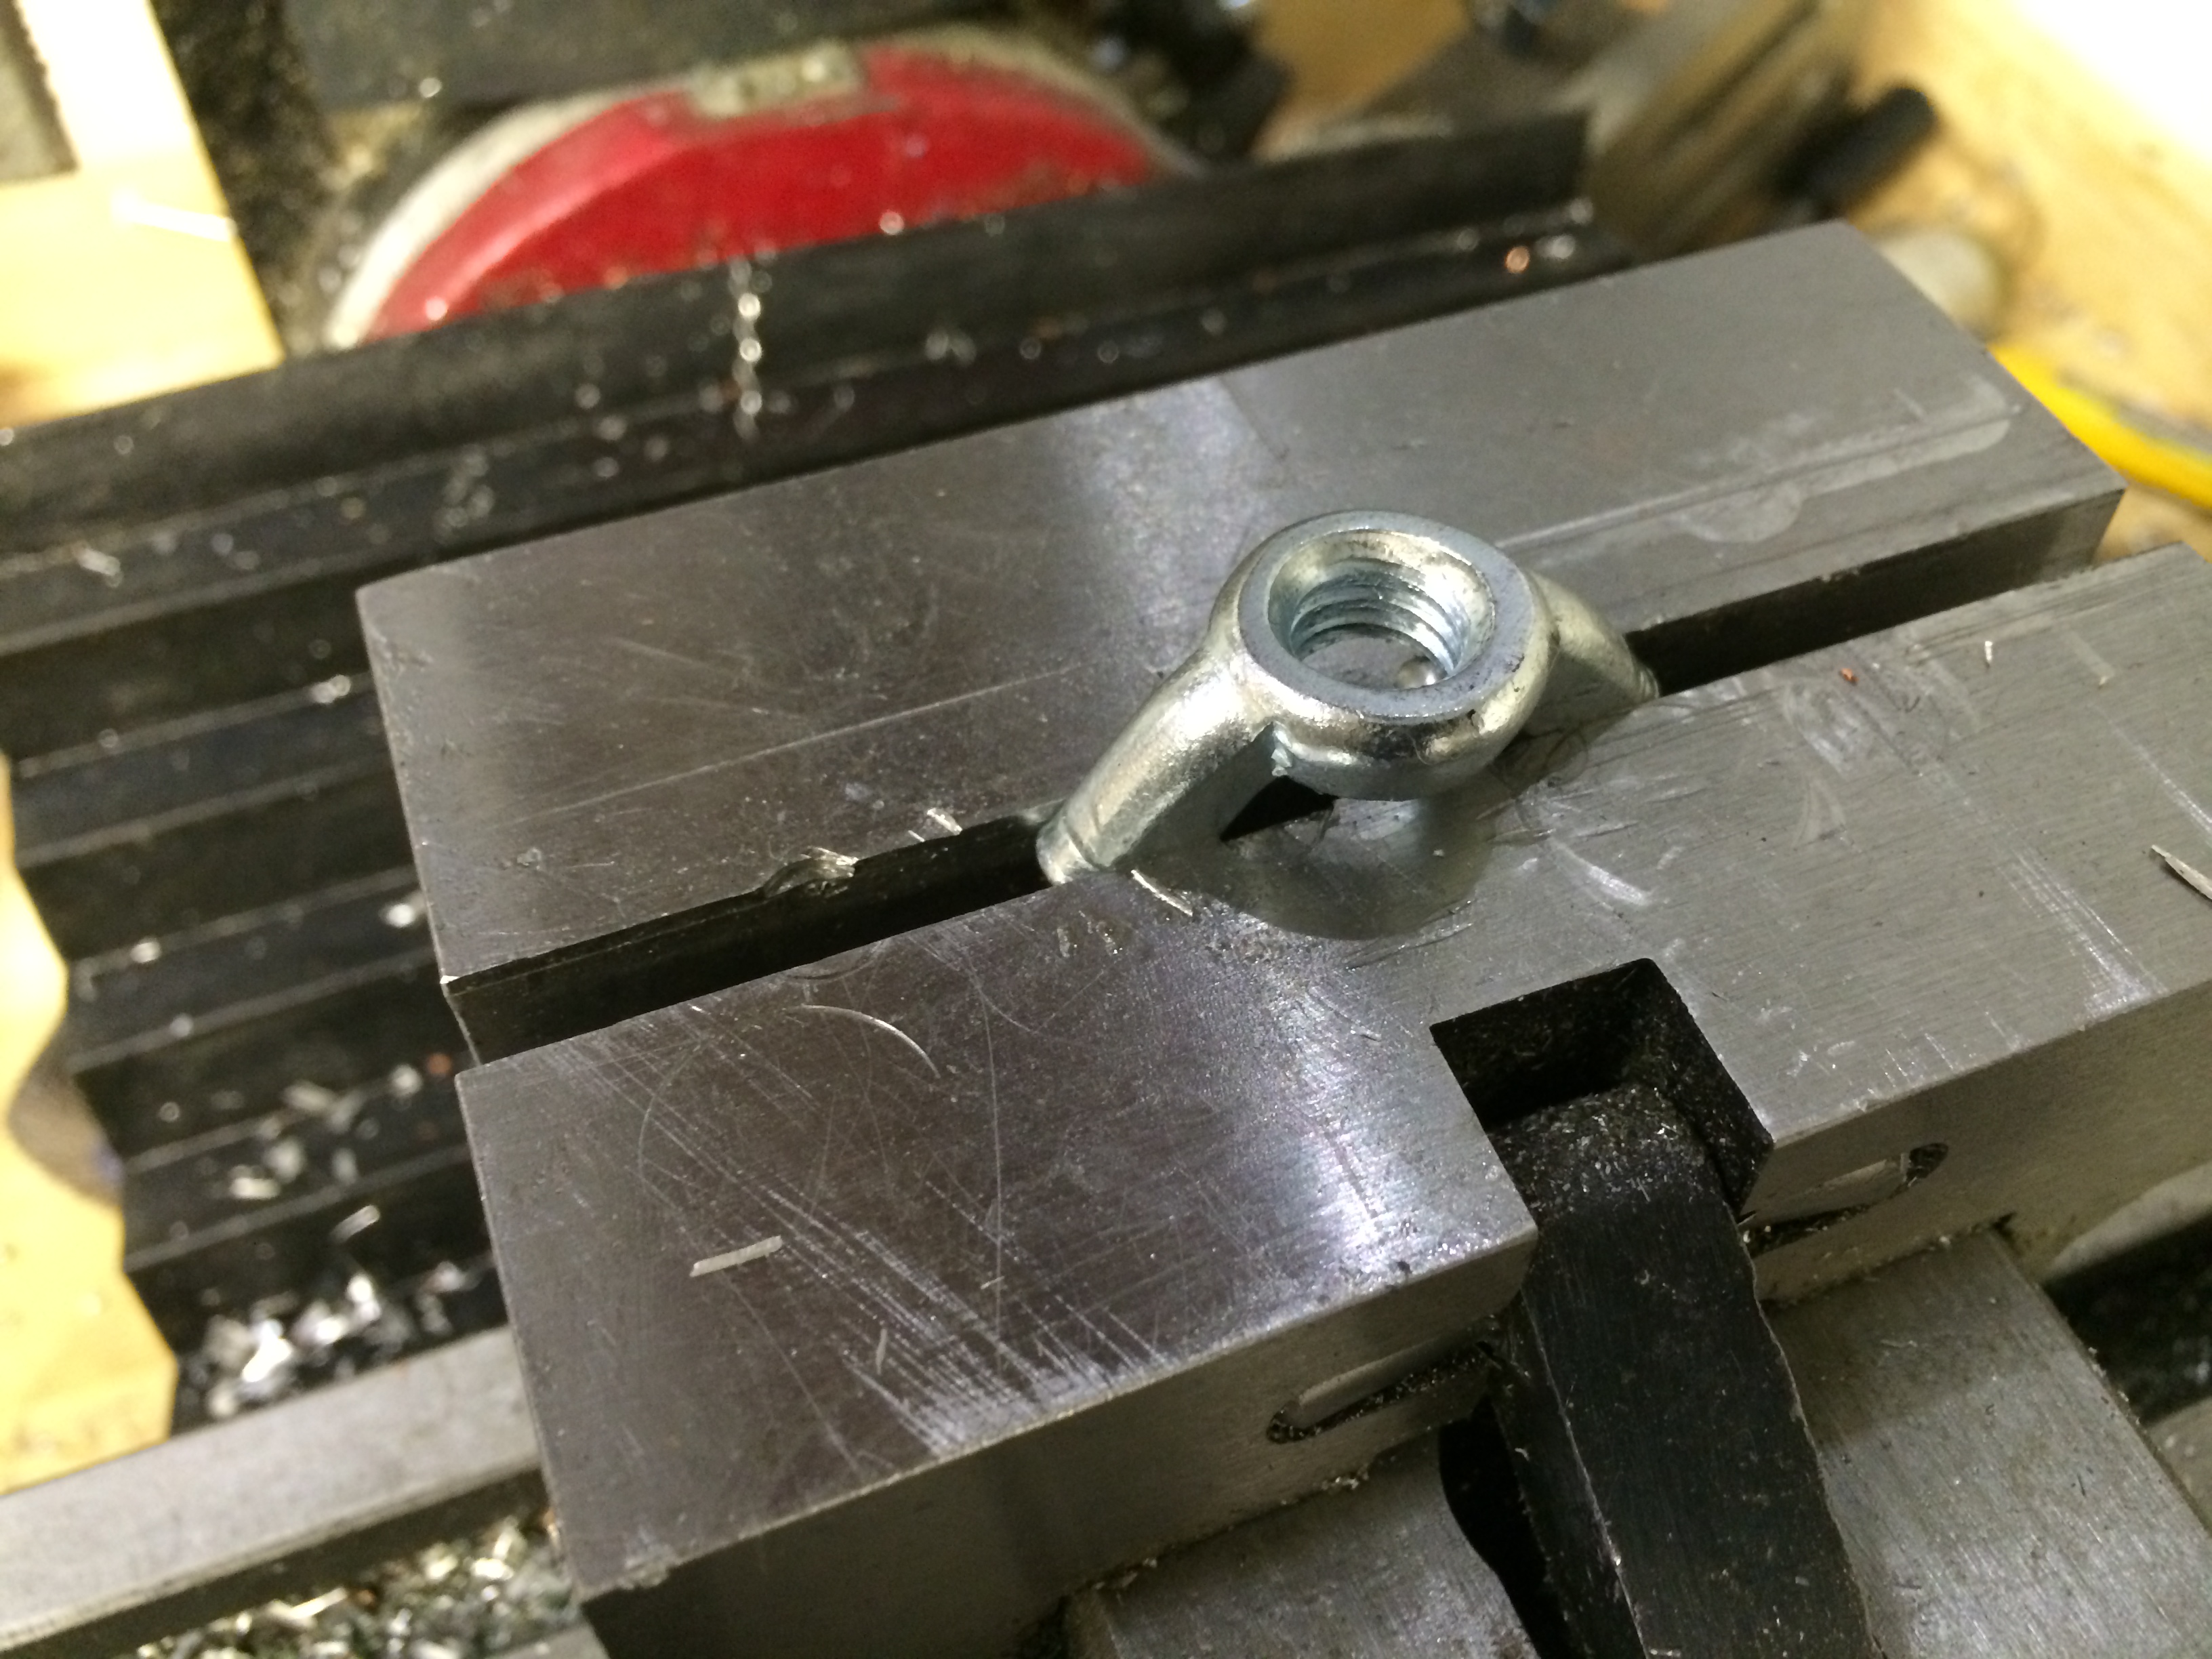
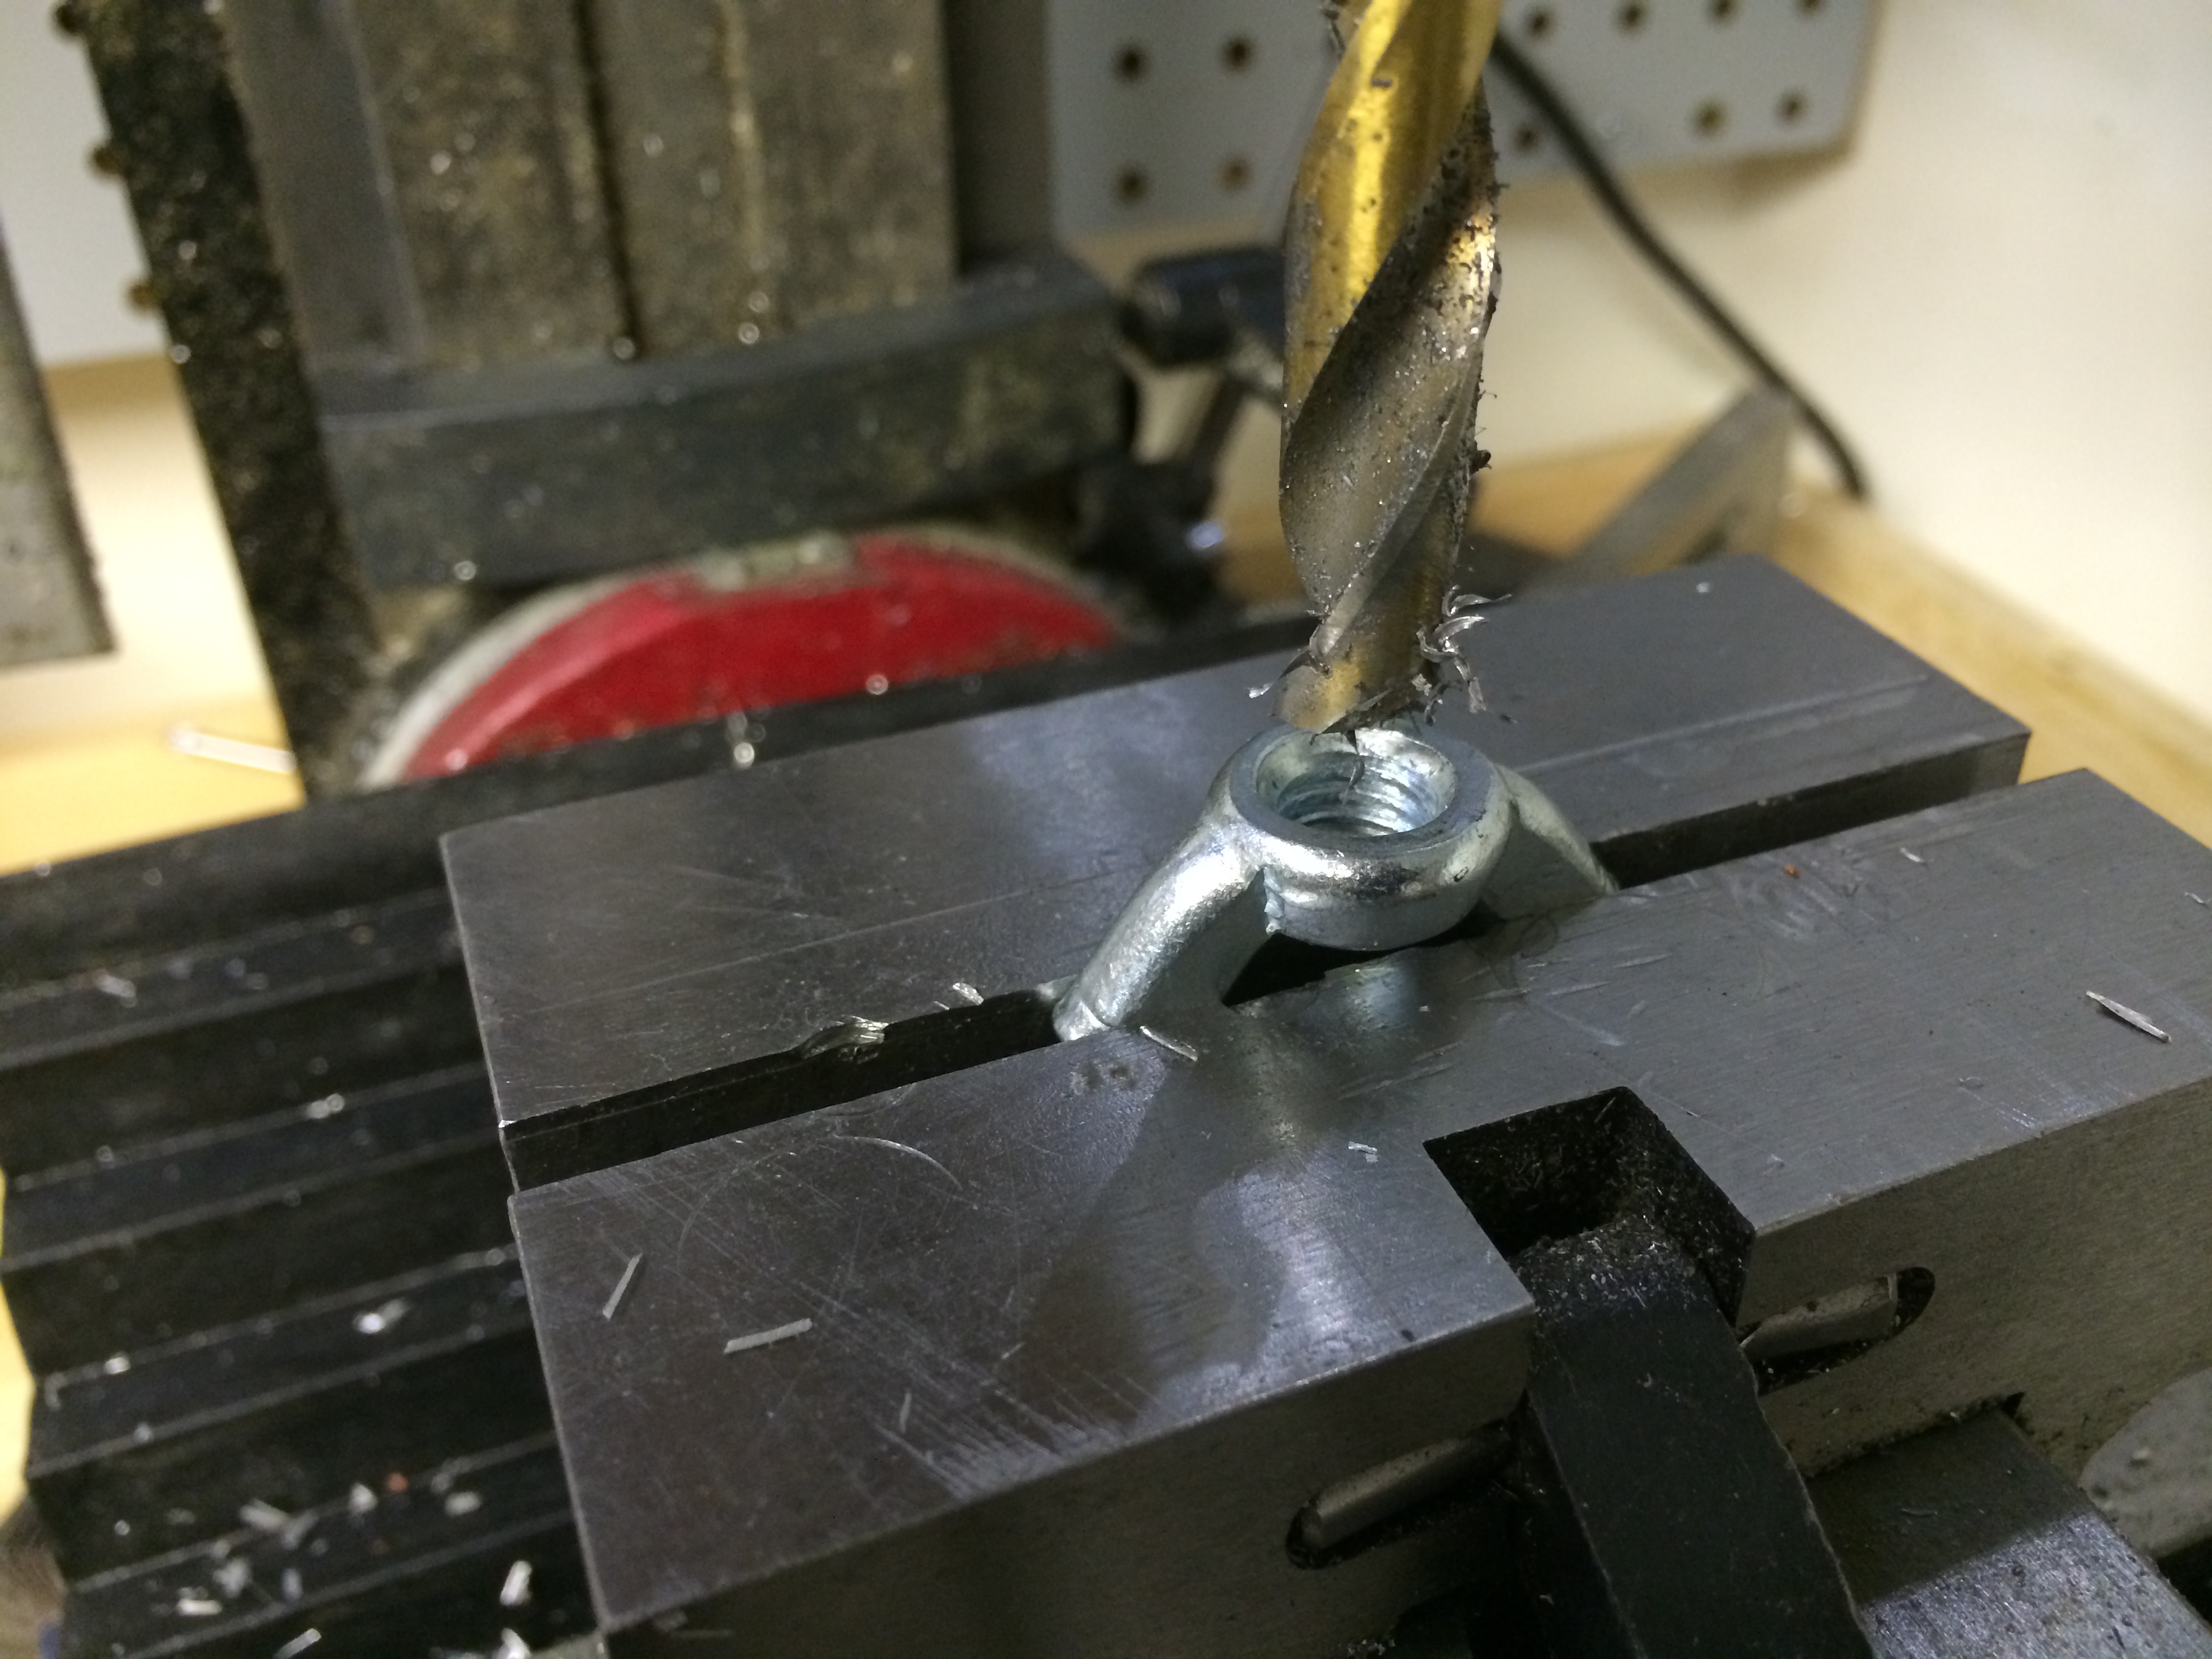
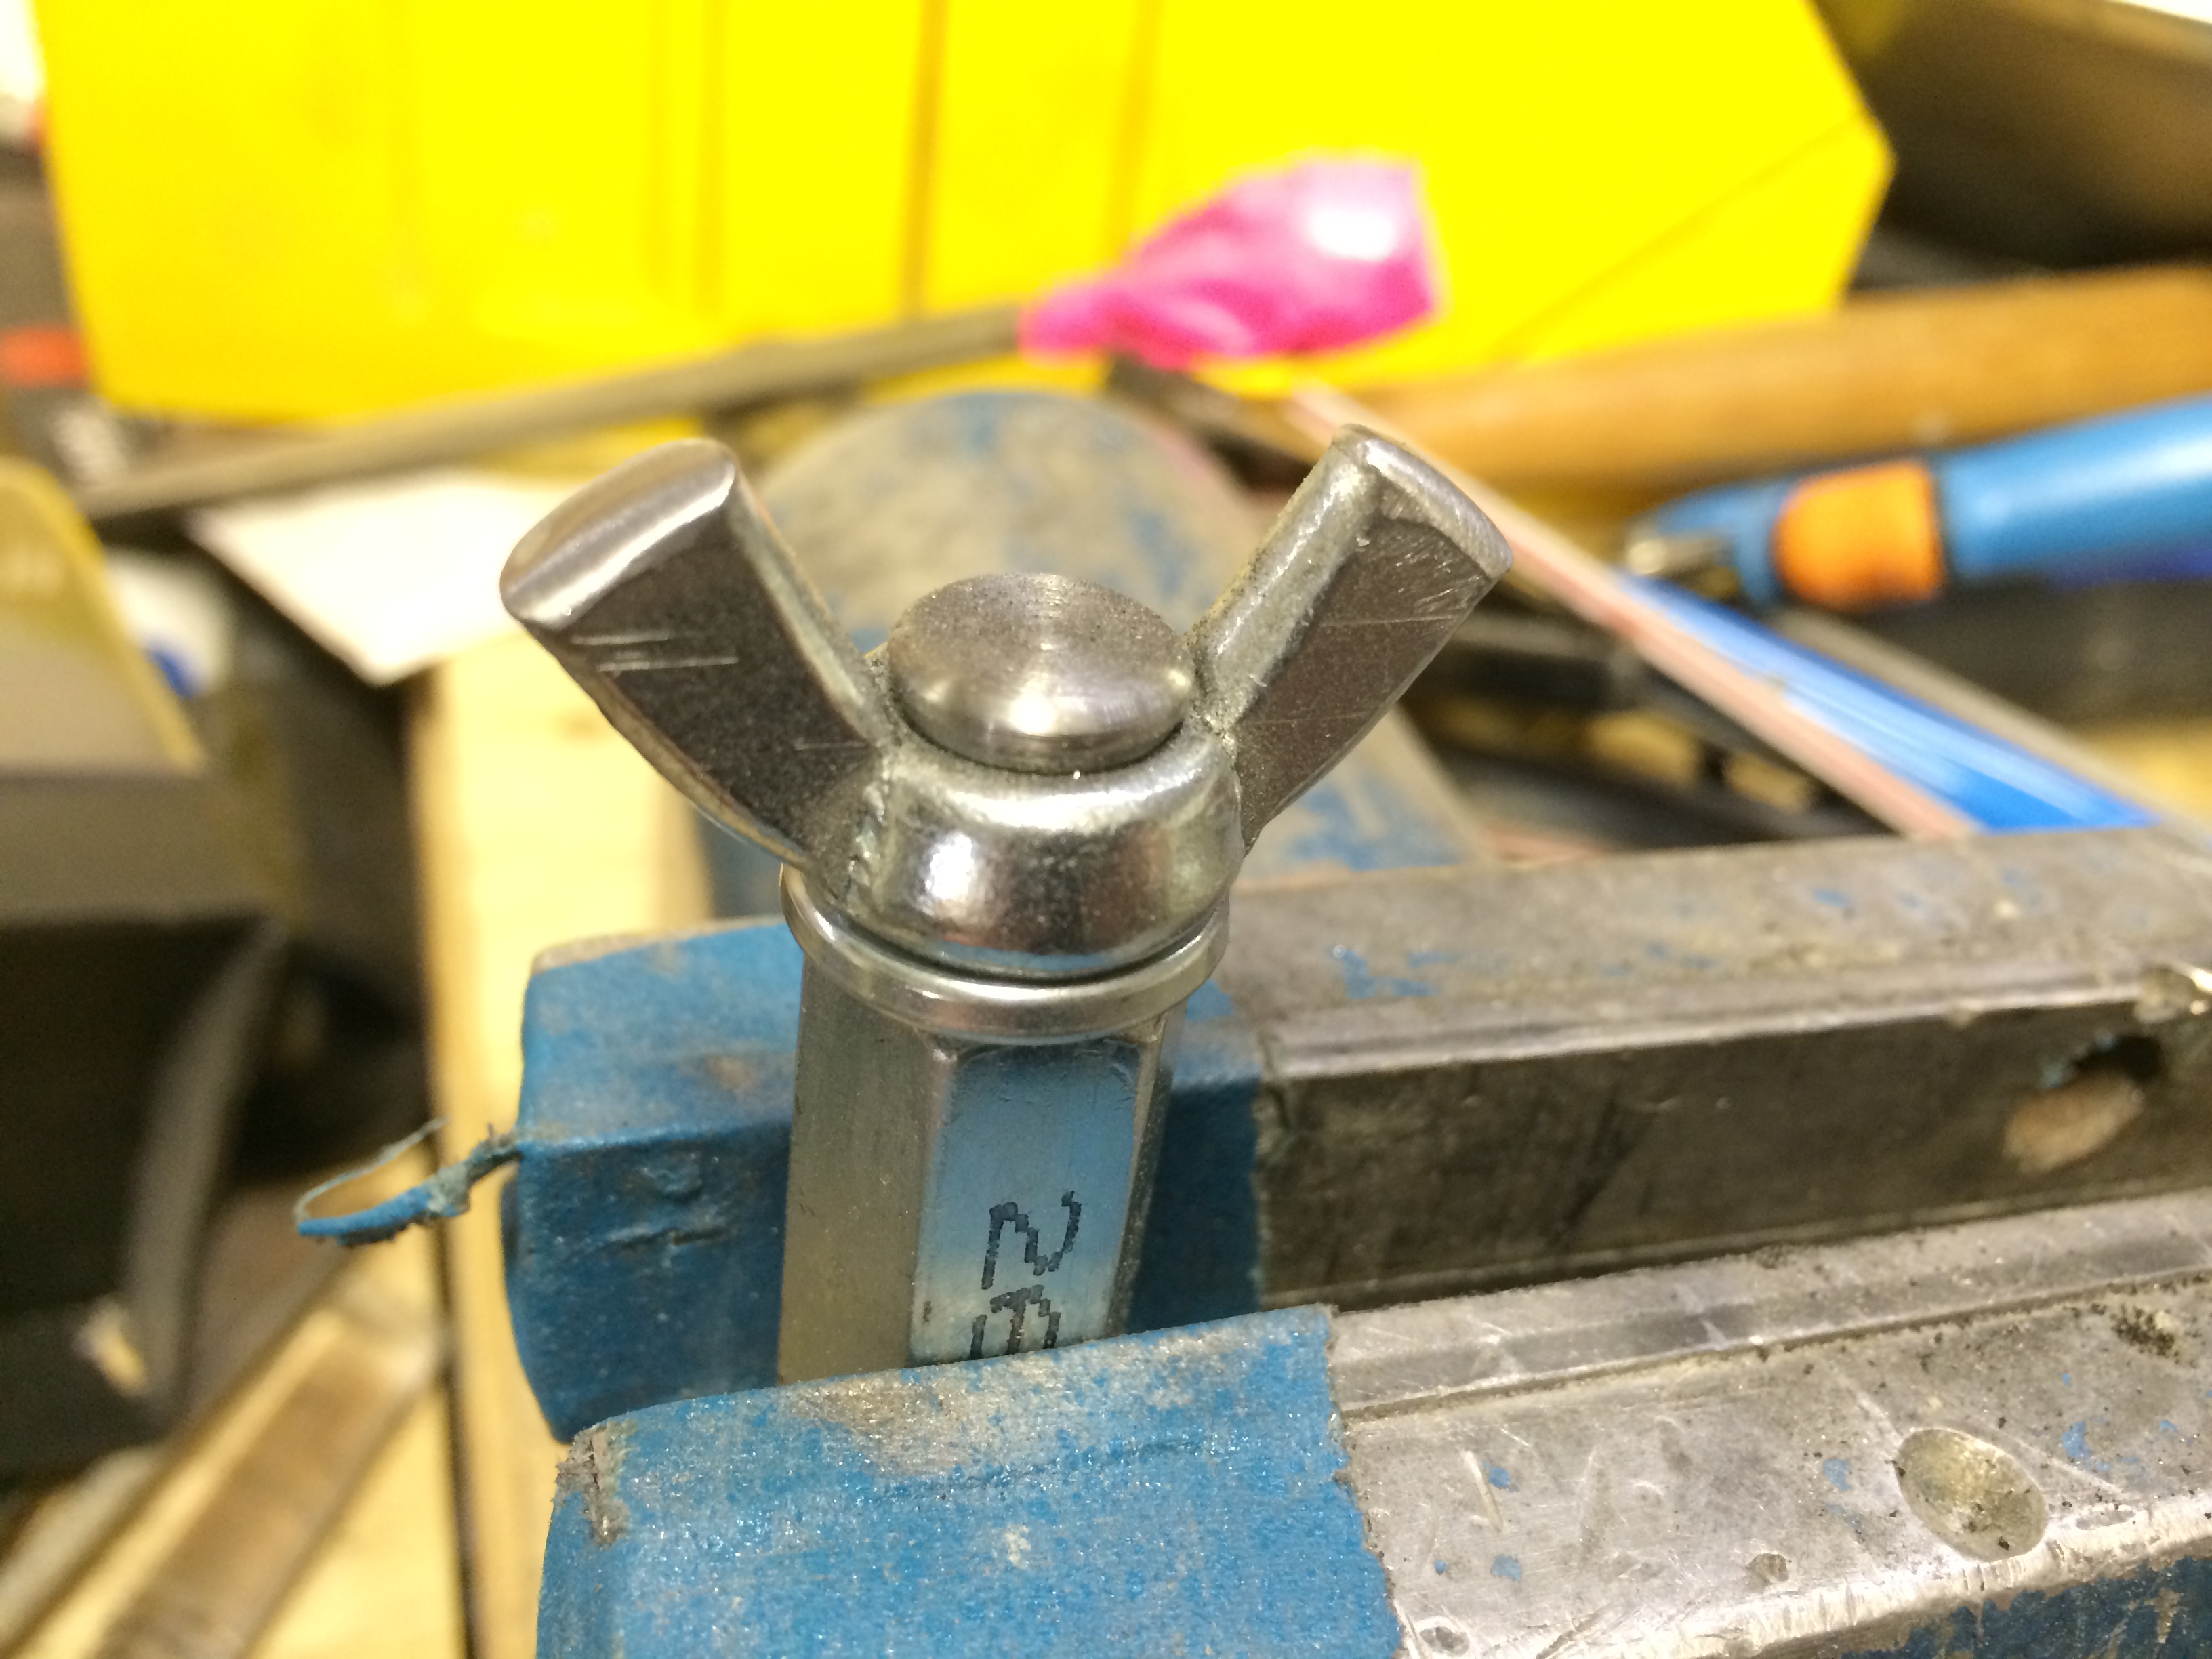
Now it’s time to pay attention to the wingnut. Again, faced with the issue of the bolt not having threads, the threads of the wingnut need to be drilled out. To do this I clamped up the wingnut in my mill using some parallels as a spacer.
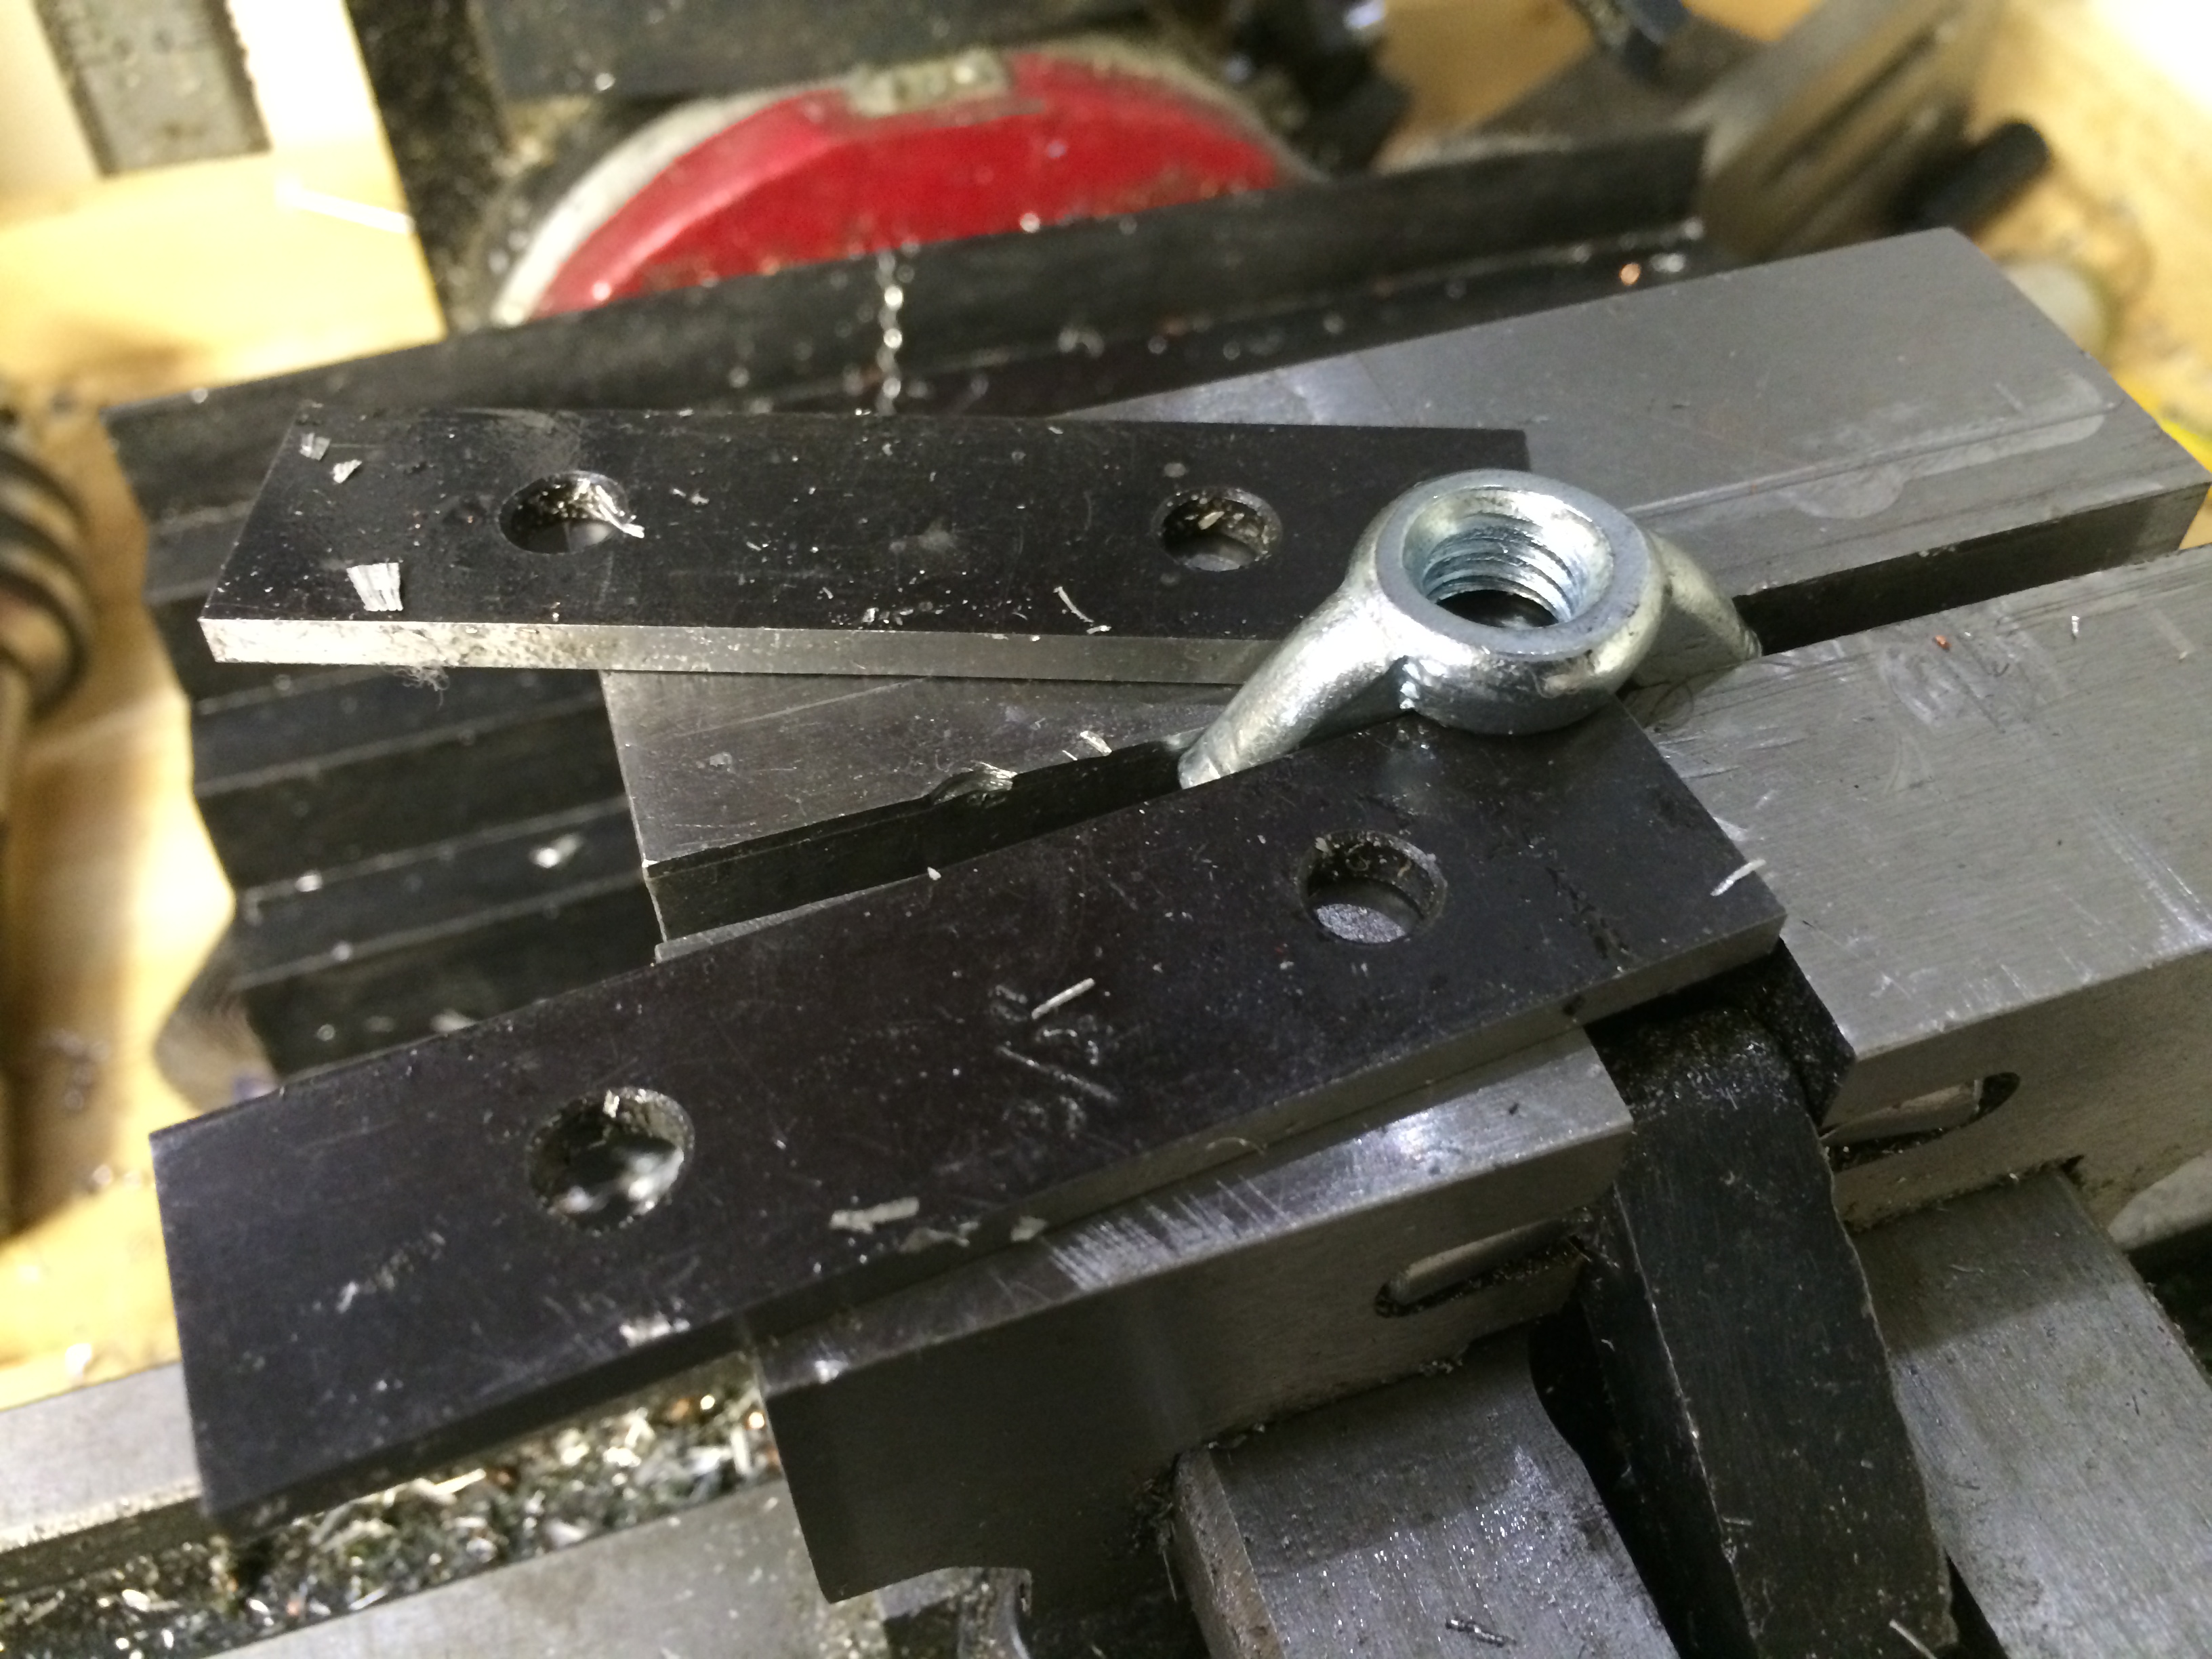
I then removed the parallels to leave the wingnut sitting proud of the vice jaws. This leaves room for the 3/8″ drill bit to cleaning pass through all the threads with out drilling into the vice.
See what I mean…
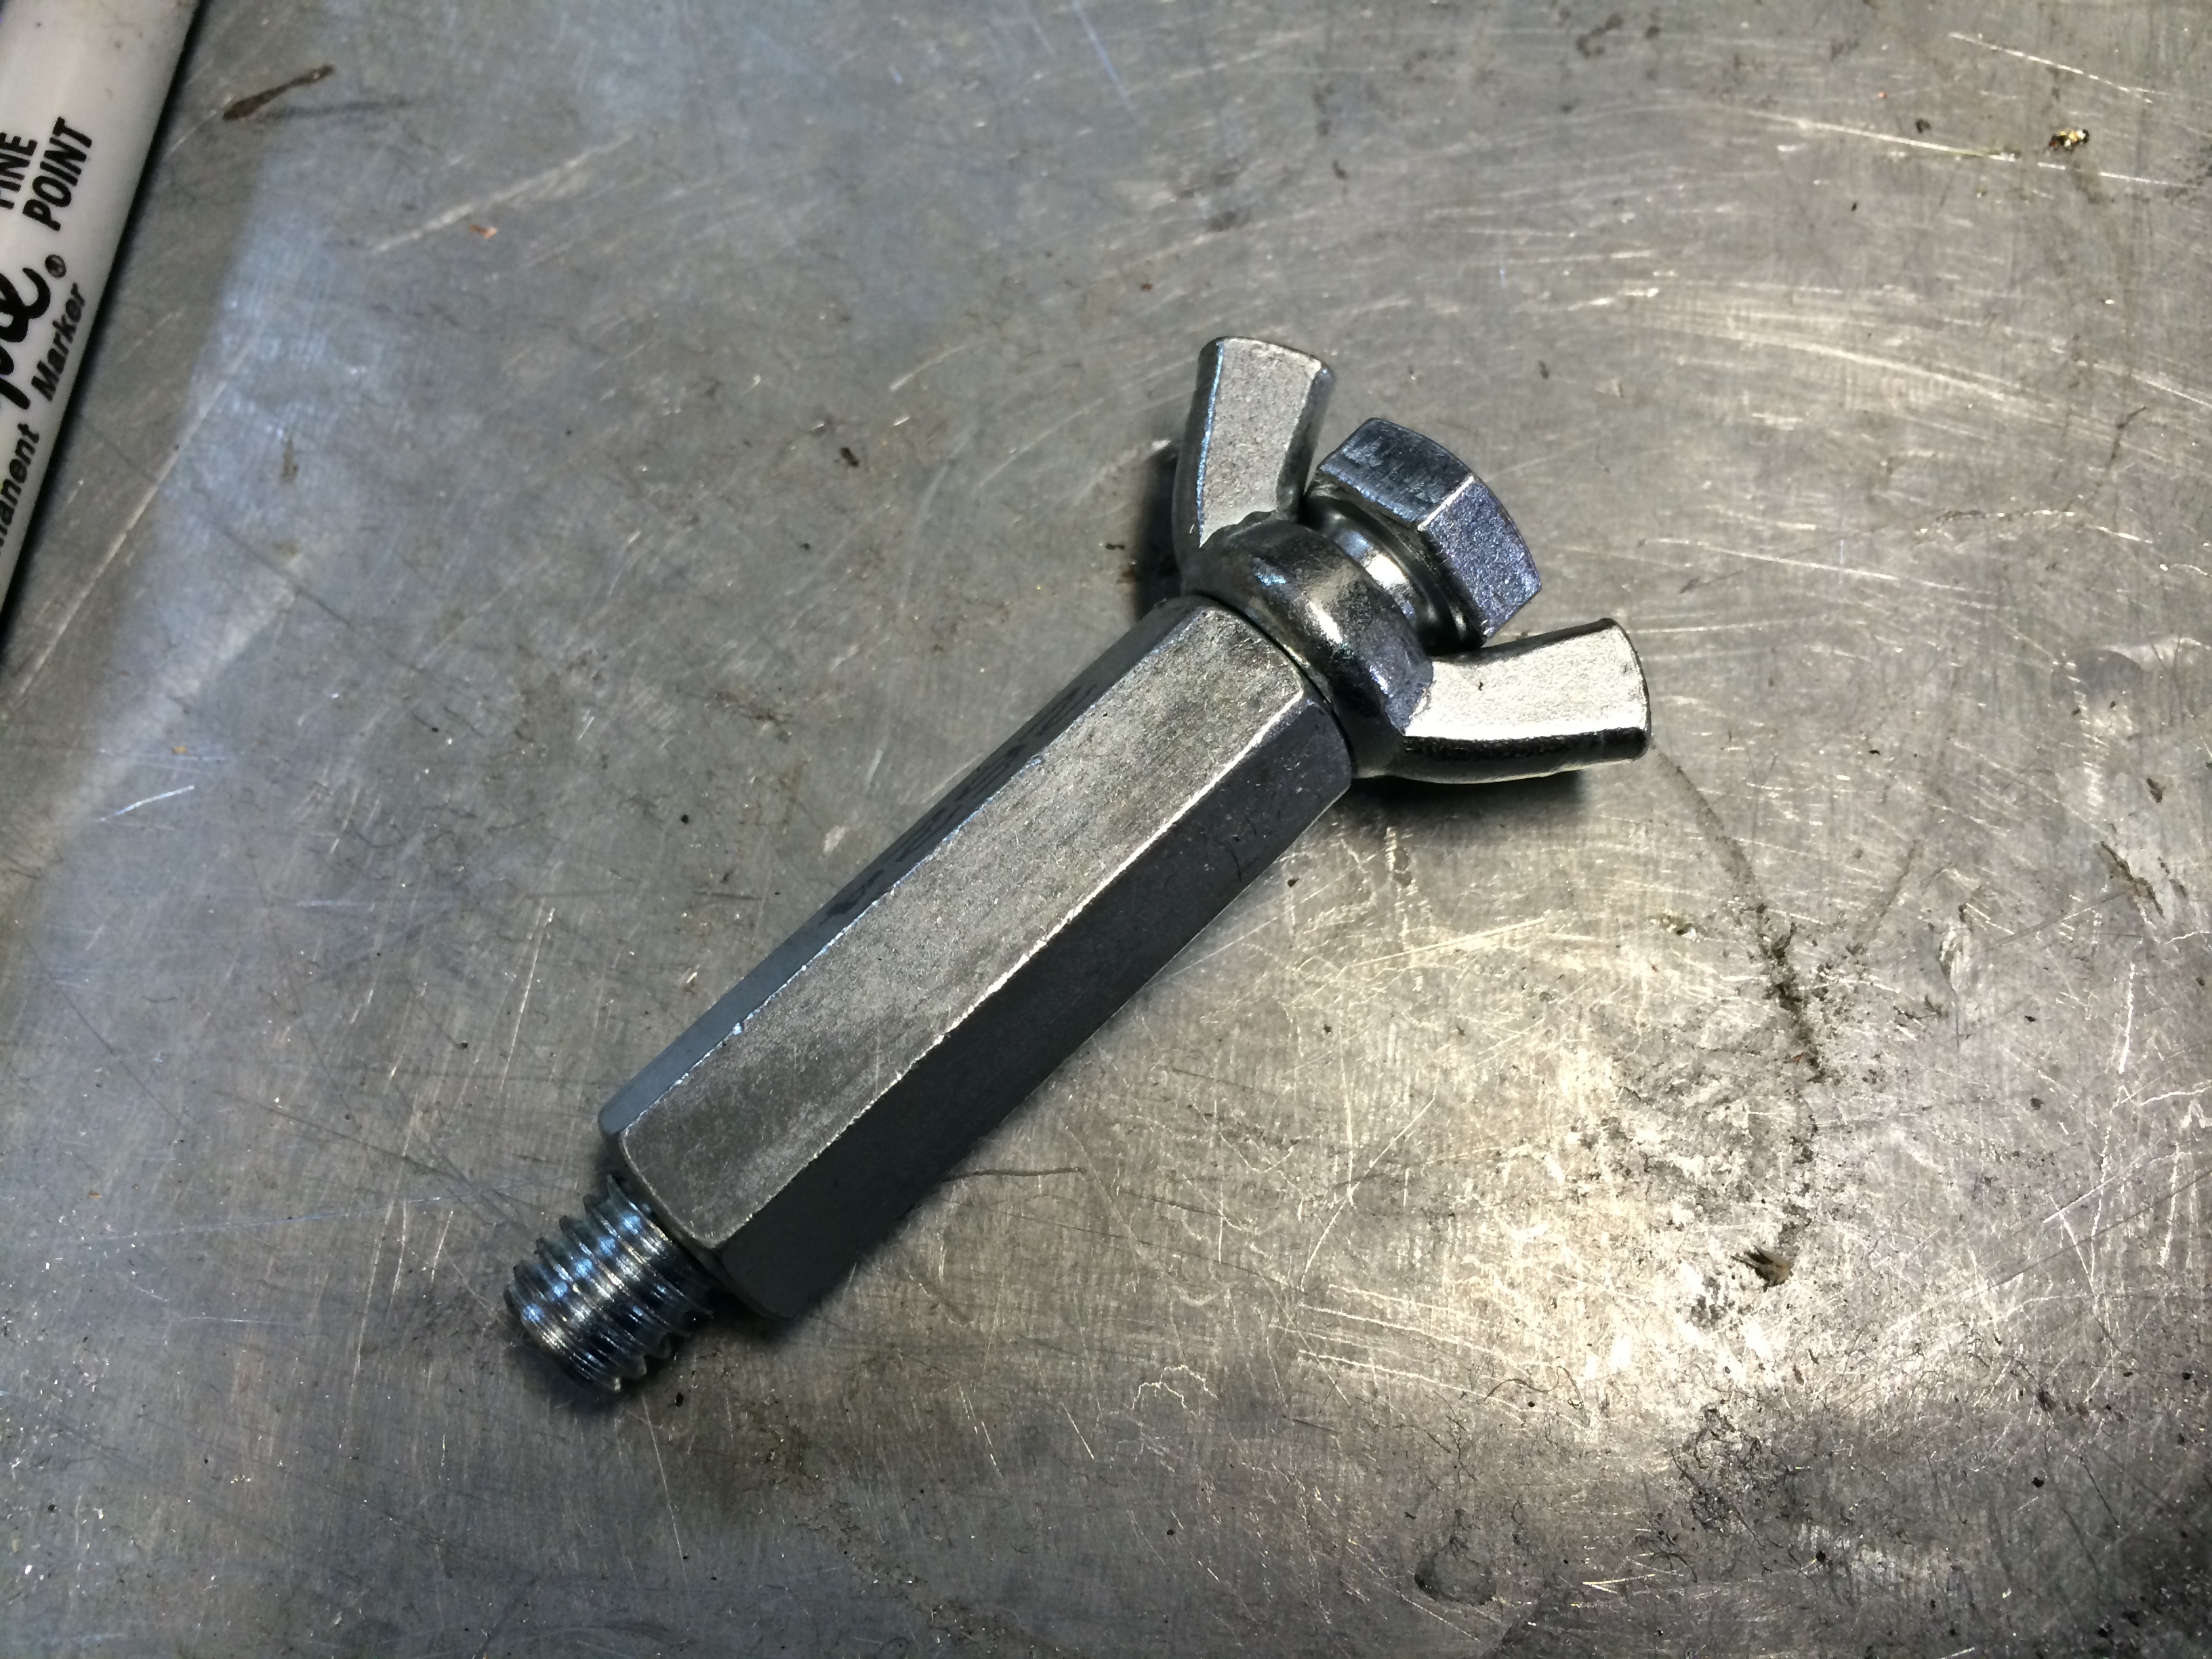
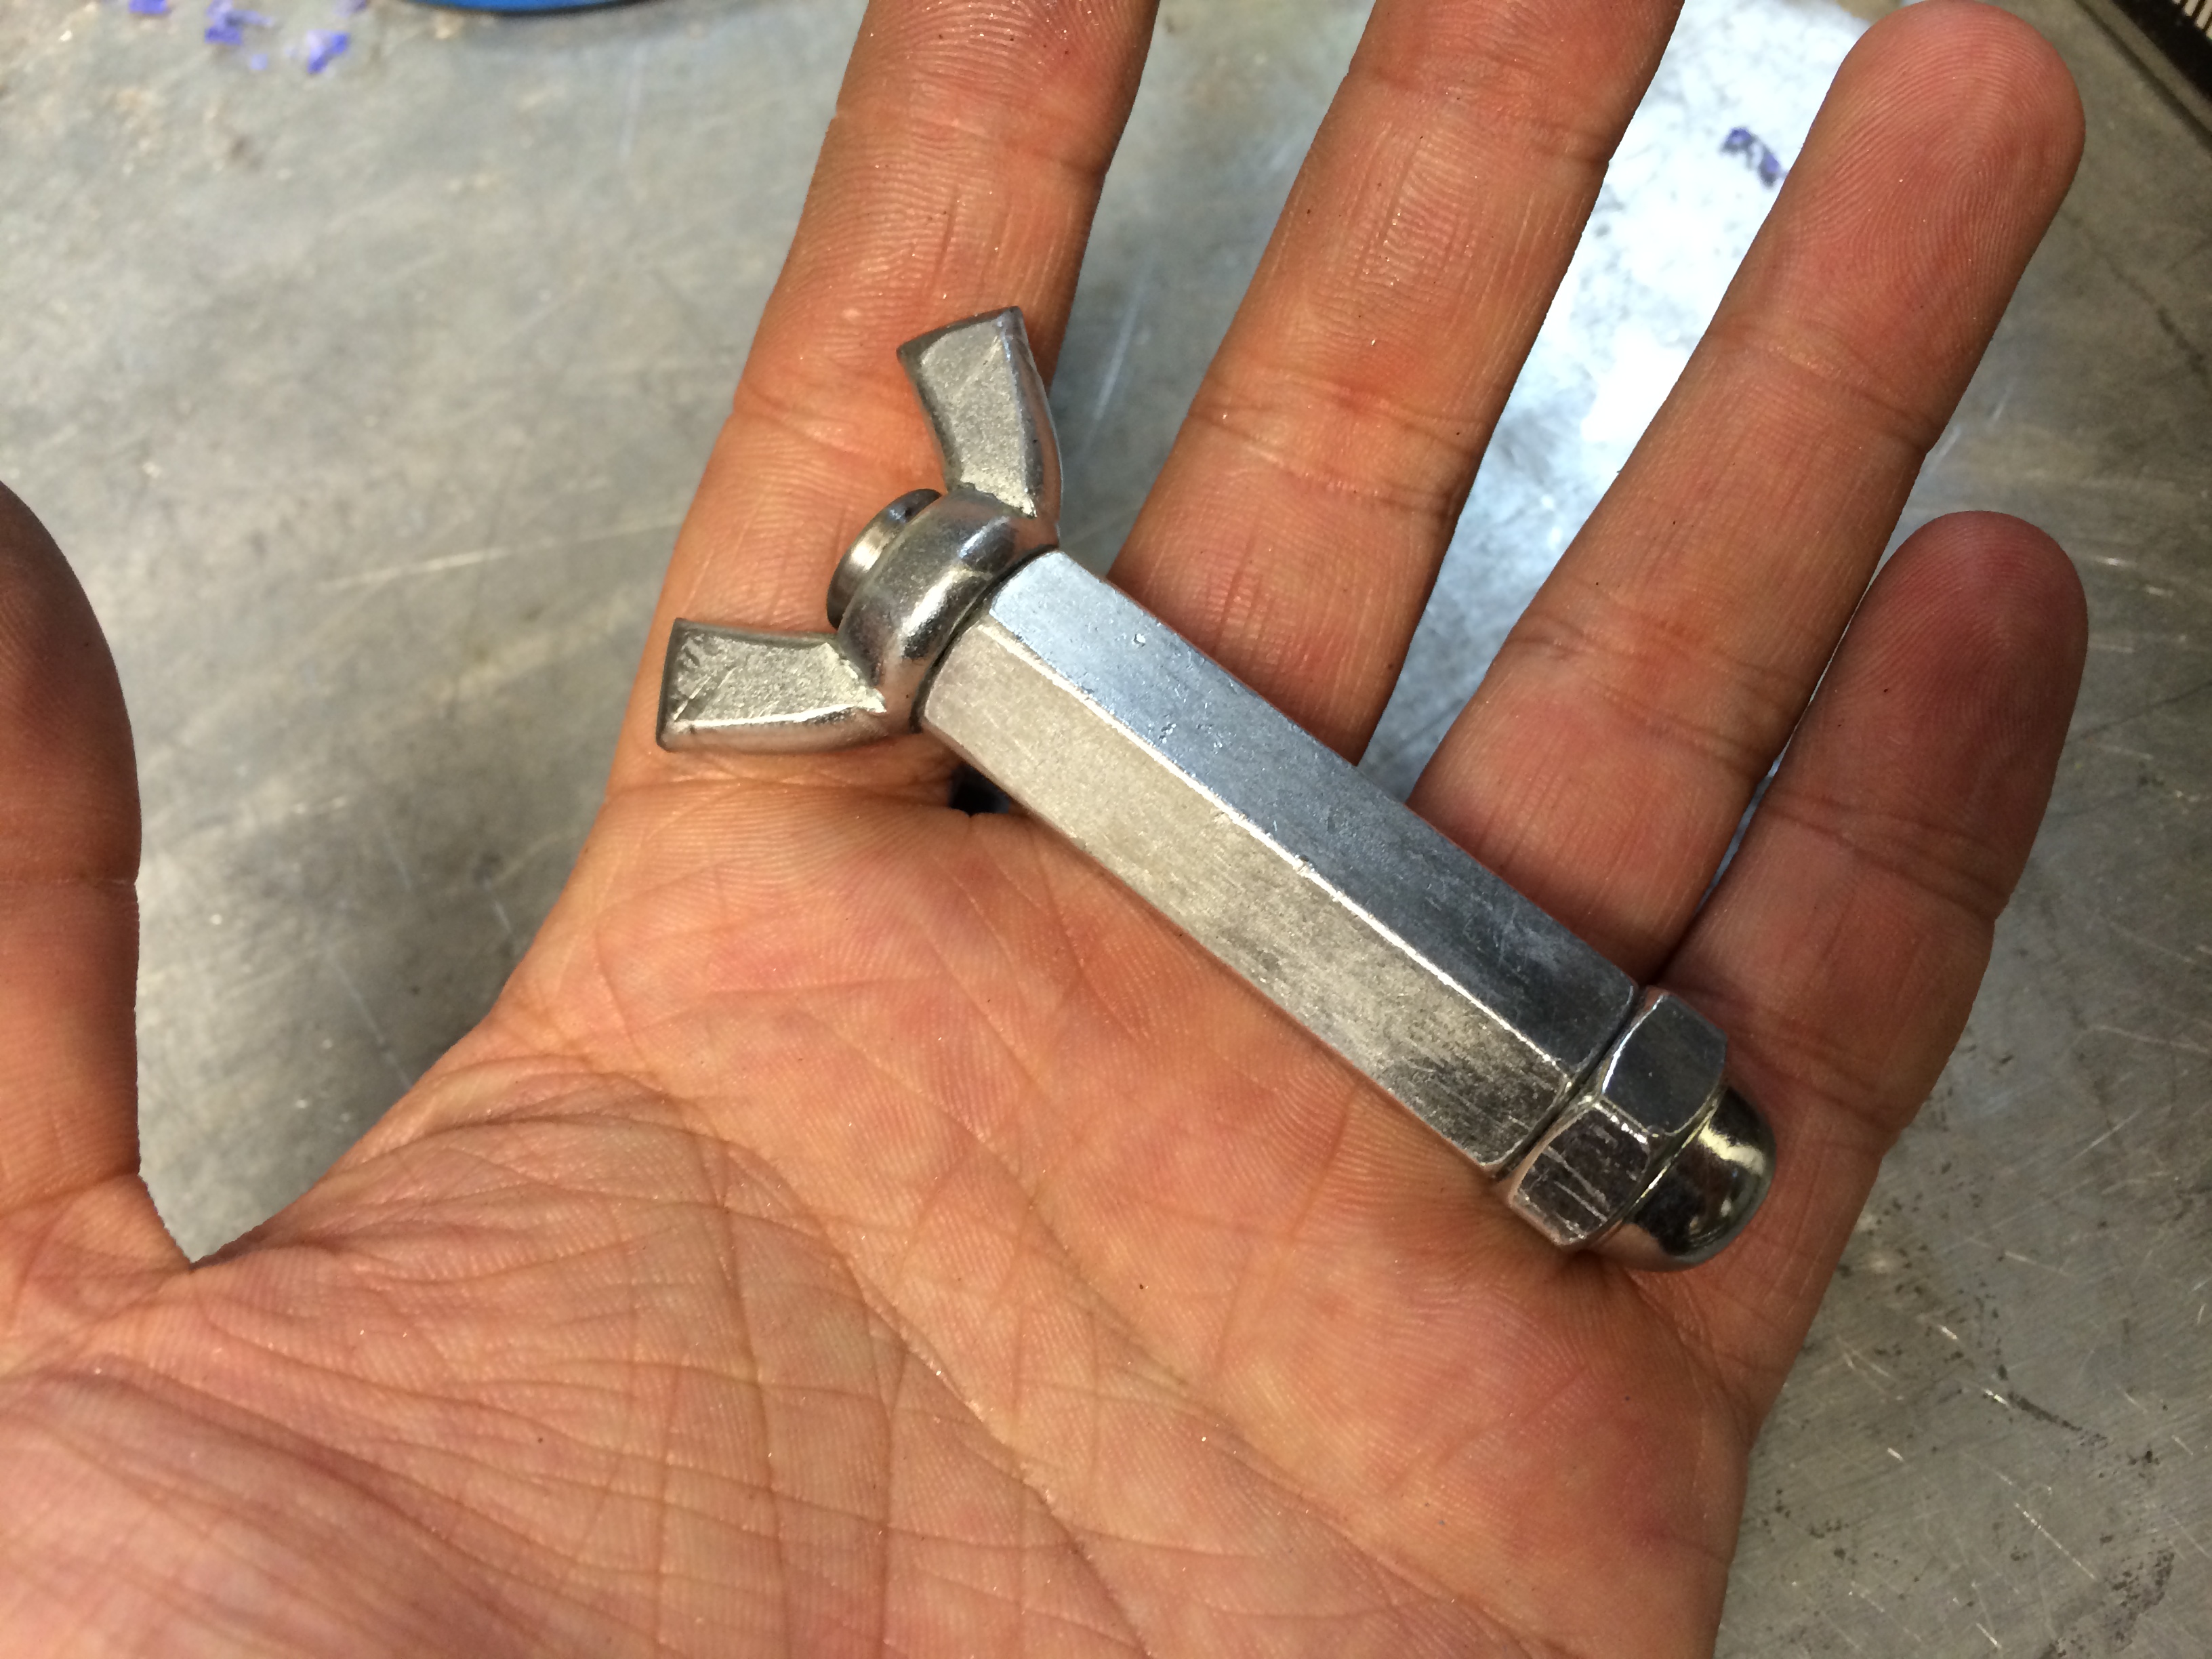
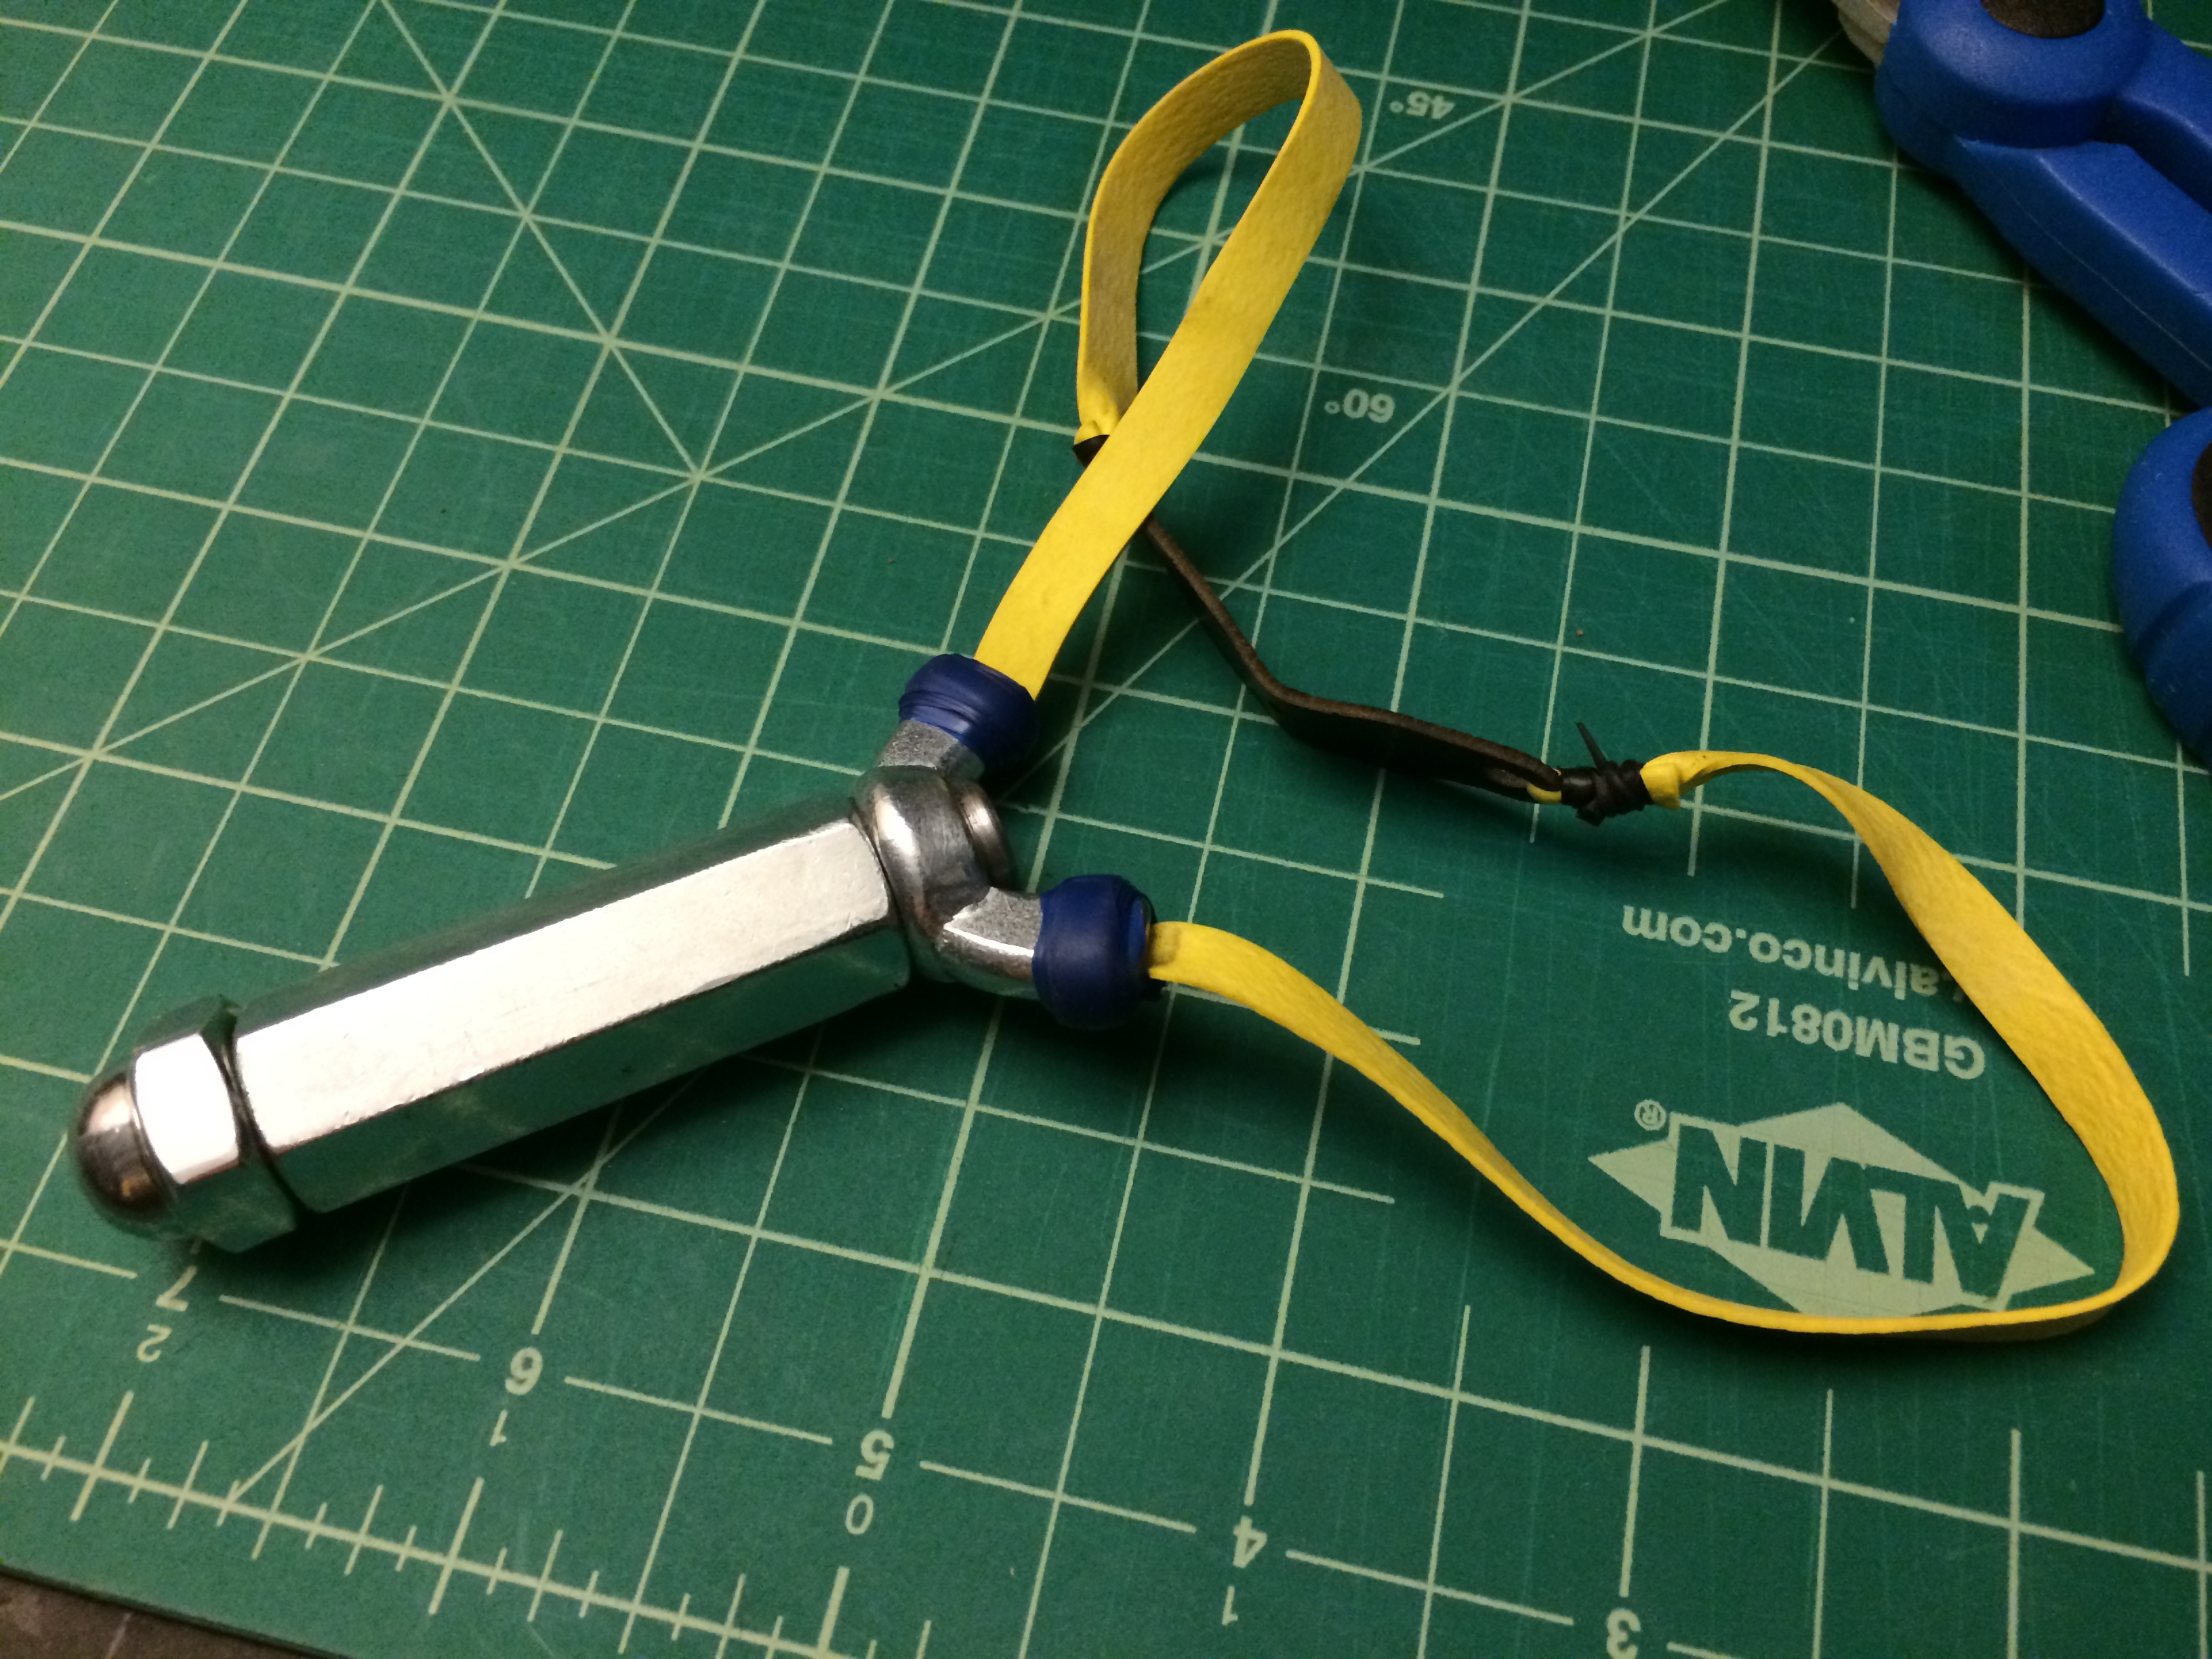
Pre assembly state. In the end, the pressure of the coupler nut is all the wingnut needs to have to be set in place. At this point you will notice the head of the bolt interferes with the forks.
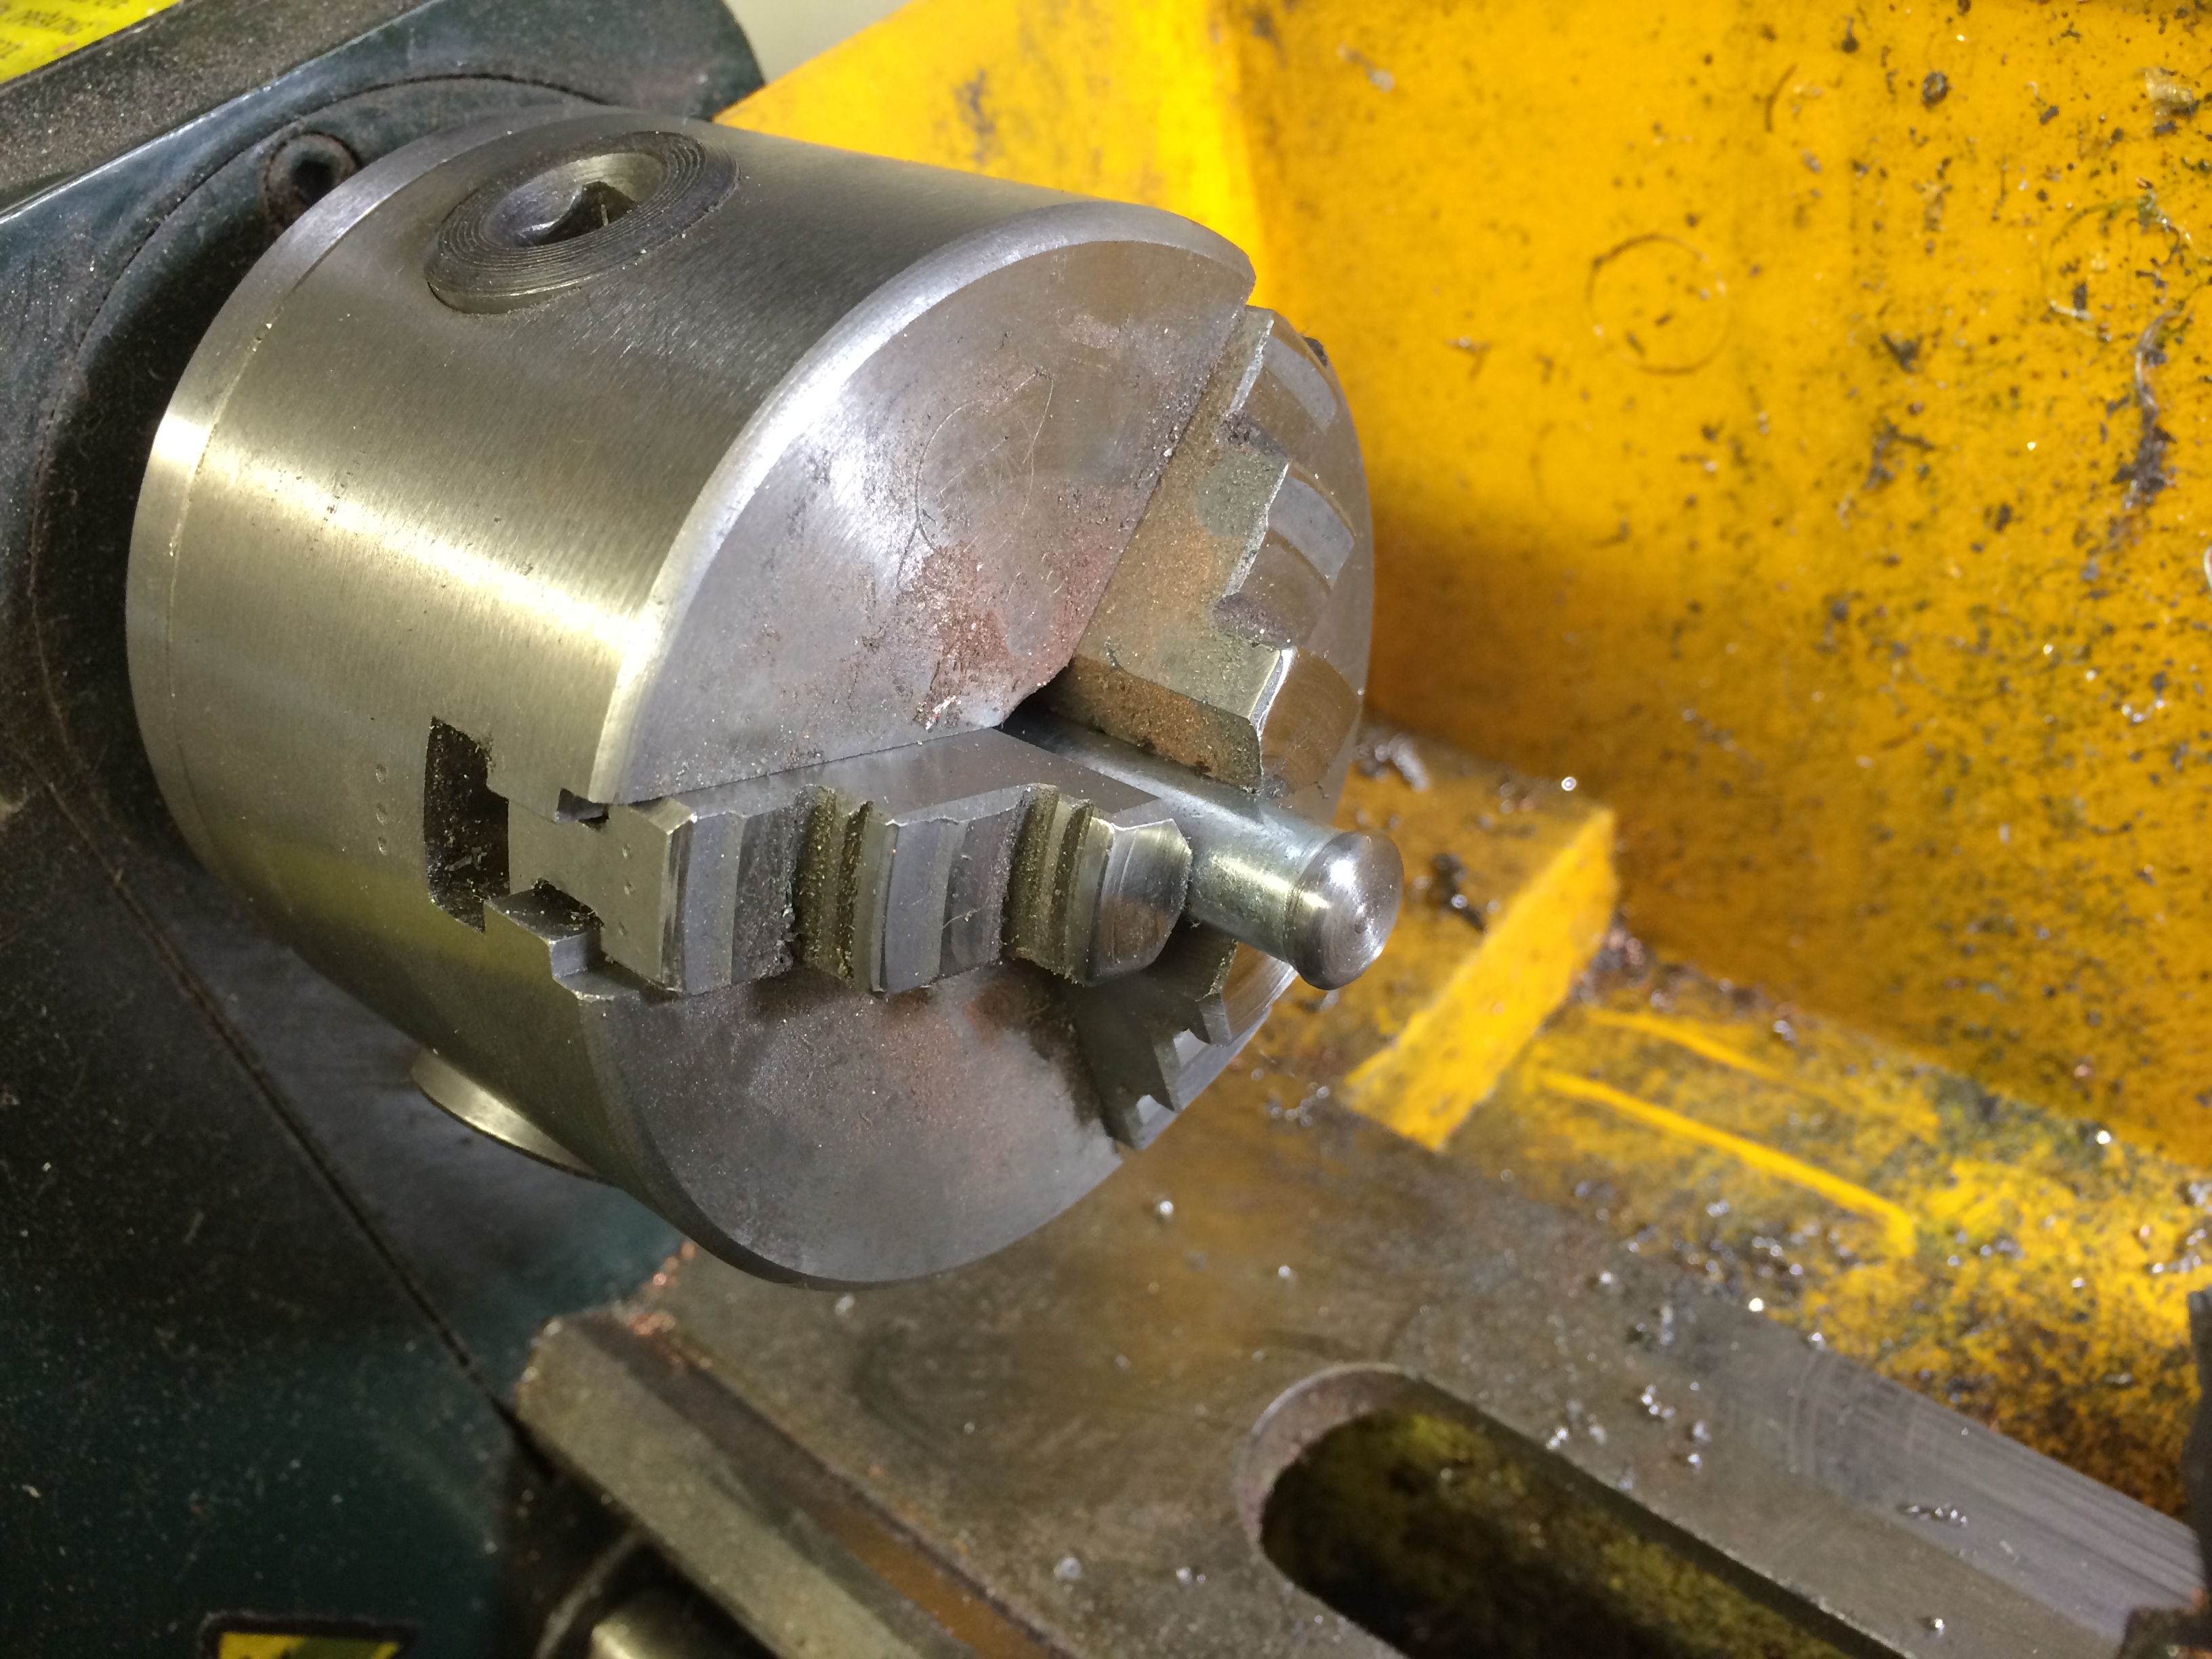
Milling off the bolt head so it sits more flush in between the forks. It’s basically a button.
Sliding the wingnut onto the shaft to see how it fits. Lots of clearance for a OTT set of BB bands.
I tested out the spring washer. While it works, it was unnecessary so I removed it and torqued down the coupler nut onto the bolt sandwiching the head and the wingnut. It is also useful to round the tips of the forks so increase band life.
Adding the acorn nut on the base. This caps off the bolt making a nice clean look. As clean as hardware stamped out at 300 per minute can look.
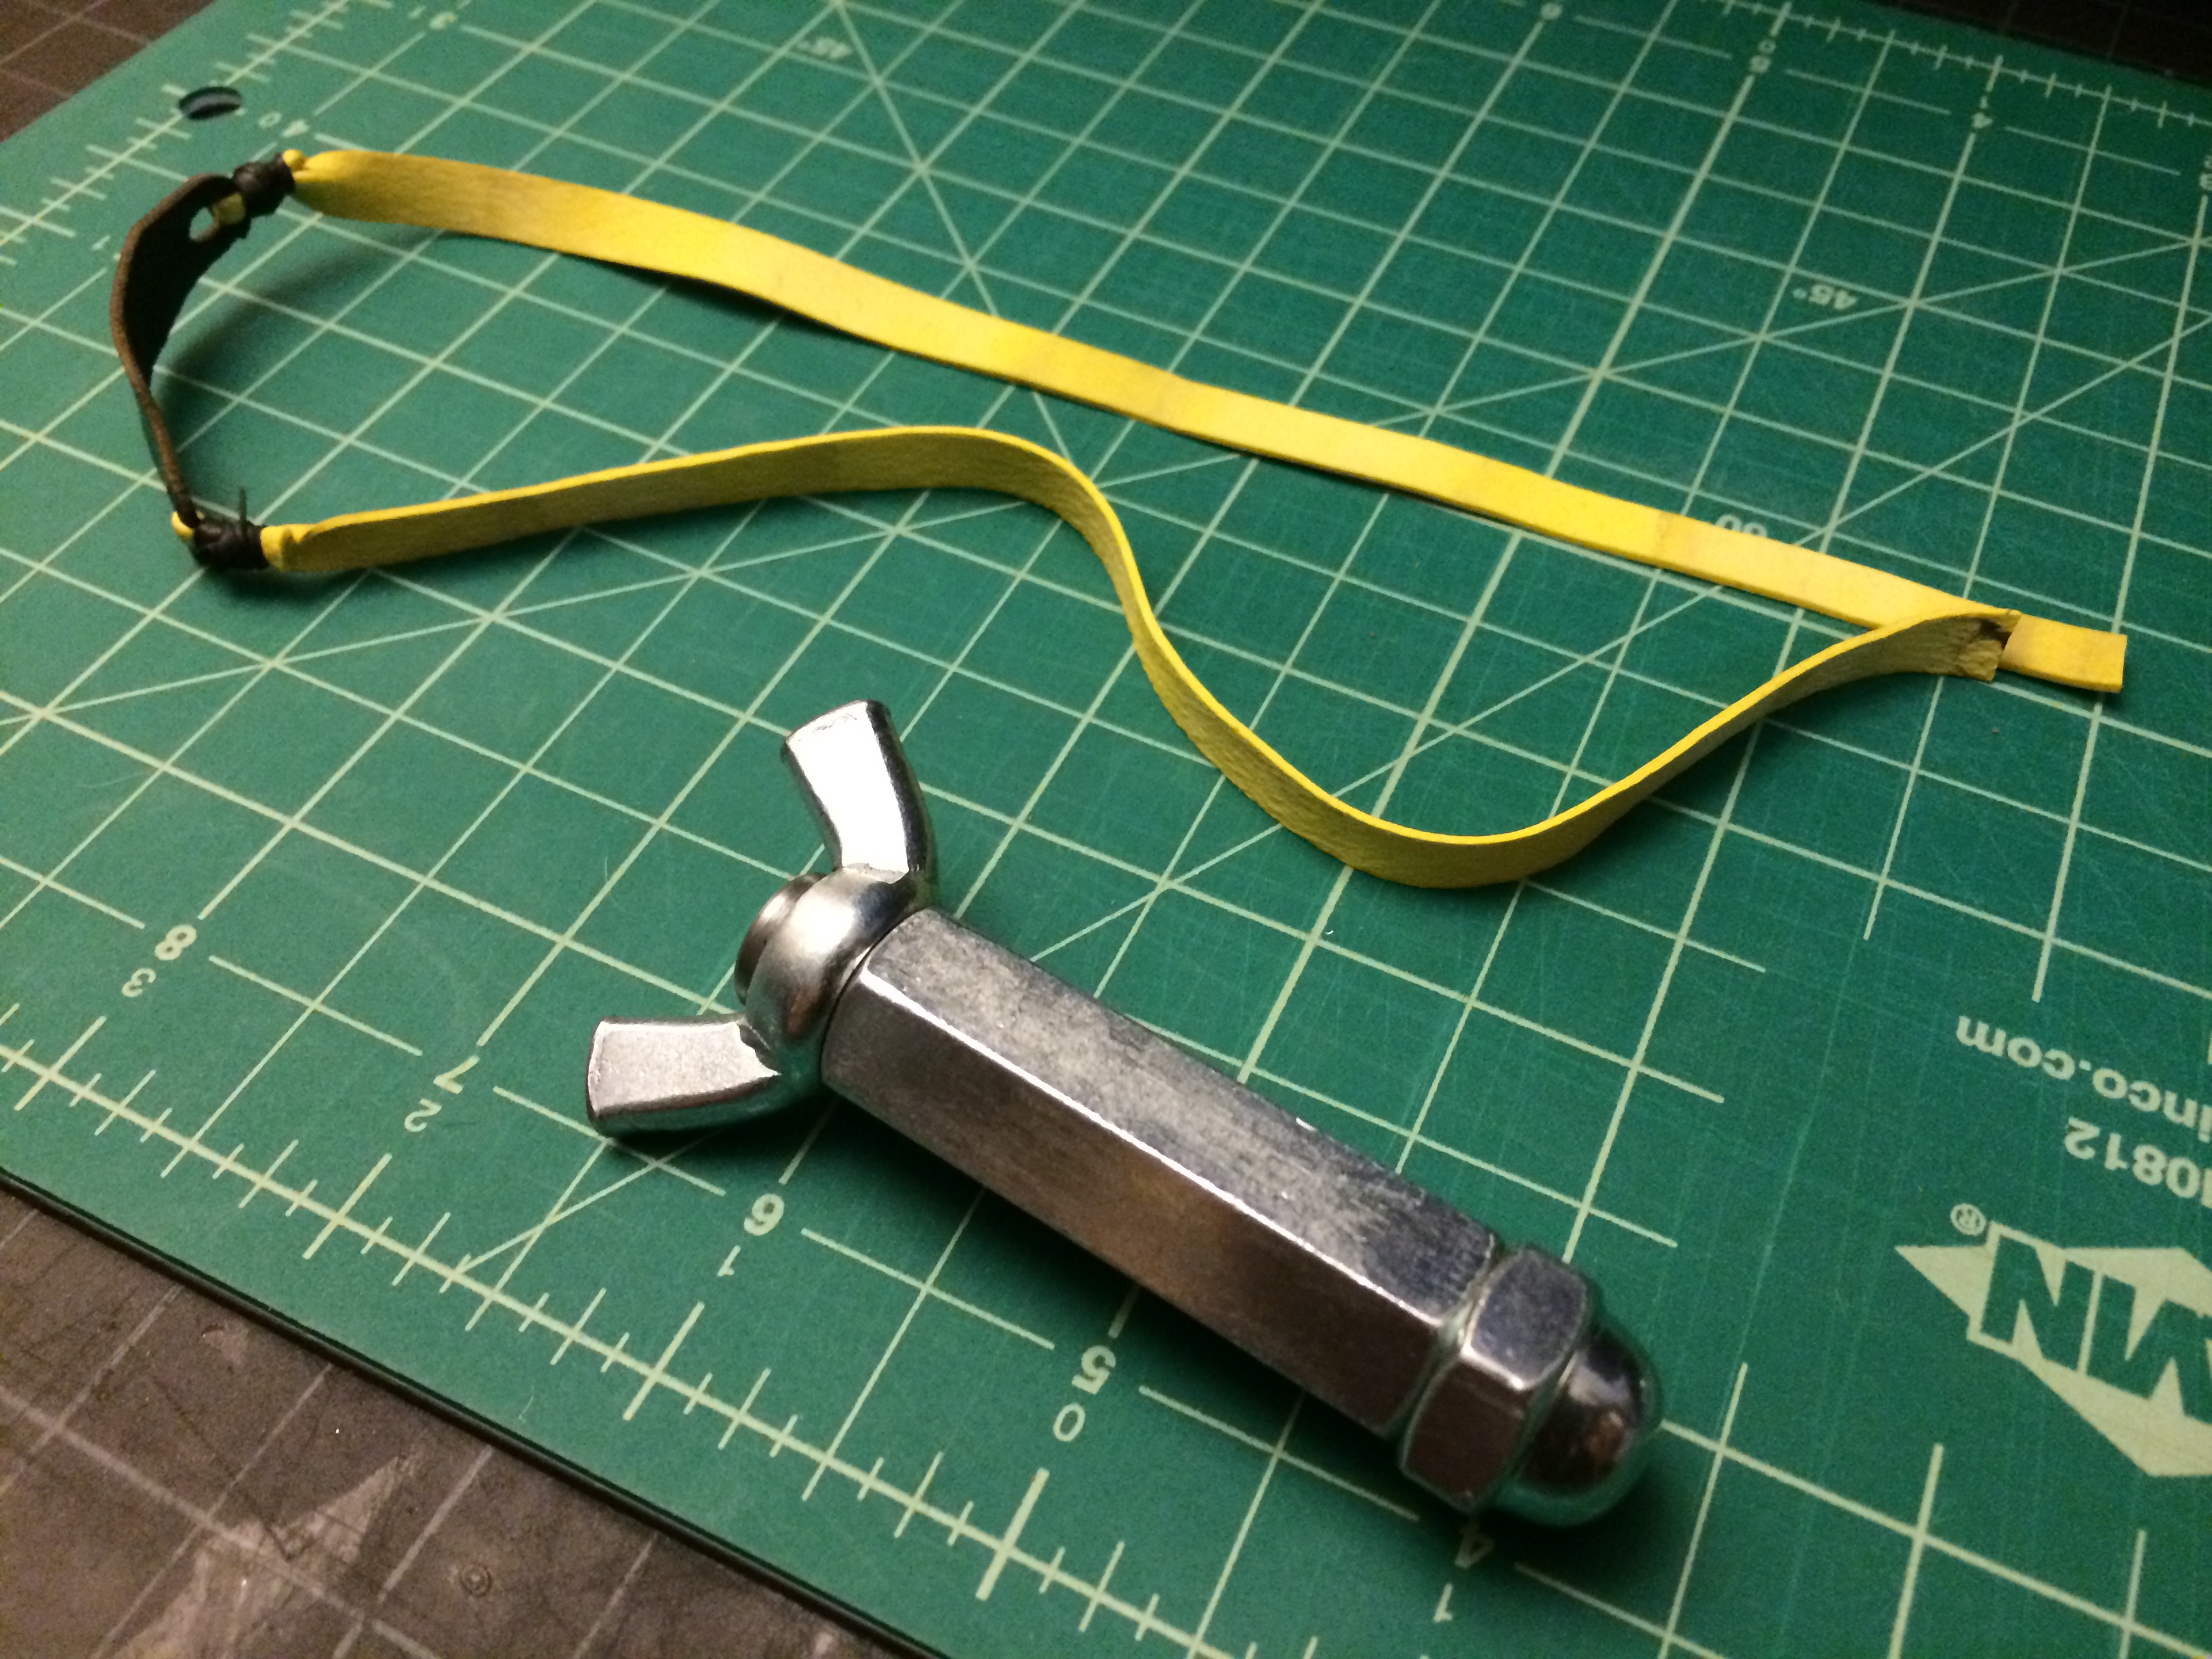
Time to make up a set of BB bands. Cutting a 1/4″ wide elastic and then attaching it to a mini kangaroo leather pouch.
Then use some Theraband Blue to attach it to the forks. I used TB Blue because it is extra thin so I can get more wraps without bulking up the tips too much.
So that’s it. While there were some advanced tools used in the making of the Bolt Cutter, you can easily do it with a drill press or even a hand drill with some patience. Here are some photos of the final result, I have a few more sets of hardware so I may make another and pimp it out with some knurling, jimping and a polish.


Don’t forget to subscribe to our Youtube Channel: Metro Made