Recently I’ve been in hardware mode, ramping up for this slingshot making season. While I make them year round, spring time and the following summer months is really when I hit my stride. I am not sure why, but the warmer months and the increased exposure to the sun helps motivate me to make more products for the outdoors. To aid my craft, I’ve combined a lot of old time practises with new emerging technologies. This Metro Made is about the AS-3 Mini Laser Engraver/Engraving machine, at the time of this post you can find this for about $200 USD shipped direct from China.
Laser etching isn’t something emerging, in fact I’ve incorporated laser cutting and etching into my work VERY early on forming the initial precision design style that I look for in everything. What is emerging is the variety of smaller, very affordable laser etchers that are easy to set up and use. I am spoiled since I am used to using larger units that shoot out 75 – 150 watts of energy to burn and cut materials, this little engraver only spits out 500 mW, that’s 1/2 a Watt.
Nevertheless, a .5 Watt of power is better than 0 Watts of power.
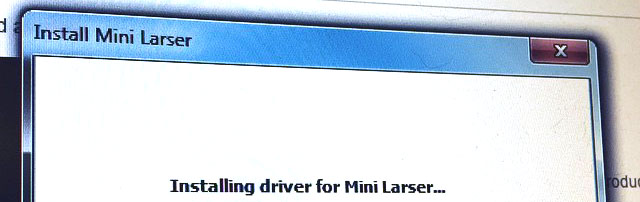
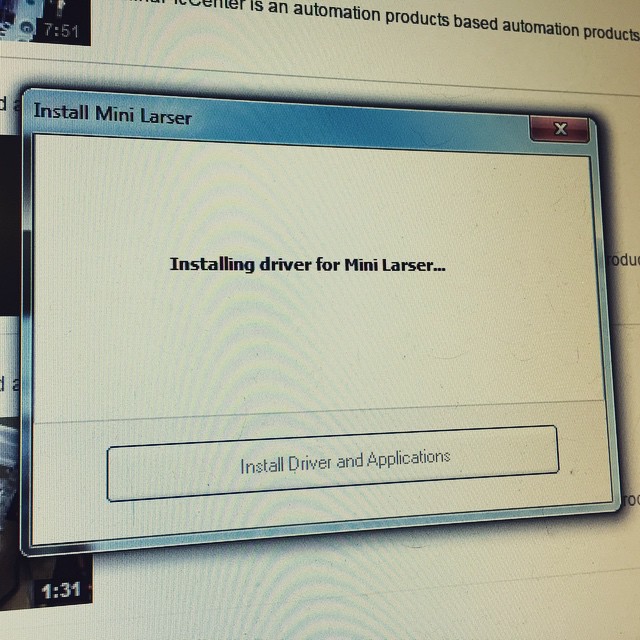
When I first received the unit (model AS-3 500mW), it was a paper weight, no software included and worst of all, no instructions. Being the nerd that I am, I am pretty familiar with lasers, but with nothing to base the operations, it was useless. Luckily, I bought this off Aliexpress which usually has a pretty good customer to seller communication platform. I was able to leave a message for the seller asking for the software and finally chatted with him directly. Once the Acan Mini Laser Engraving software was installed, it moved like it was ready to take over the world. (Yes, it’s written Larser, think of a person who speaks Mandarin and then spell LASER phonetically,)
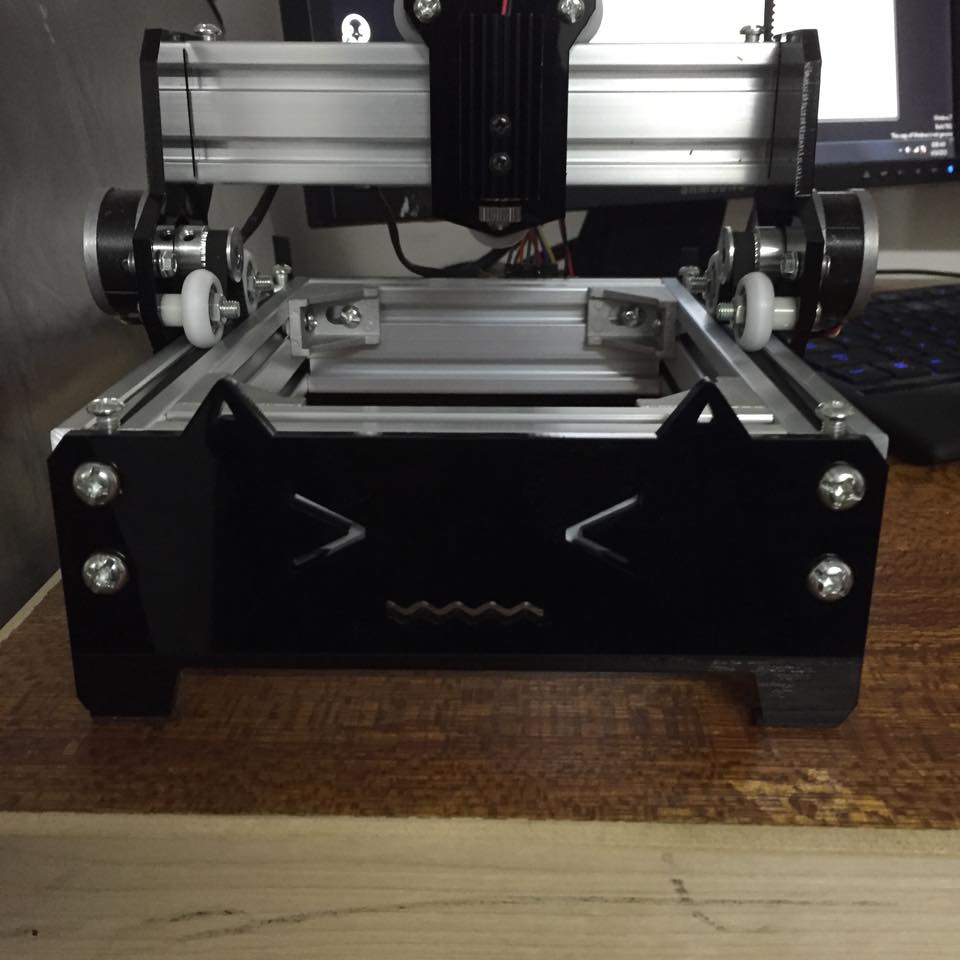
Unfortunately for me, this little guy (thusly named Grumpy, since it has a face on the front) ONLY runs on a PC. I’ve been a Mac user for more than half my life, but I have been exposed to PC’s for much of it due to the same machine/software interface constraints. Needless to say, I wasn’t happy but I contended with the problem by firing up an old tower and making it my “laser station”. Side note: I saw that this tower also has a parallel port, which makes me want to get one of those 3040 or 6040 CNC’s that ONLY runs off PC AND a 25 pin parallel port.
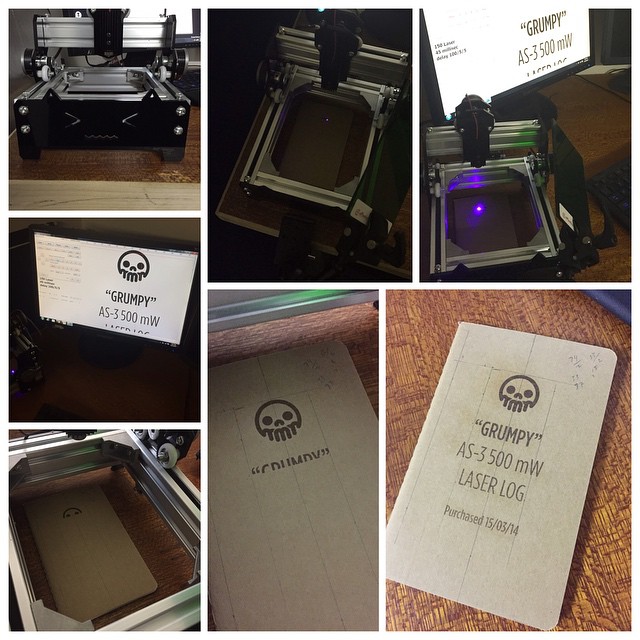
After playing with the software and finding the limitations of the machine, it was time to test it out! Of course, I had to burn the Metro Grade skull onto some useless splintered walnut.
This turned out awesome. I soon discovered that there are actually 2 variables to change, like on most machines, the intensity of the laser fire and duration of the laser. These are controlled through the software, a simply single window that only responds to BMP or PNG files. The intensity of the laser ranges from 0-255%. Why 255% is beyond me, but that seems to be the limit since it would not let any number higher be typed into that the field. The duration of the laser effects how much heat the material receives and how long the laser lingers on the area, this is represented in milliseconds (0 – infinity, aka setting your house on fire)
You can play with these two to achieve the right depth of engraving and speed. I prefer to use less intensity and slow burn times since it saves the laser from overheating. Sometimes you need the faster speed with higher power if the material is sensitive to heat (like some thermoplastics).
It wasn’t long after that I took a prototype plywood Jester slingshot and put it under the laser knife.
That turned out great. The quality of engraving was very good, very crisp edges and was done in about 8 minutes time.
So far, I had only etched three types of wood with good success on all of them (Maple, Walnut and Birch). The primary reason for me getting this laser was to etch wood, but lets try some cardboard. Not just any cardboard…maybe the front of a Moleskine Volant…maybe with the Metro Skull…and maybe to keep track of the weirdness with the software and hardware….maybe like this:
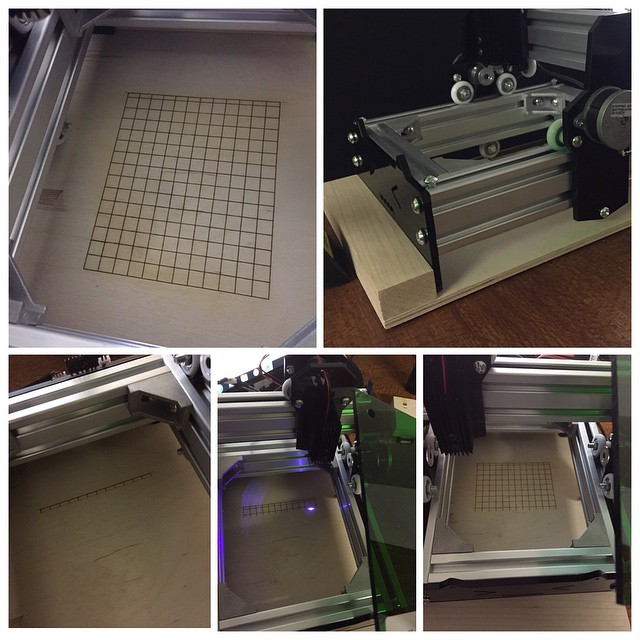
Lining up the etch was kind of odd, but once I understood where to line up the X-Y origin (top left corner), it was easy to lay out the centre line and where it would go. The working area on this laser is only 10cmx12cm, which doesn’t seem like a lot but when you are etching emblems or small text, it’s kind of the perfect size. I’ll have to build a jig or at least a sacrificial bed to put under the gantry and etch in some grid lines.
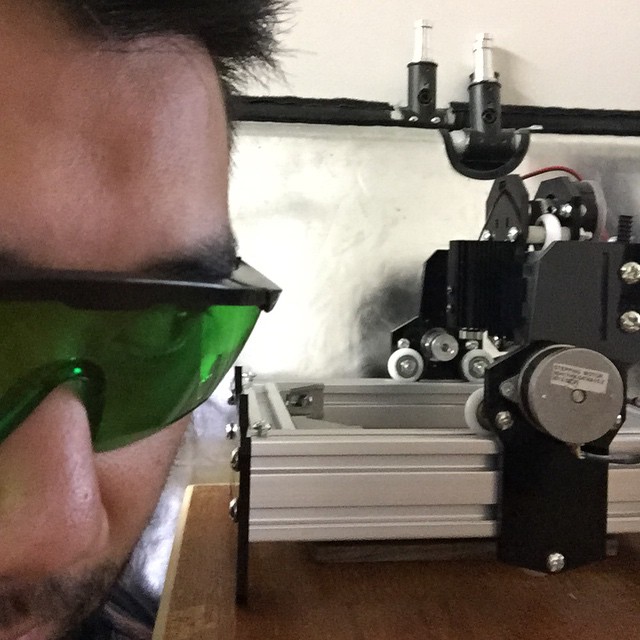
The AS-3 is a violet laser so it came with these super rad green glasses to protect you from stray laser fire from burning your retinas. Since I wear glasses, these were kind of a pain to wear. I came up with this, a super clamp with a universal arm holding a 4″x6″ piece of green plexiglas, this shields me from the laser while I sit at the desk.
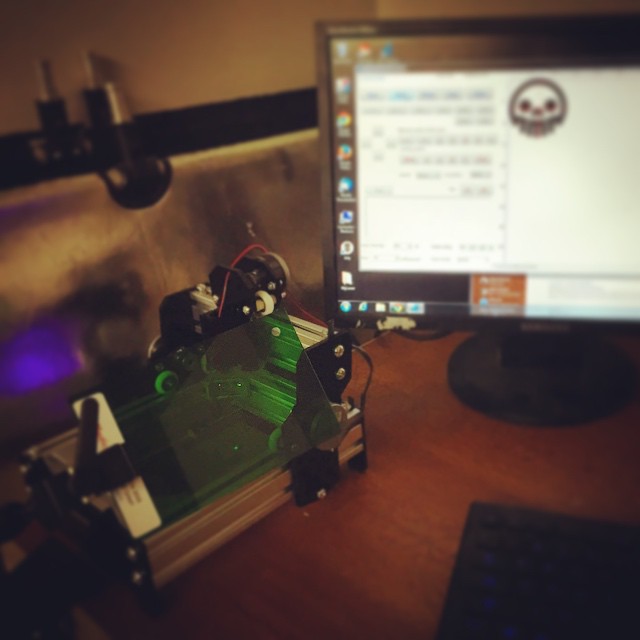
UPDATE: RIGHT after I posted this I decided to make a small sub bed for Grumpy and then make a grid pattern BMP to etch onto it so I can line up work better and get a better sense of the working area. 2.5 hours later, the grid was done etching.
I am really happy with this new addition to the Metro Grade tool family.
Welcome home Grumpy.
-Eric
buy Gabapentin powder PS, if you are on Instagram follow me @ericausome