http://spidercreative.co.uk/wp-admin/images/my1.php This project, titled the Taser PFS, couples a number of things that I love: machining metal on a lathe, working with stabilized wood and using leather tabs for attaching rubber to a sling.
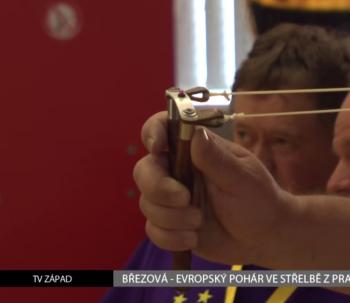
This all started when I was poking around YouTube trying see what other country’s slingshot tournaments looked like. I came across this Eurocup coverage:
Later in the video, an interesting designed slingshot came up. It looked like a wood handle with two brass posts where a bridge attached hosting a center located sight pin. The posts and the bridge compressed two short leather tabs that attached to the rubber tubing. Needless to say, in the short few seconds that I saw it, I was intrigued.
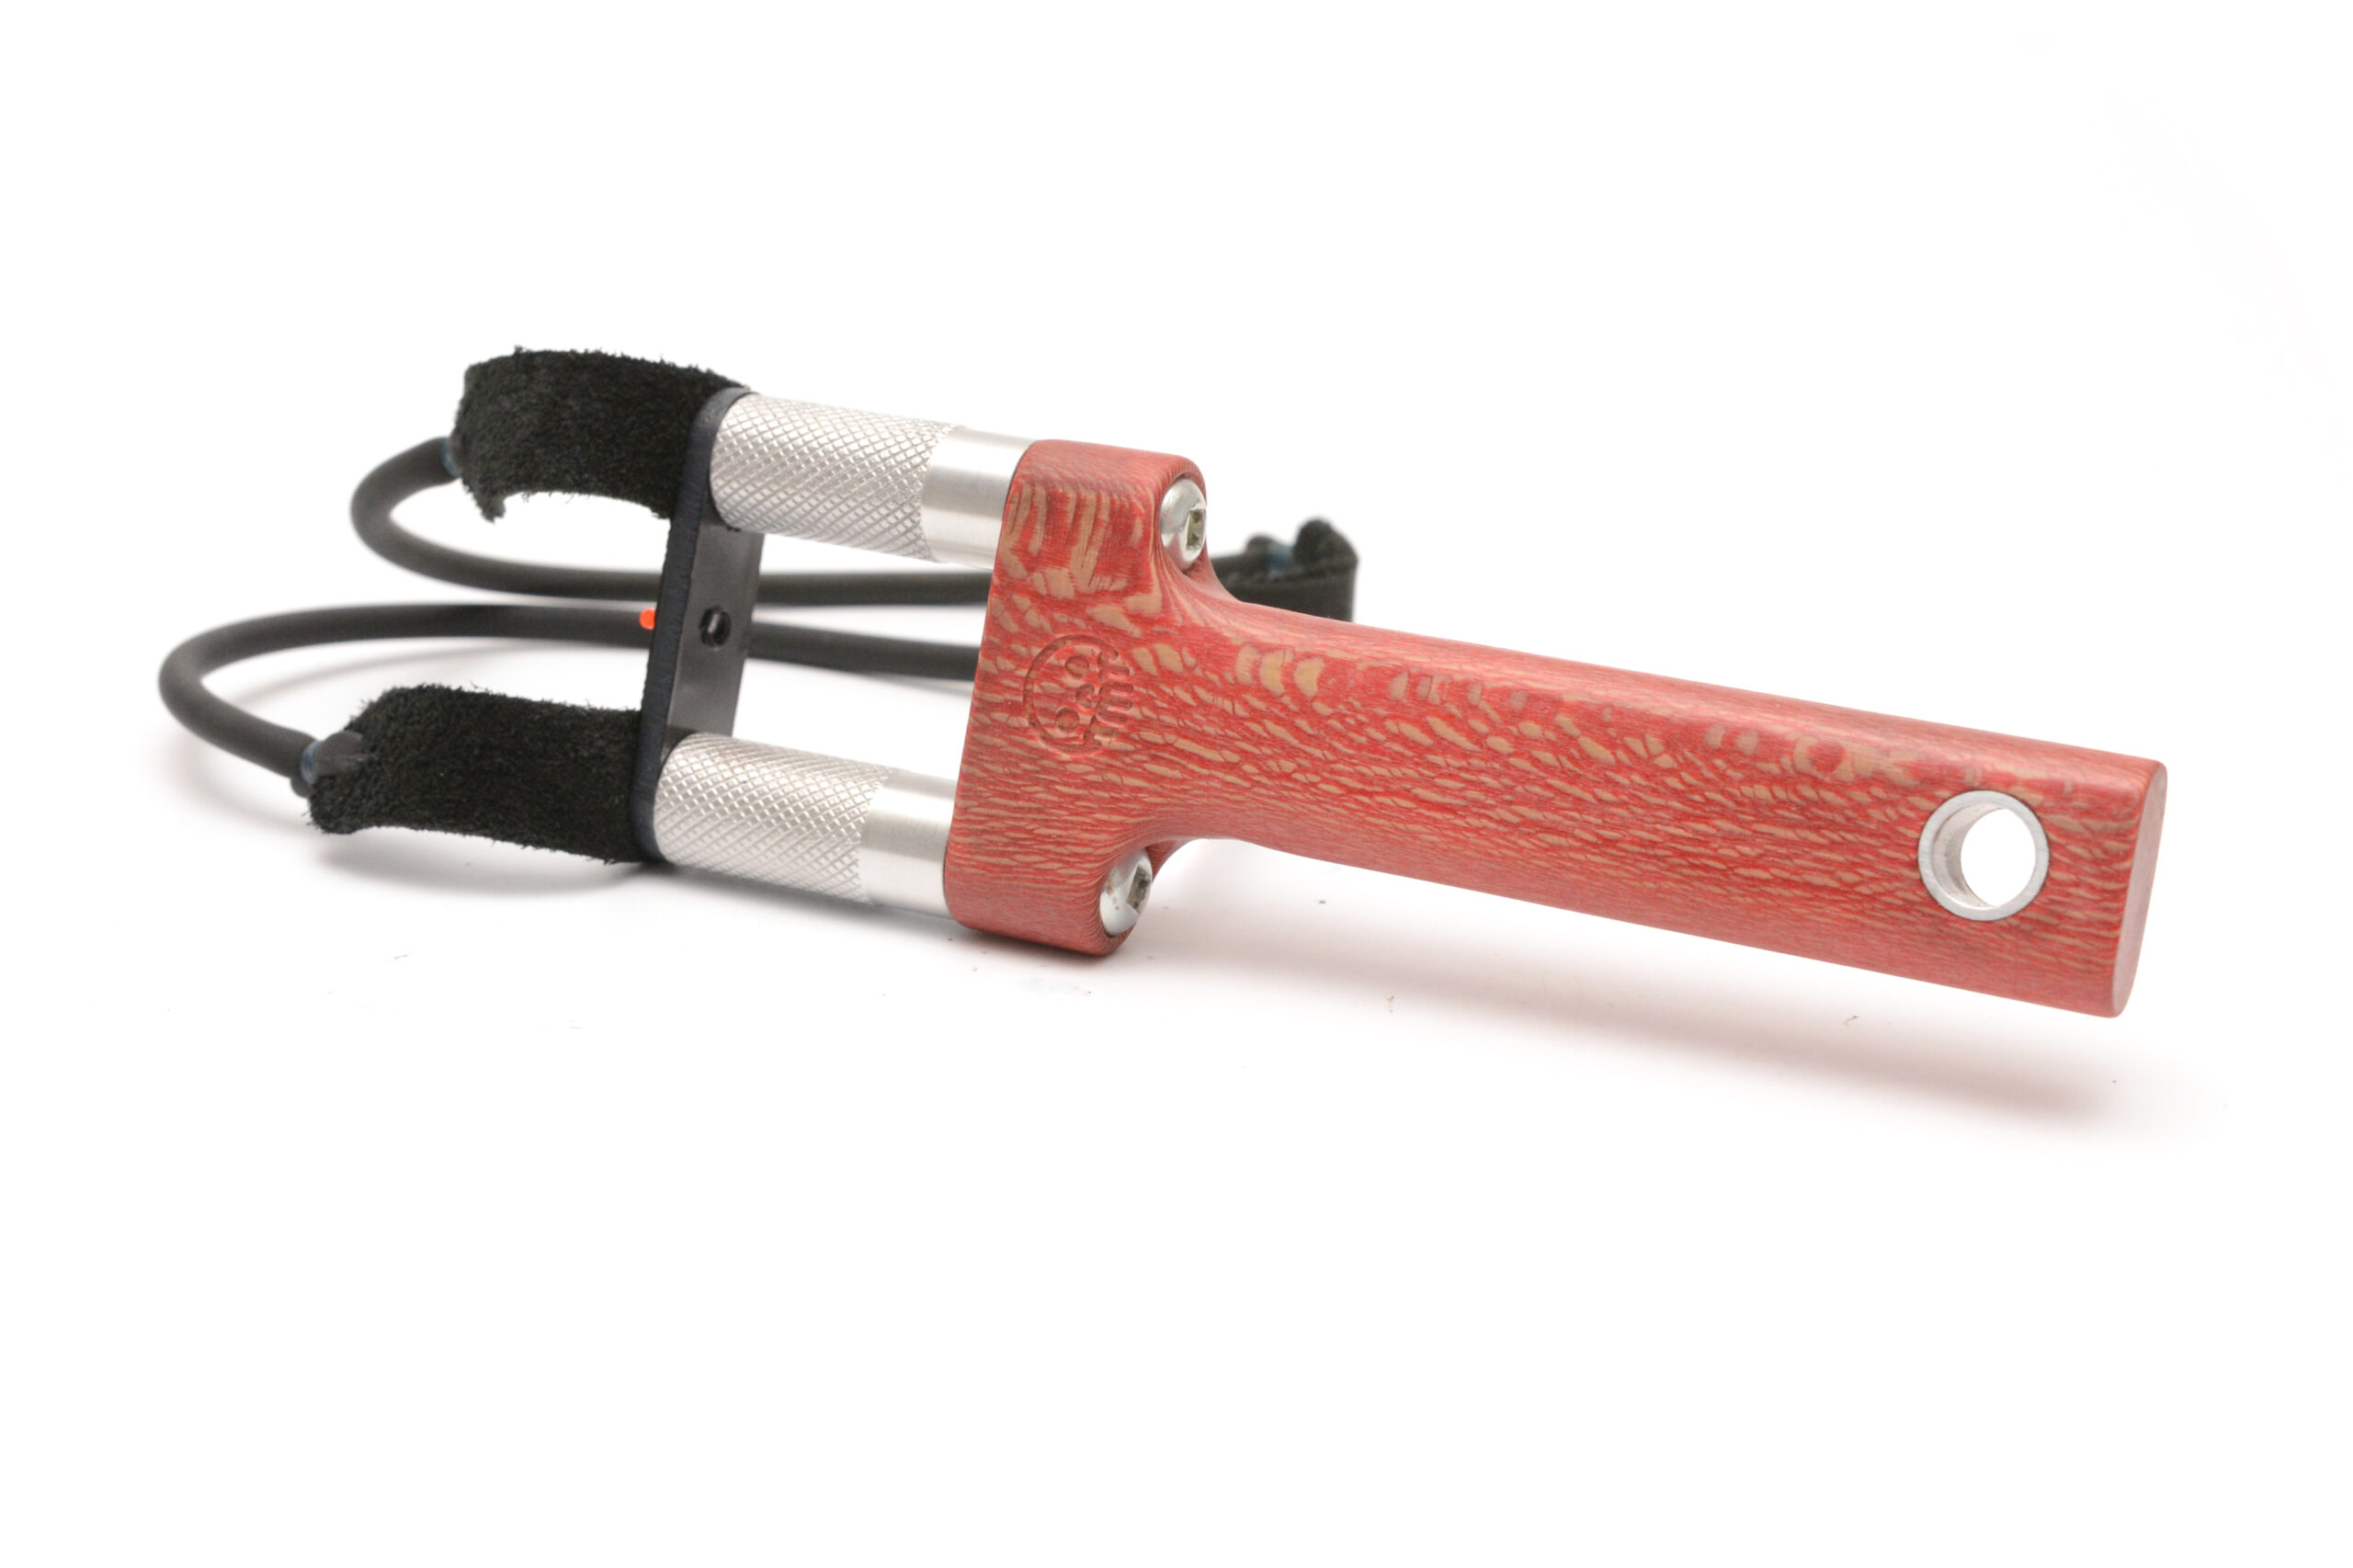
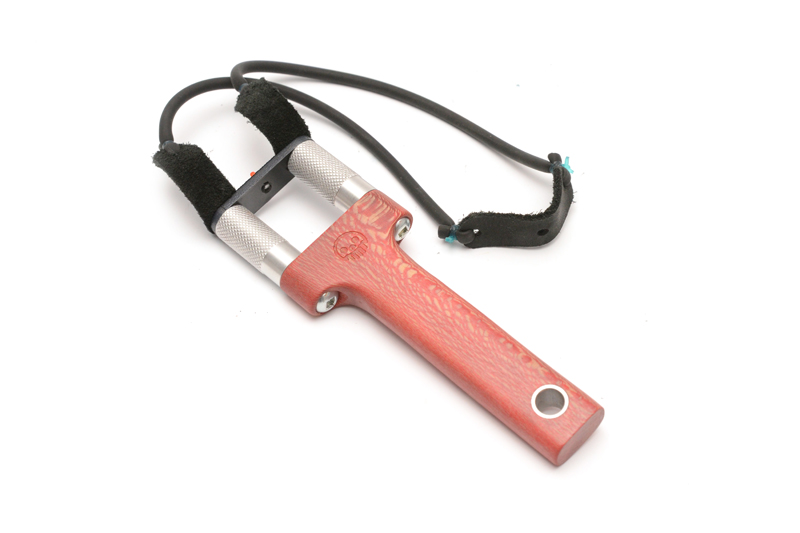
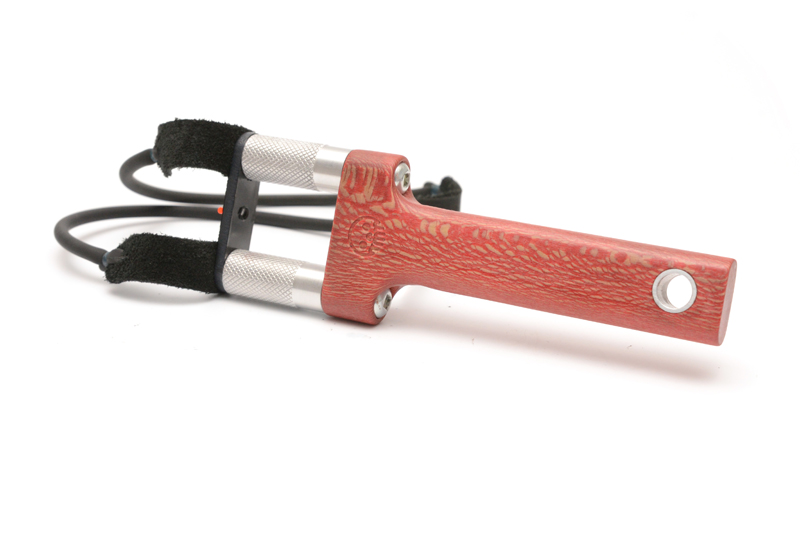
So I set out to make something unique…not exactly like the one in the video but something I could pocket, enjoy with a variety of shooting styles and best of all, something I could challenge myself with. Over the course of my time as a designer, I’ve amassed quite the collection of materials and I am not proud to say that my stock area is more like a hoarder’s dream, and a organizer’s nightmare. For this ‘Taser” I wanted something narrow, but sturdy. A thick slab of red dyed, stabilized sycamore wood that was booked matched to be a knife handle scale was suitable for this project.
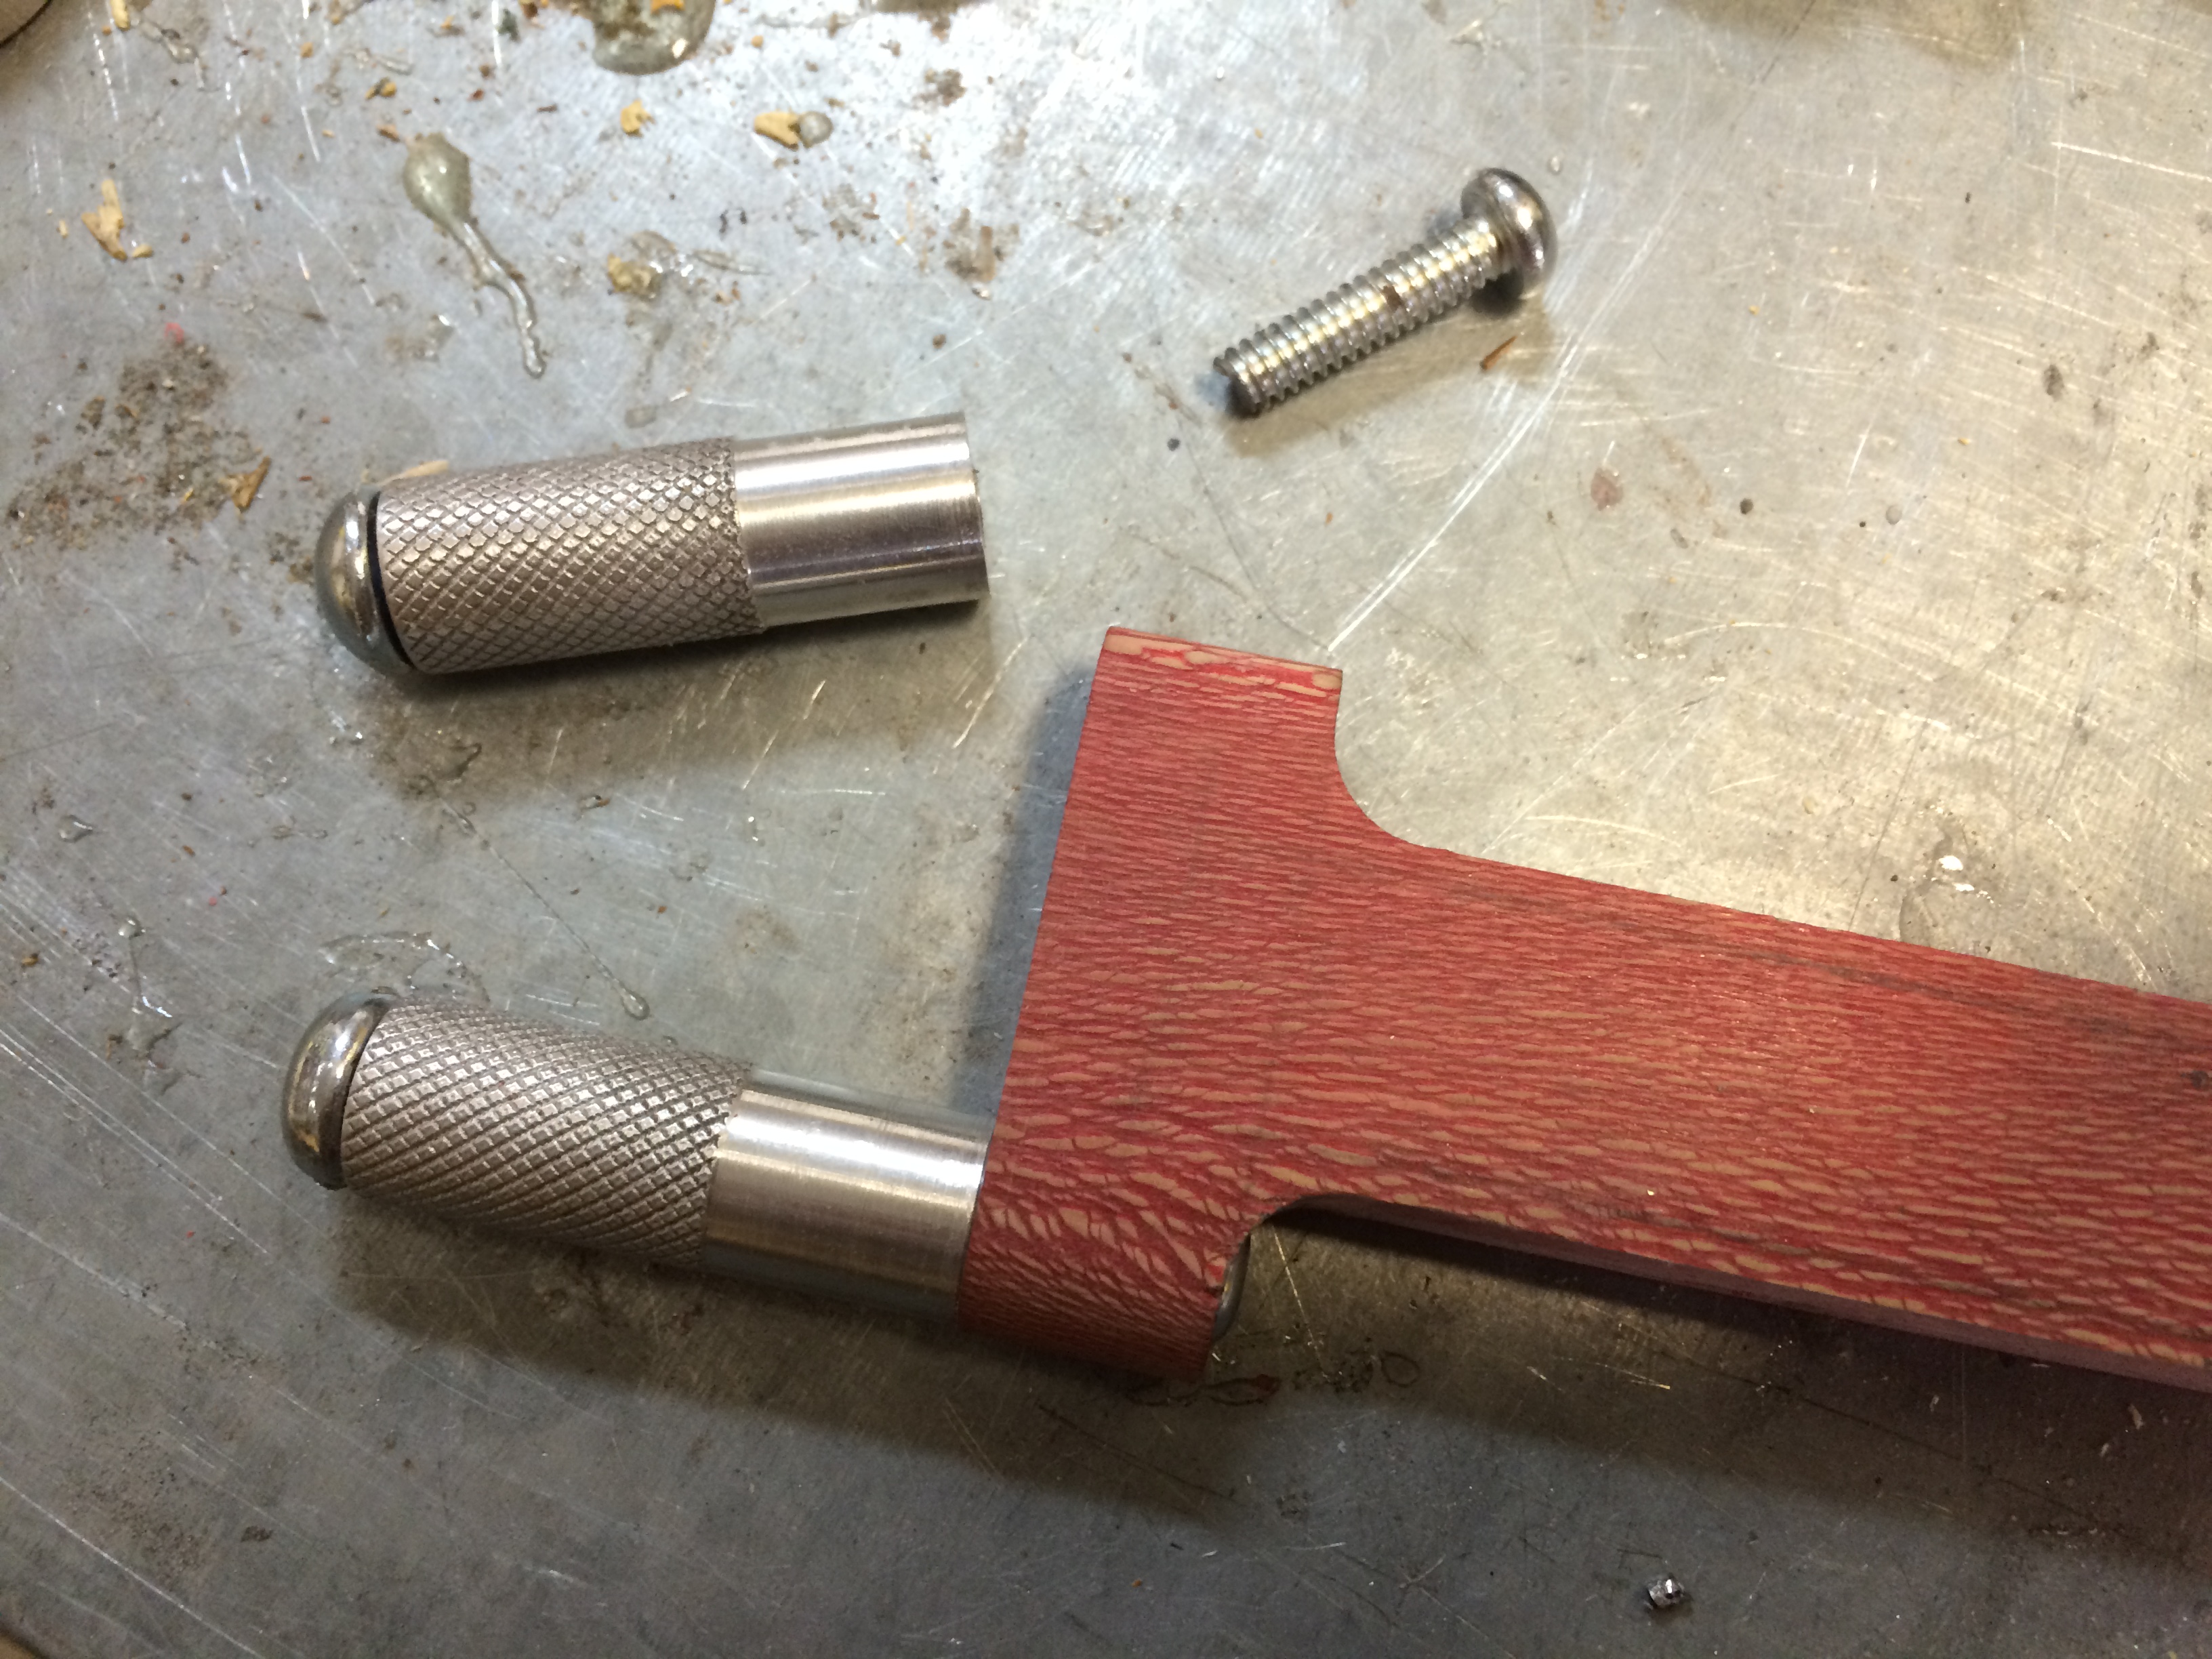
The sycamore scale slab was about 1.5″ wide, .5 thick and 5″ long. I didn’t need 5″, more like 3.5″. First thing first was to machine the sycamore and since it was stabilized with resin, this was pretty easy since it worked more like plastic than wood. BUT before machining the wood, I needed to make the posts.
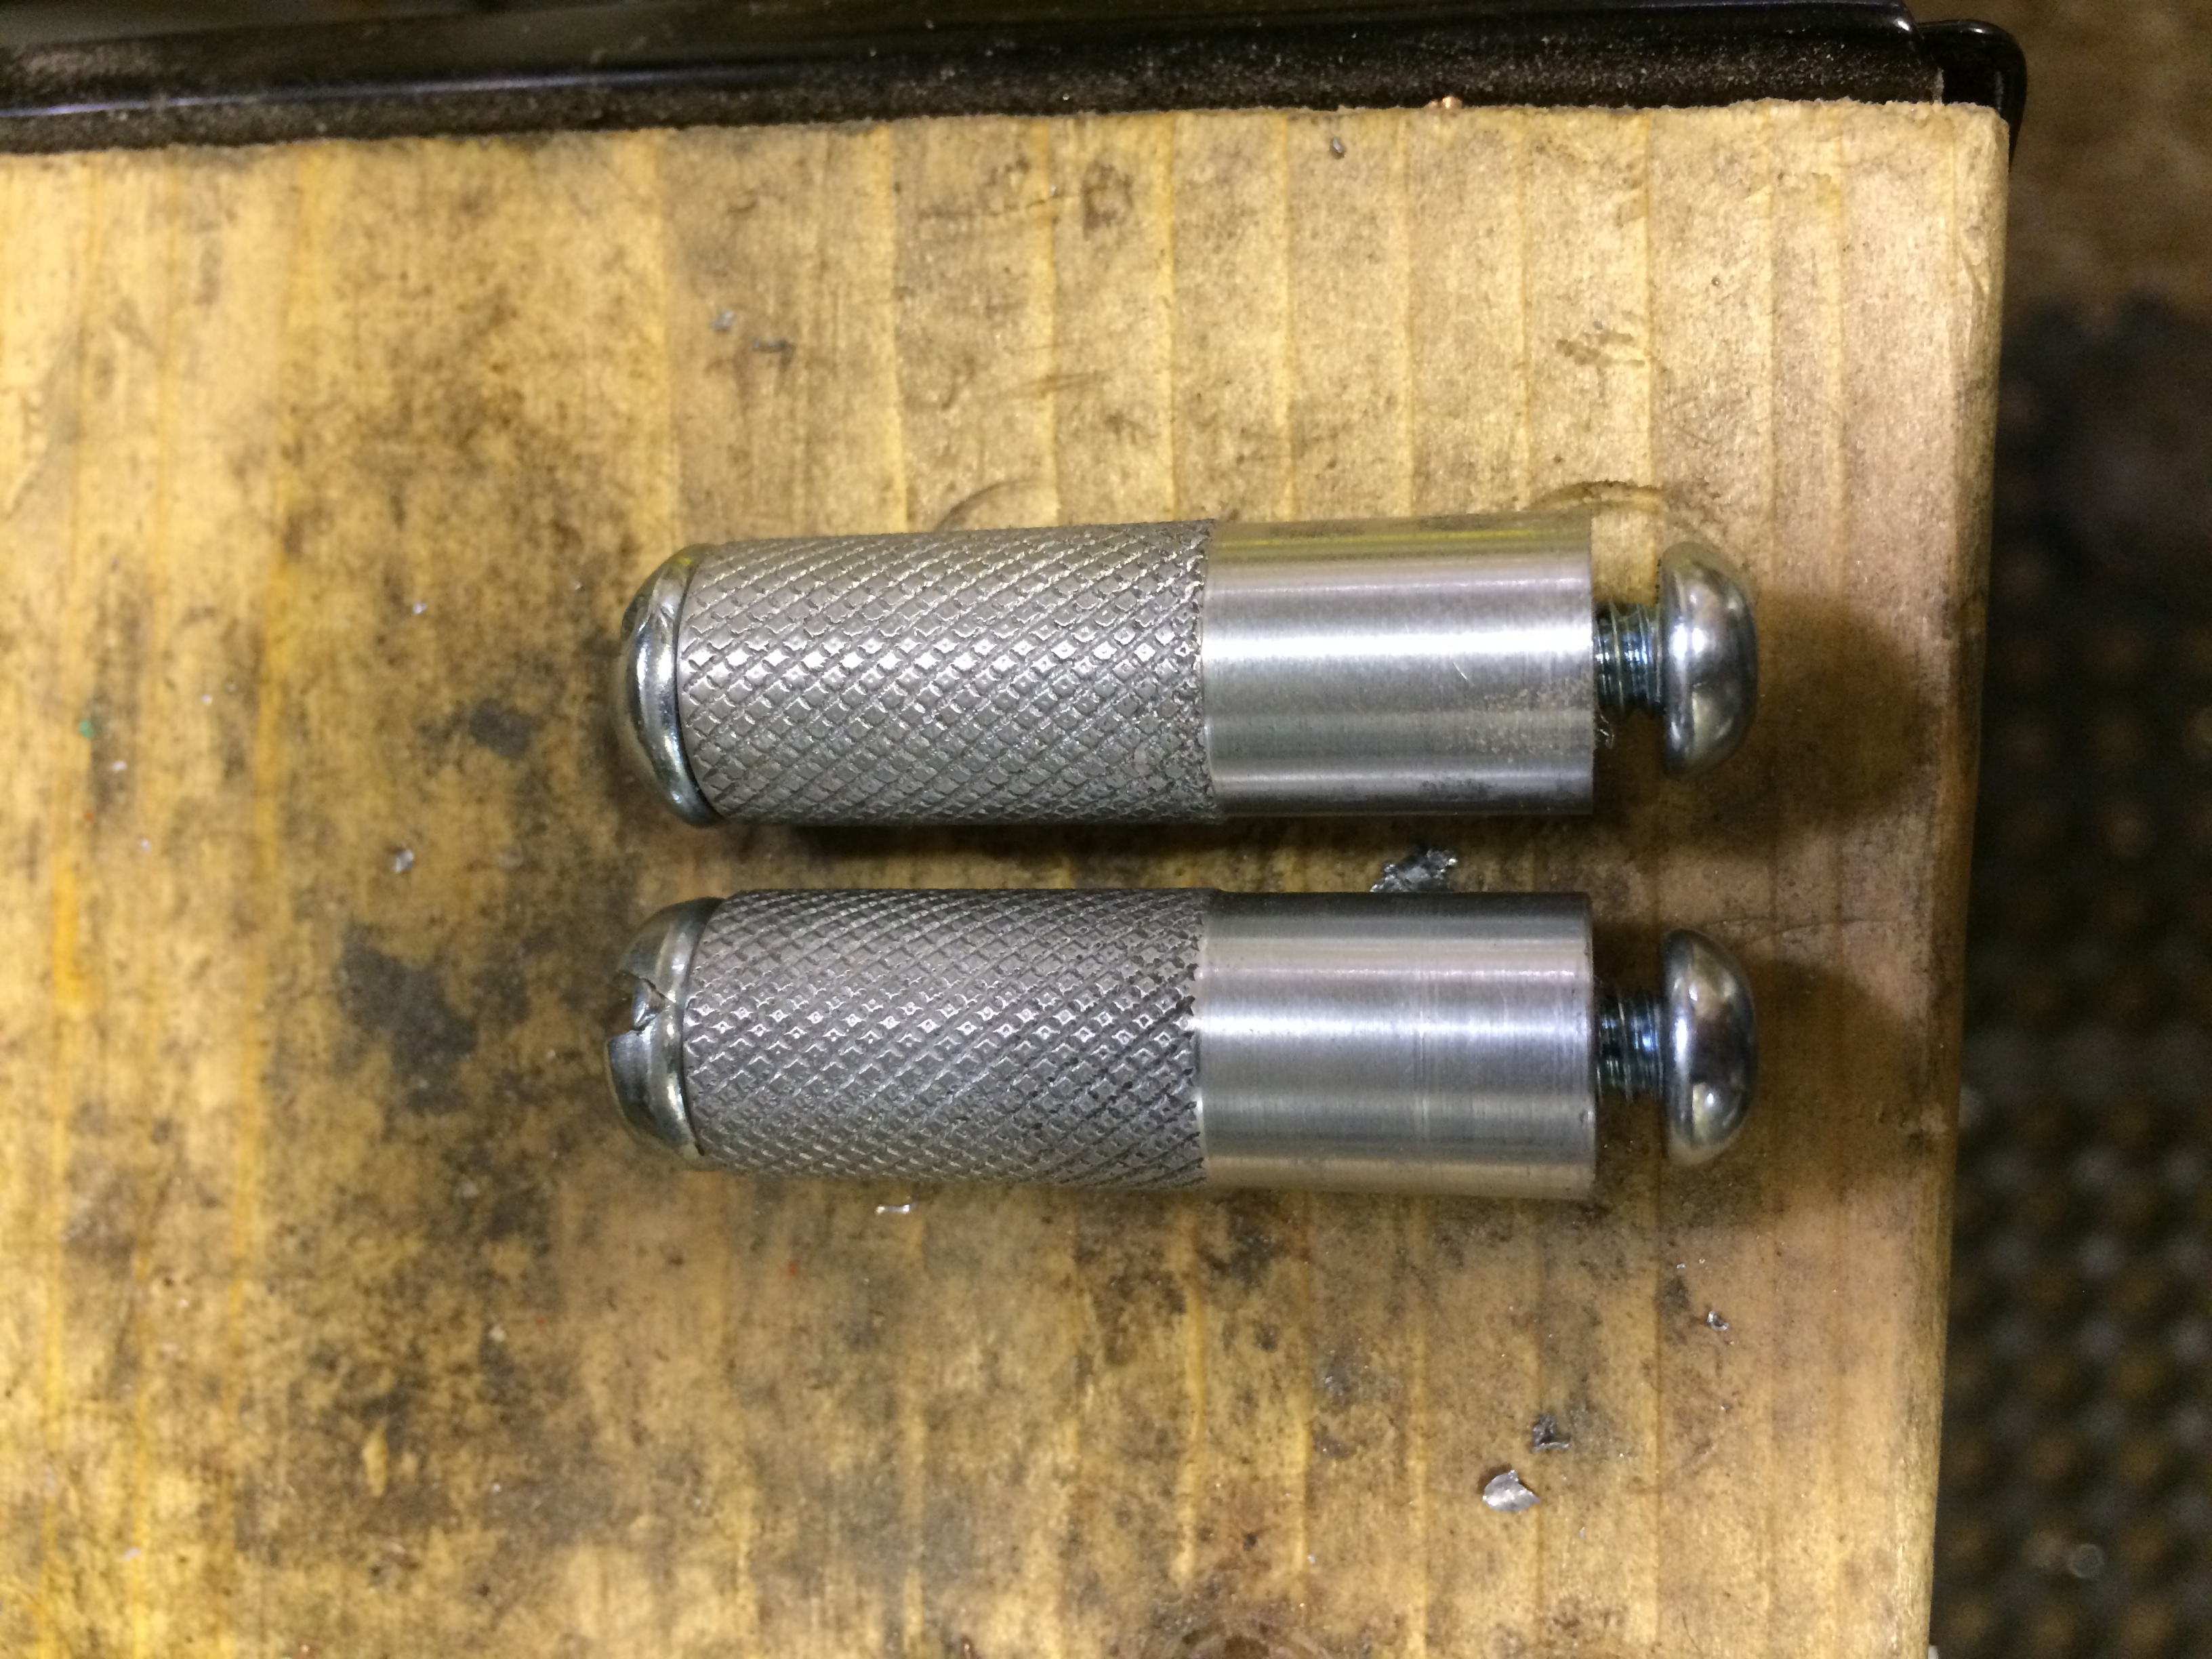
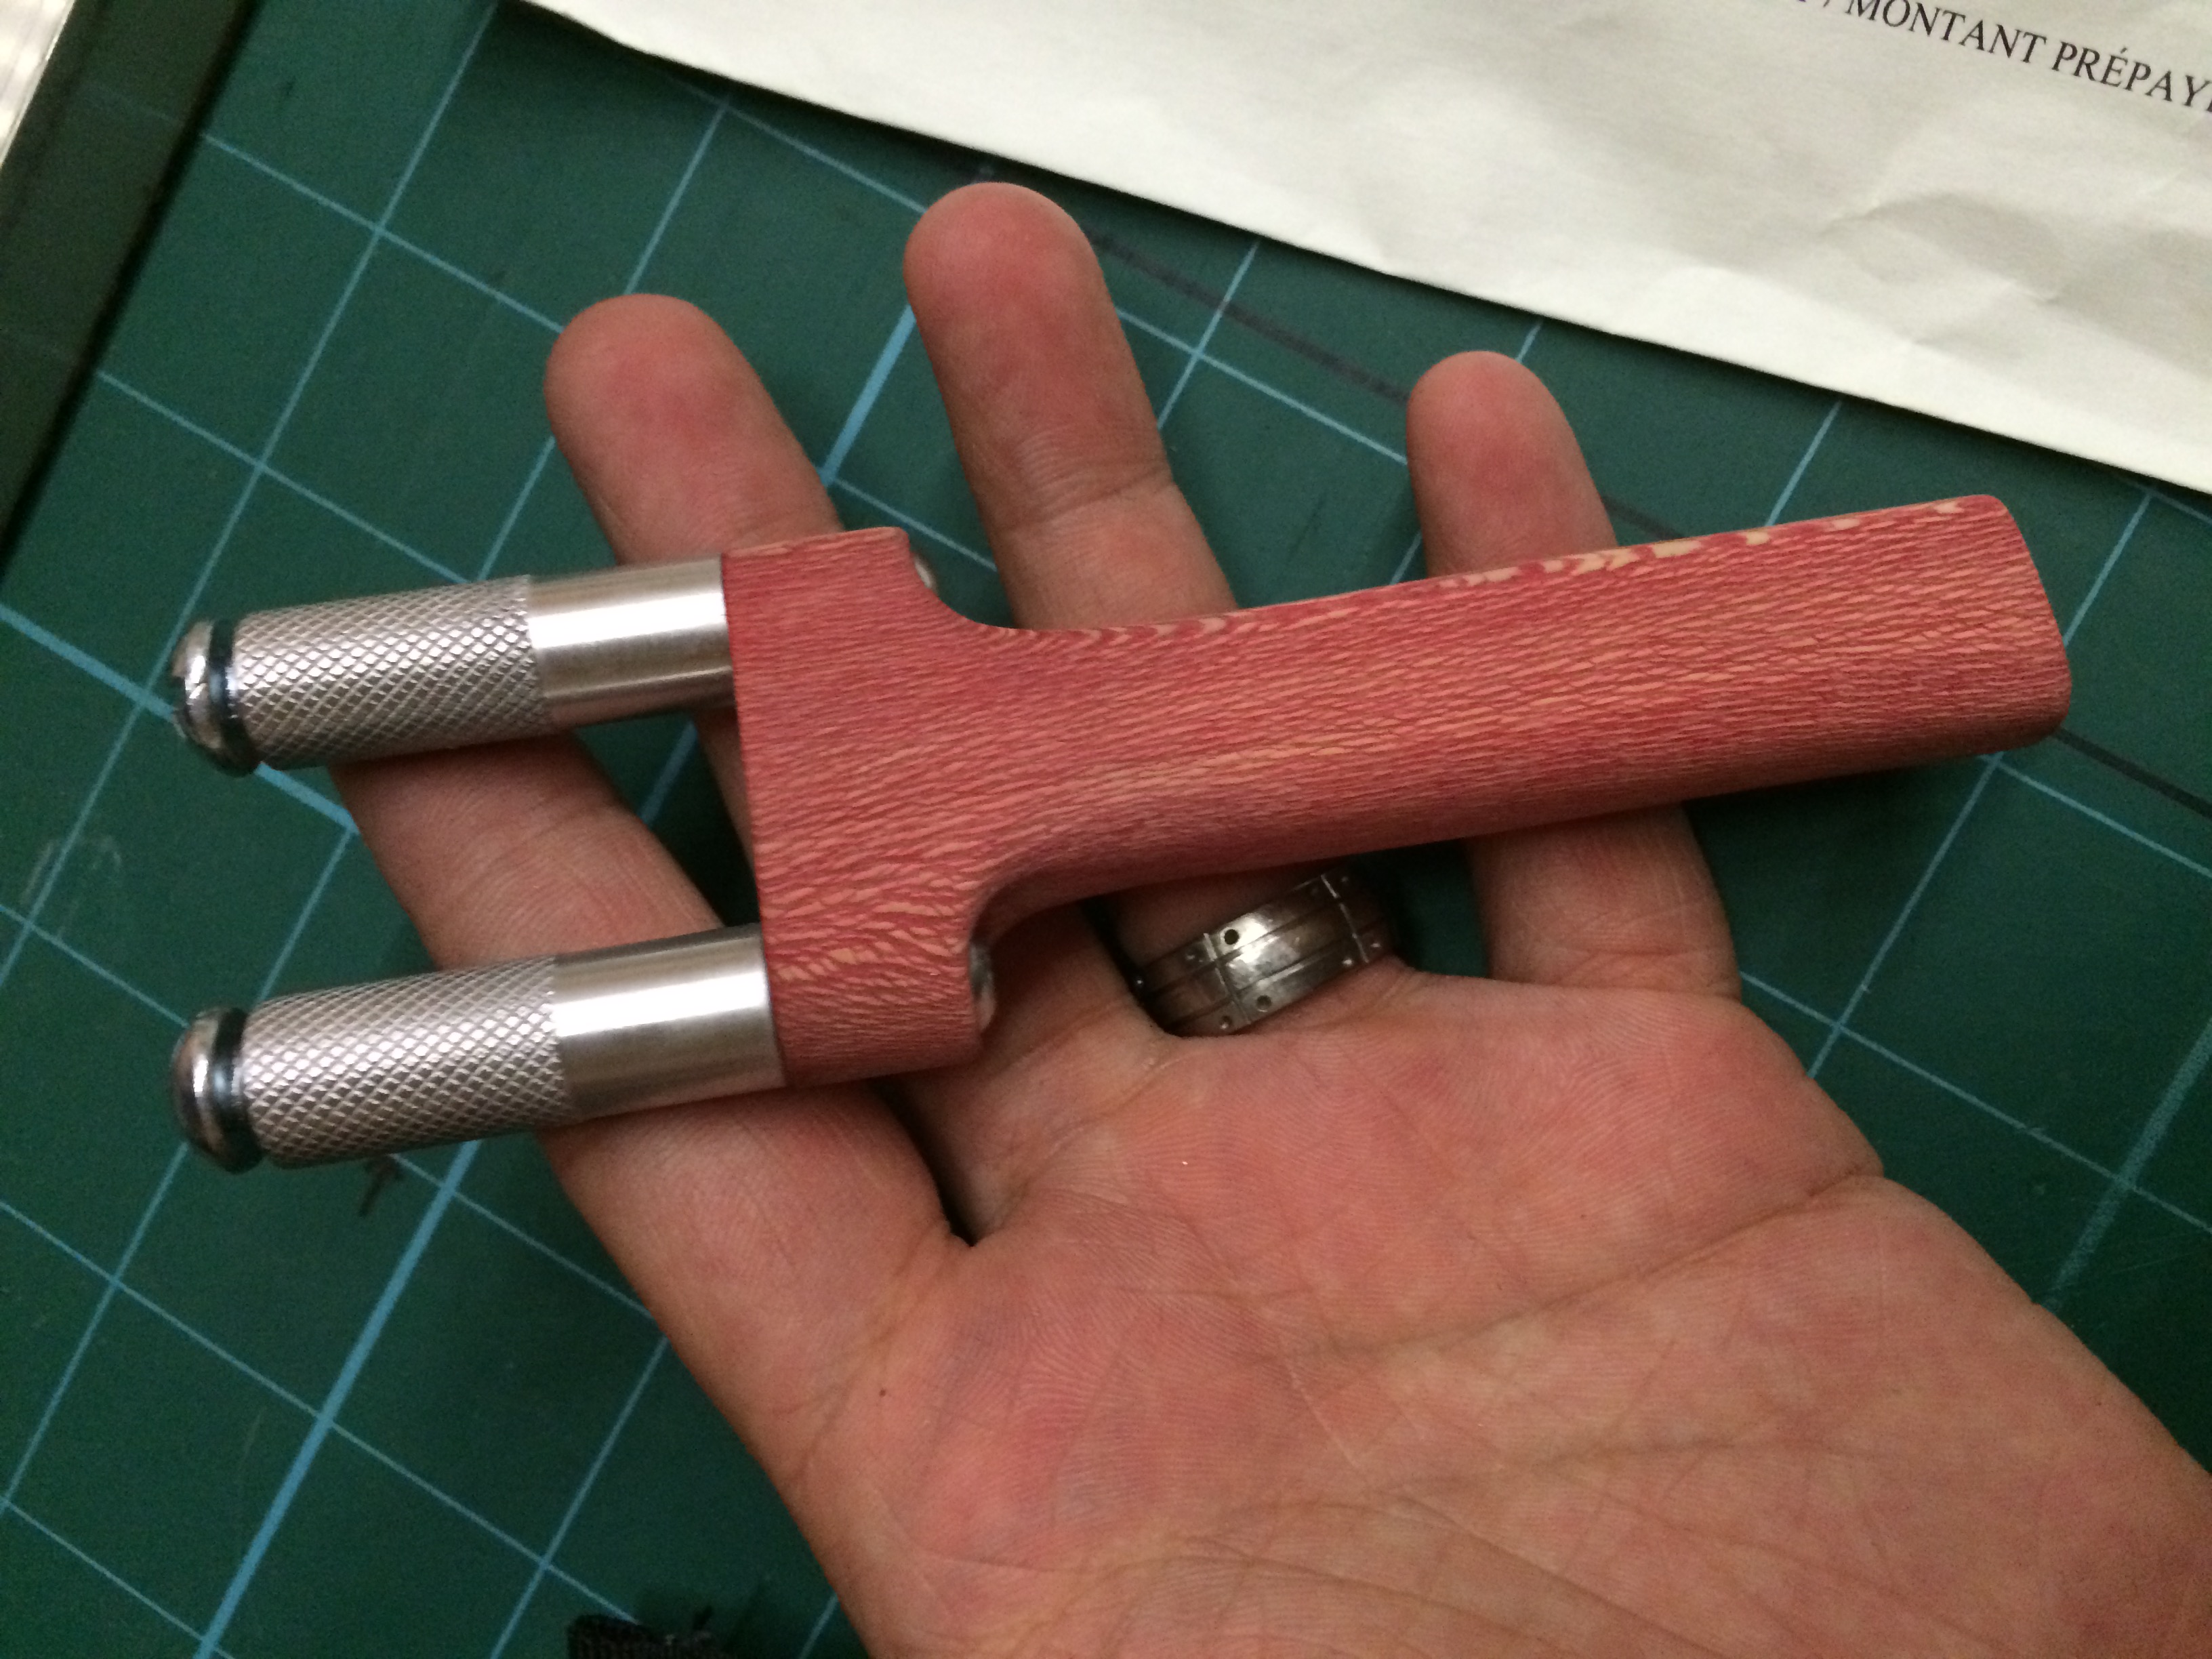
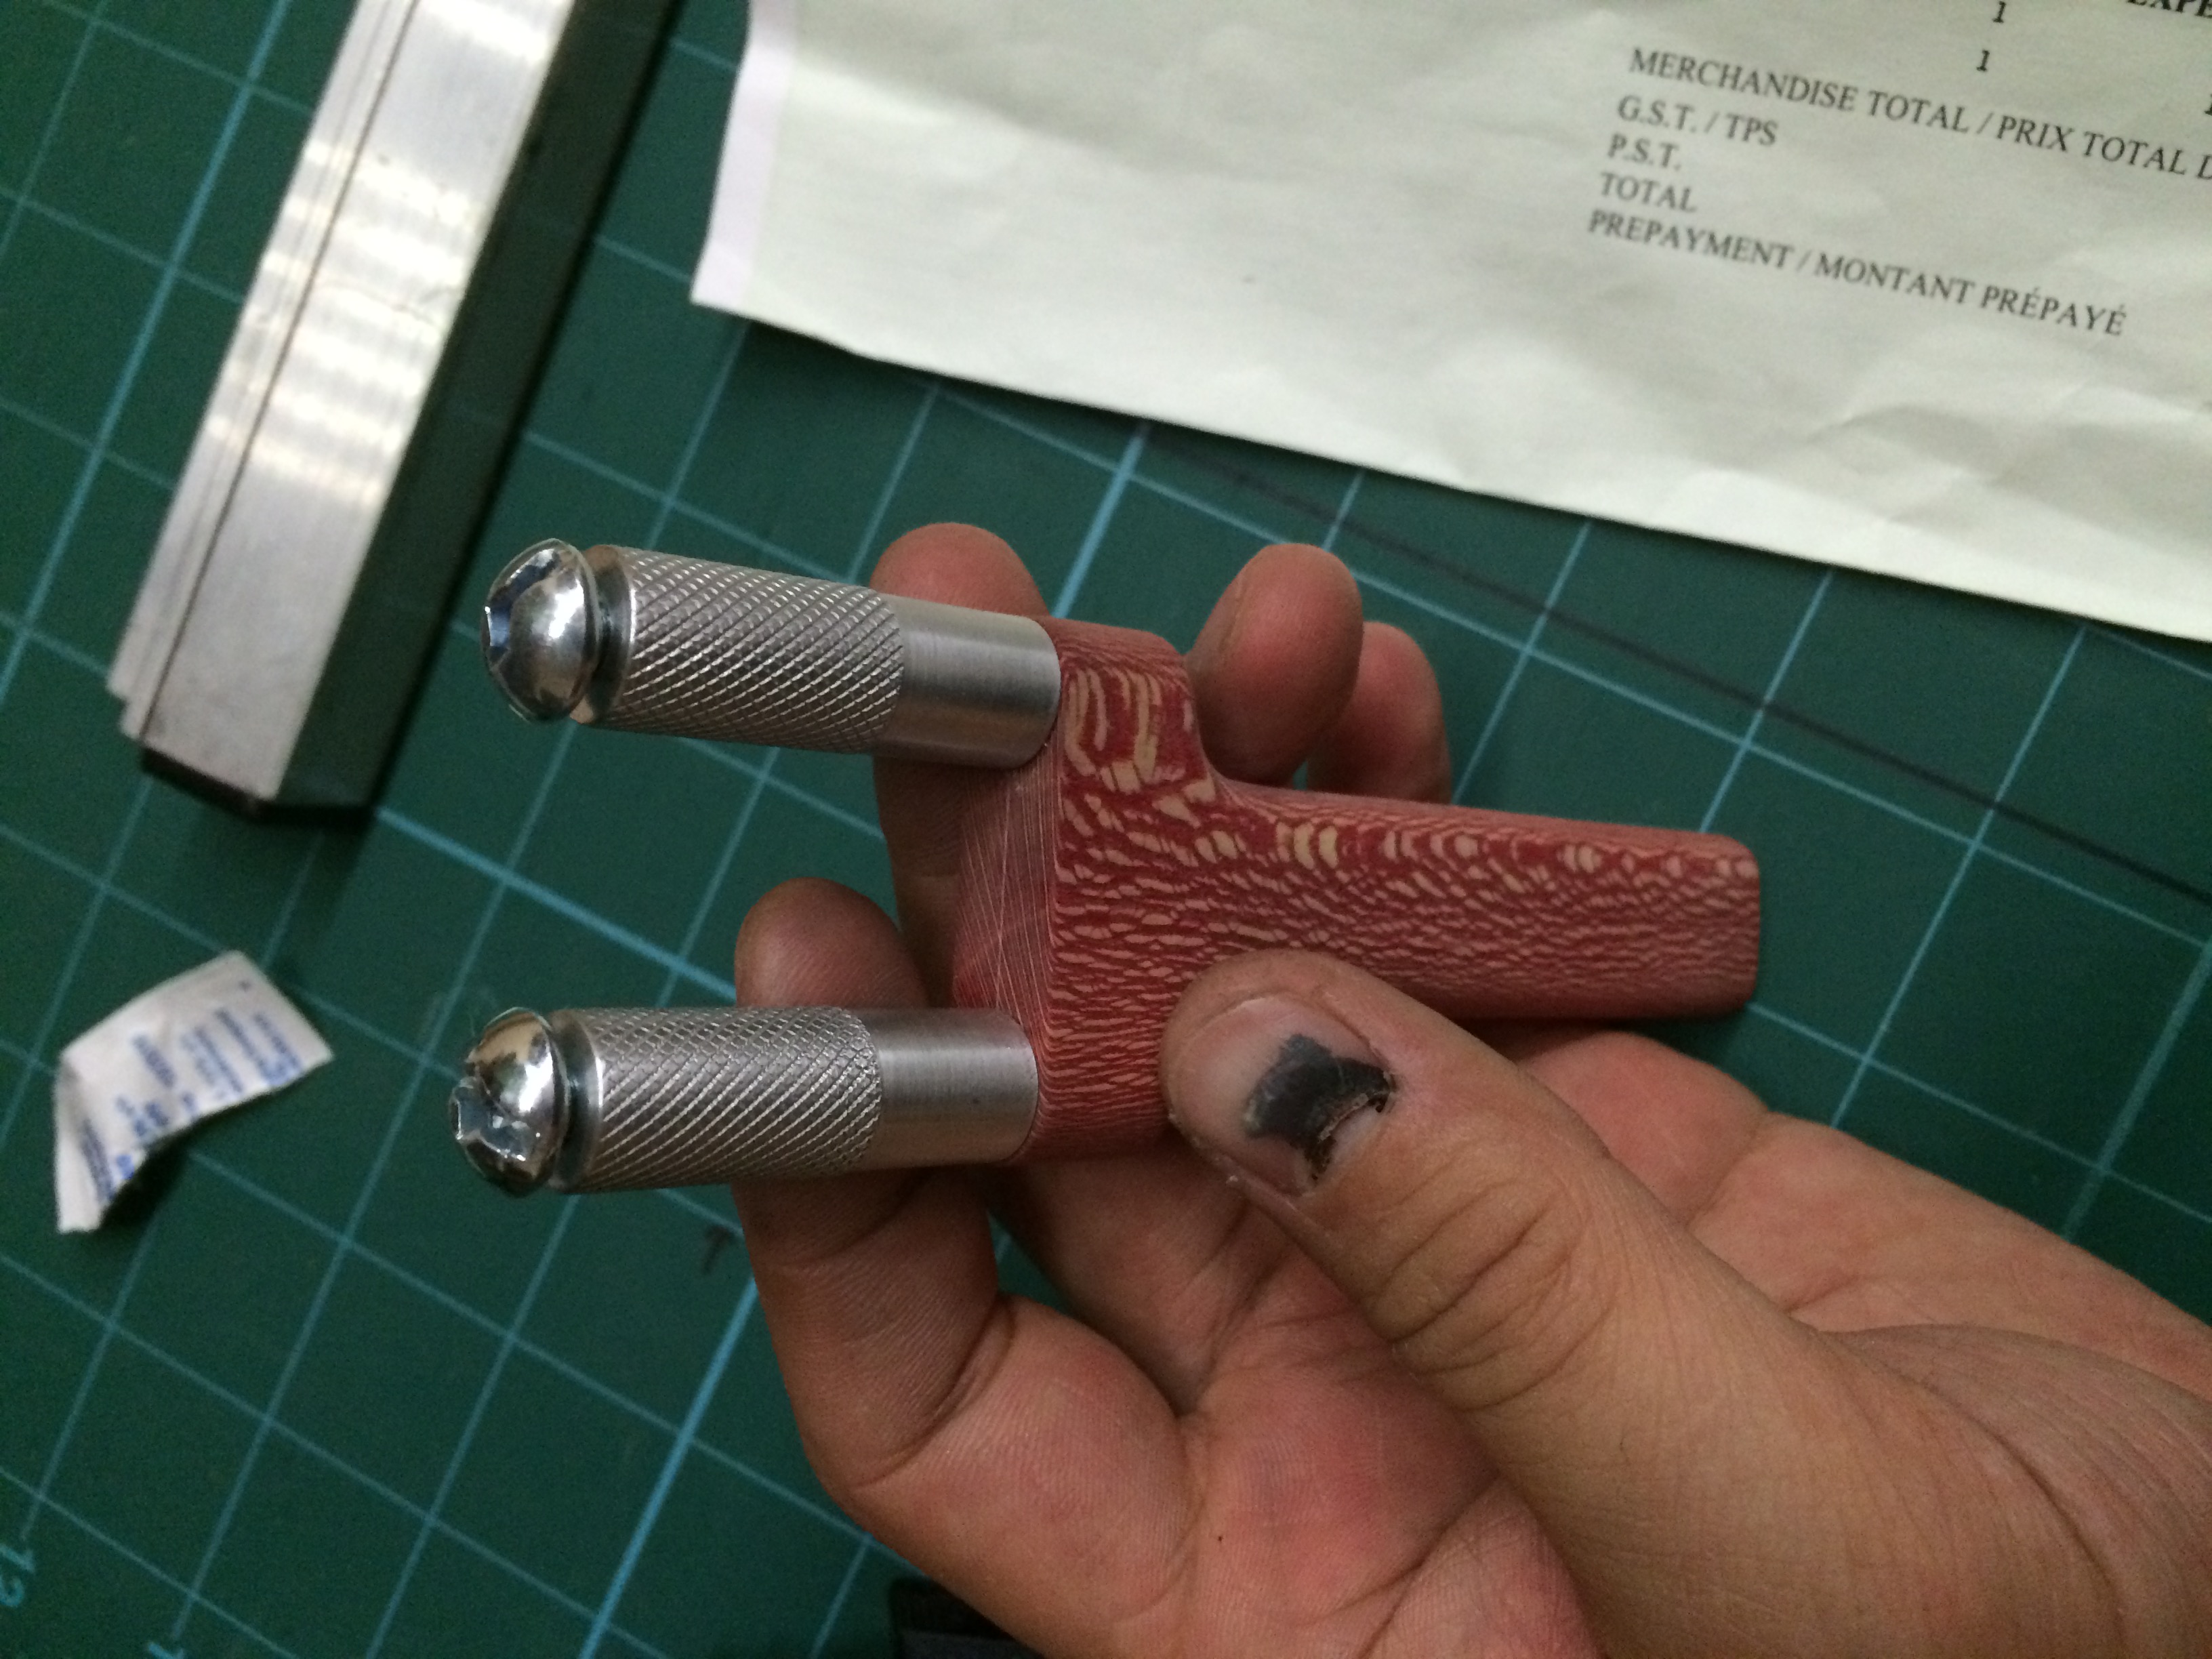
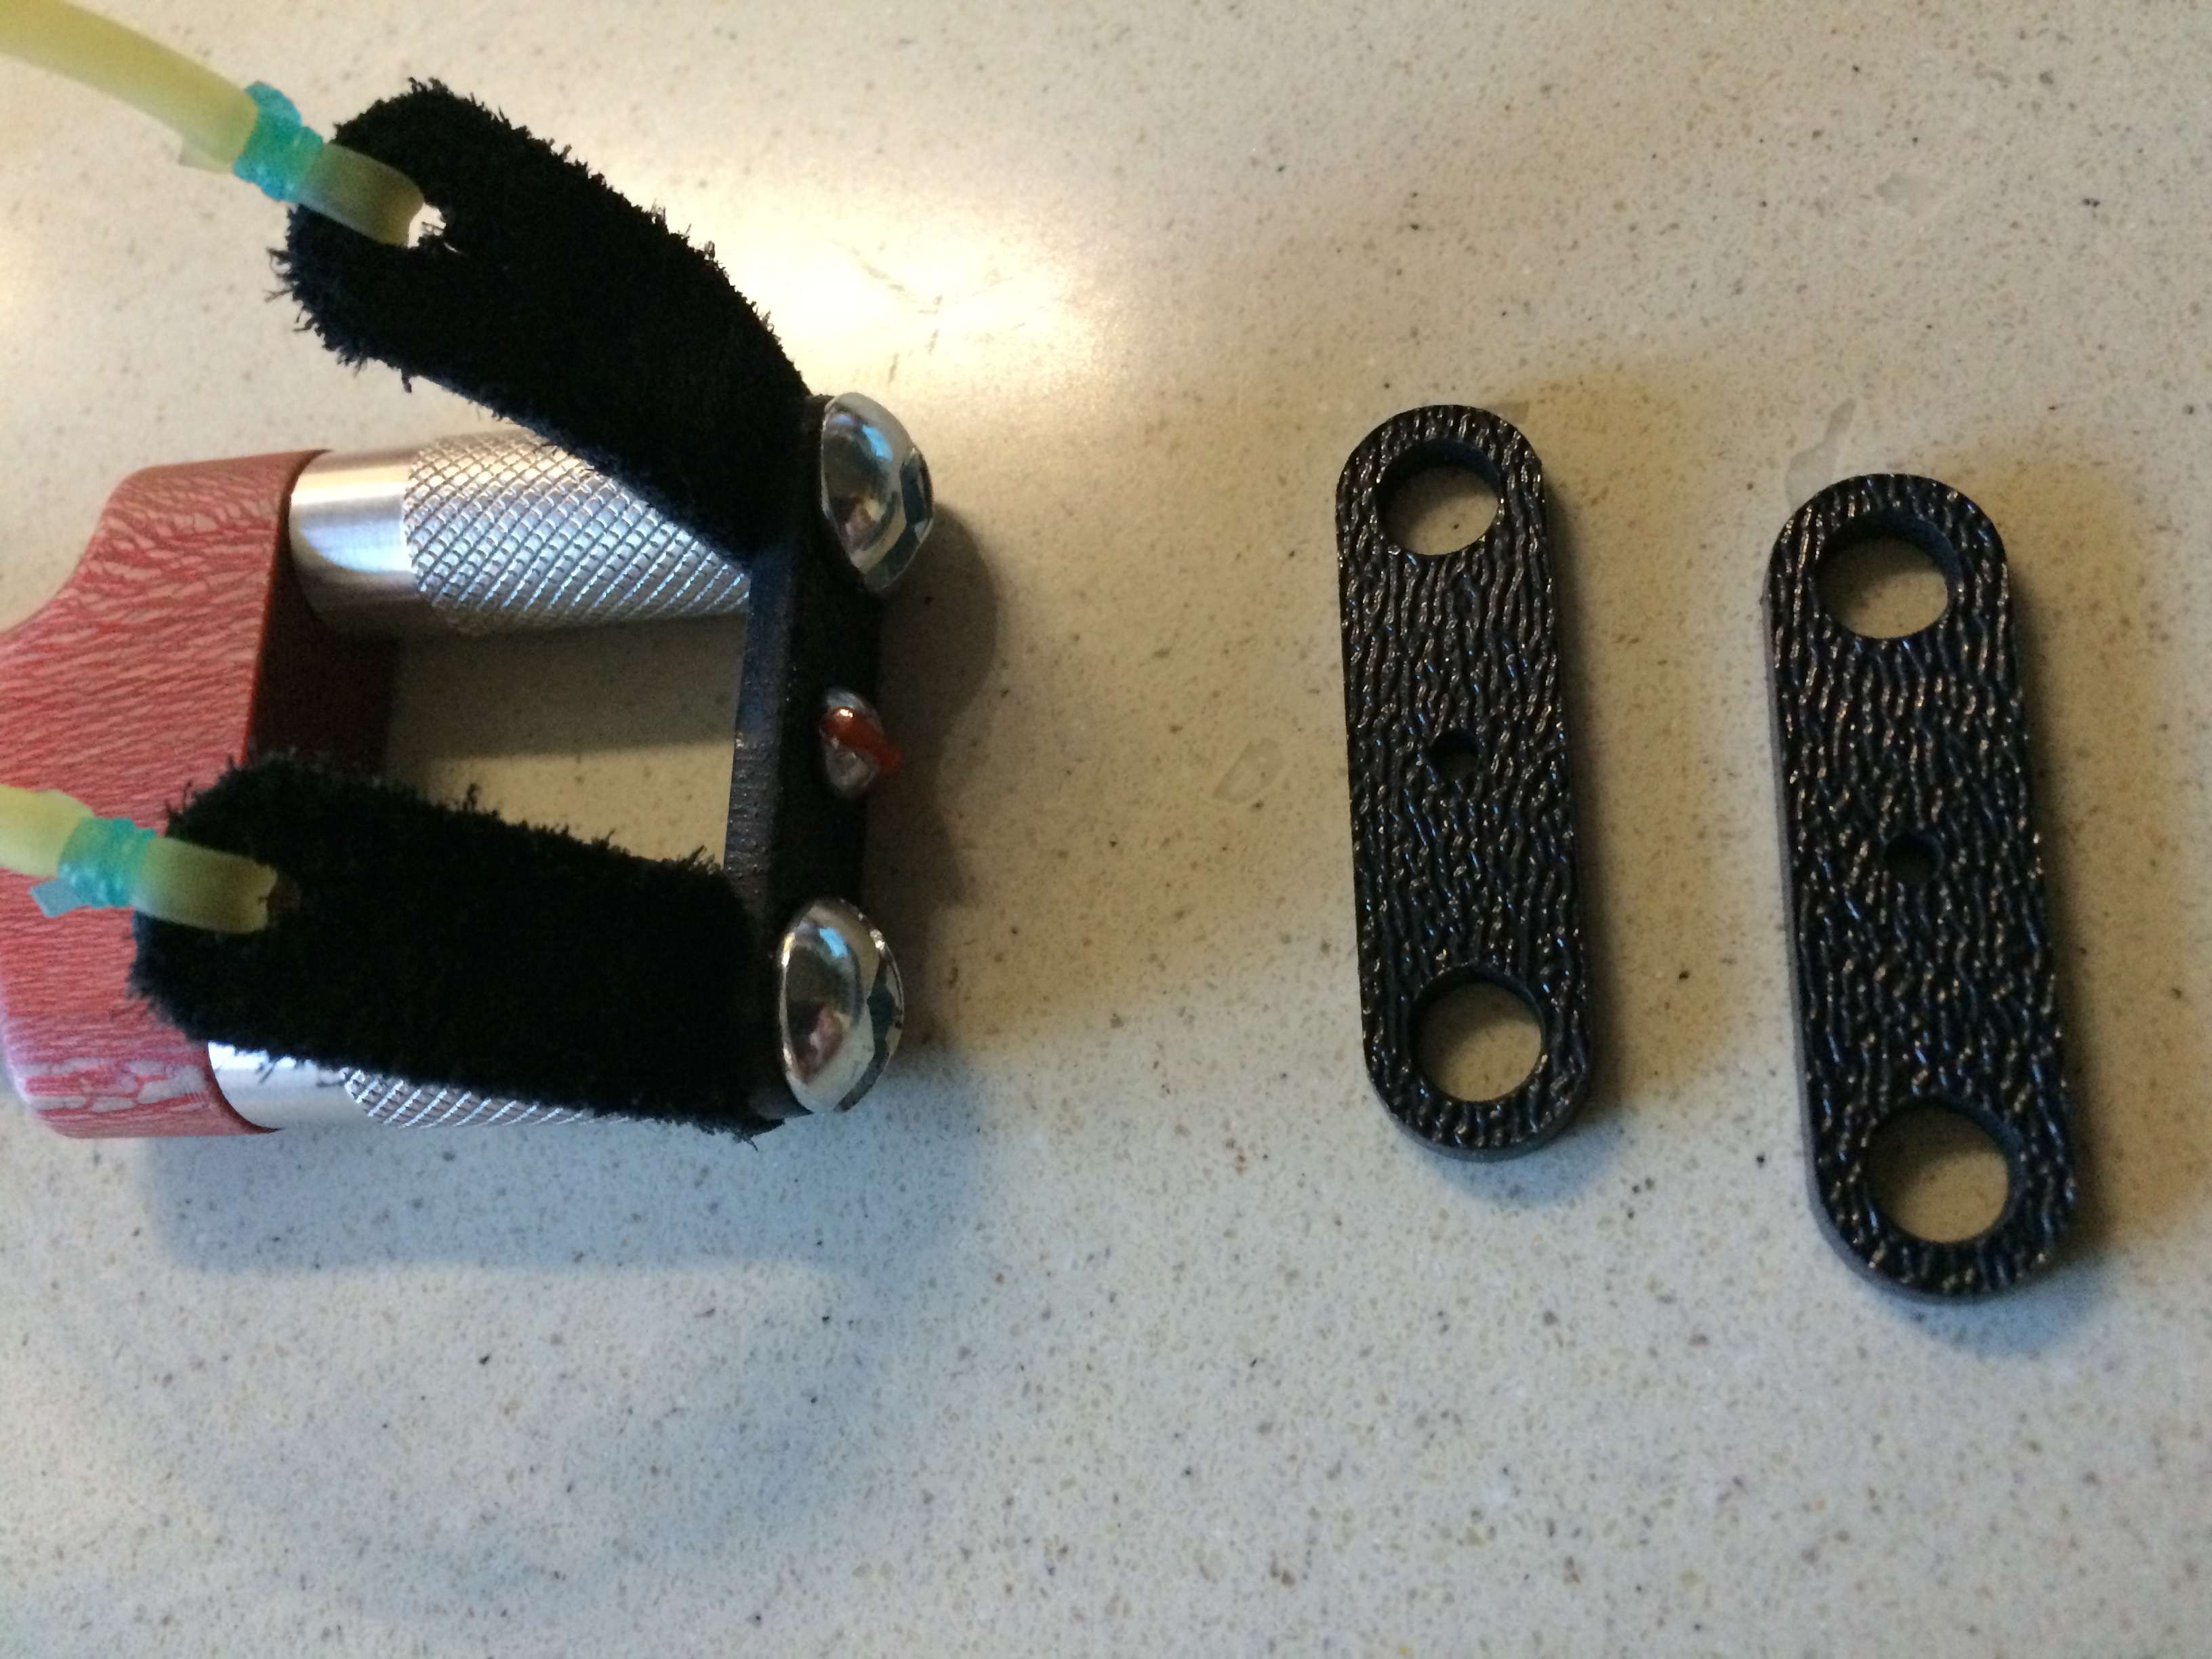
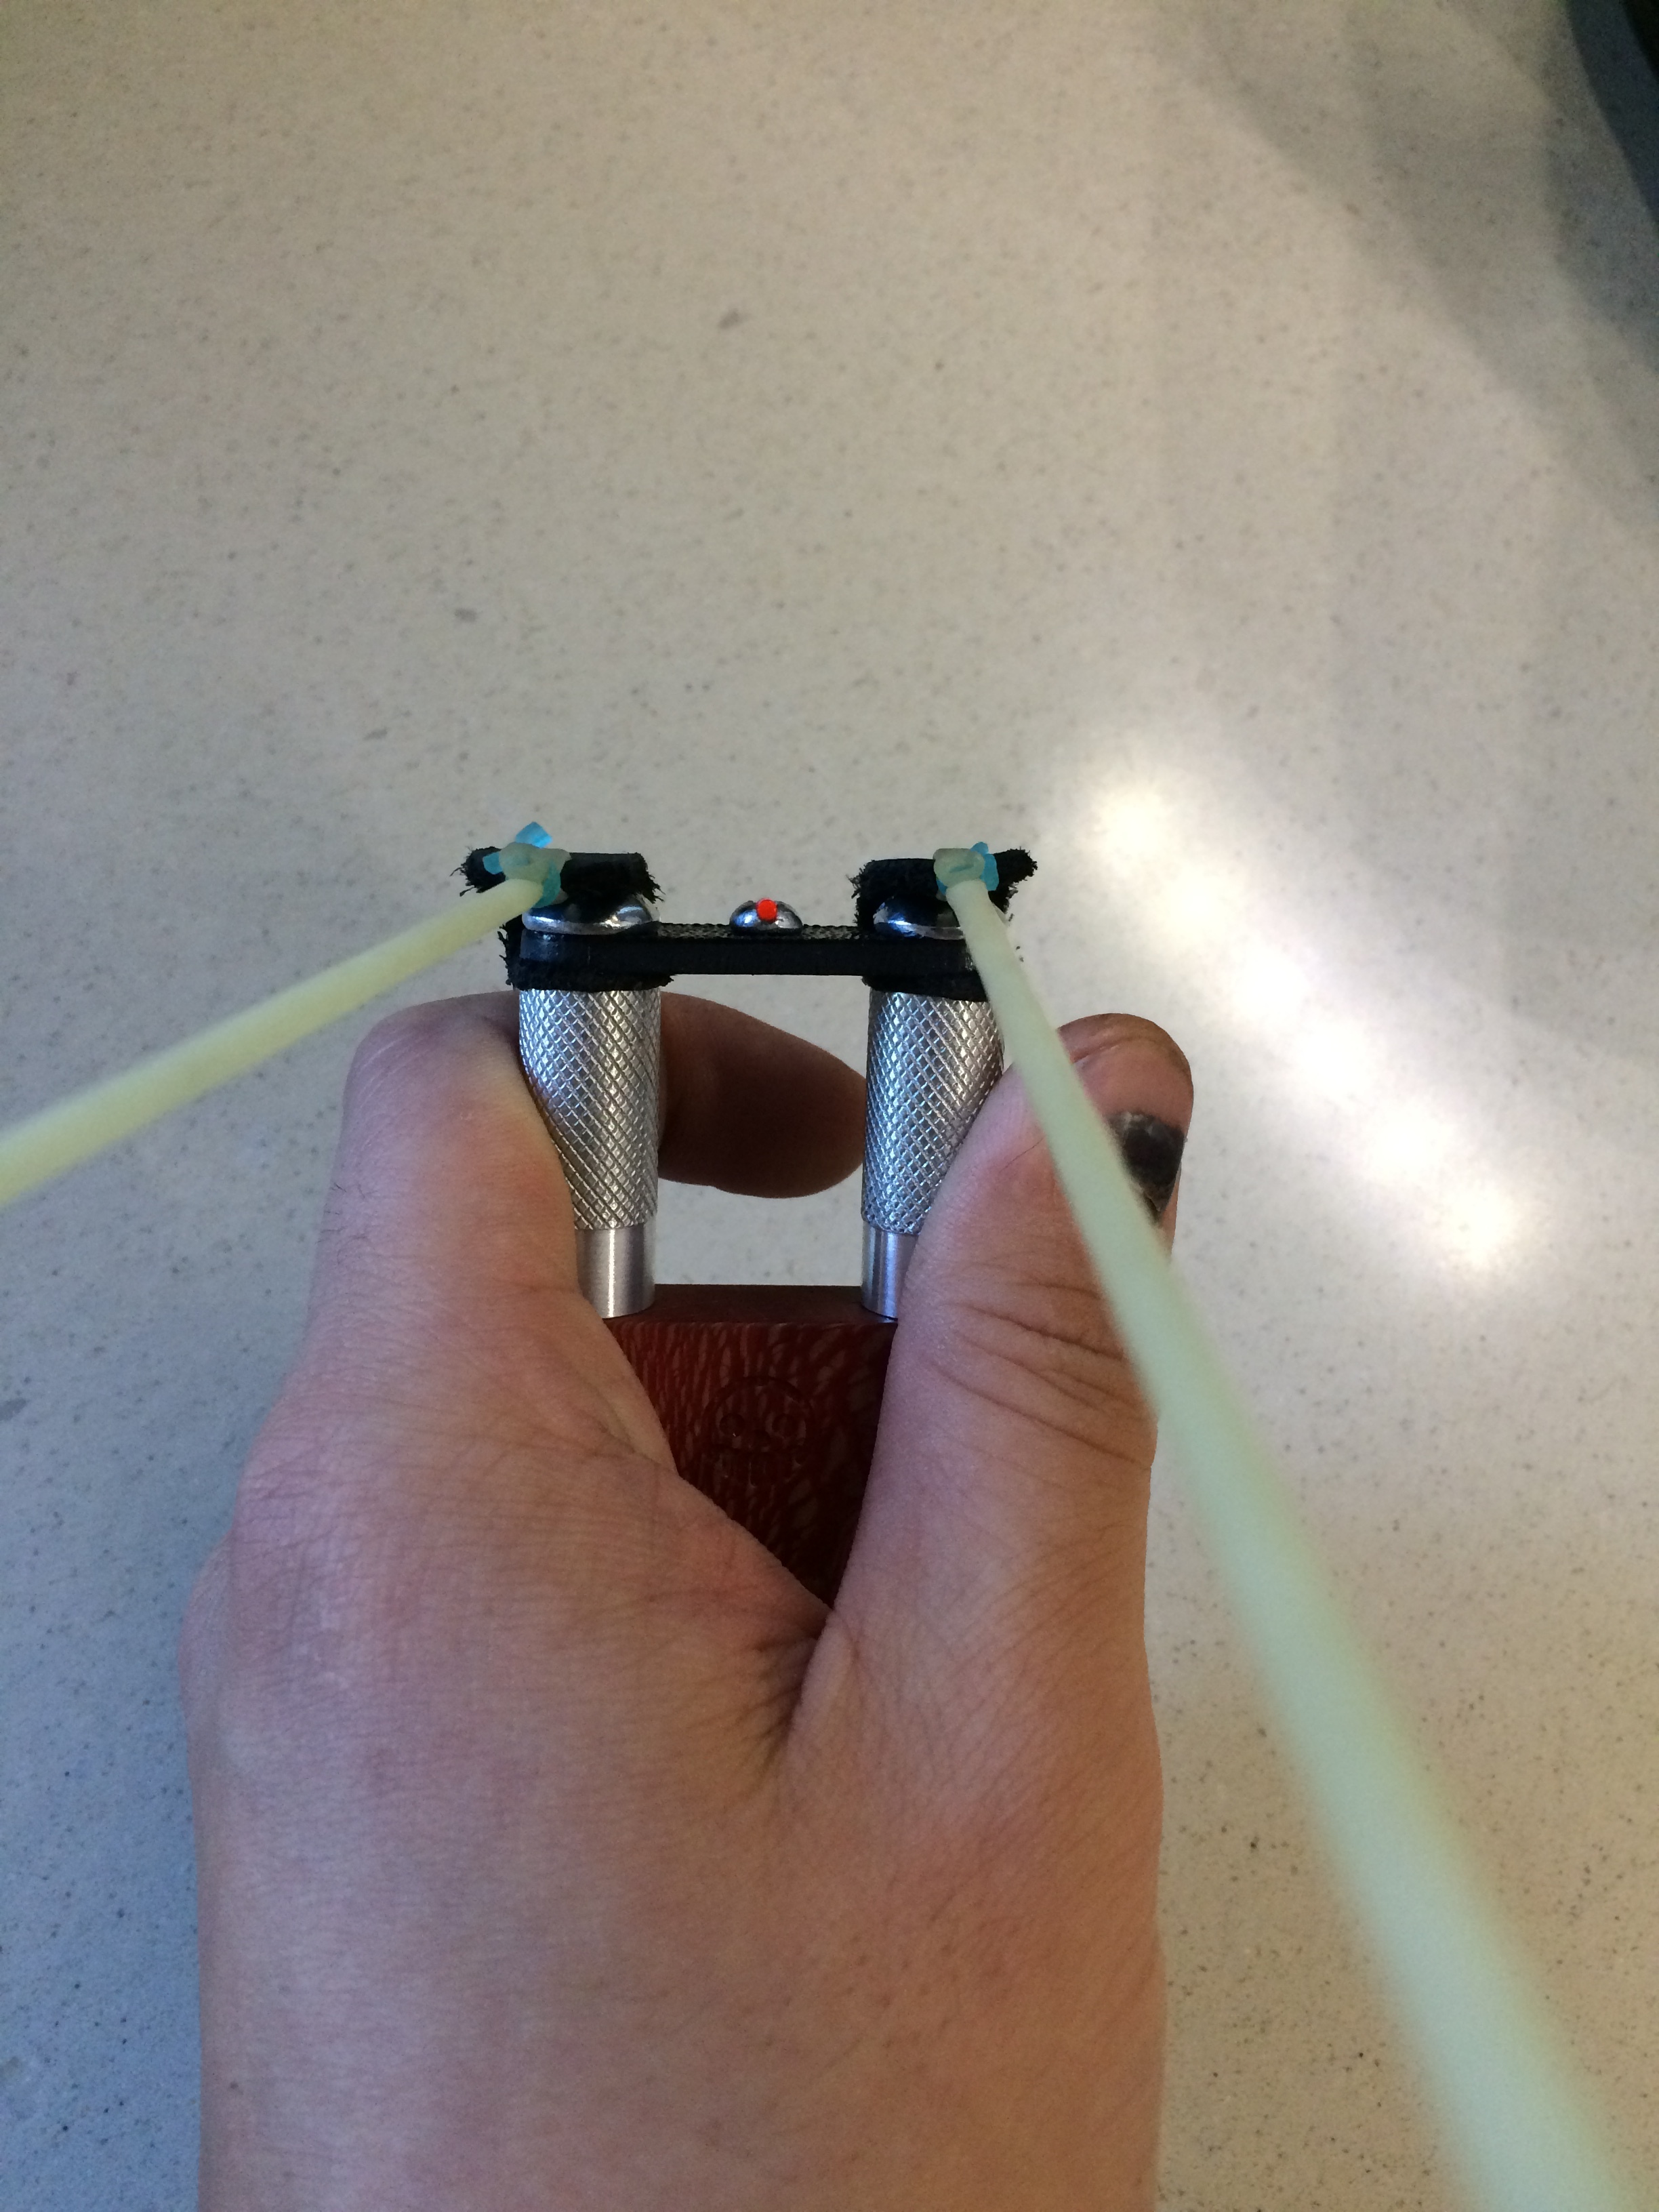
I wanted taller posts than the one in the video since my plan was to attach these onto the wood from underneath and have the leather tab bolts, independent to the post. These ended up being about 1.25″ long with a 1/4-20 thread on the top tip and 10-24 threads on the handle attachment side. I also knurled the top of the tips so there would be a little bit of grip, it also added a bit of a cool look to the final product
Once I had the posts all sussed out, it was time to machine the sycamore. This was pretty easy, as previously mentioned, the stabilized sycamore’s resin content really smoothed out the cutting. The handle was made into a paint brush shape and in the shoulders two holes to attach the posts were made. The holes where counter sunk on the underside to recess the 10-24 screw heads.
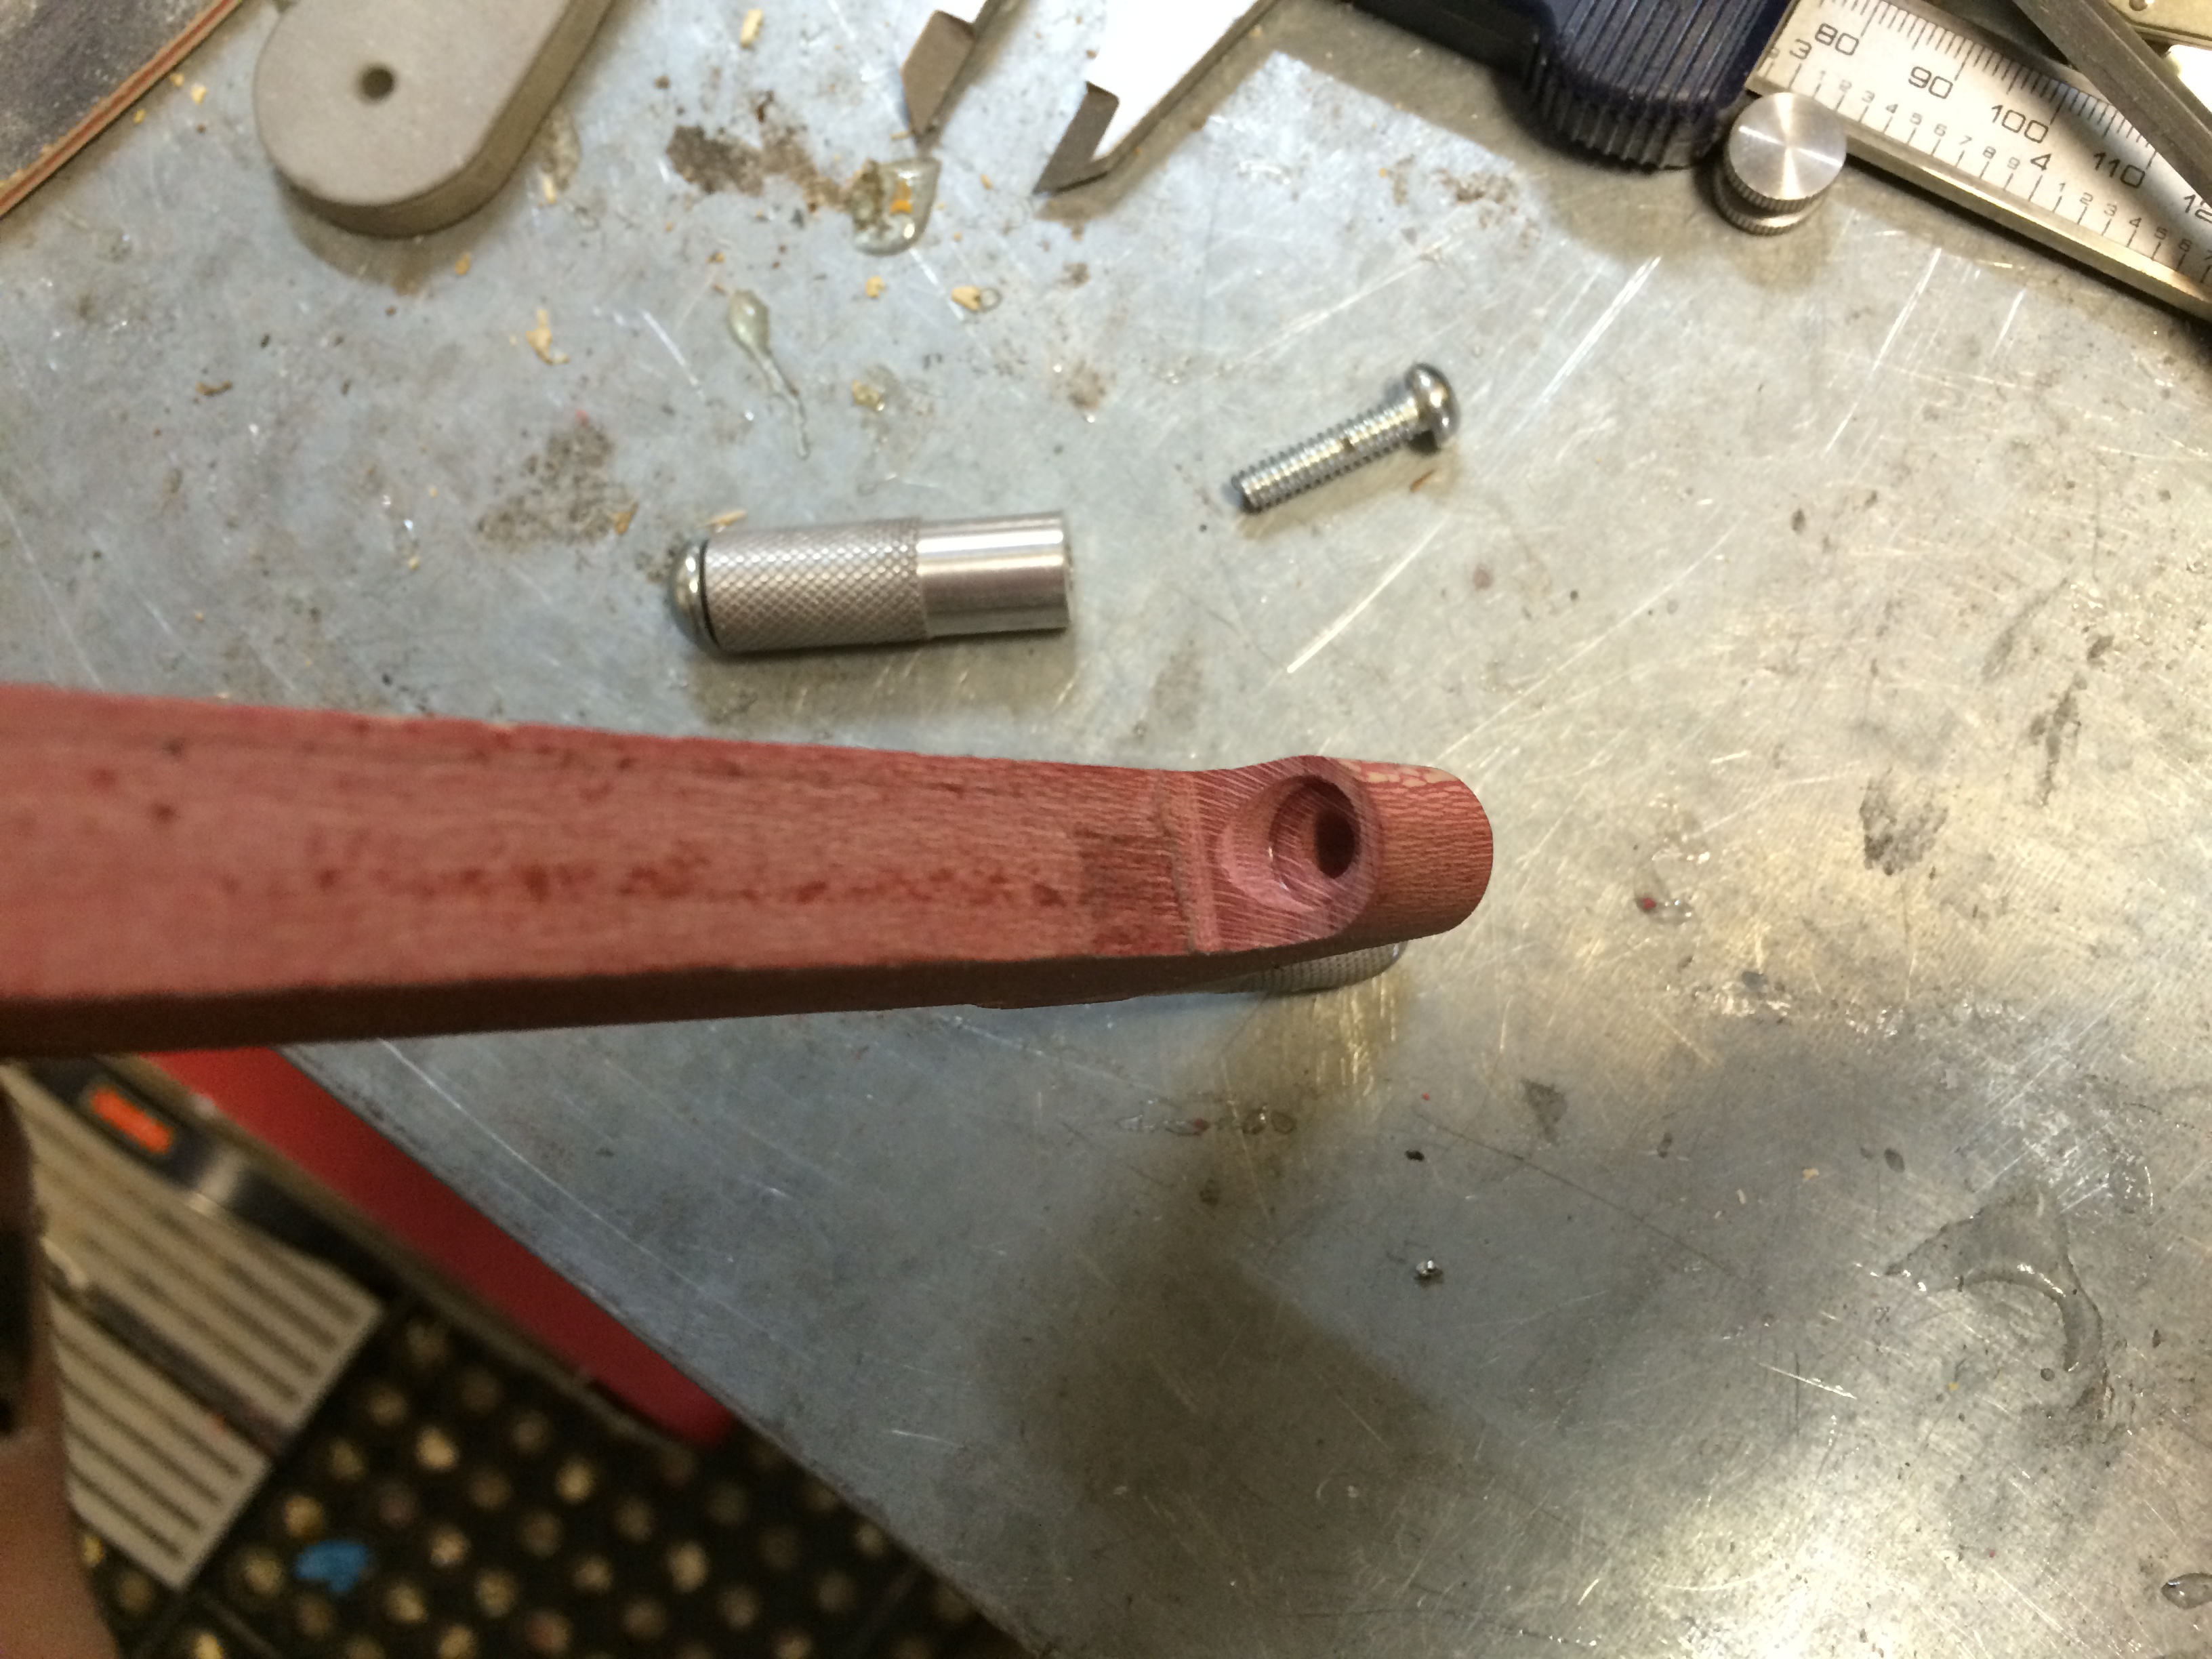
After the initial fitting, the edges of the skinny handle were rounded into a generous radius. This provided comfort and a cool reveal of the sycamore’s neat grain structure.
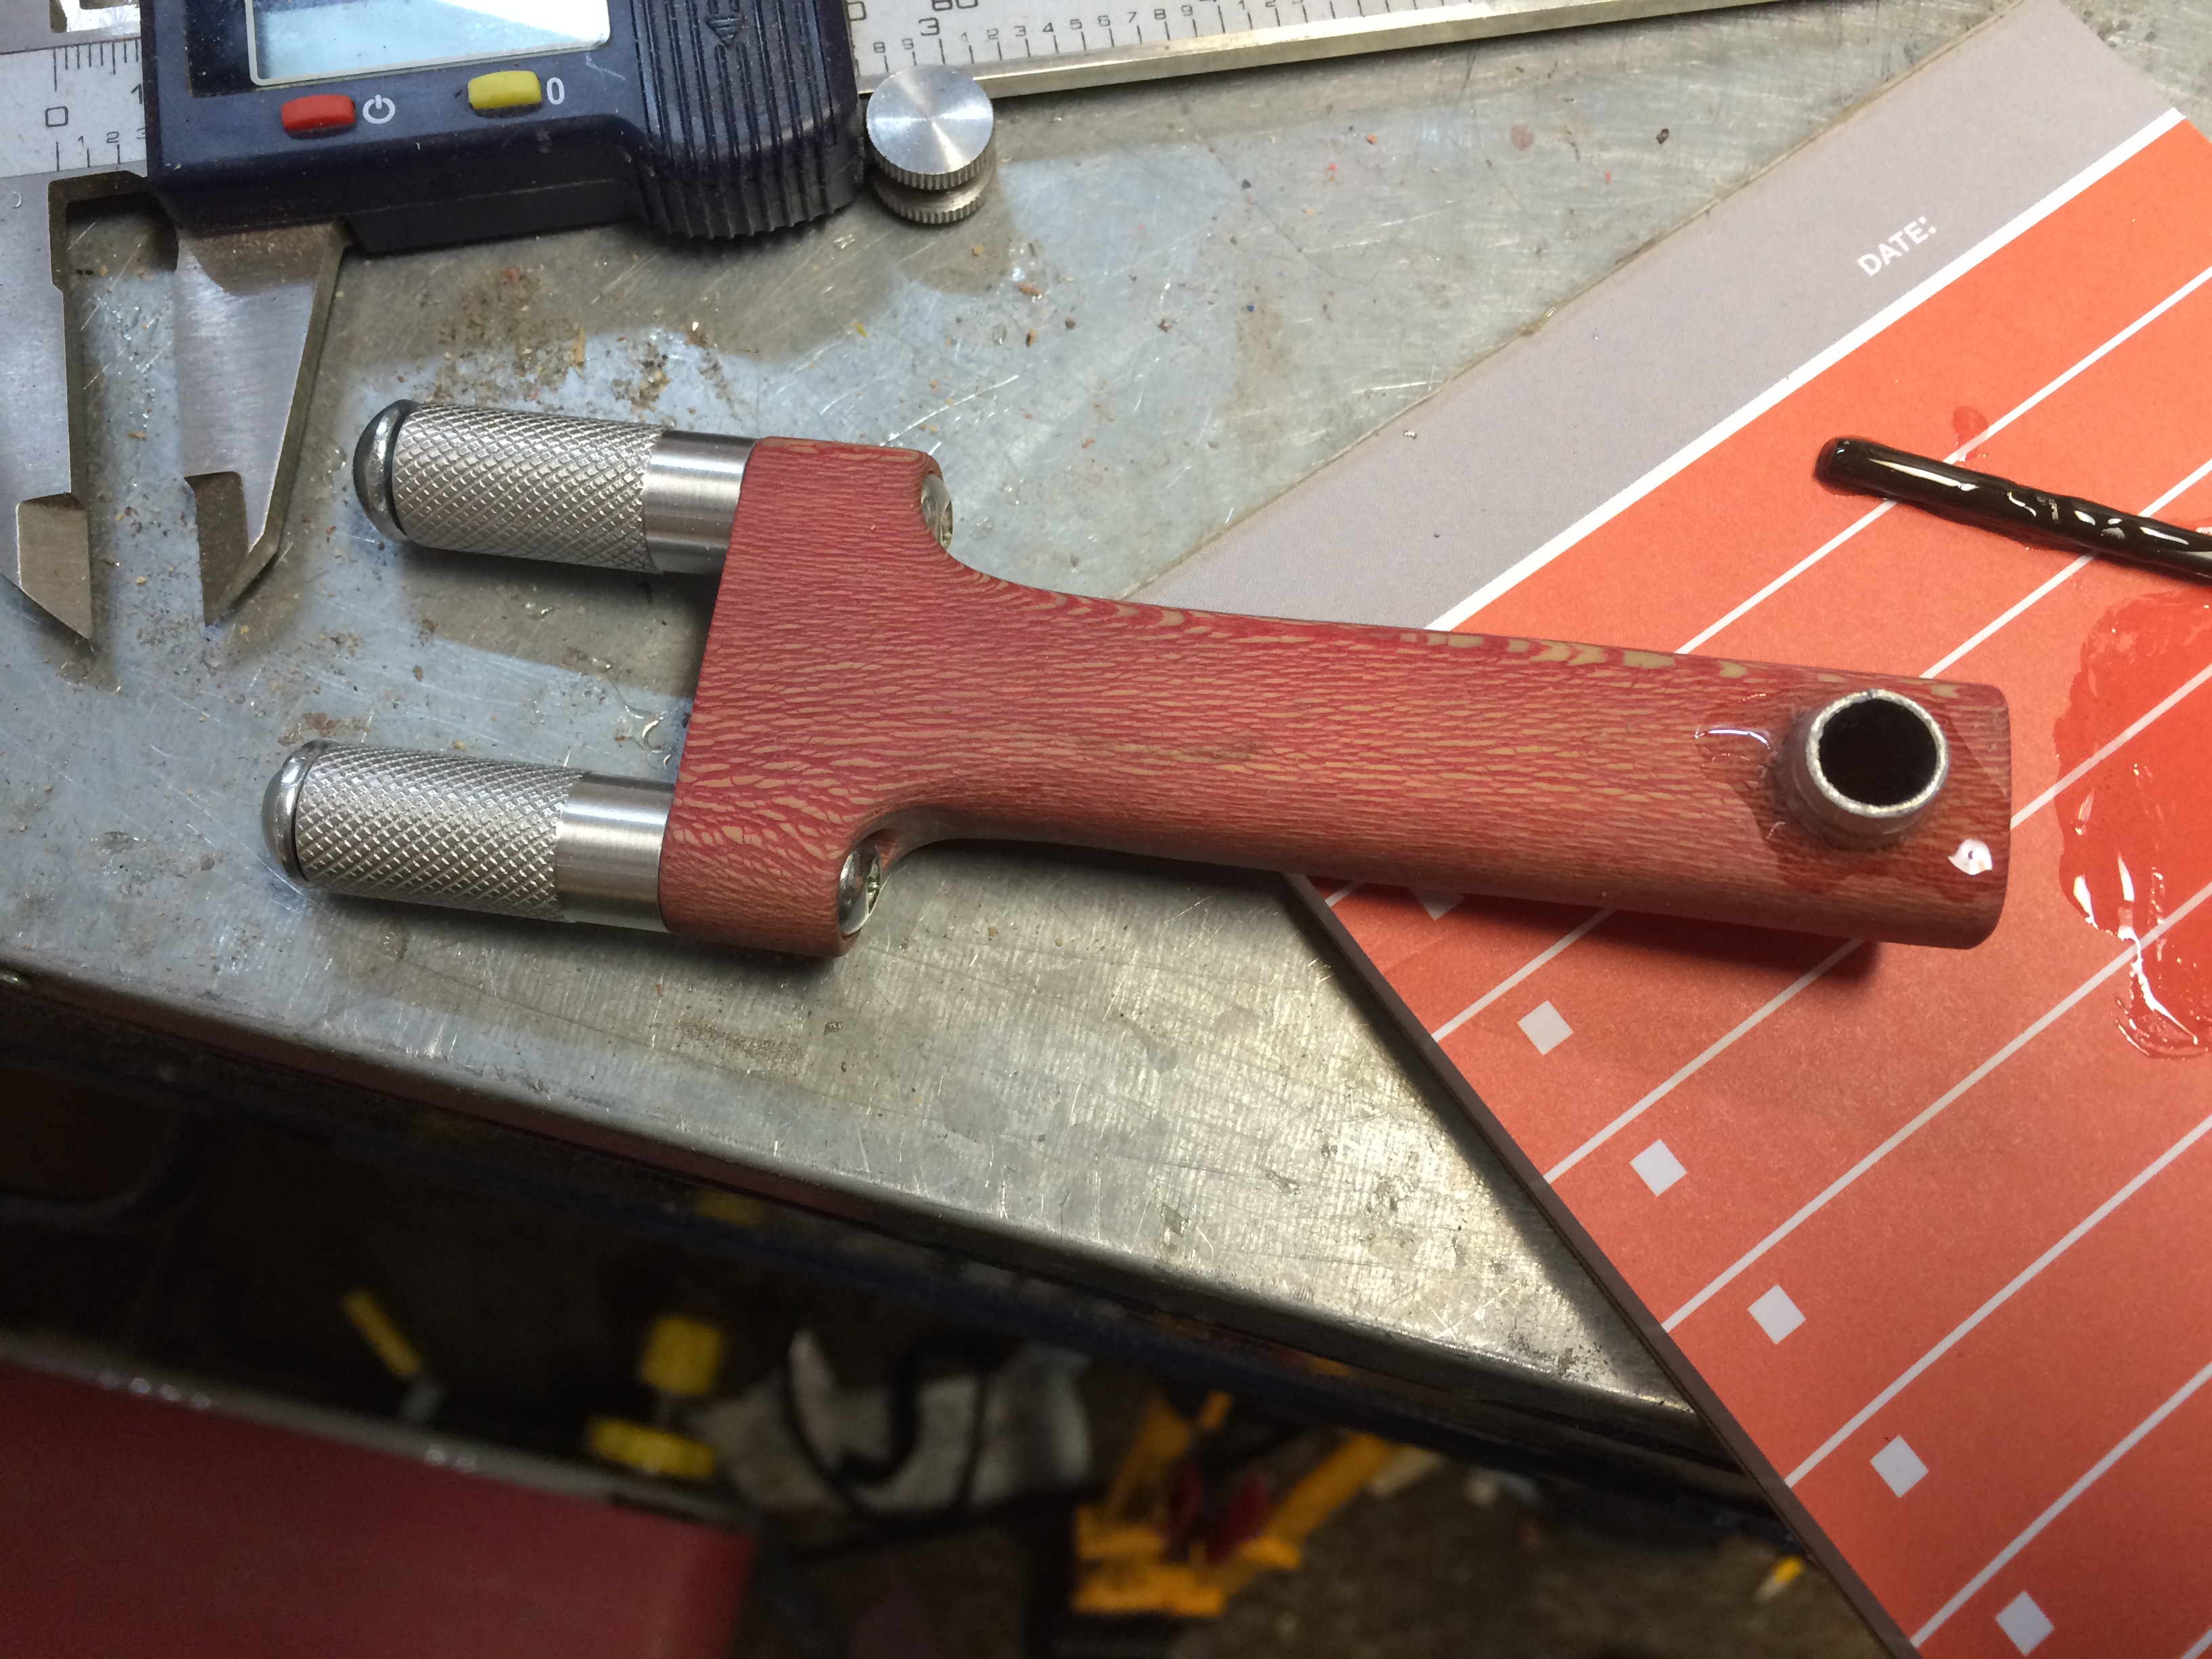
After rounding, there was an element missing from the handle’s base so I added a 1/2″ aluminum tube to serve as a lanyard hole should I choose to add one. This again brought another element of machine aesthetic to an already machined product.

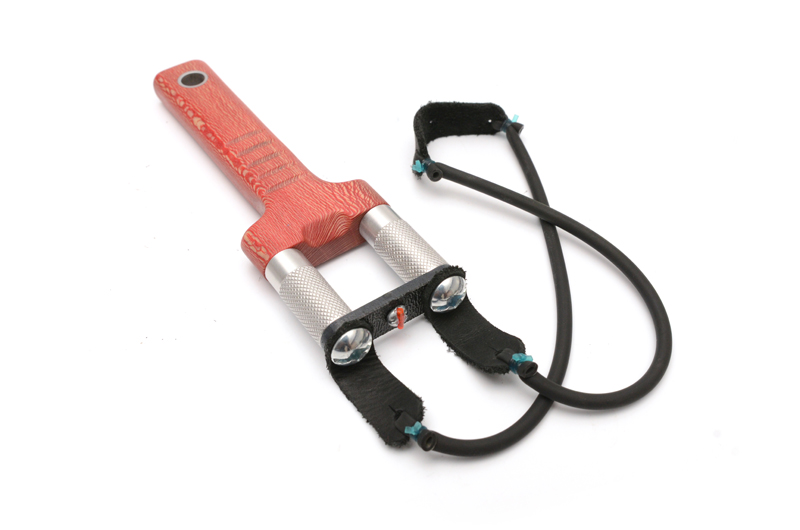
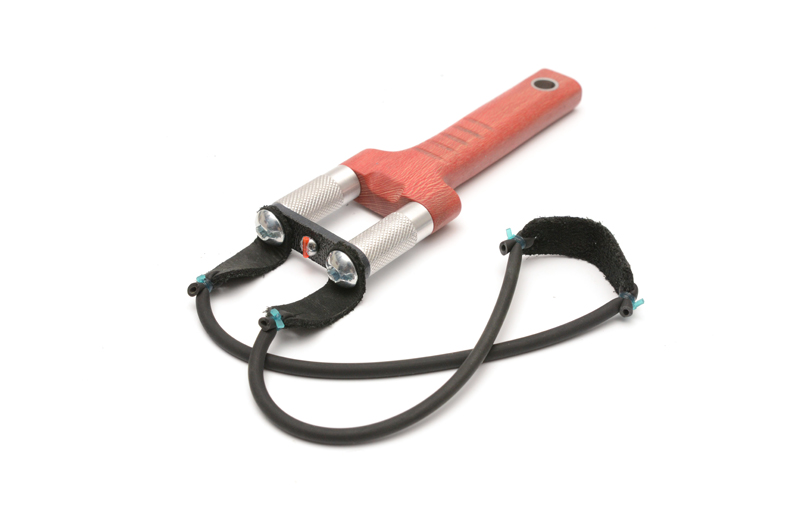
At this point the Taser was done, serviceable as a target destroying tool. The last thing to add was the sight bridge, like the one in the video. It’s an added feature that if it didn’t serve the slingshot well, it could be removed. To achieve this bridge, I turned to another machine; the laser cutter. I chose to cut 1/8″ ABS, since ABS is more shock and impact resistant to other plastics that can be laser cut. Acrylic would shatter and polycarbonate cannot be laser cut. ABS’s soft structure gives when struck, which is good since I needed to tap a small 6/32 bolt into the top.
This pan head bolt’s groove was slotted with a file to accept a 1/32″ acrylic rod which, when hit with sunlight, will glow red. This served as a compound bow style sight pin. This worked very well in both concept and action, however, my preference in the end was to leave the sight bridge off.
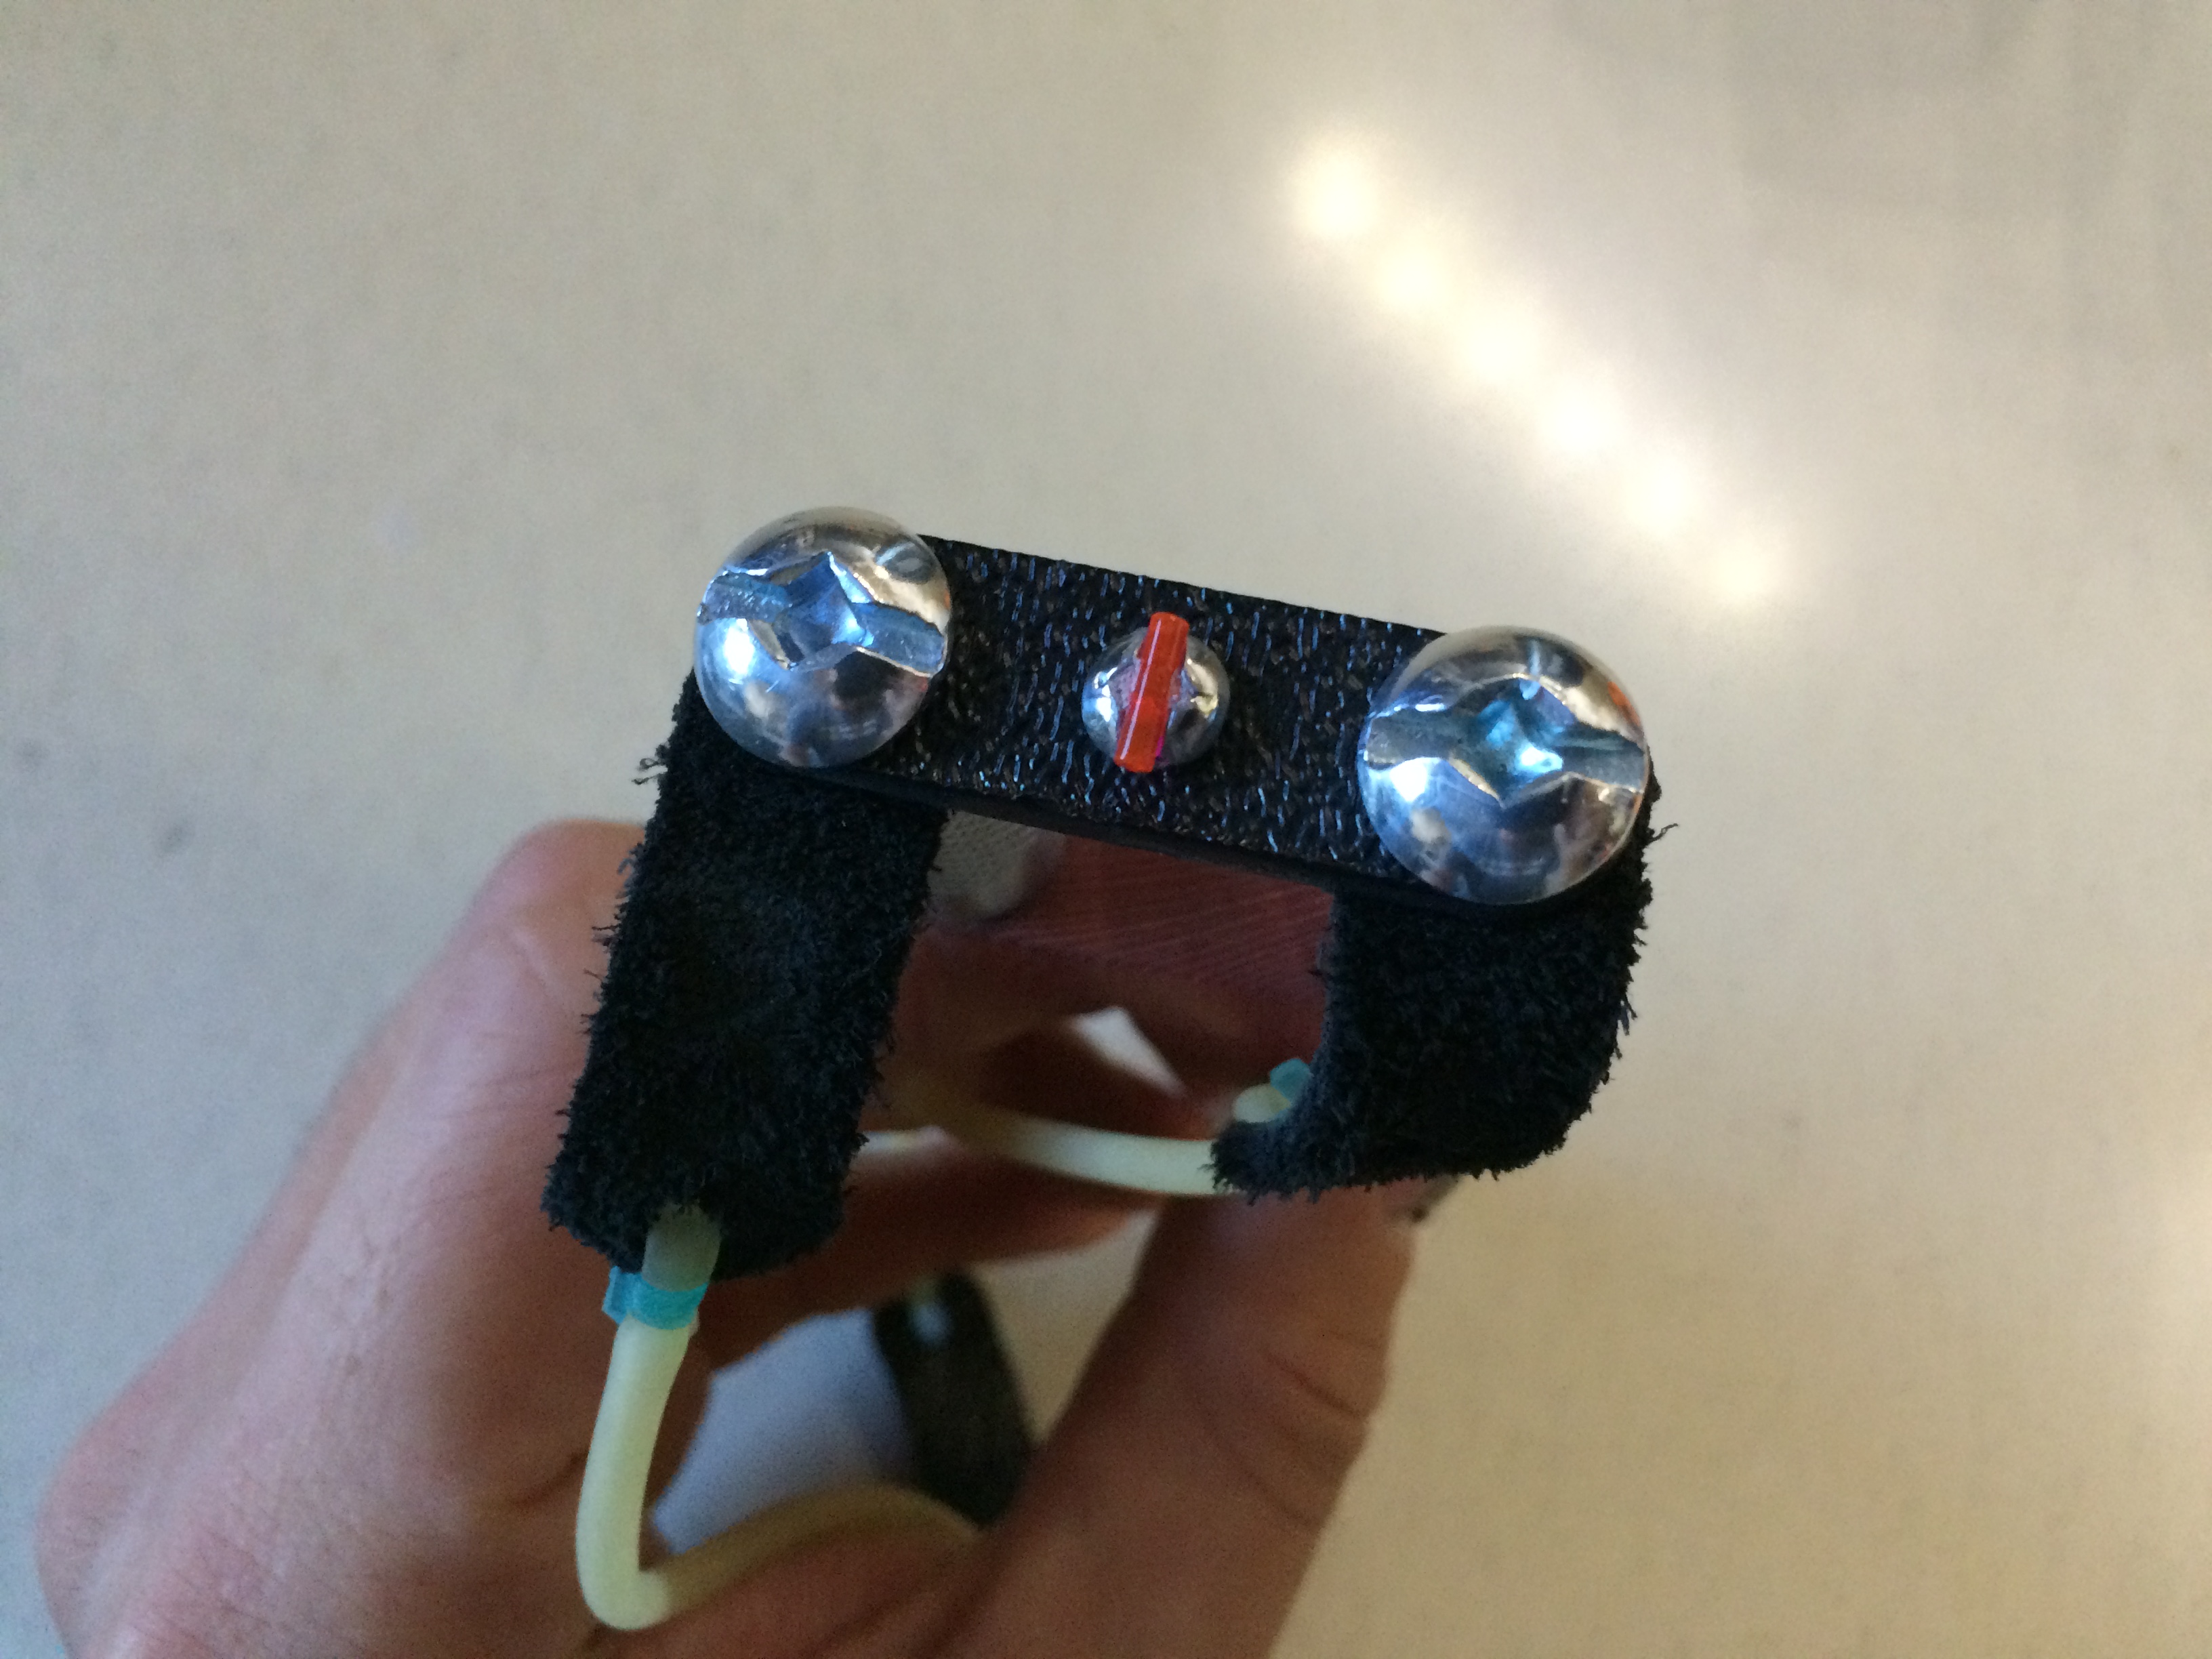
Here’s a pic of how the sight pin looks like with some light shining on it. The coolest thing about attaching tabs under compression like this is you can shoot with the tabs rolled OVER the tips like at true OTT (Over-the-top) configuration when shooting this frame sideways, or you can pull the tabs straight back and have it like an upright PFS (pickle-fork-shooter).
Both are fun to shoot and in the end…isn’t it all about how fun it is?
After etching the Metro Grade skull into the surface of the sycamore, it was time to take some juicy archive photos:

Thanks for reading another Metro Made, I know you have a choice to read other blogs so thanks for stopping by!
Stay tuned for even more slingshot builds and Metro Made posts.