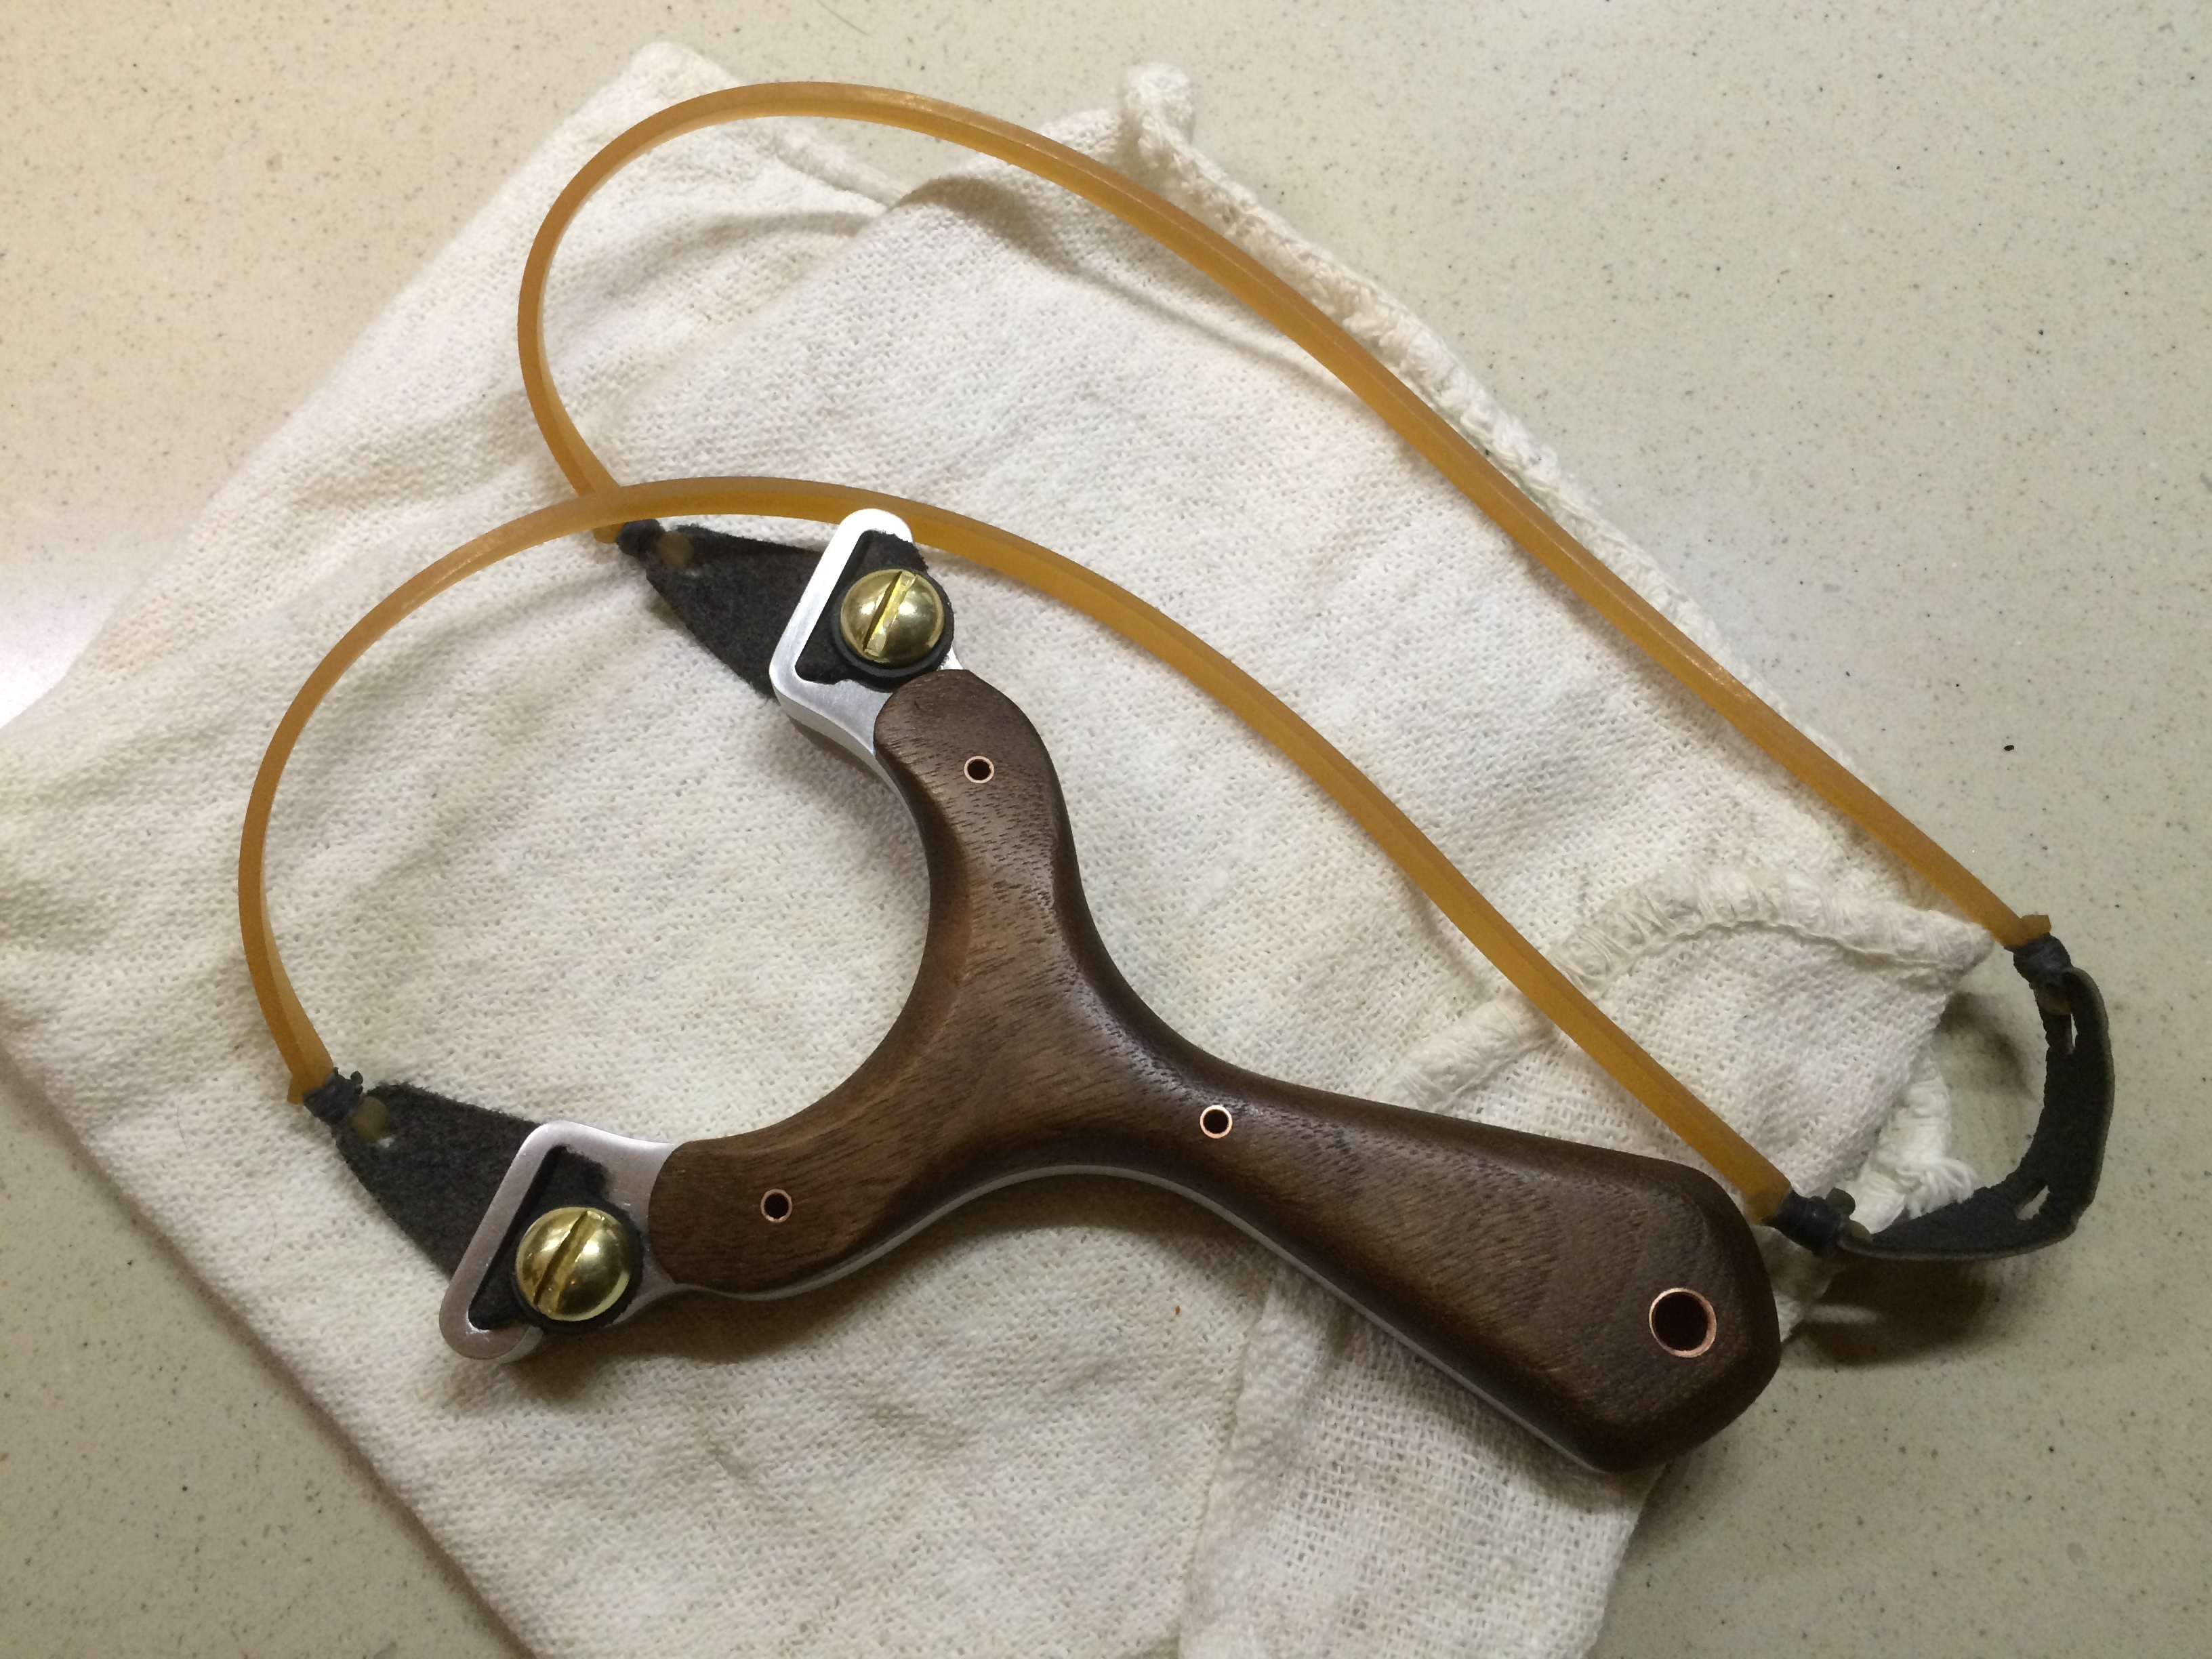
Fall is here, which means less time on the range and more time in the shop. This also means more Metro Made posts! In this instalment, we make a slingshot for Gaspar Arcón, one of Spain’s top slingshot target shooters. Not only is he deadly with 8mm steel balls, he’s also a super nice guy and also friendly on Facebook.
We been chatting back and forth for the last little while and we decided to work on a trade. Gaspar lives in the heart of Spain where Olive trees grow naturally, free for the picking. He often goes out and collects forks from these trees, the wood being a very dense, very figured and shapeable material, perfect for slingshots. A couple of months ago, he sent me a box full of goodies including a huge thick fork for carving and several smaller forks for standalone slings.
Here is the Metro Trade report I did on it:
This Metro Made is my end of the bargain, grab a cup of coffee, this is an exact play by play of the whole process, start to finish.
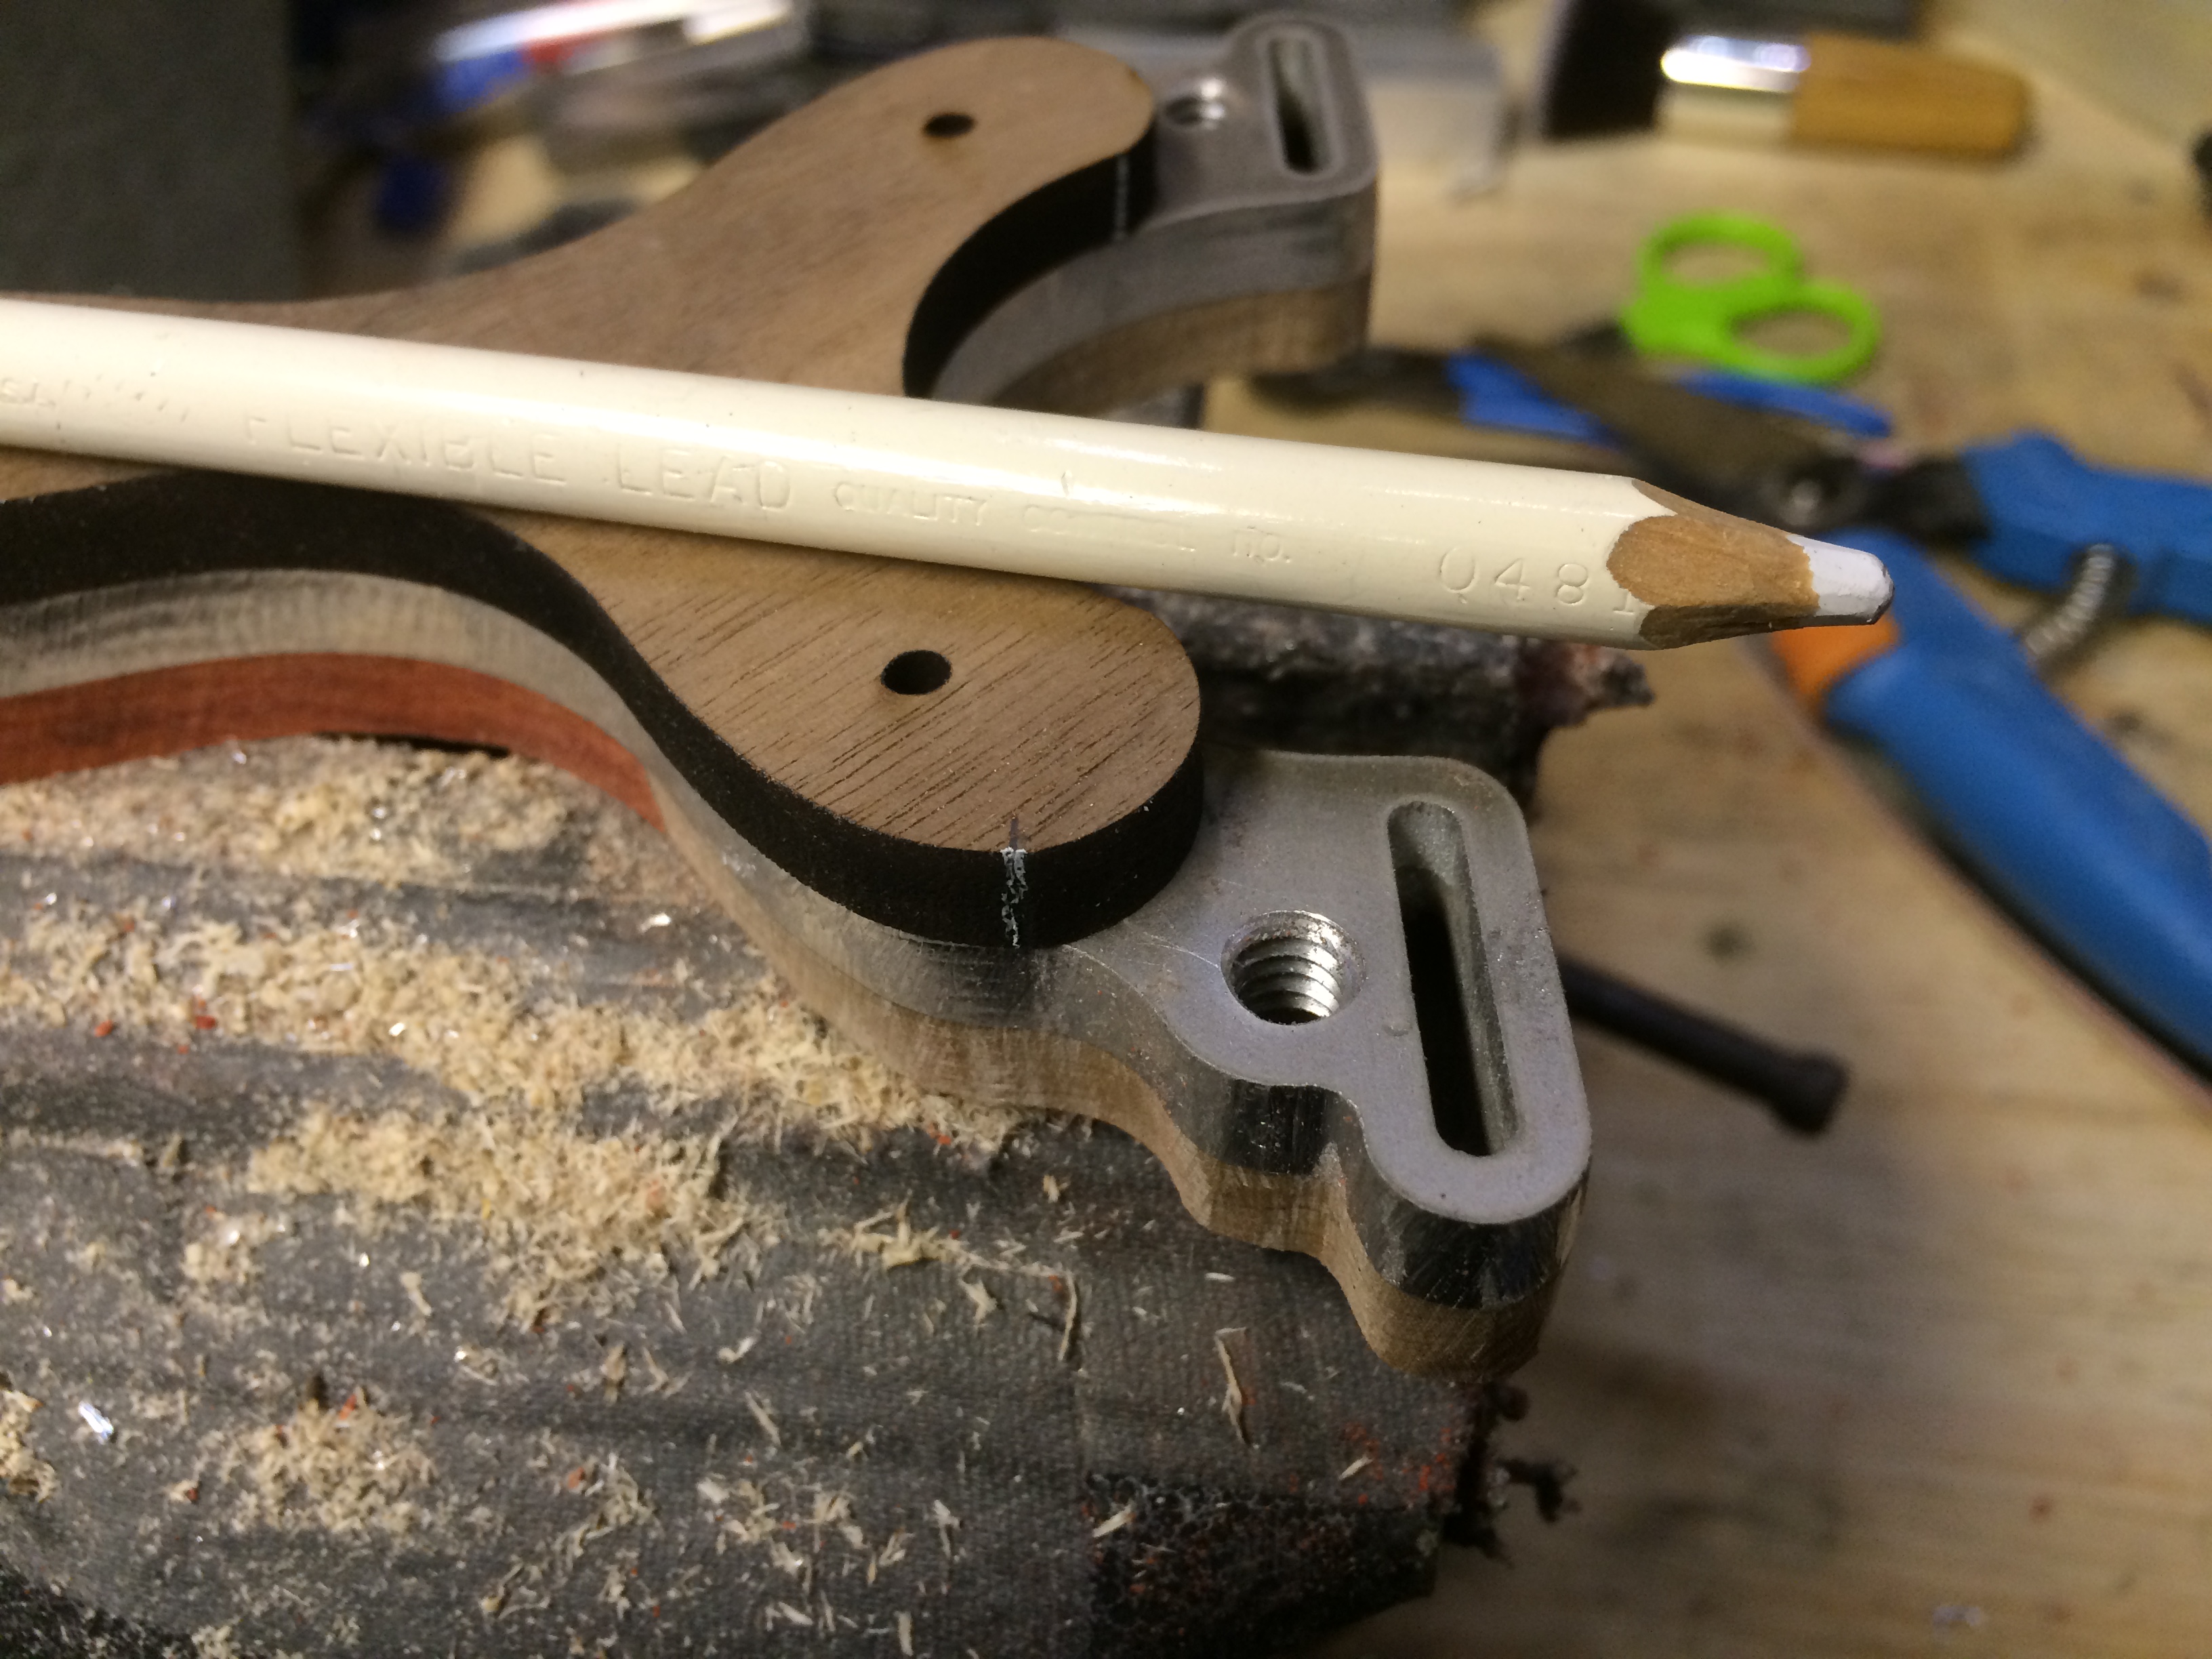
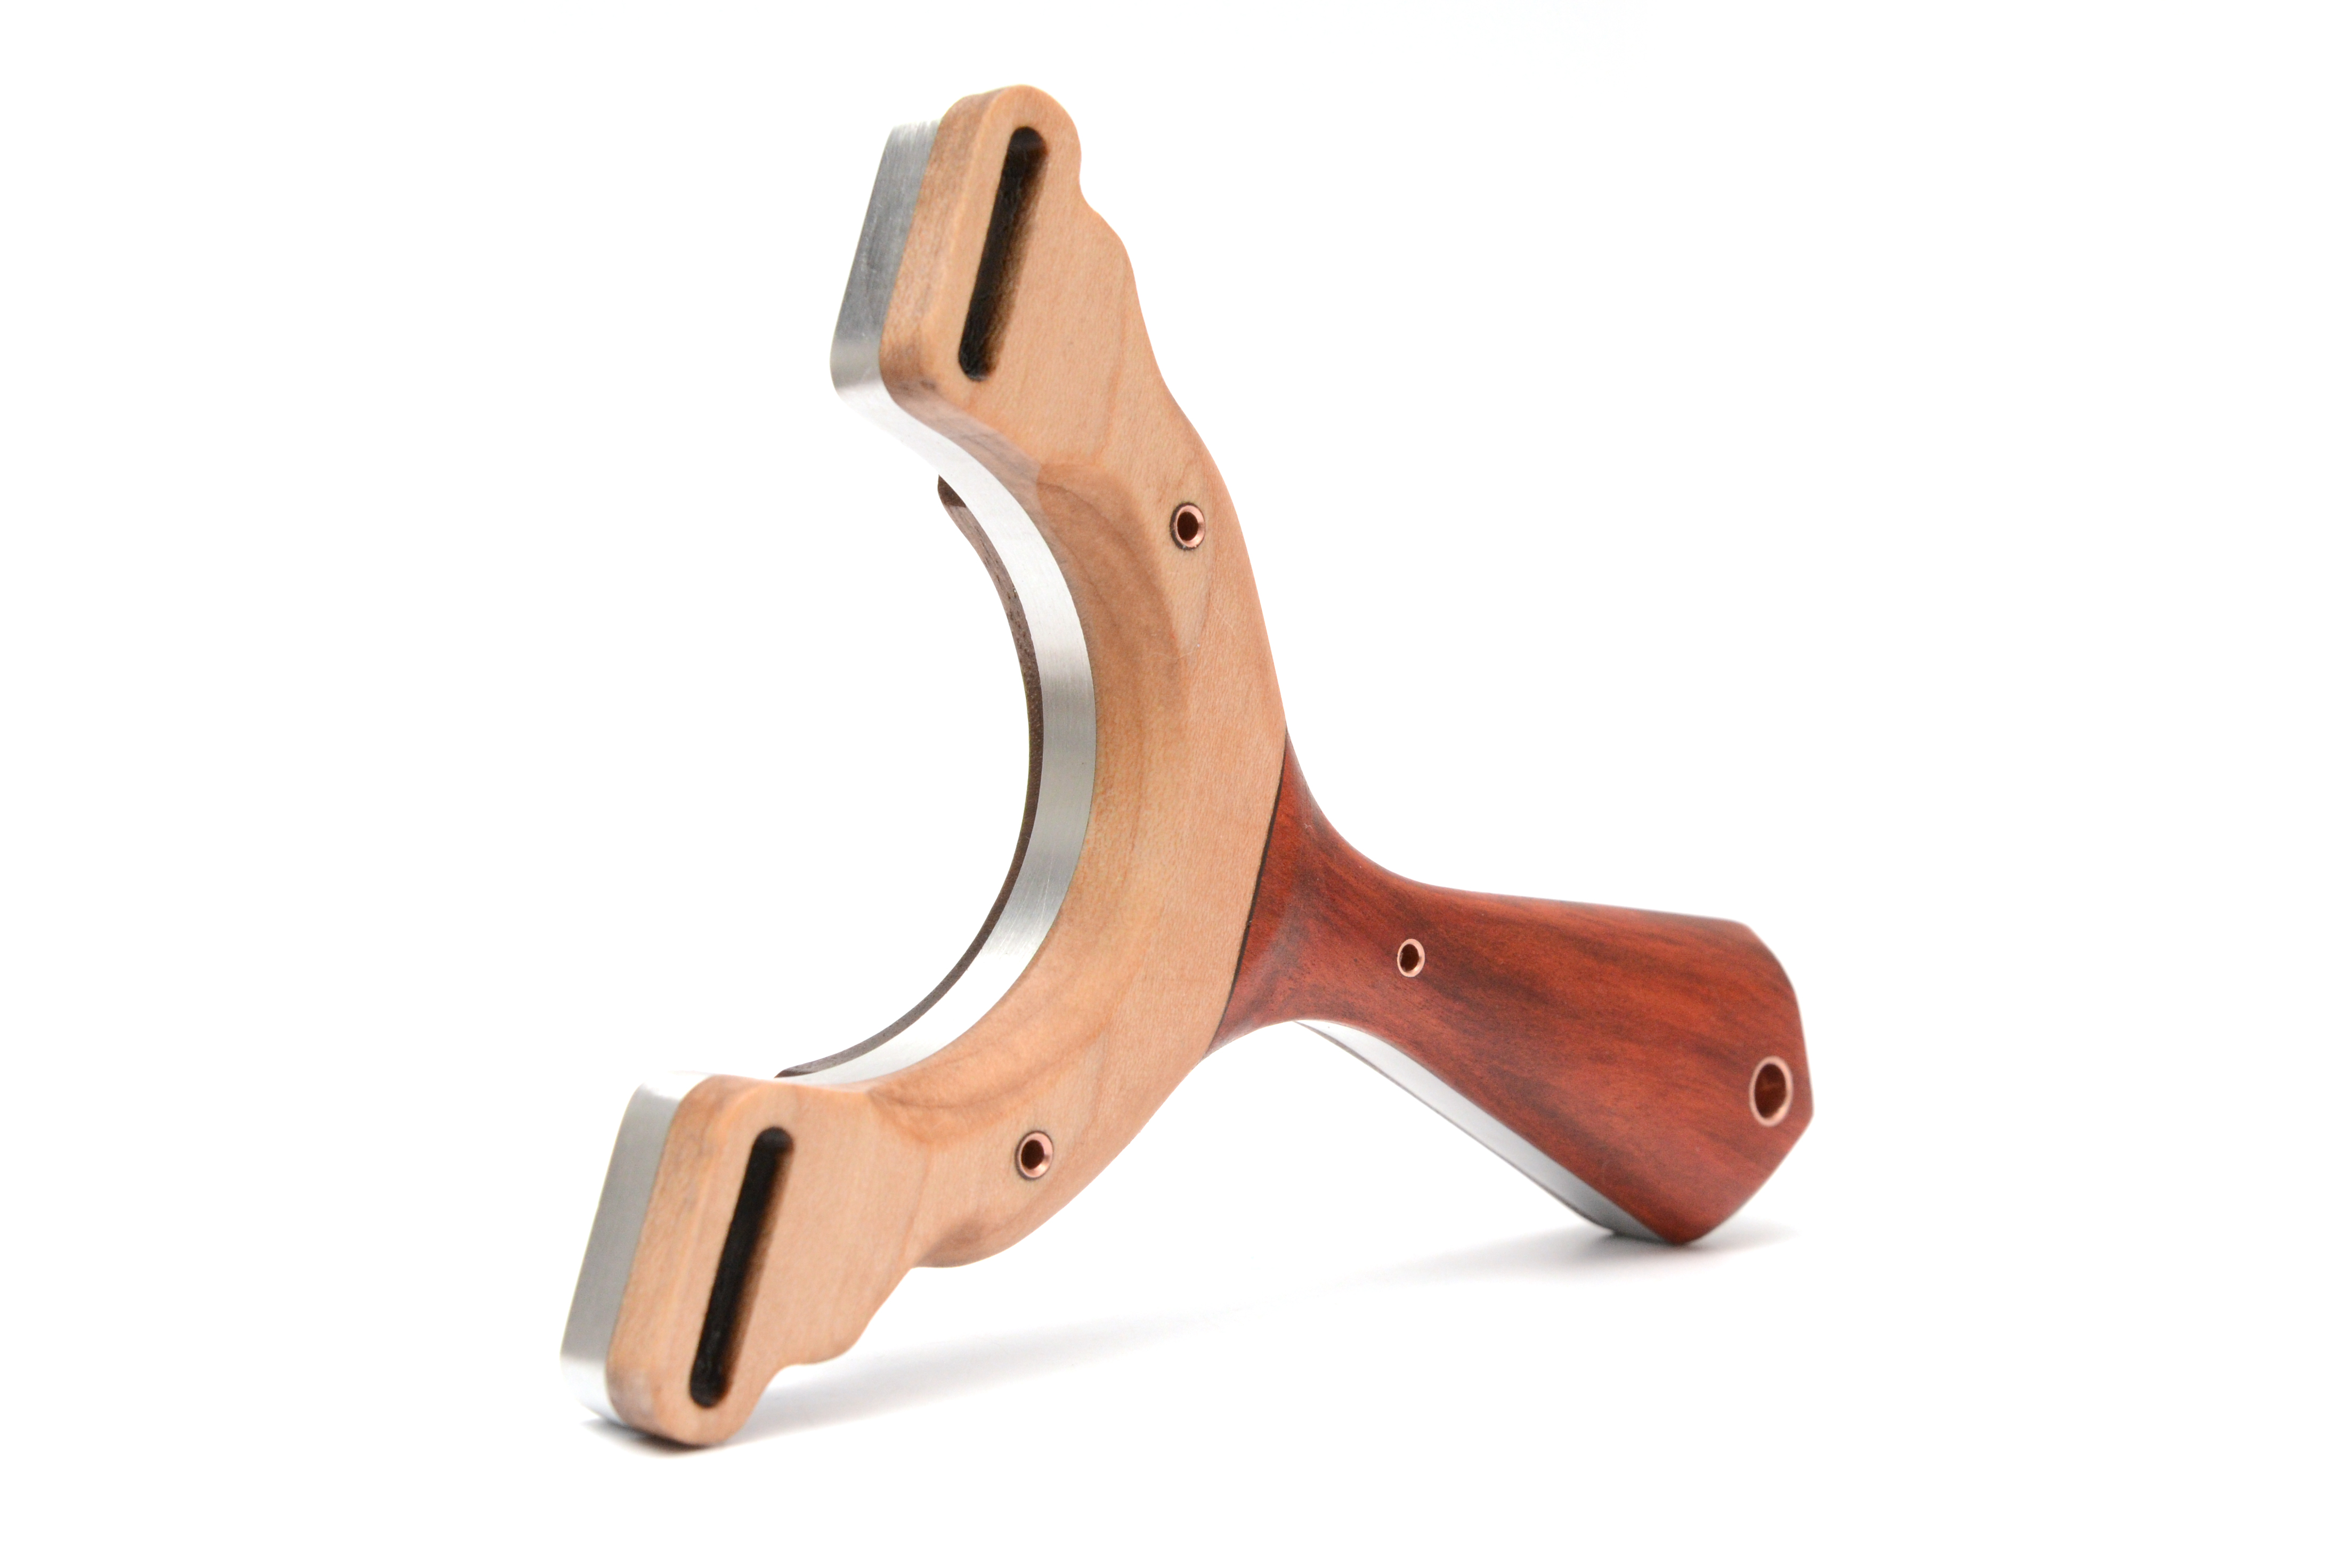
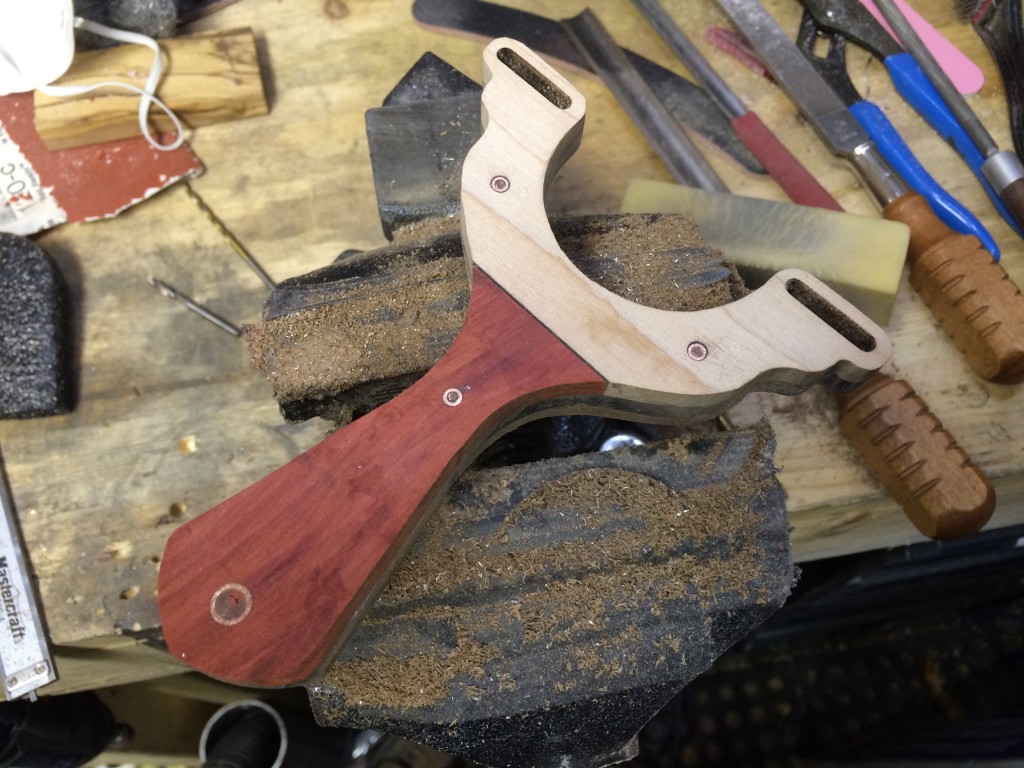
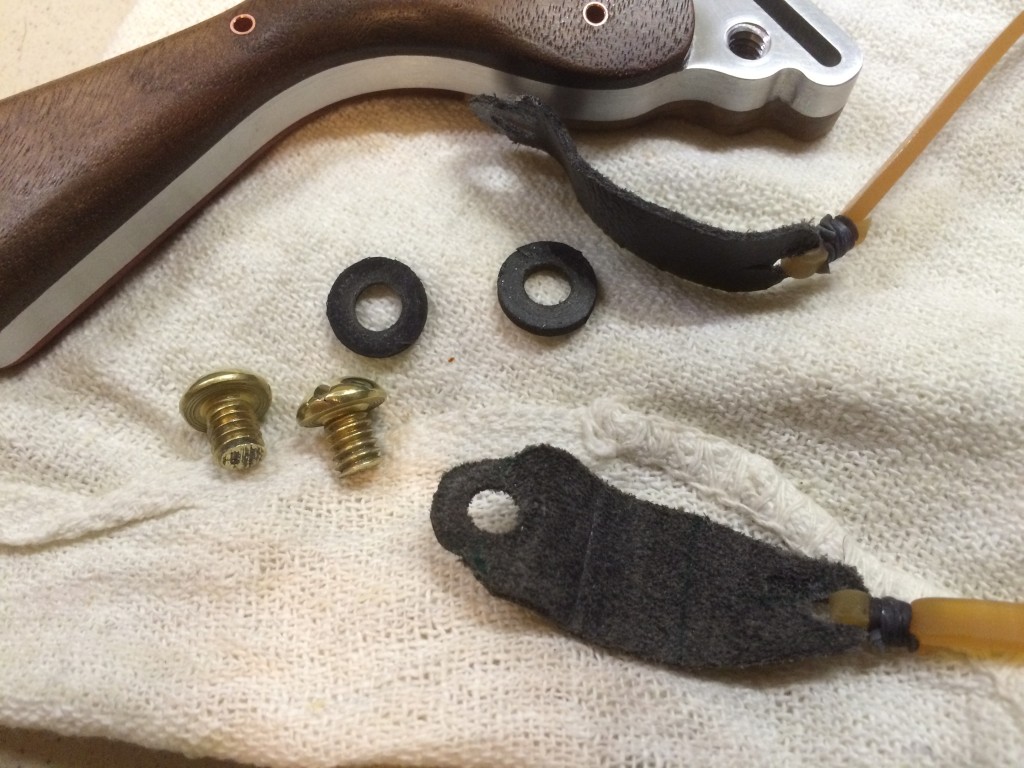
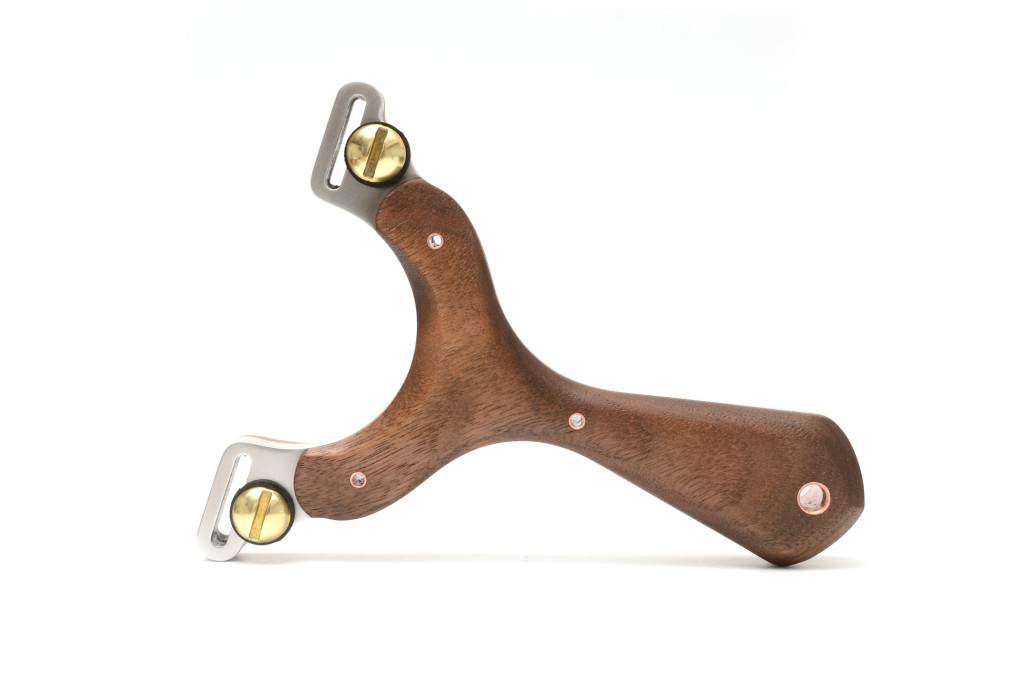
I started off asking how large Gaspar’s hands were. After knowing how far his grip was, it was time to map out where his fingers would lay and incorporate leather tab band attachments commonly found on Spanish style slingshots. On a previous, top secret project, I developed a slot system for the leather tab that would attach with a screw on to the frame. I used that design on this Spanish Knight.

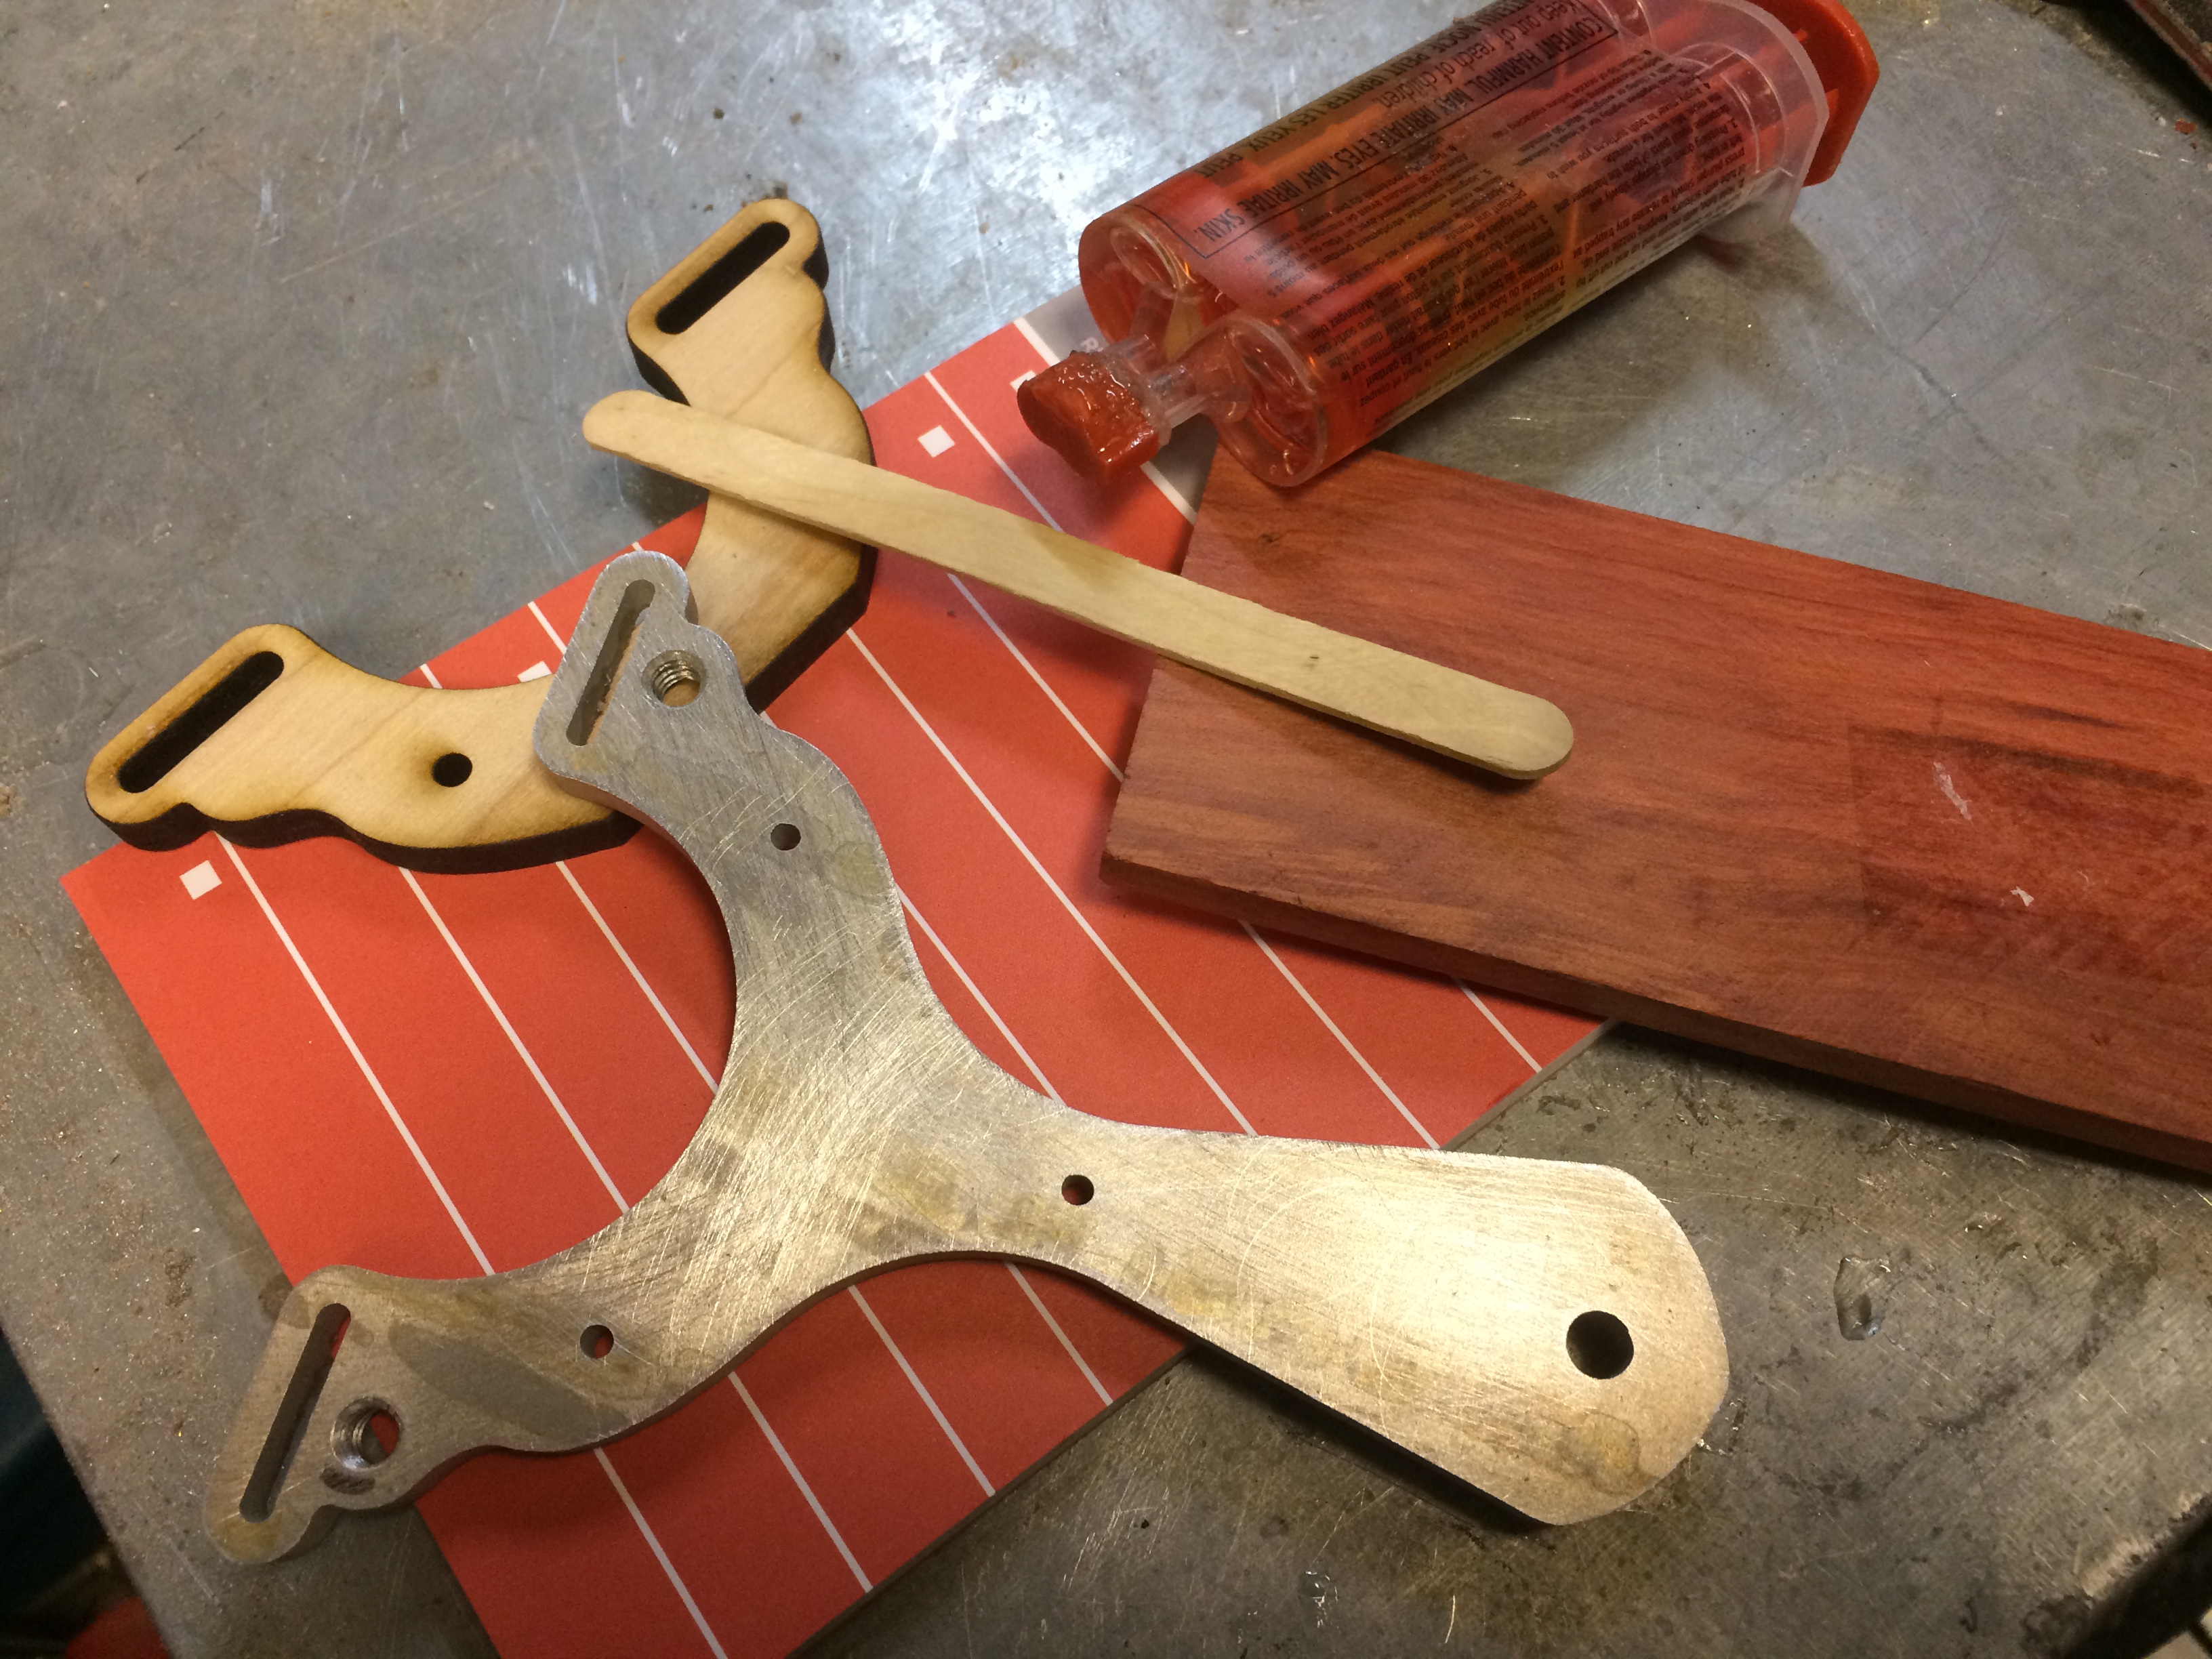
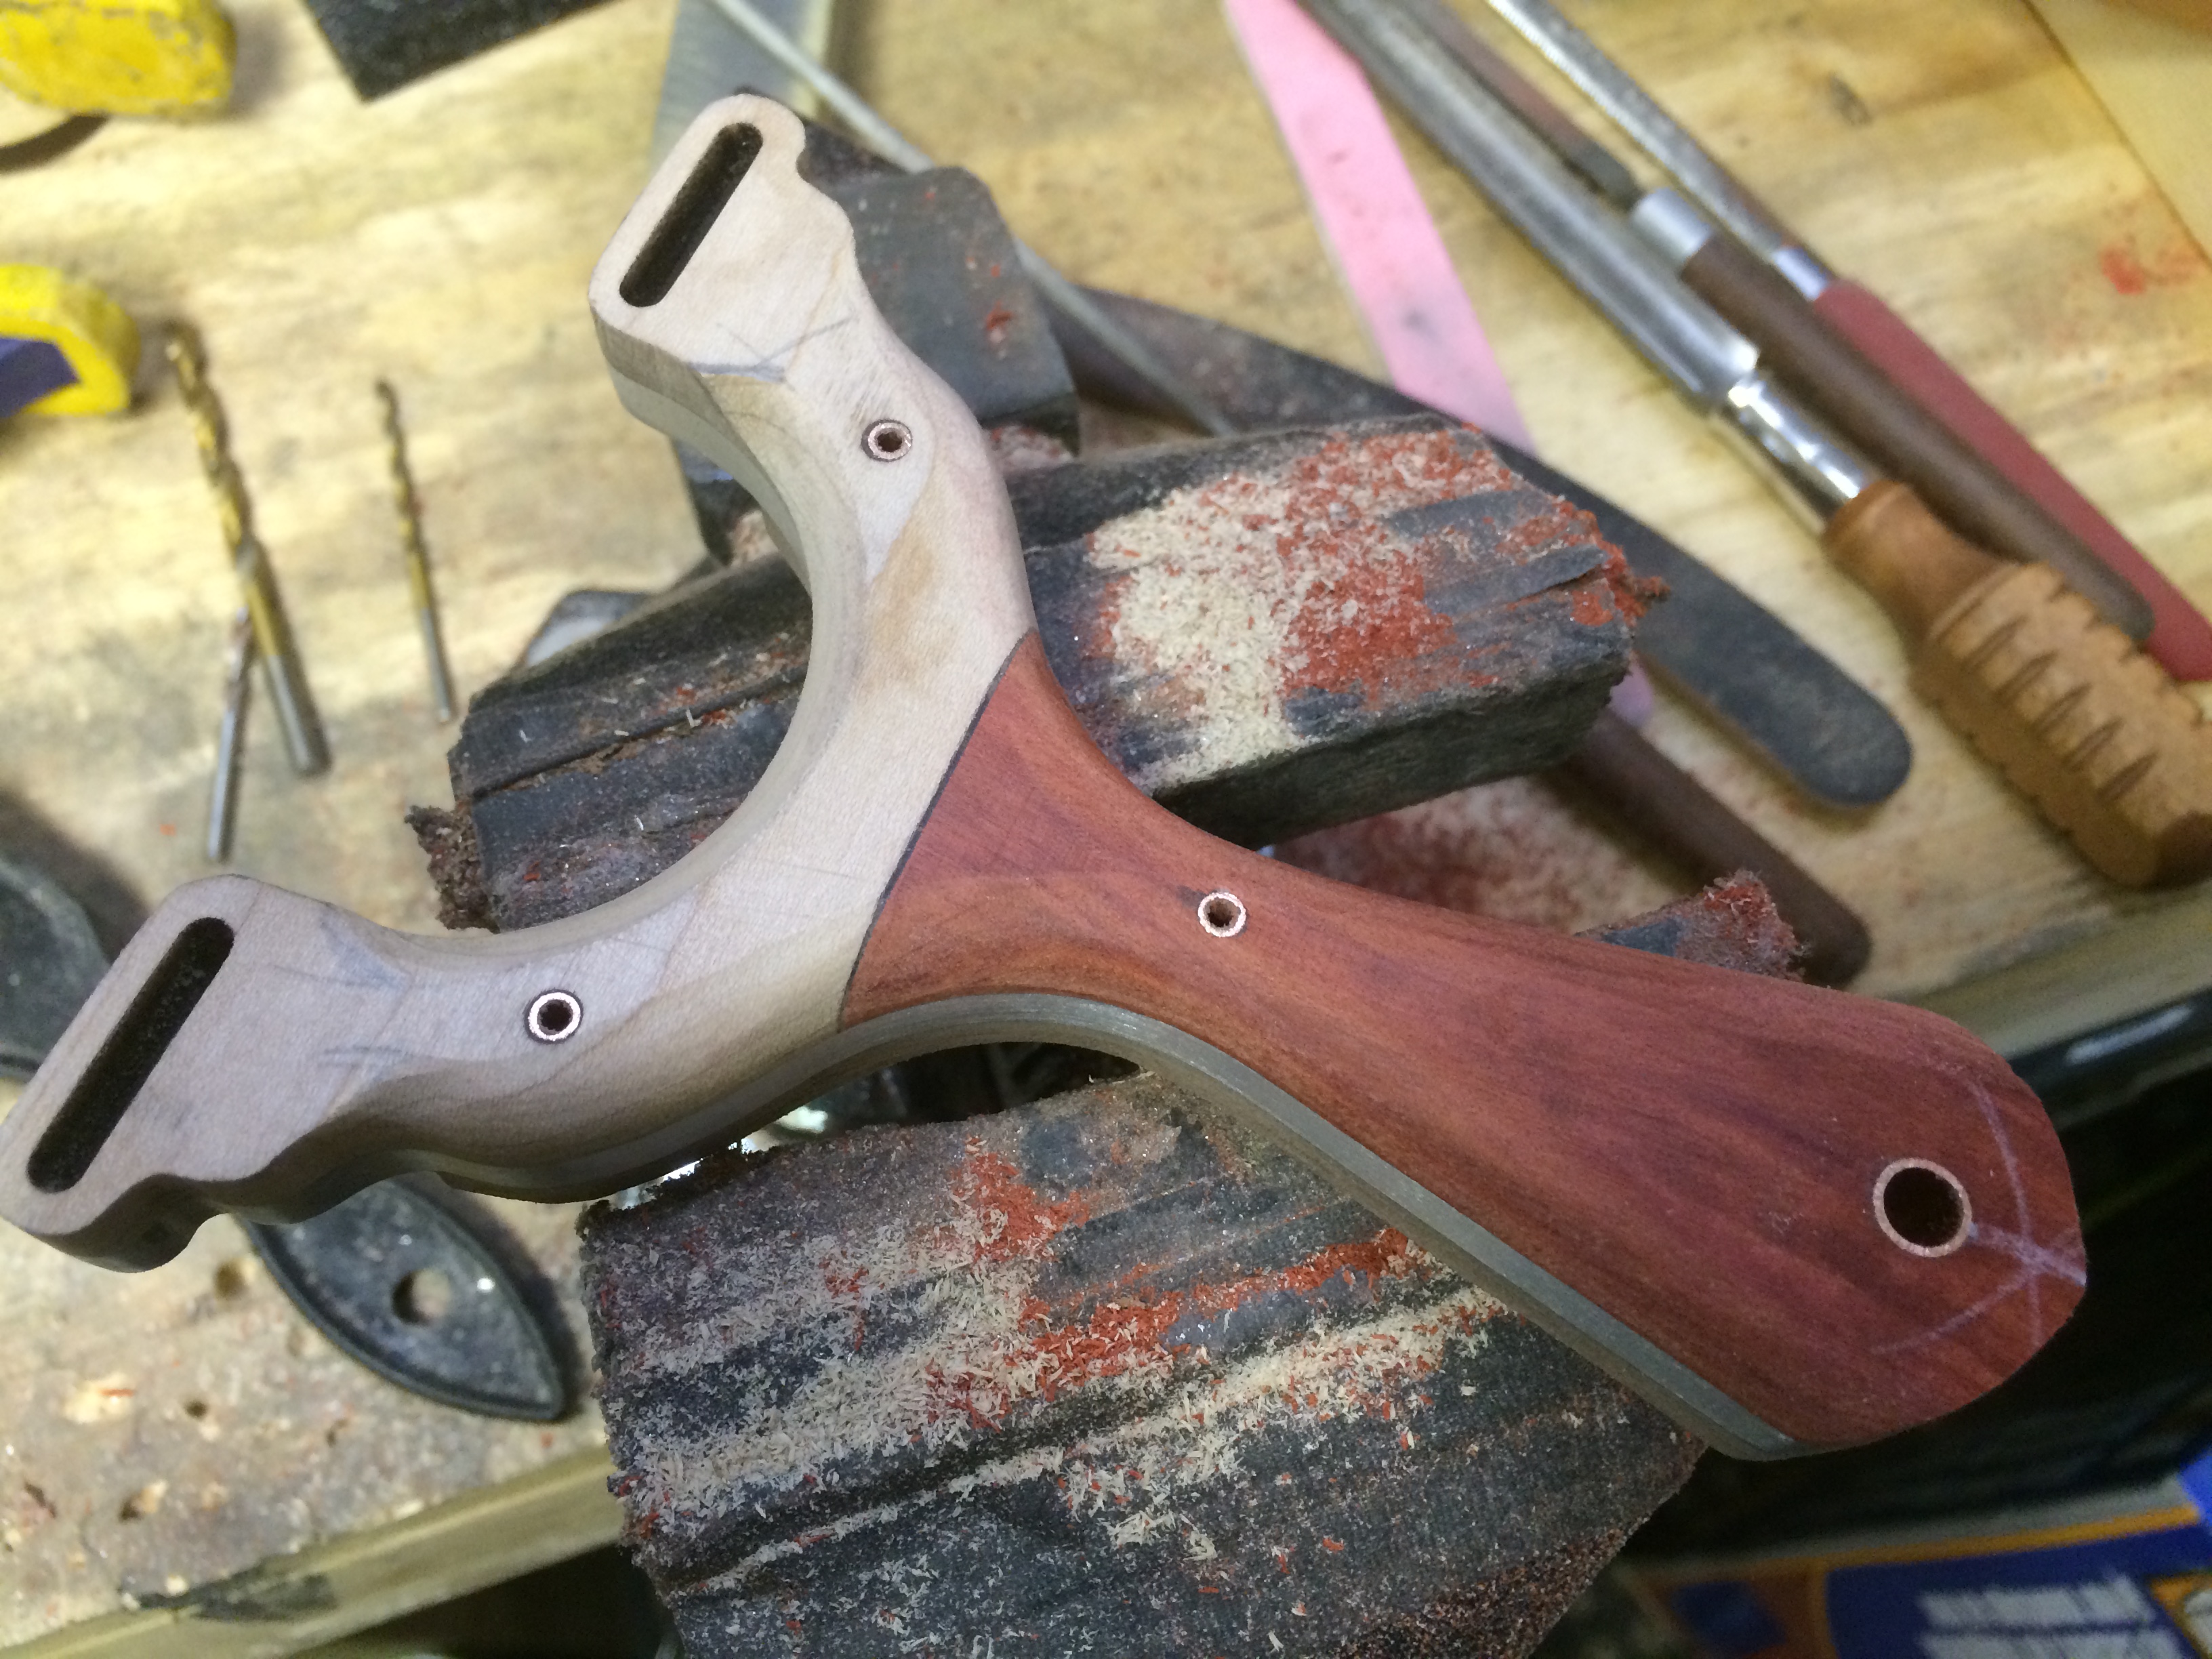
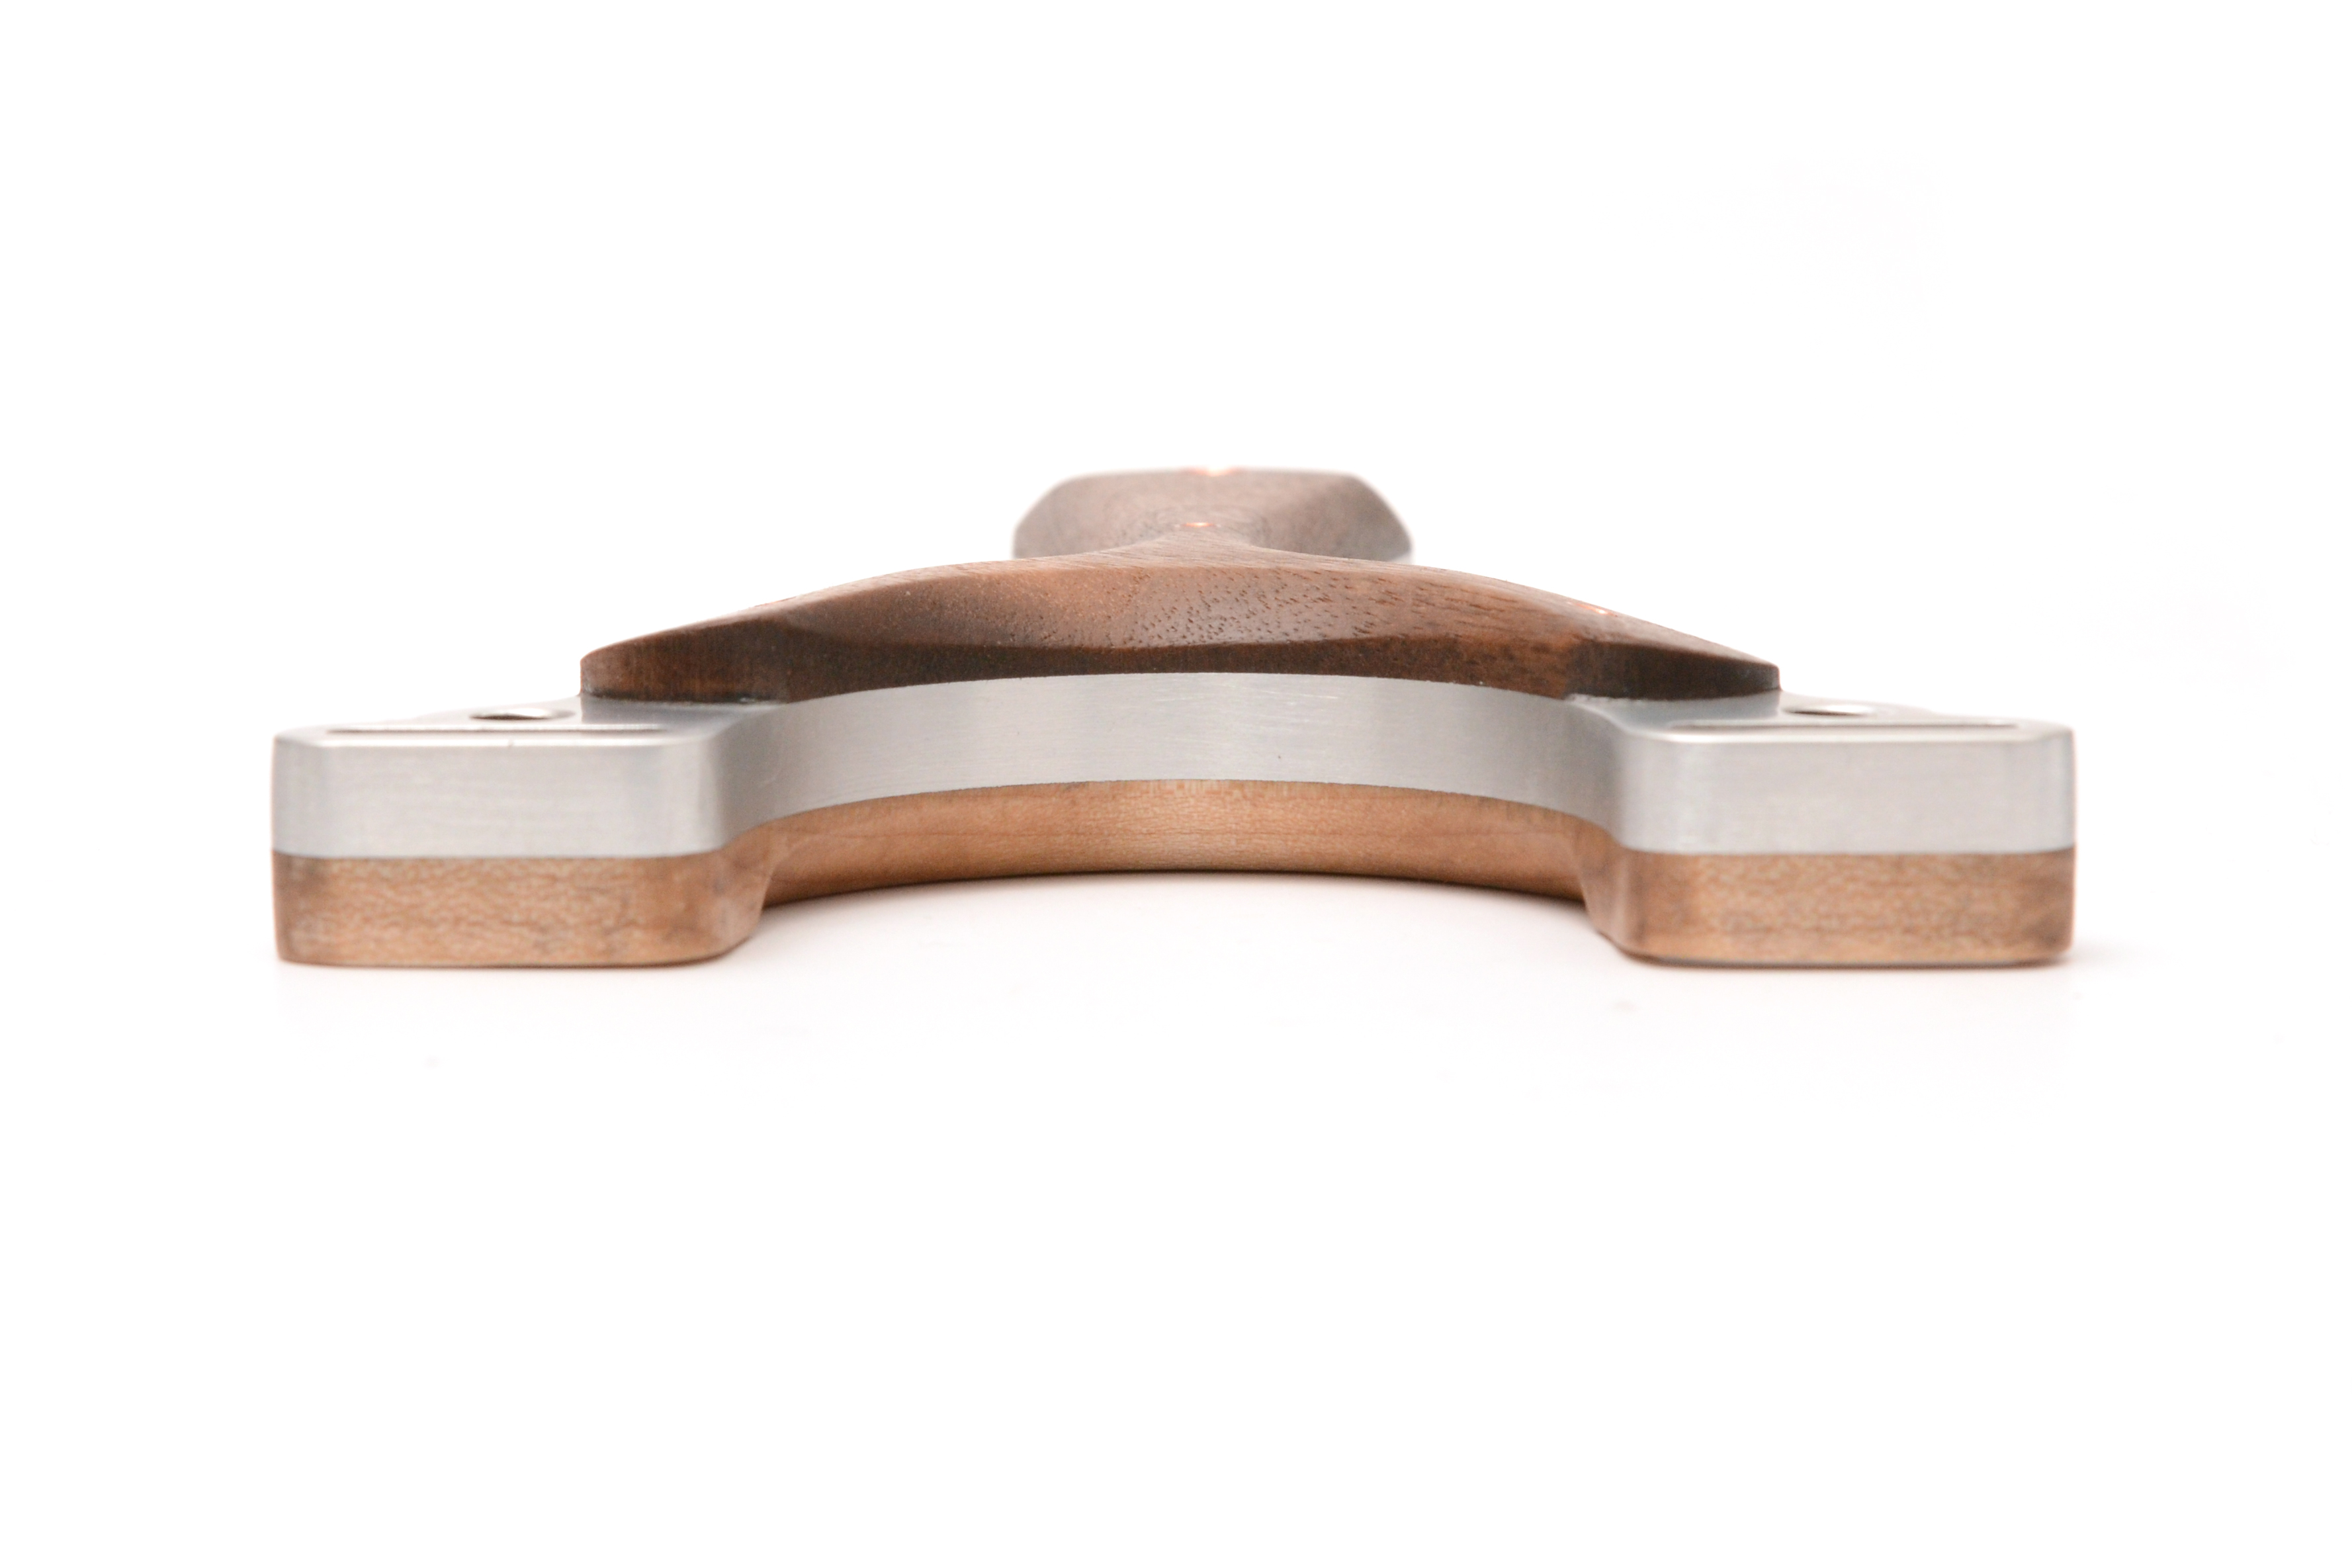
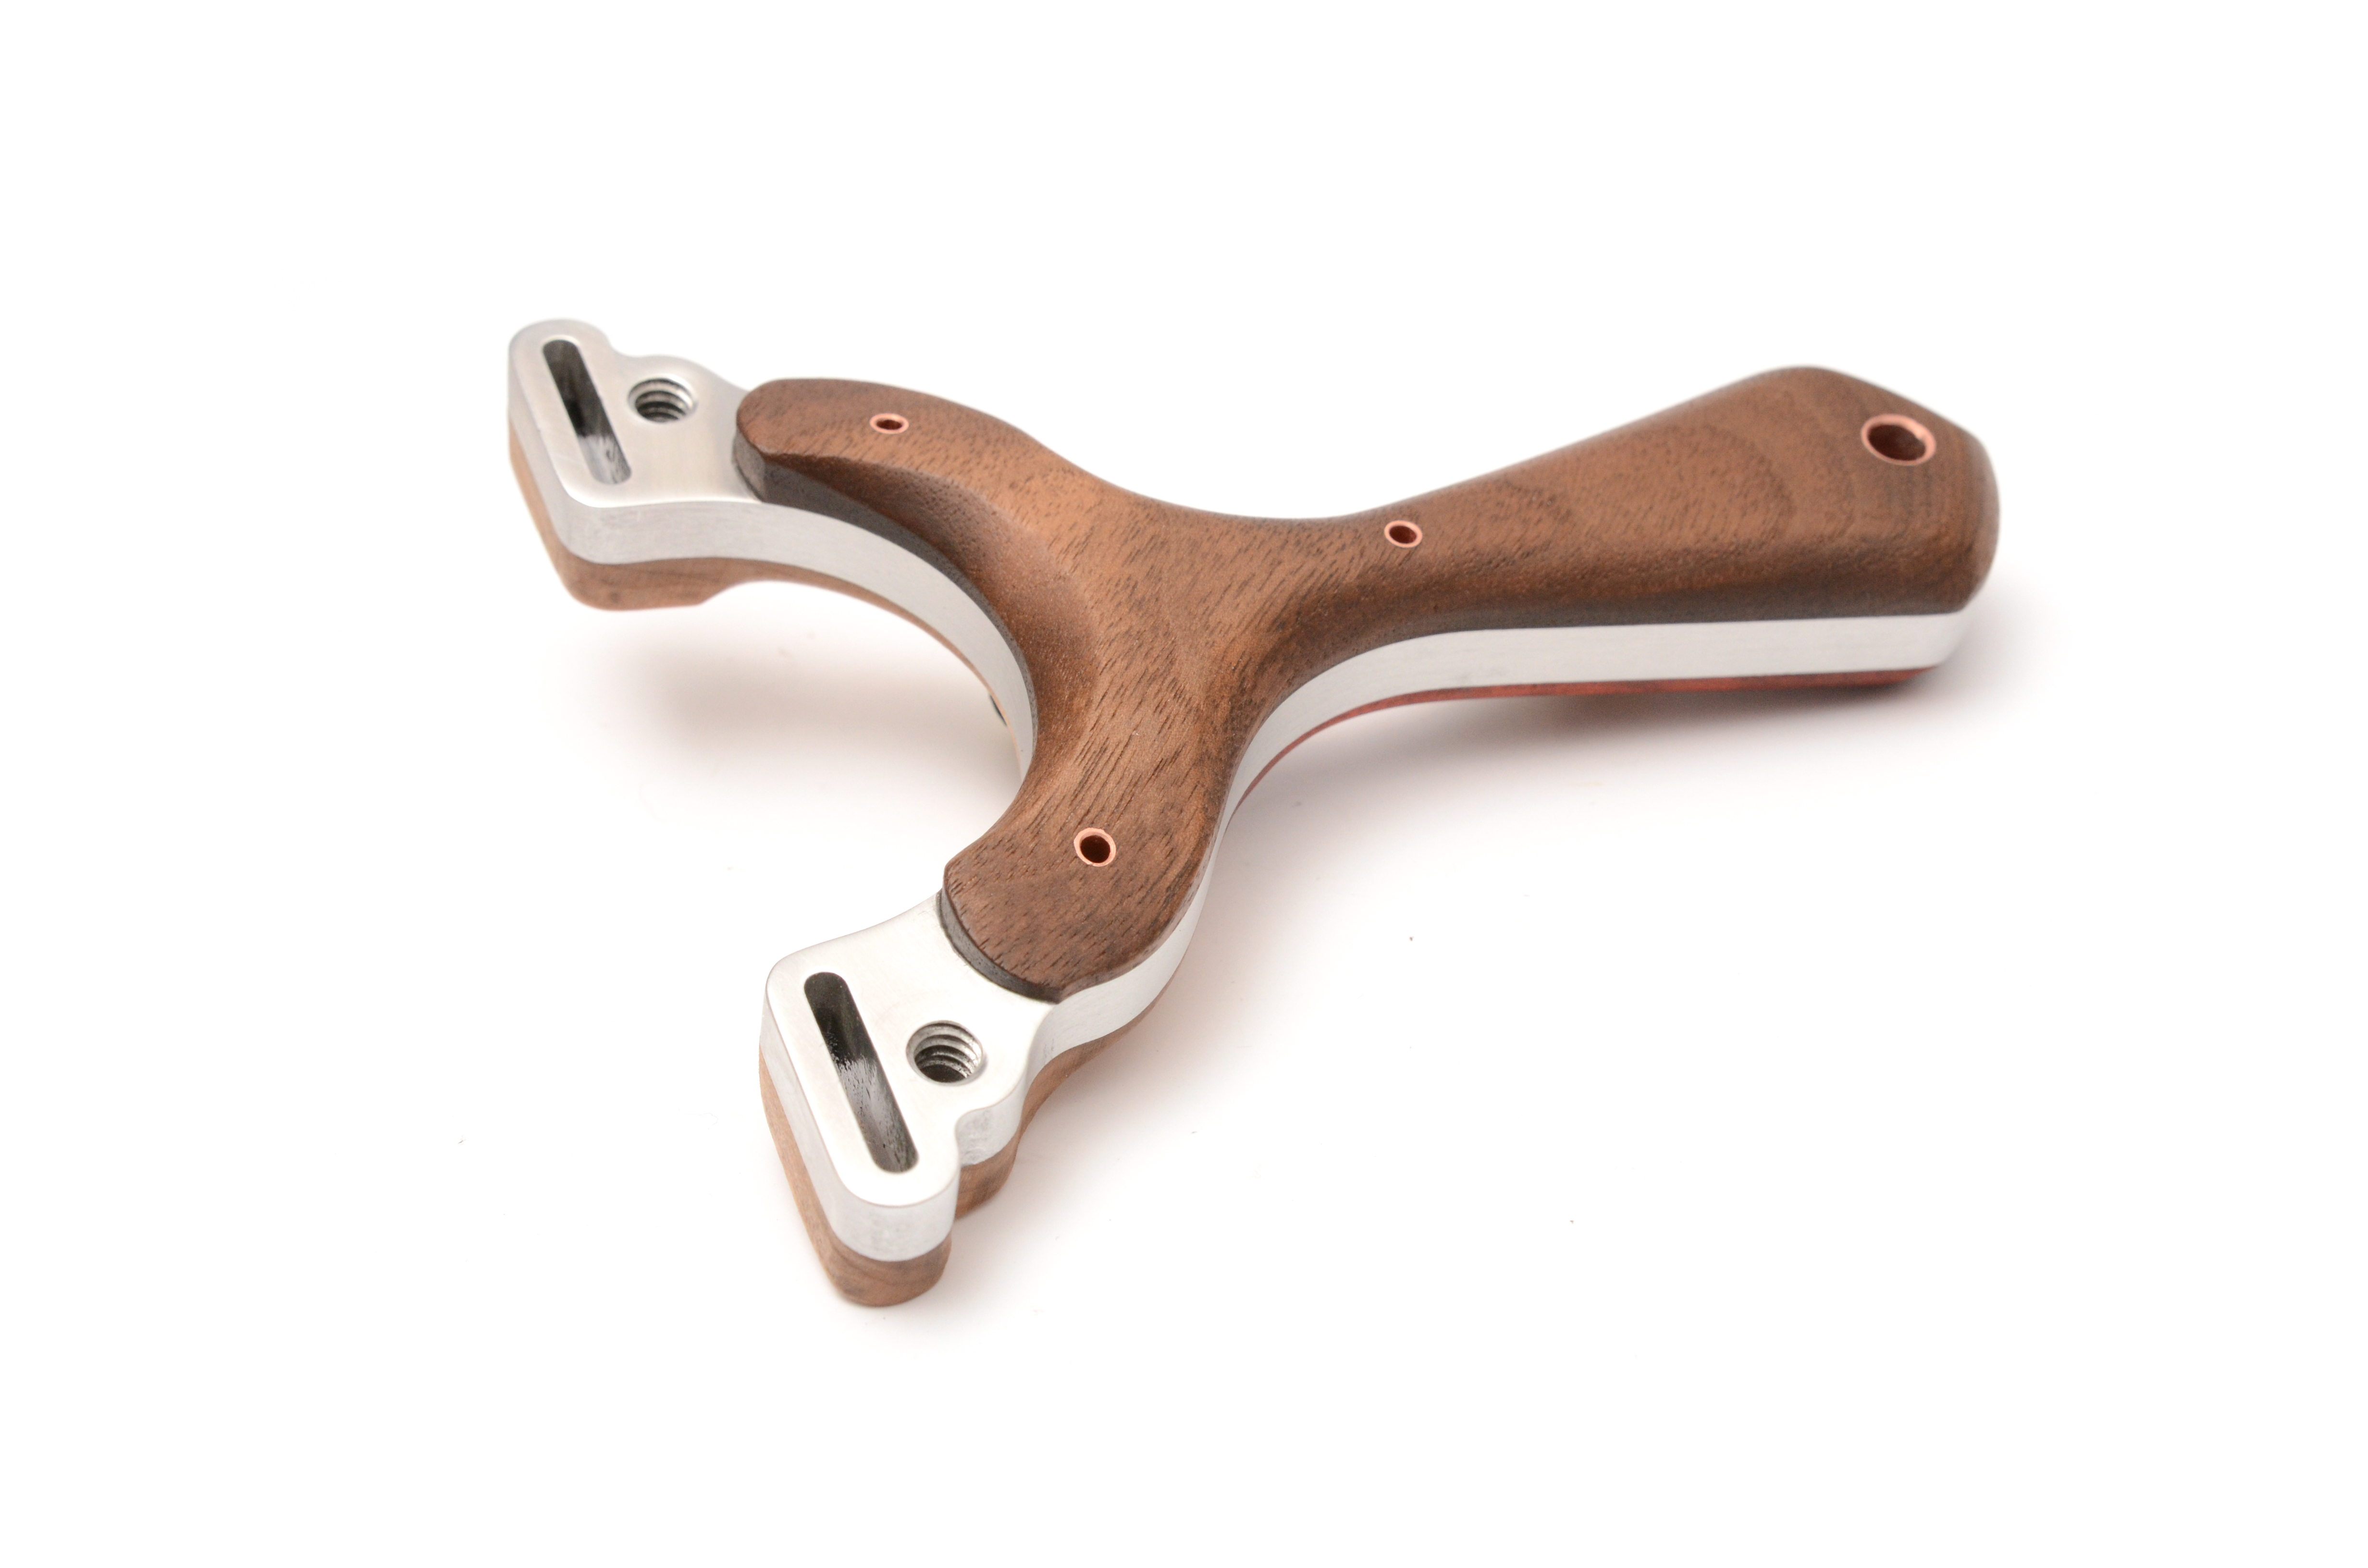
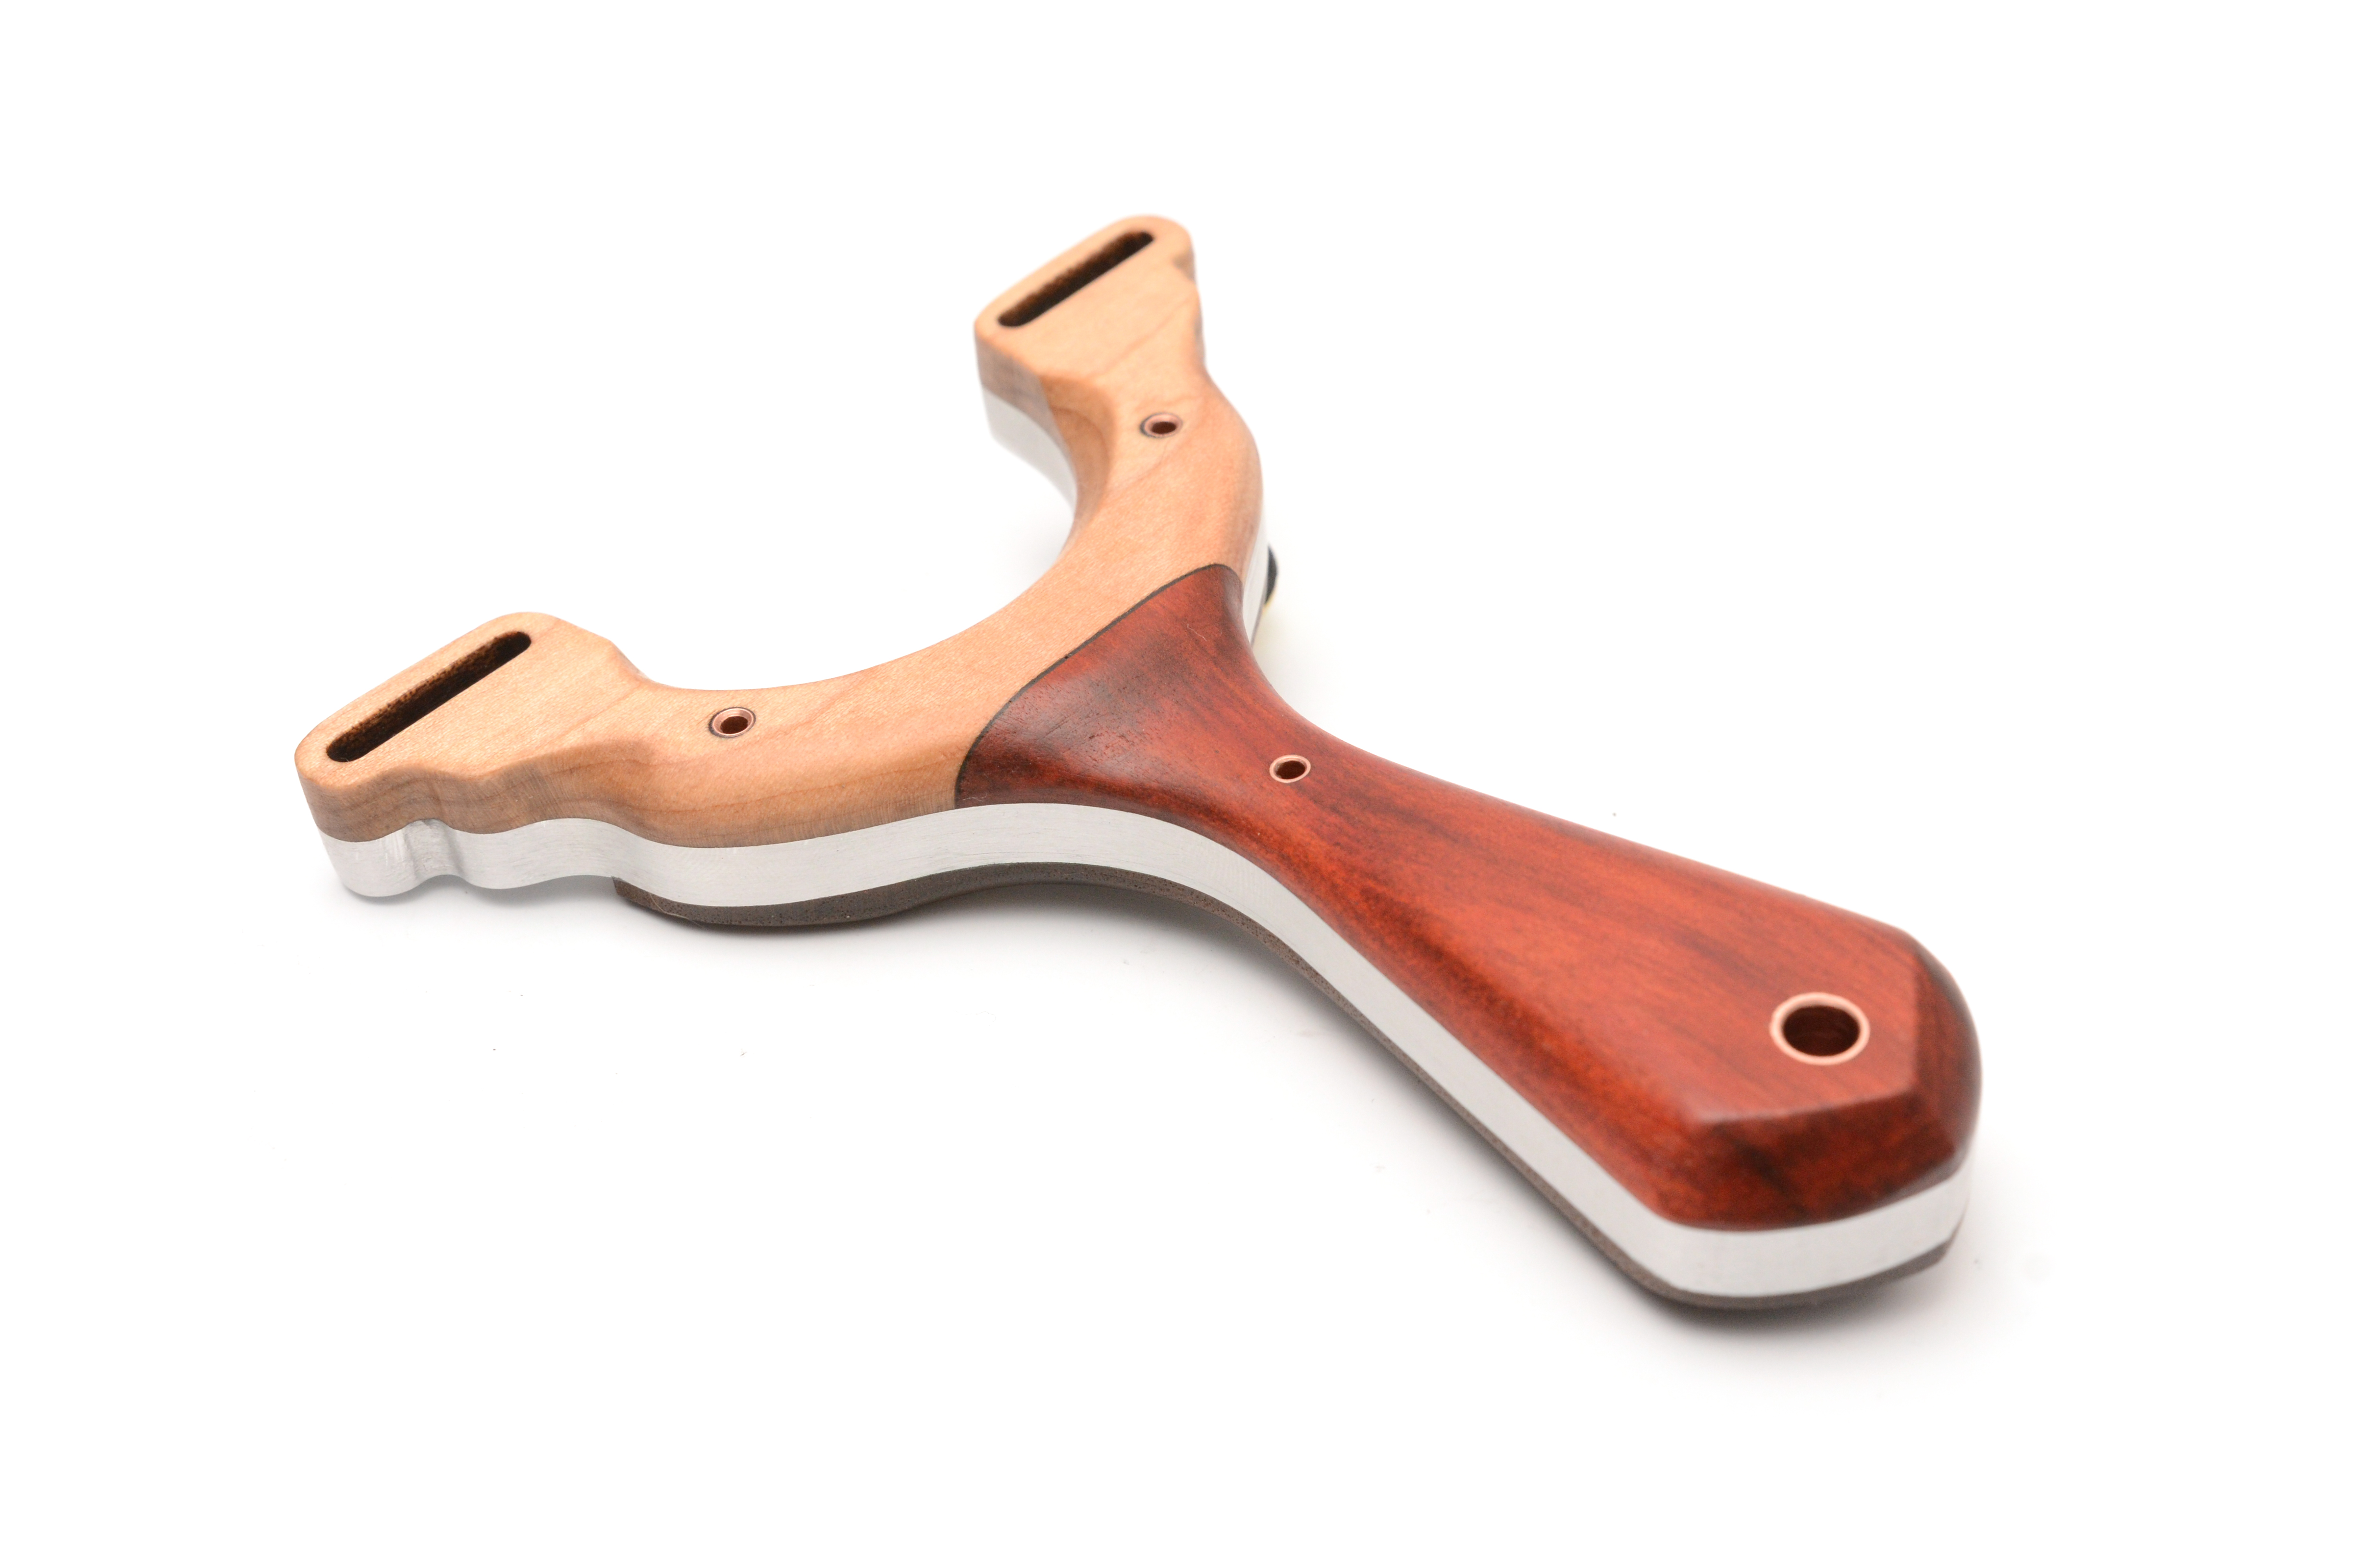
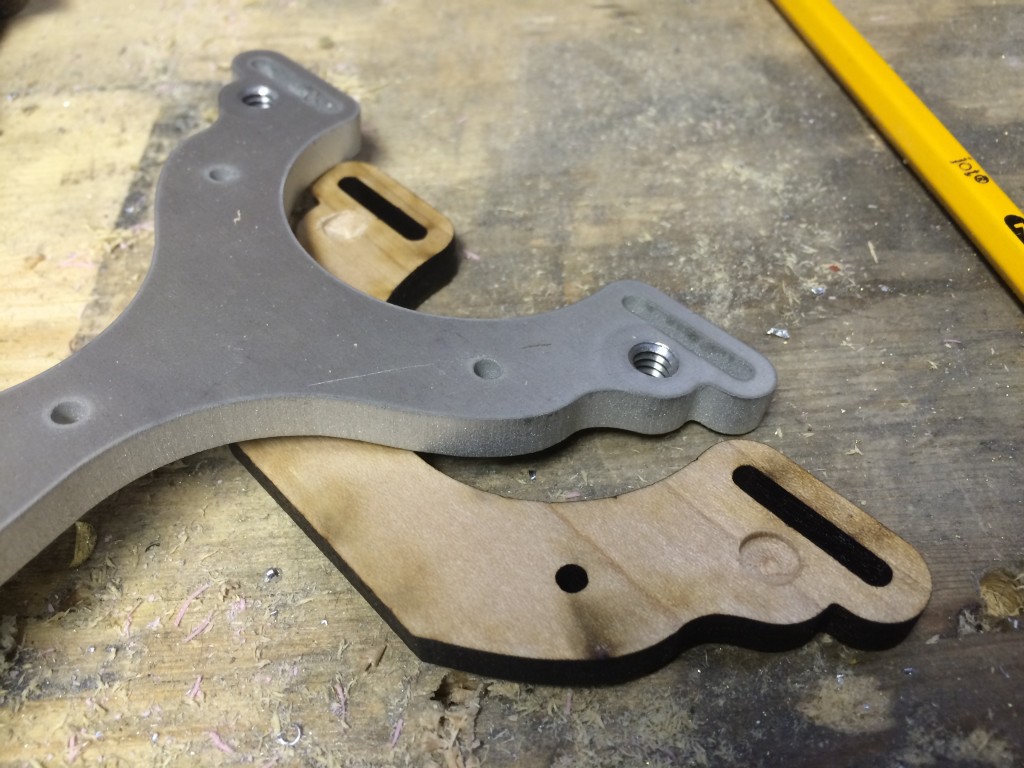
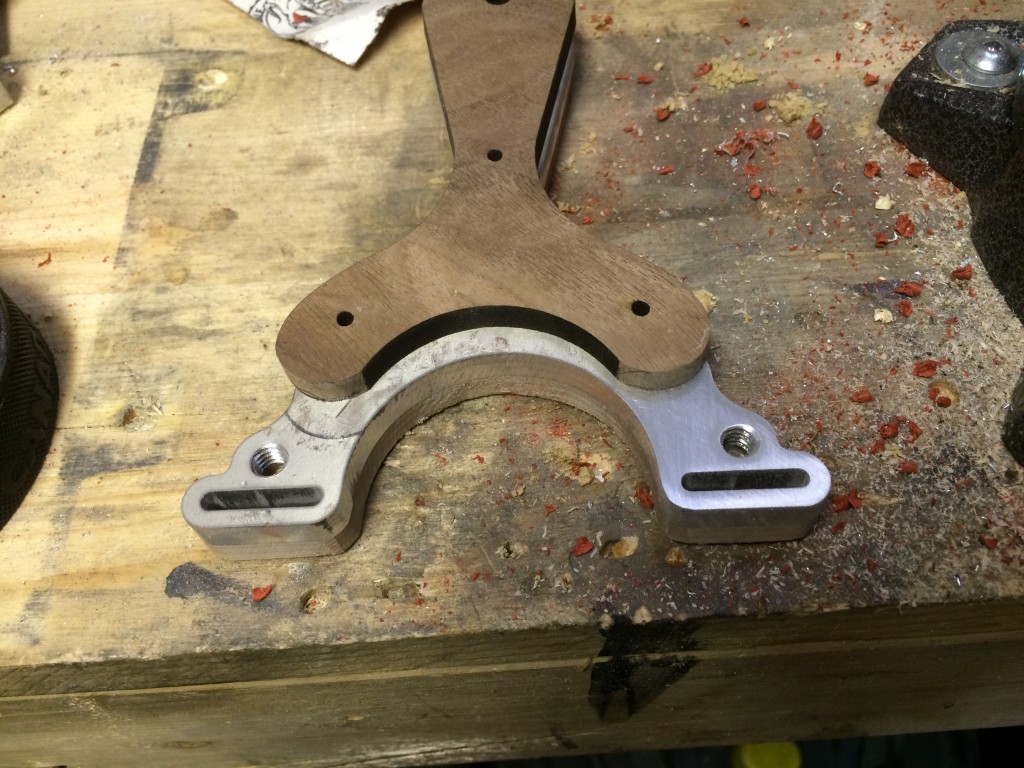
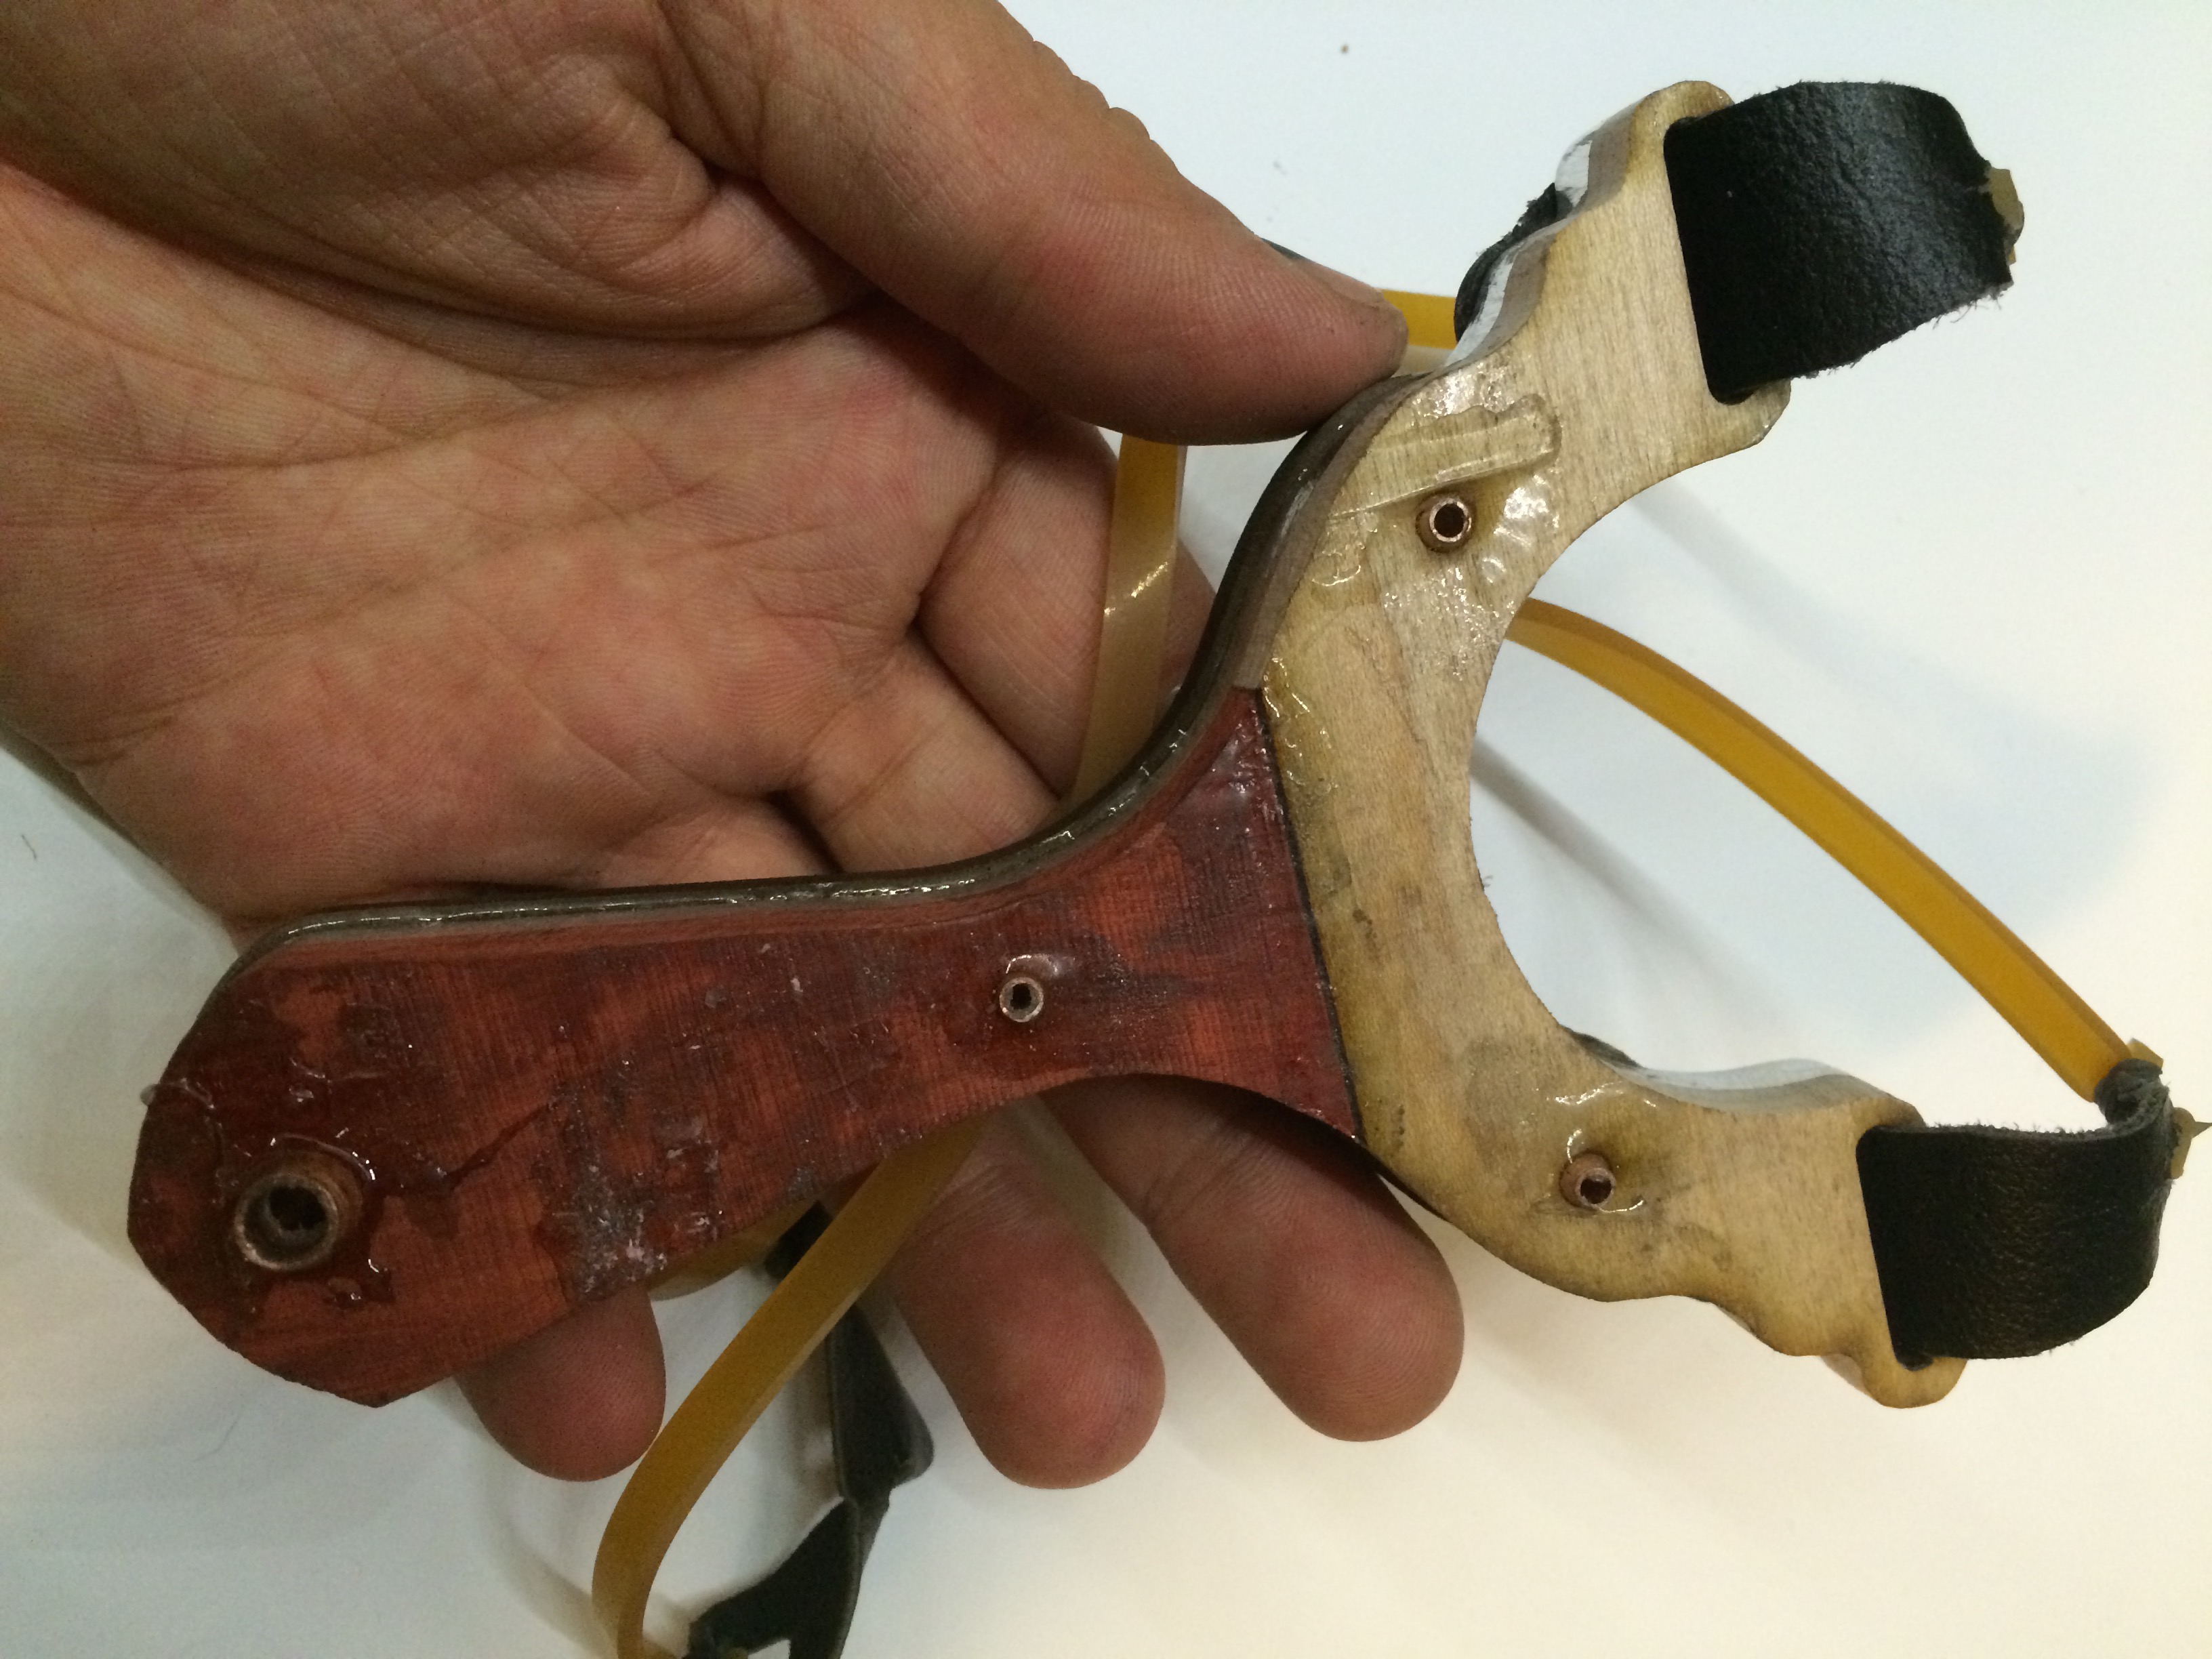
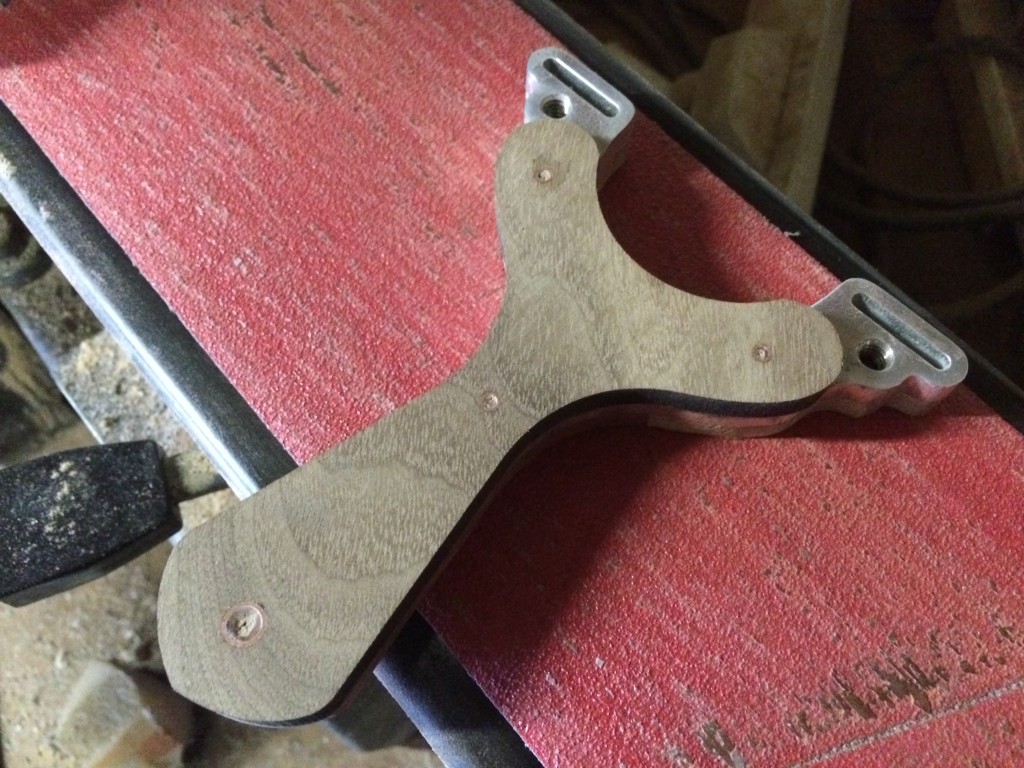
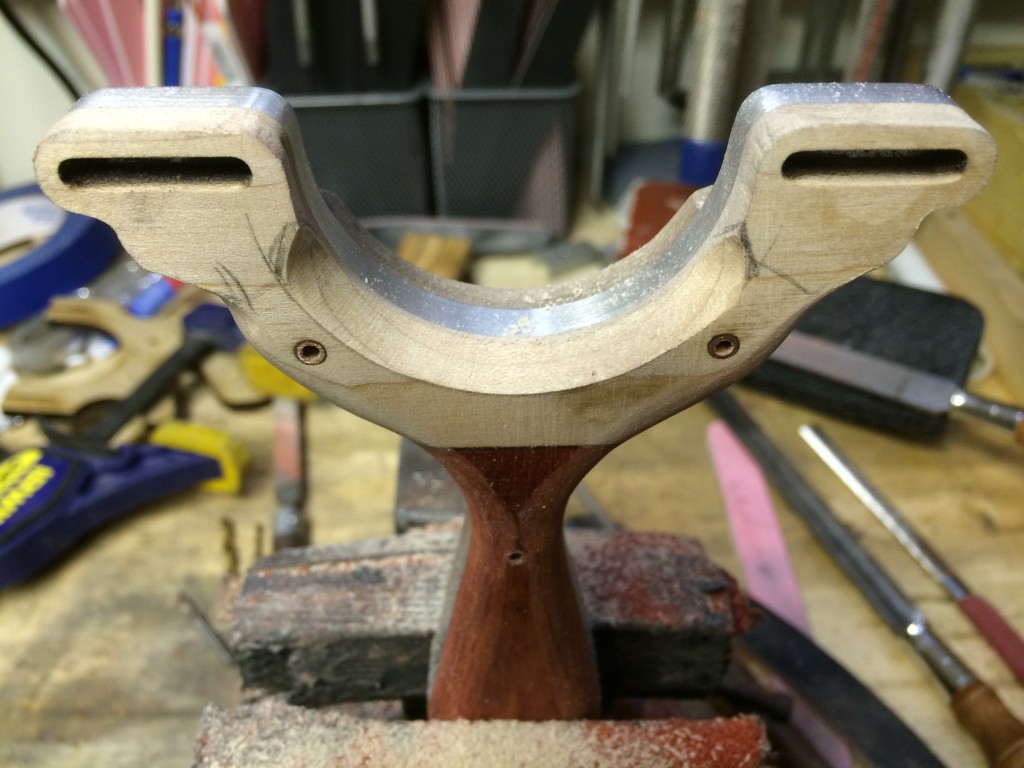
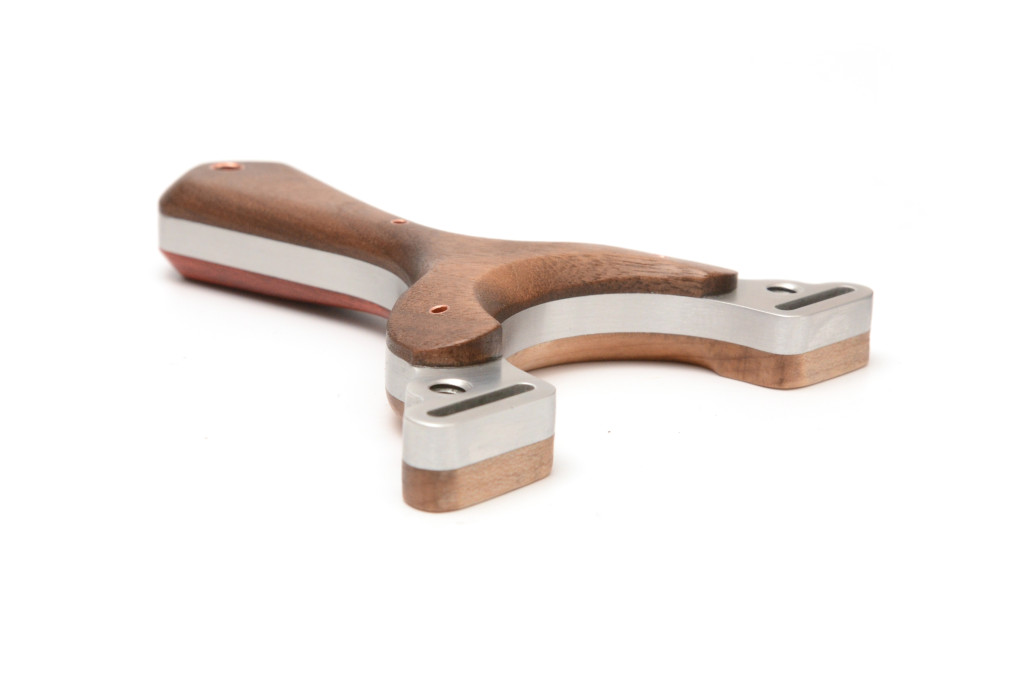
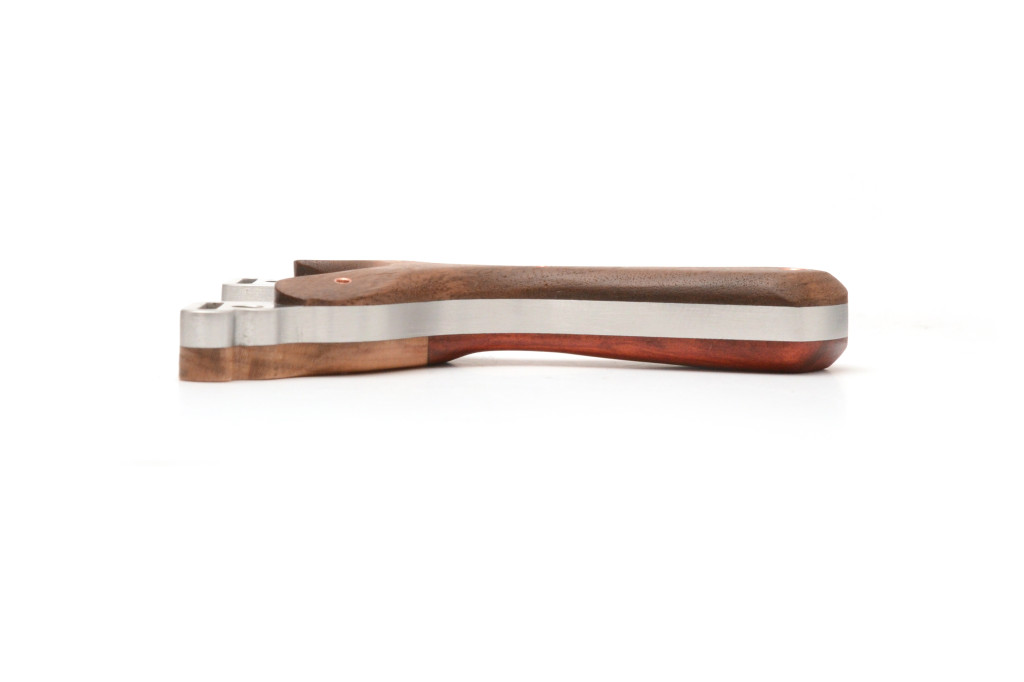
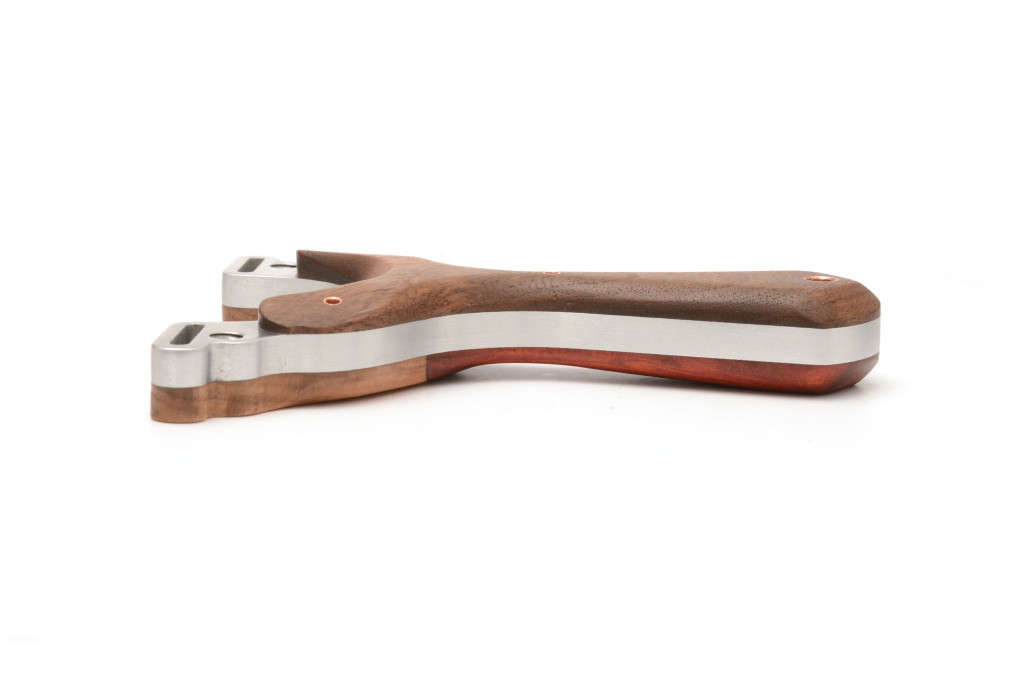
This DXF file was then sent to the waterjet shop and the frame was cut out of 1/4″ 6061 aluminum, known for it’s good strength to weight ratio but at a relatively inexpensive cost. Once the cores were in the shop, it was time to select the timbers. I wanted this to be a useable slingshot, not too crazy of a jewel that Gaspar wouldn’t be afraid to use it, but something special he would love sharing with his colleagues. I also wanted it to be inherently Canadian. For the business end (the tips) I chose Canadian sugar maple, for a couple of reasons, firstly it’s Canadian, secondly, it laser cuts with very good accuracy.
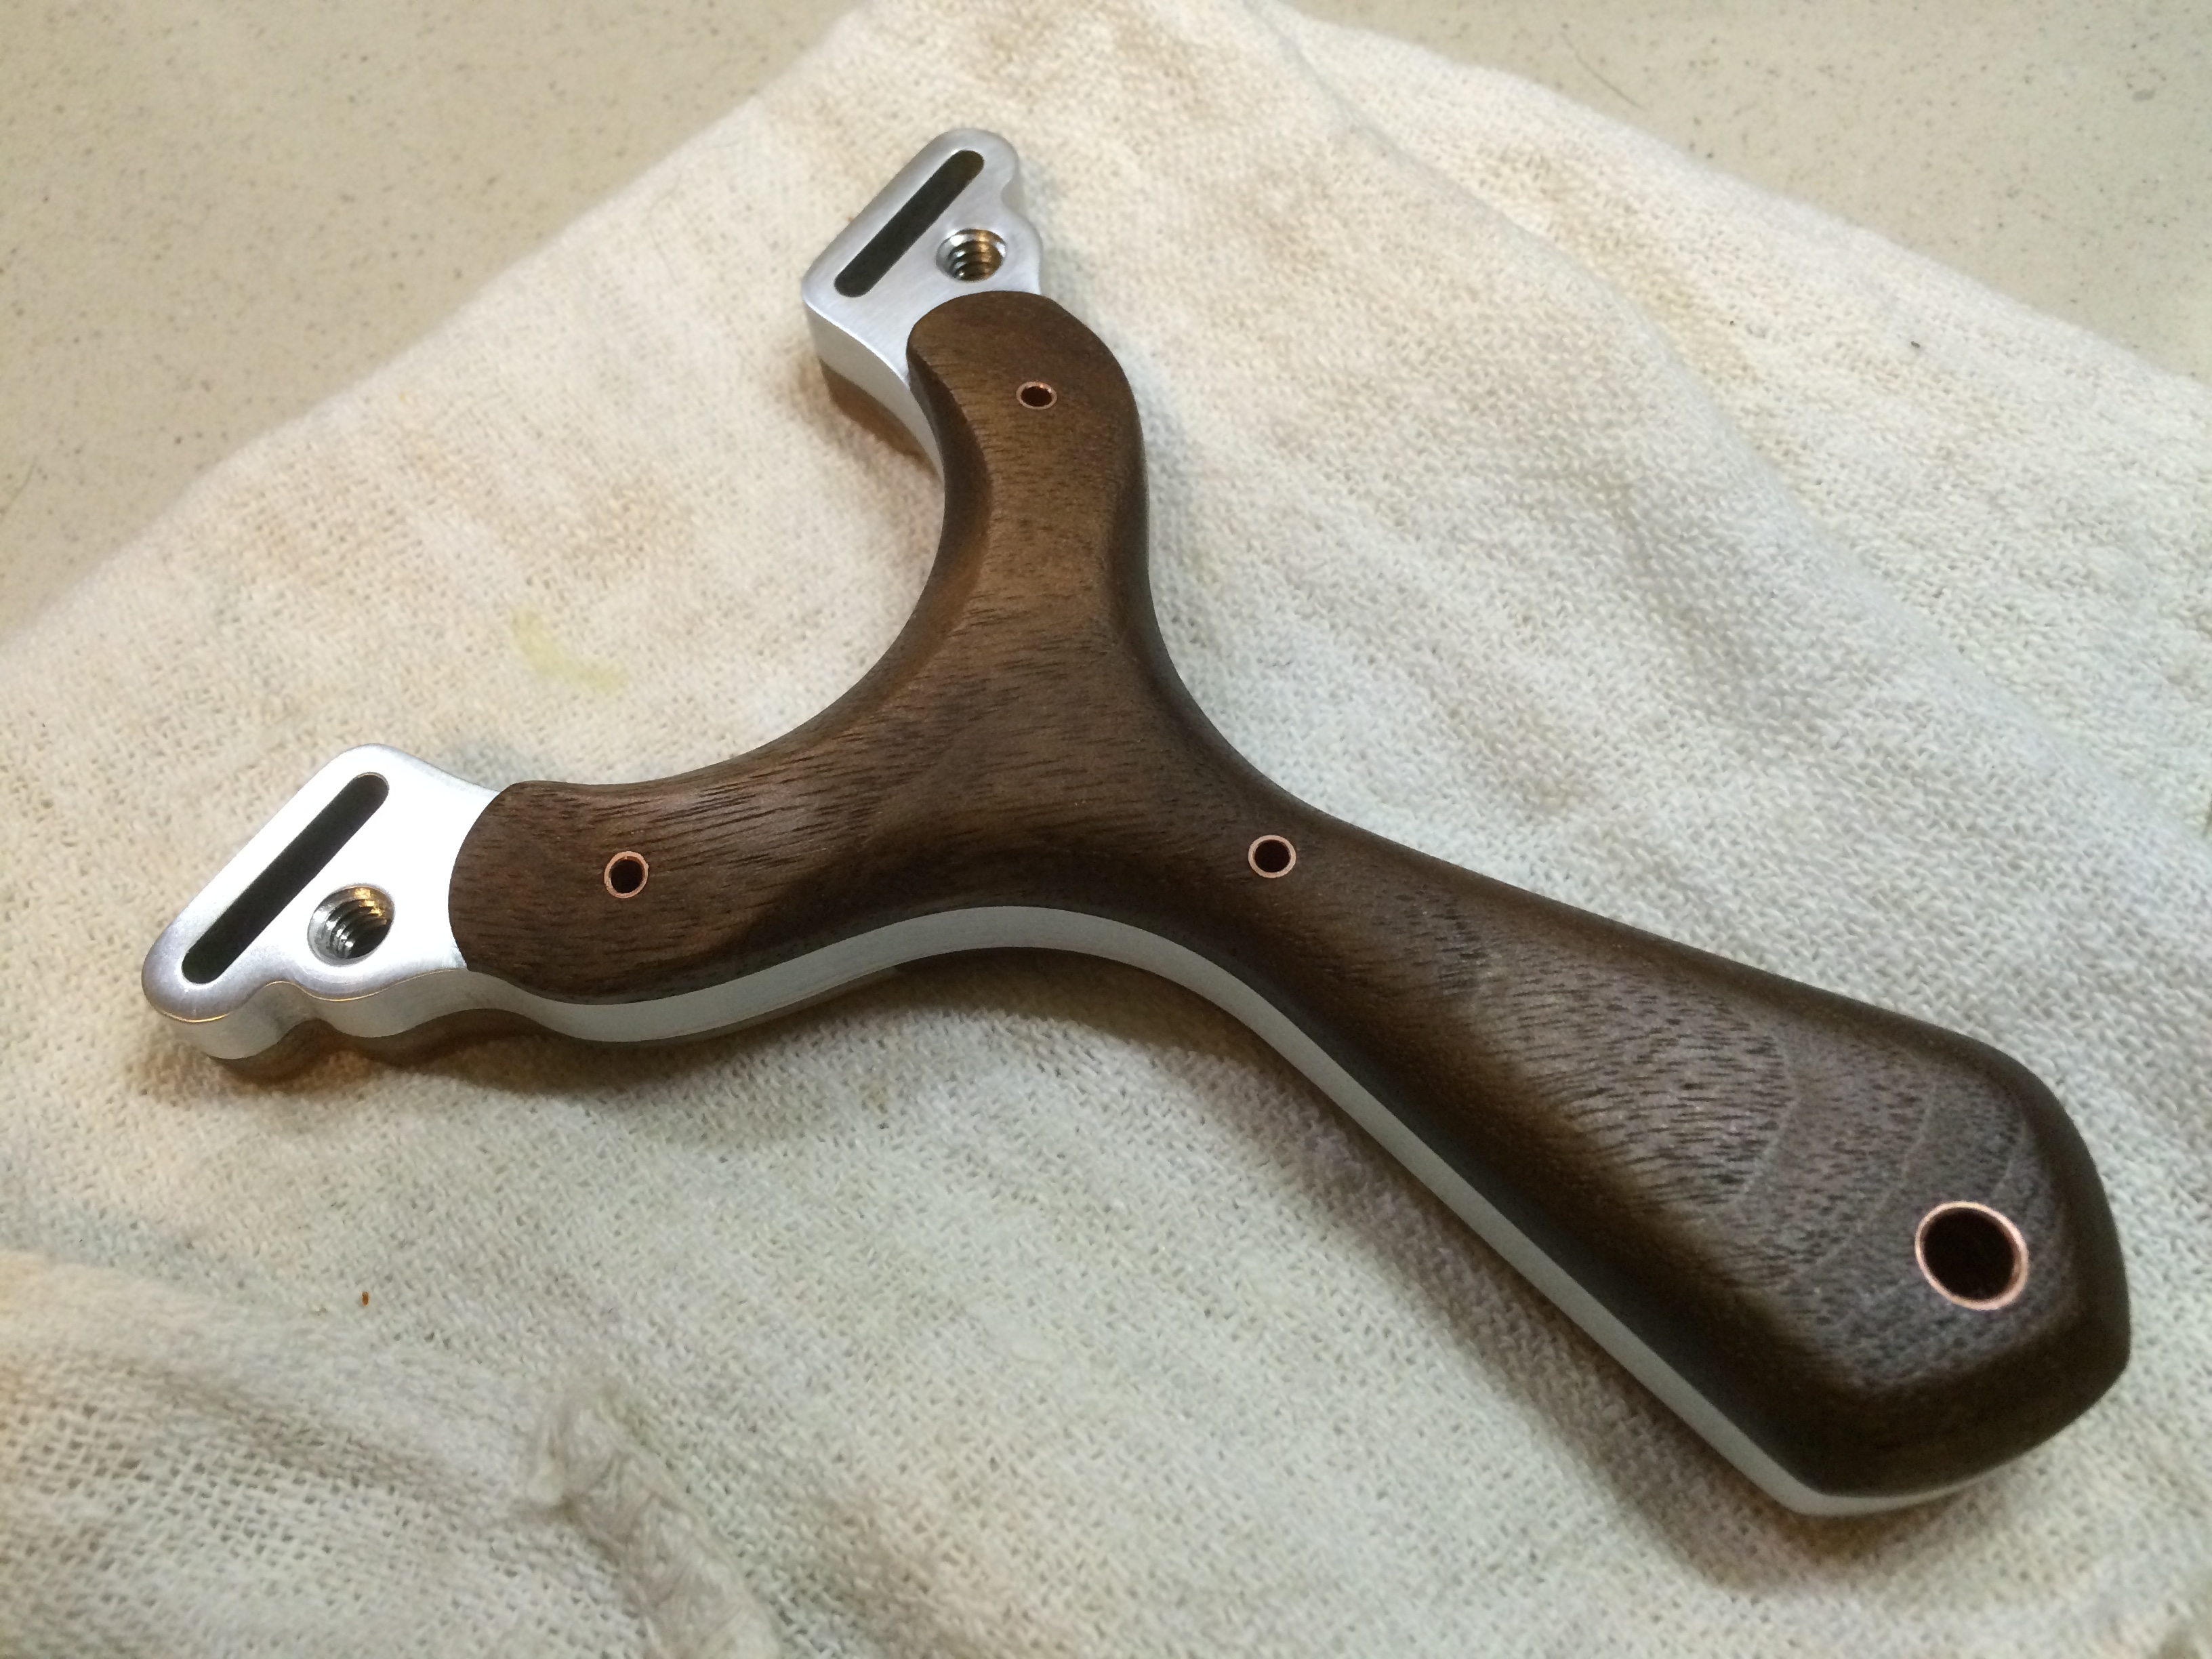
I also chose a nice red coloured wood, Chakte Kok AKA Redheart. for the handle section of the back side. This wood doesn’t laser cut very well but it’s a section that can be manually cut out. On the front side, I chose a nice section of curly Walnut because it is easy to shape and it’s very warm to the touch.
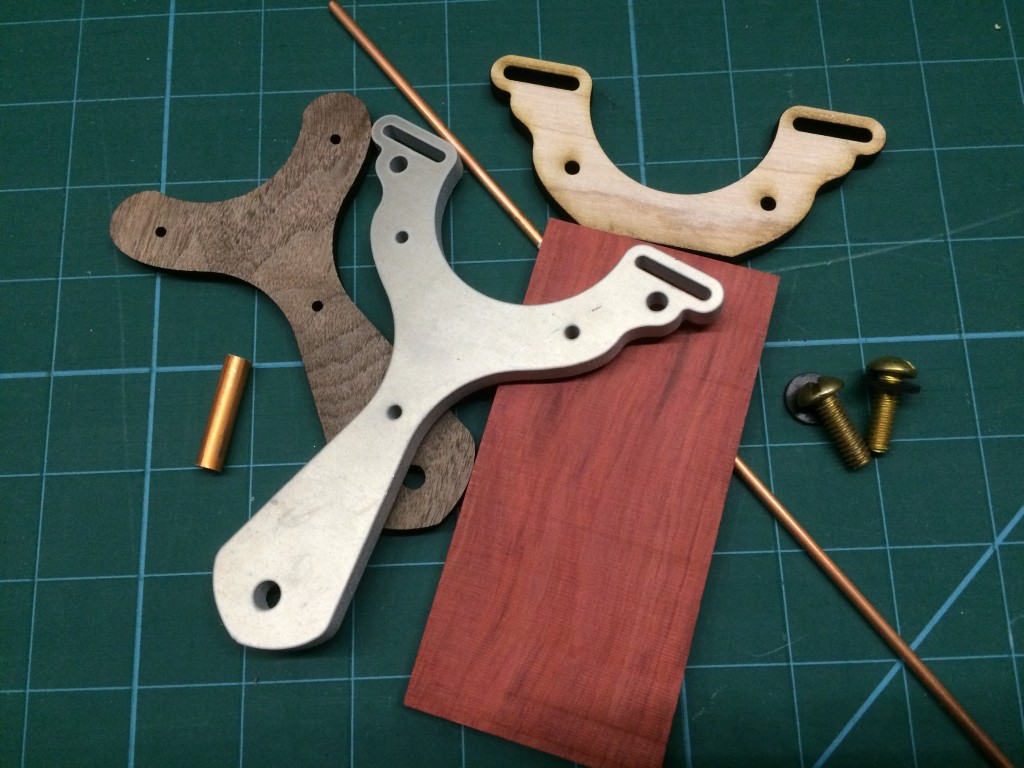
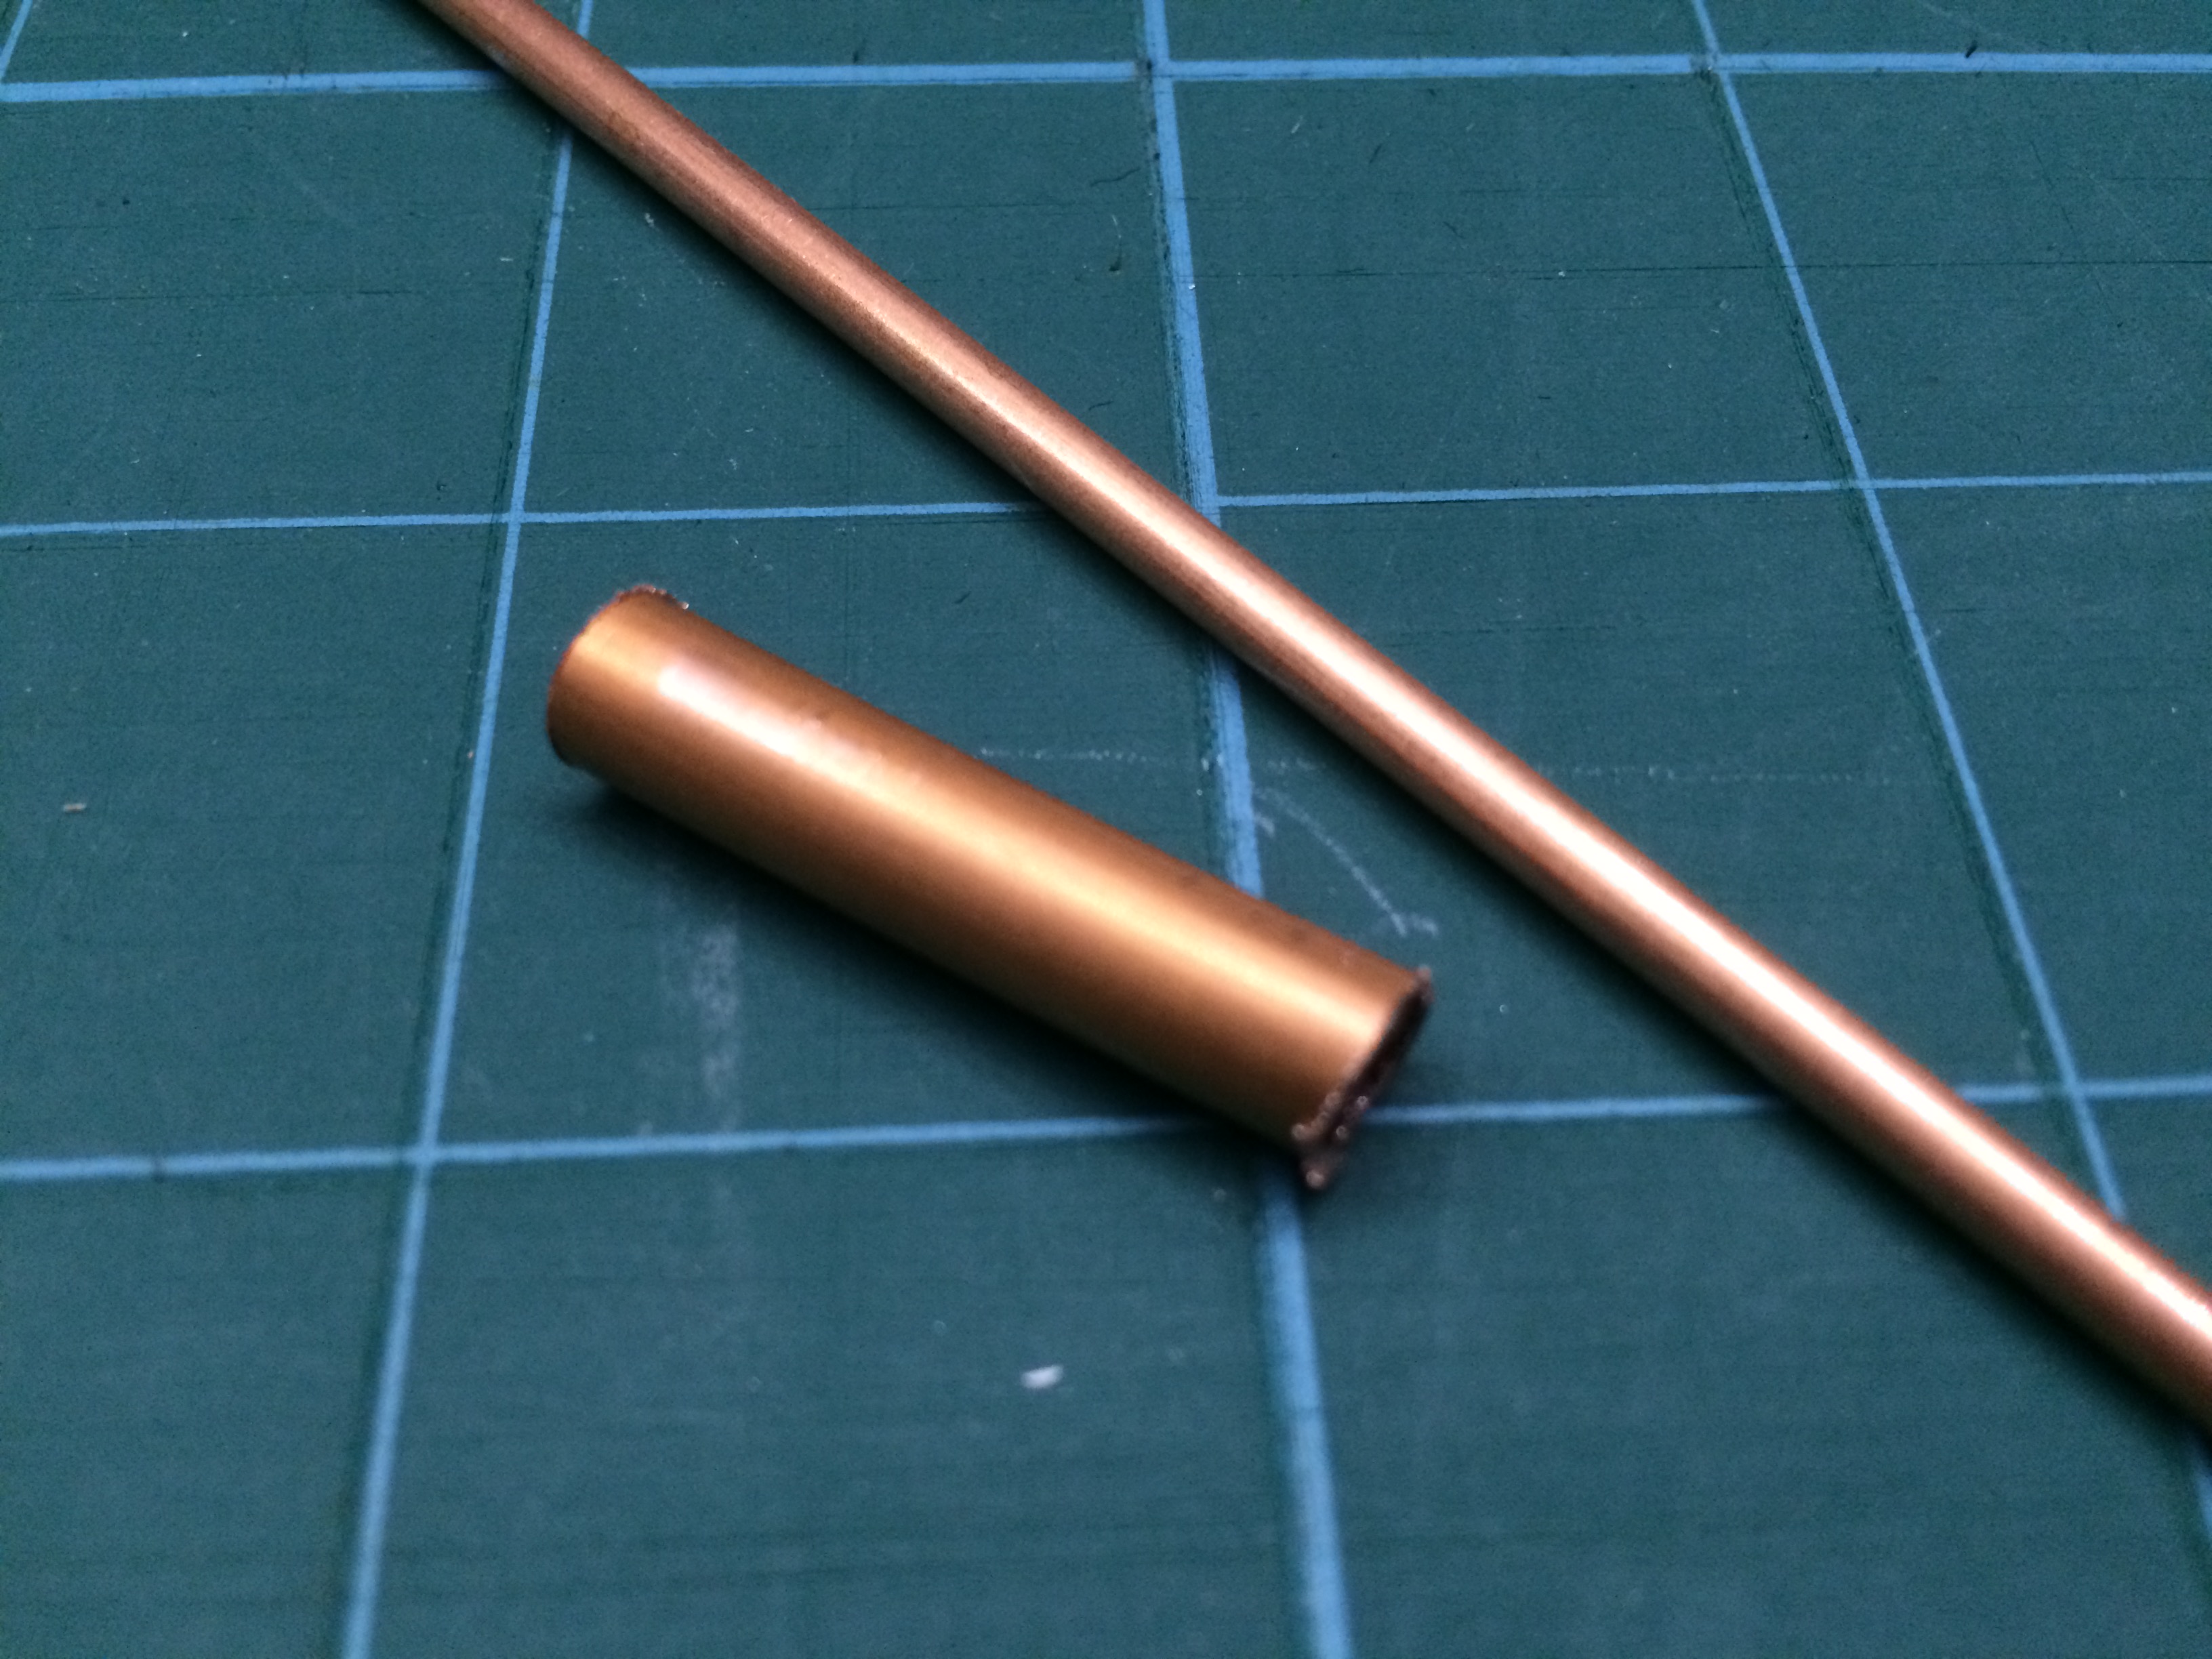
To accent the selection of timbers, I went with copper tubes for the pinning. A nice 1/8″ from K&S Engineering and a section of 1/4″ OD utility soft grade tubing (for the lanyard hole)

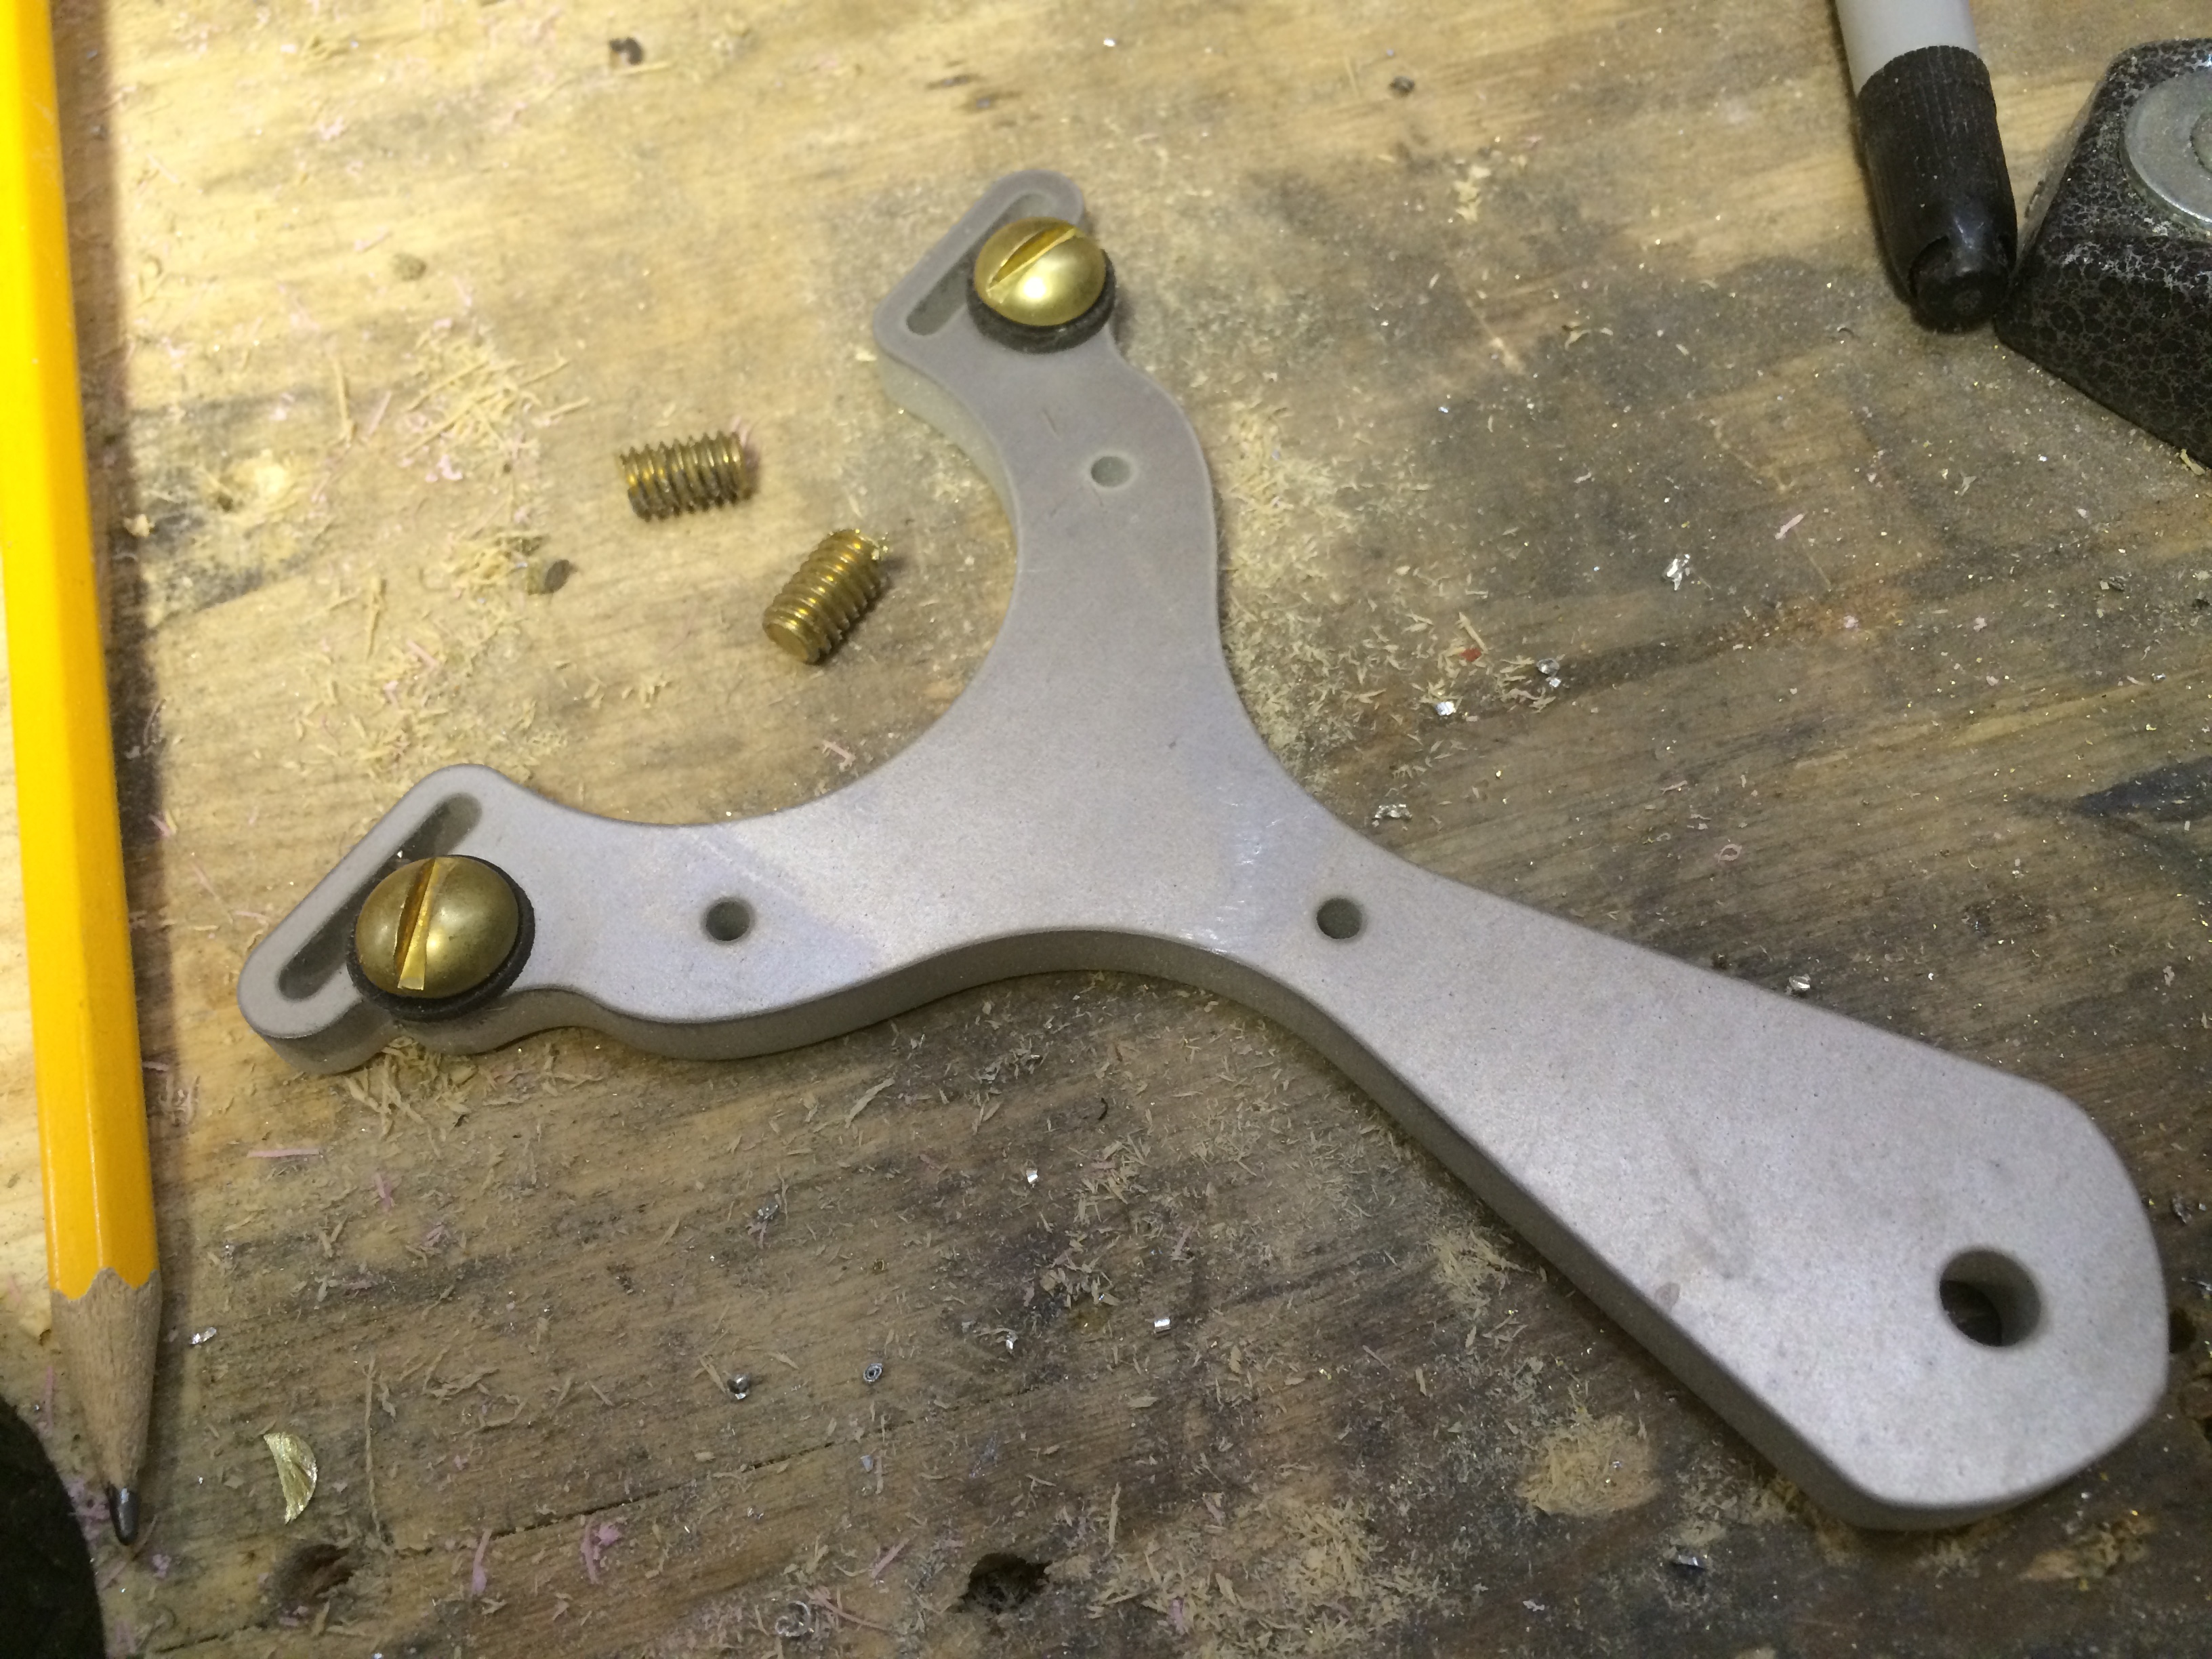
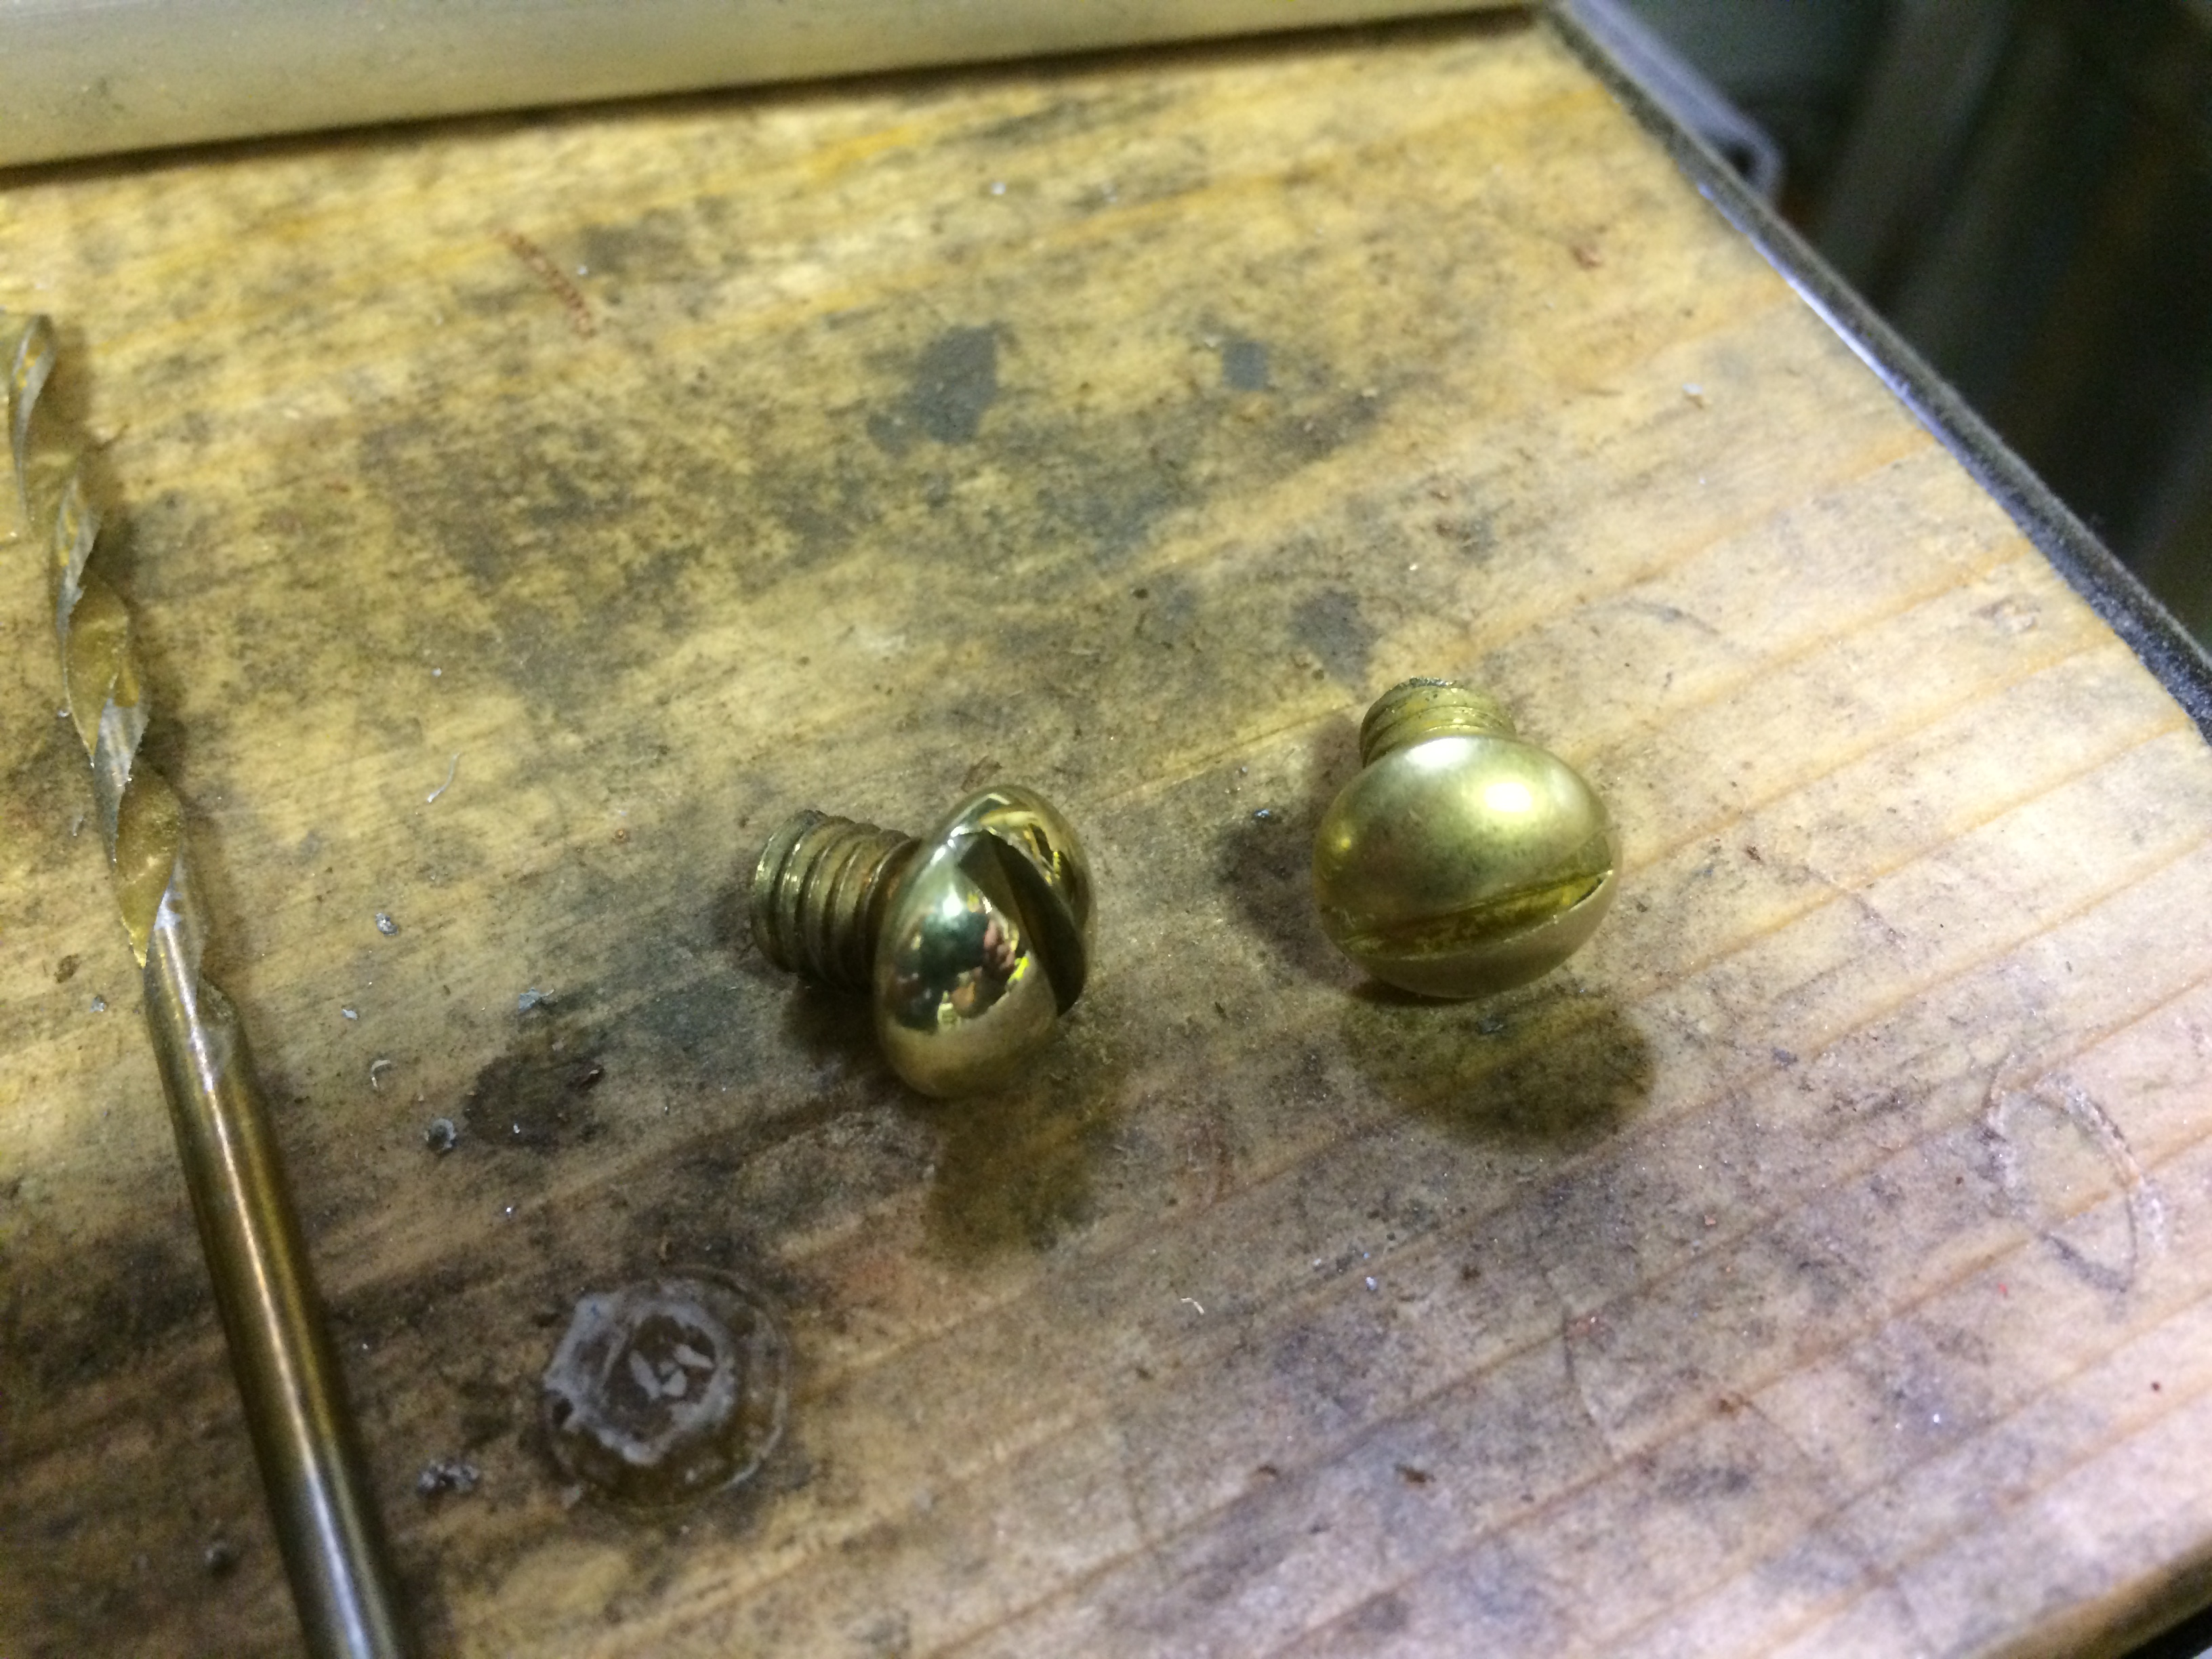
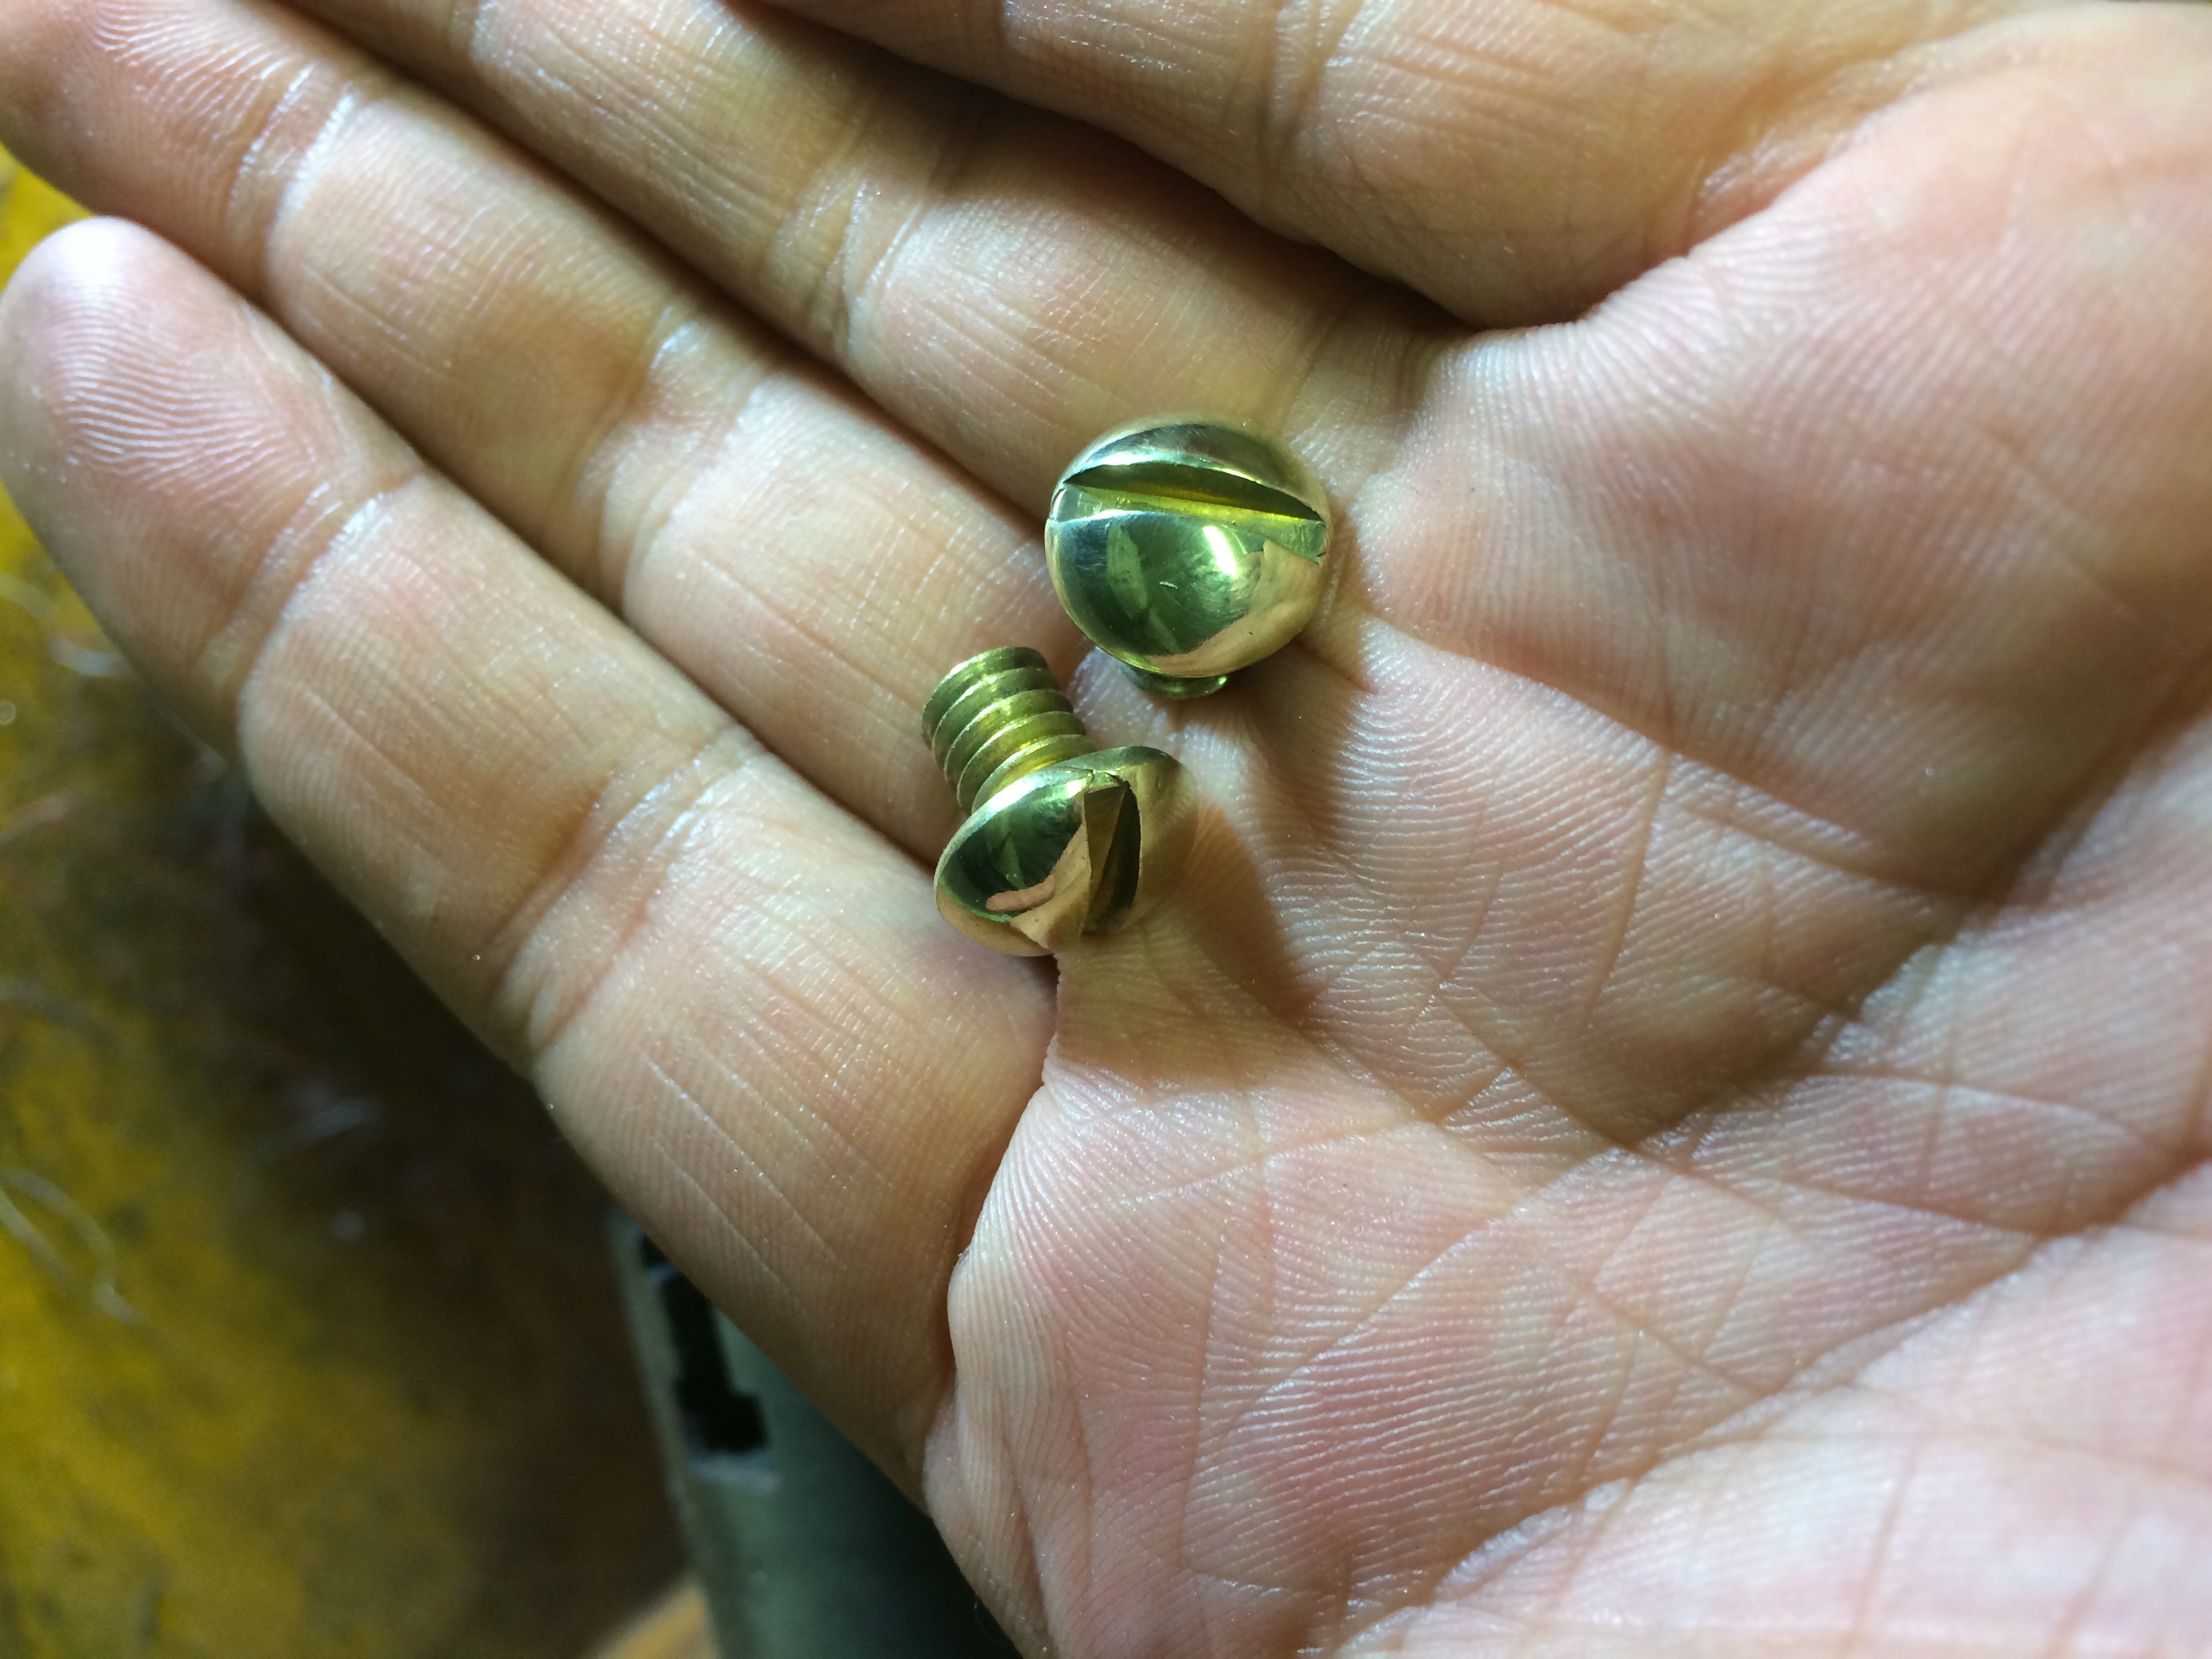
For that extra special touch, I sourced some brass 1/4-20 screws where I would normally use steel. I coupled these with some neoprene washers which would prevent over-tightening since they have a single slot for a screw driver/coin.
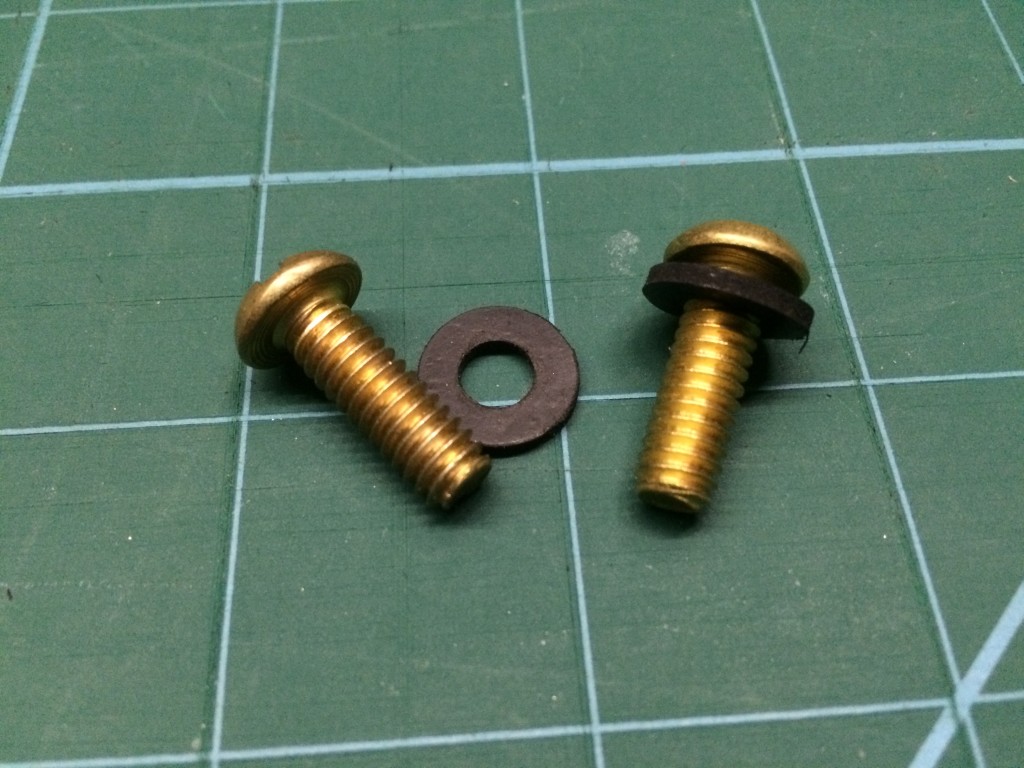
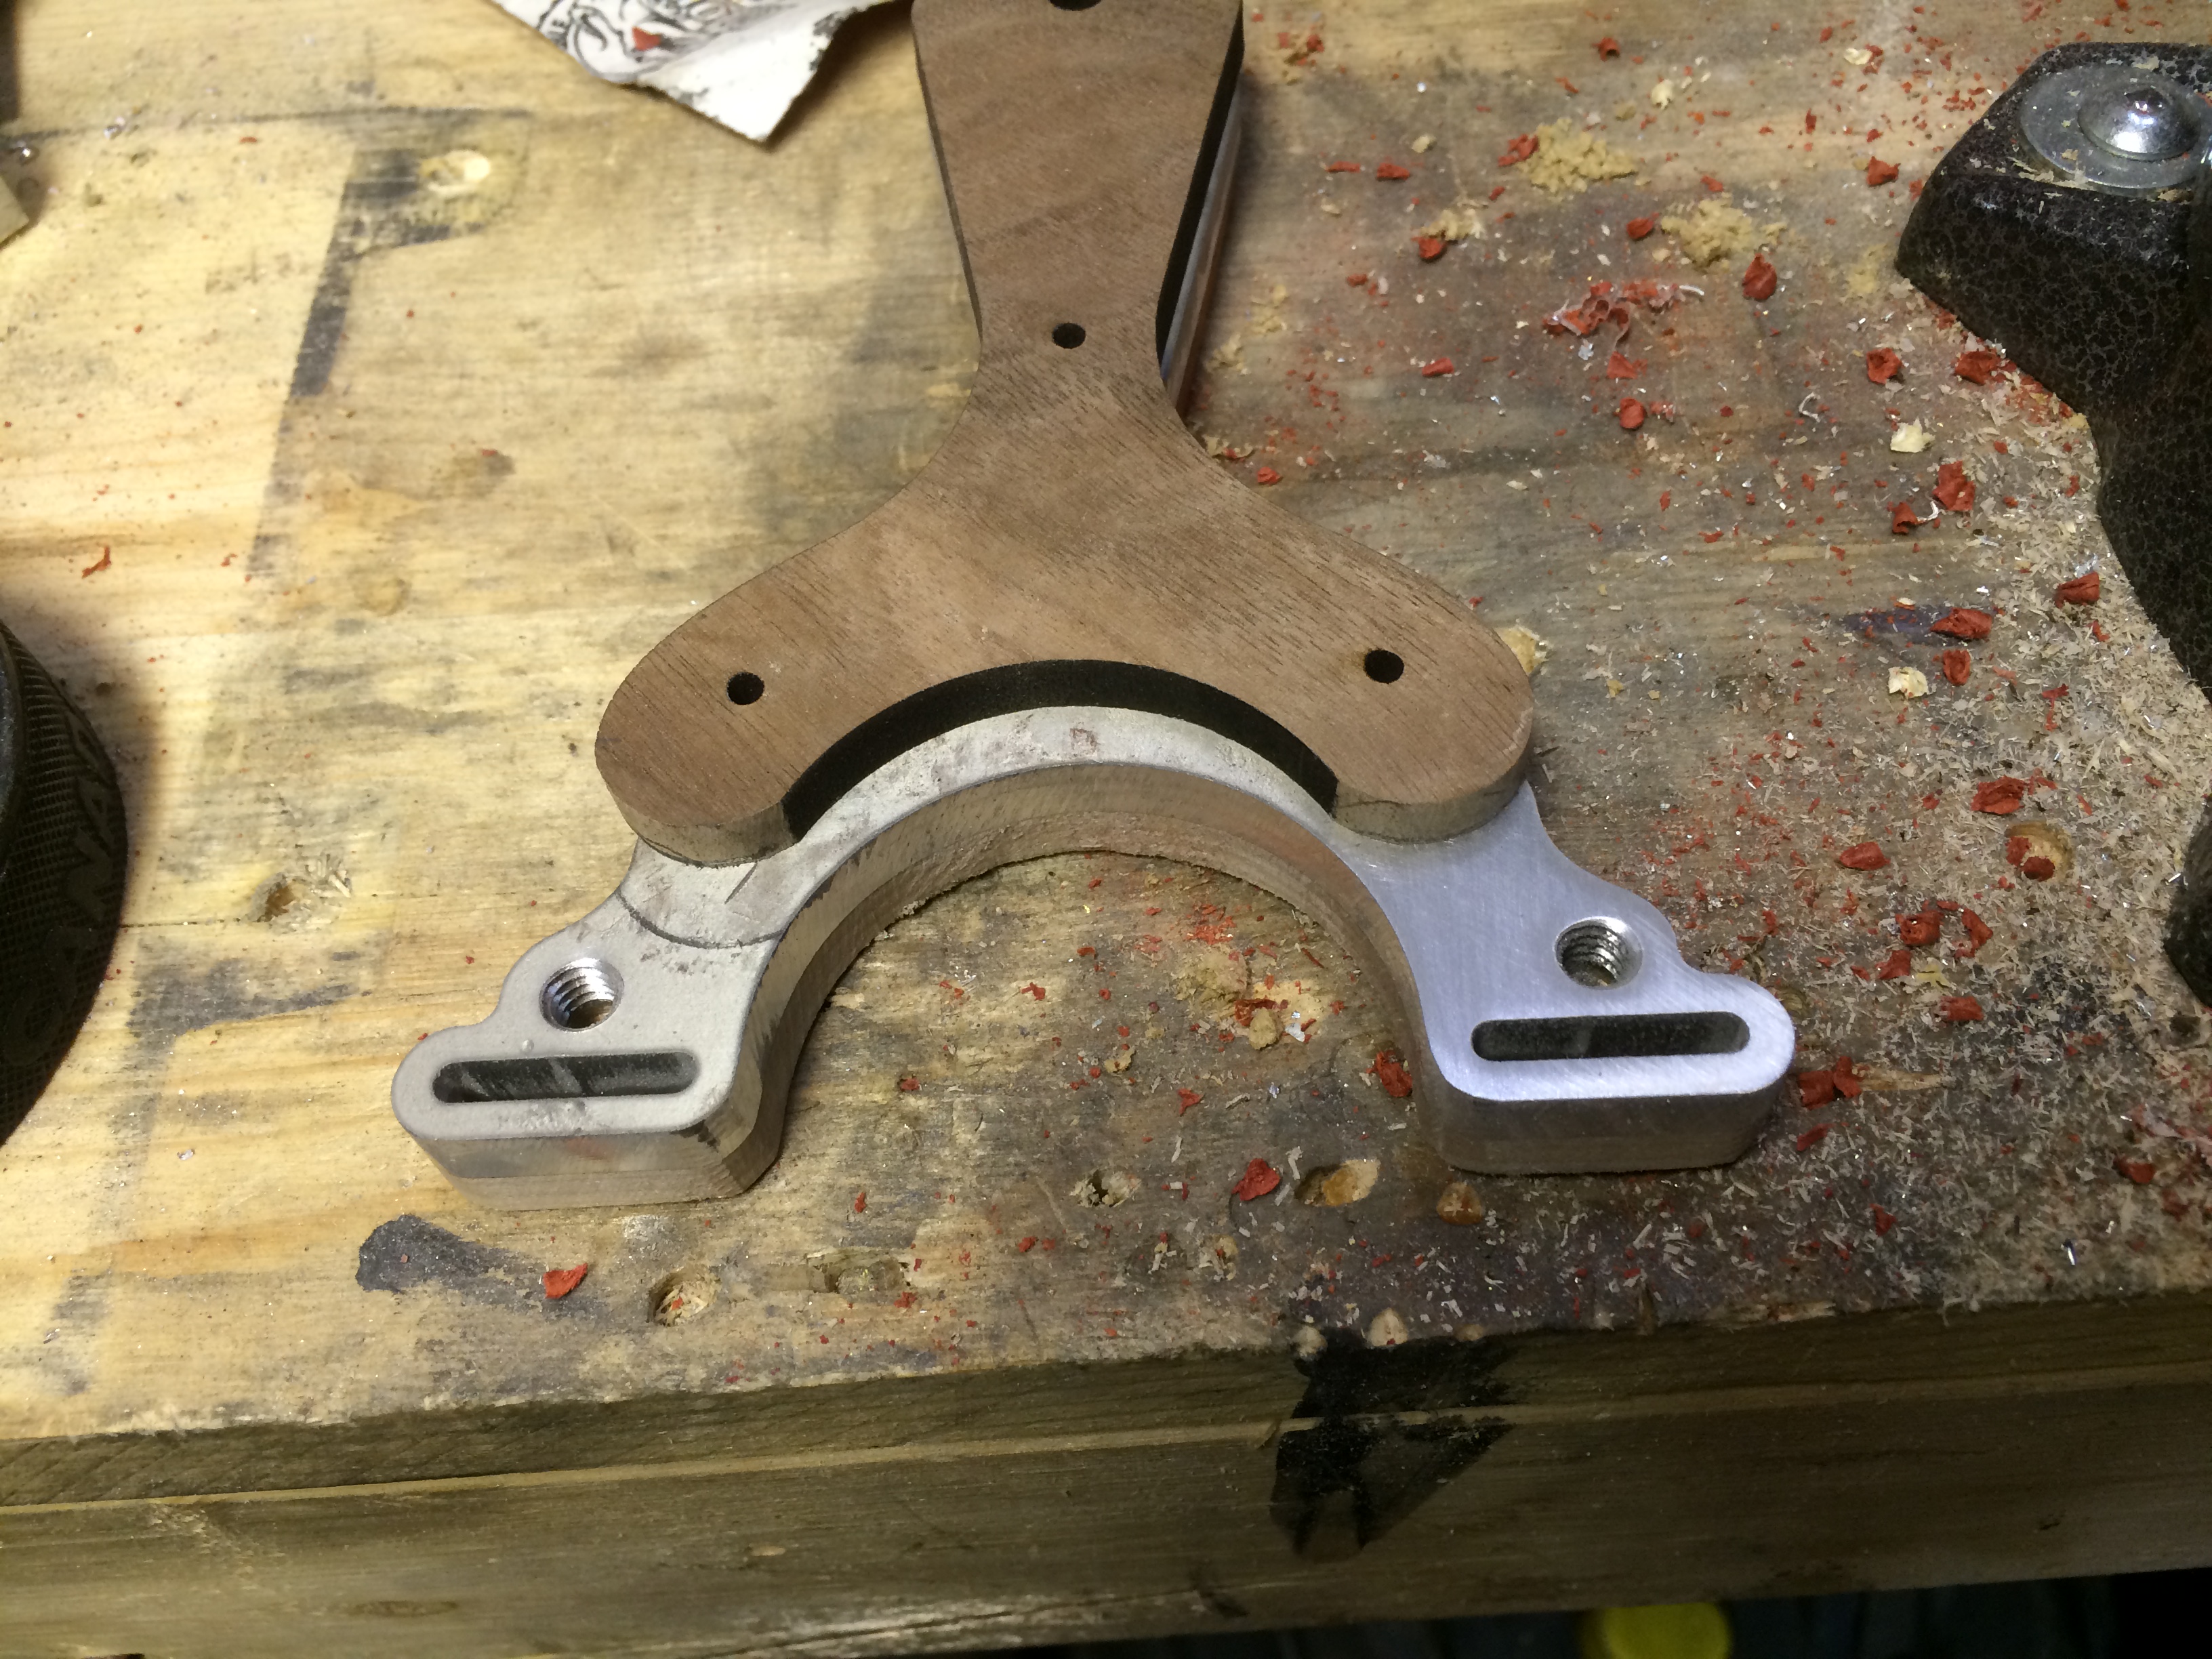
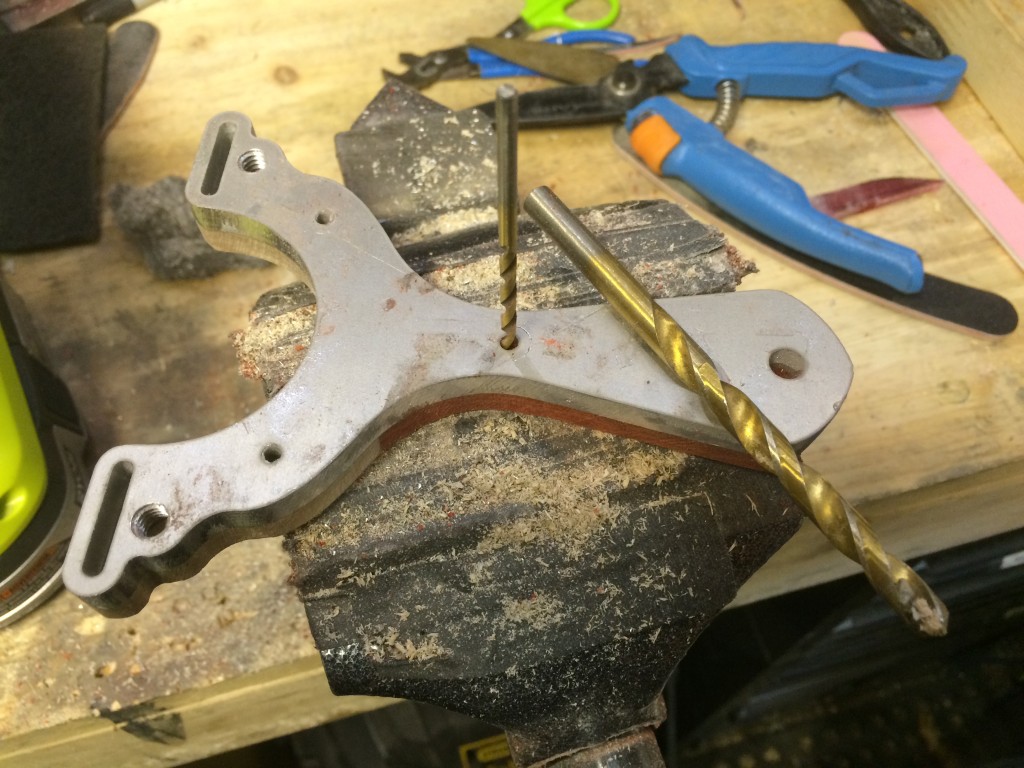
After getting all the materials ready to go, it was time to get cracking. First step was to machine the hole for the screws, this is important to do now since the scale would cover this hole up and it’s good to get the messy work done first. A power drill, a 1/4-20 tap and some machine oil made quick work of the threads. The hole was already presized to the correct size so there was no need to drill it out for the tap.
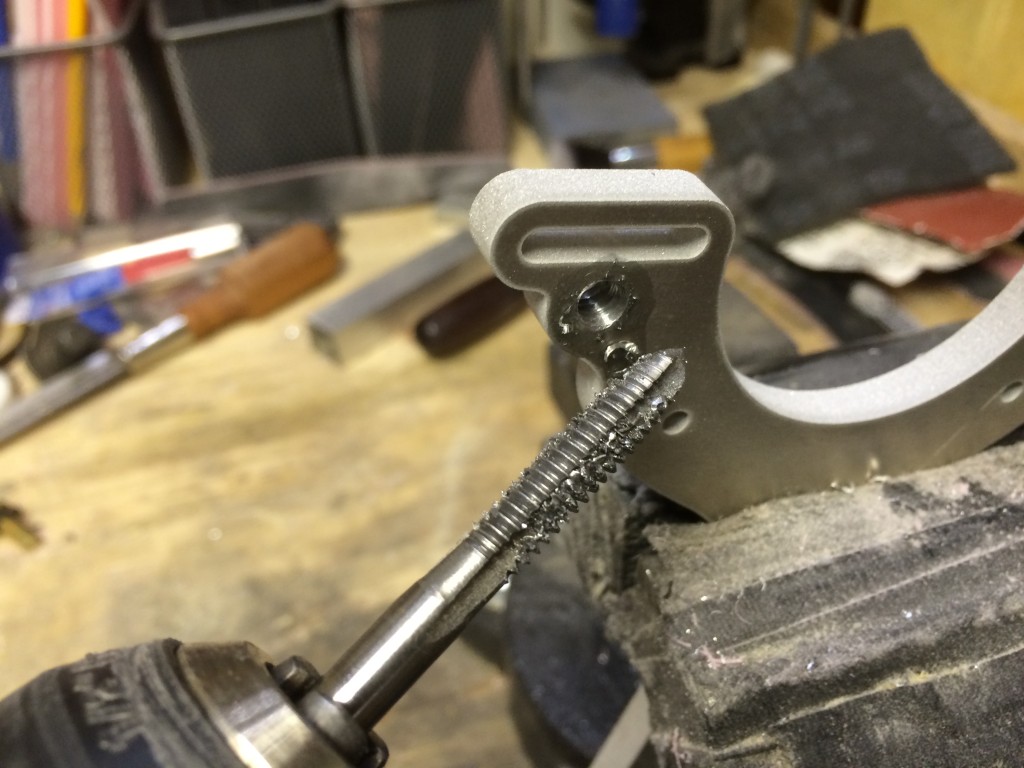
The brass bolts only came in 3/4″ lengths so they were cut and filed down to size. 1/4-20 is a nice, forgiving thread that is strong but small enough to fit into this frame.

Using the threaded holes as a locator, some recesses were drilled into the mating side of the maple JUST in case there was over-tightening. The recess would provide some relief so that the mechanical advantage of the screw wouldn’t delaminate the scale from the core.
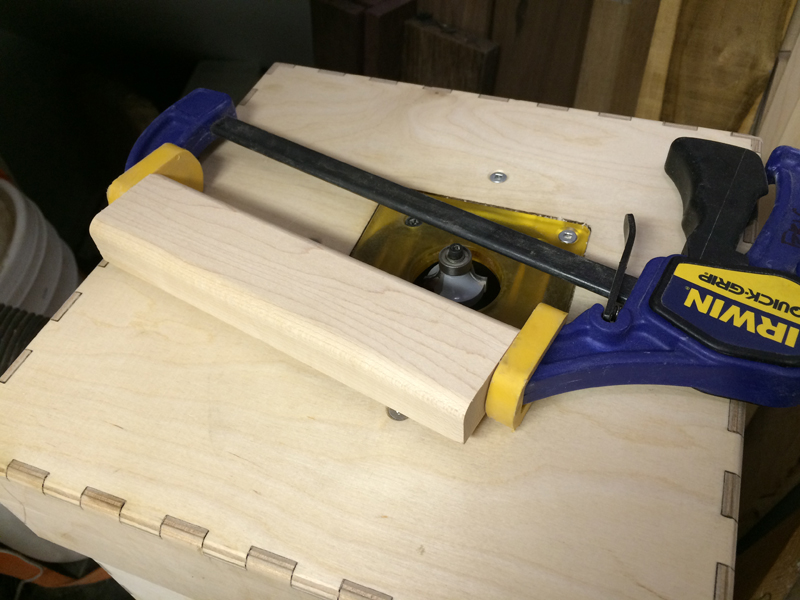
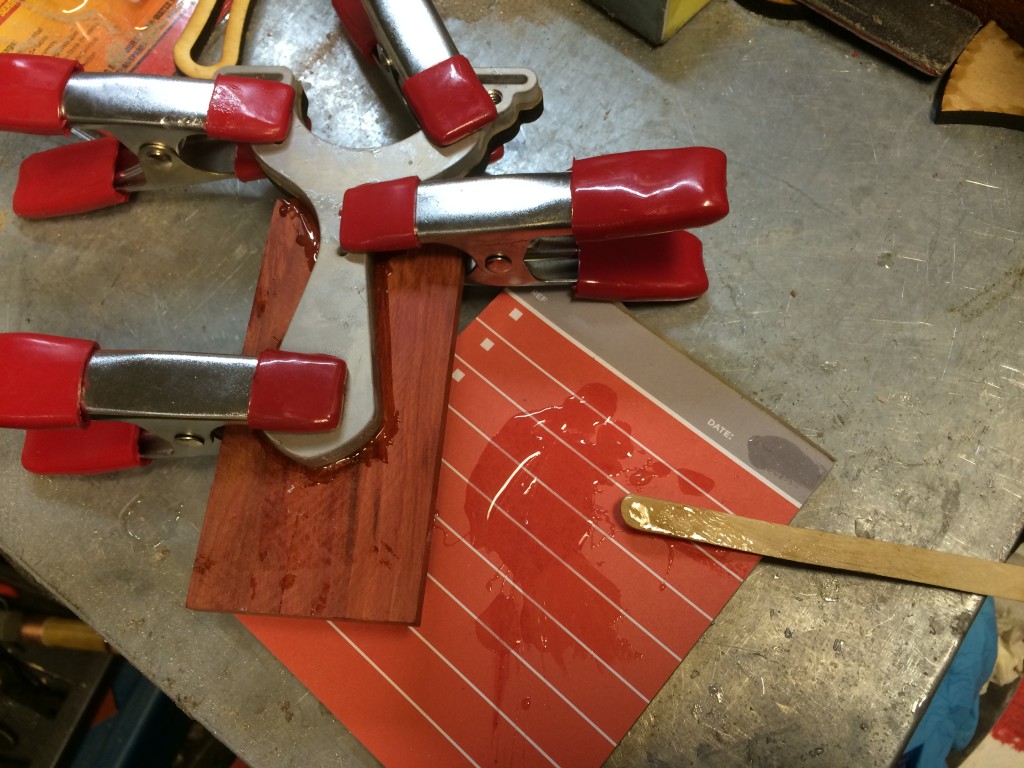
Time to adhere the two parts of the back scale into place. The mating surface of the aluinum was keyed with 80 grit sand paper so the epoxy would have something to tack to.

Using pony spring clamps to hold the timber in place. It’s important not to put too much pressure on it since the epoxy wants to squeeze right out if too much is used.
http://prepaid365awards.co.uk/date/2015/01/14/ Maker Tip: Get yourself a notepad, a cheap one but with thick paper. Use this combined with a stash of cheap popsicle sticks to mix up your epoxy. When you are done mixing or even if you leave it to set, you can rip off the top sheet of the pad and throw it away. No need for mixing your epoxy on a scrap wood or whatever. You can even drill or punch a hole in it and hang it up near your epoxy supply.
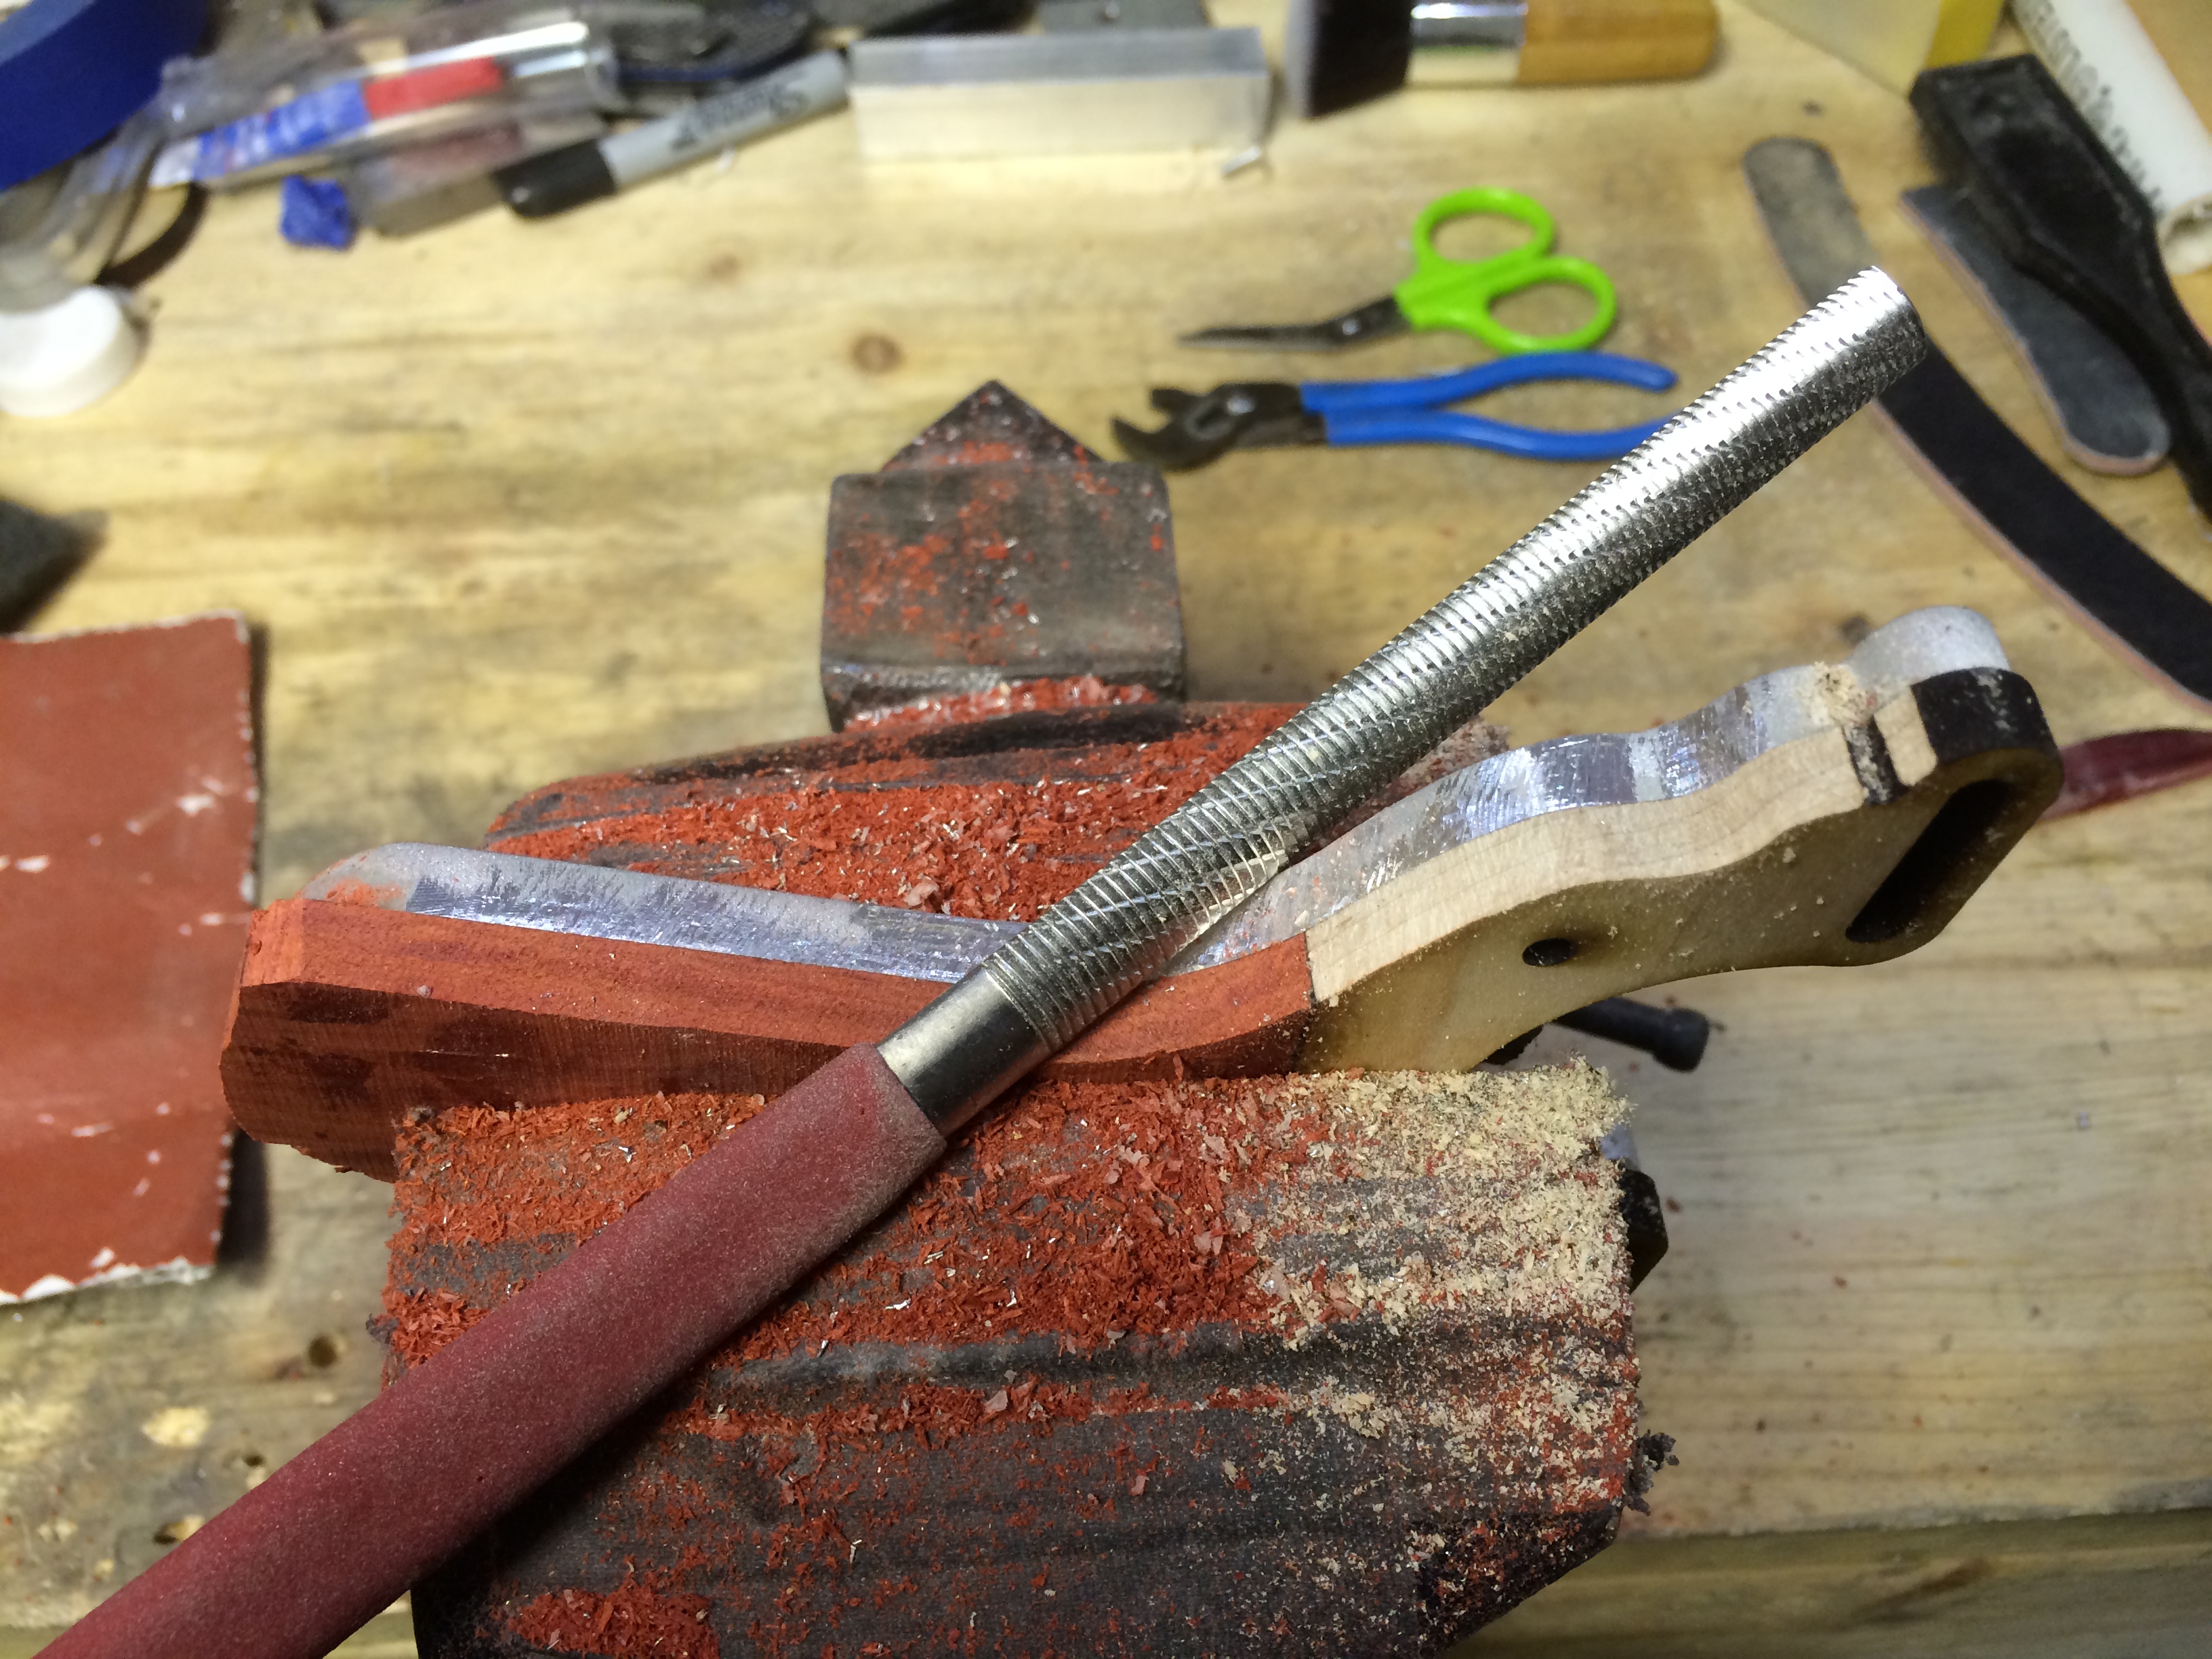
Once the epoxy has had an hour or so to cure, a coping saw it is a great way to remove the excess material. The redheart smells funny when cut and sanded so I wore a dust mask every time I worked with wood. No sense developing a dust allergy.
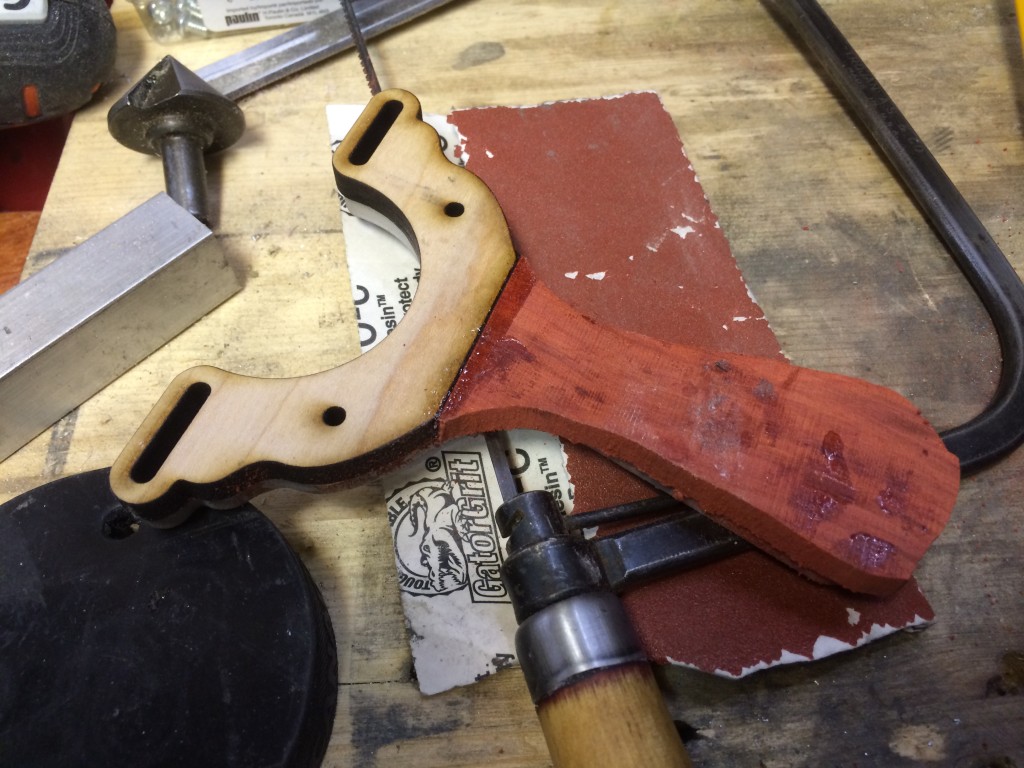
Now I get to use some of my favourite tools, the Razor File. This particular flavour is a 1/2″ wide, Xfine version. The Razor File actually CUTS the wood instead of abrading it. I work into the core so not to blow out fibres. It’s a good time to note that the laser cut maple was digitally expanded 1mm so the burned edges could be filed away to perfectly meet the aluminum core. The Redheart is filed flush as well.

I am a big fan of power tools as they make quick of work on things but when dealing with special projects and delicate wood, cutting things by hand prevents big mistakes. I love how the slow file process produced a neat pile of light and red coloured filings. Notice the razor file creates chips and not powder.
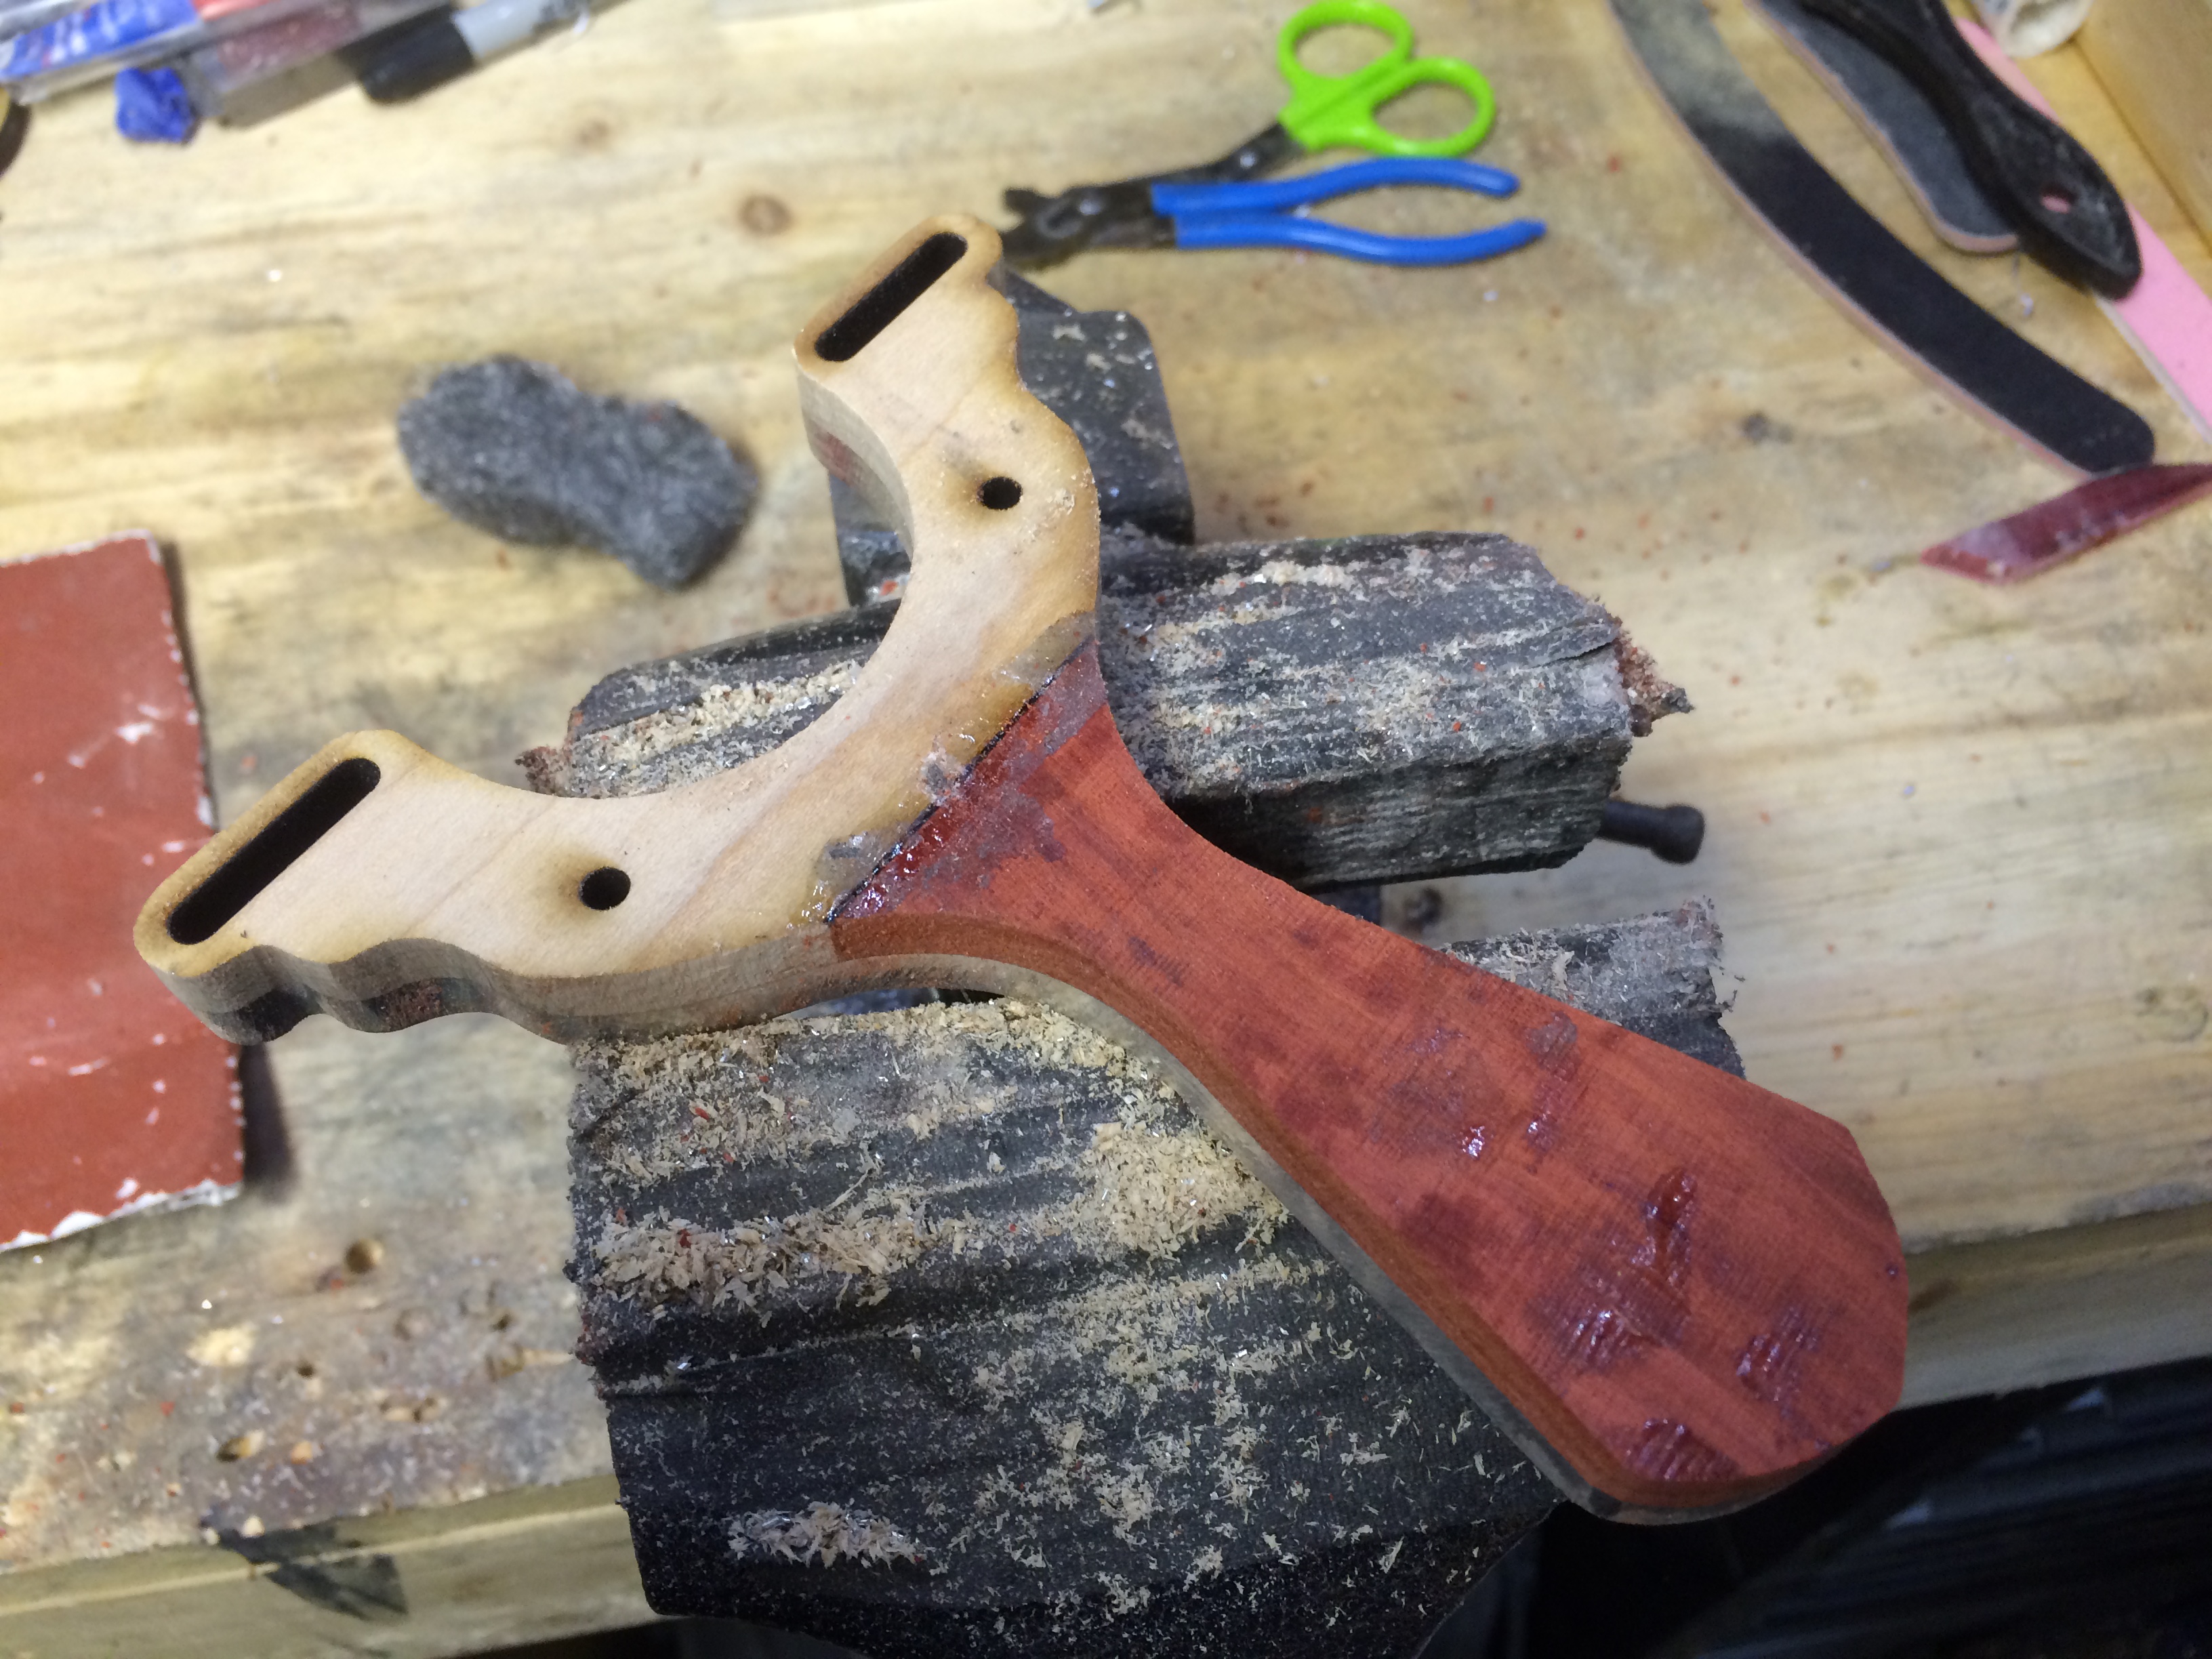
This is the final shape of the silhouette, the excess epoxy will act as a gap filler mixing with the burned edge of the maple to create very crisp black line.

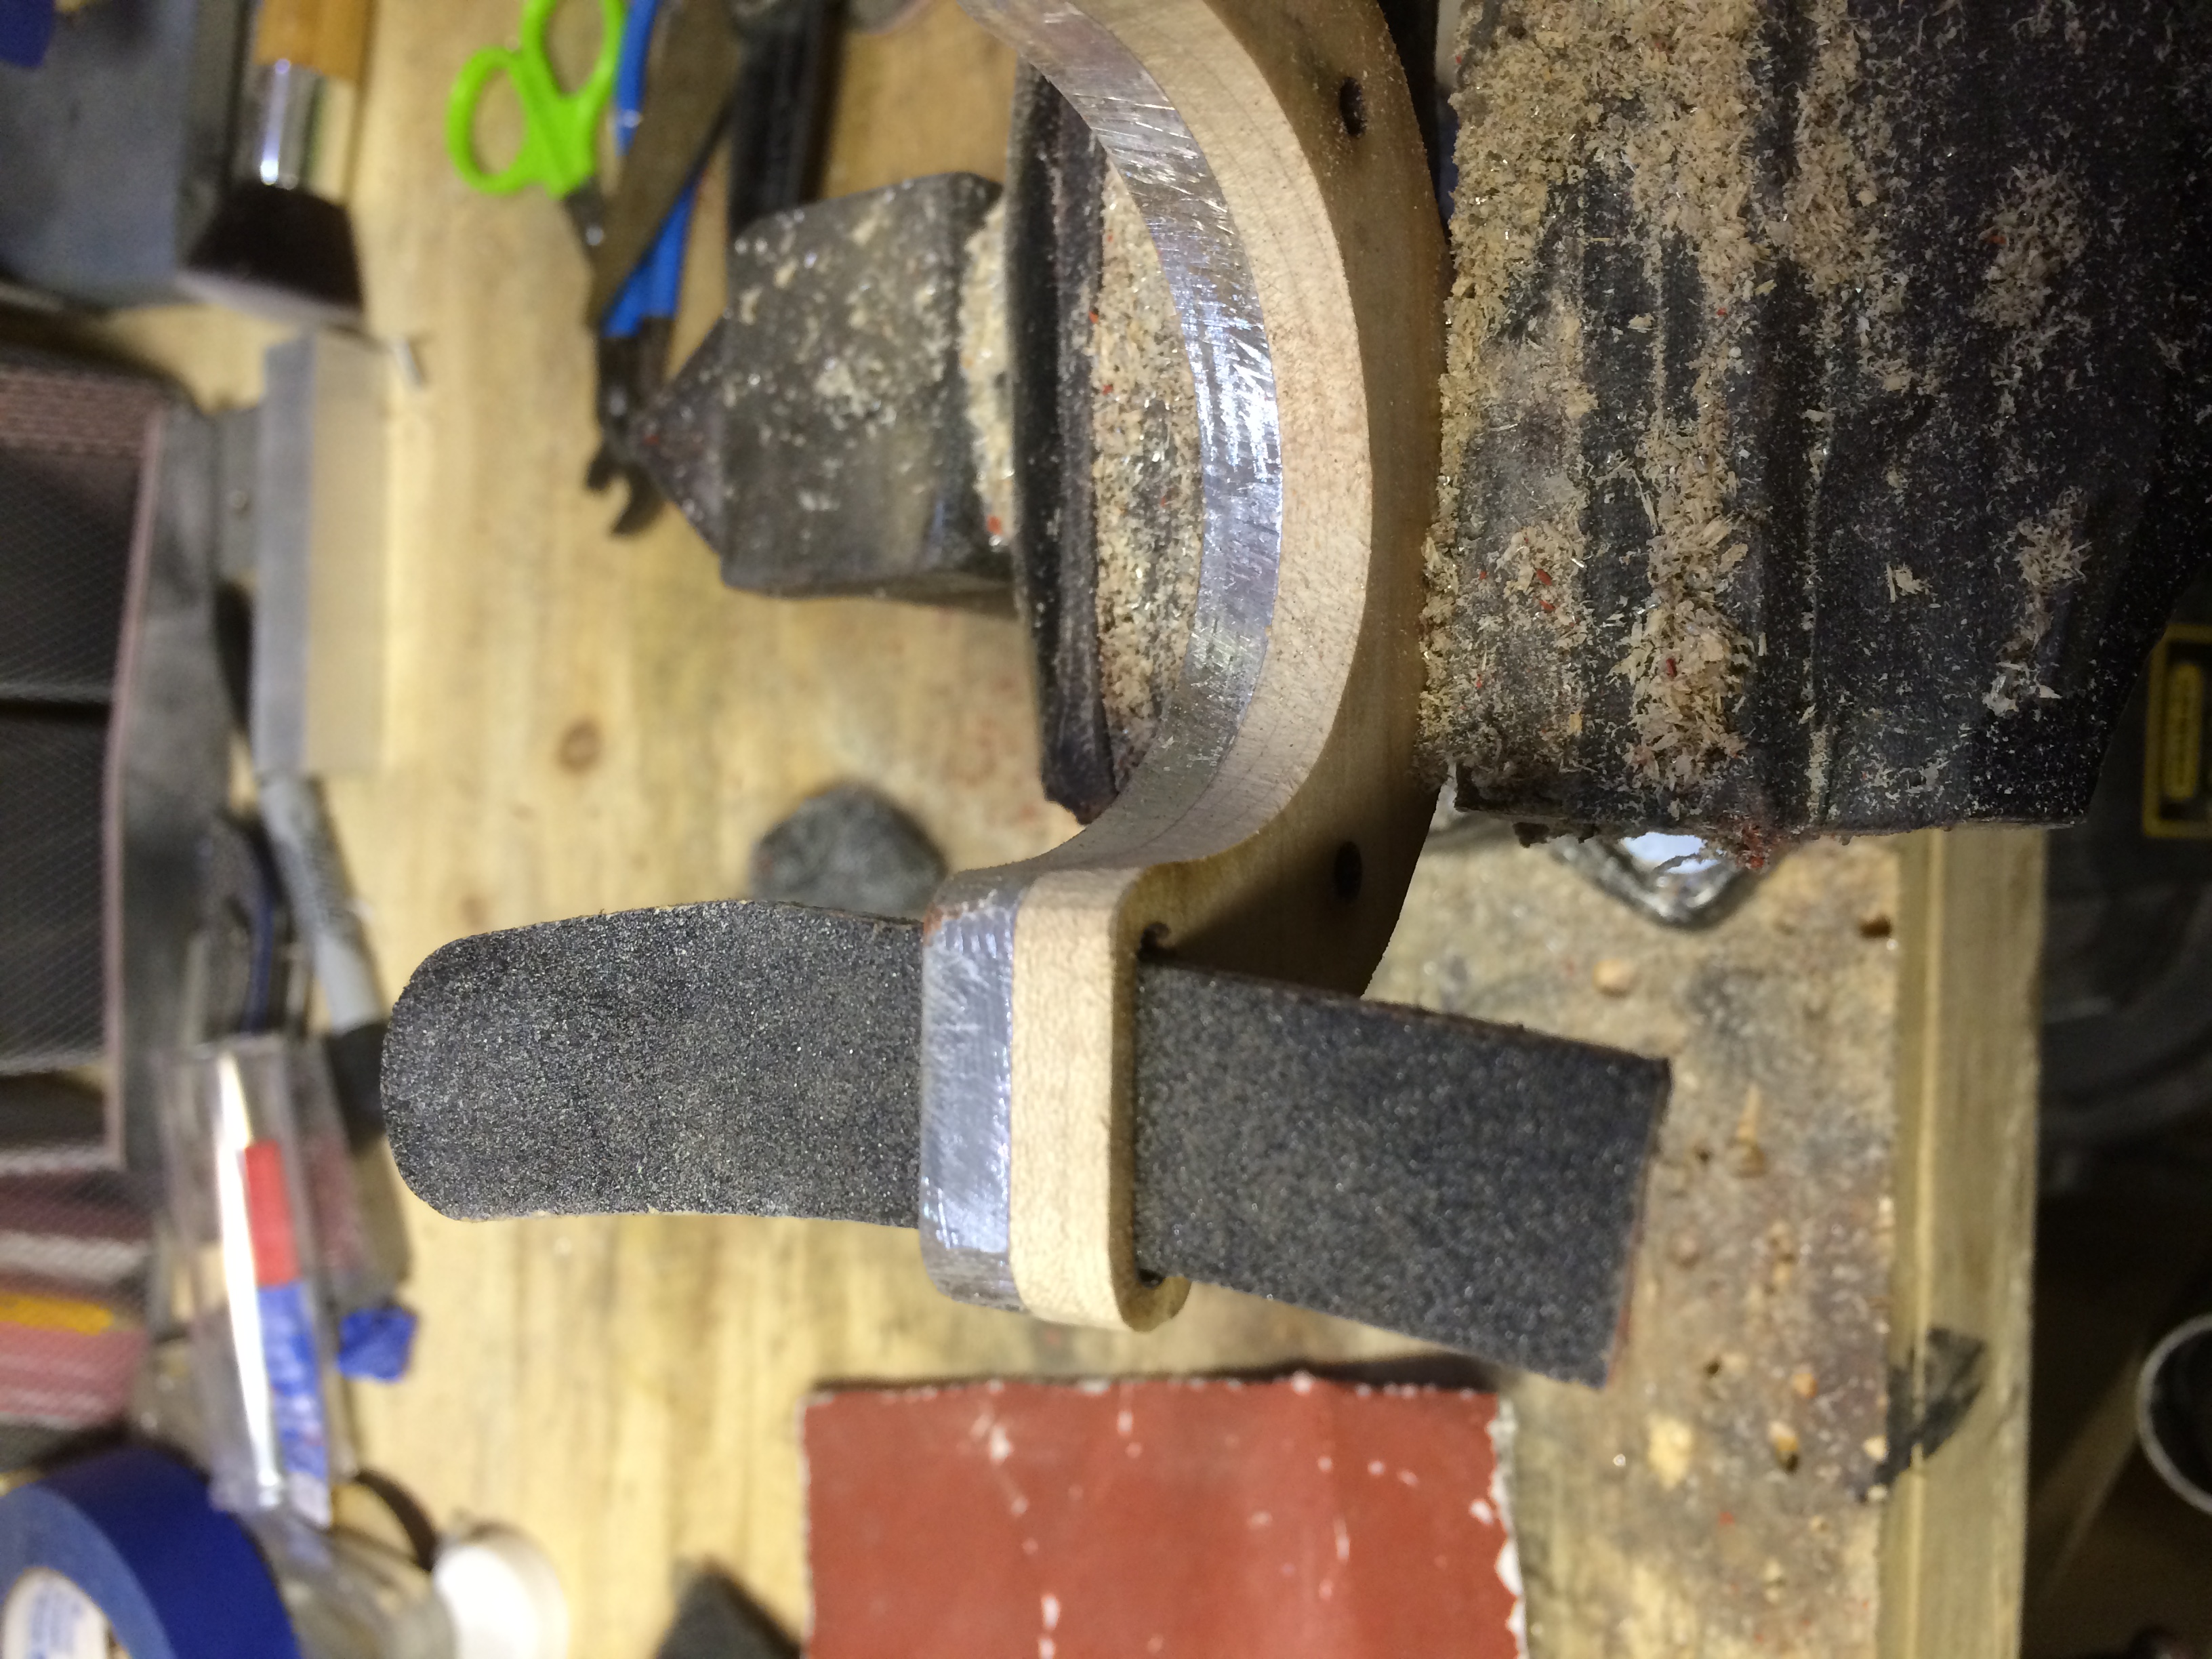
To clean up the inside slot, a nail file is trimmed down to fit in there and a couple of swipes and it’s done.
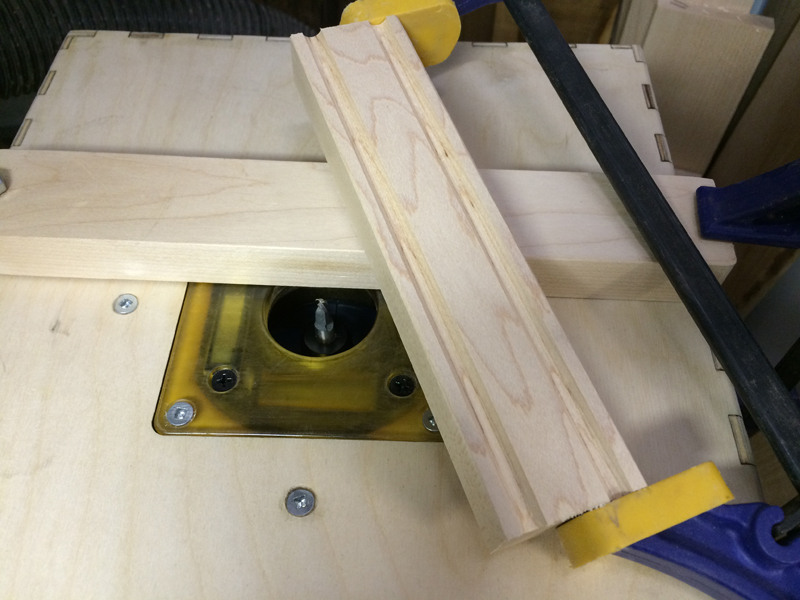
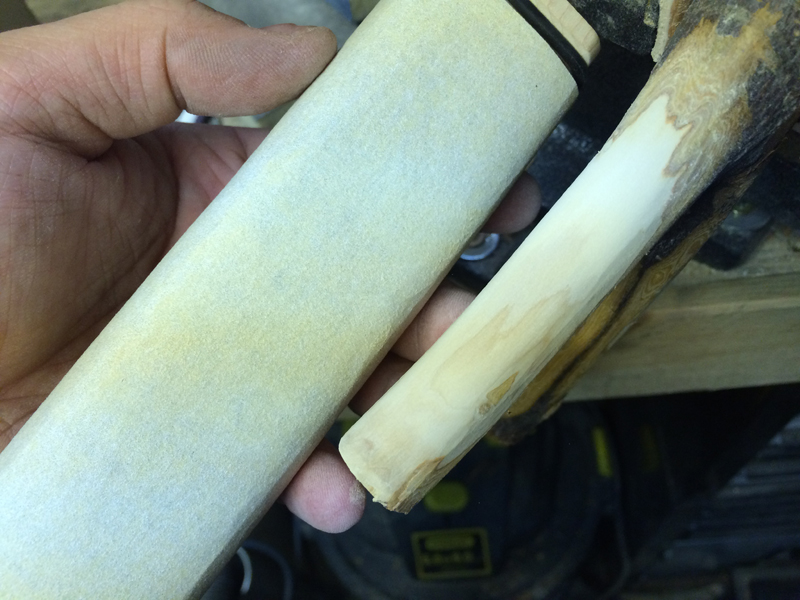
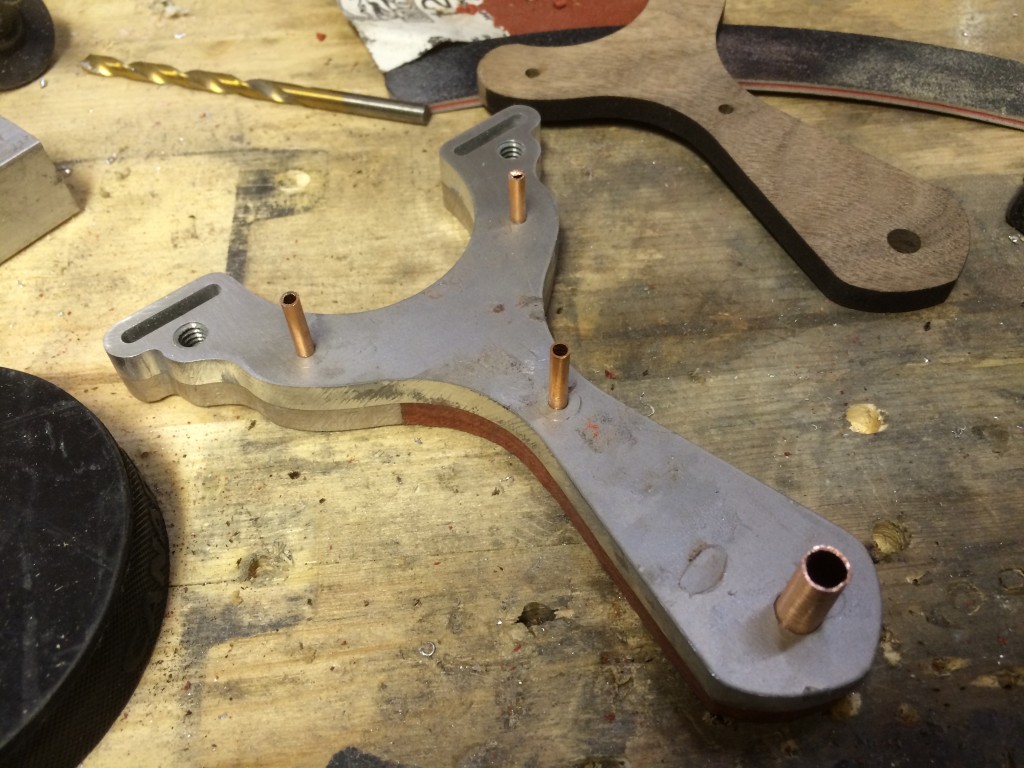
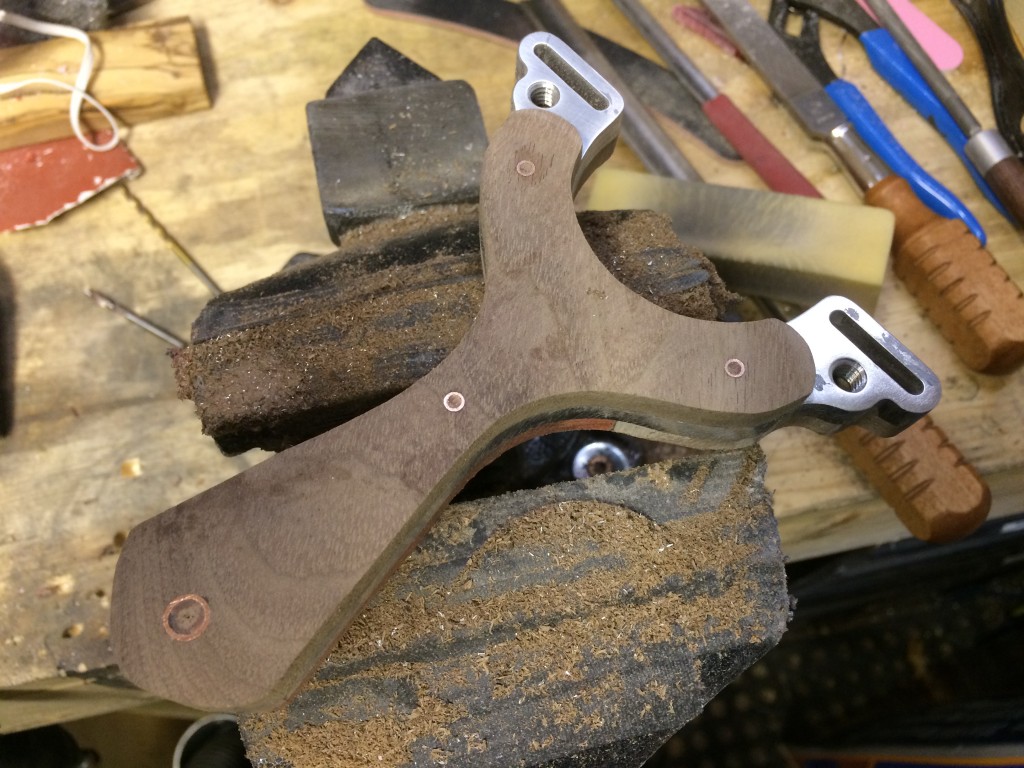
Now that the backside scale is profiled, it’s time to prep for the front side scale. Here a 1/8″ bit and a 1/4″ bit are used to clean up the holes, prepping for the copper tubes.
..but before that, the walnut scale needs some attention. Since this is going to be epoxied on before shaping, there are two edges near the exposed aluminum that would be inaccessible after it’s tacked down. I use a pencil crayon to mark where I need to sand back the burned edges.

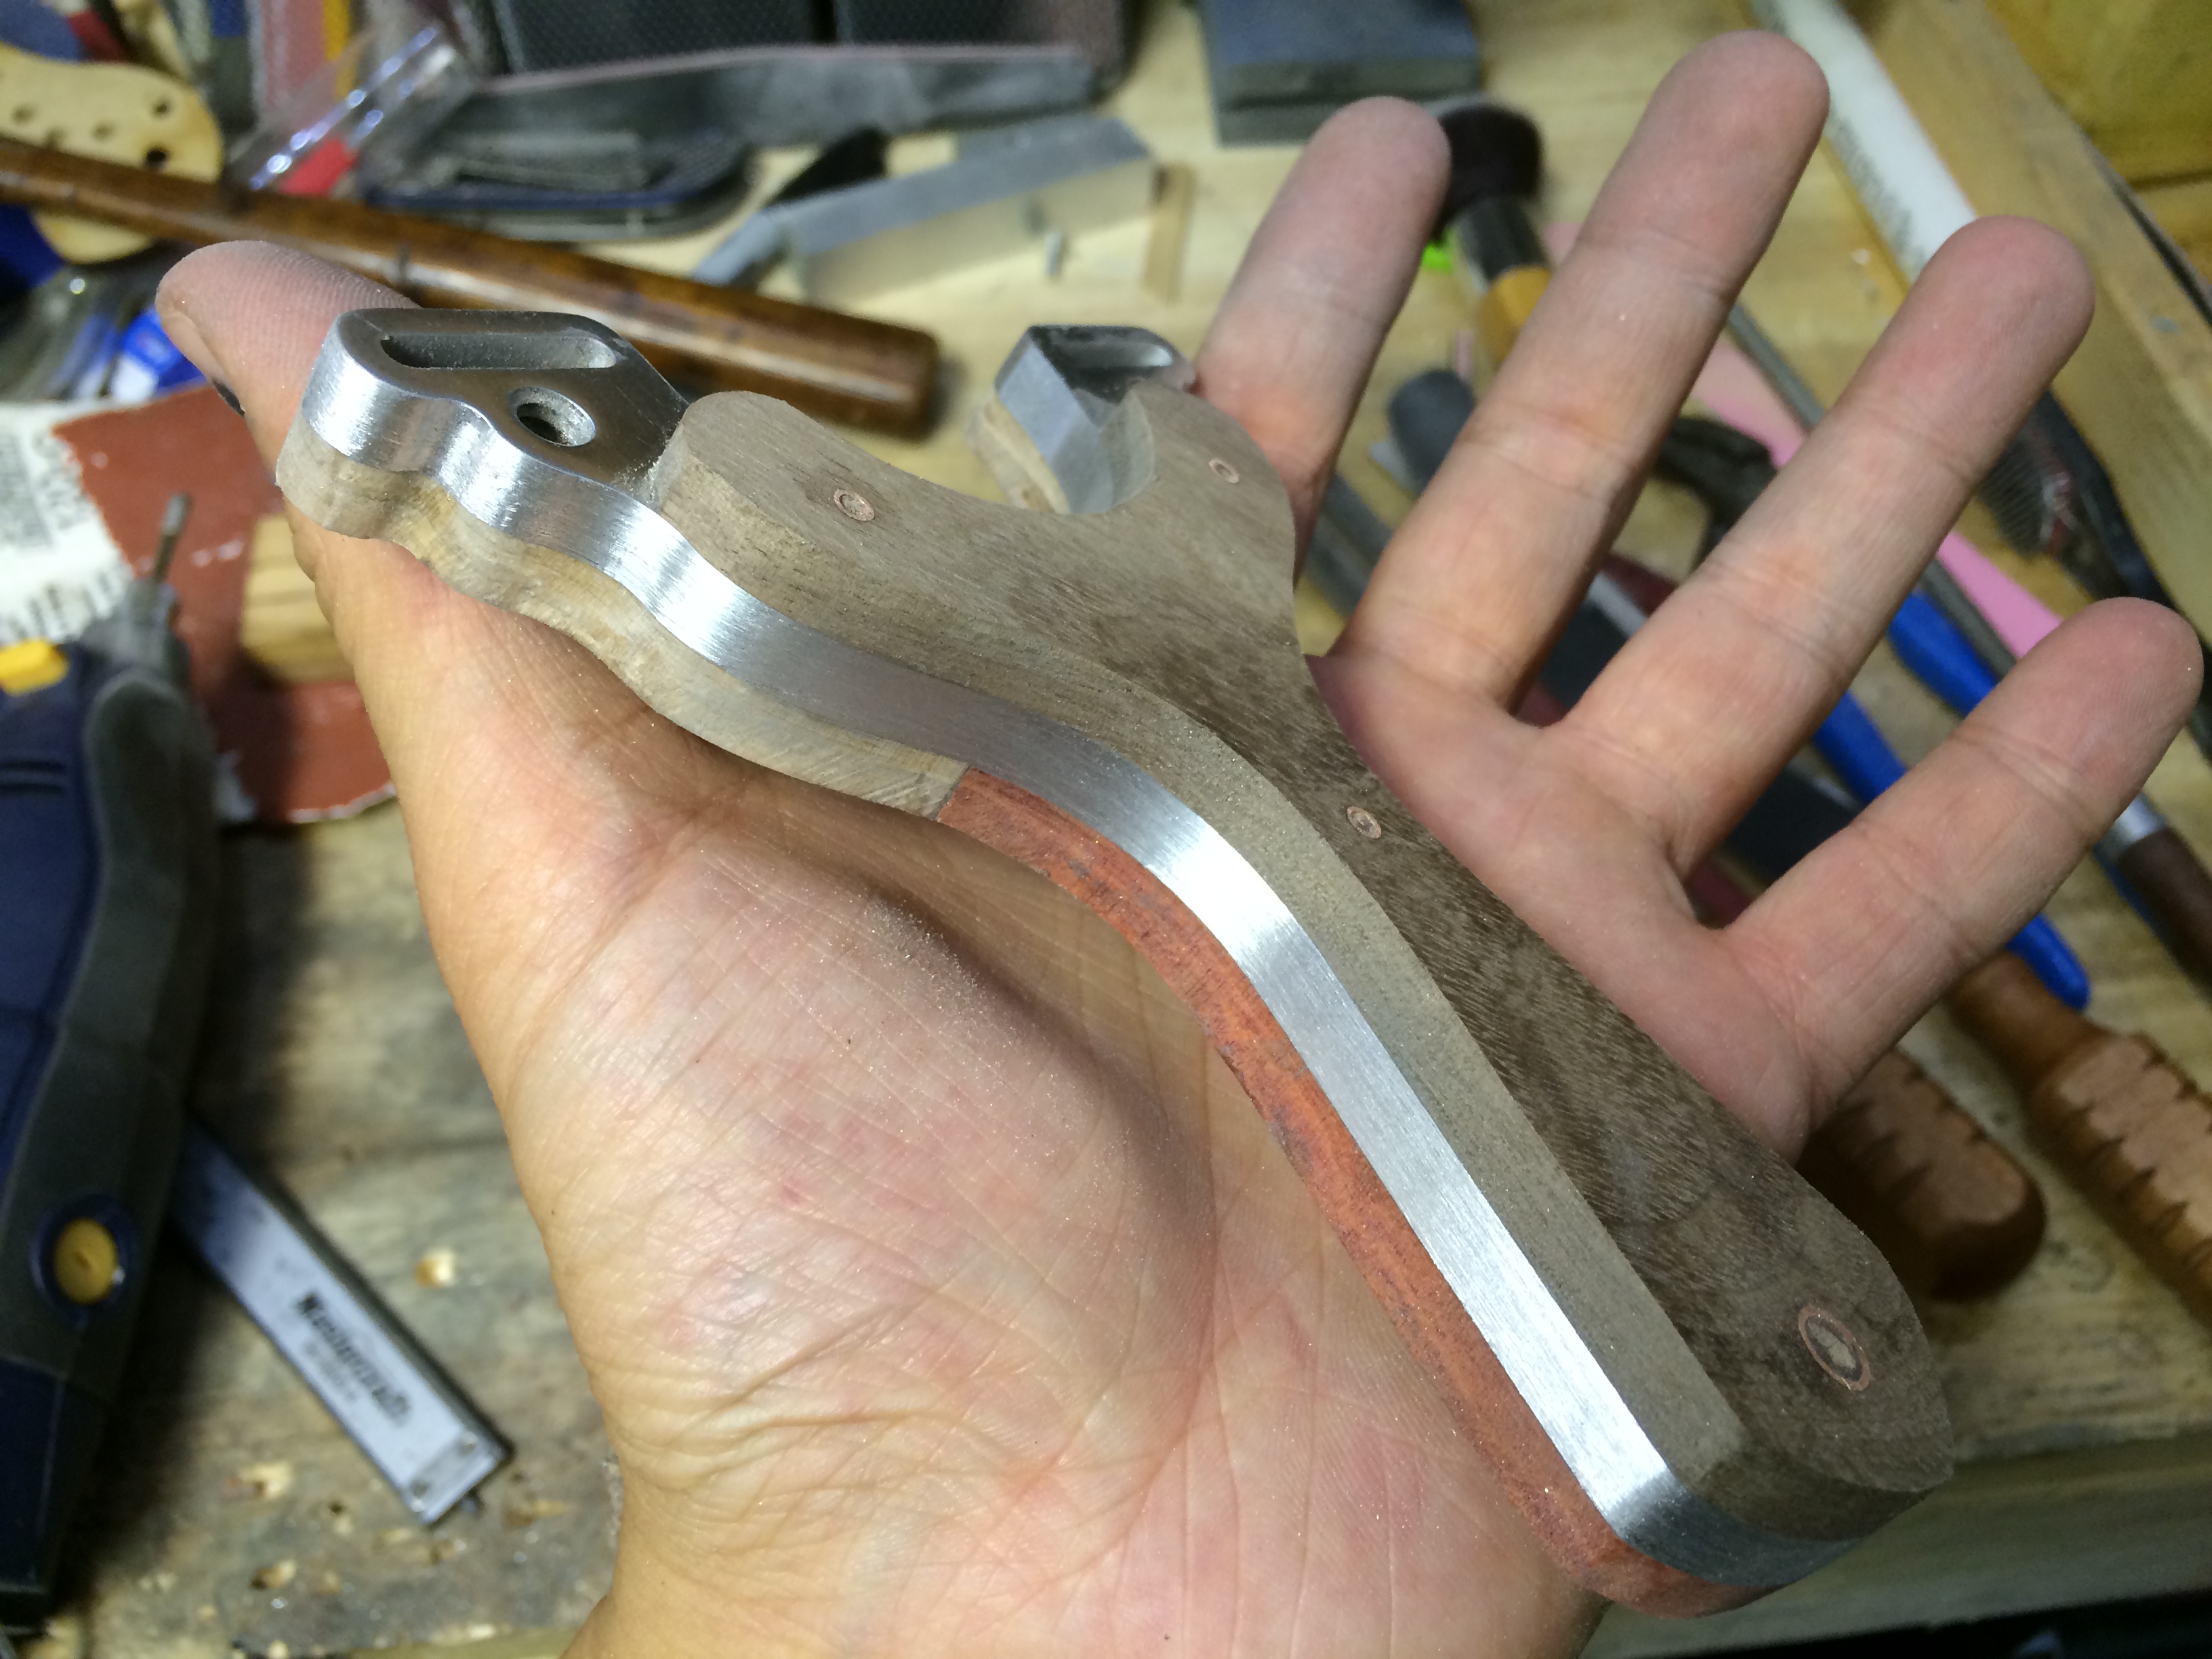
The frame itself needs to some attention. The exposed aluminum area get a sanding to 600 grit. The smooth transition from wood to aluminum needs to be prefect since there is no other exposed aluminum other than the spine and edges. Having the aluminum smooth there is also important in the gluing process, more on that later.
The copper tubes dry fit into place. They get chucked into a drill and a coarse sanded to create a tooth for the epoxy to grab onto.
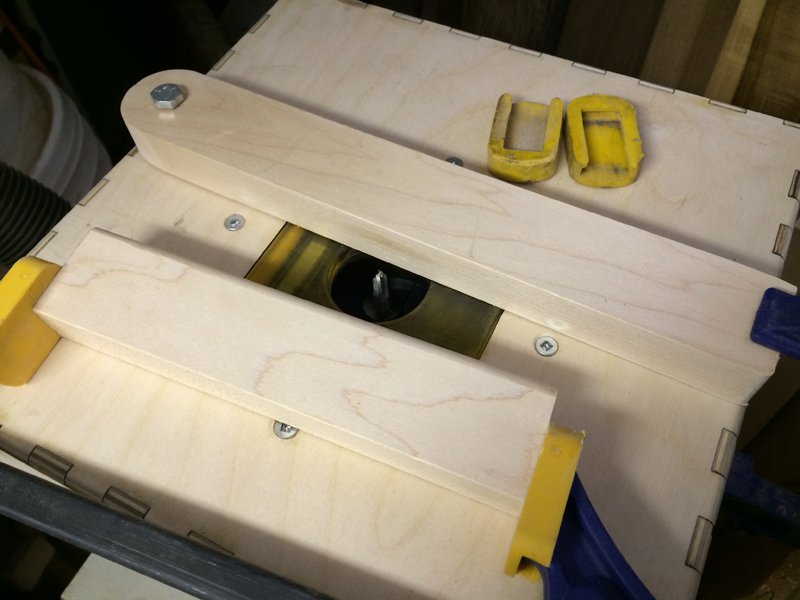
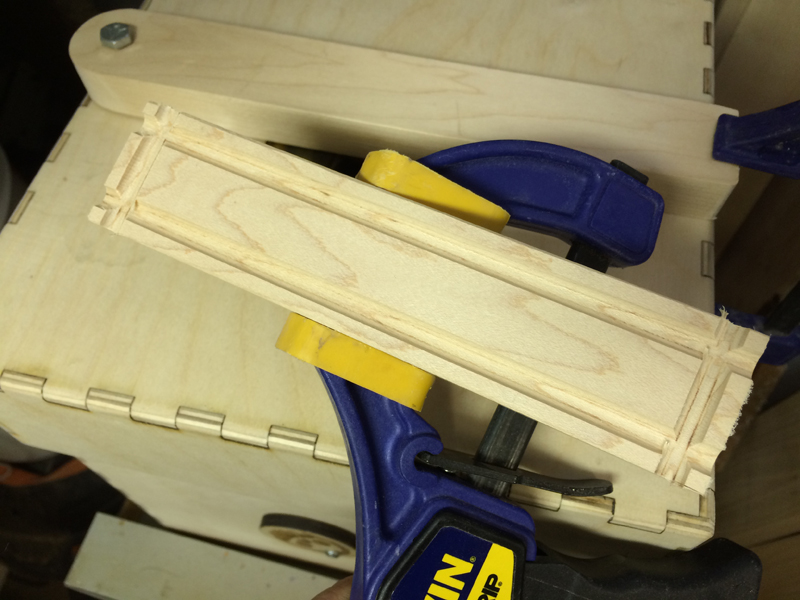
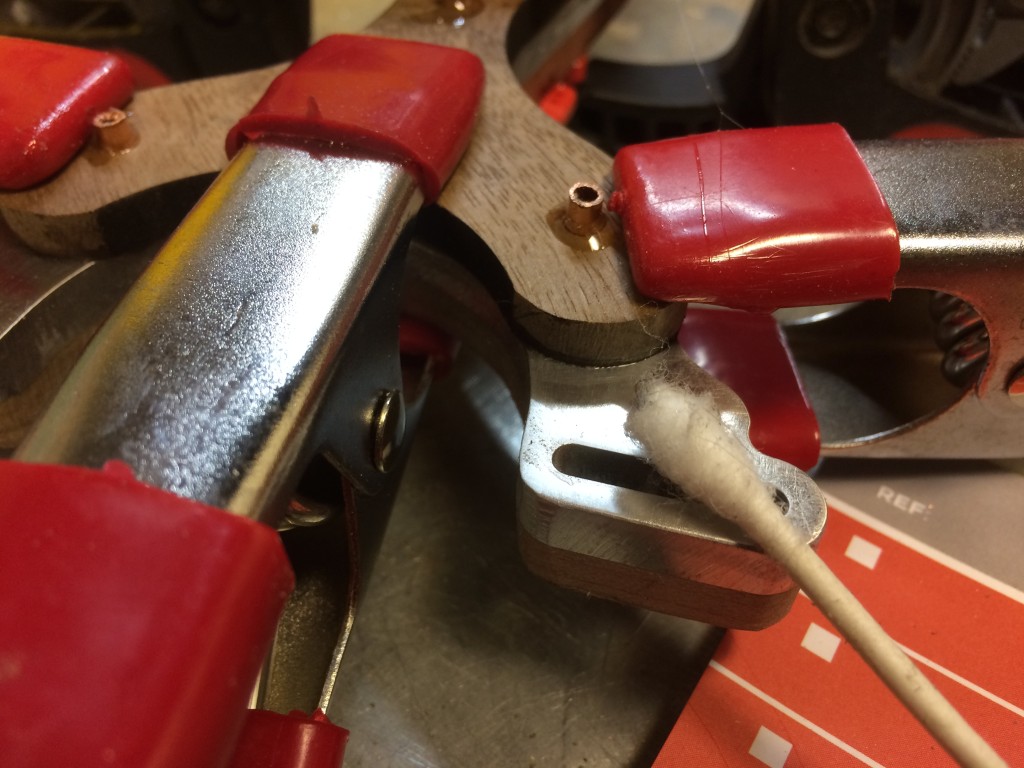
Again, spring camps hold down the critical mating areas, mainly the tips and butt end. Some additional epoxy was dabbed onto the tubes so any gaps would be filled.
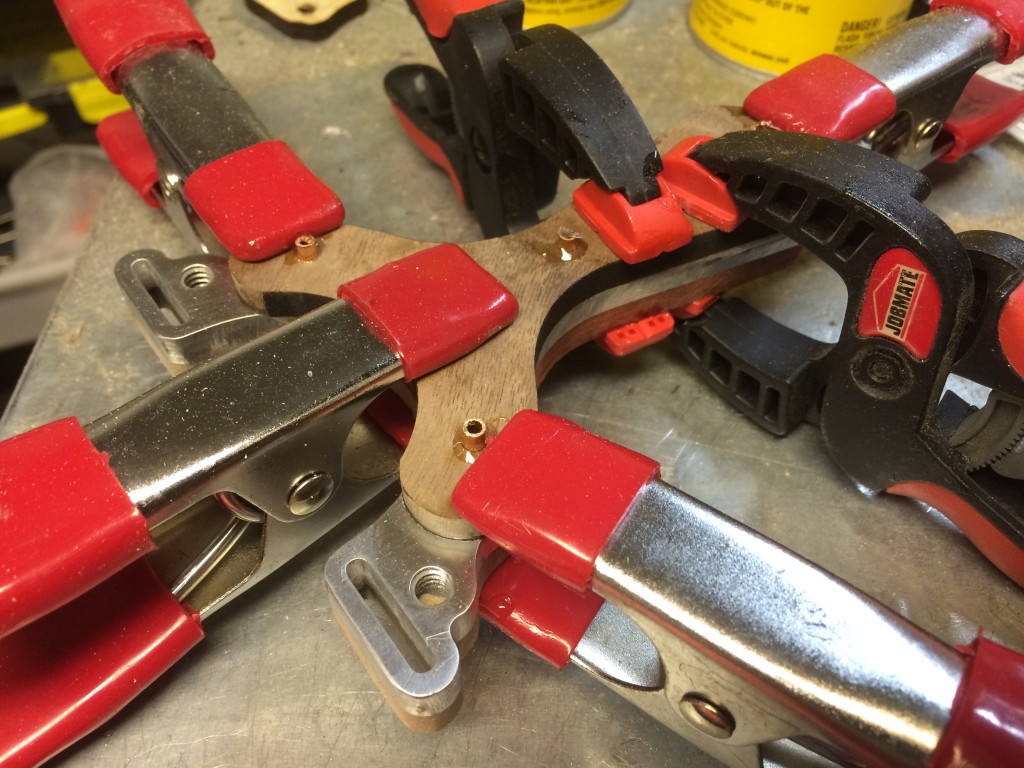
This is where surface prep proves its worth in time investment. Since the fork tips was sanded flat and smooth, removing any excess epoxy that was squeezed out with a cotton swab was easy and painless. The transition between wood and metal is now seamless with a tiny bead of epoxy filling any gap.
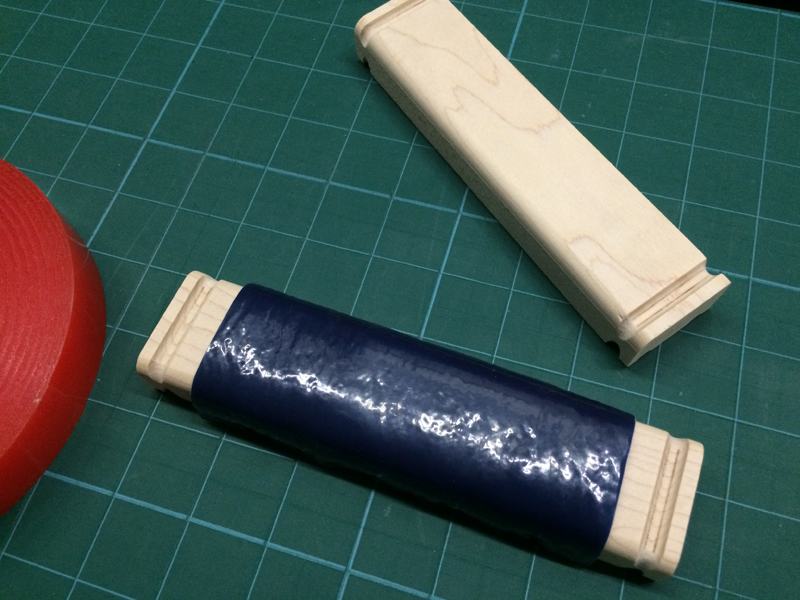
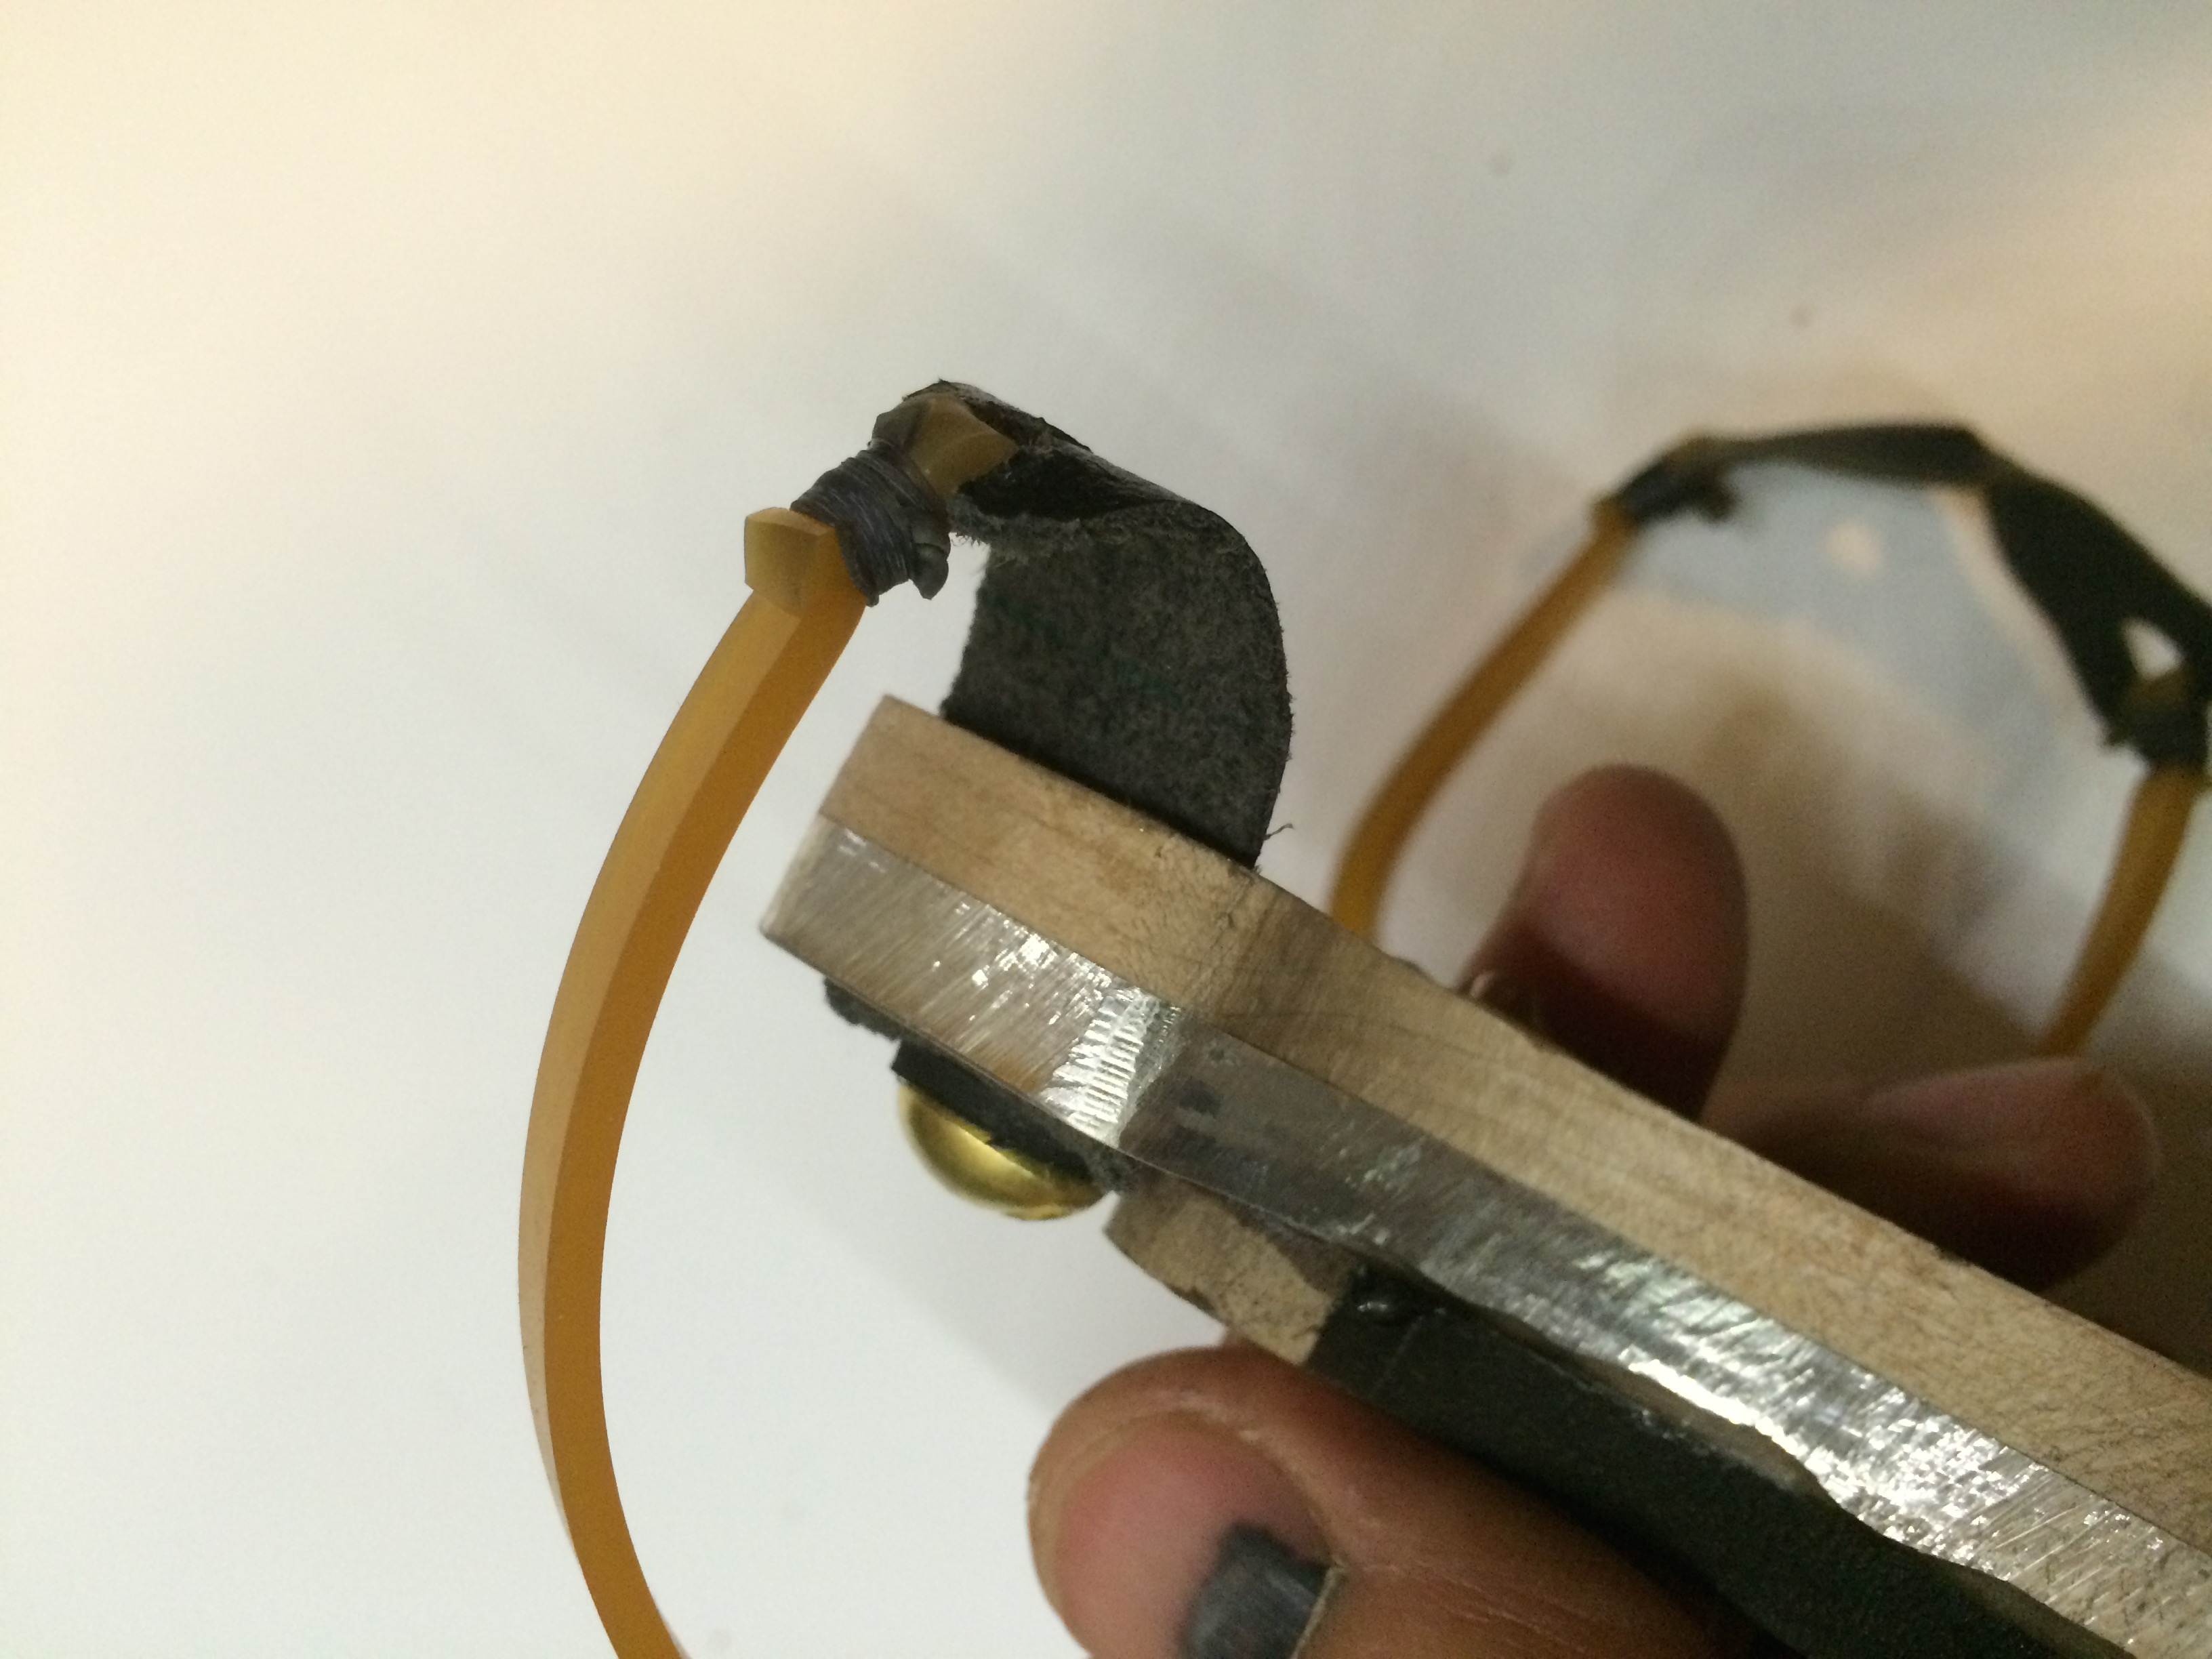
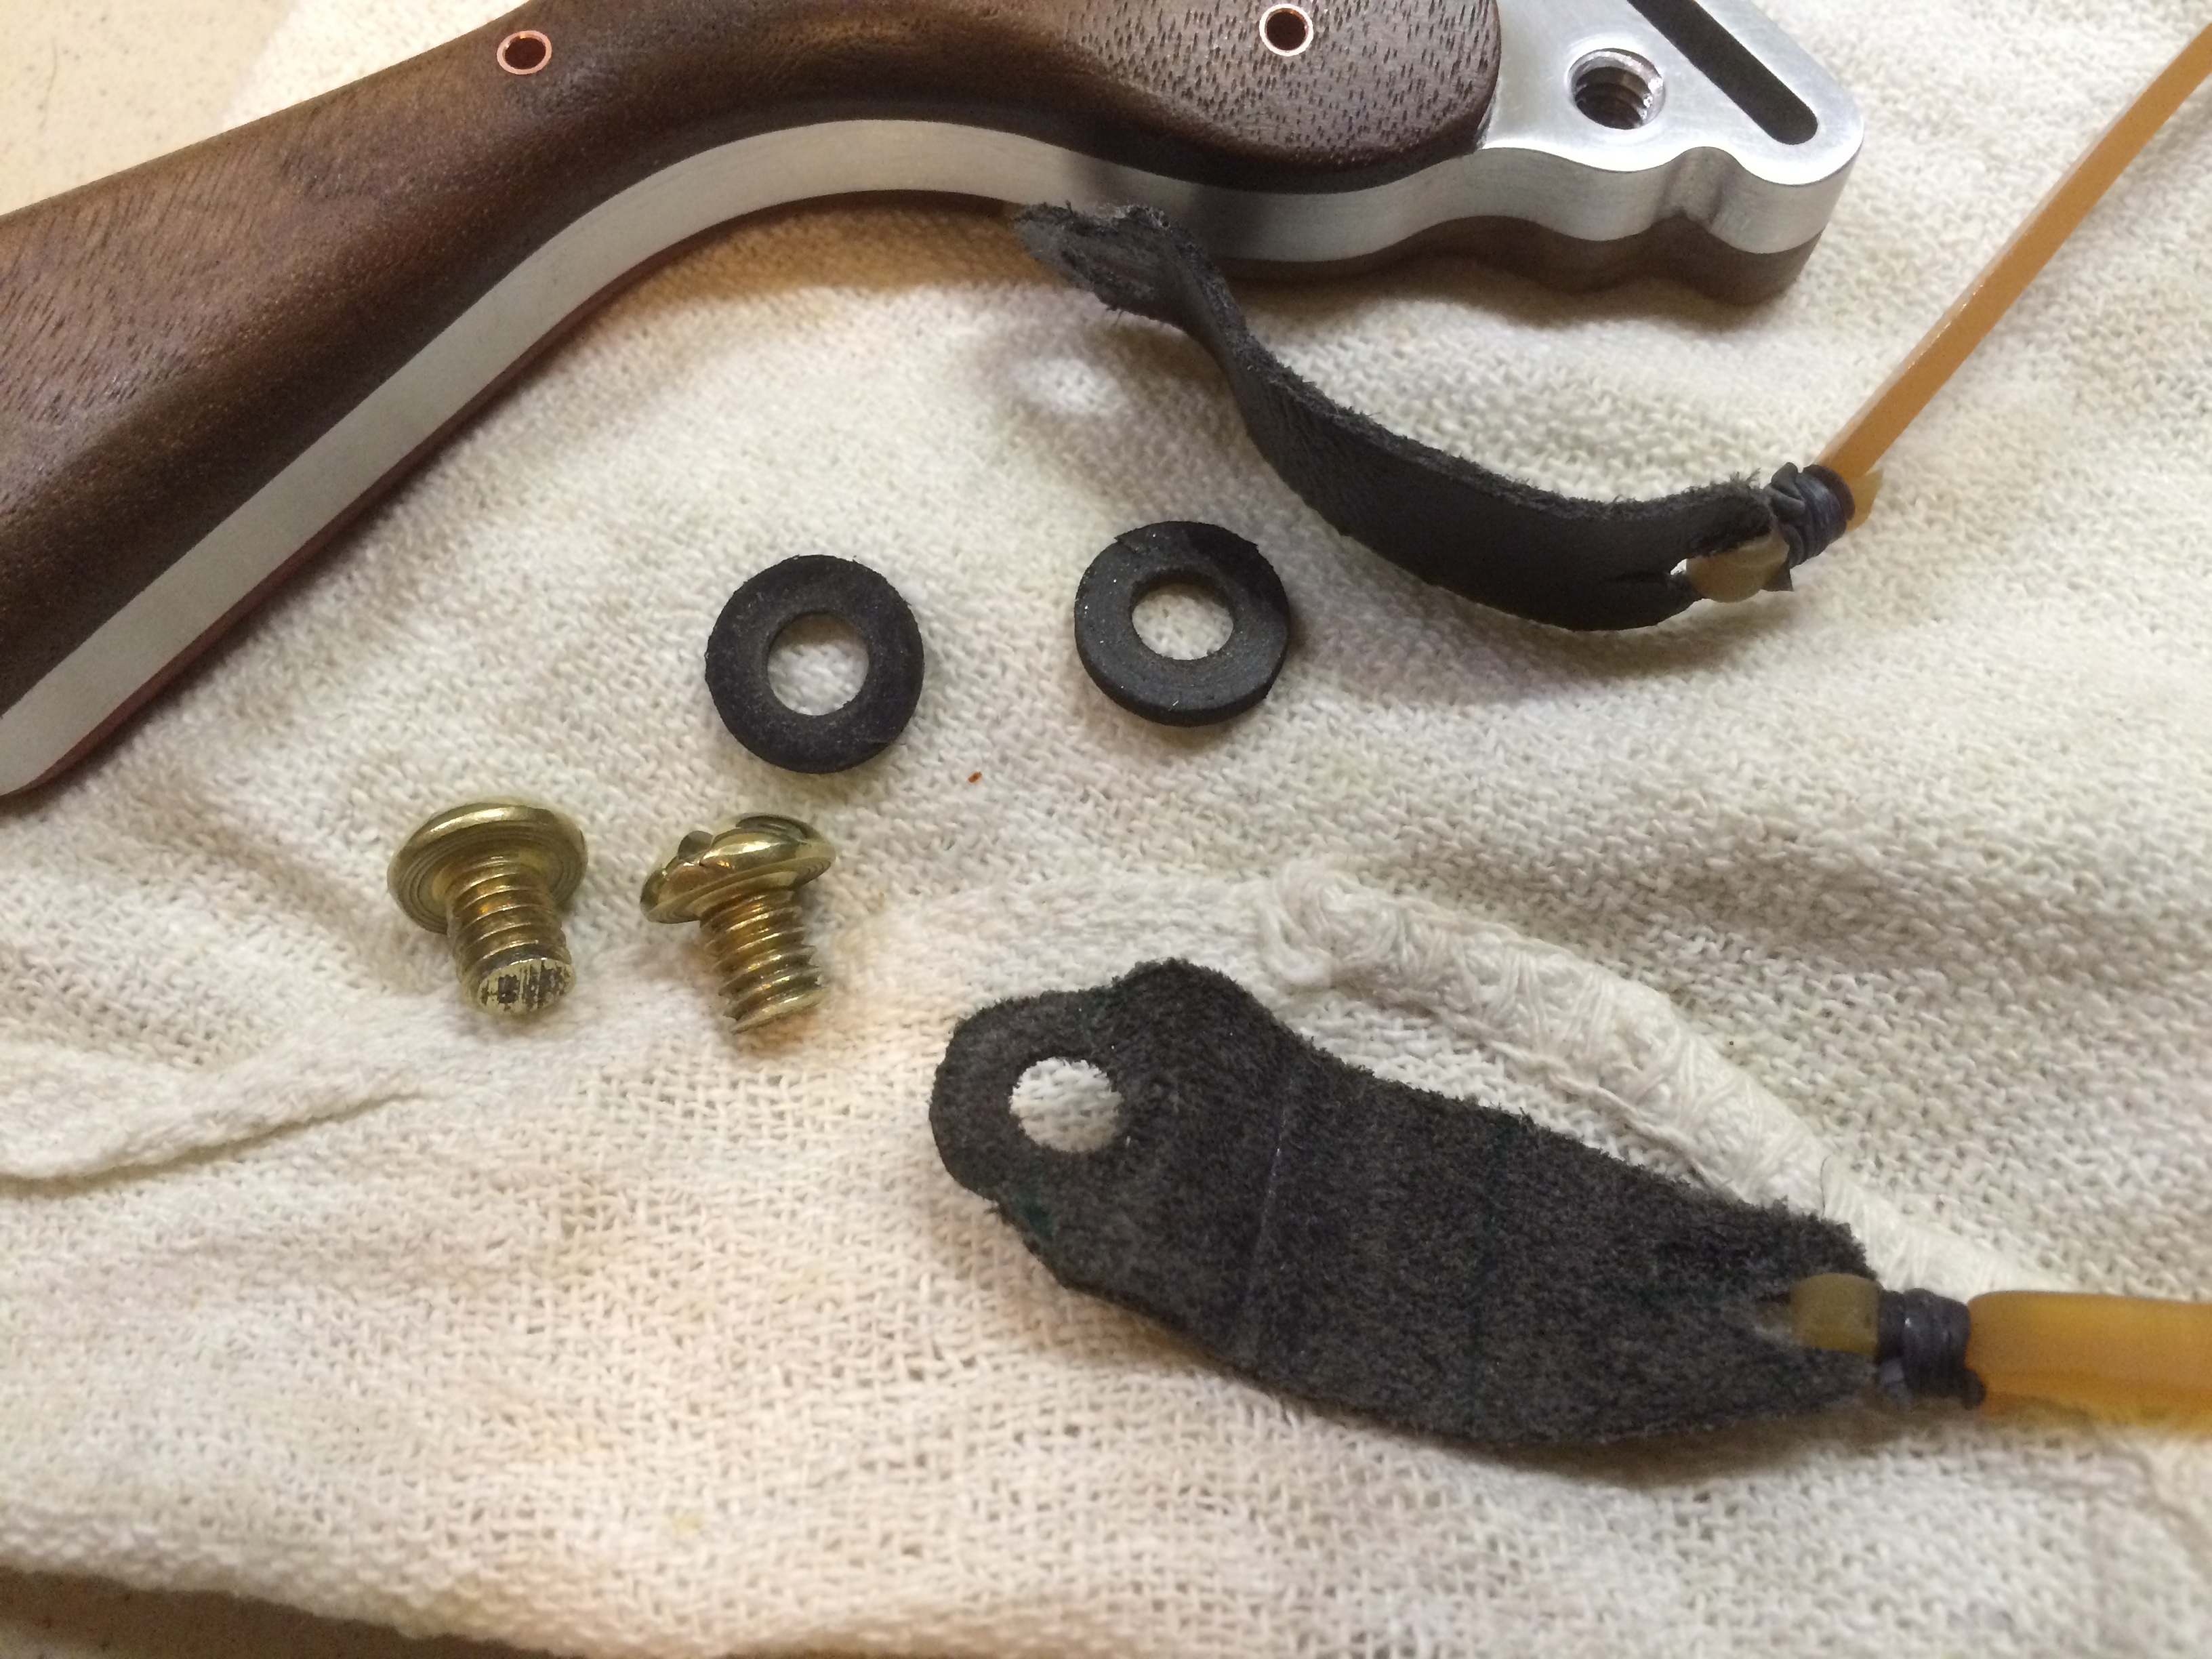
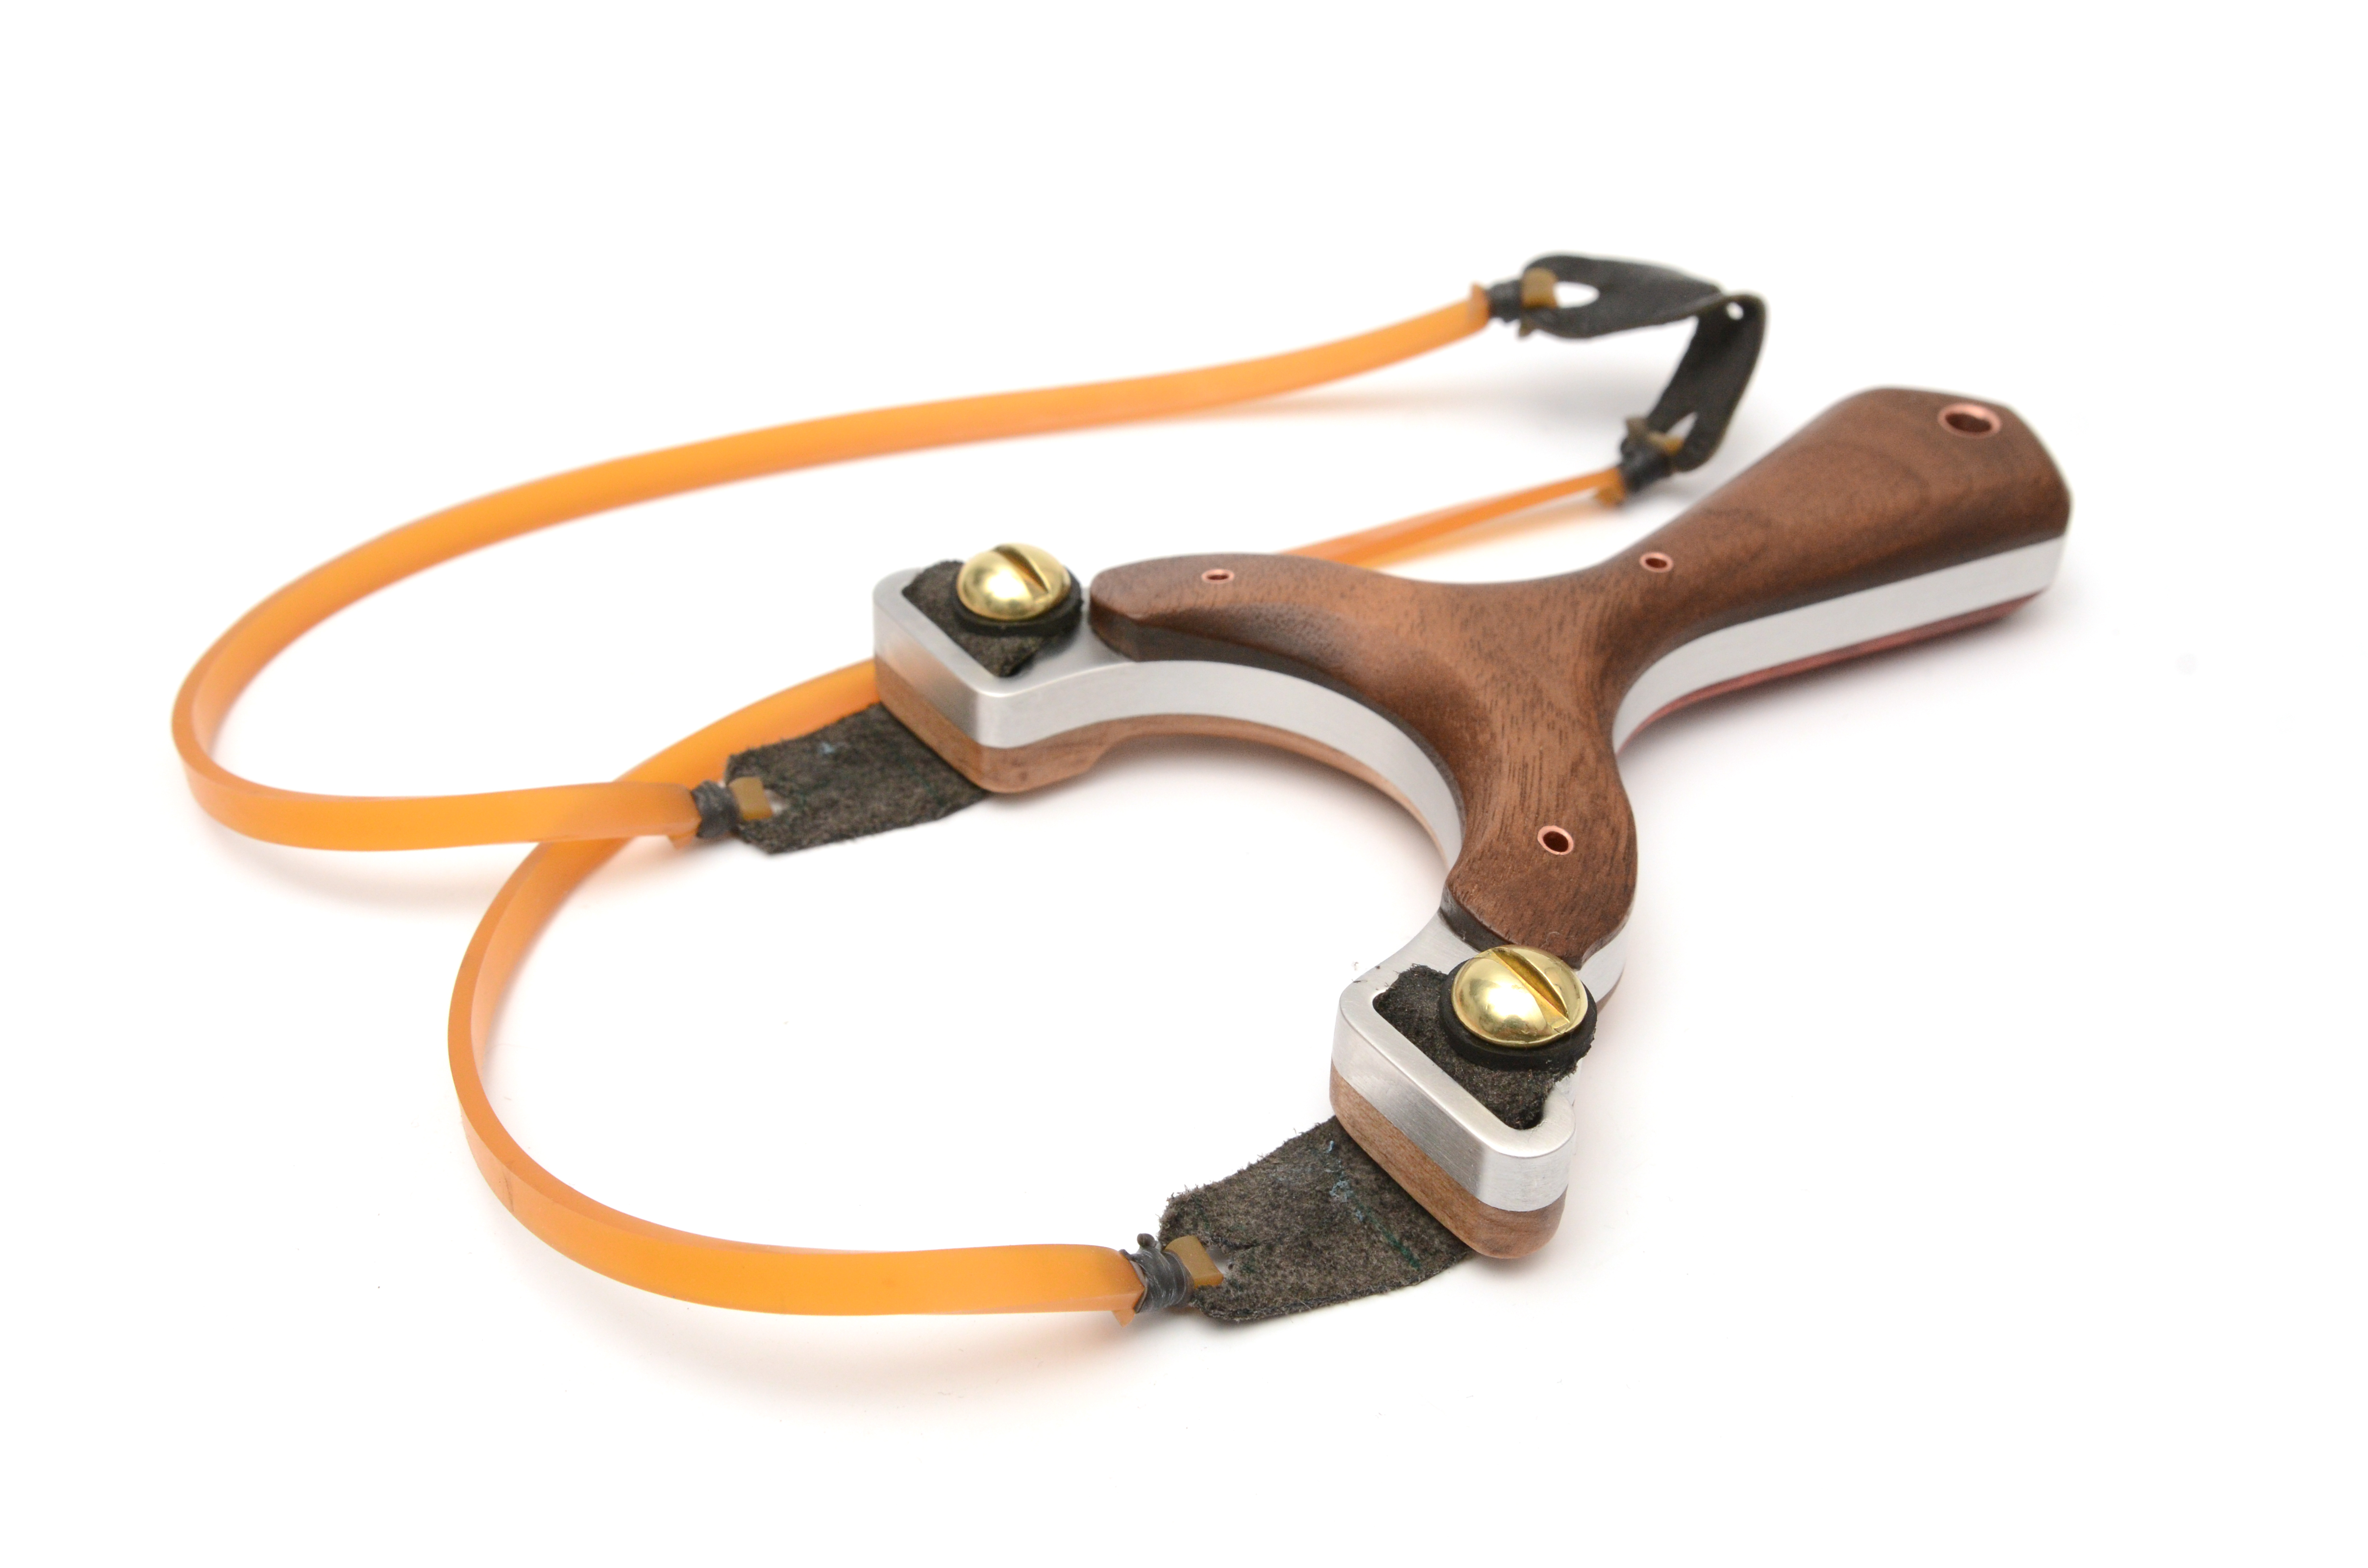
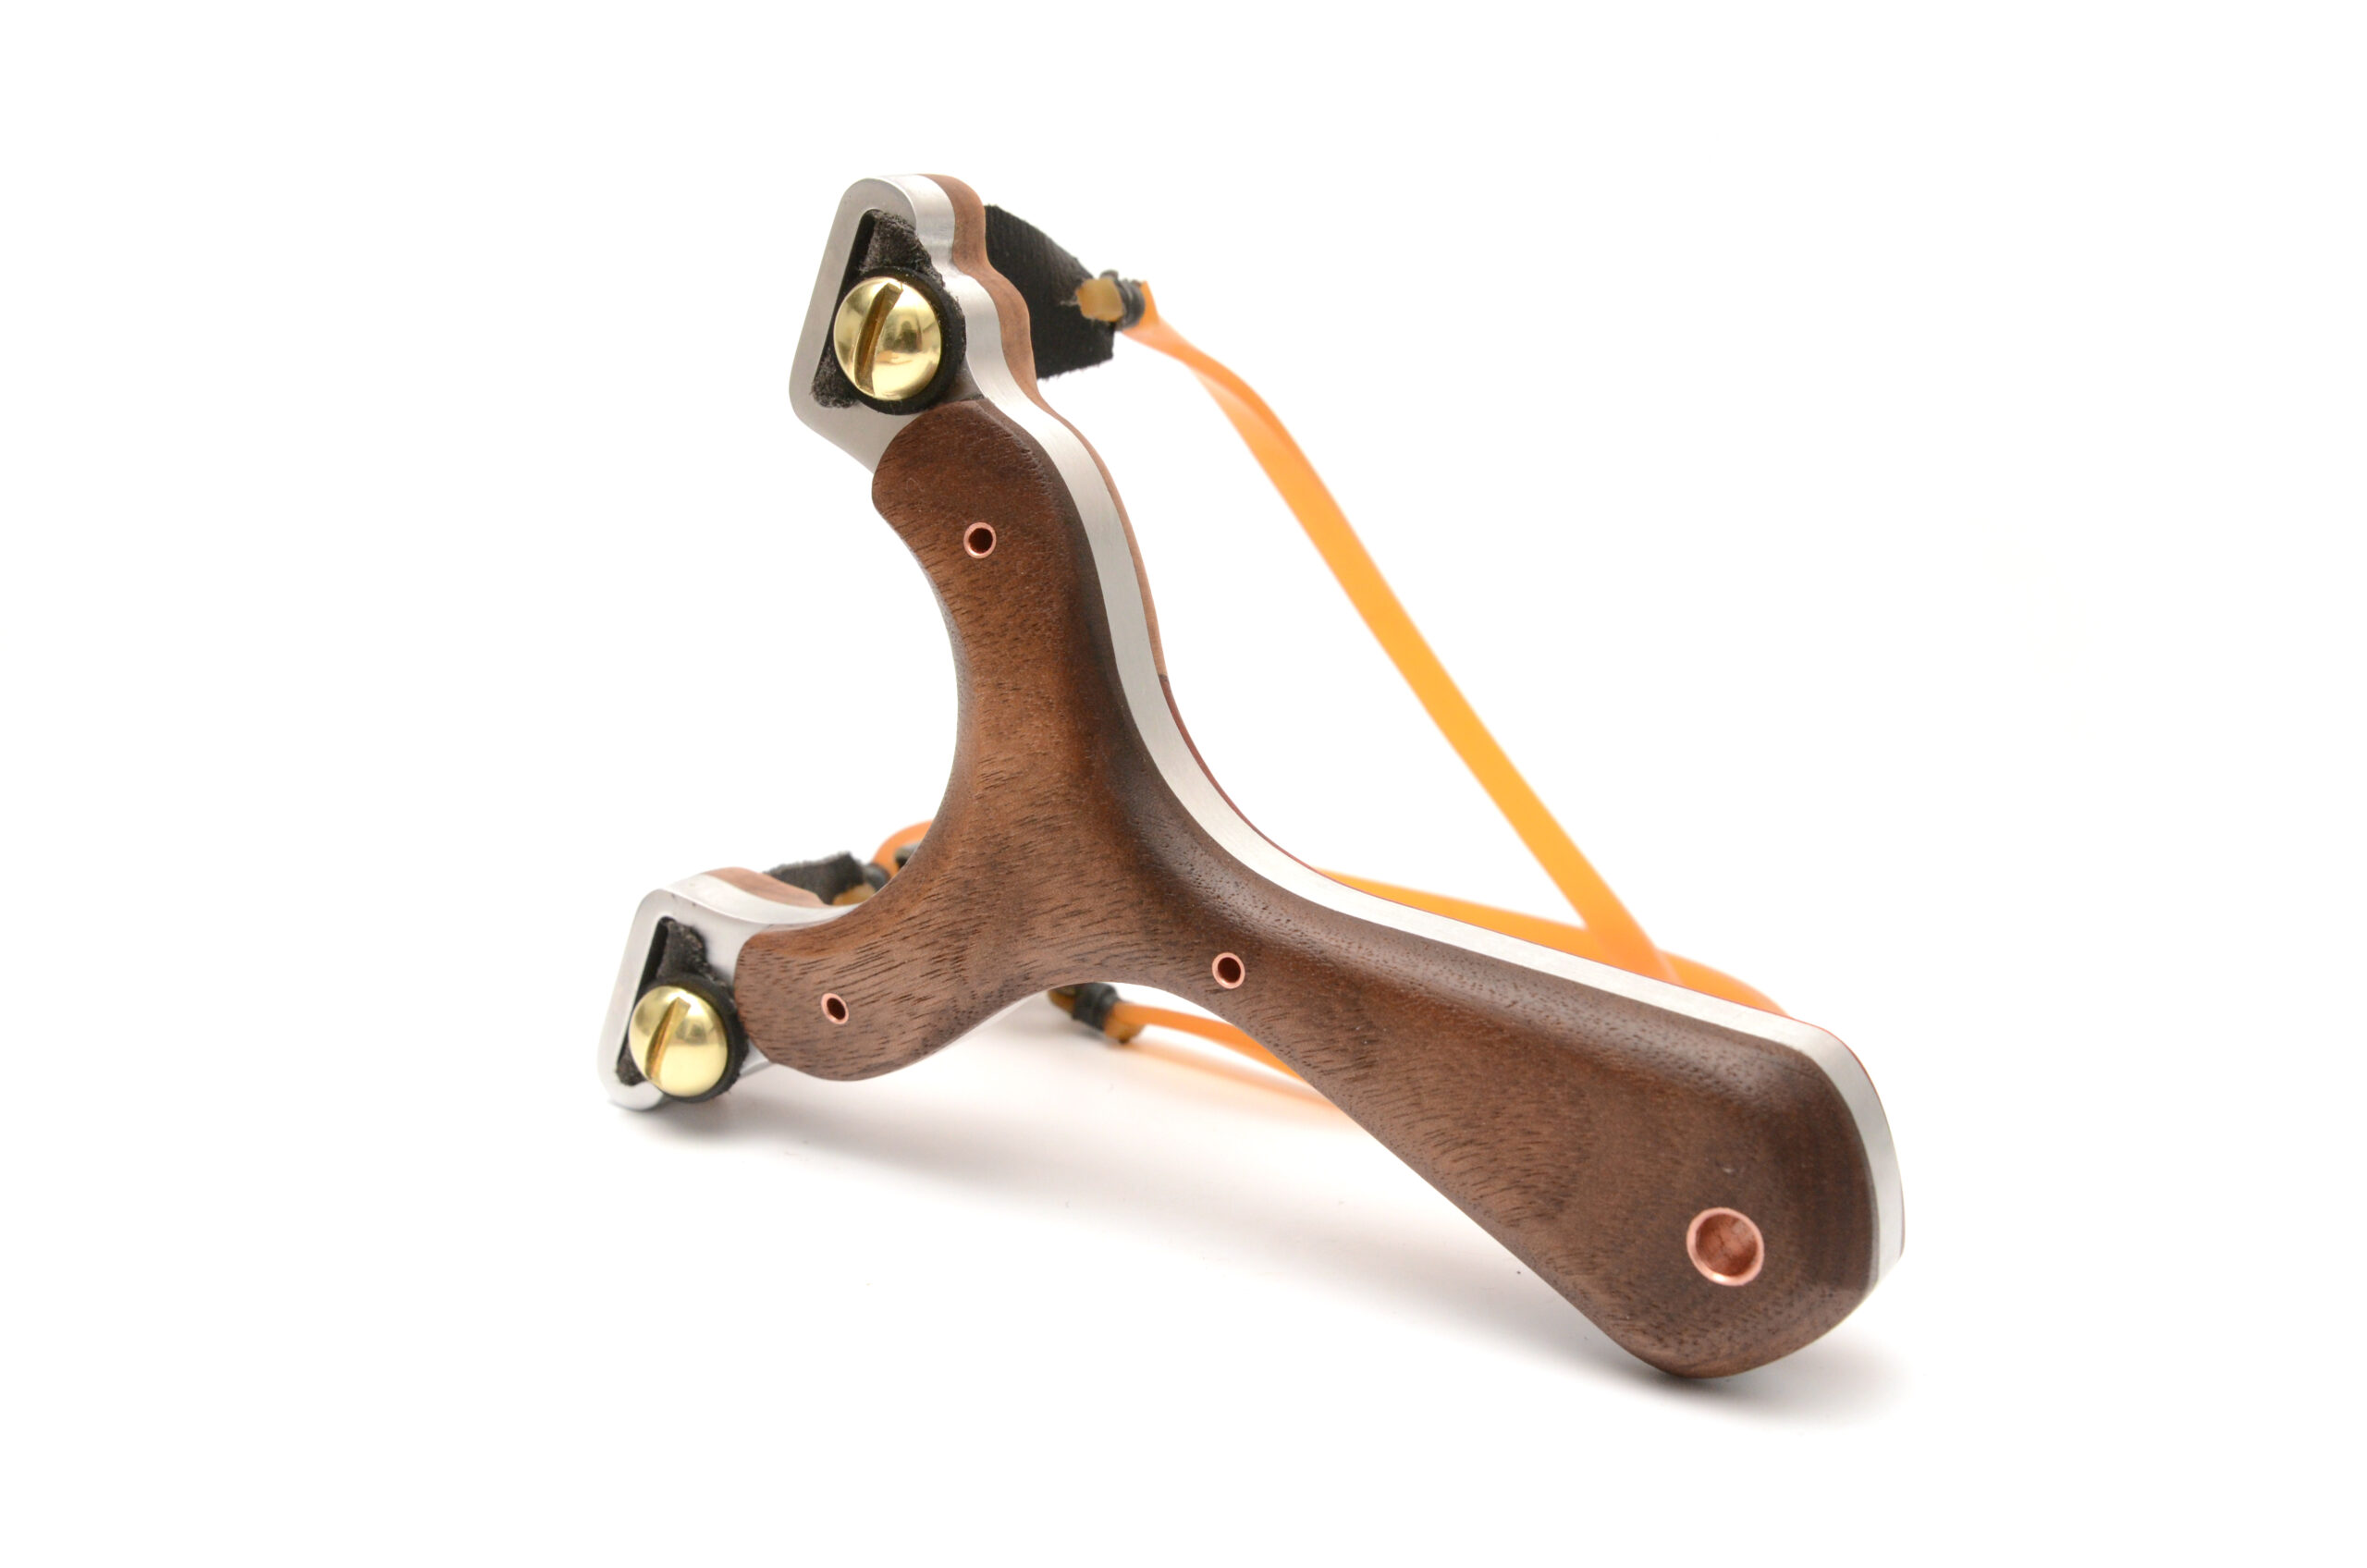
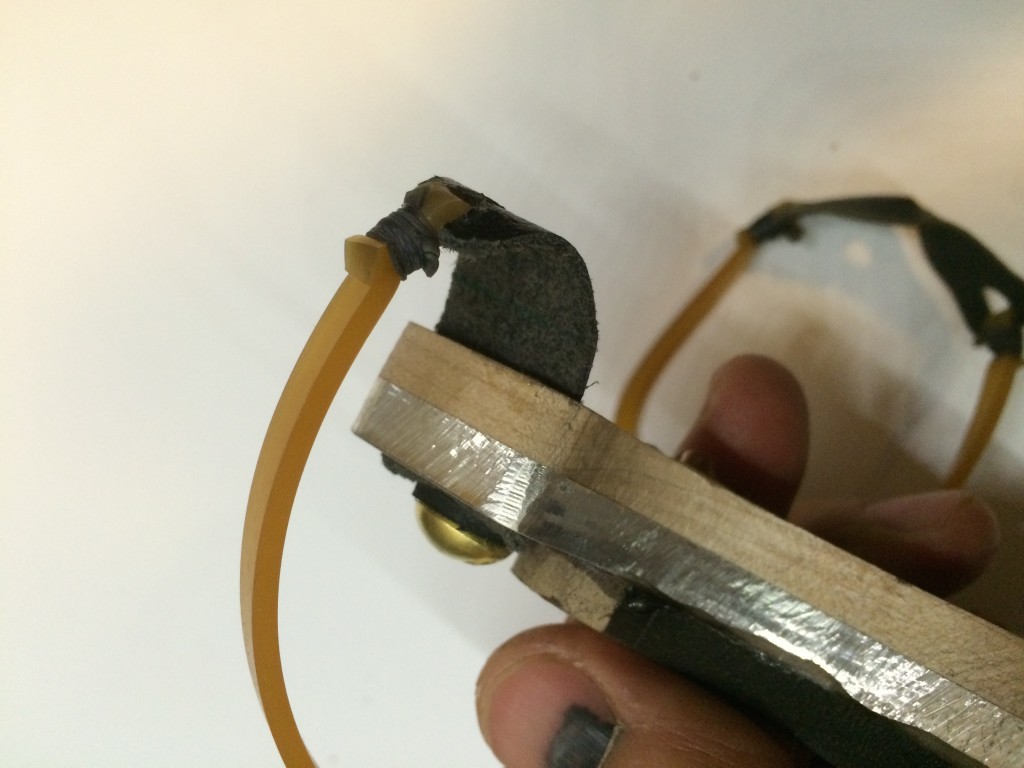
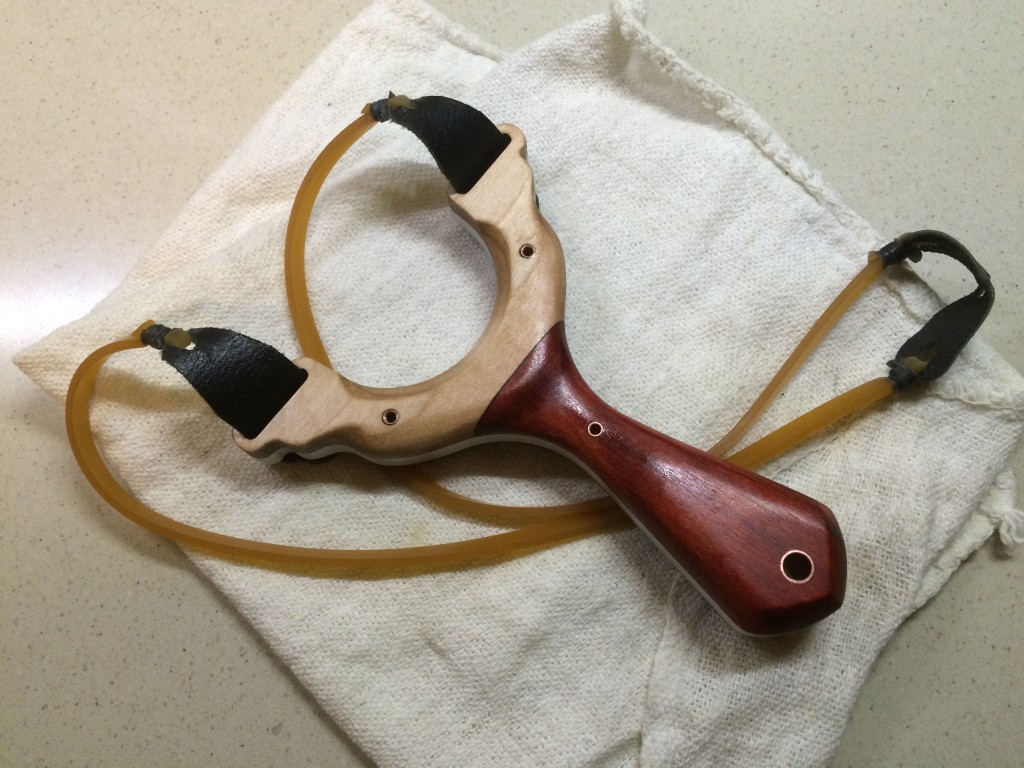
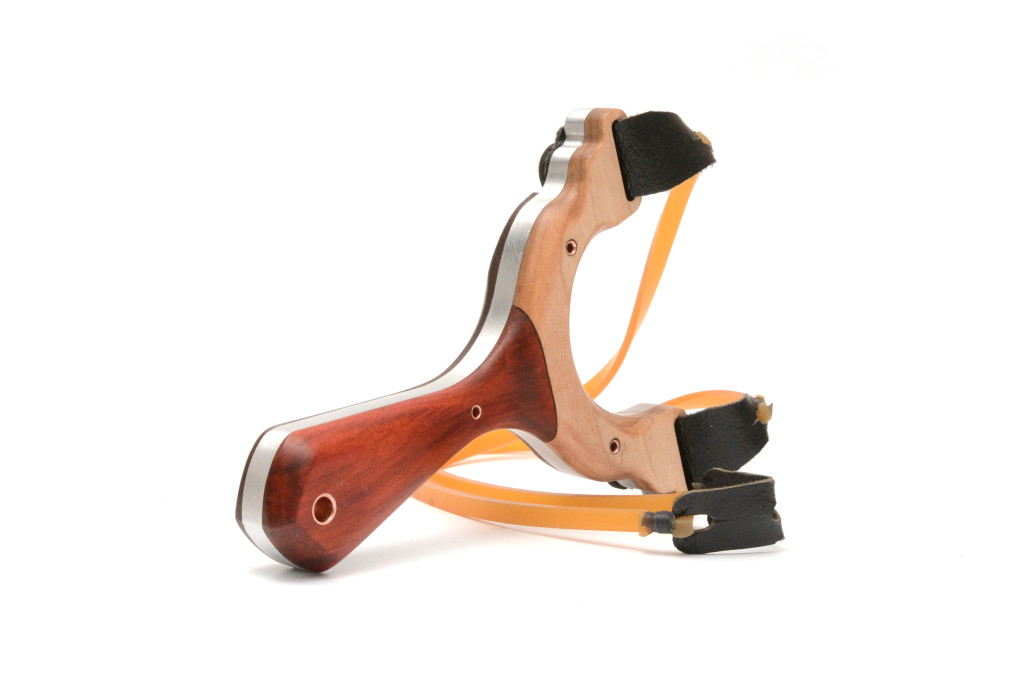
A short while later, I couldn’t help by test fit the bands. These are traditional 5mm wide gum rubber bands that Gaspar sent to me a couple of week ago. They are medium pull and work great with tabs.
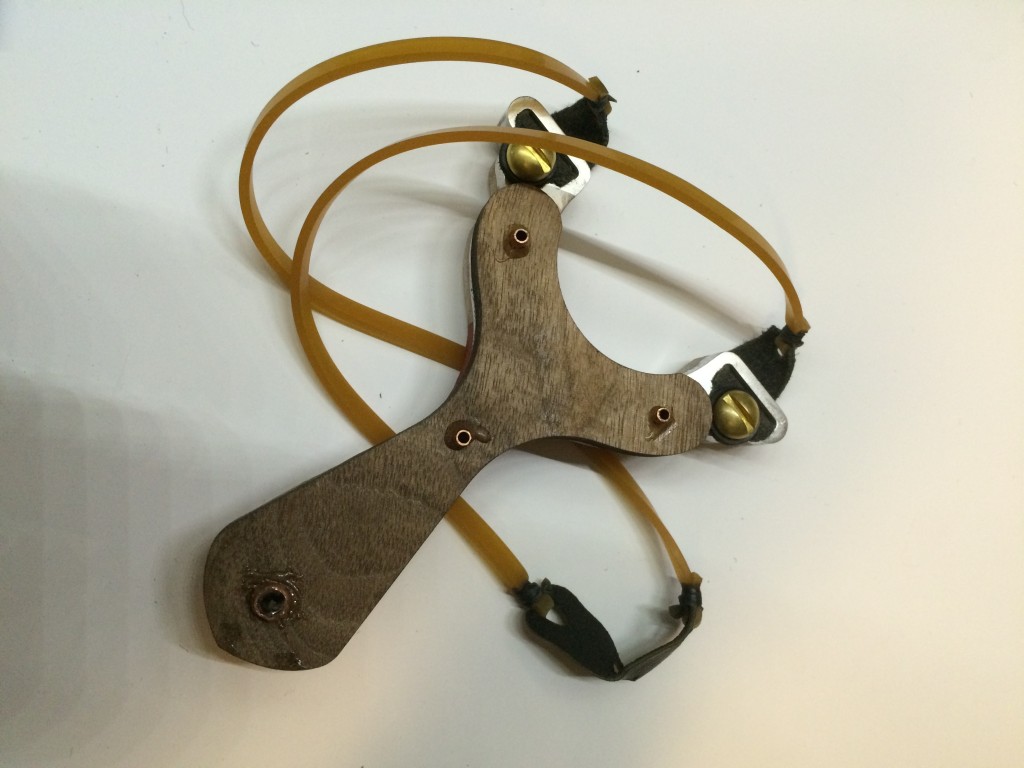
You can get a first look of how the tab attachment system works now, the tab is threaded through the frame, and held in with the bolt. Then the tab is rolled over the top and gets held down by the tension of the bands. Upon release, the tab rolls over the frame and like any other OTT shooter, but the bands do not touch the frame, making them last much longer than normal.
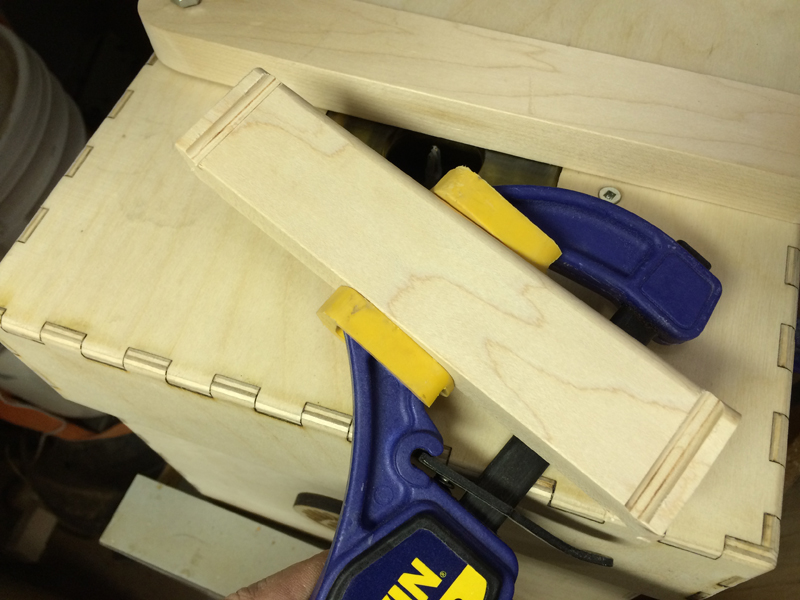
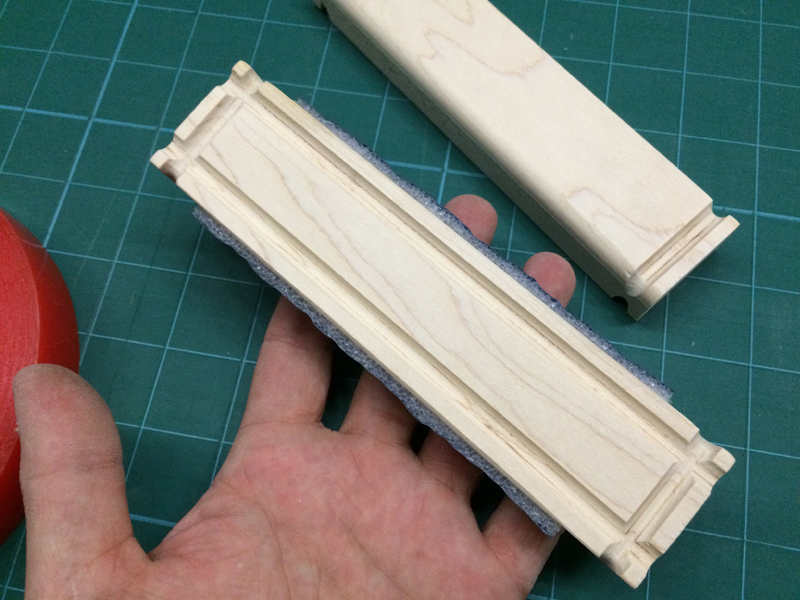
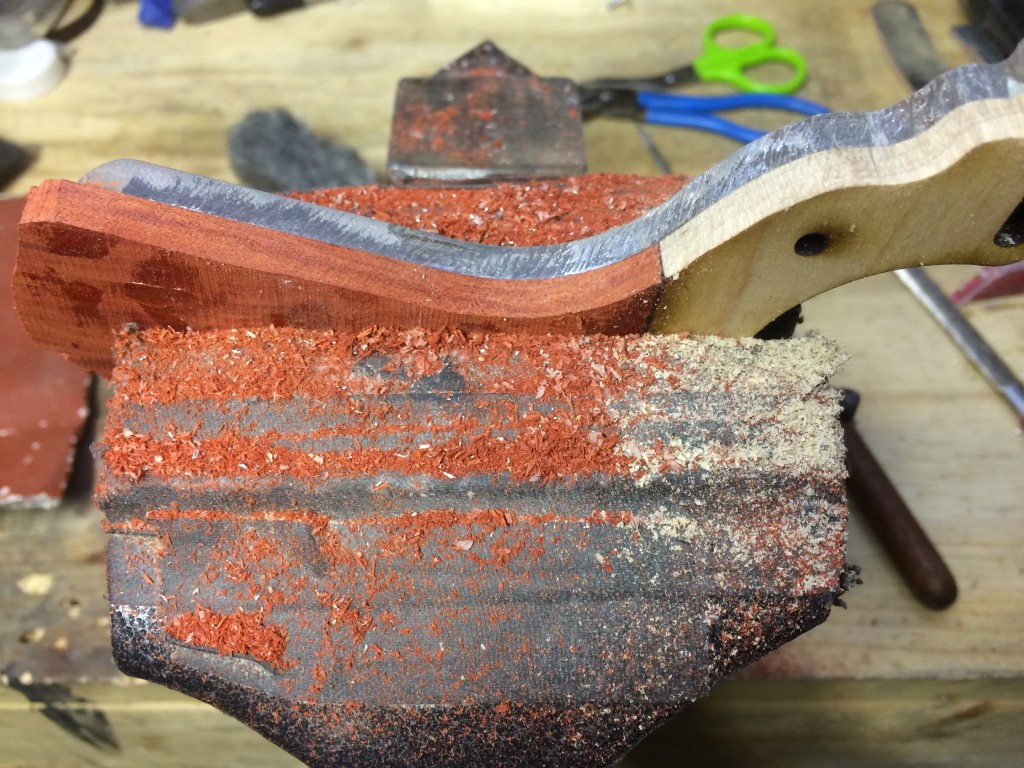
After a short trip on the belt sander, the excess surface epoxy, tubes and wood are all flush.

The curly walnut is looking fine.
Returning back to the vice the edges of the walnut where filed back to flush with the frame with a fine, 3/4″ Iwasaki Razor File.

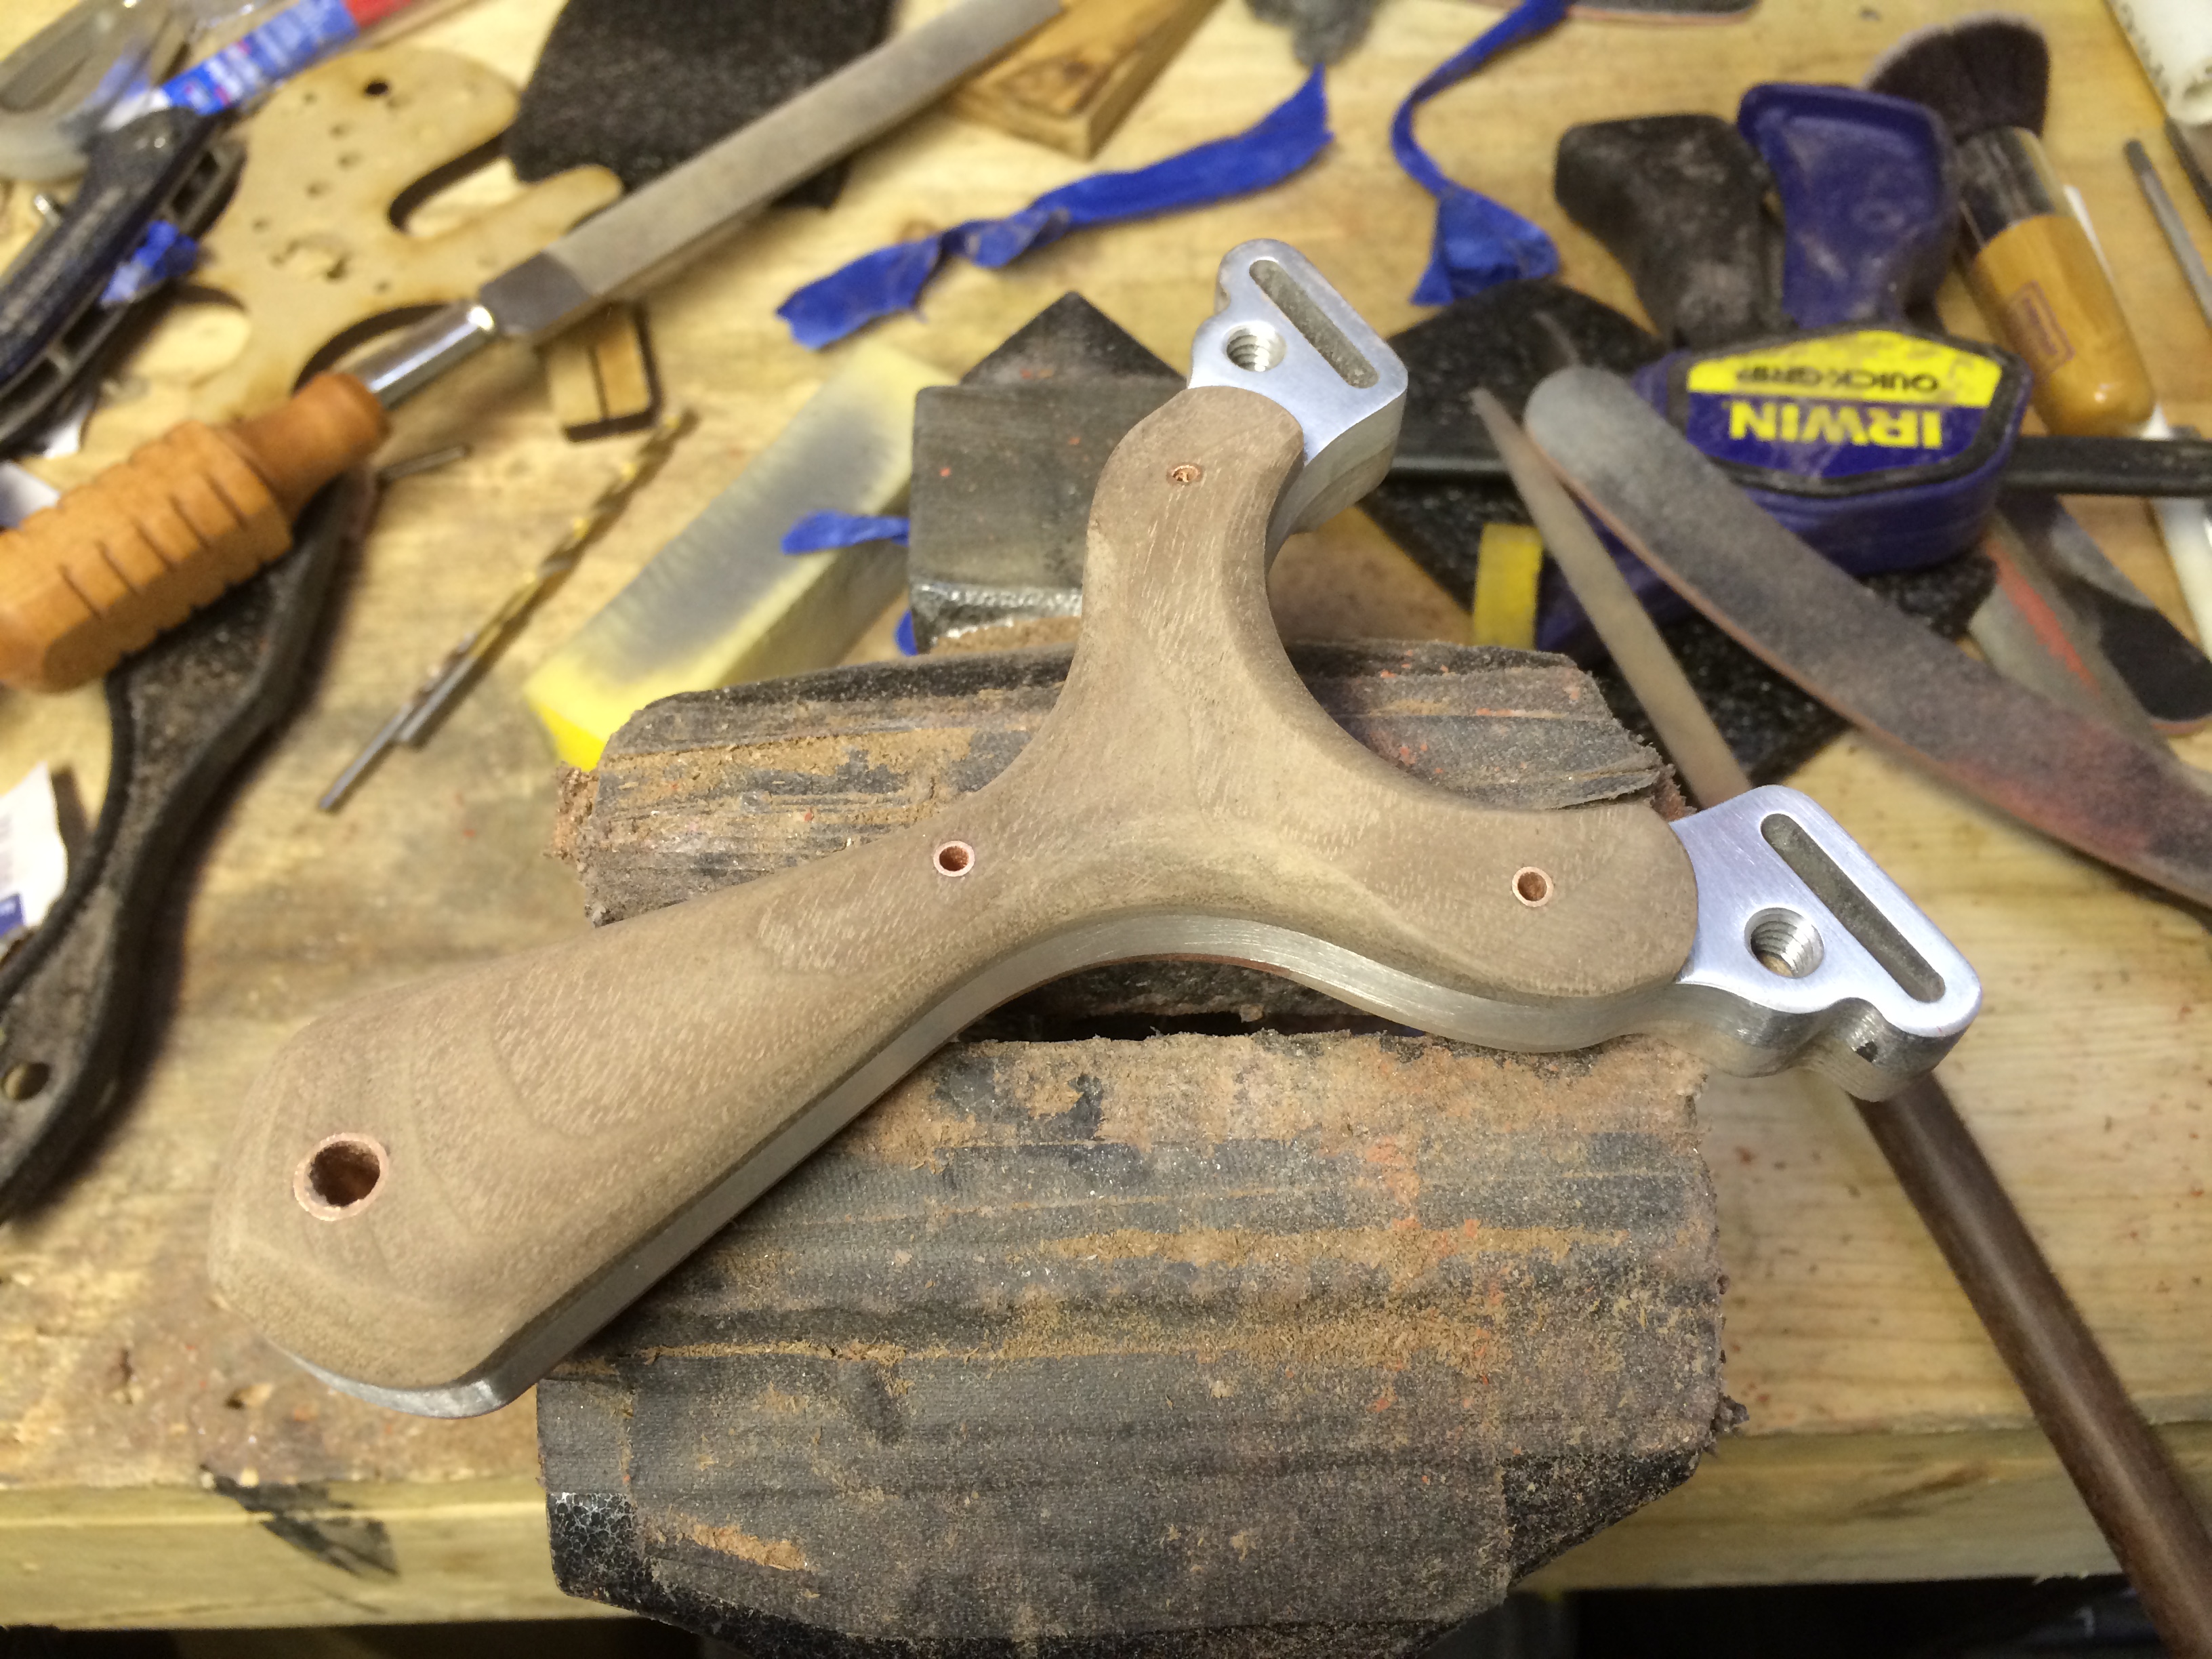
It’s starting to look like a sling!
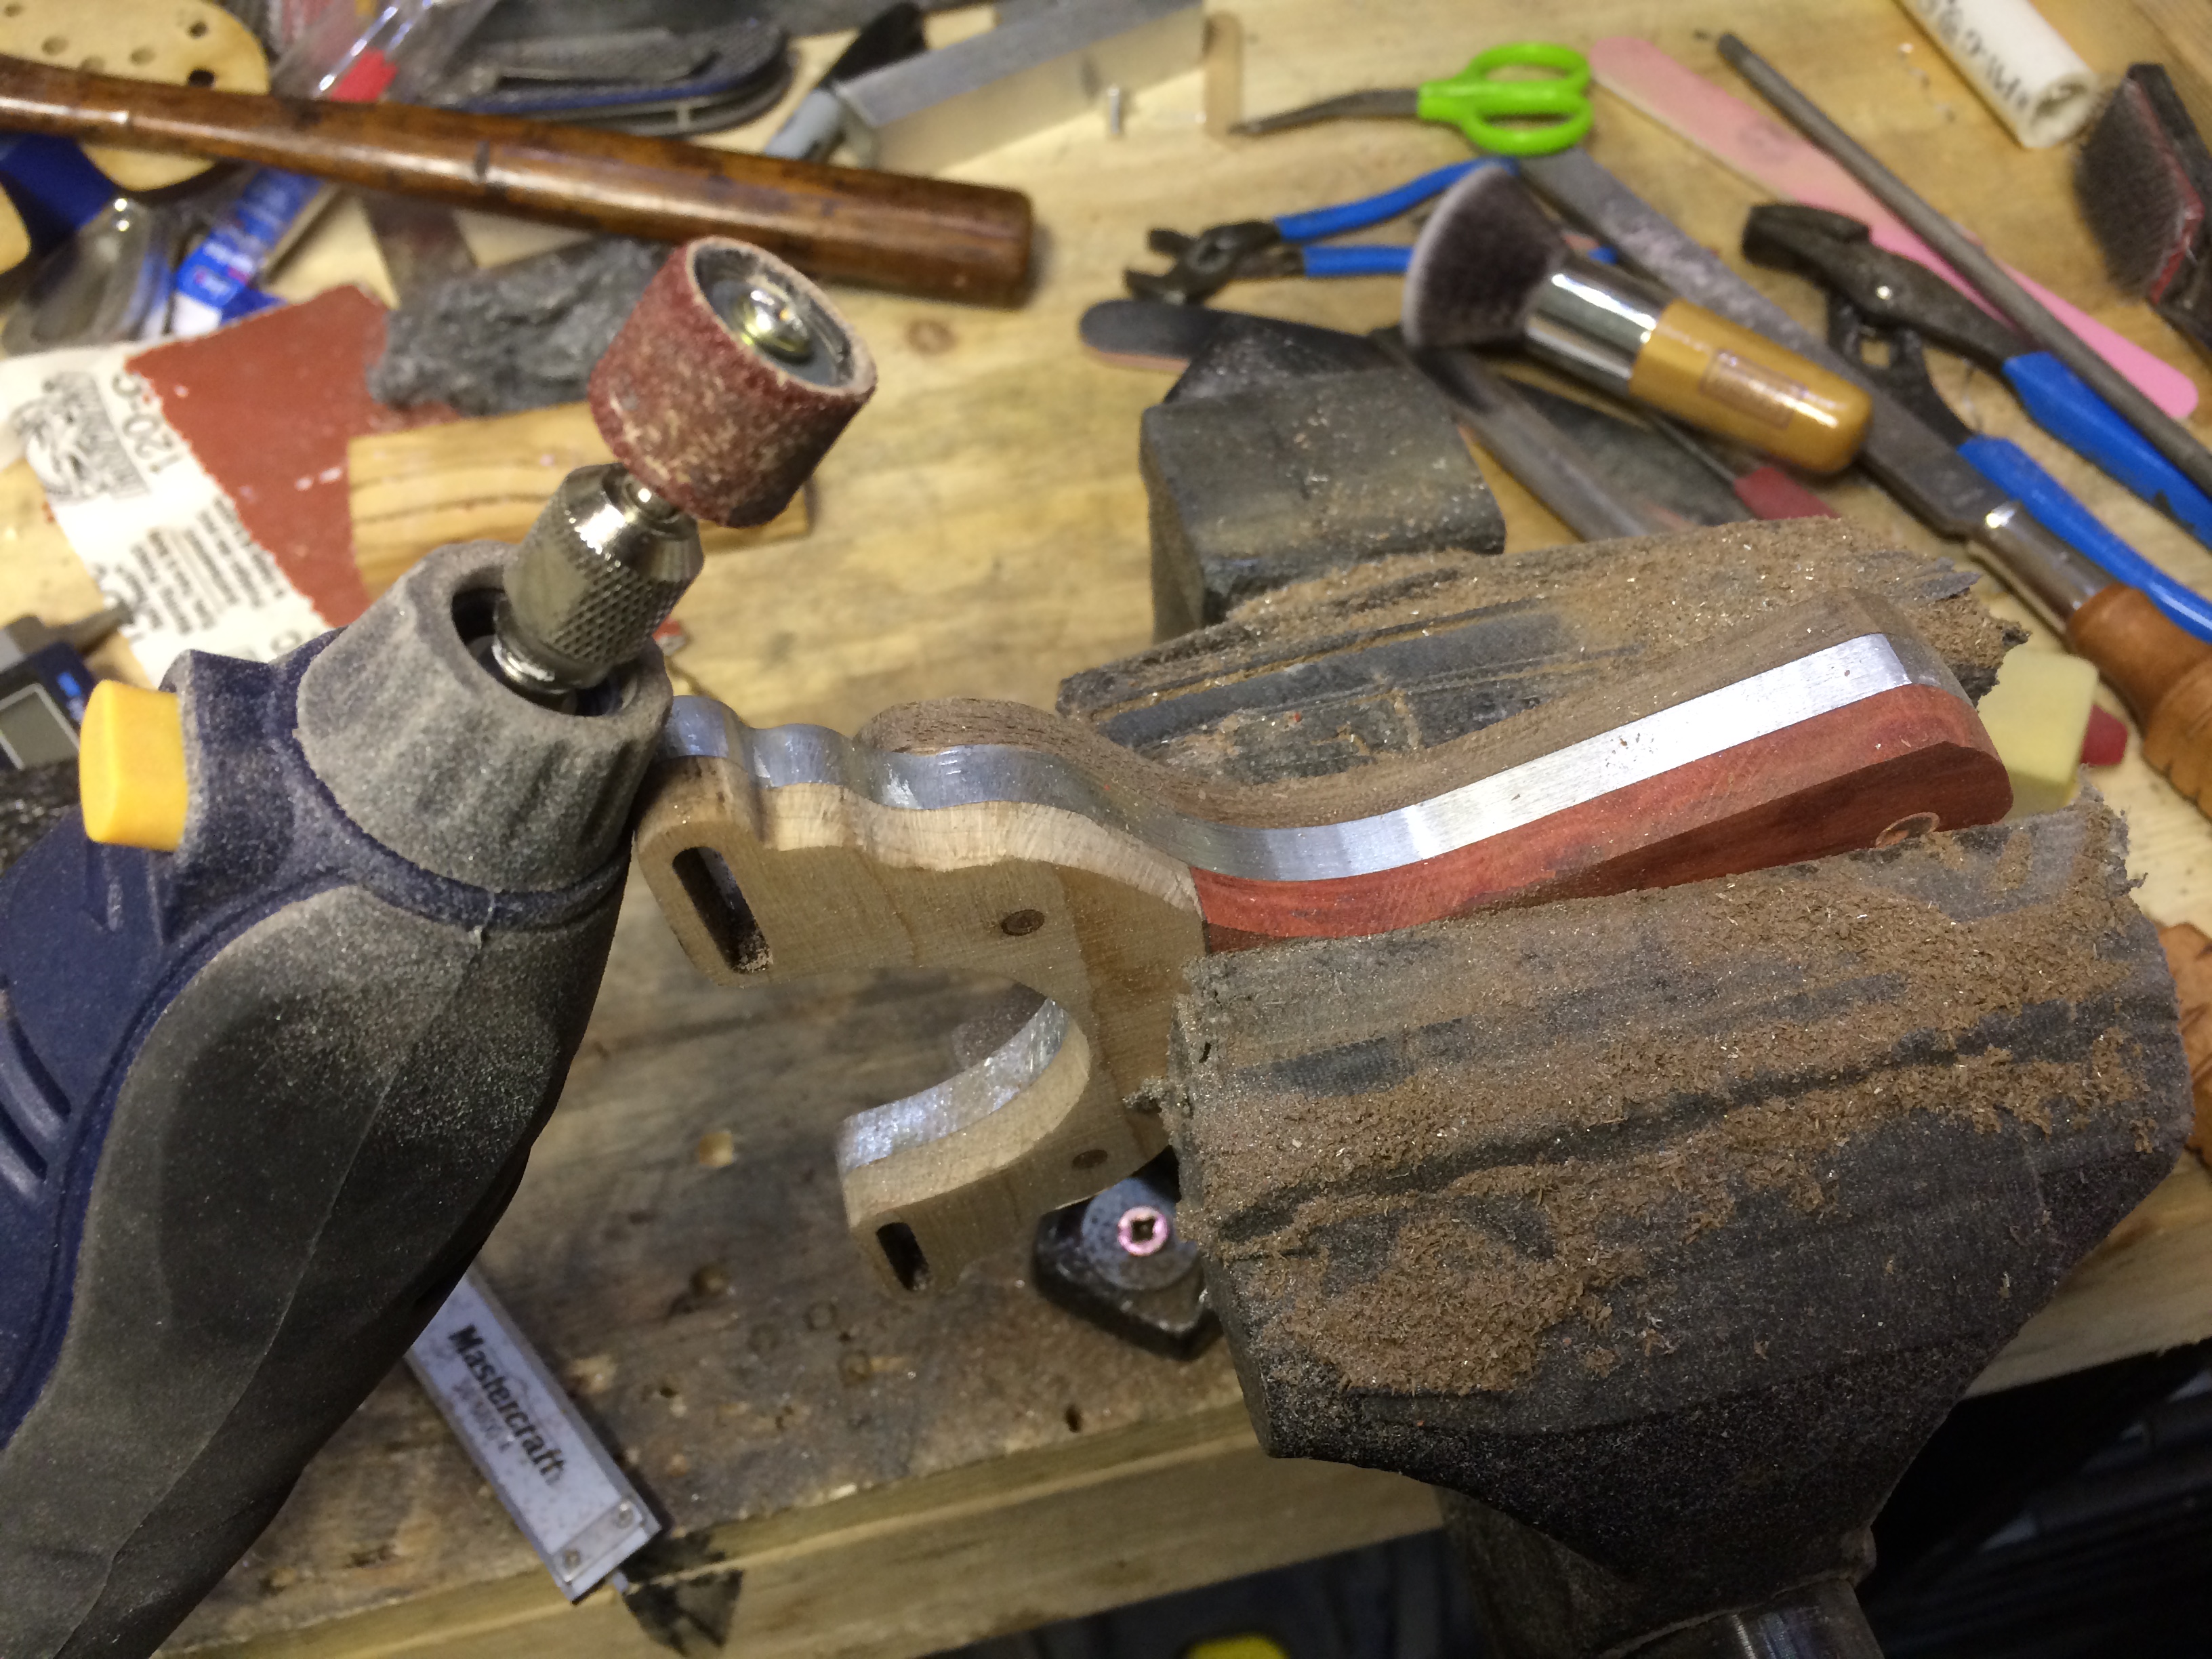
Time to clean up the aluminum from all the file scratches. A round of 80 grit sand drum with a rotary tool and then a second pass with a 120 grit.

This removes the major scratches and dings.

Now the hardest part. This whole time, it was about prepping the surface for the real artistry: shaping the scales. Normally, a 1/4″ round over bit can be used to just give the whole thing a uniform edge and it would be done. Too easy, too quick, too dangerous and not special enough. Remember, this is going to a champion!
I talk about layout and marking tools in this video:
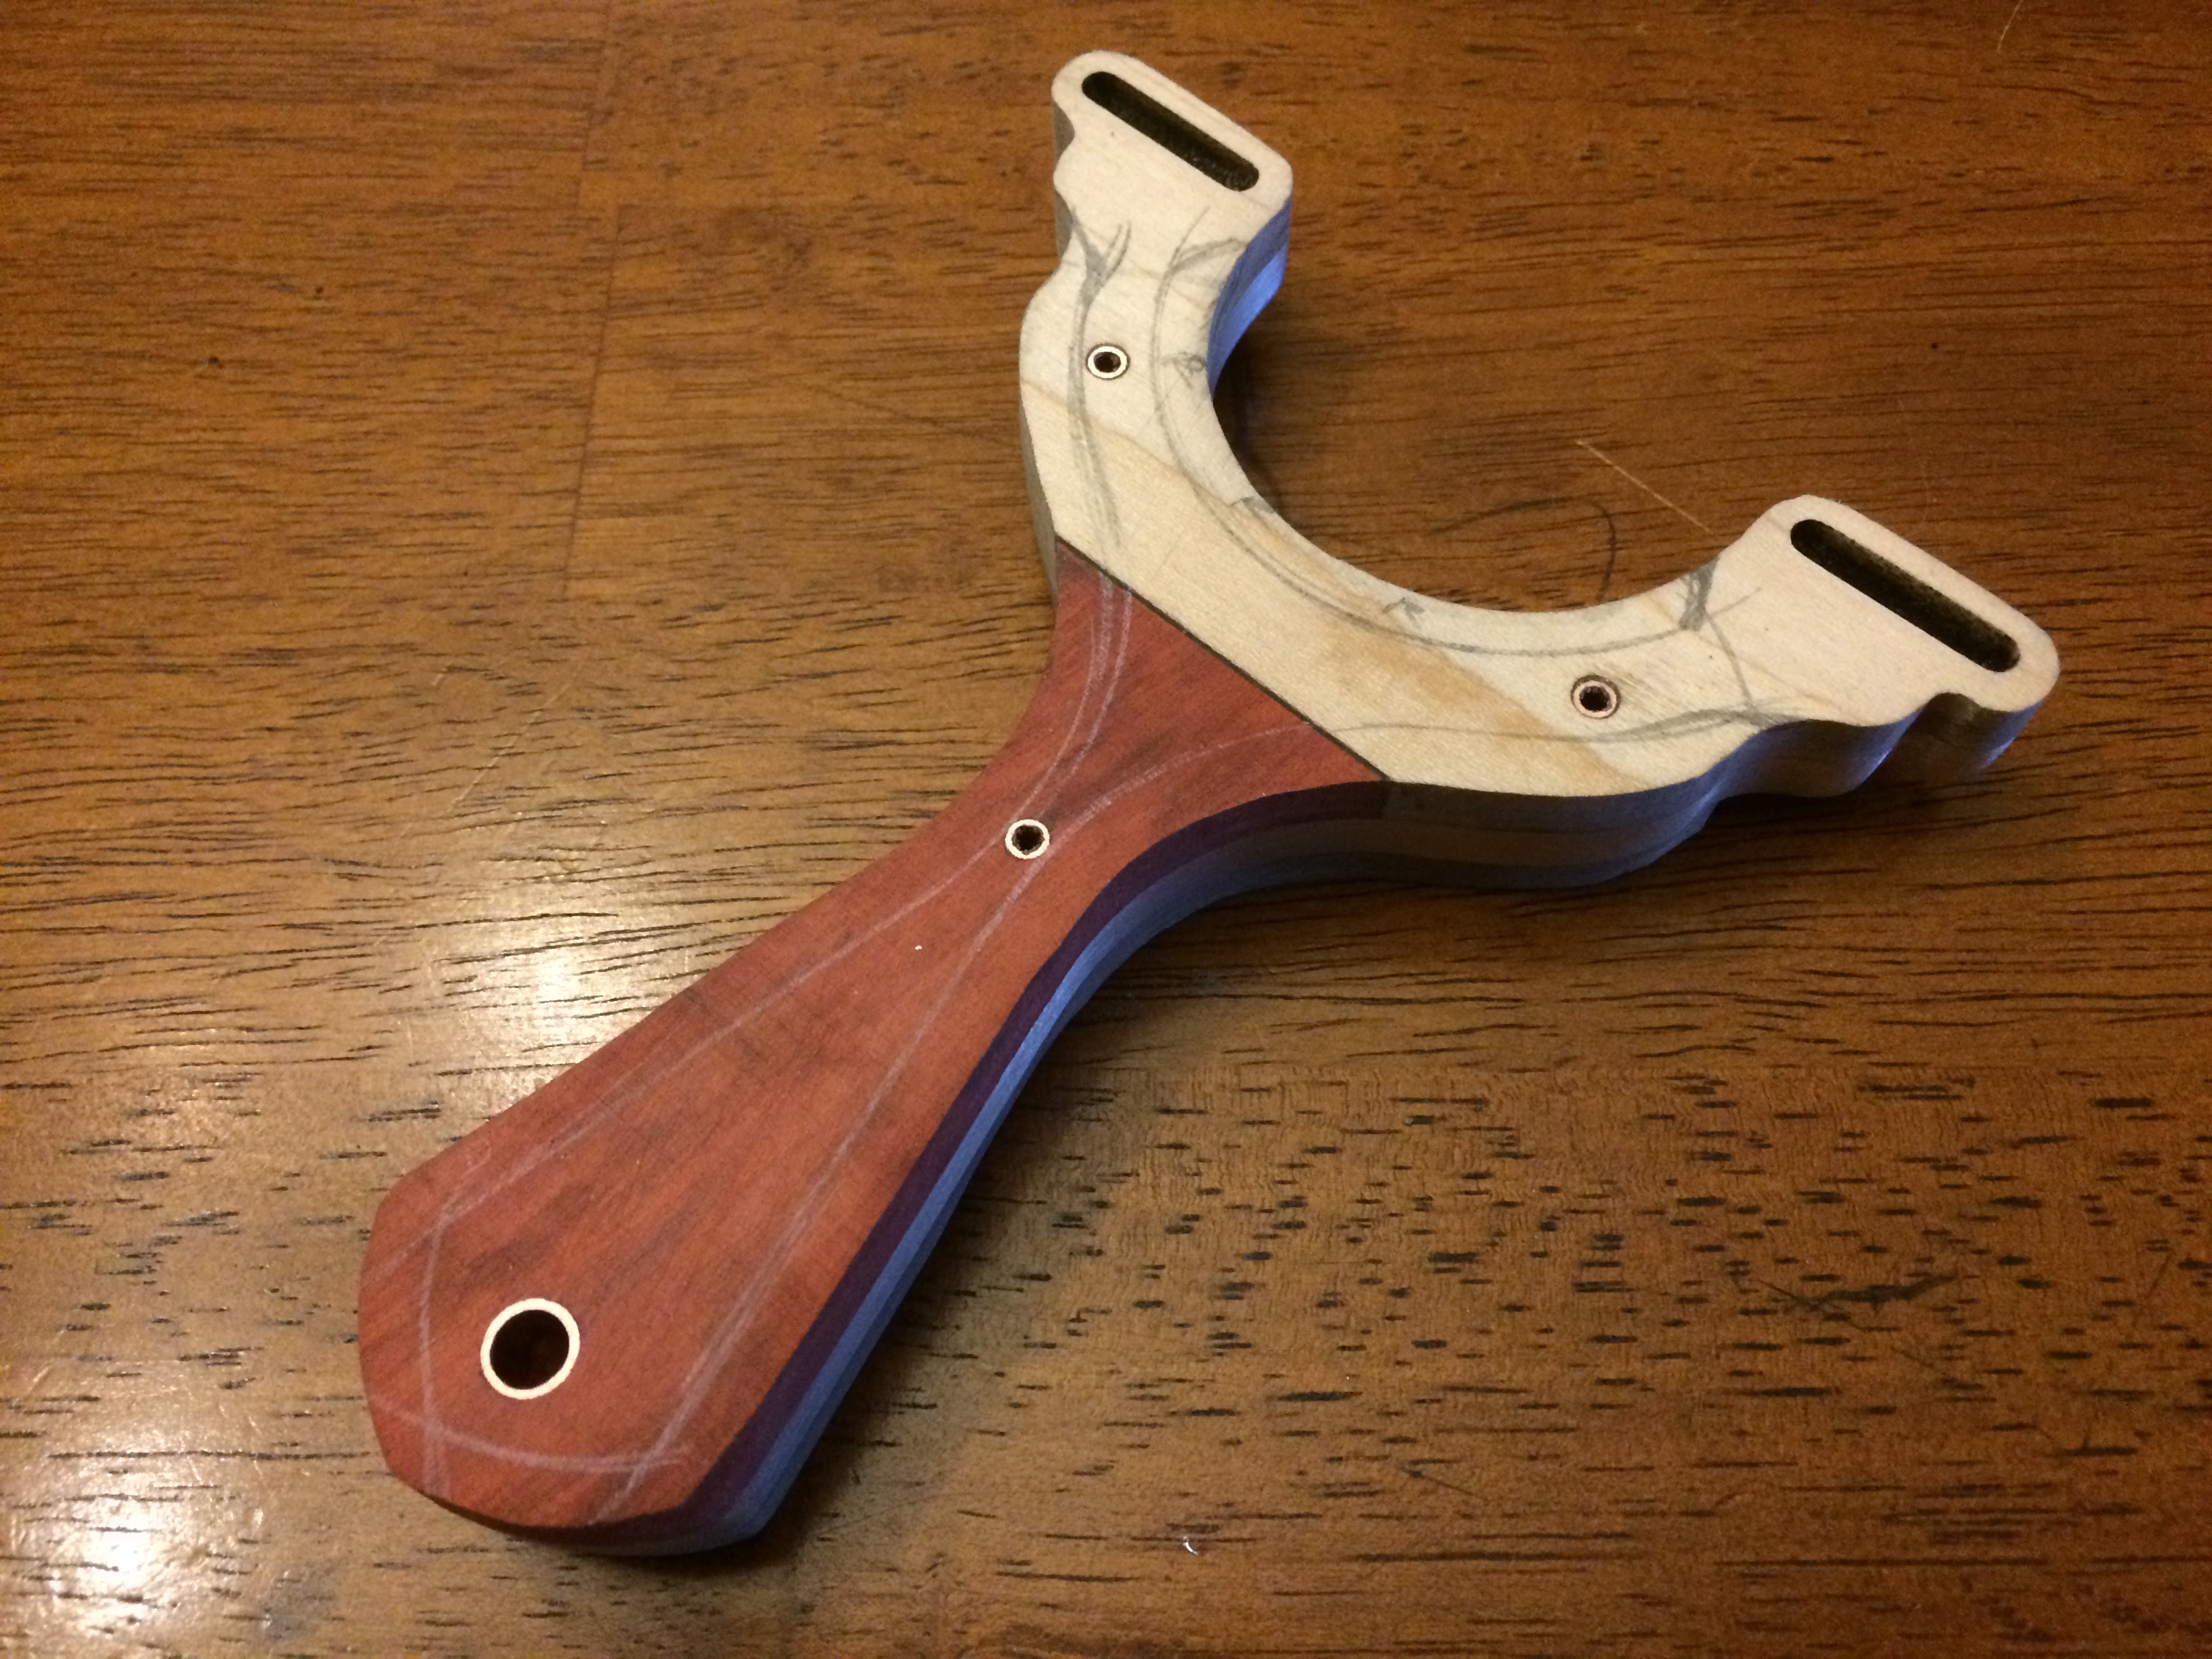
The marking tools come out, a HB pencil, a white pencil crayon and a compass.
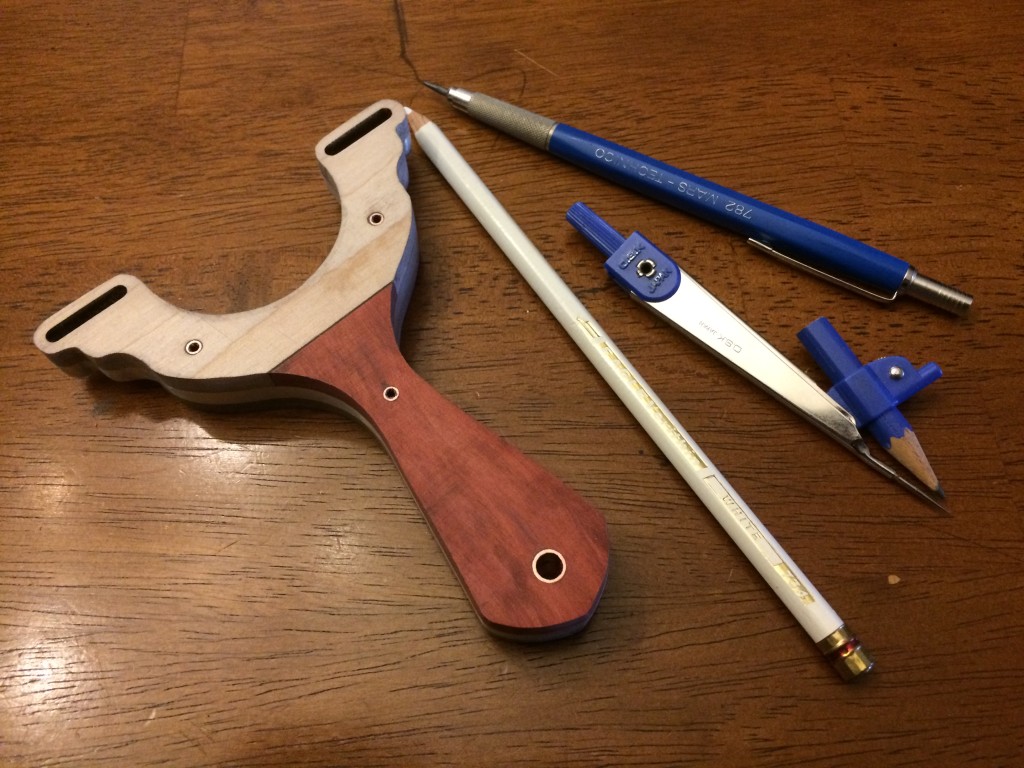
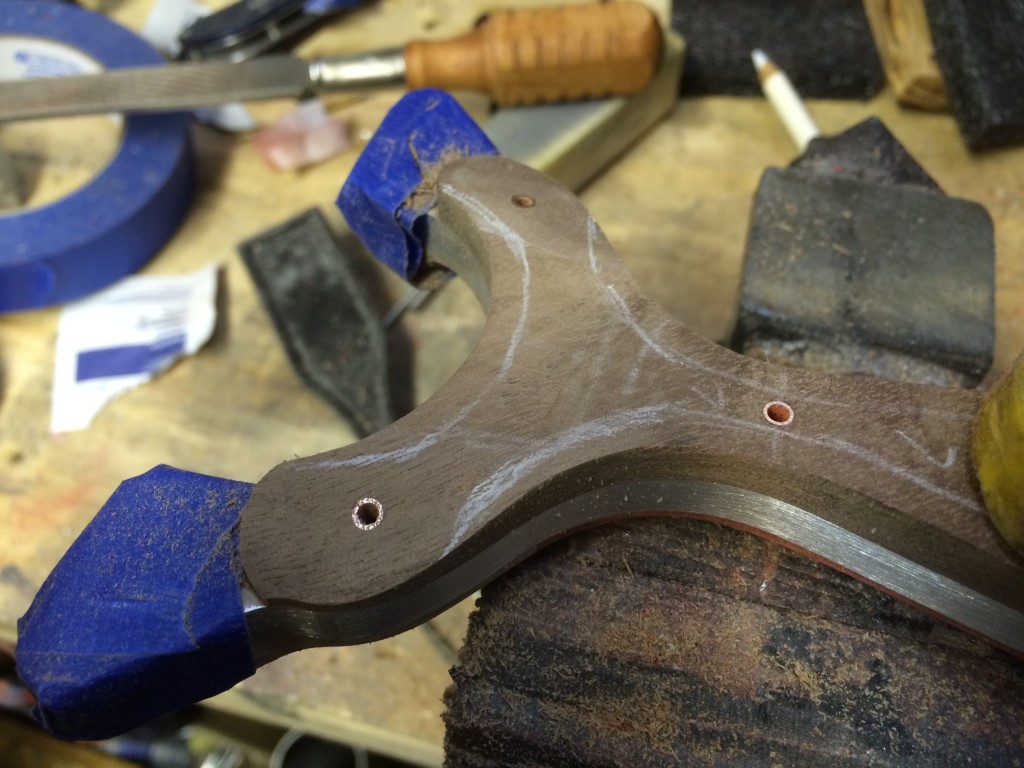
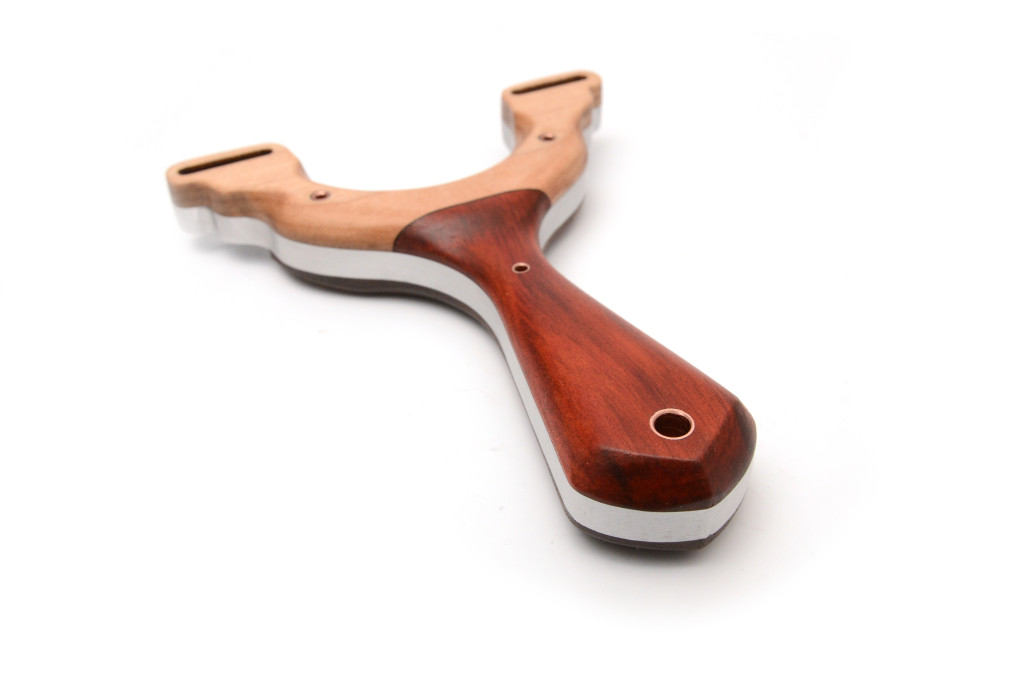
On the walnut, I map out where I want the scale to taper towards the tips so that the thumb can naturally rest and push up against the button head screw. Gaspar holds in his left hand, but to keep things symmetrical, I laid out the taper on both sides. I also mark out the radius on the rest of the handle and the two areas where I want to chamfer and not round (the fork yoke and the butt end)

The back side is even more complicated, I wanted transitions between the radius of the handle and the crisp edge of the slots. The yoke area will have the same chamfer as the walnut side.

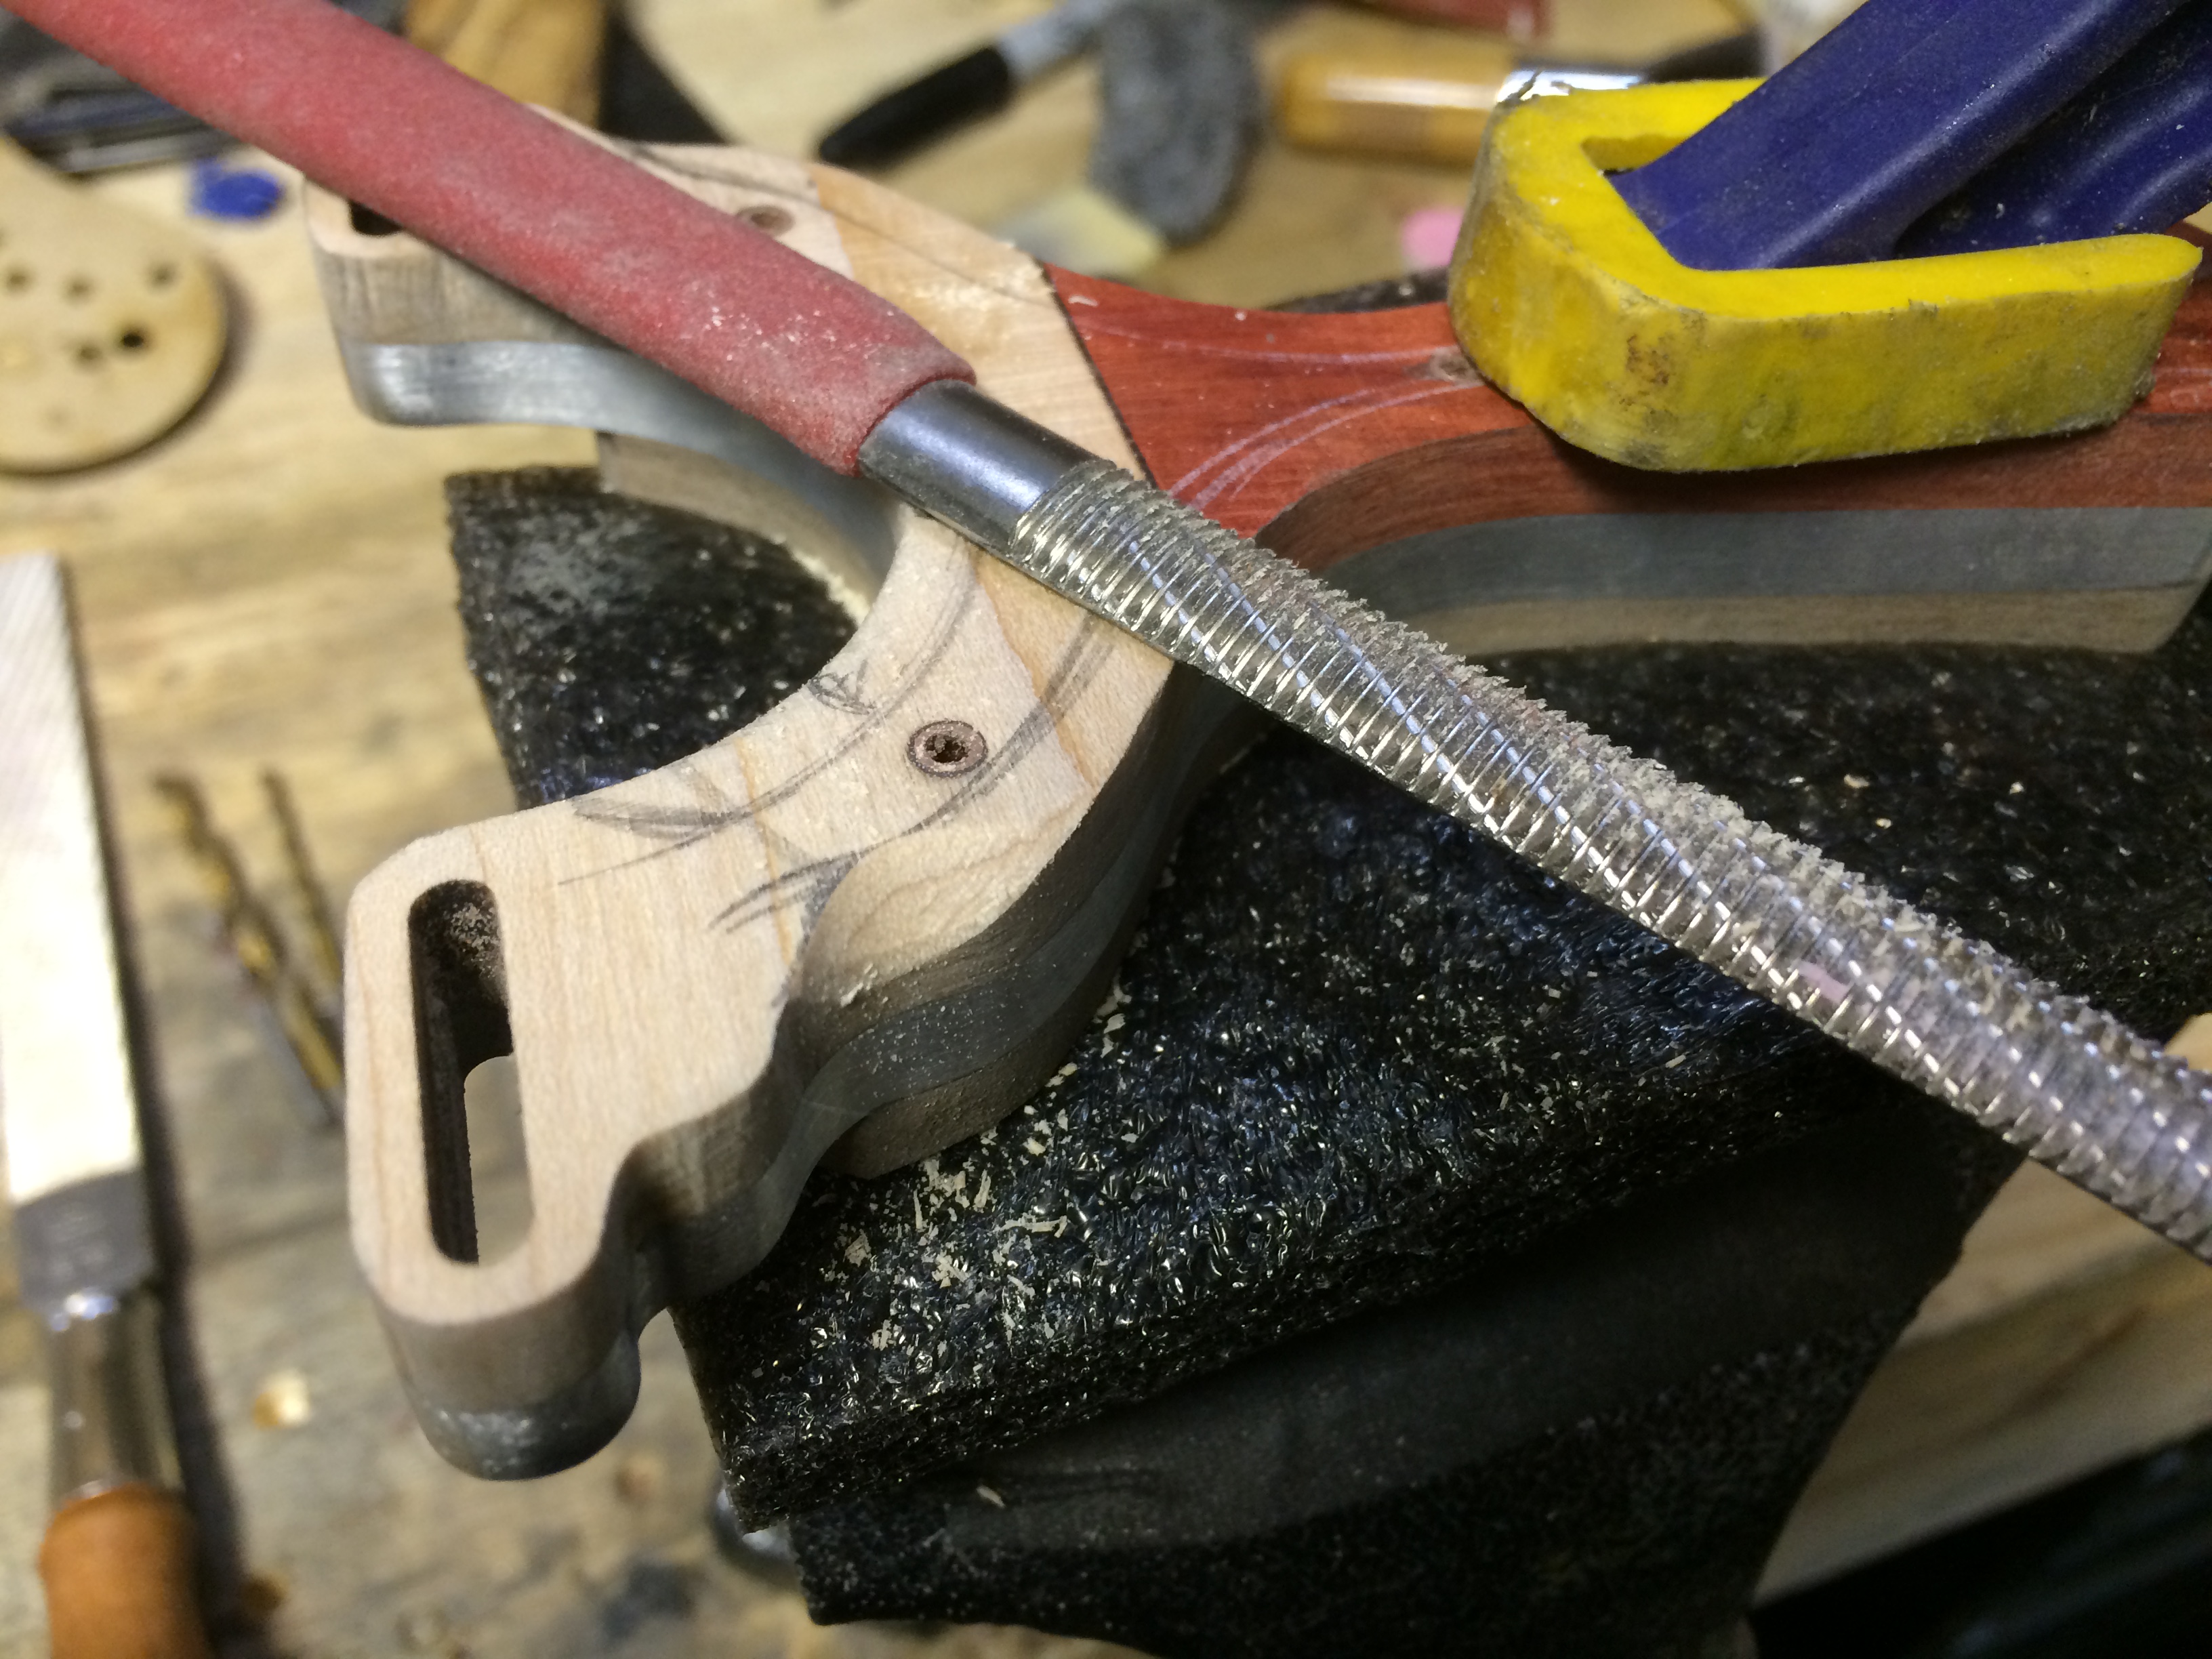
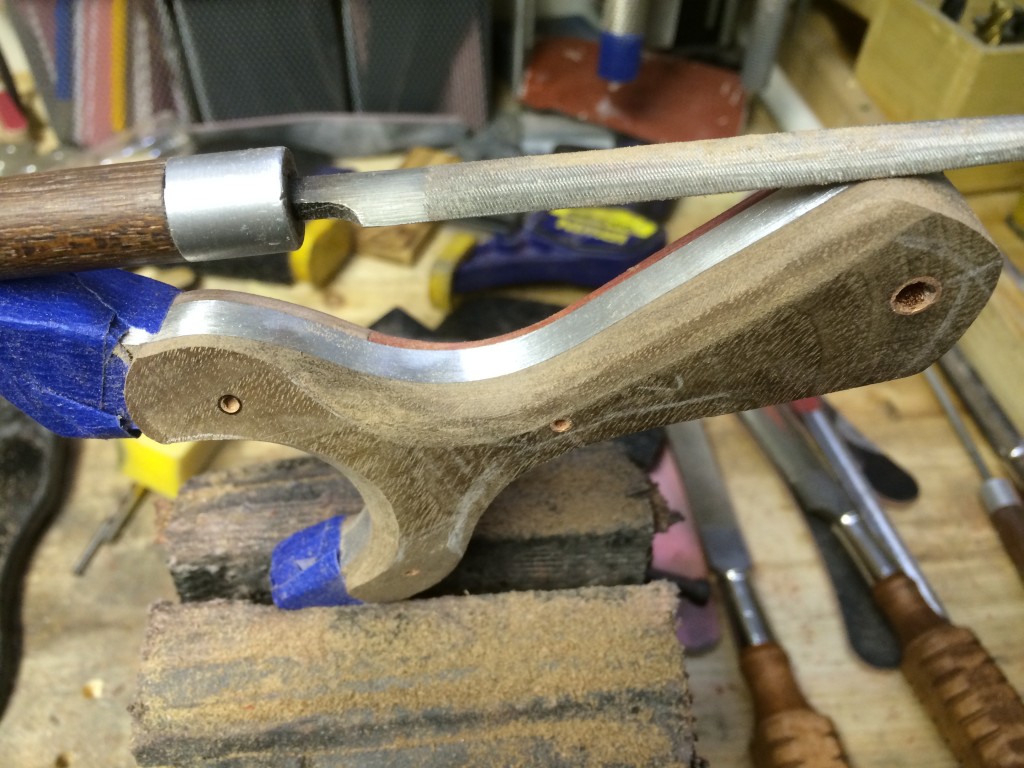
Time to get filing. To establish the transition, the Xfine 1/2″ razor file gets plunged into the edge to create the crisp line that follows the frame curve.

Then it was a matter of following the lay out lines and rounding the edge until it met the metal. Taking great care not to cut into the metal surface.

Using a super fine half round file, the roughed out edge is cleaned up to a reasonable smoothness. The goal here is to blend in areas that need blending and leave the crisp edge on the places that need to be left alone. This is where power tools fail and hand finishing and slow methodical cutting wins.
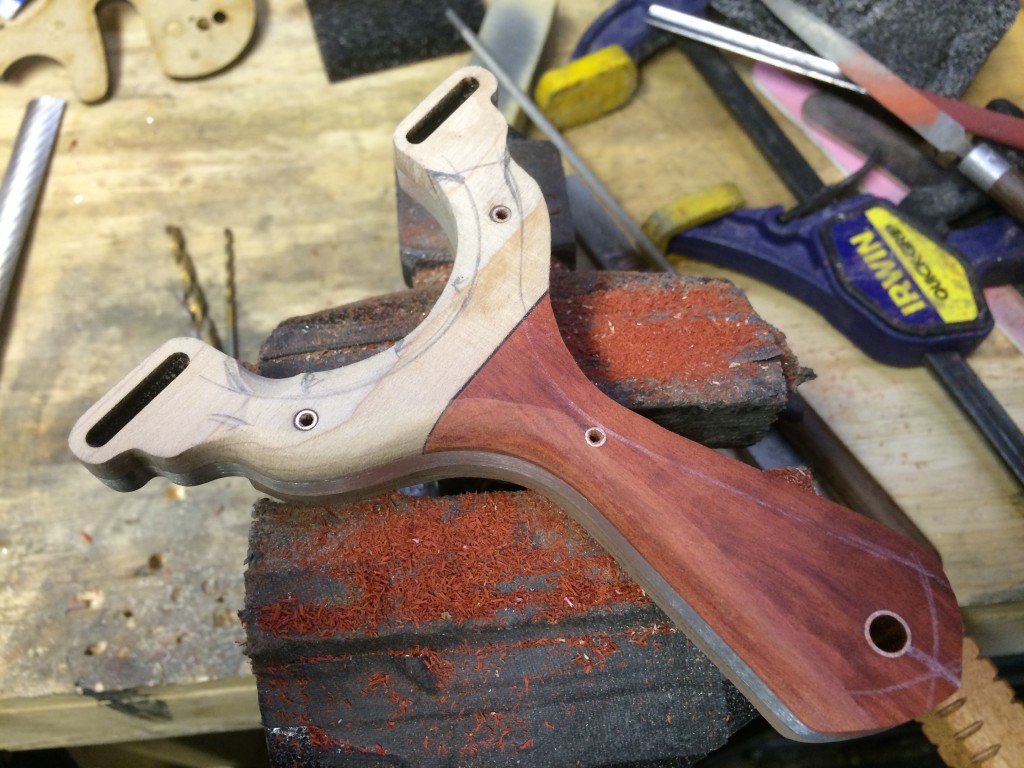
The same technique was applied on the yoke area, establish the crisp transition and then cut away to the guideline. This was a lot easier since a chamfer is much more forgiving than a hand cut radius.
Lather, rinse, repeat on the other side.

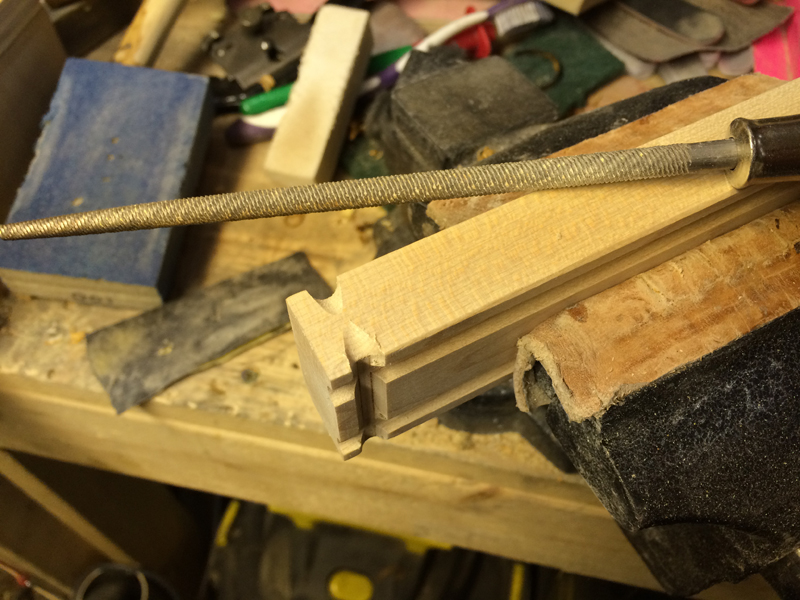
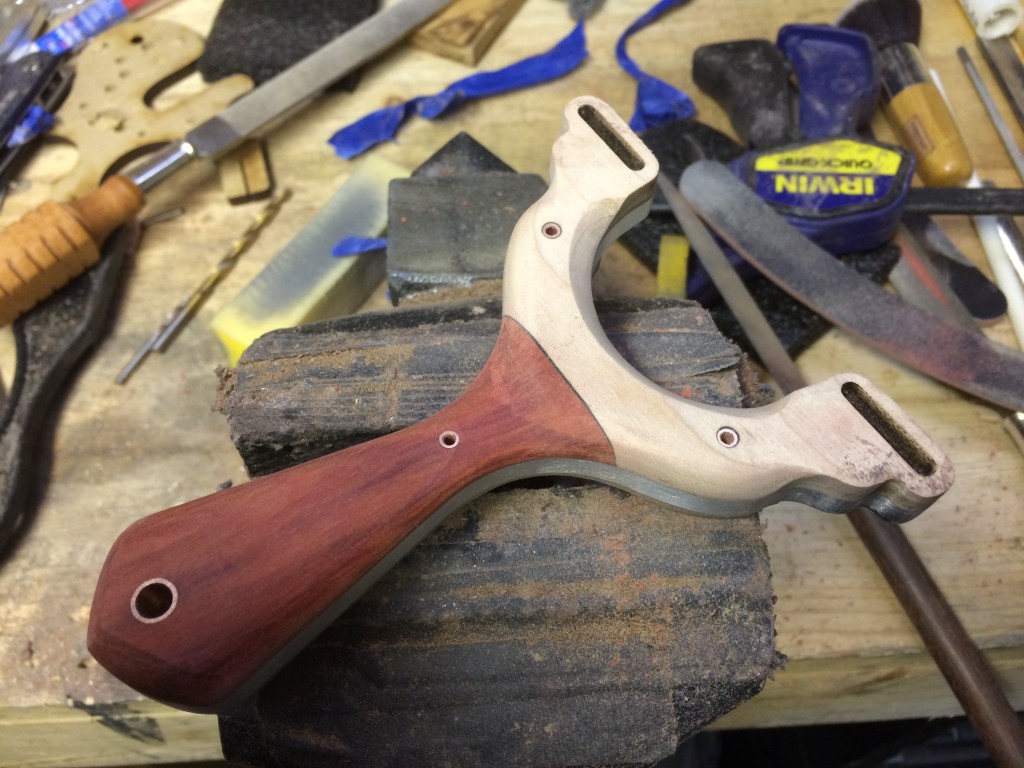
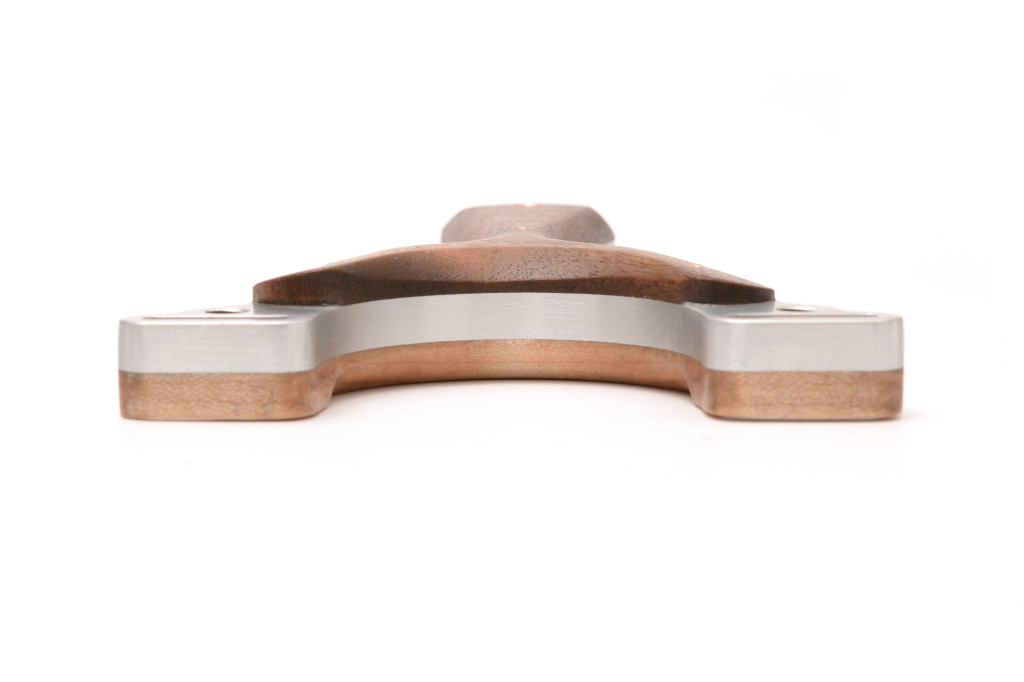
The last chamfer is the butt end, I imagined this to be the tip of a broad sword so the two chamfer meet in the middle the two edges of a sword. There is a slight curve but careful filing completes the compound curve.
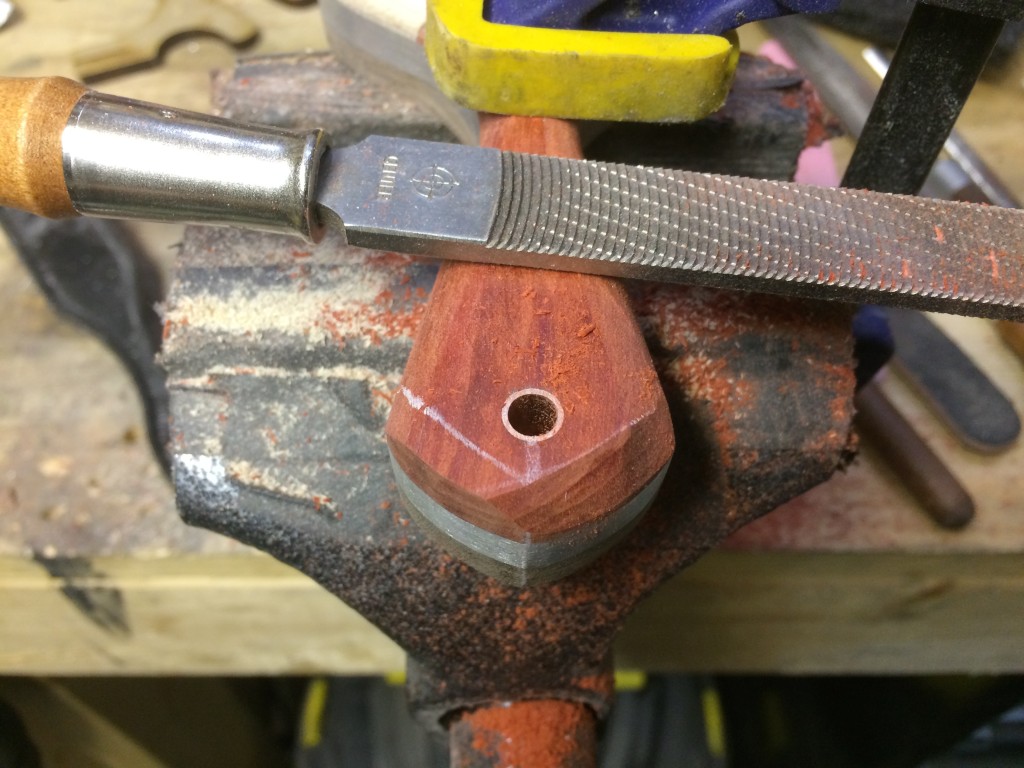
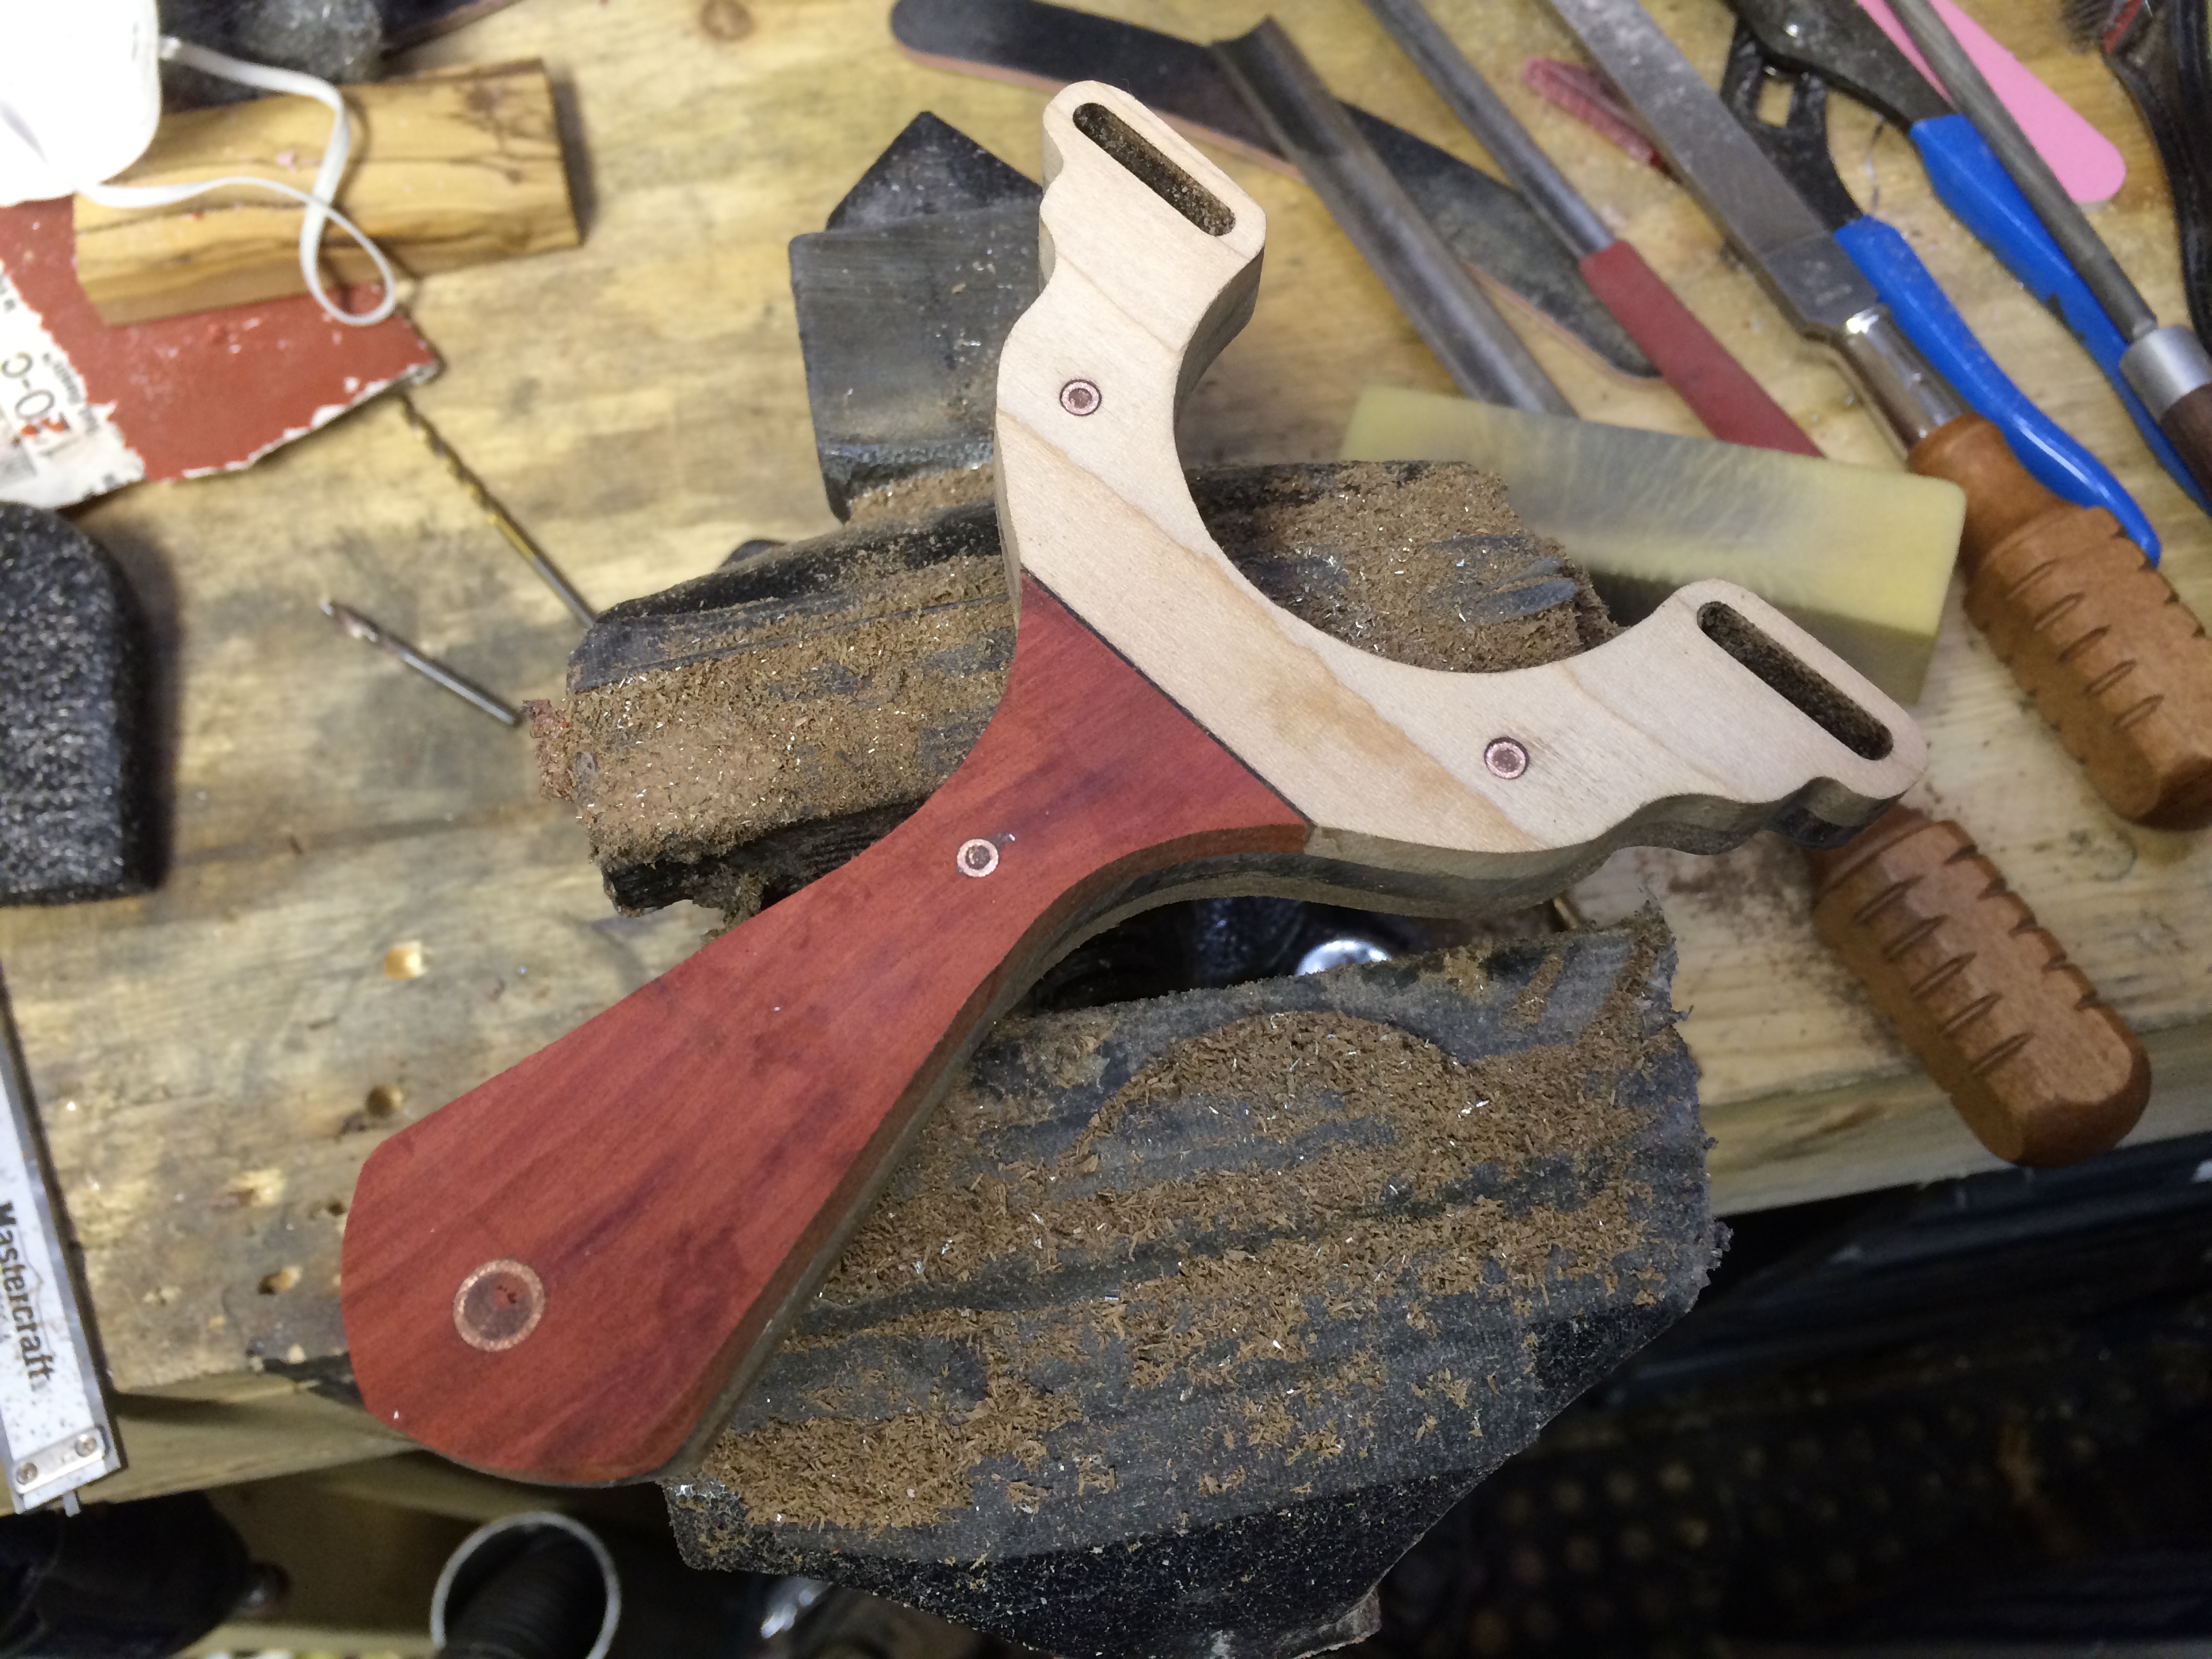
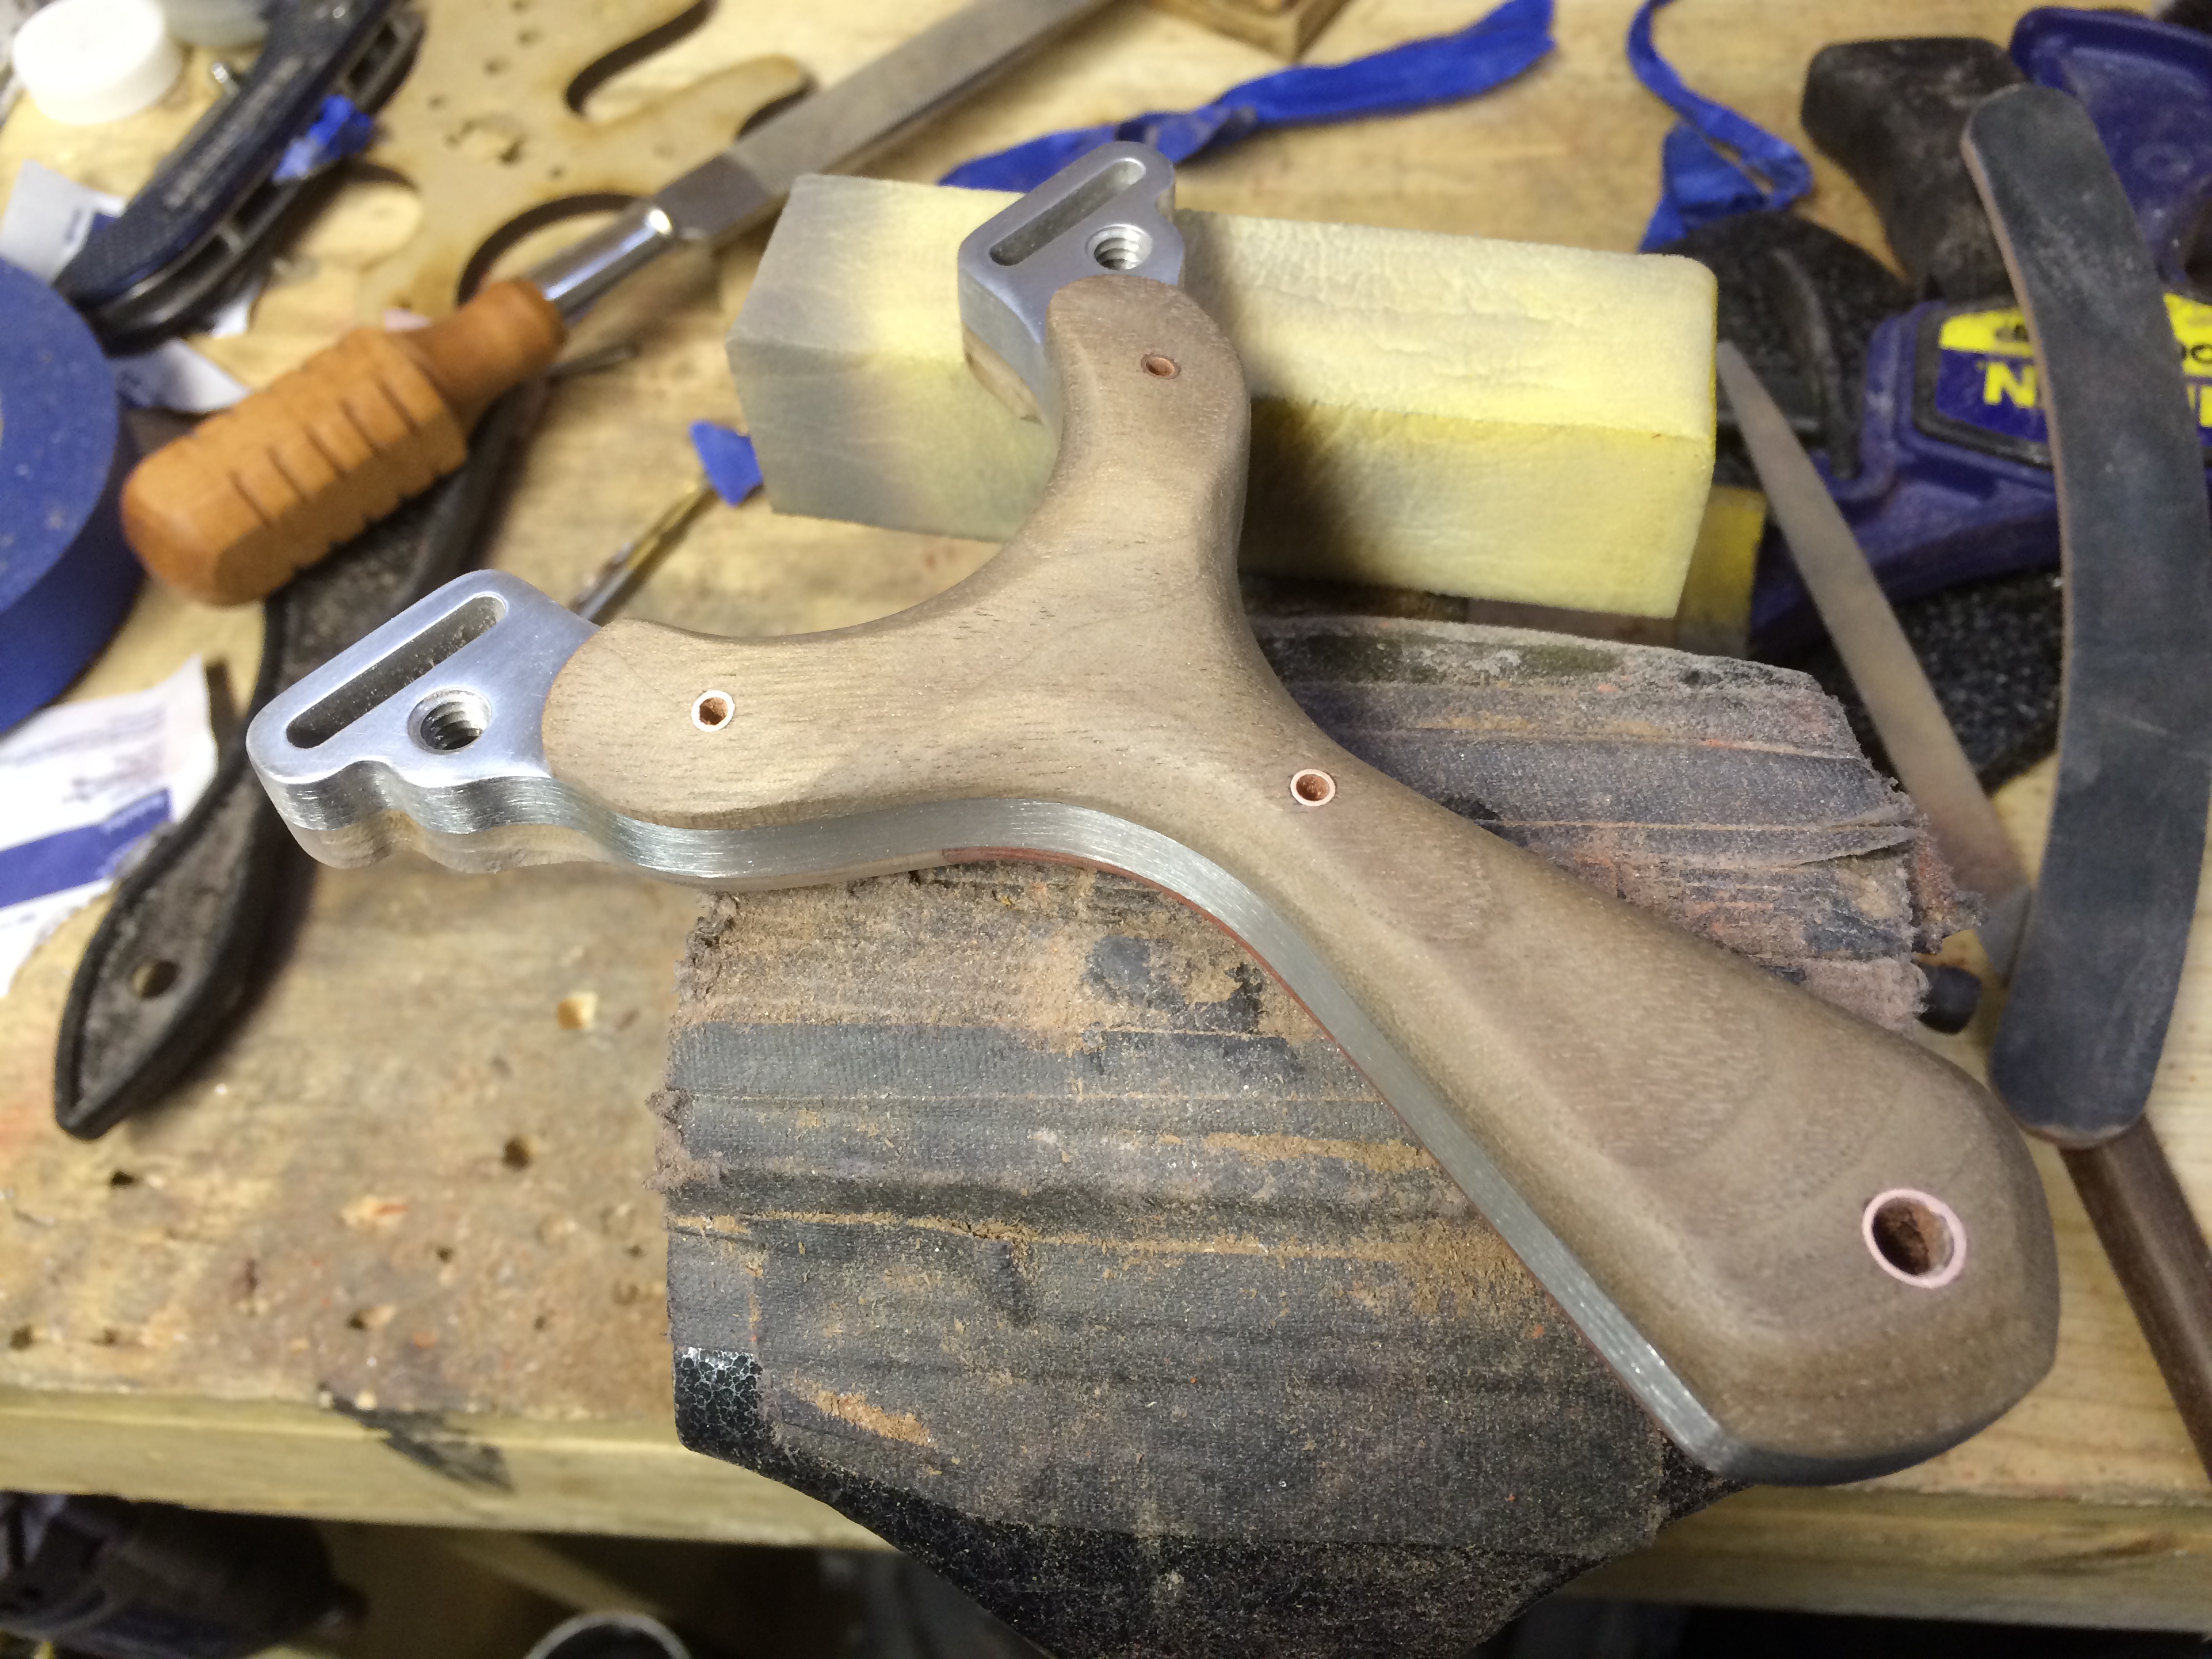
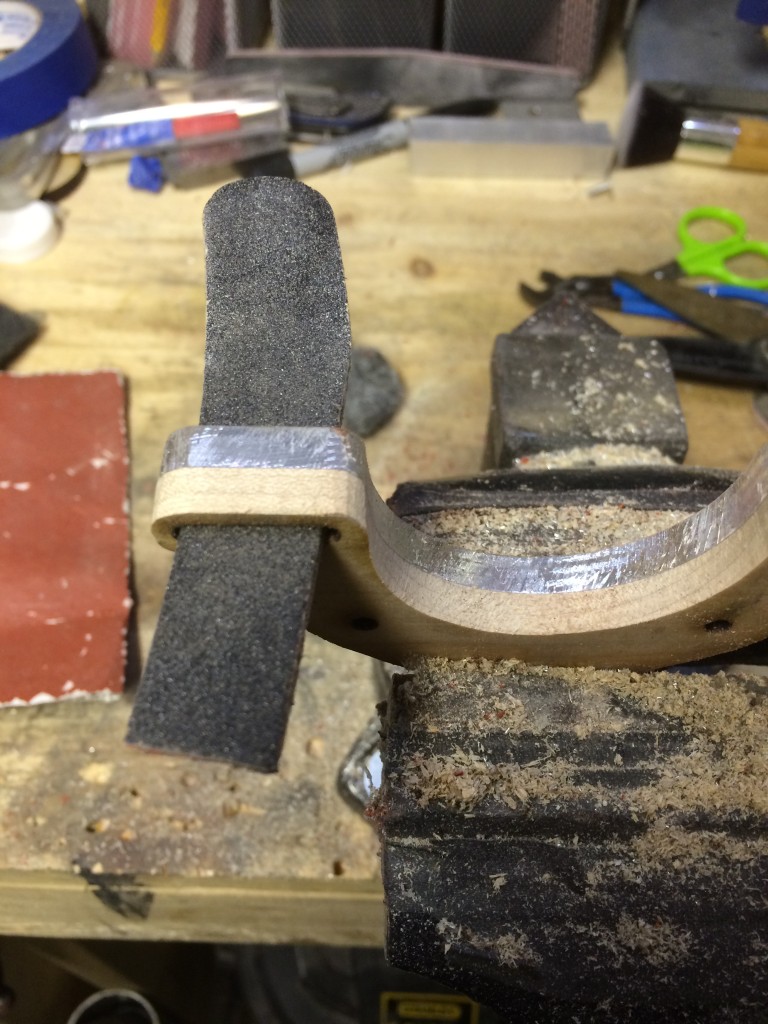
The back side isn’t quite finished. Since the middle and index fingers get wrapped around the waist area, the scale was filed down with a half round file (so the copper pin could be also filed down simultaneously). The subtle 3mm dip into the surface of the slingshot makes registering the grip a lot easier and intuitive.
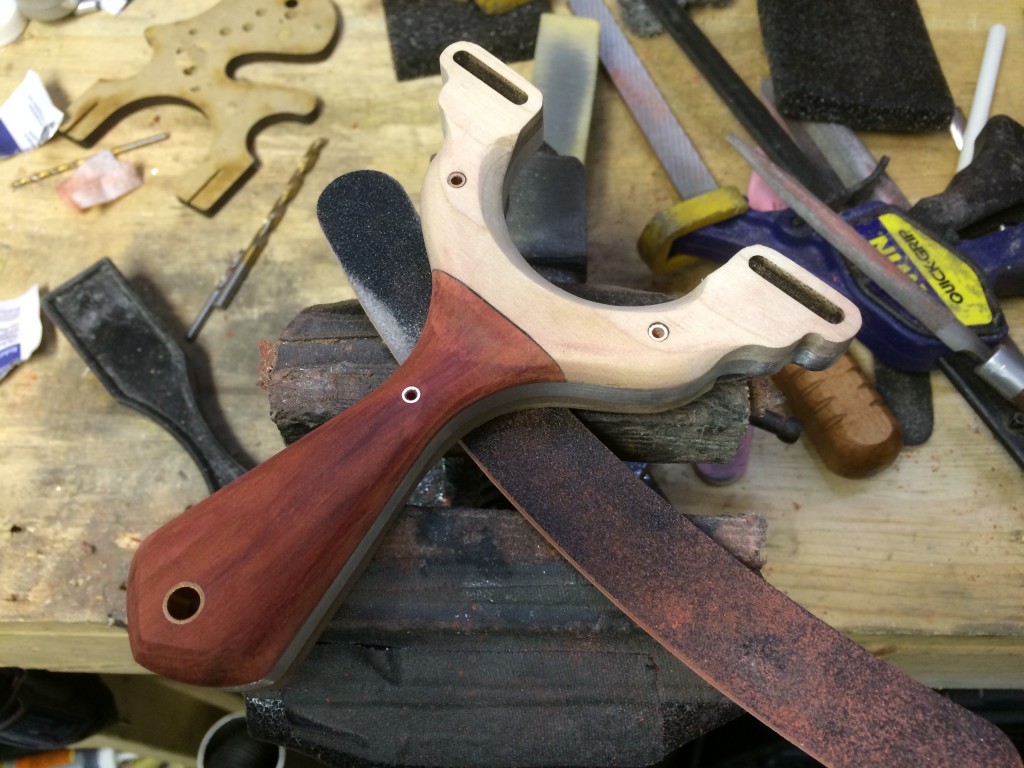
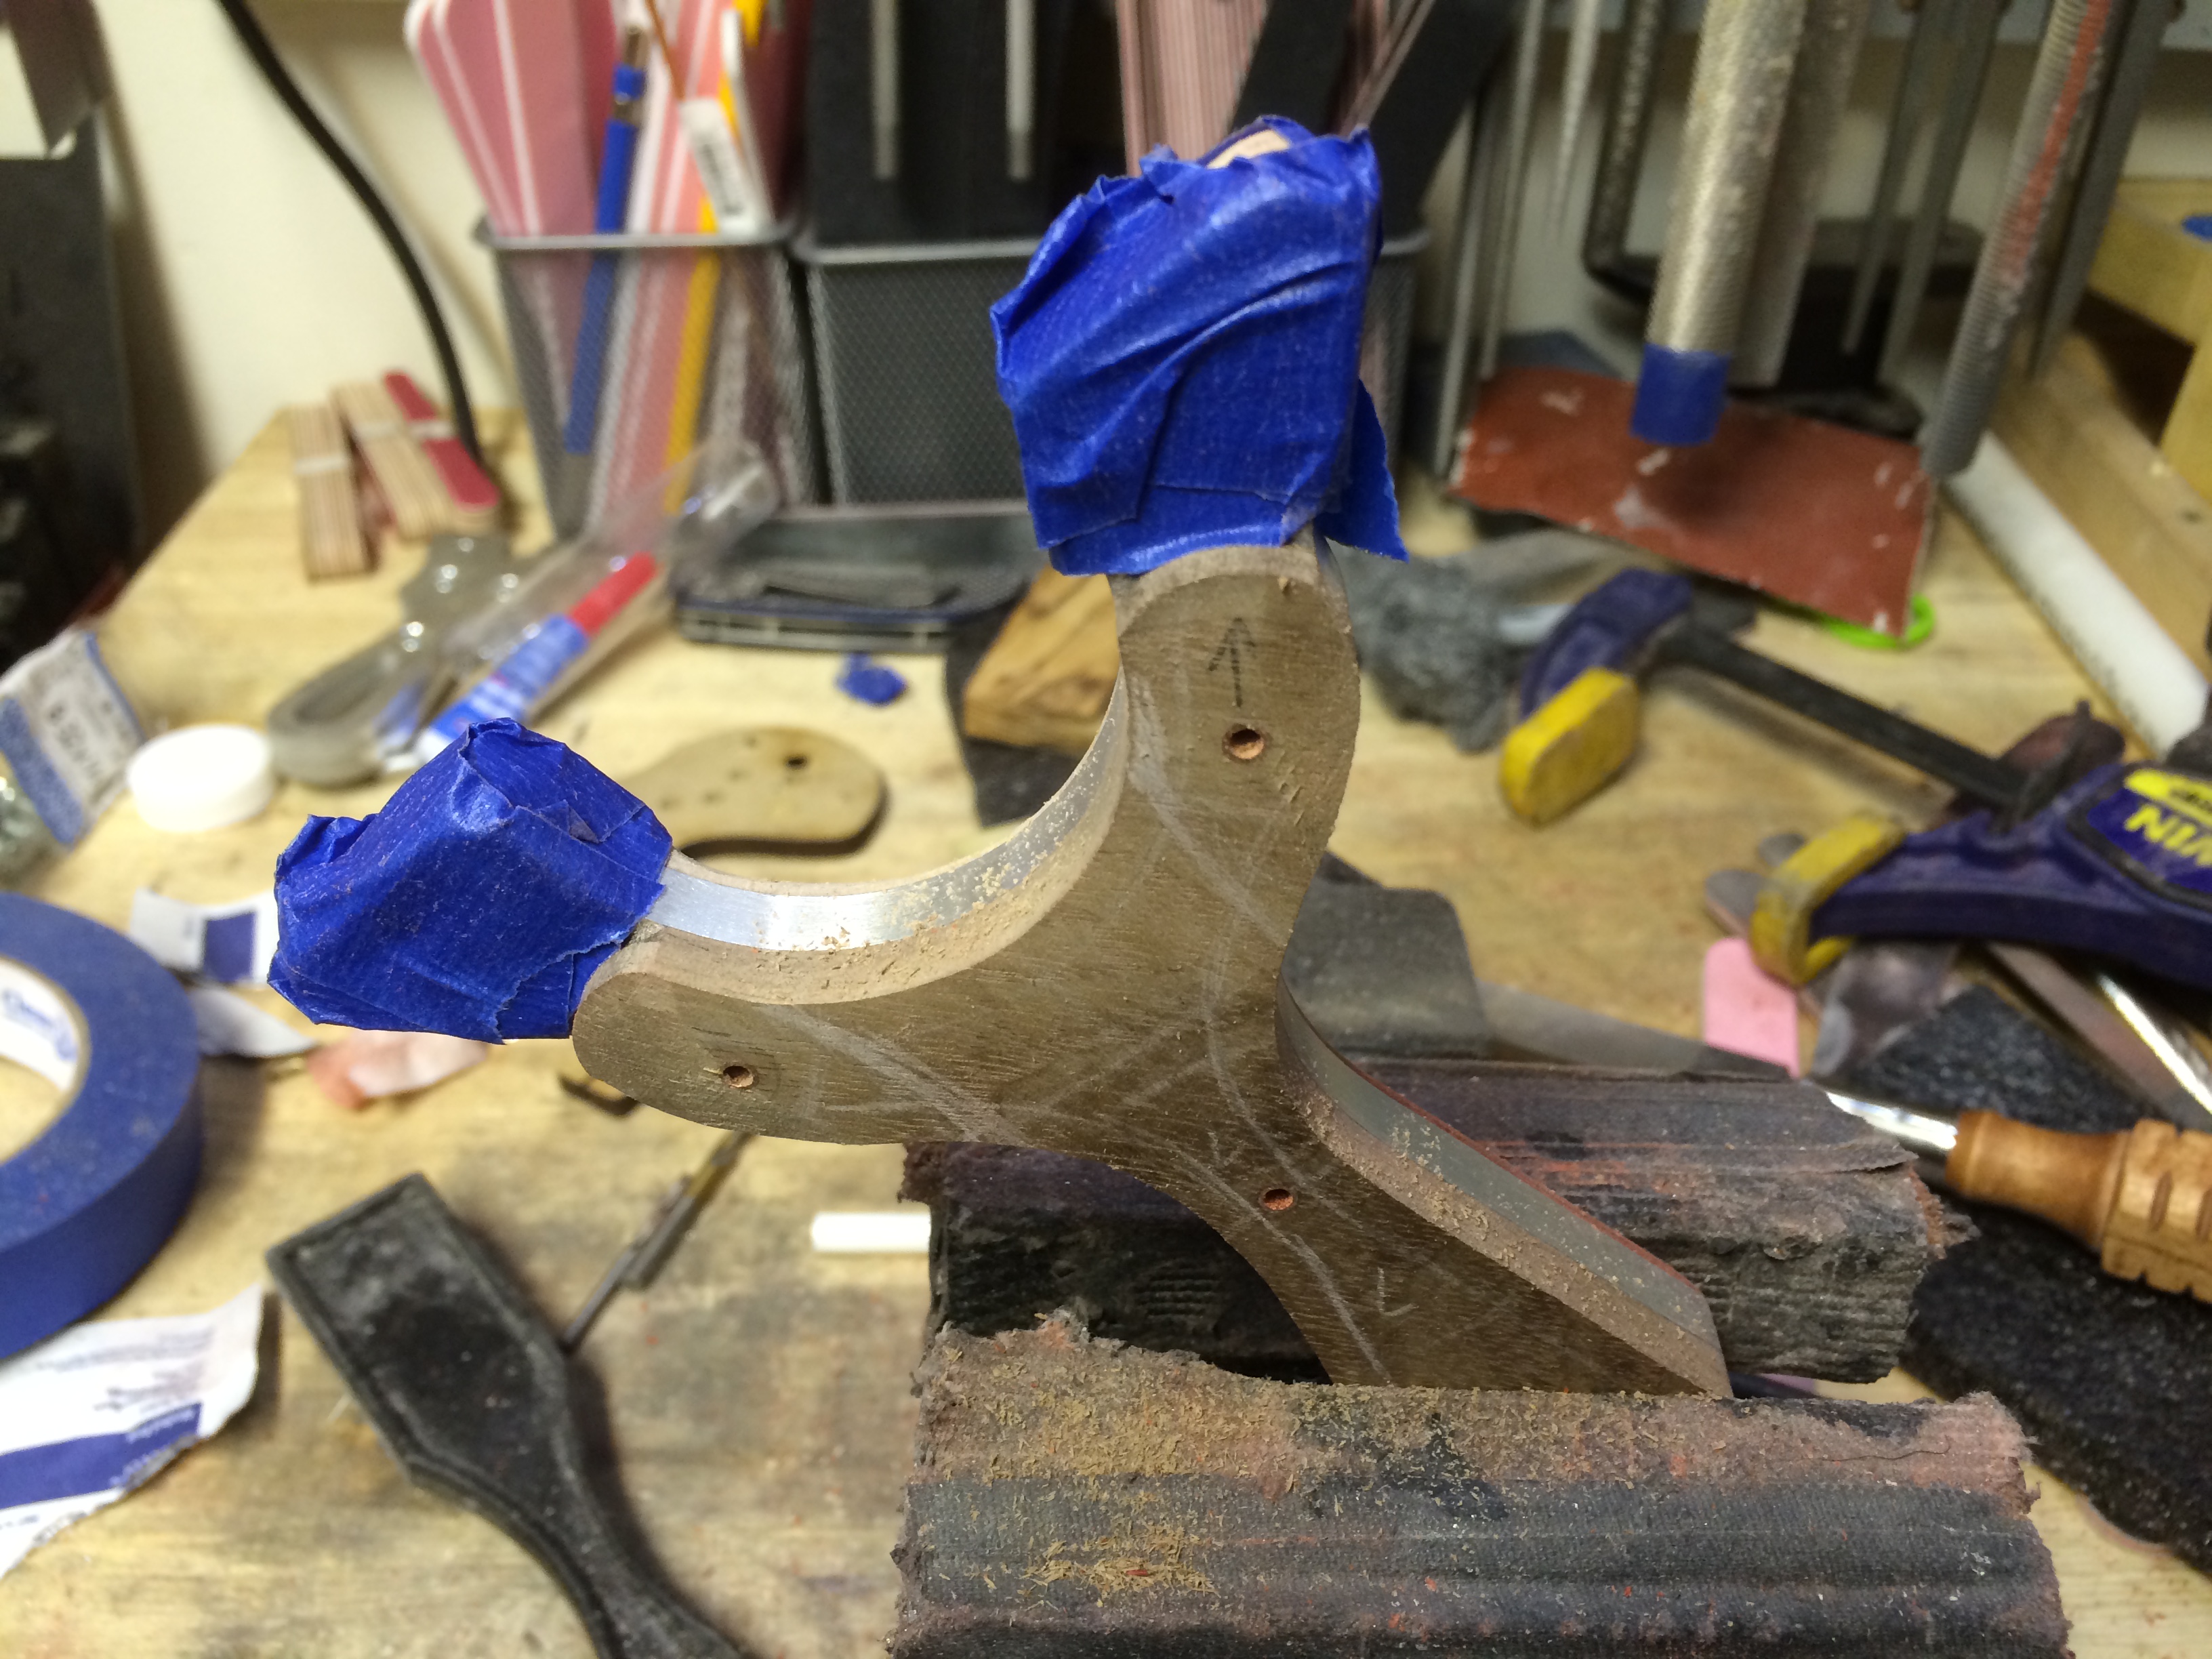
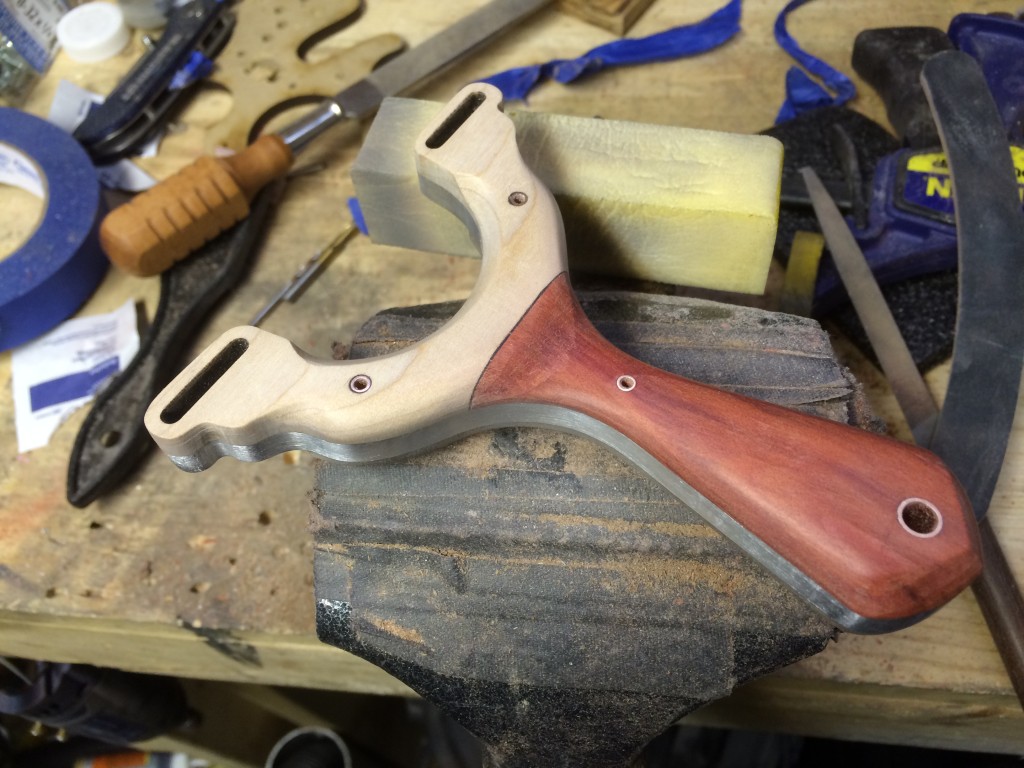
Now it was time to pay attention to the walnut/front scale. Blue painters tape is used to cover the aluminum tips to minimize damage if an accidental slip of the file happens. Those who make knives, know this technique all to well to save the highly buffed and prepped surface of a blade.

This was one of the toughest shaping processes since it’s not just a slope, but a compound curve sloping towards the tips and outside of the forks. The goal here was to have a nice place for the thumb to brace since a thumb normally rotates outwards.
Once those two complex slopes were done (super tough to get symmetrical!) The same process of establishing the transition between curve and edge and then continuing to round the edge was done. In the photo is one of my favourite files, a super fine 6″ half round USA made Nicholson.
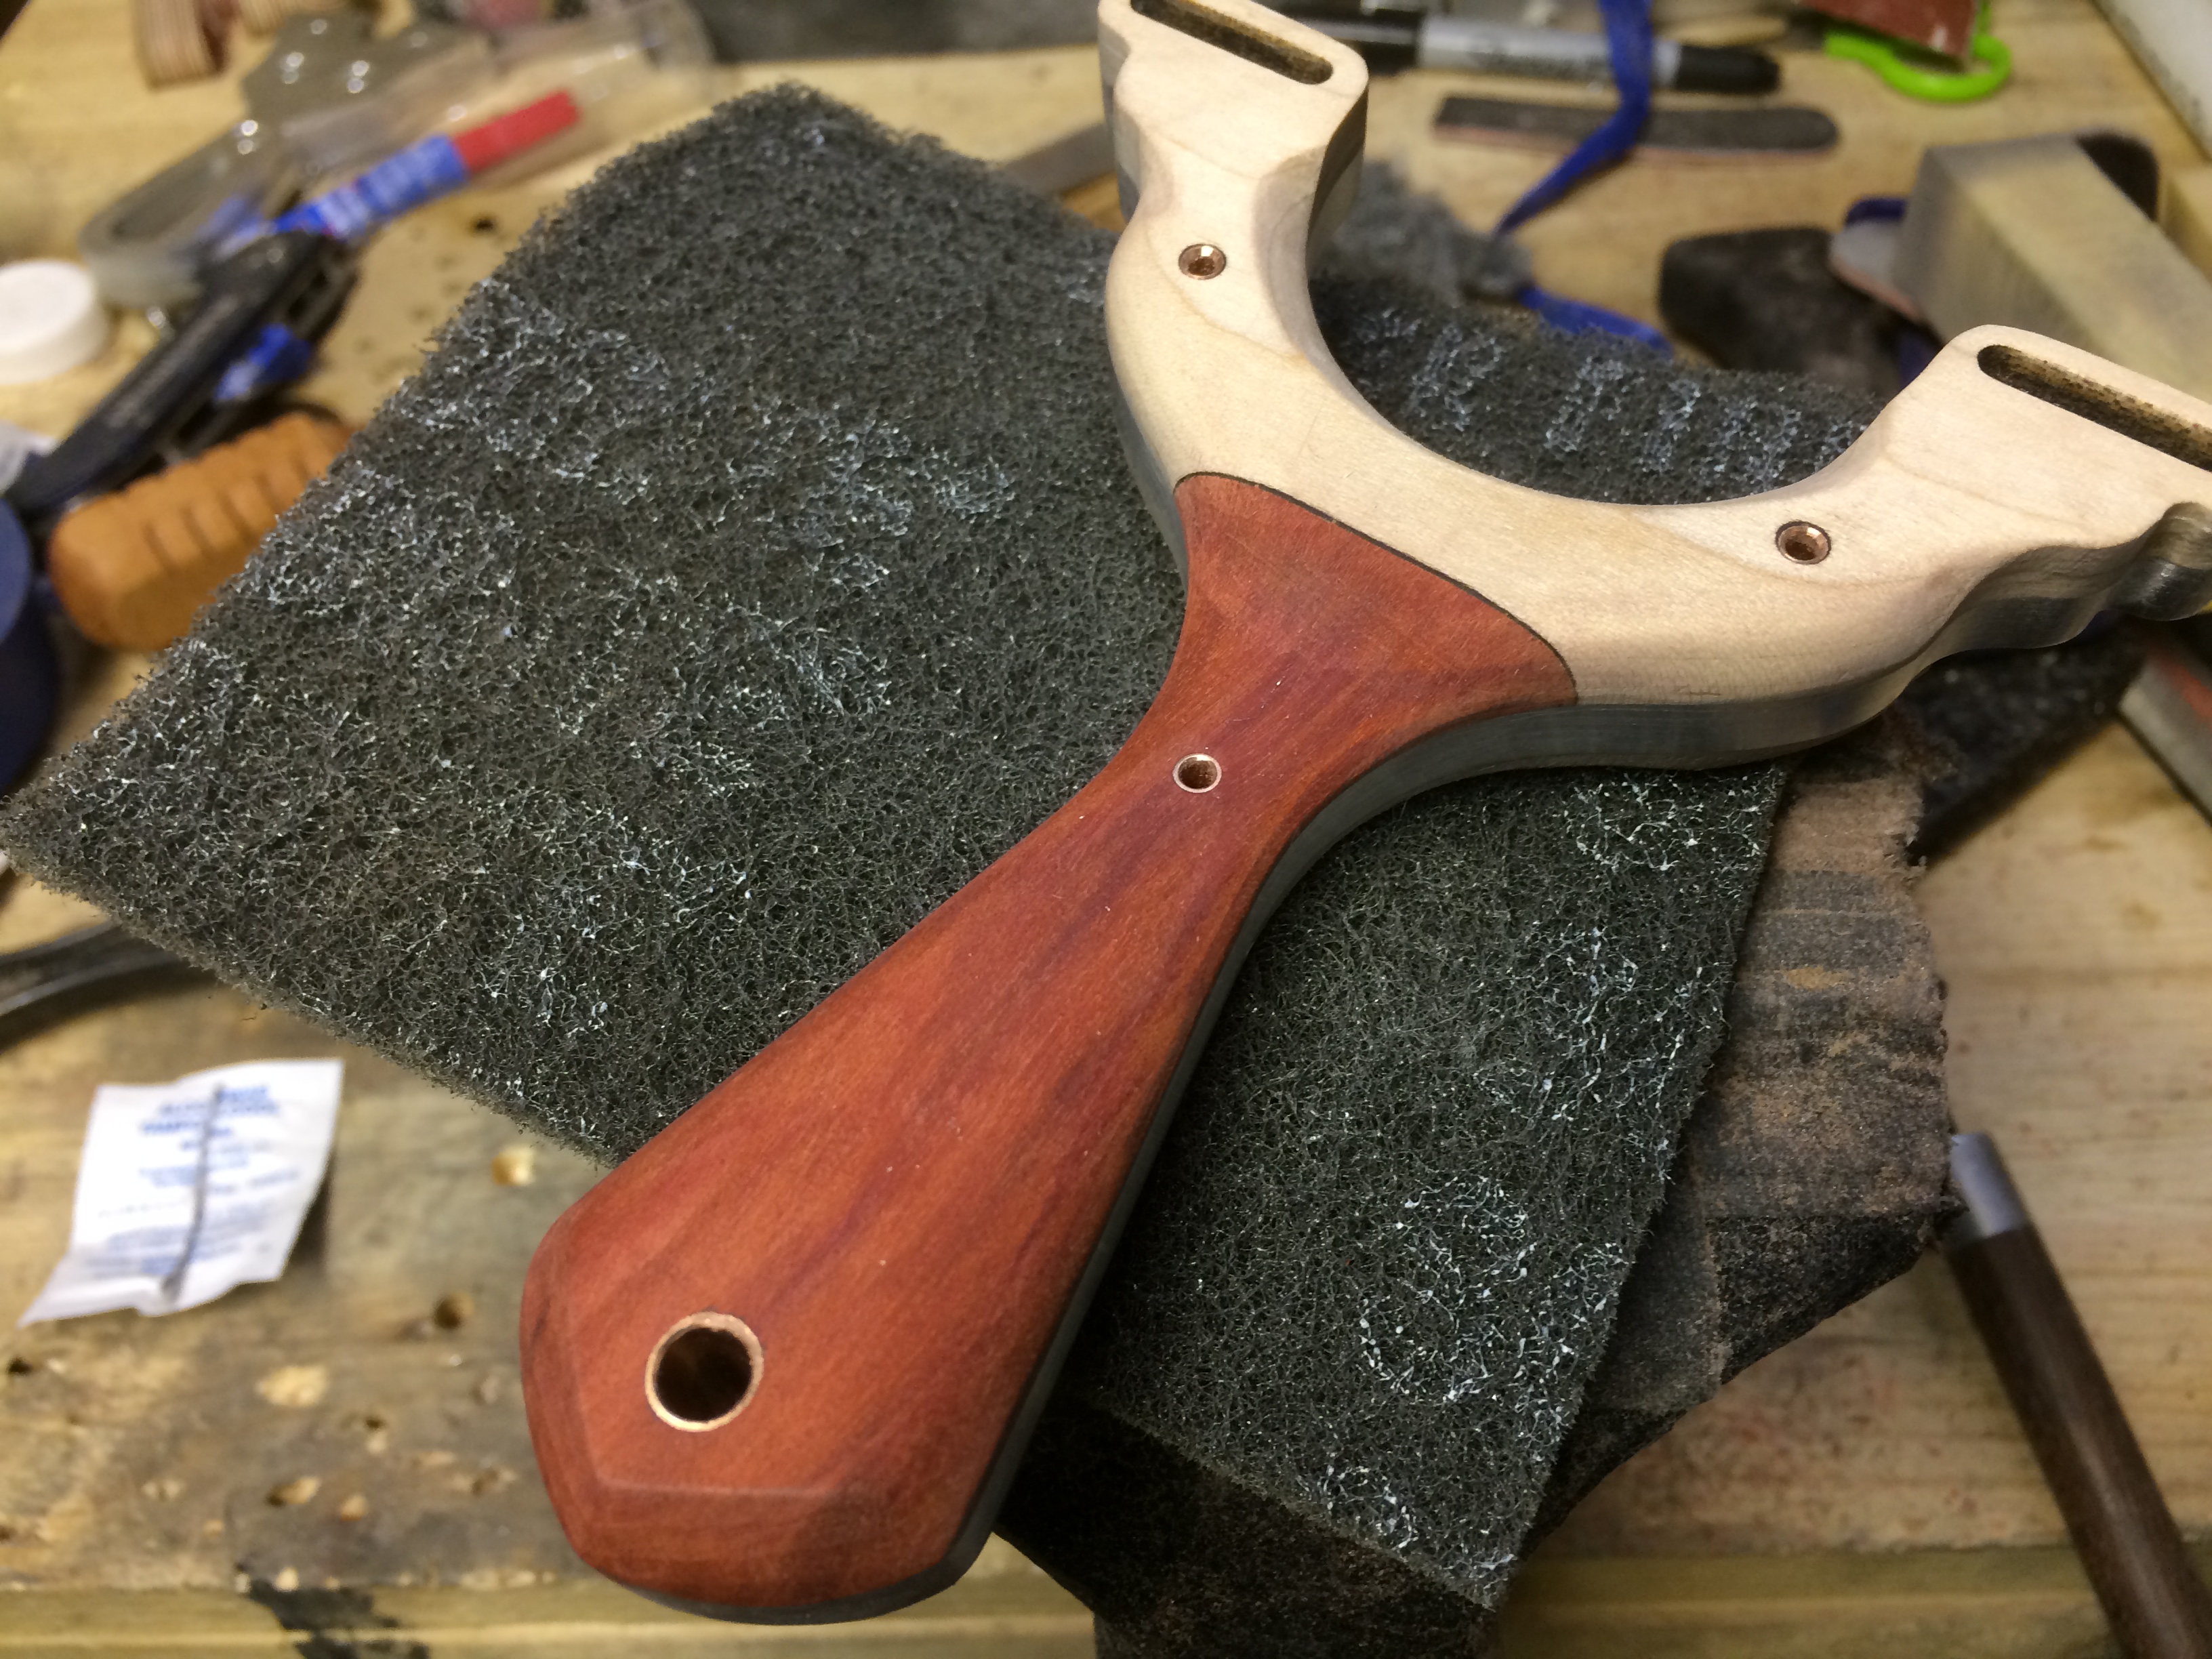
The file leaves the surface pretty smooth, but some 100 and 240 grit sanding sticks help smooth the transitions and surface out.

A some buffing with a 320 grit sponge to really smooth out the wood.
You can see how the tips of the walnut scale roll out and towards the tip.

Lastly, some synthetic steel wool takes out any remaining weirdness in the surface.

A rubbing alcohol swab removes any grease and dirt (and the redheart tends to deposit on the lighter coloured wood). The compound is quick evaporating so it doesn’t raise any grain, but any grain can be knocked down again with the steel wool.

Finishing!
The whole slingshot gets a 15 min bath in boiled linseed oil and then massage for a couple of minutes. The sling is then left with a thick layer of it for about 30 mins while the the oil has a chance to penetrate the surface.

After the 30 mins, excess is wipe away and again left for another 30 mins.
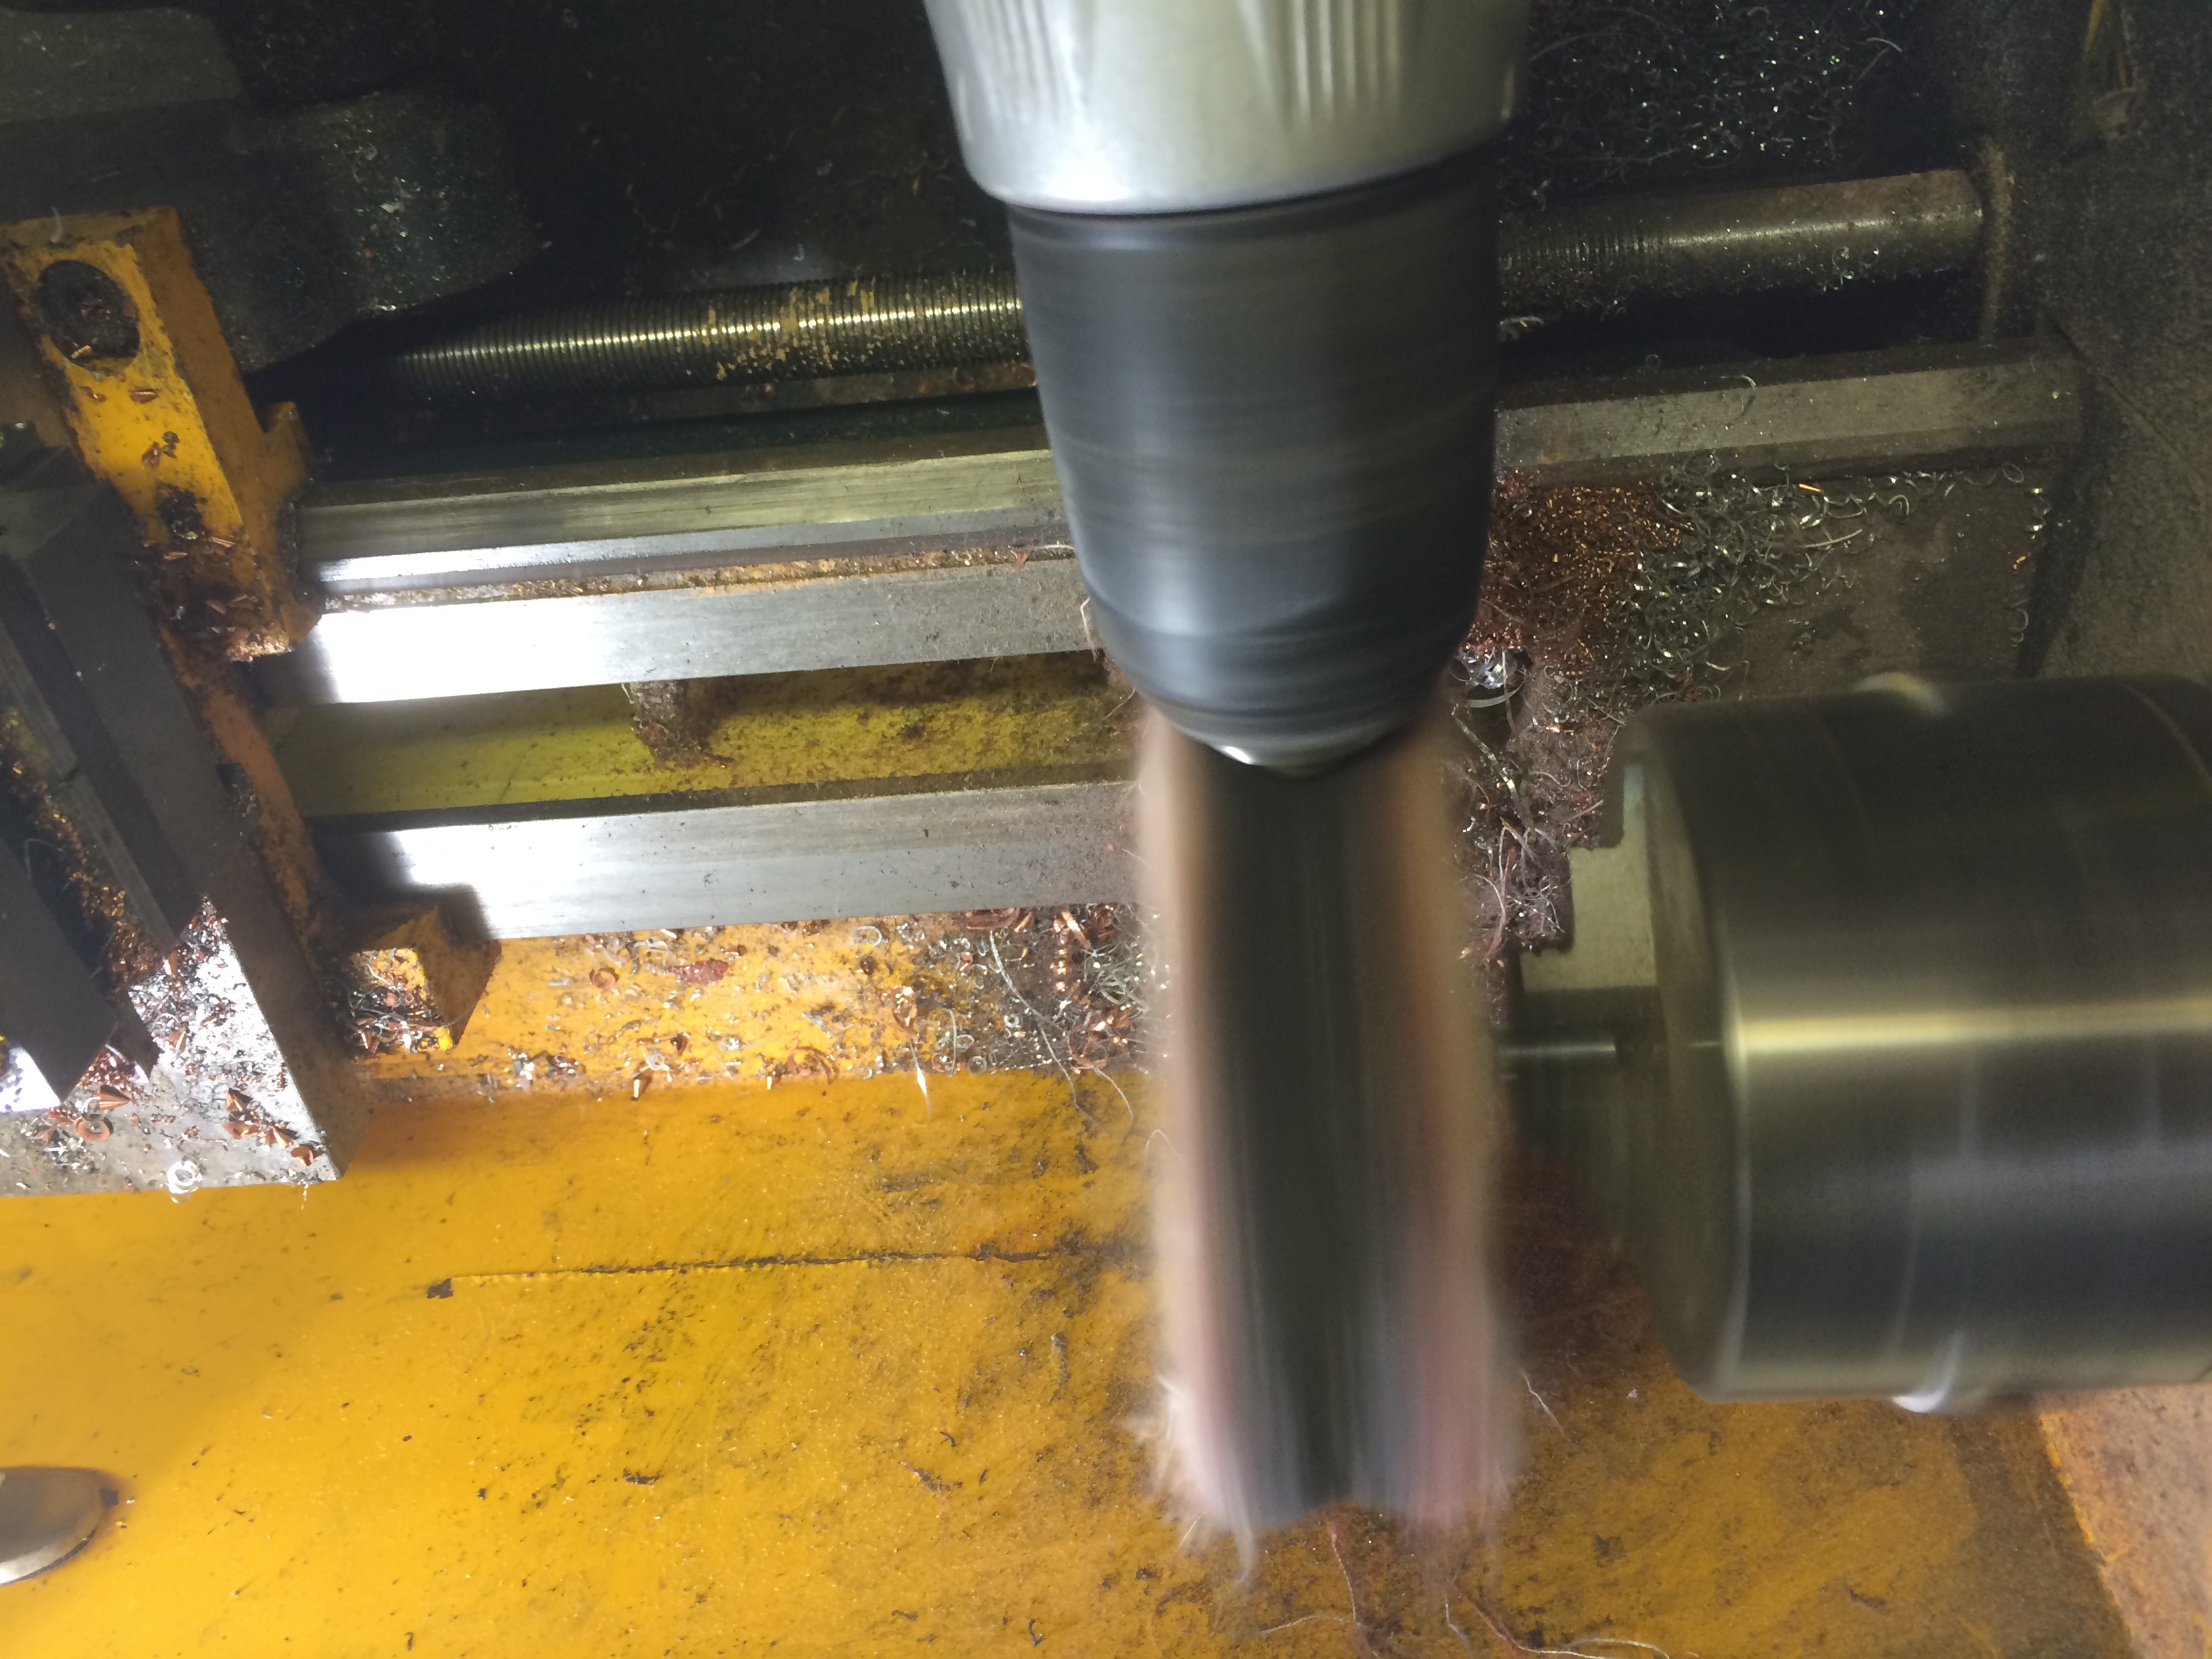
Meanwhile….the brass screws get chucked into a drill and then while spinning, get pushed into a spinning cloth wheel. The dual spinning action creates a mirror surface in no time. Overkill? Sure. Why not.

You can almost make out my camera!

Shiny!

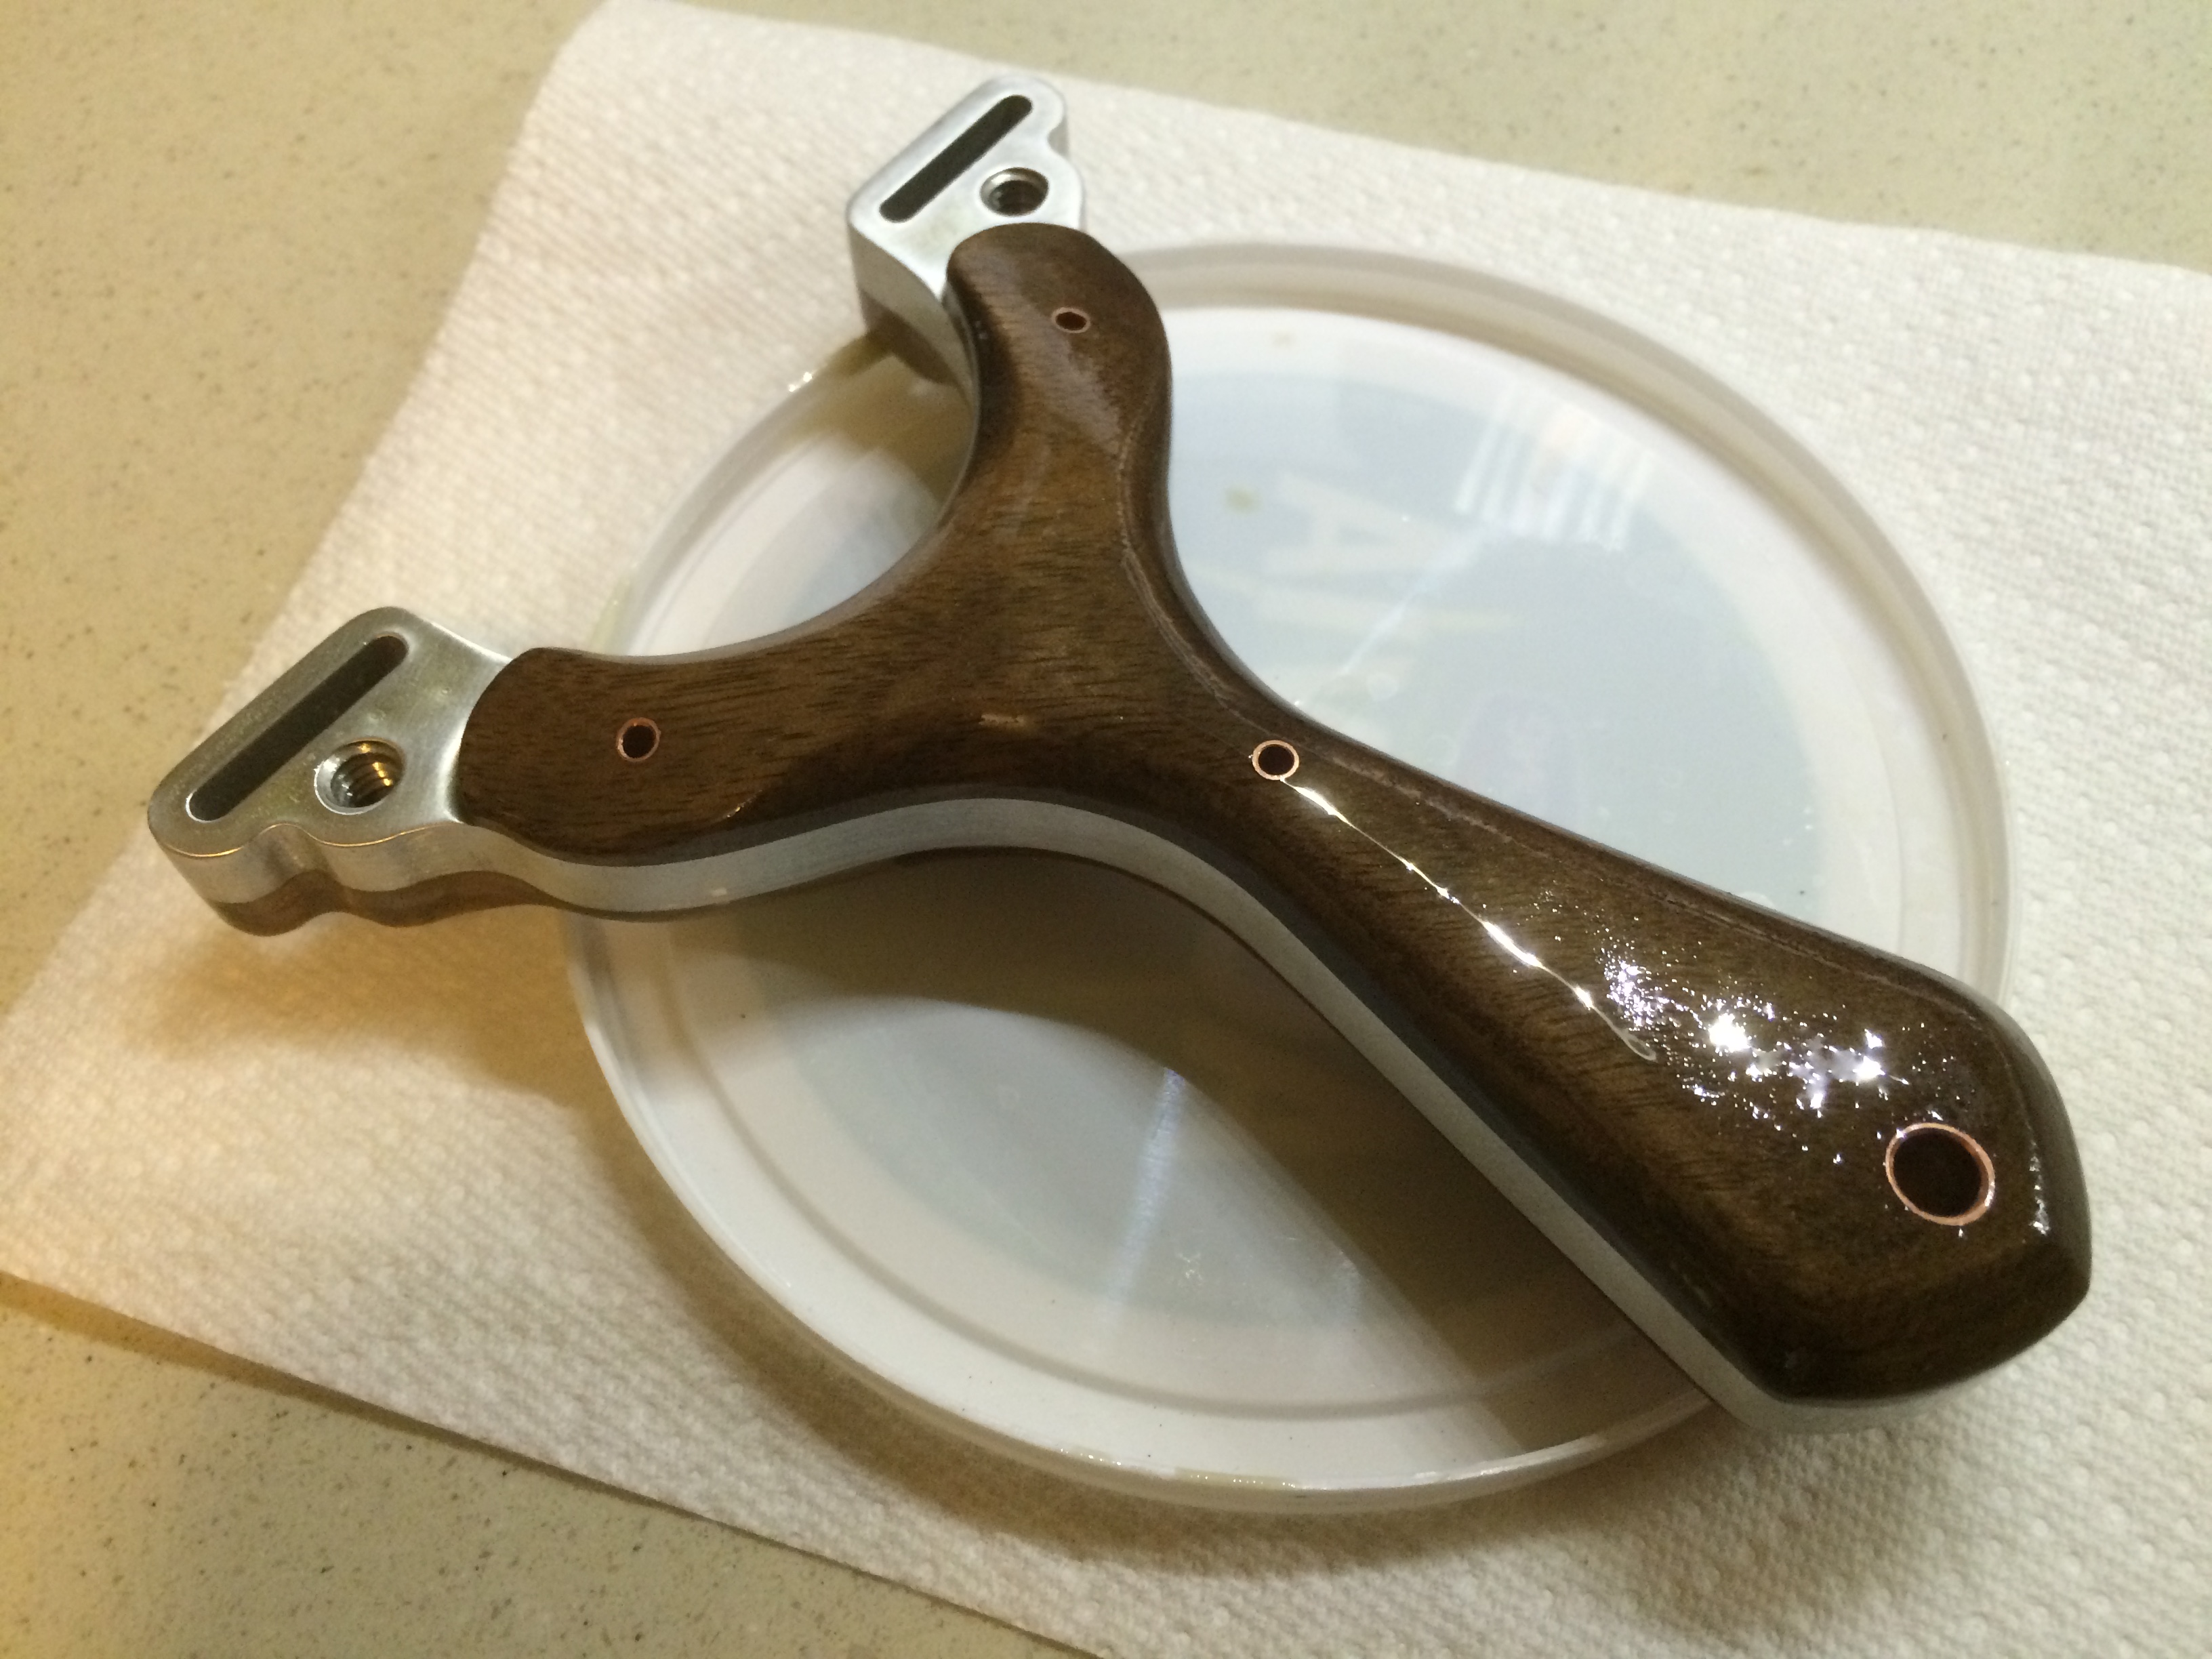
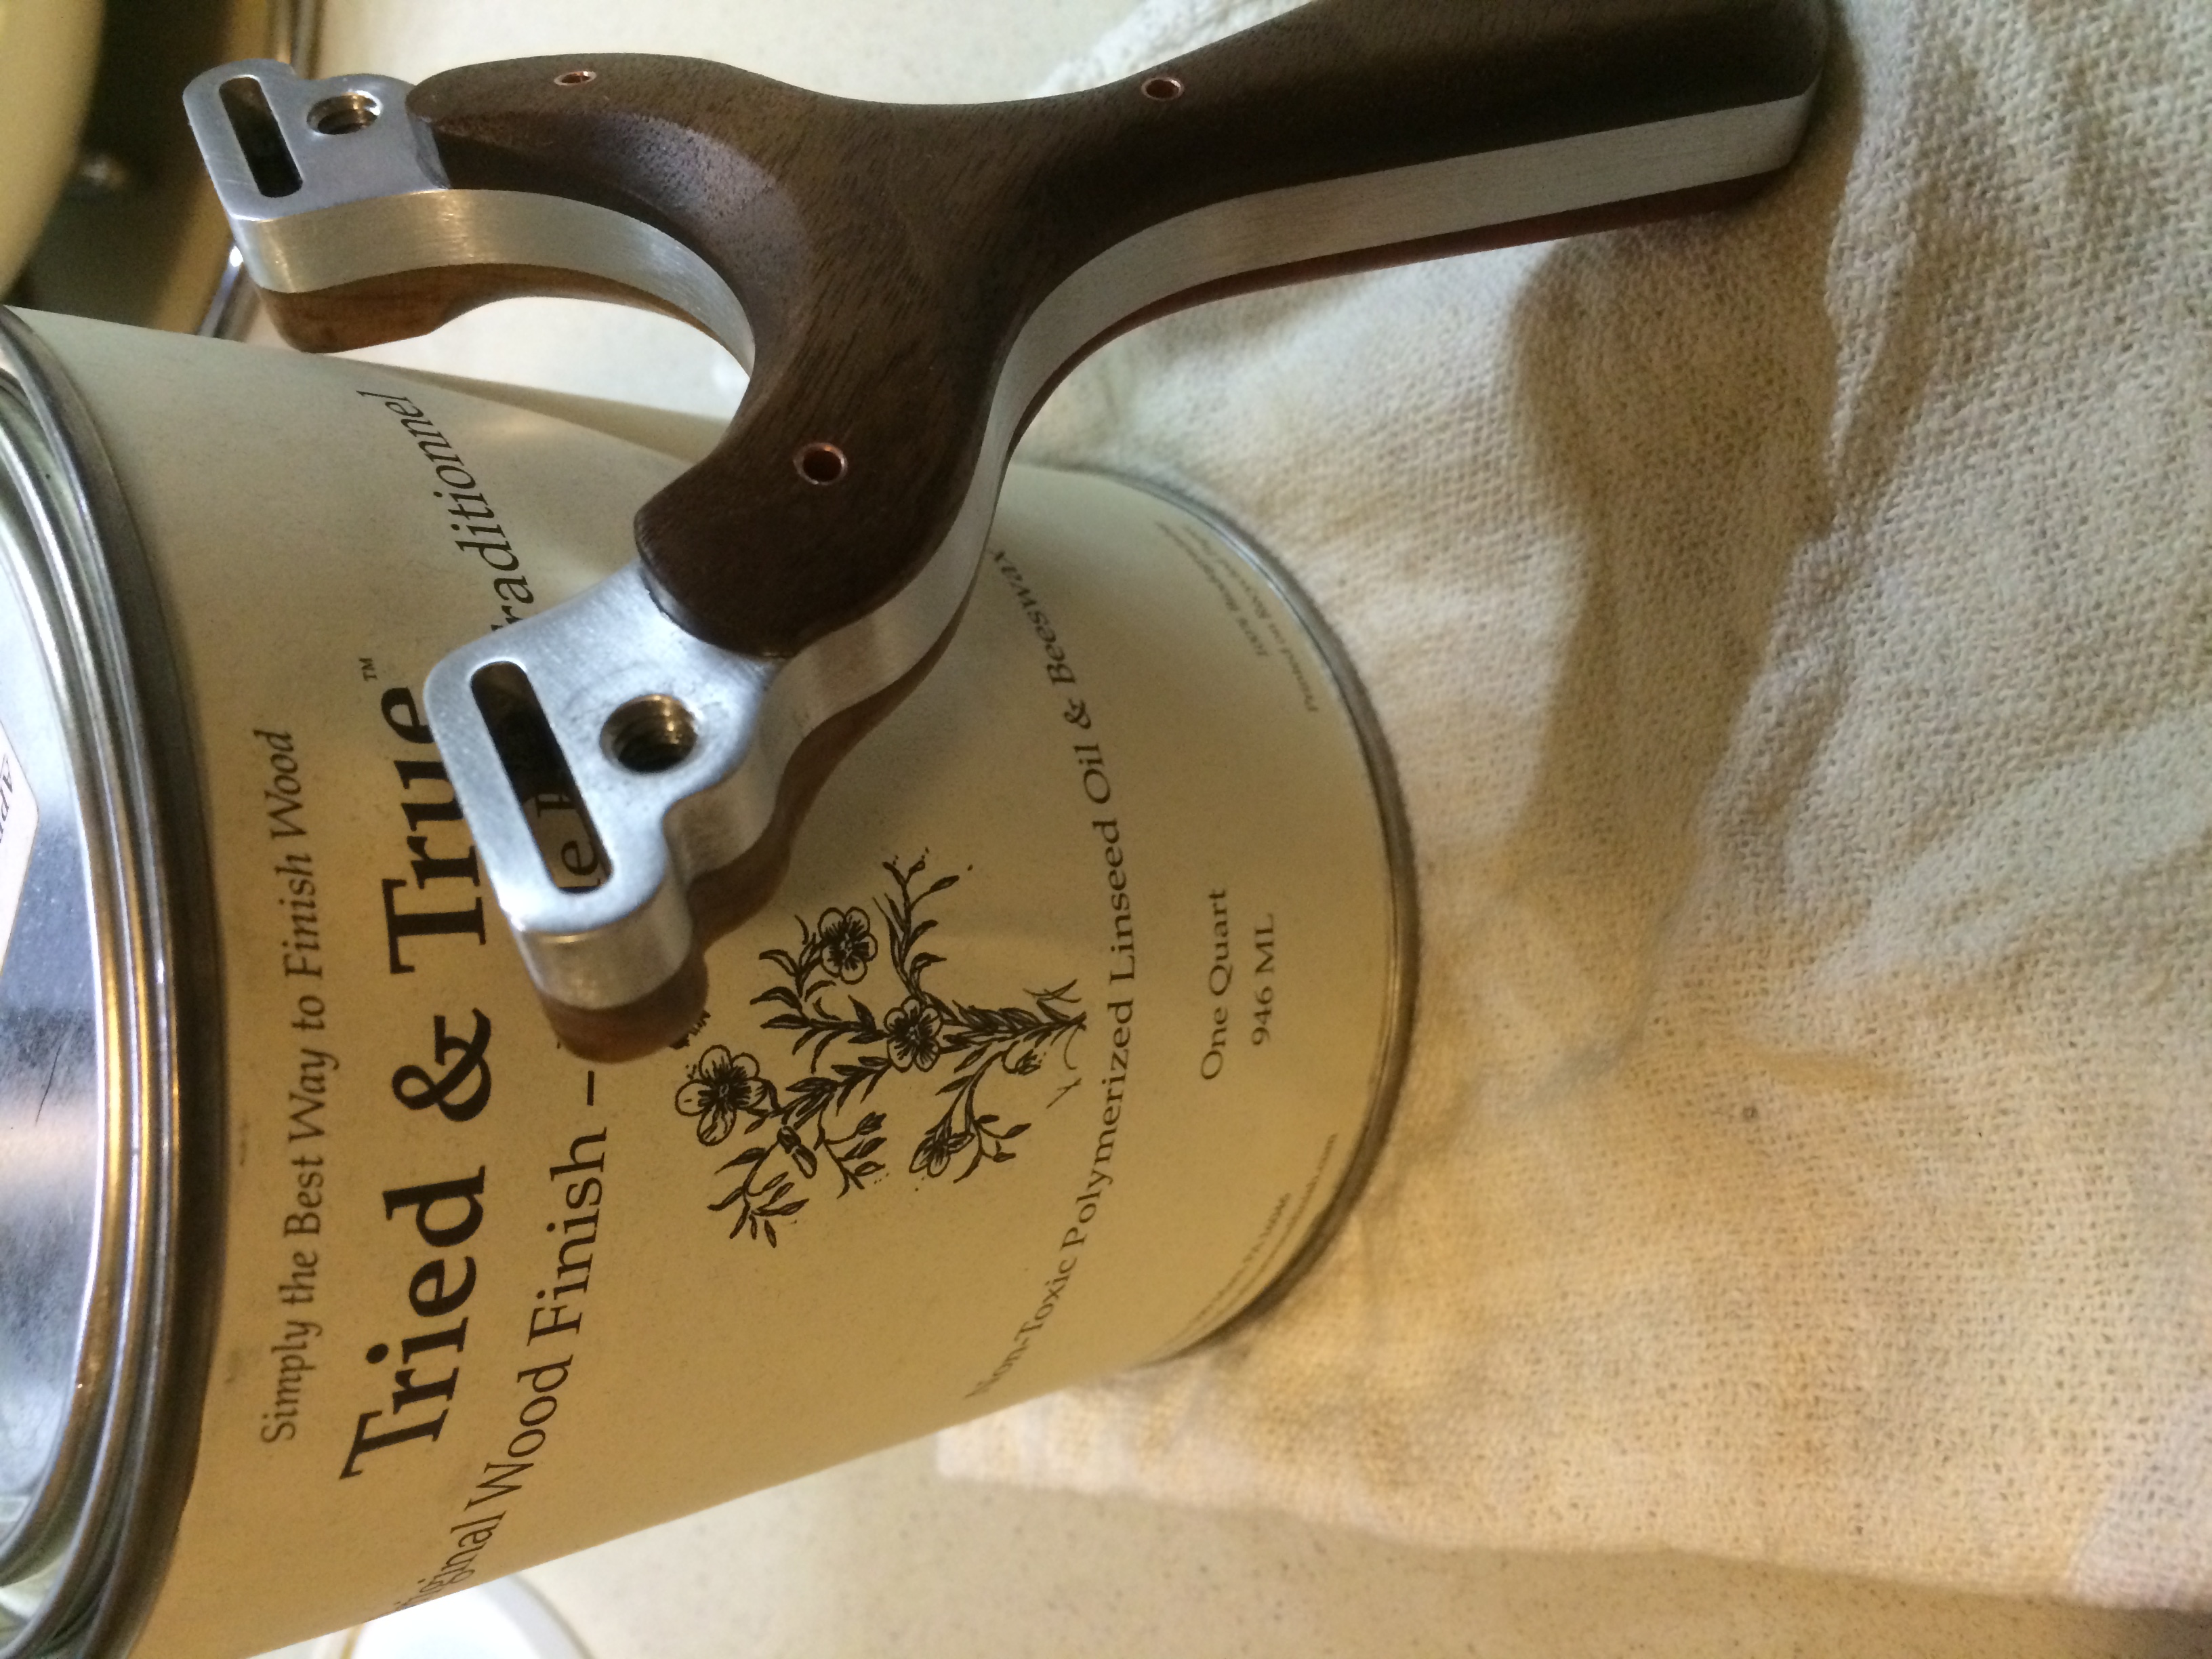
Time for some Tried & True beeswax/linseed oil mix.
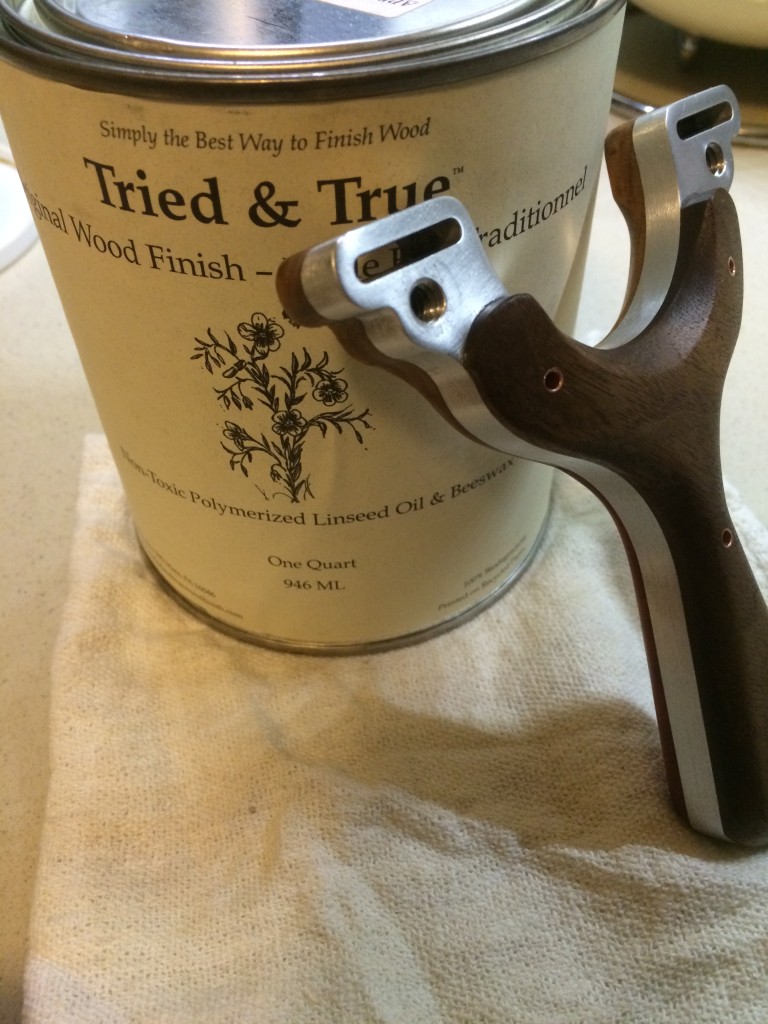
Laying it on thick and then leaving it for 15 mins, wiping away the excess then buffing it dry with a cotton rag. The result is a nice natural finish low shine and smooth texture.

The Maple coupled with the Redheart is just divine, since they are similar in hardness, the texture on both is similar.

One of the best thing about beeswax is that there is no cure time, so onwards to fitting the bands on!
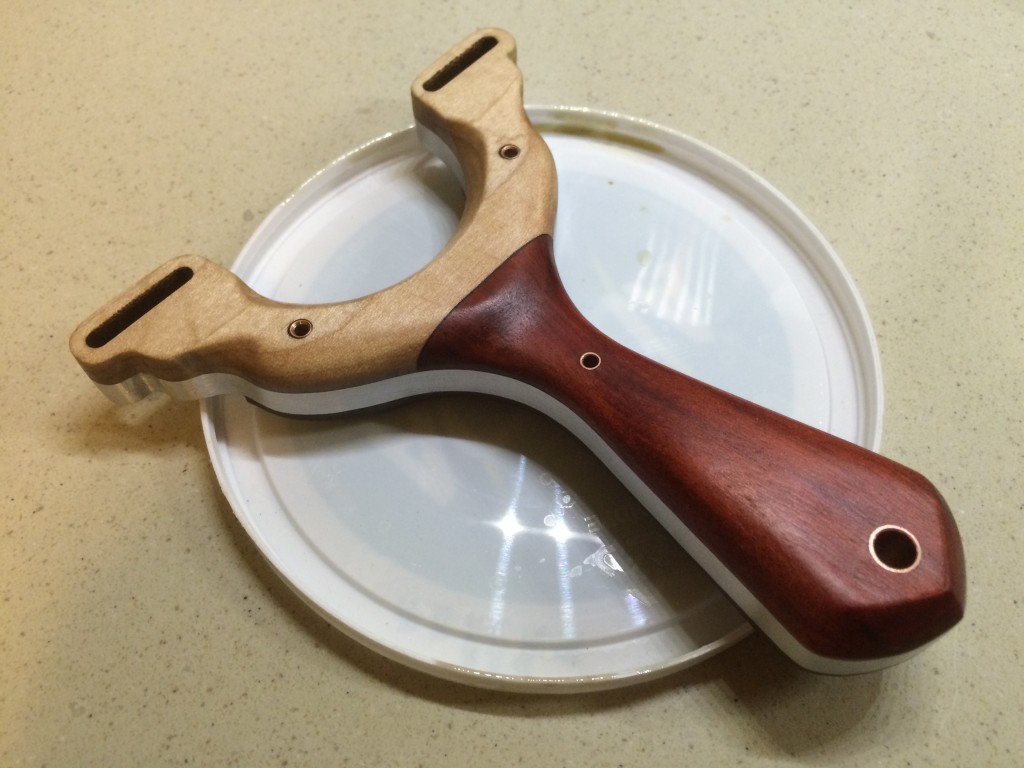
Huge satisfaction in seeing this together.

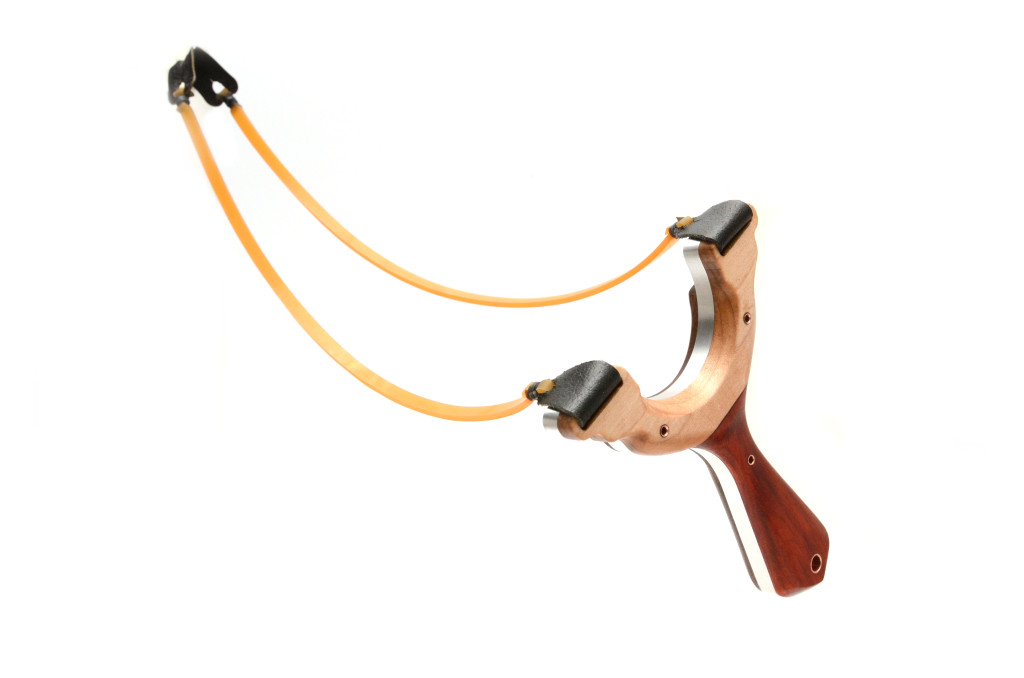
Once it was together, it was time to get some archivable photos.


Thanks for reading, if you’ve stayed up to this point..it’s time to get up and stretch, I know you’ve sat for at least a fortnight.
Get out and make something.
-Eric