Posted on 4 Comments

Metro Made | The Steamplinker Slingshot

It’s been quite some time since I’ve written about another build, frankly, it is tough to live up to last slingshot (The Cafe Racer). In this Metro Made, I dive into a deep custom for my last build of 2016. I’ve been collecting materials for this build for quite some time, from all over the planet. Mainly, brass sheet and brass hardware and brass coated components. When the last component arrived, it was time to start building.

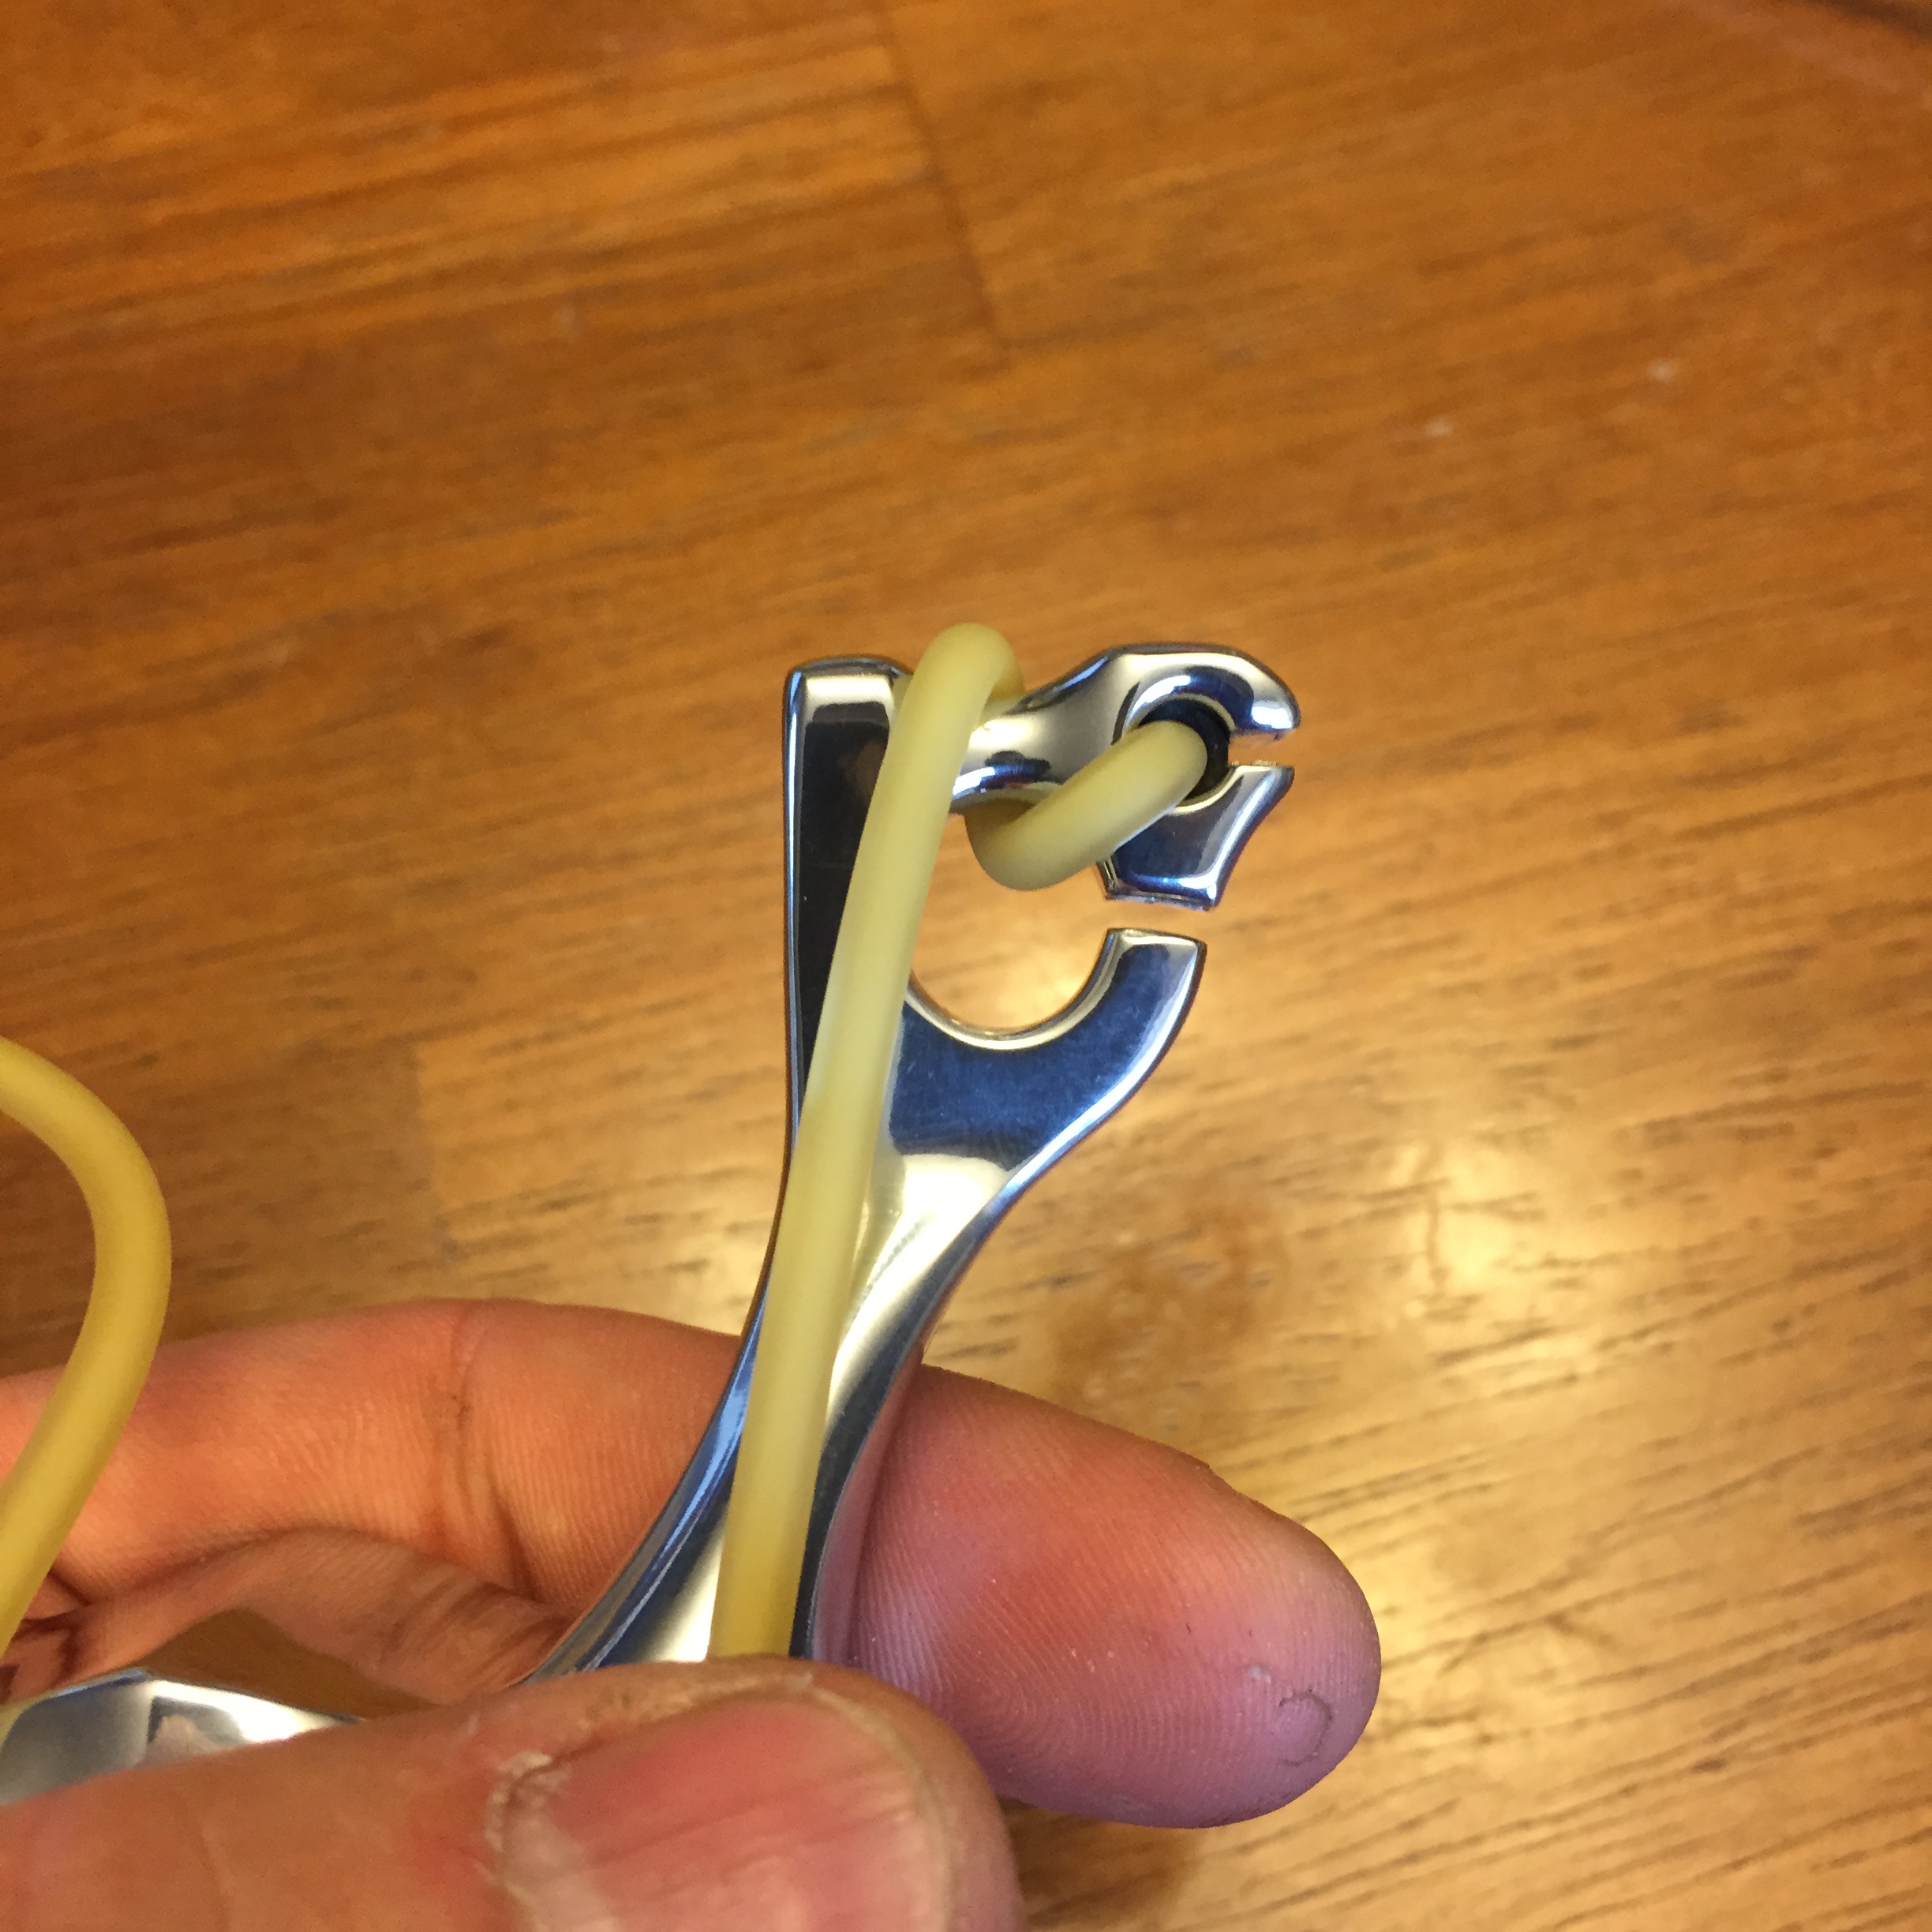
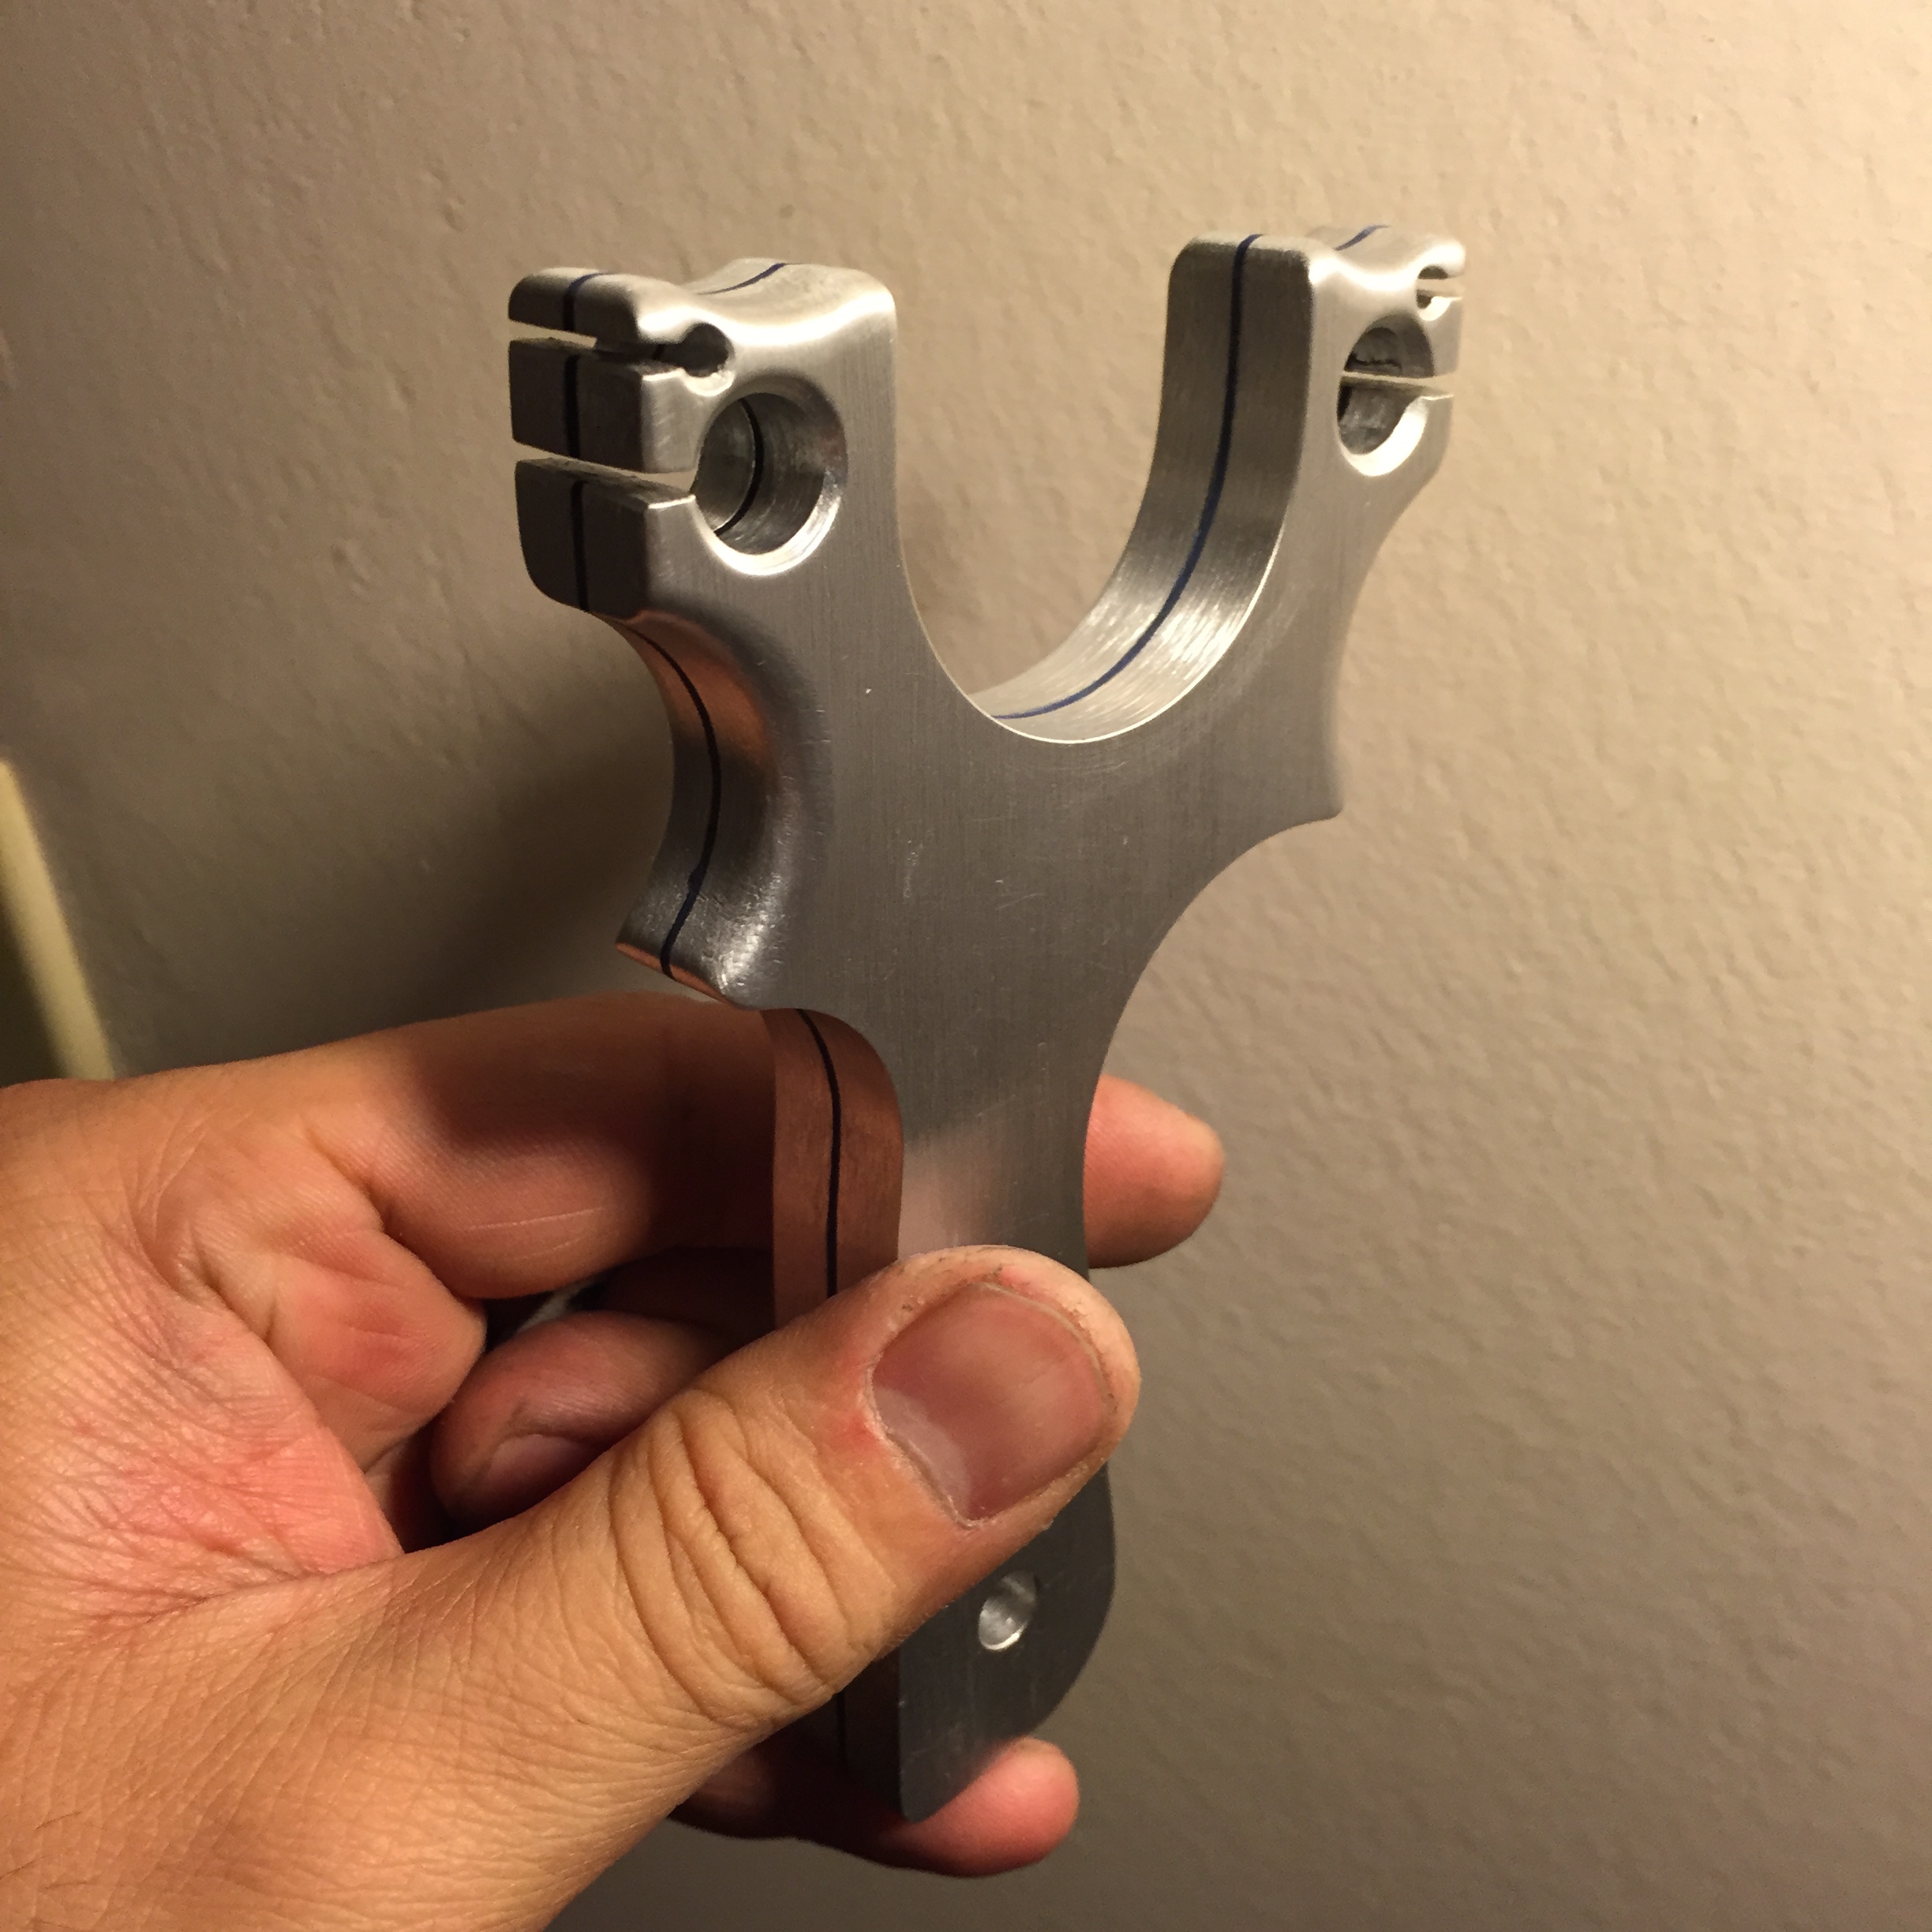
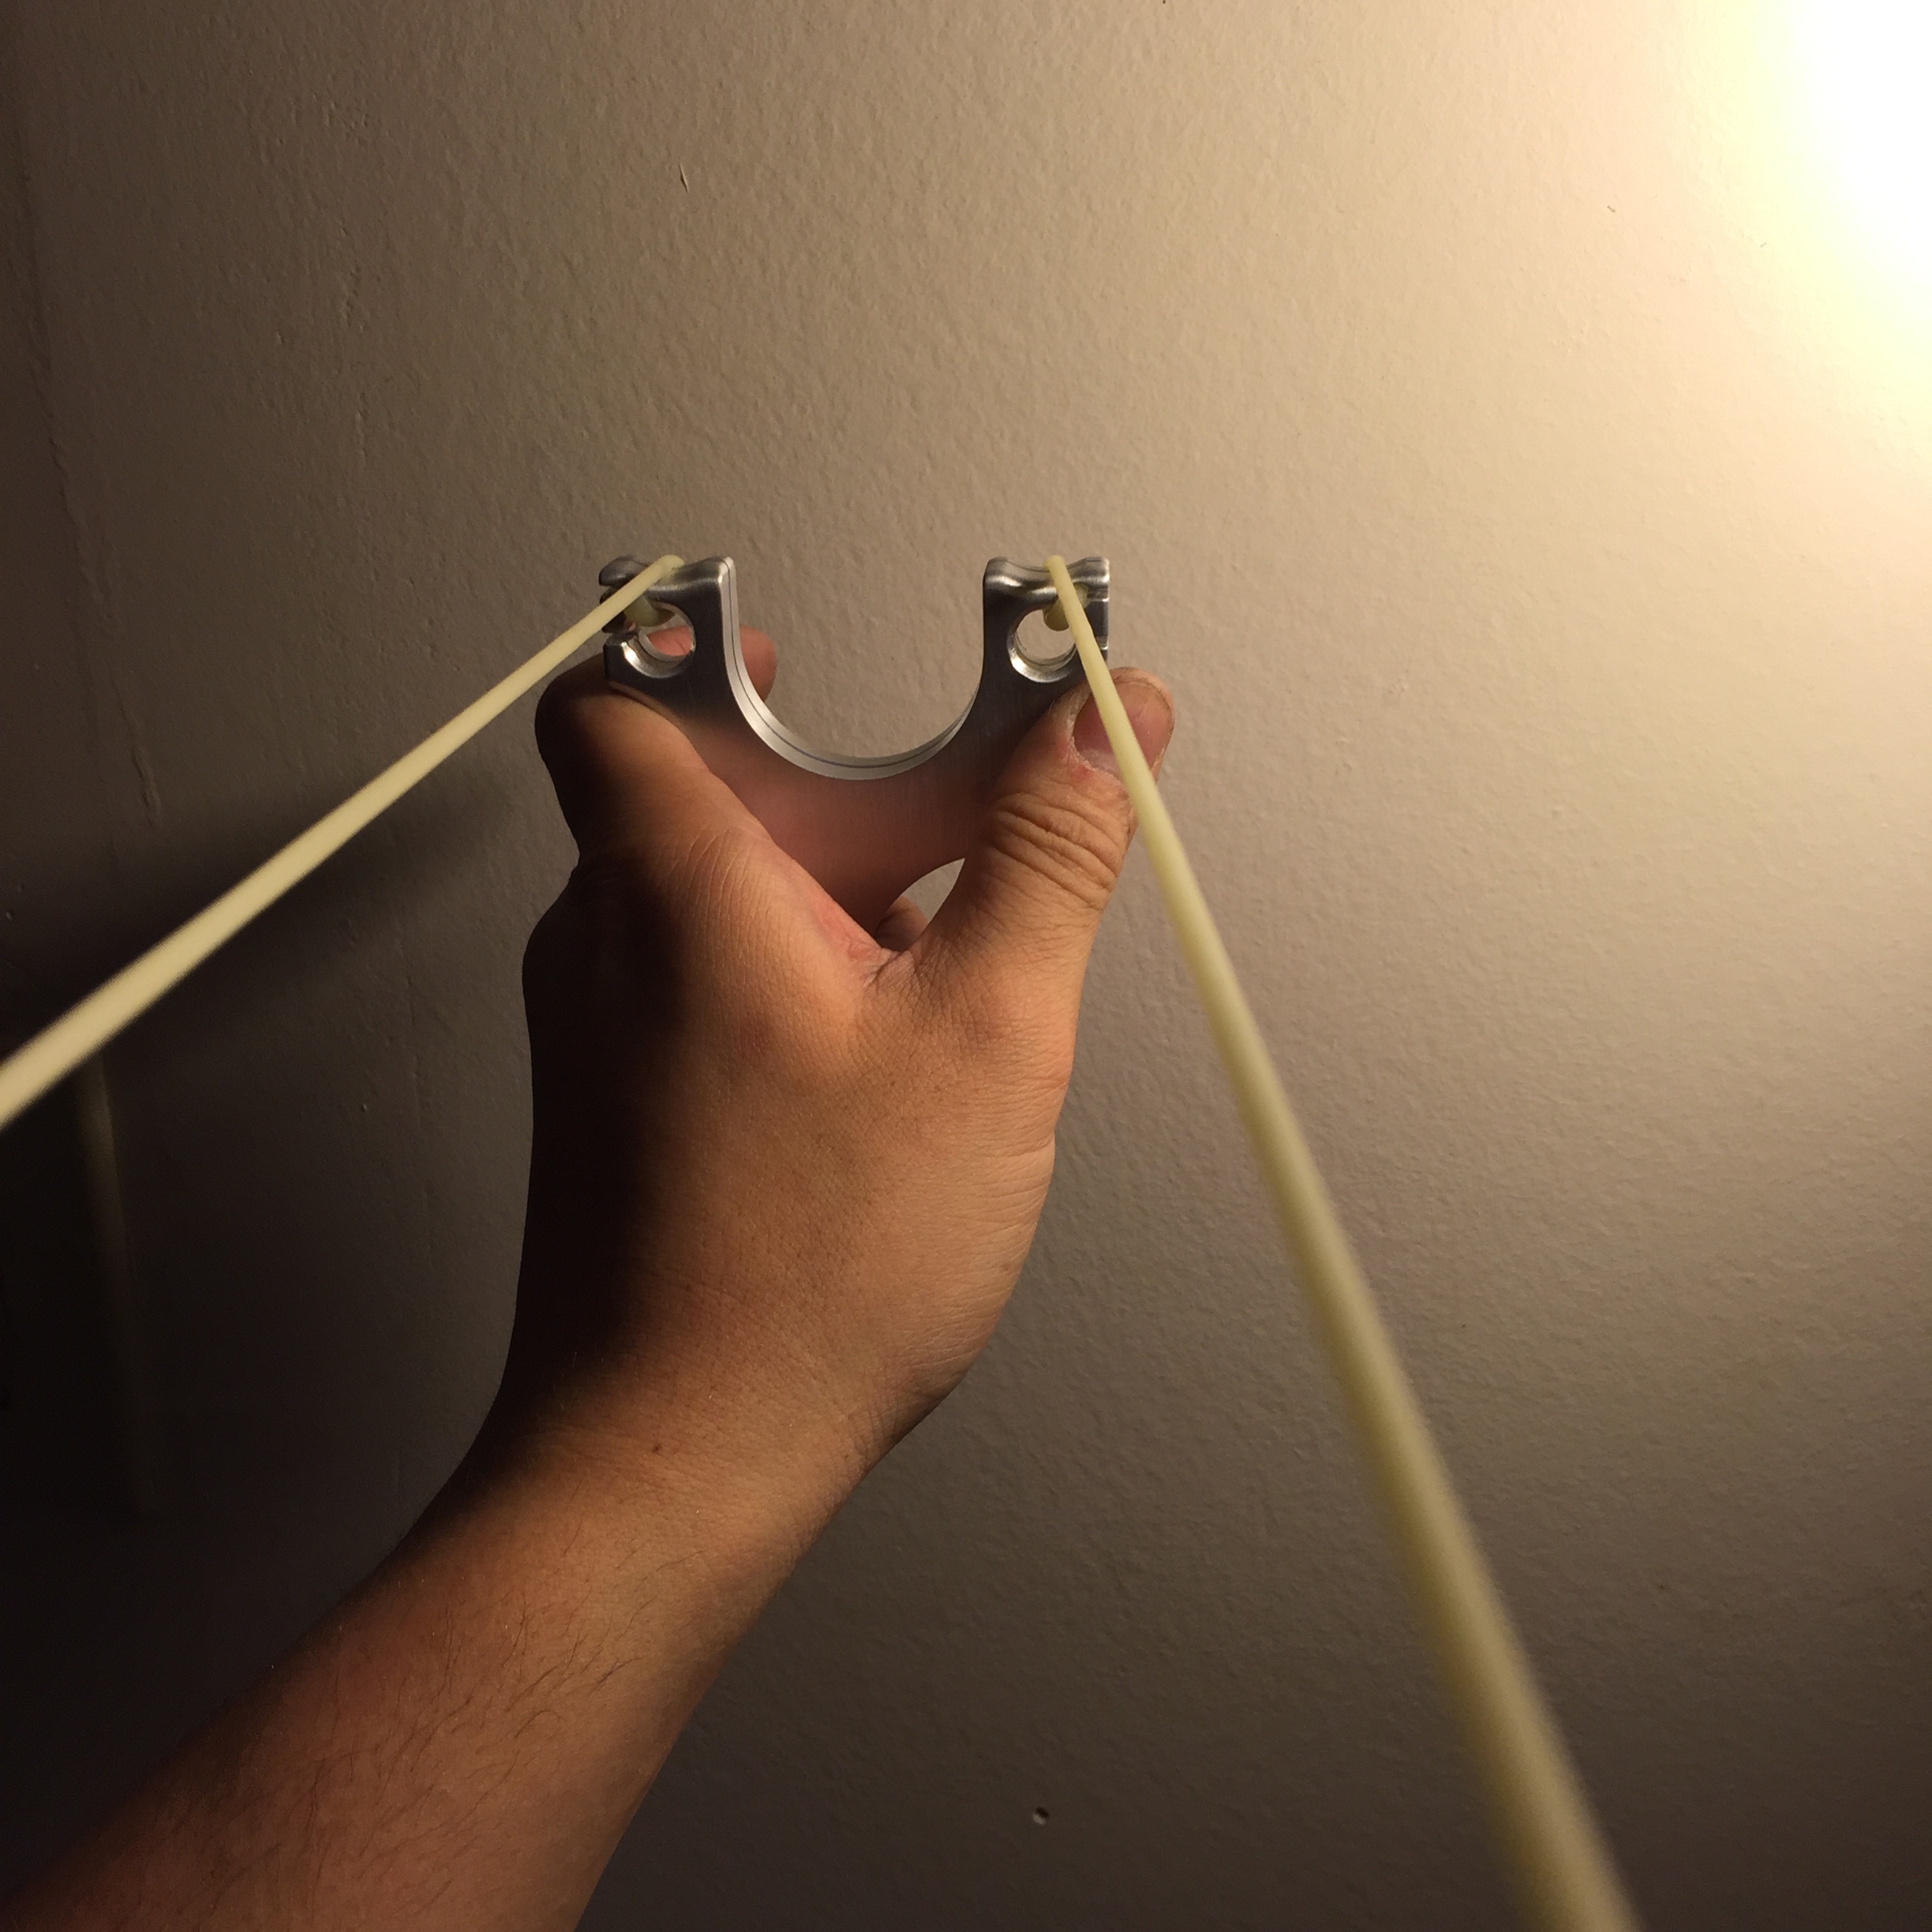
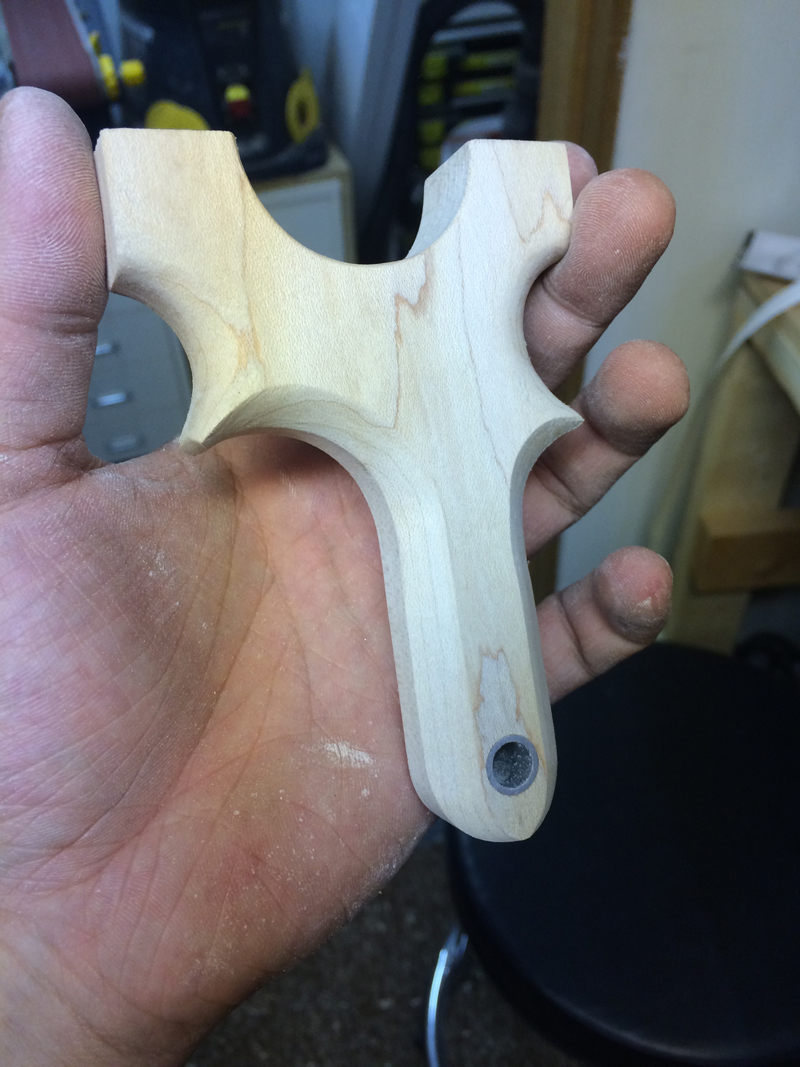
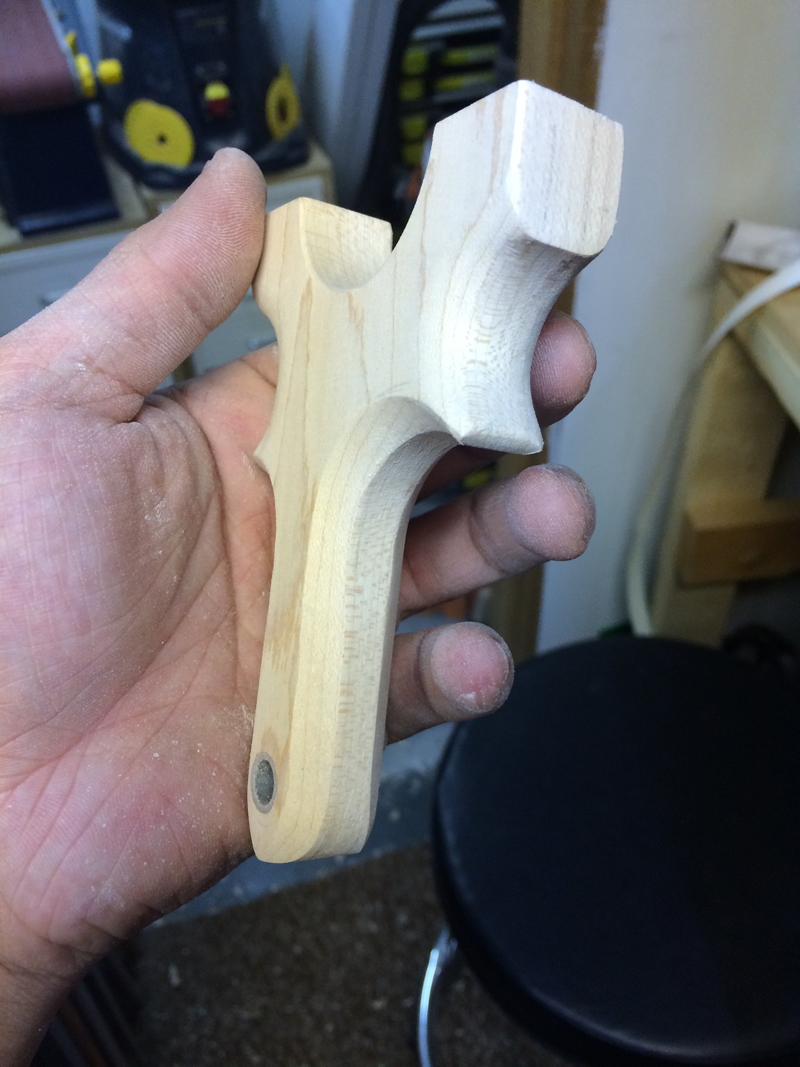
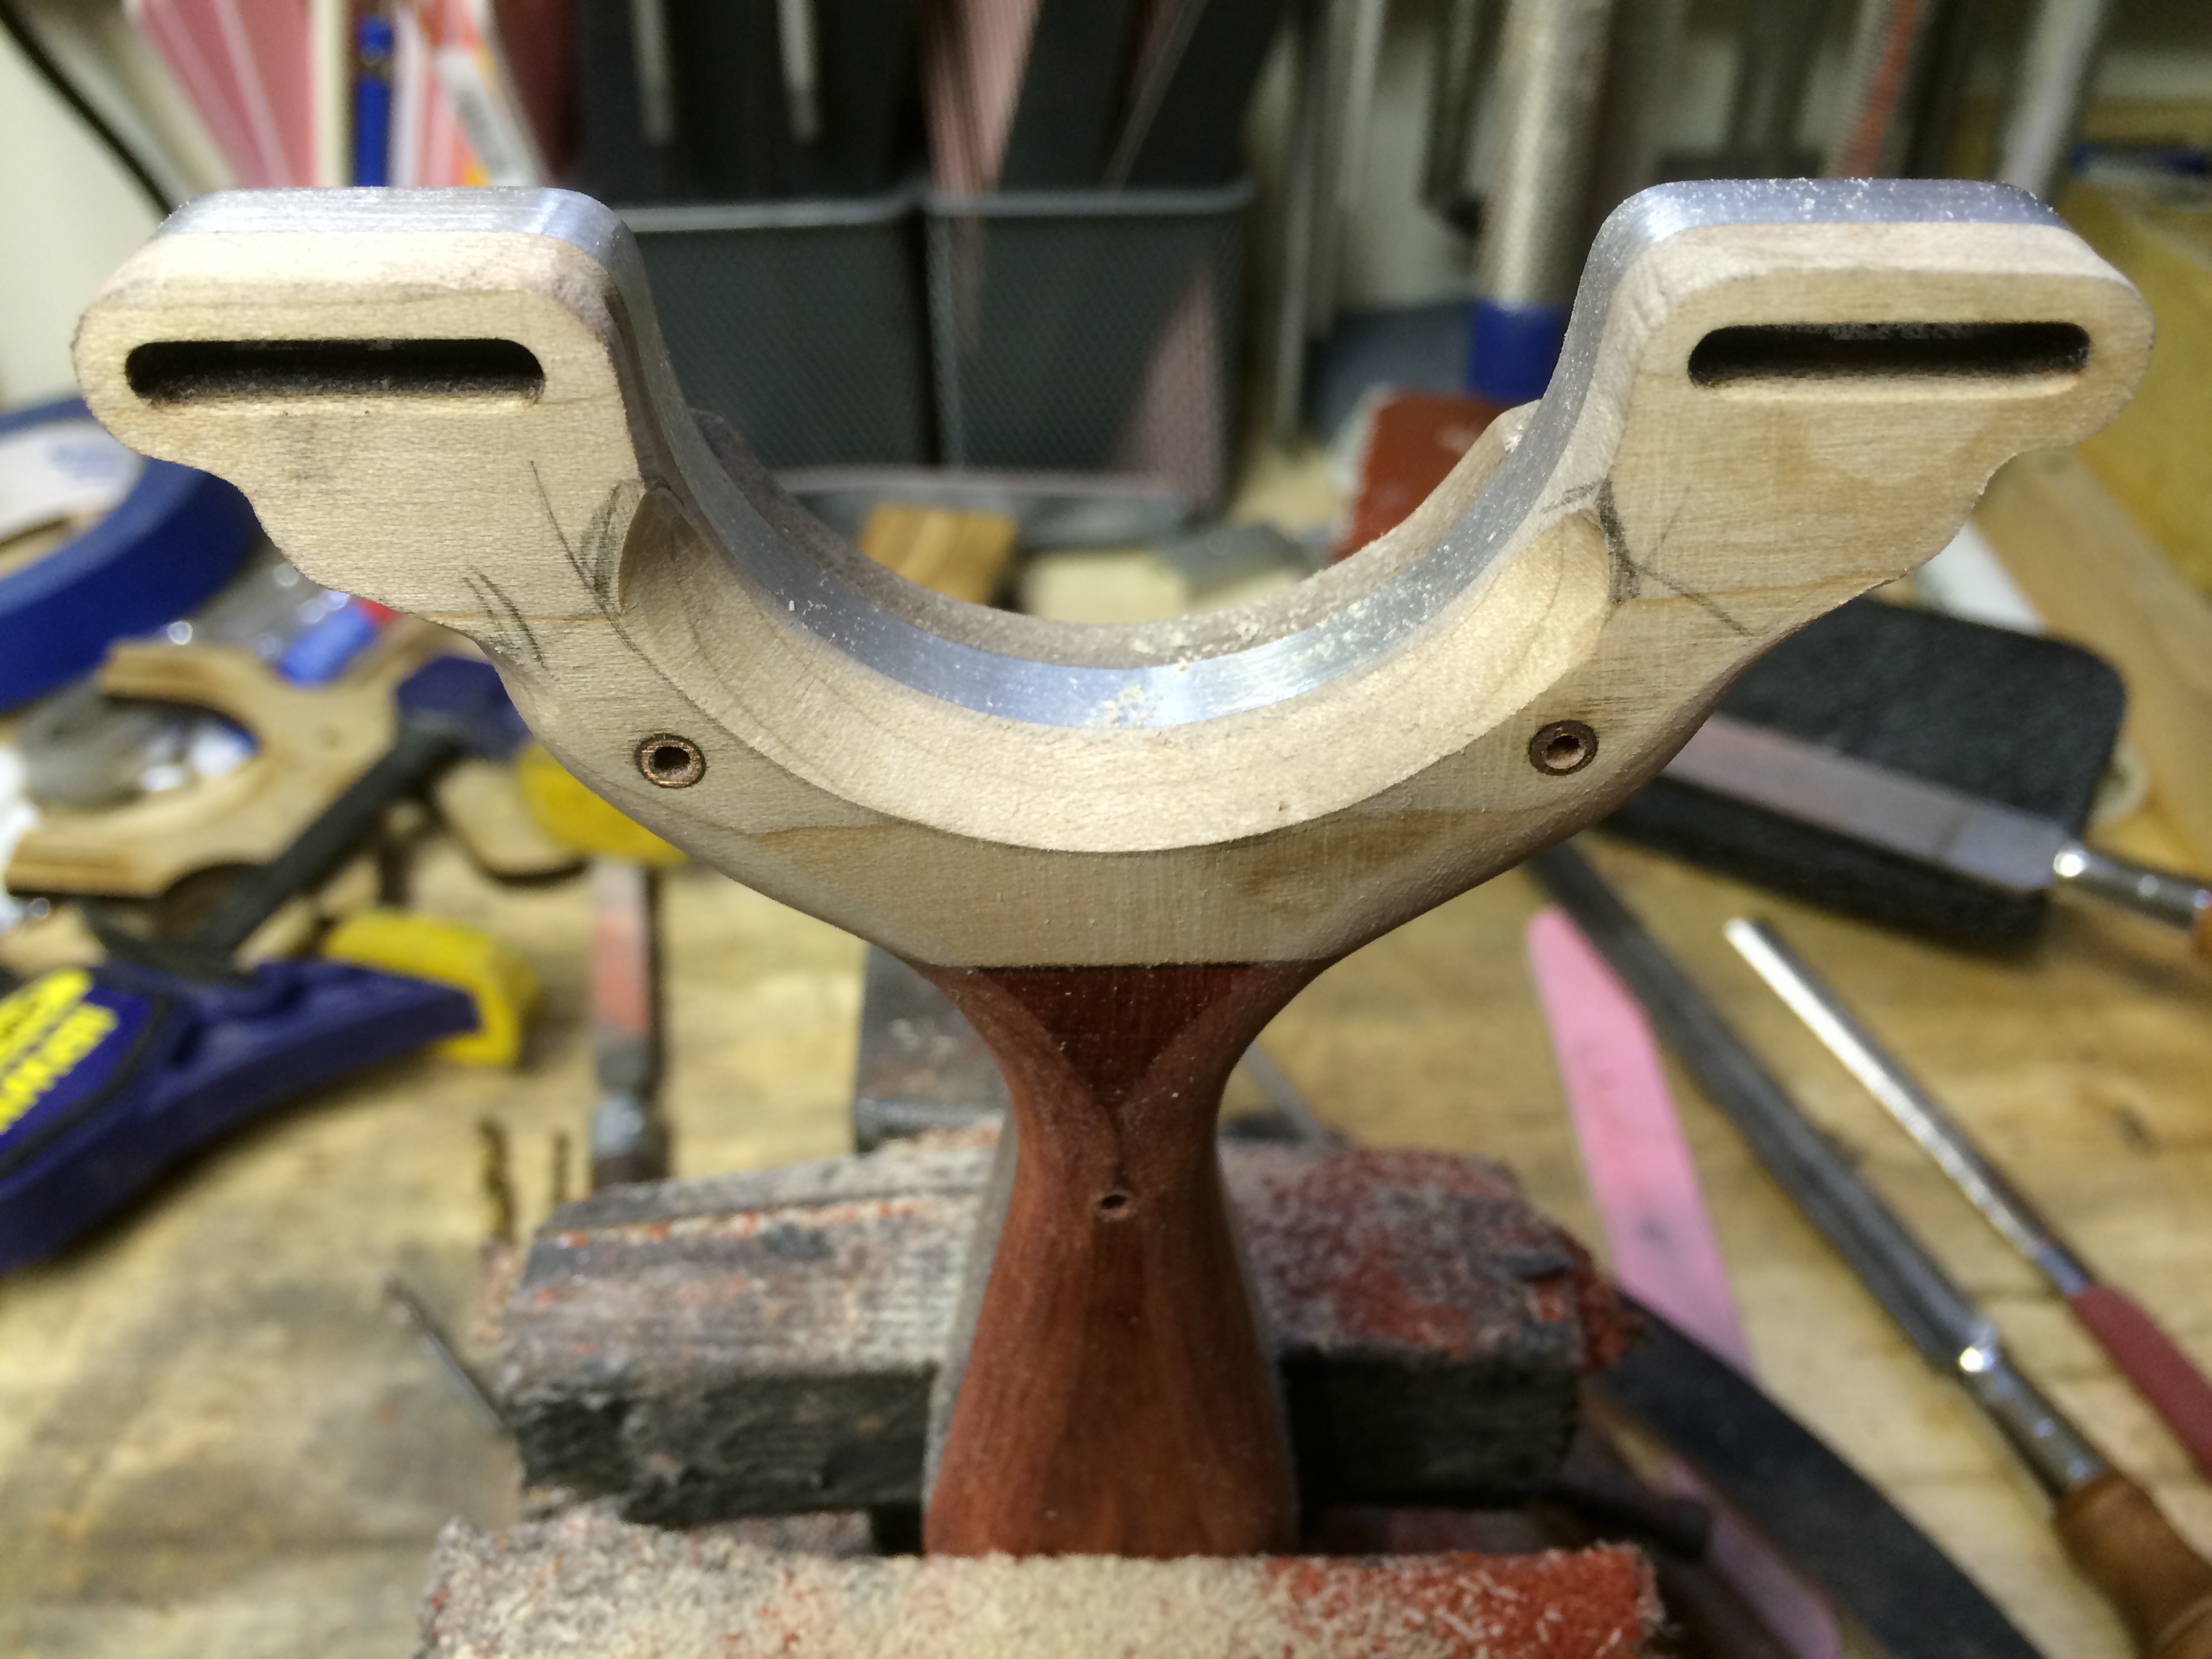
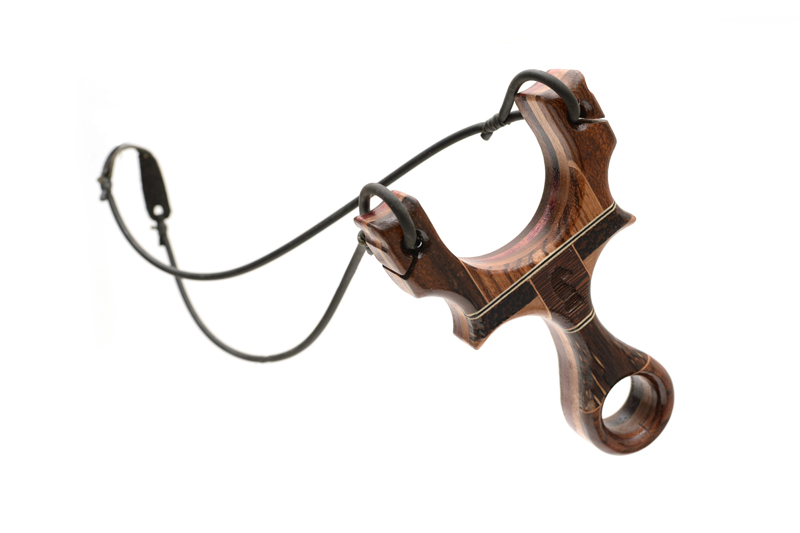
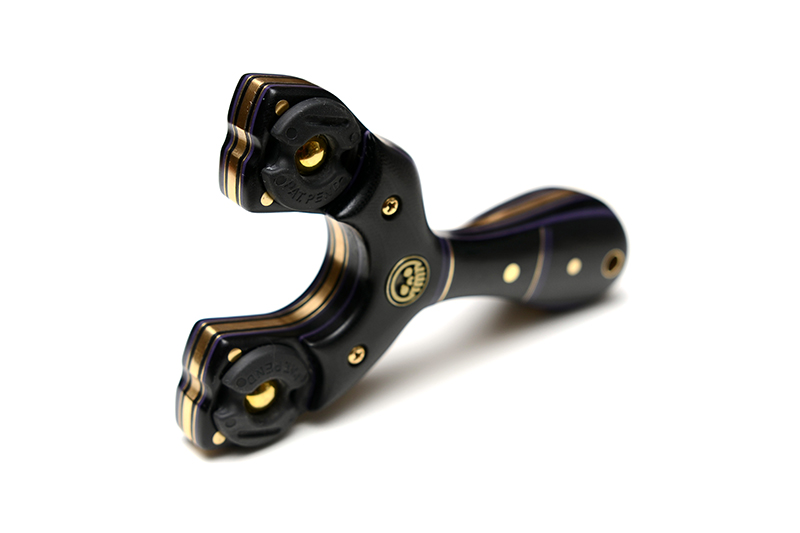
To start, this slingshot is dedicated to OTT shooting, with flats and tubes. To achieve this, the design of the Oren’s tips (which this design was based on) had to be altered. Probably the most unique and often debated feature of Simpleshot’s Ocularis ® plug system is the rounded tips. While it offers an incredible versatility and ease of banding for various styles of band orientation, my preference for the Ocularis ® is usually always OTT. Since this build is going to be my 2016 opus and this frame being exclusively mine, I decided to refine the tip into something I would enjoy shooting over, and over and over again.

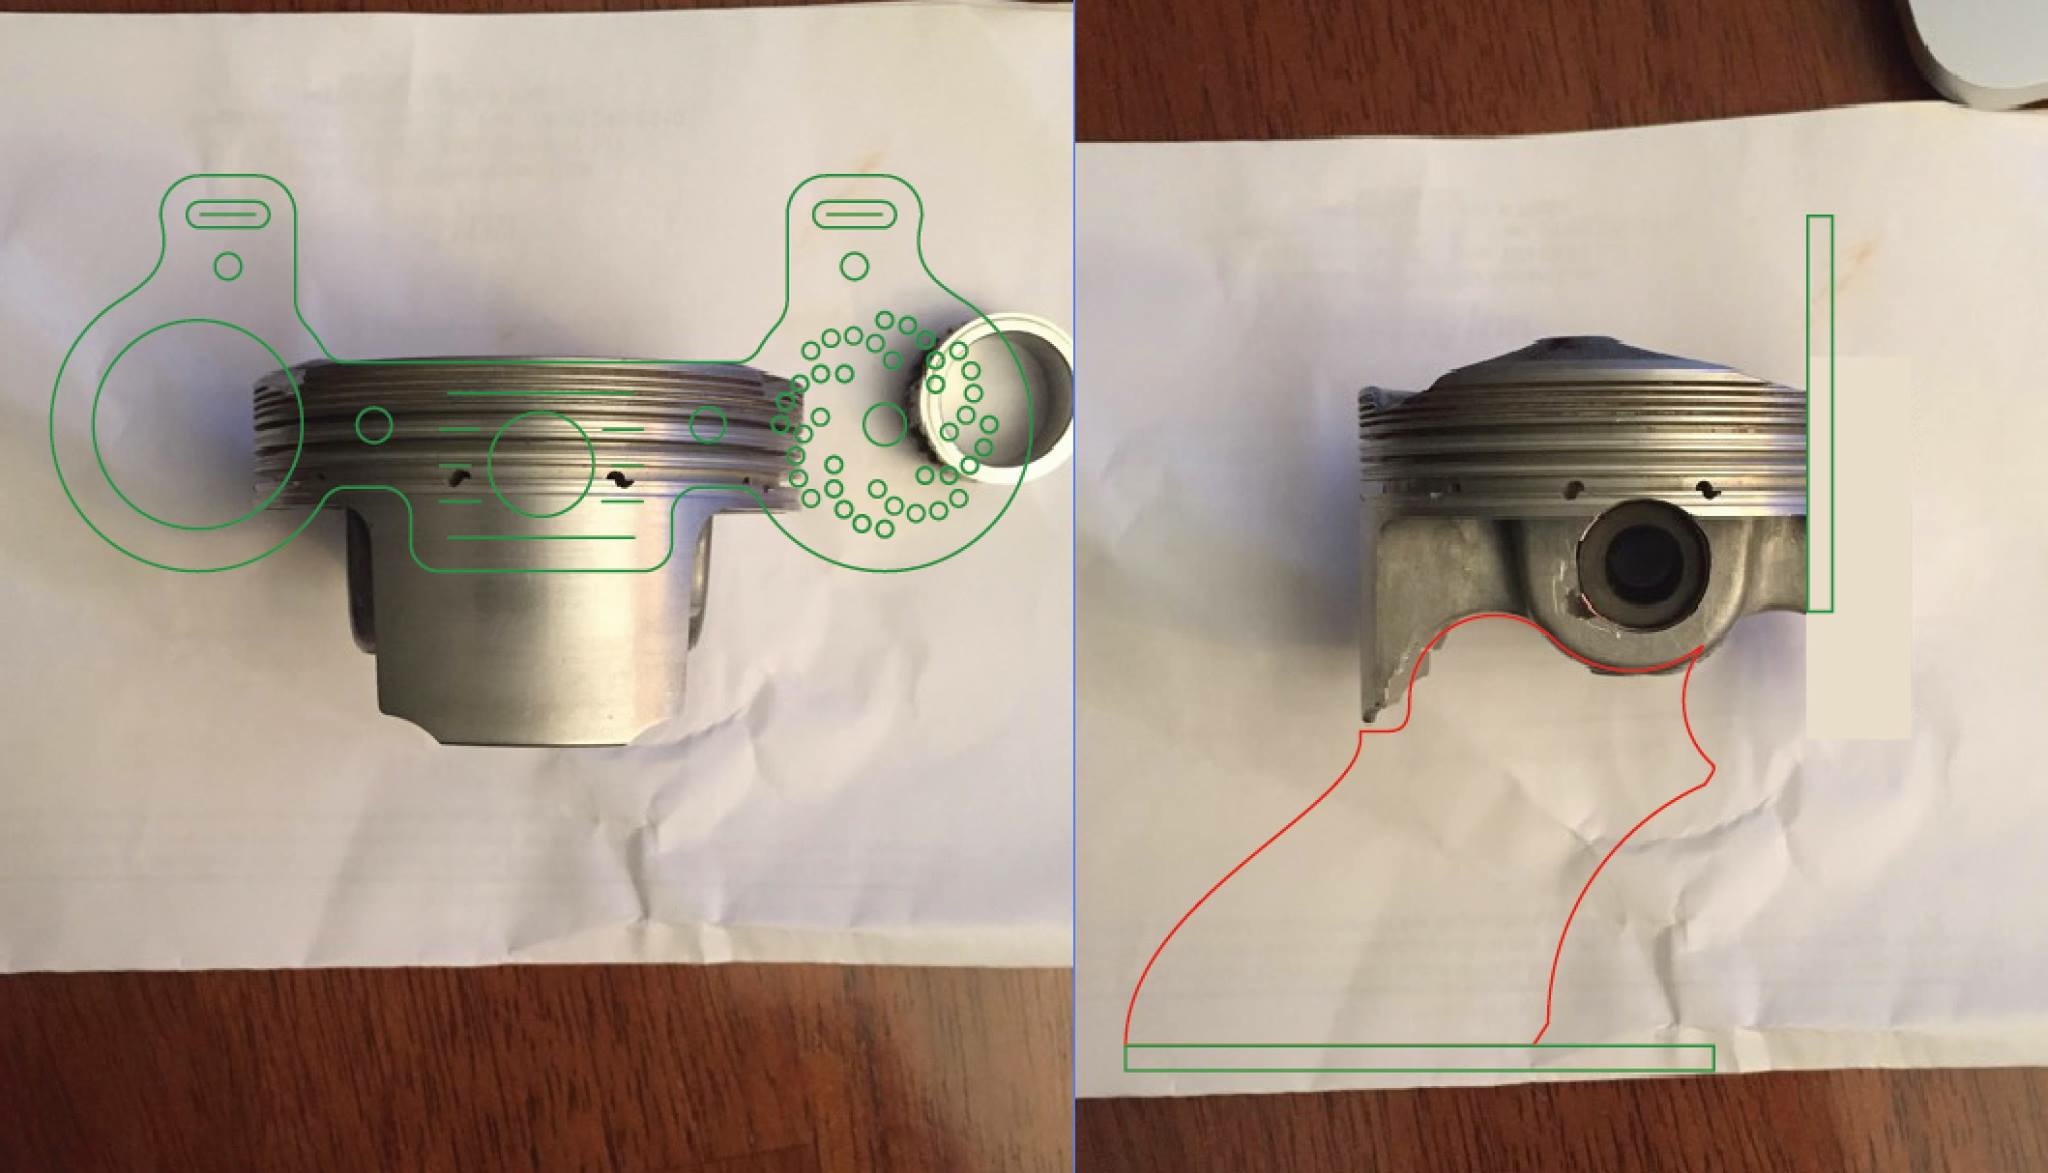
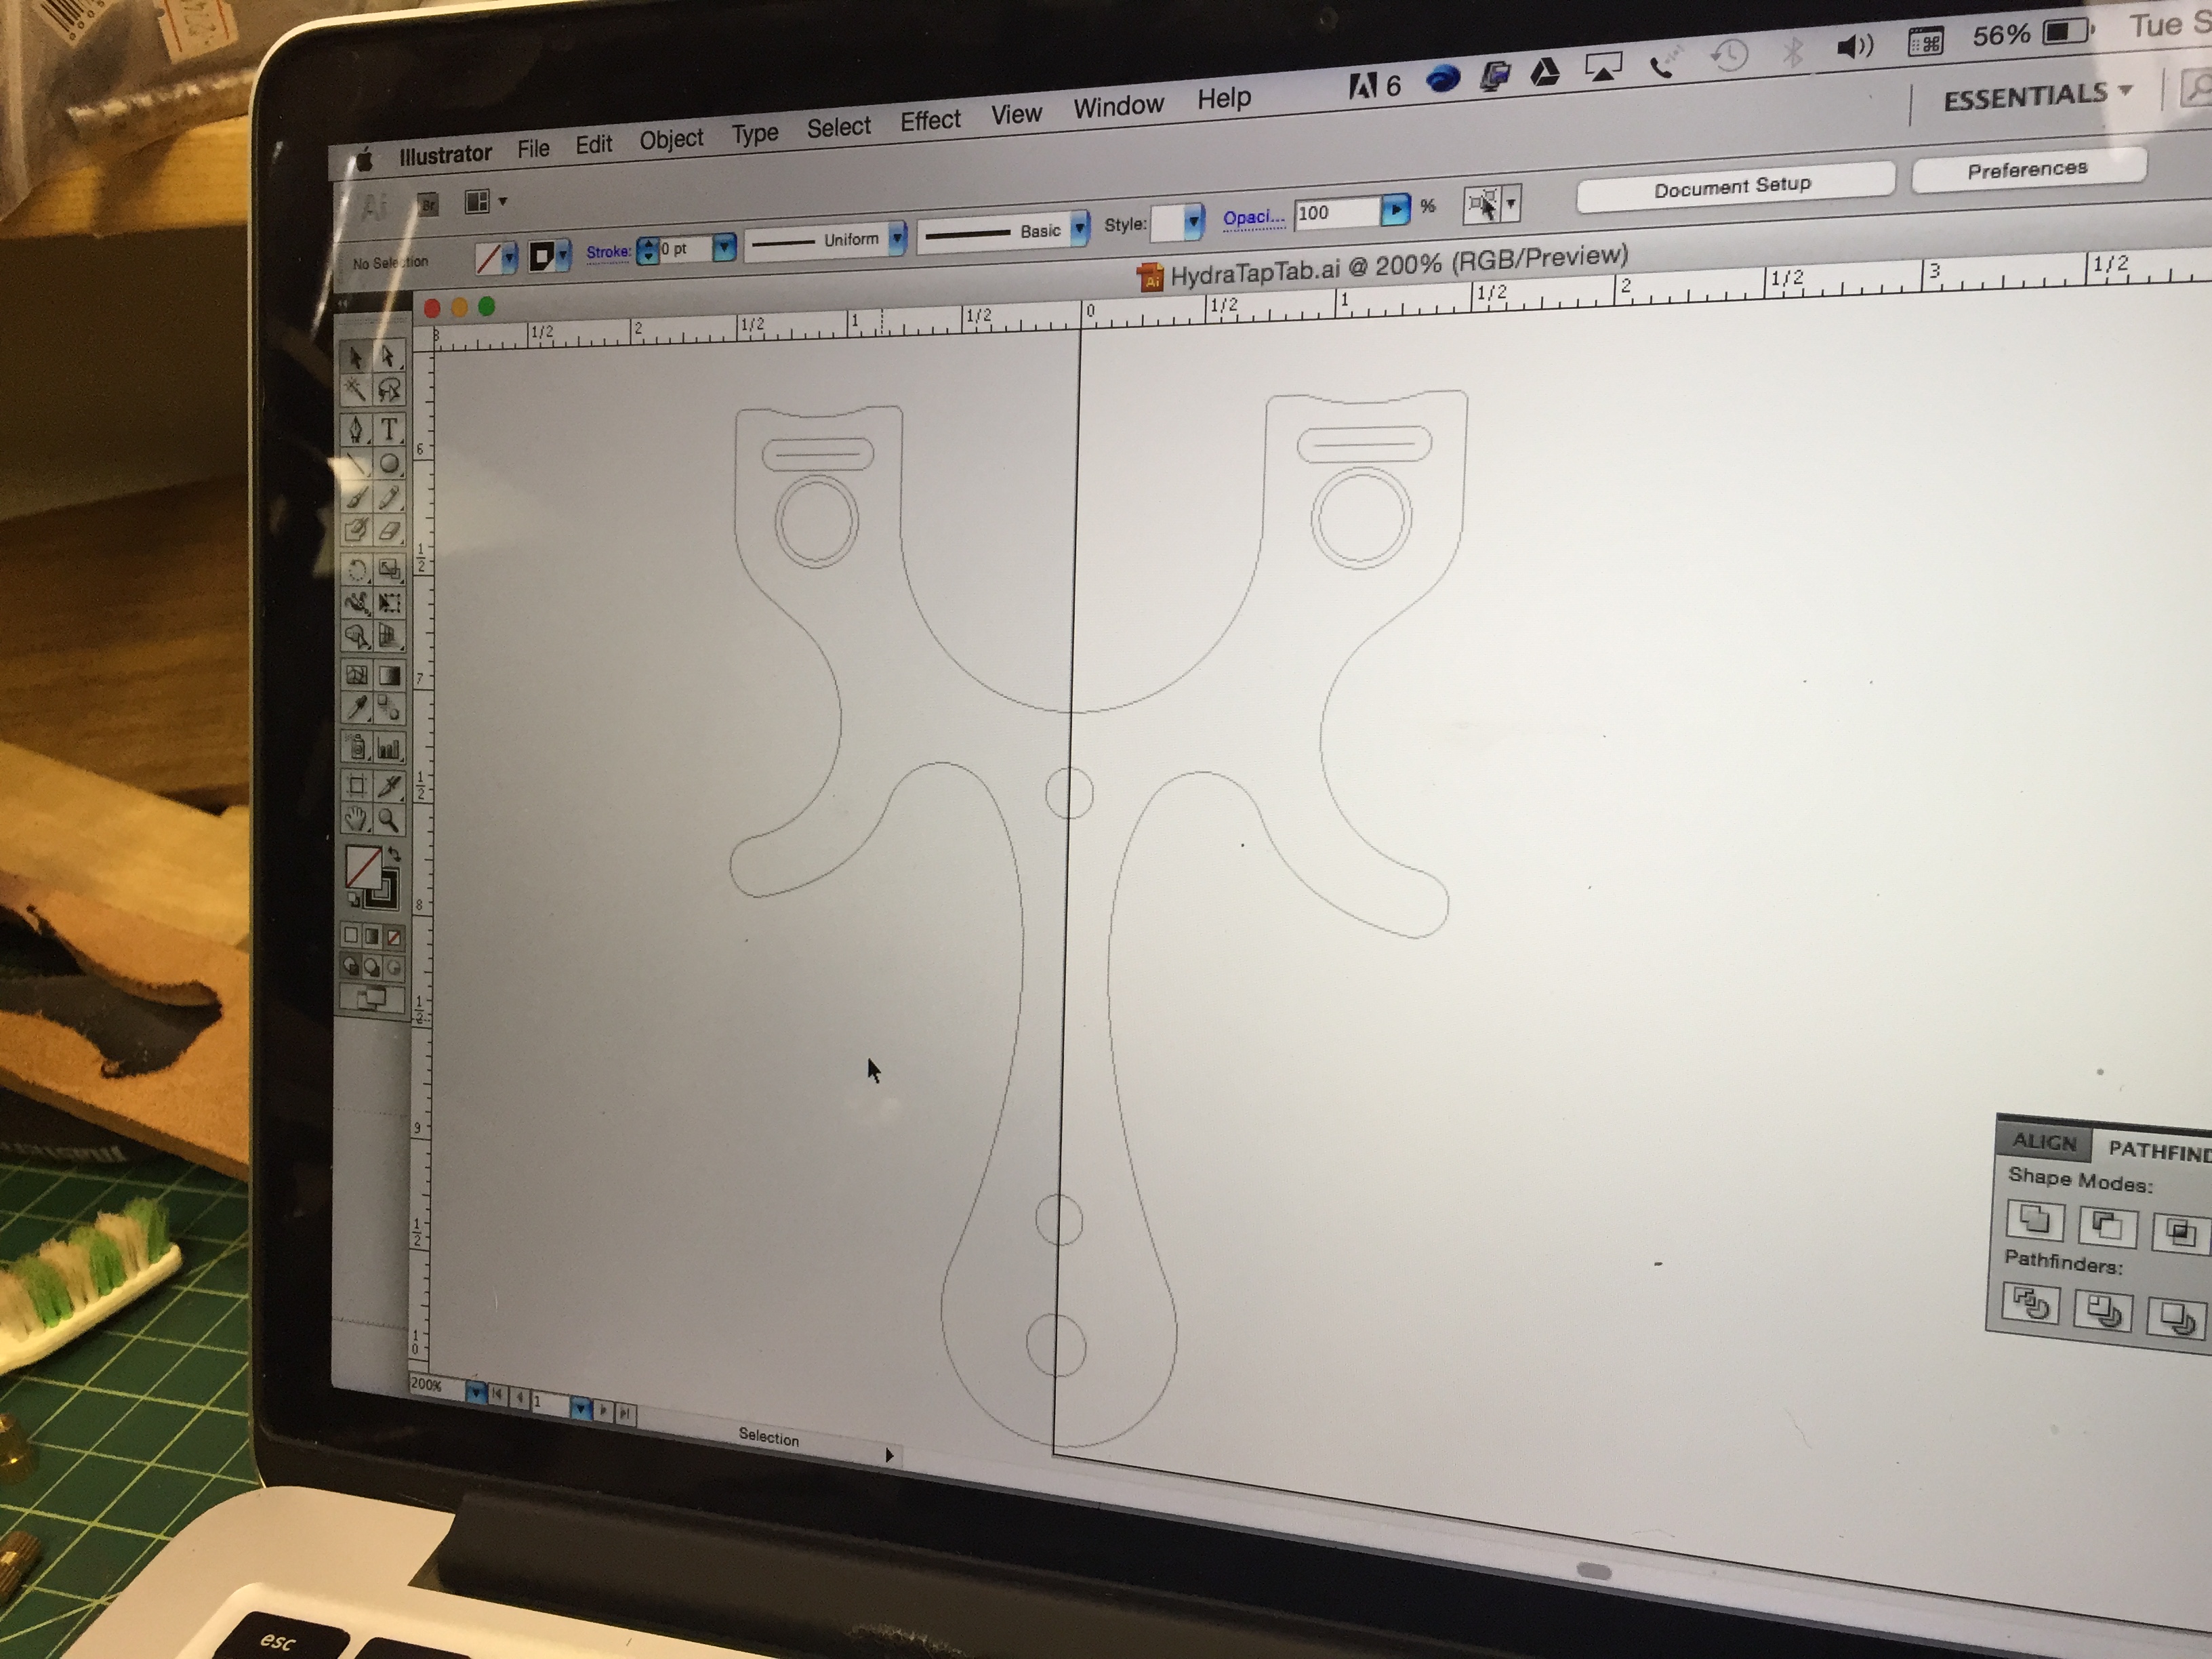
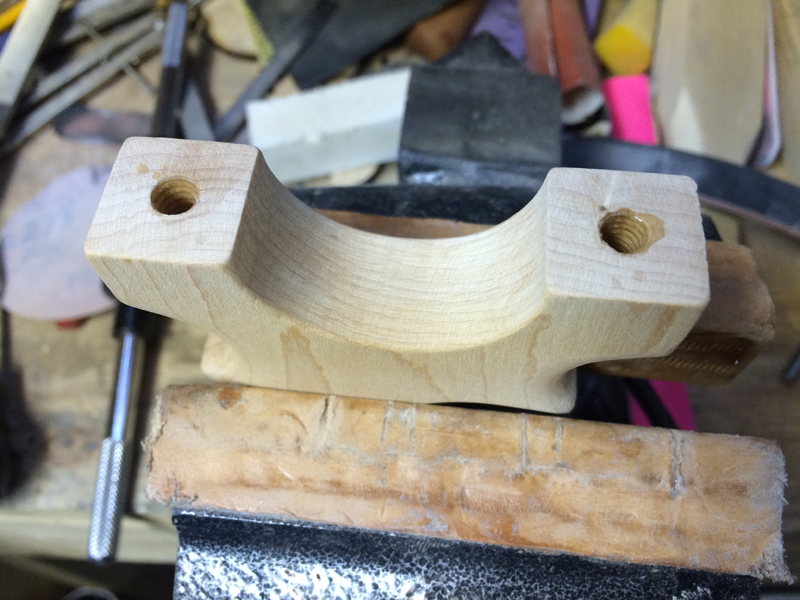
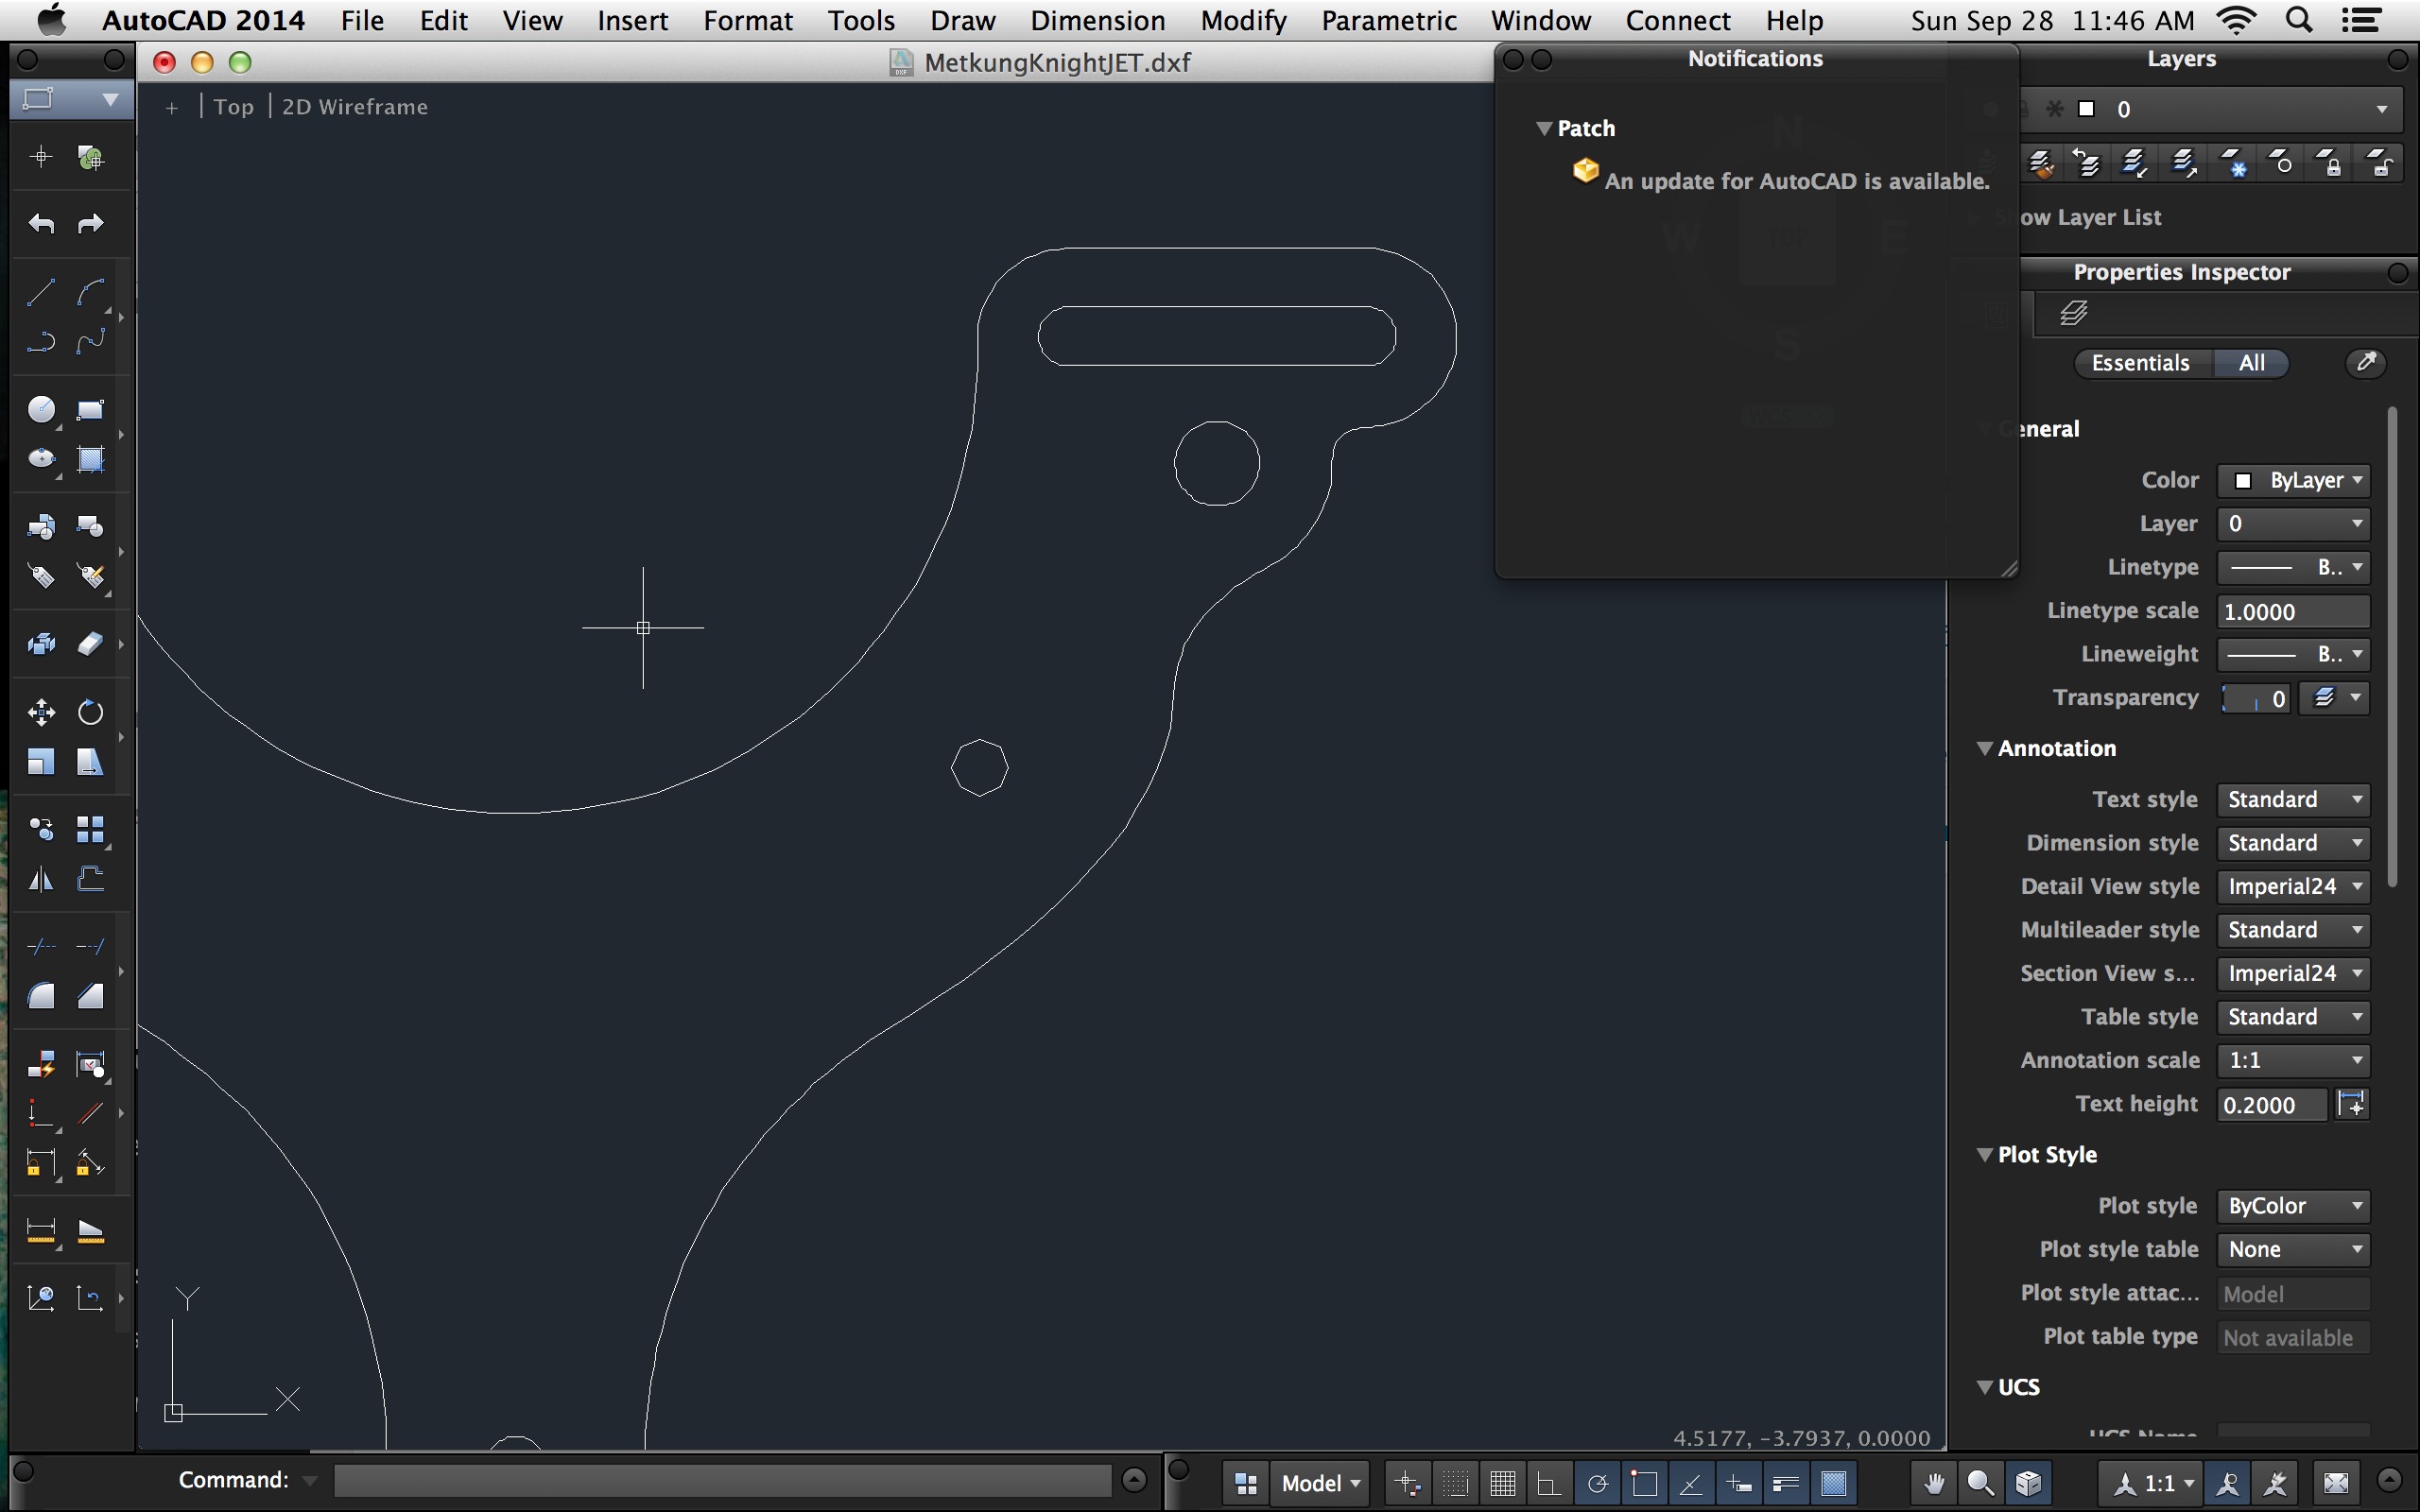
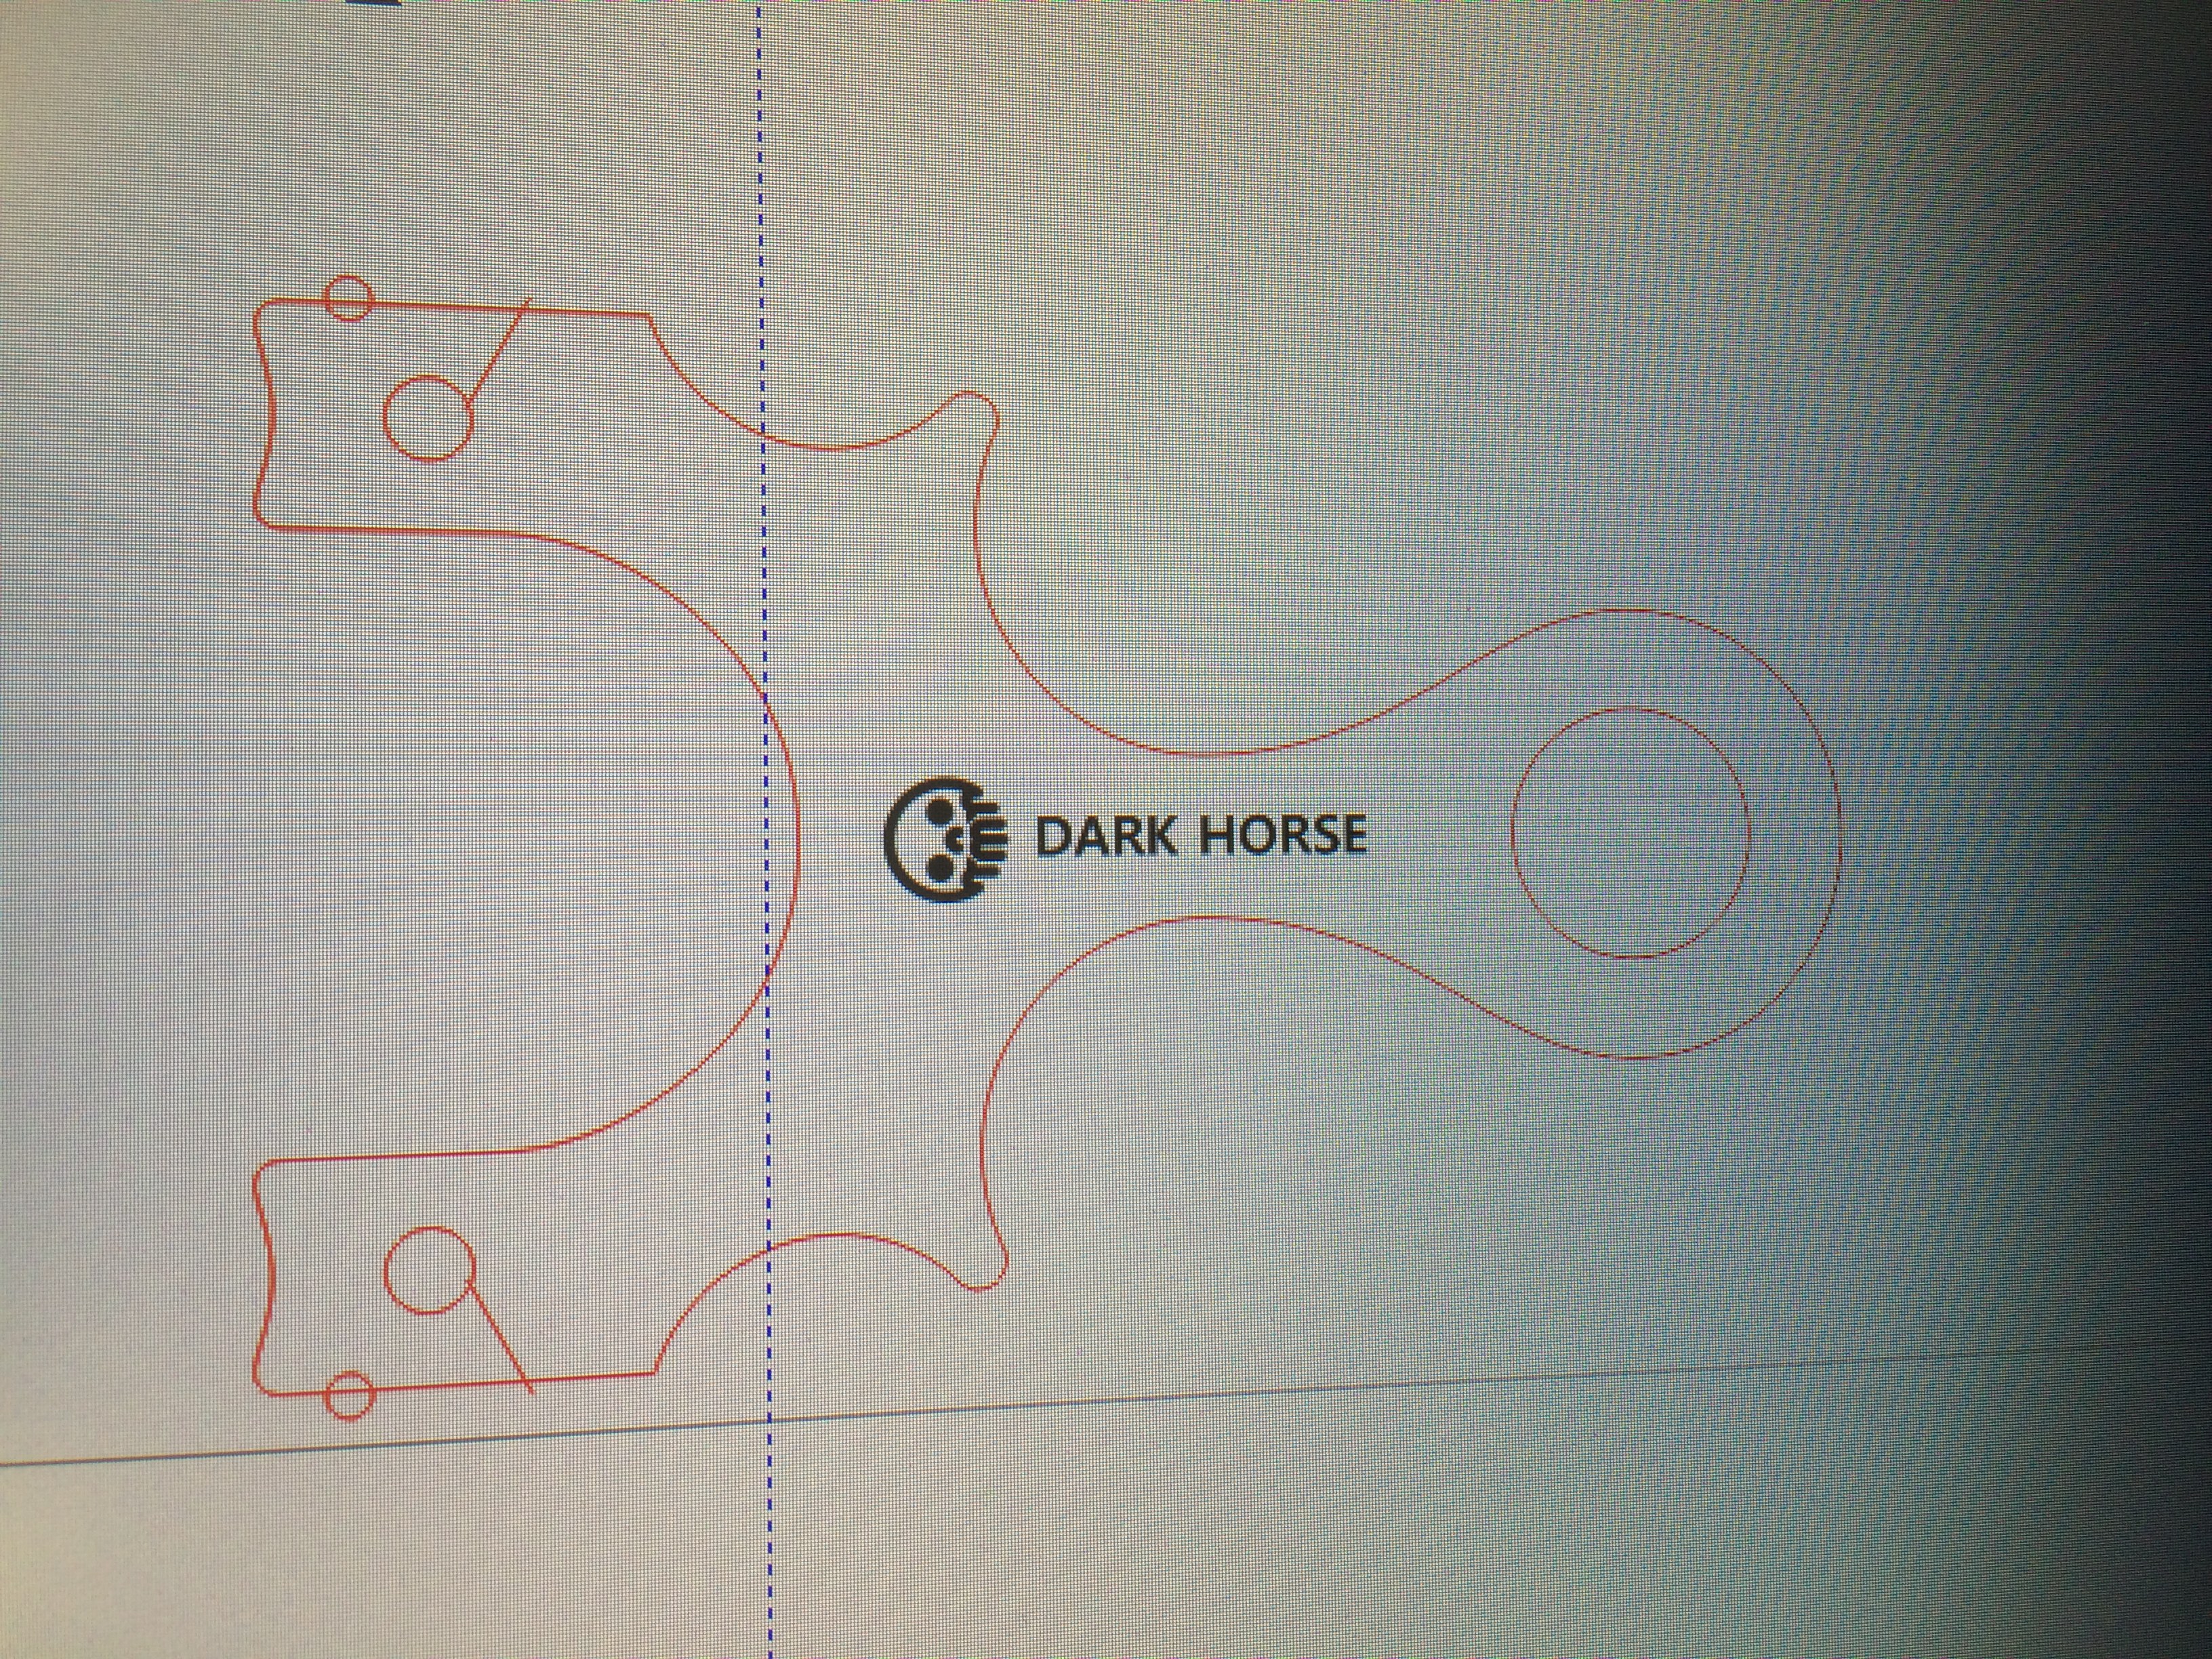
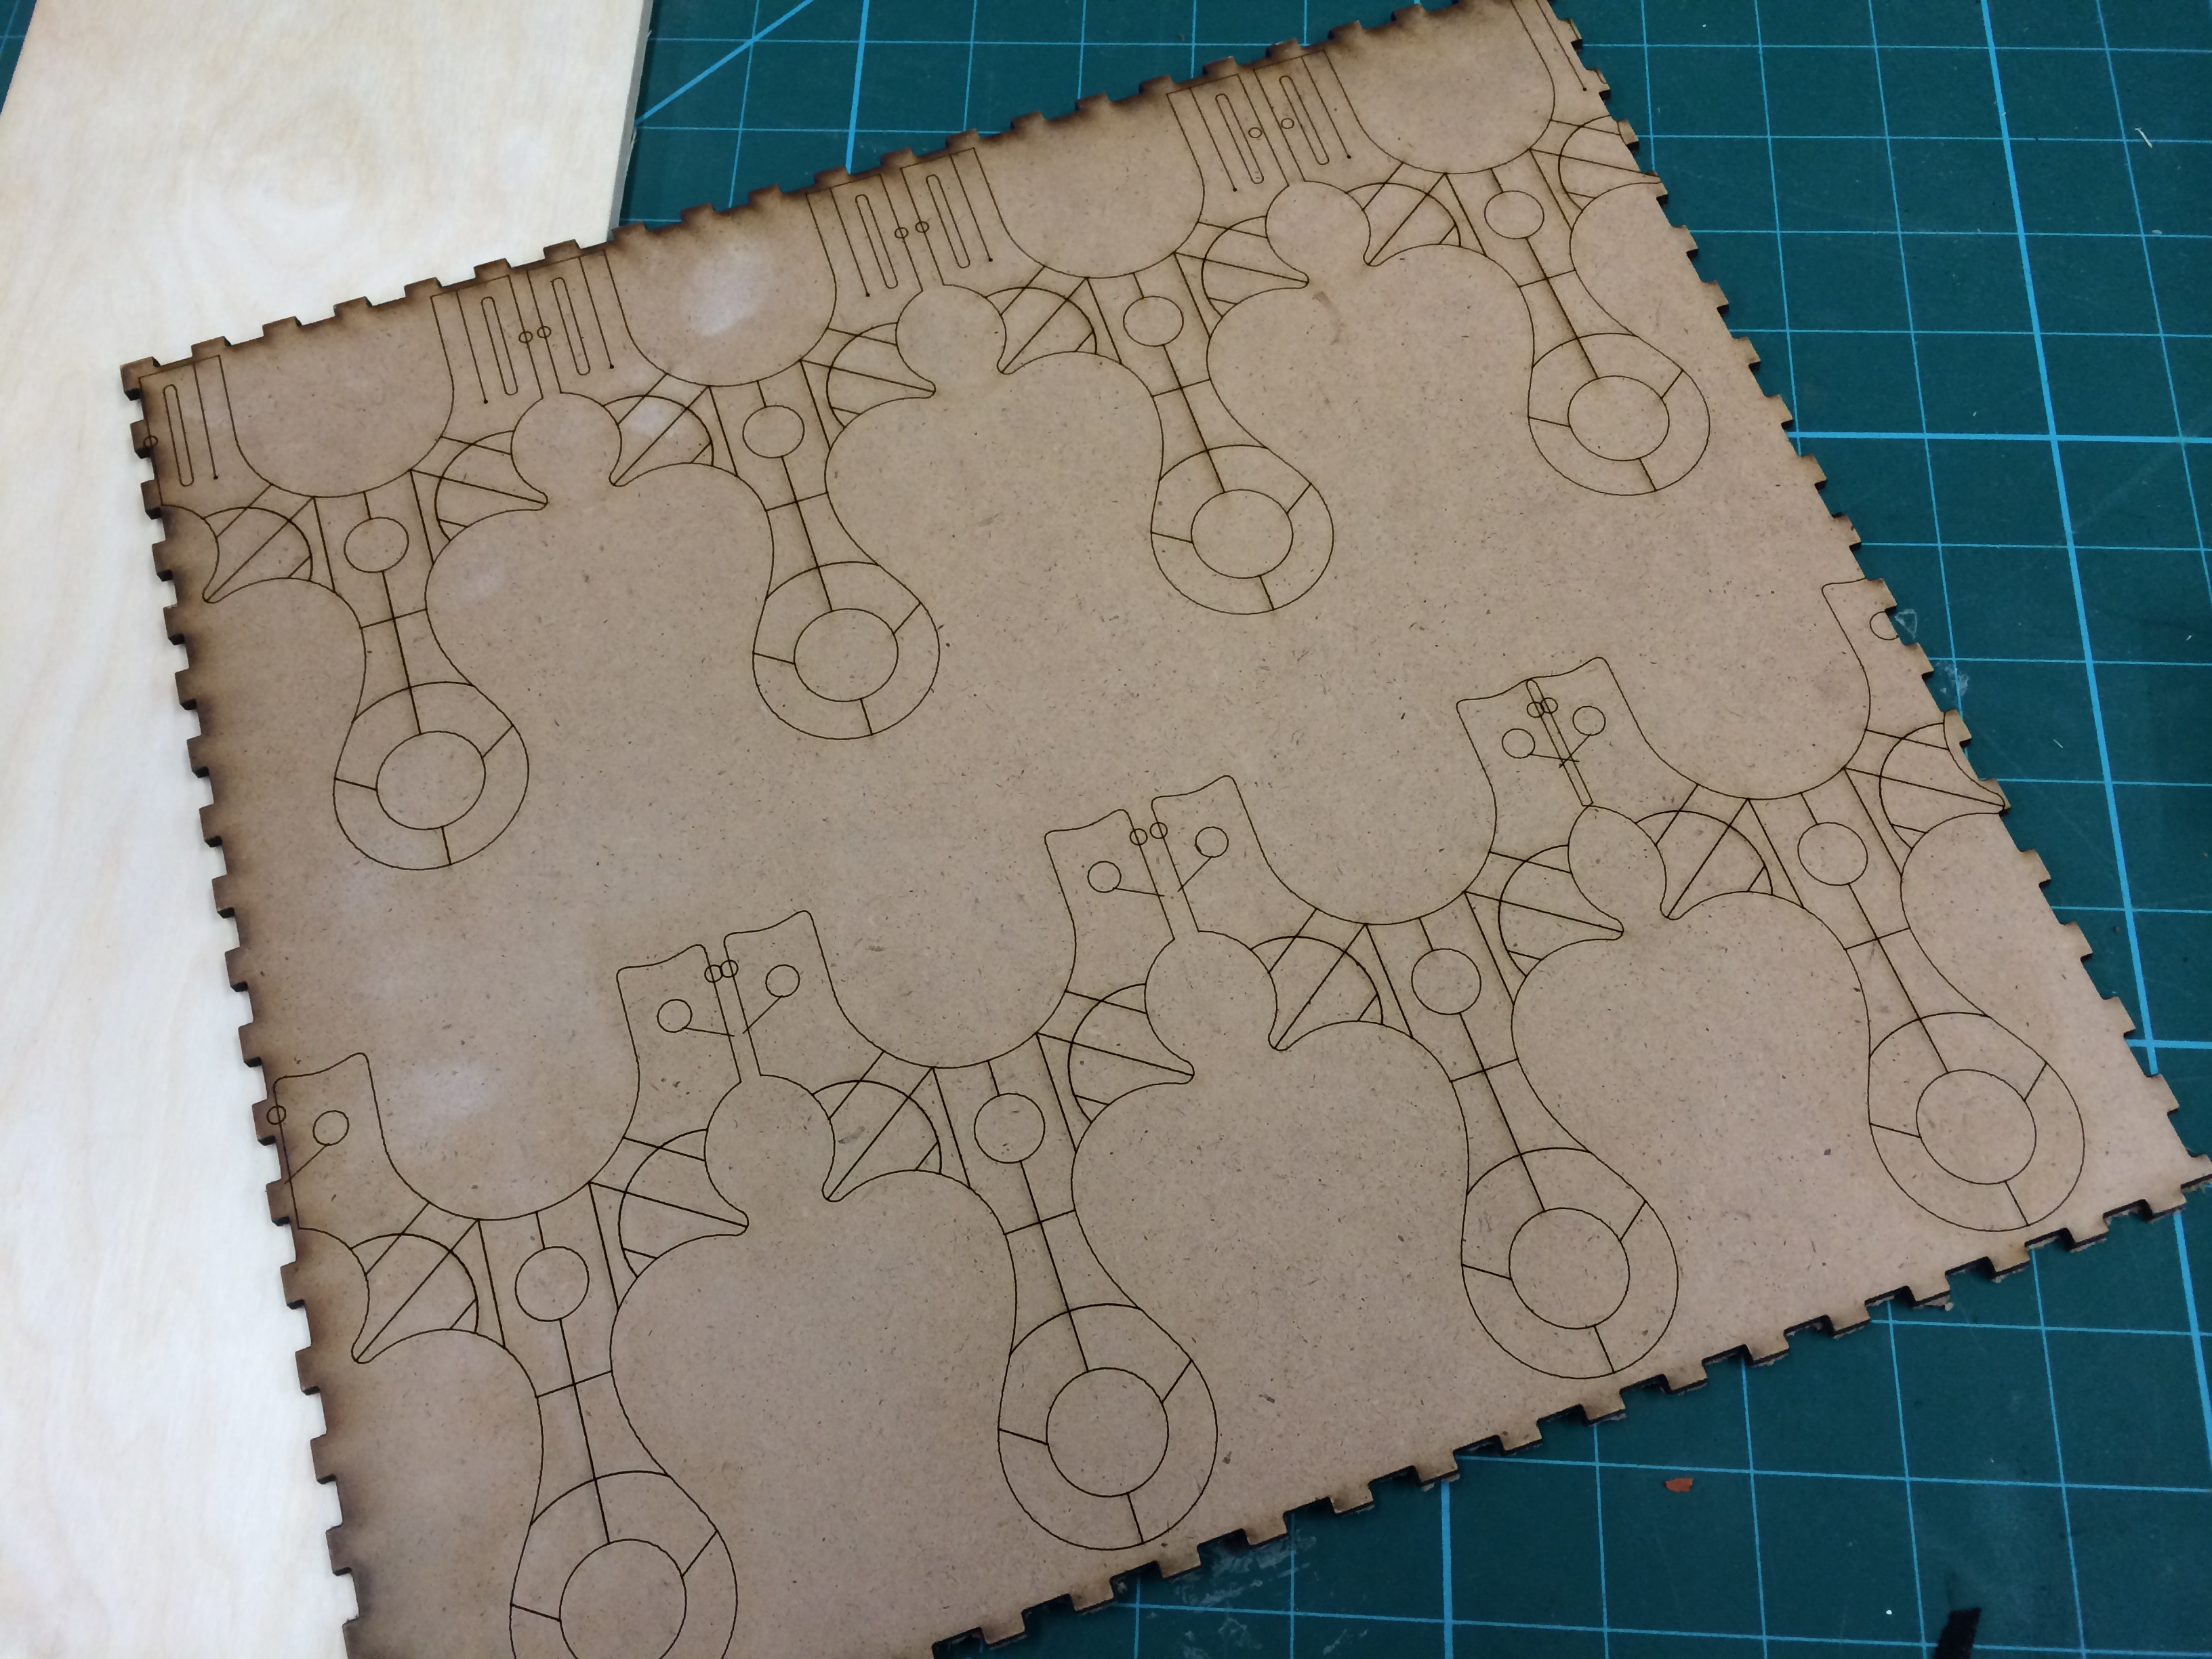
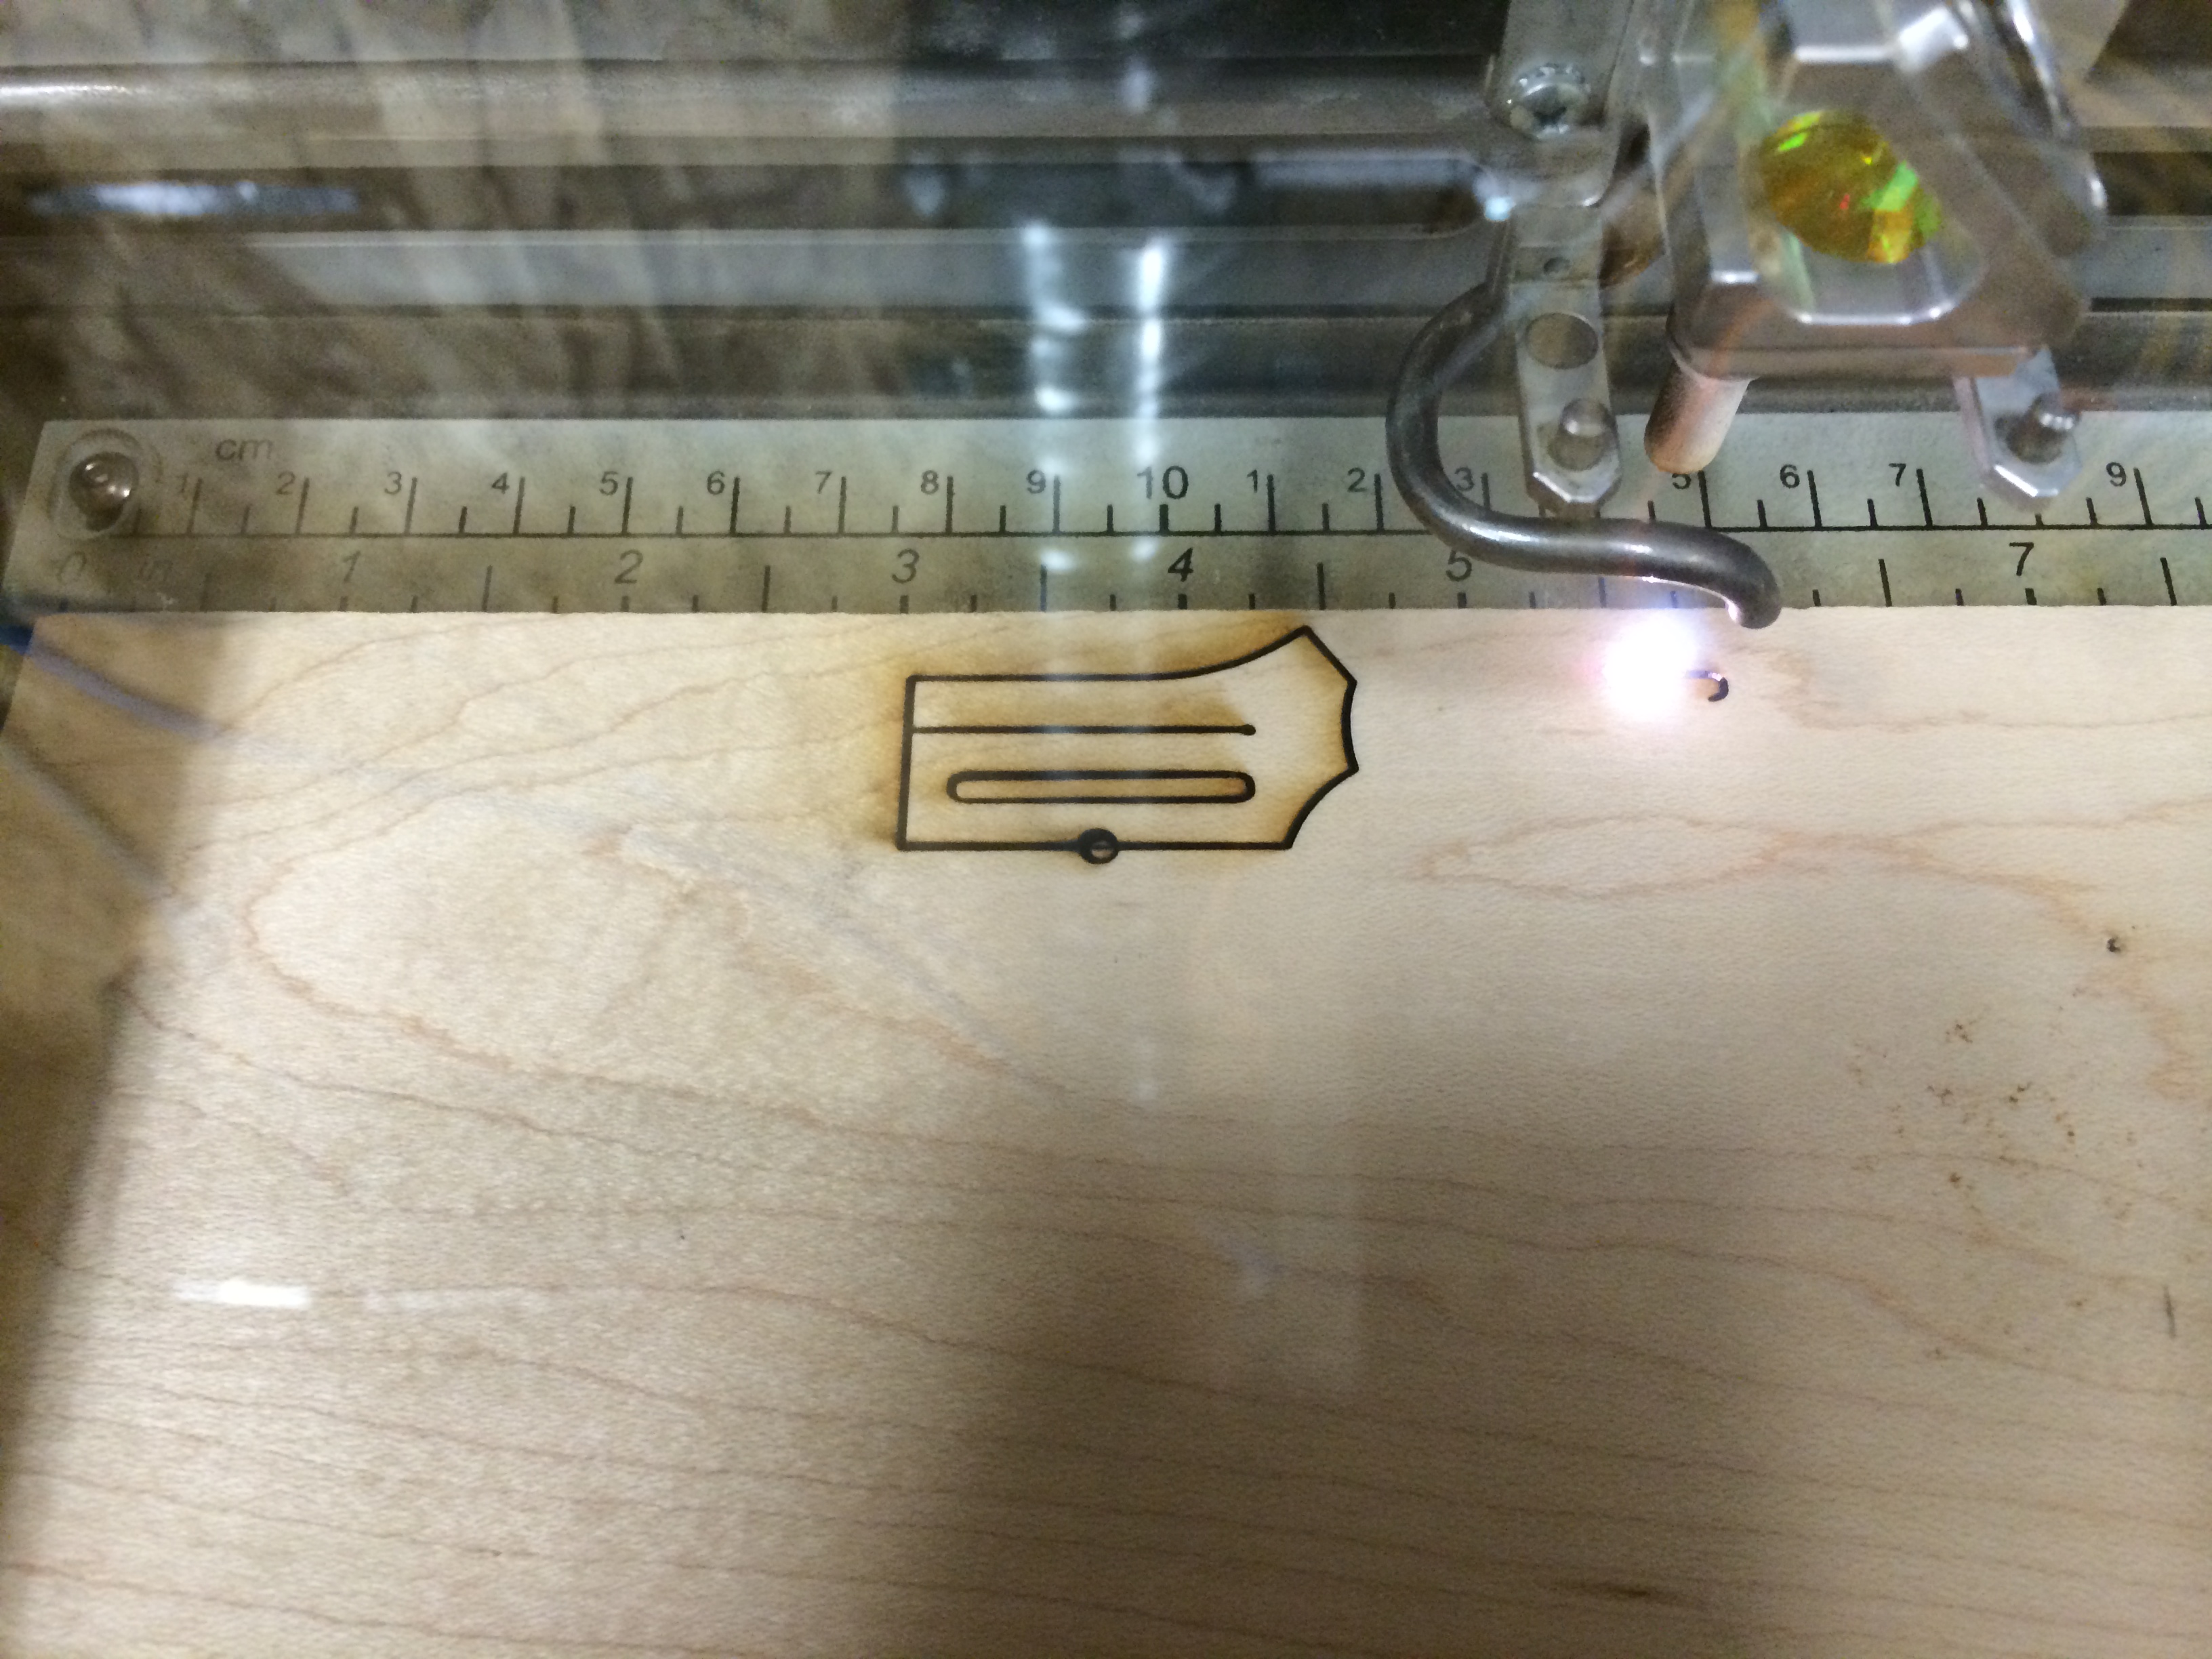
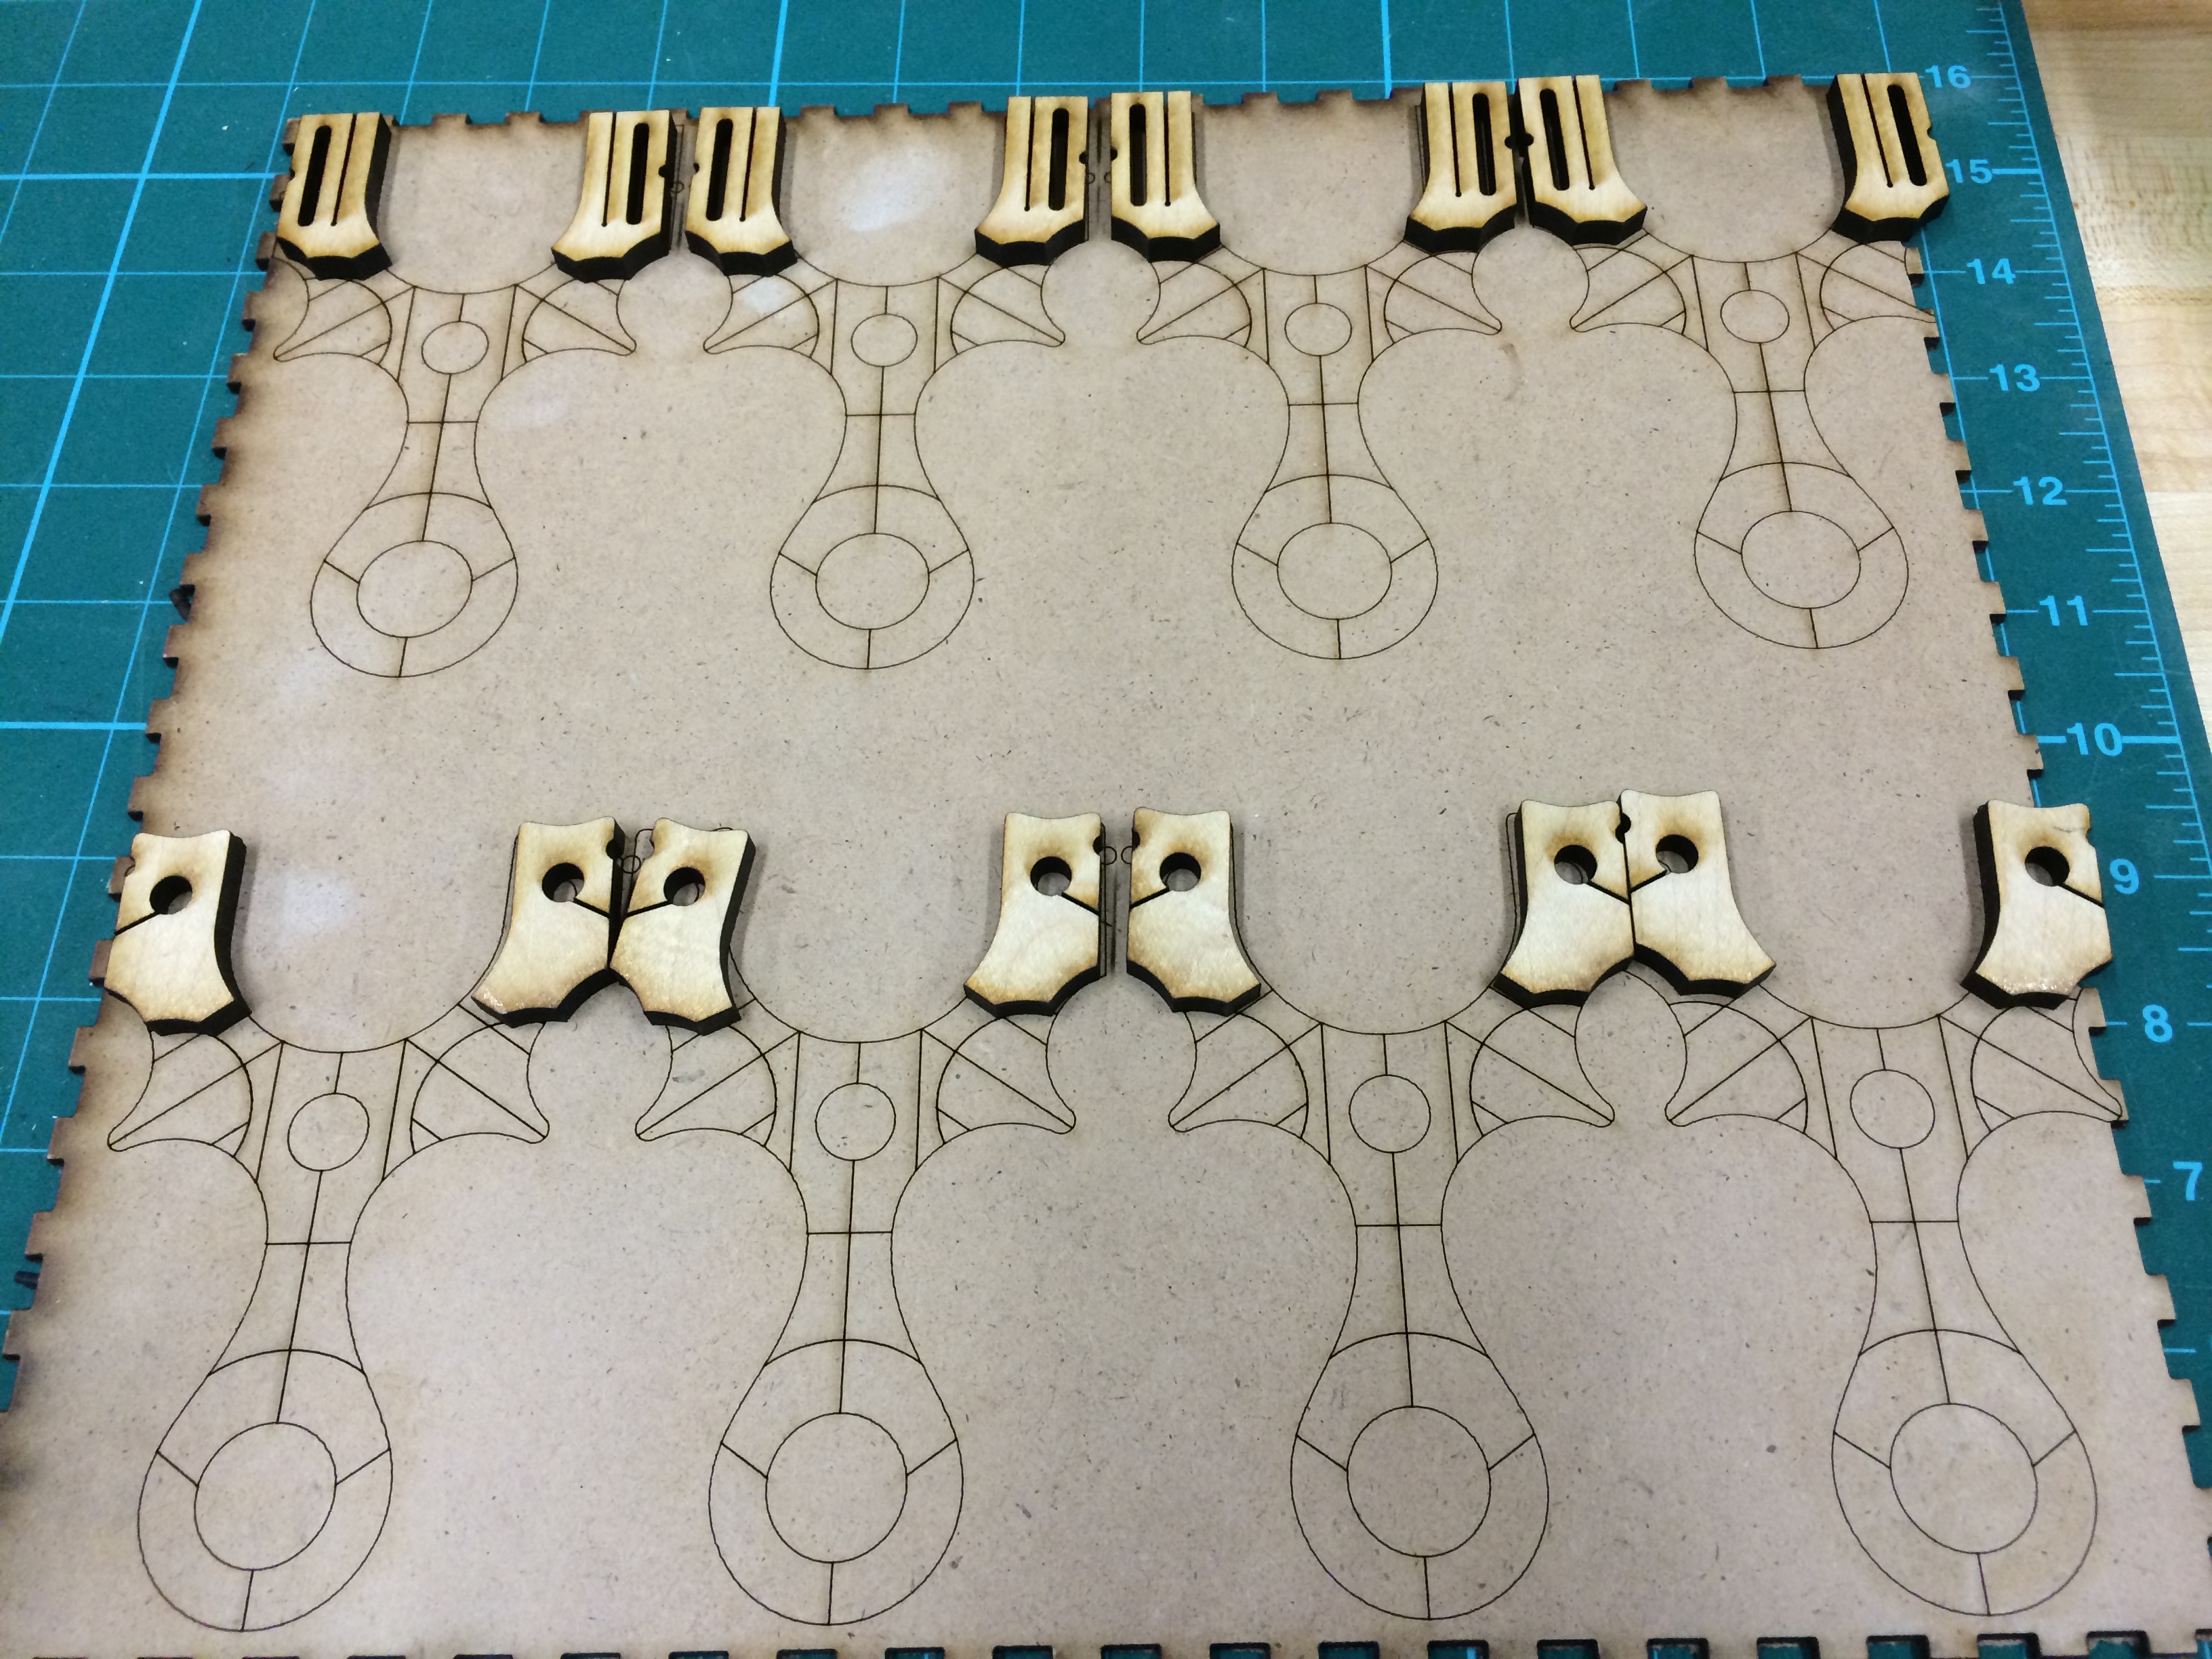
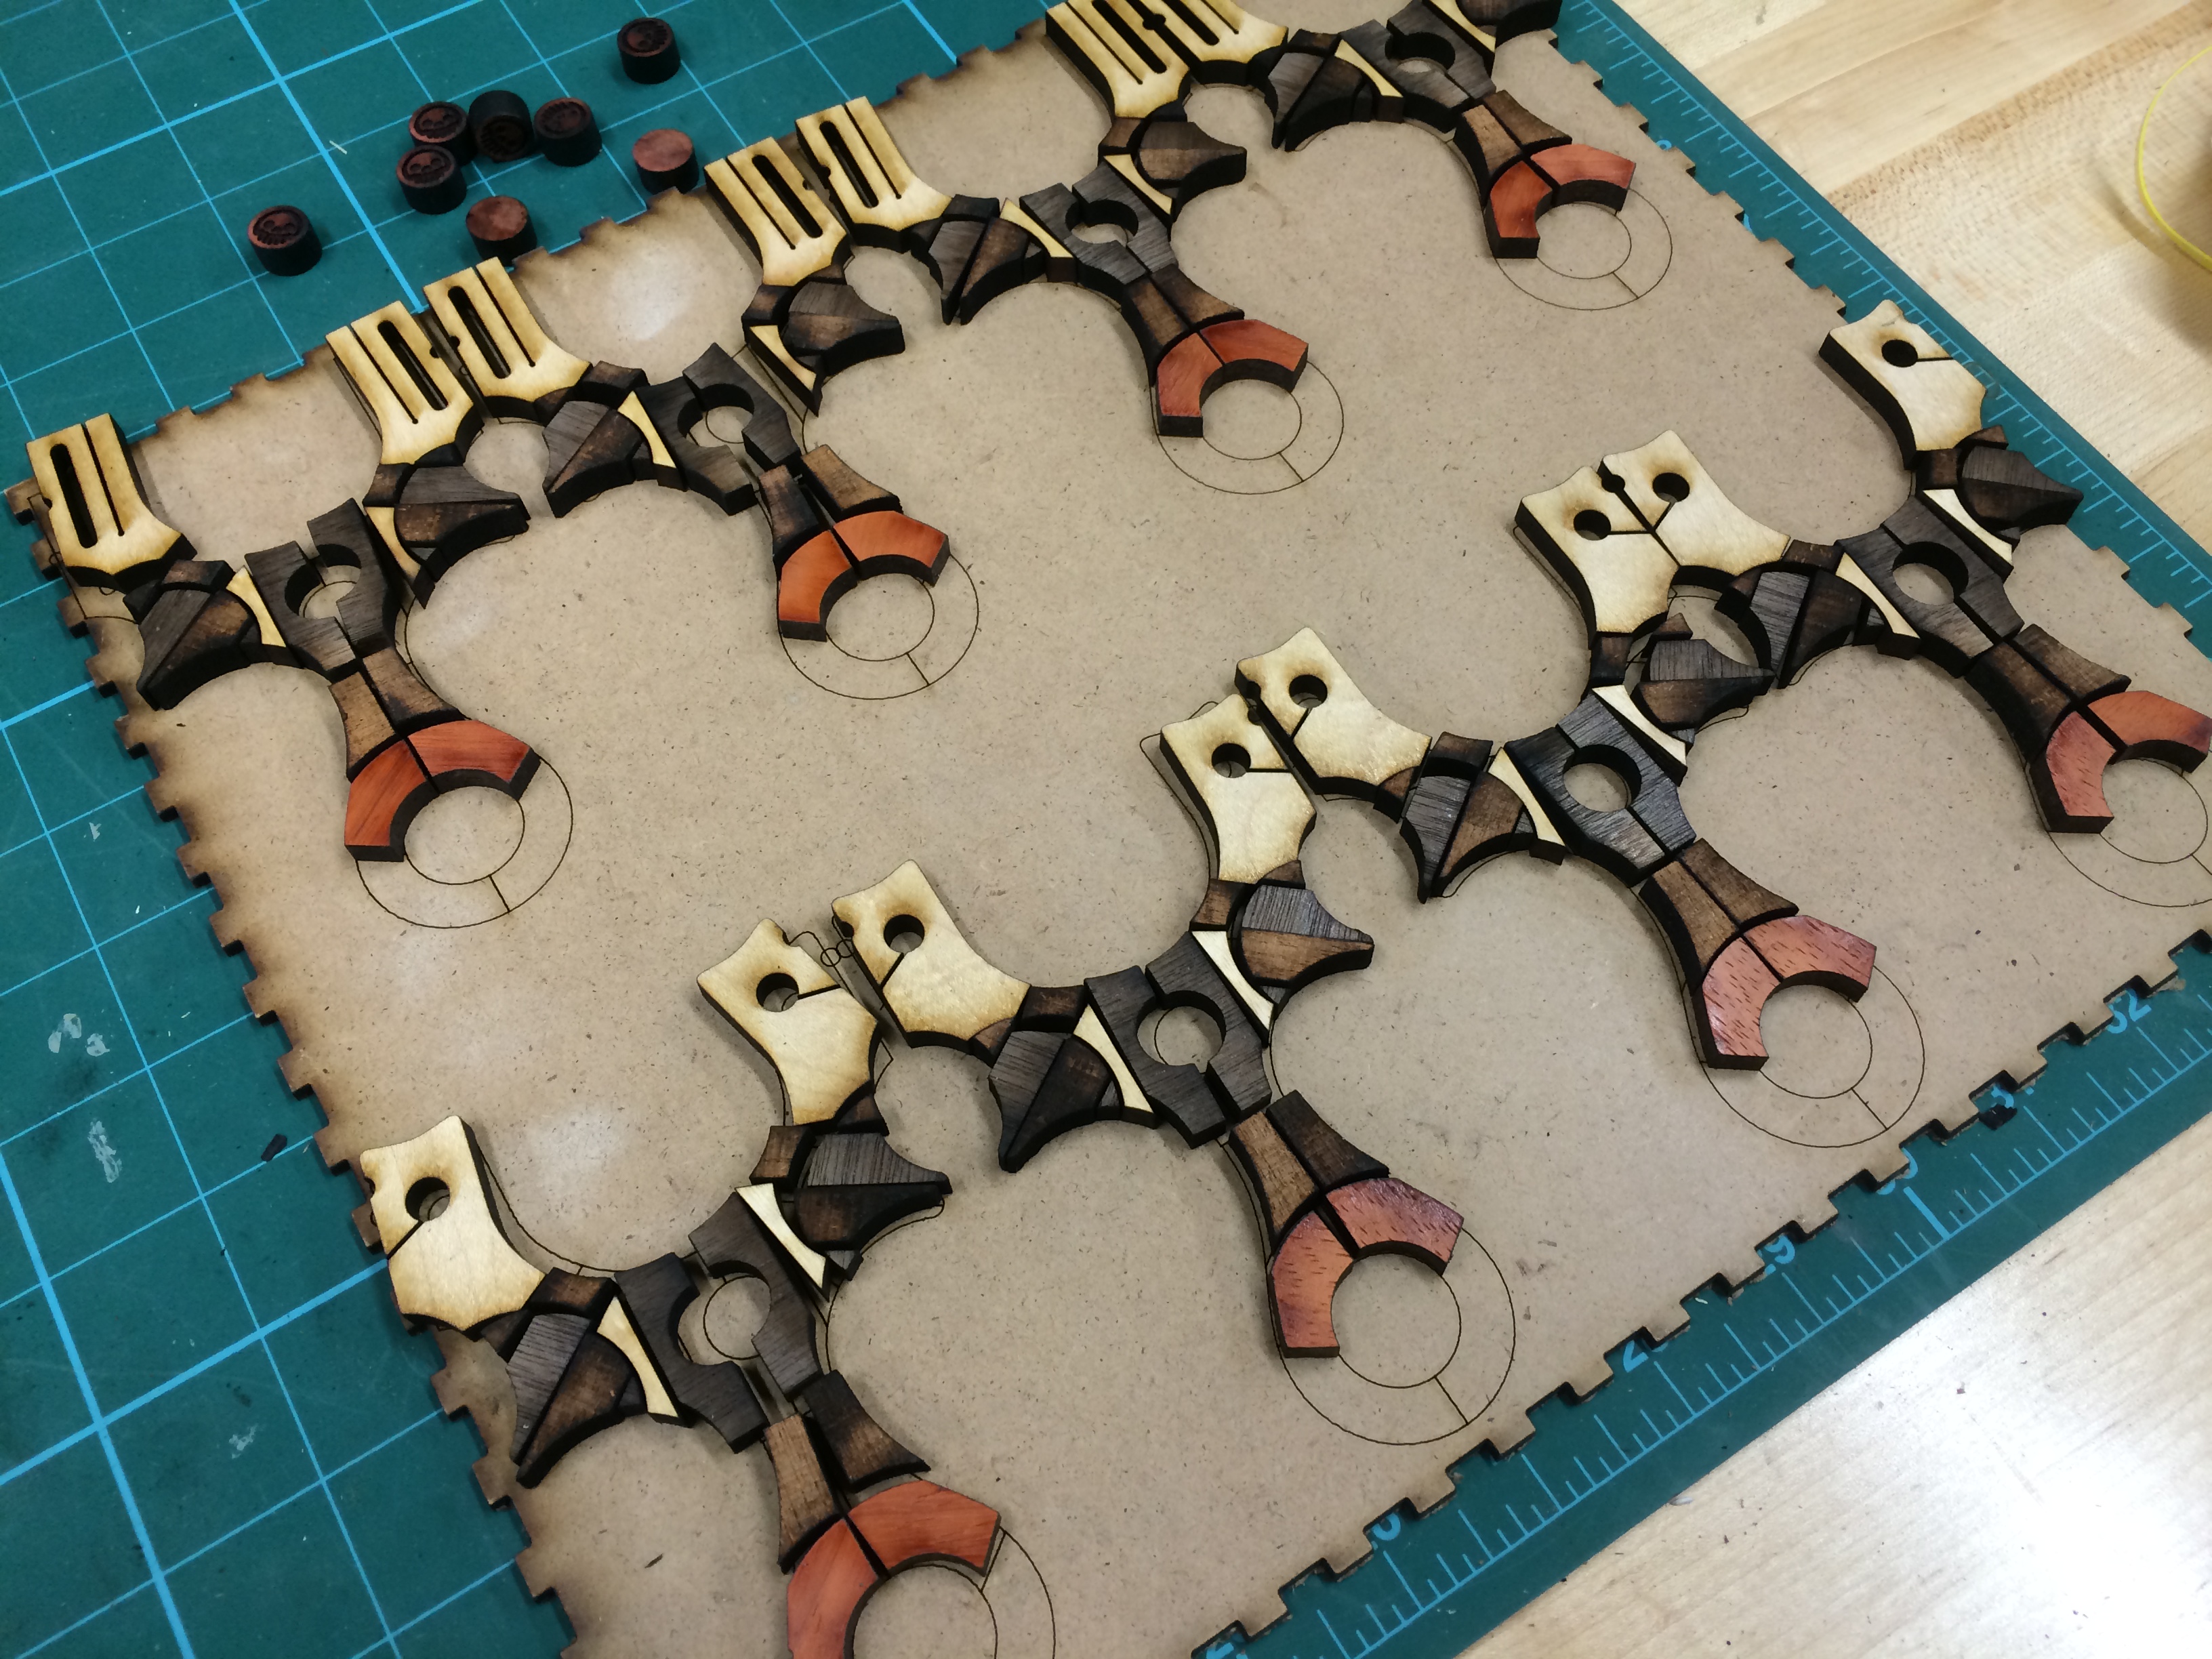
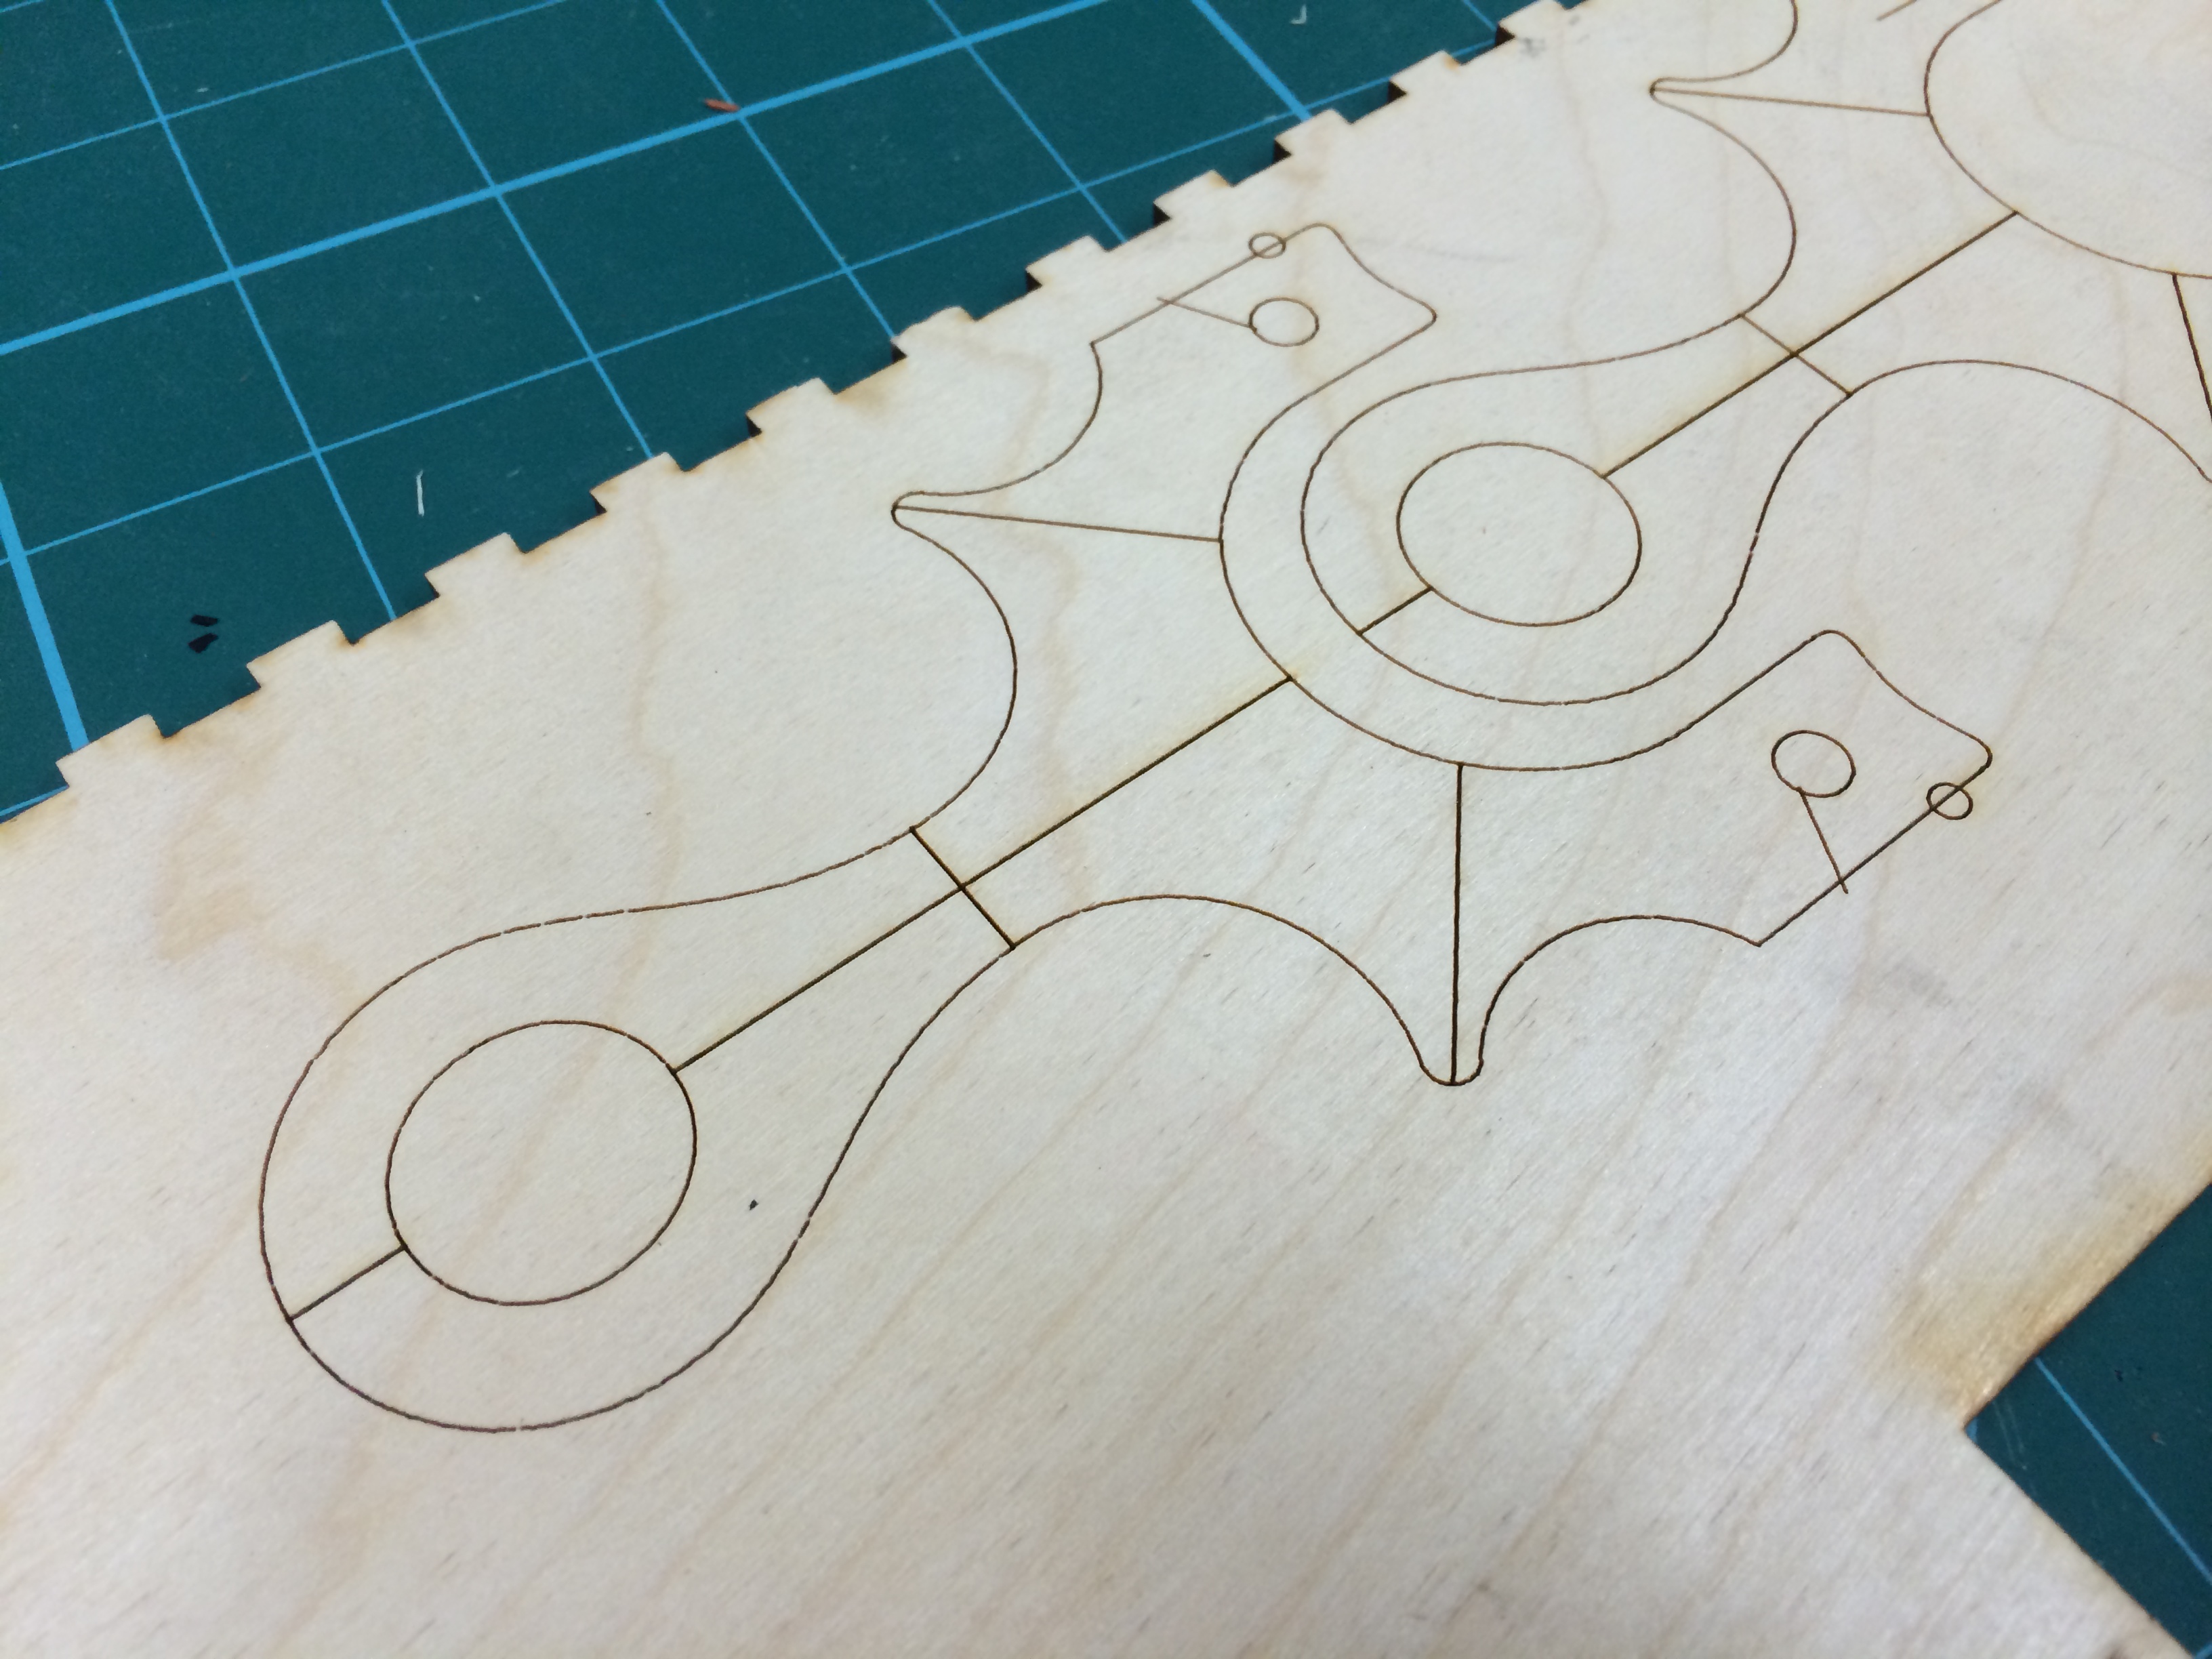
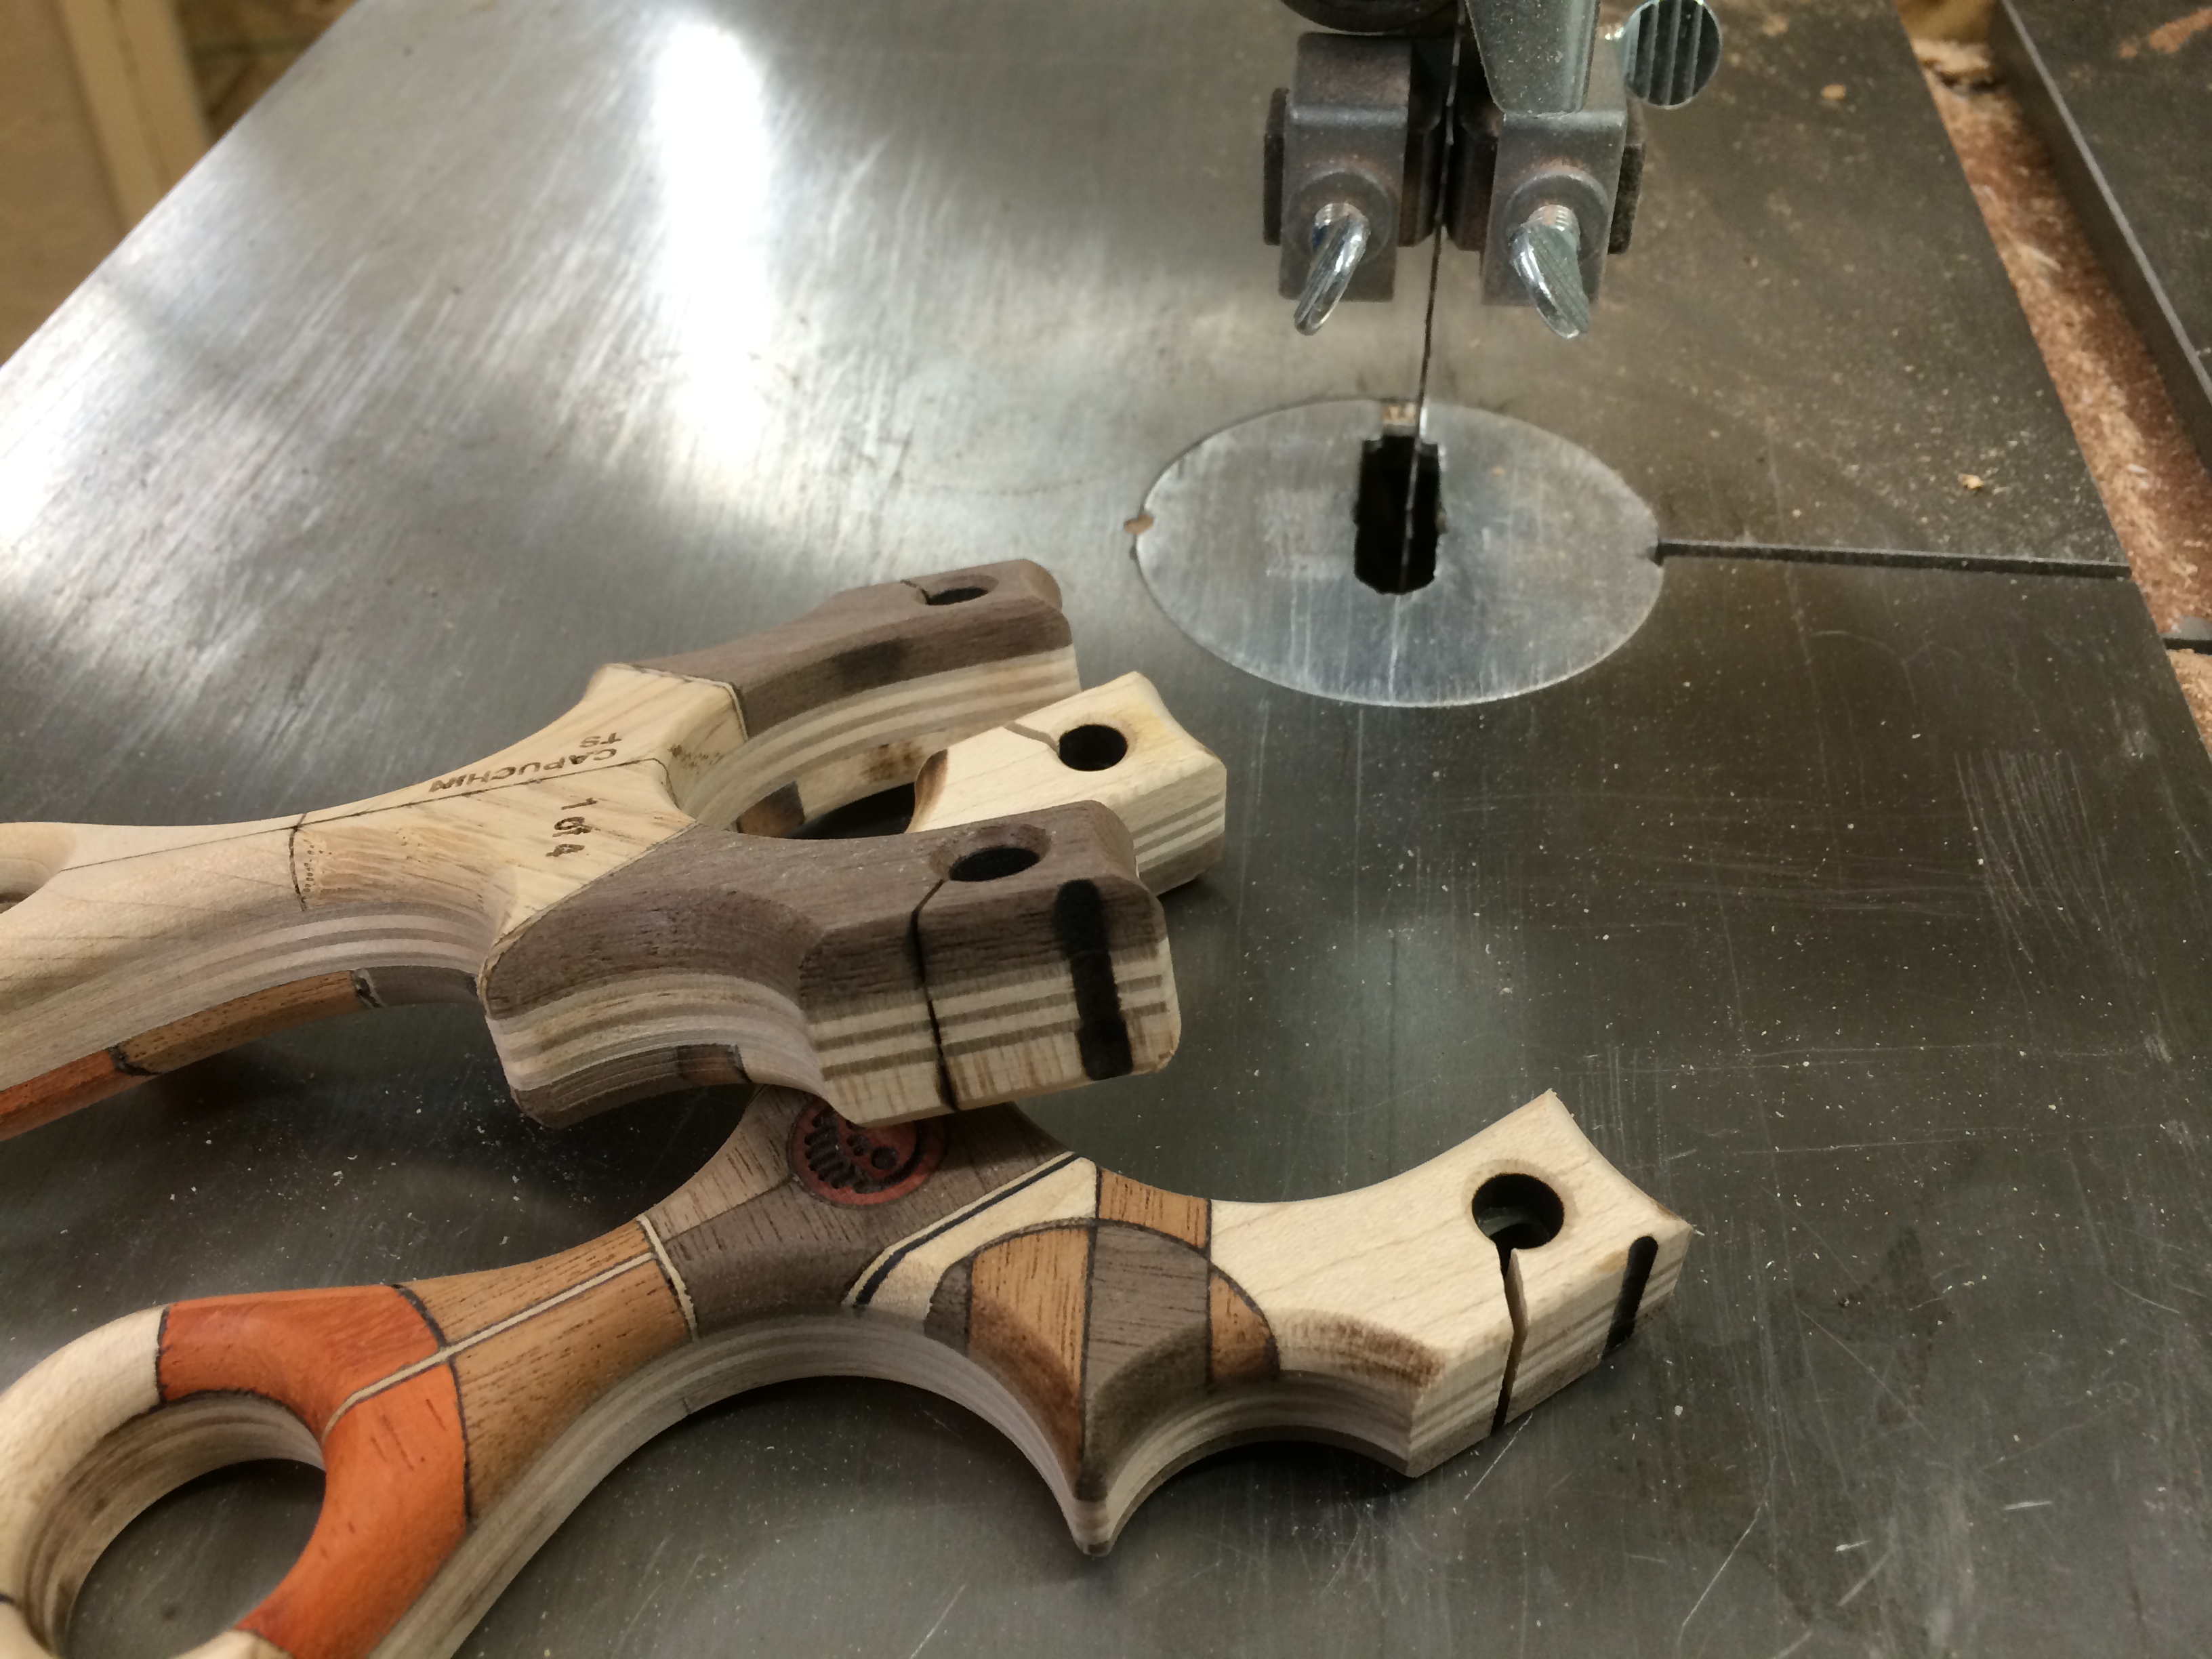
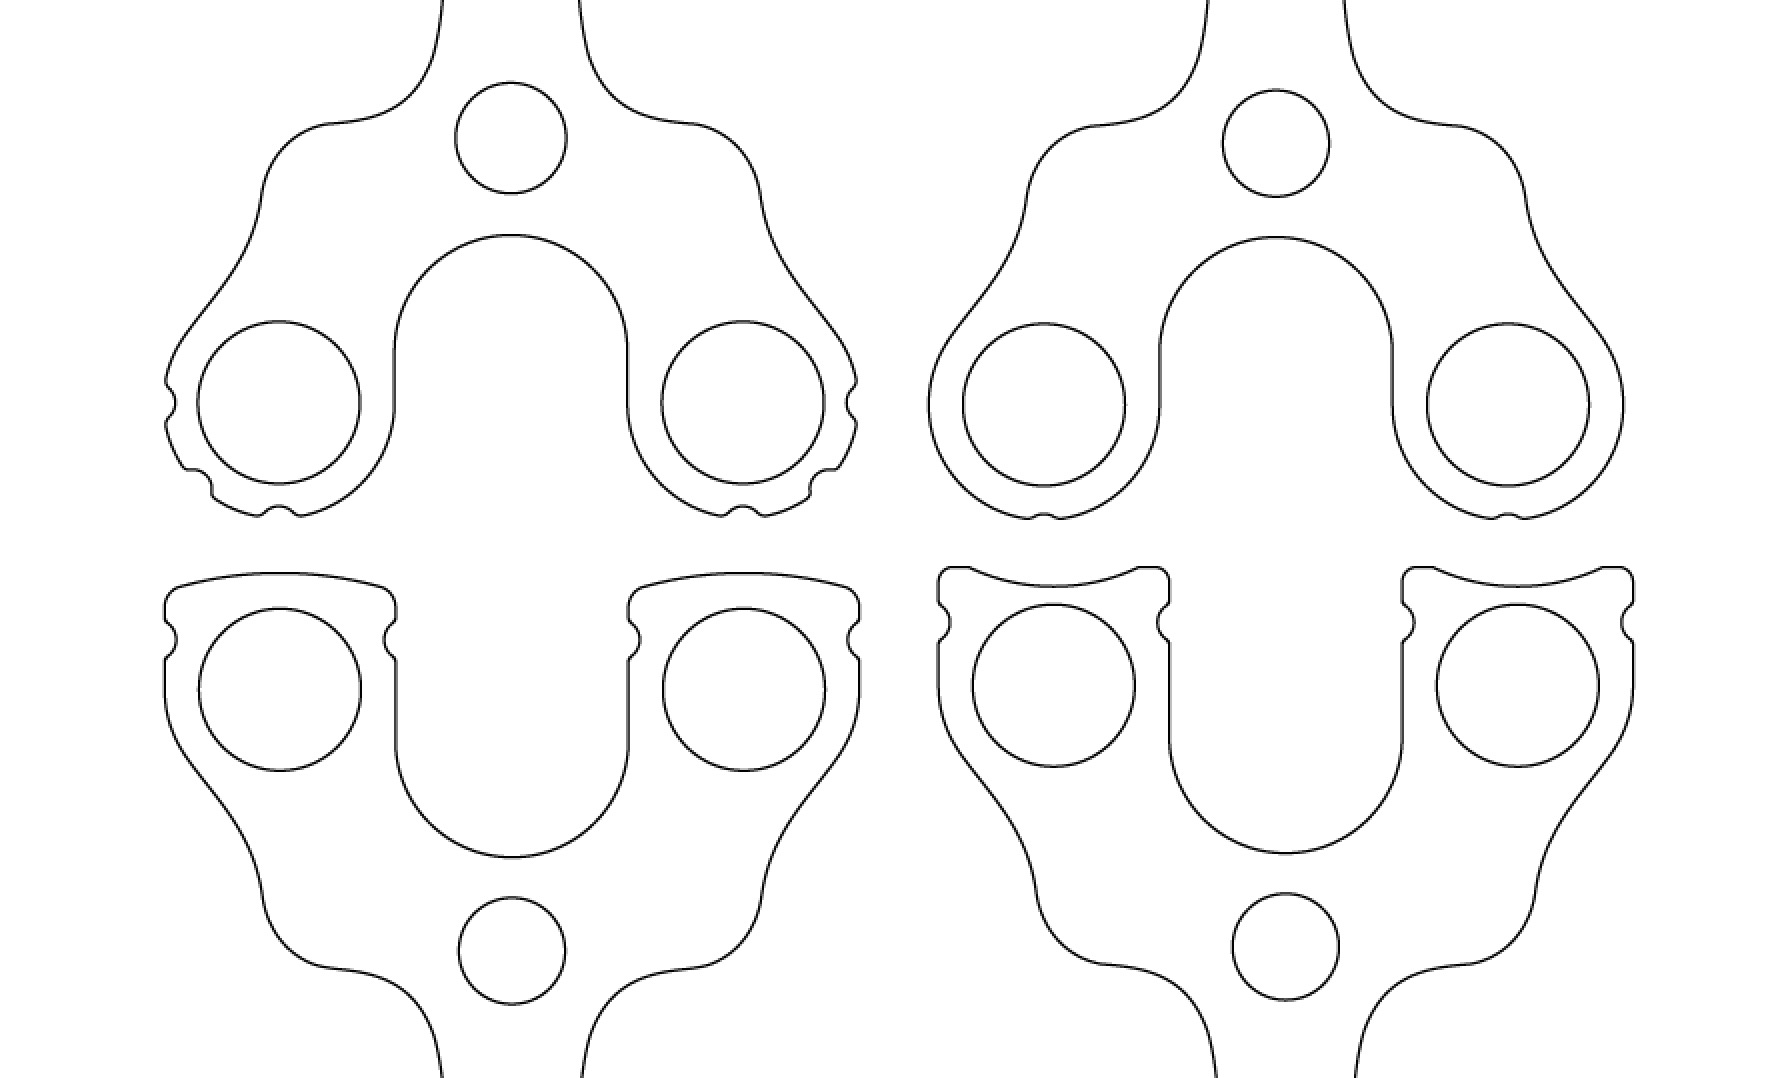
This illustration you can see the variations I went through to arrive at the final shape. The final tip shape is slightly convex with flat sides and a dip in the middle for the single tube to seat into. The bottom left is what I went with, but without the indentations (a meek attempt at adding wrap and tuck style grooves). The body and handle style remained unchanged, a shape I was very familiar and comfortable with.

screen-shot-2016-12-02-at-11-15-21-am-dec-2

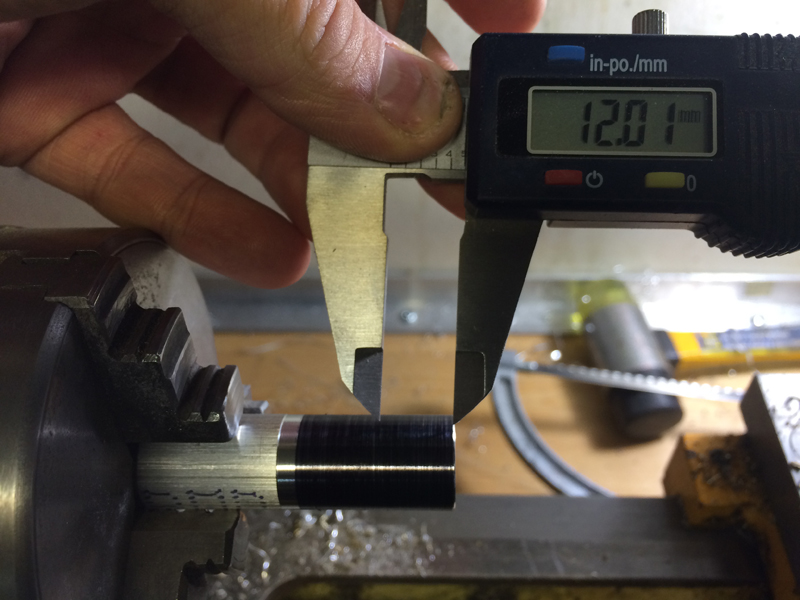
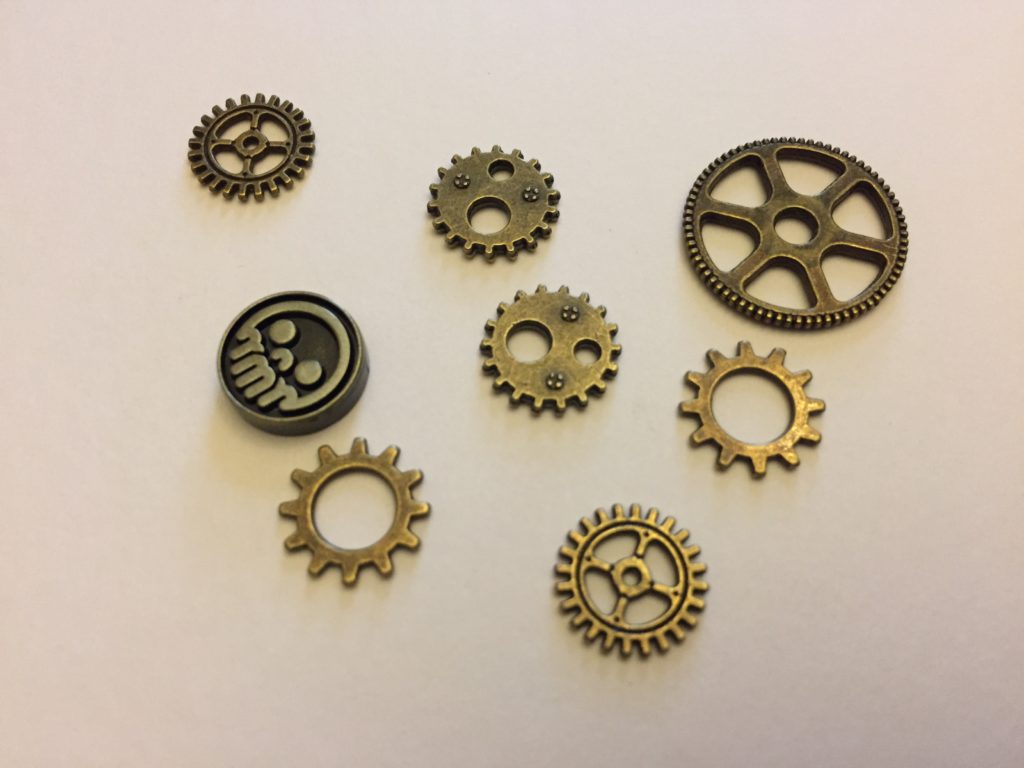
Here’s a sample of what I had to work with for details. Some very small 12mm brass cogs, gears and otherwise Steampunk-like accoutrements.

img_0514

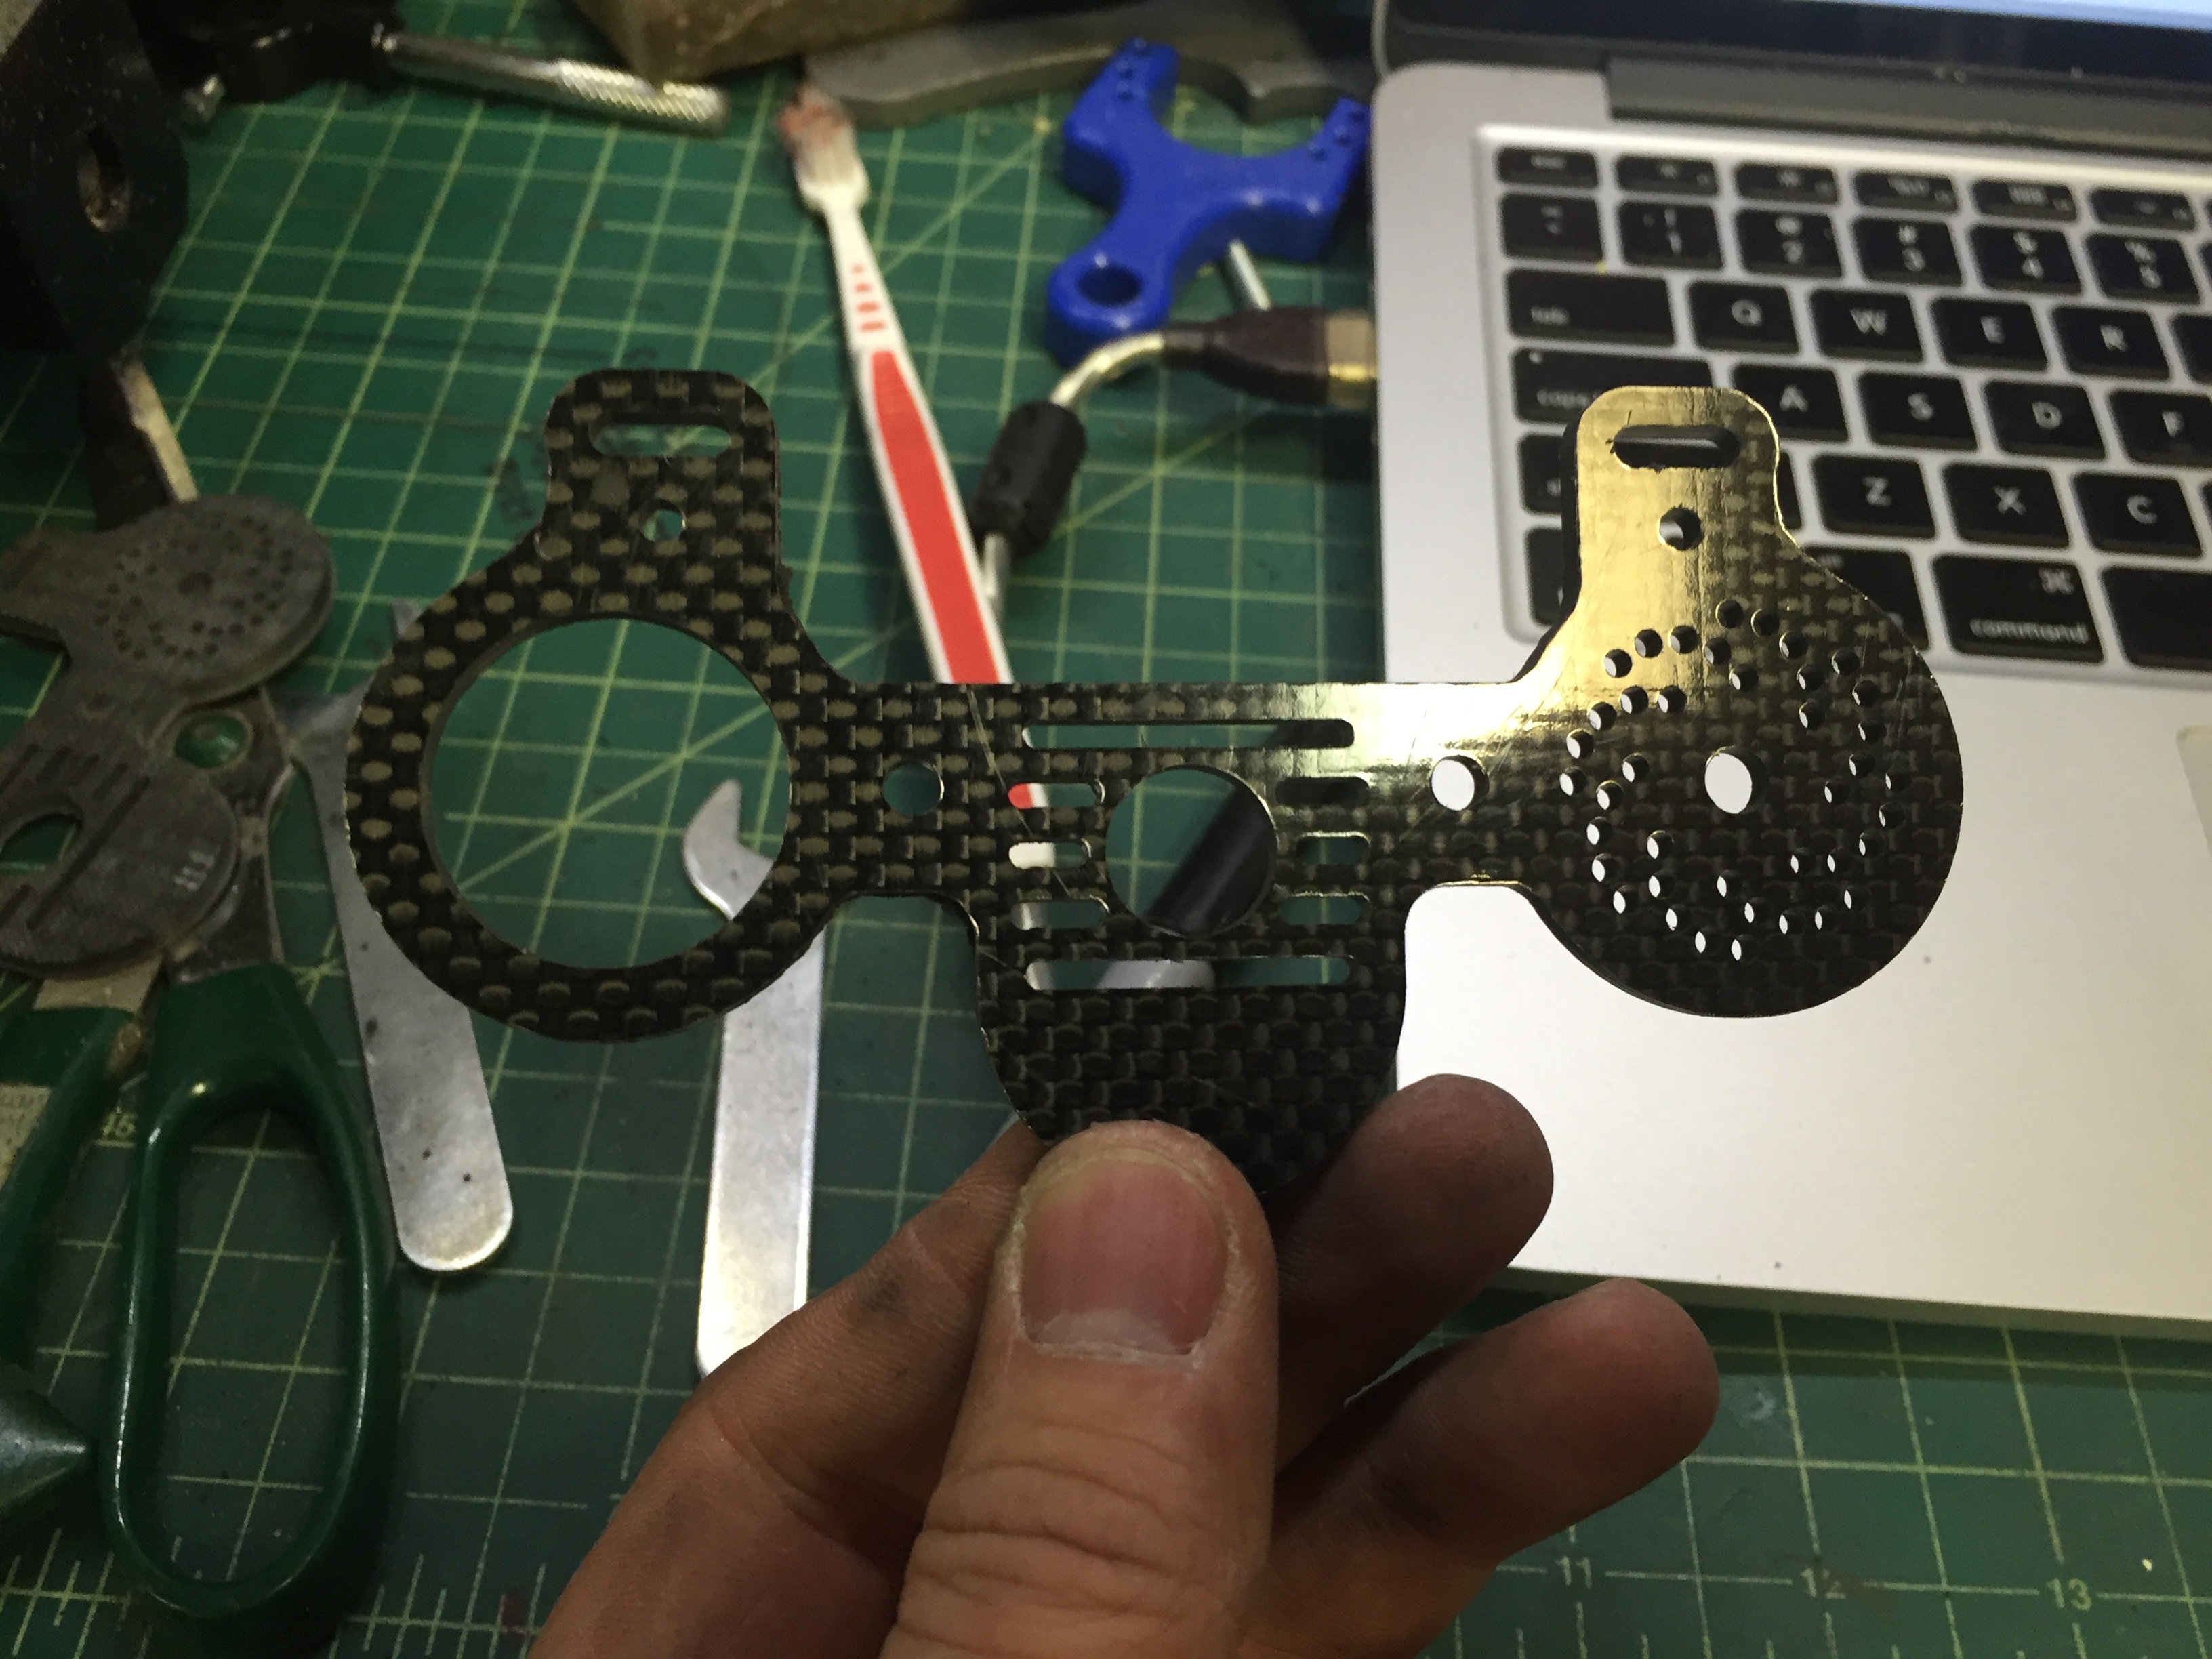
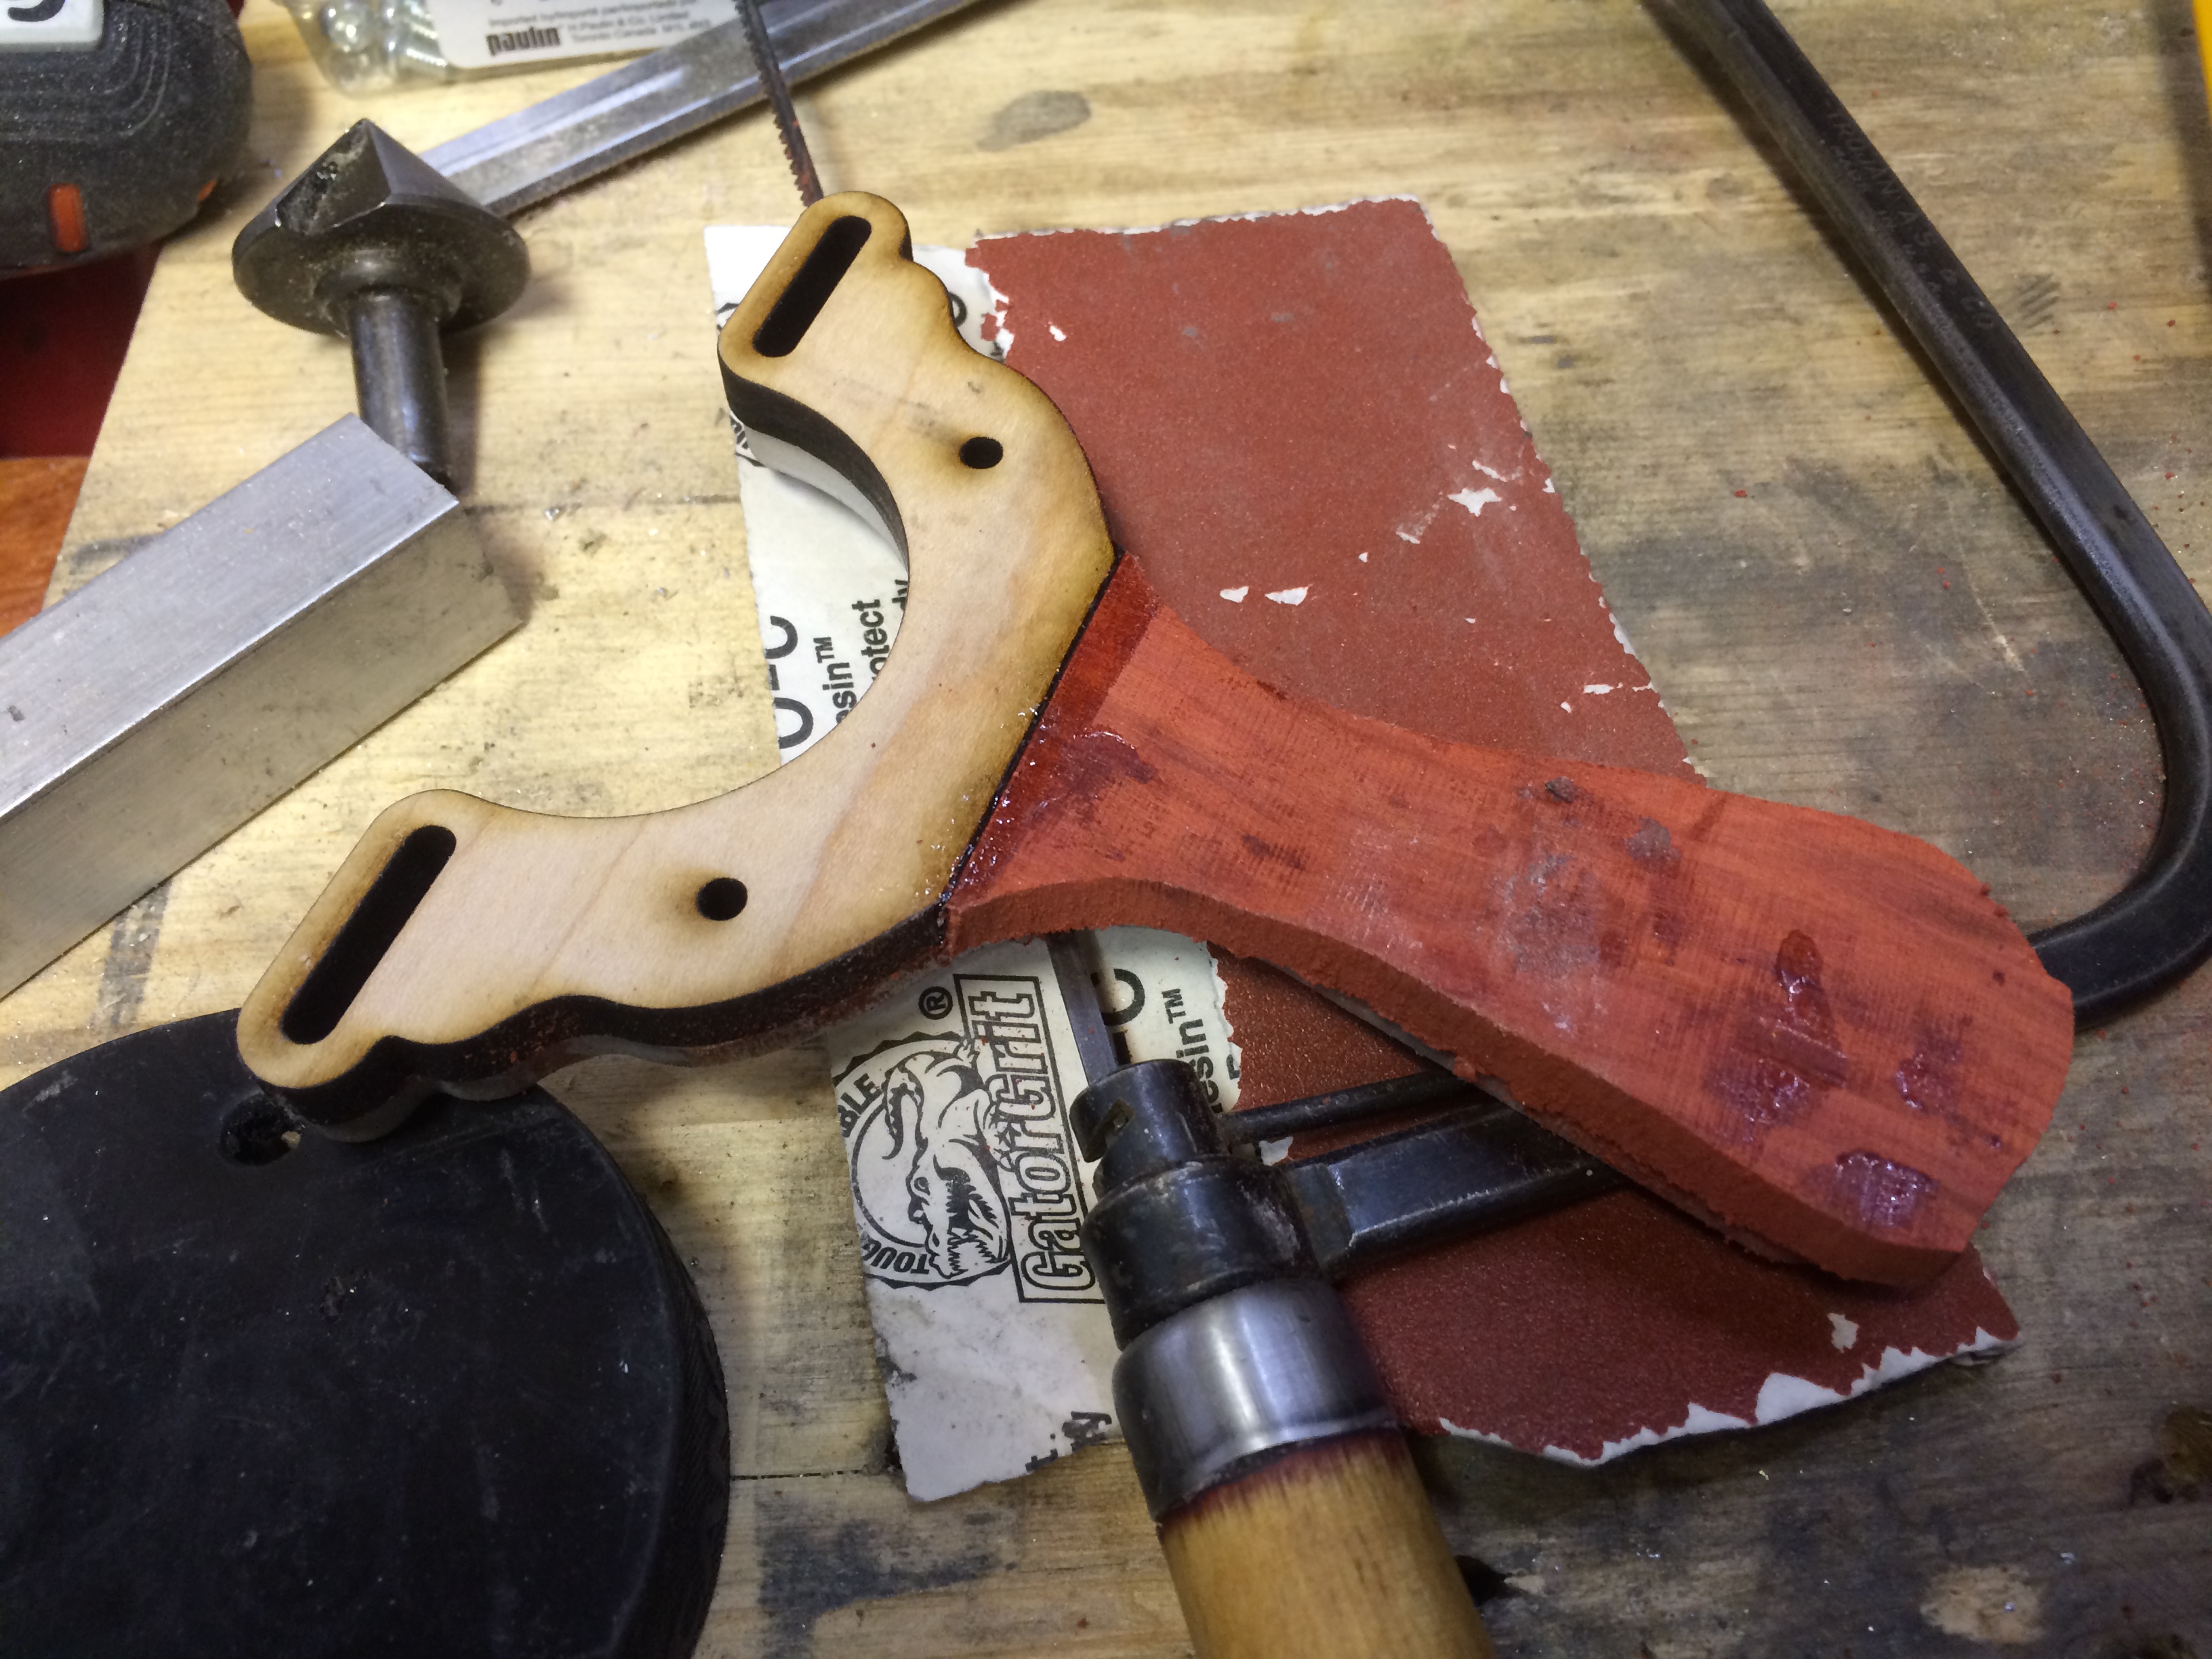
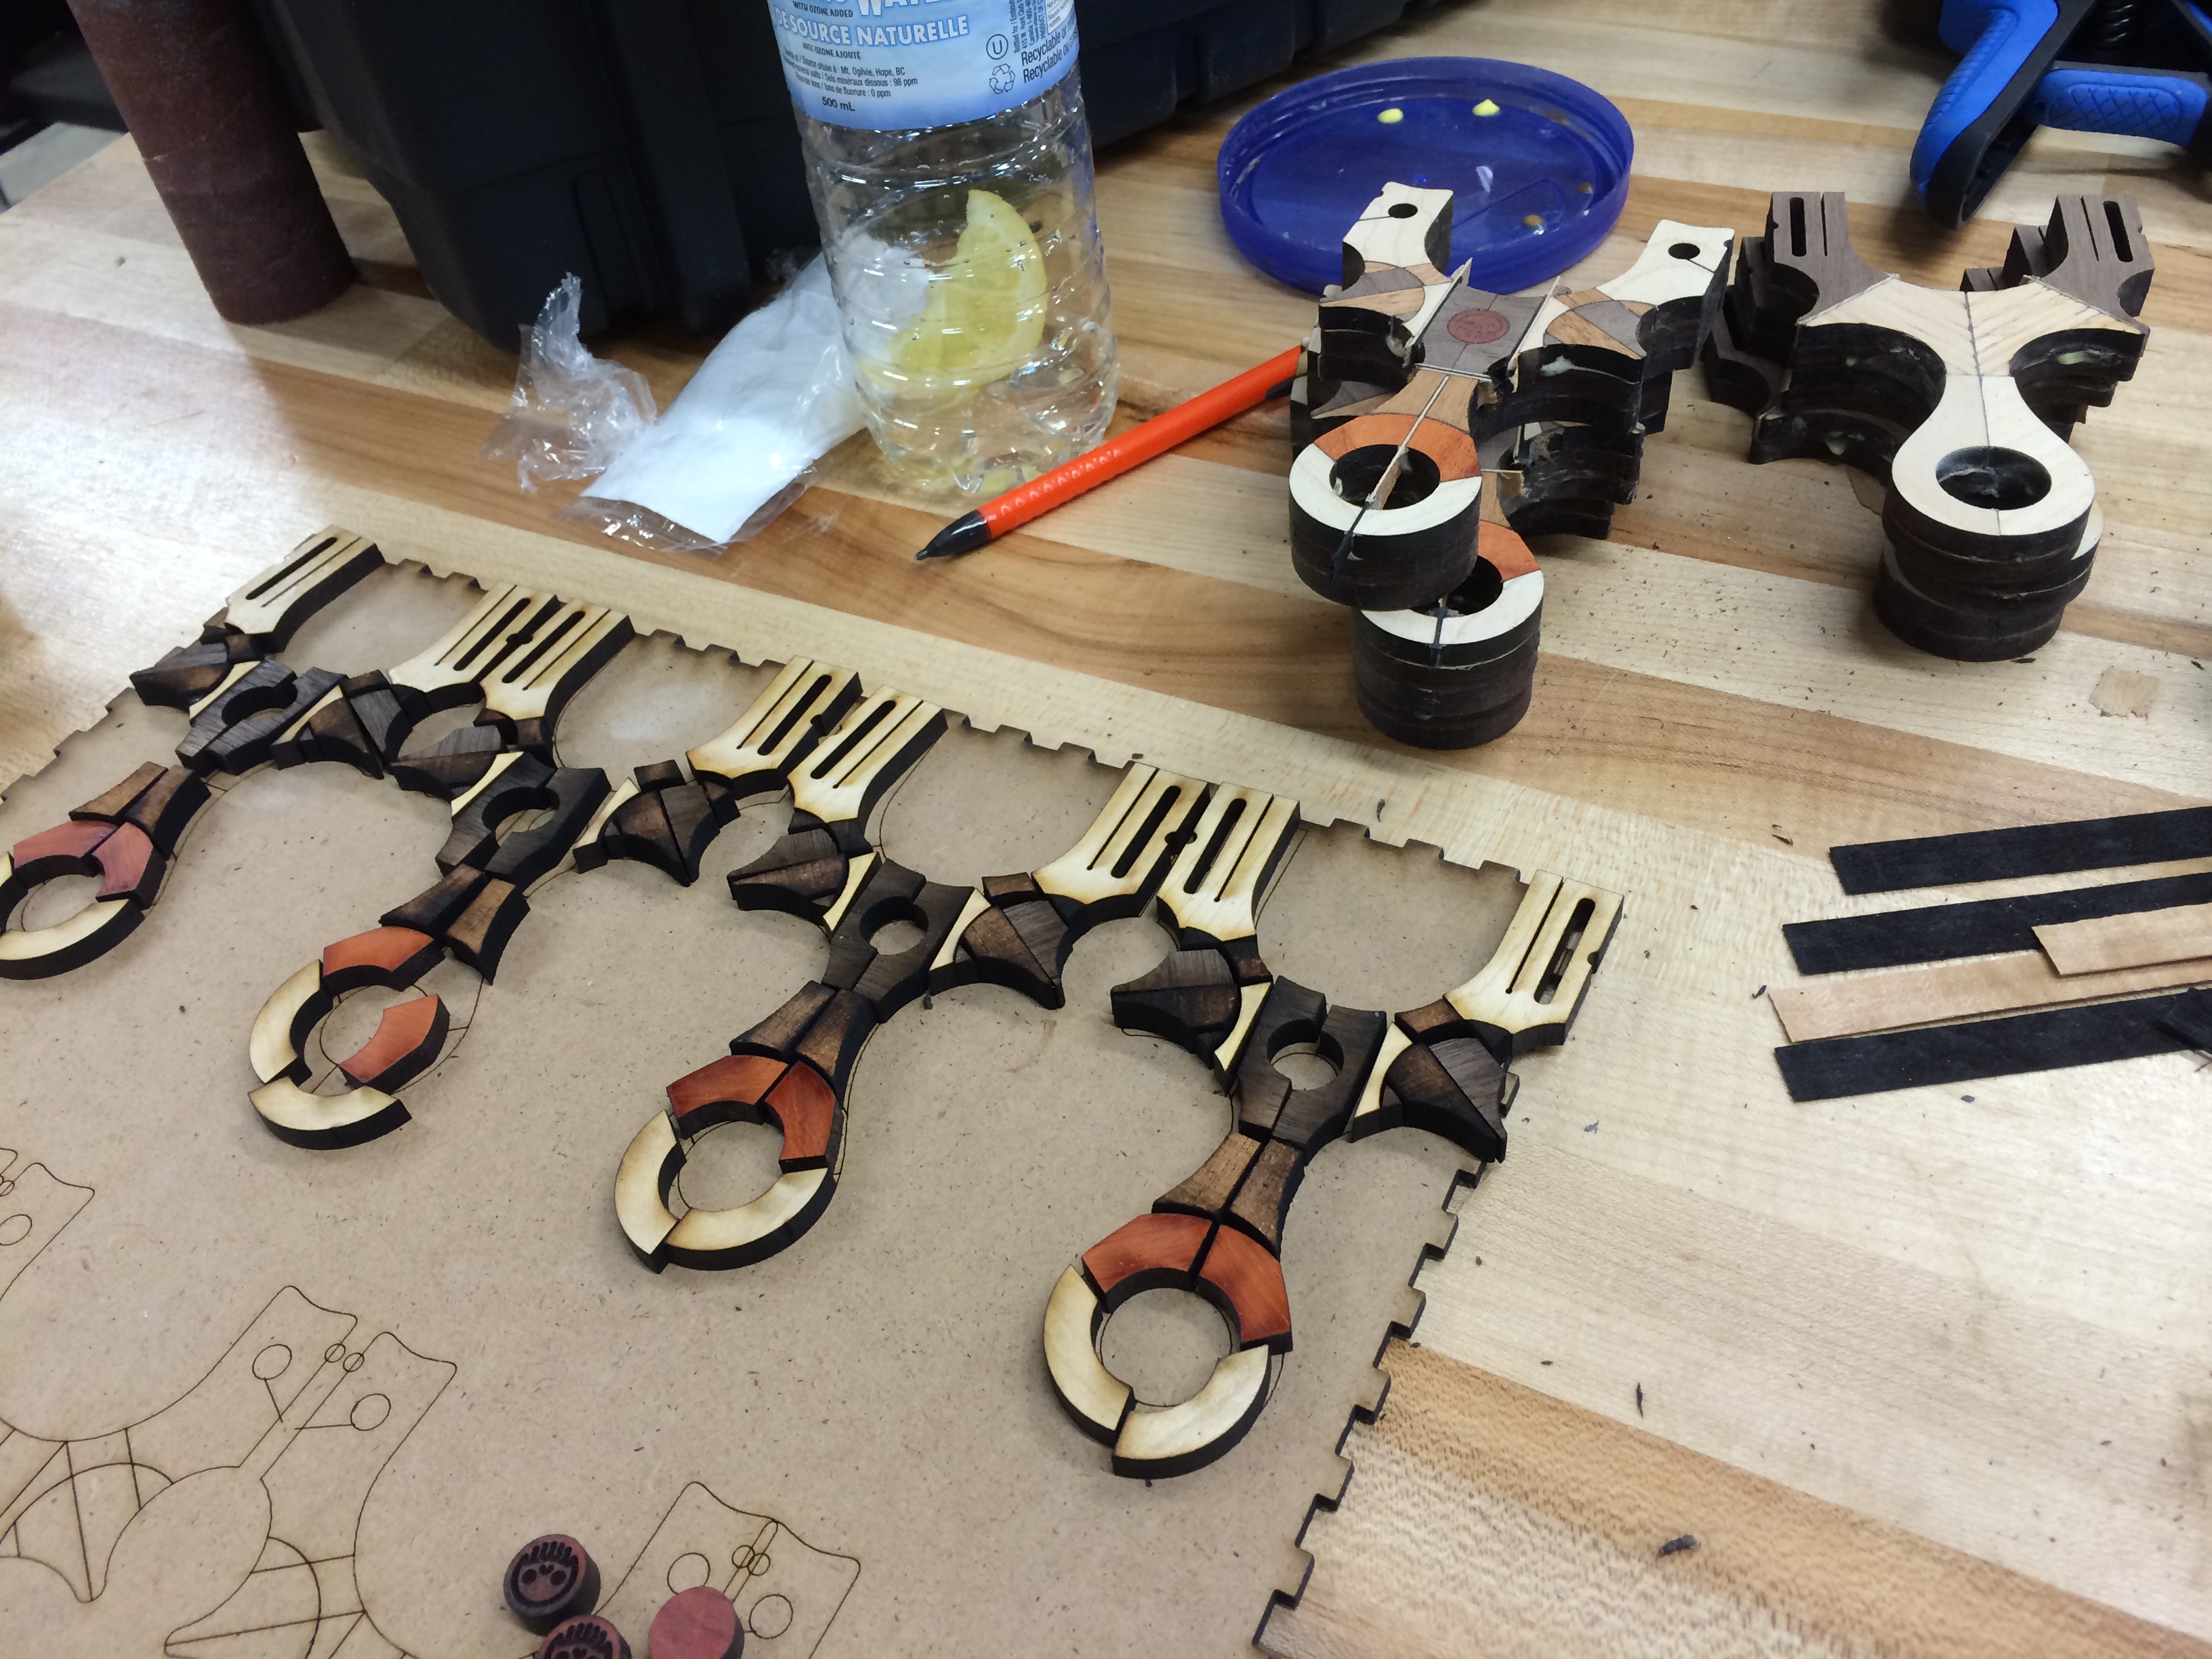
After programing the initial profile, the concept was to use the profile as a template to successively cut and trim each layer of brass, g10, brass, g10 etc etc. This worked out with a few hiccups, but for a complex build like this it can be expected.

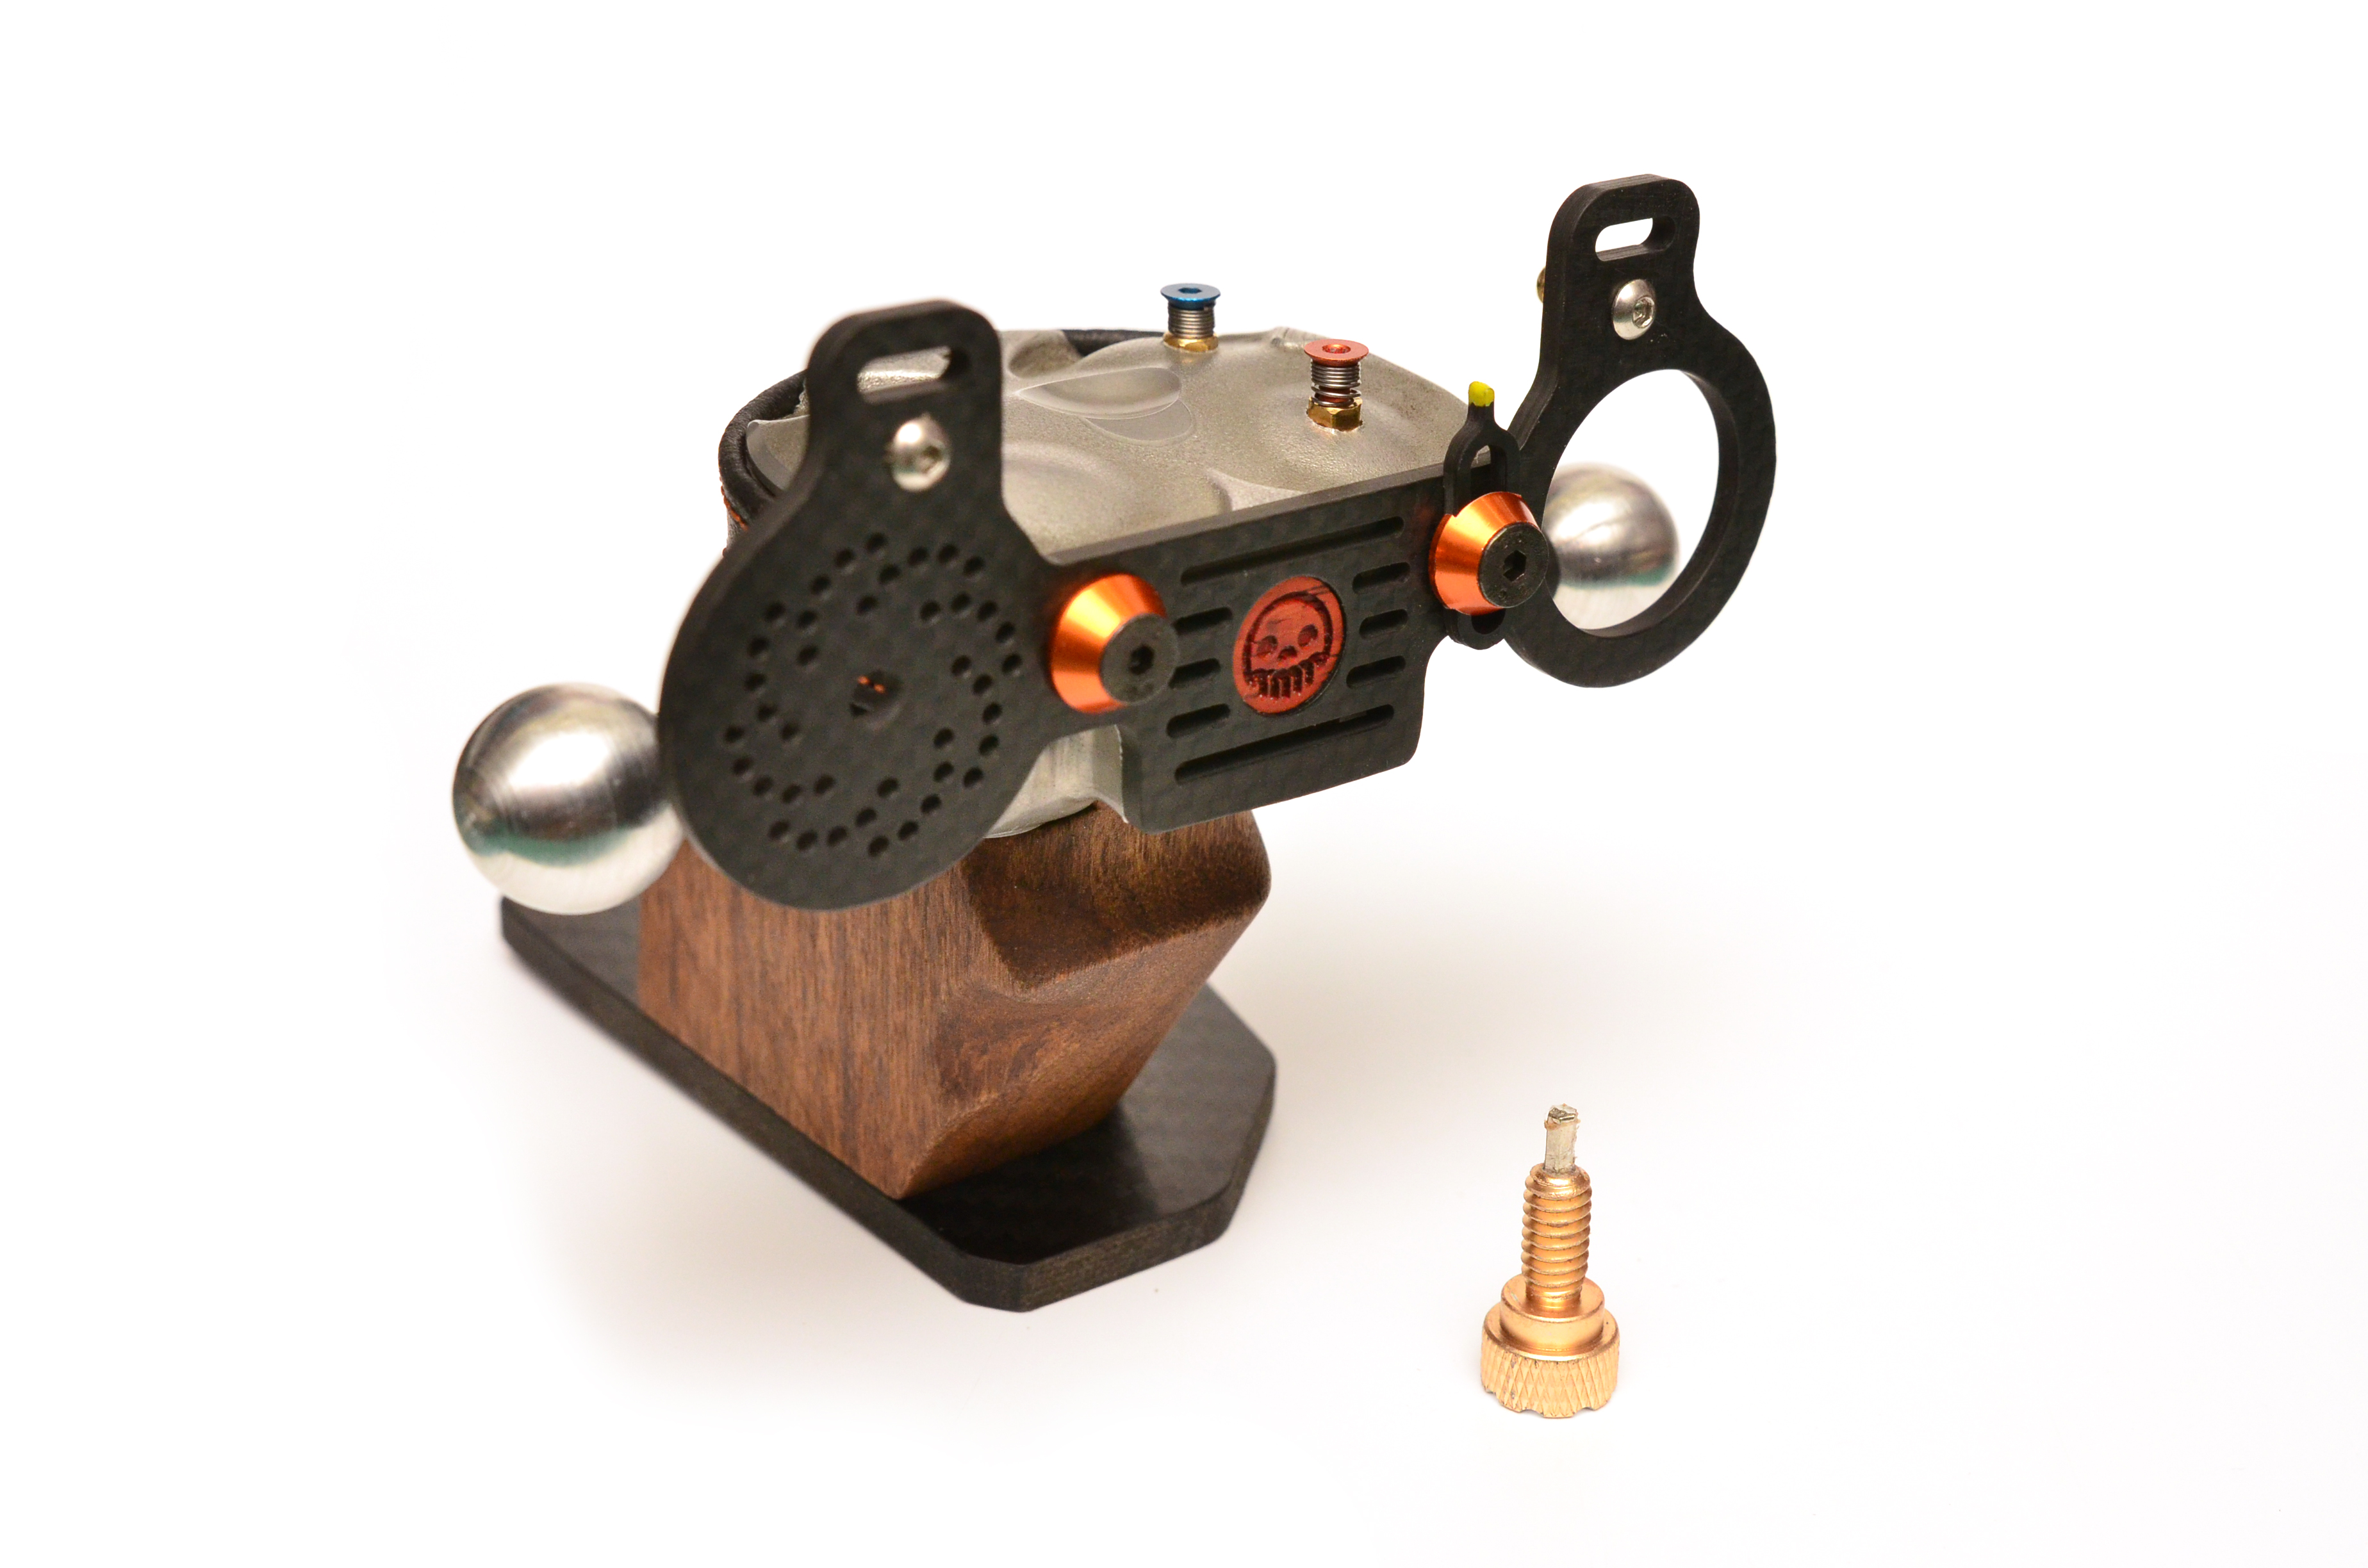
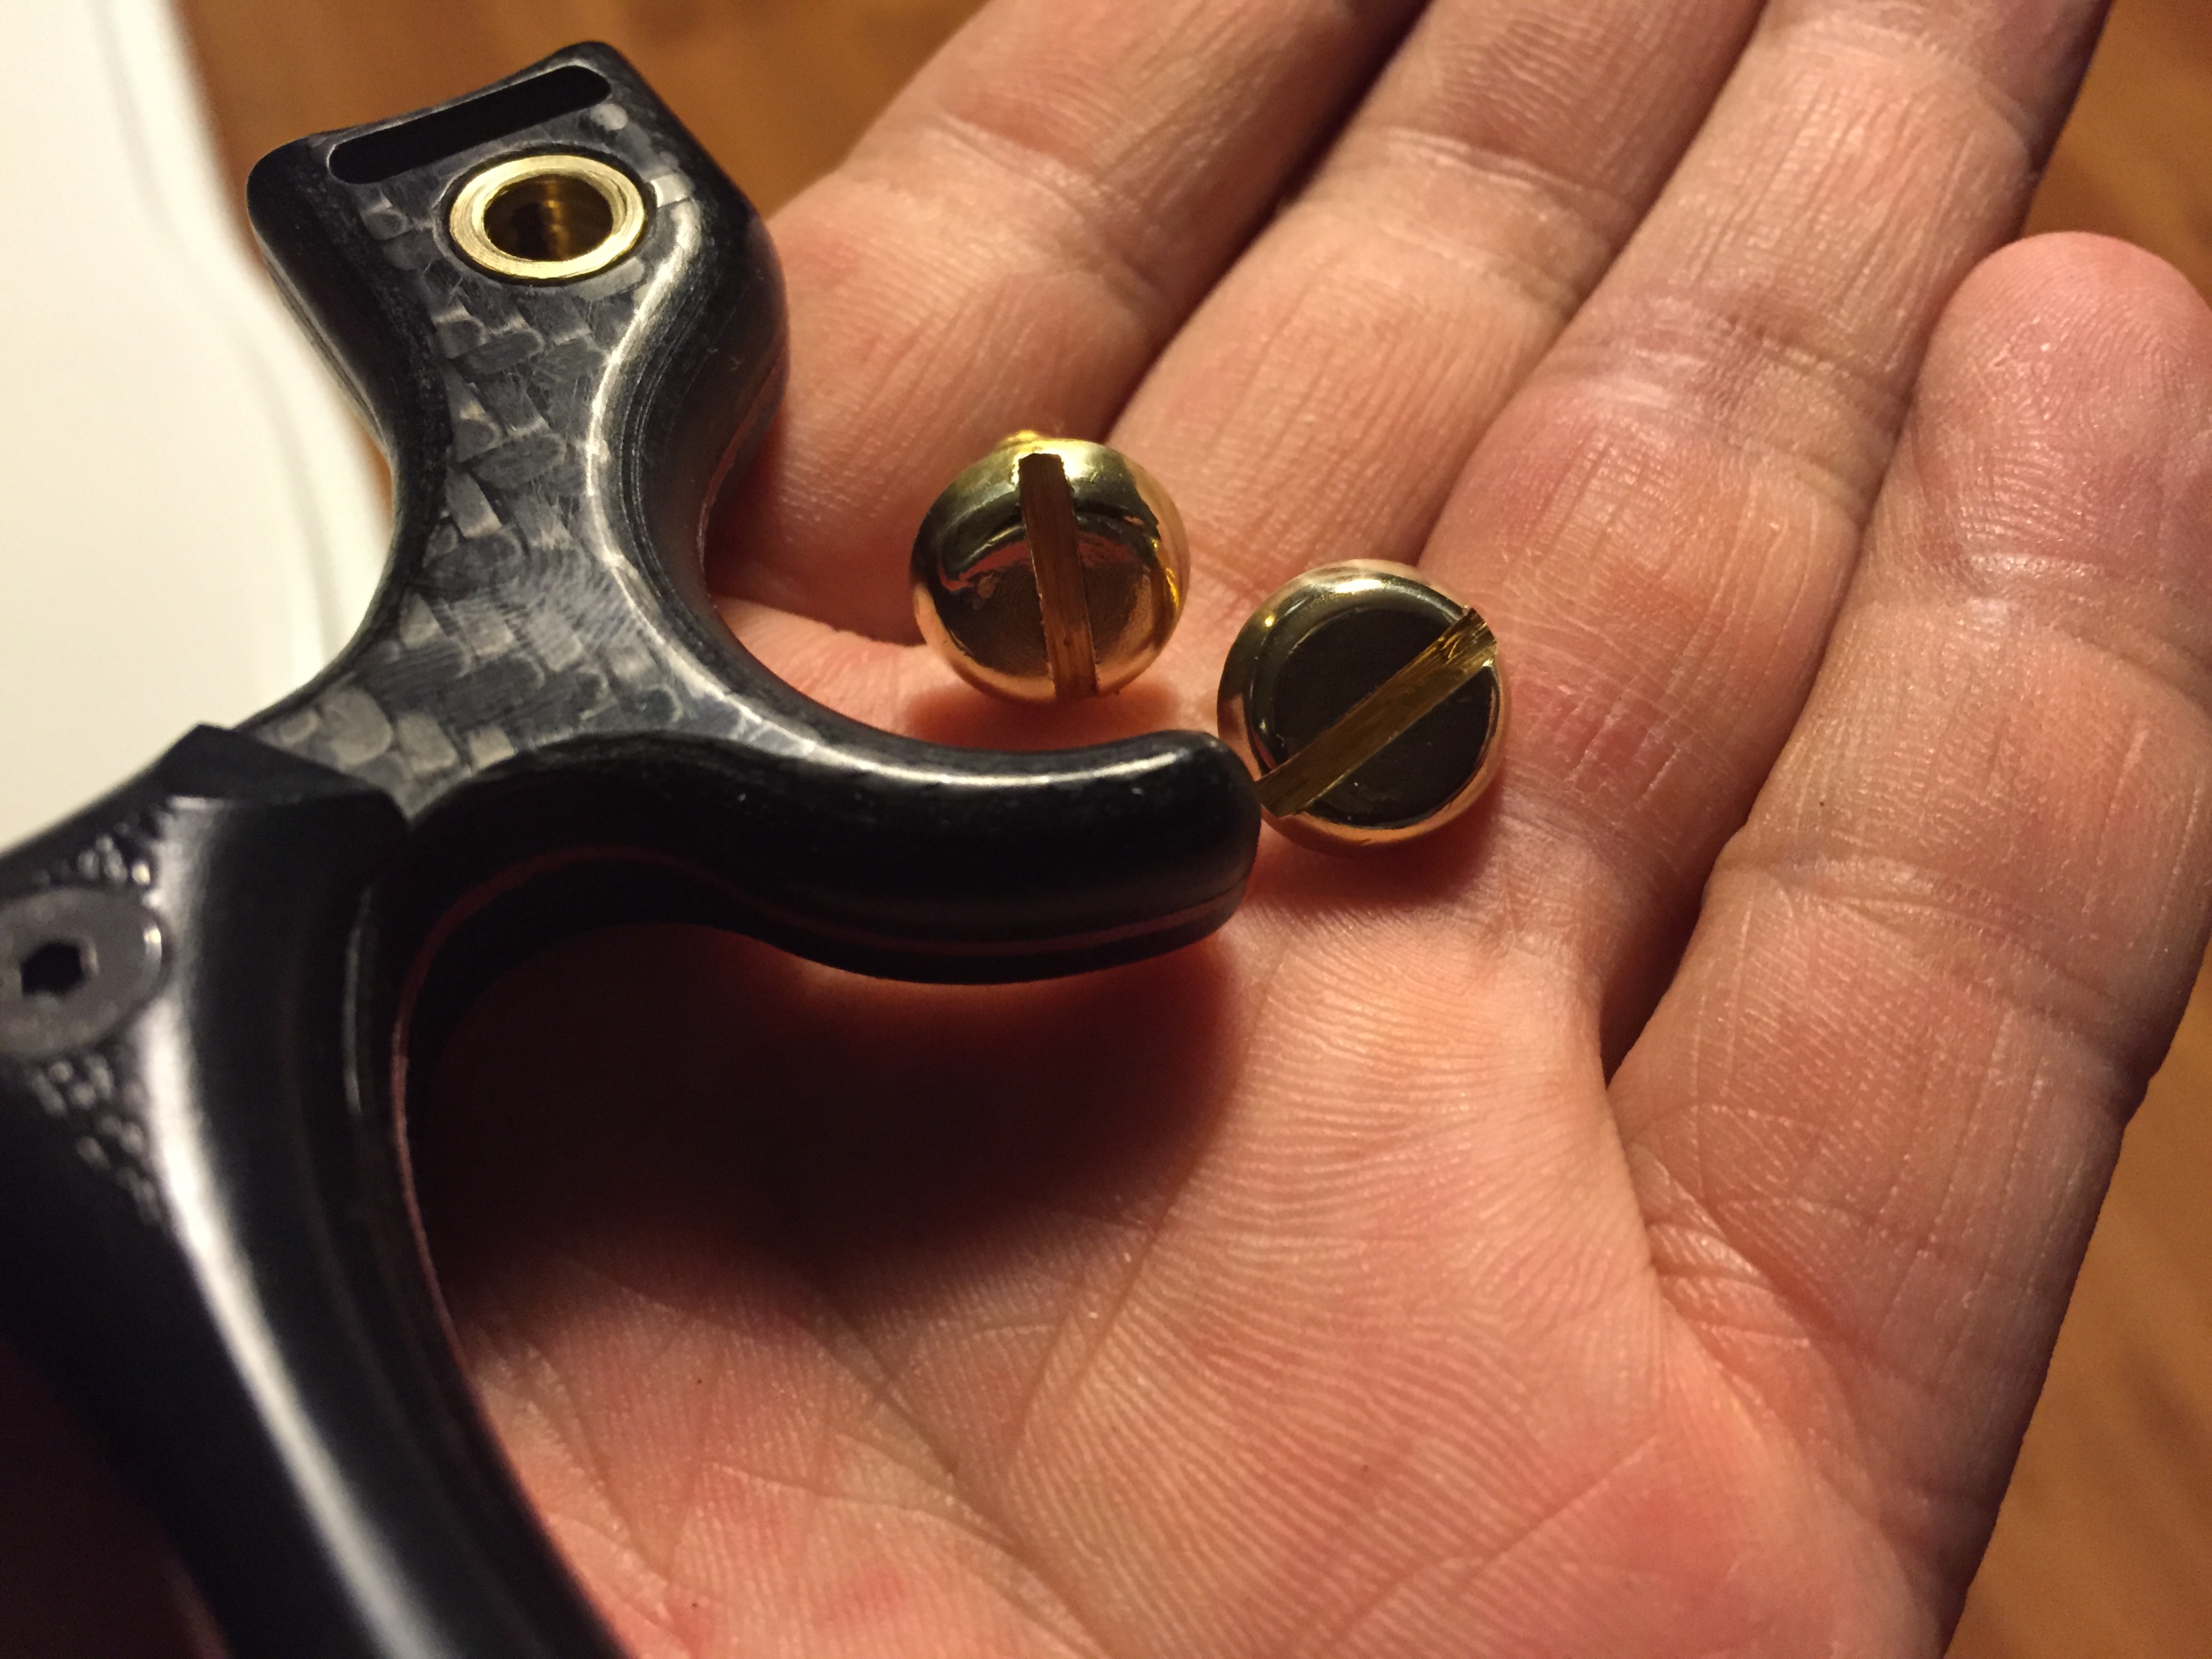
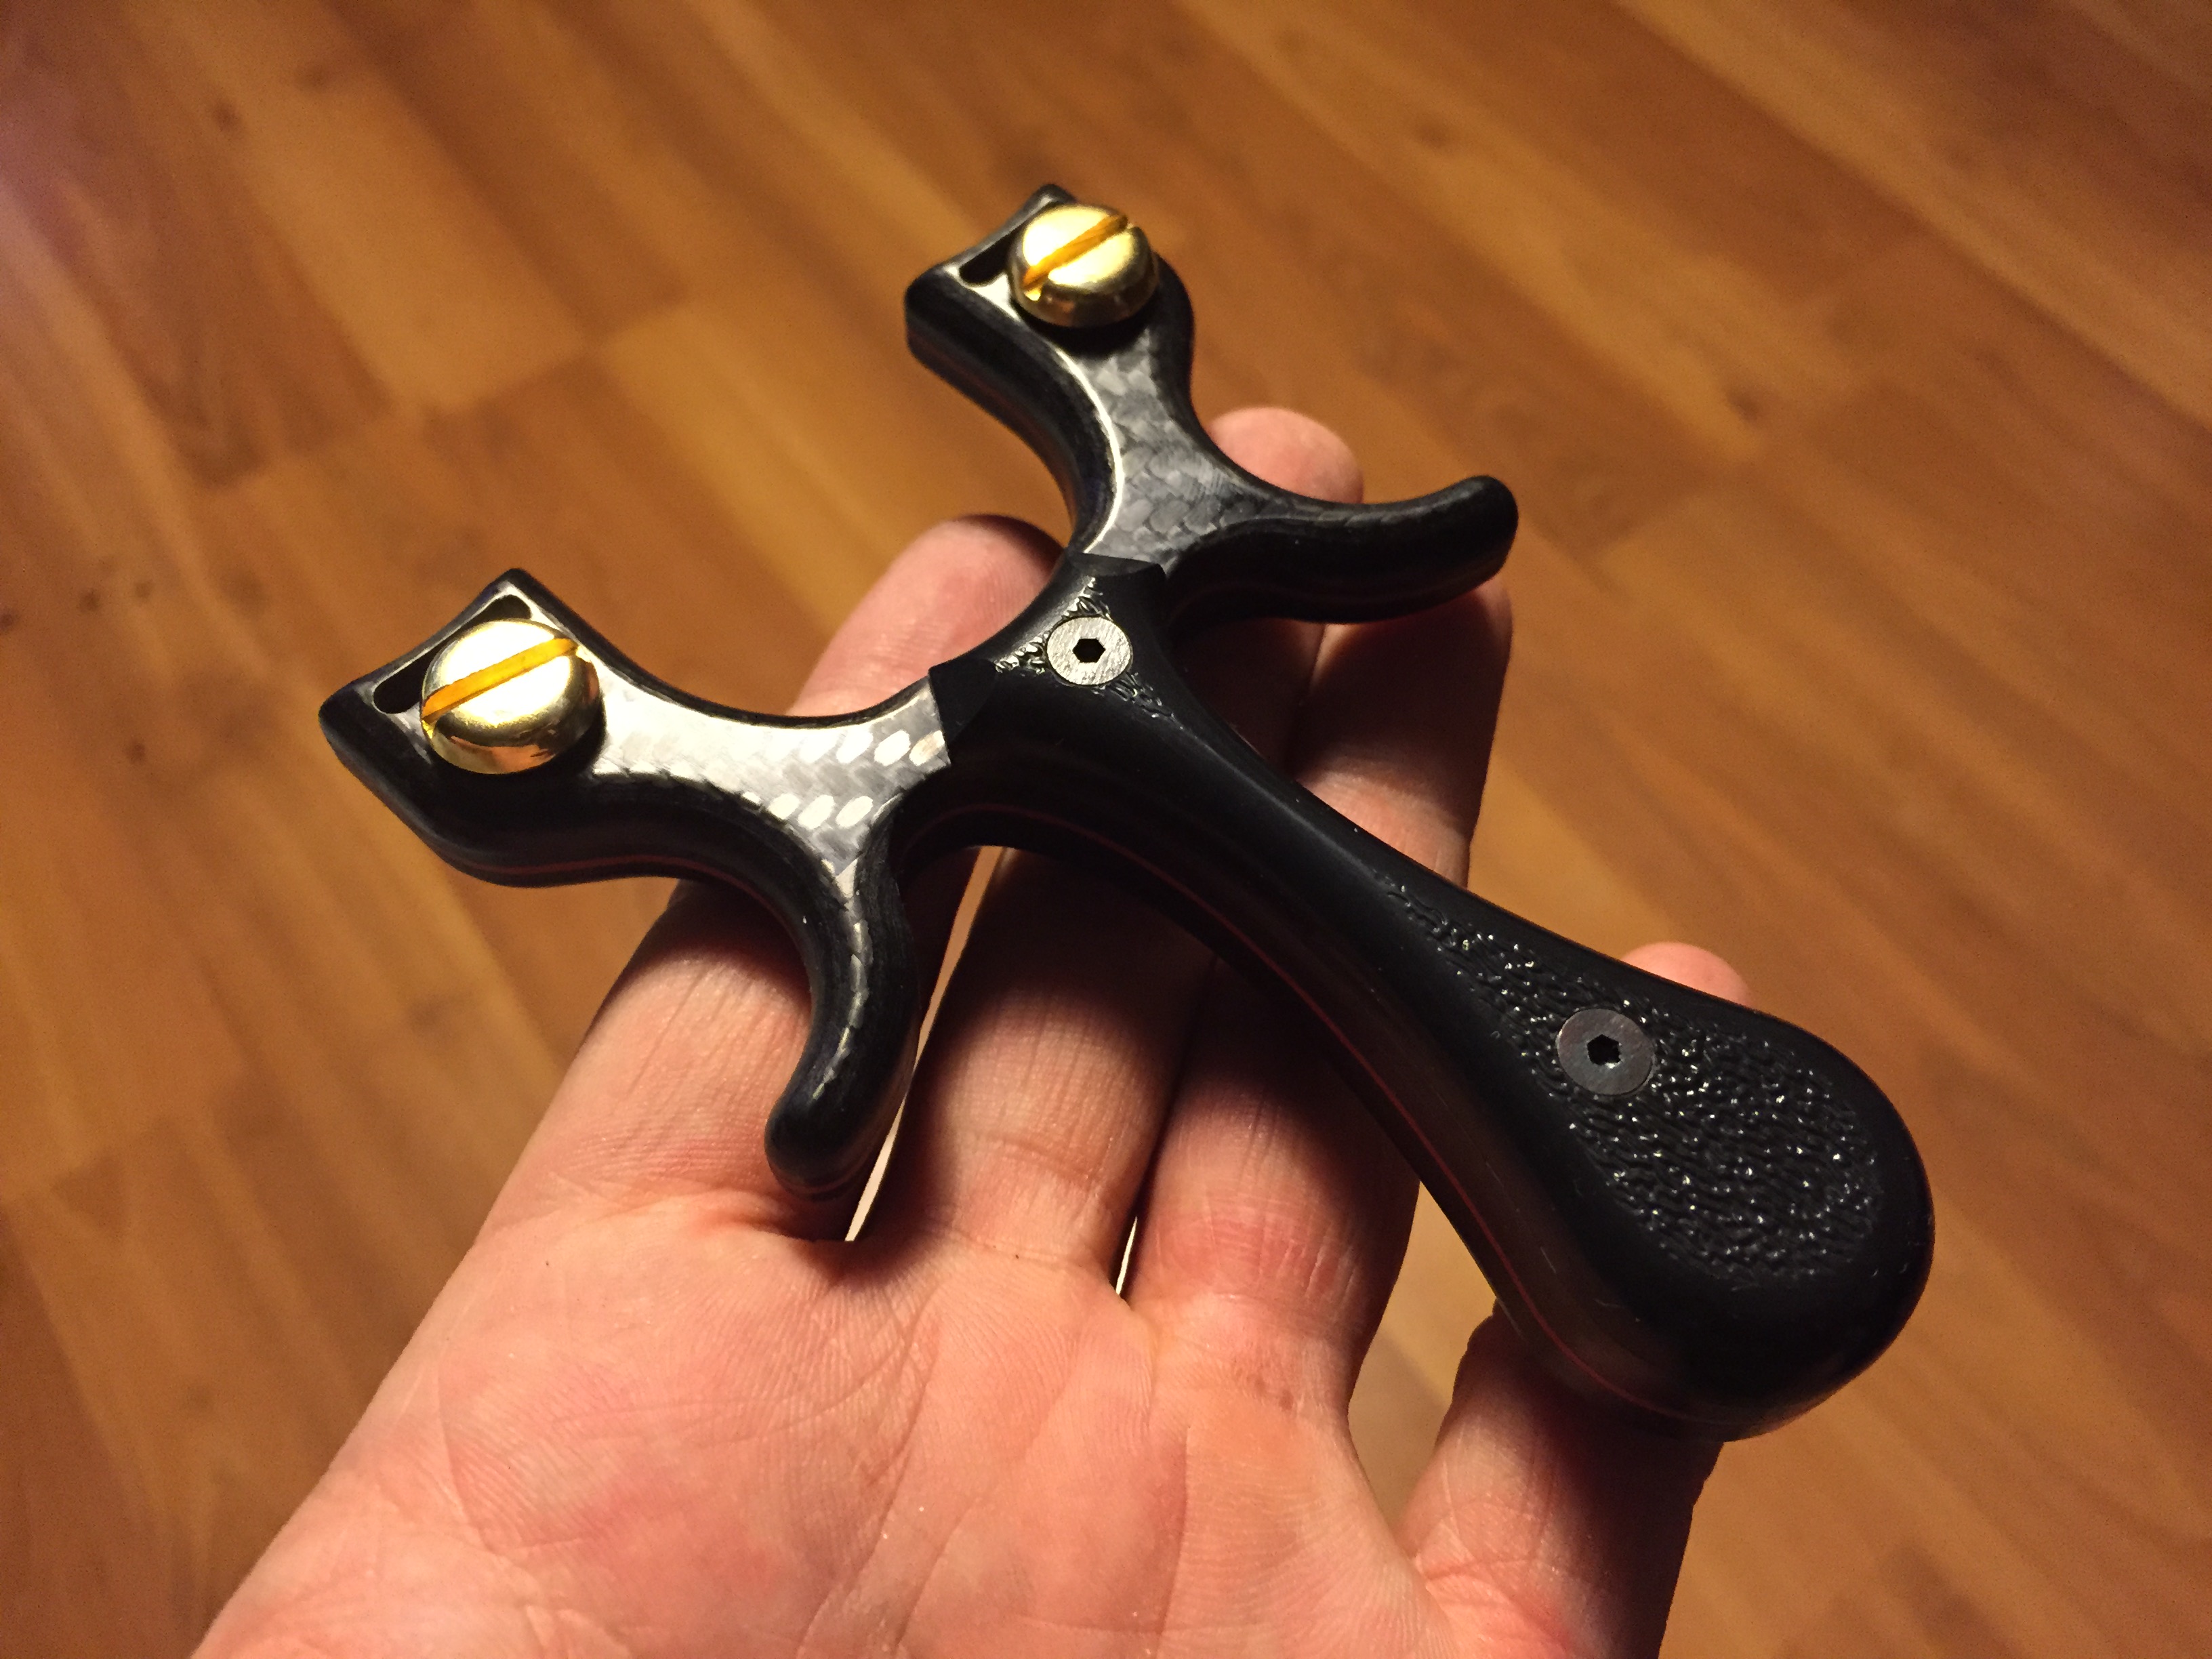
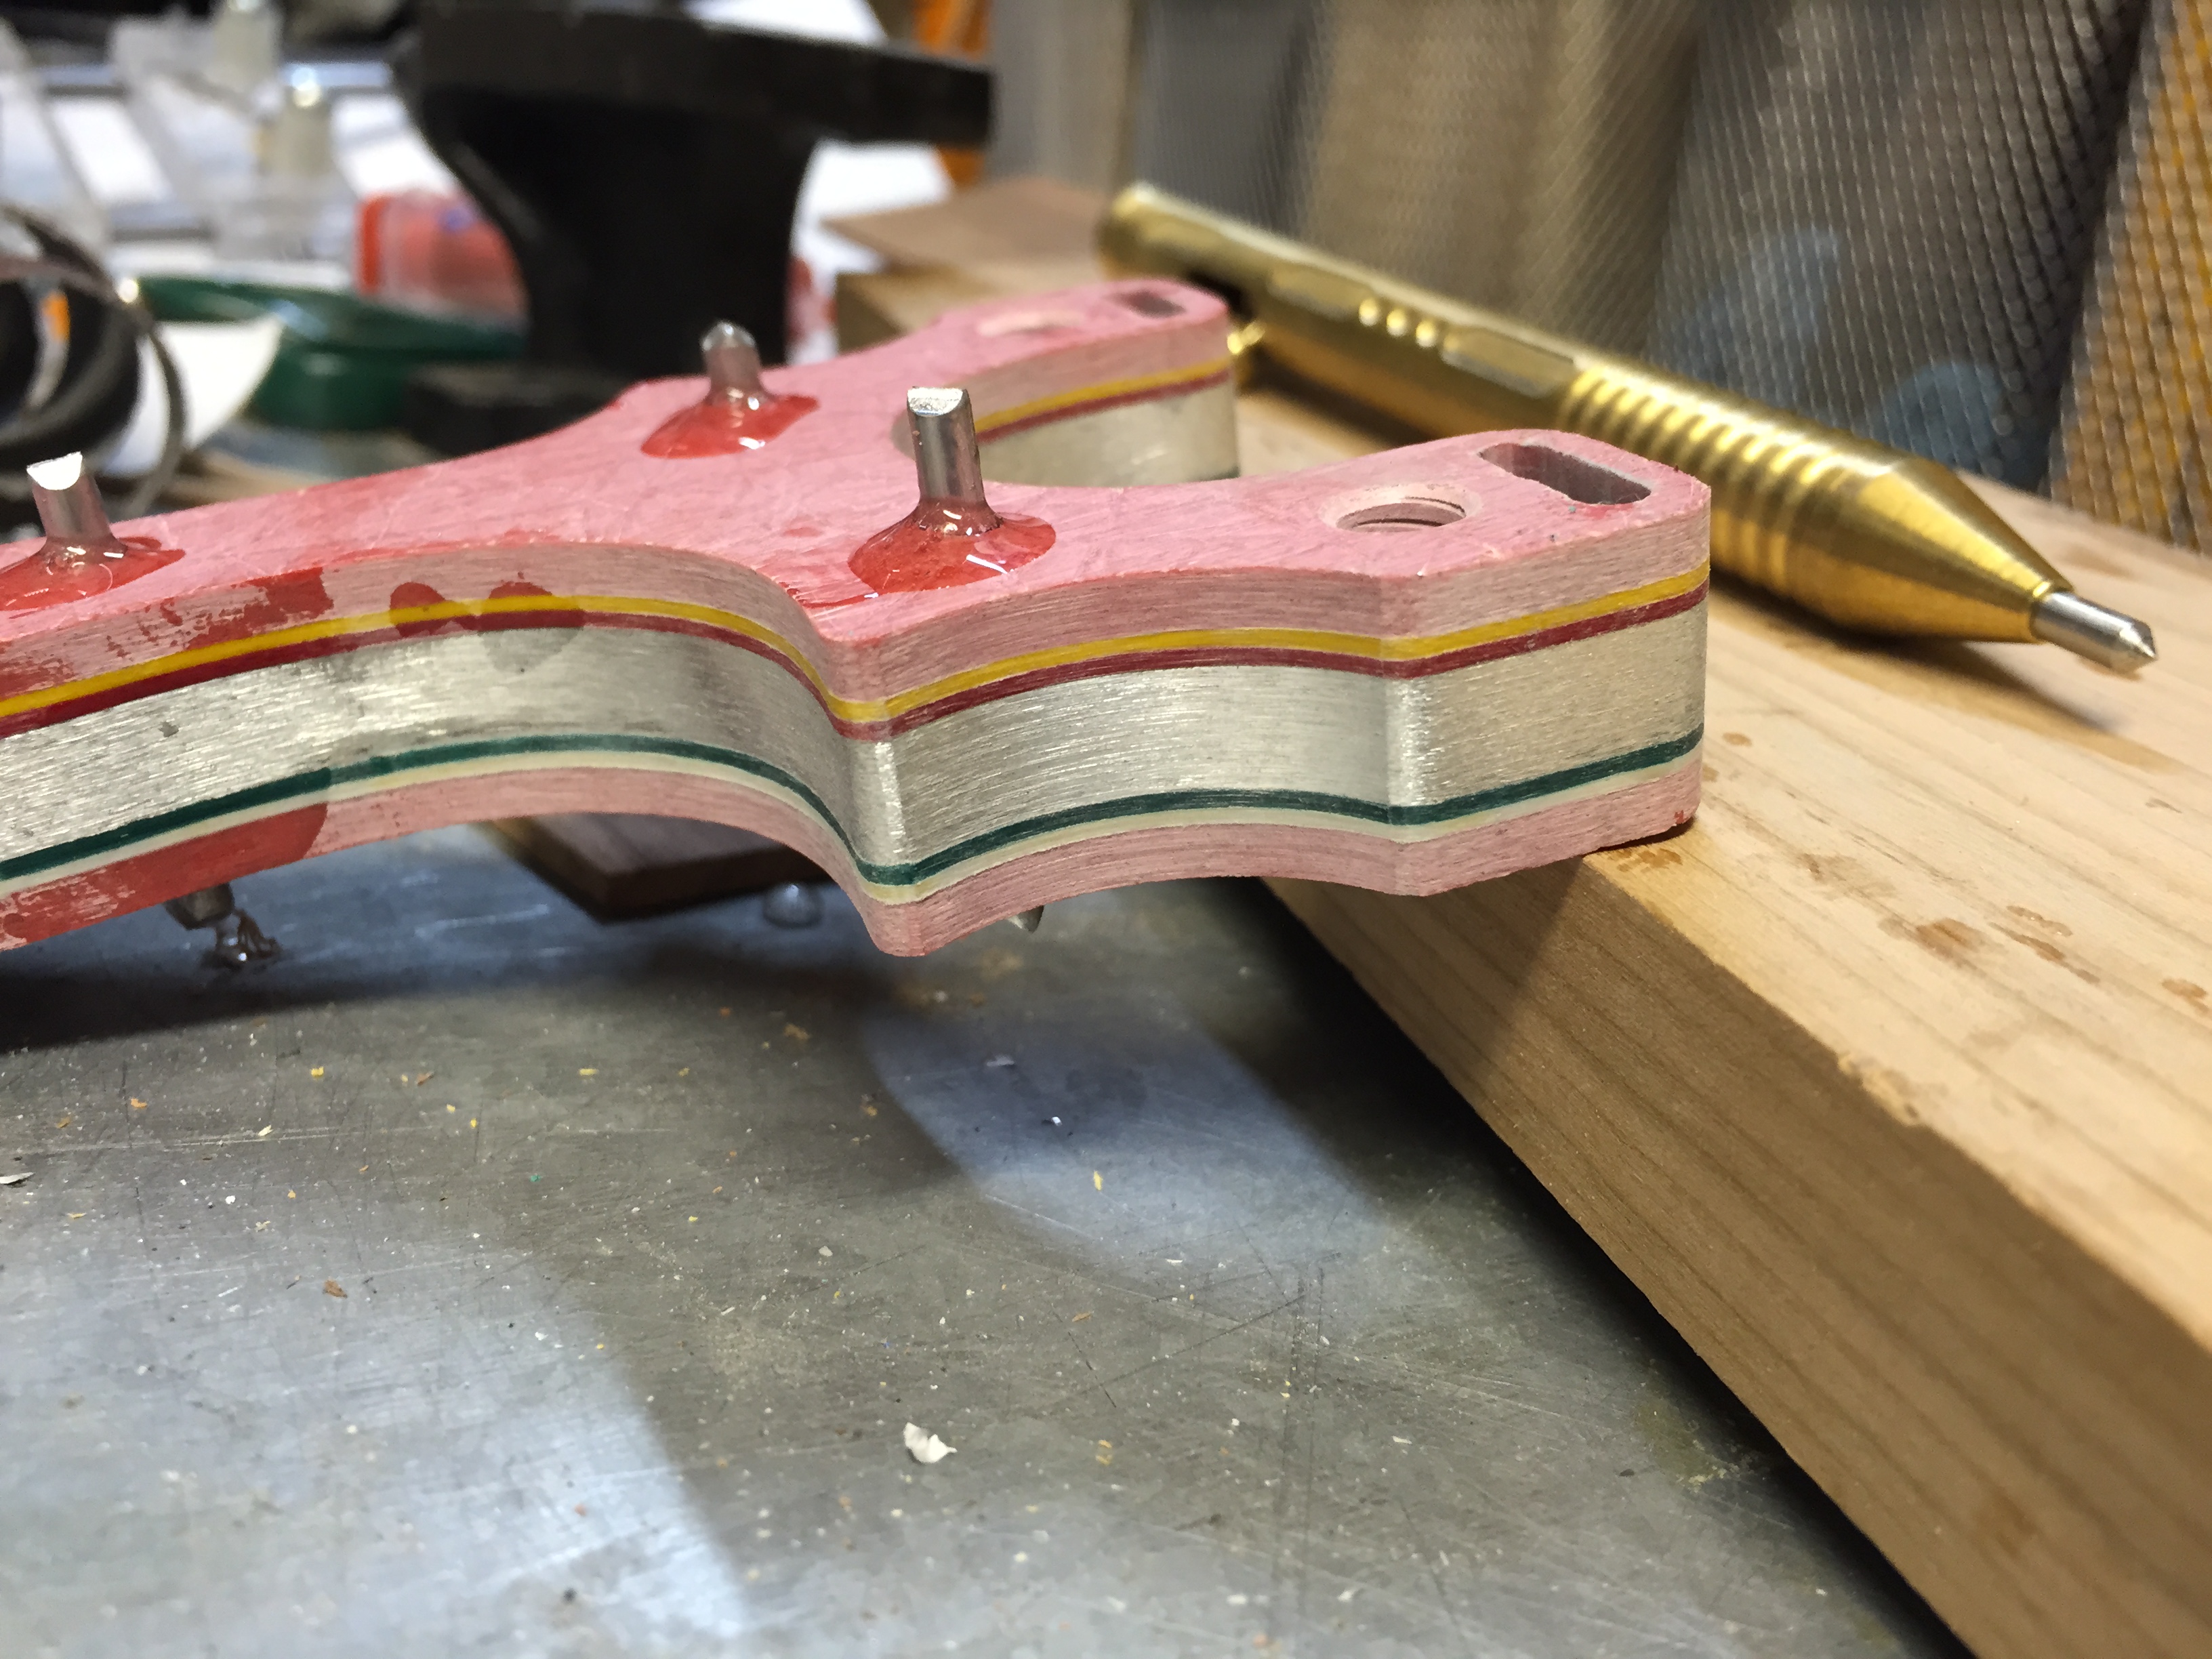
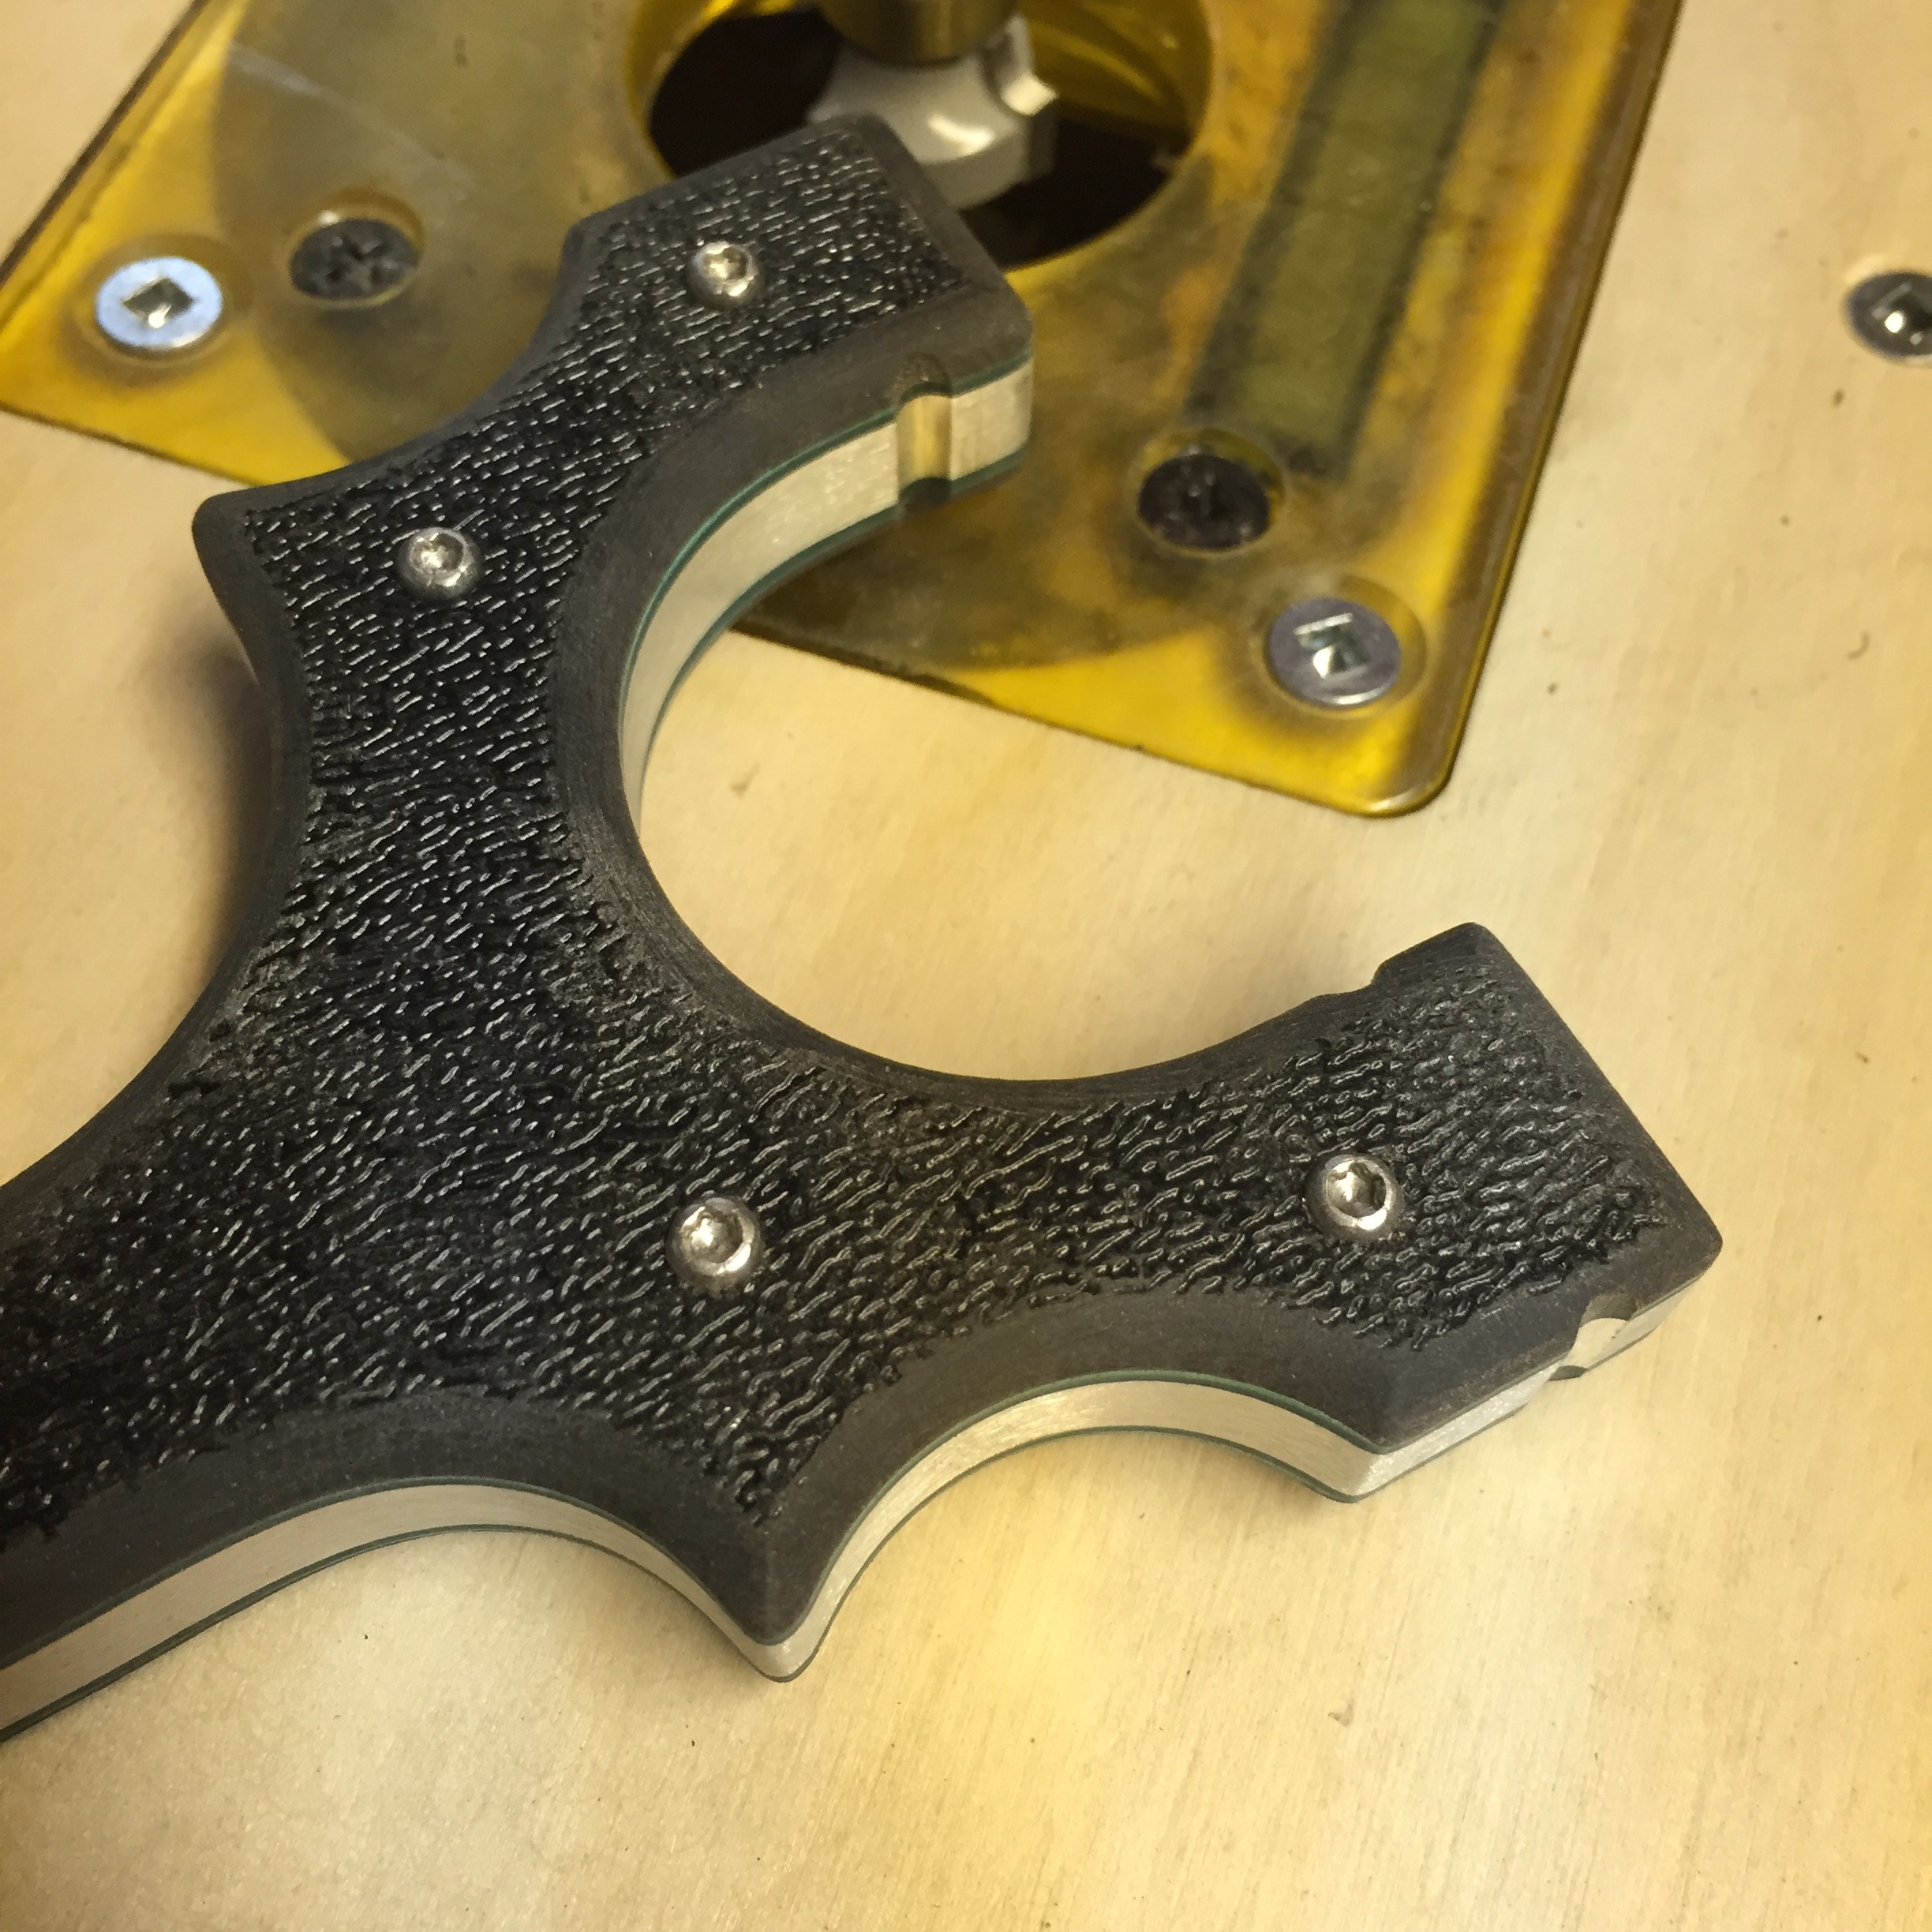
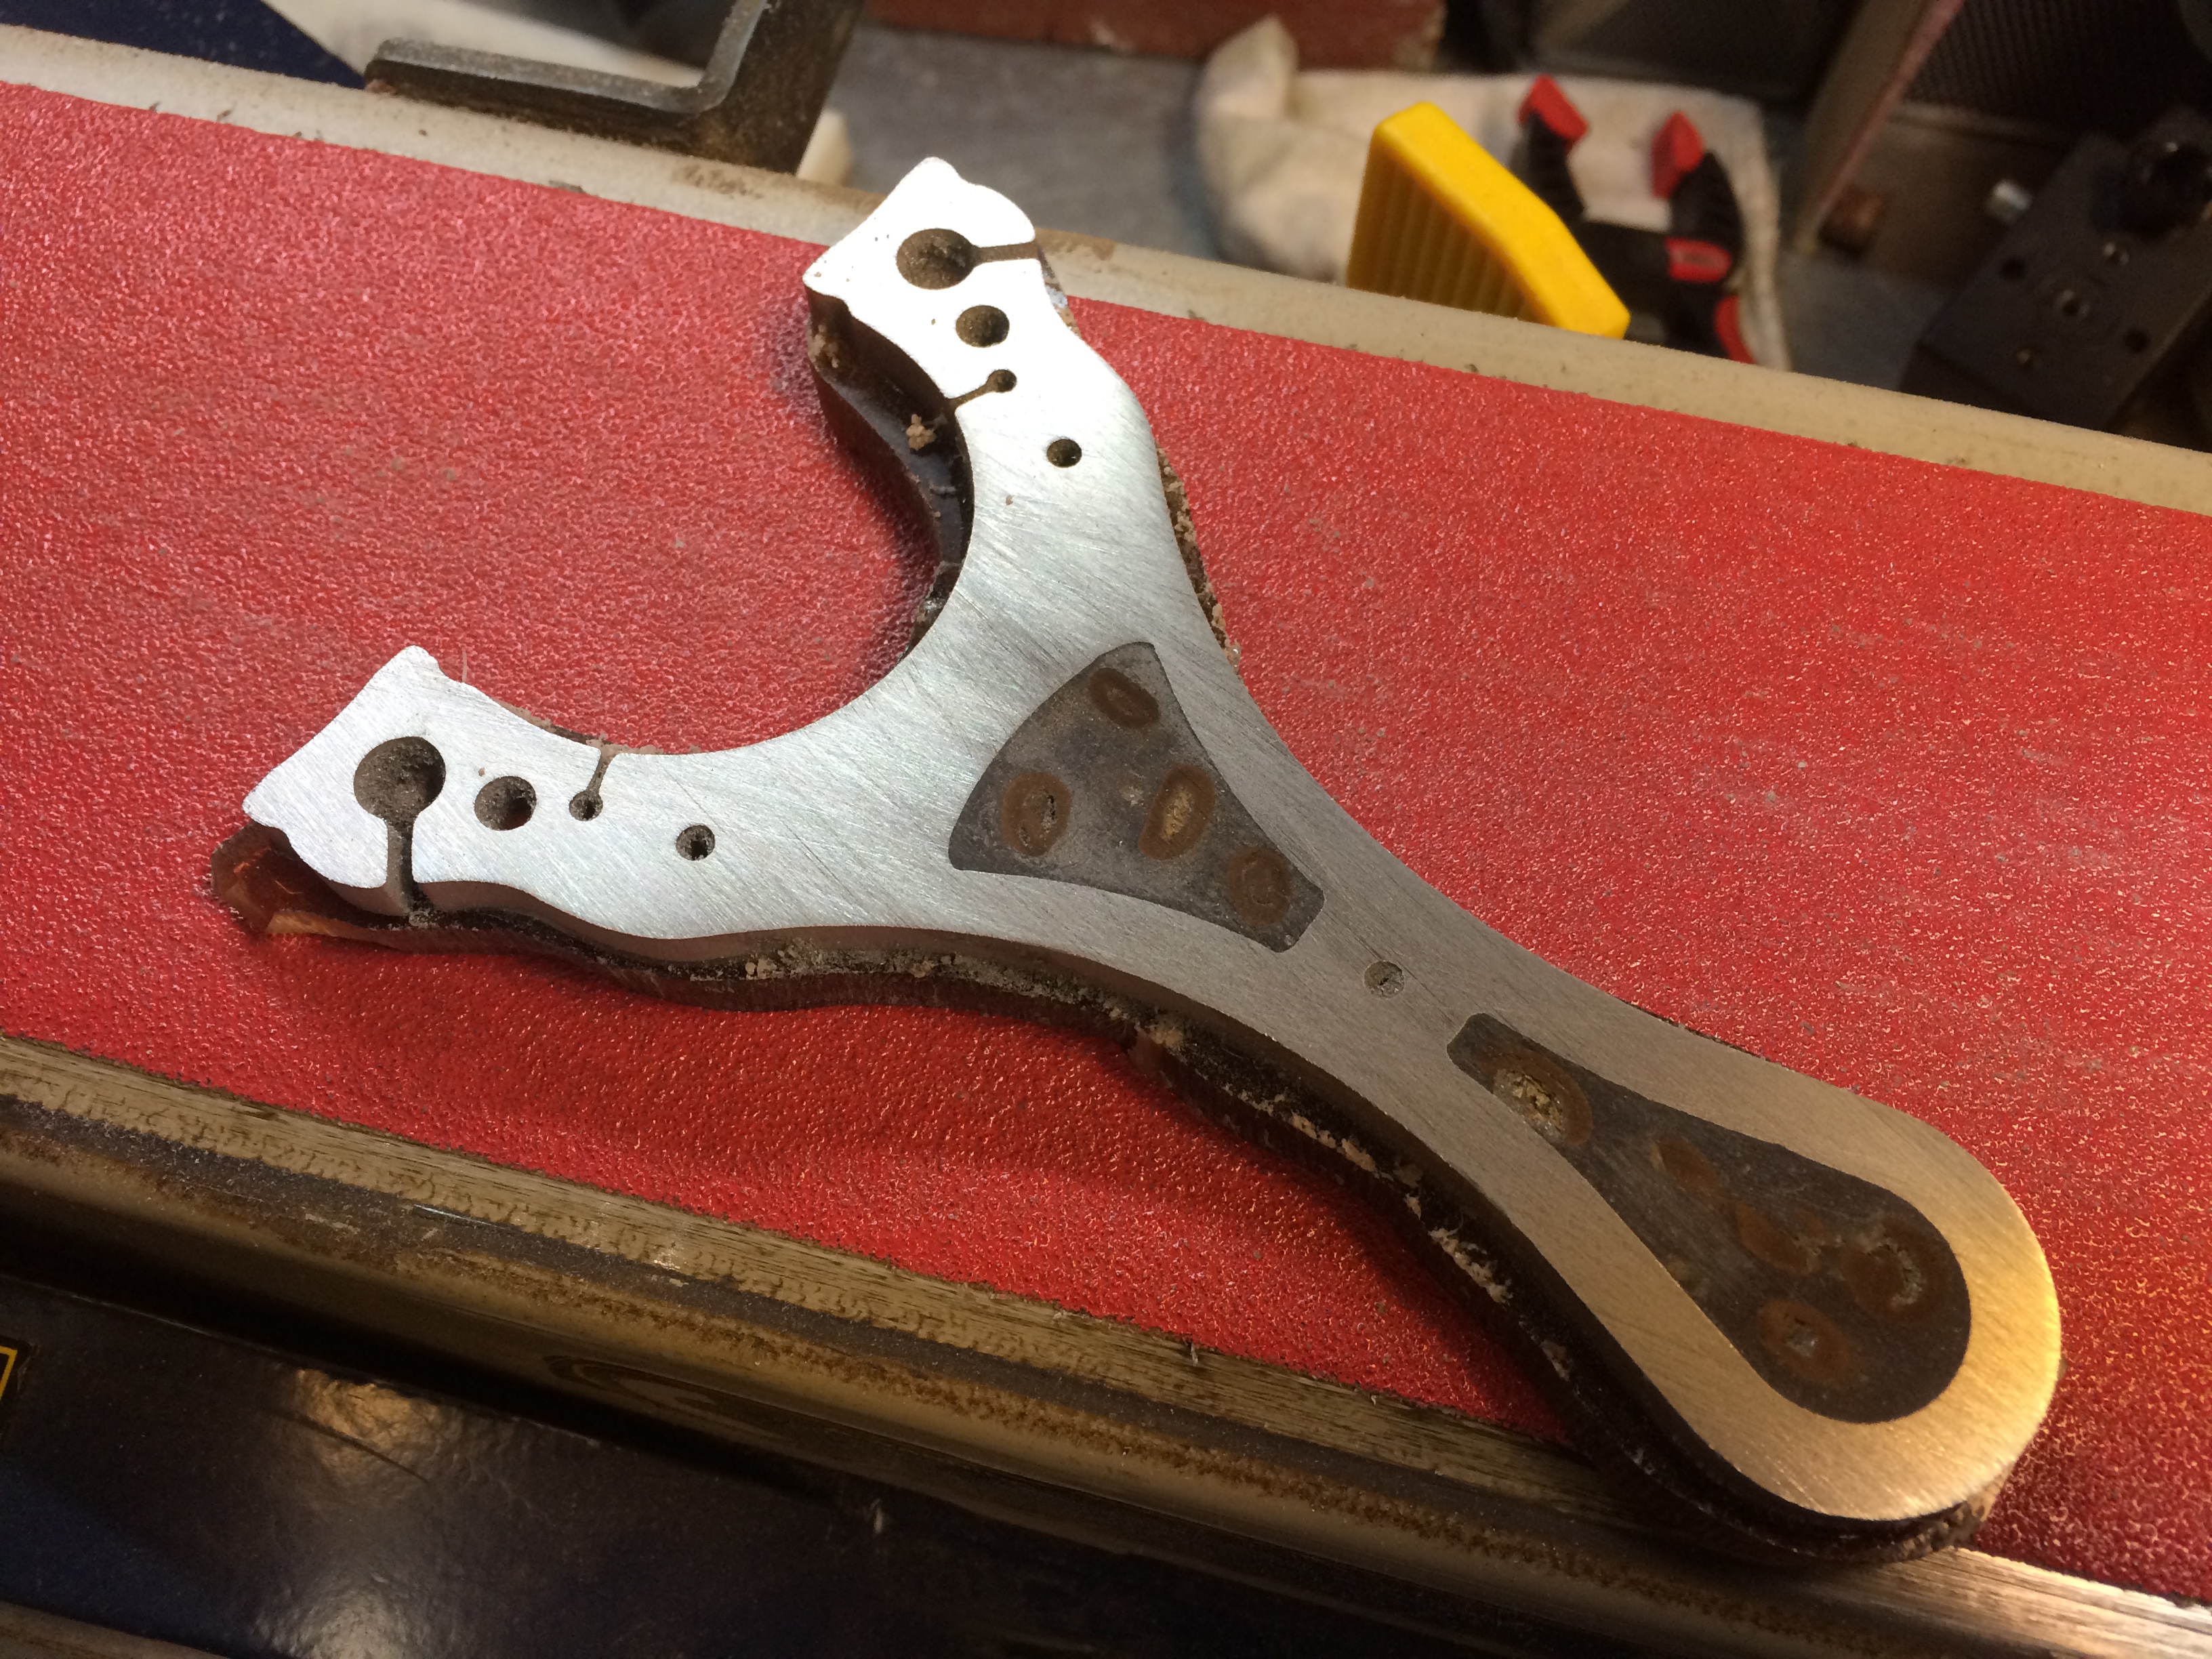
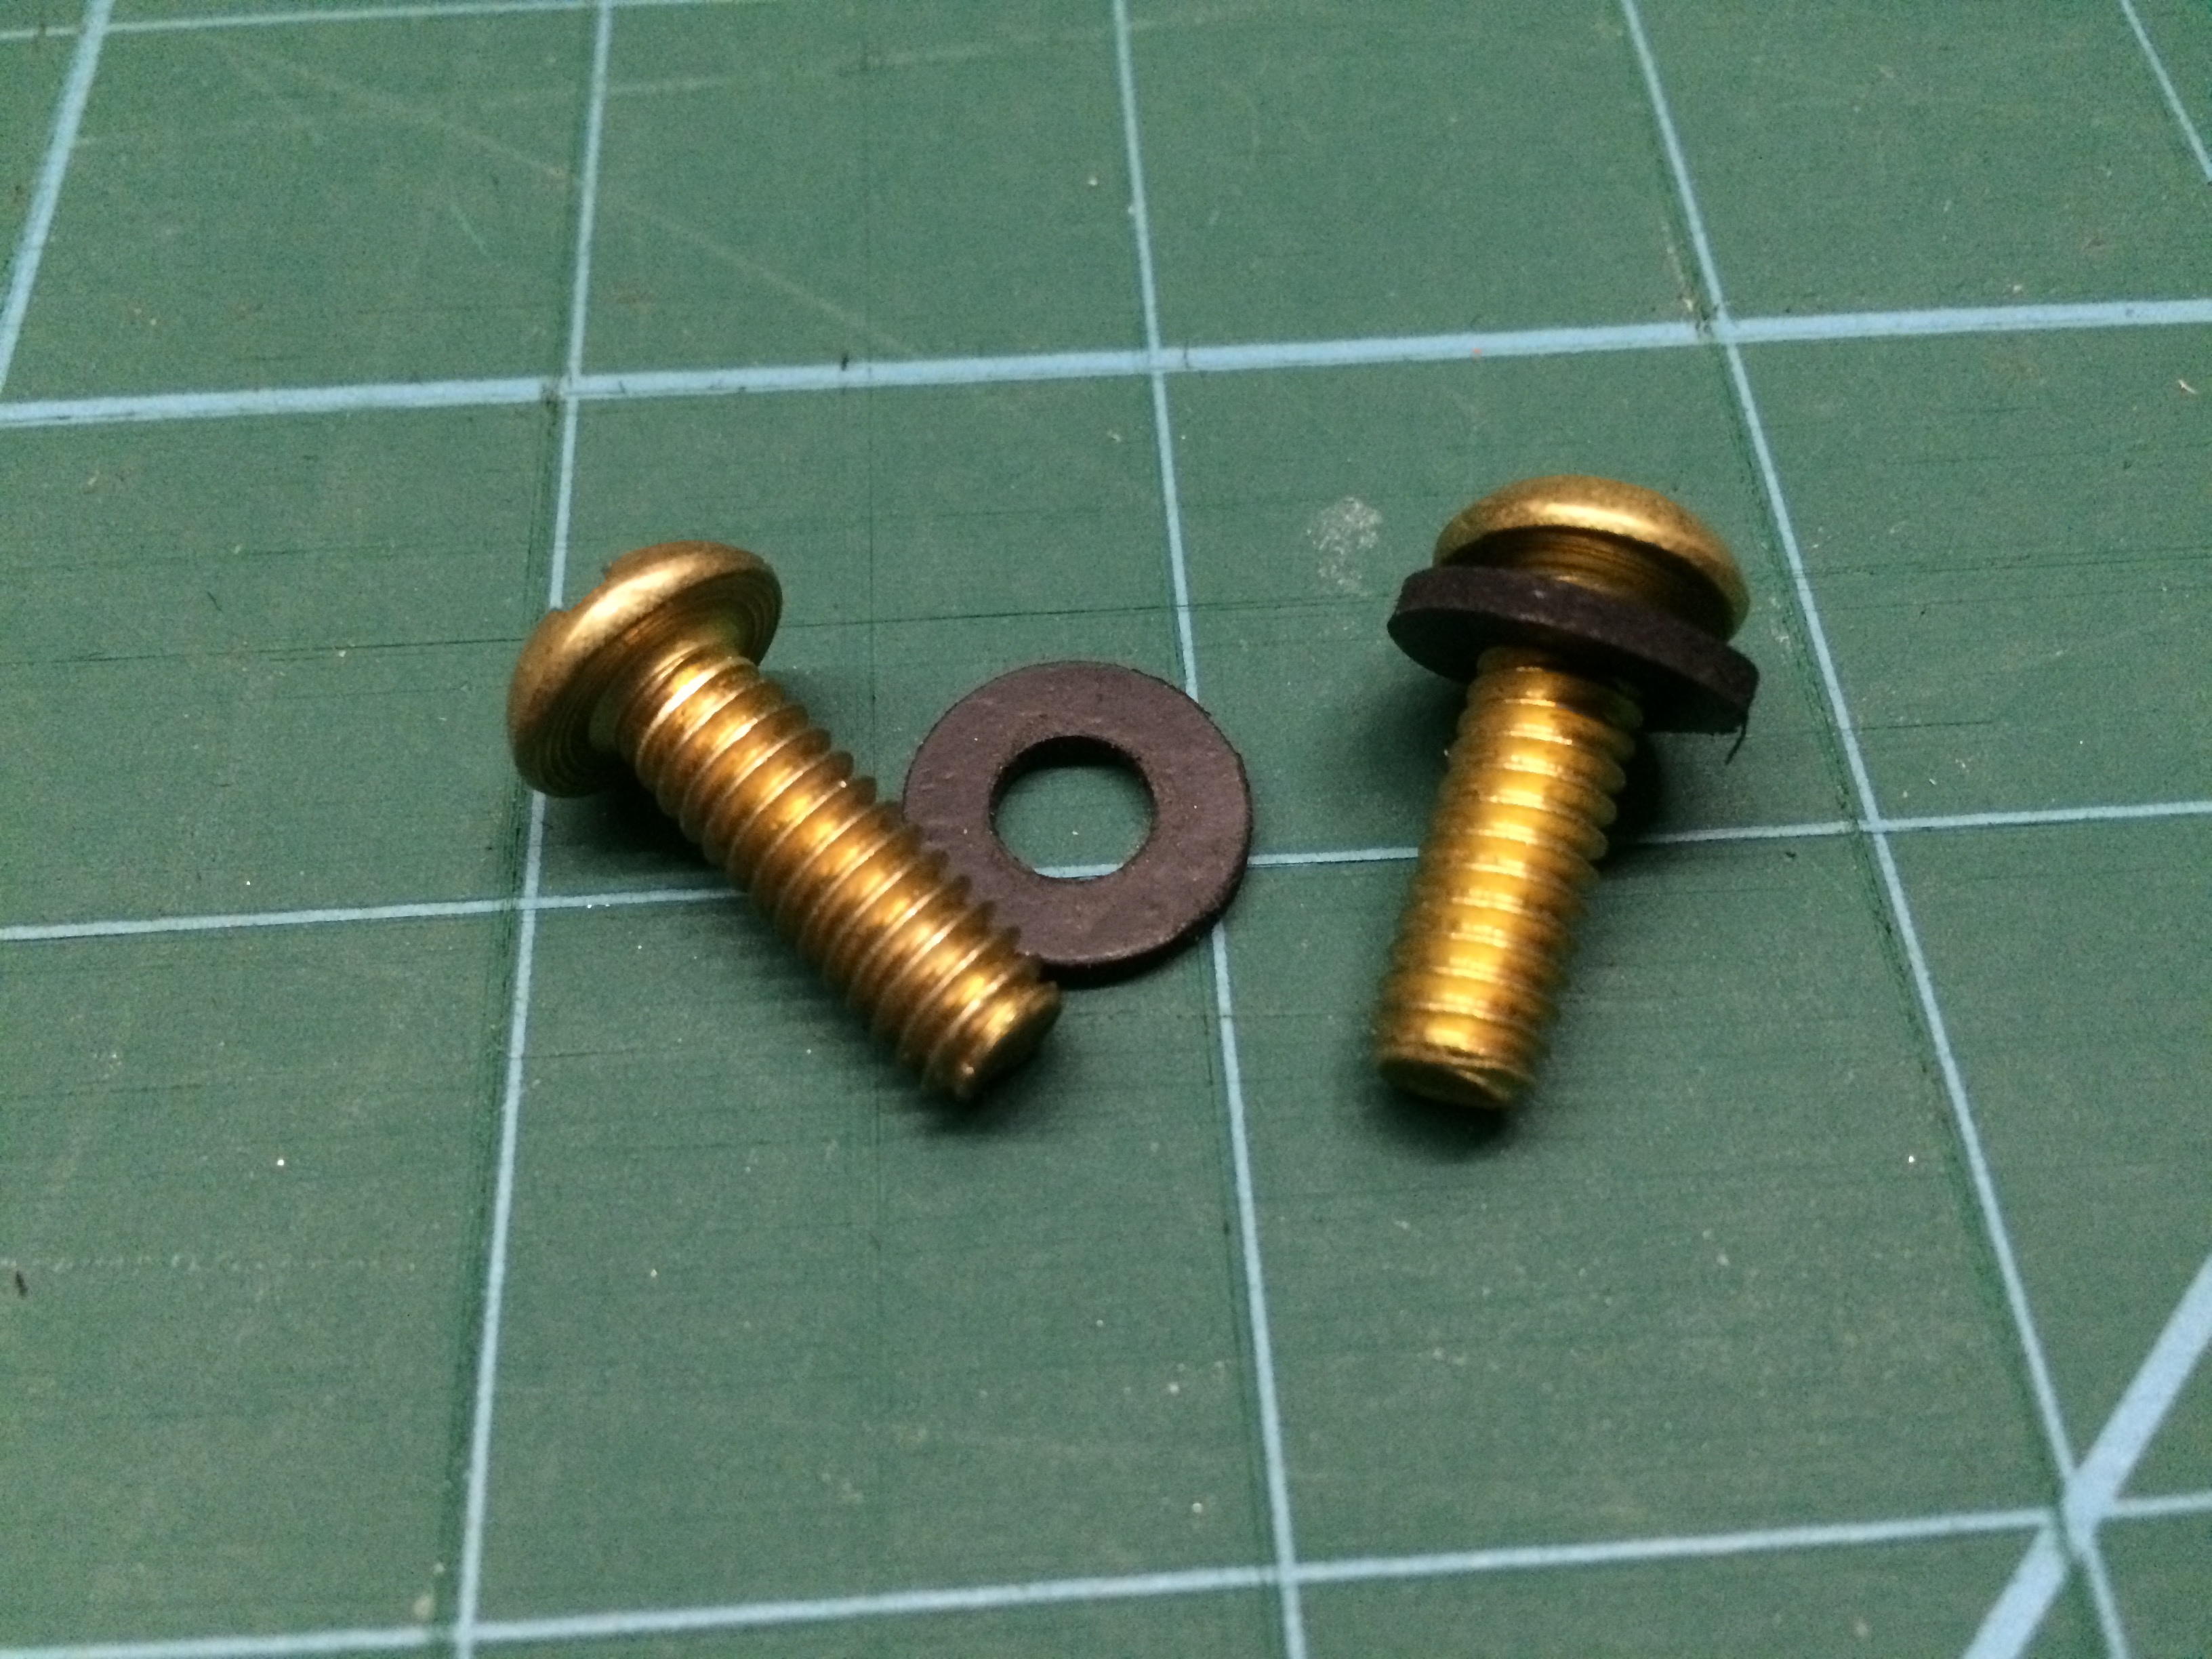
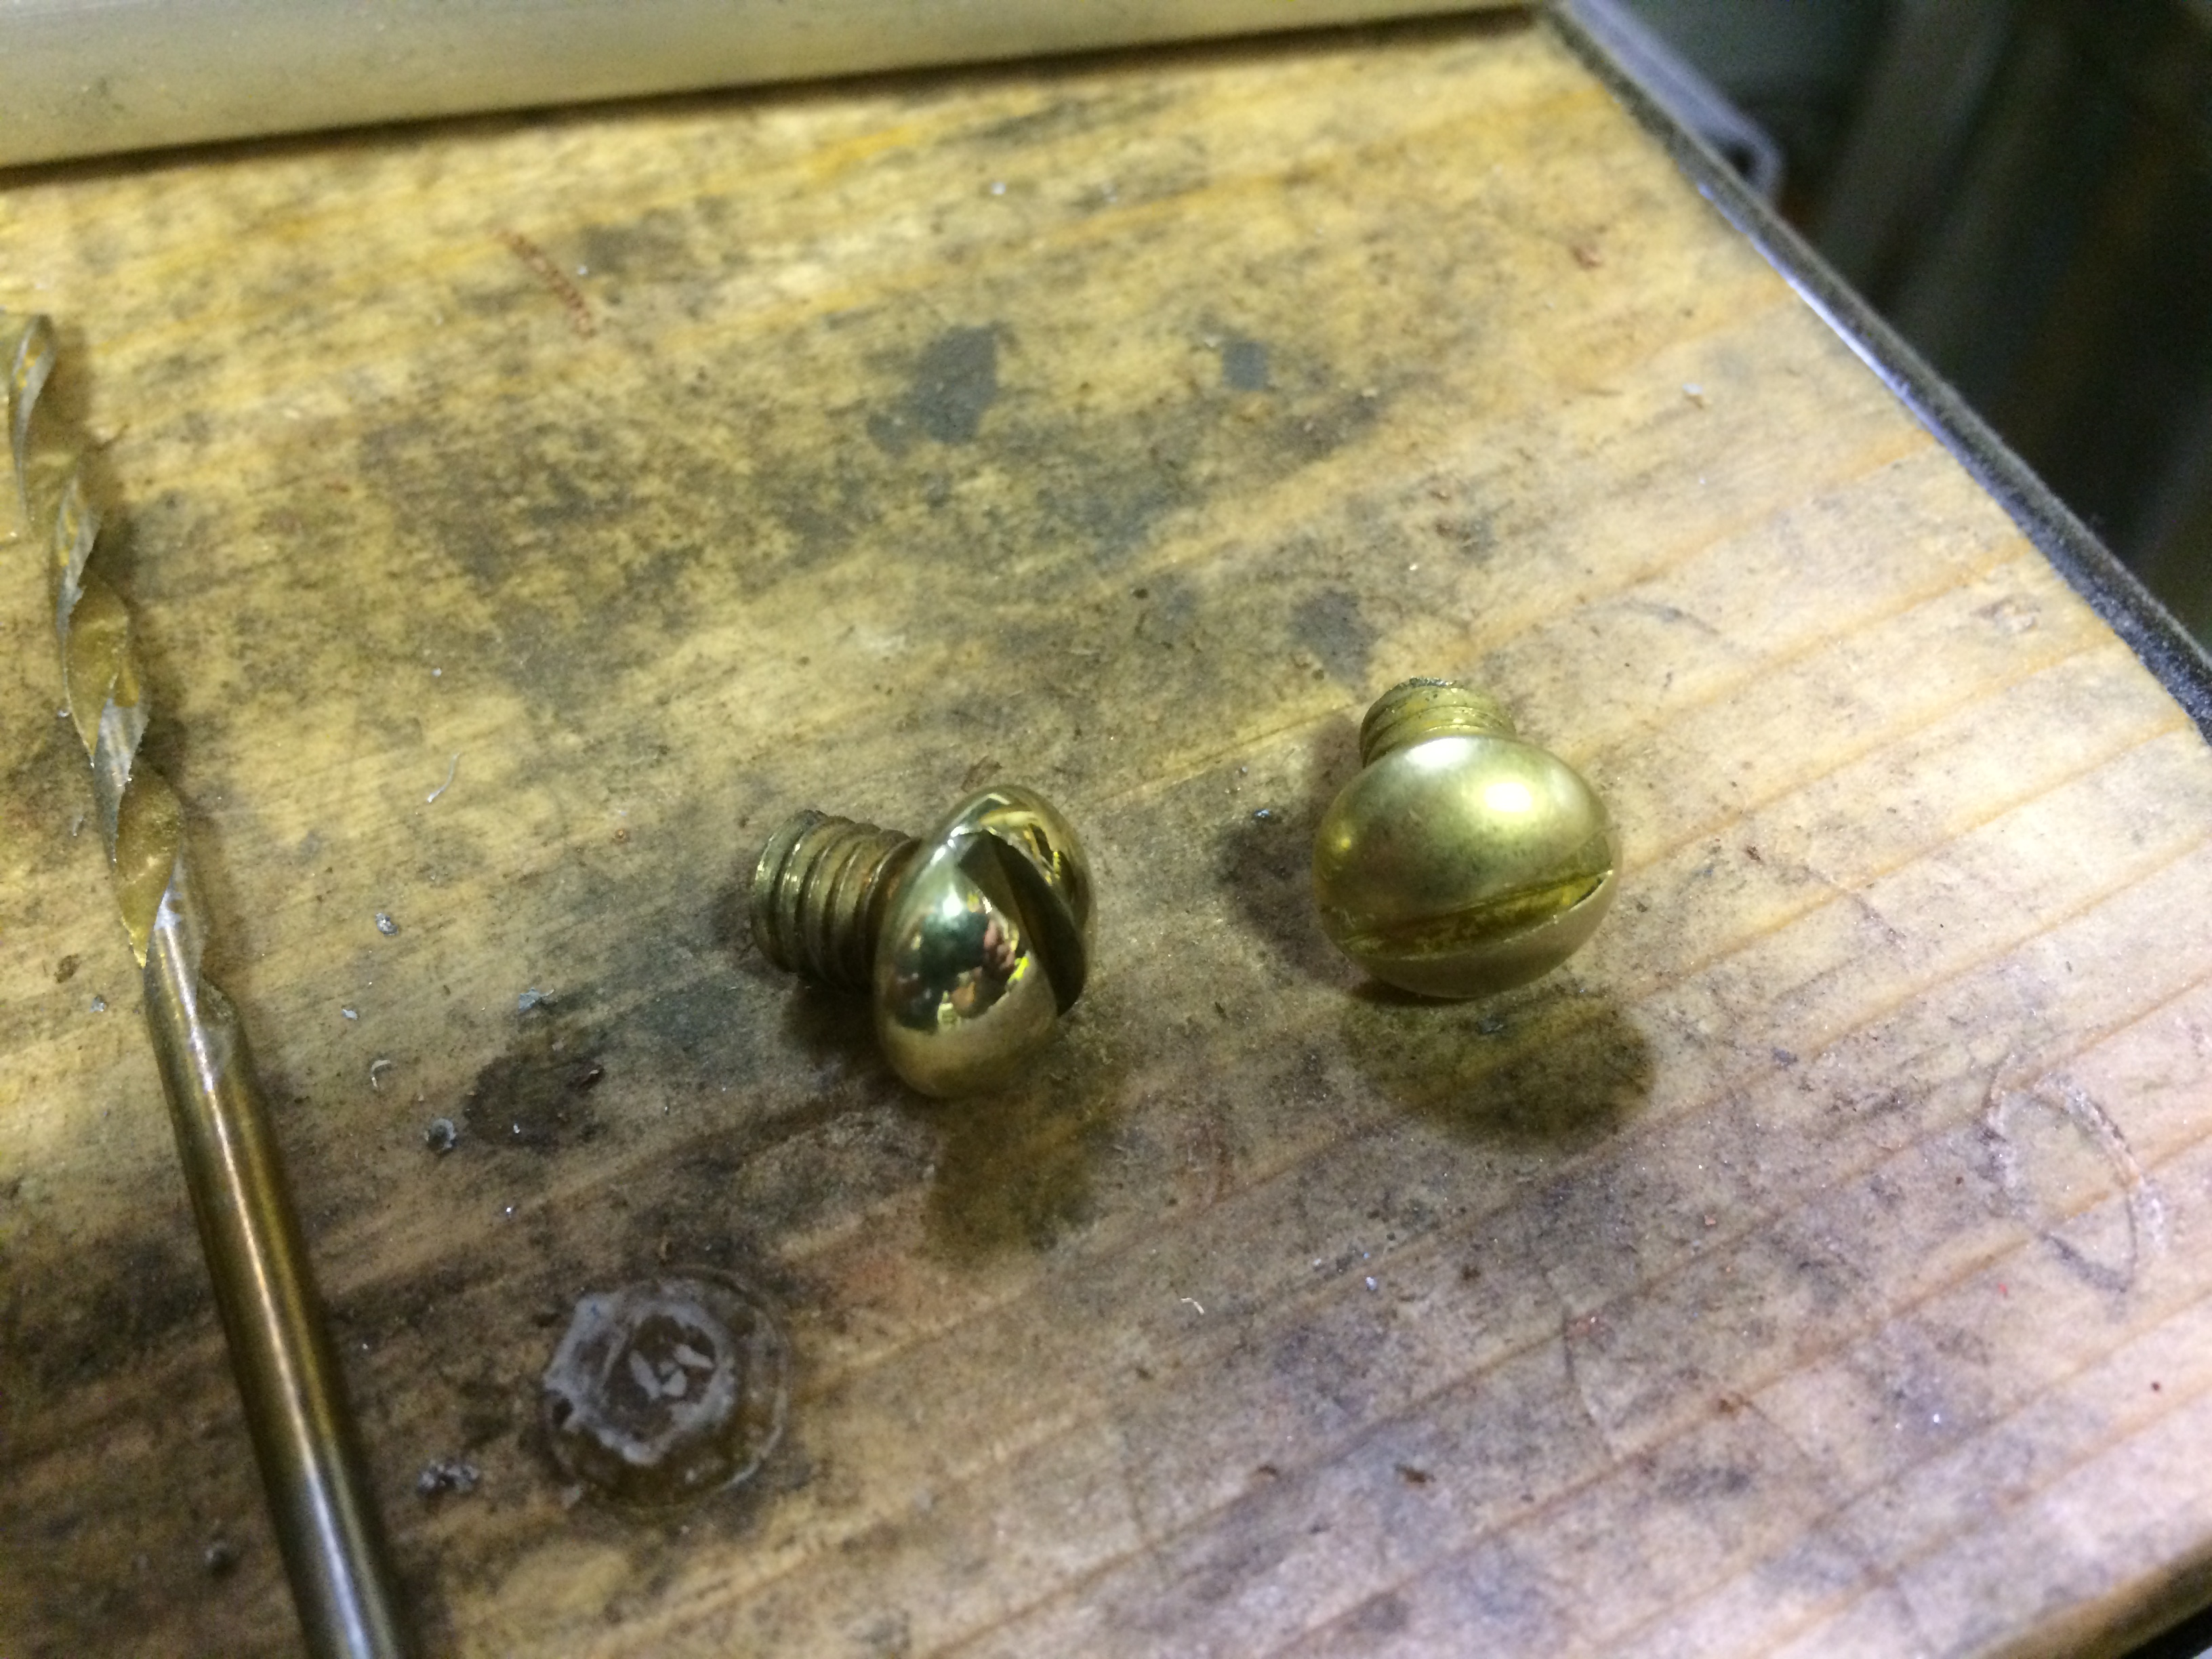
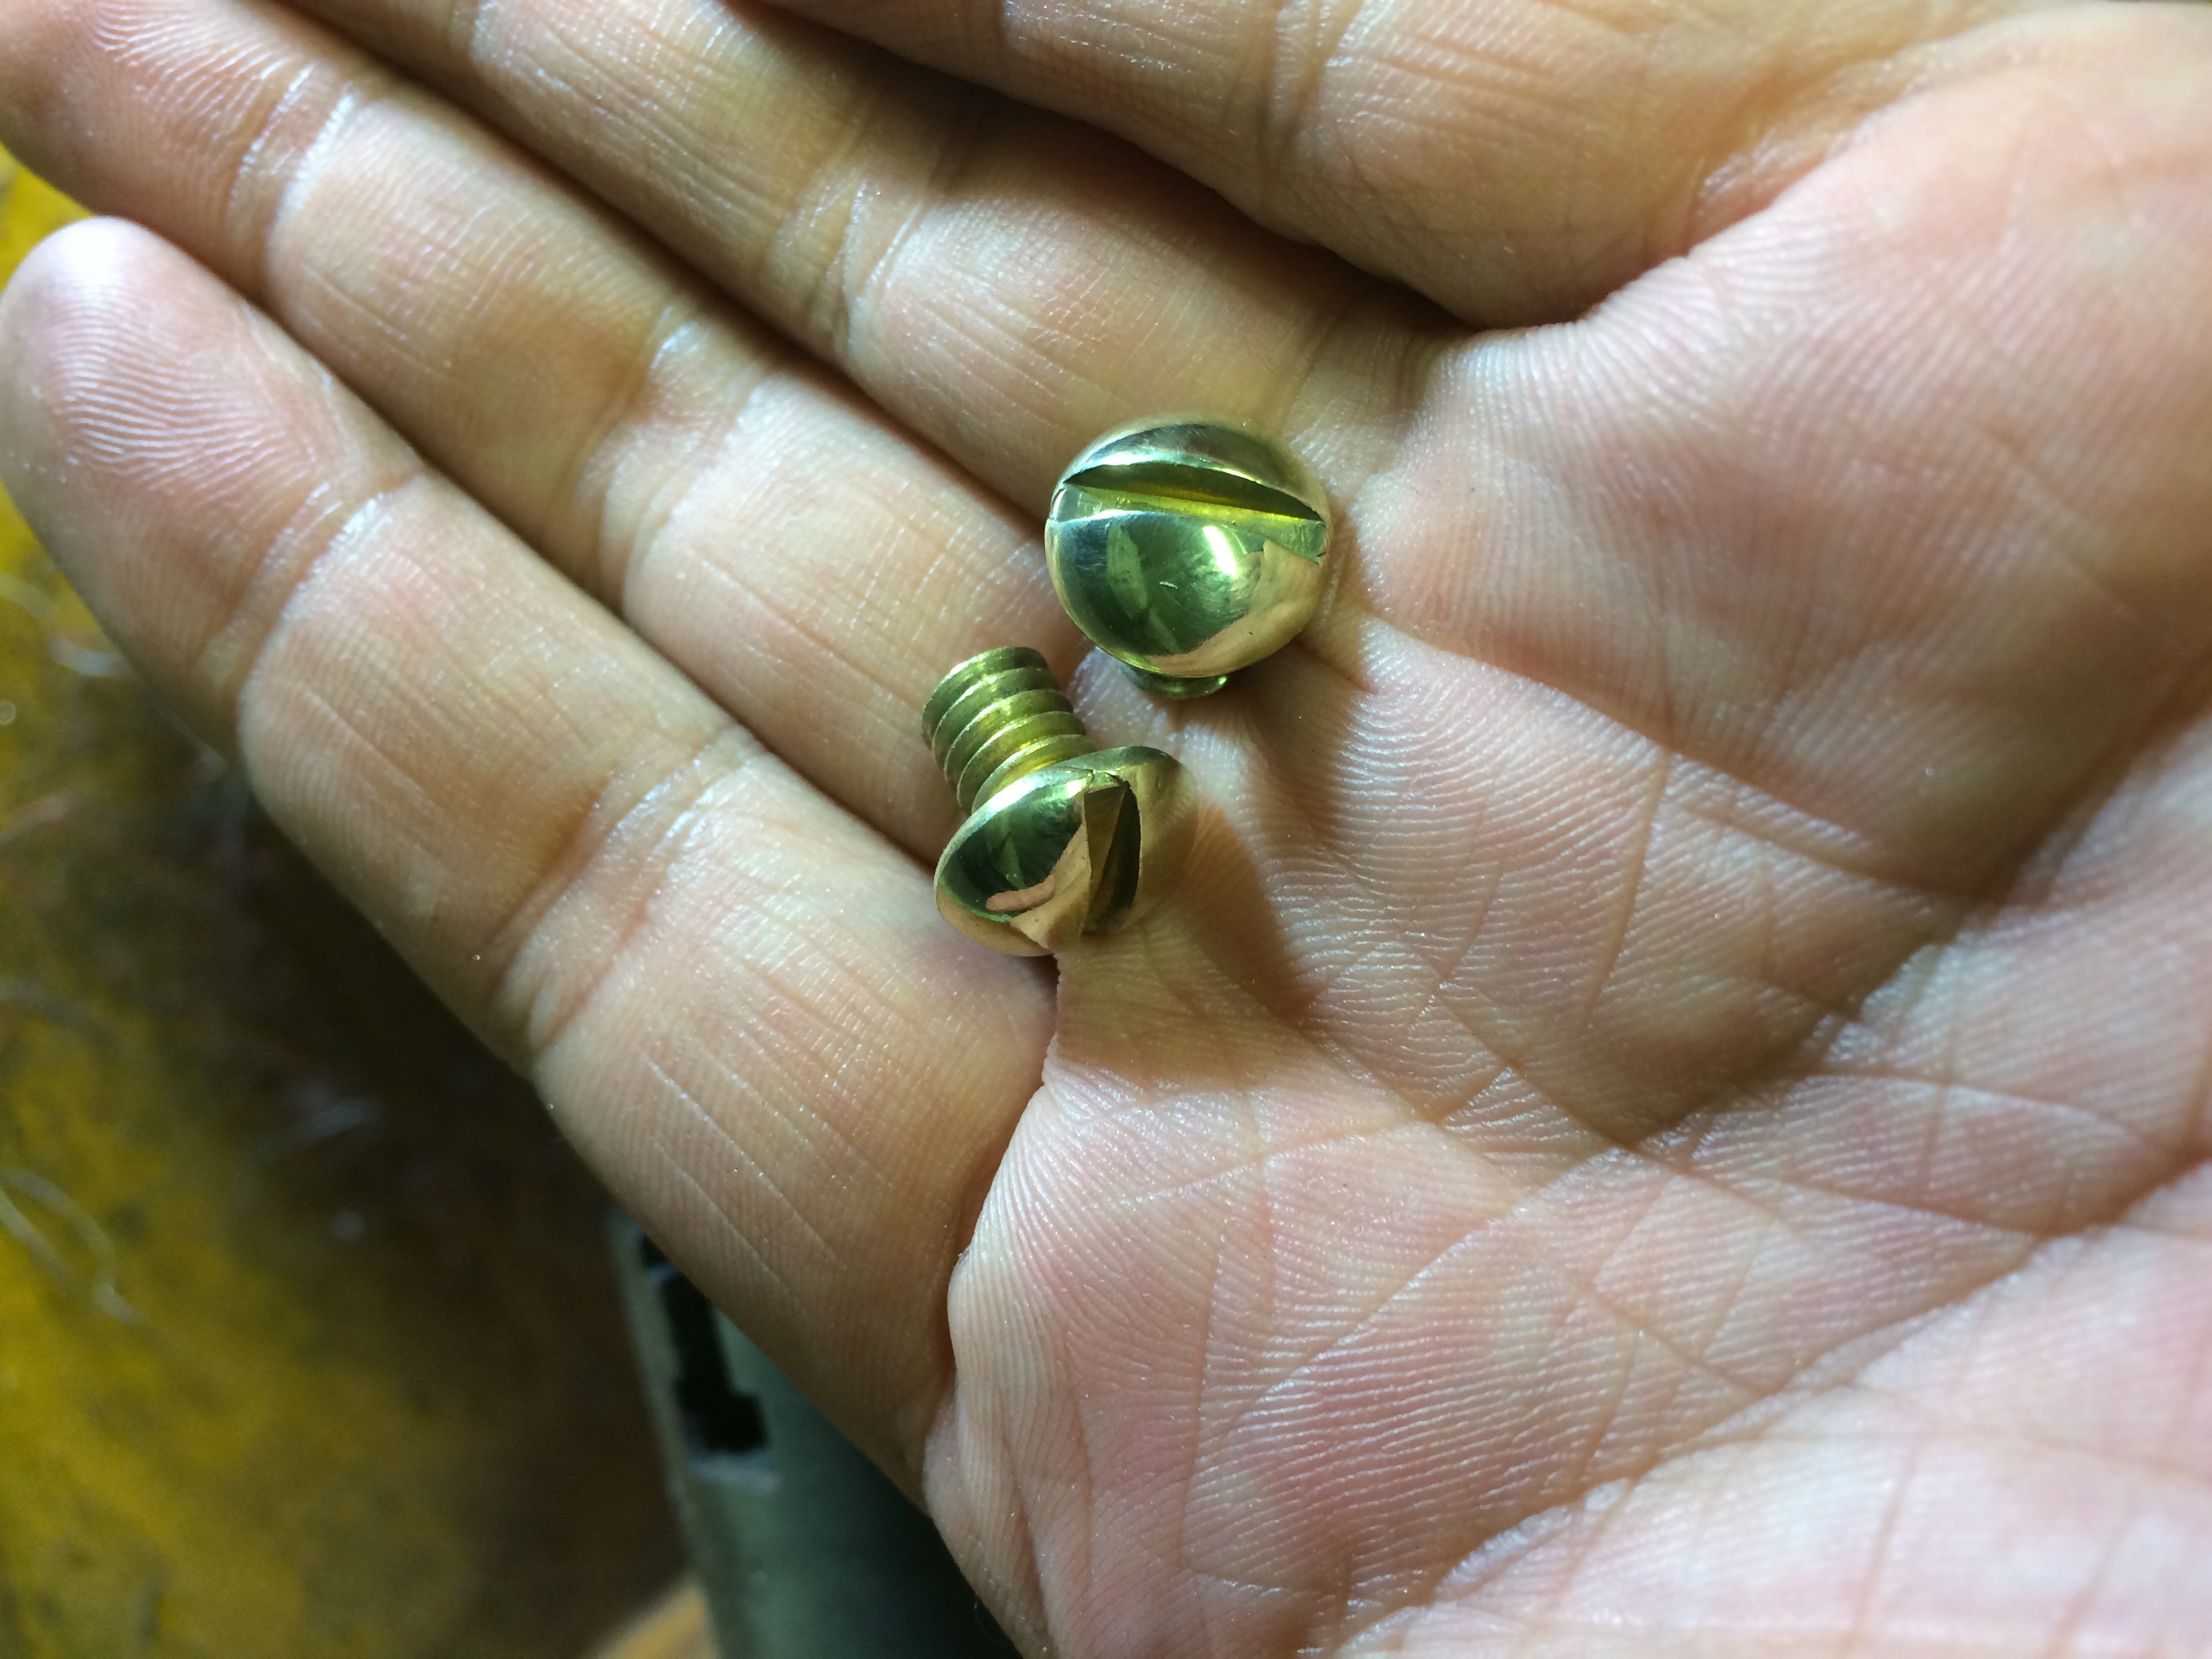
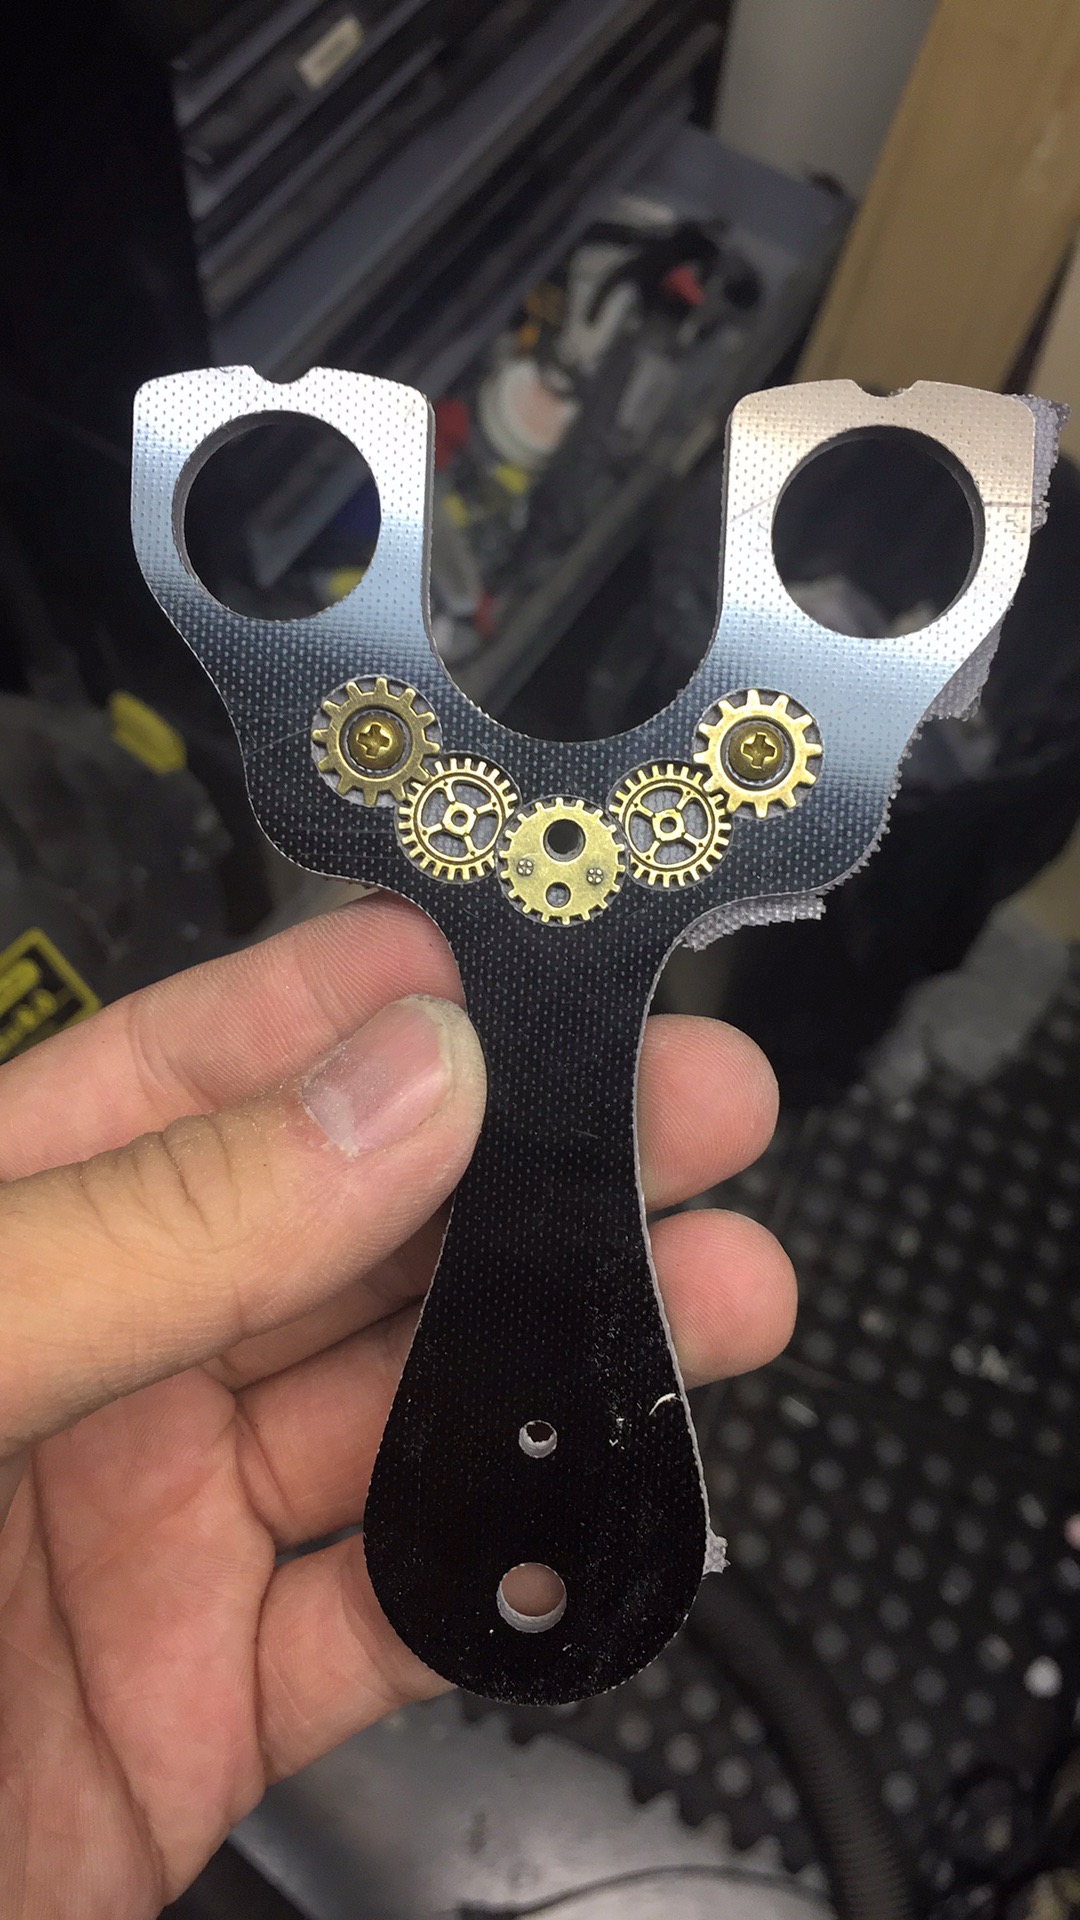
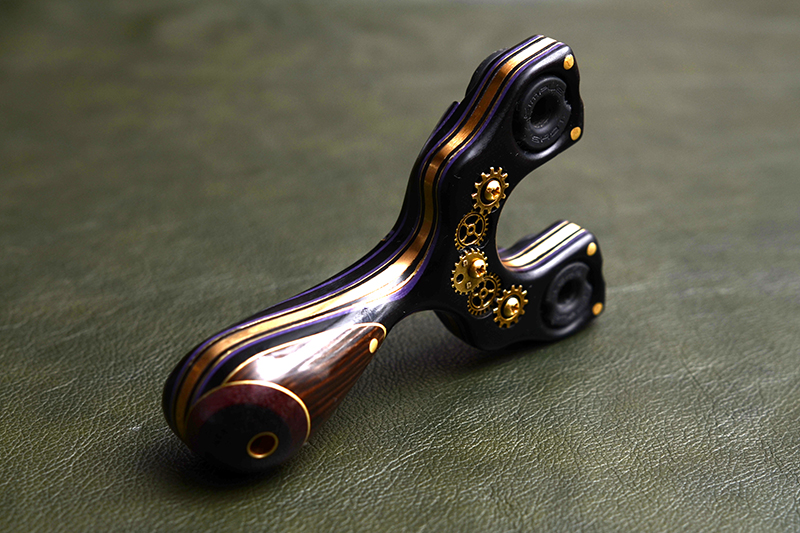
The profile also was host to gears, layered at different depths to really mesh into the body. The outmost gears had a 5mm hole which I used to integrate the brass Philps screws.

img_0538

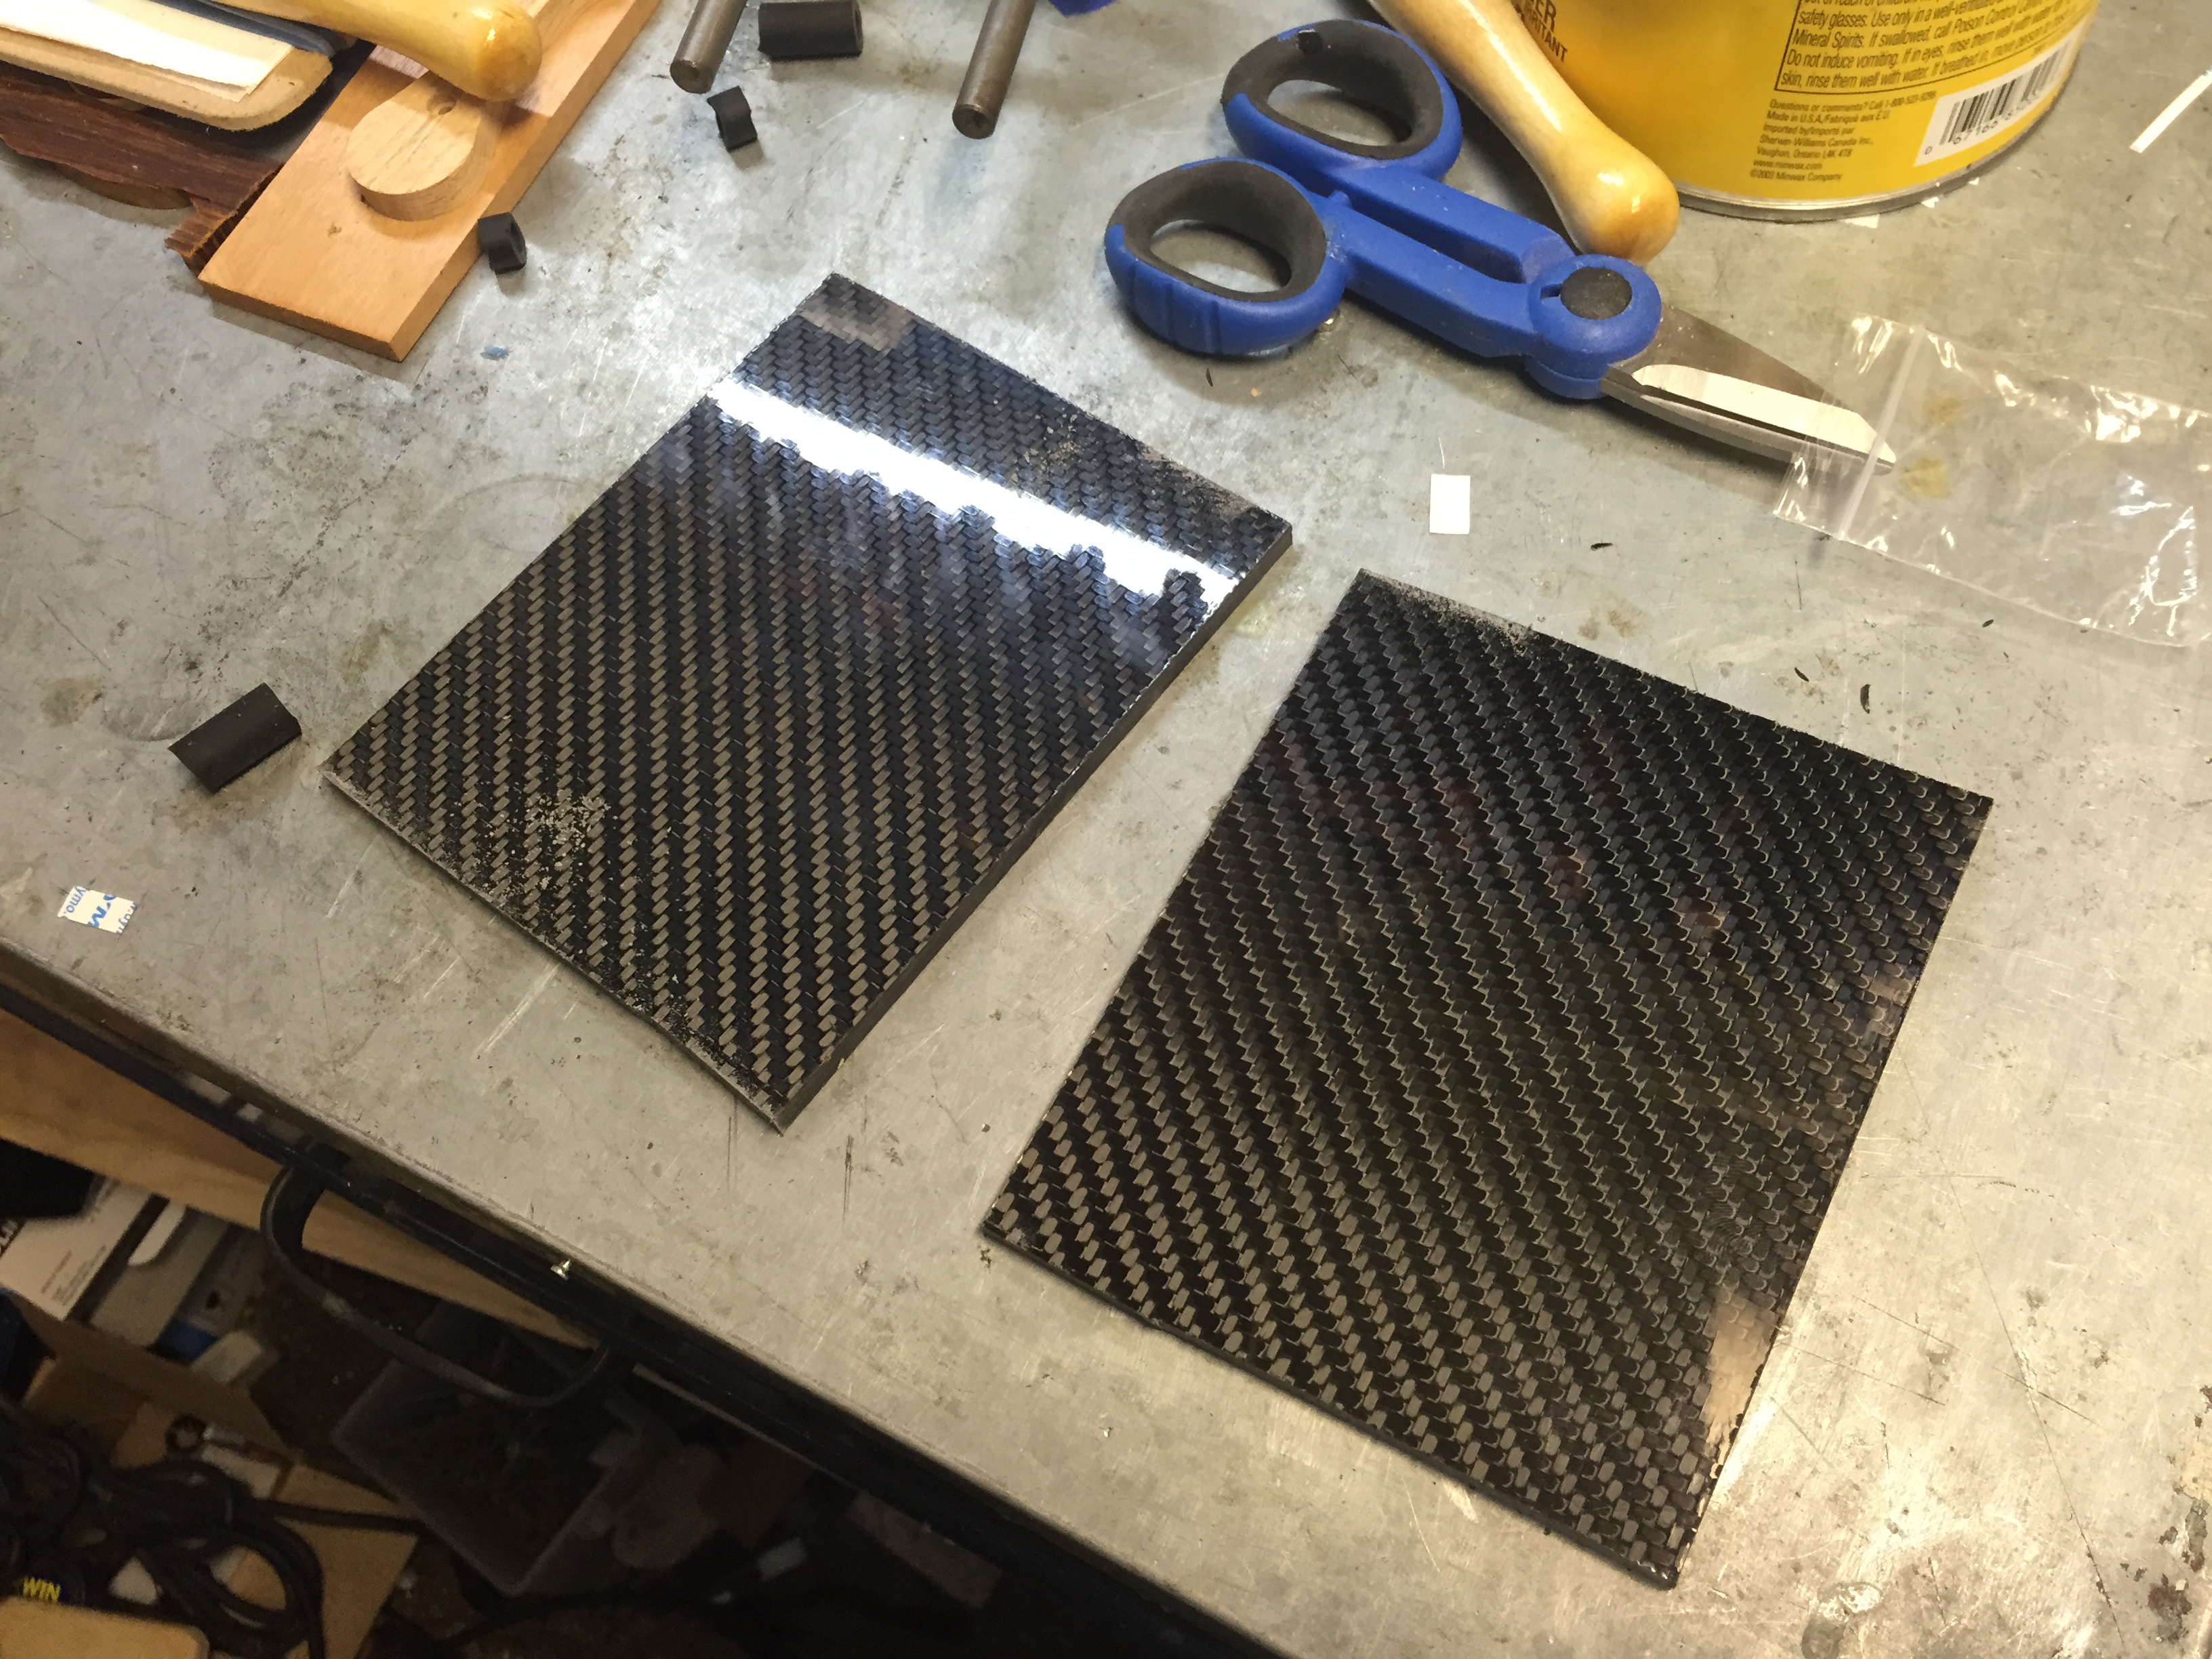
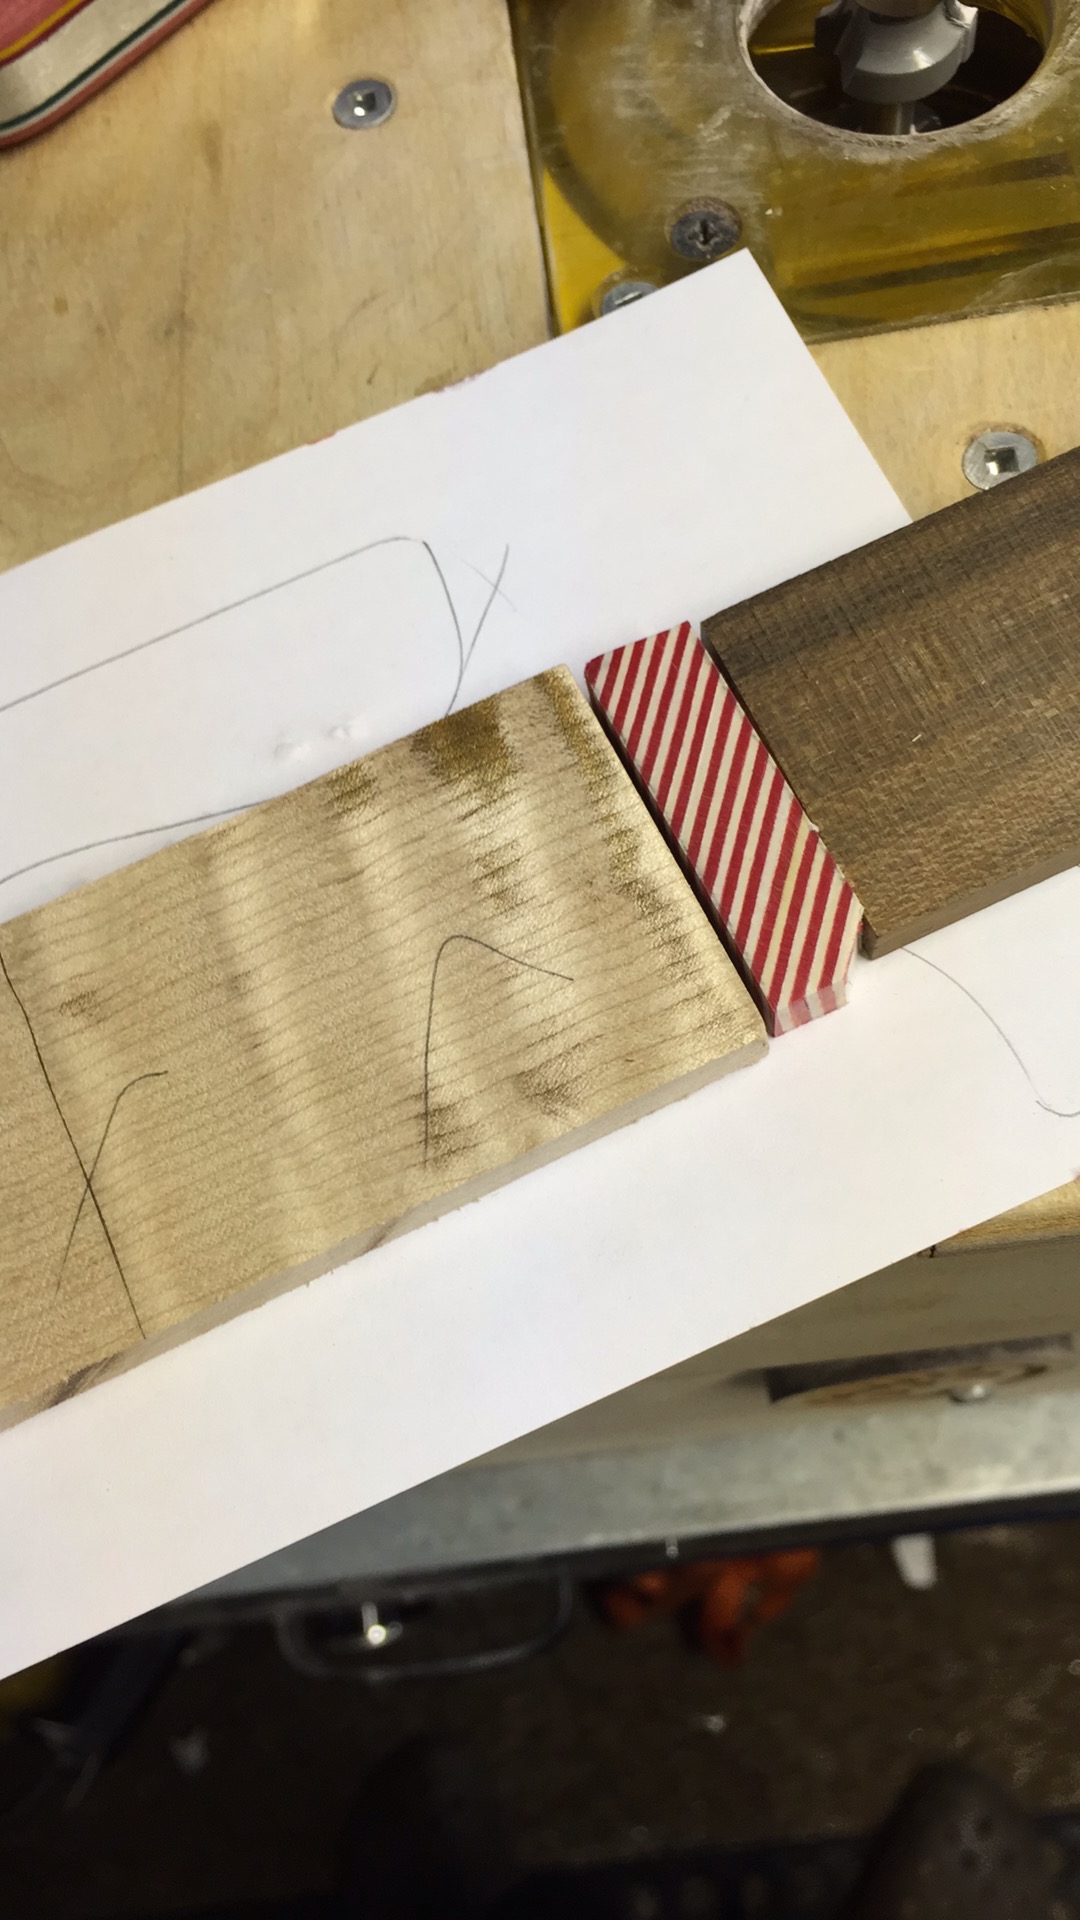
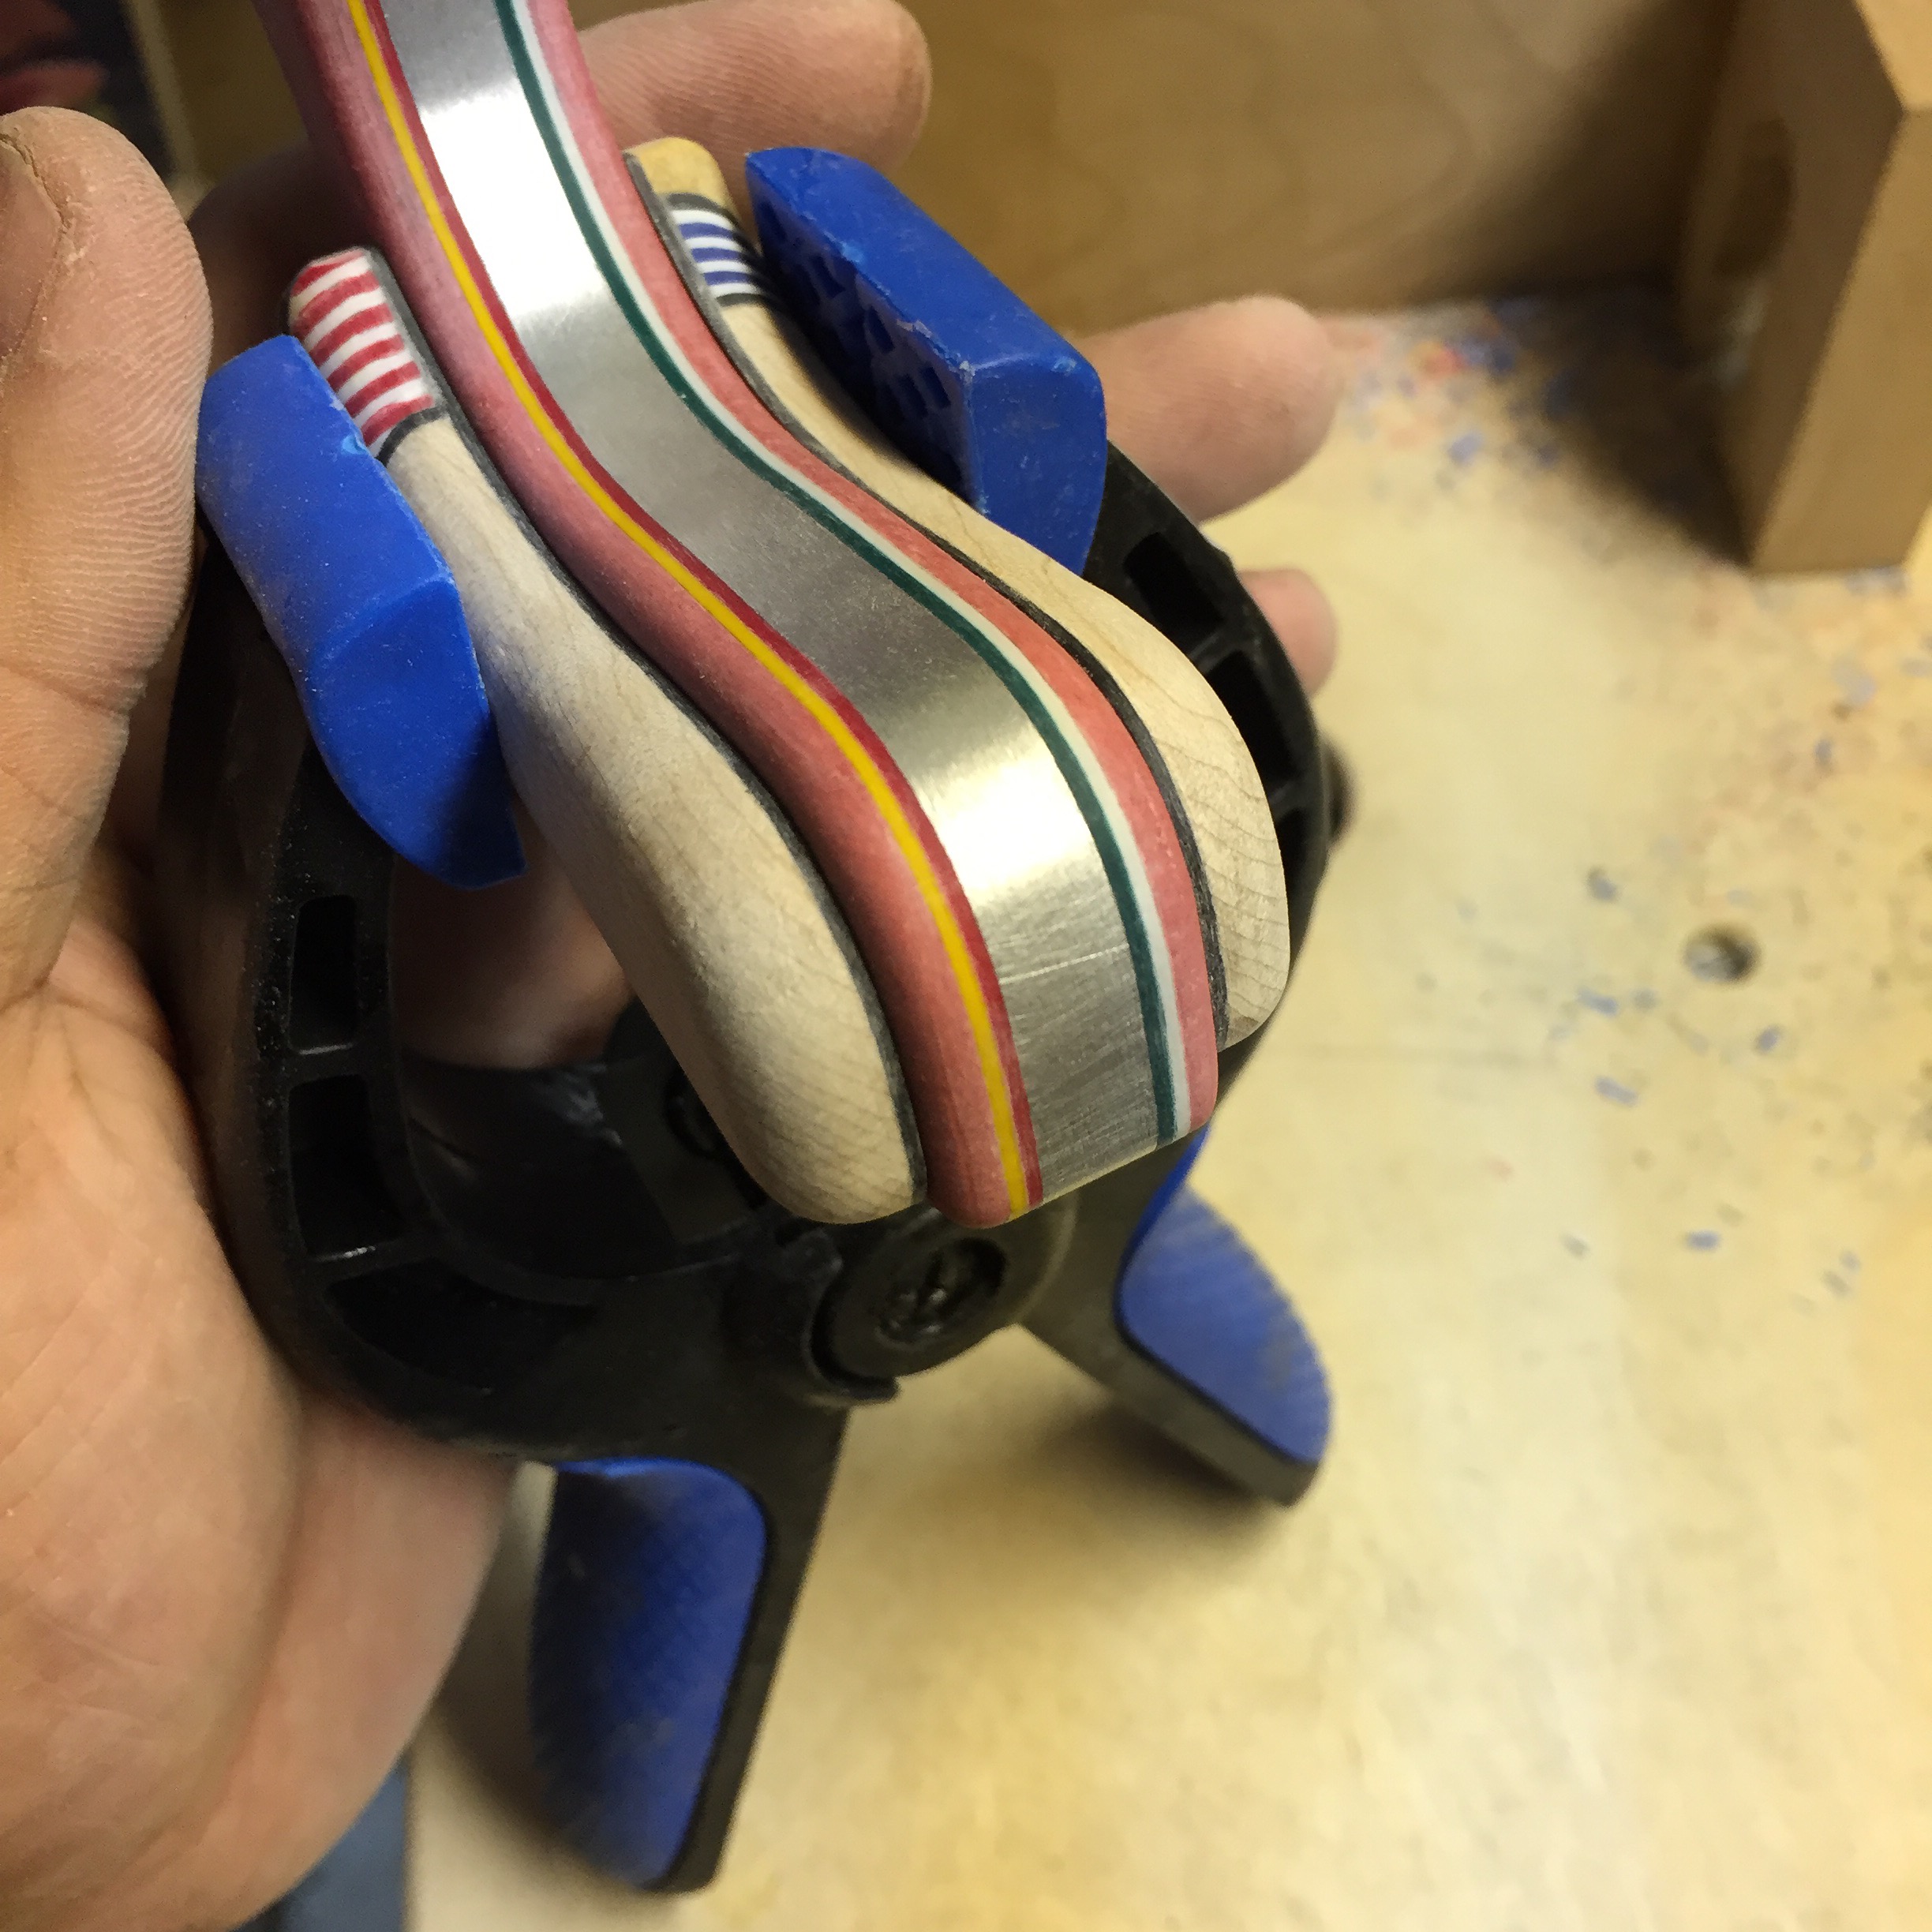
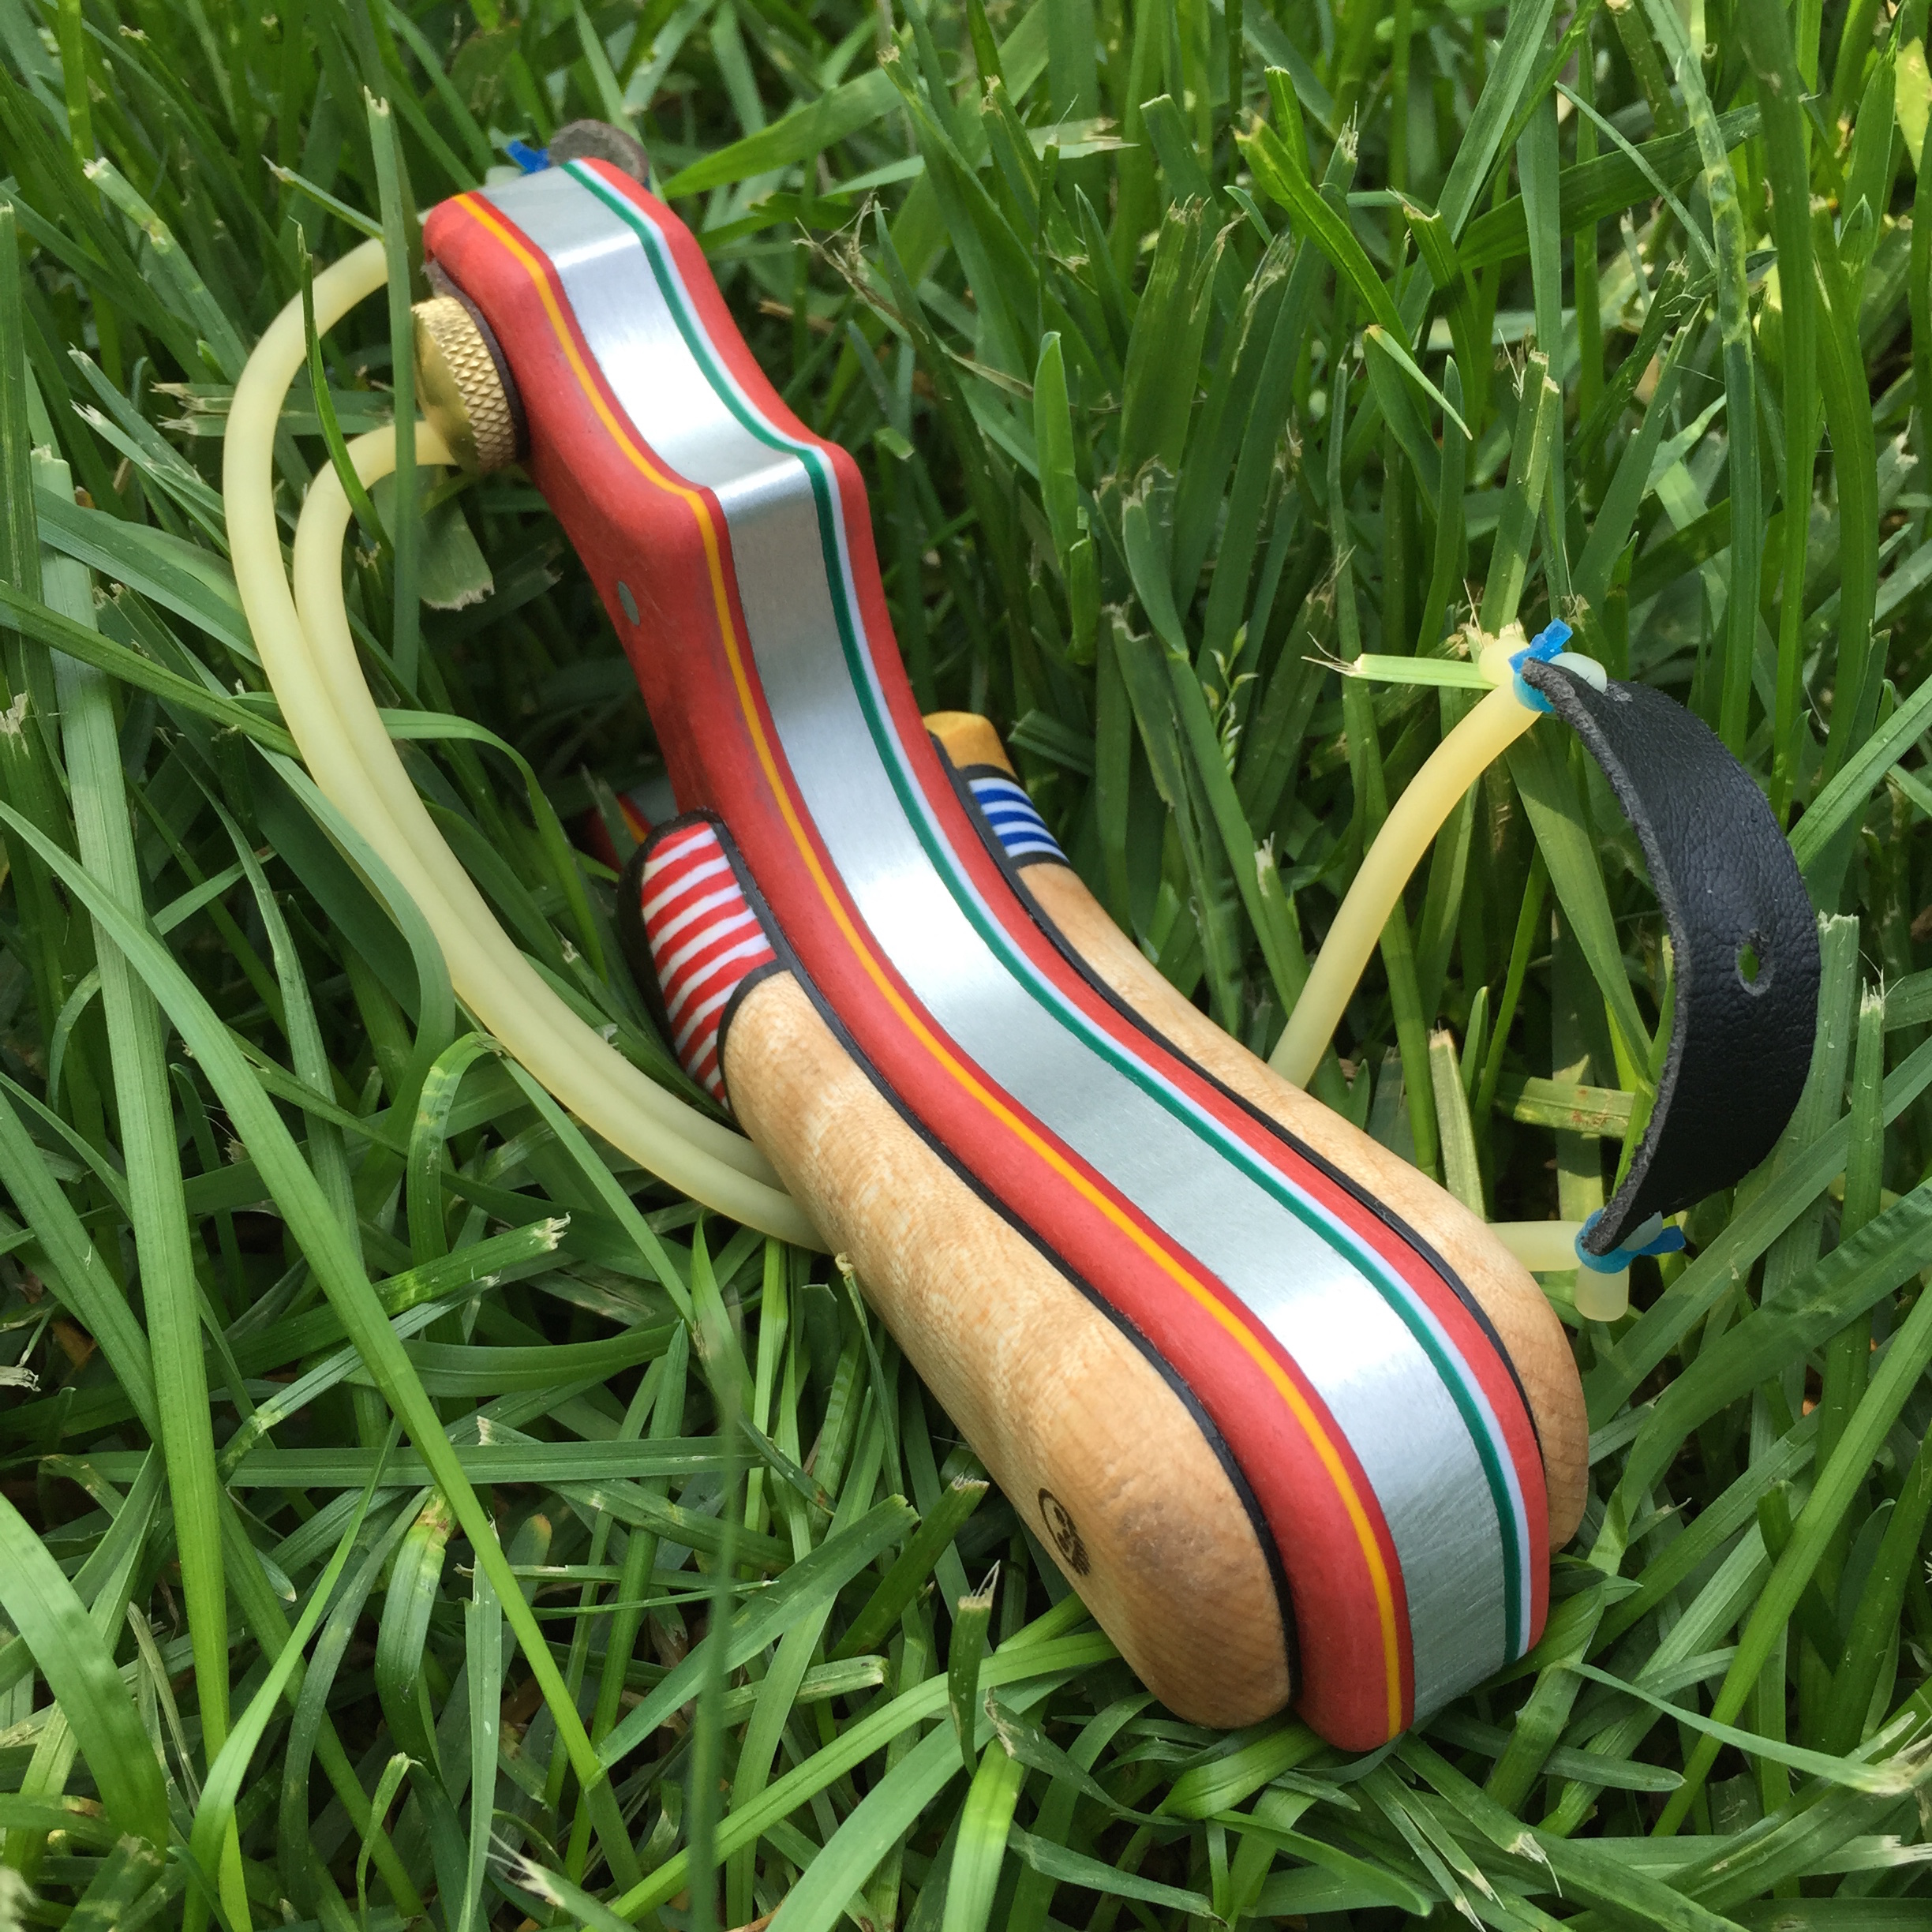
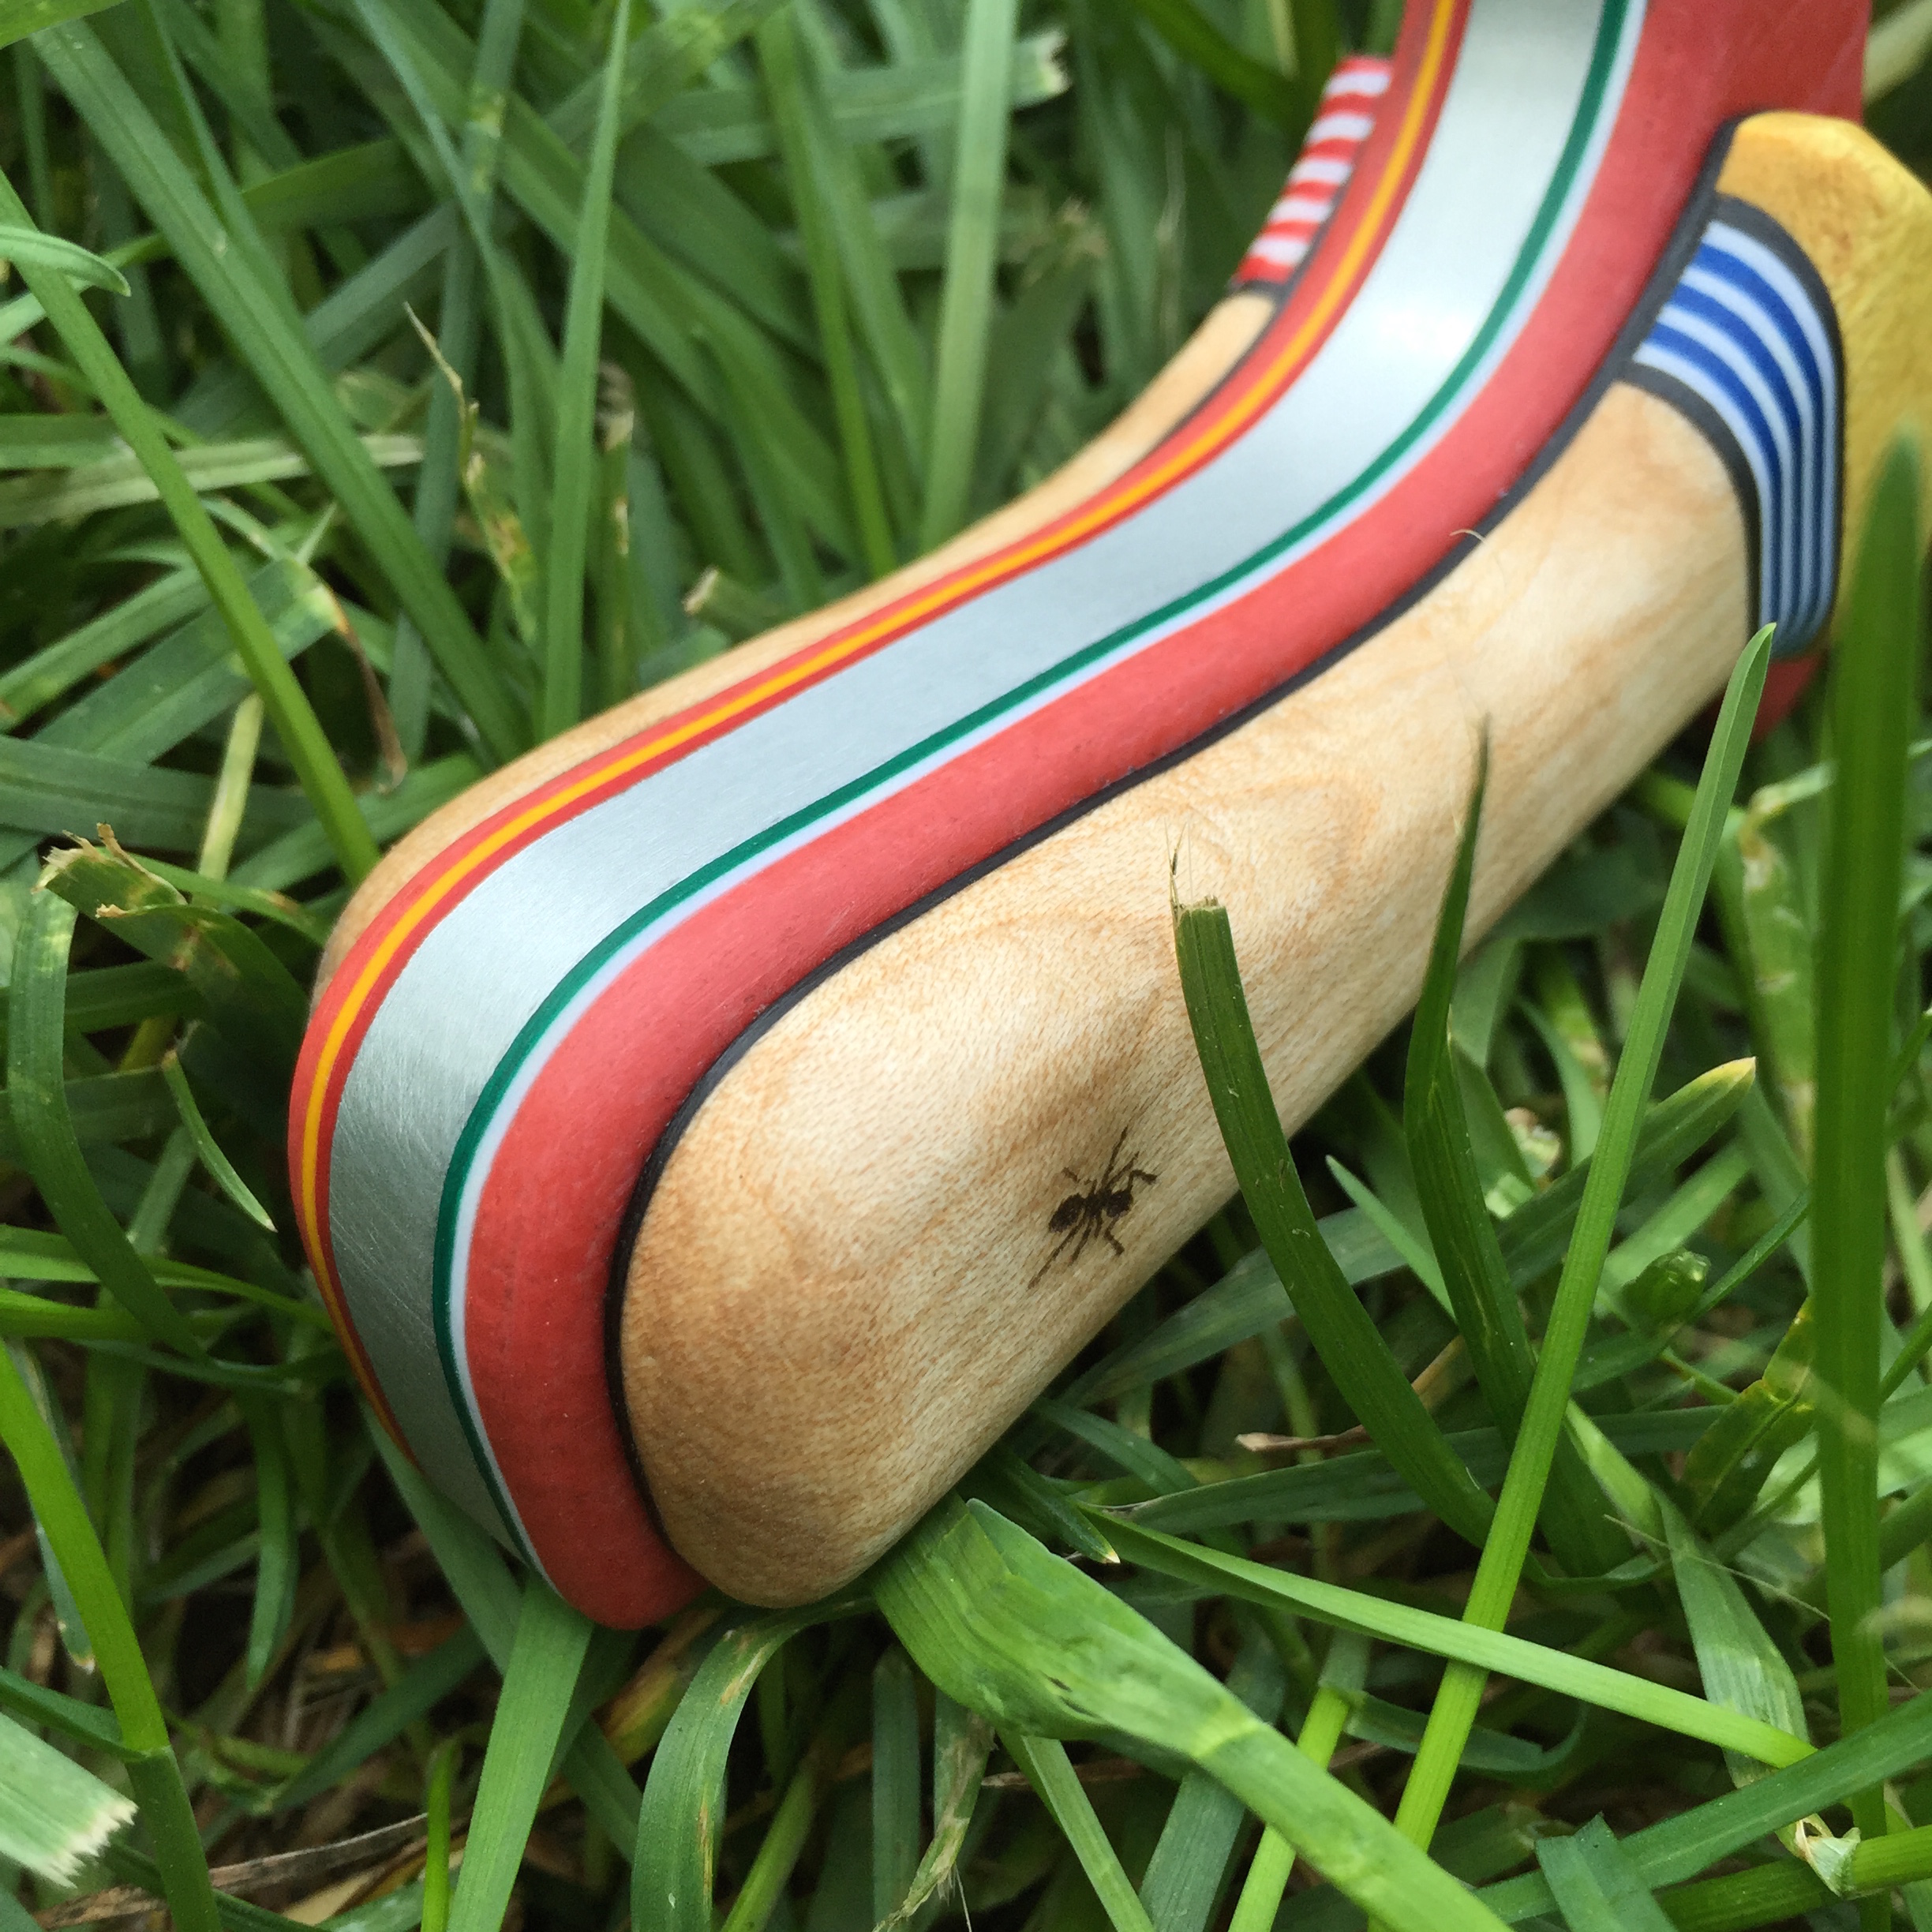
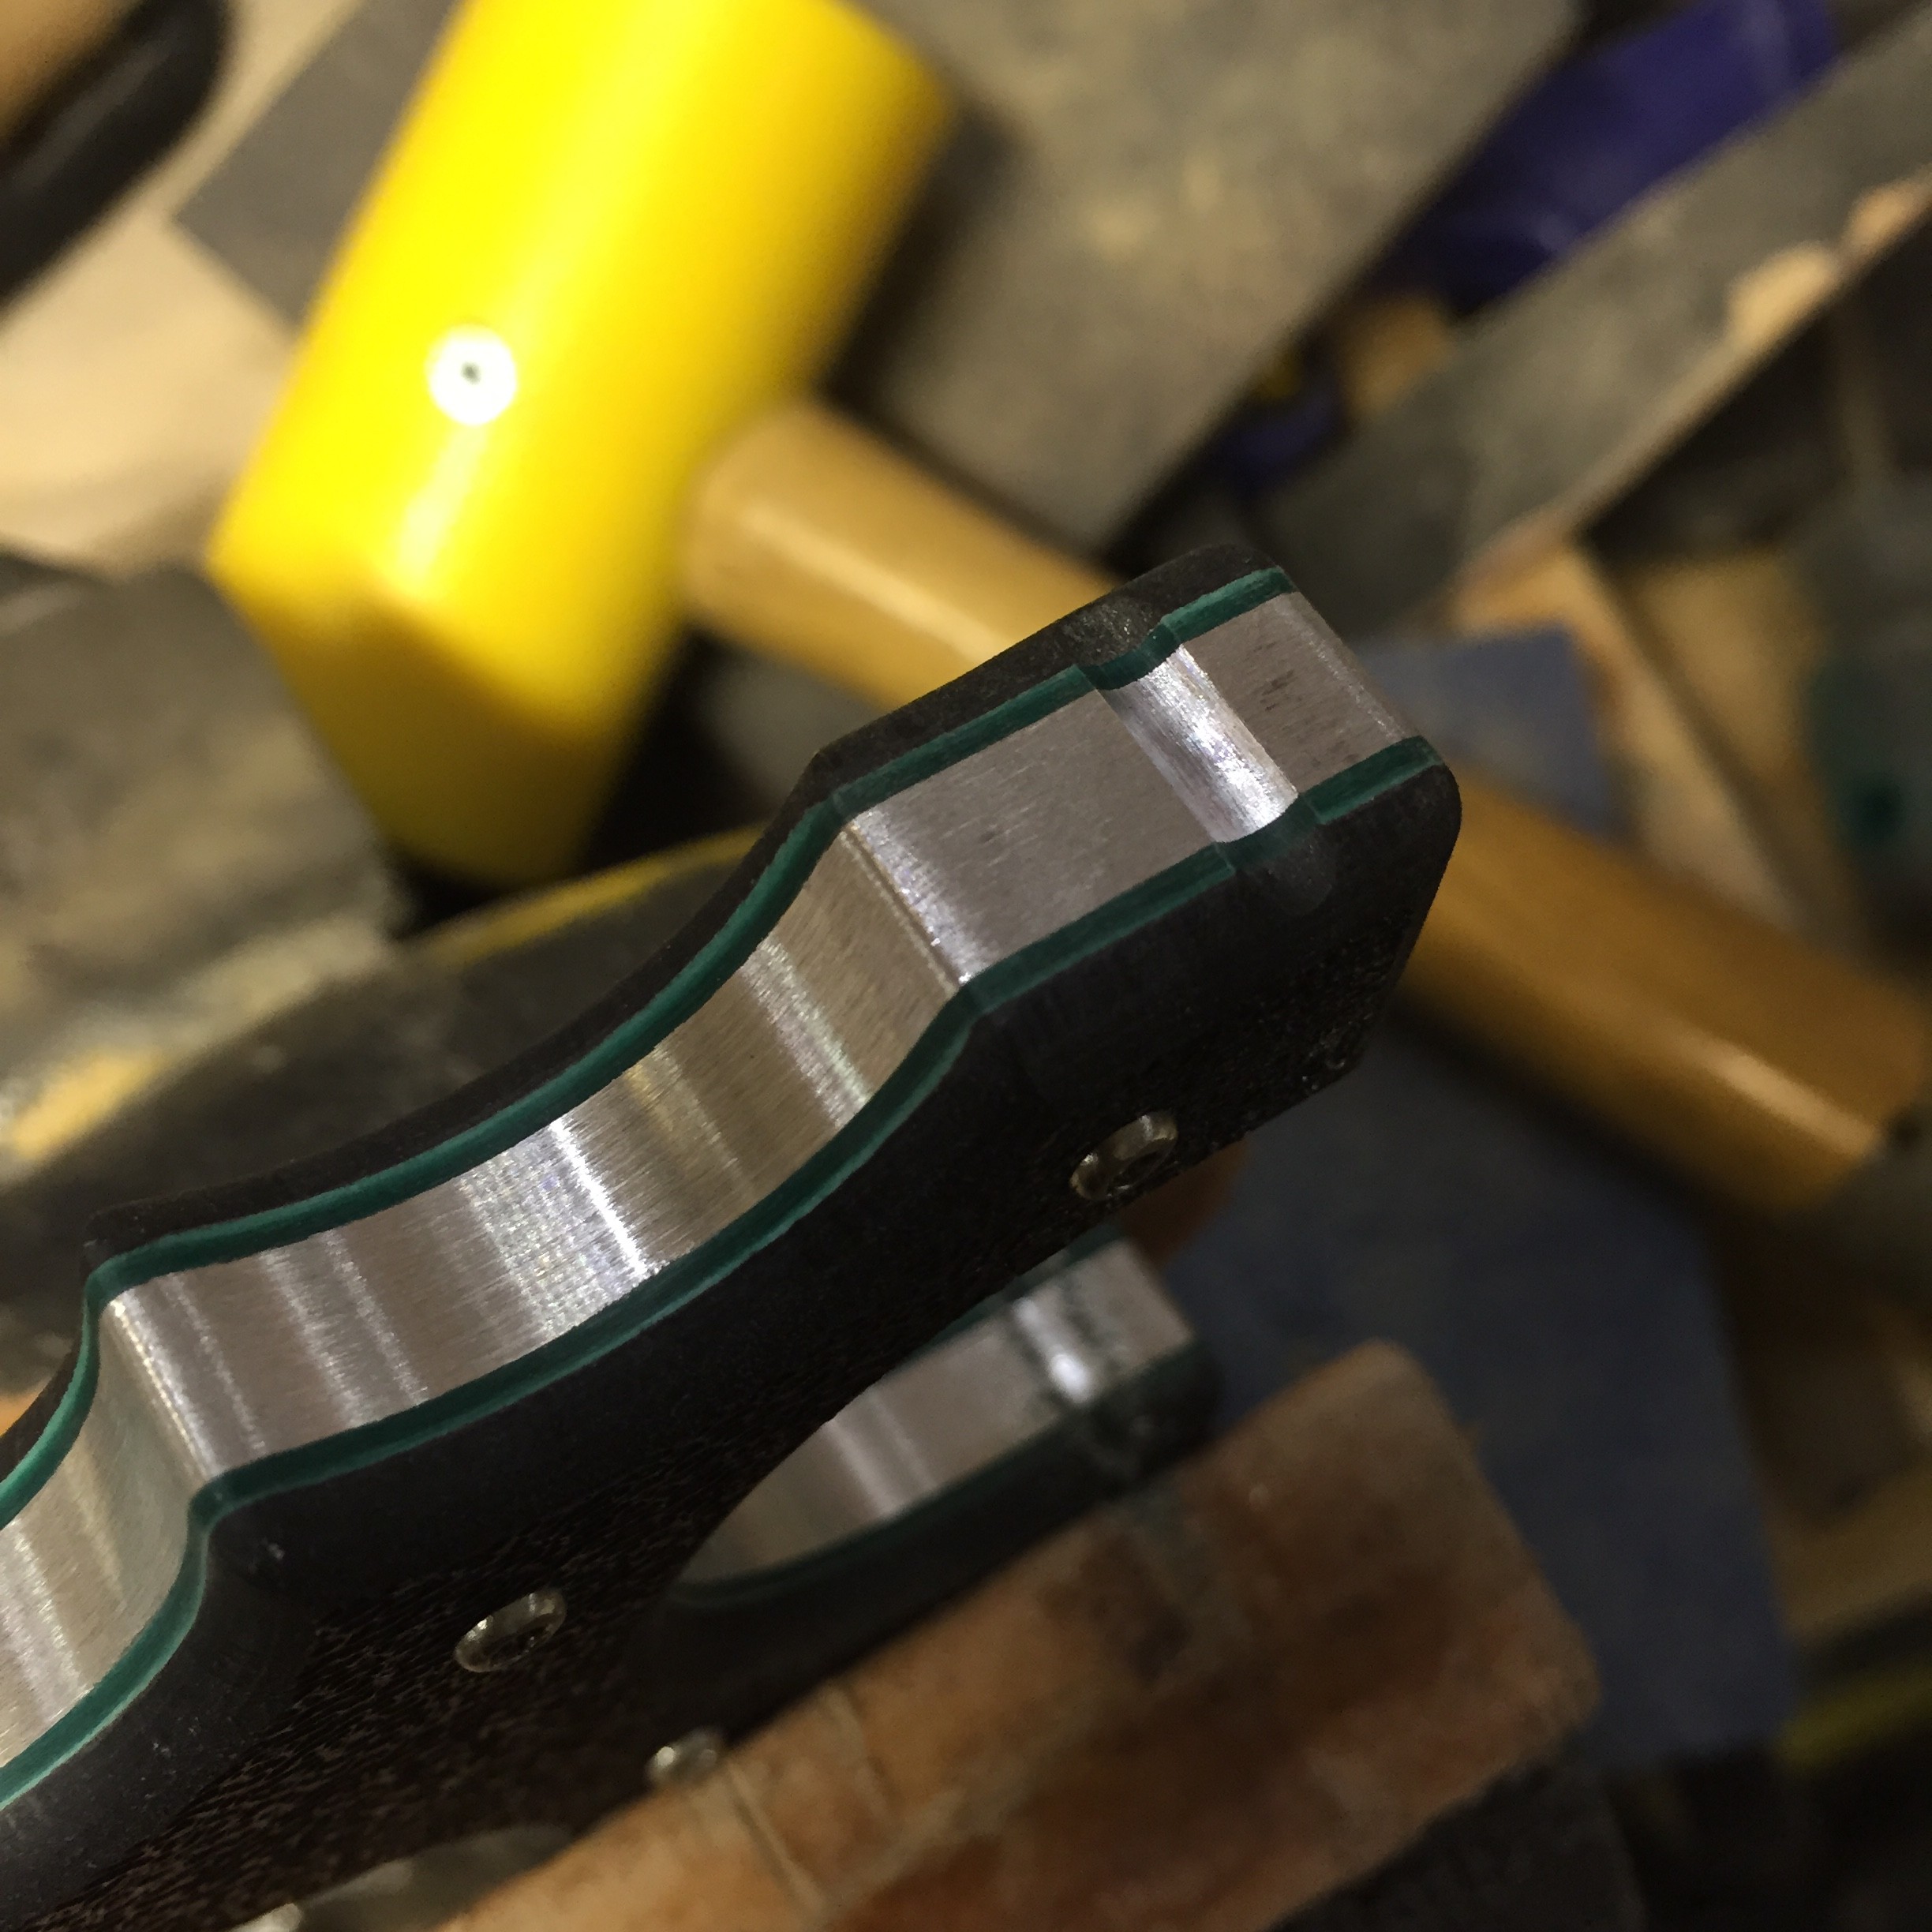
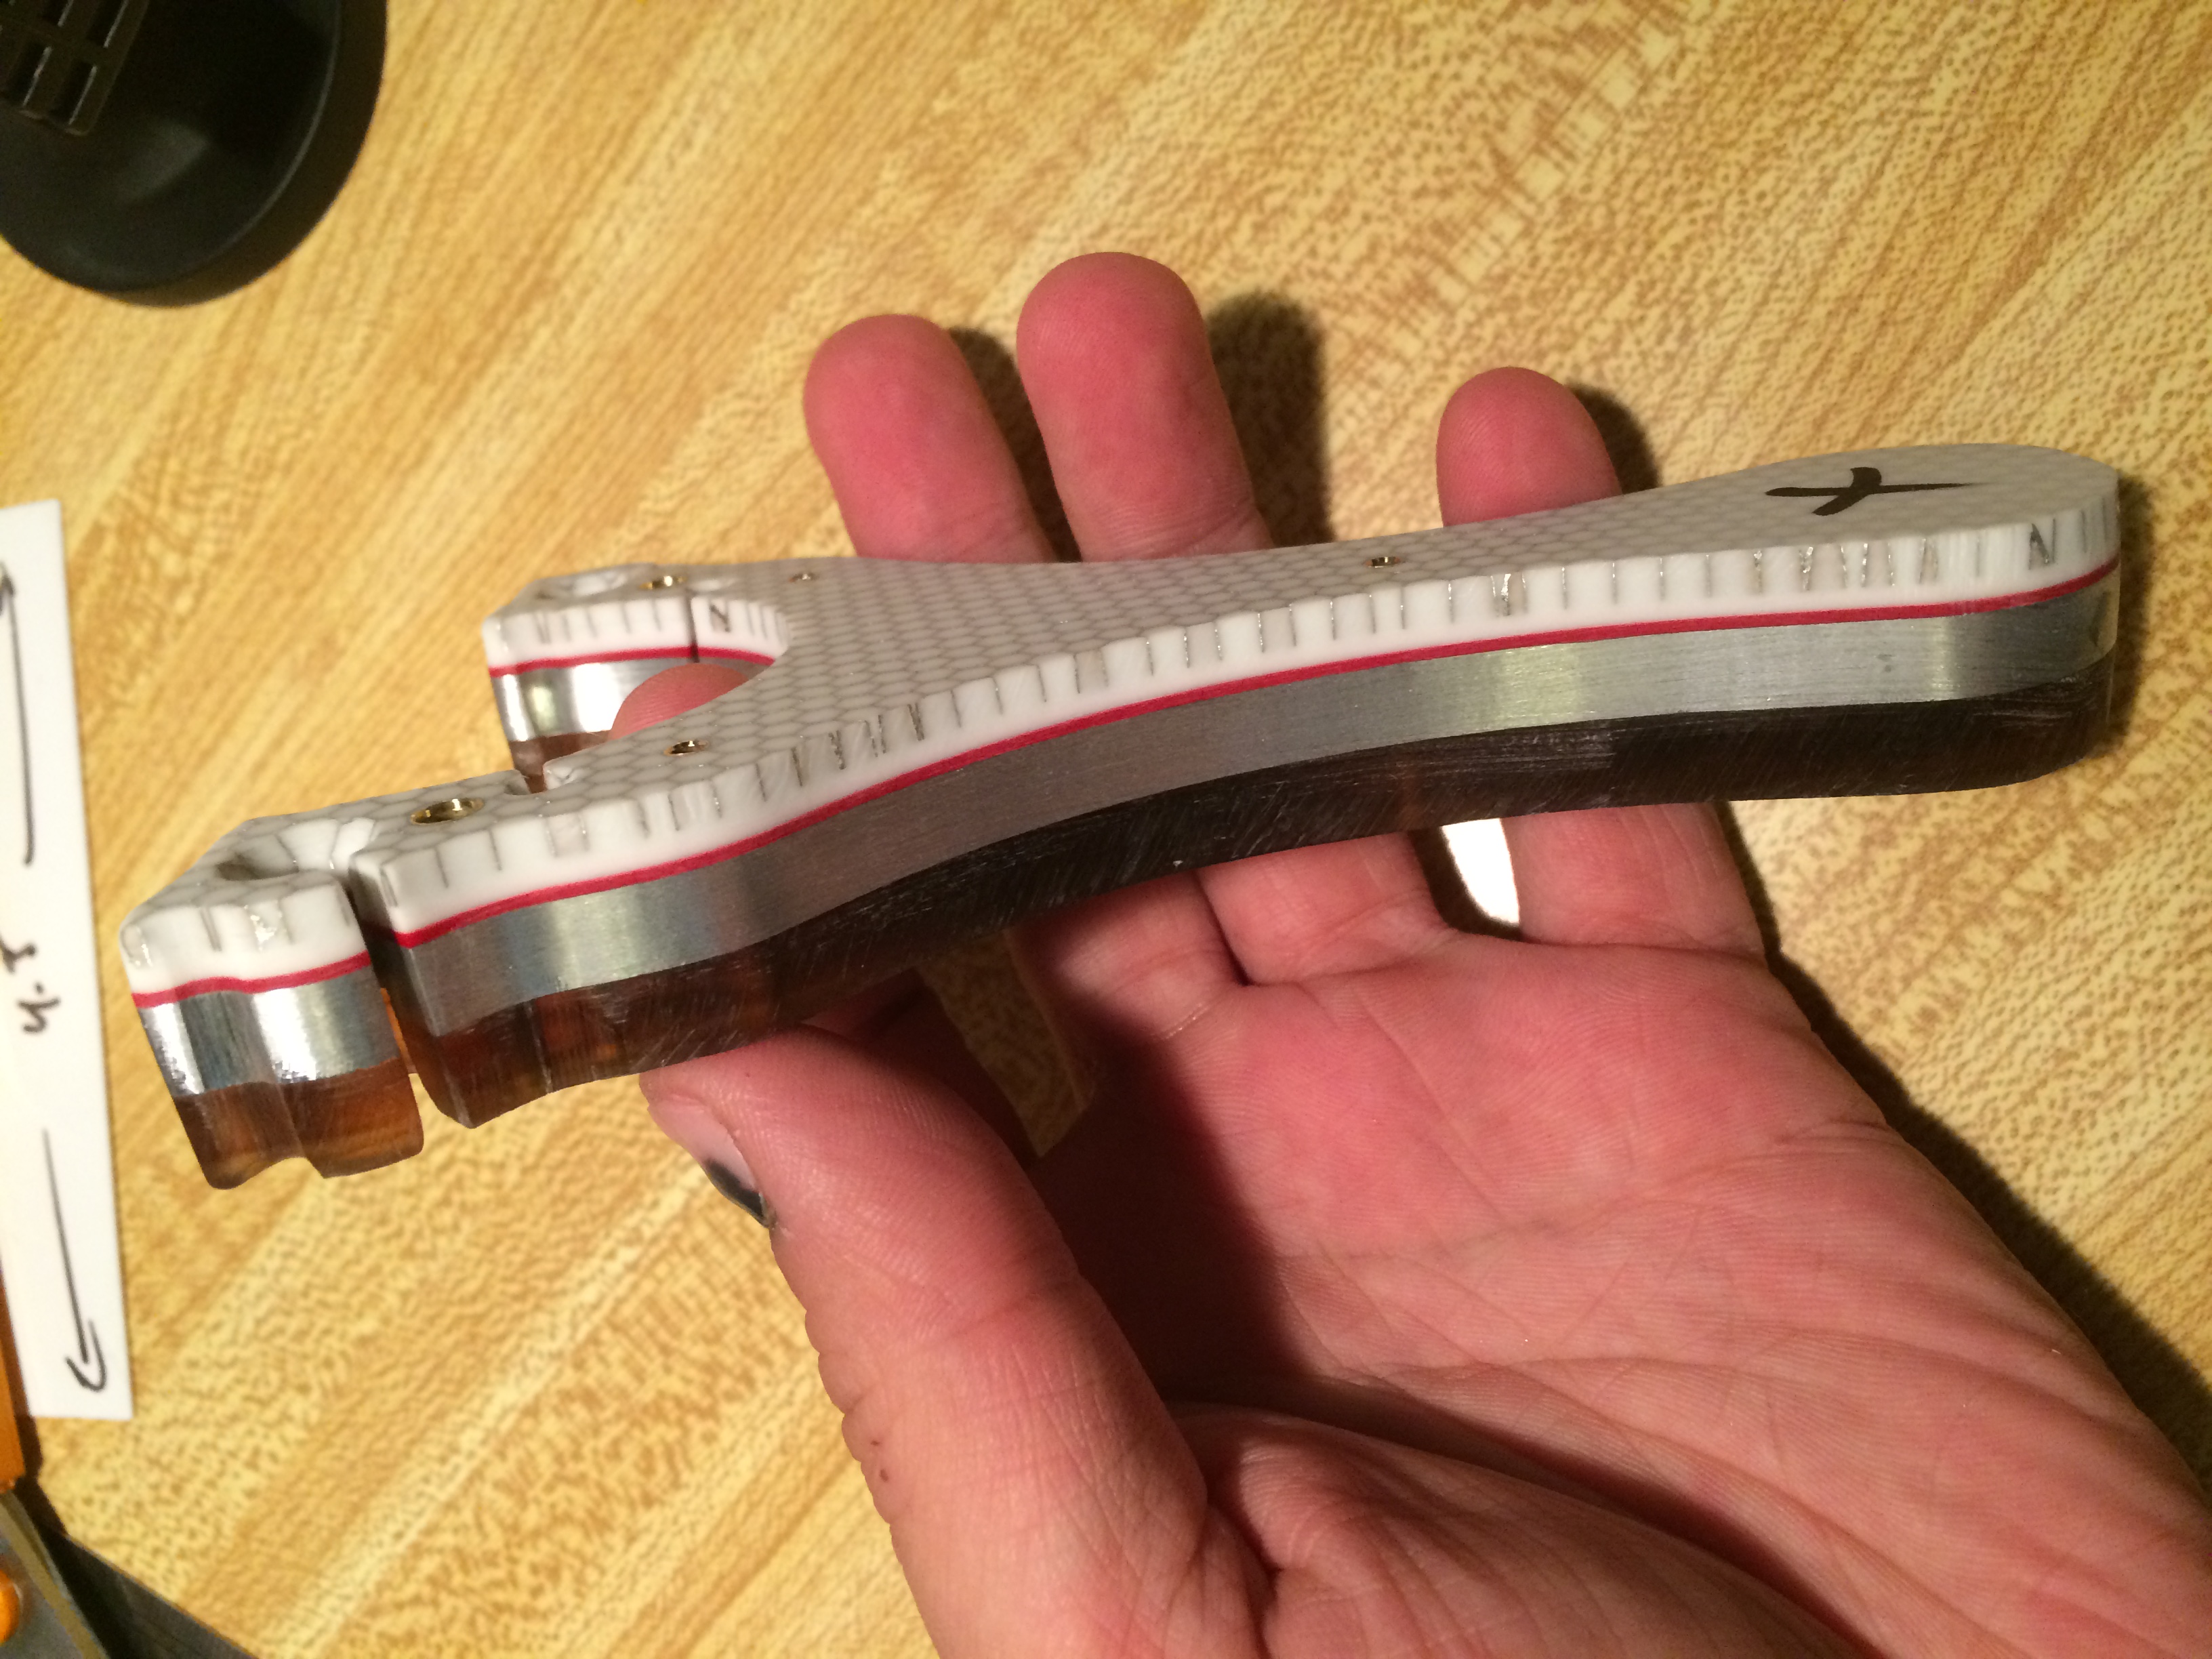
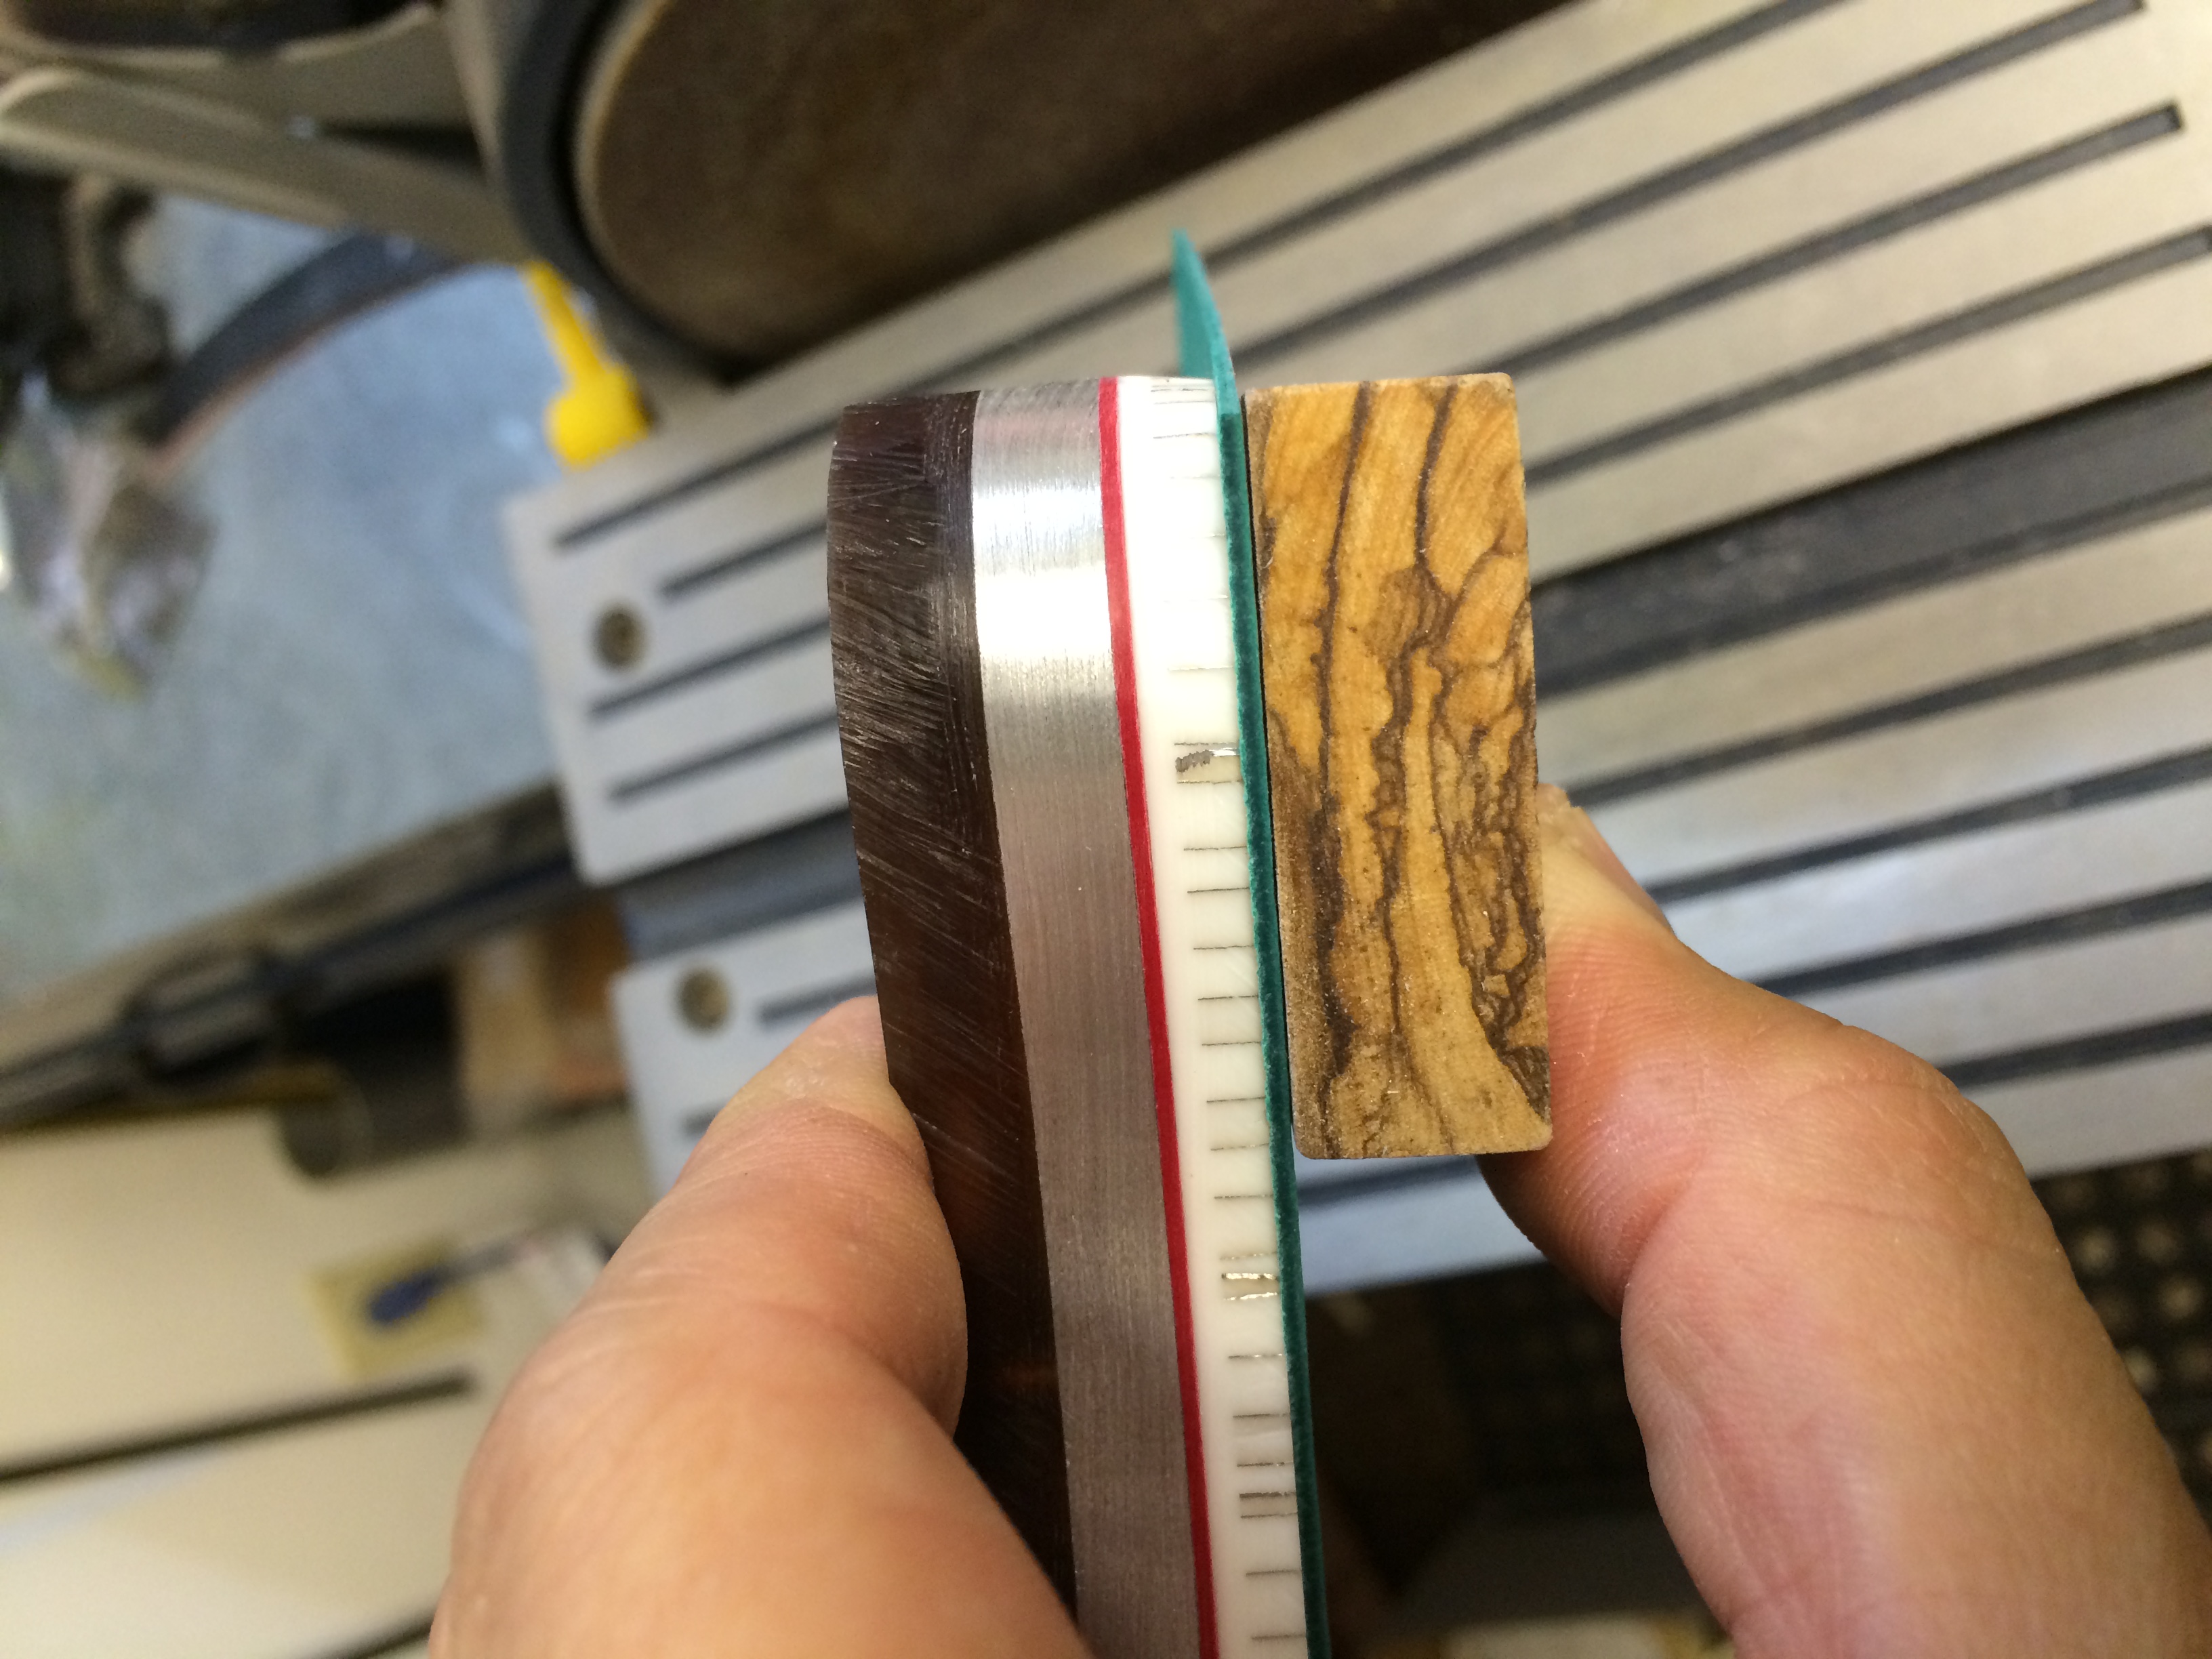
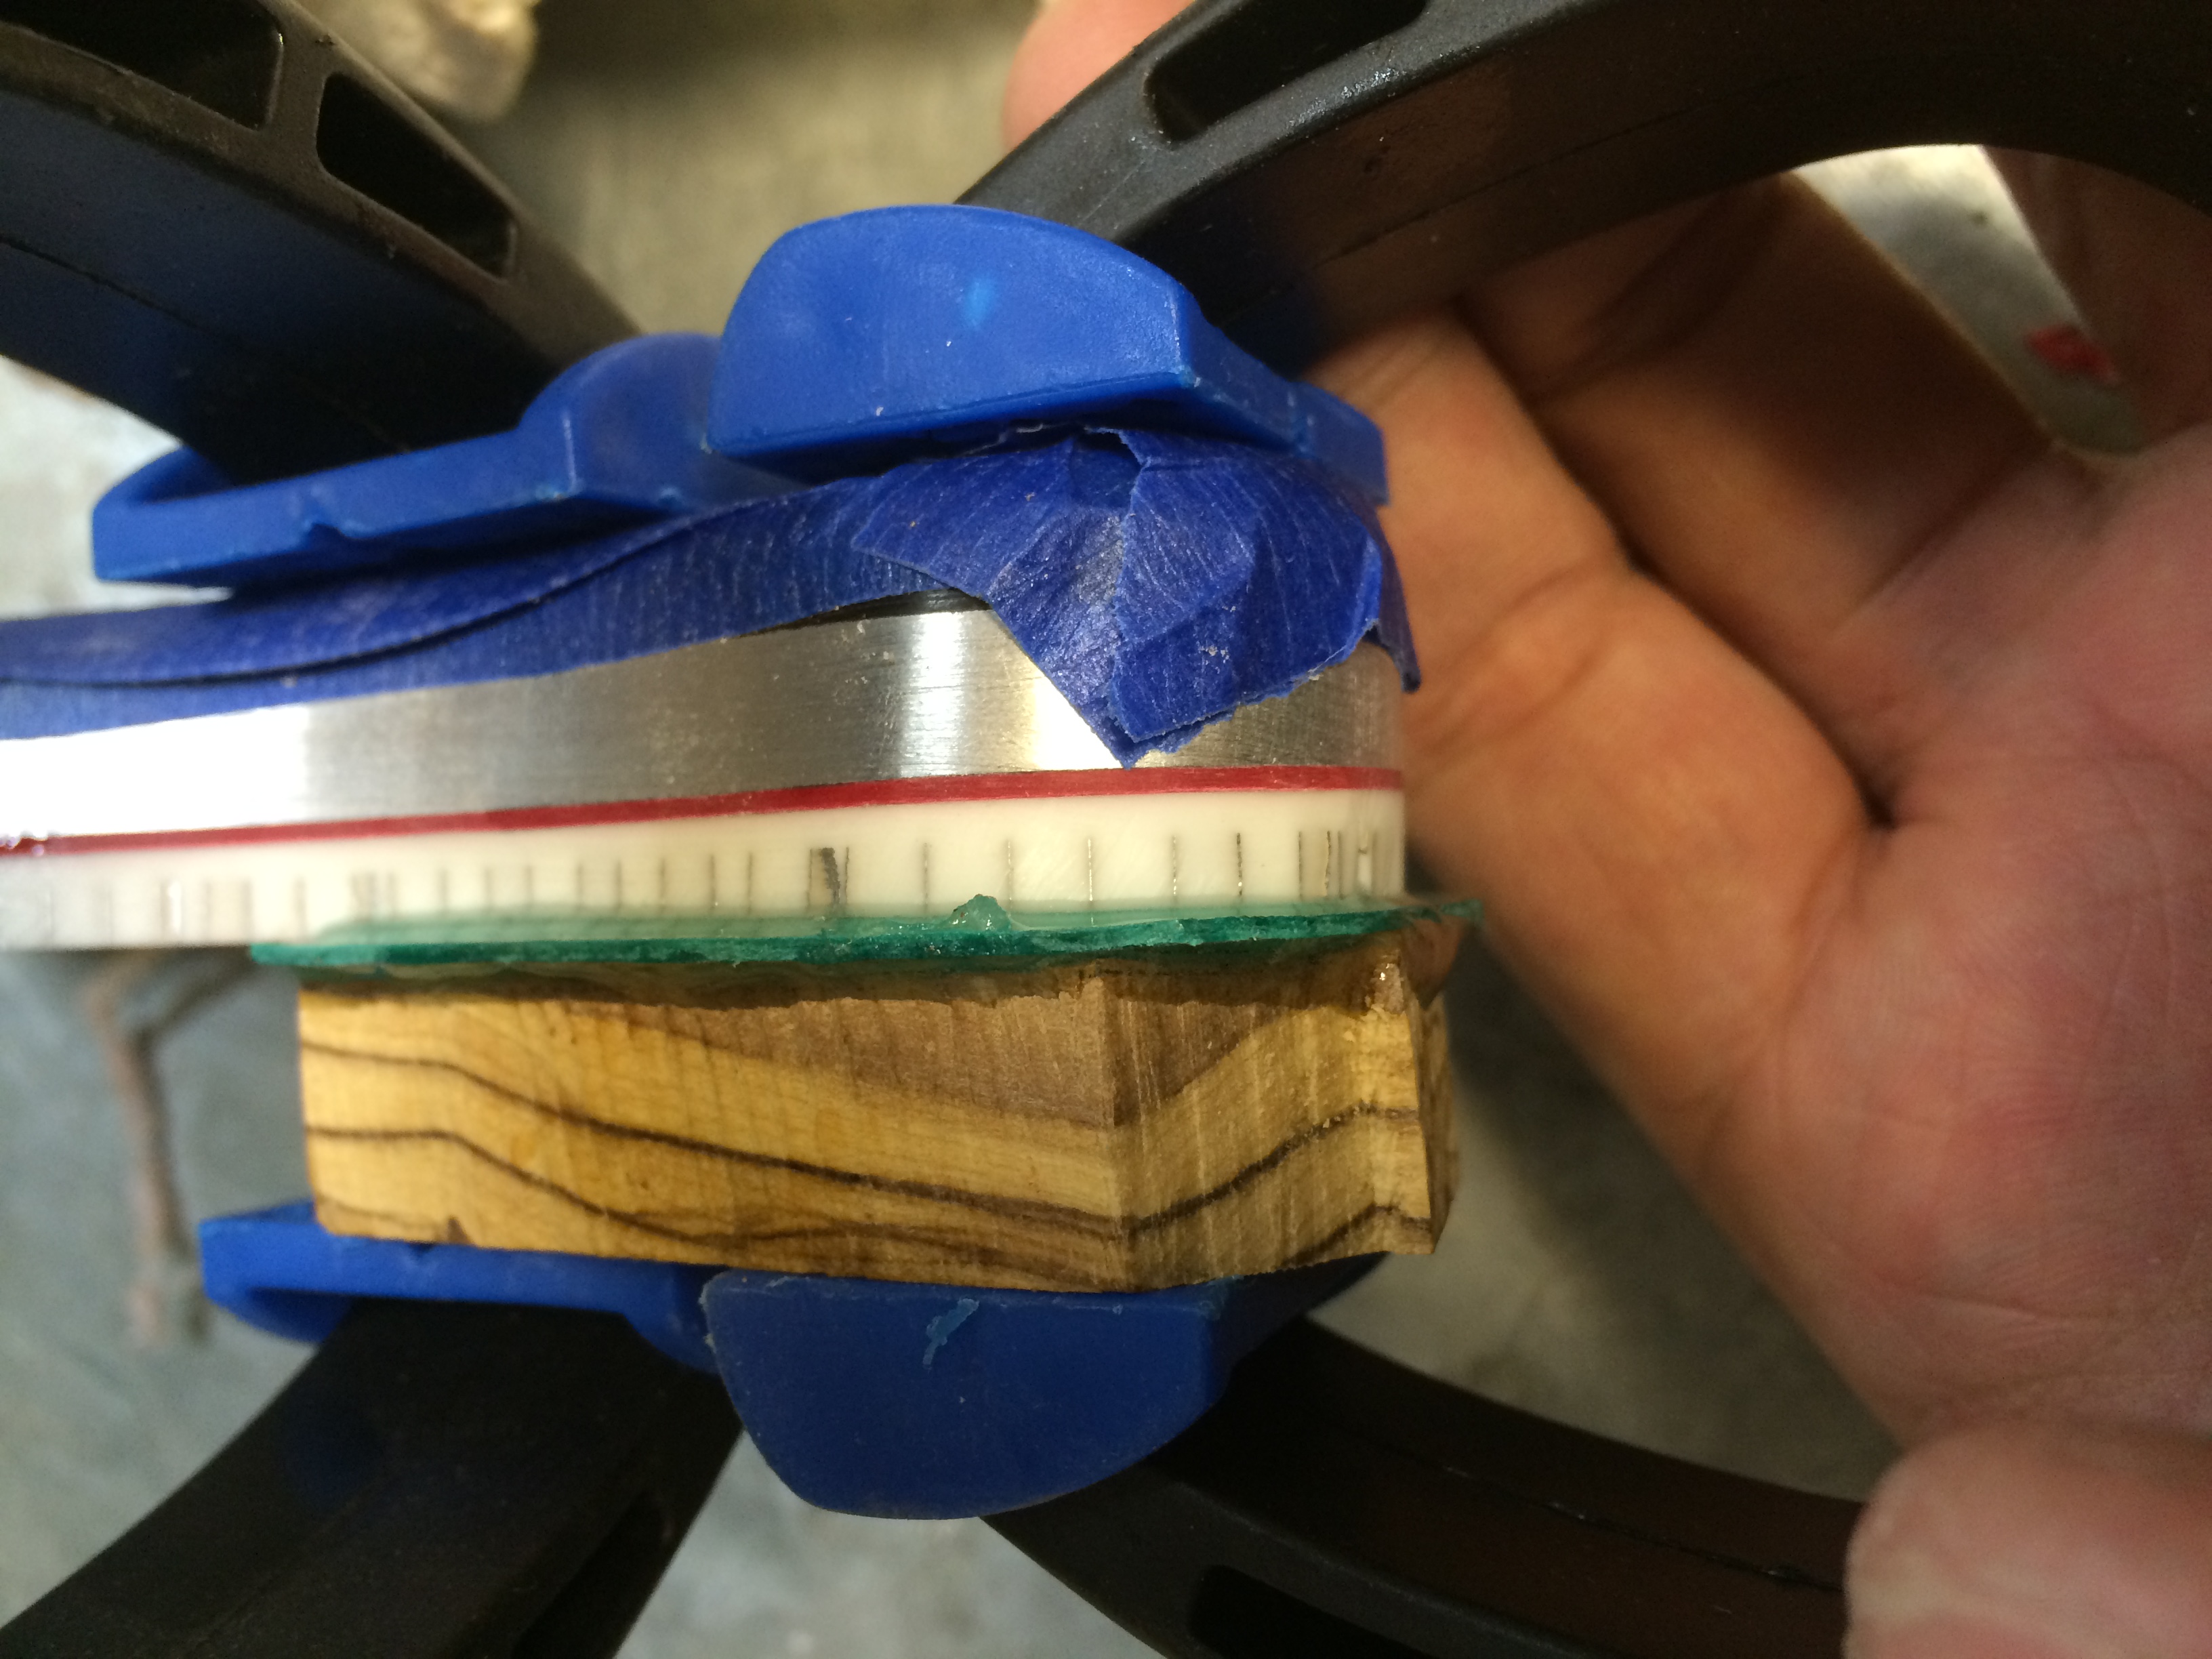
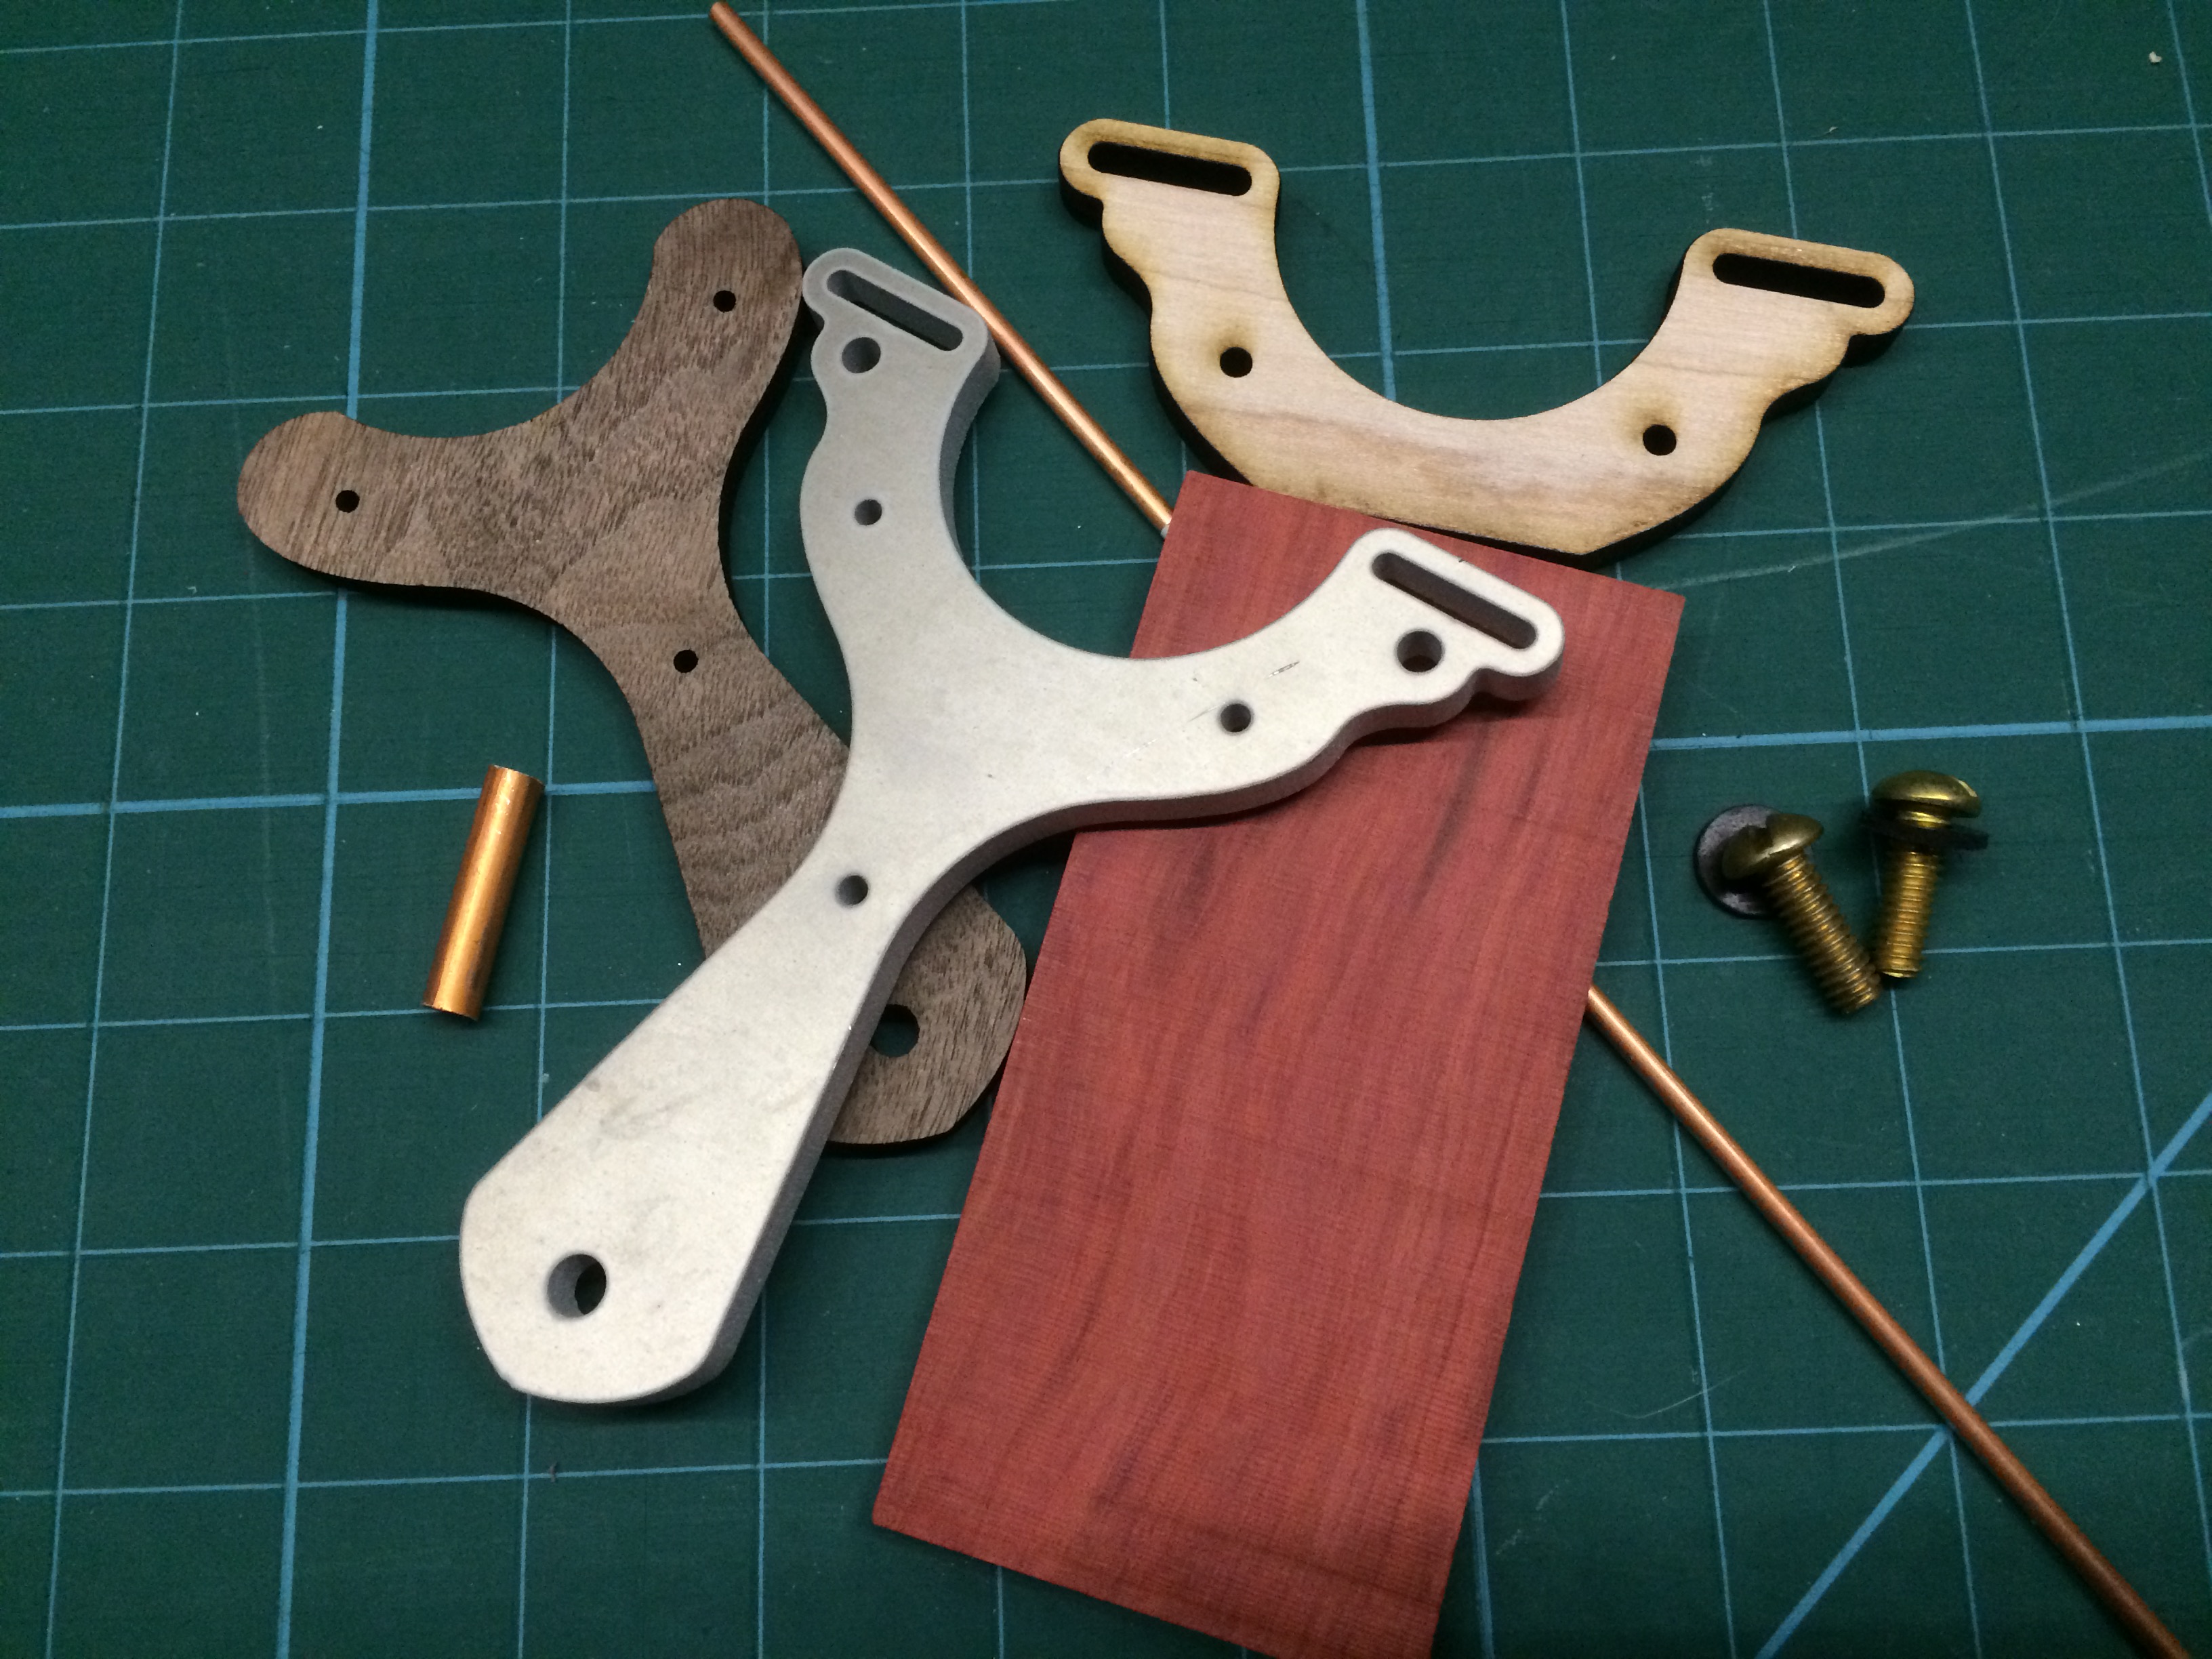
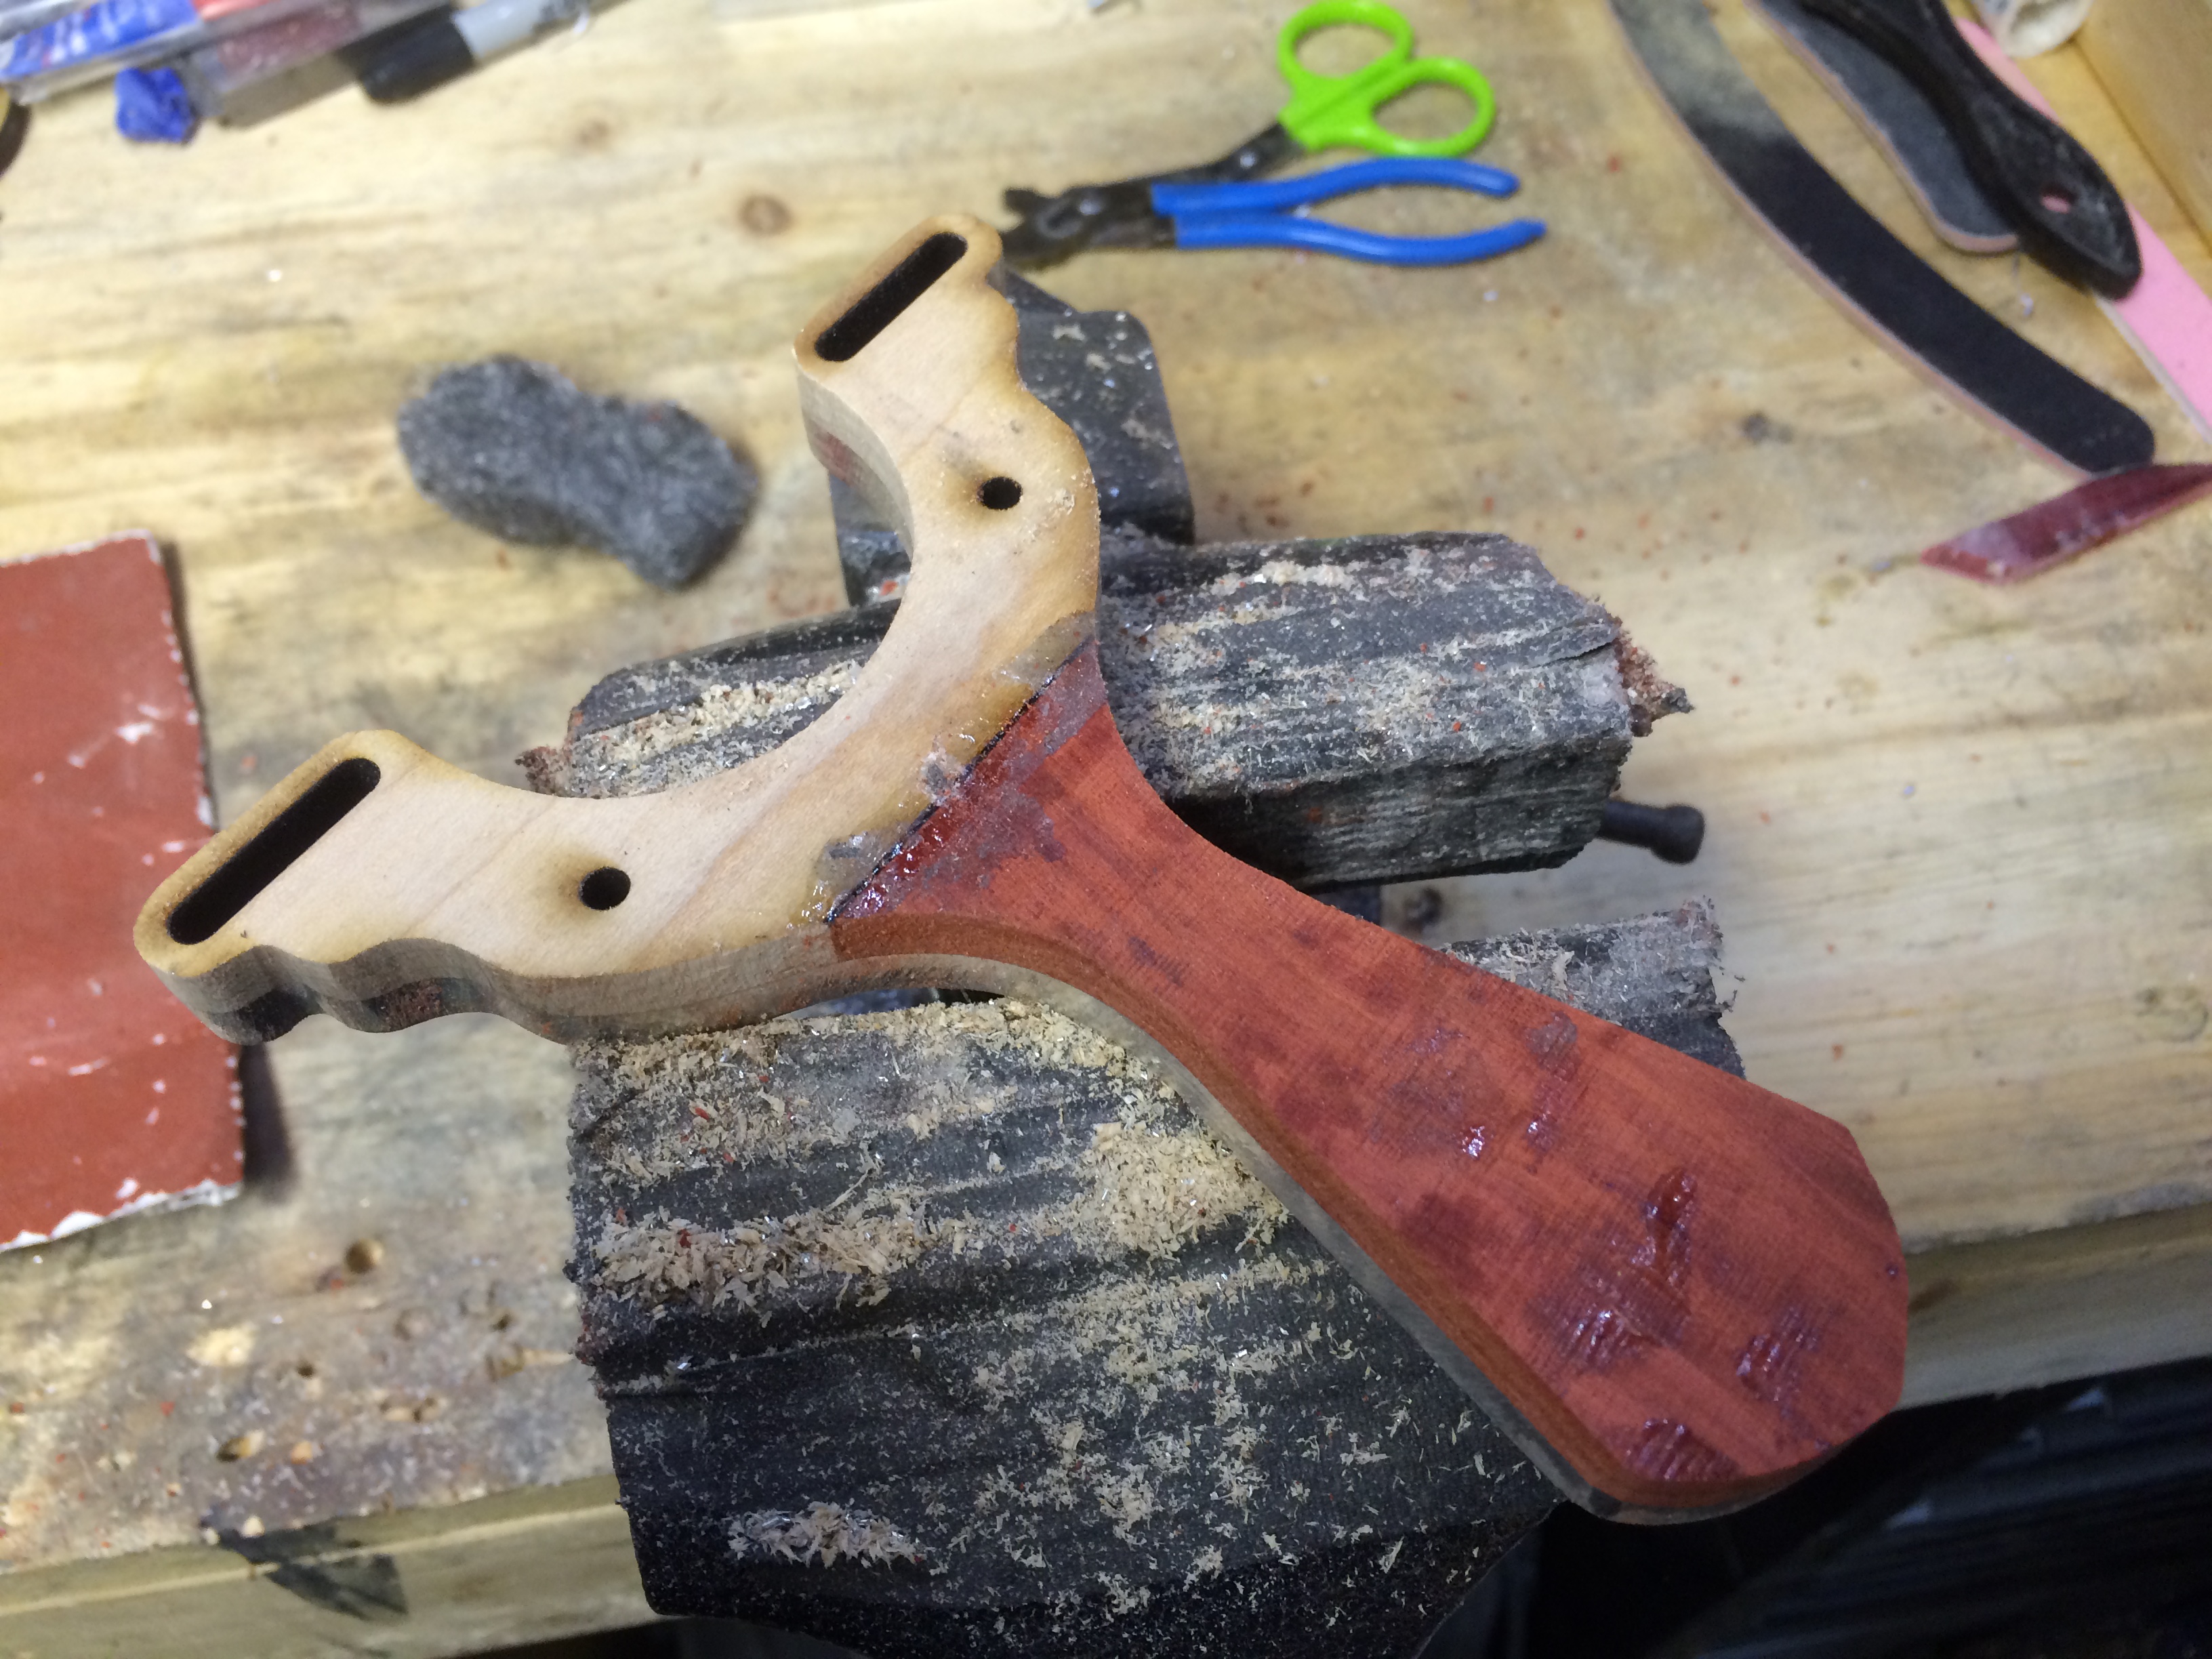
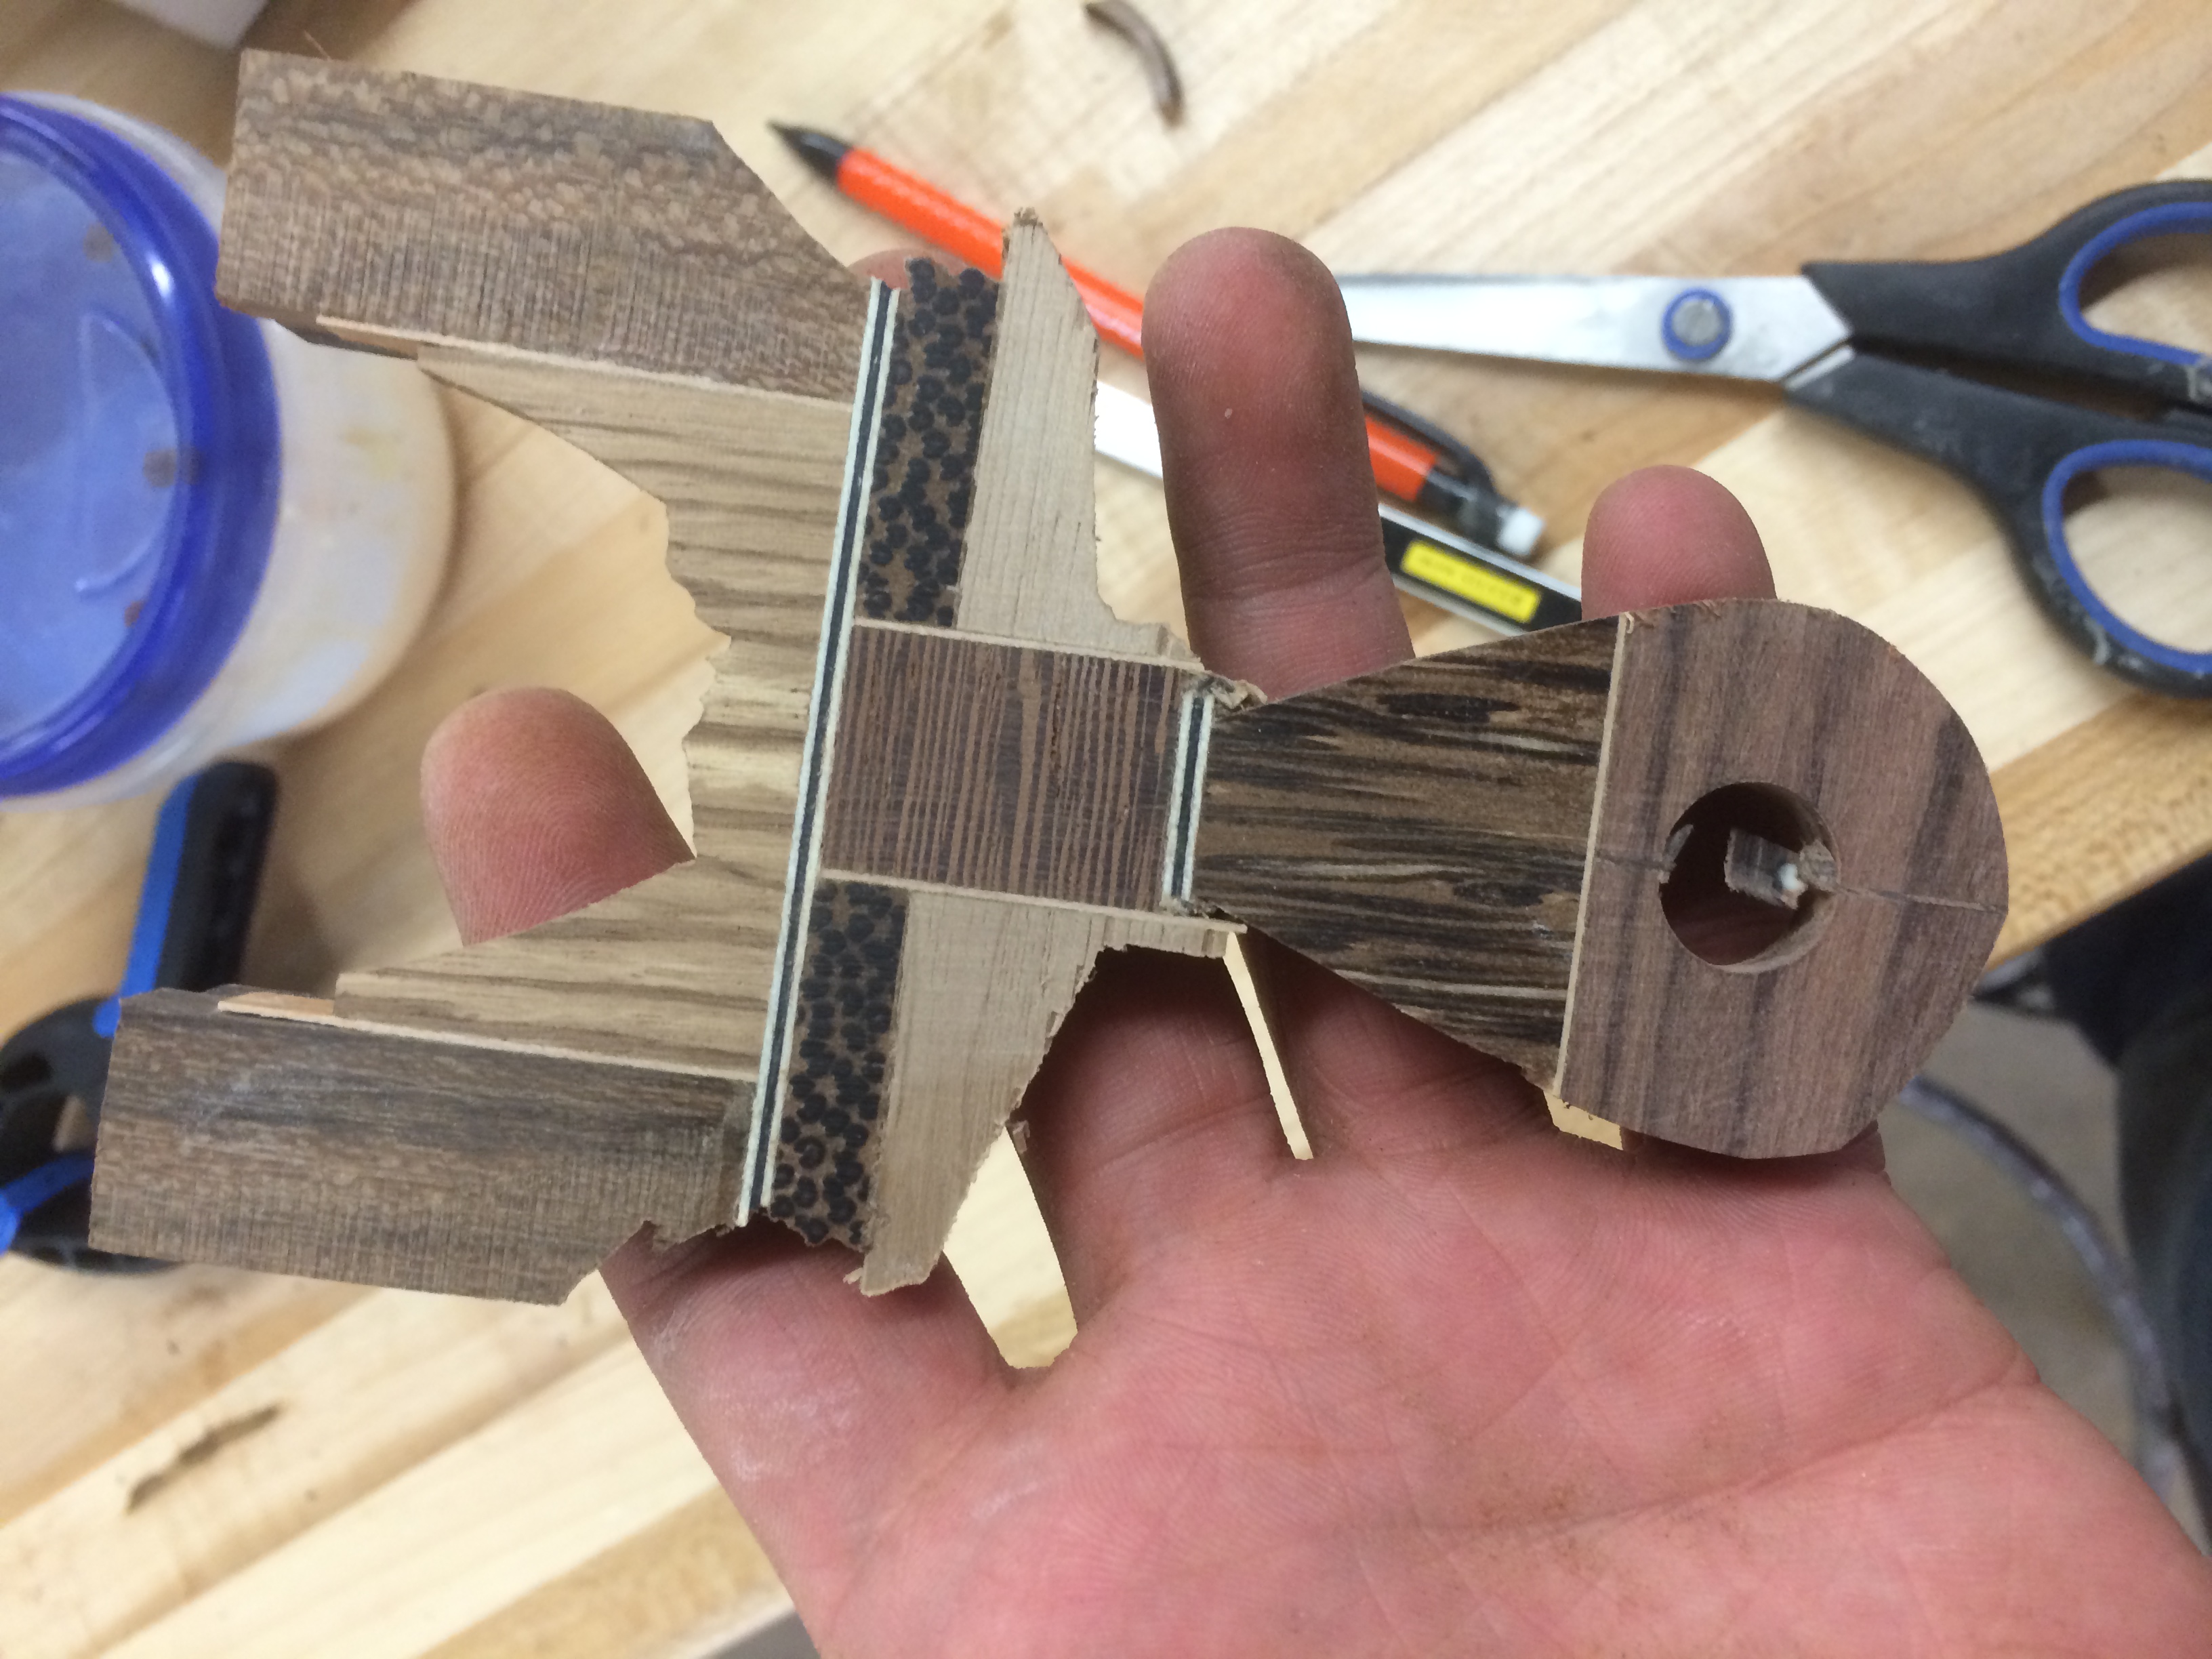
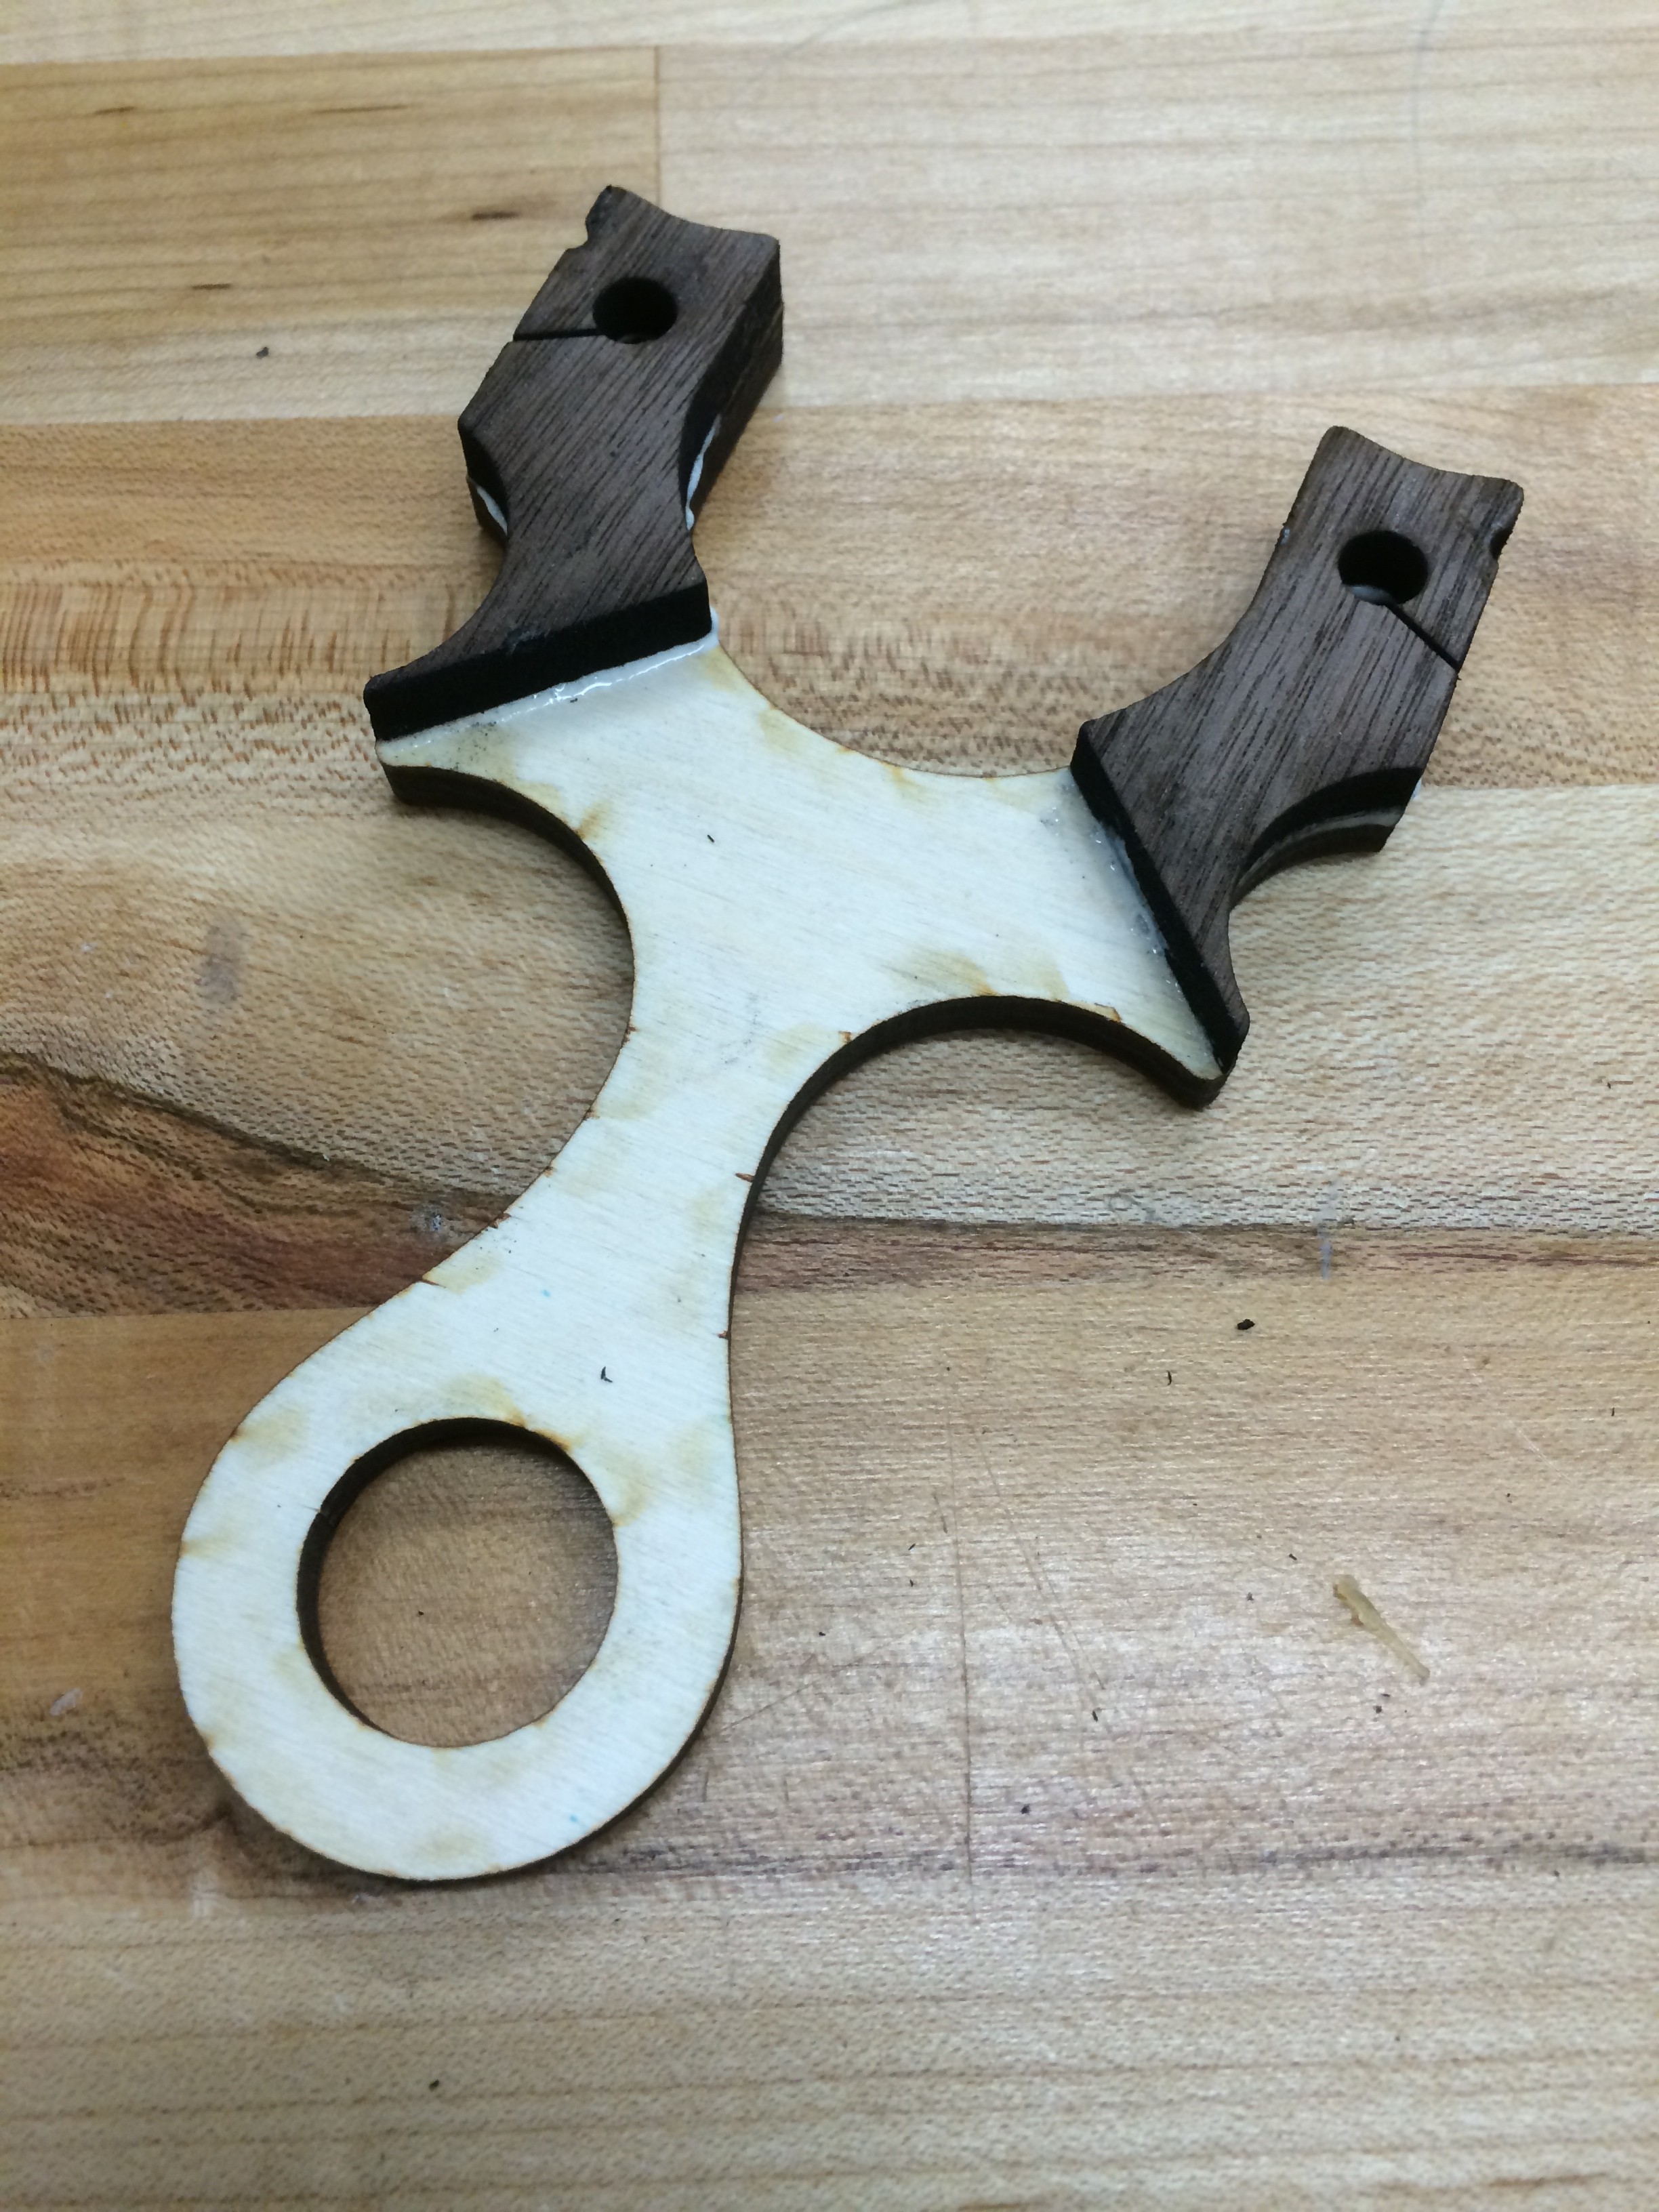
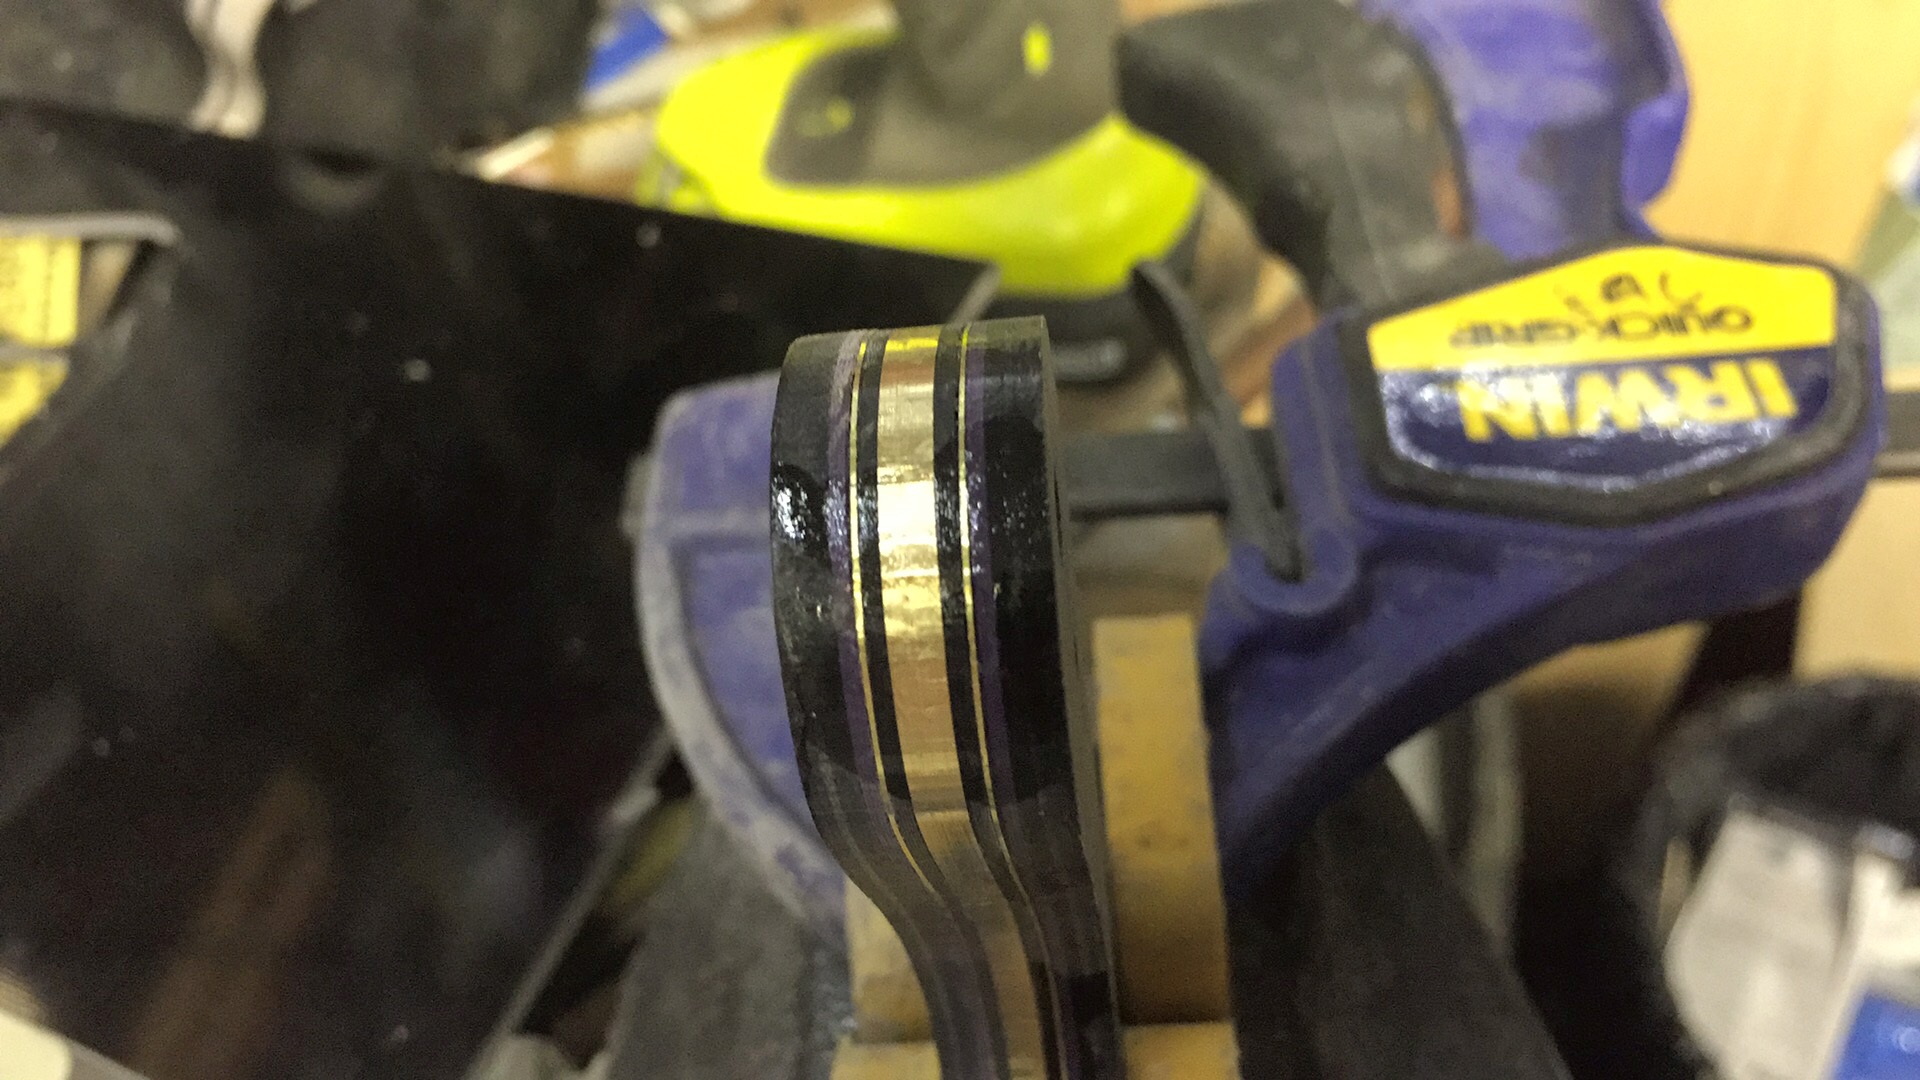
Rough cutting the rest of the materials. At the core is a 3mm thick brass sheet, flanking that is a .03″ black g10, then a .5mm brass sheet, then purple .03″ G10 and finally an outside scale of .125″ black G10. Did I confuse you with the Imperial/Metric measurements? Try working with them…the reason is that they are sourced from all over the world, so the Metric 3mm and .5mm brass was sourced overseas, while the G10 was source from two different North American suppliers. Regardless of system, the final thickness is just a hair over the ideal thickness for the Ocularis ®plugs. I wanted to create a piece that had colour in it but in a subdued colour palette suitable for the steampunk theme. While purple on its own is quite flashy; however used as an accent colour to black and brass/gold tones, it gives an air of royalty and class.

img_0539

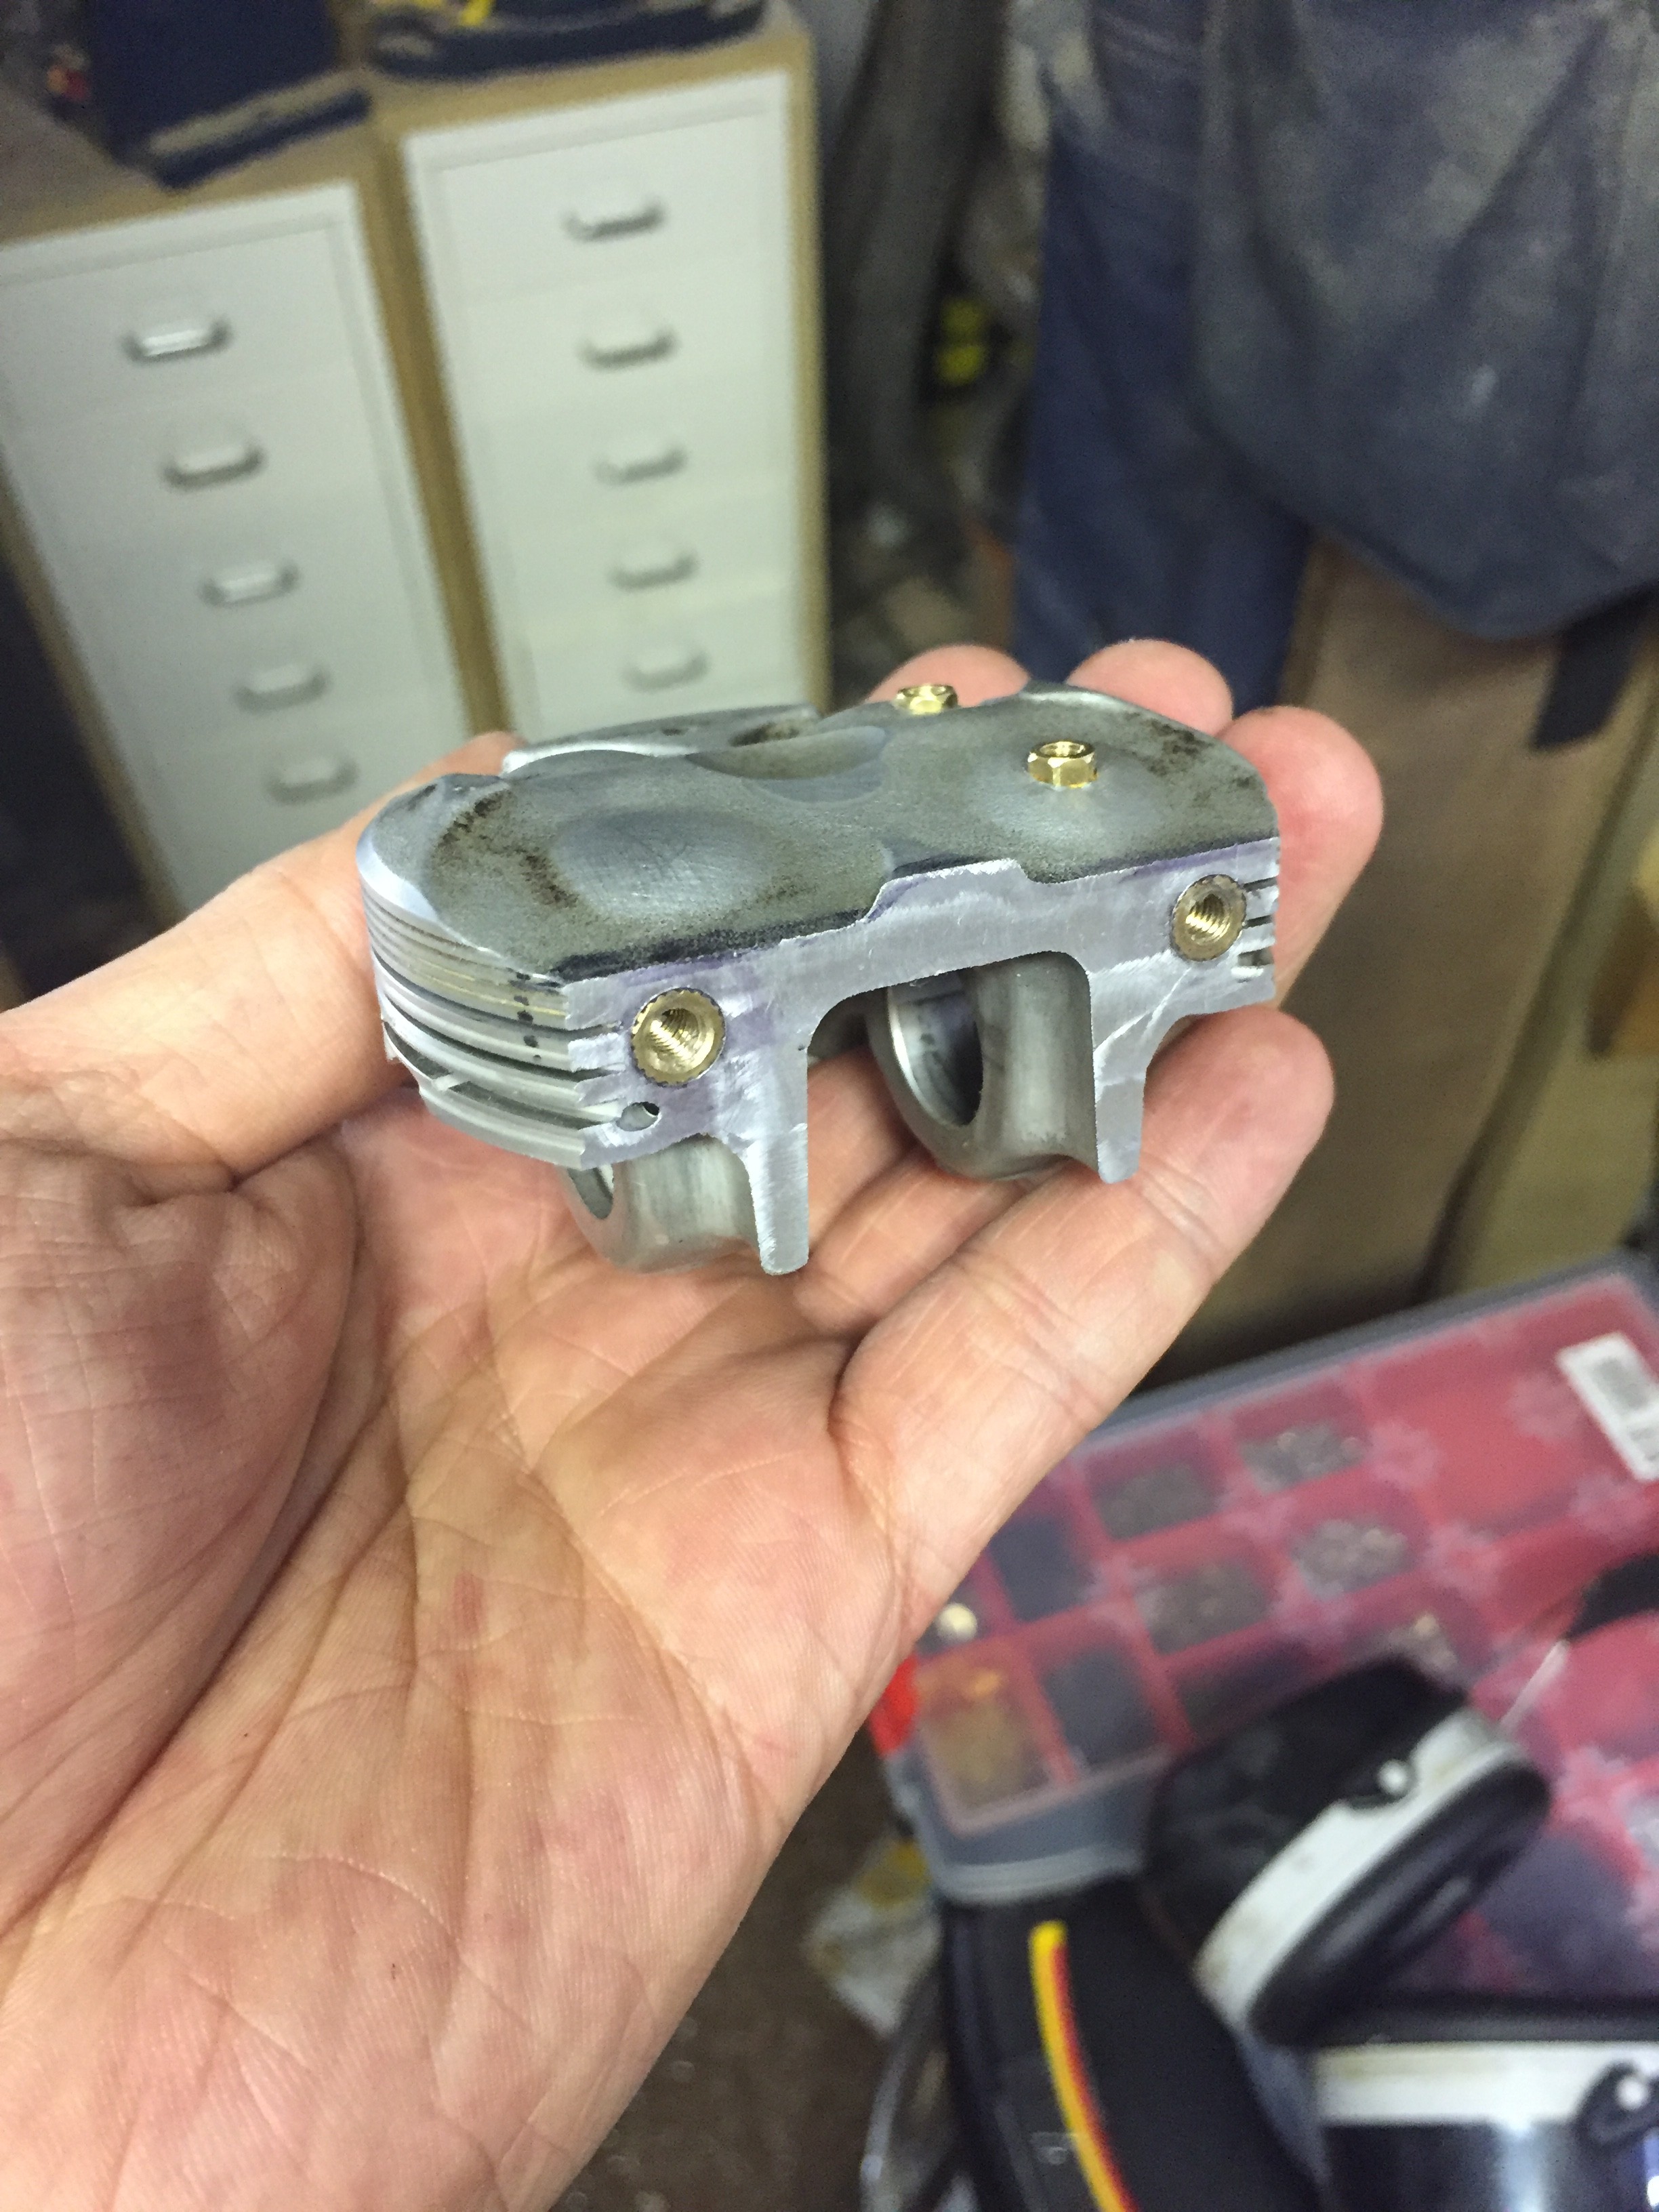
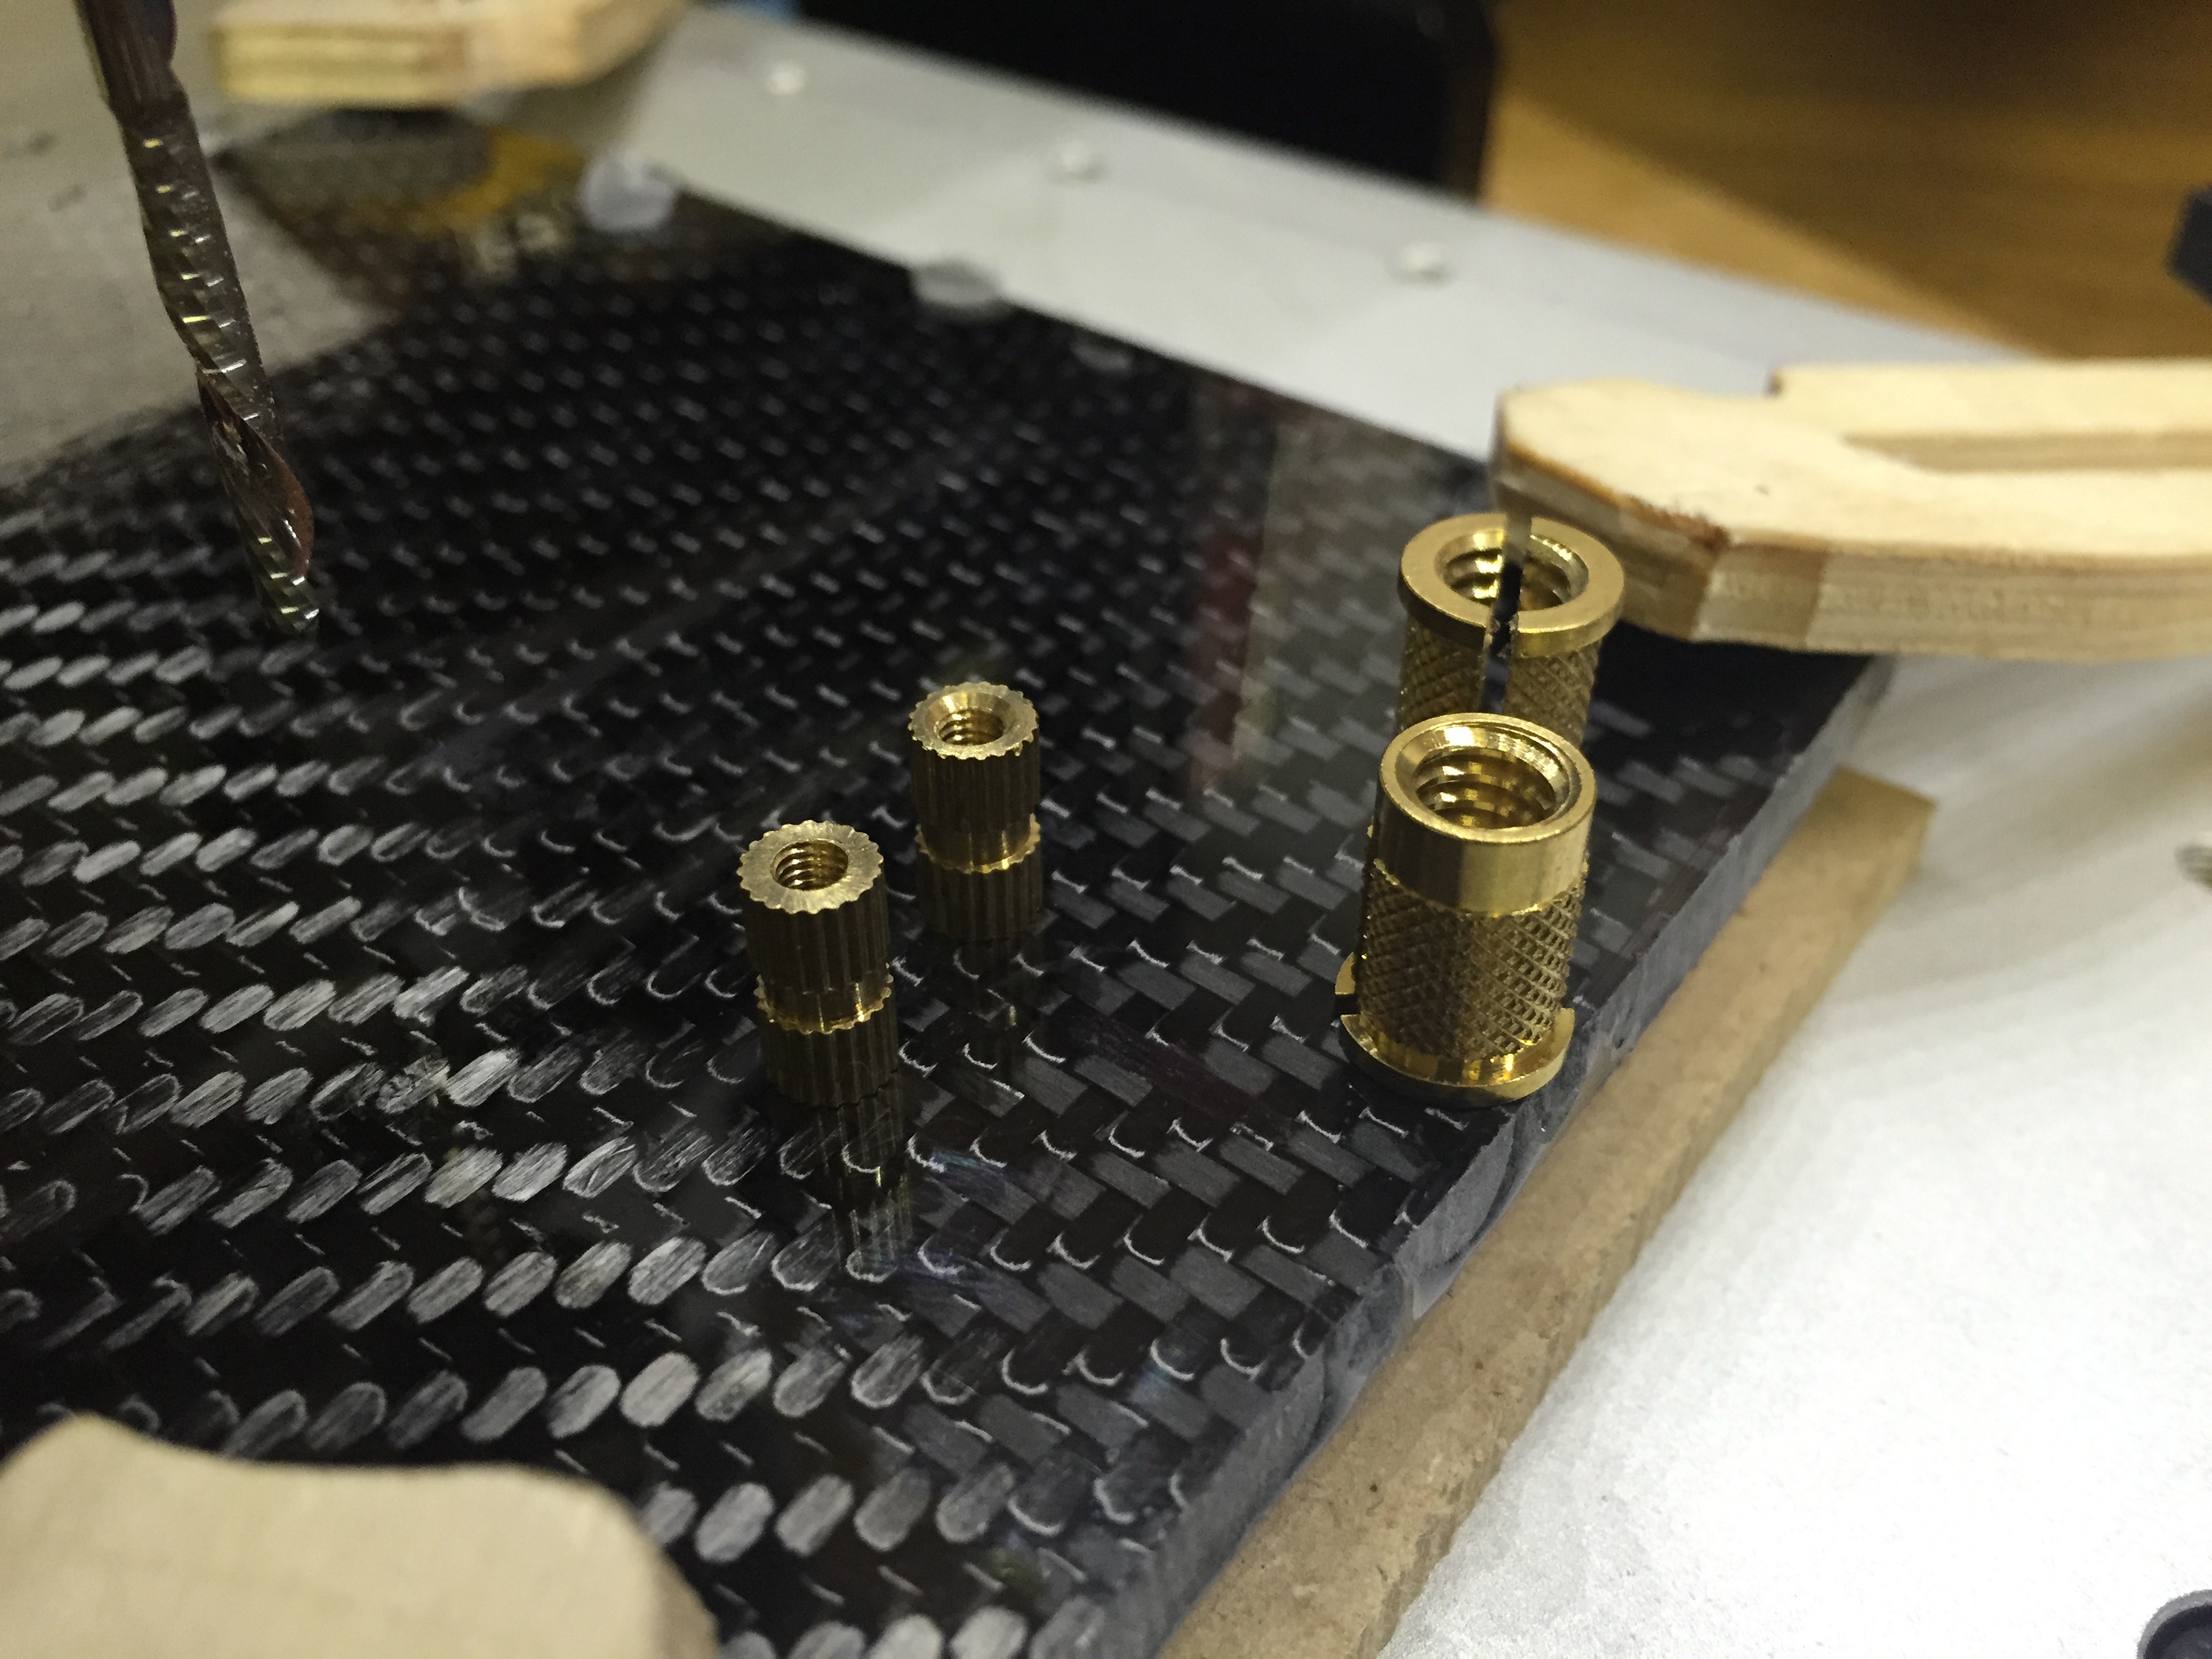
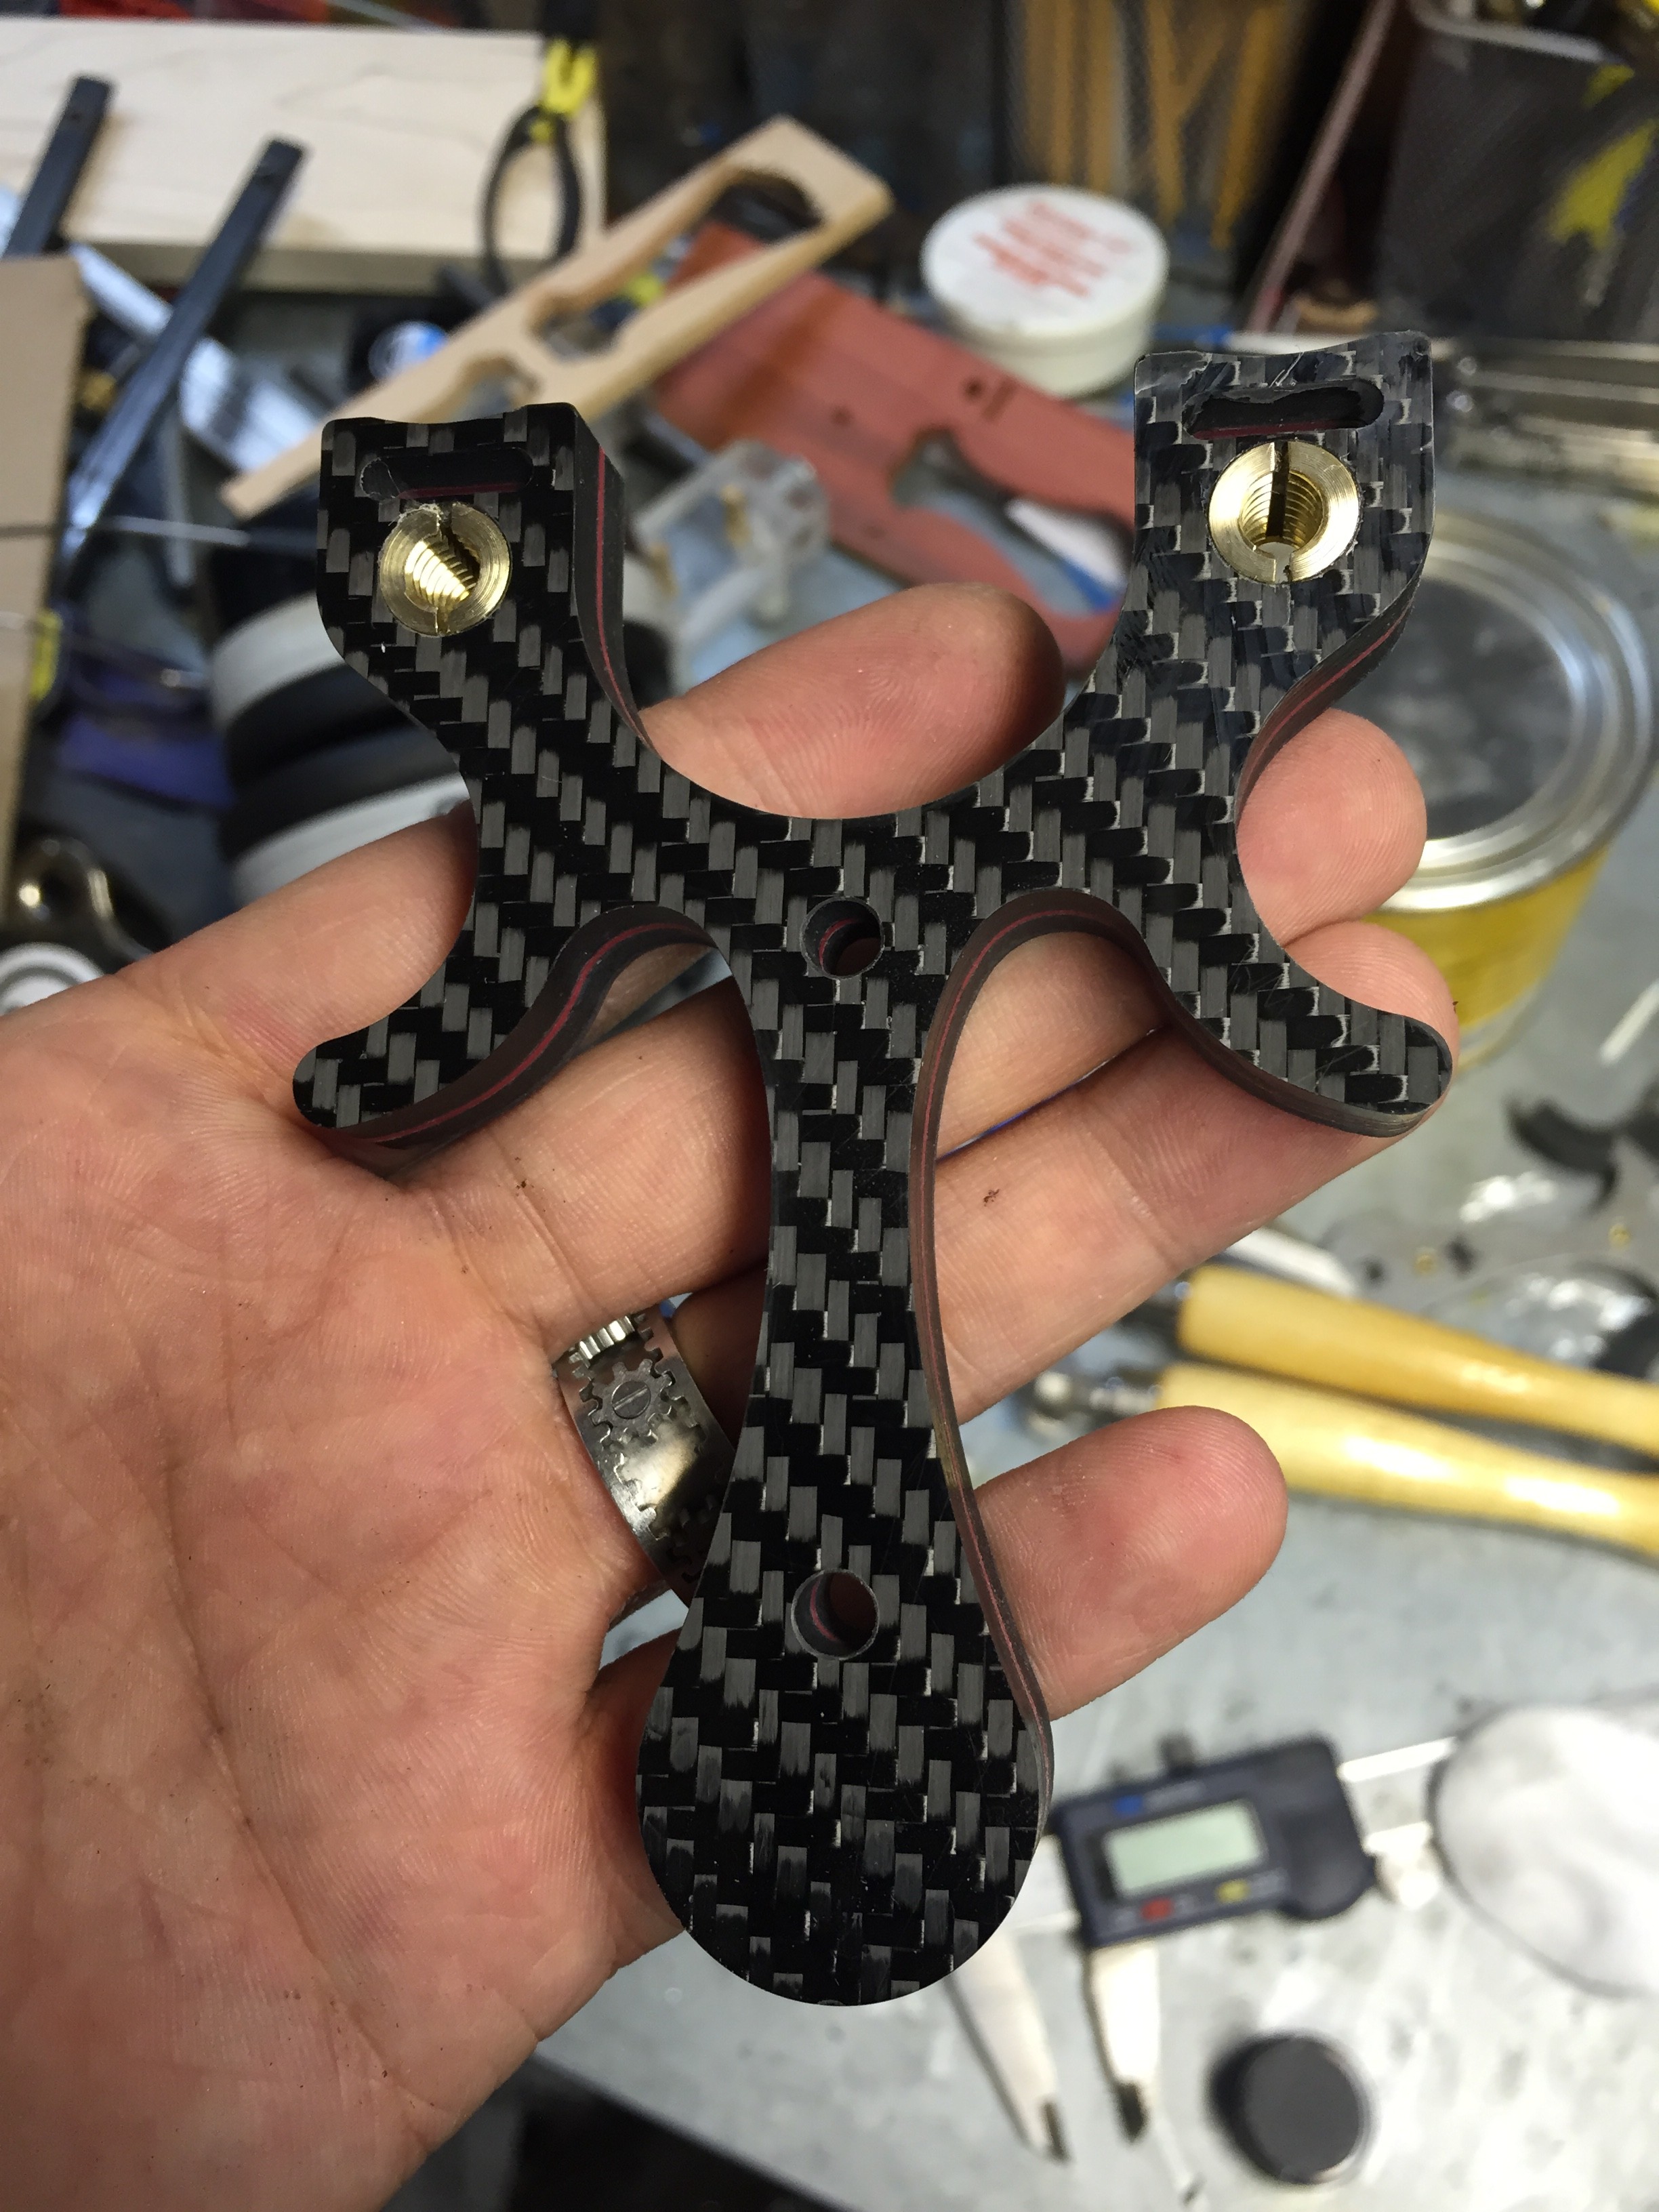
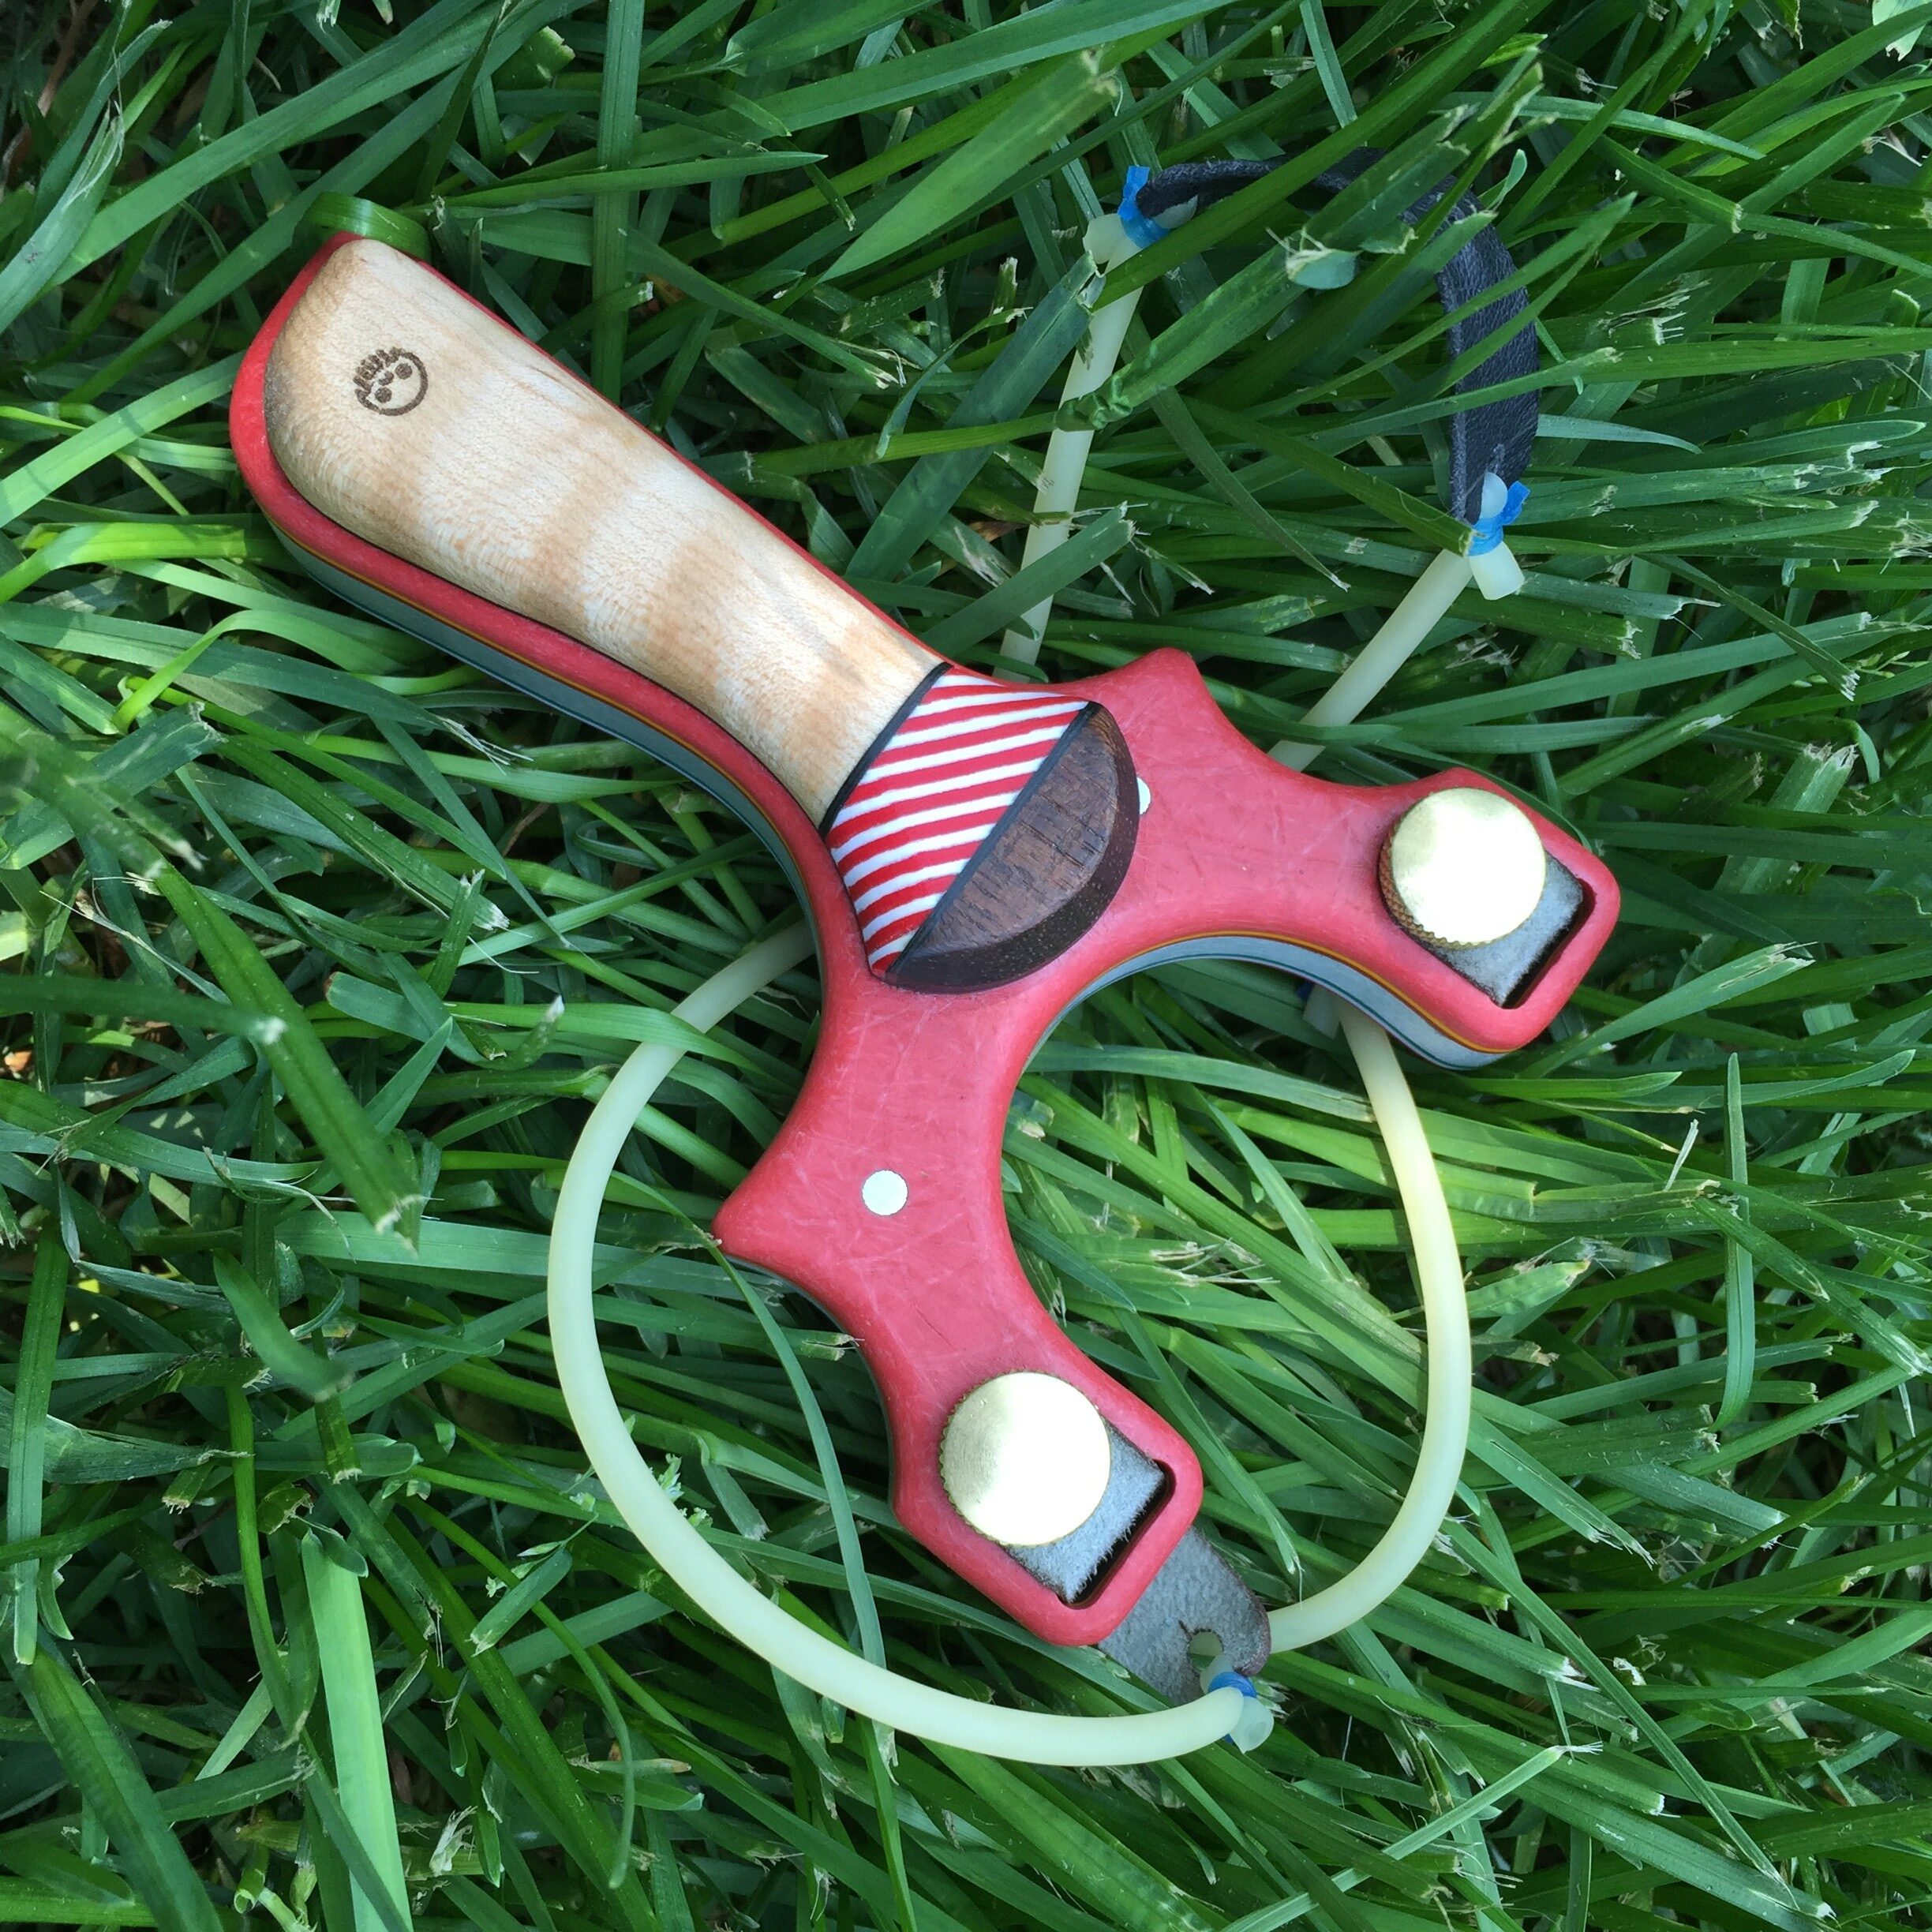
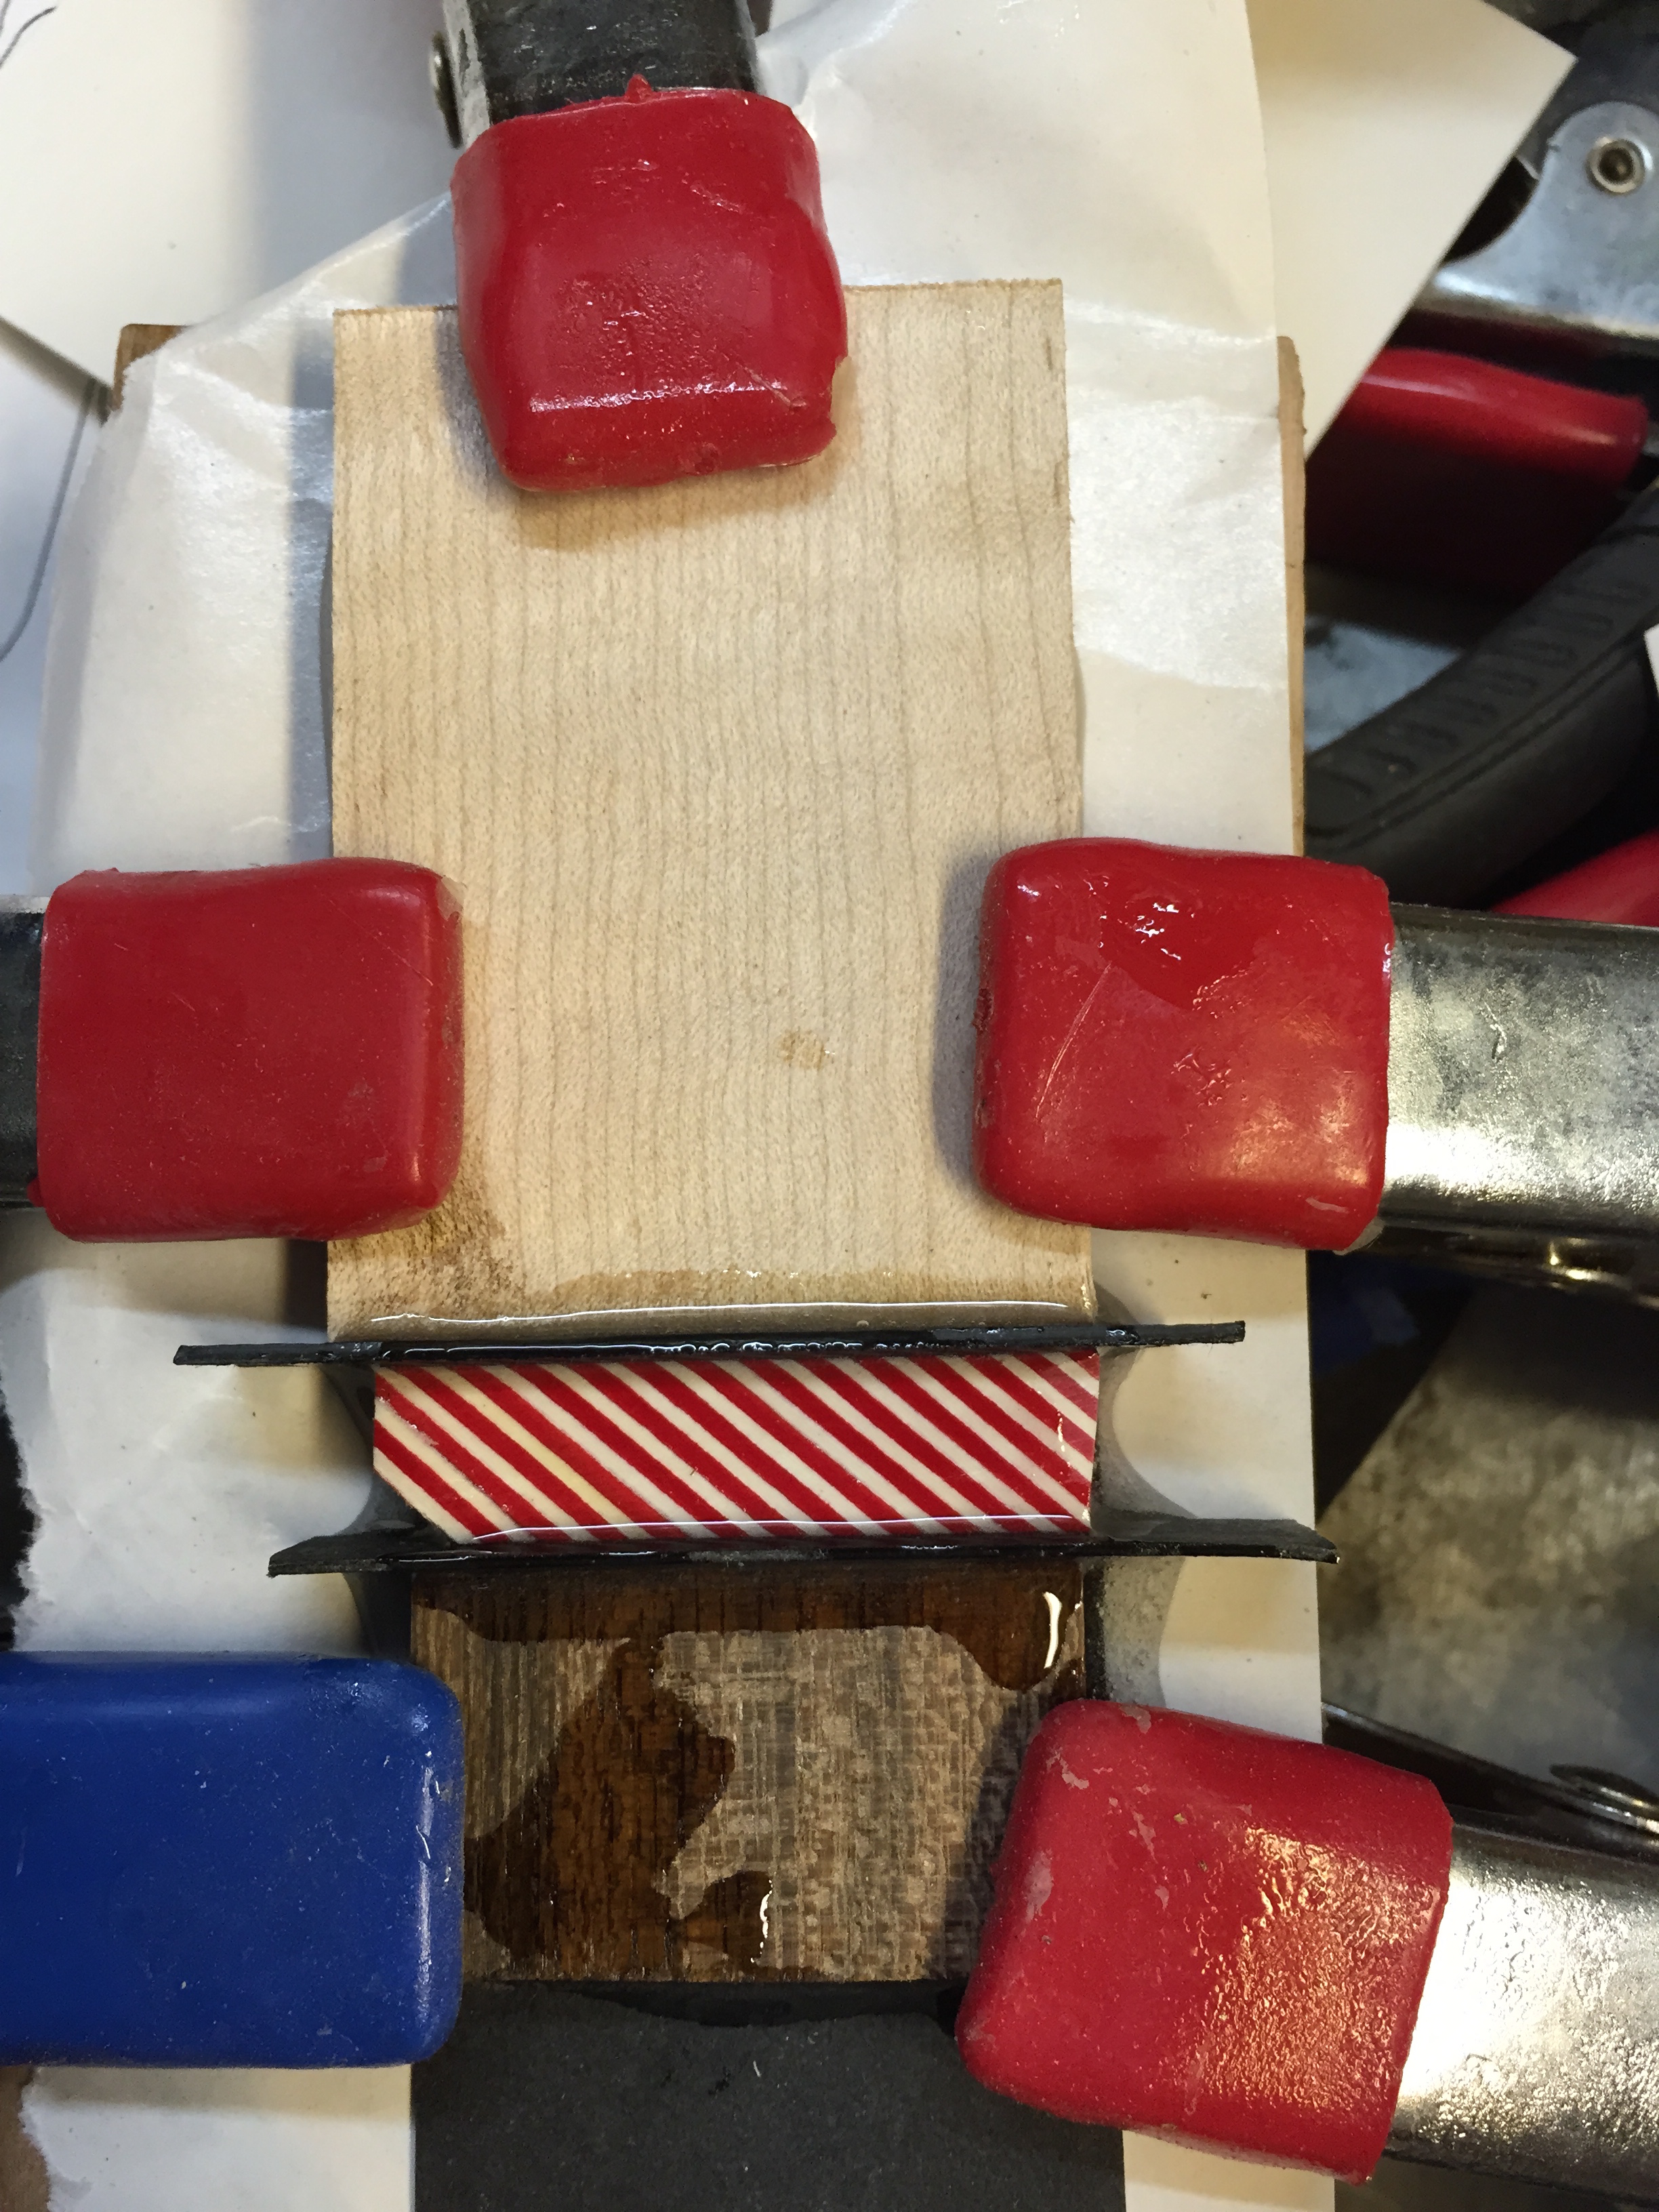
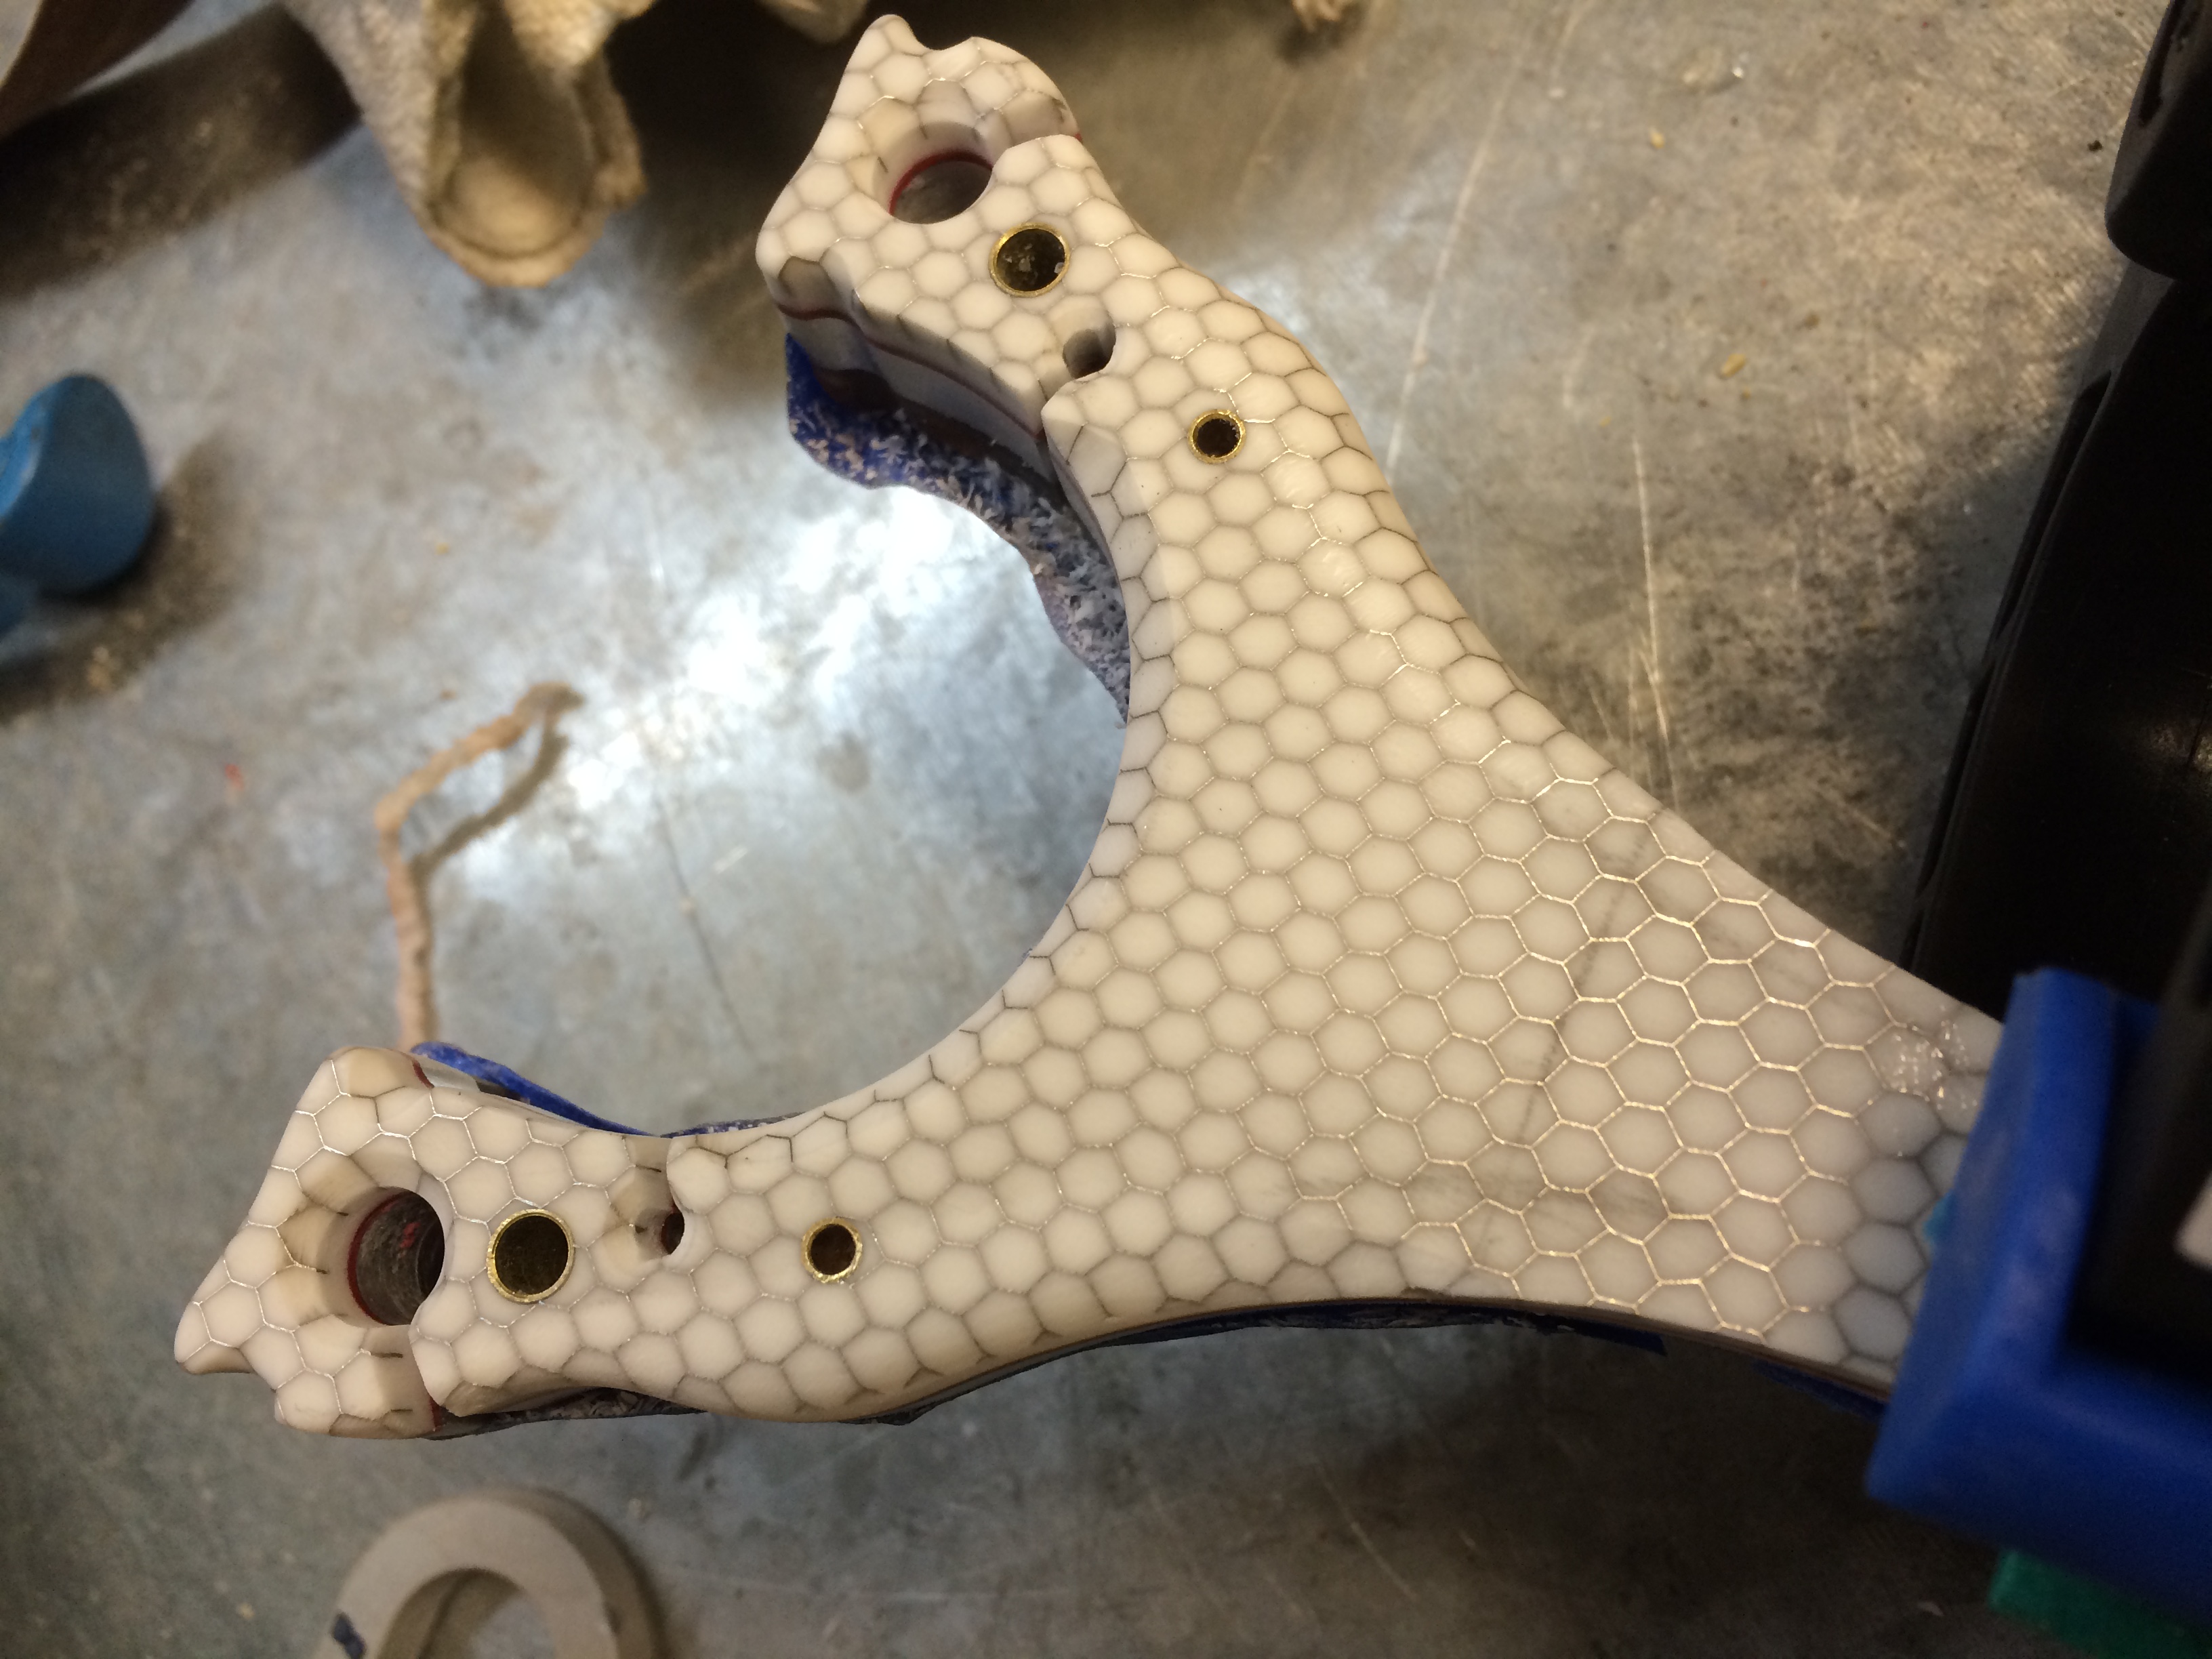
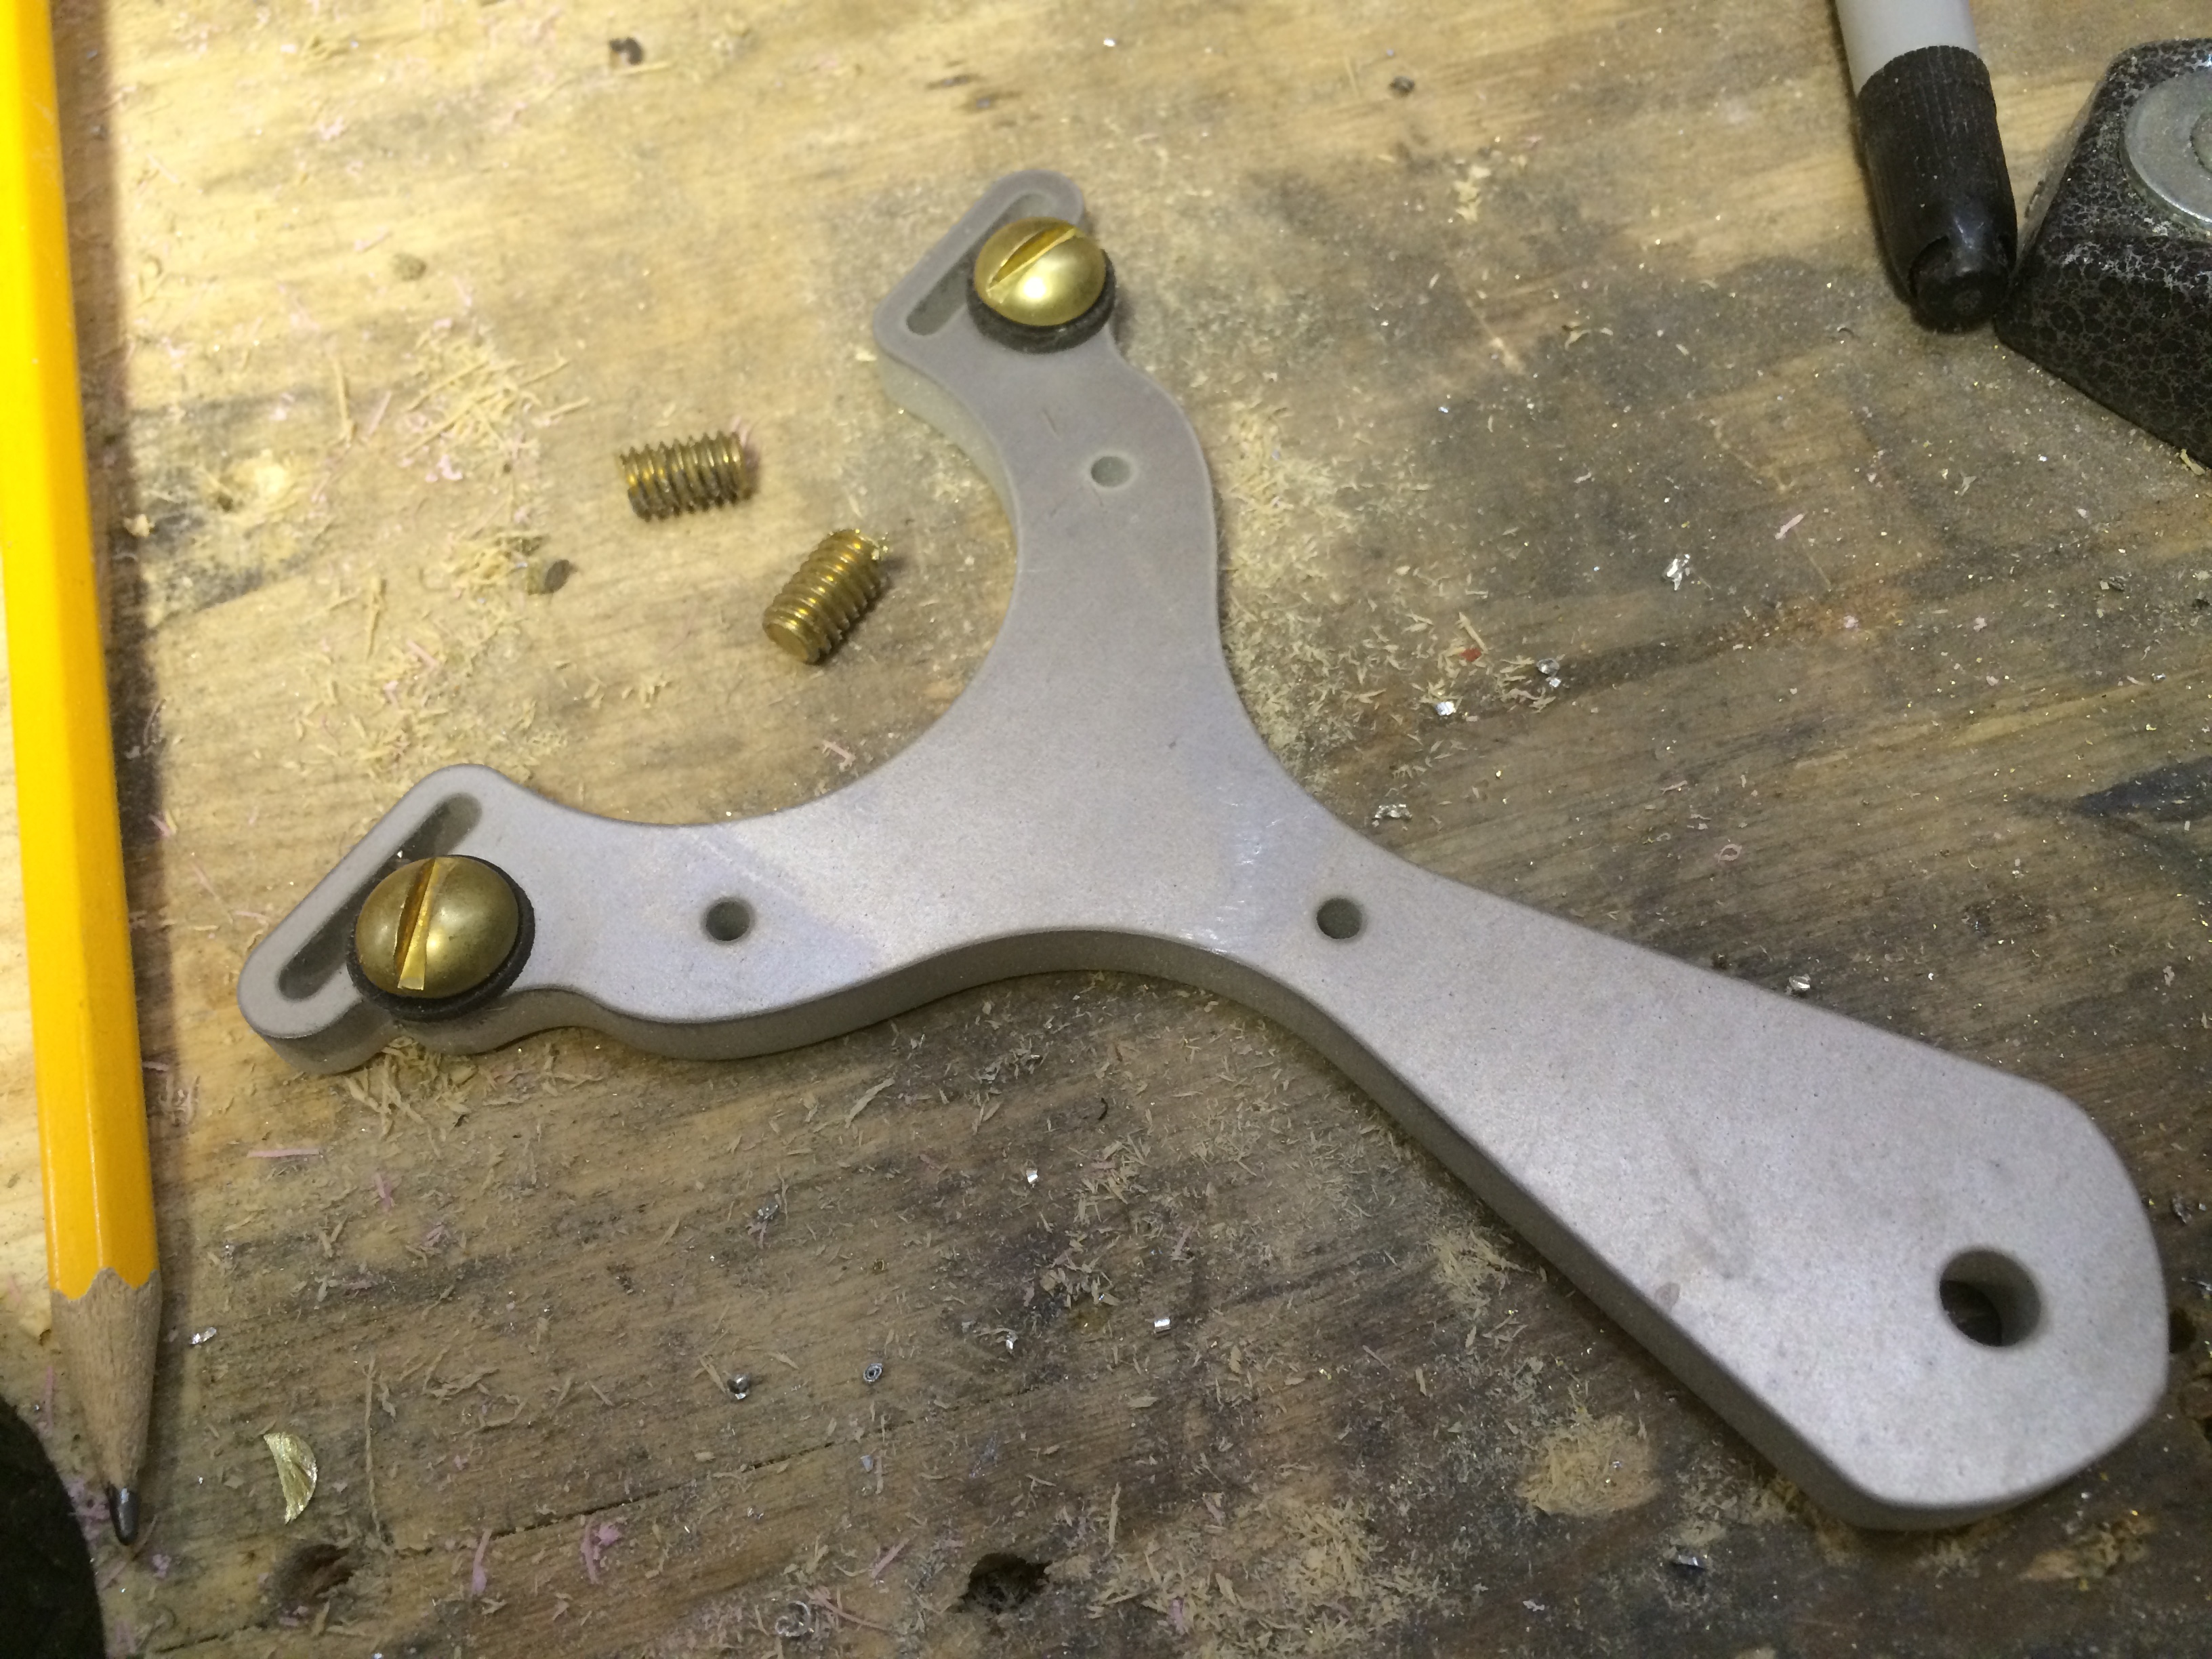
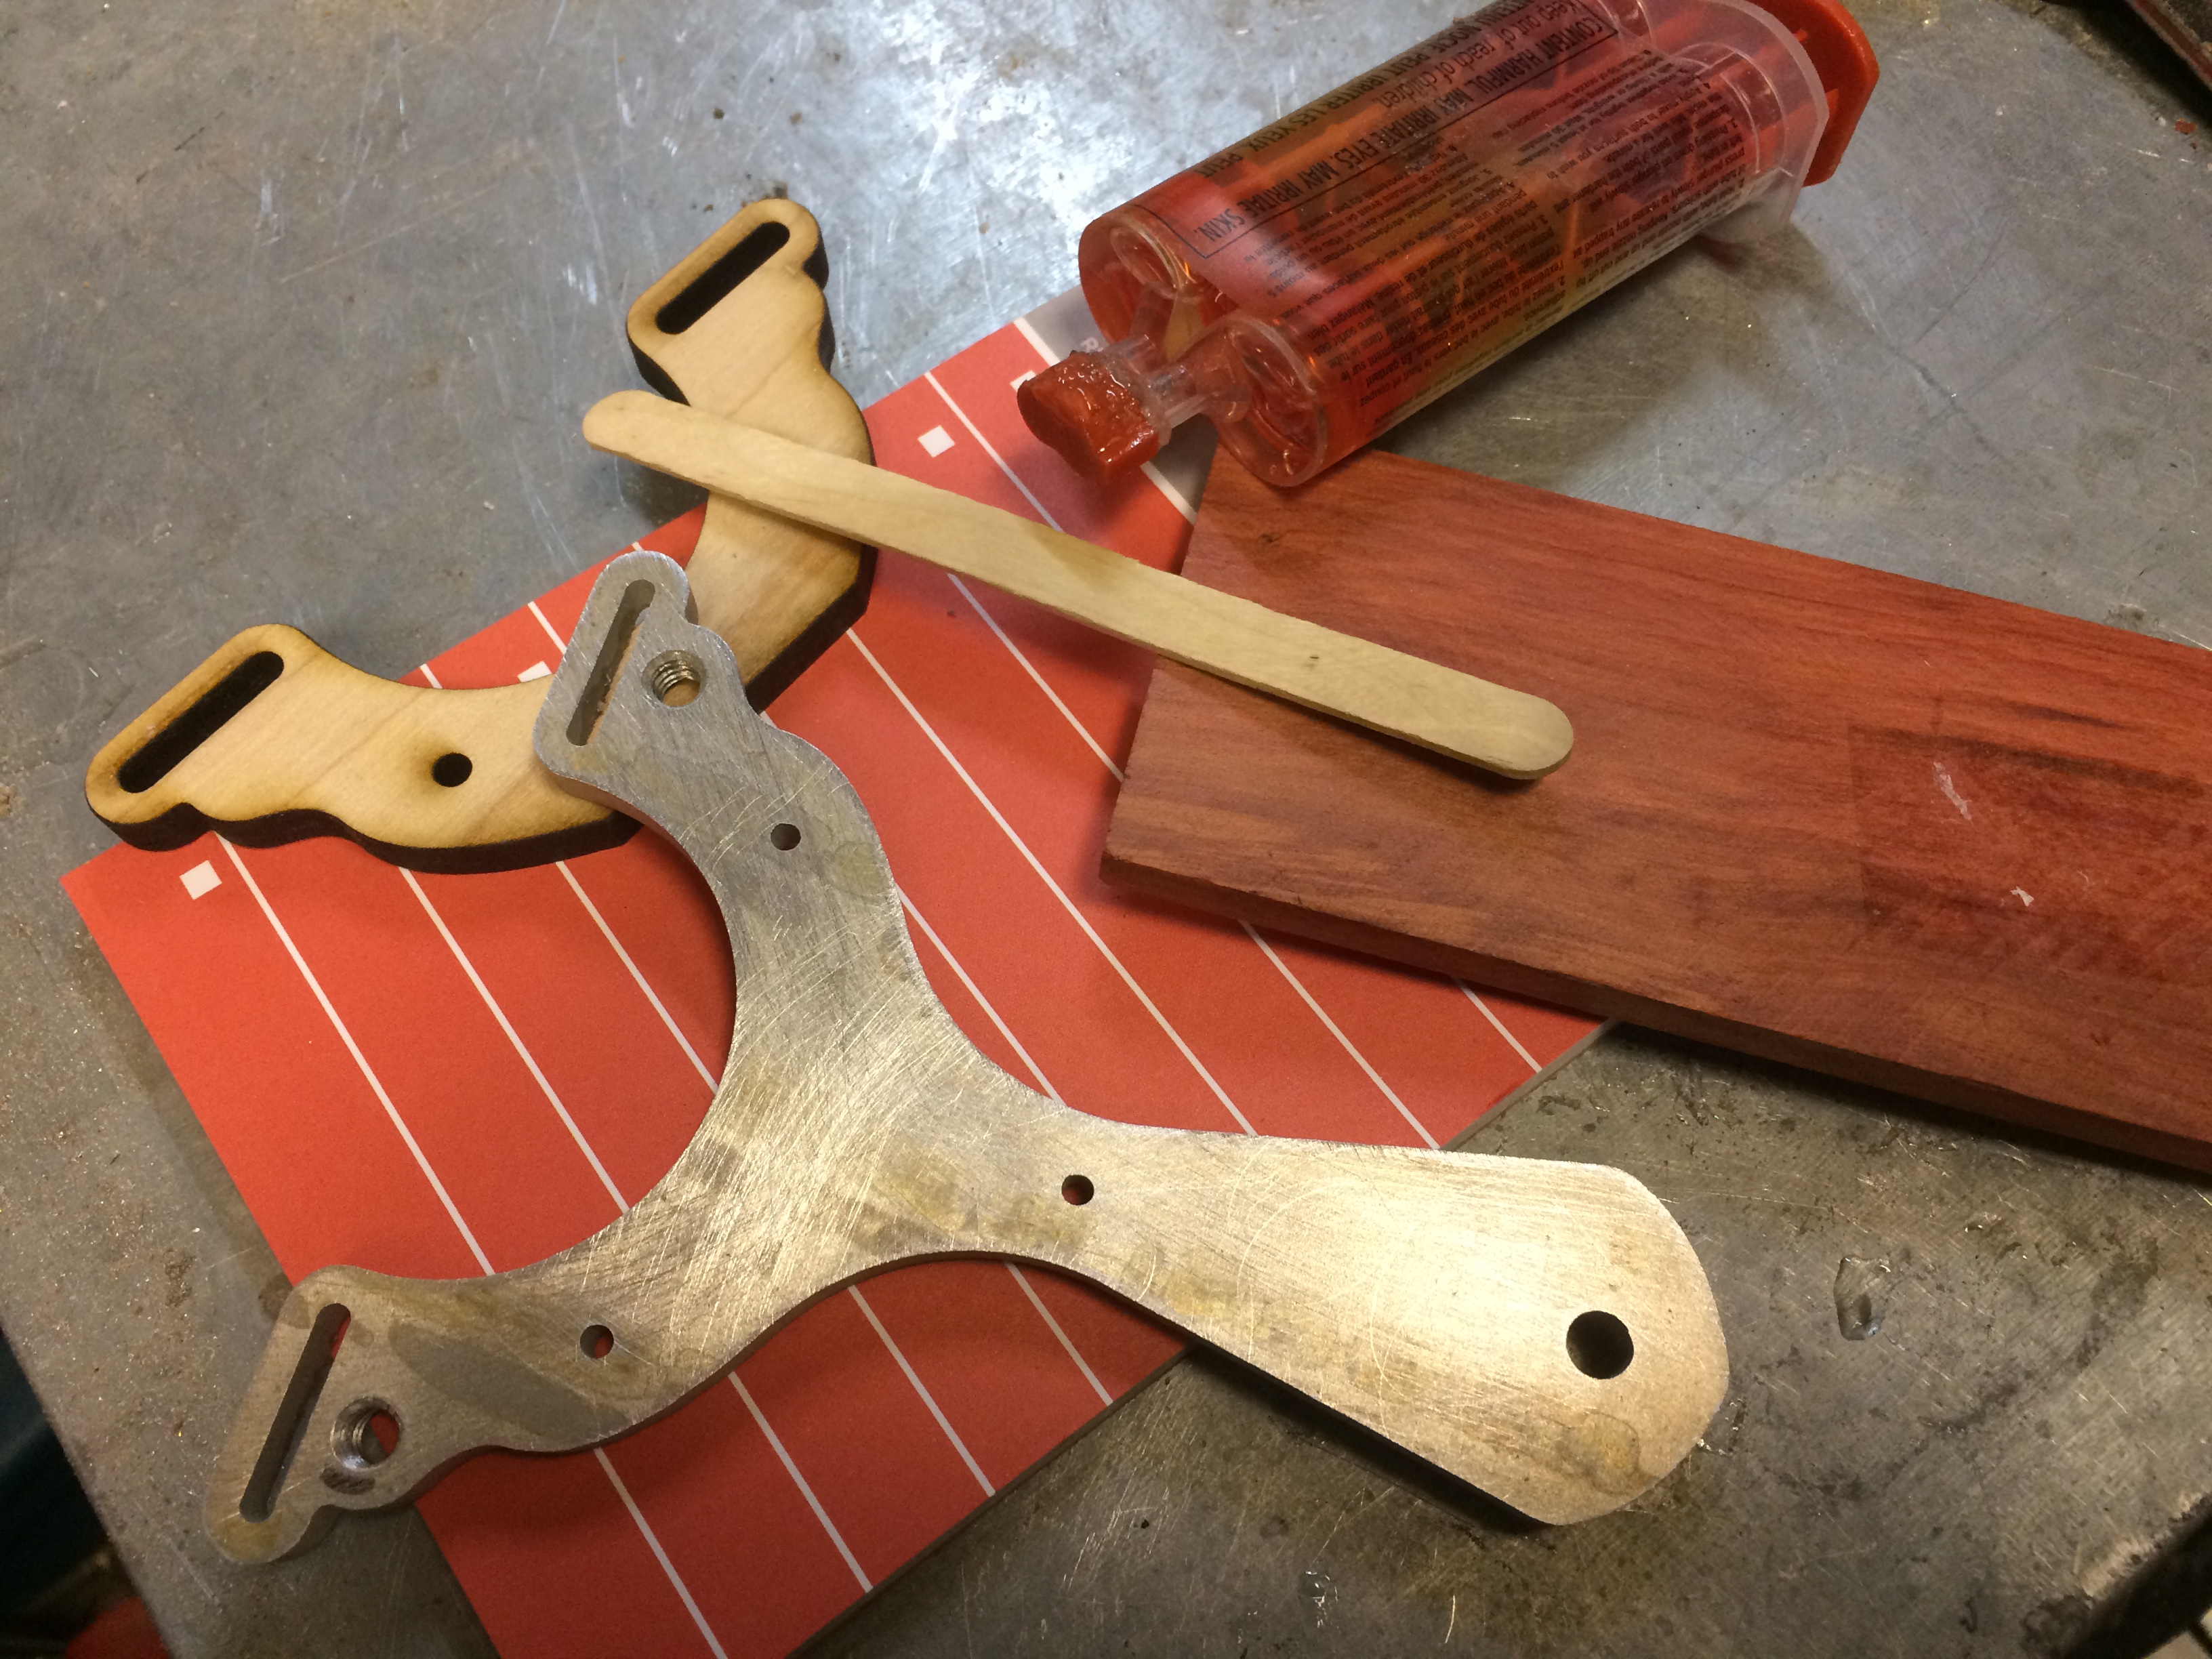
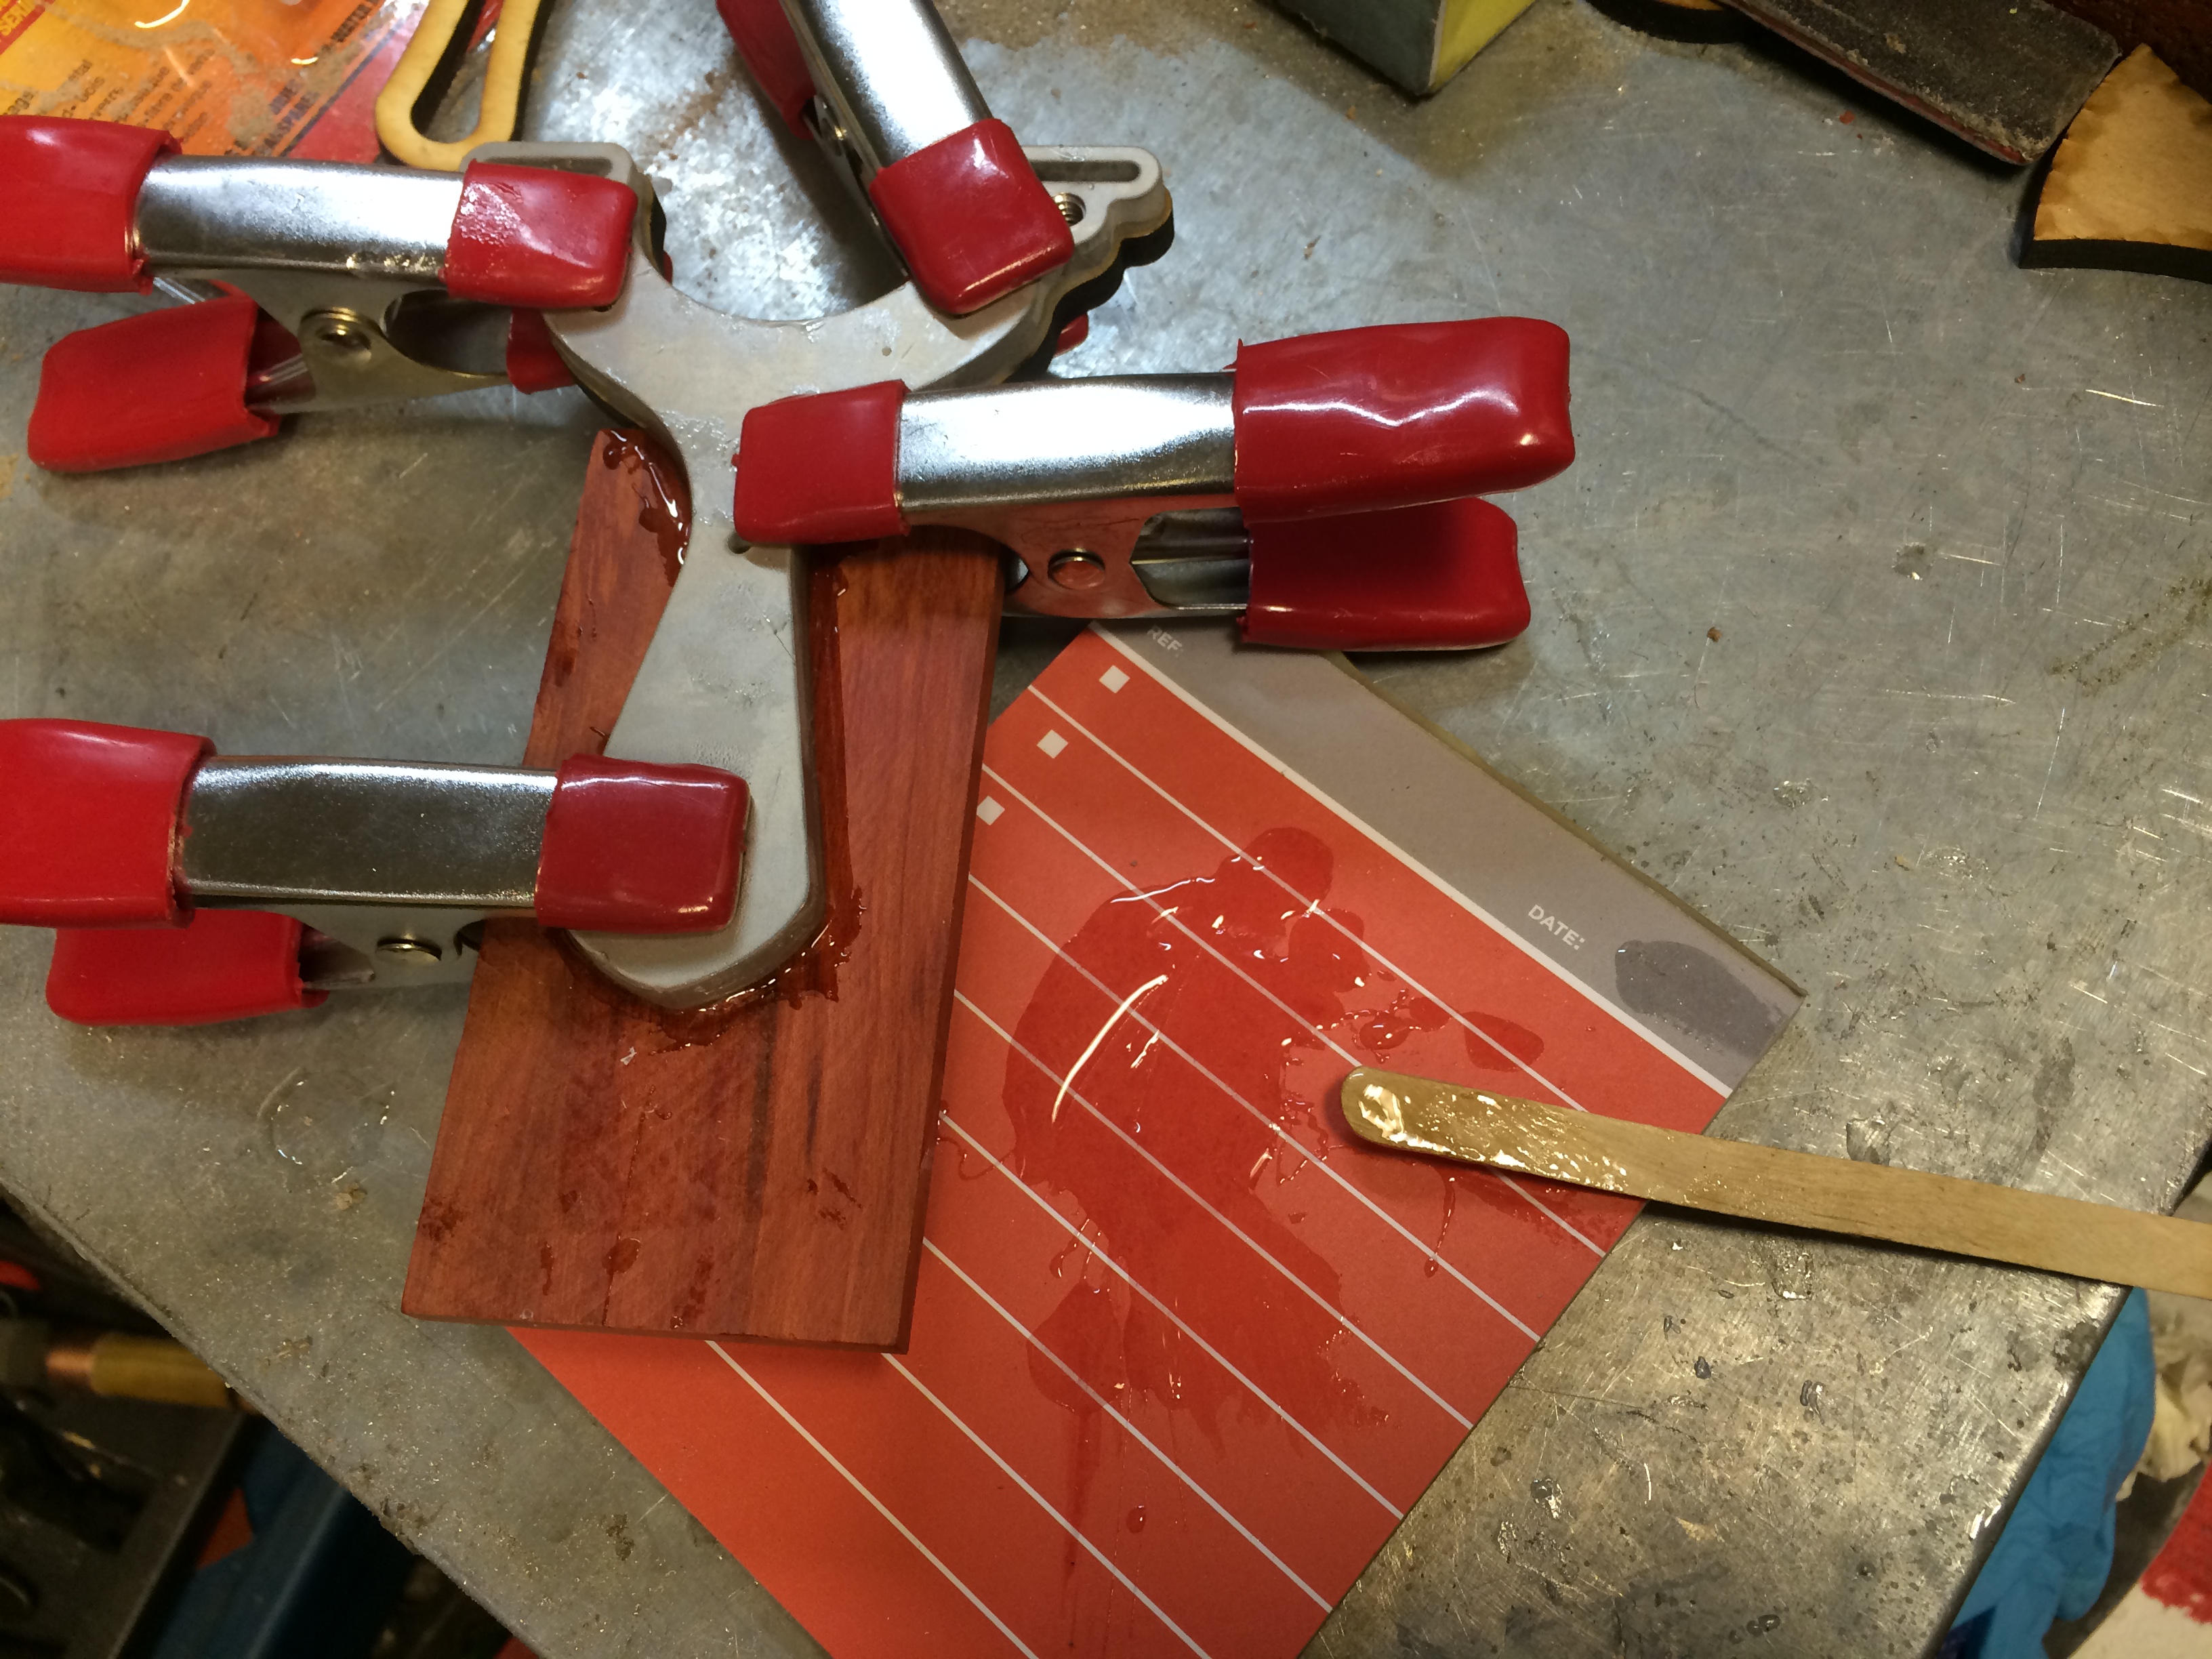
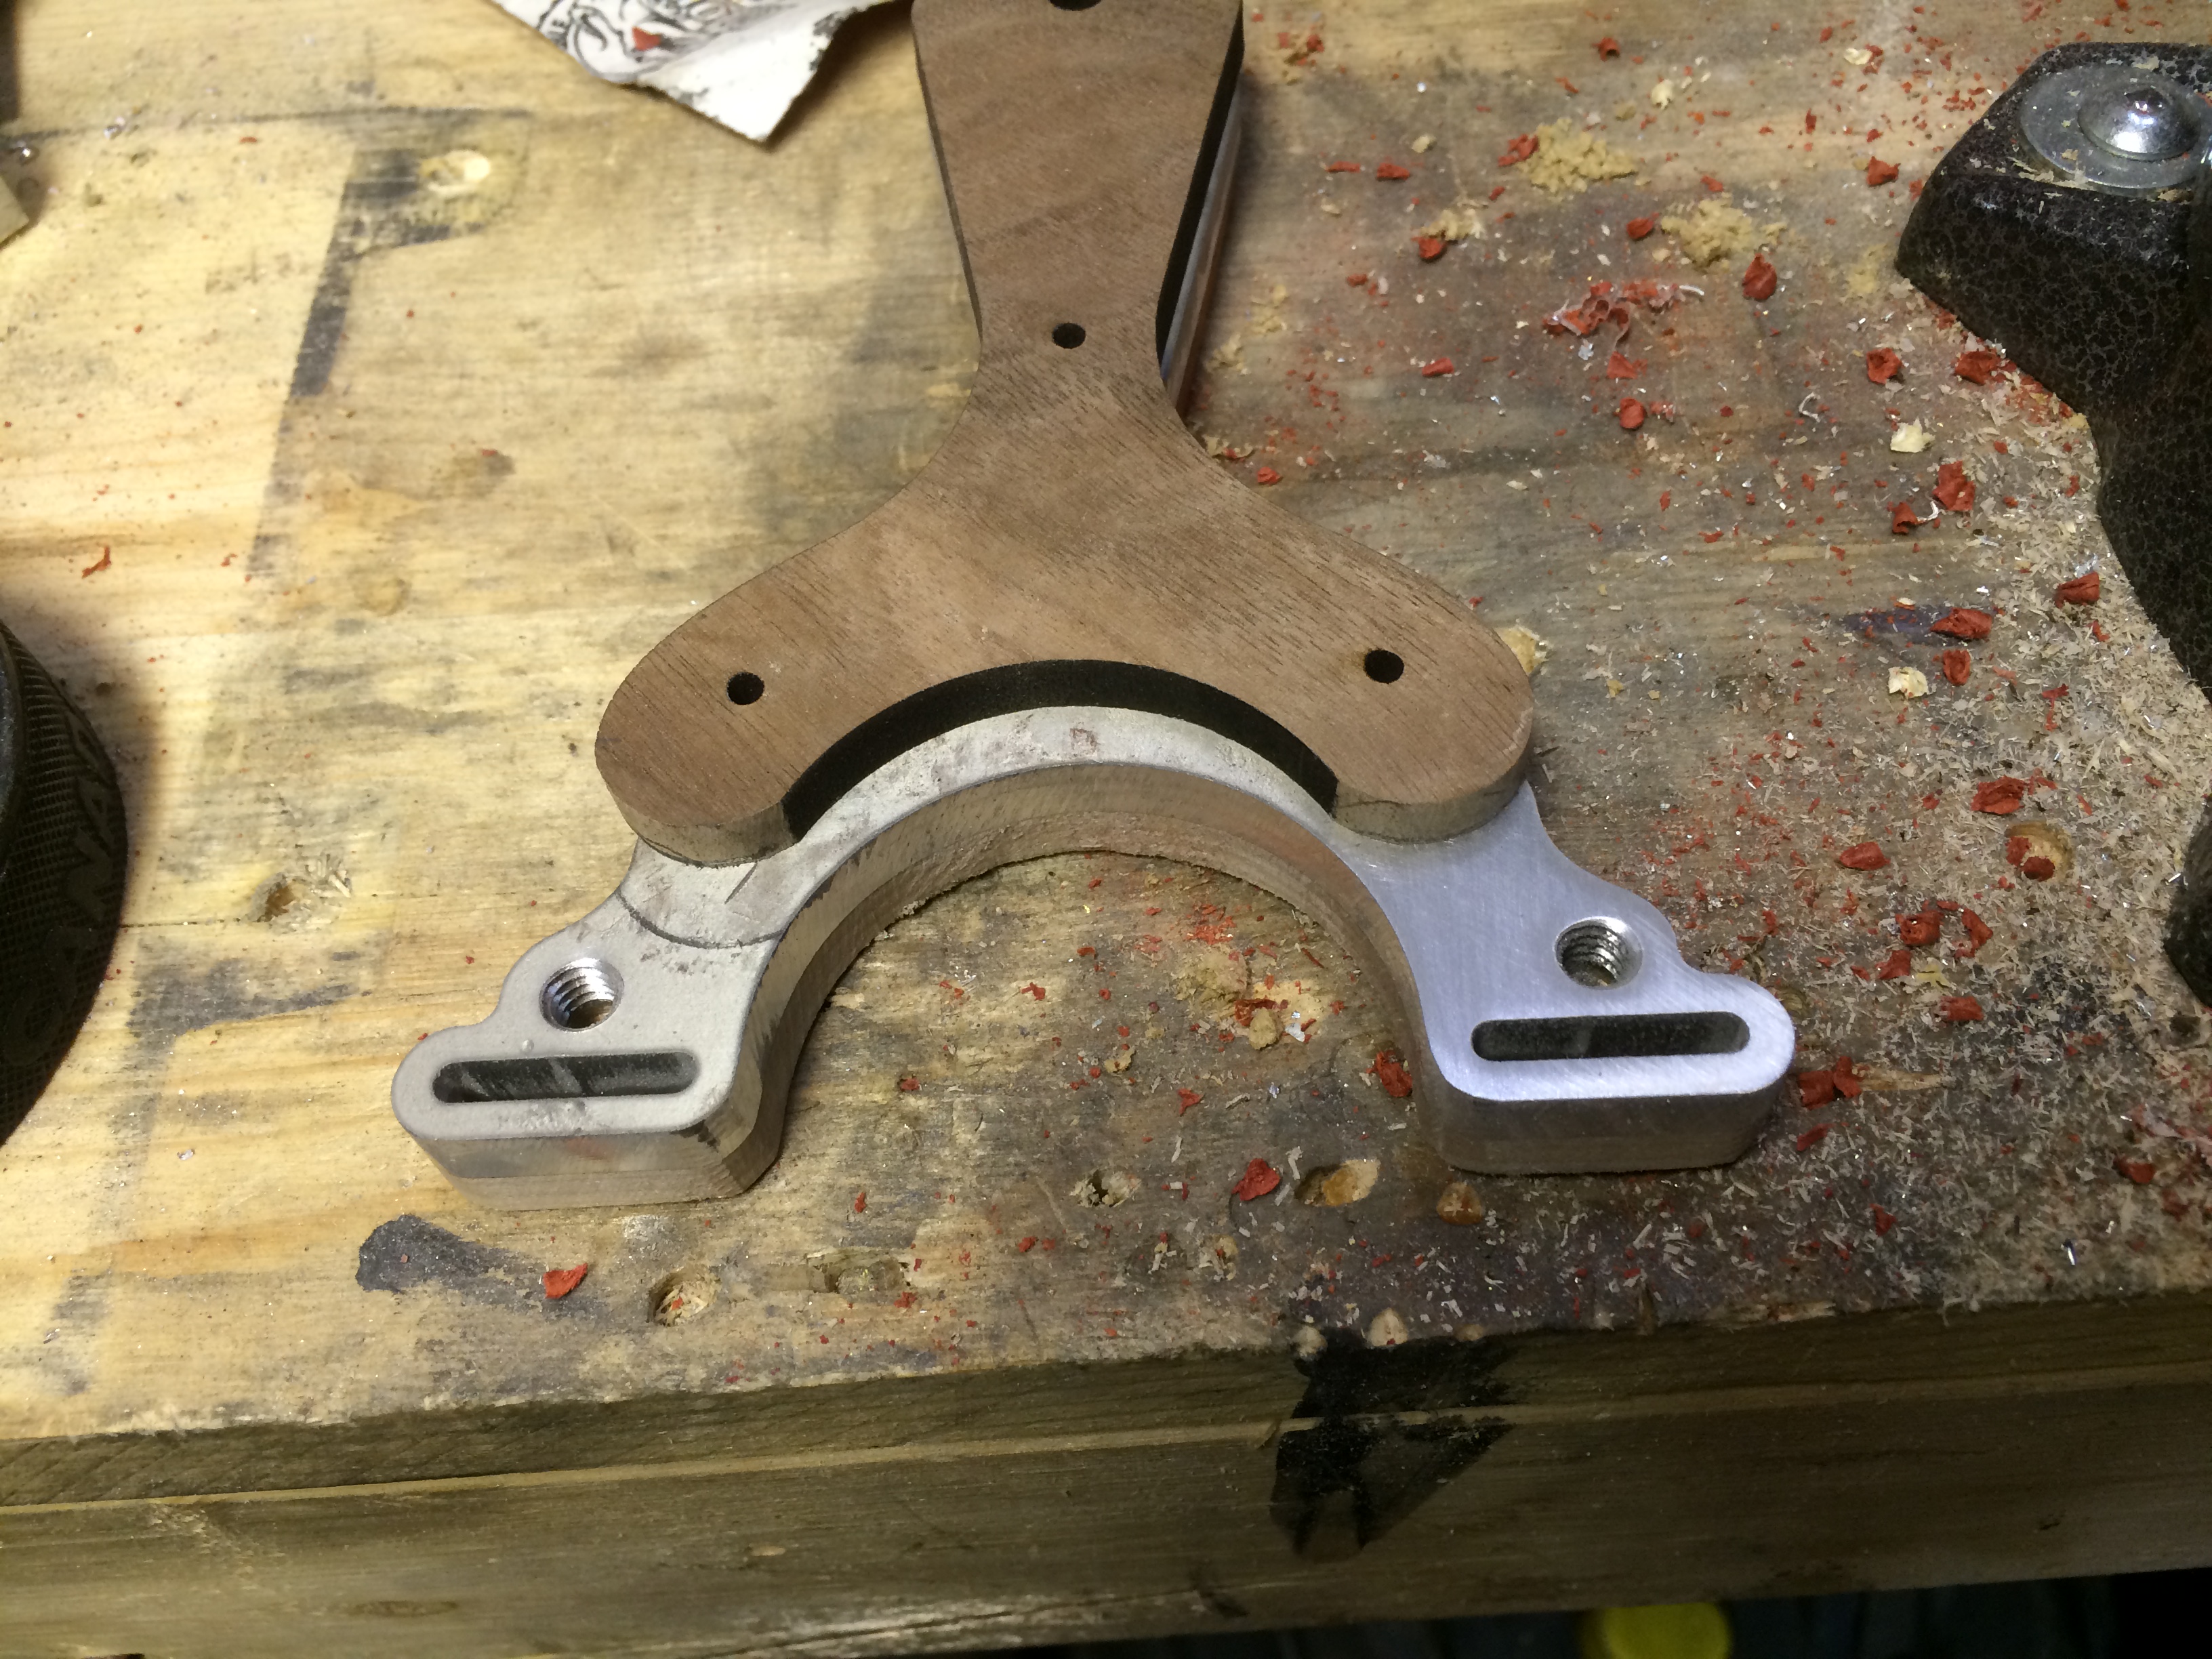
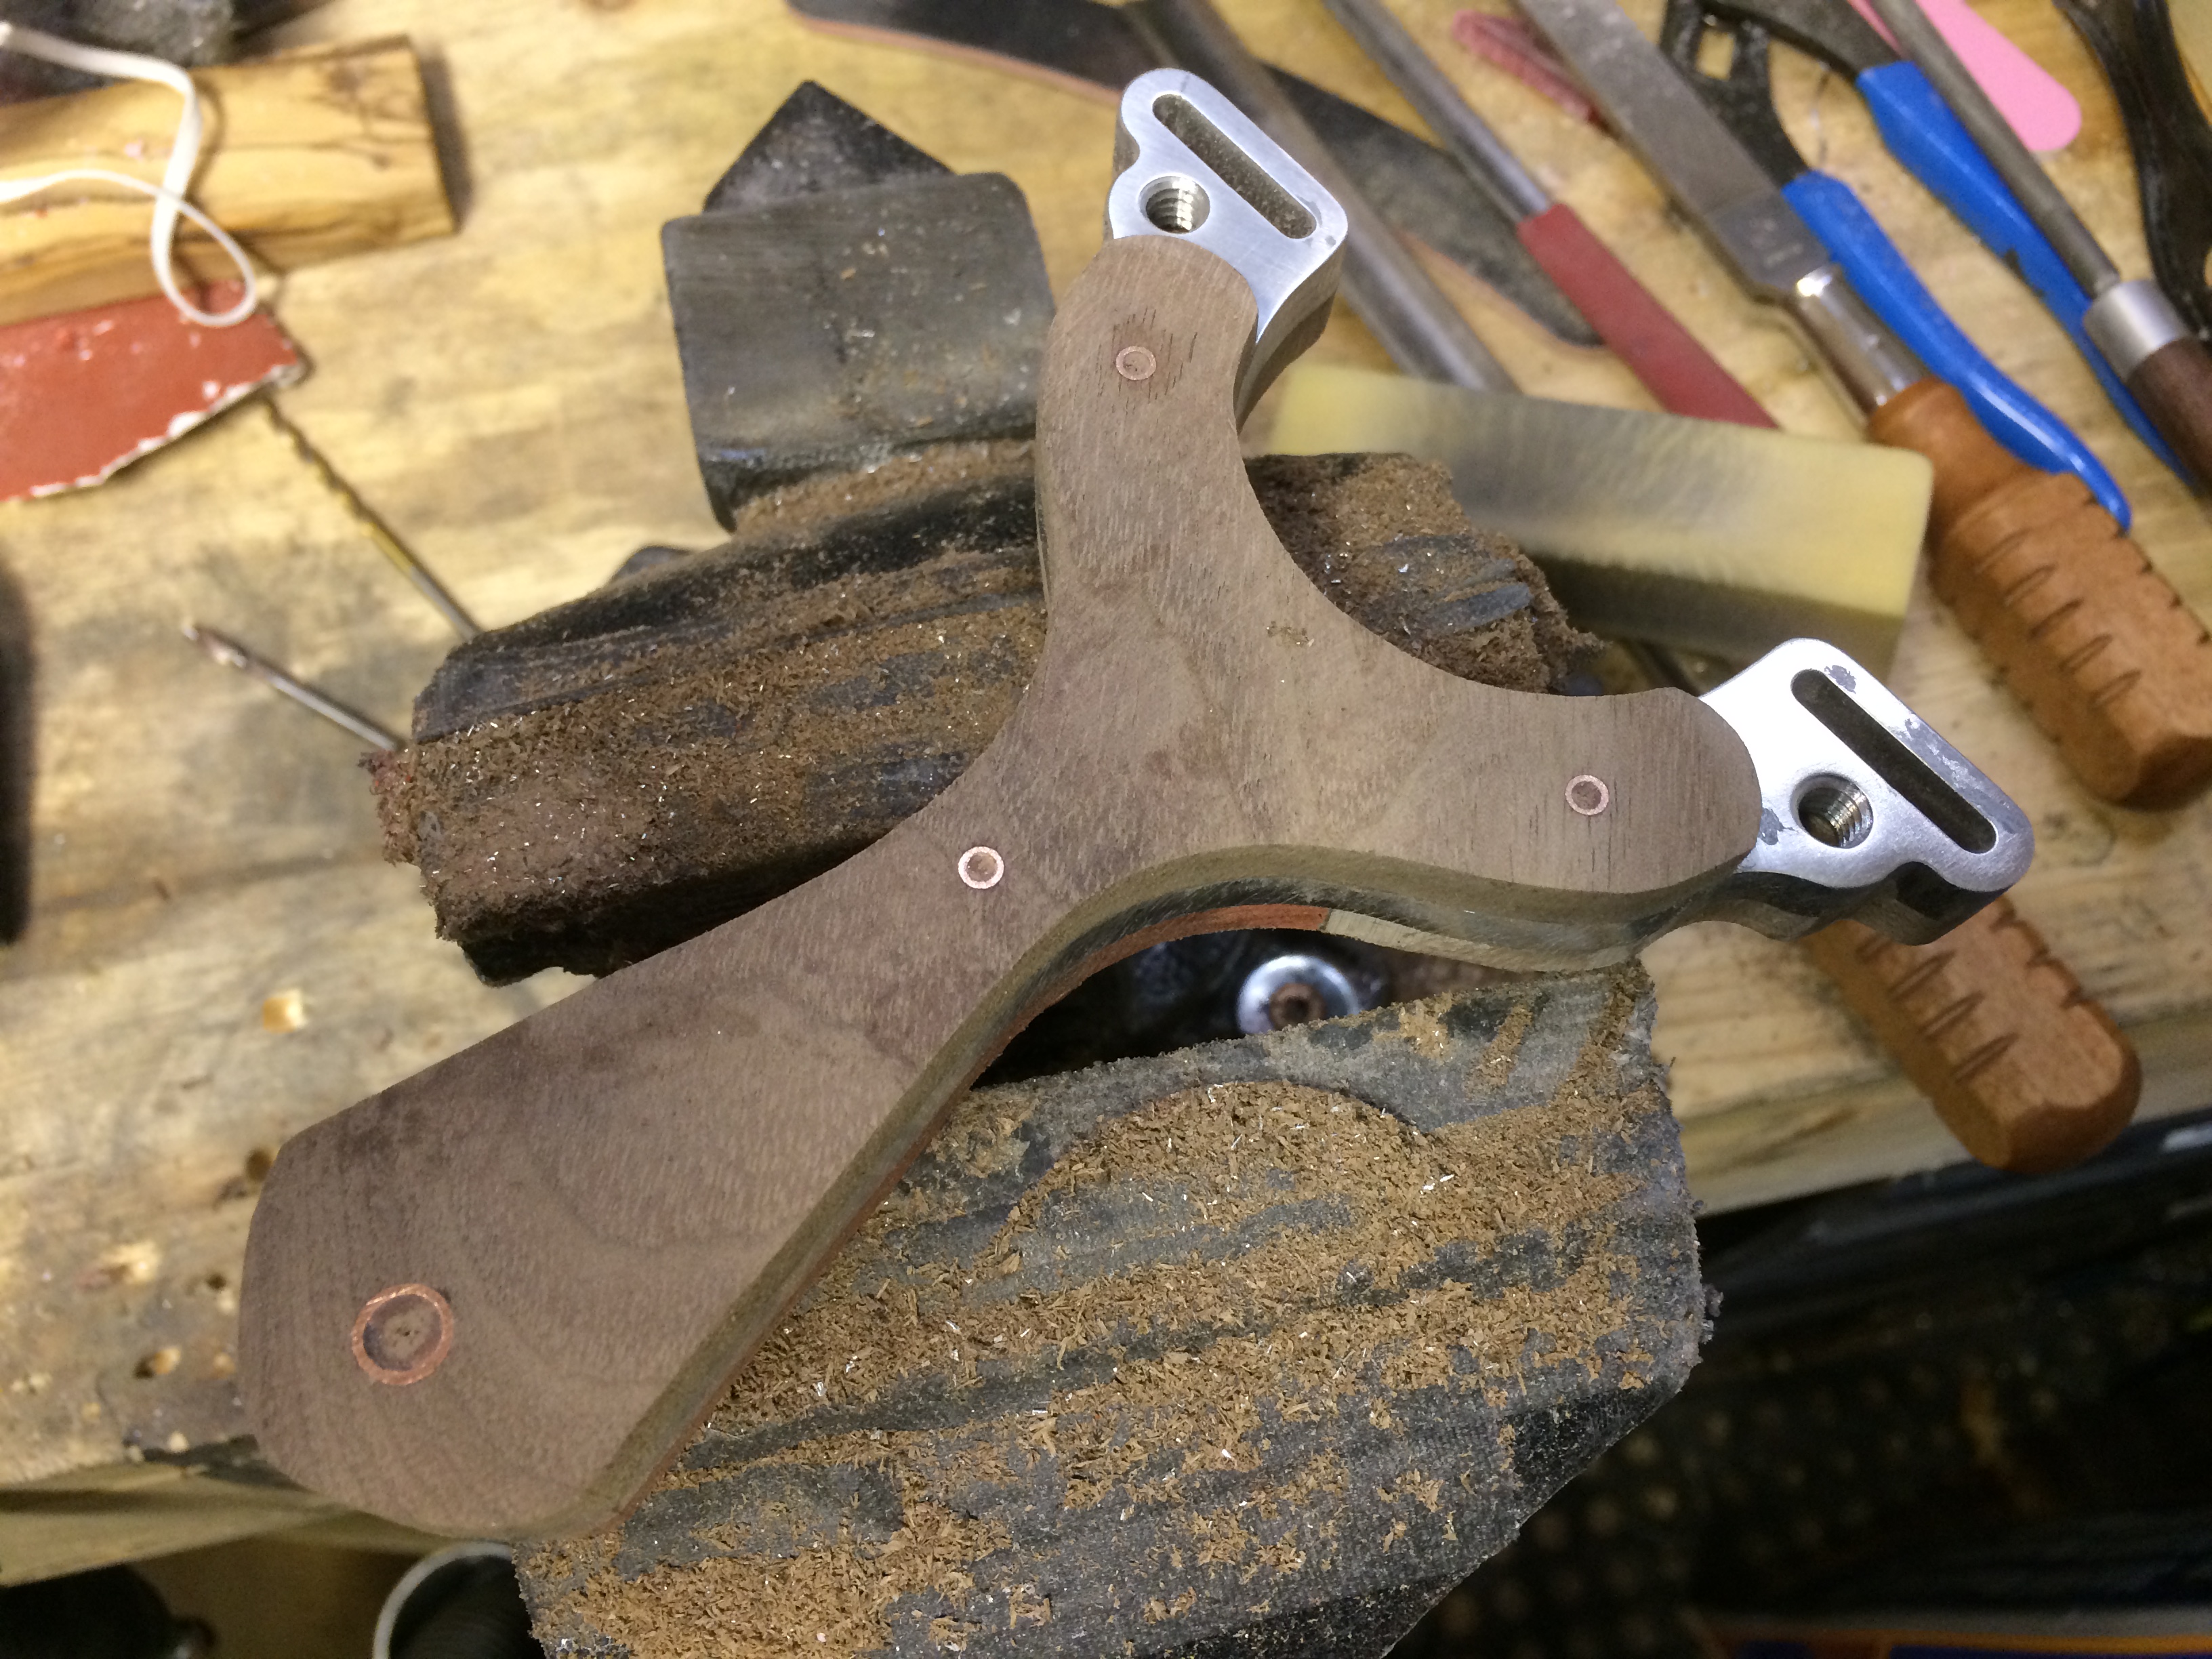
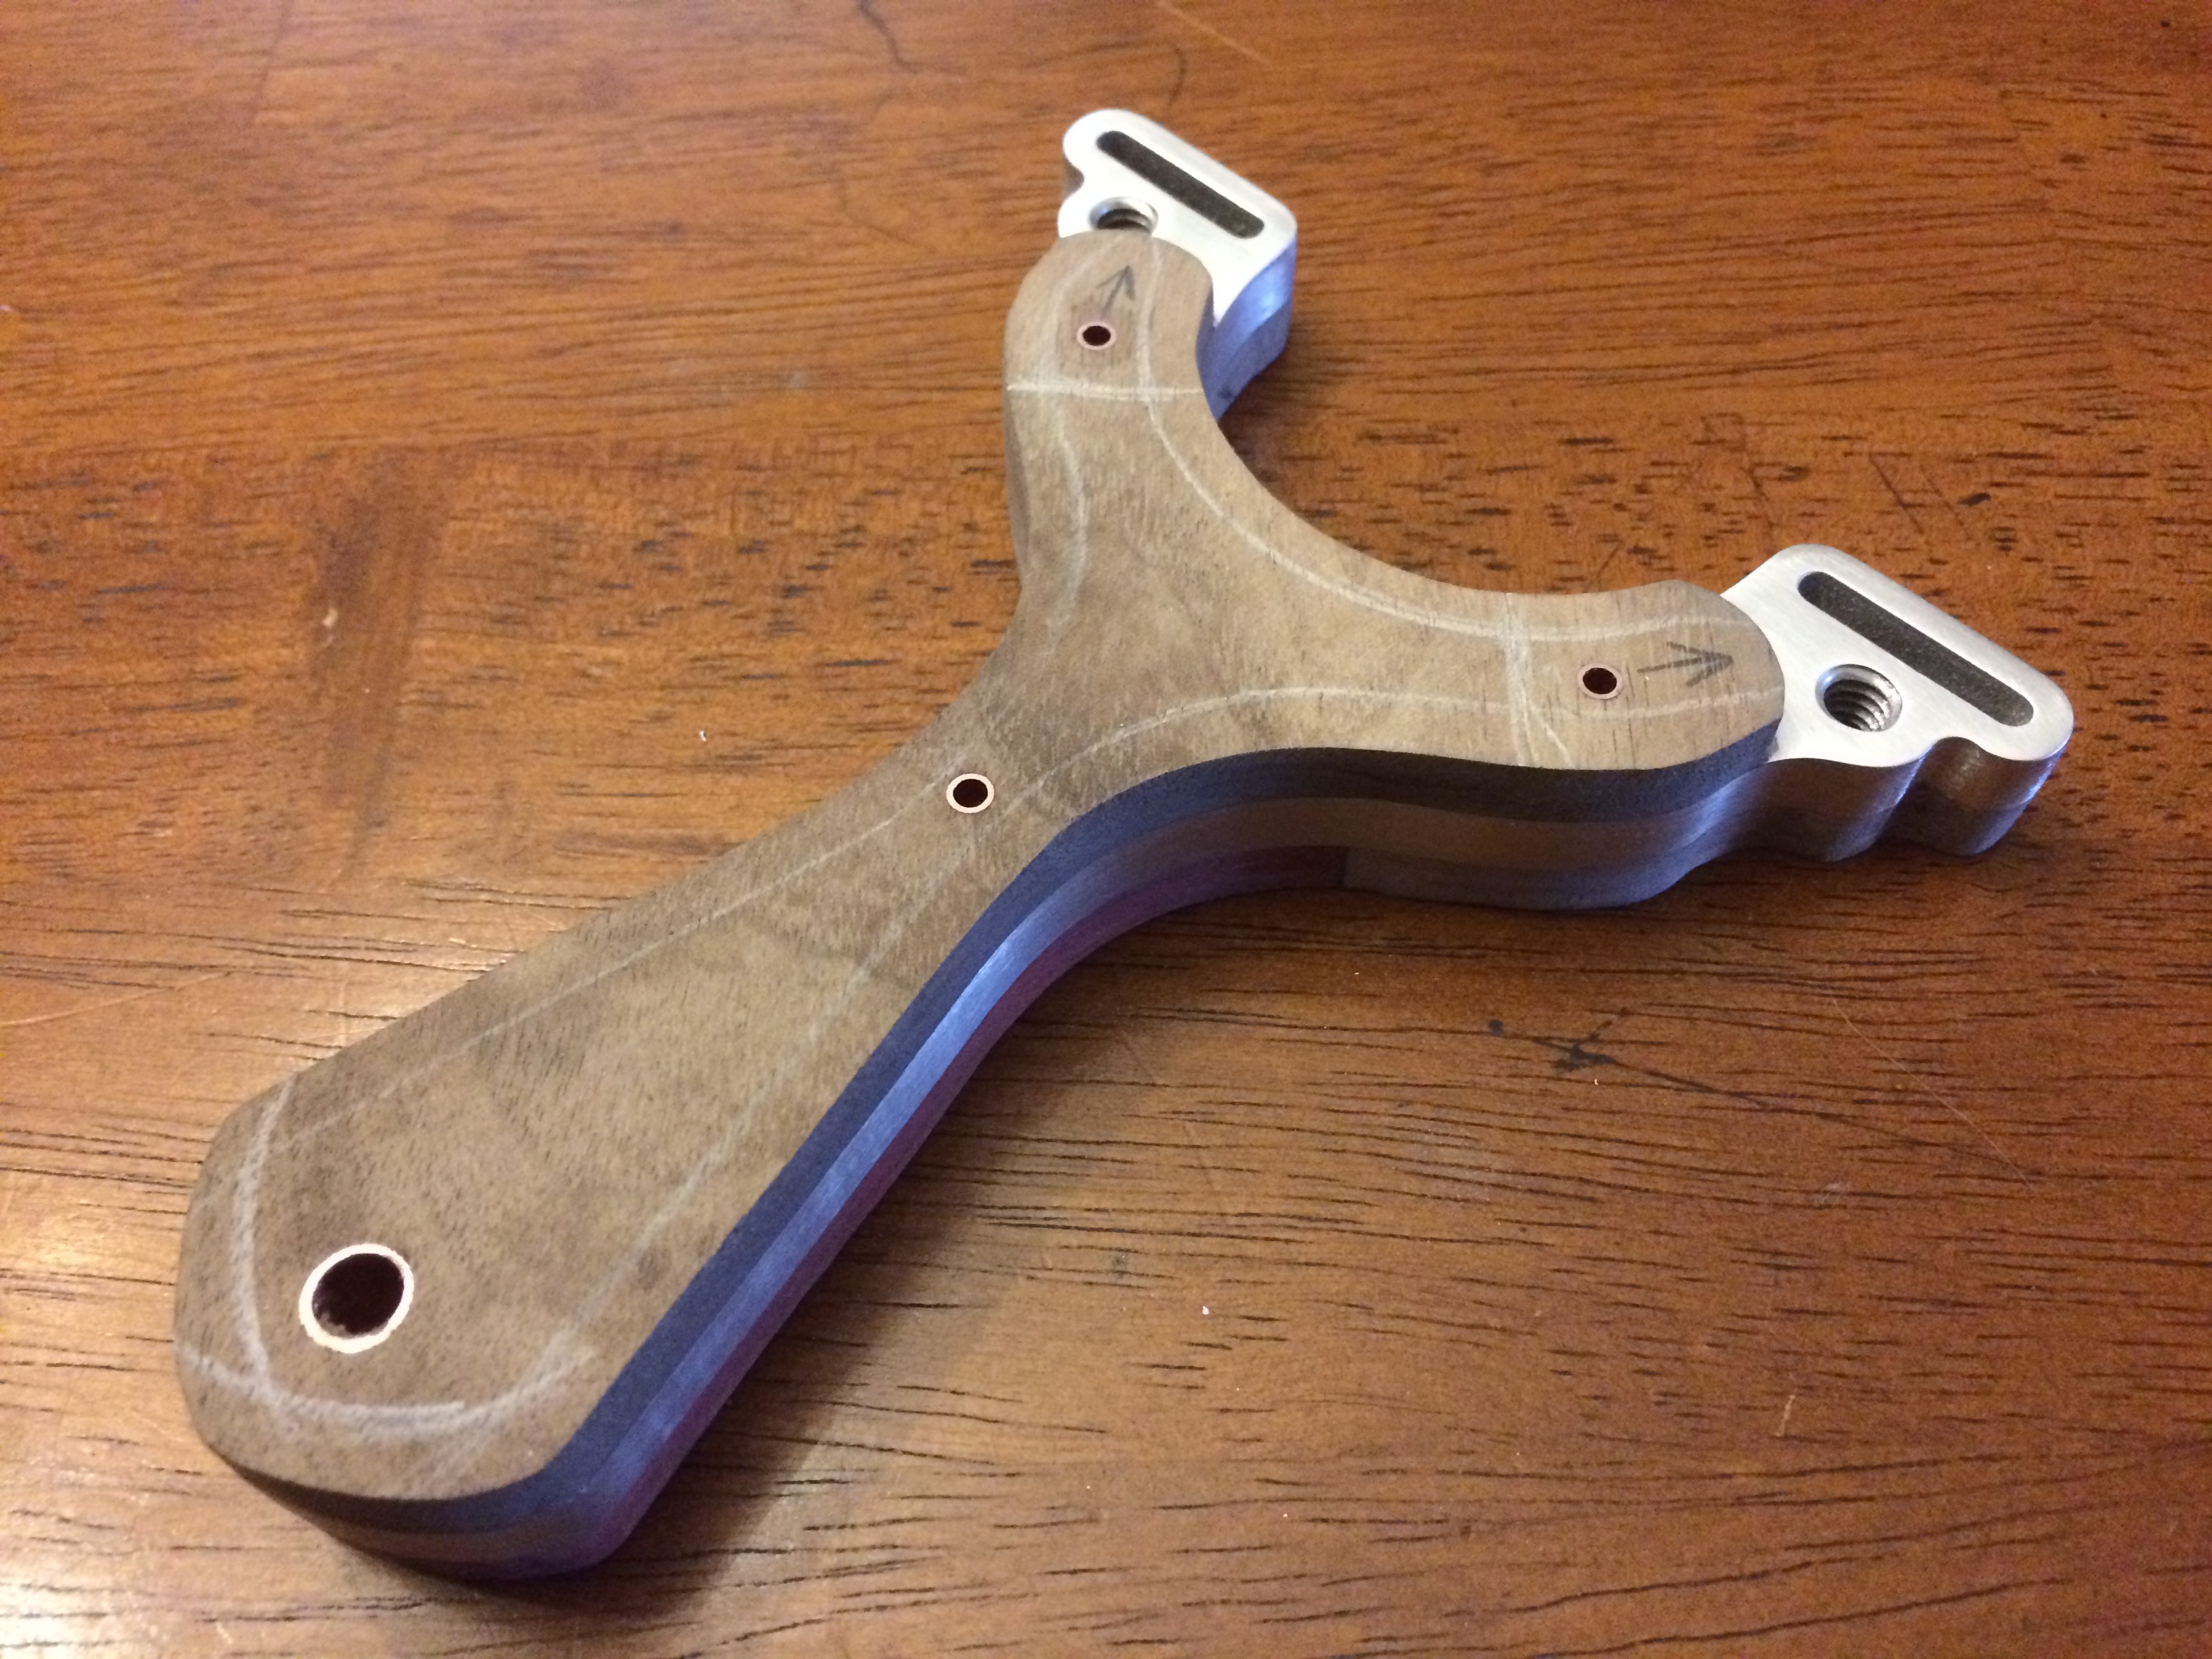
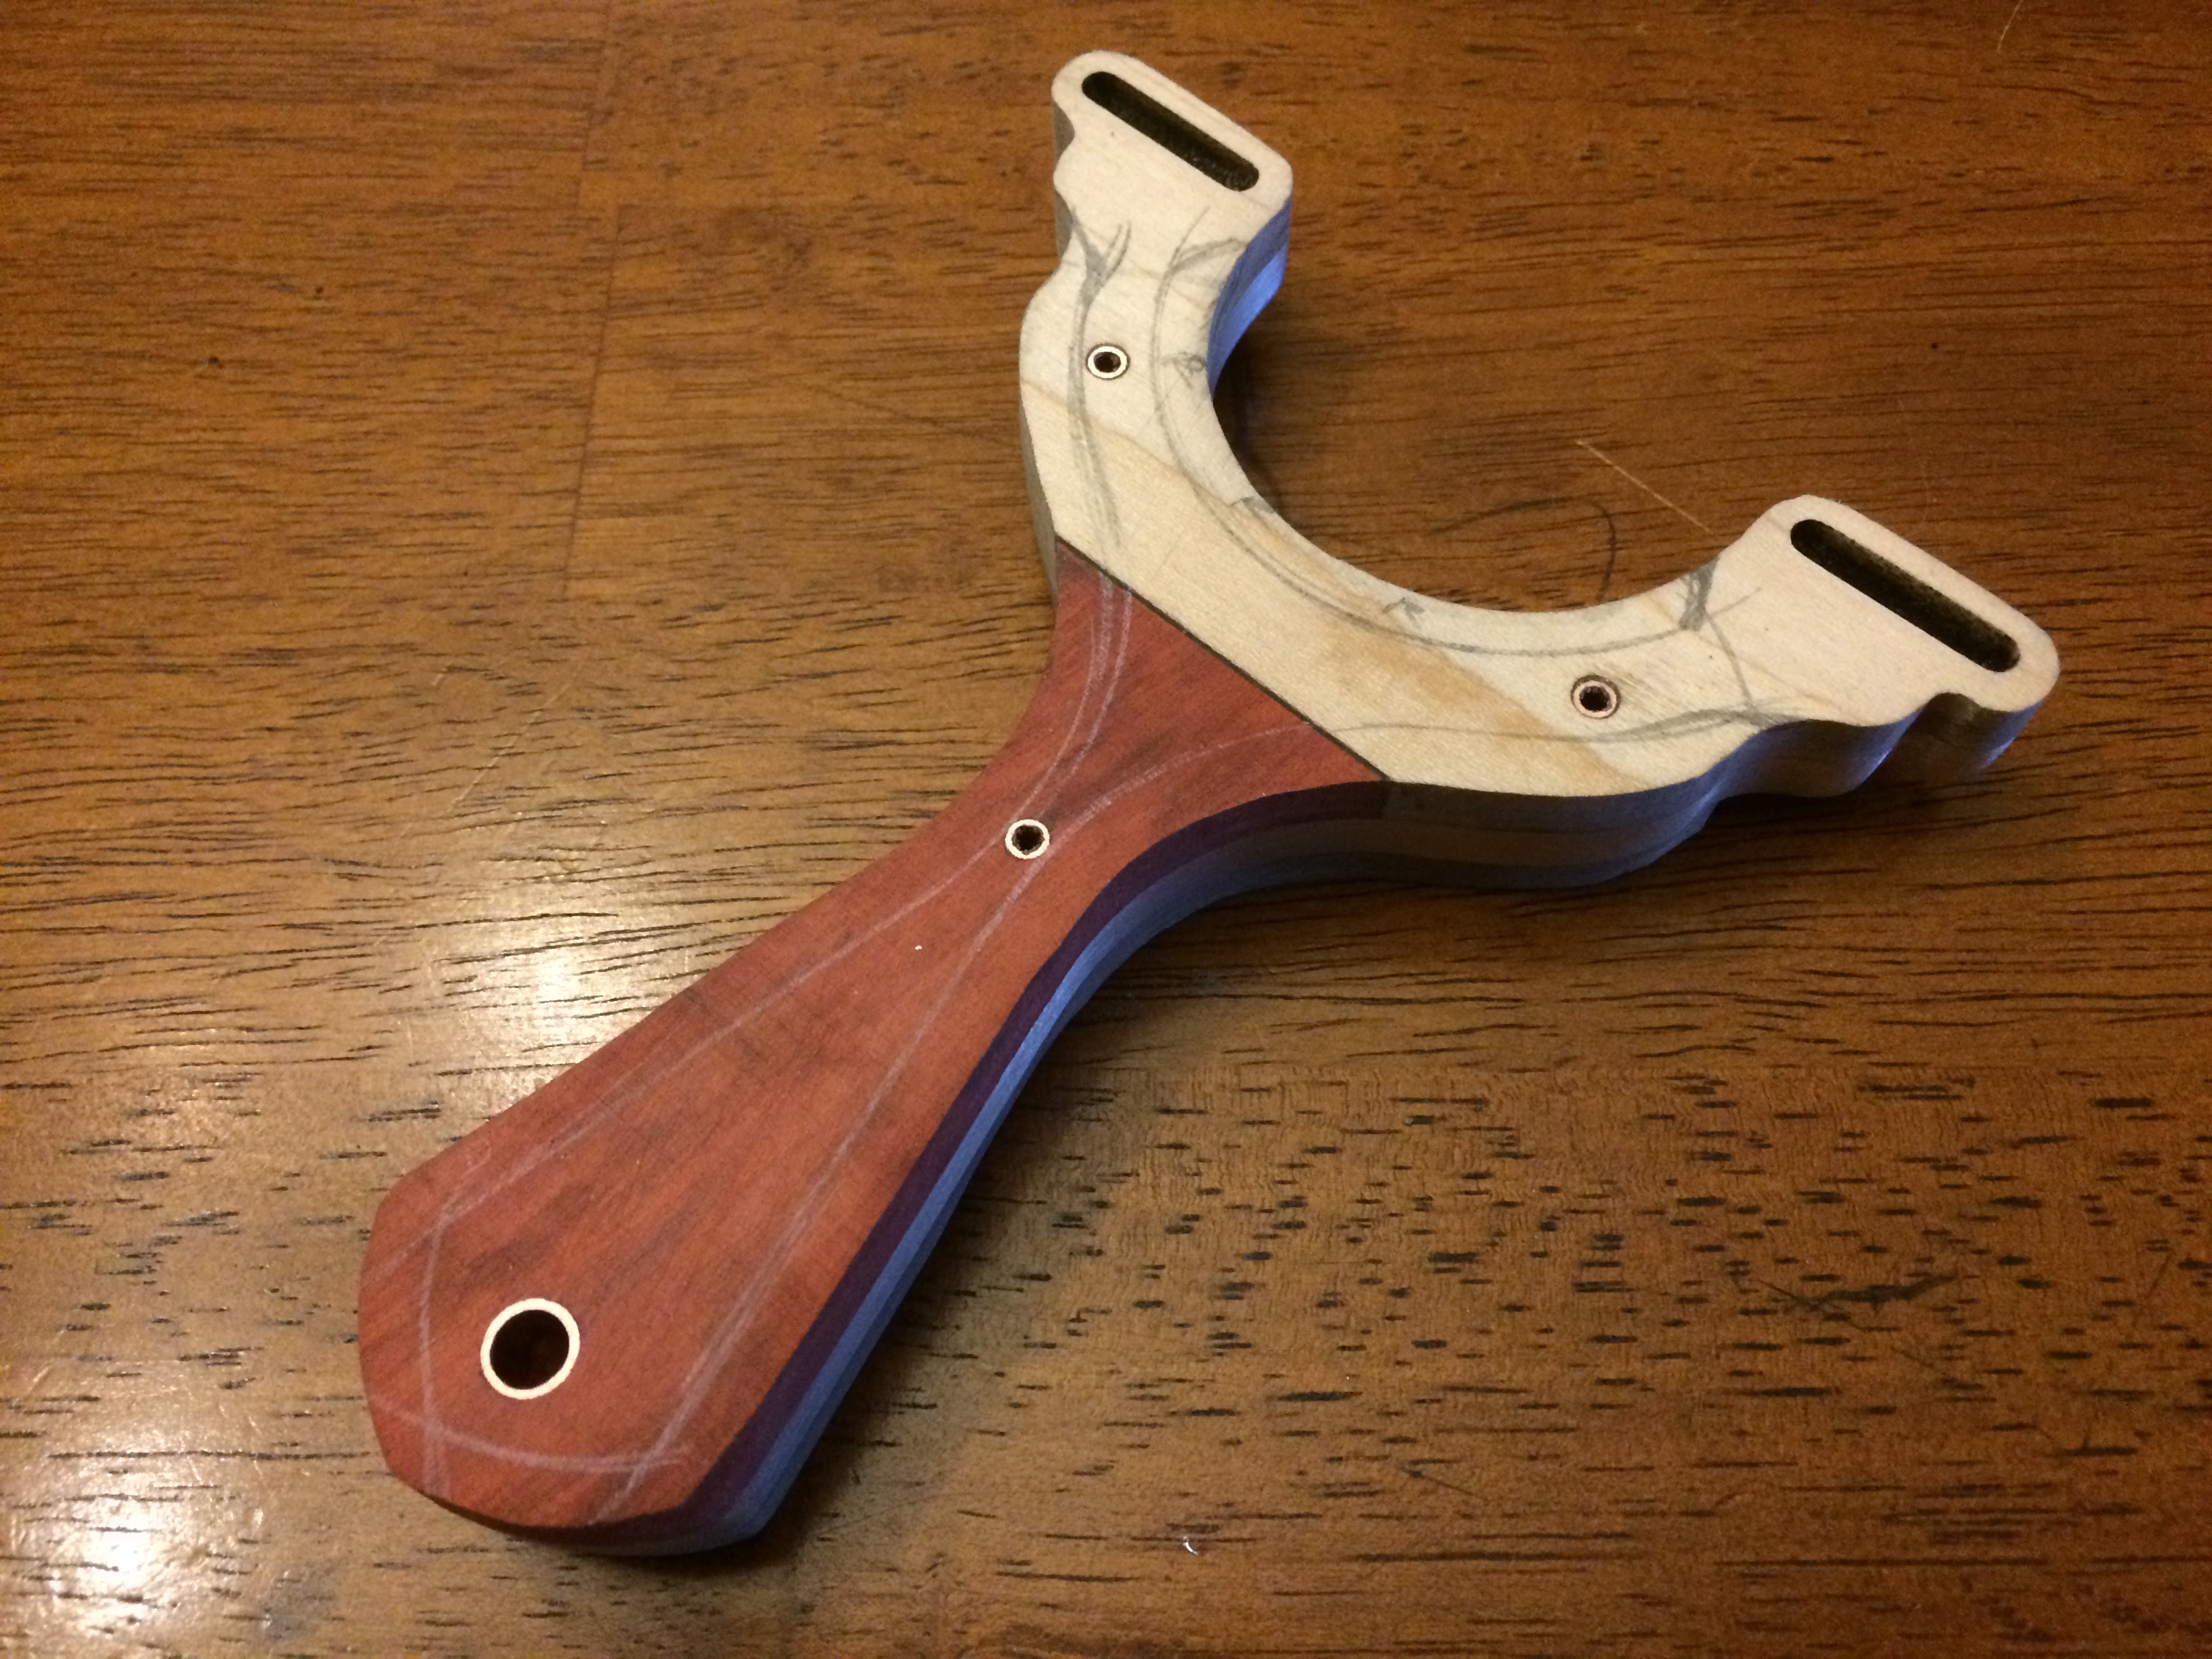
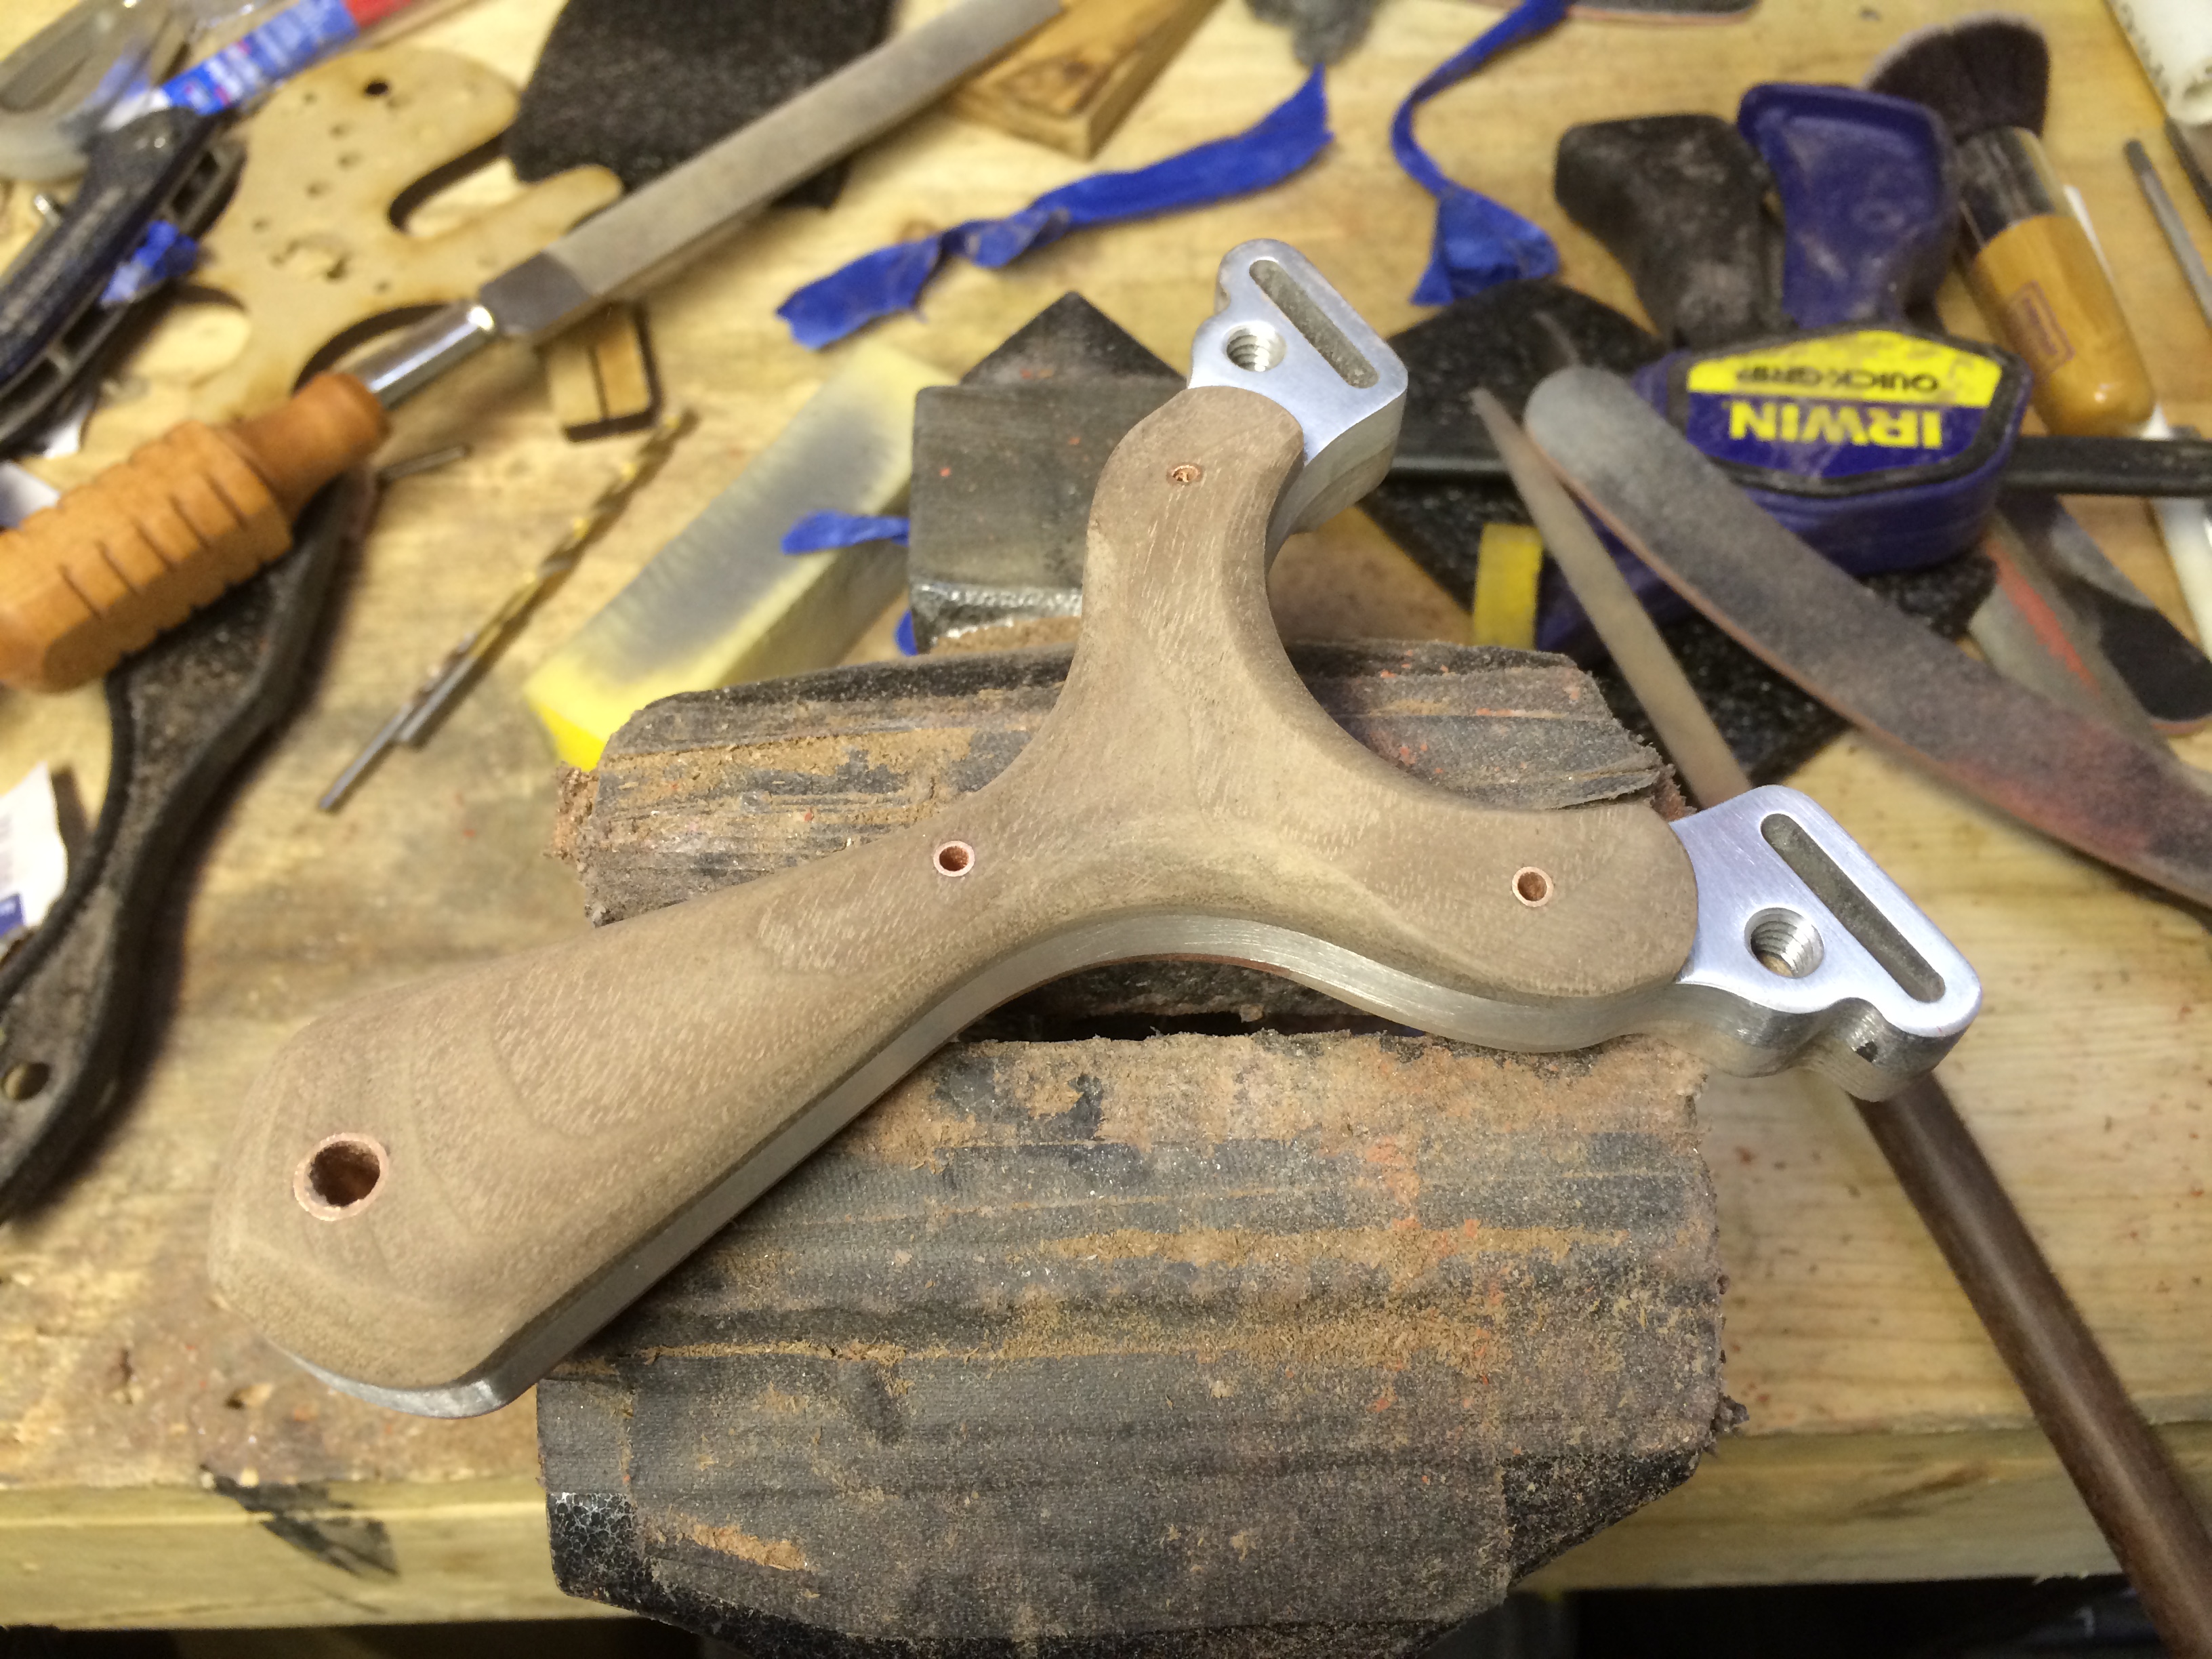
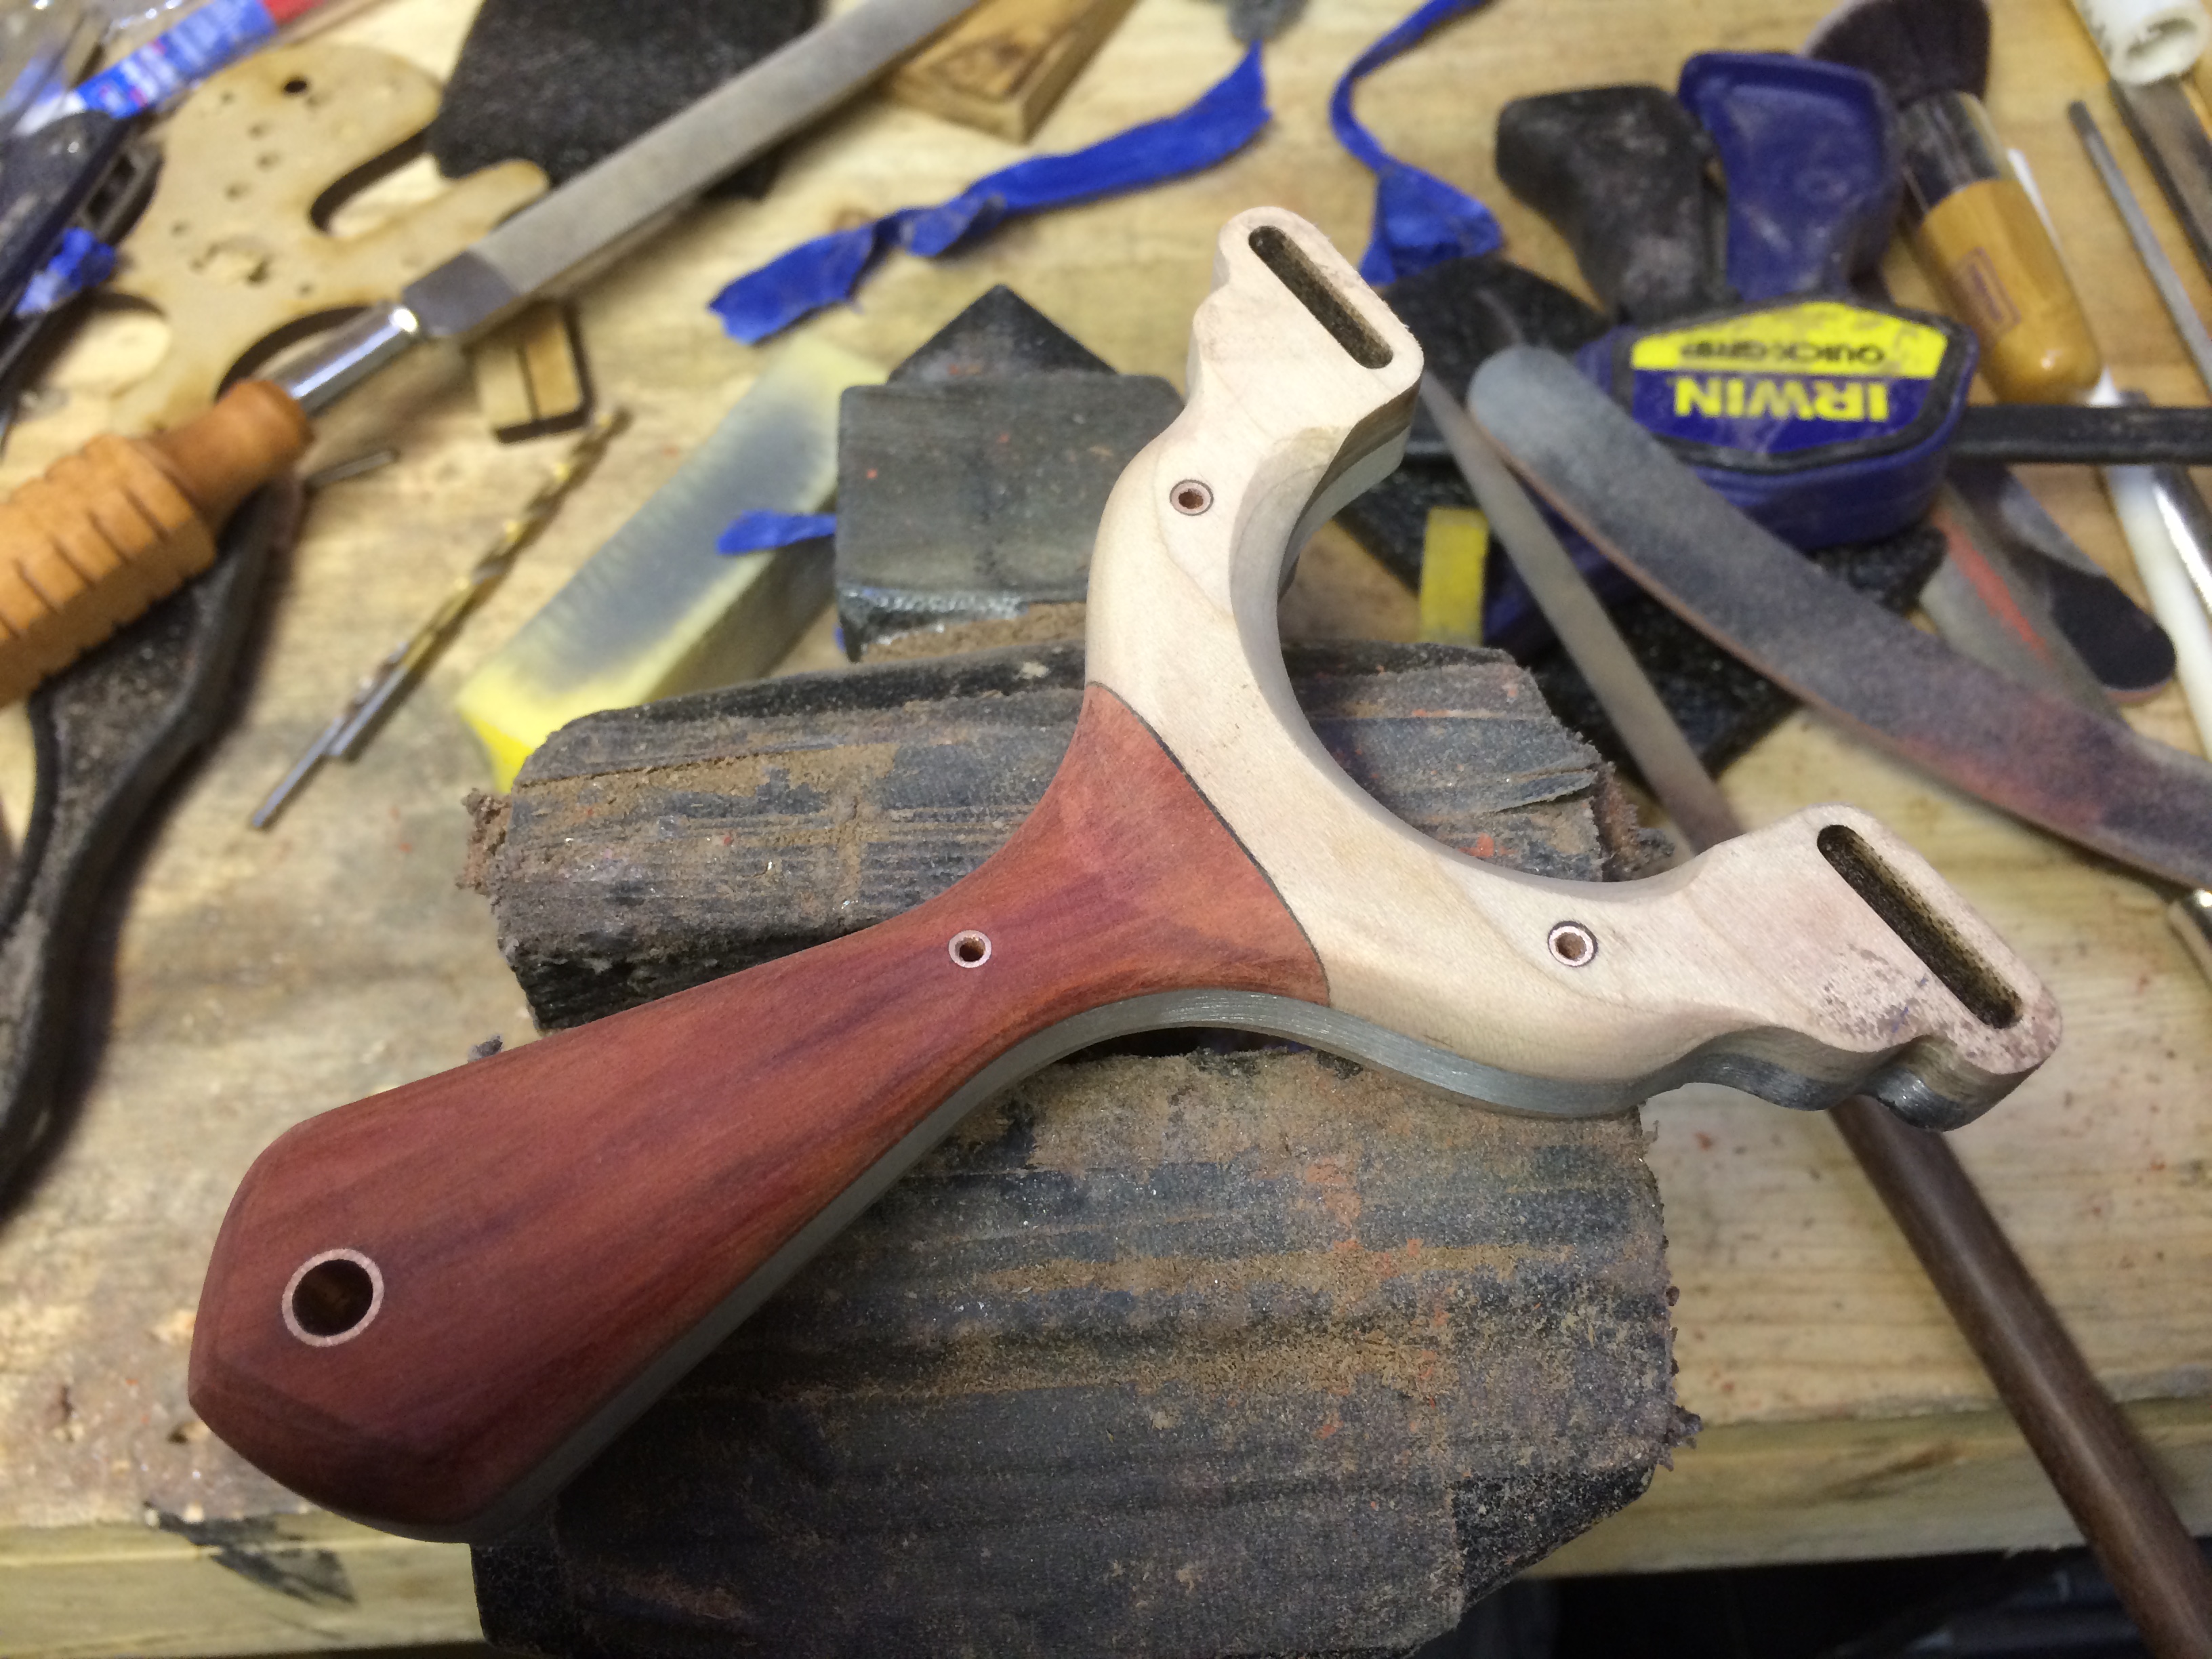
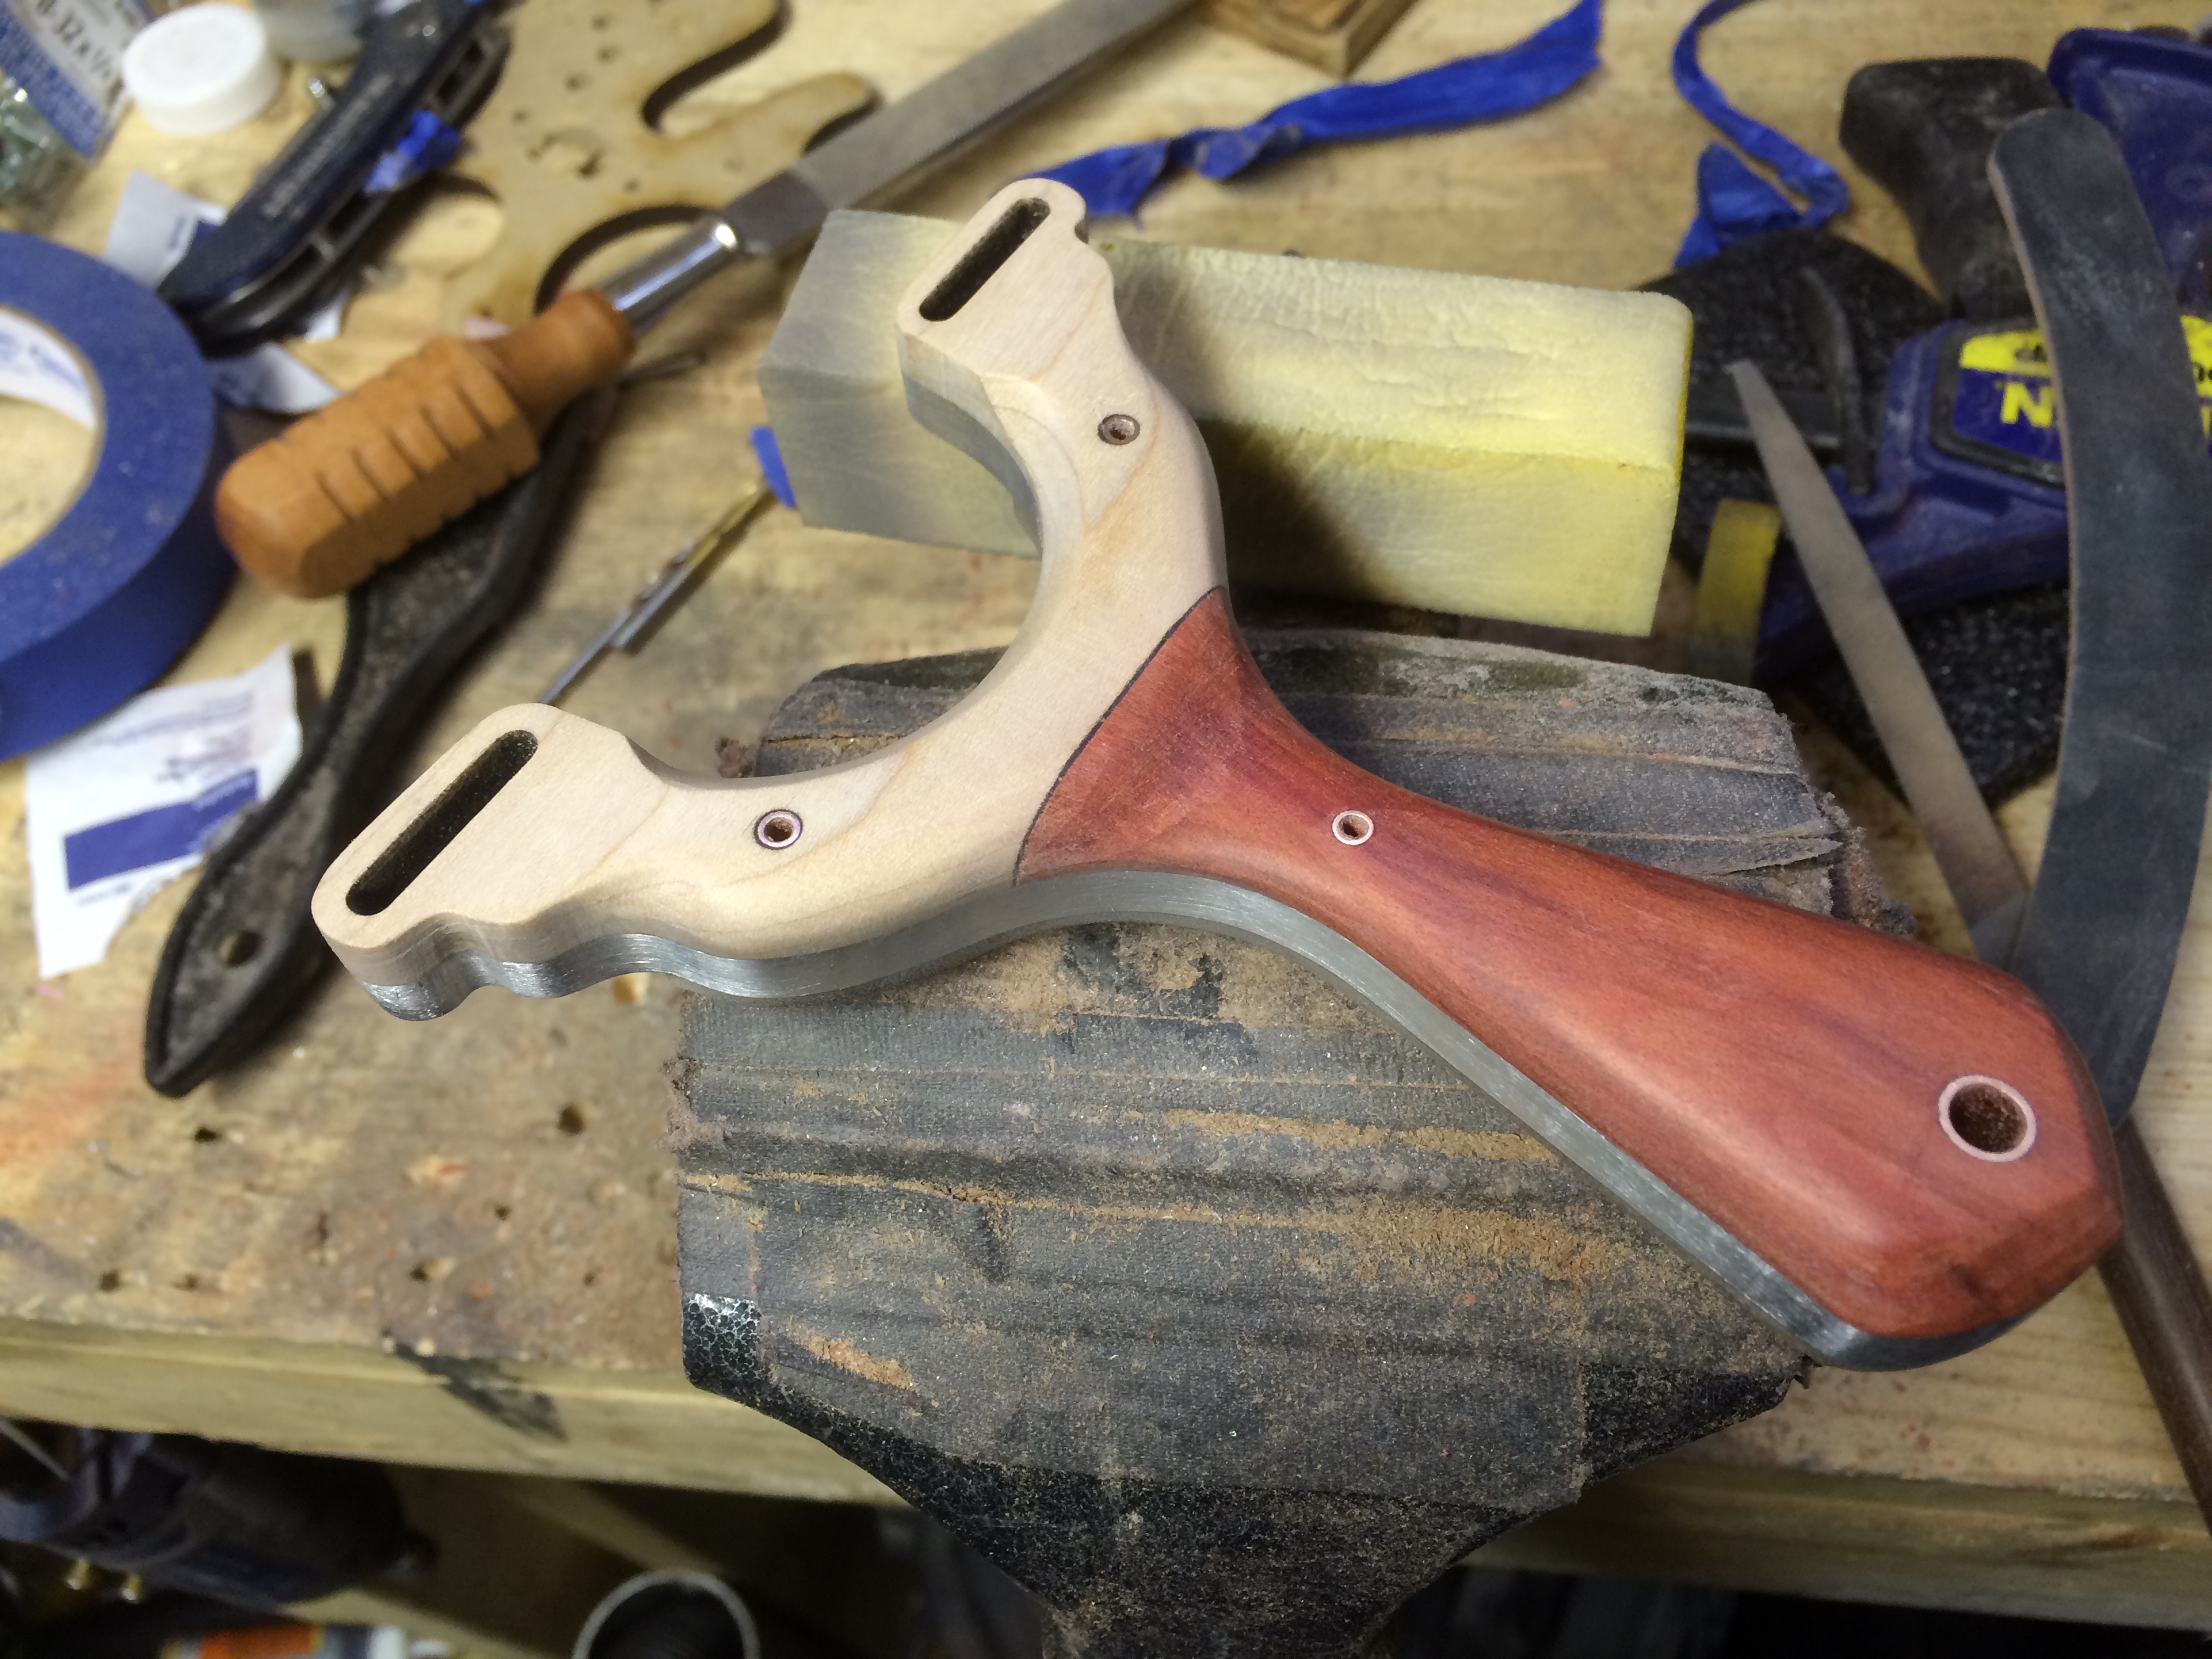
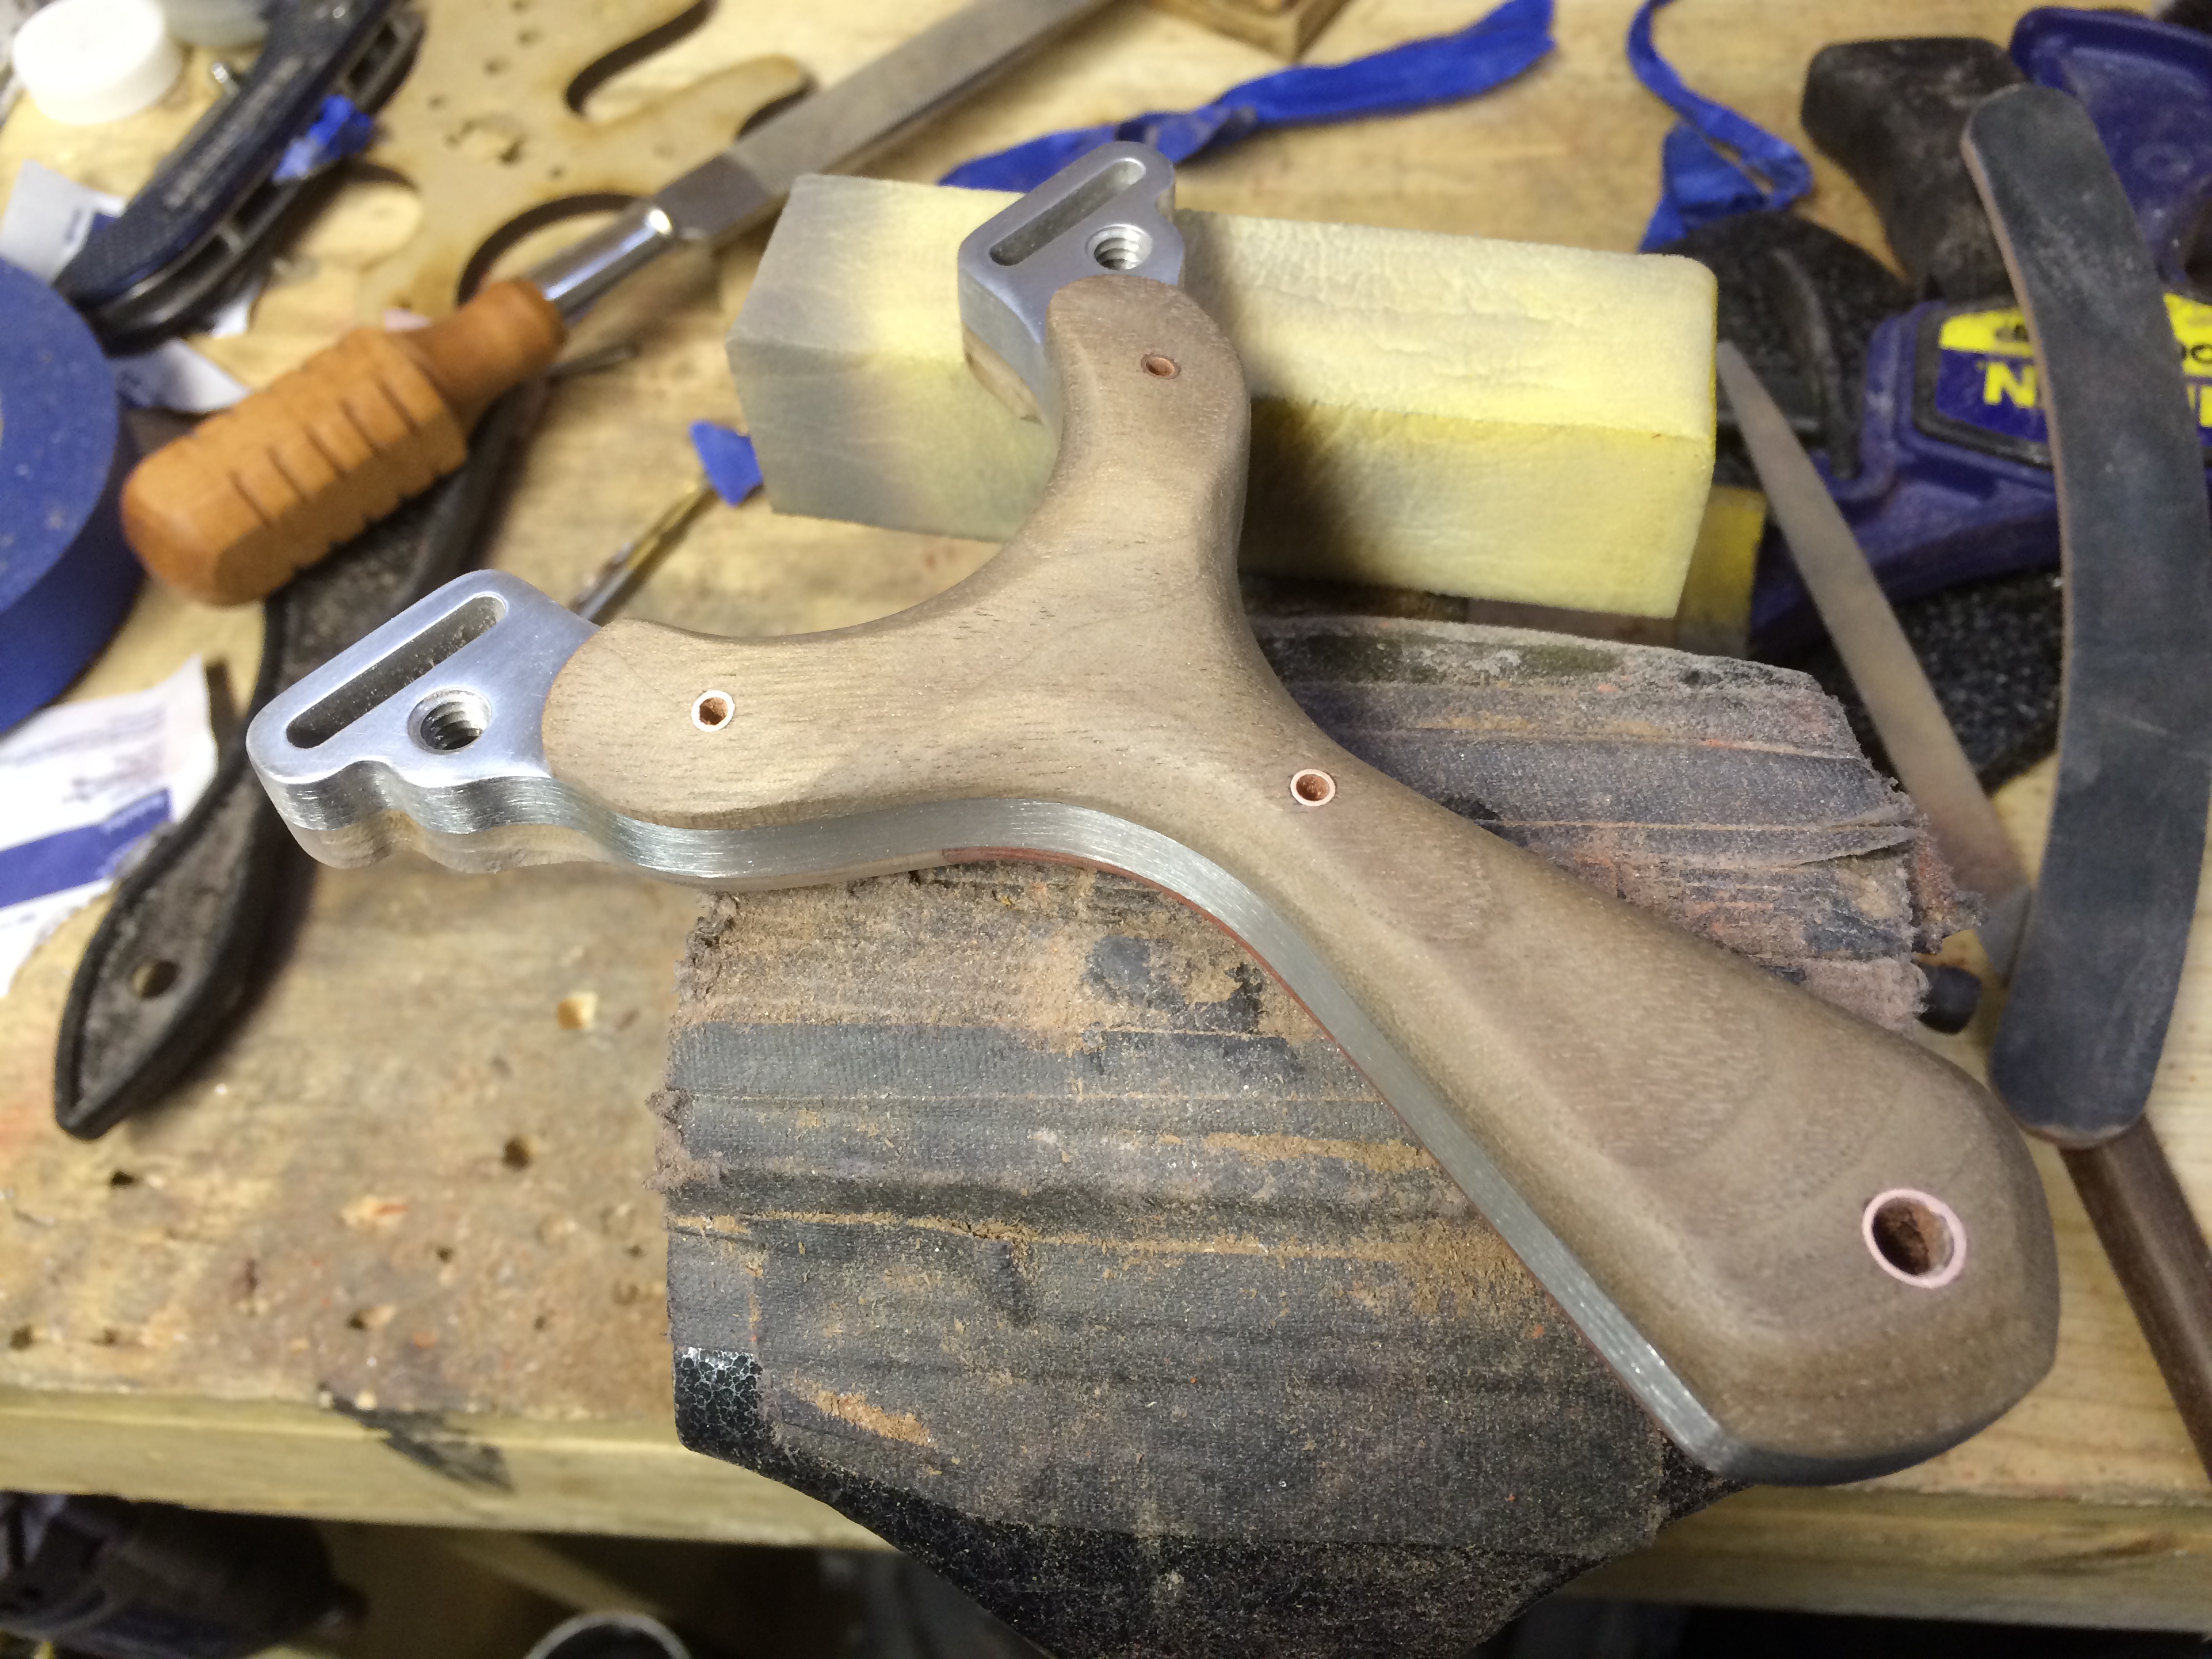
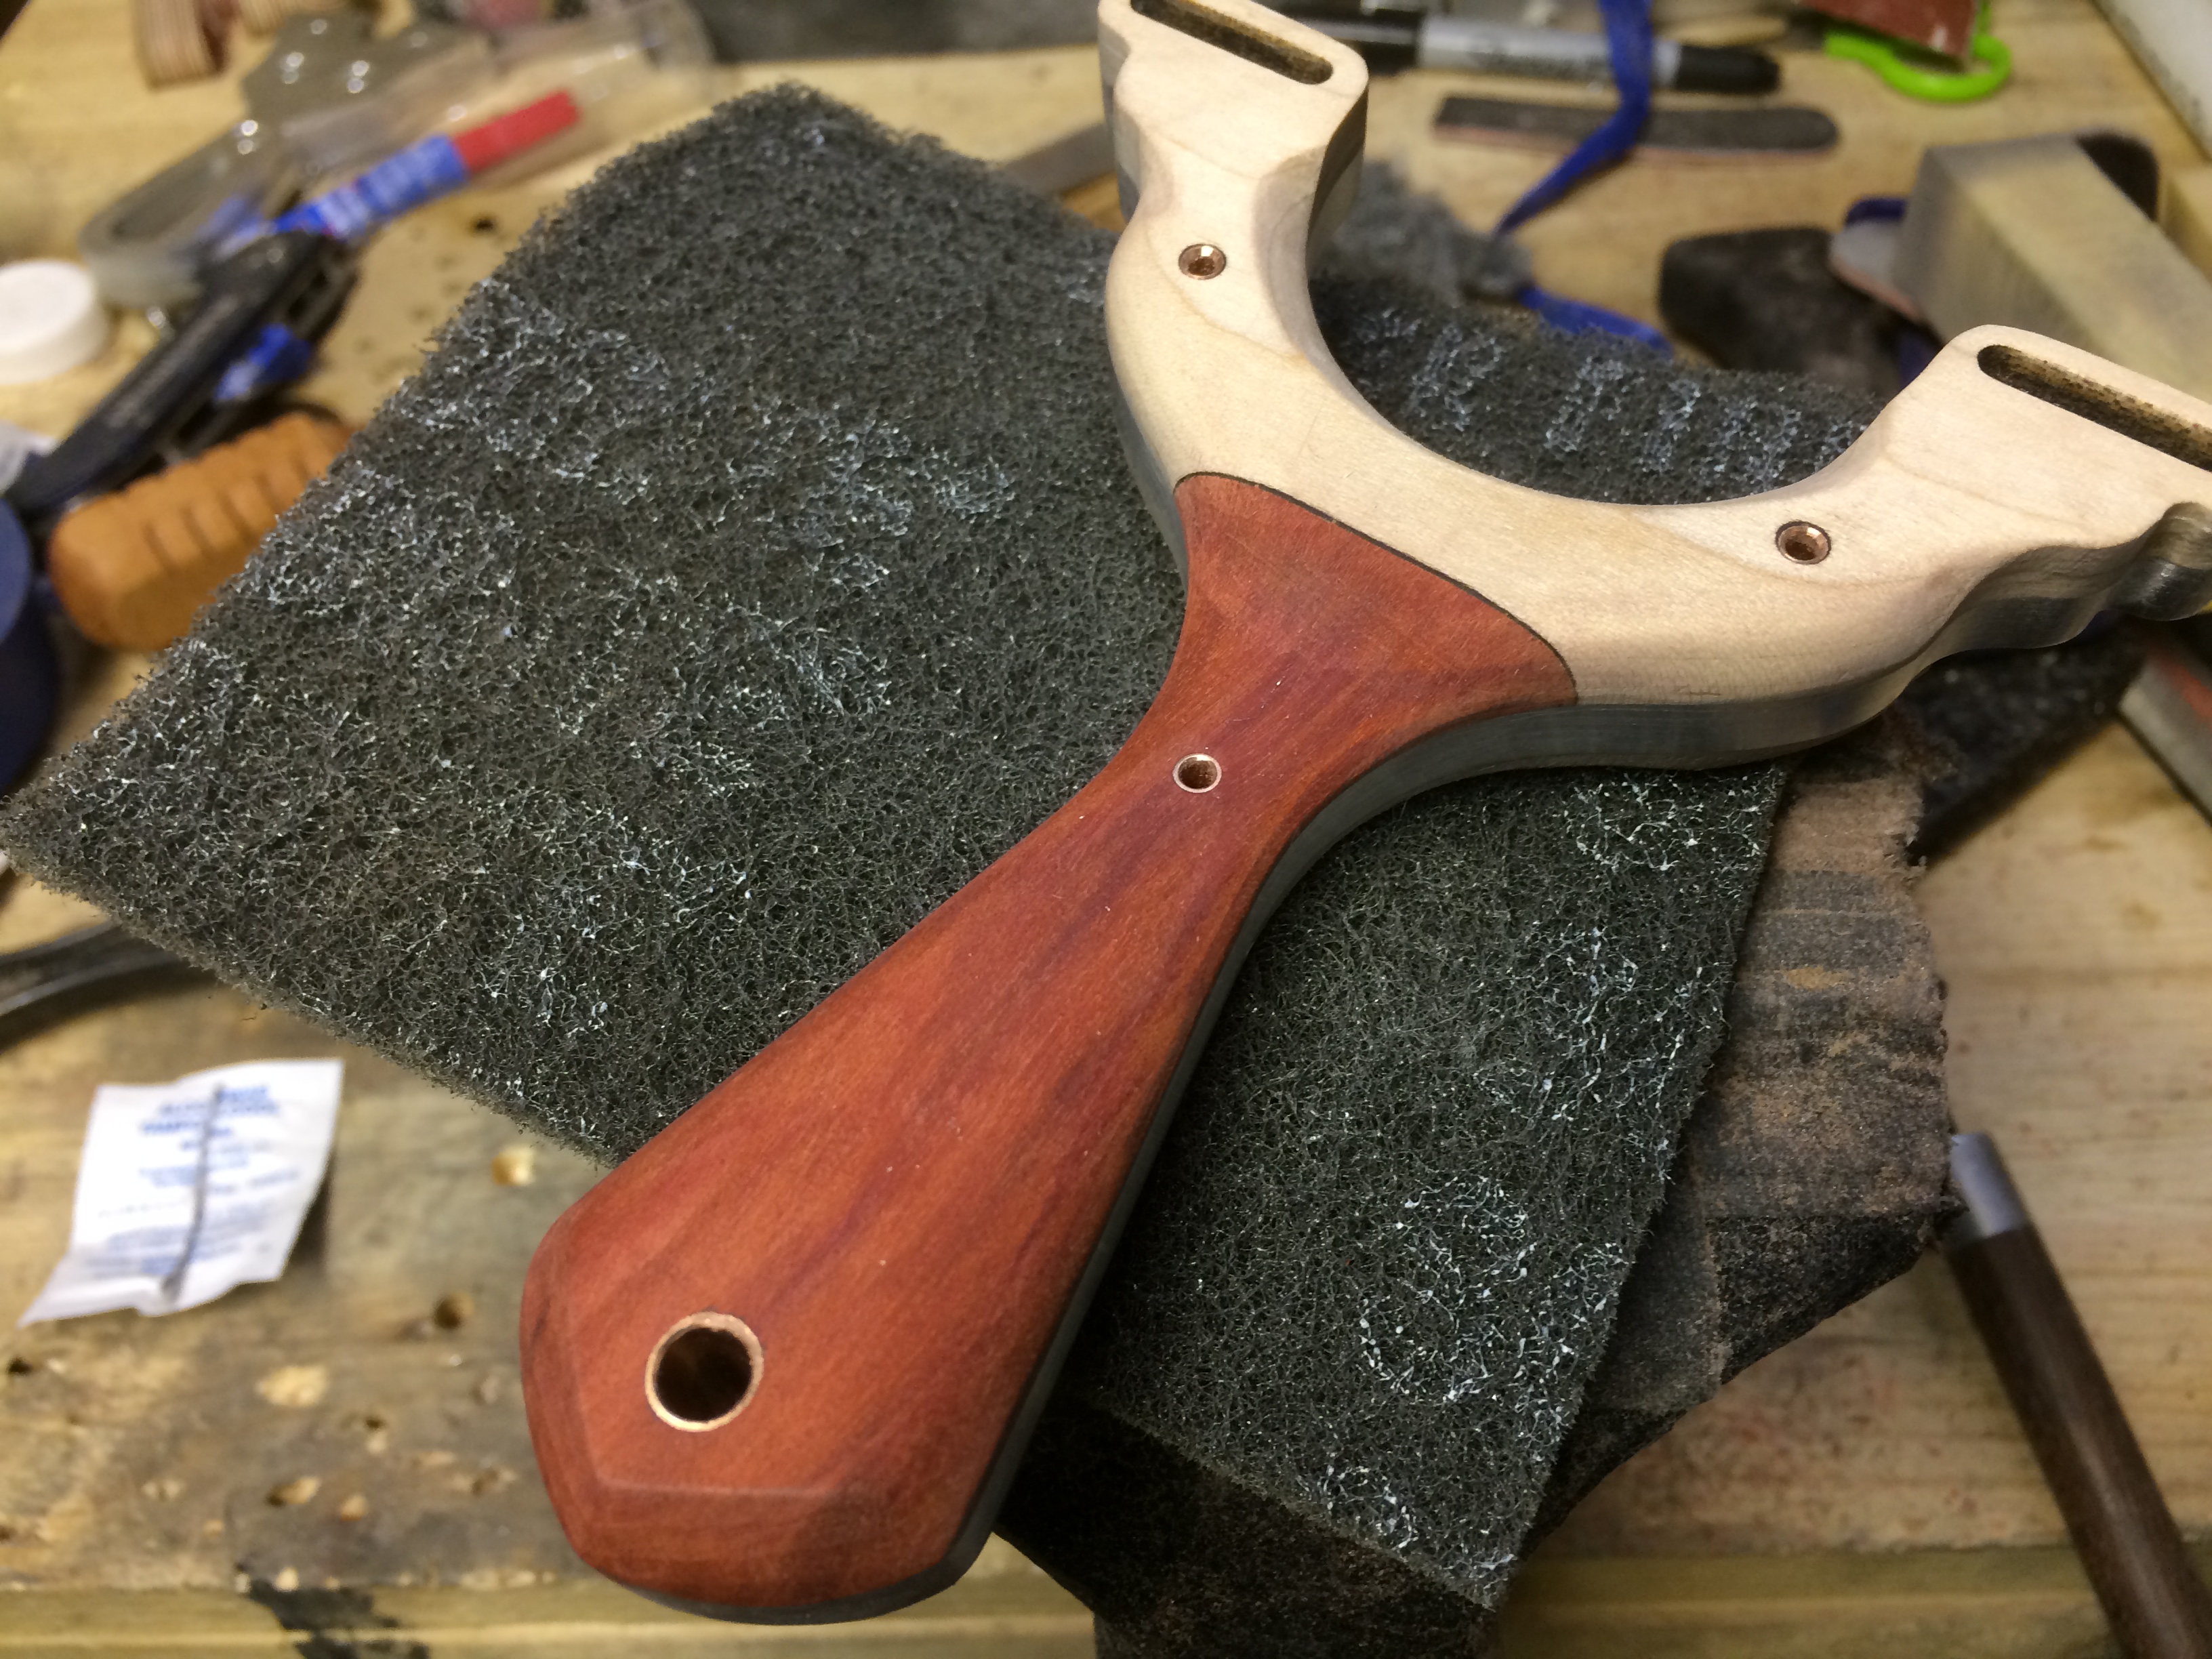
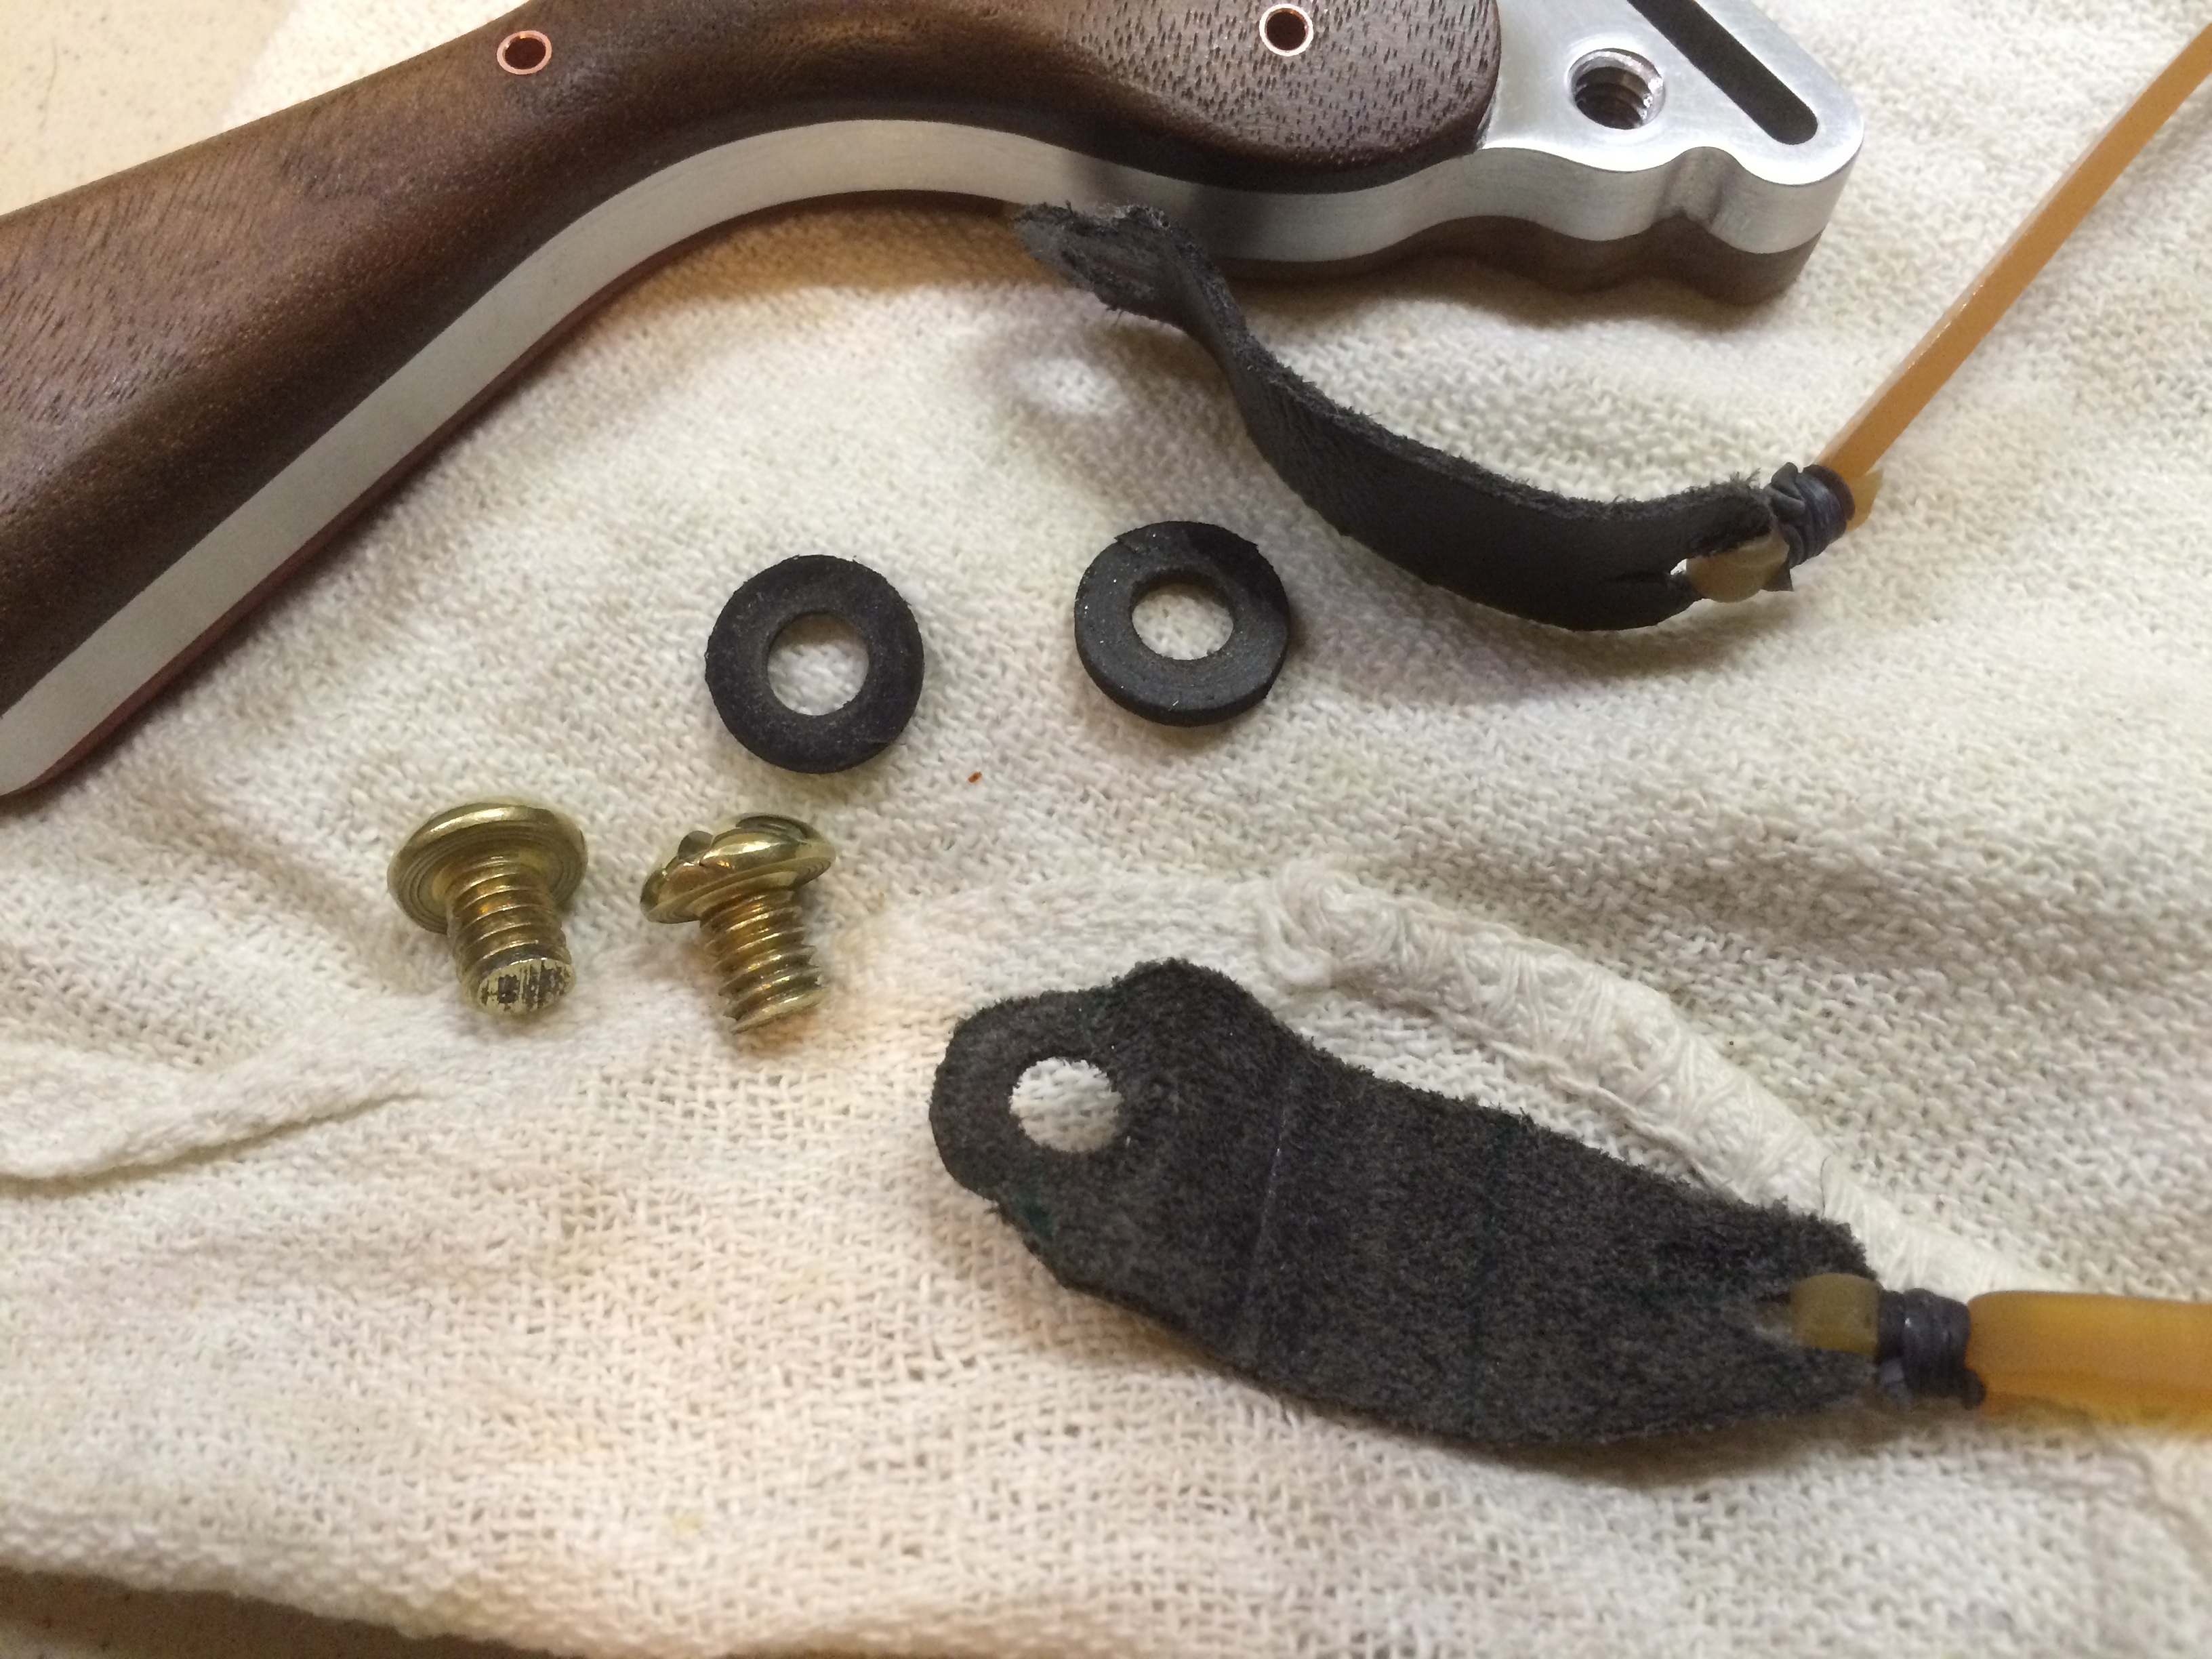
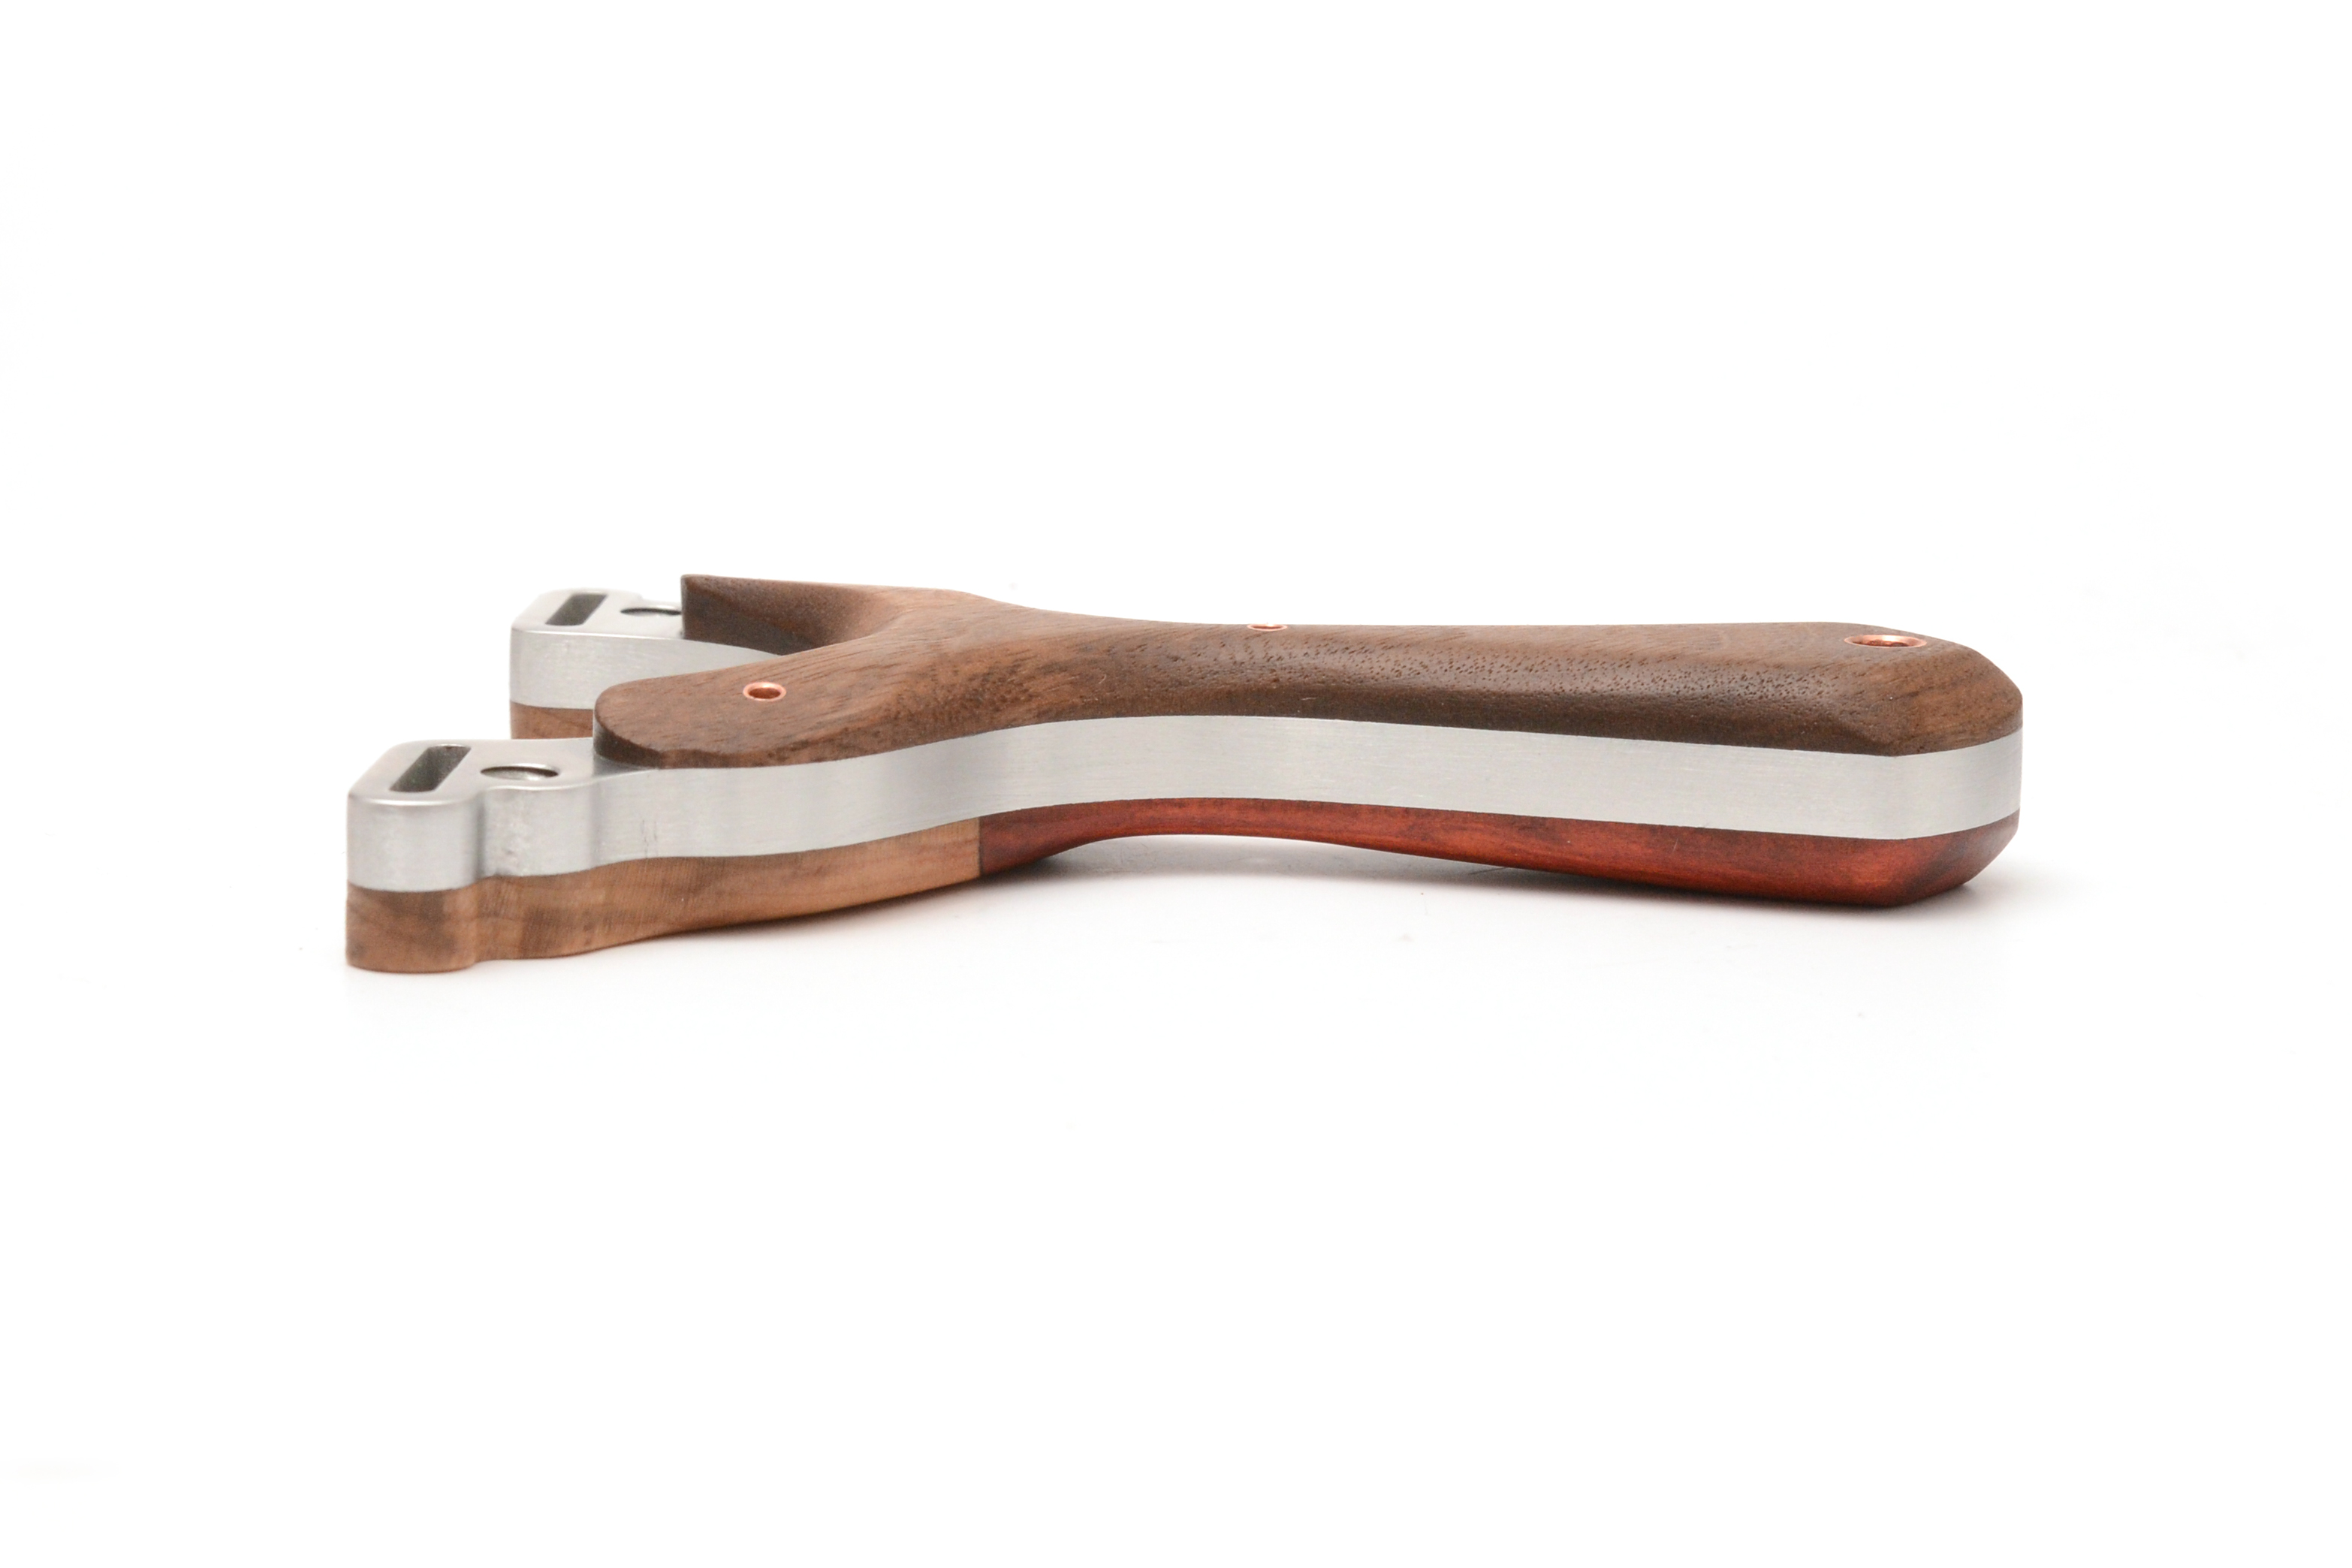
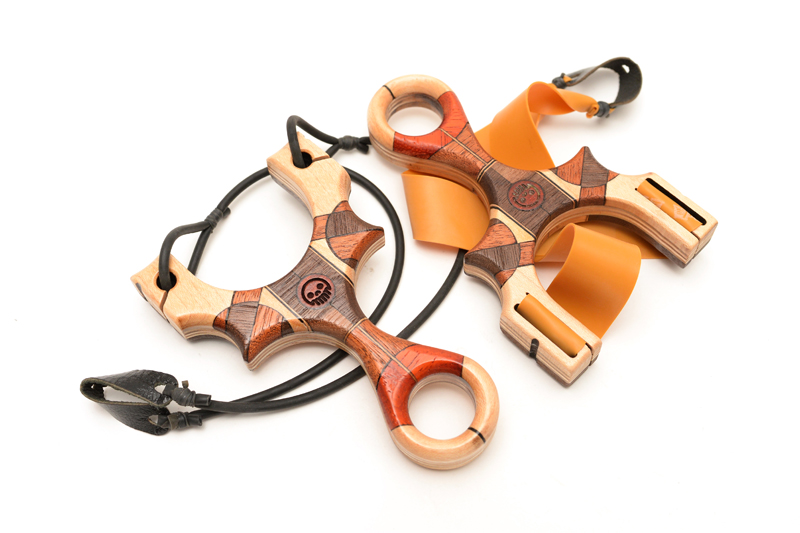
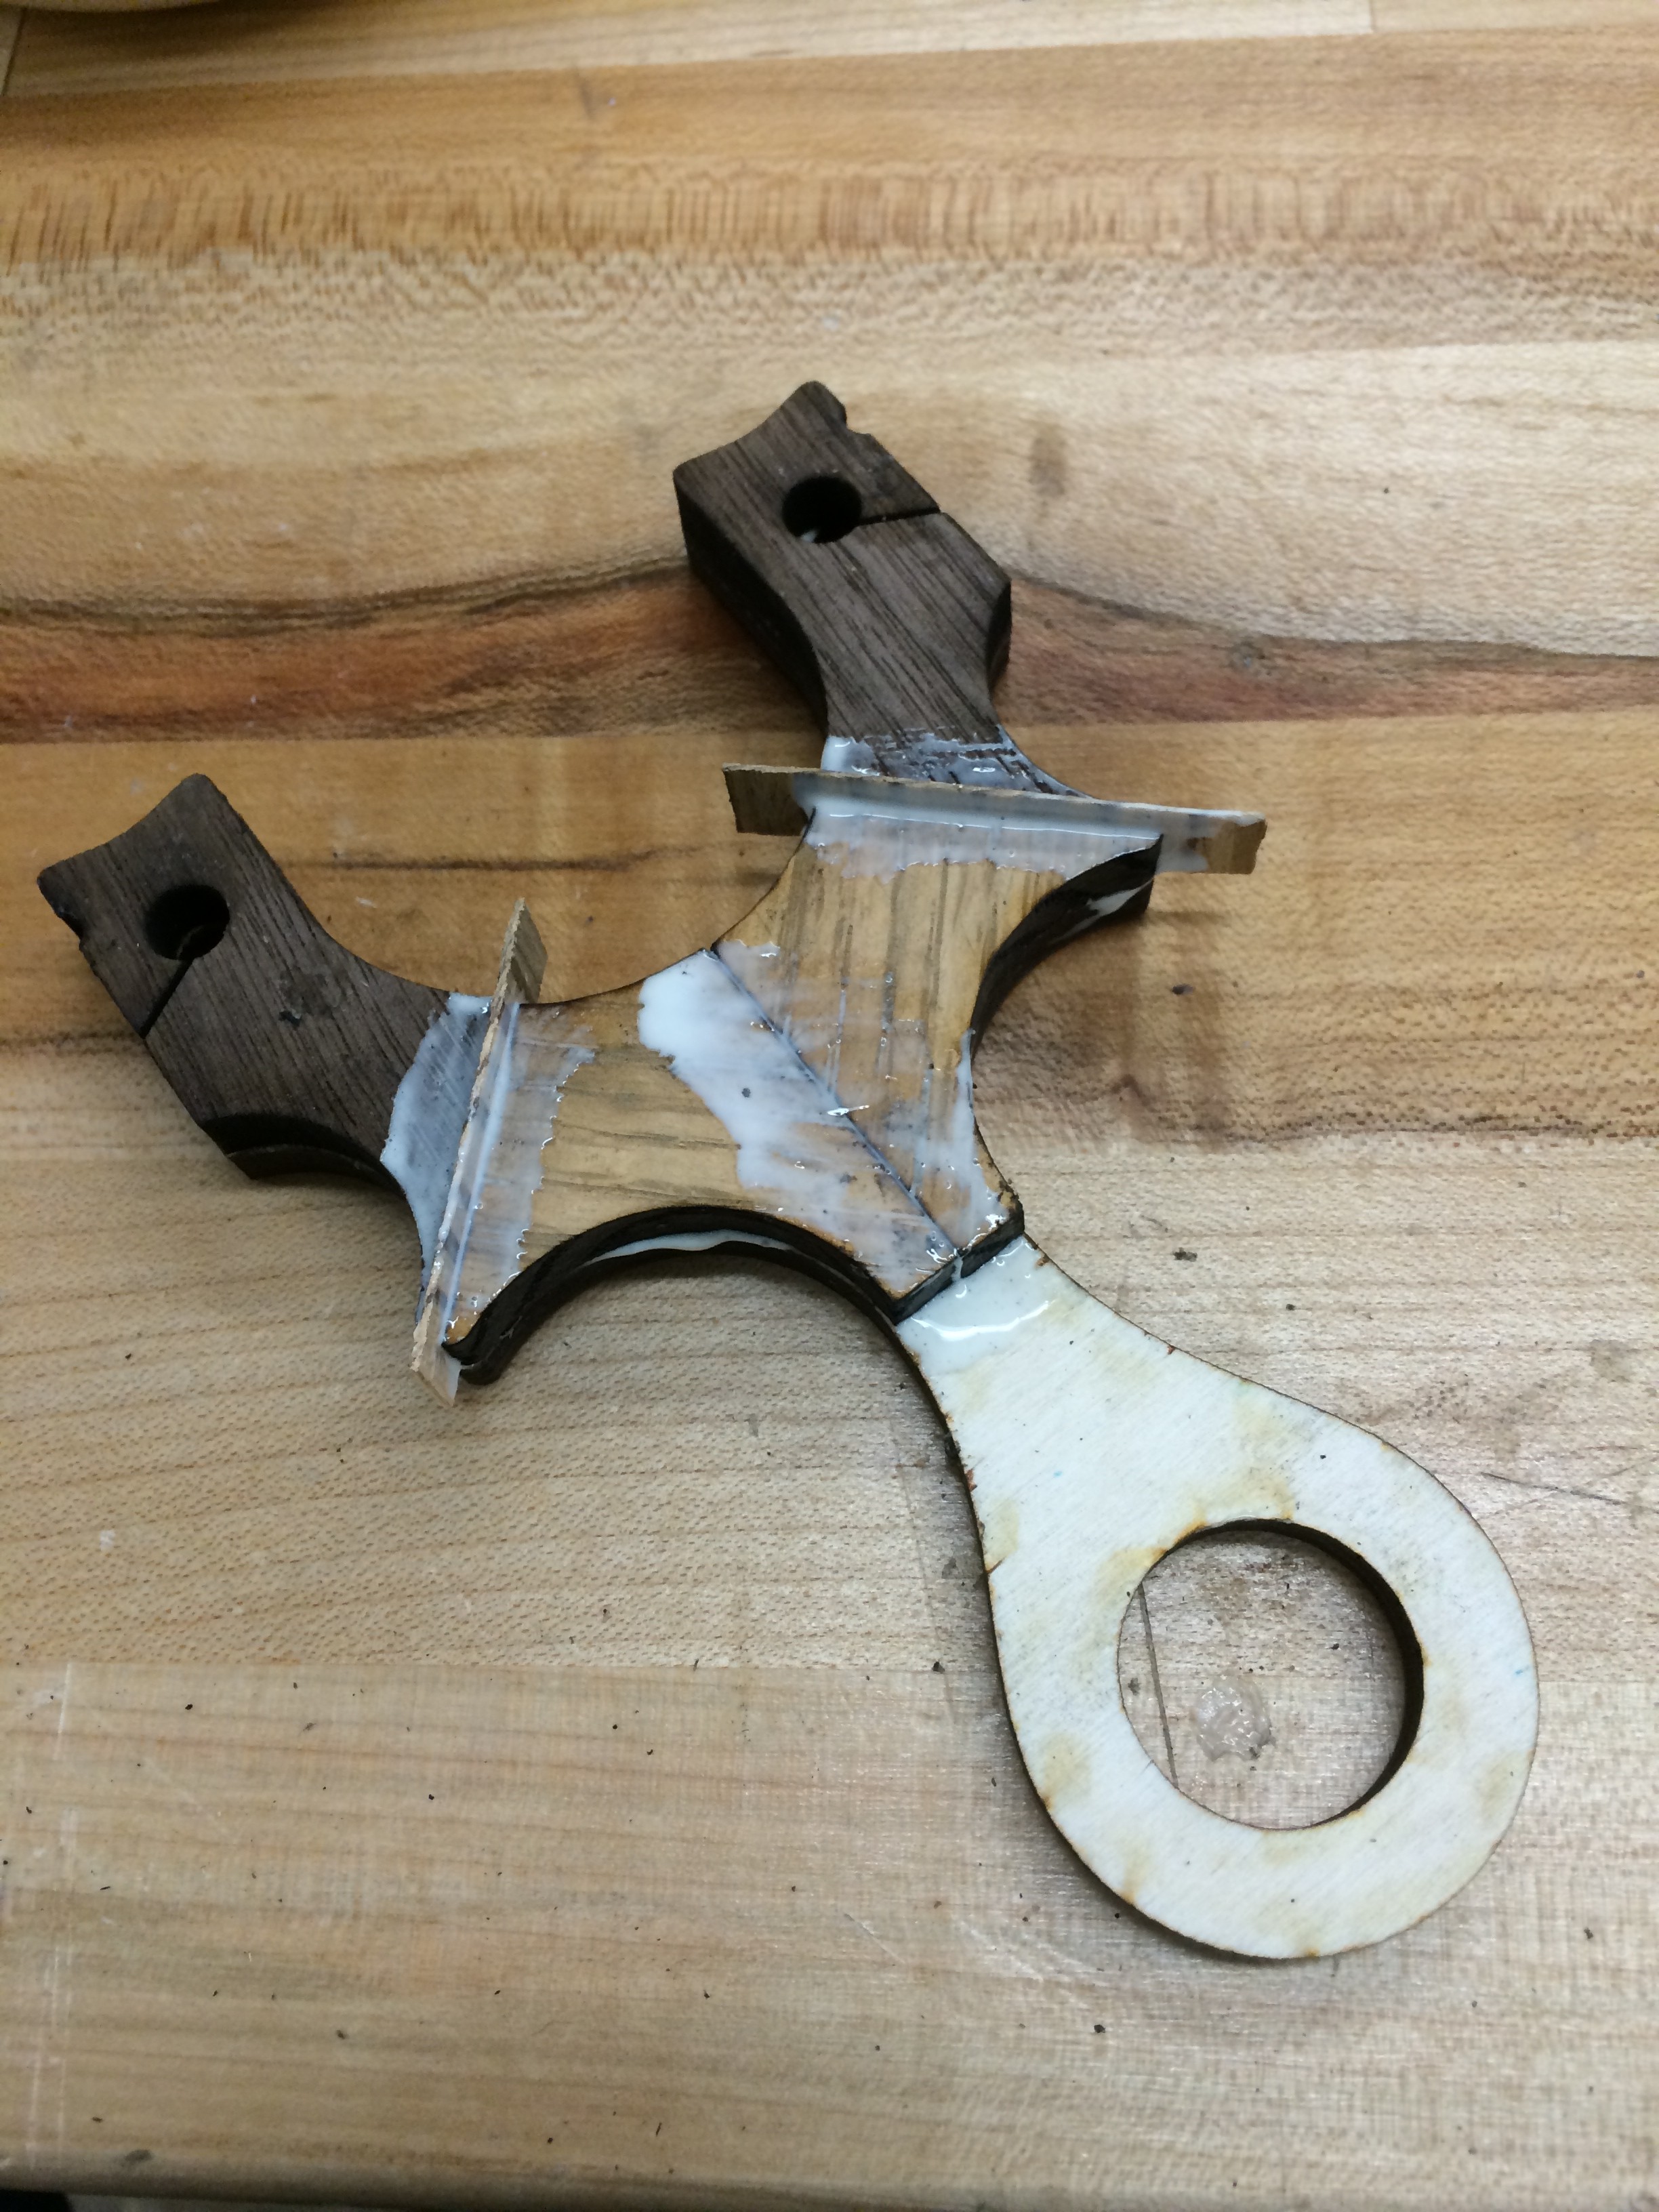
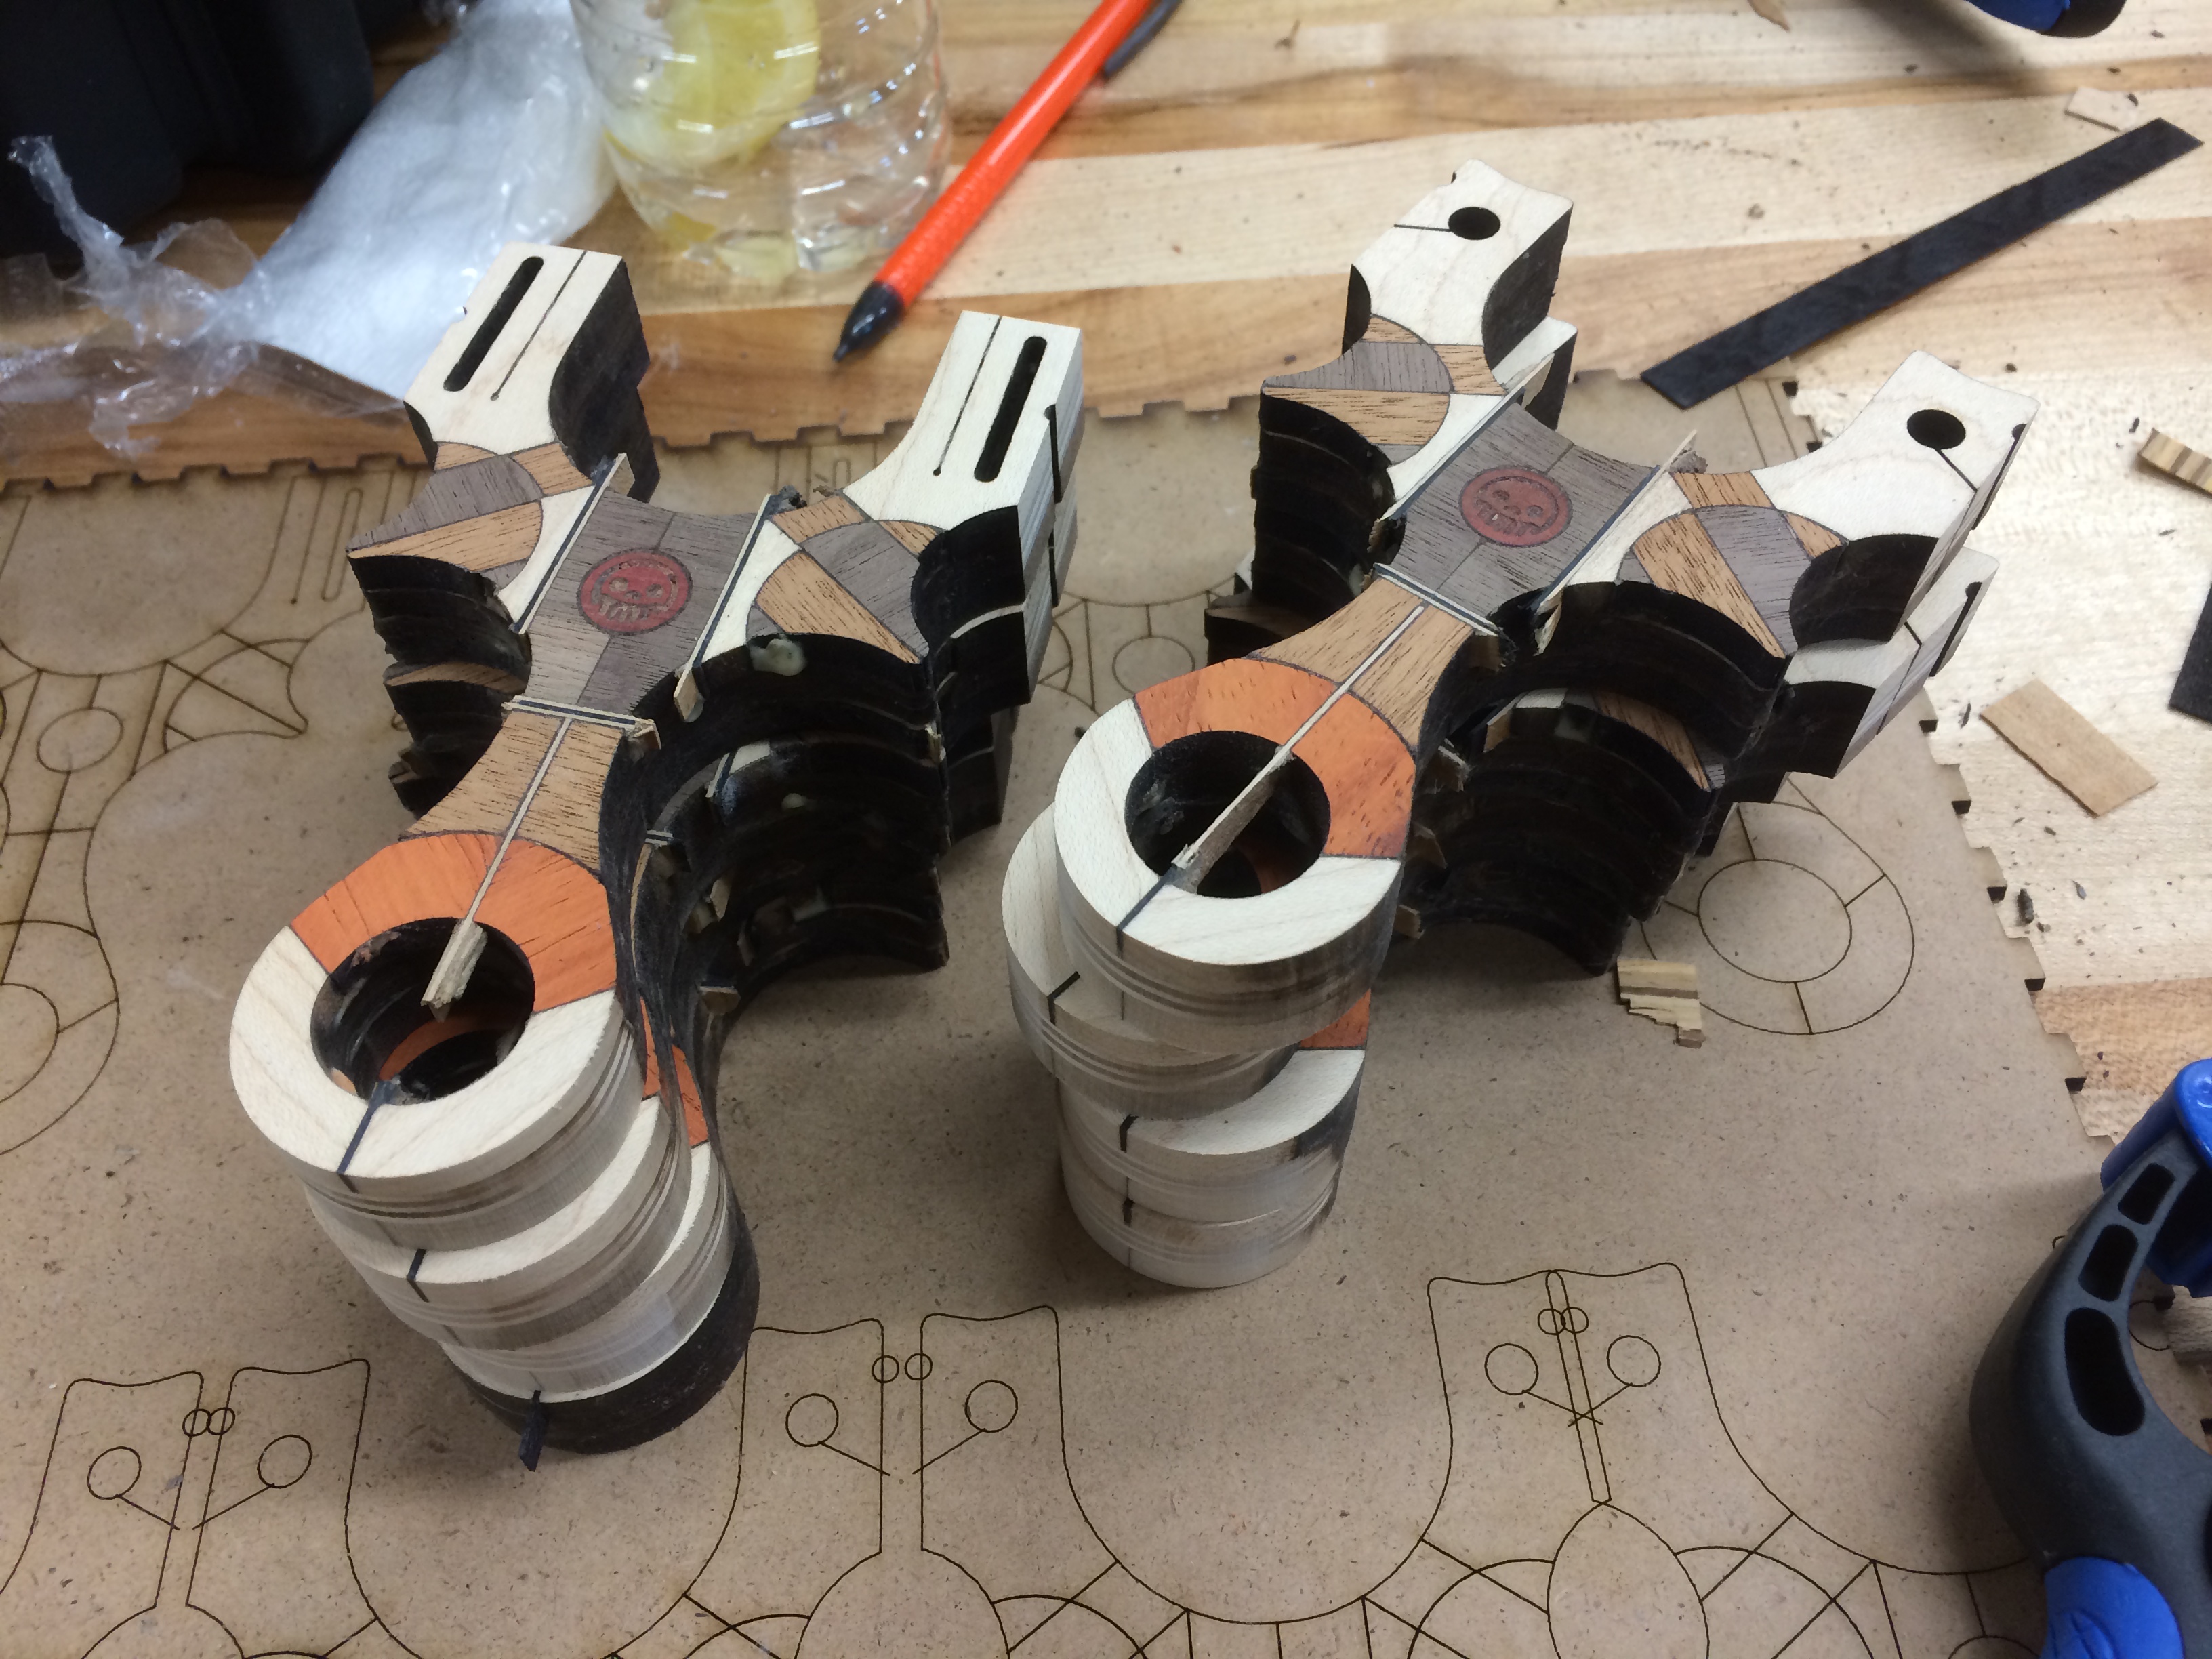
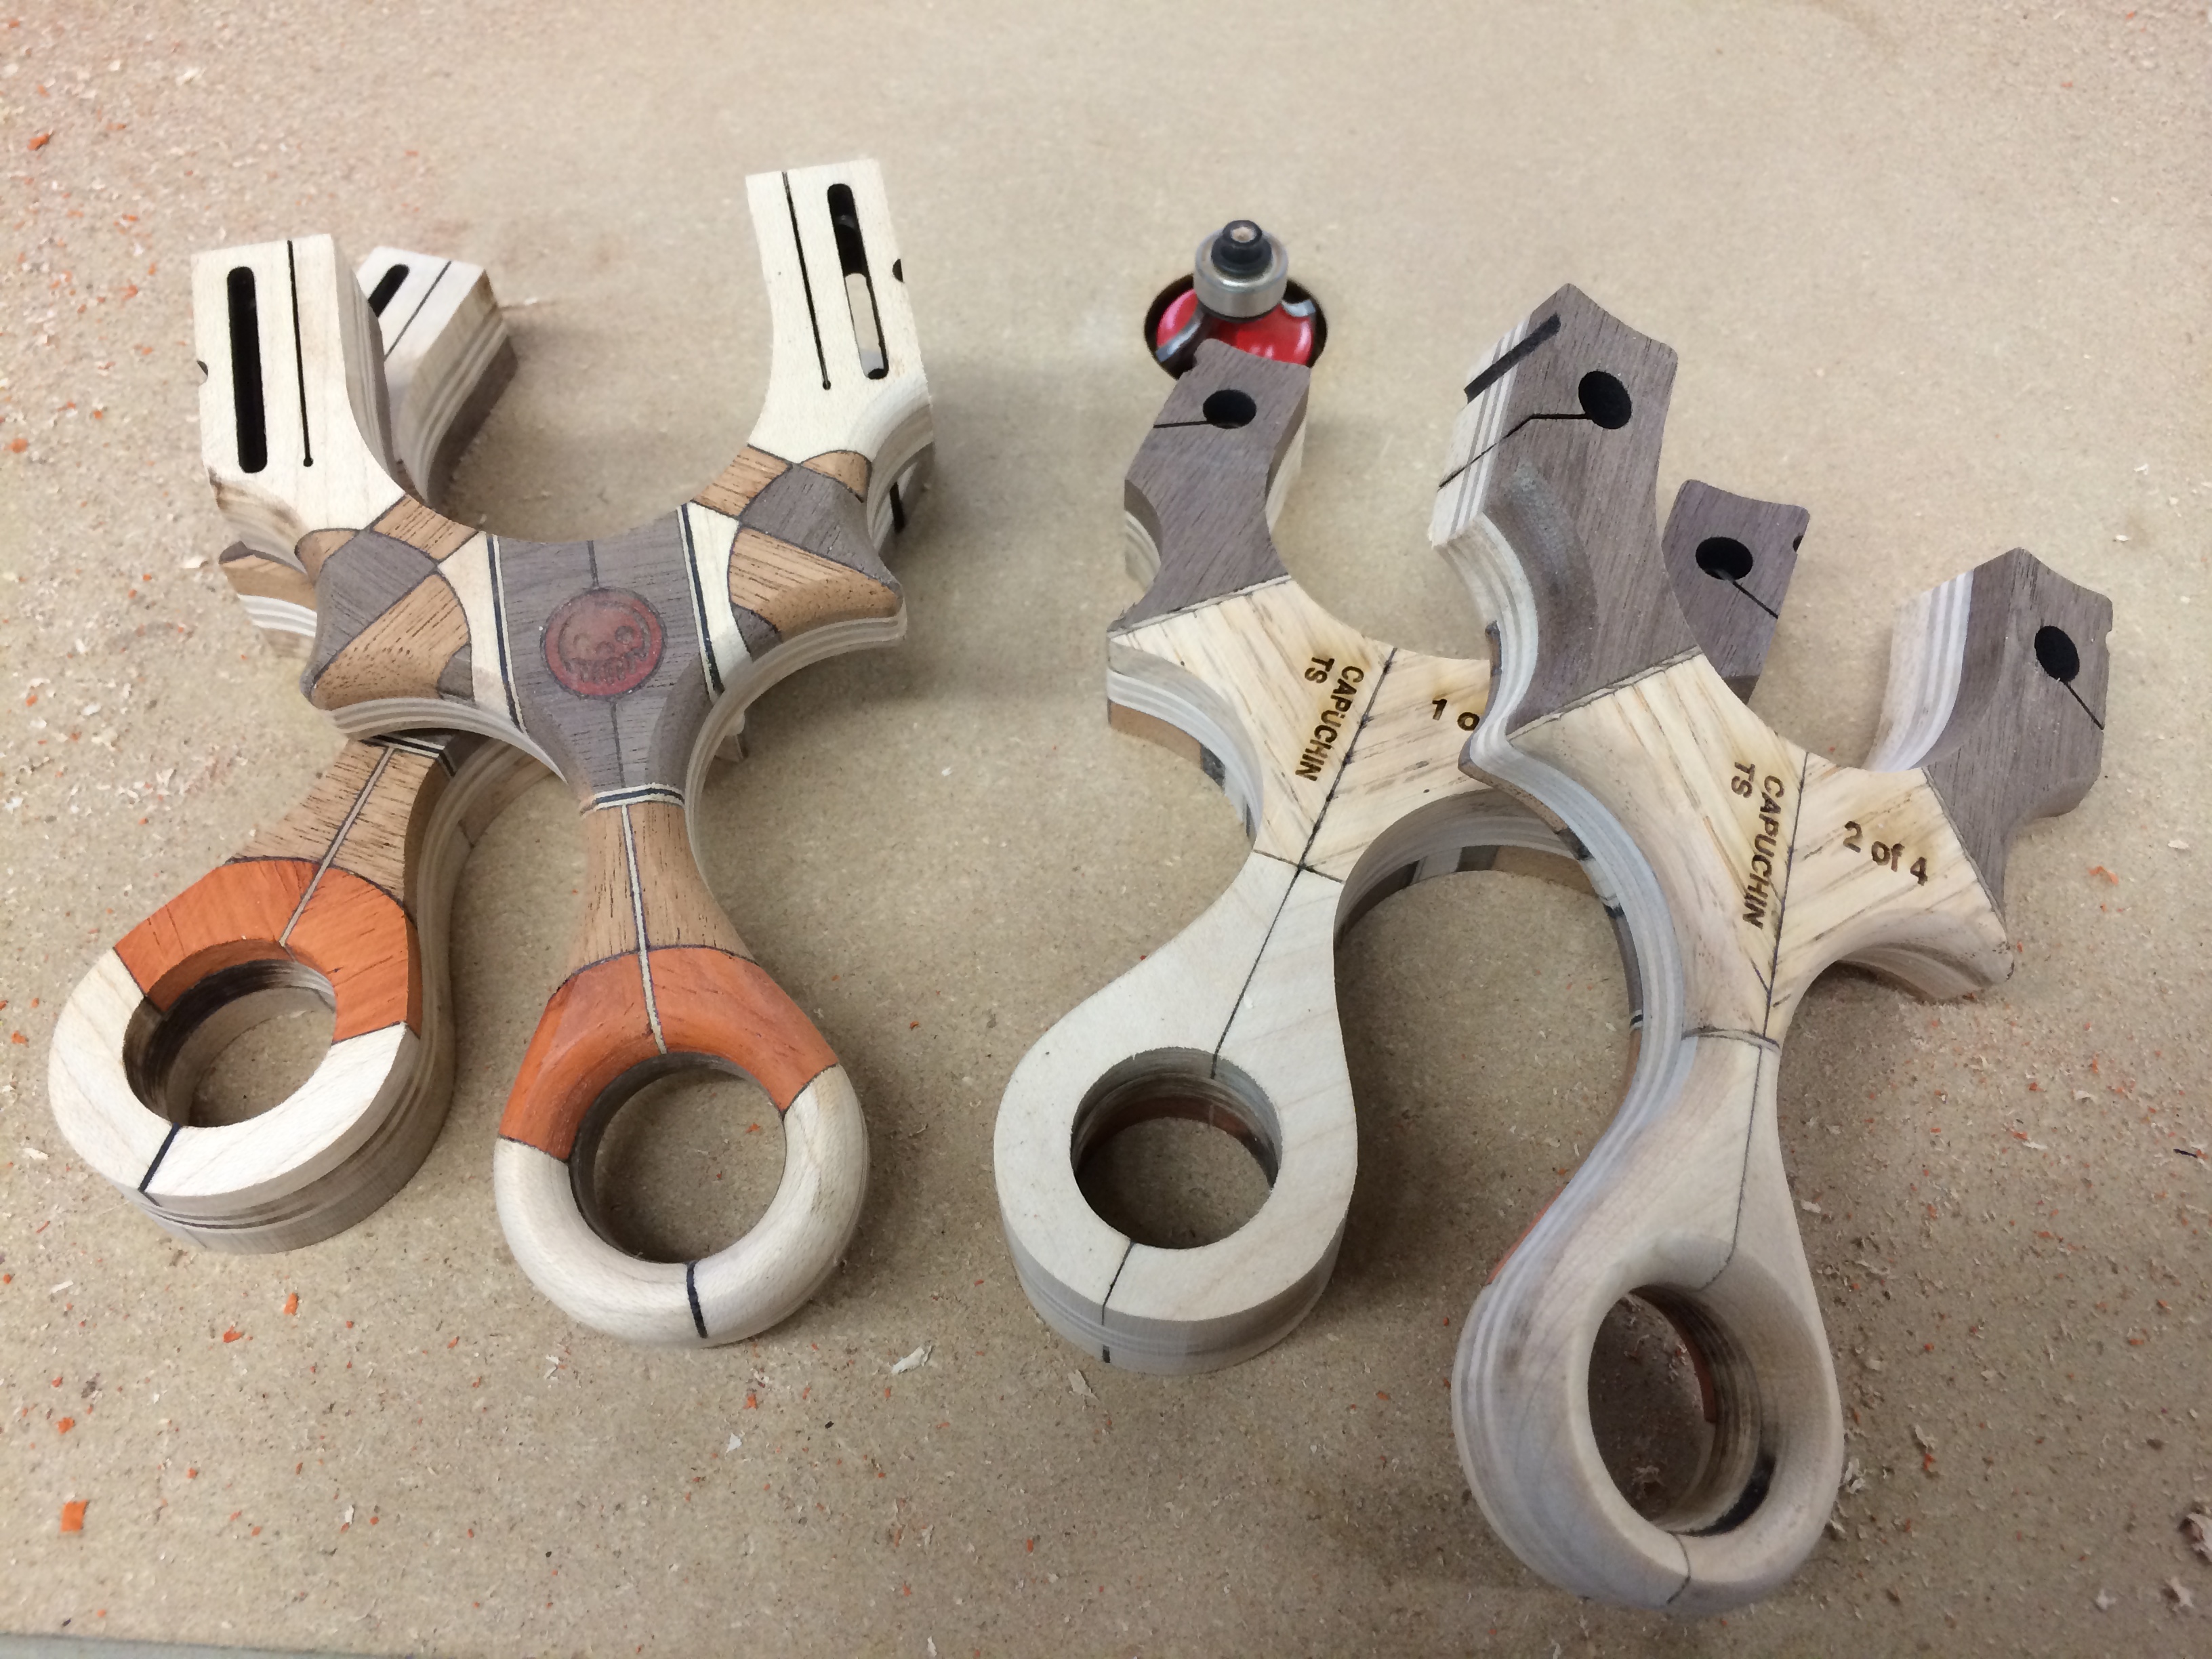
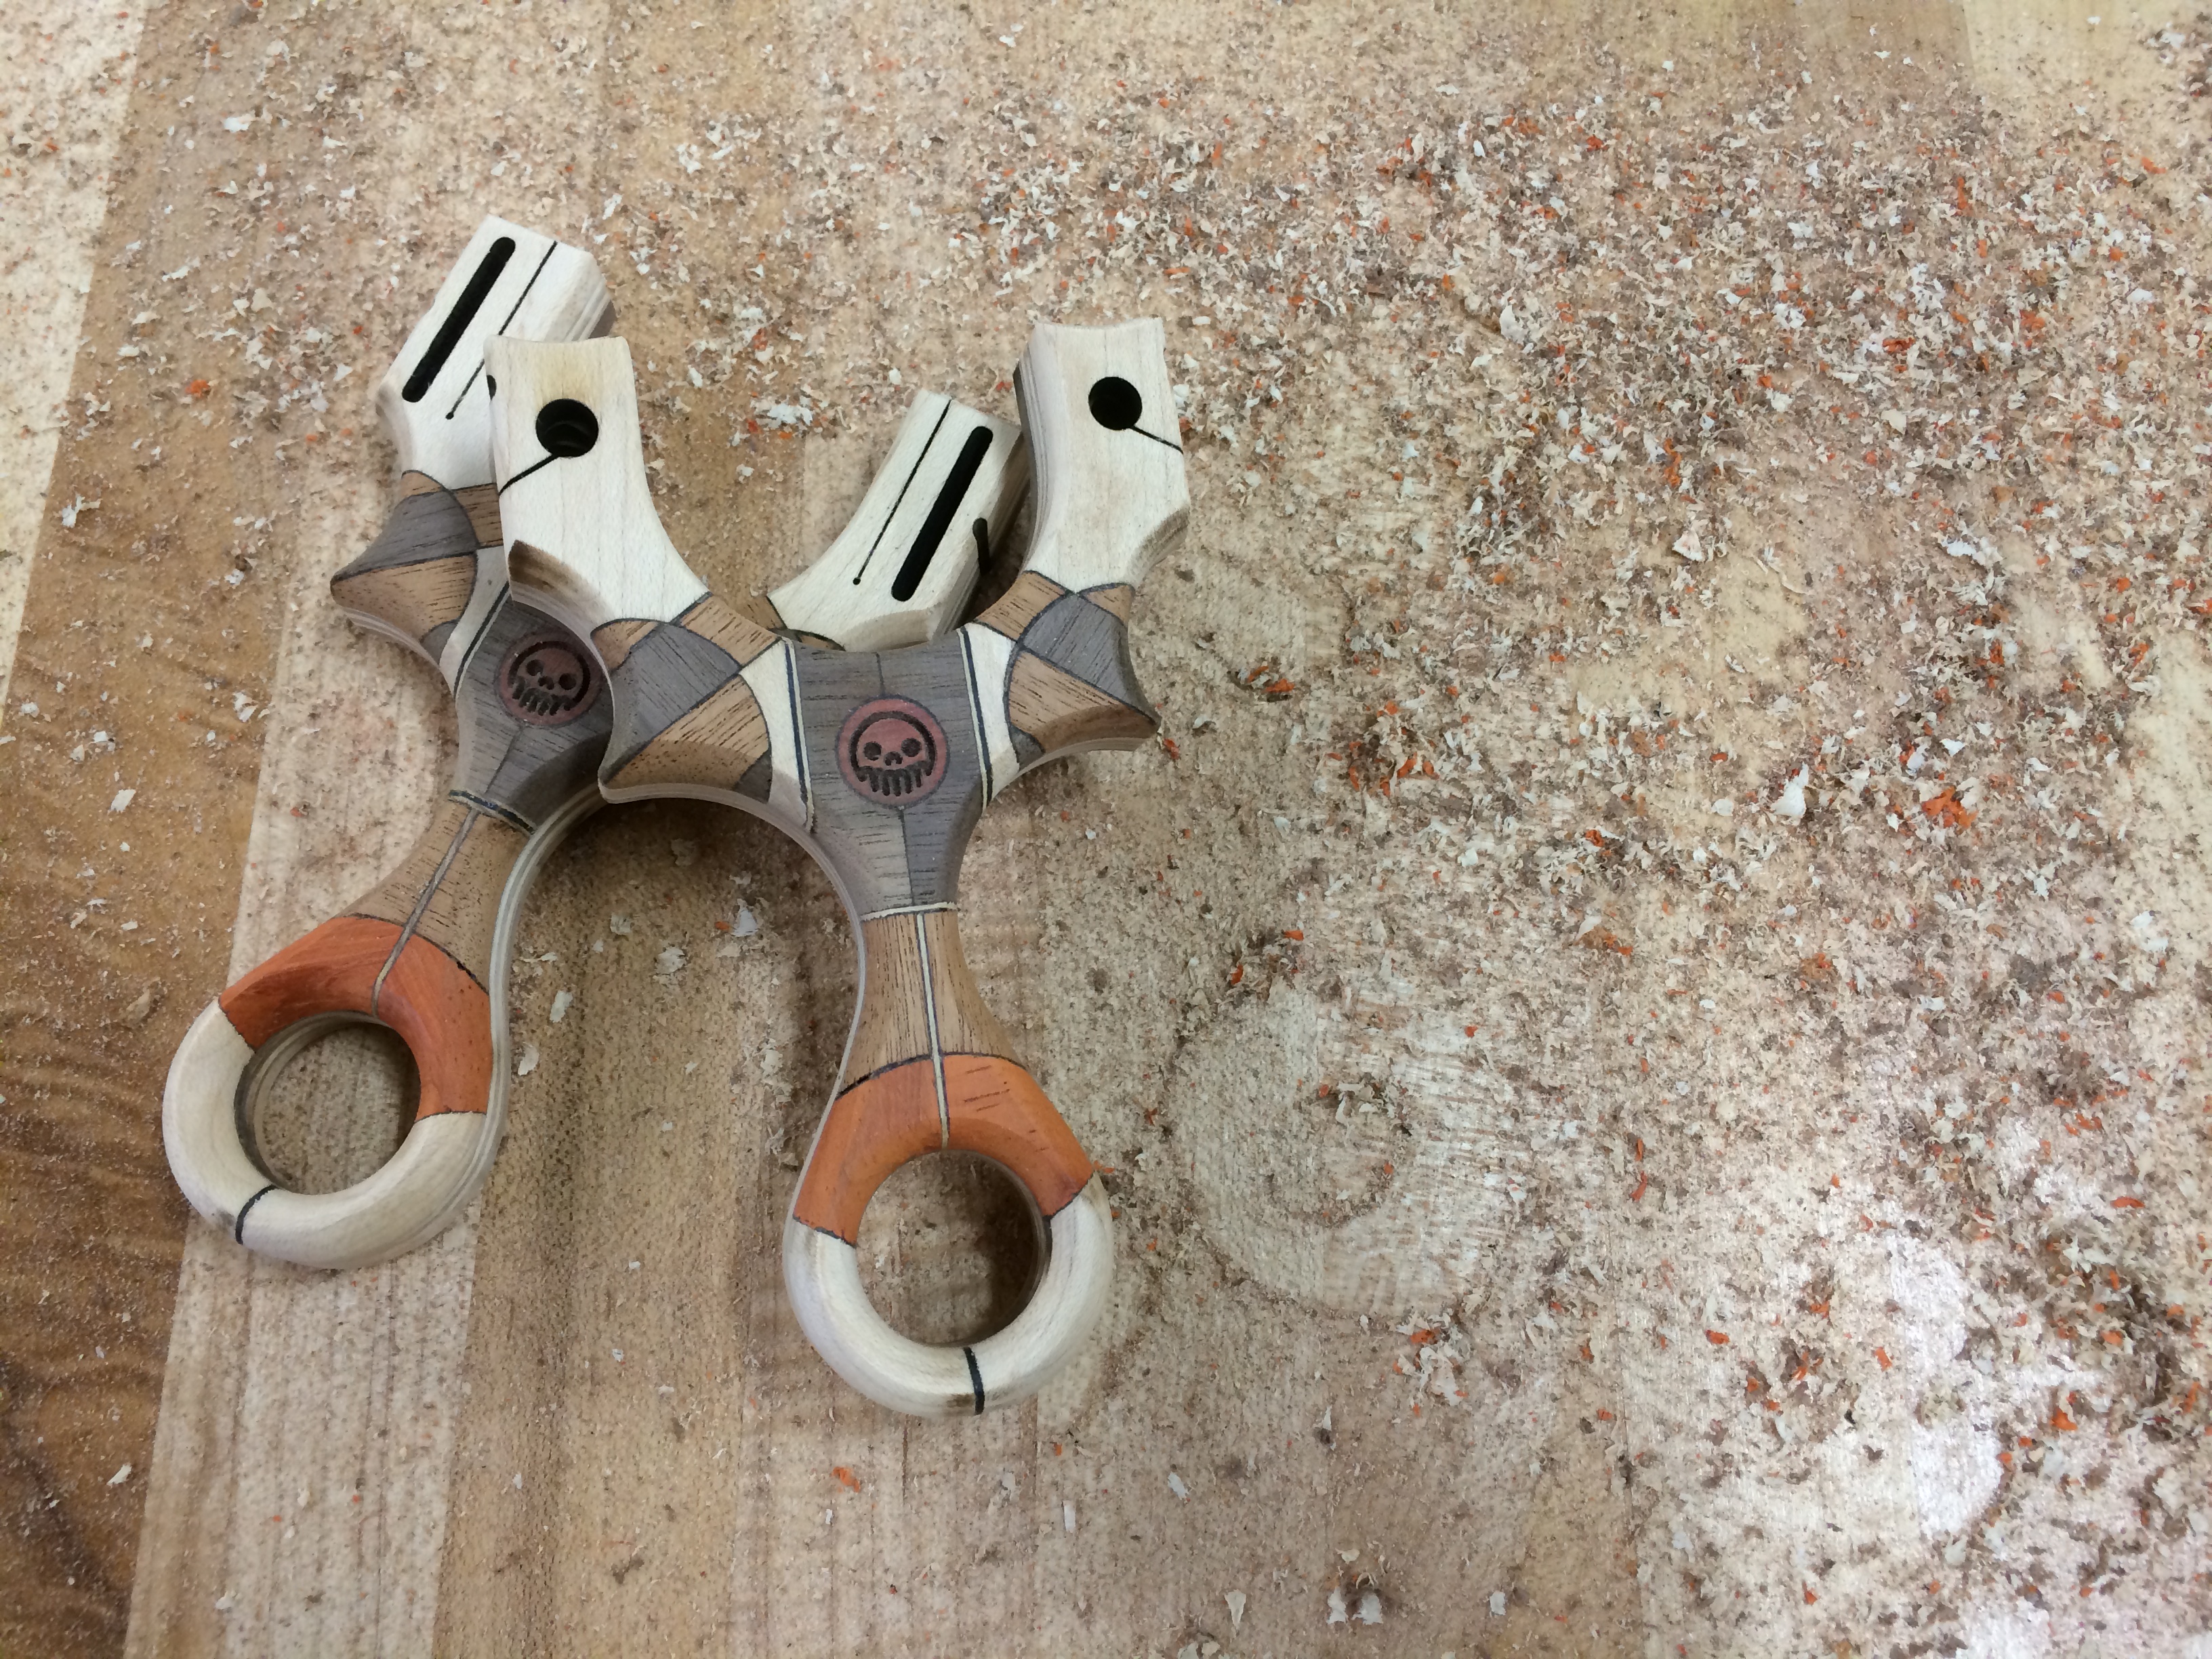
Each layer was attached with glue and then trimmed closer to the final shape. Then the brass core and before the last layer was applied, brass M3 inserts were set into the body to so that the screws could be put in place when it was time for final assembly. Unlike most of my excited builds, I took my time with this, letting it sit overnight before trimming the excess material. The Cu-Ren sits next to the Steamplinker as a jumping off point.

img_0550

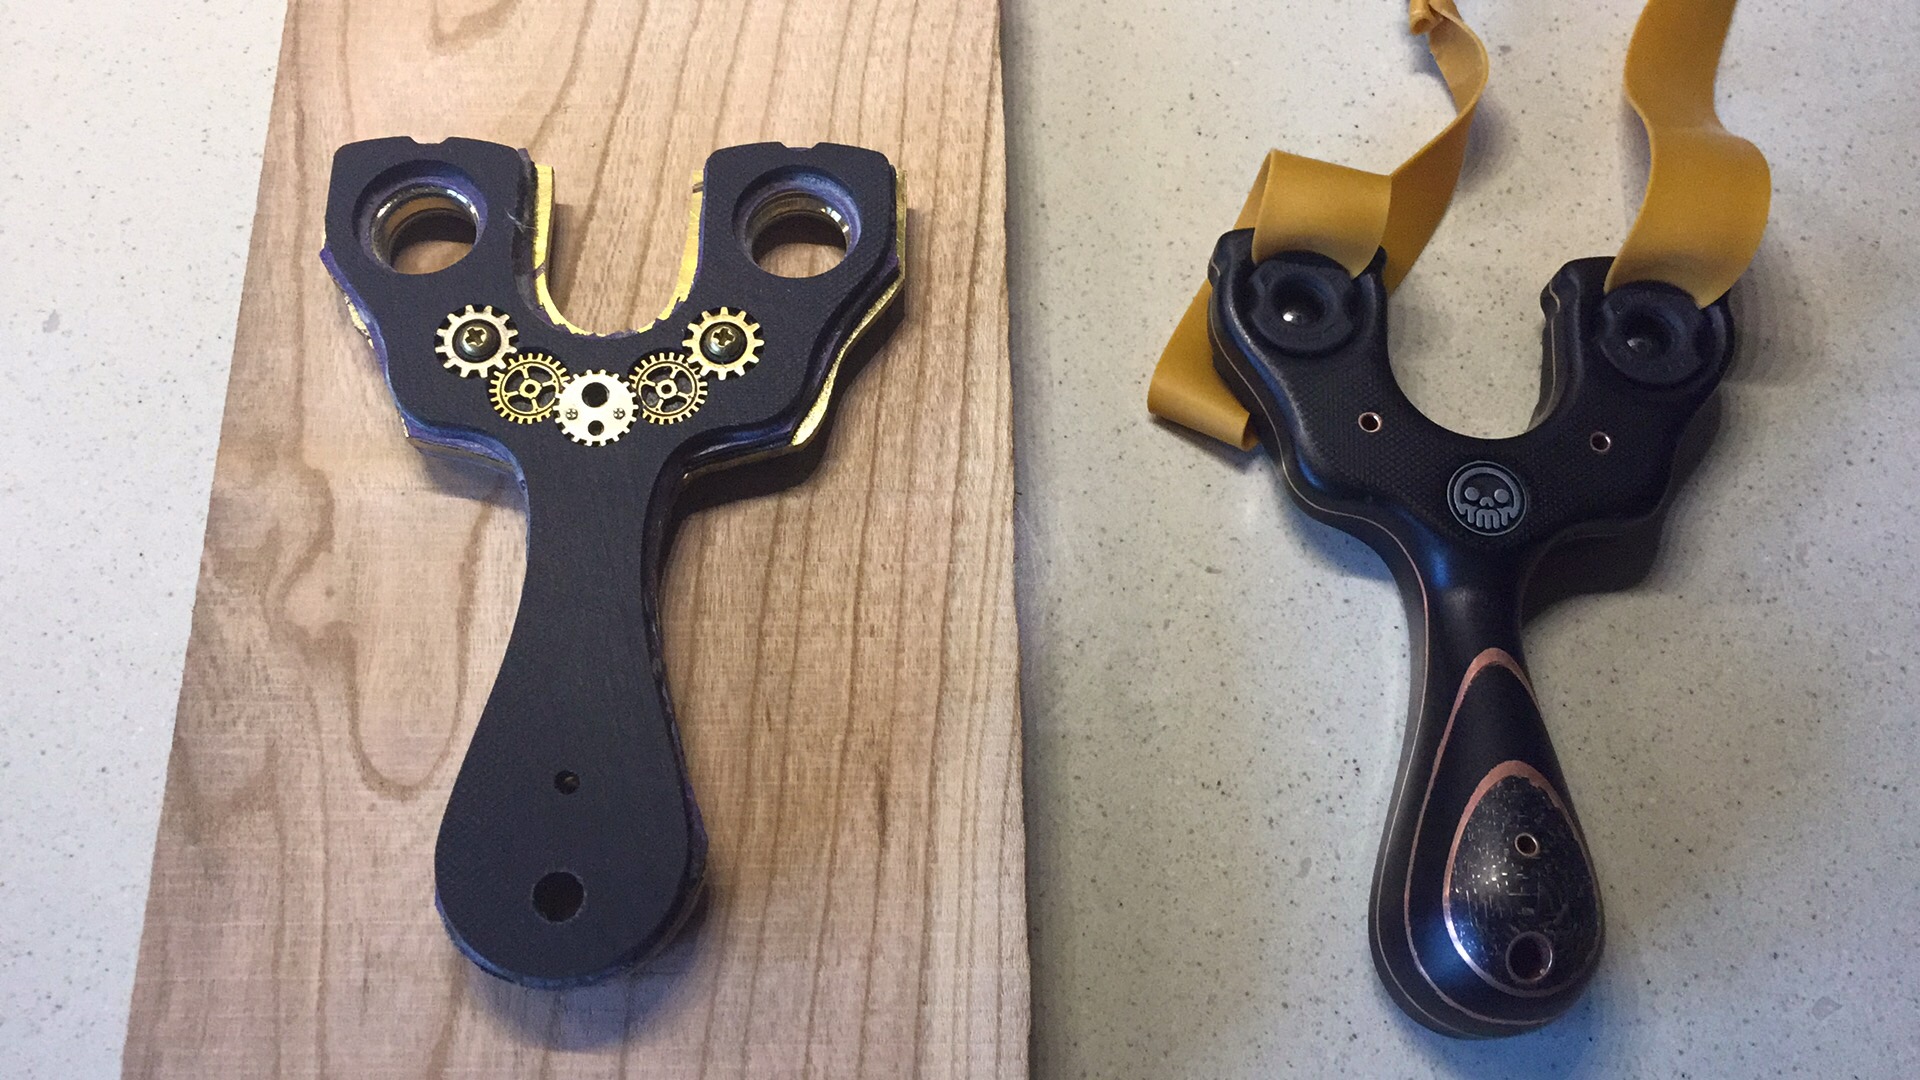
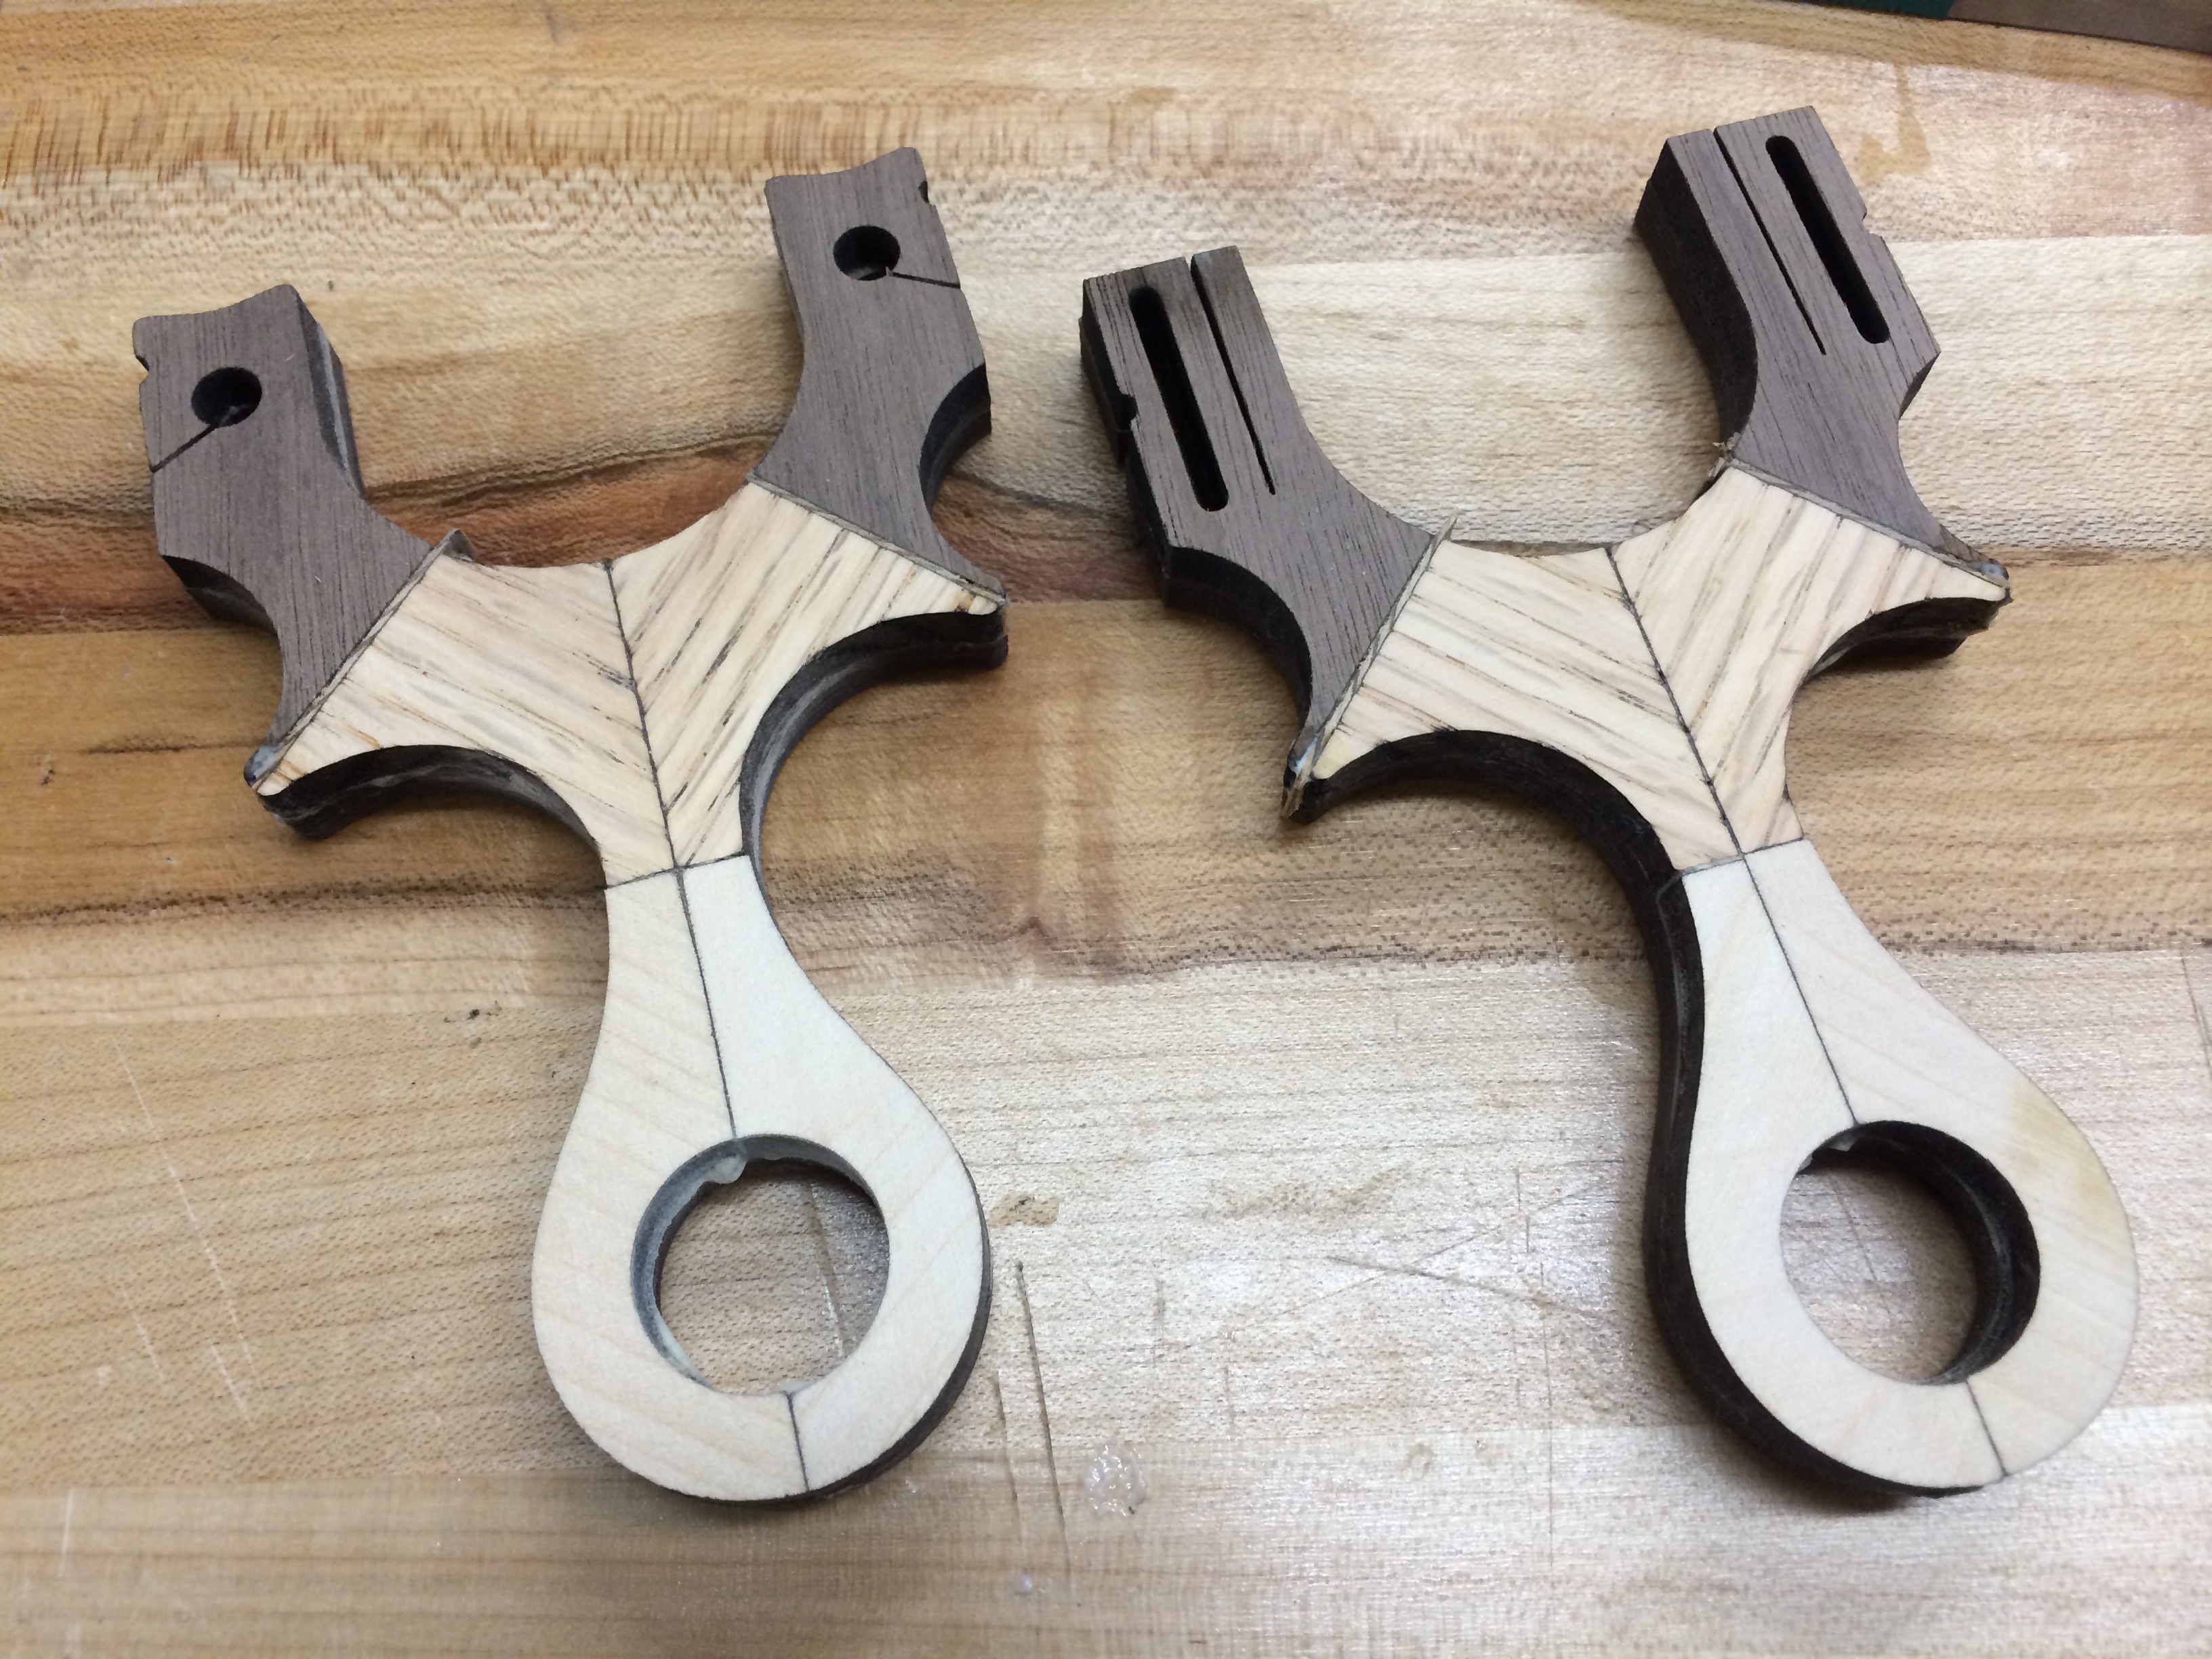
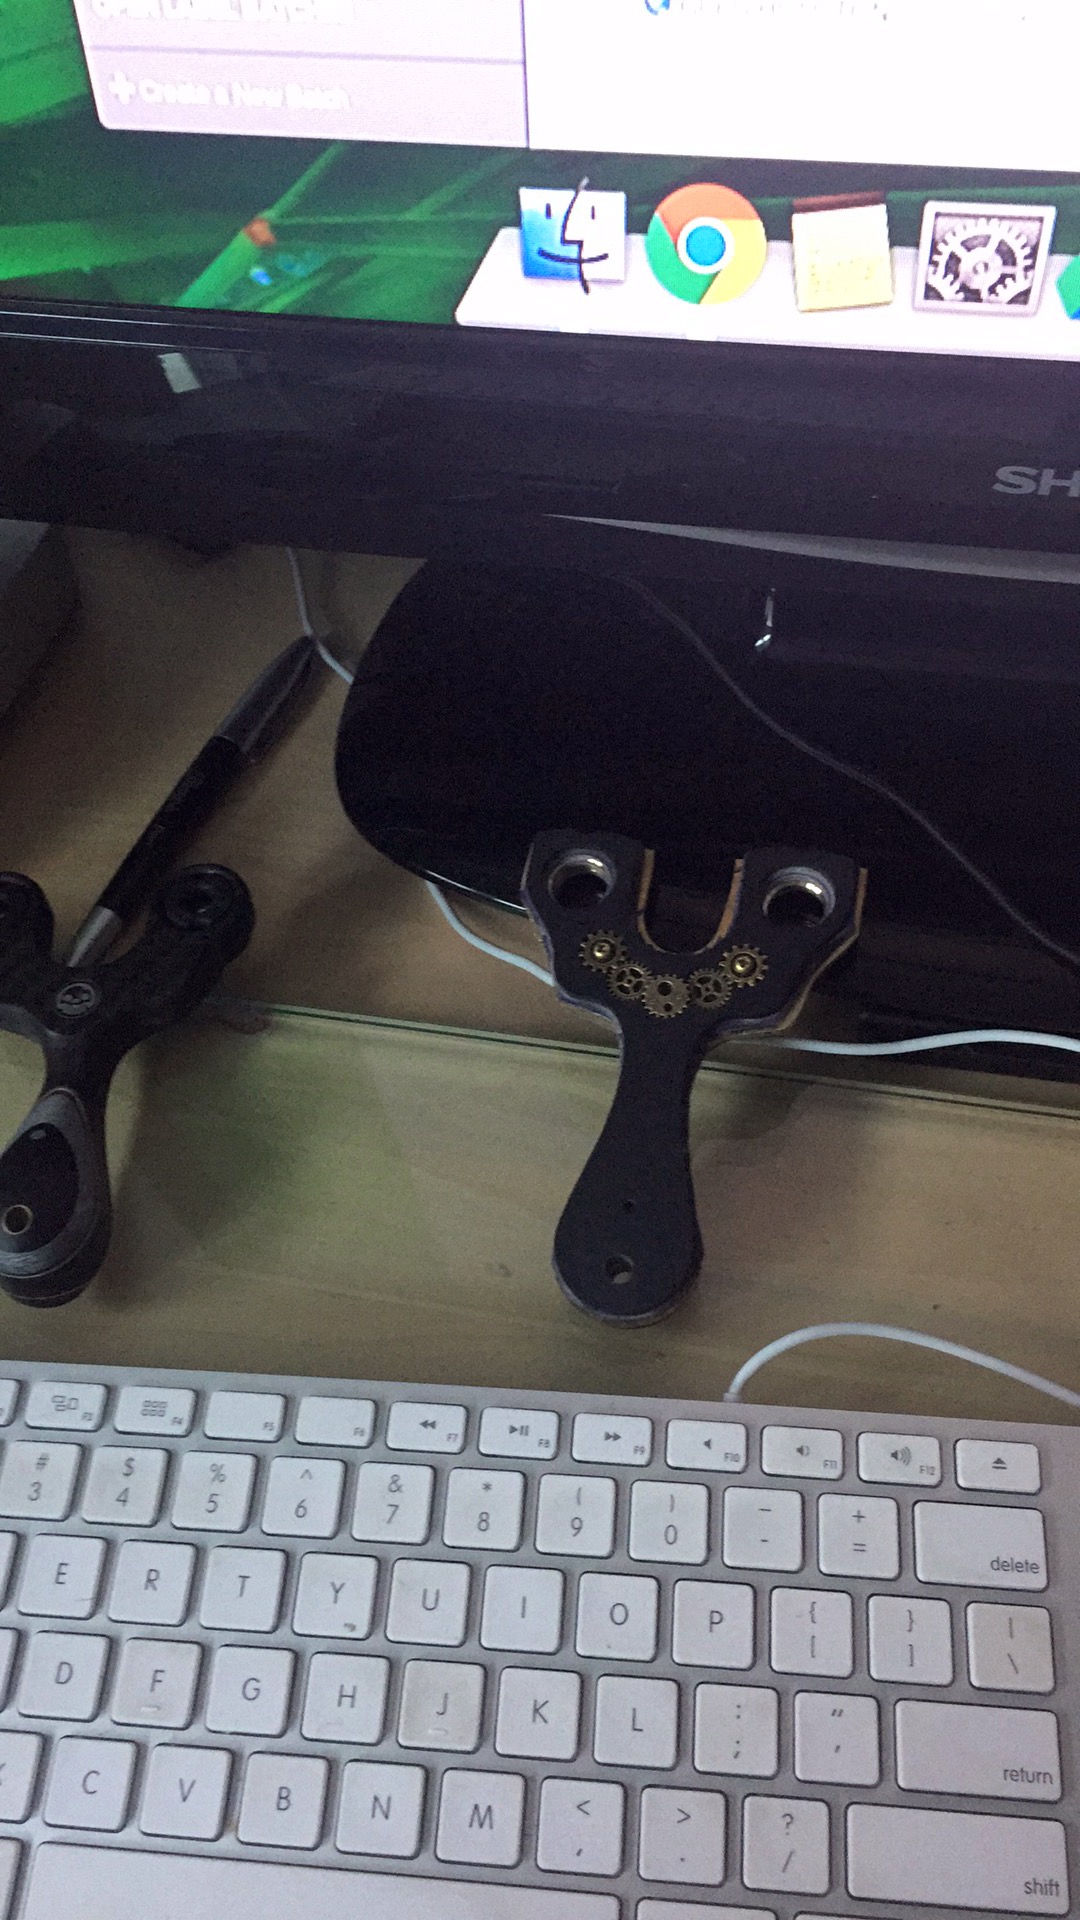
The unfinished main body travelled around with me while I did some admin work and shipped out some orders. The more I looked at it, the more things I resolved in my head on how to finish it. Next to it is the Kylo-Ren, yet another Oren variant.

img_0551

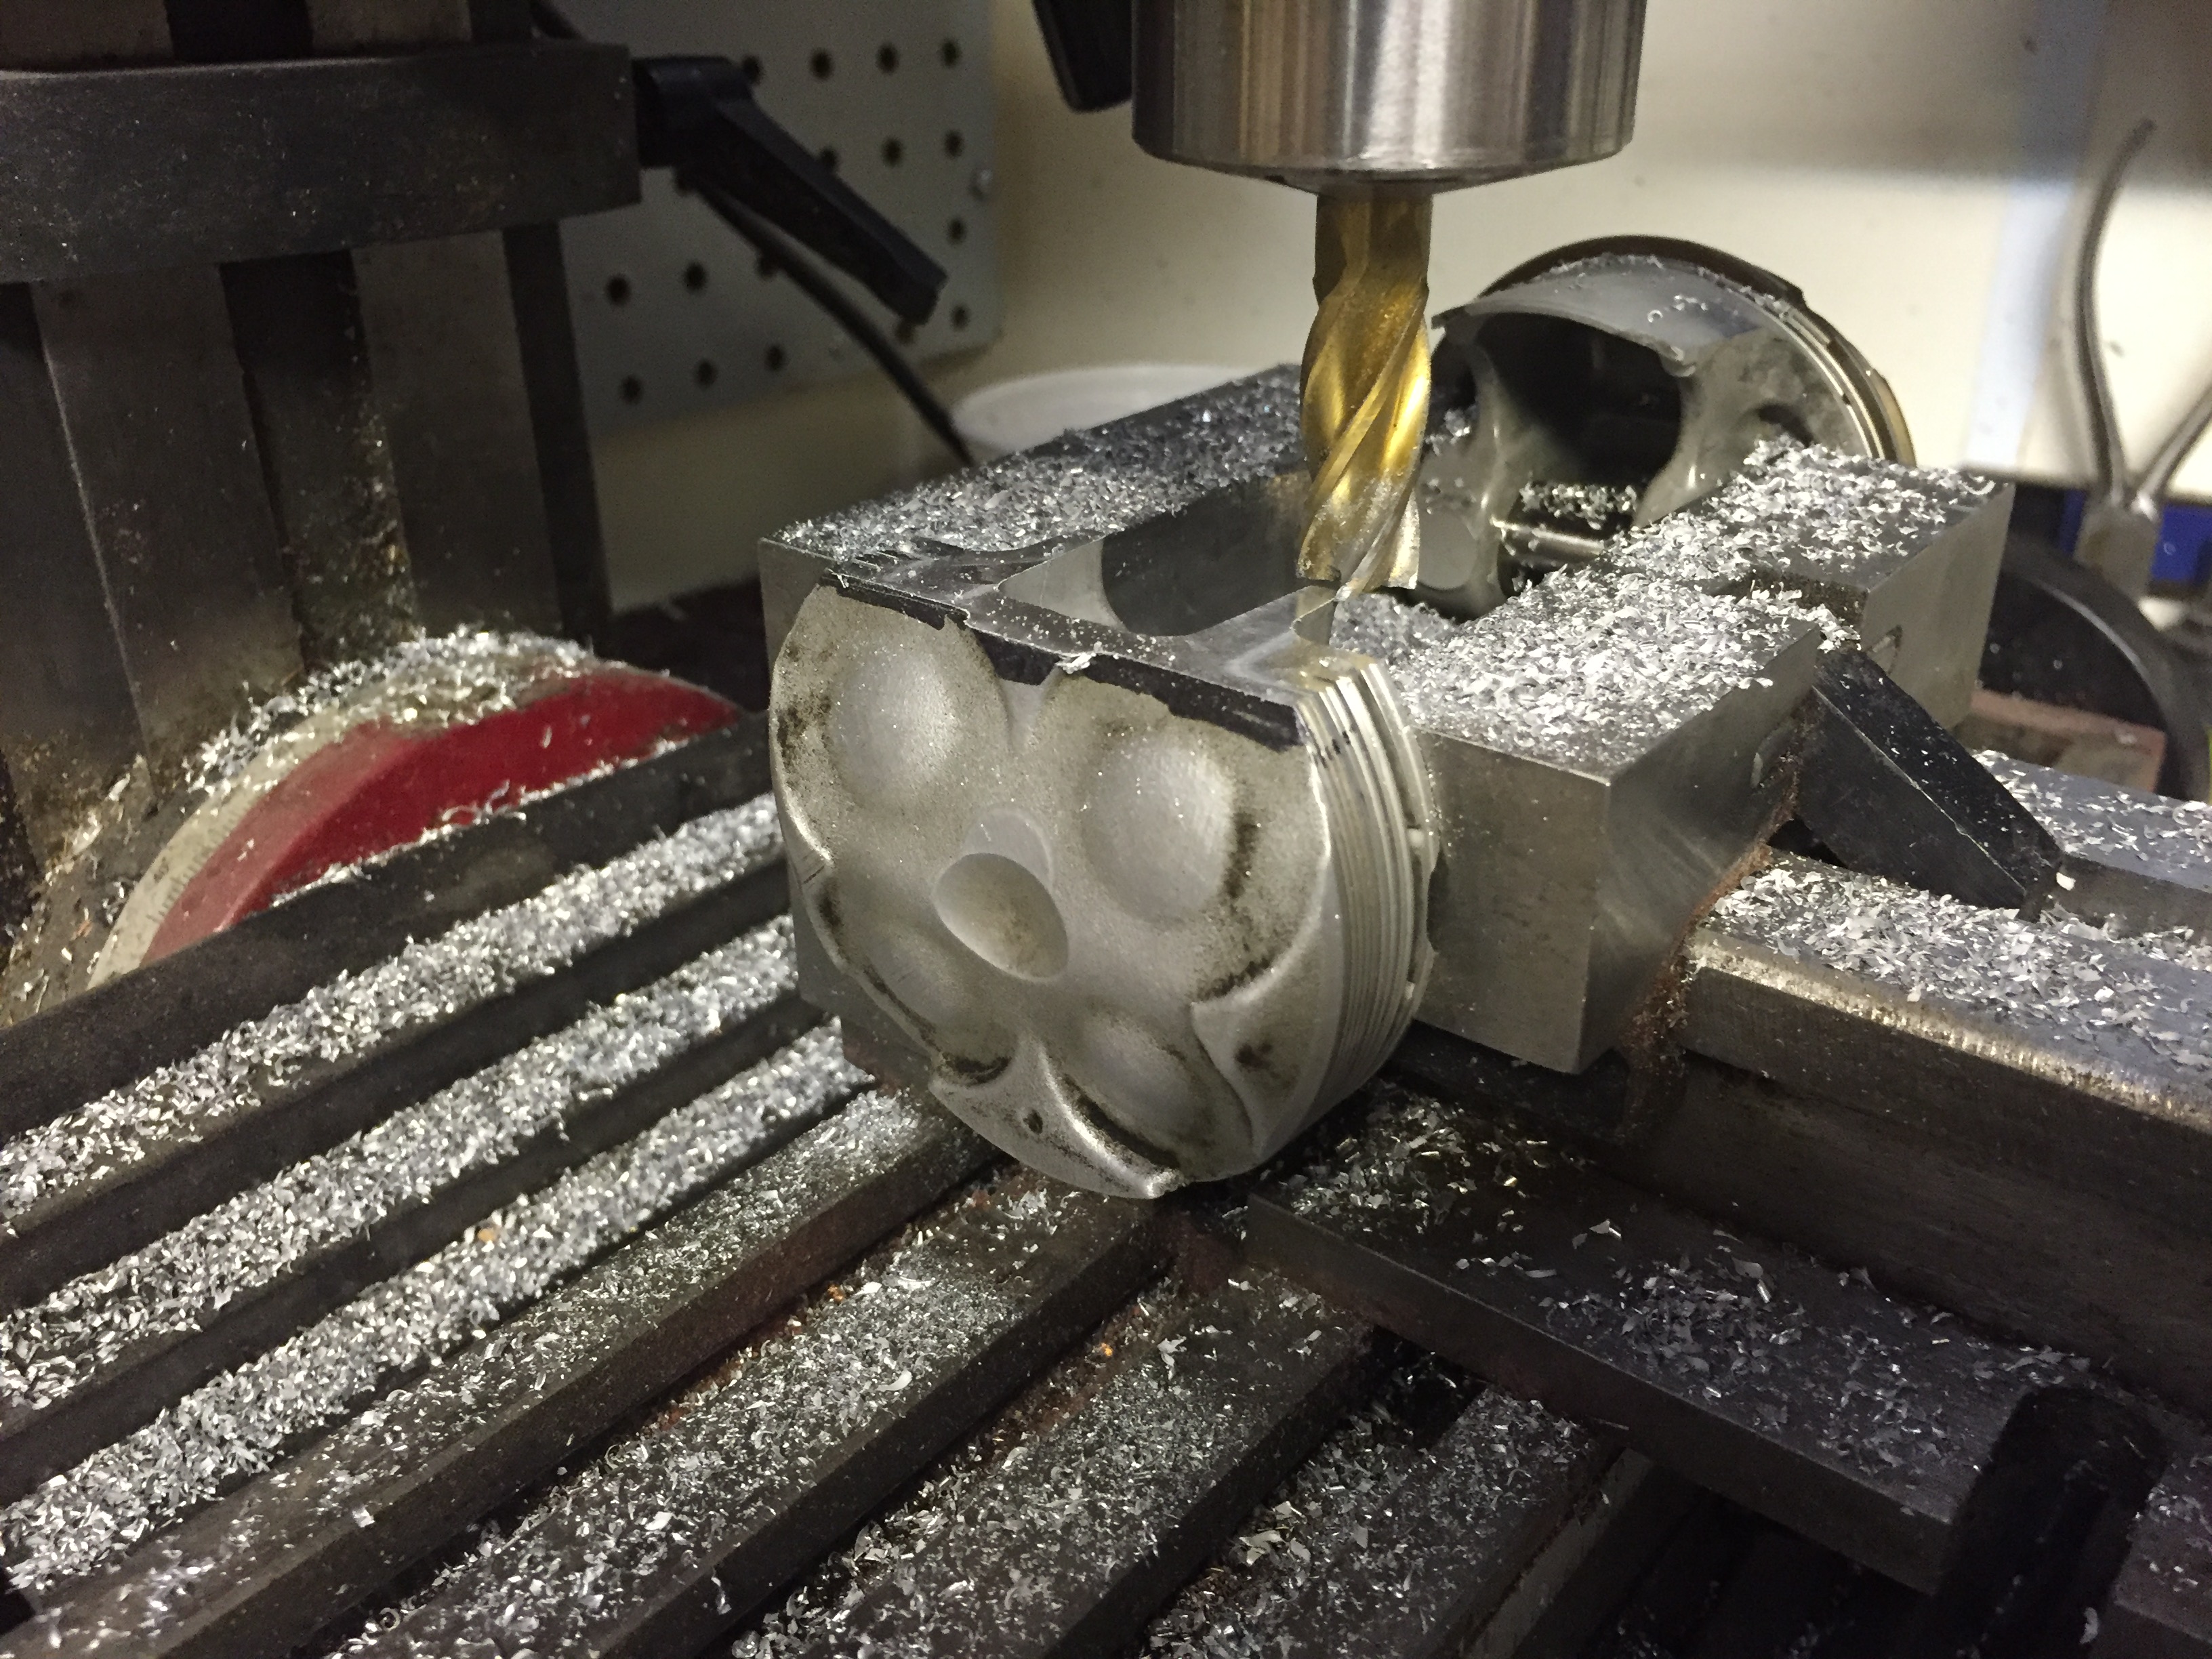
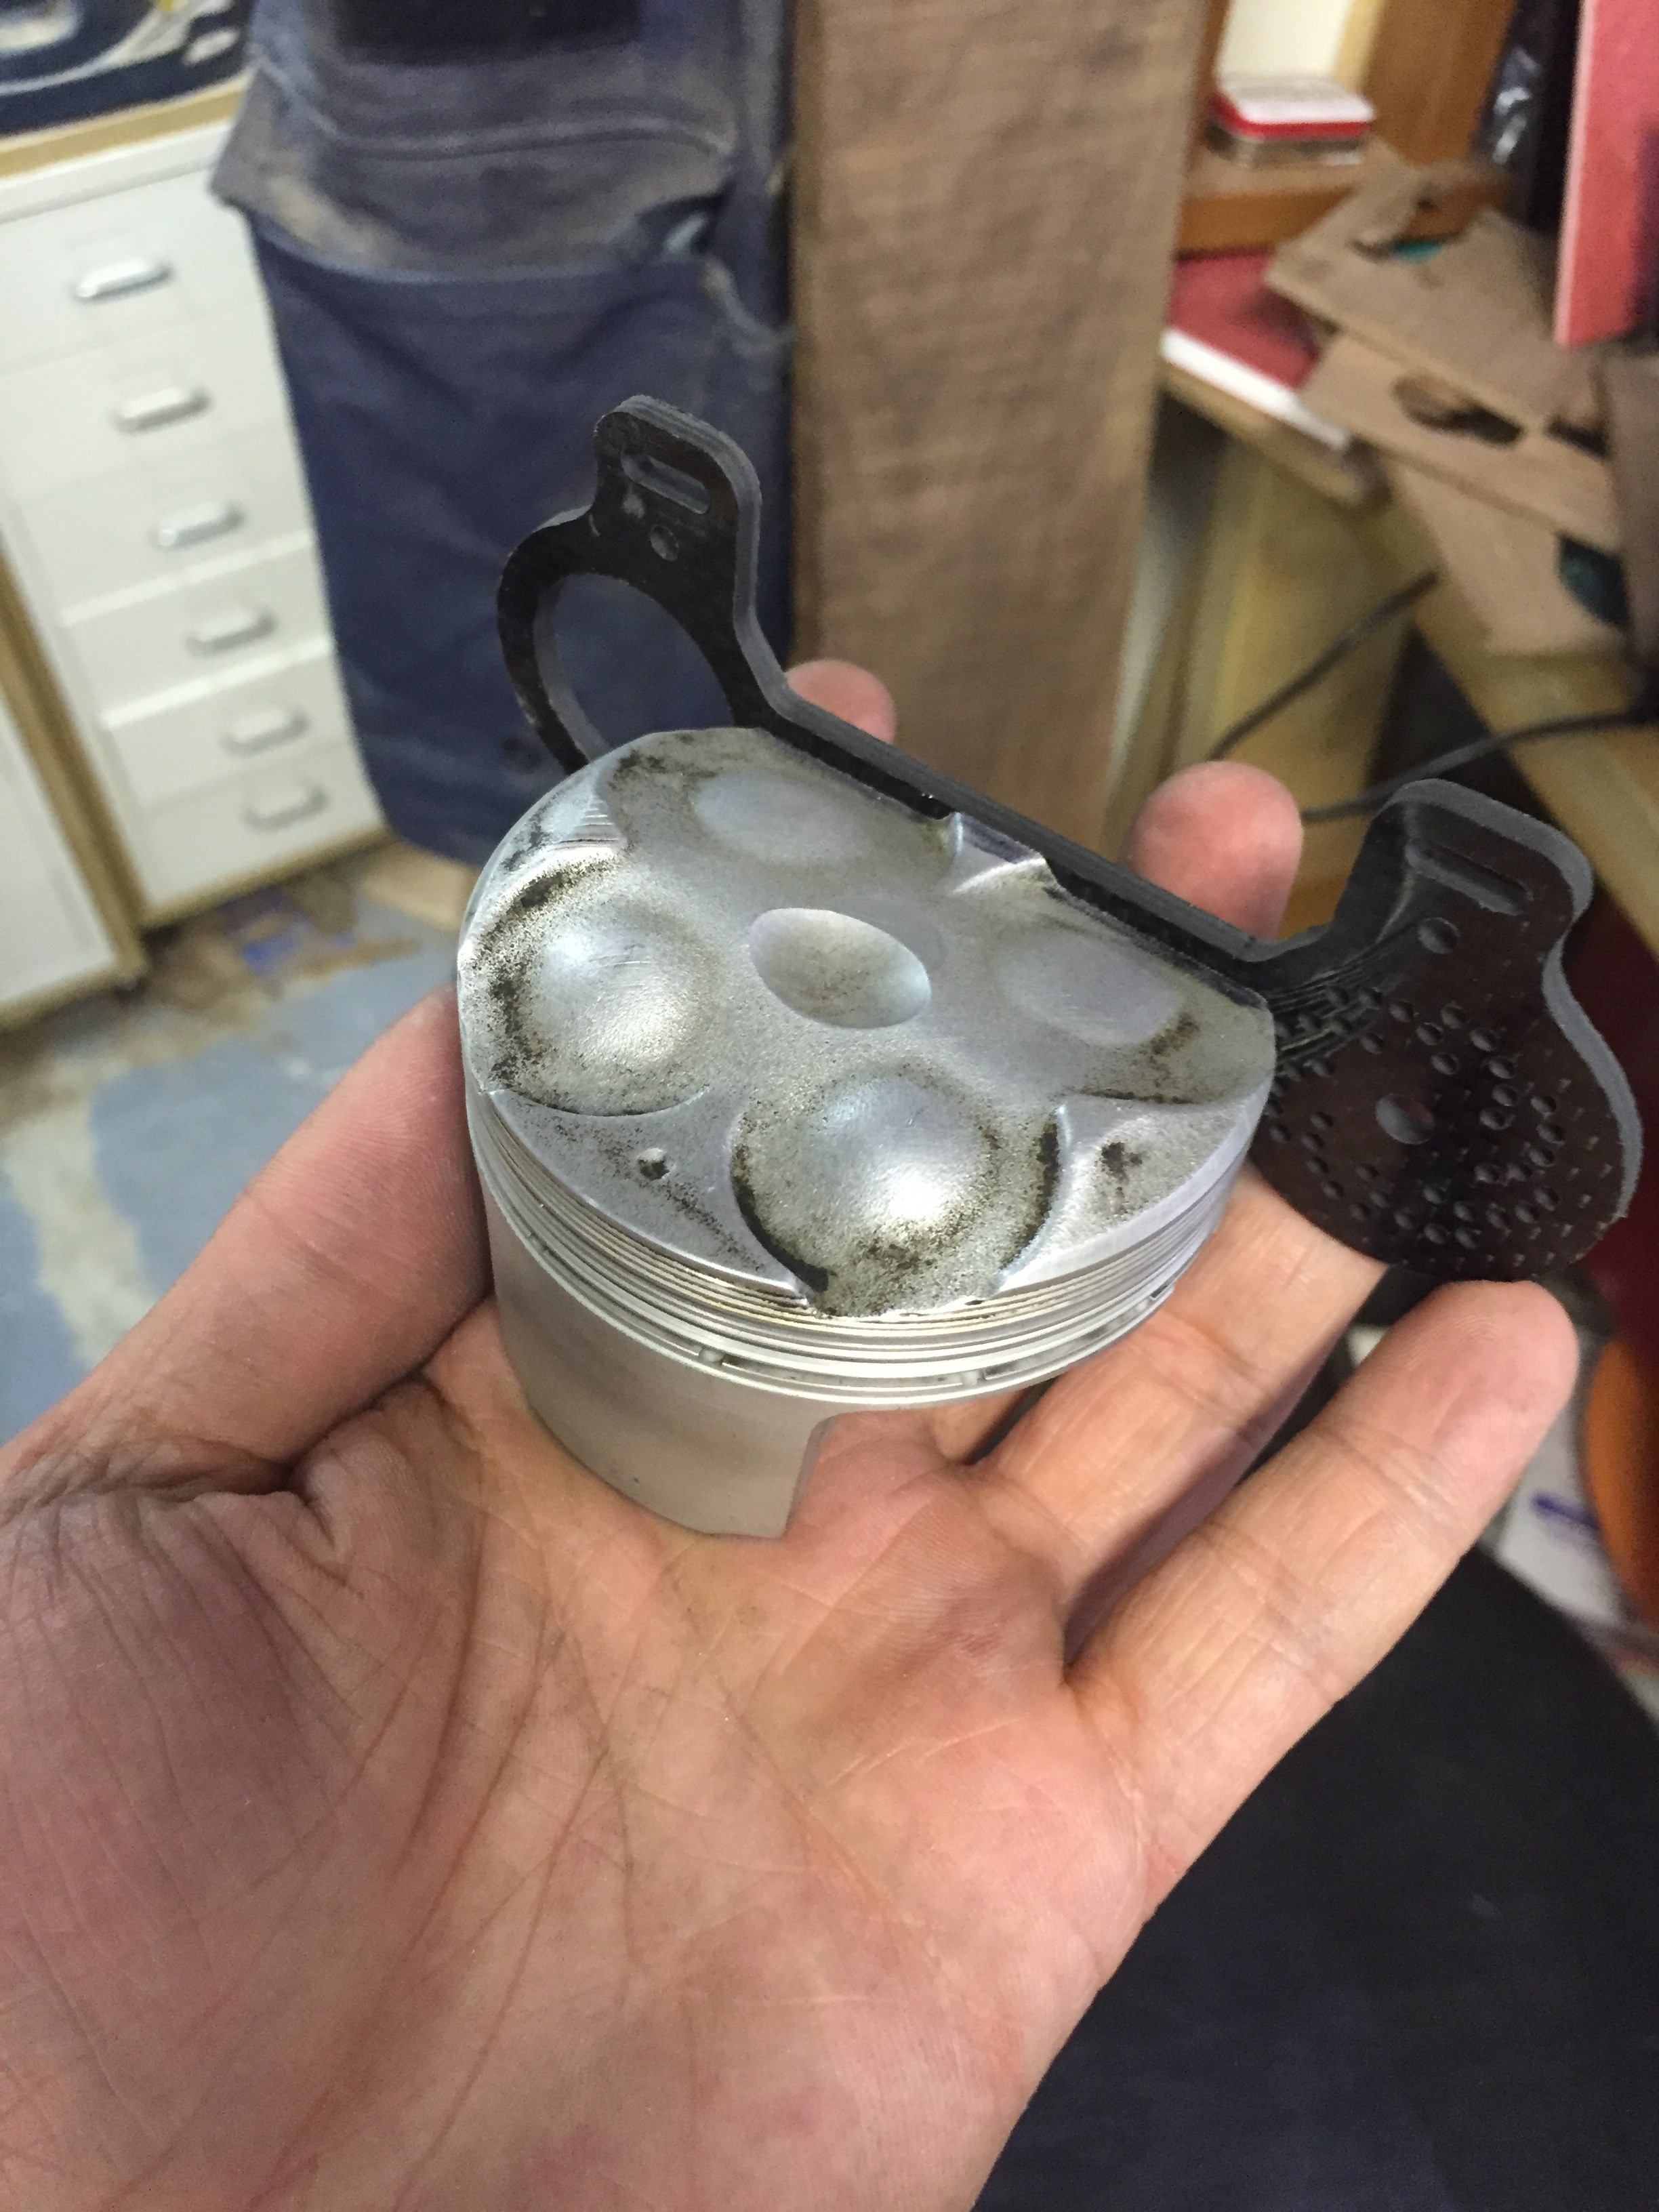
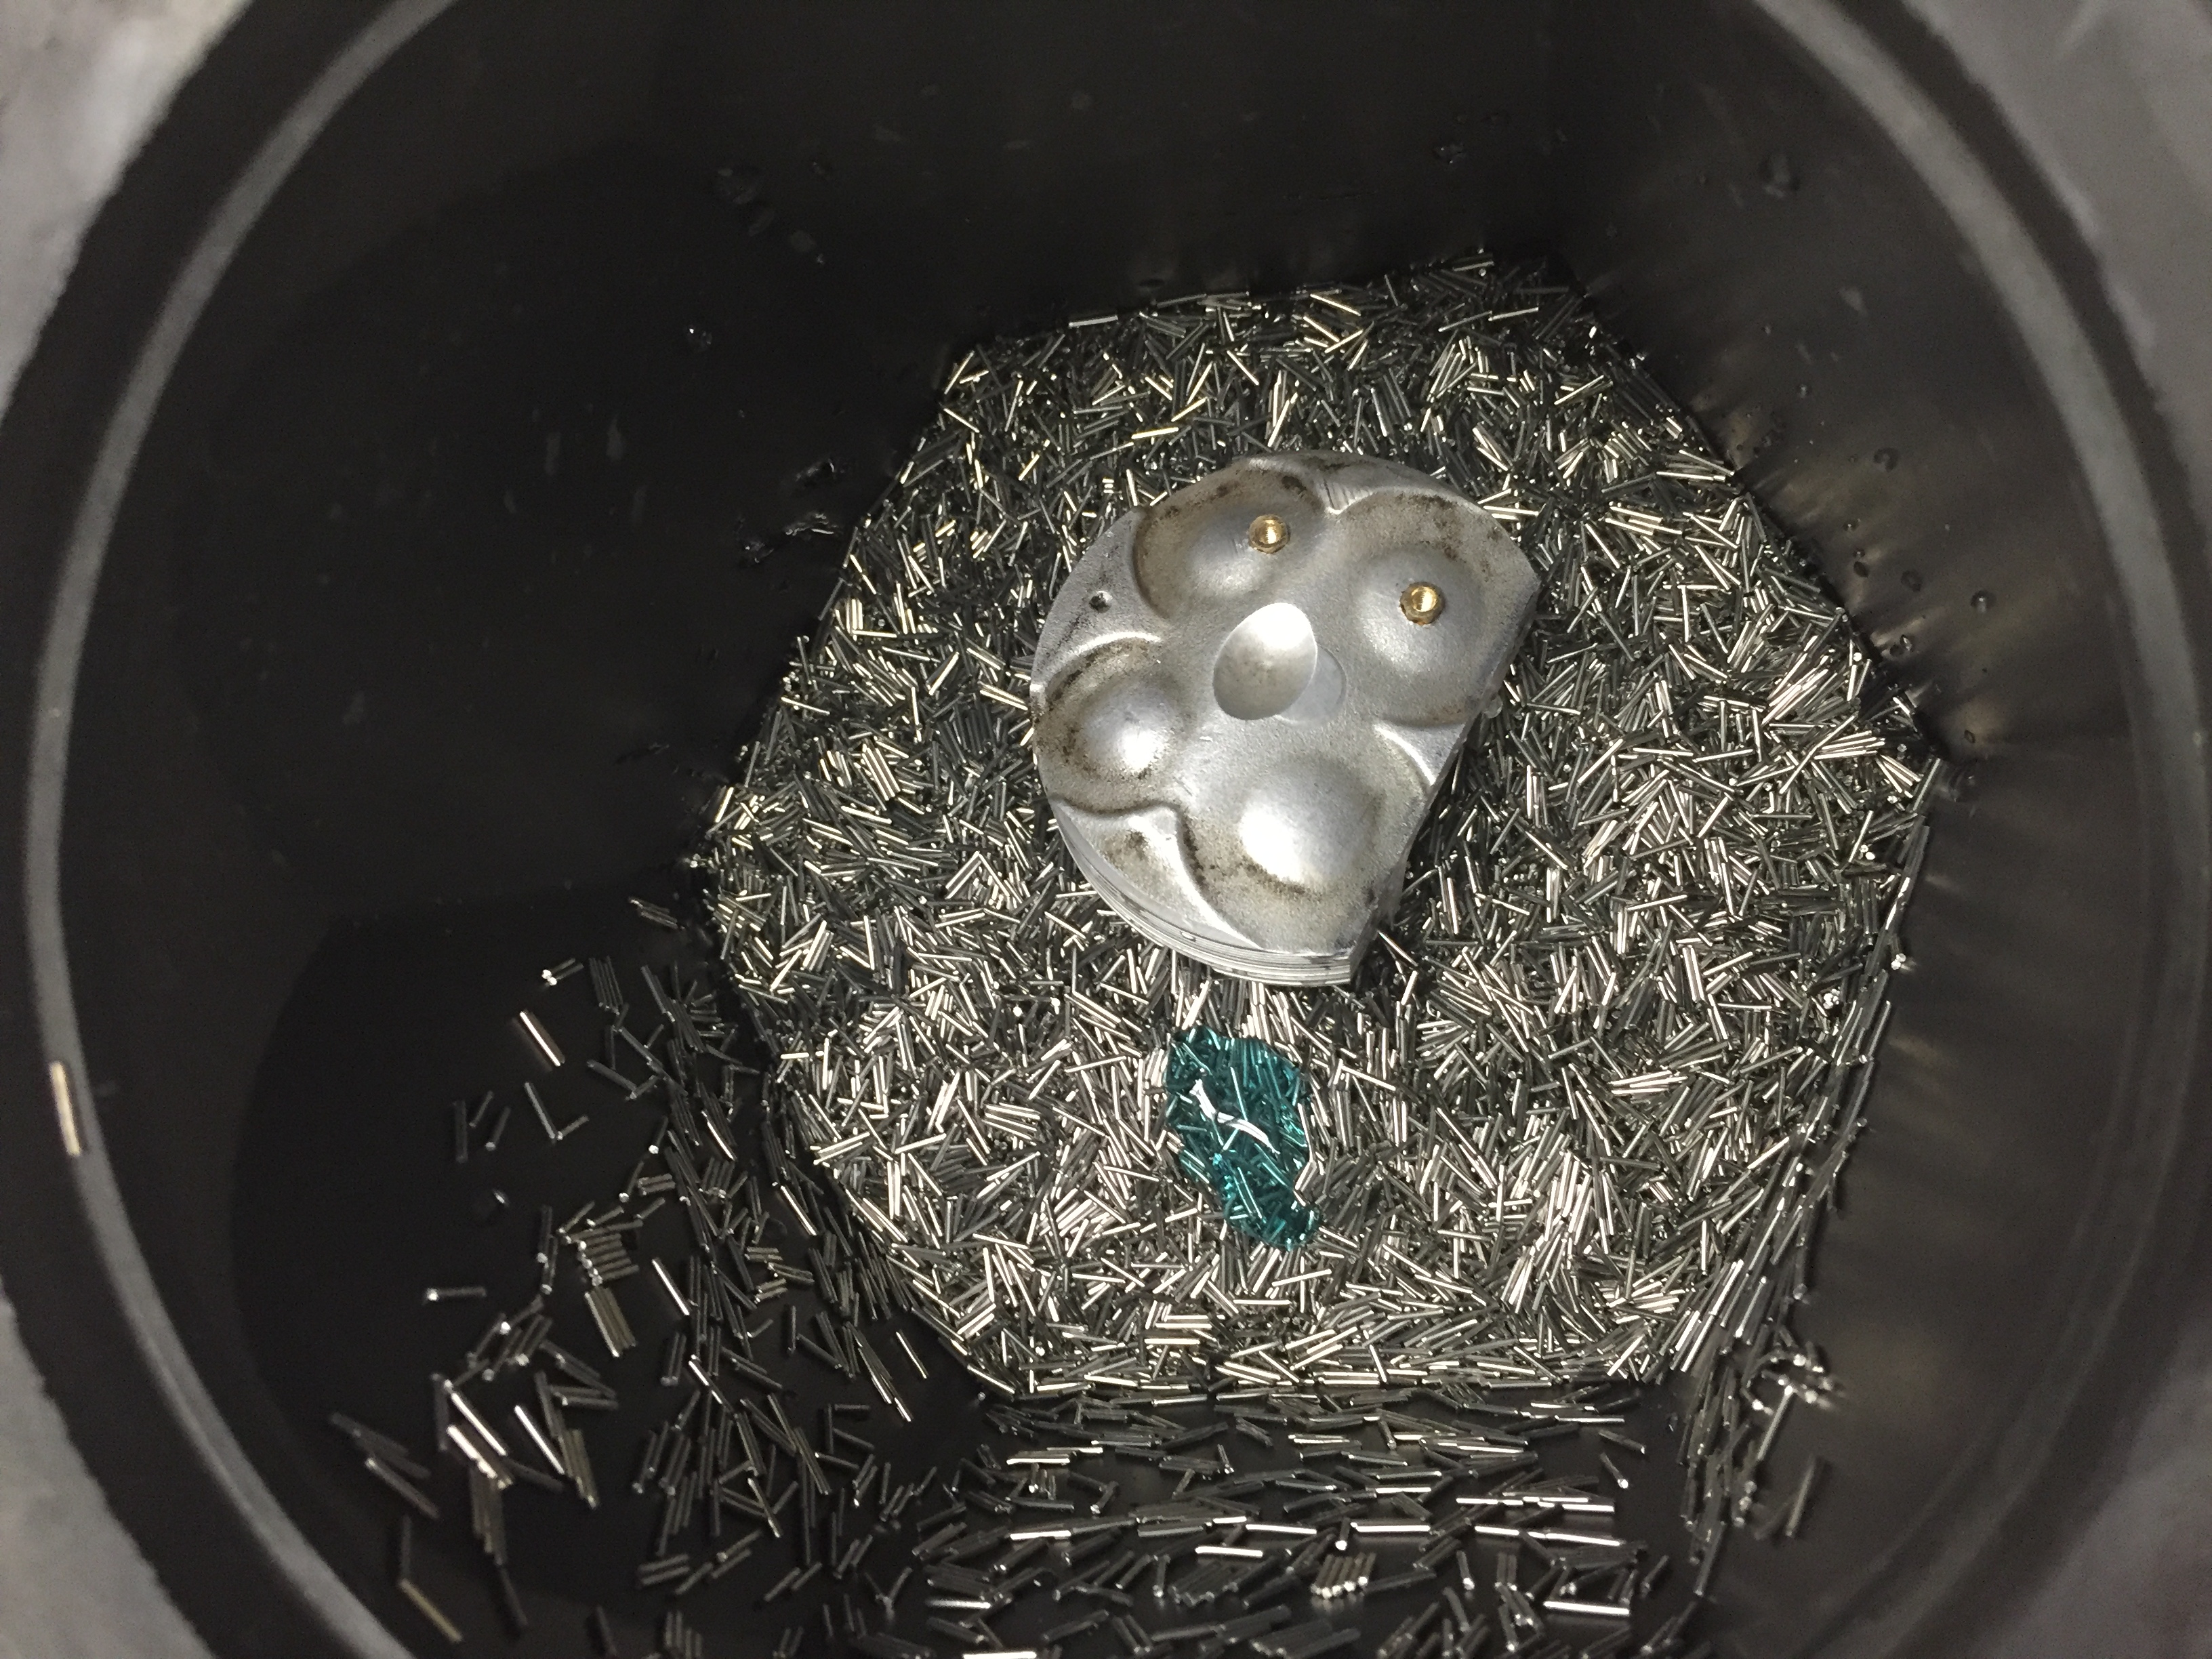
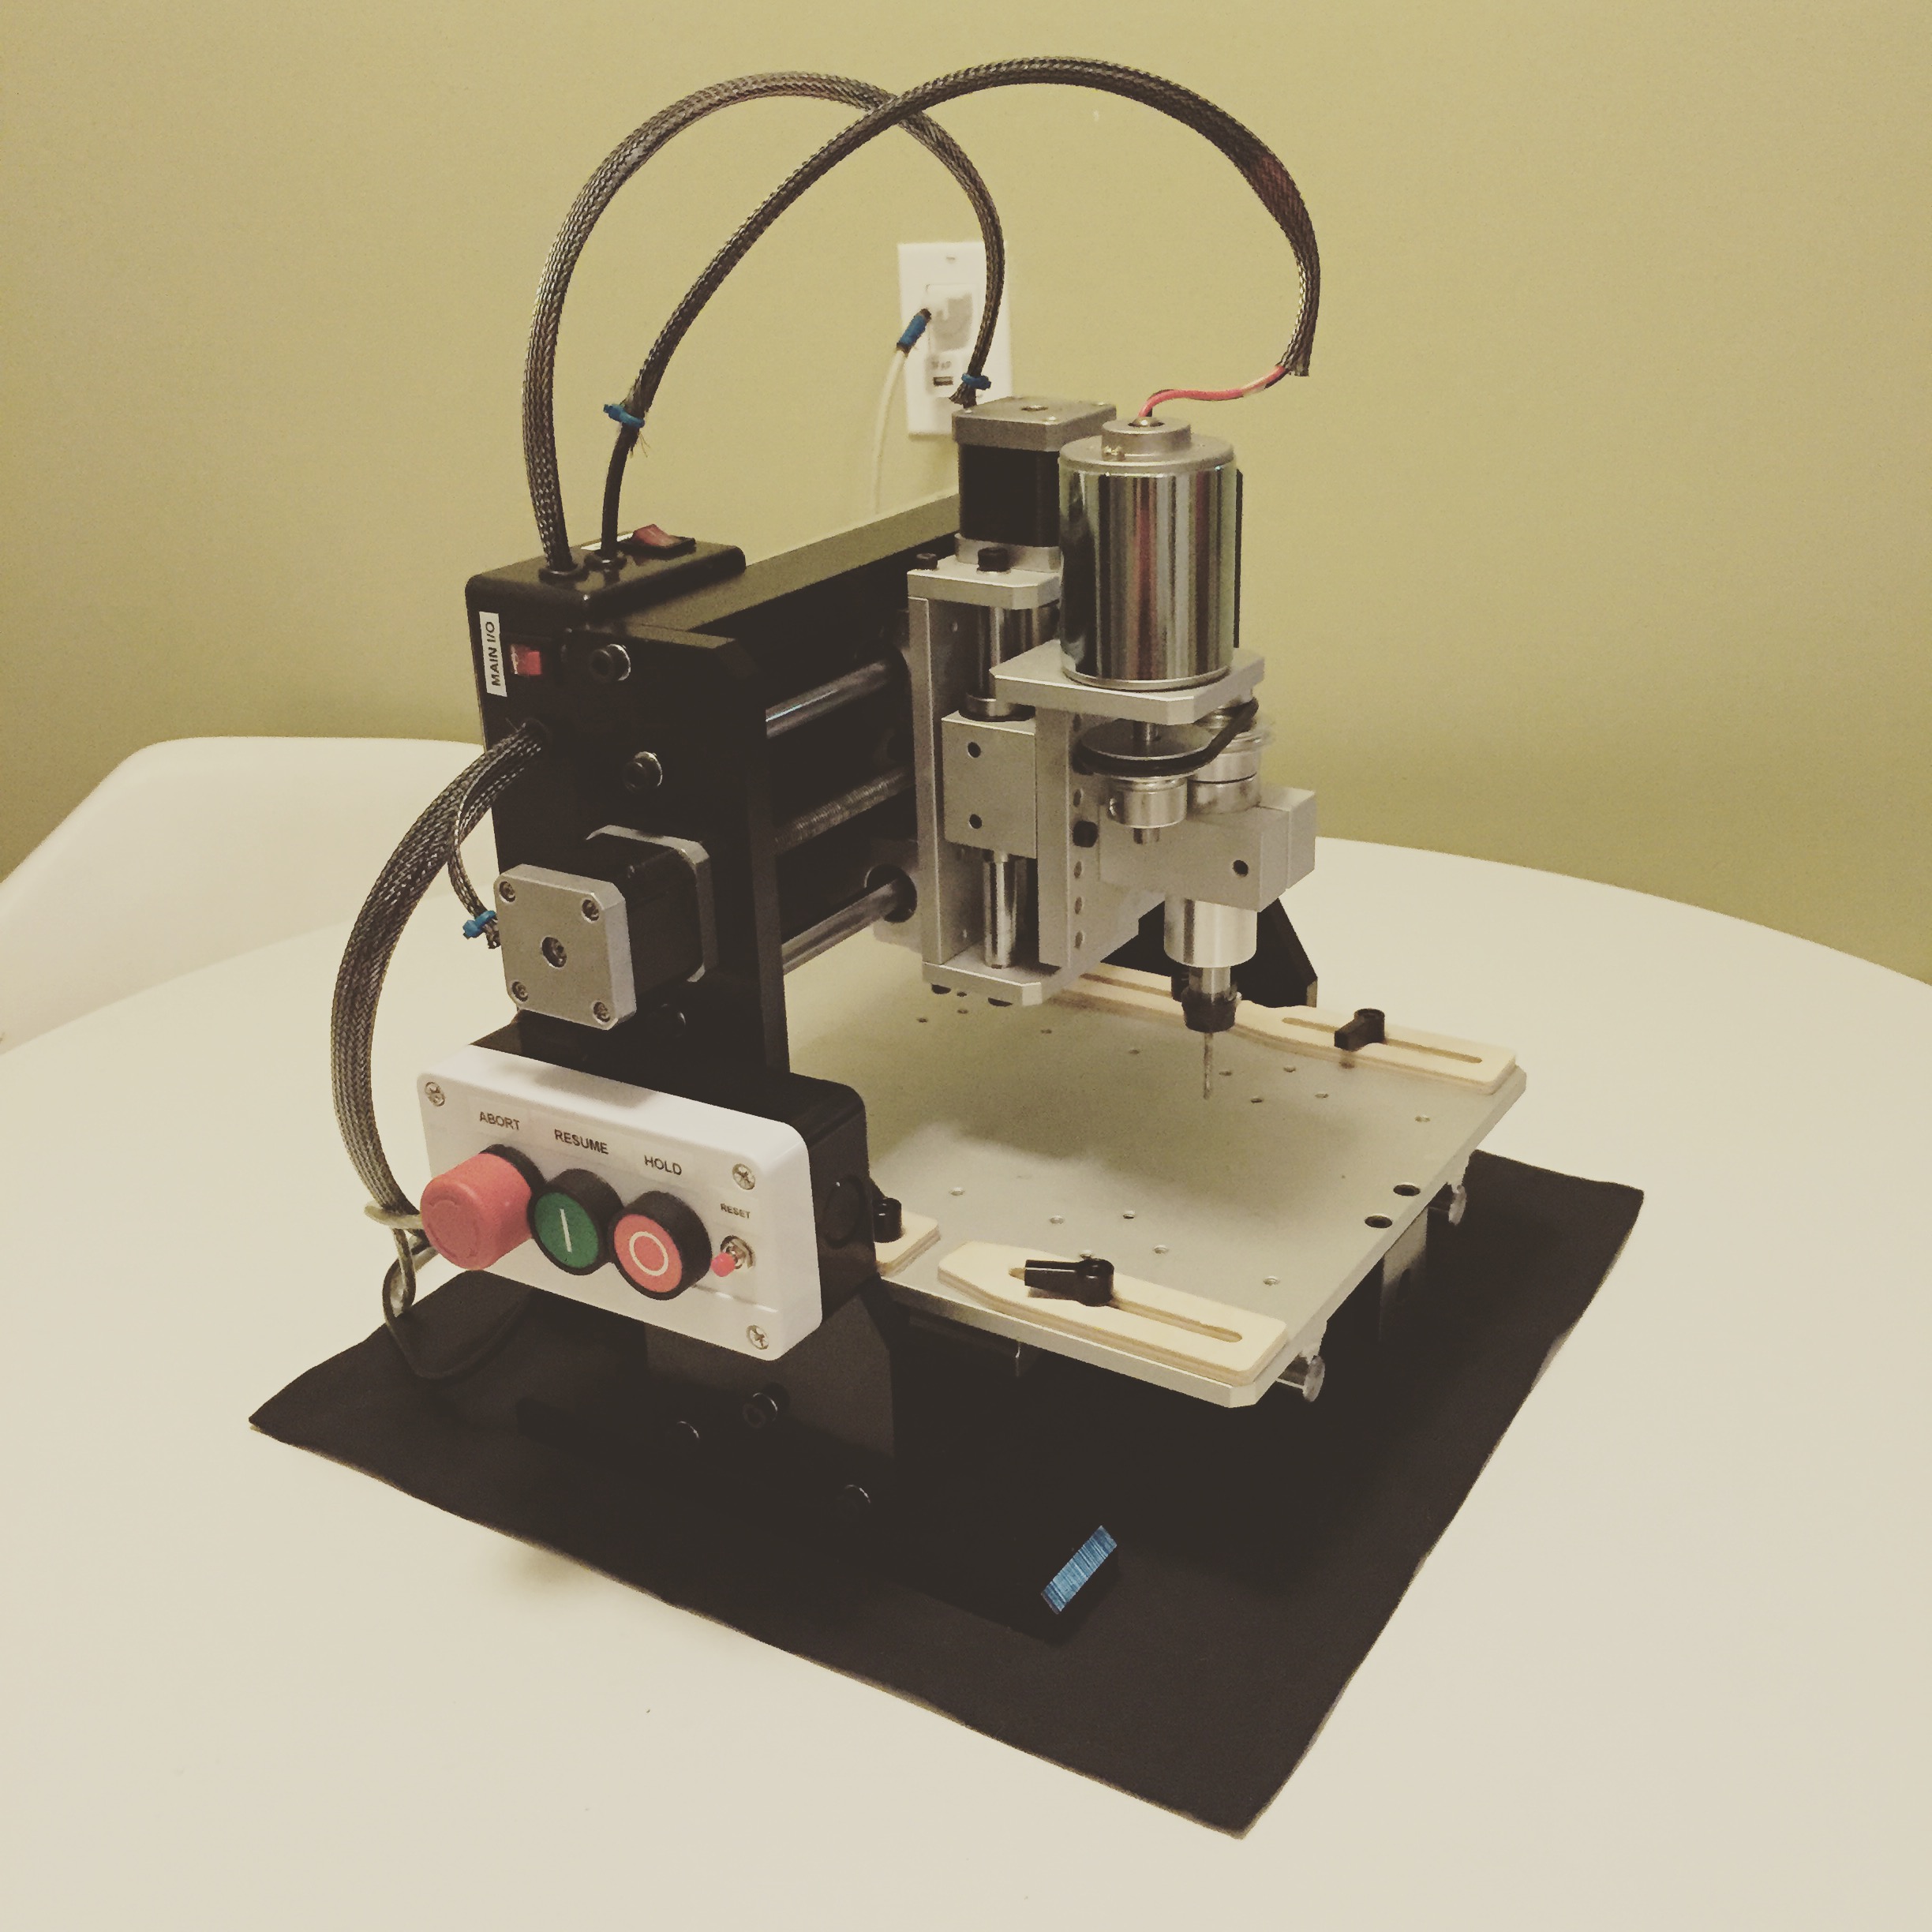
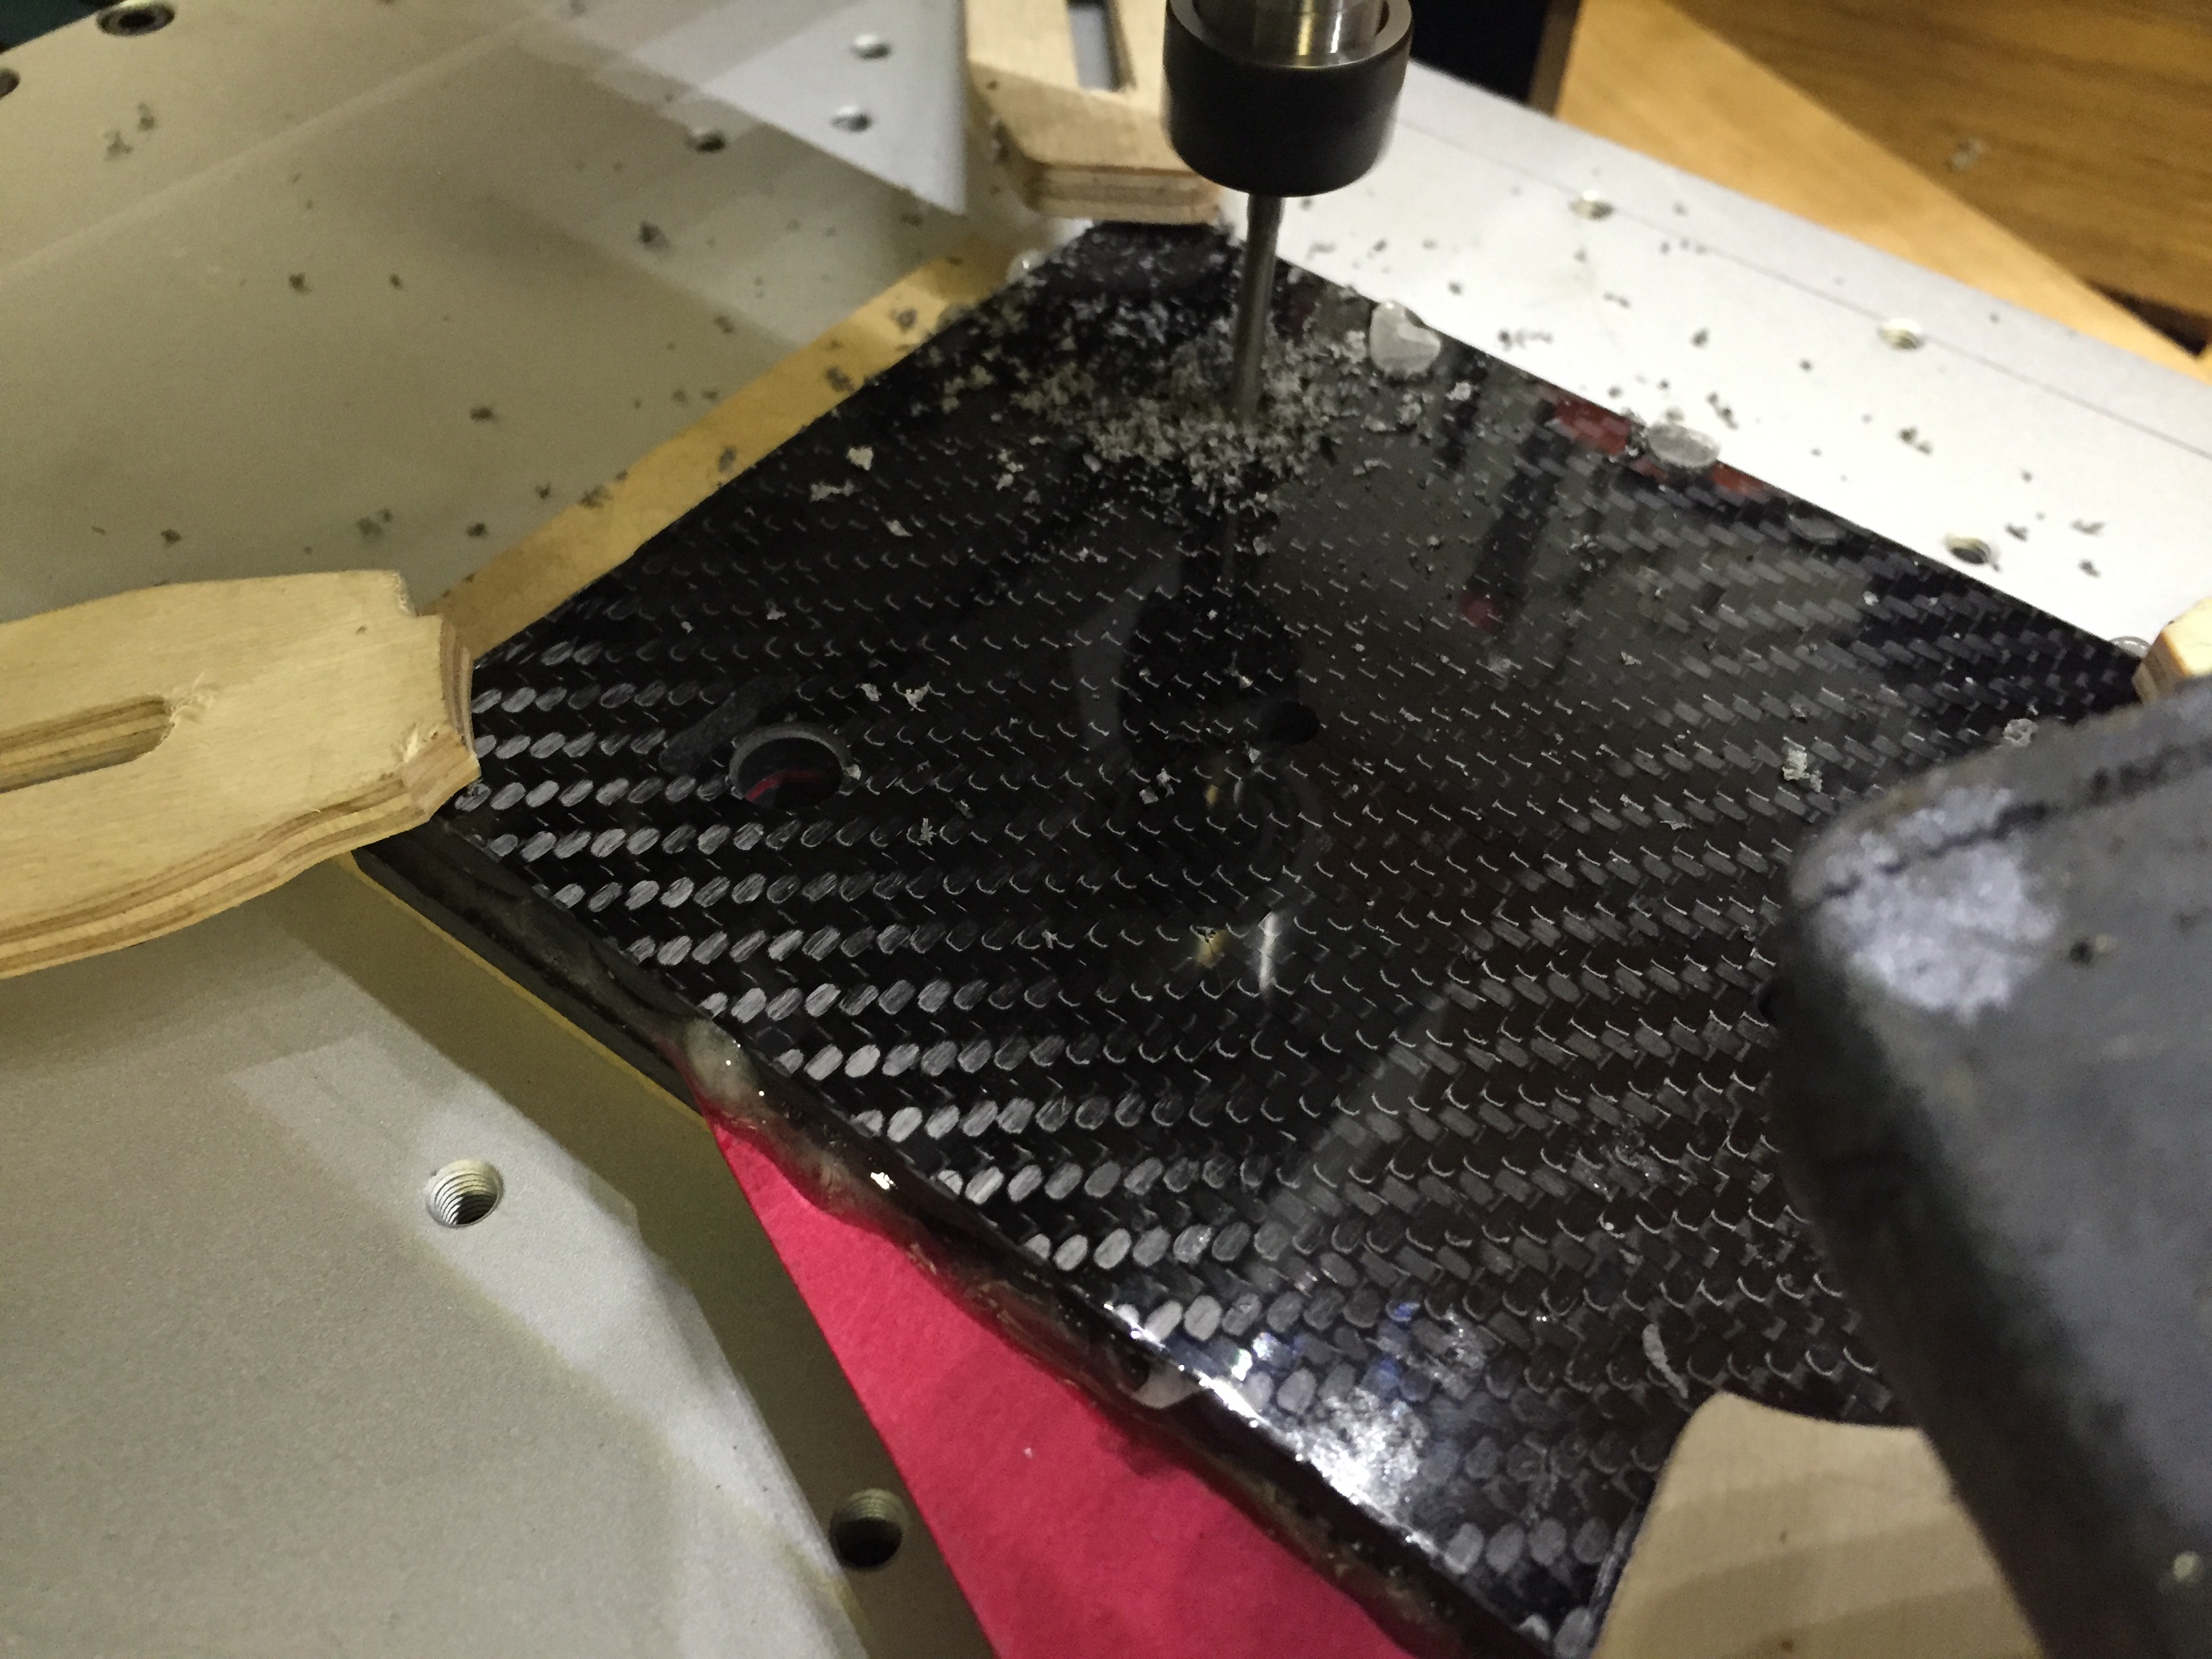
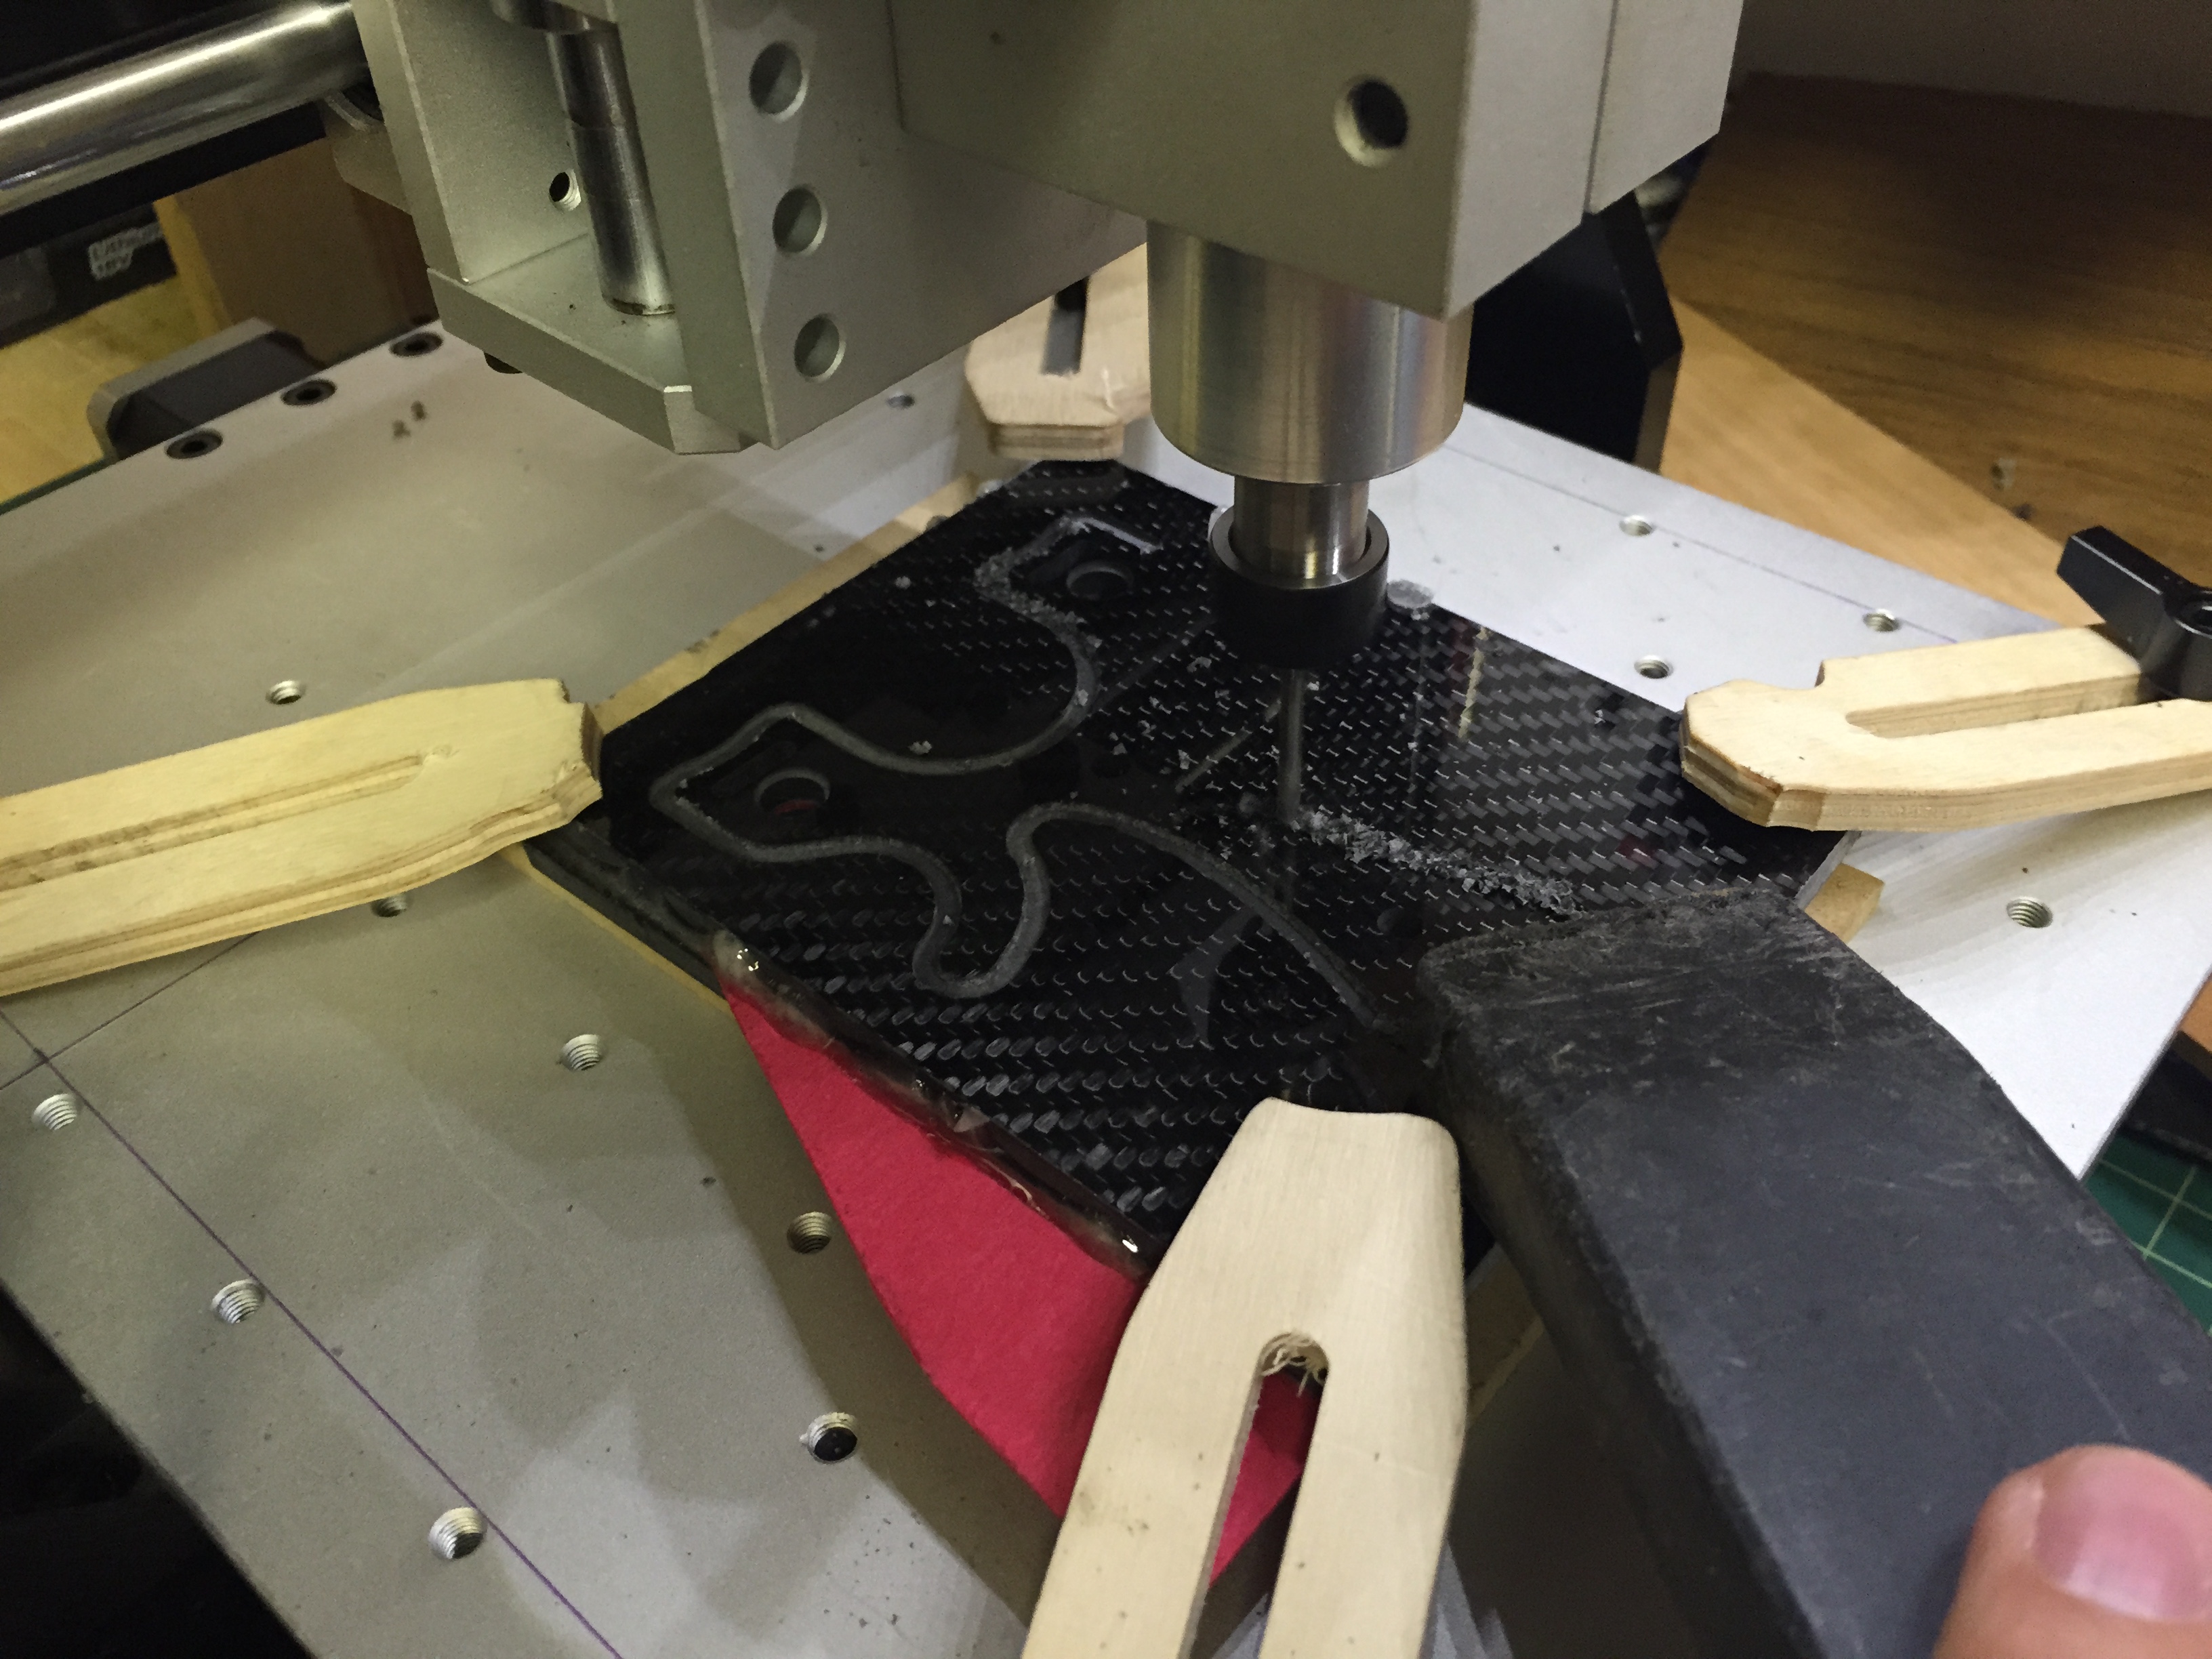
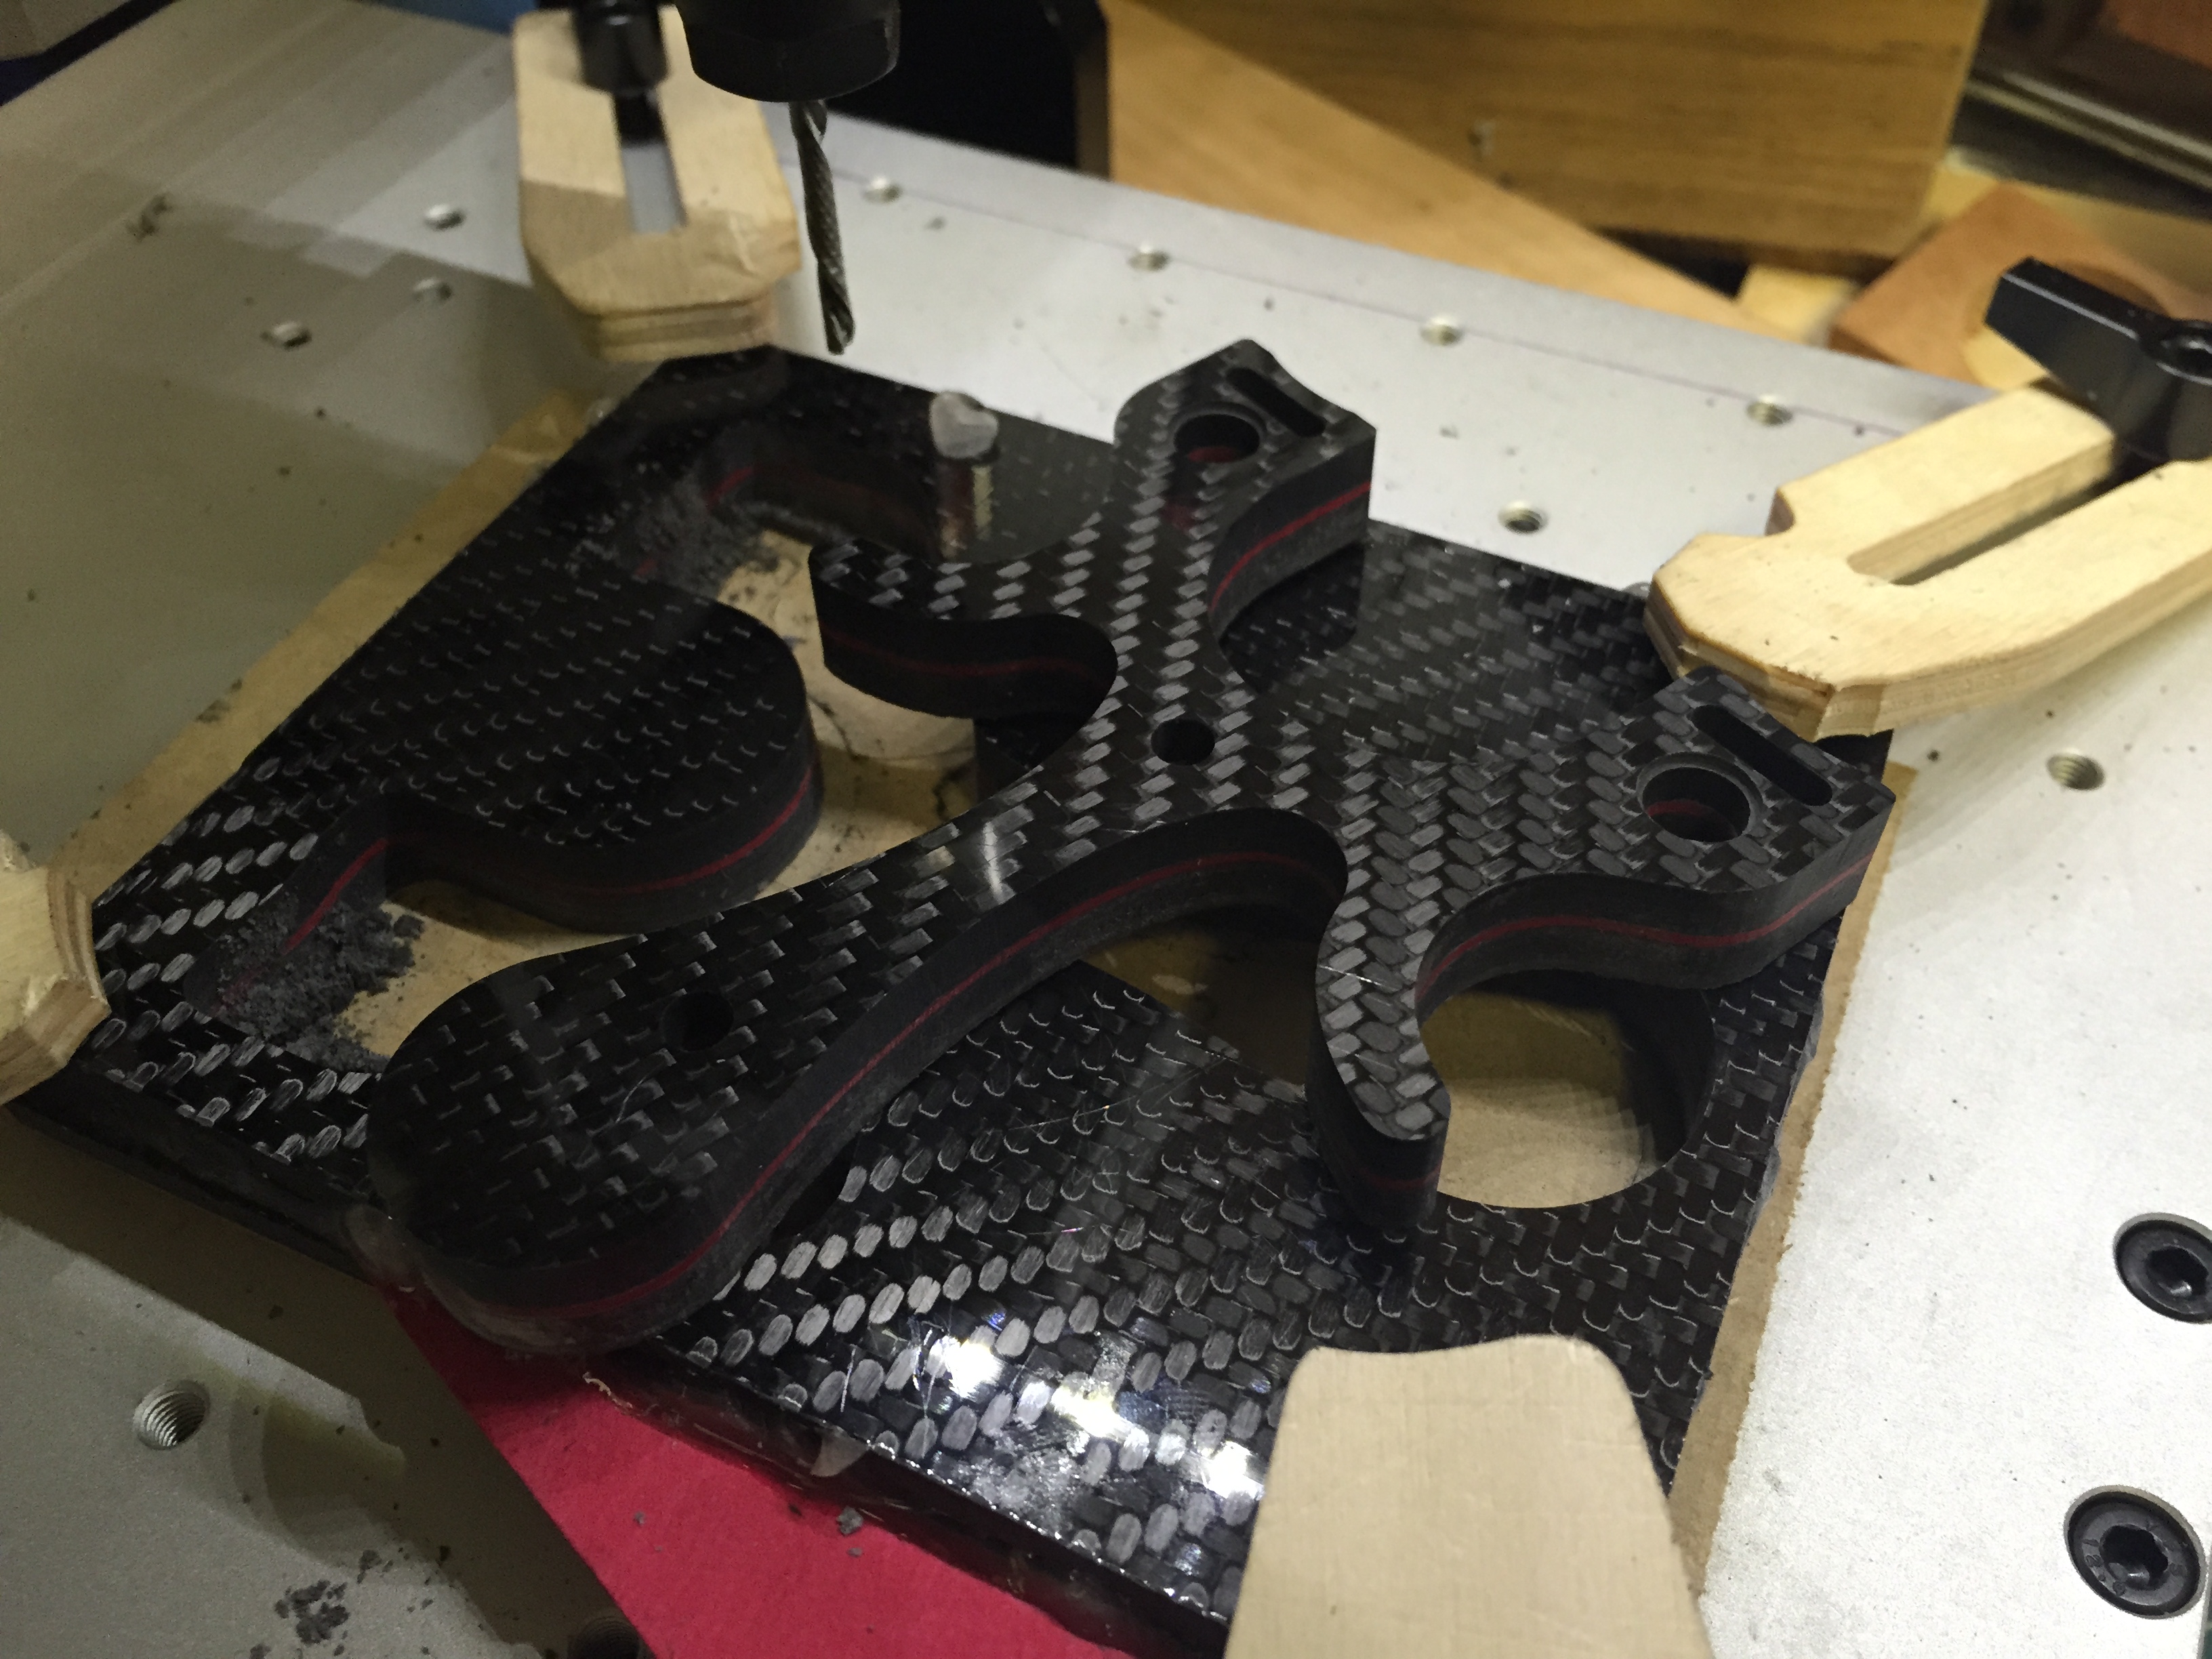
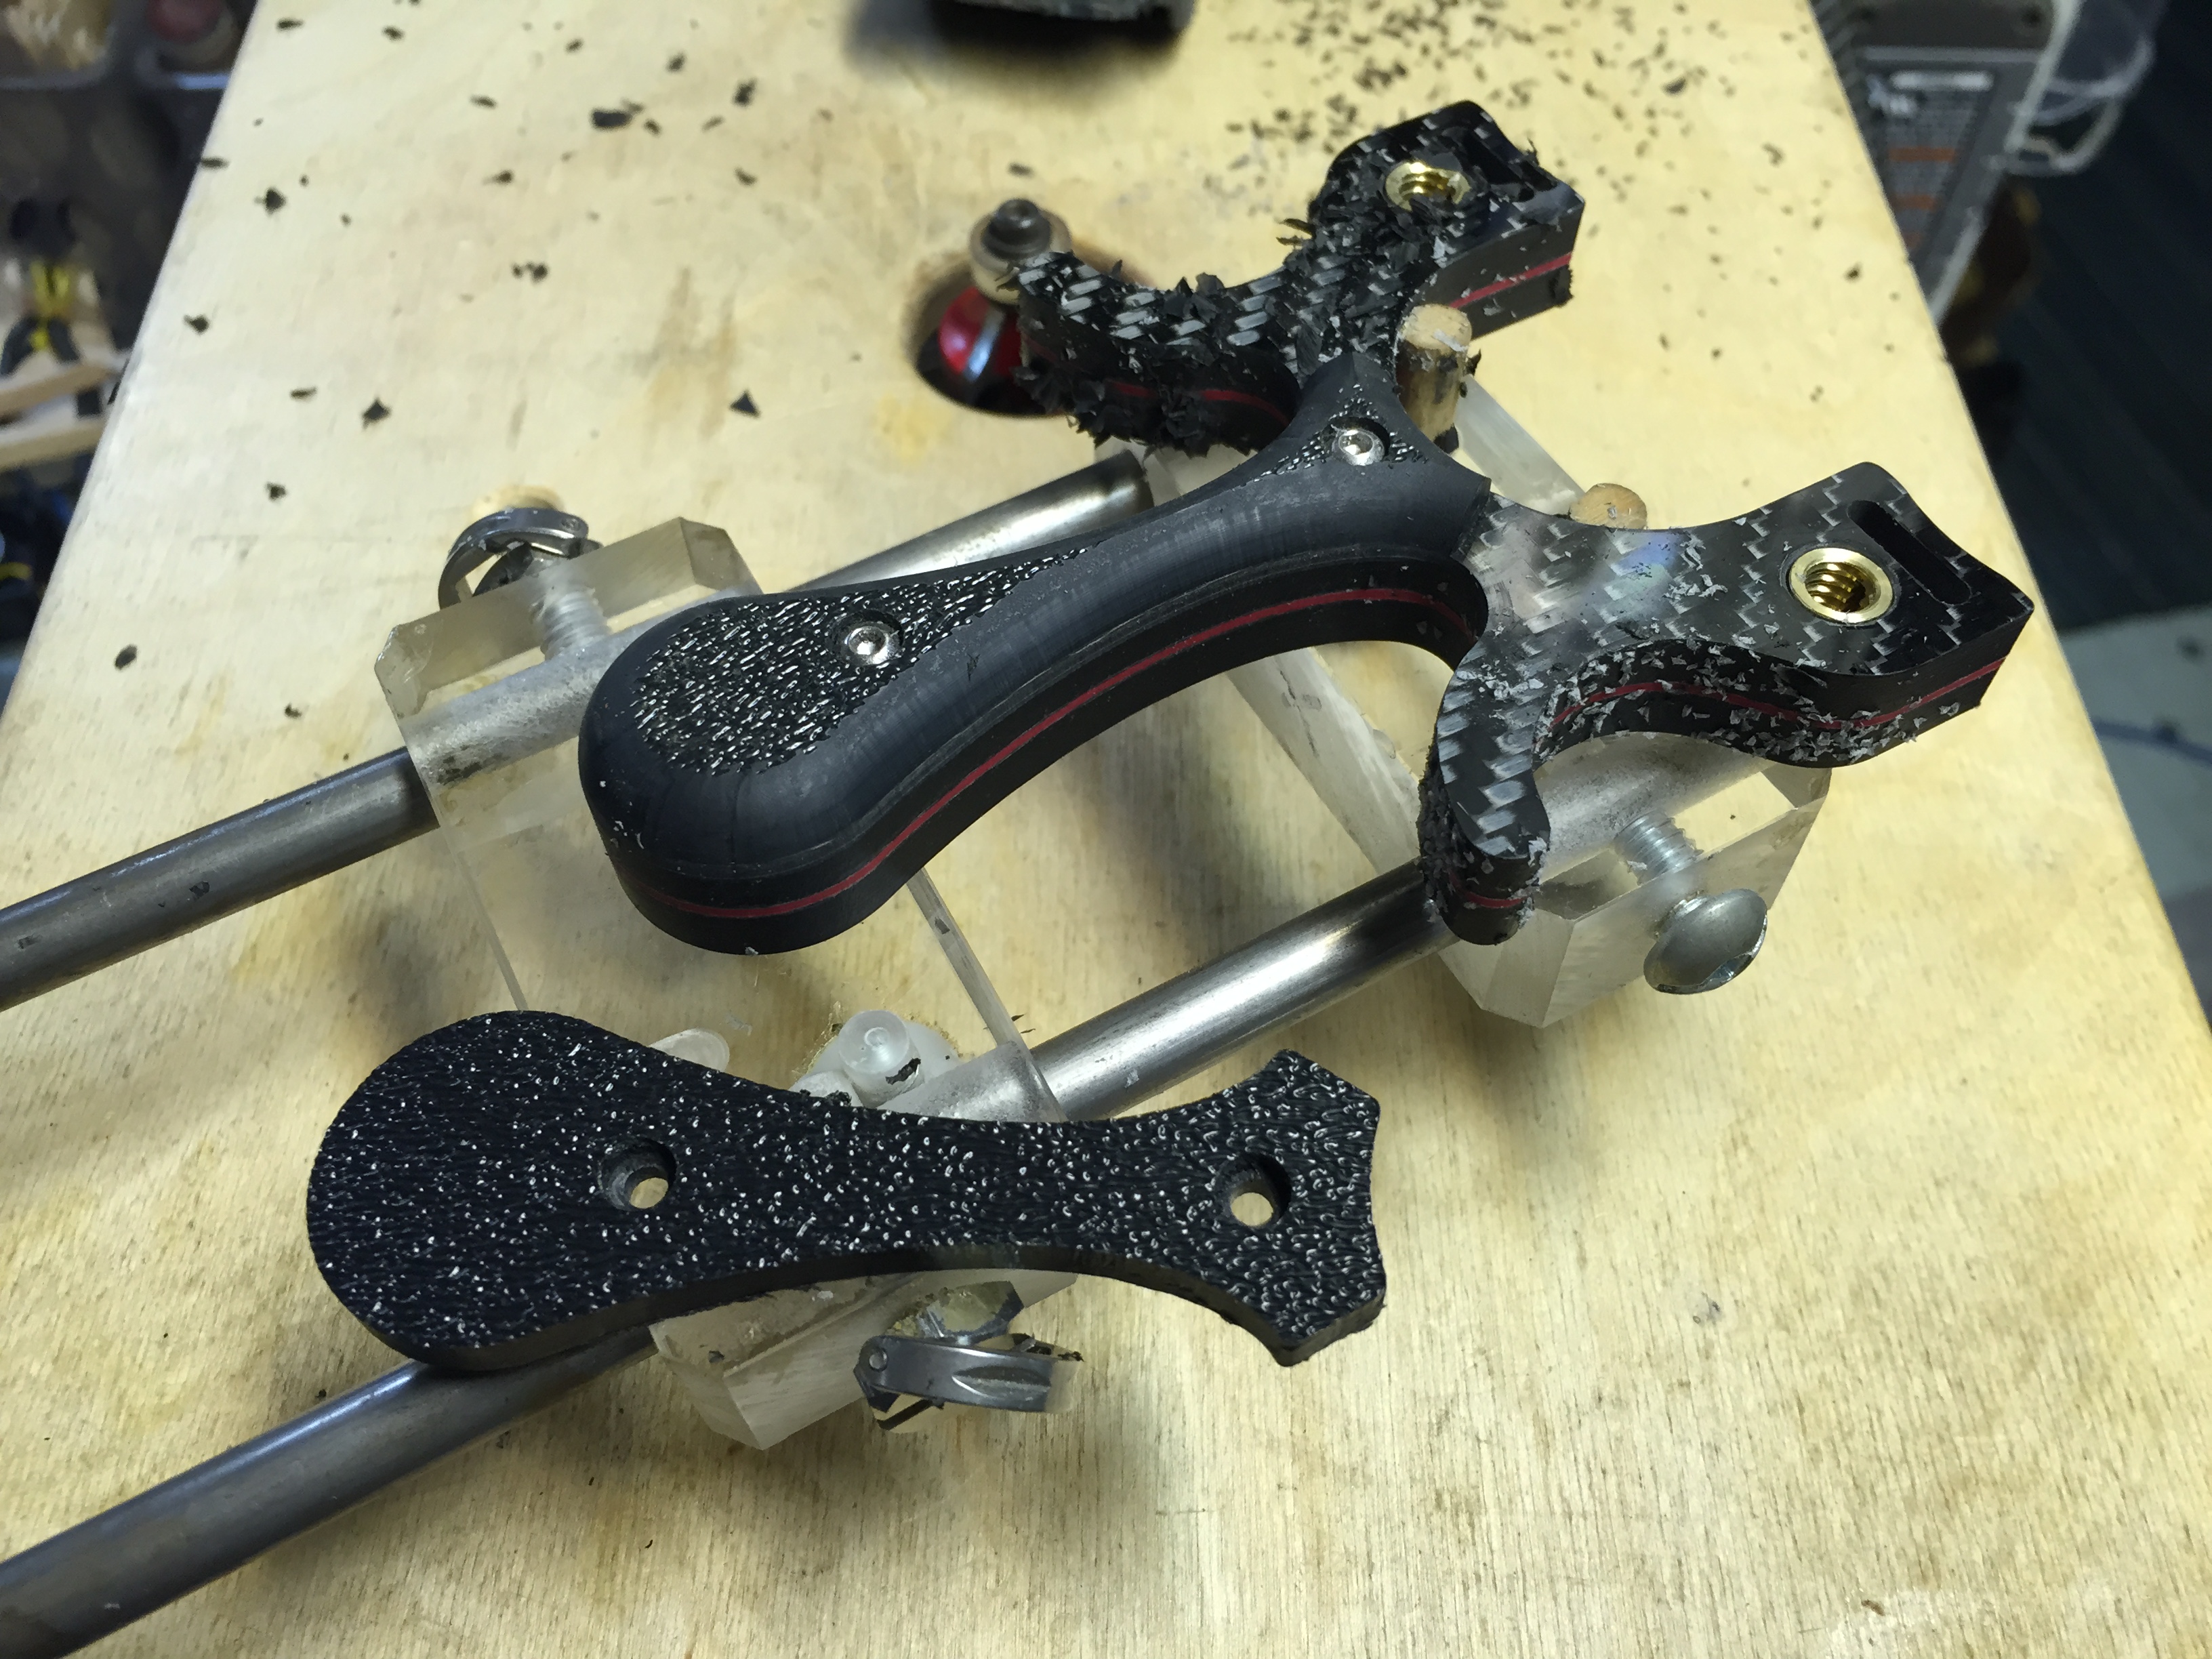
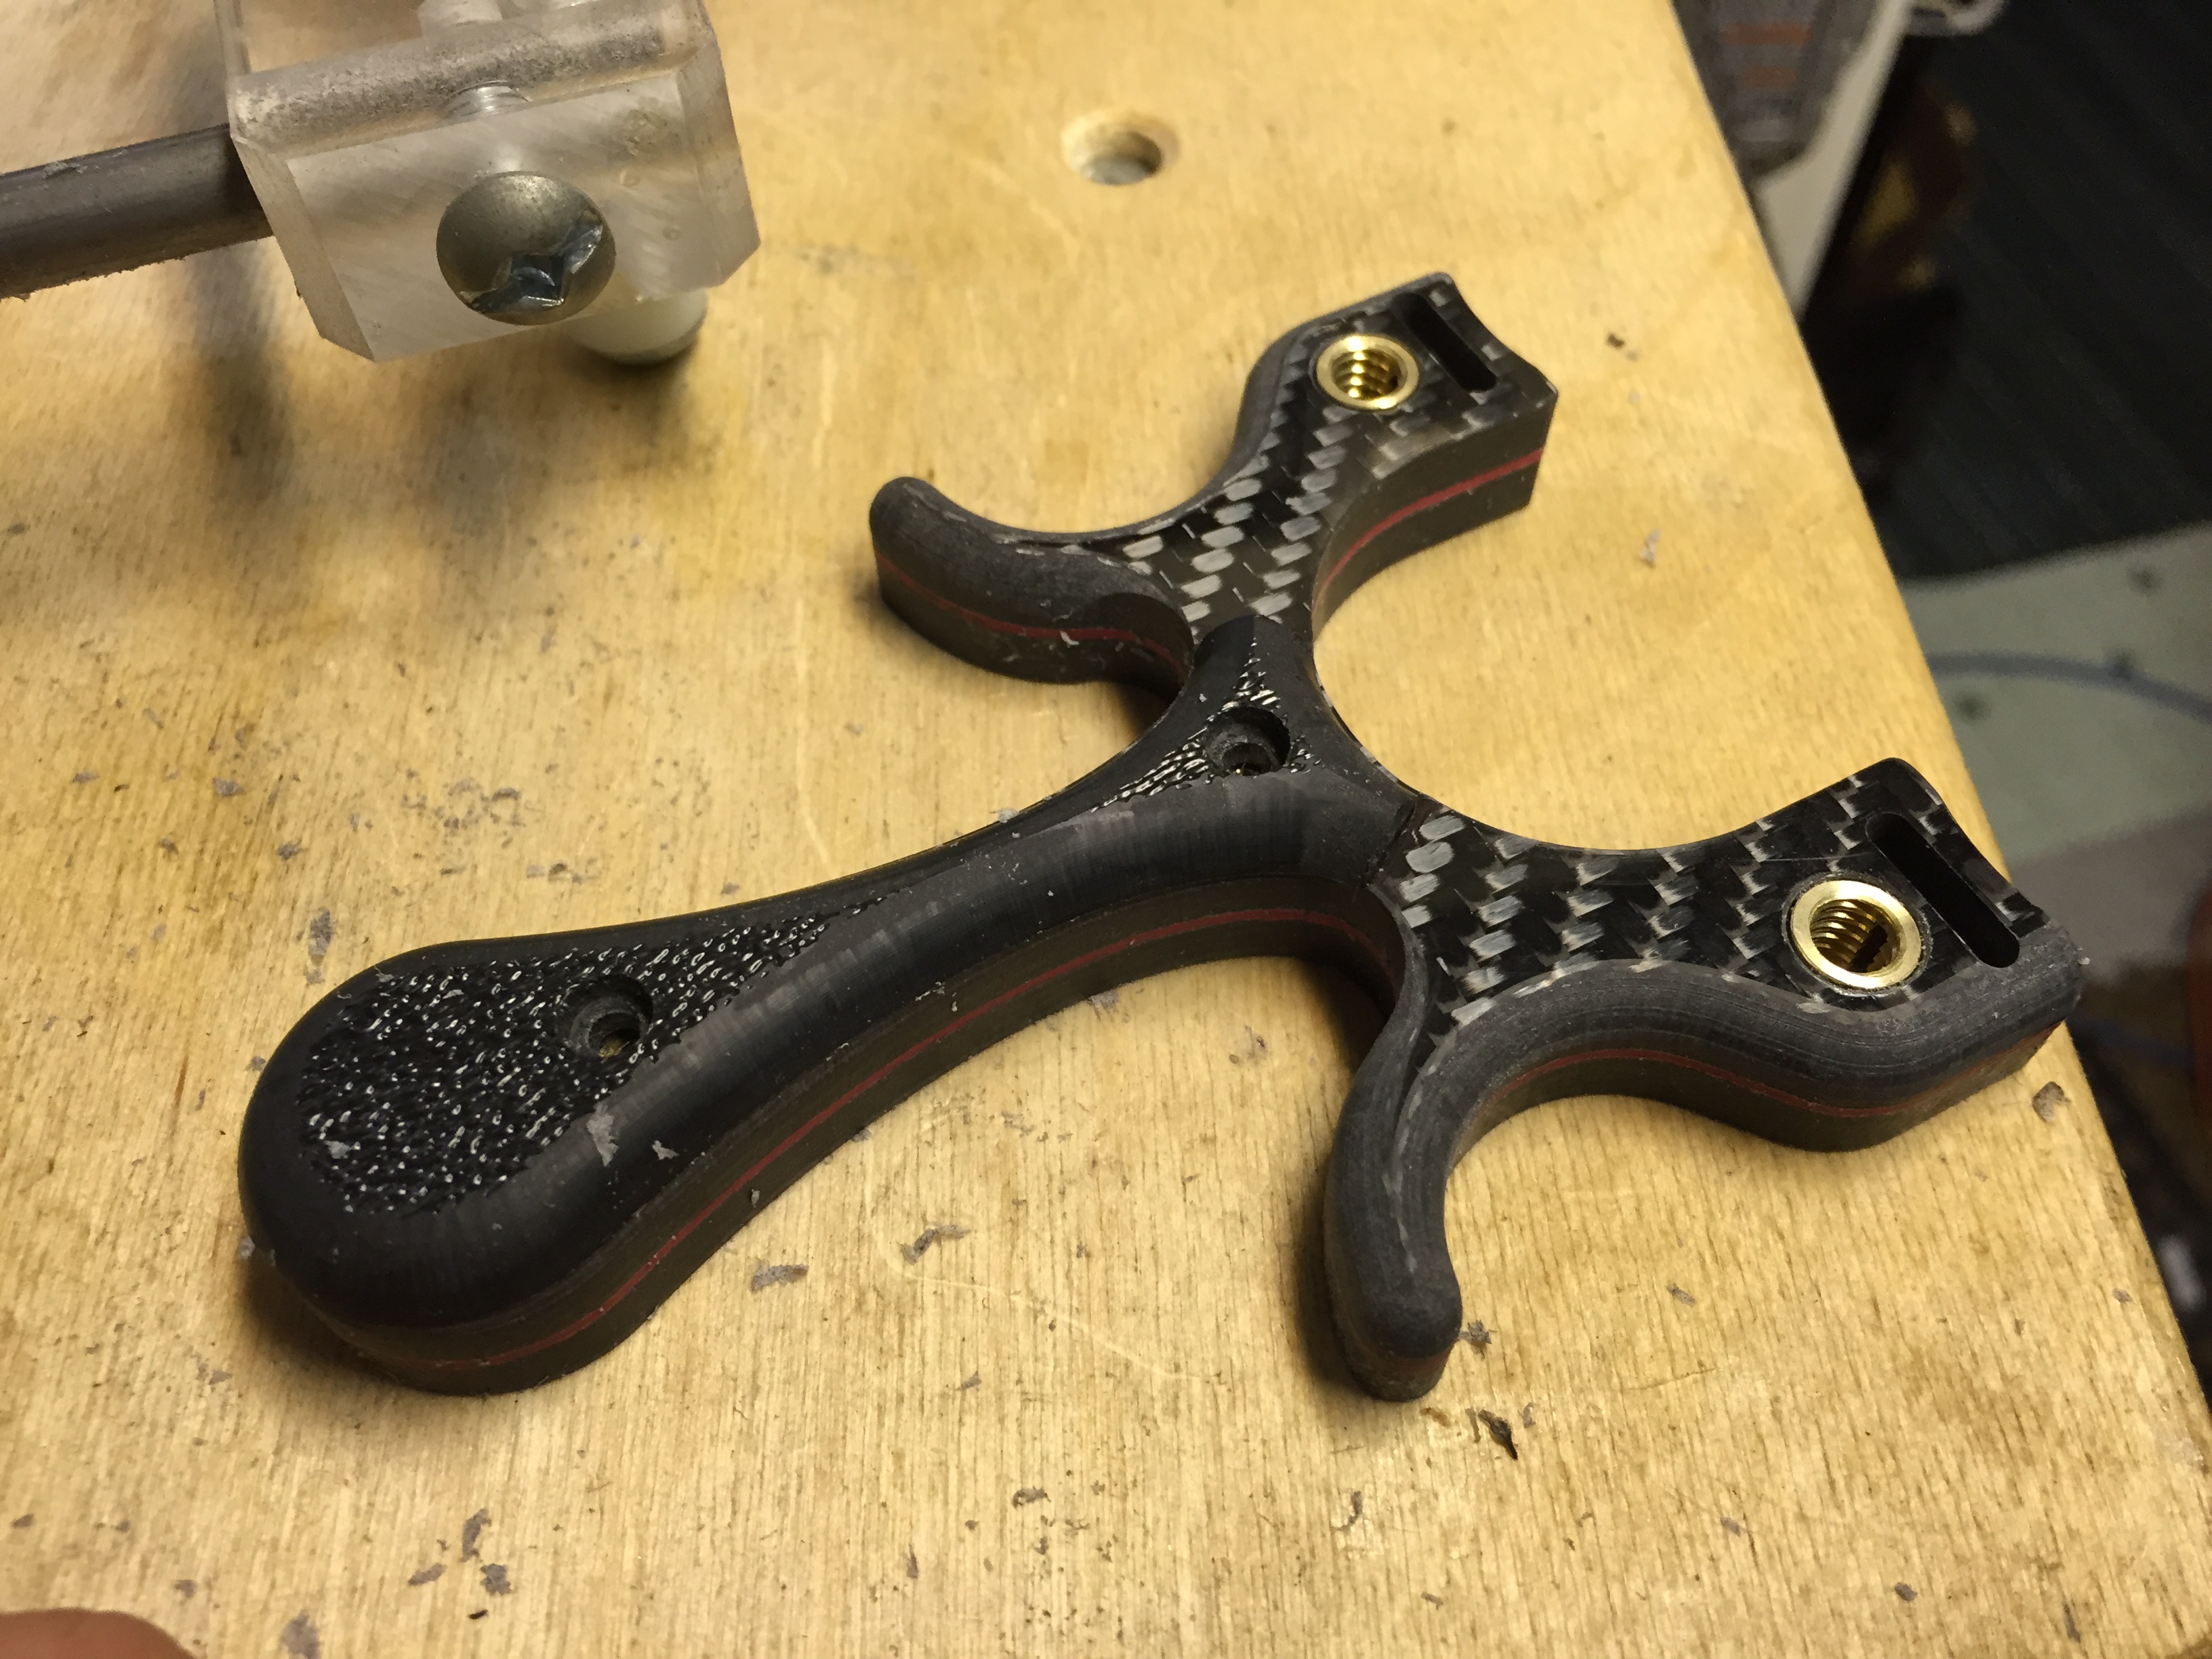
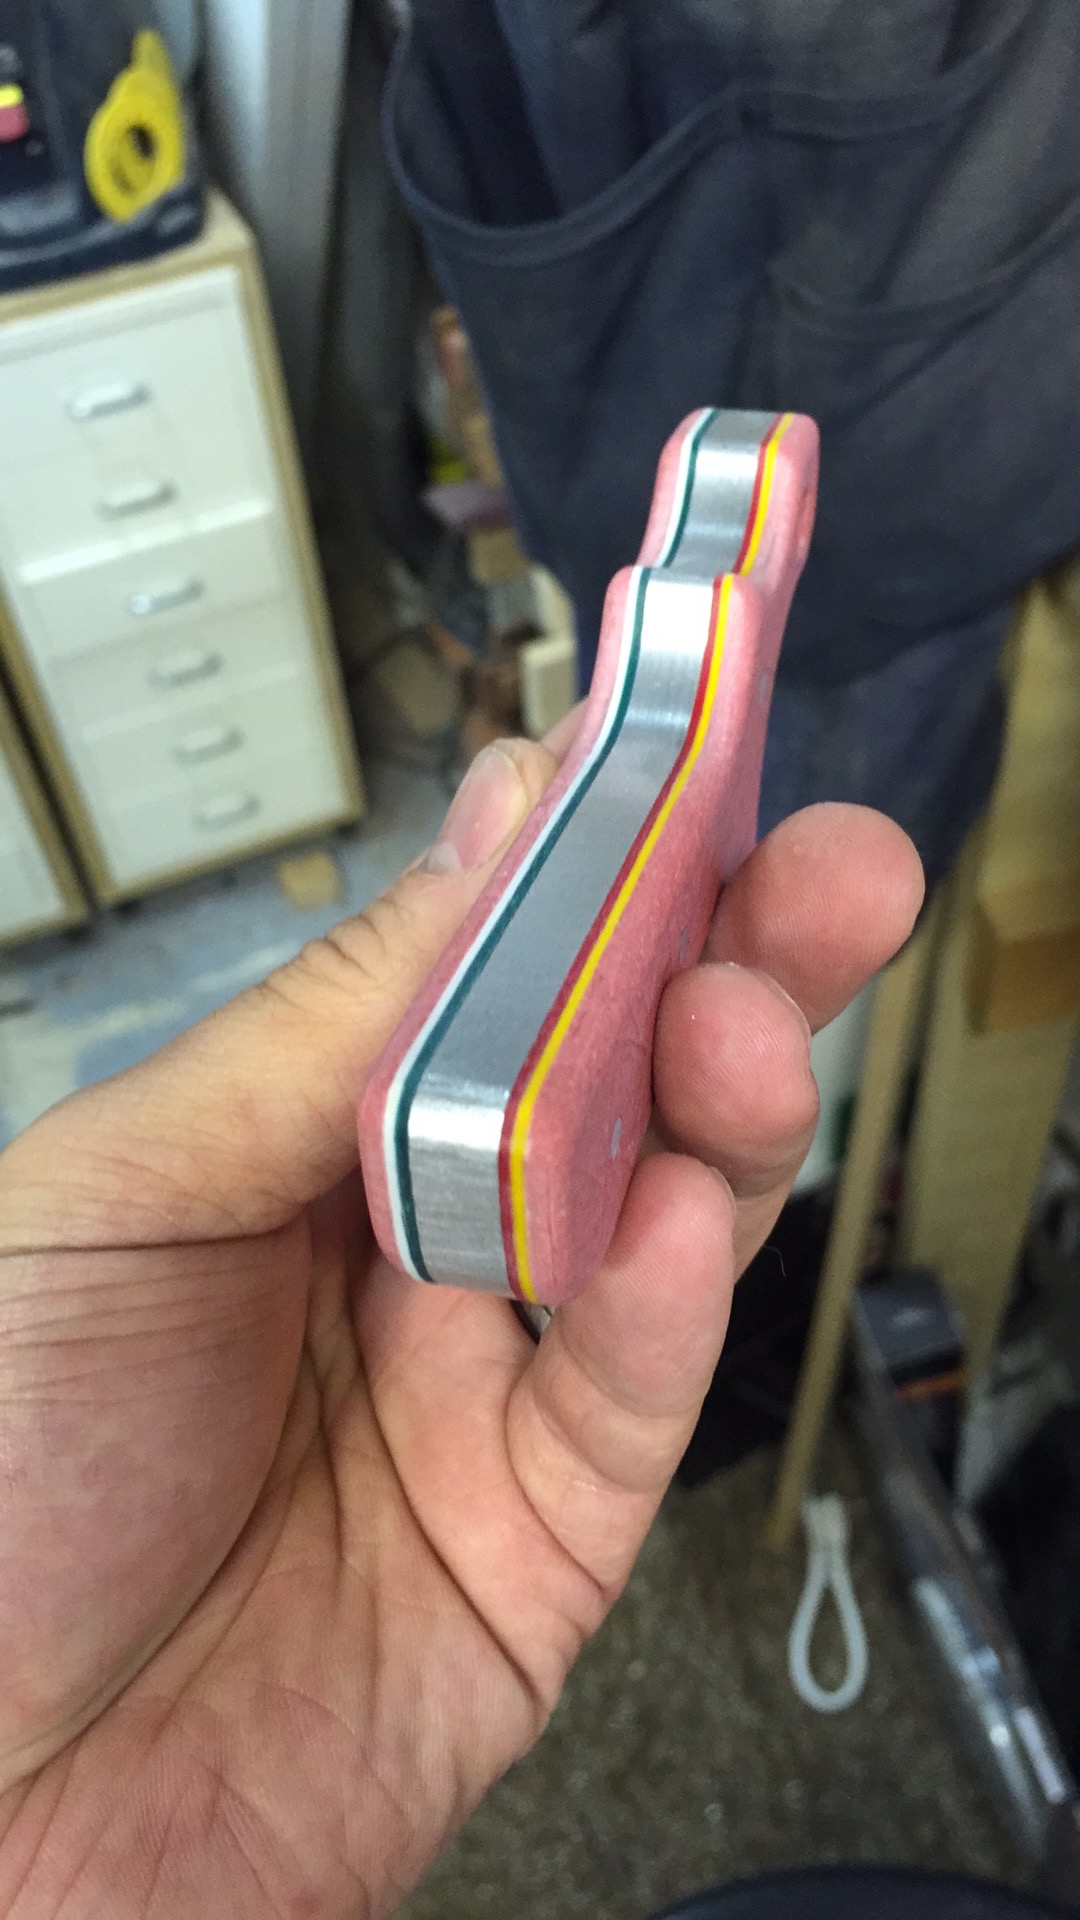
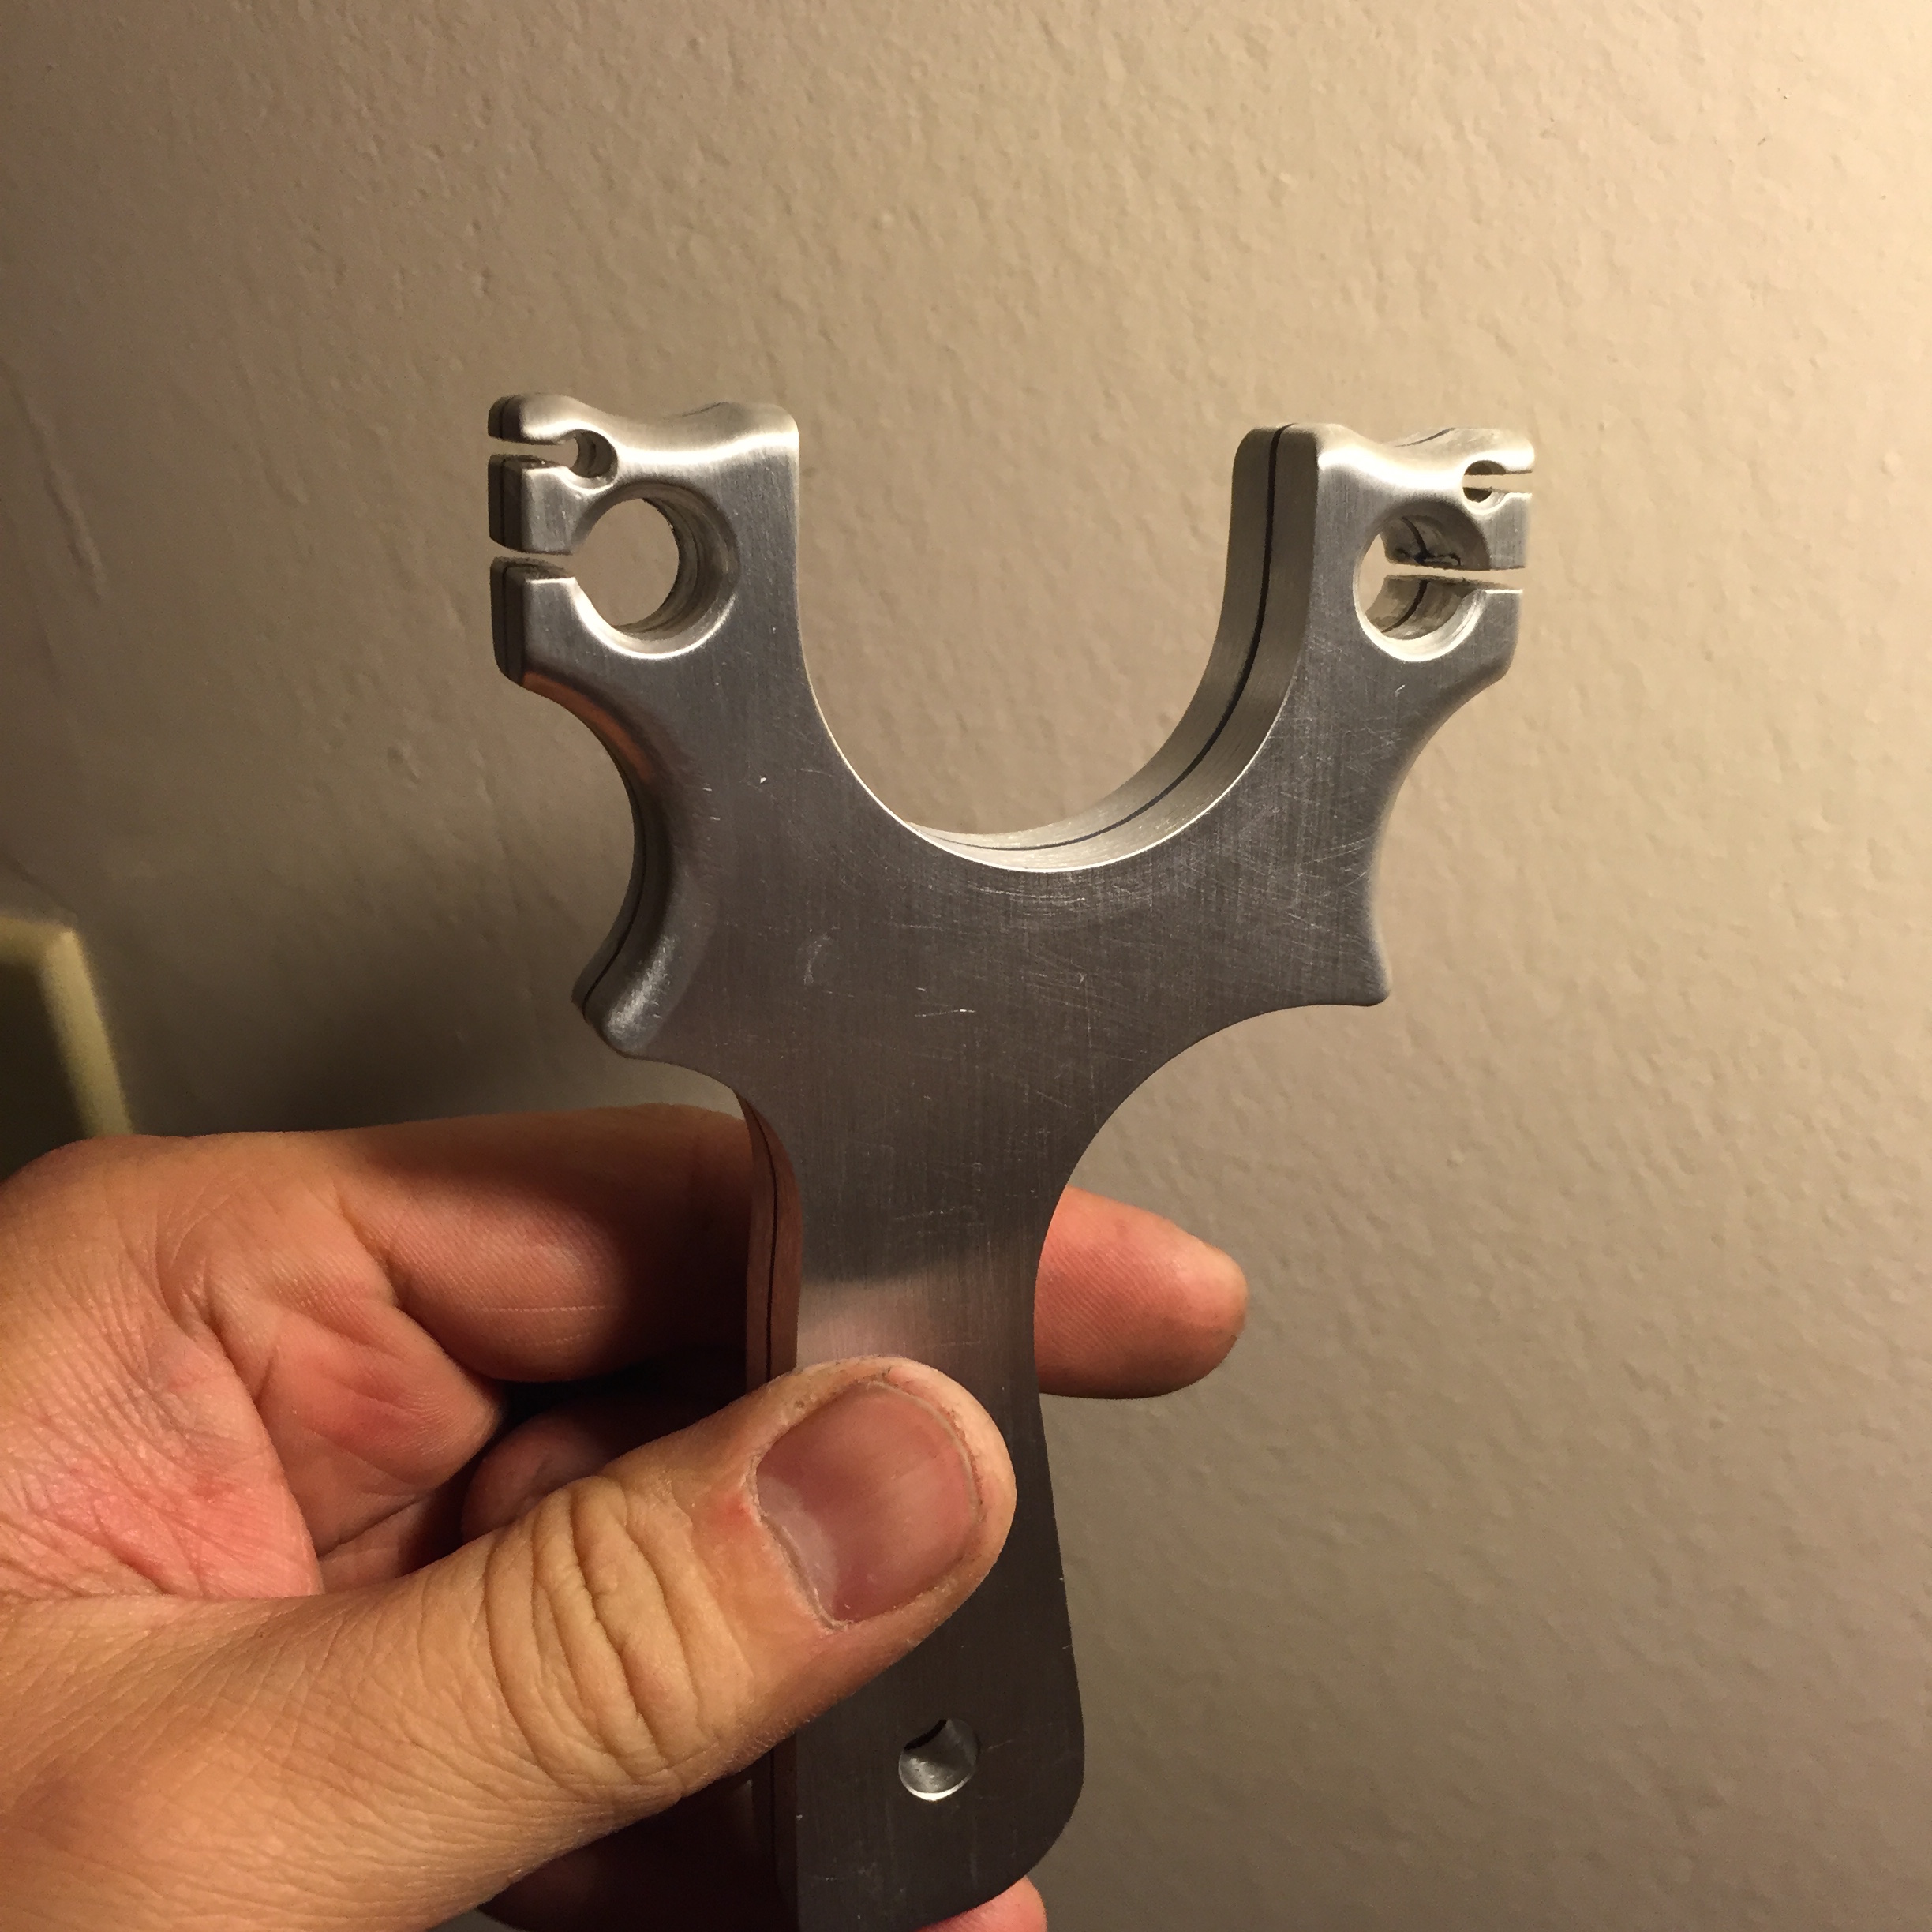
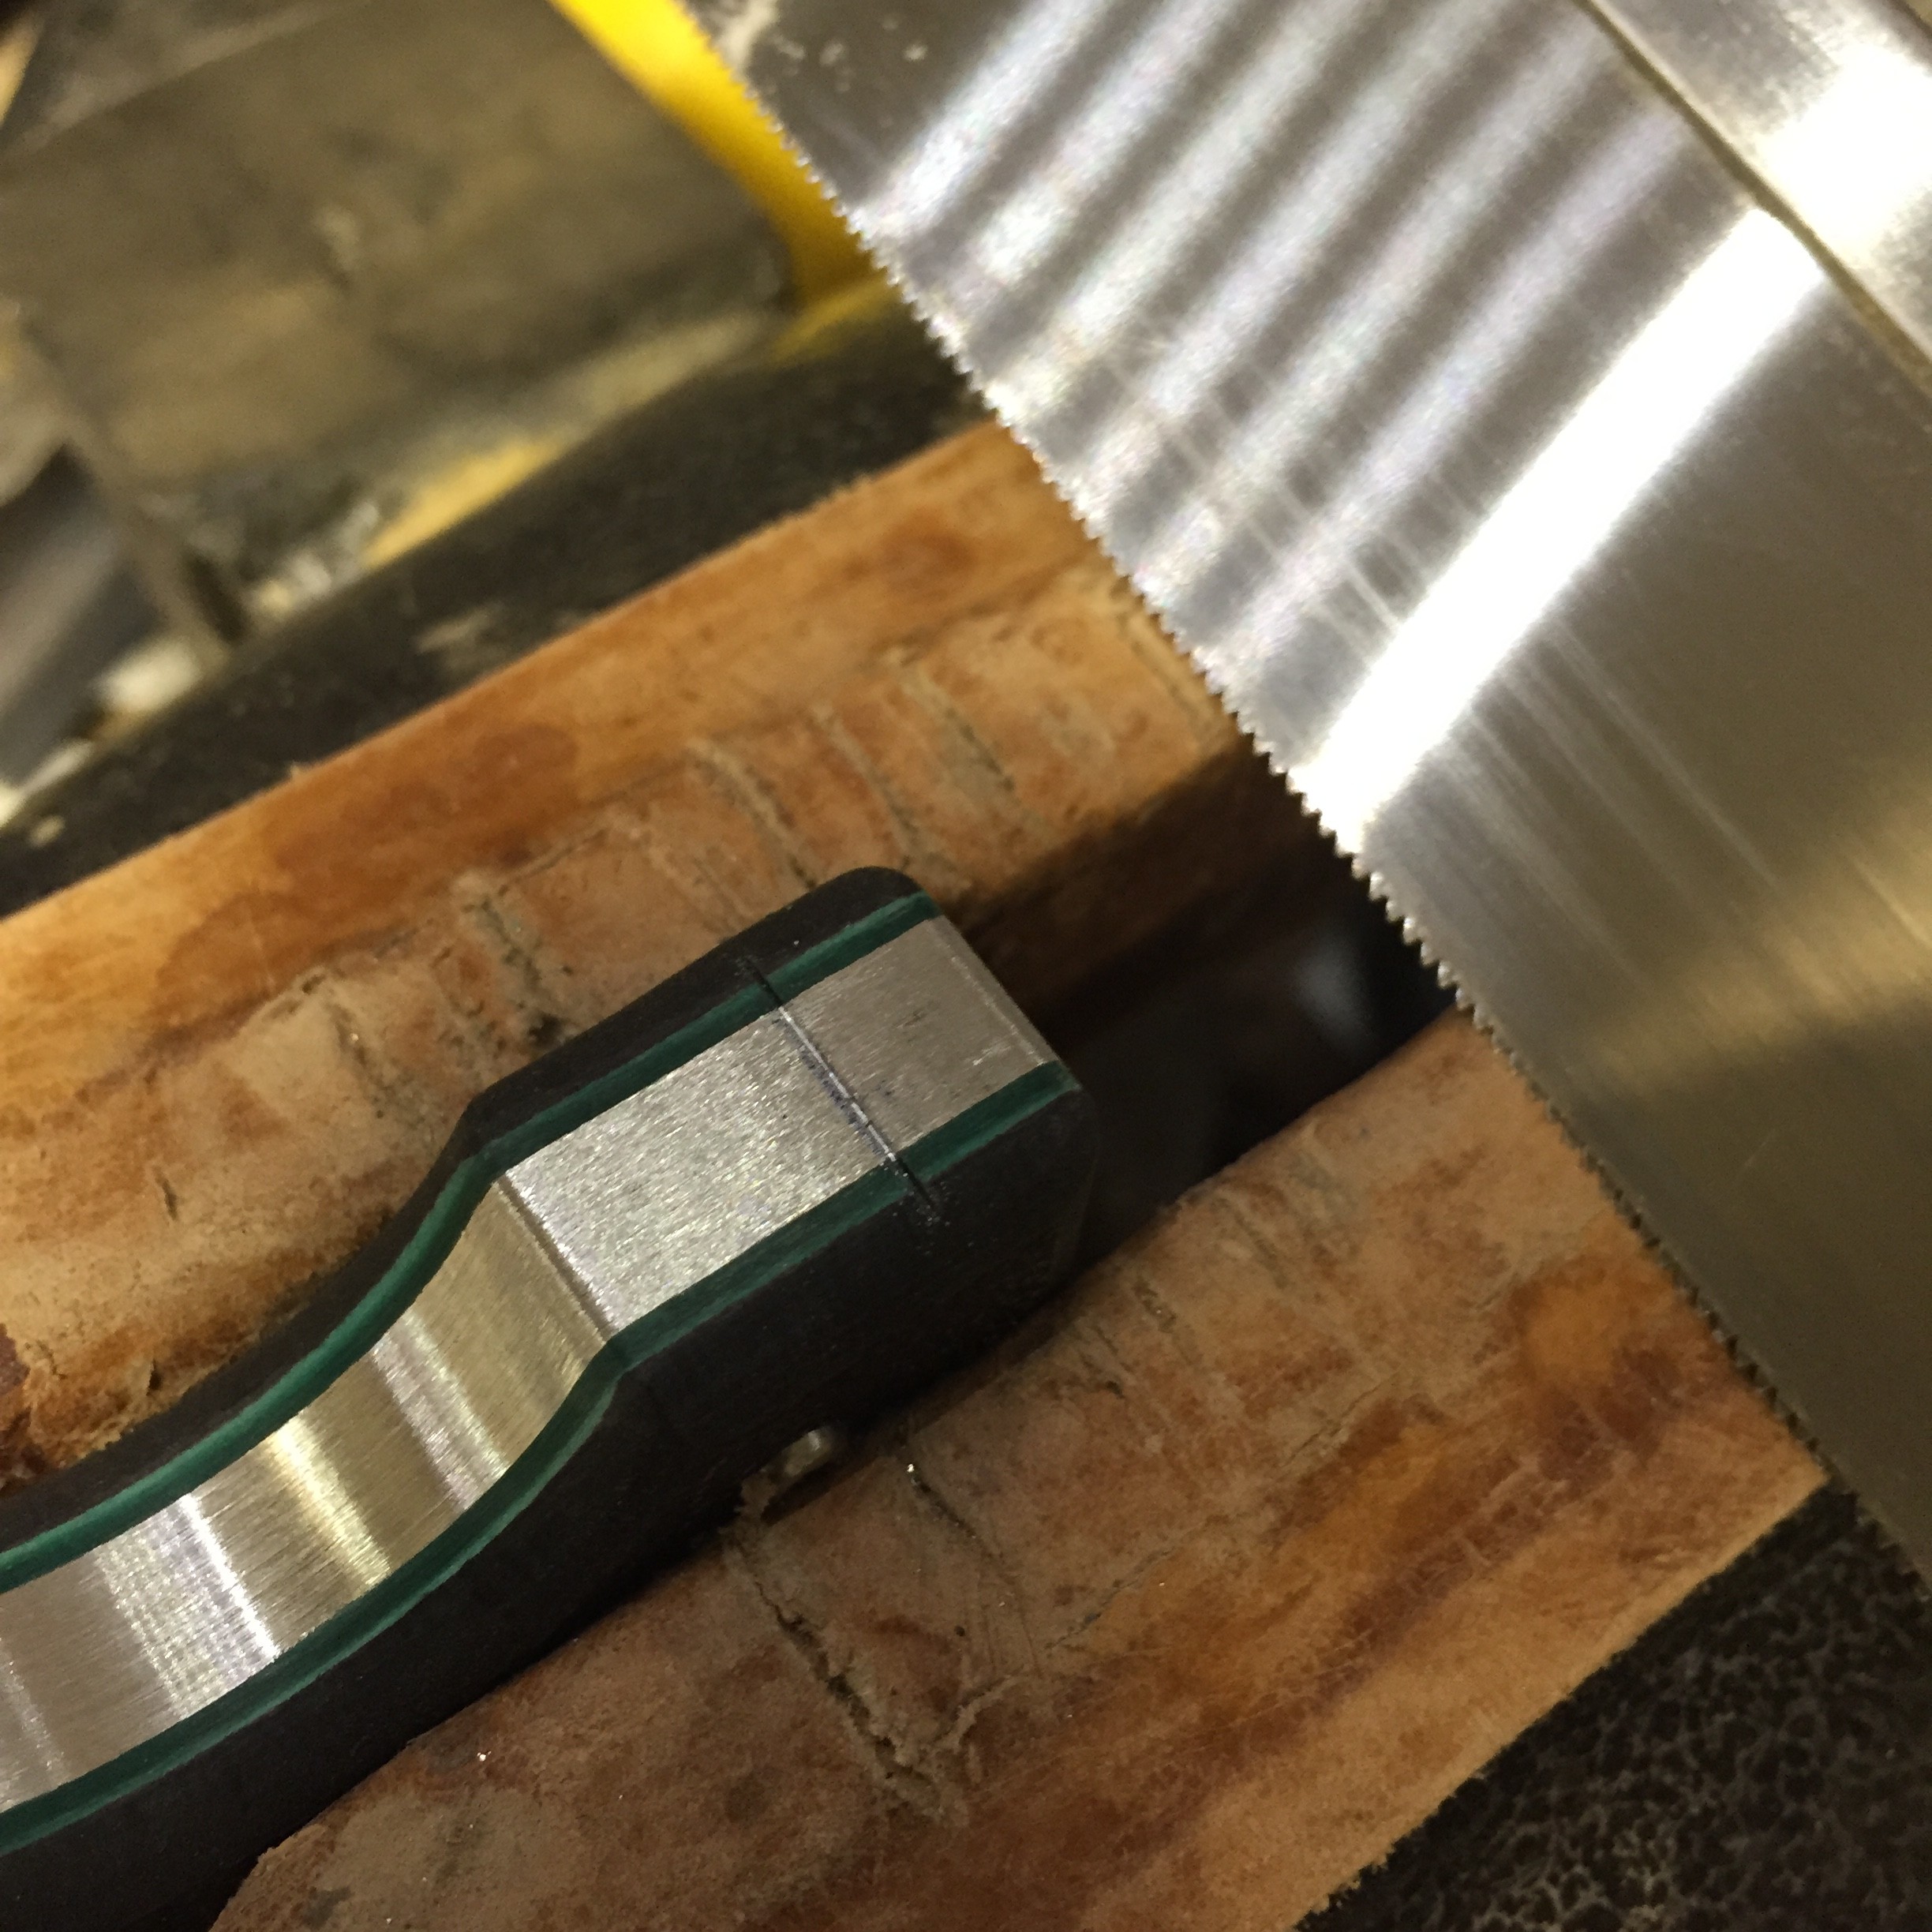
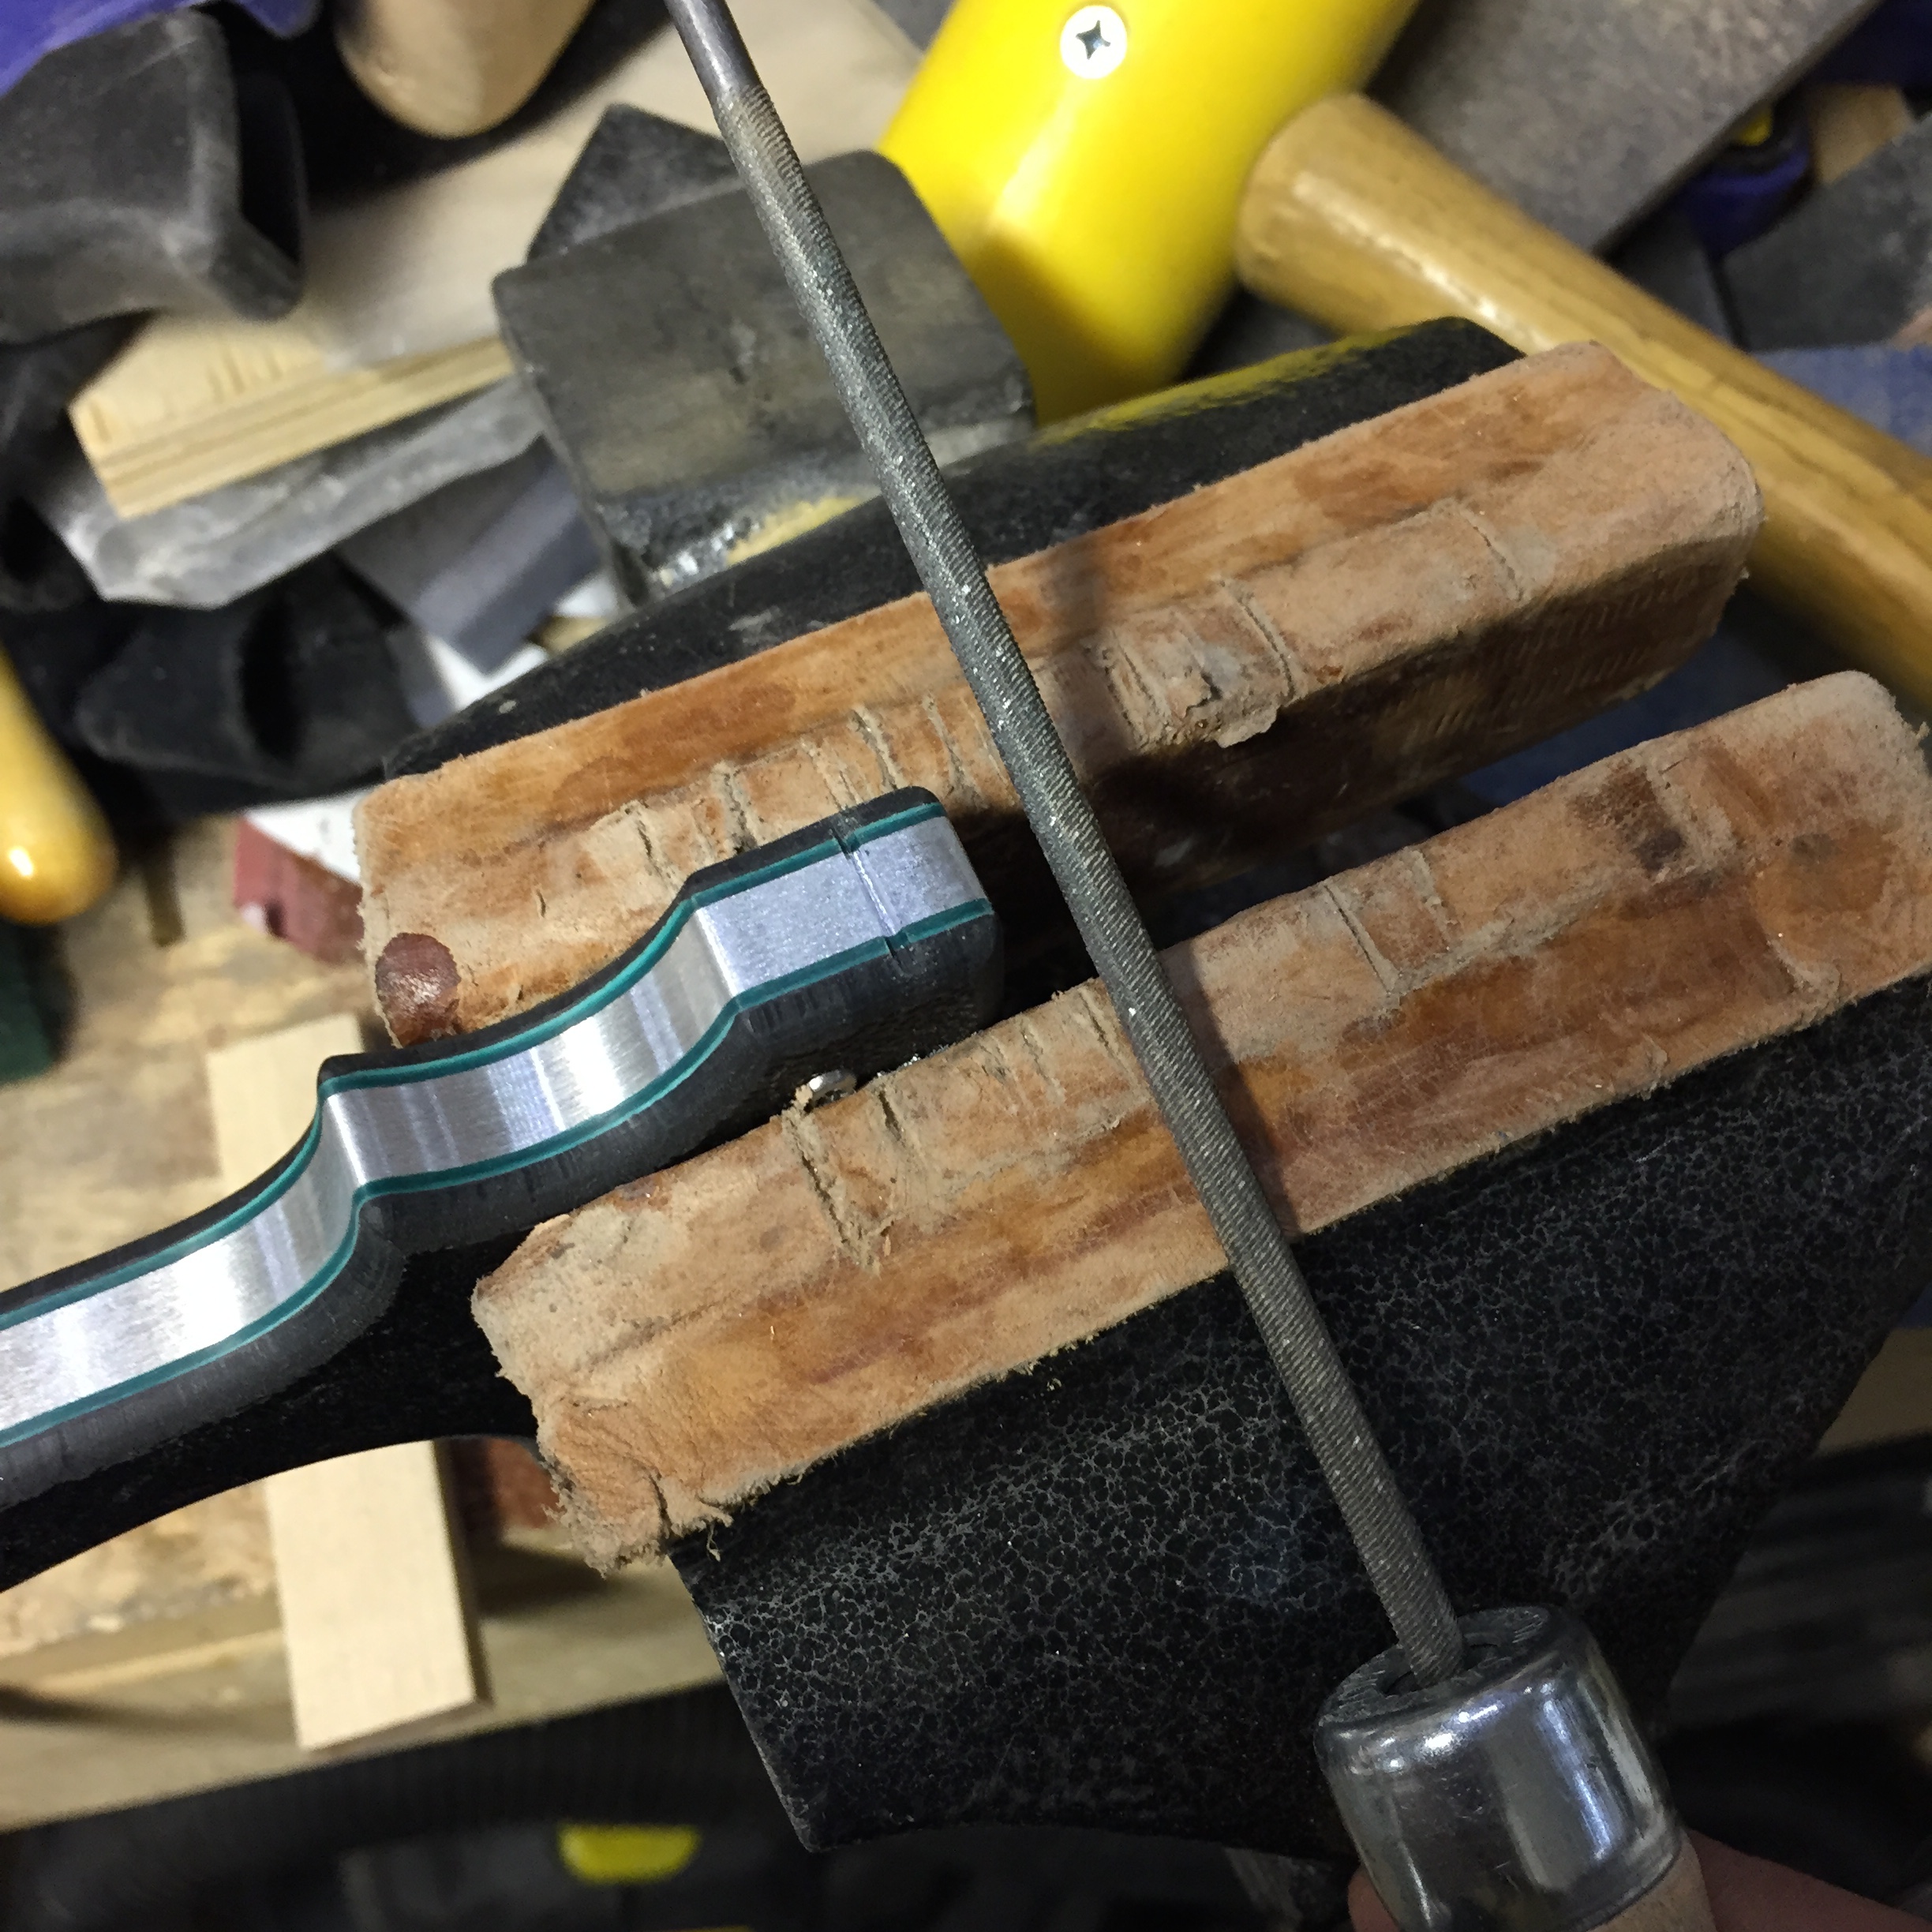
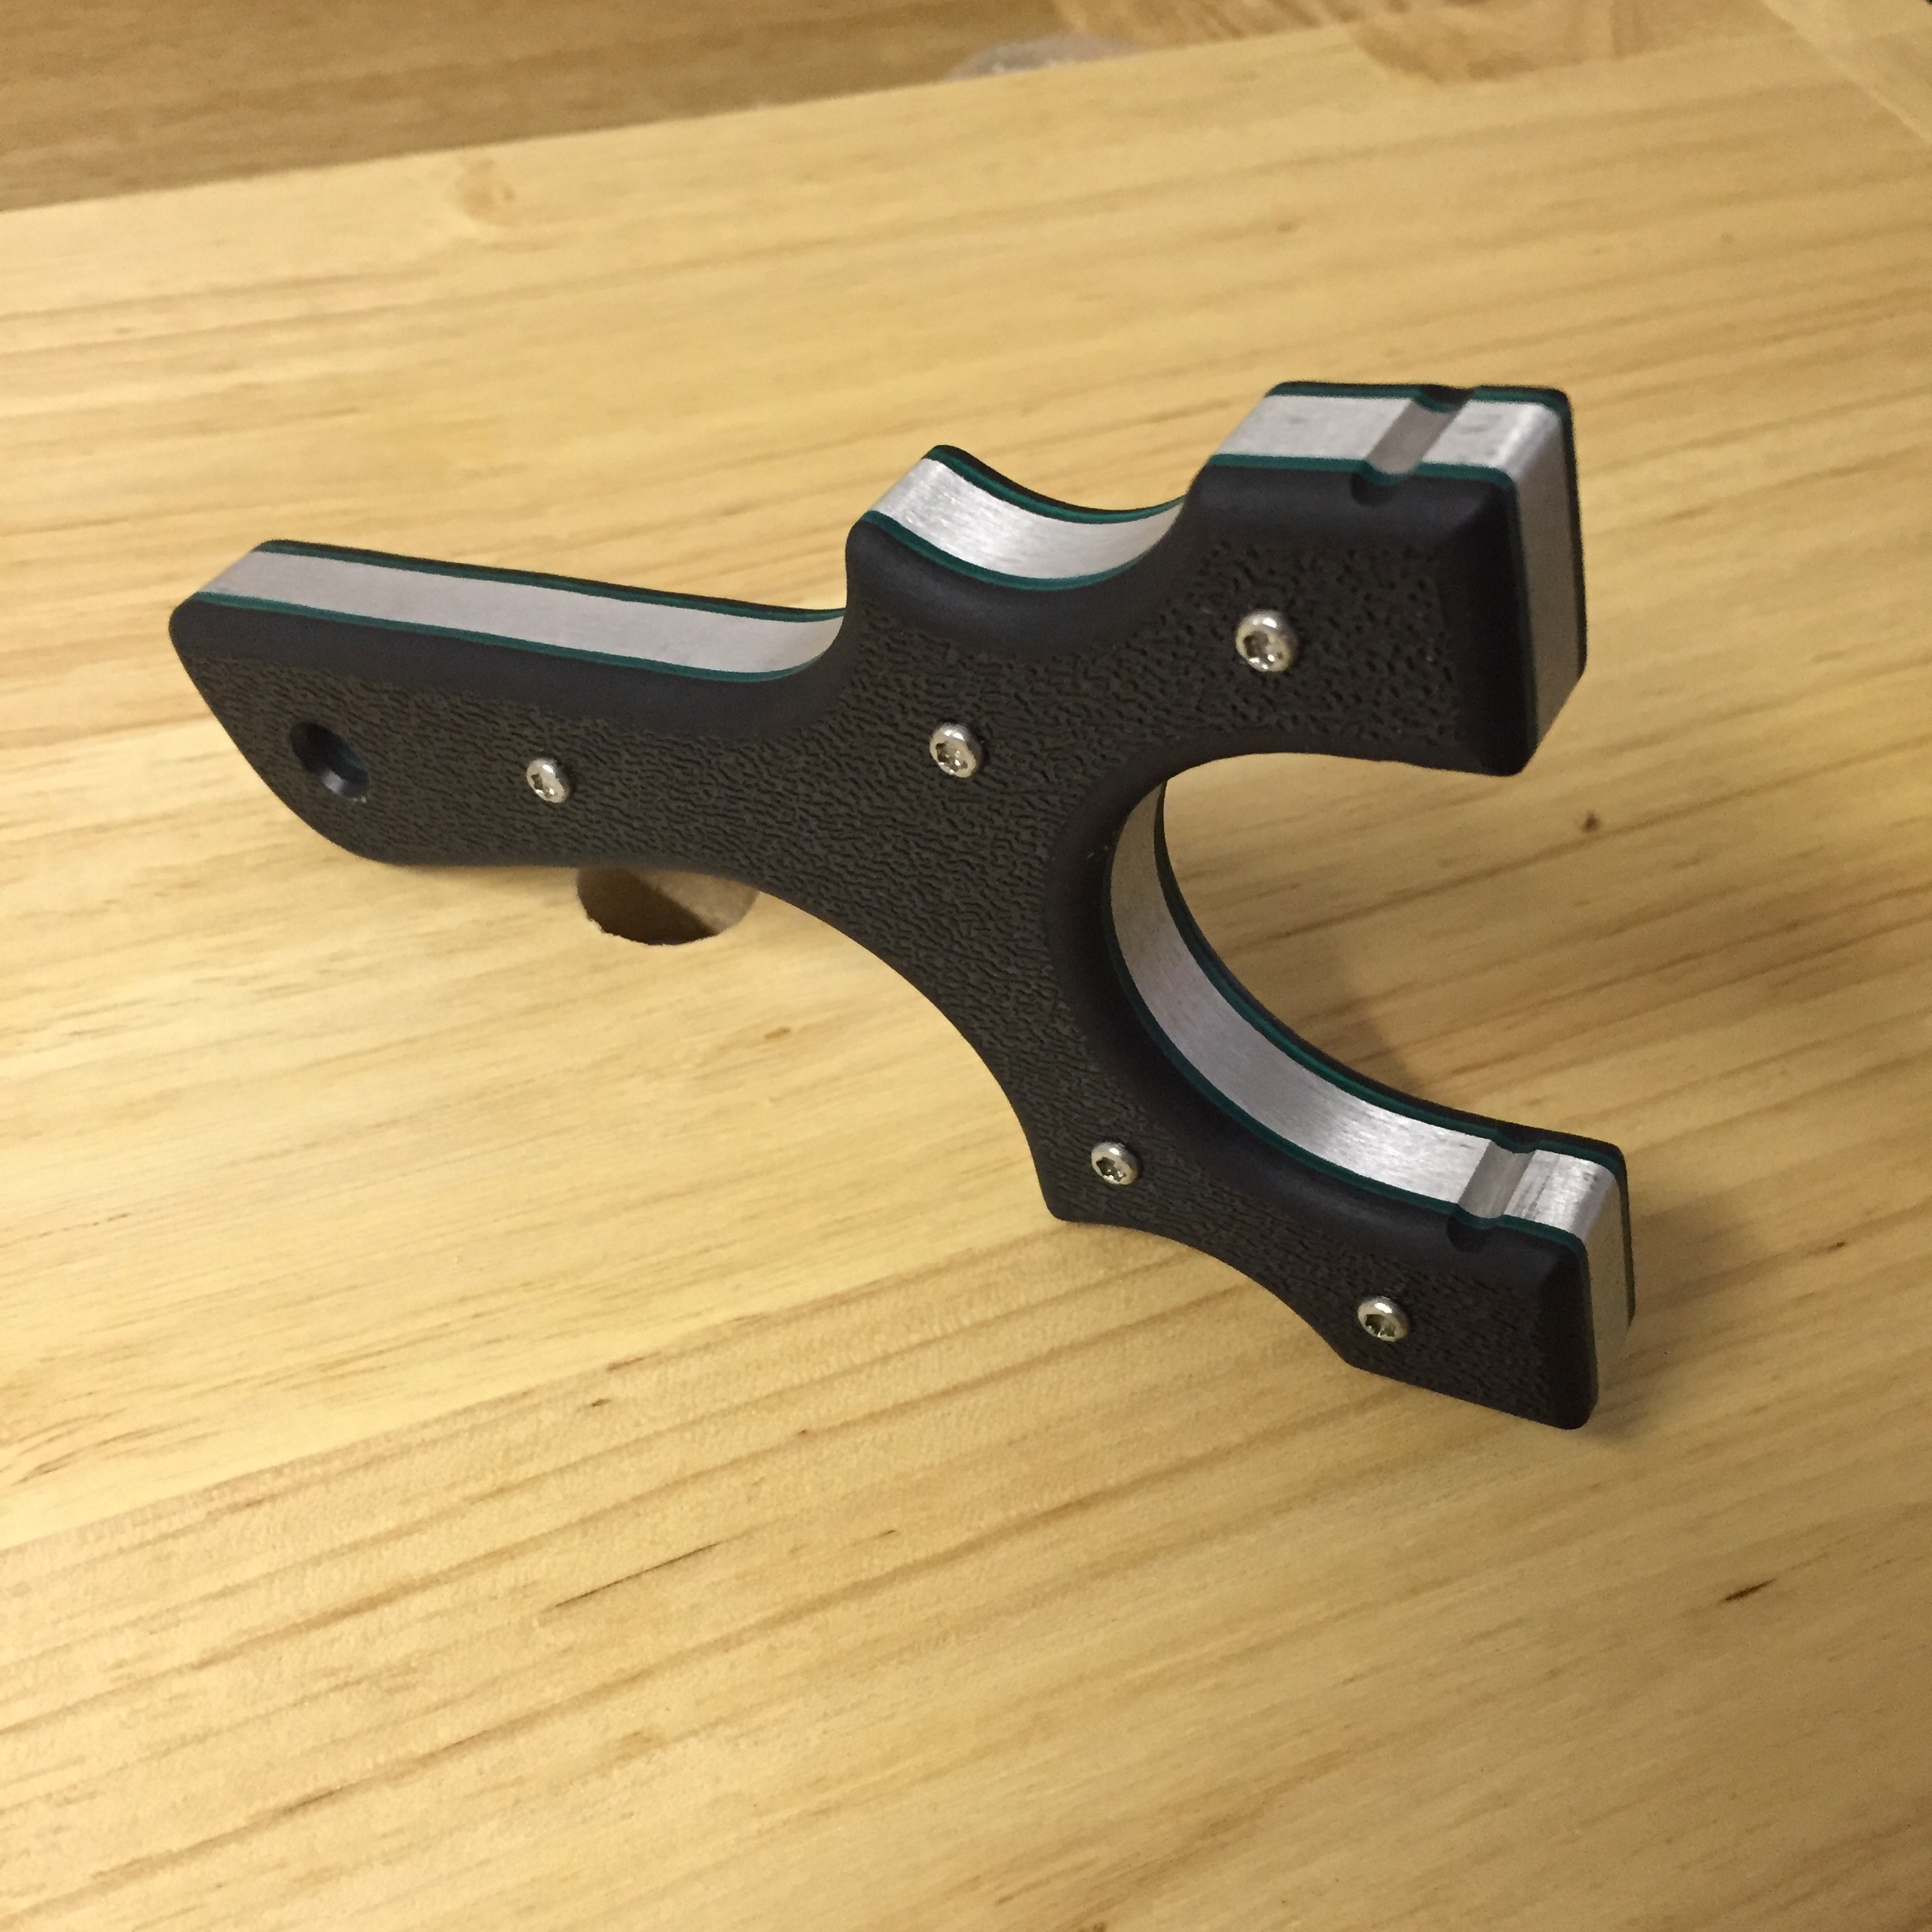
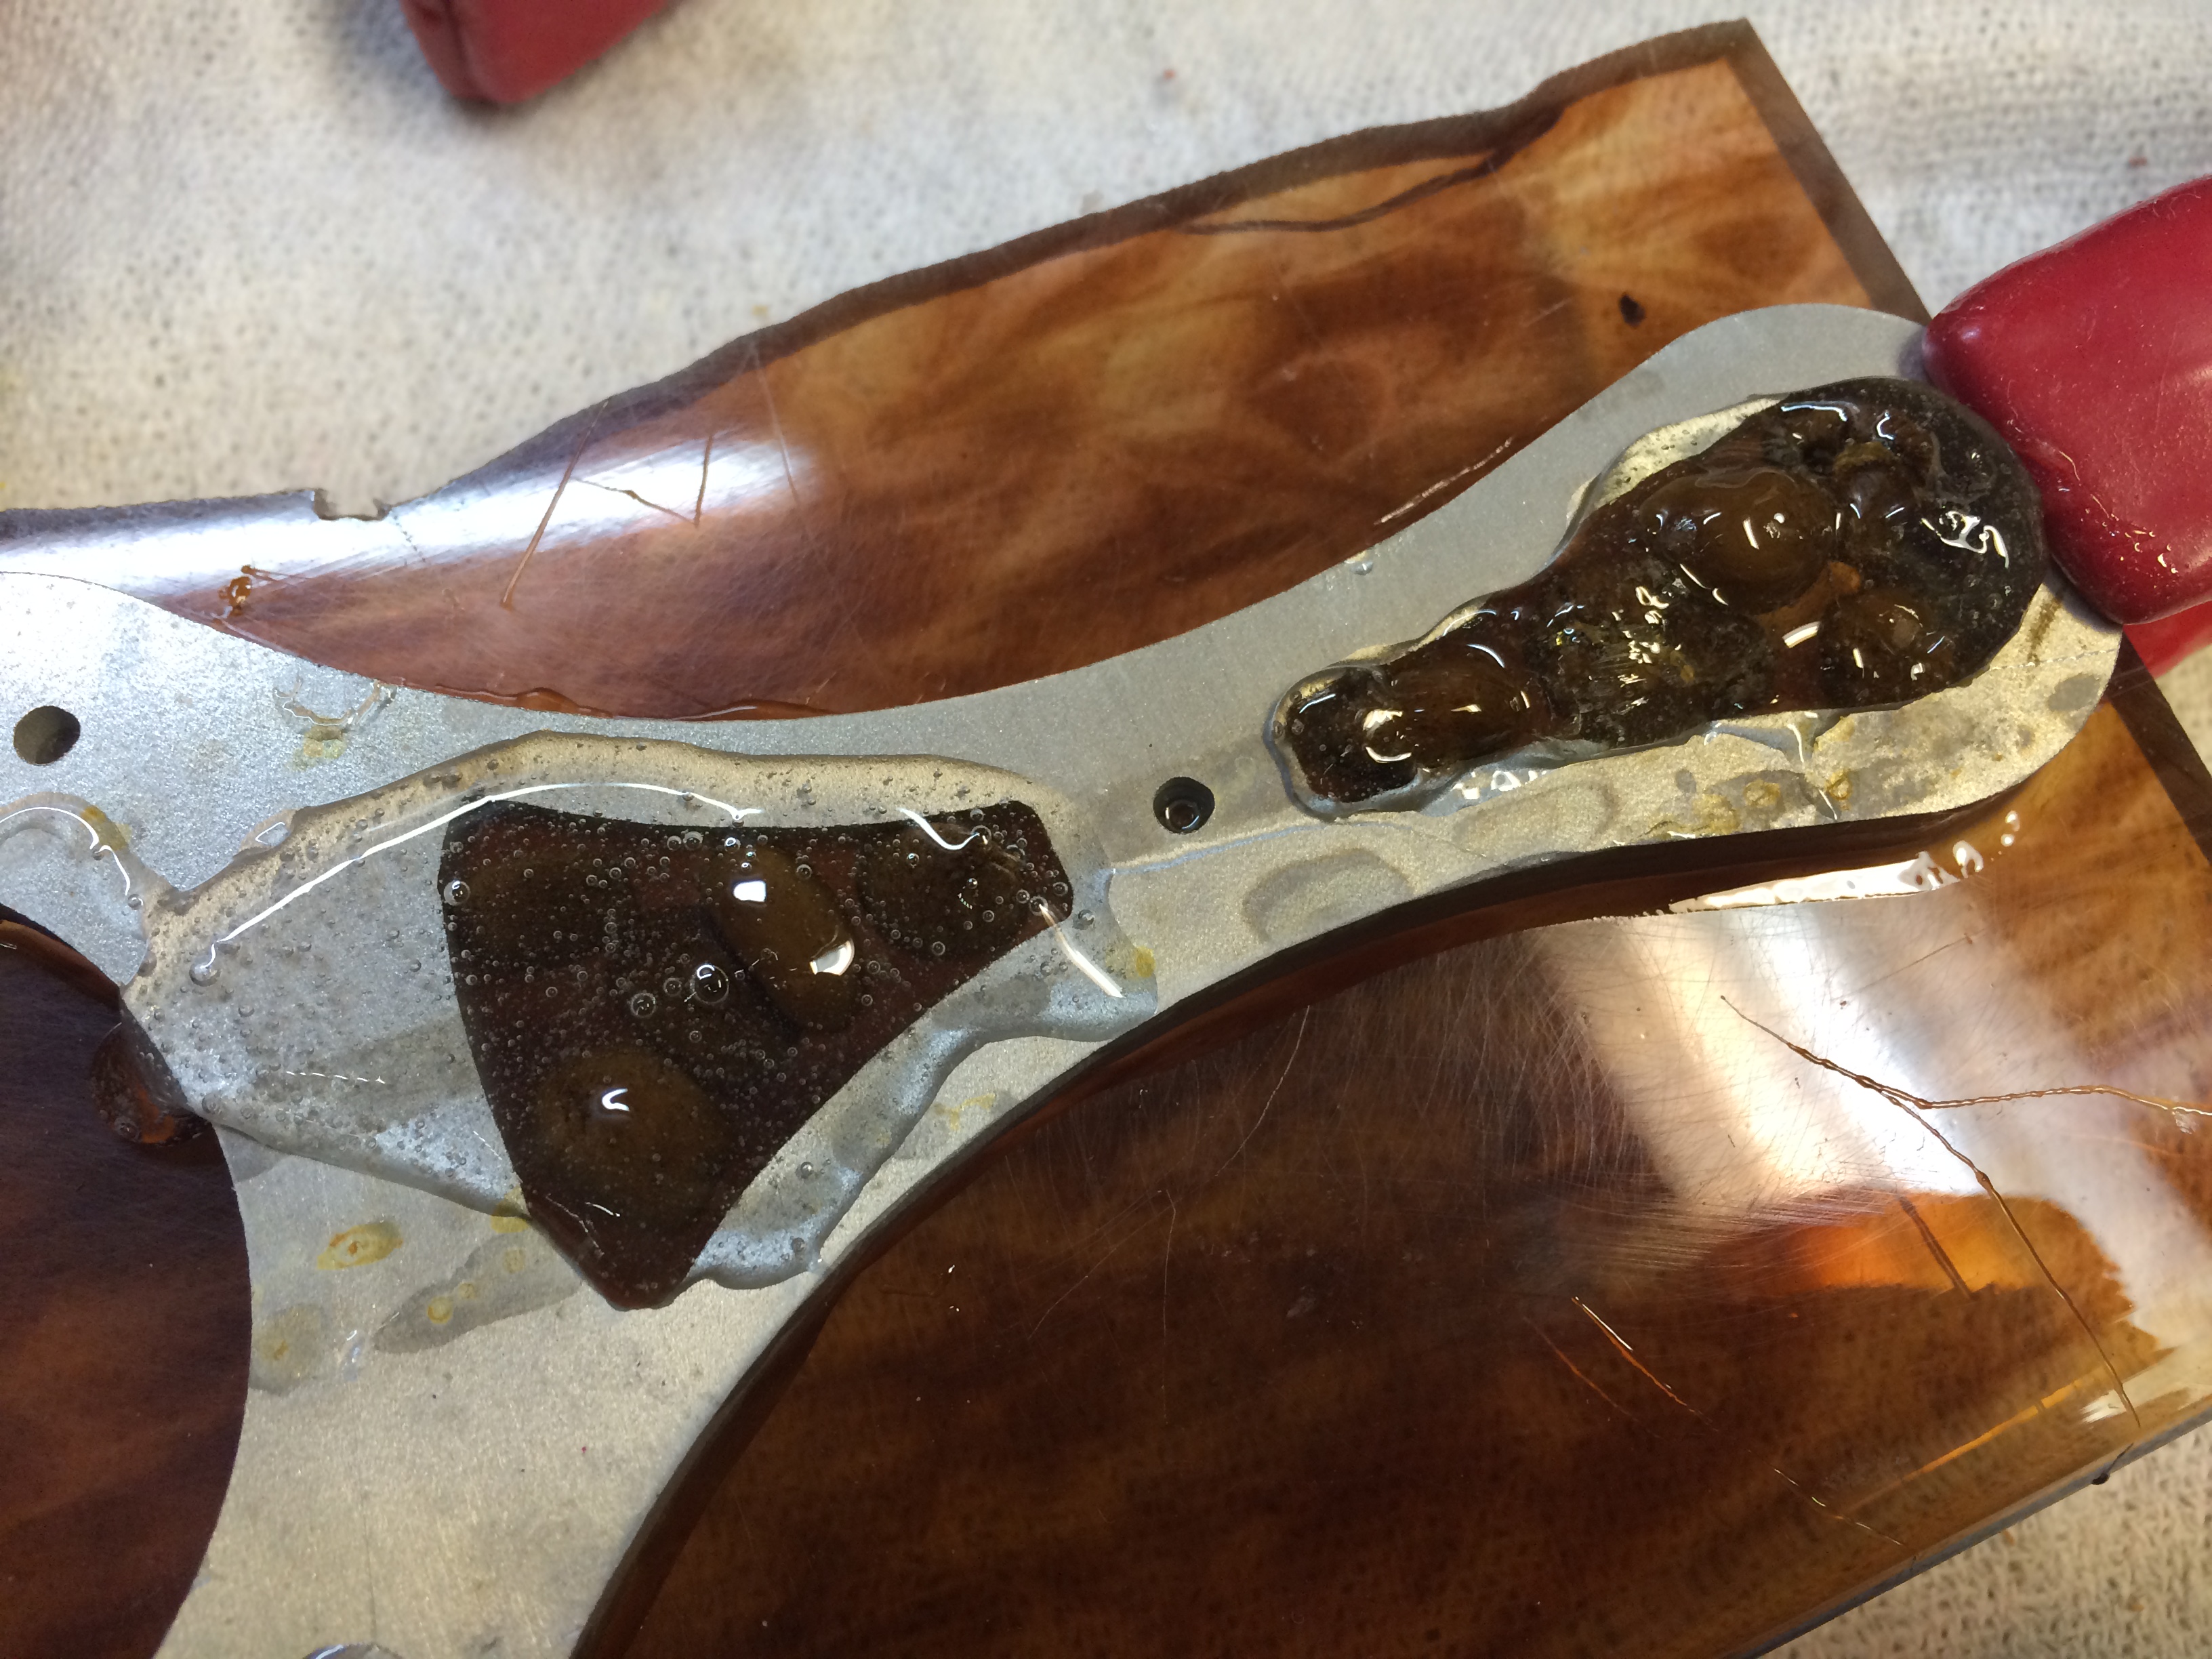
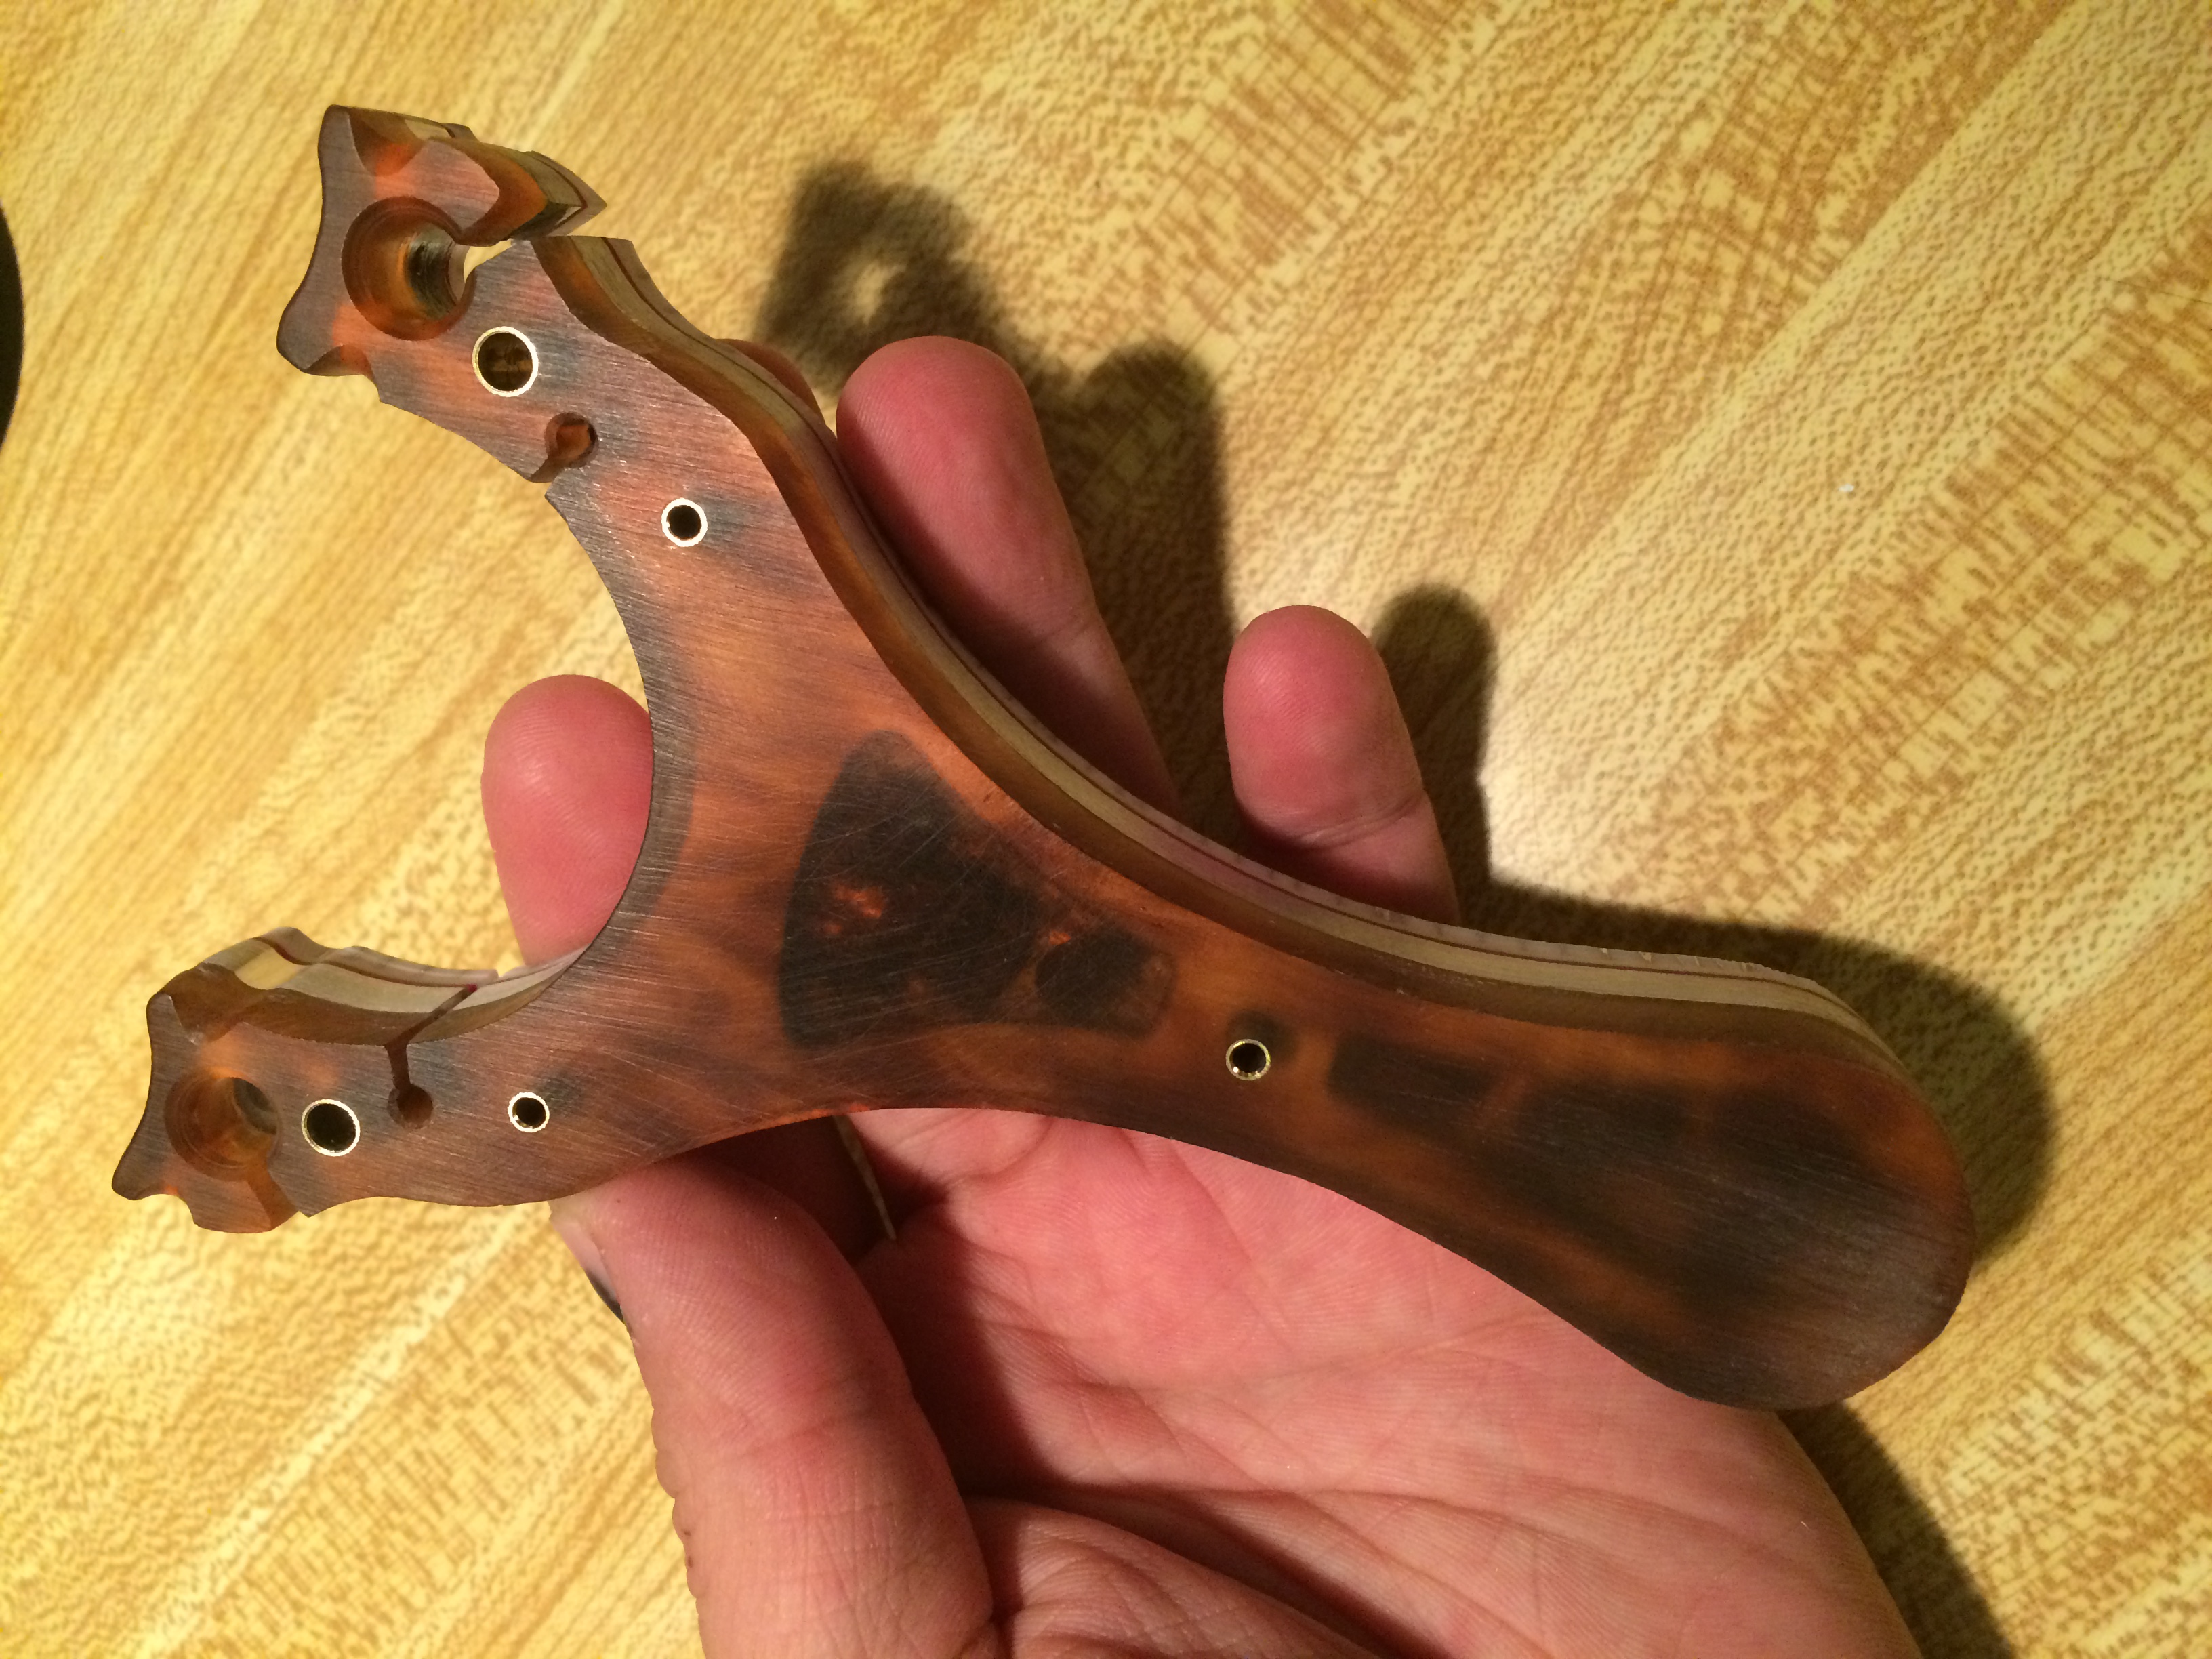
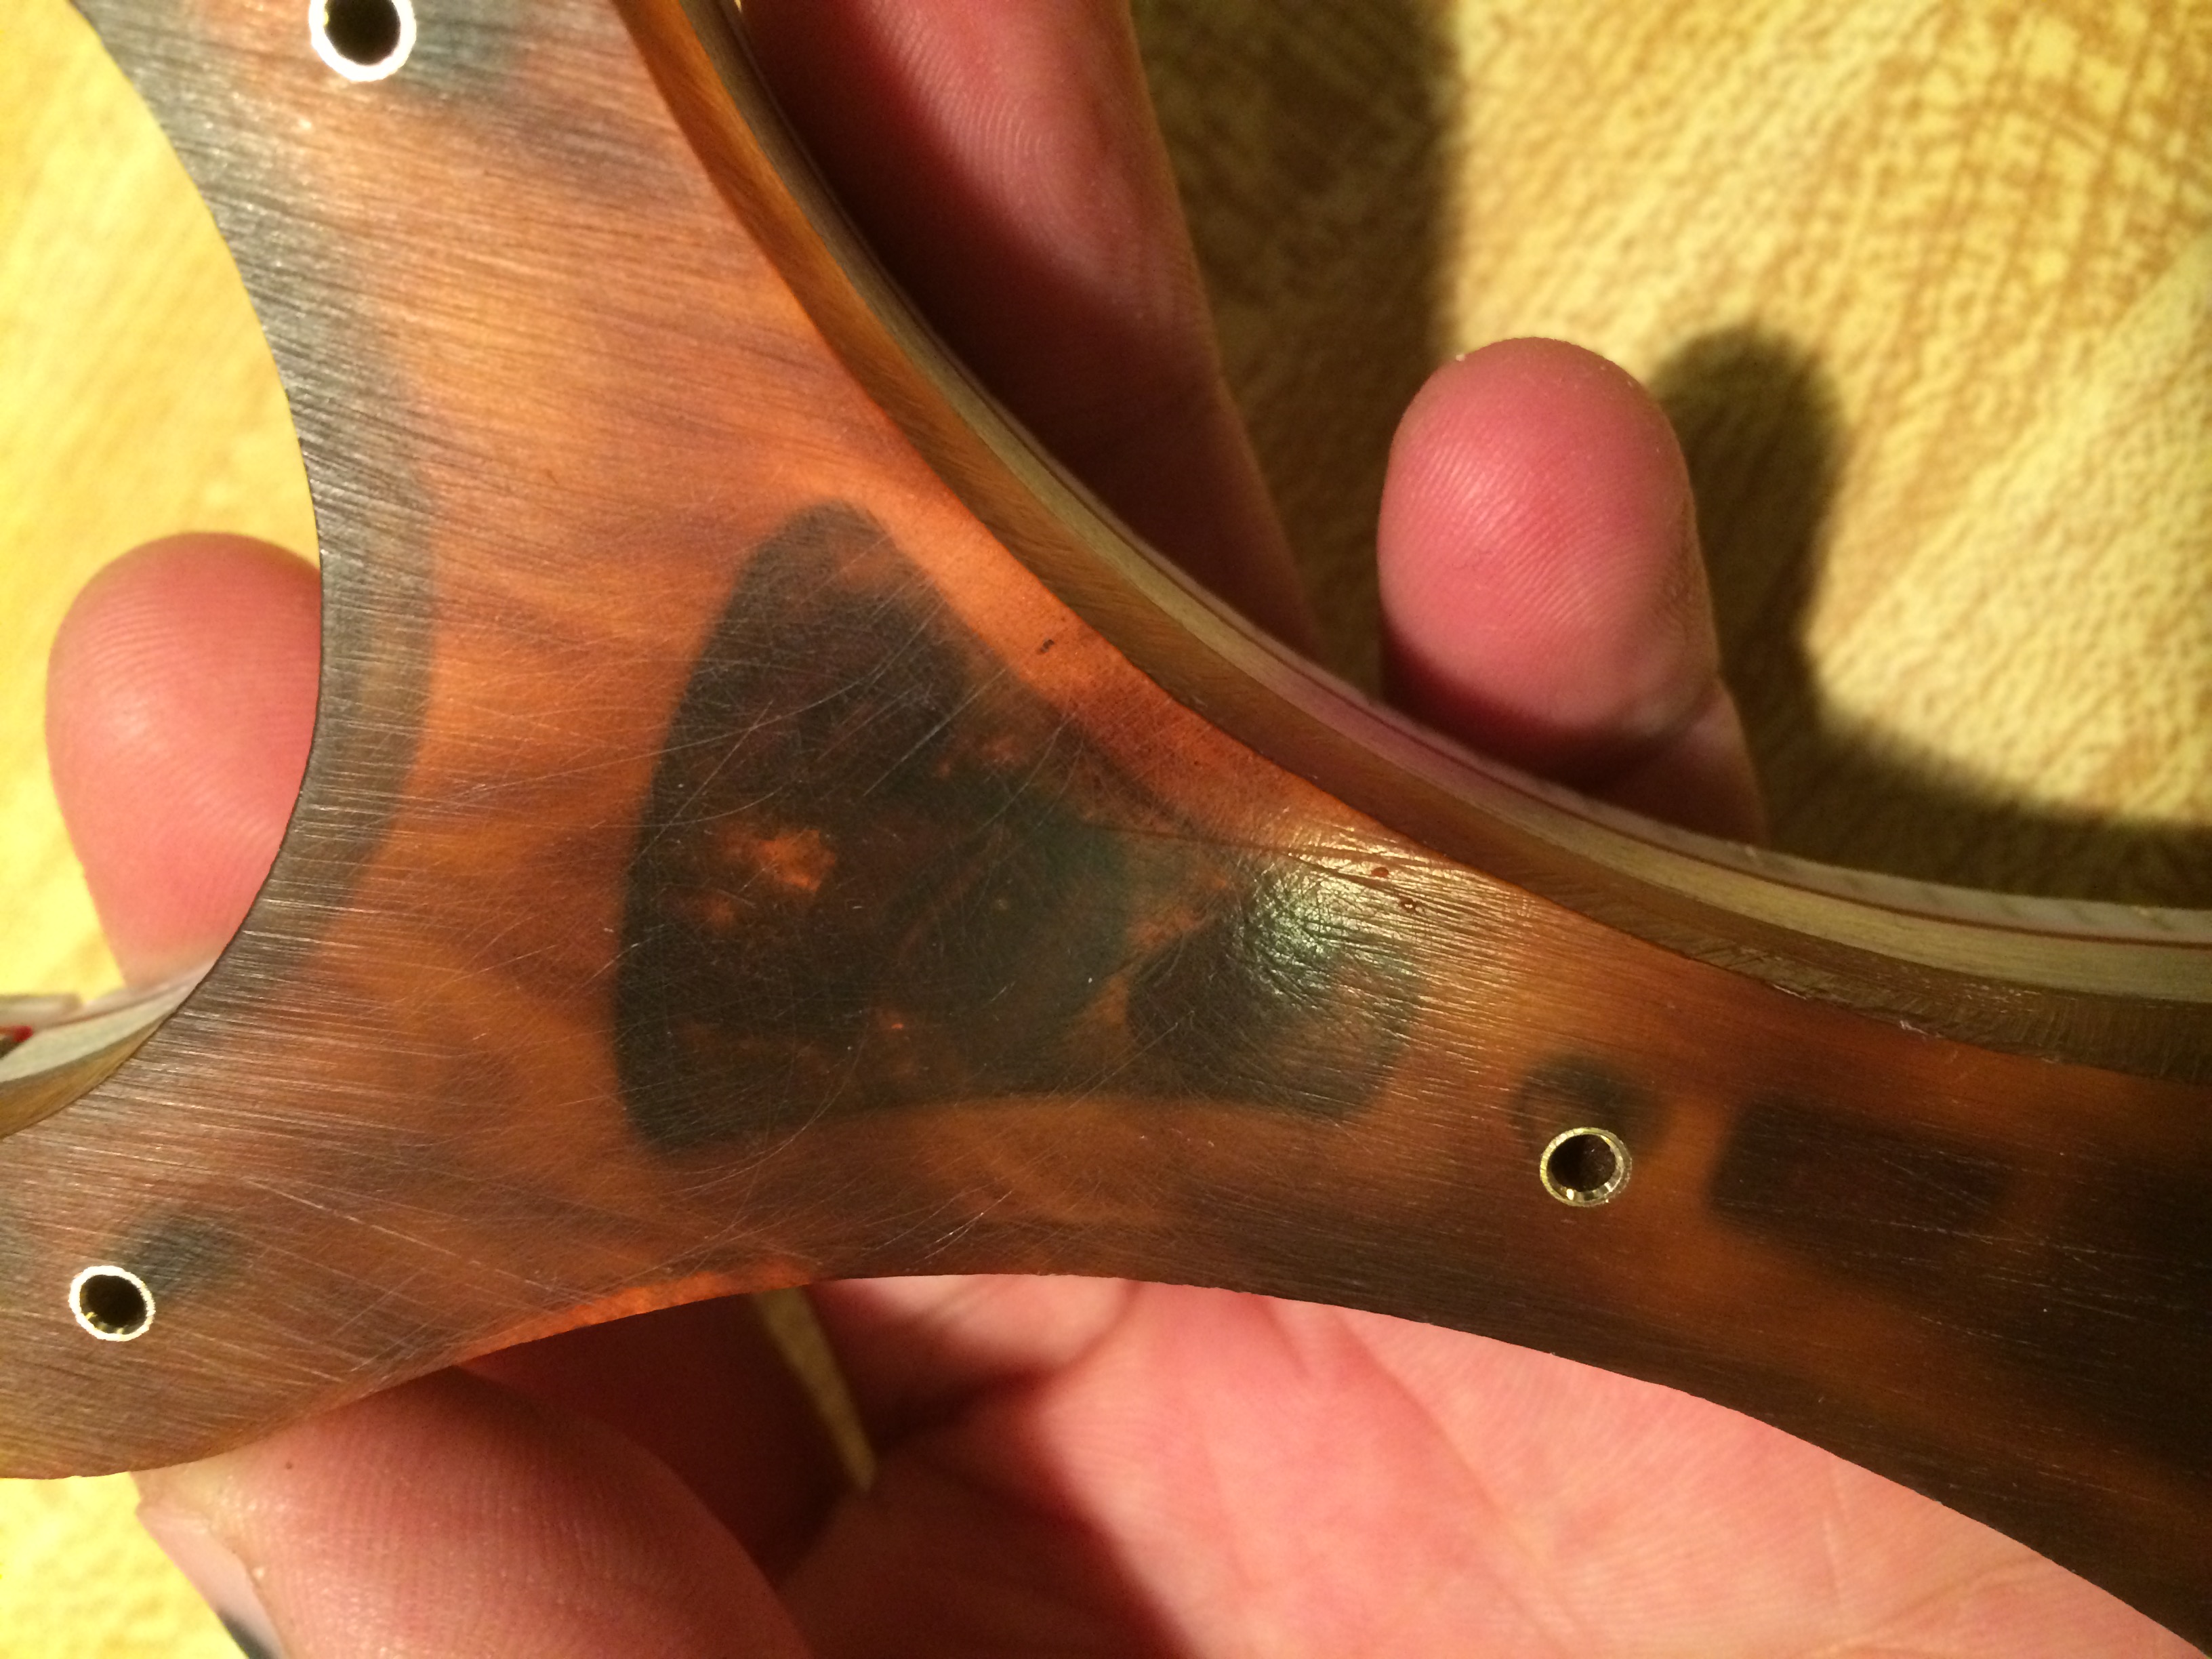
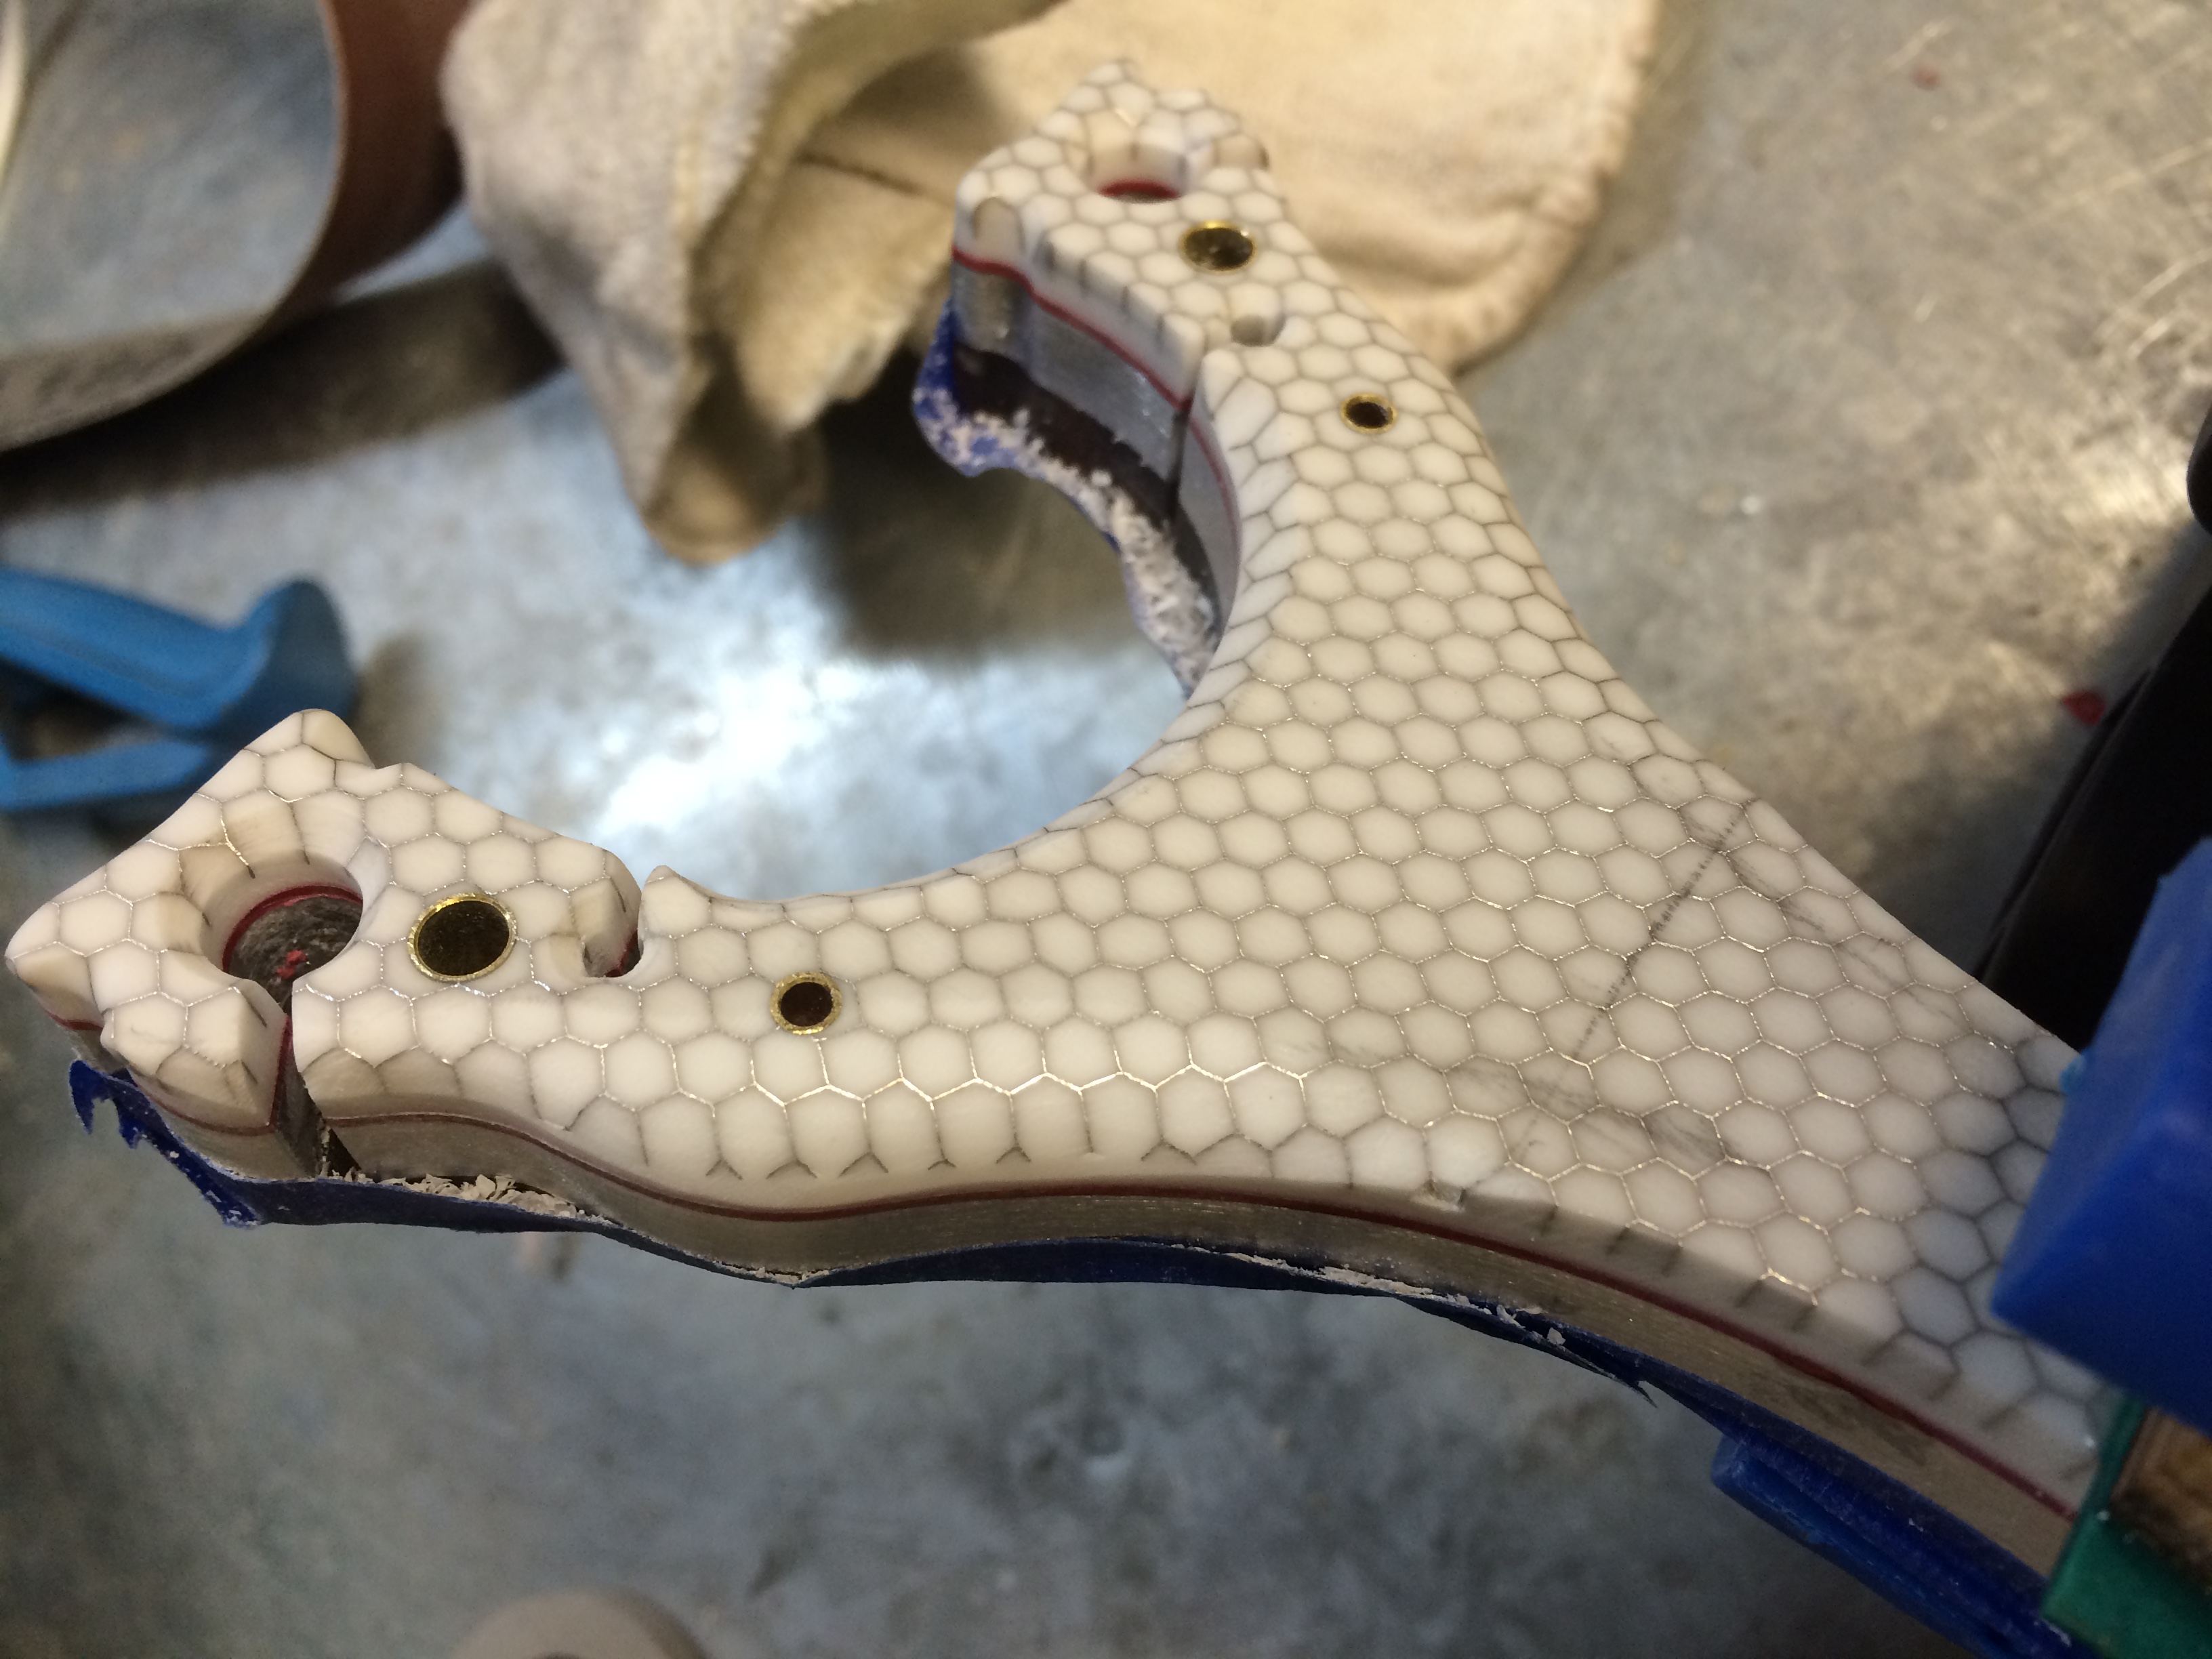
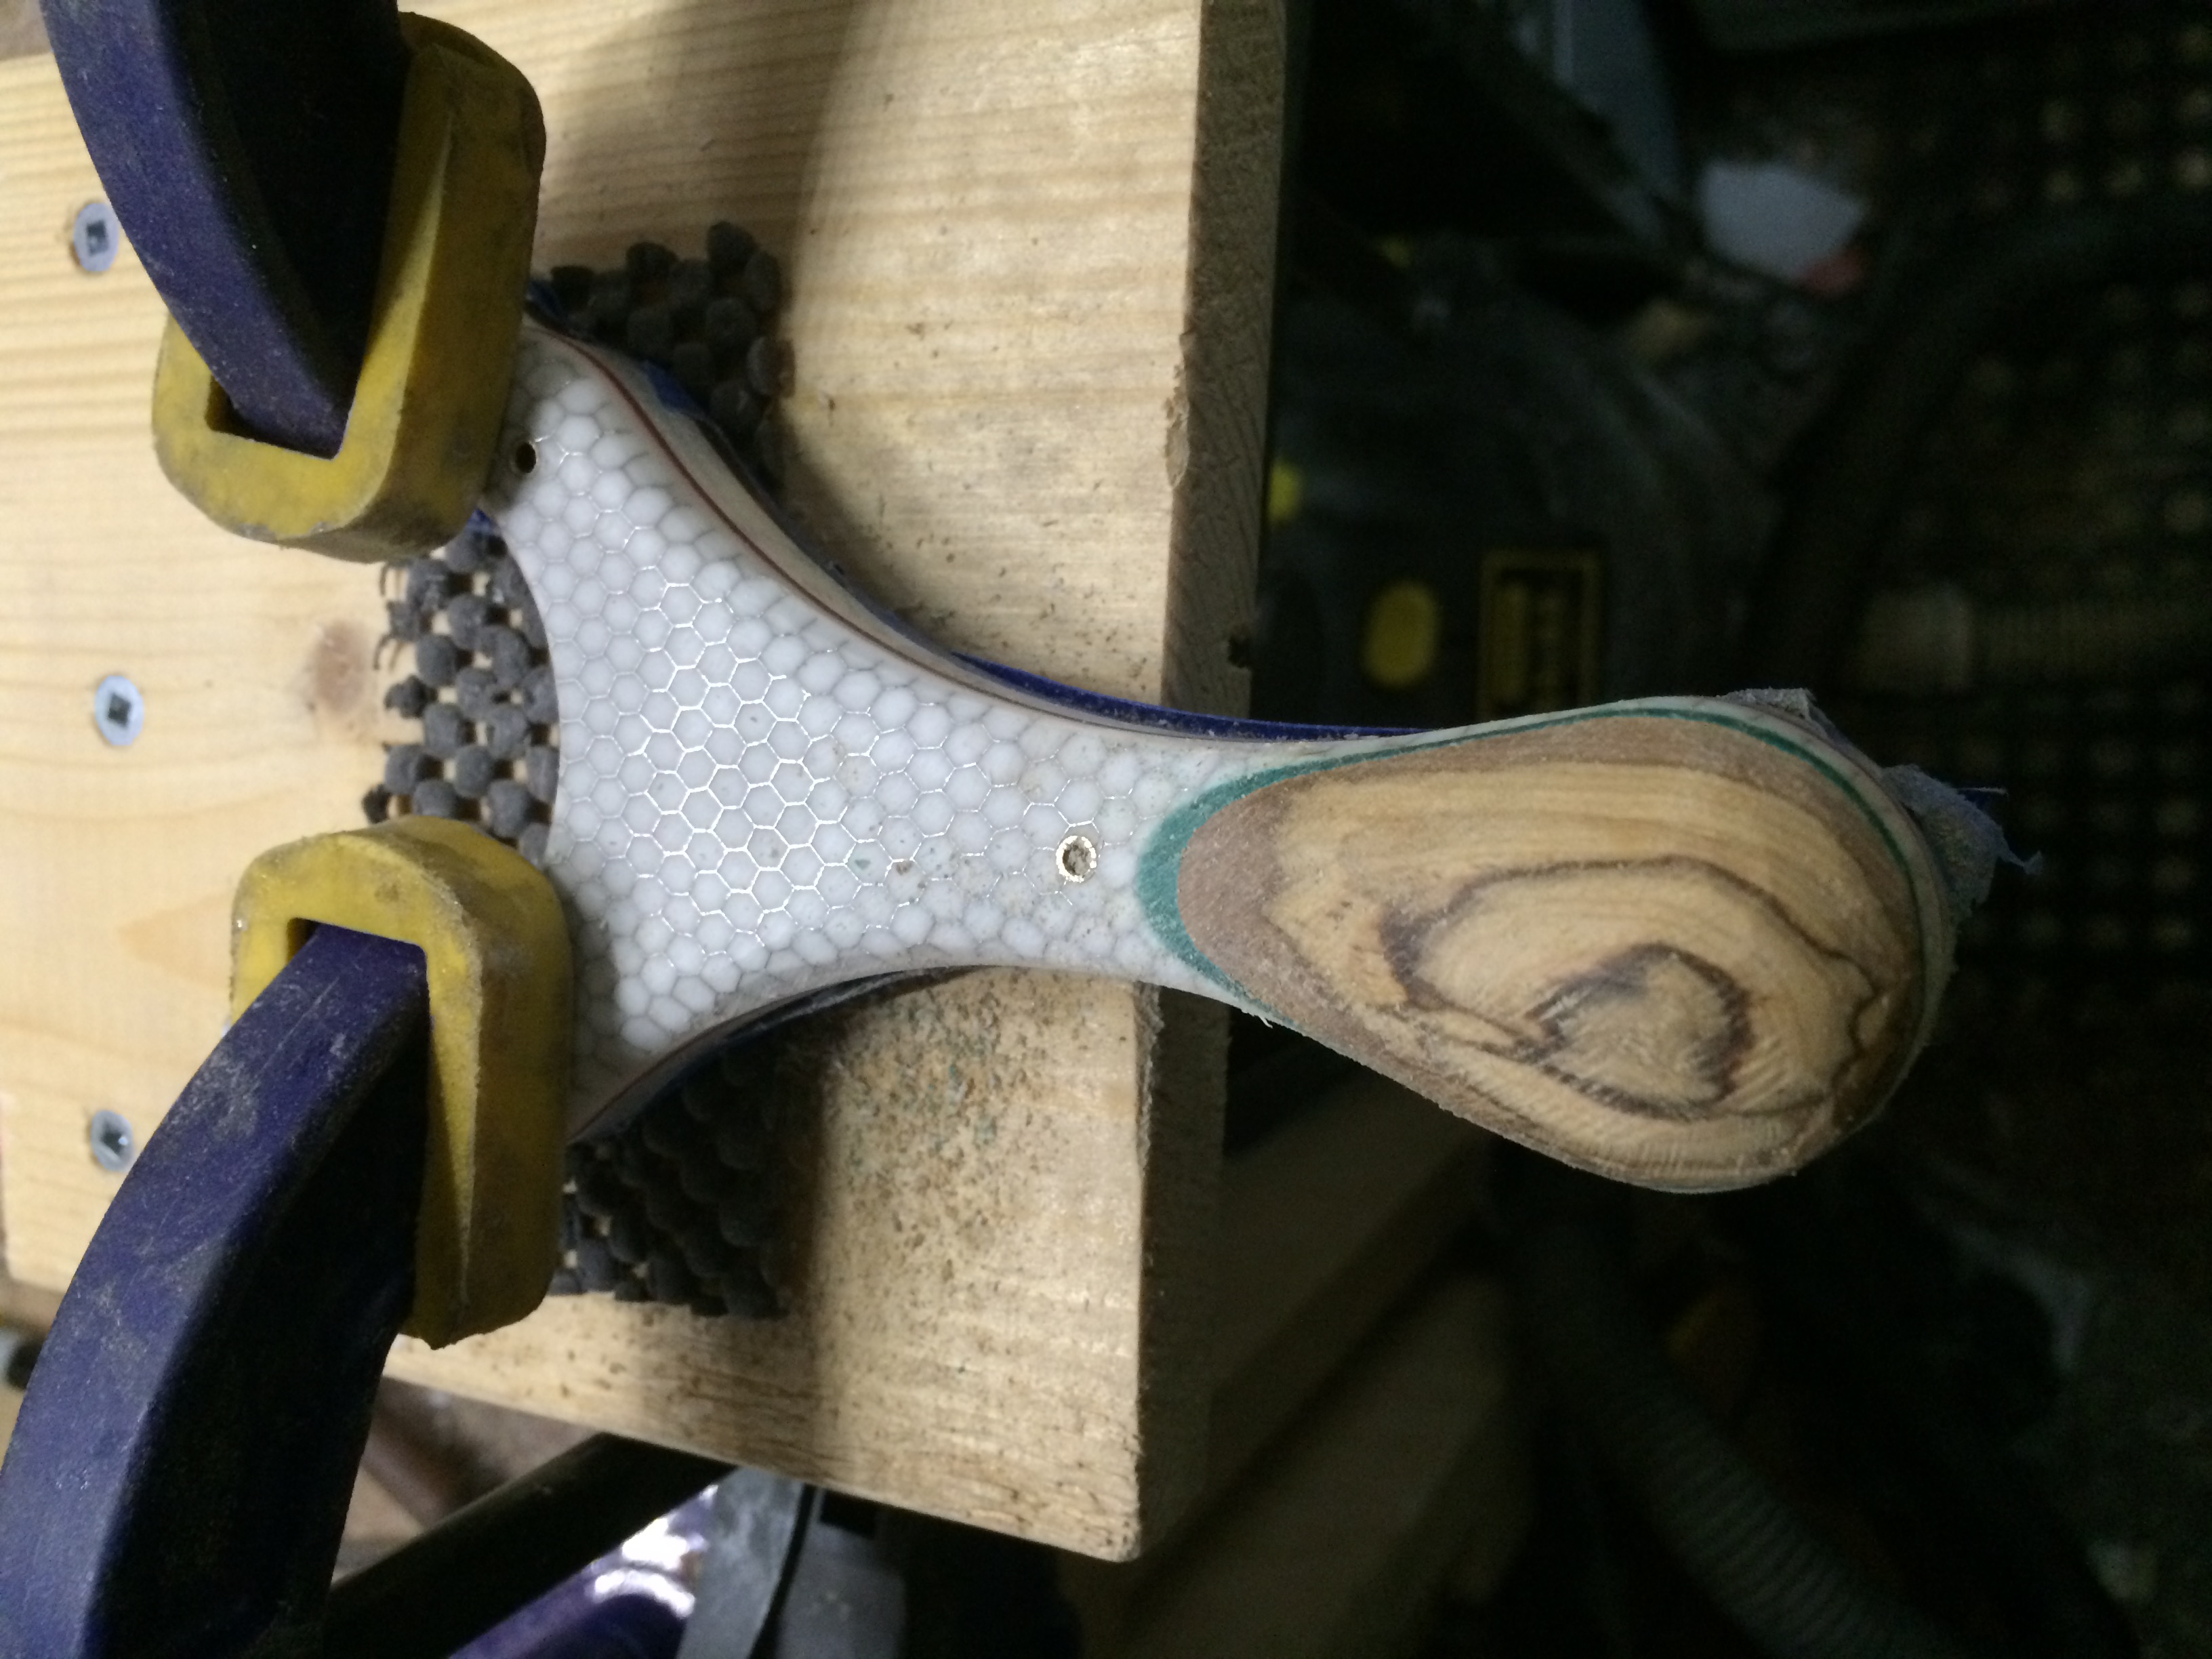
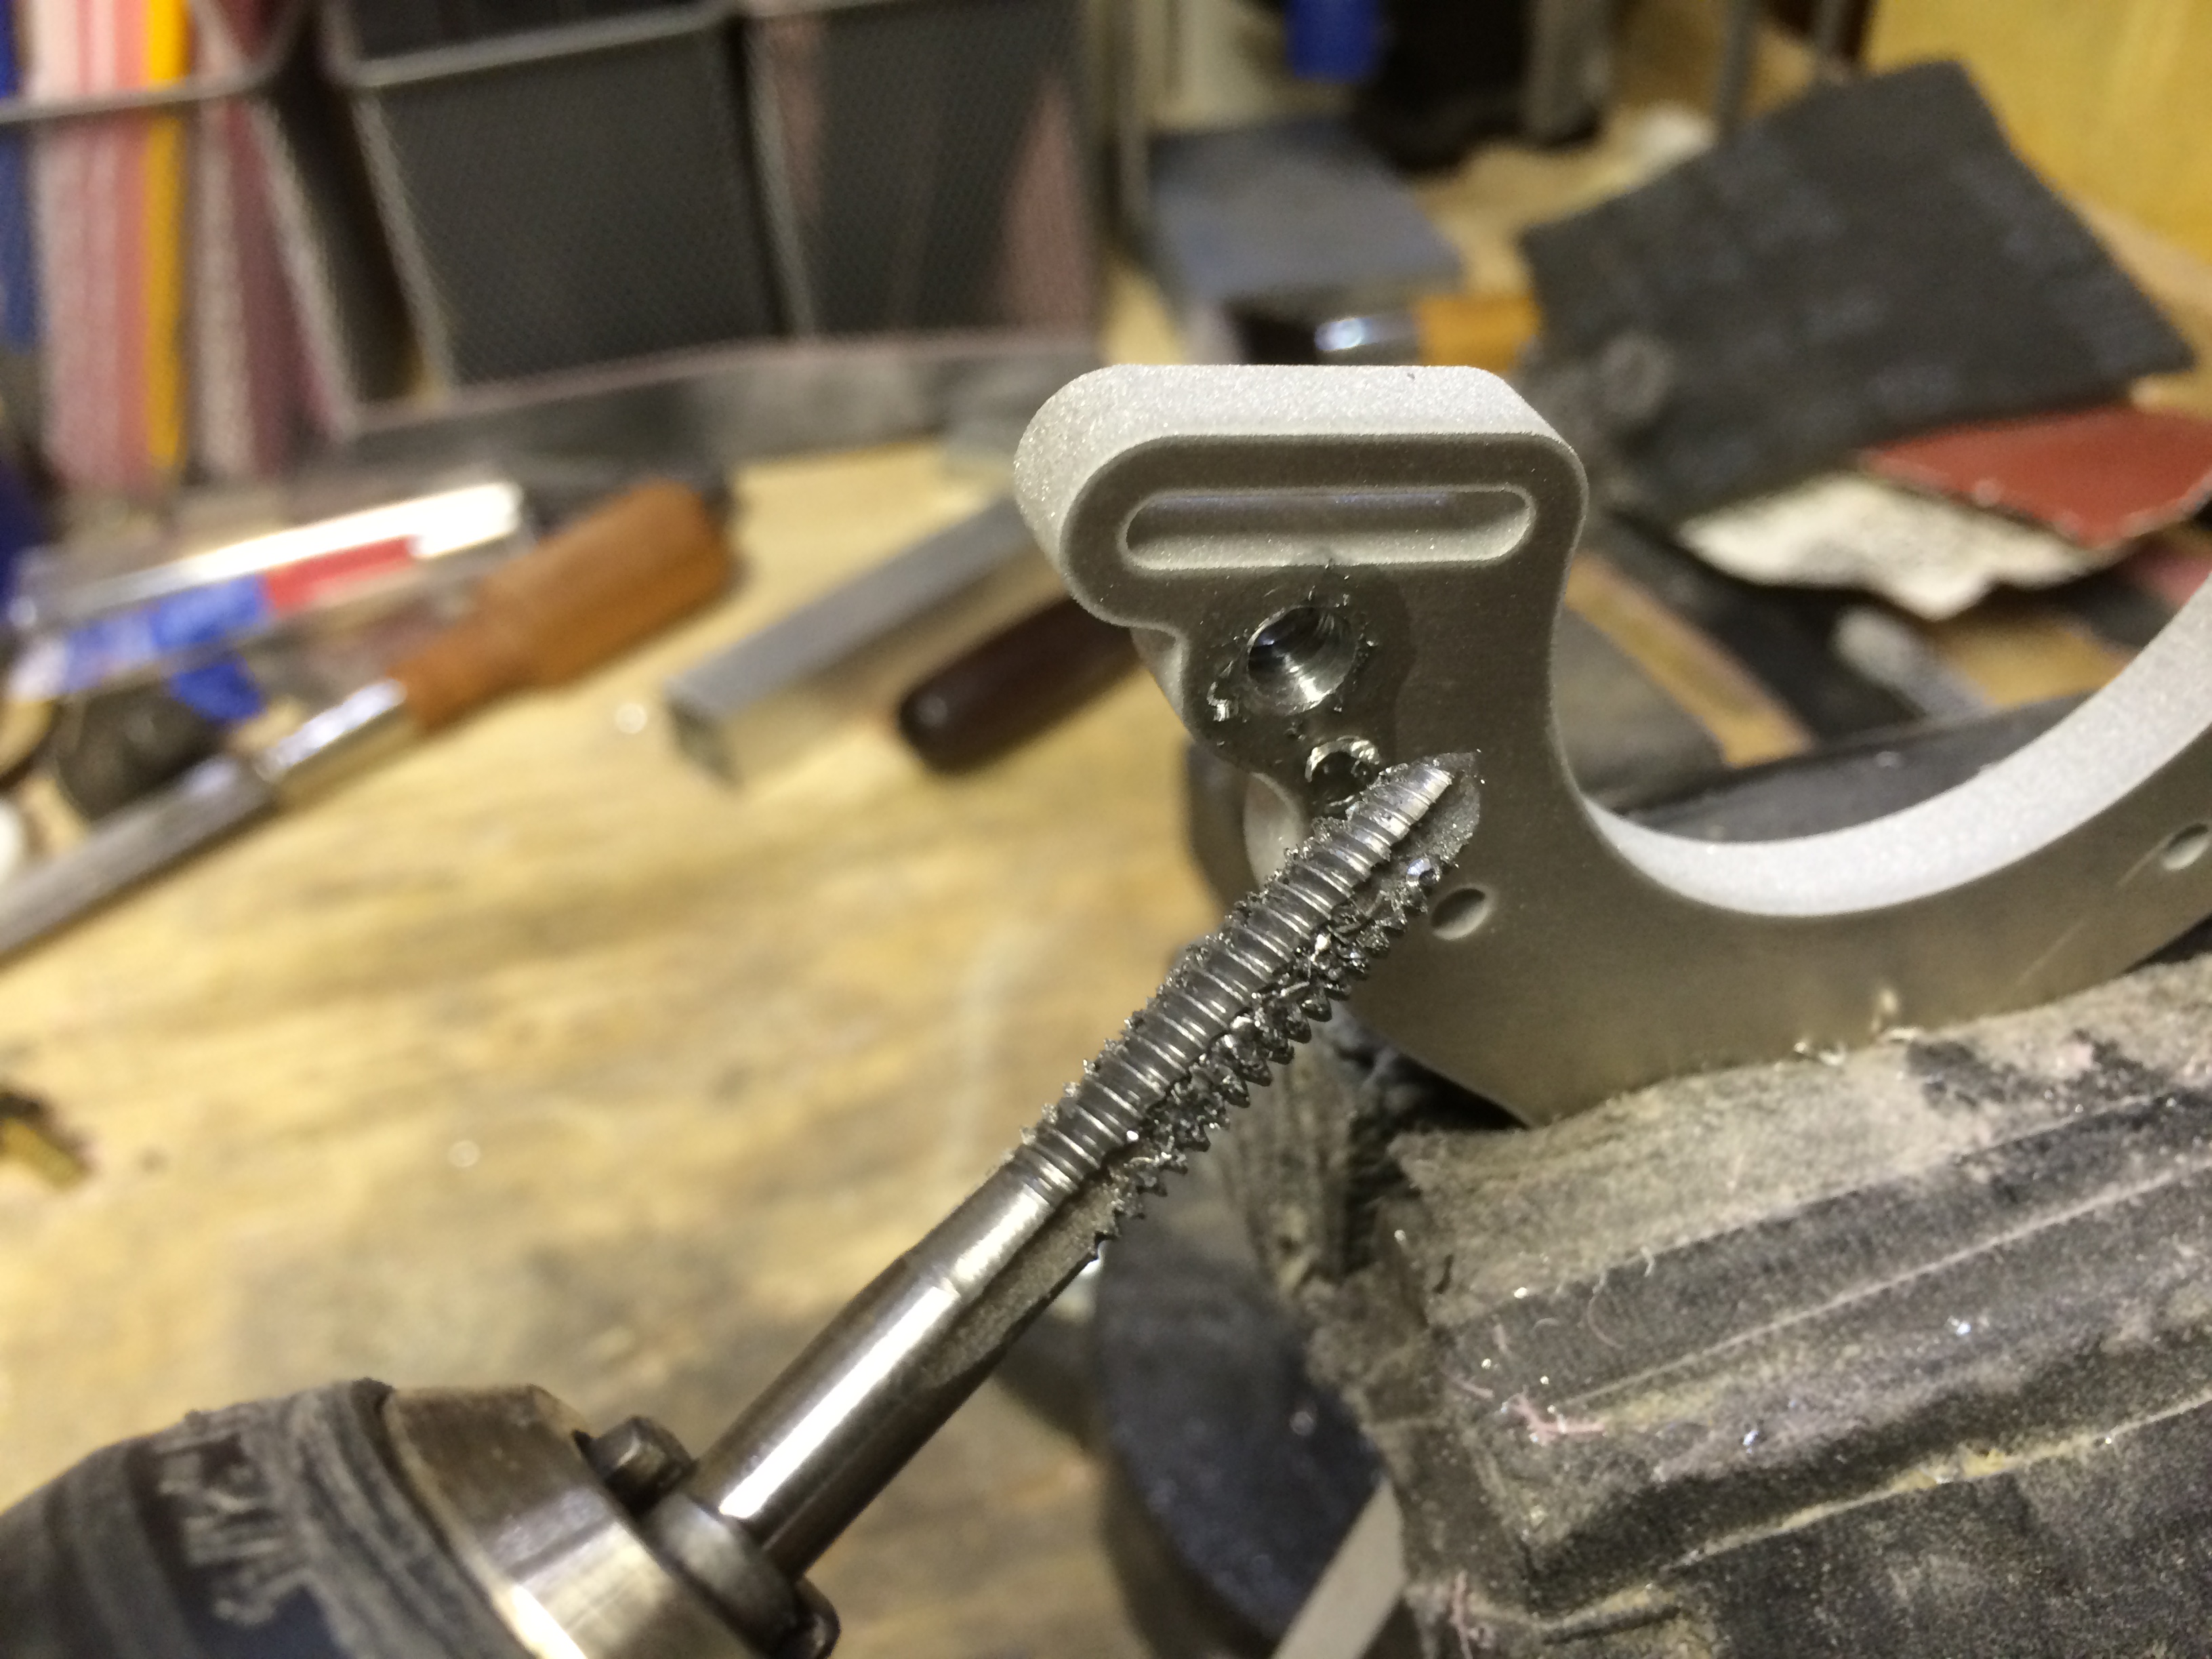
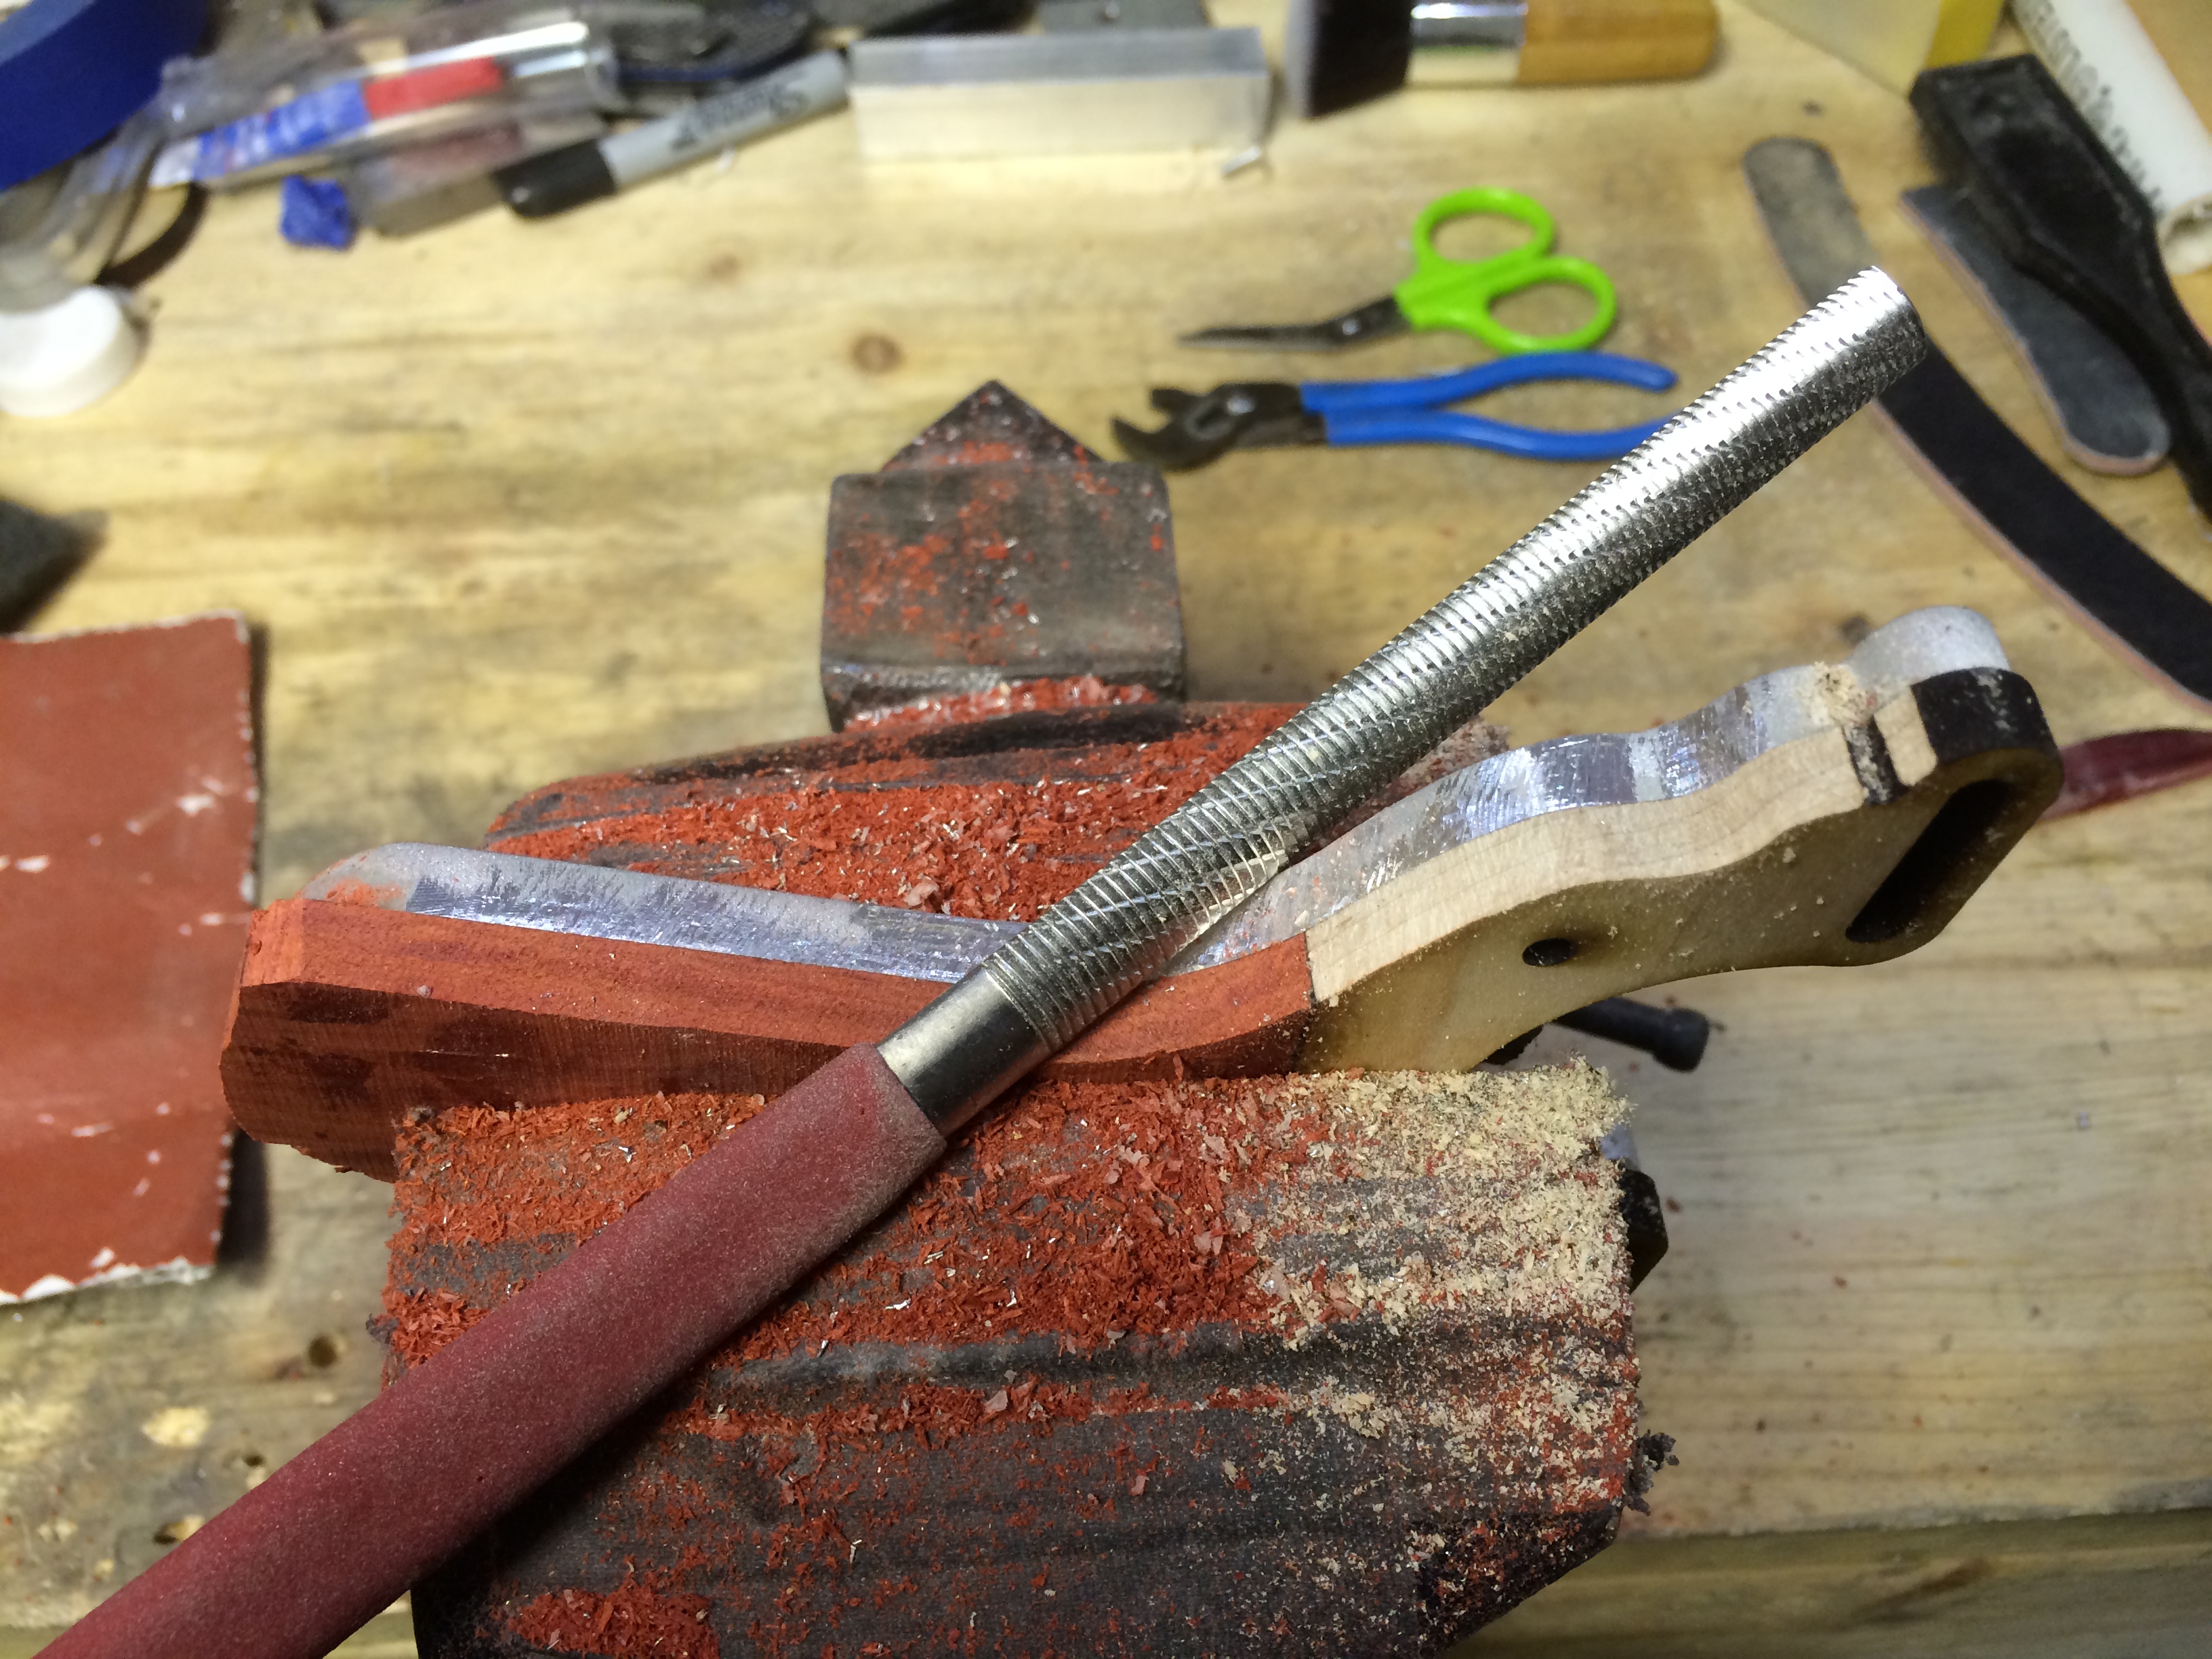
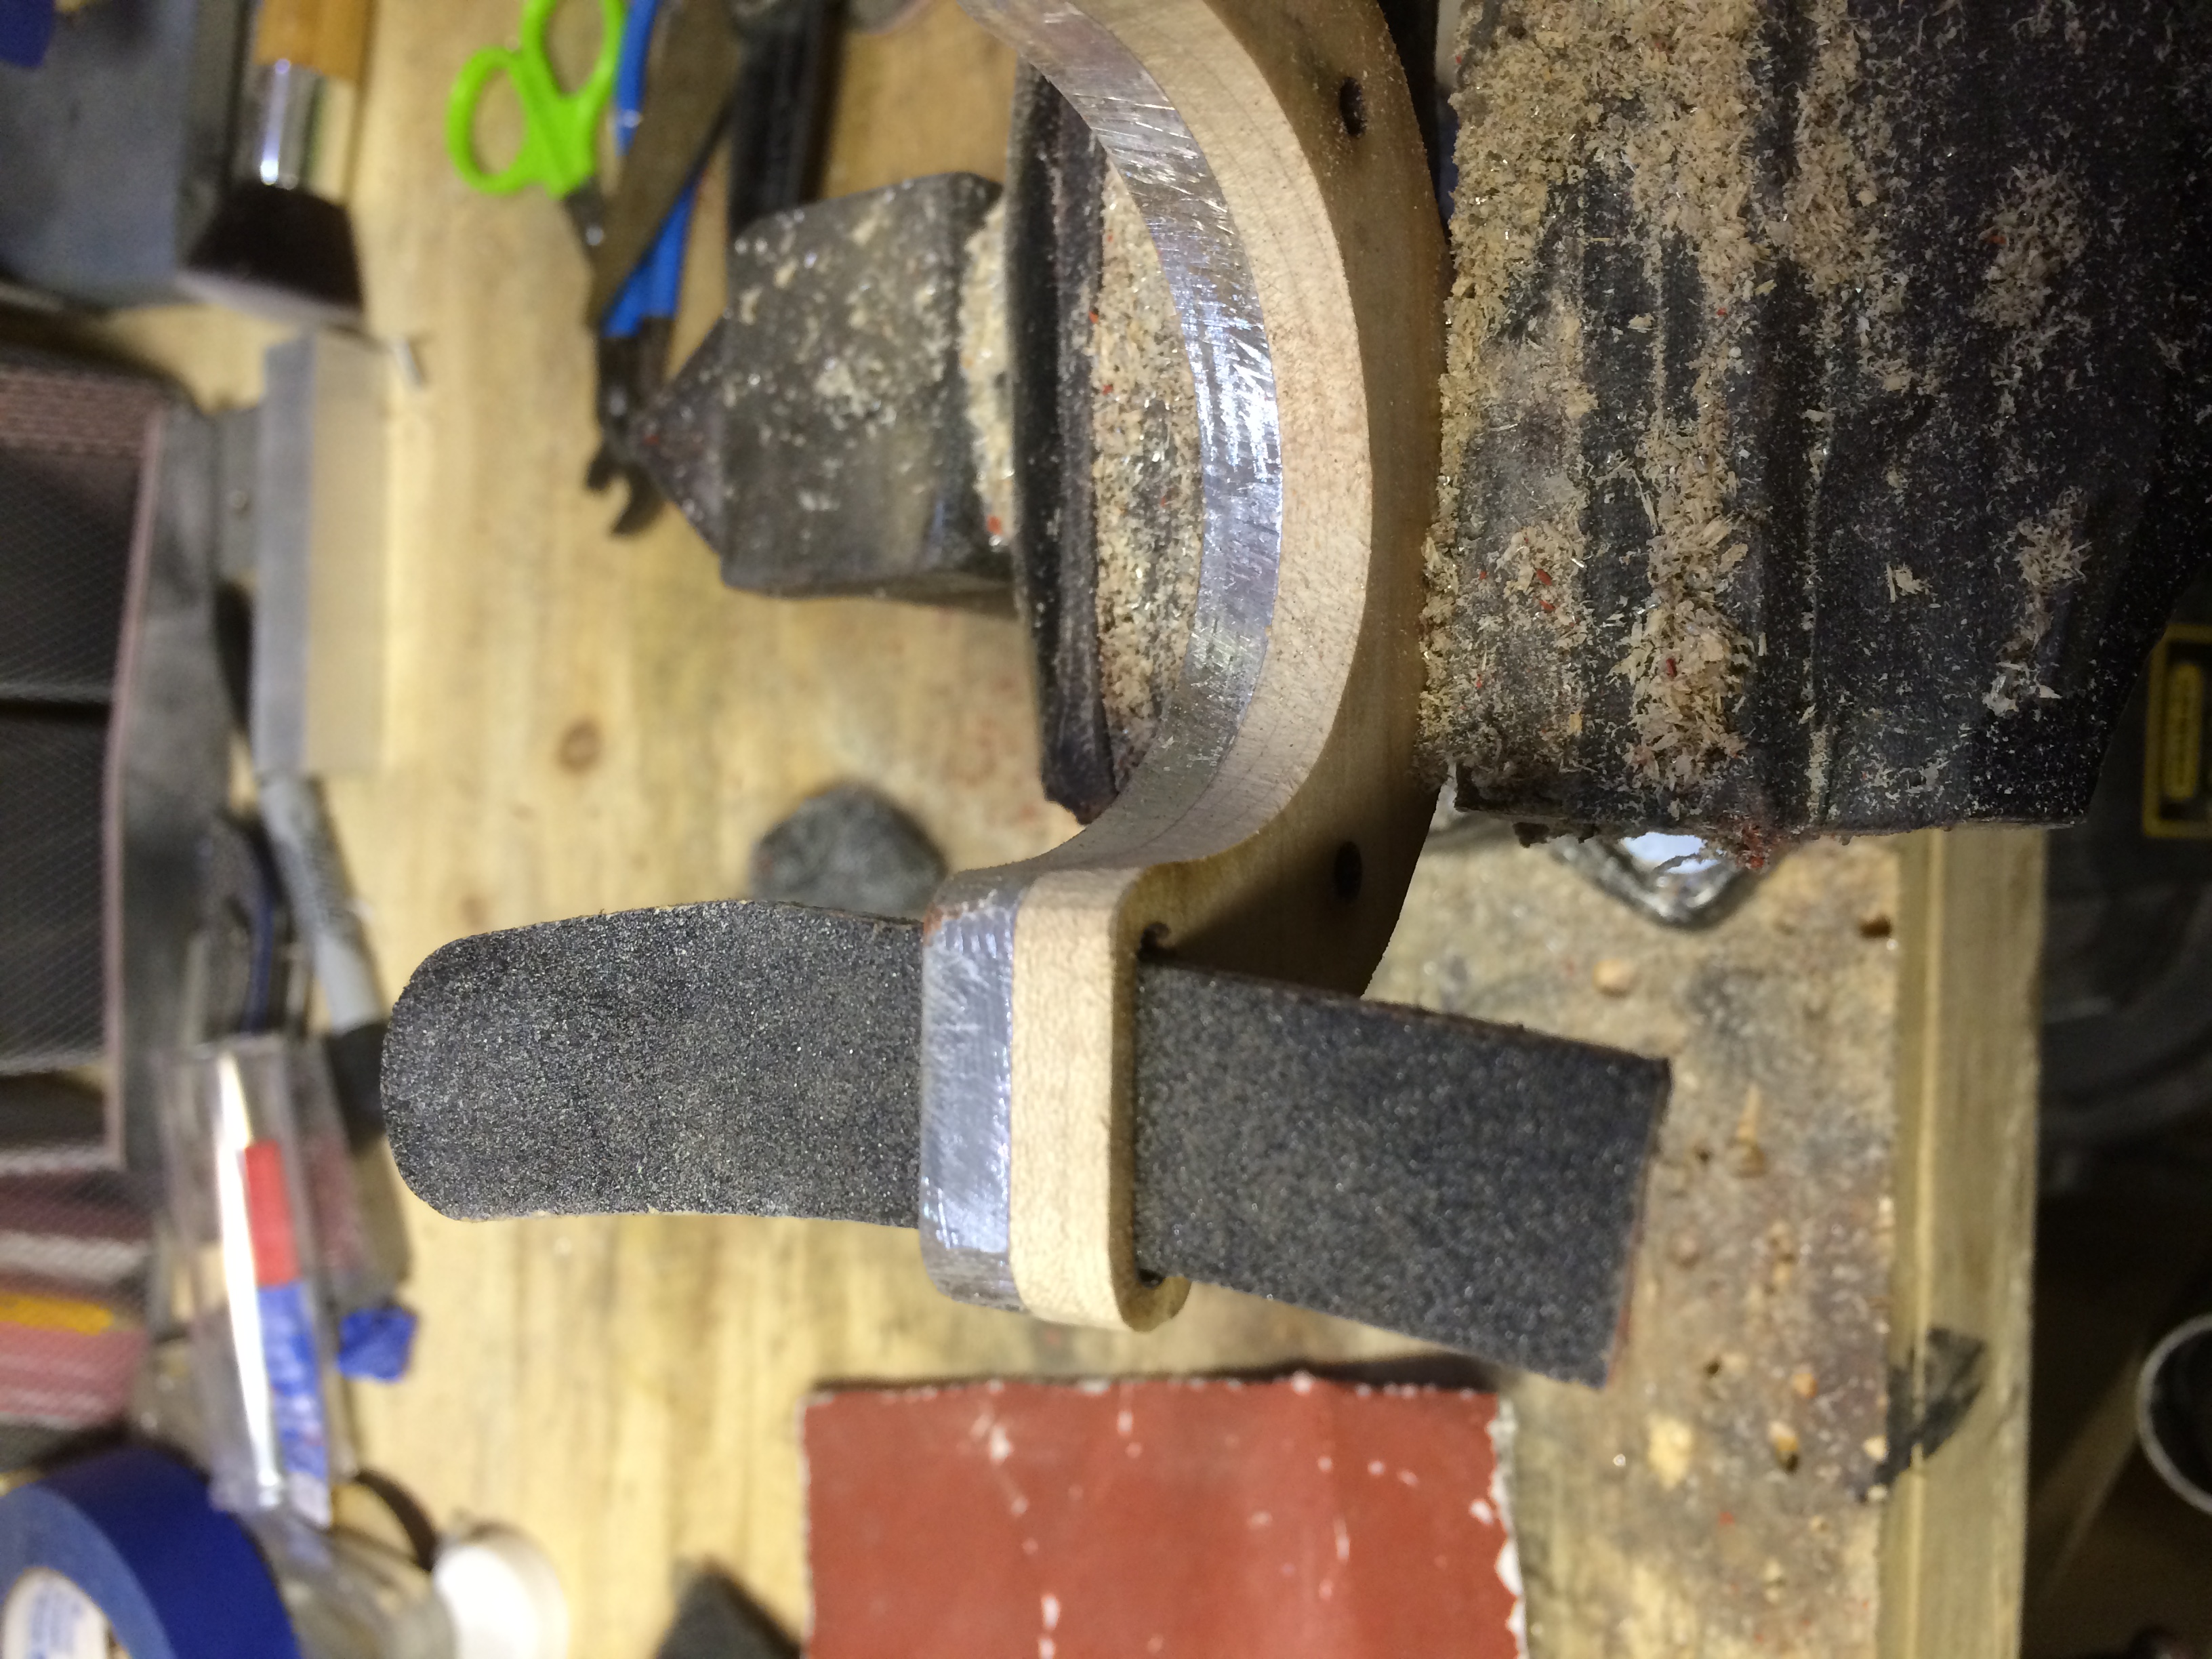
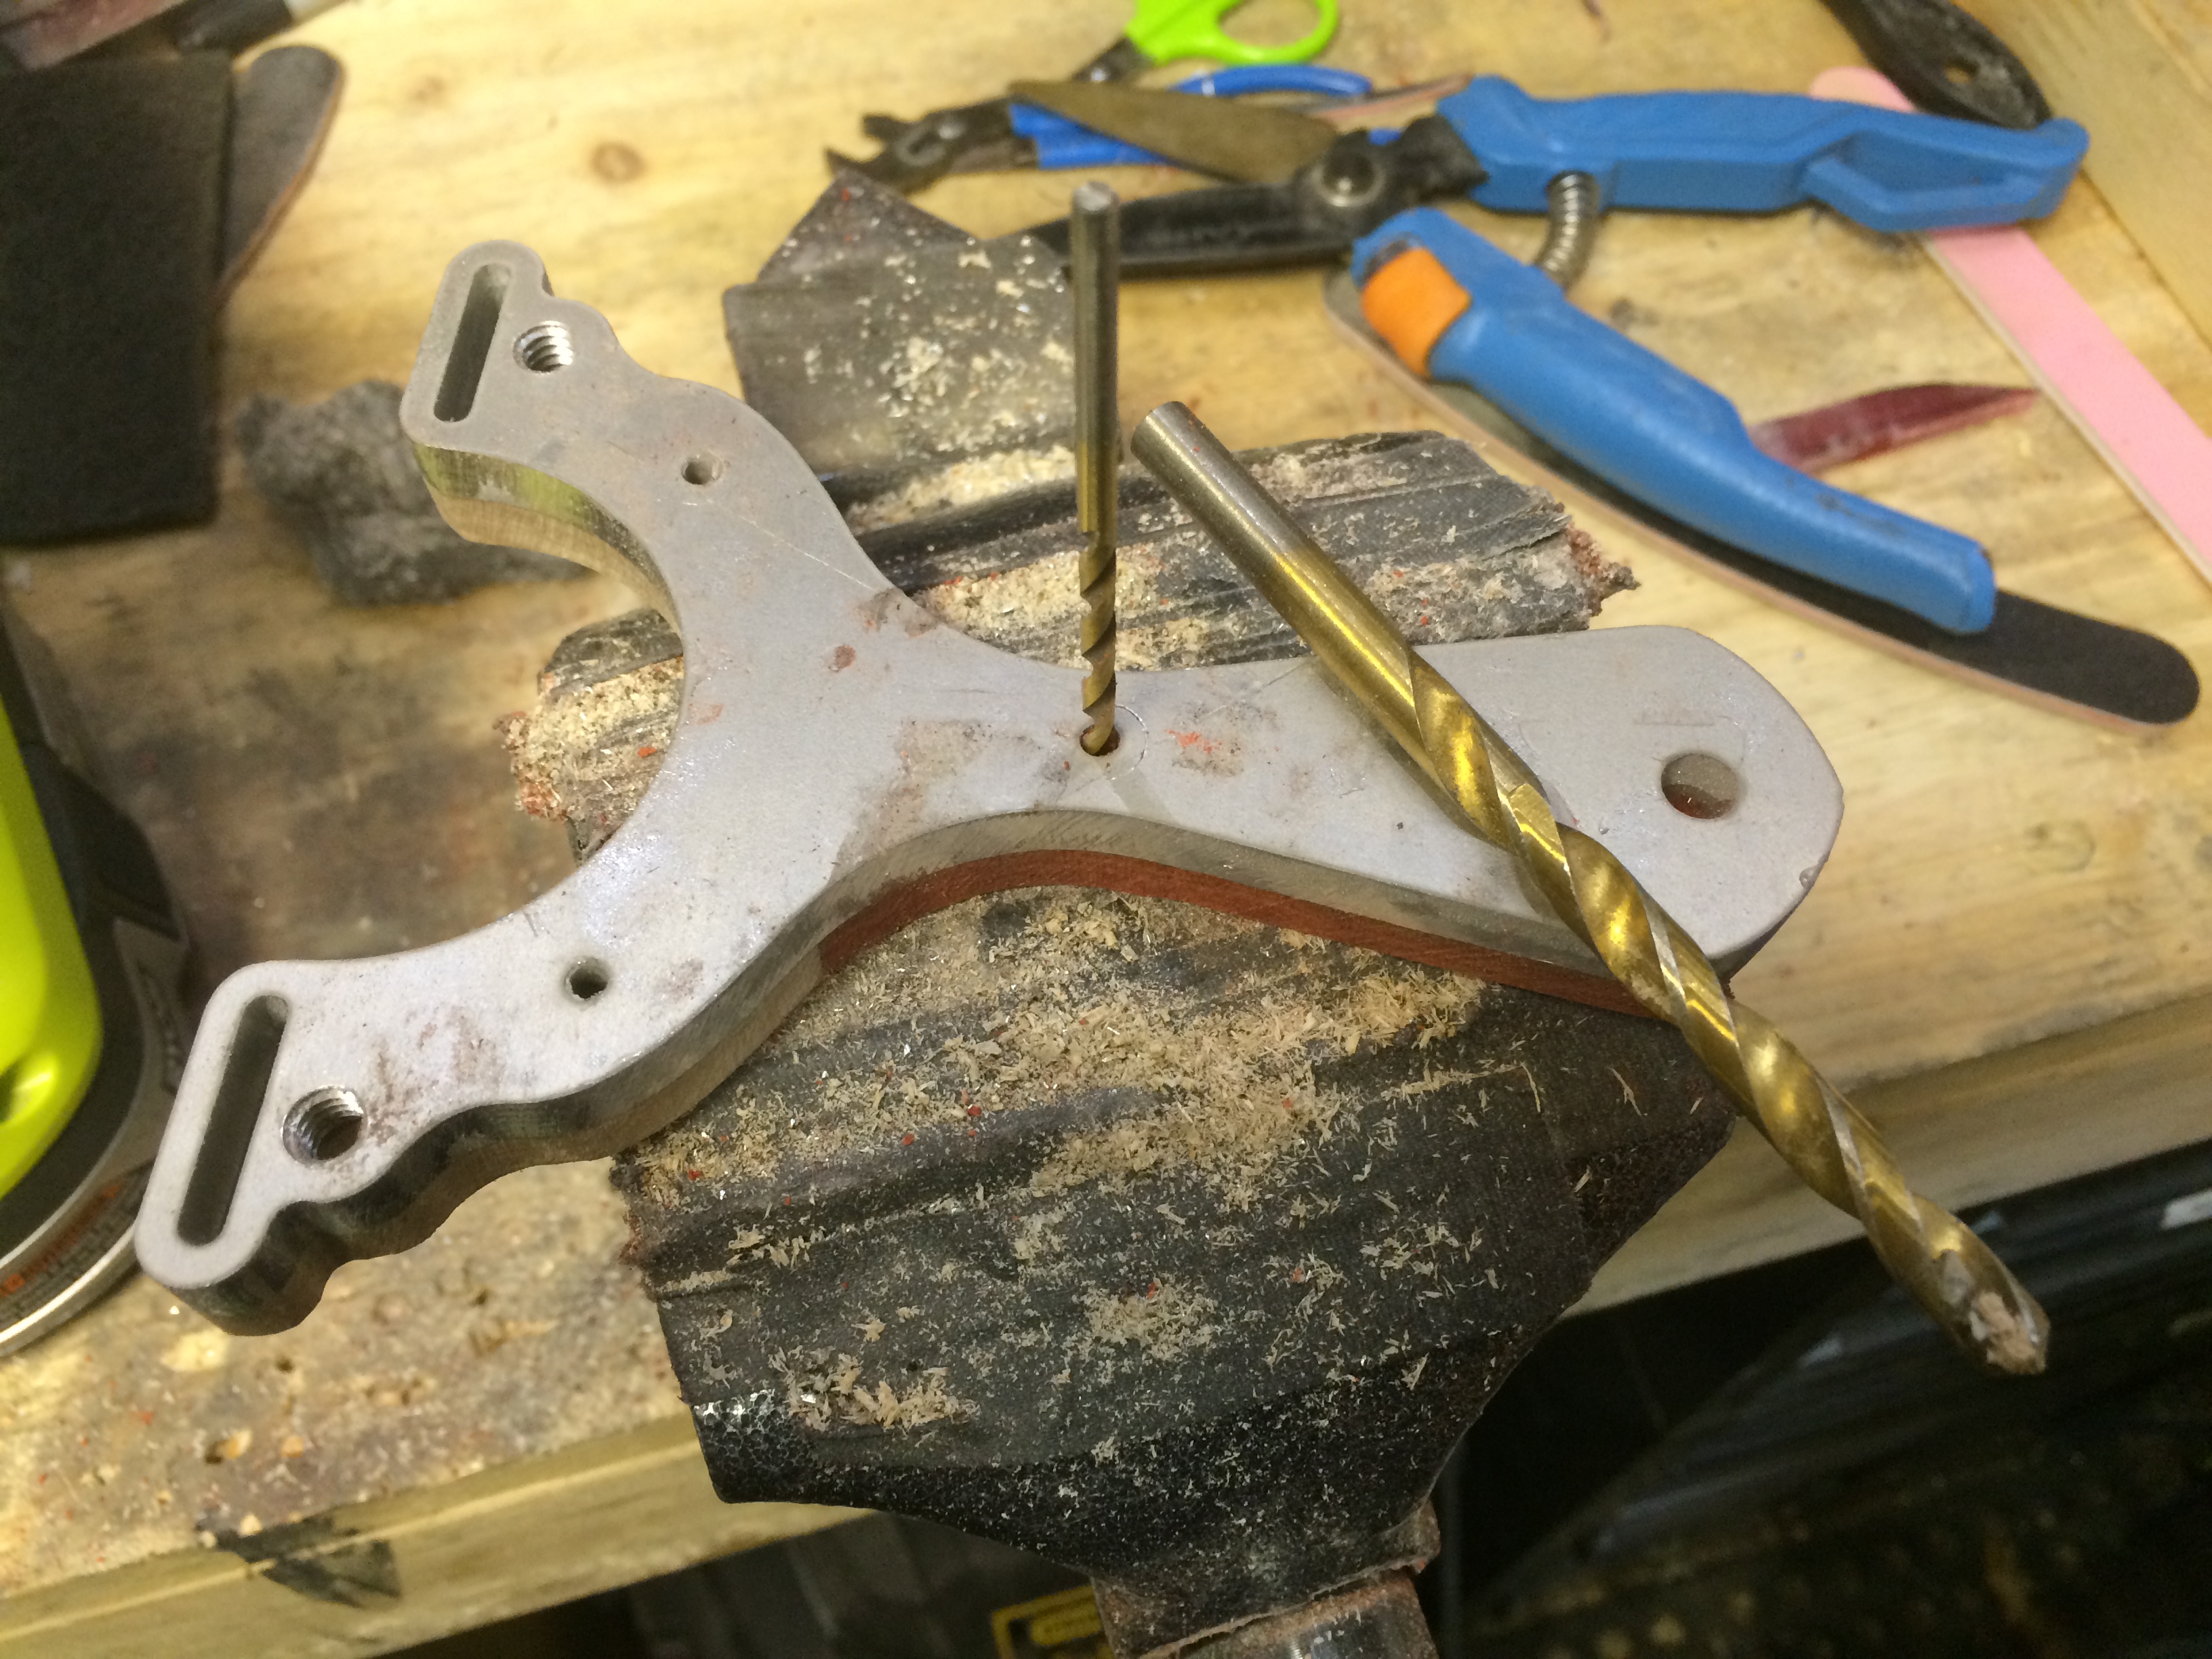
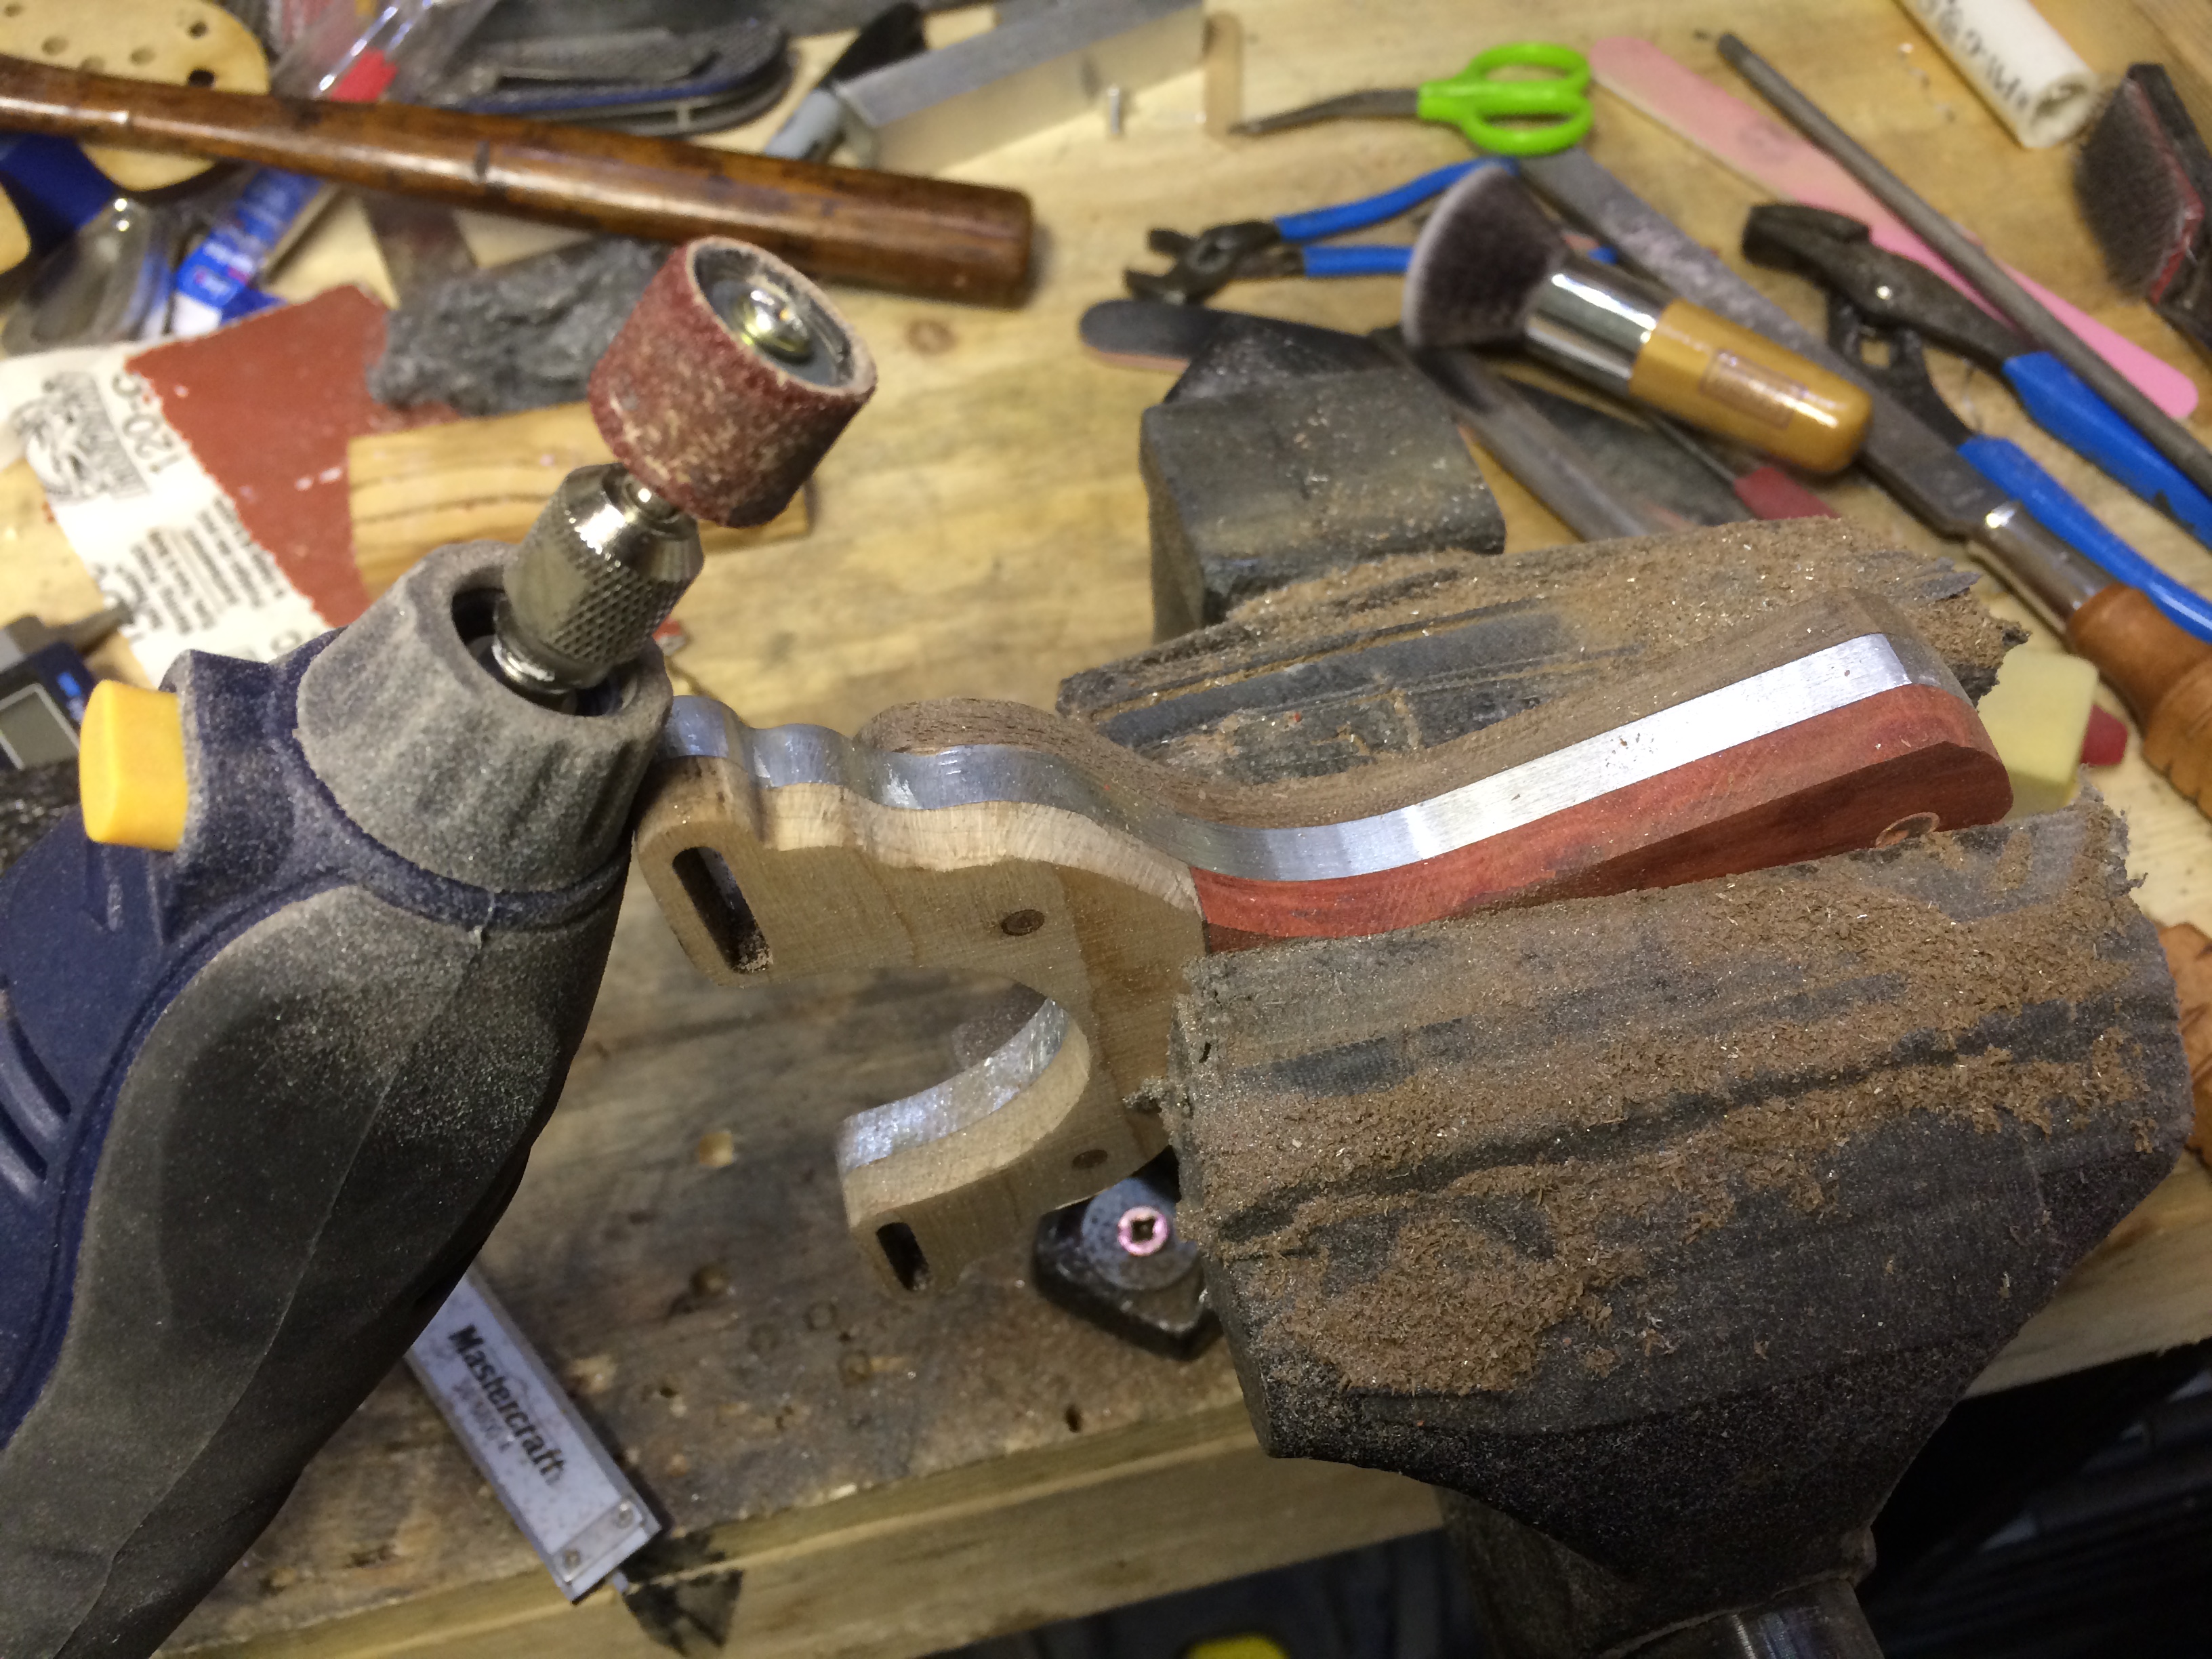
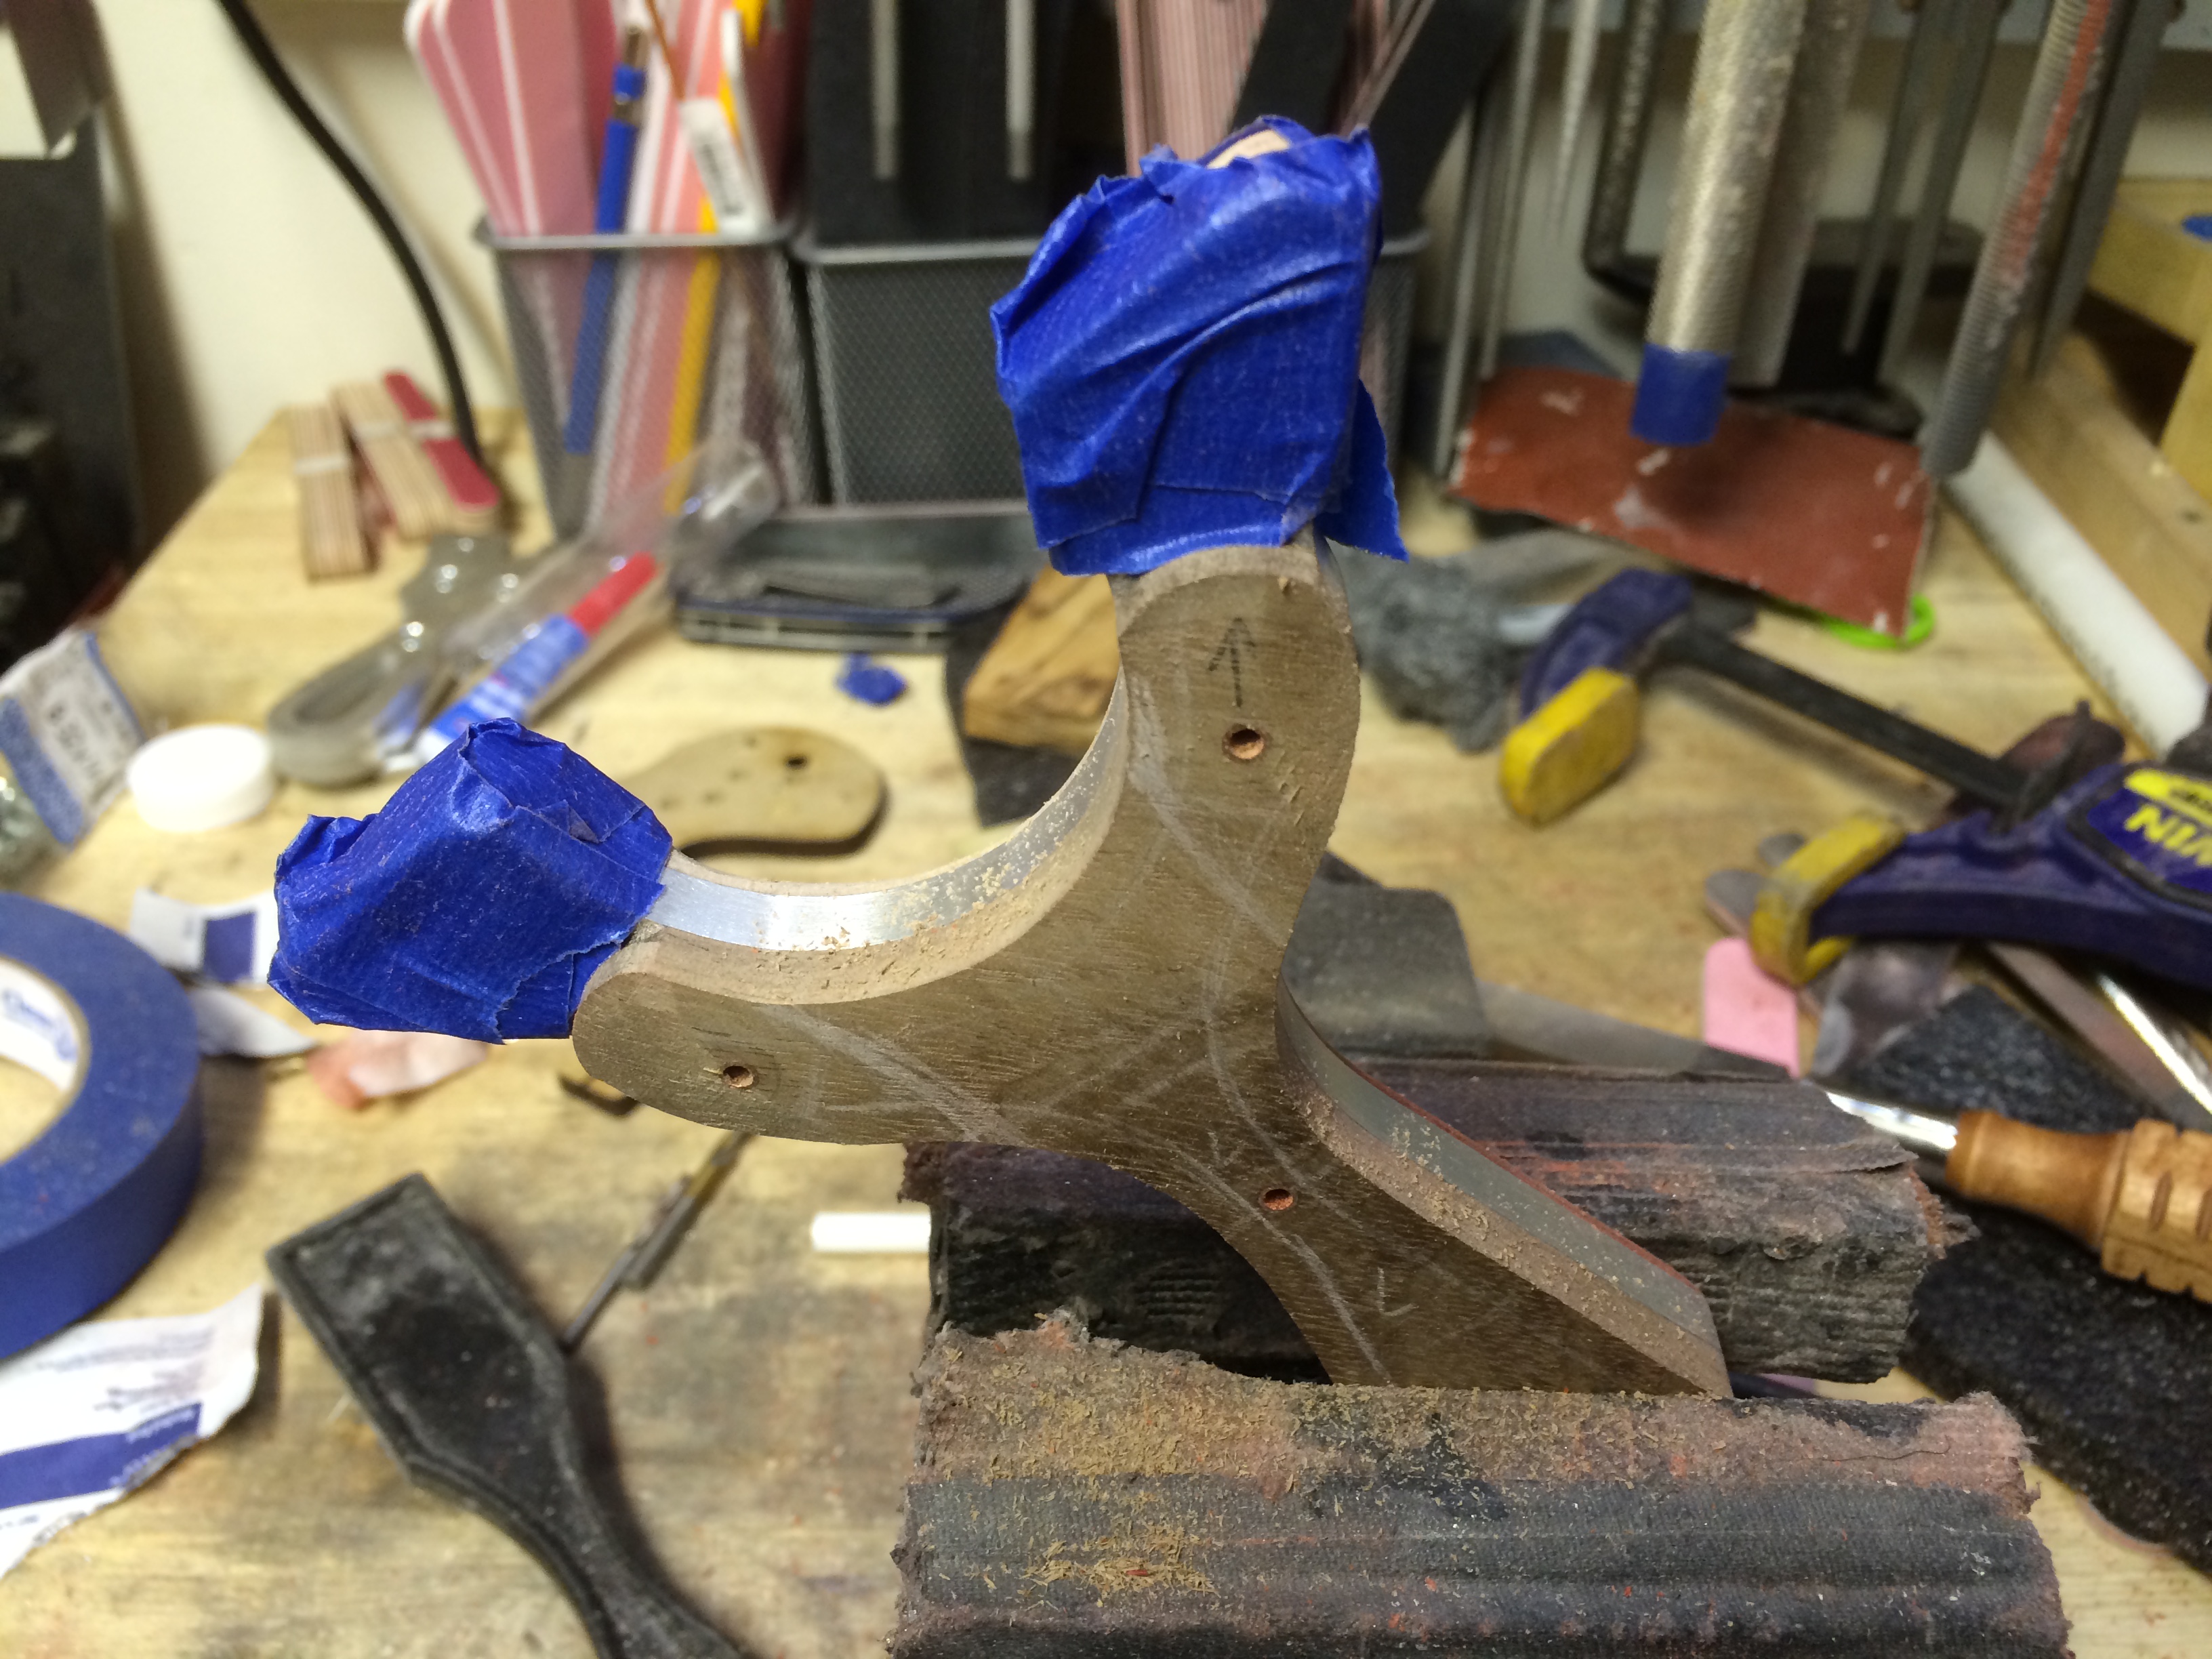
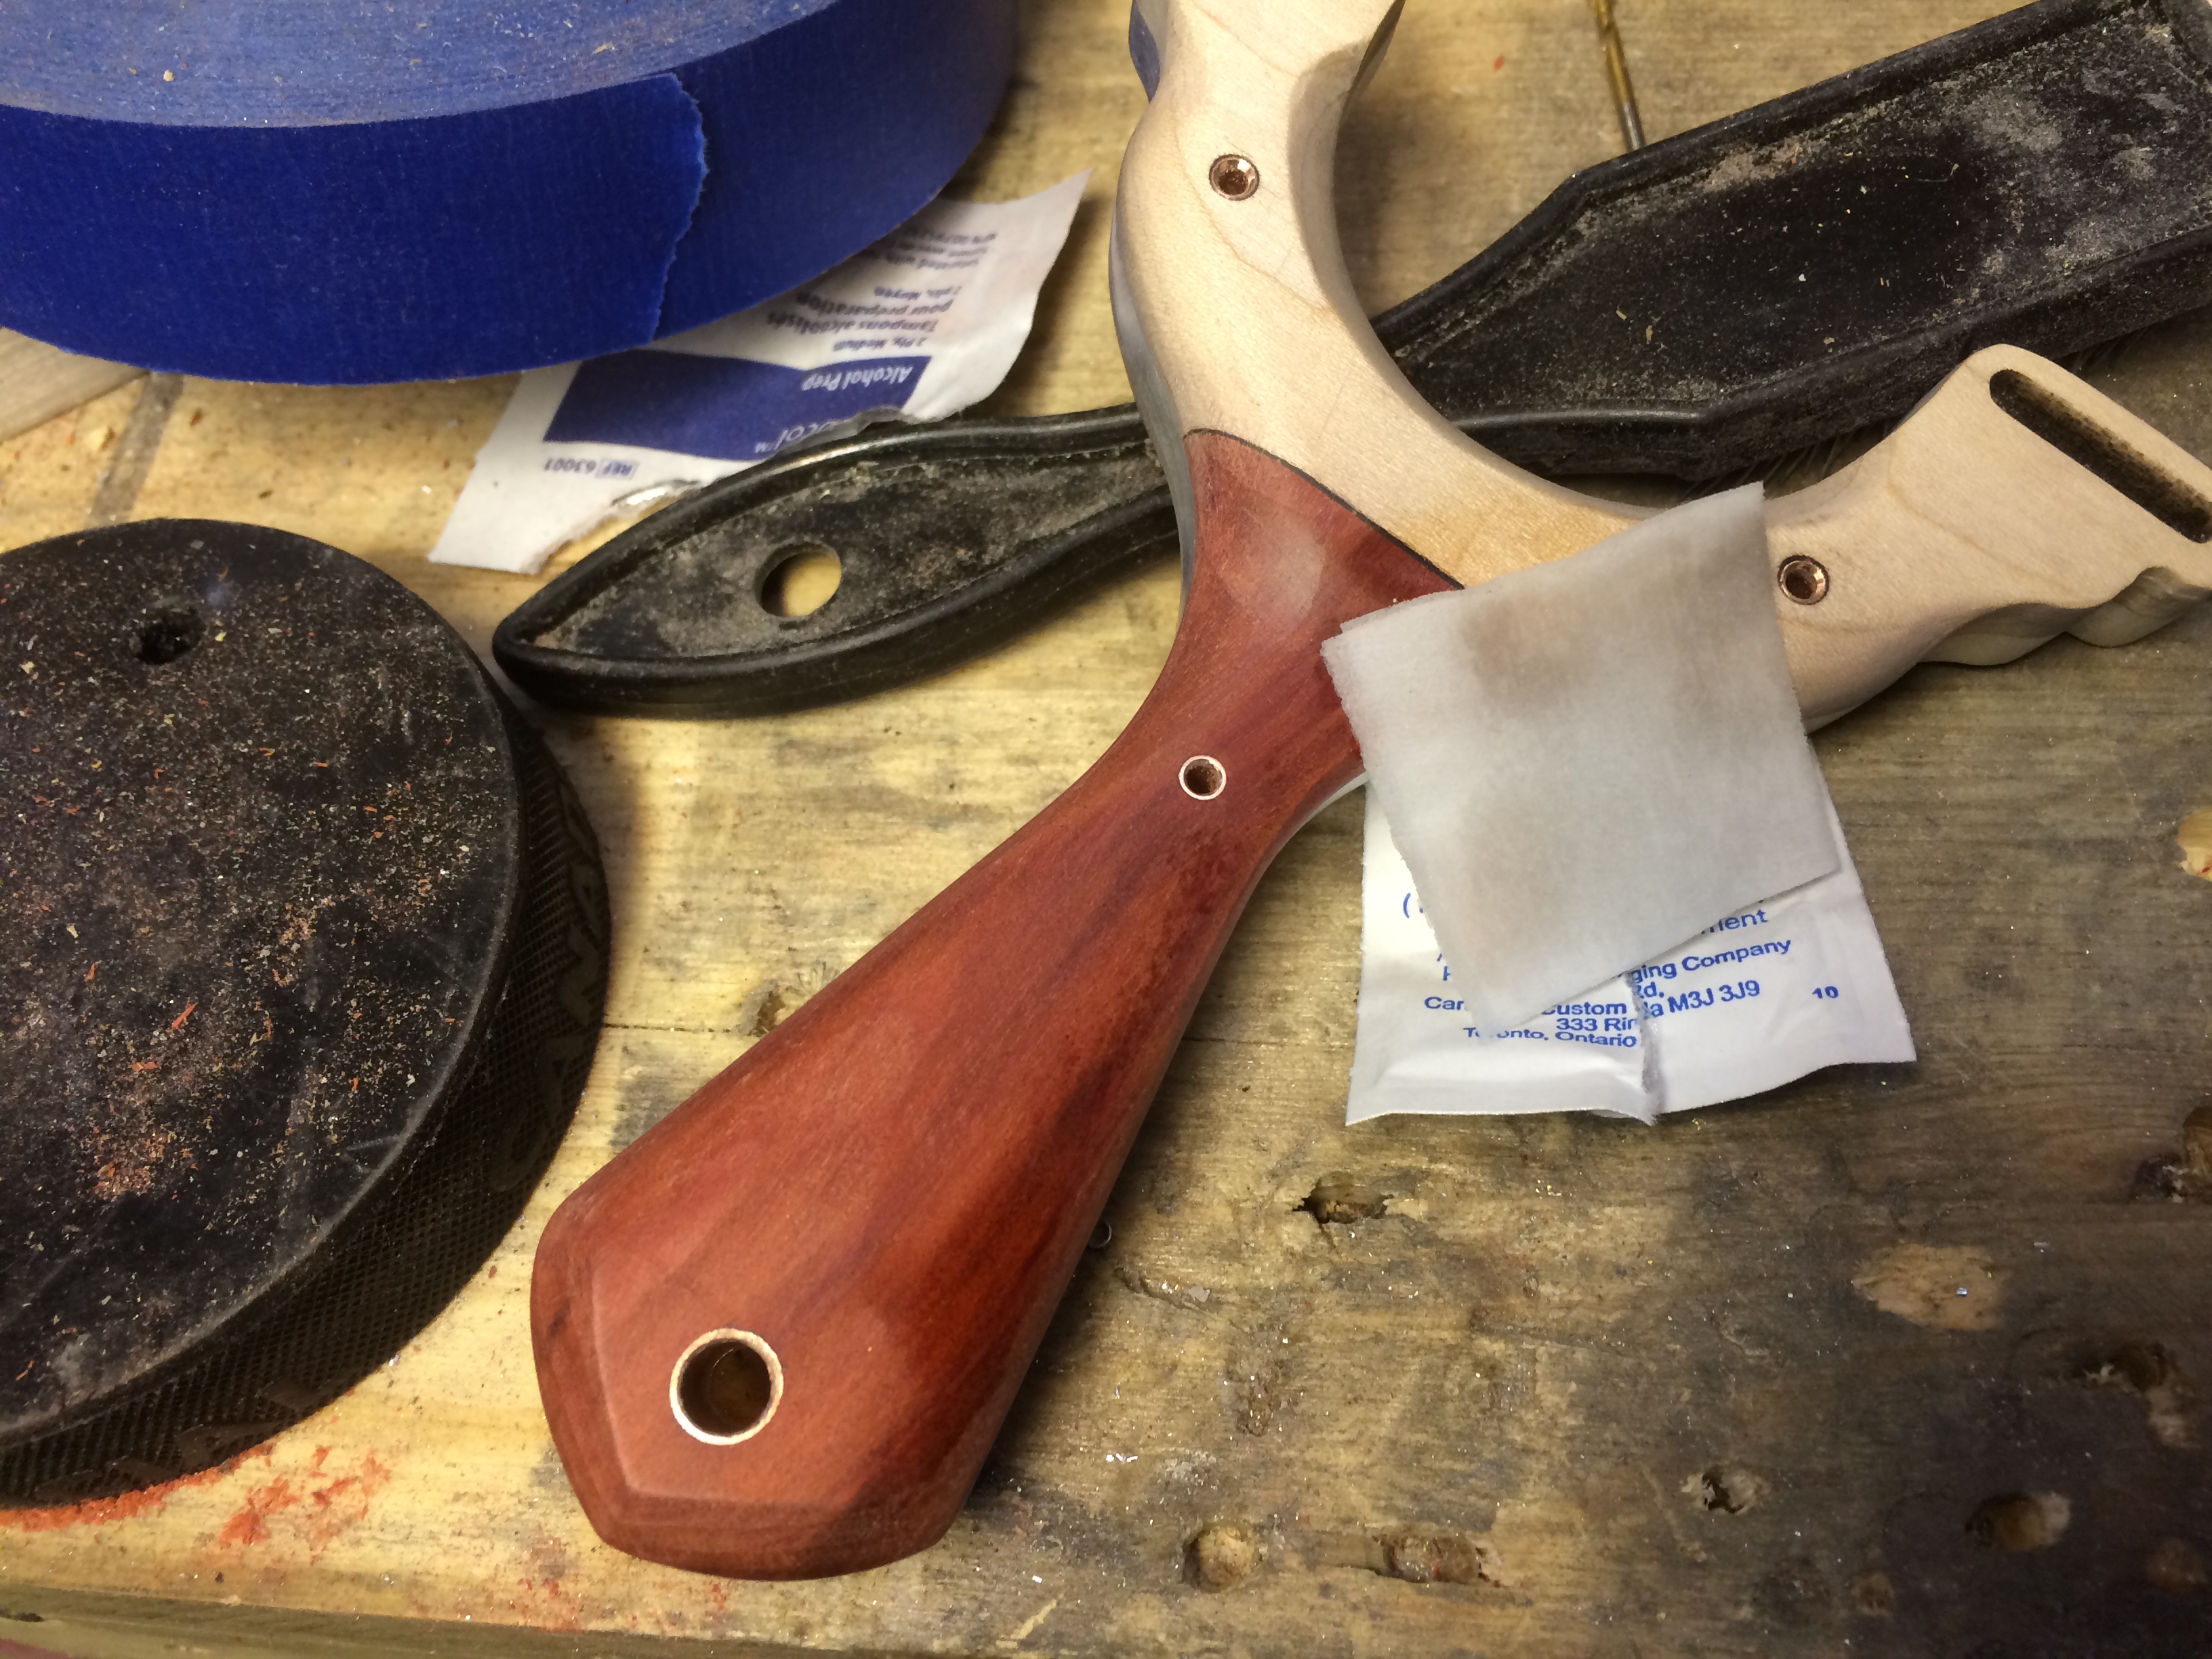
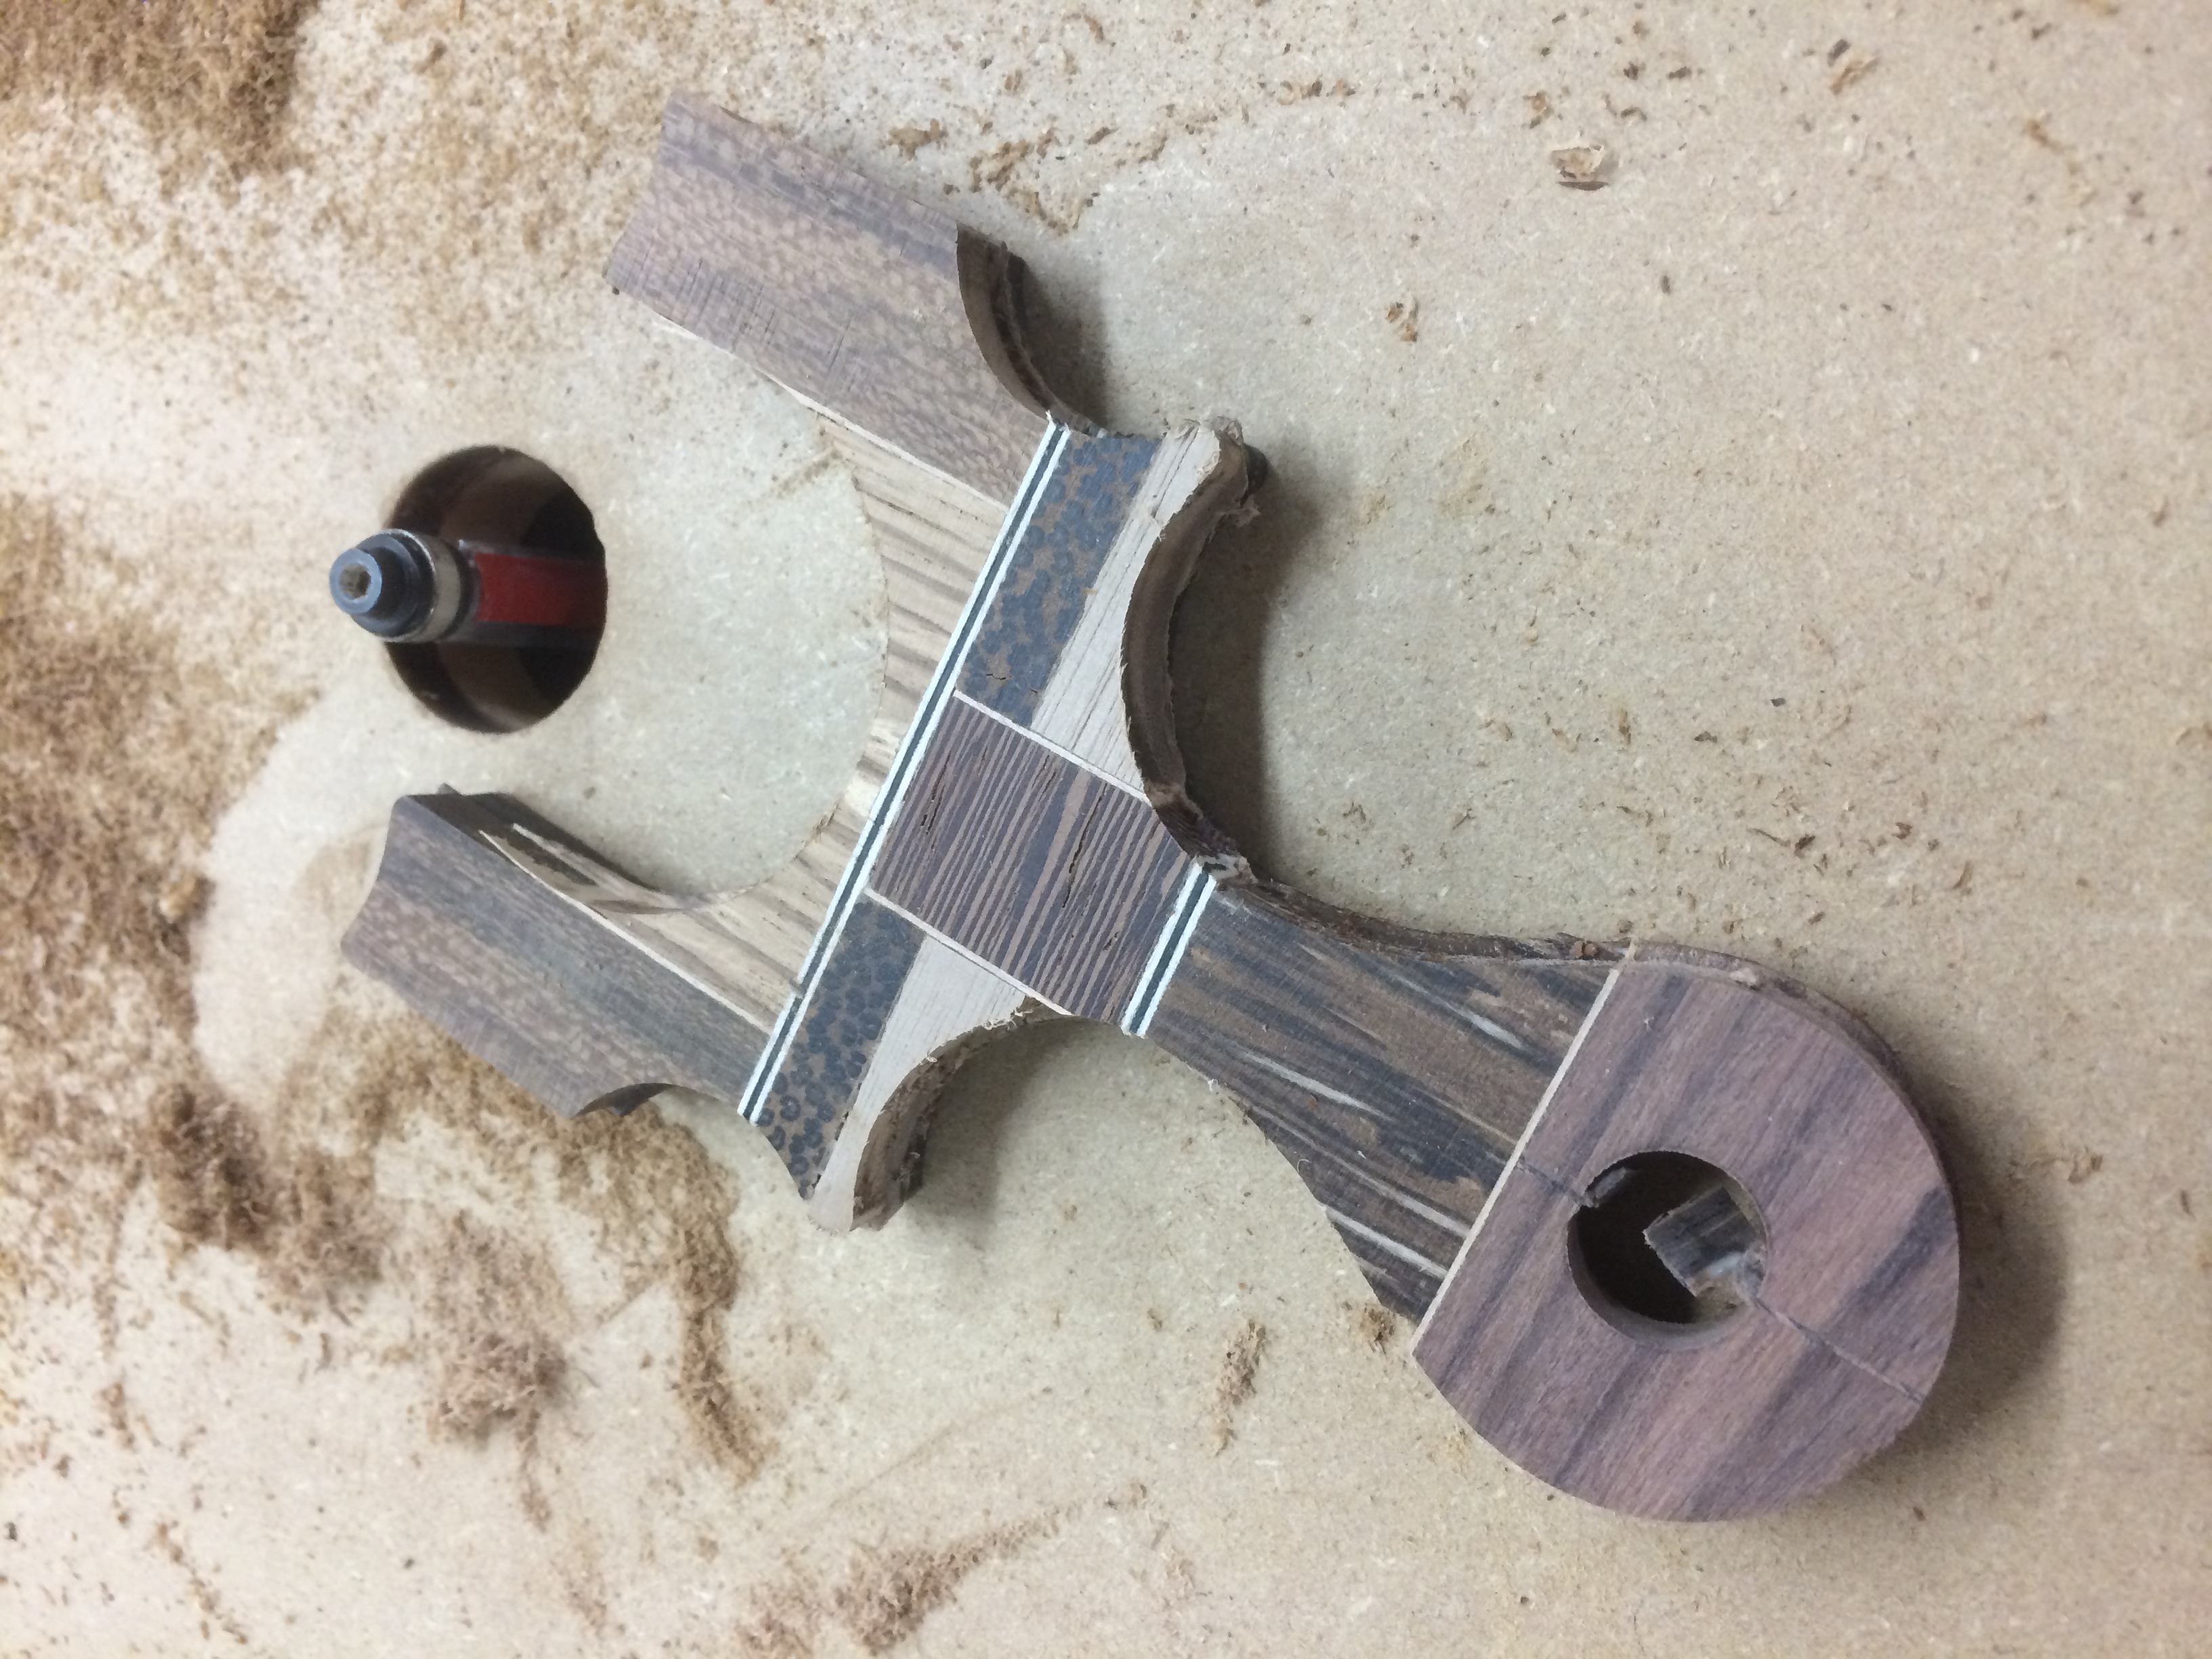
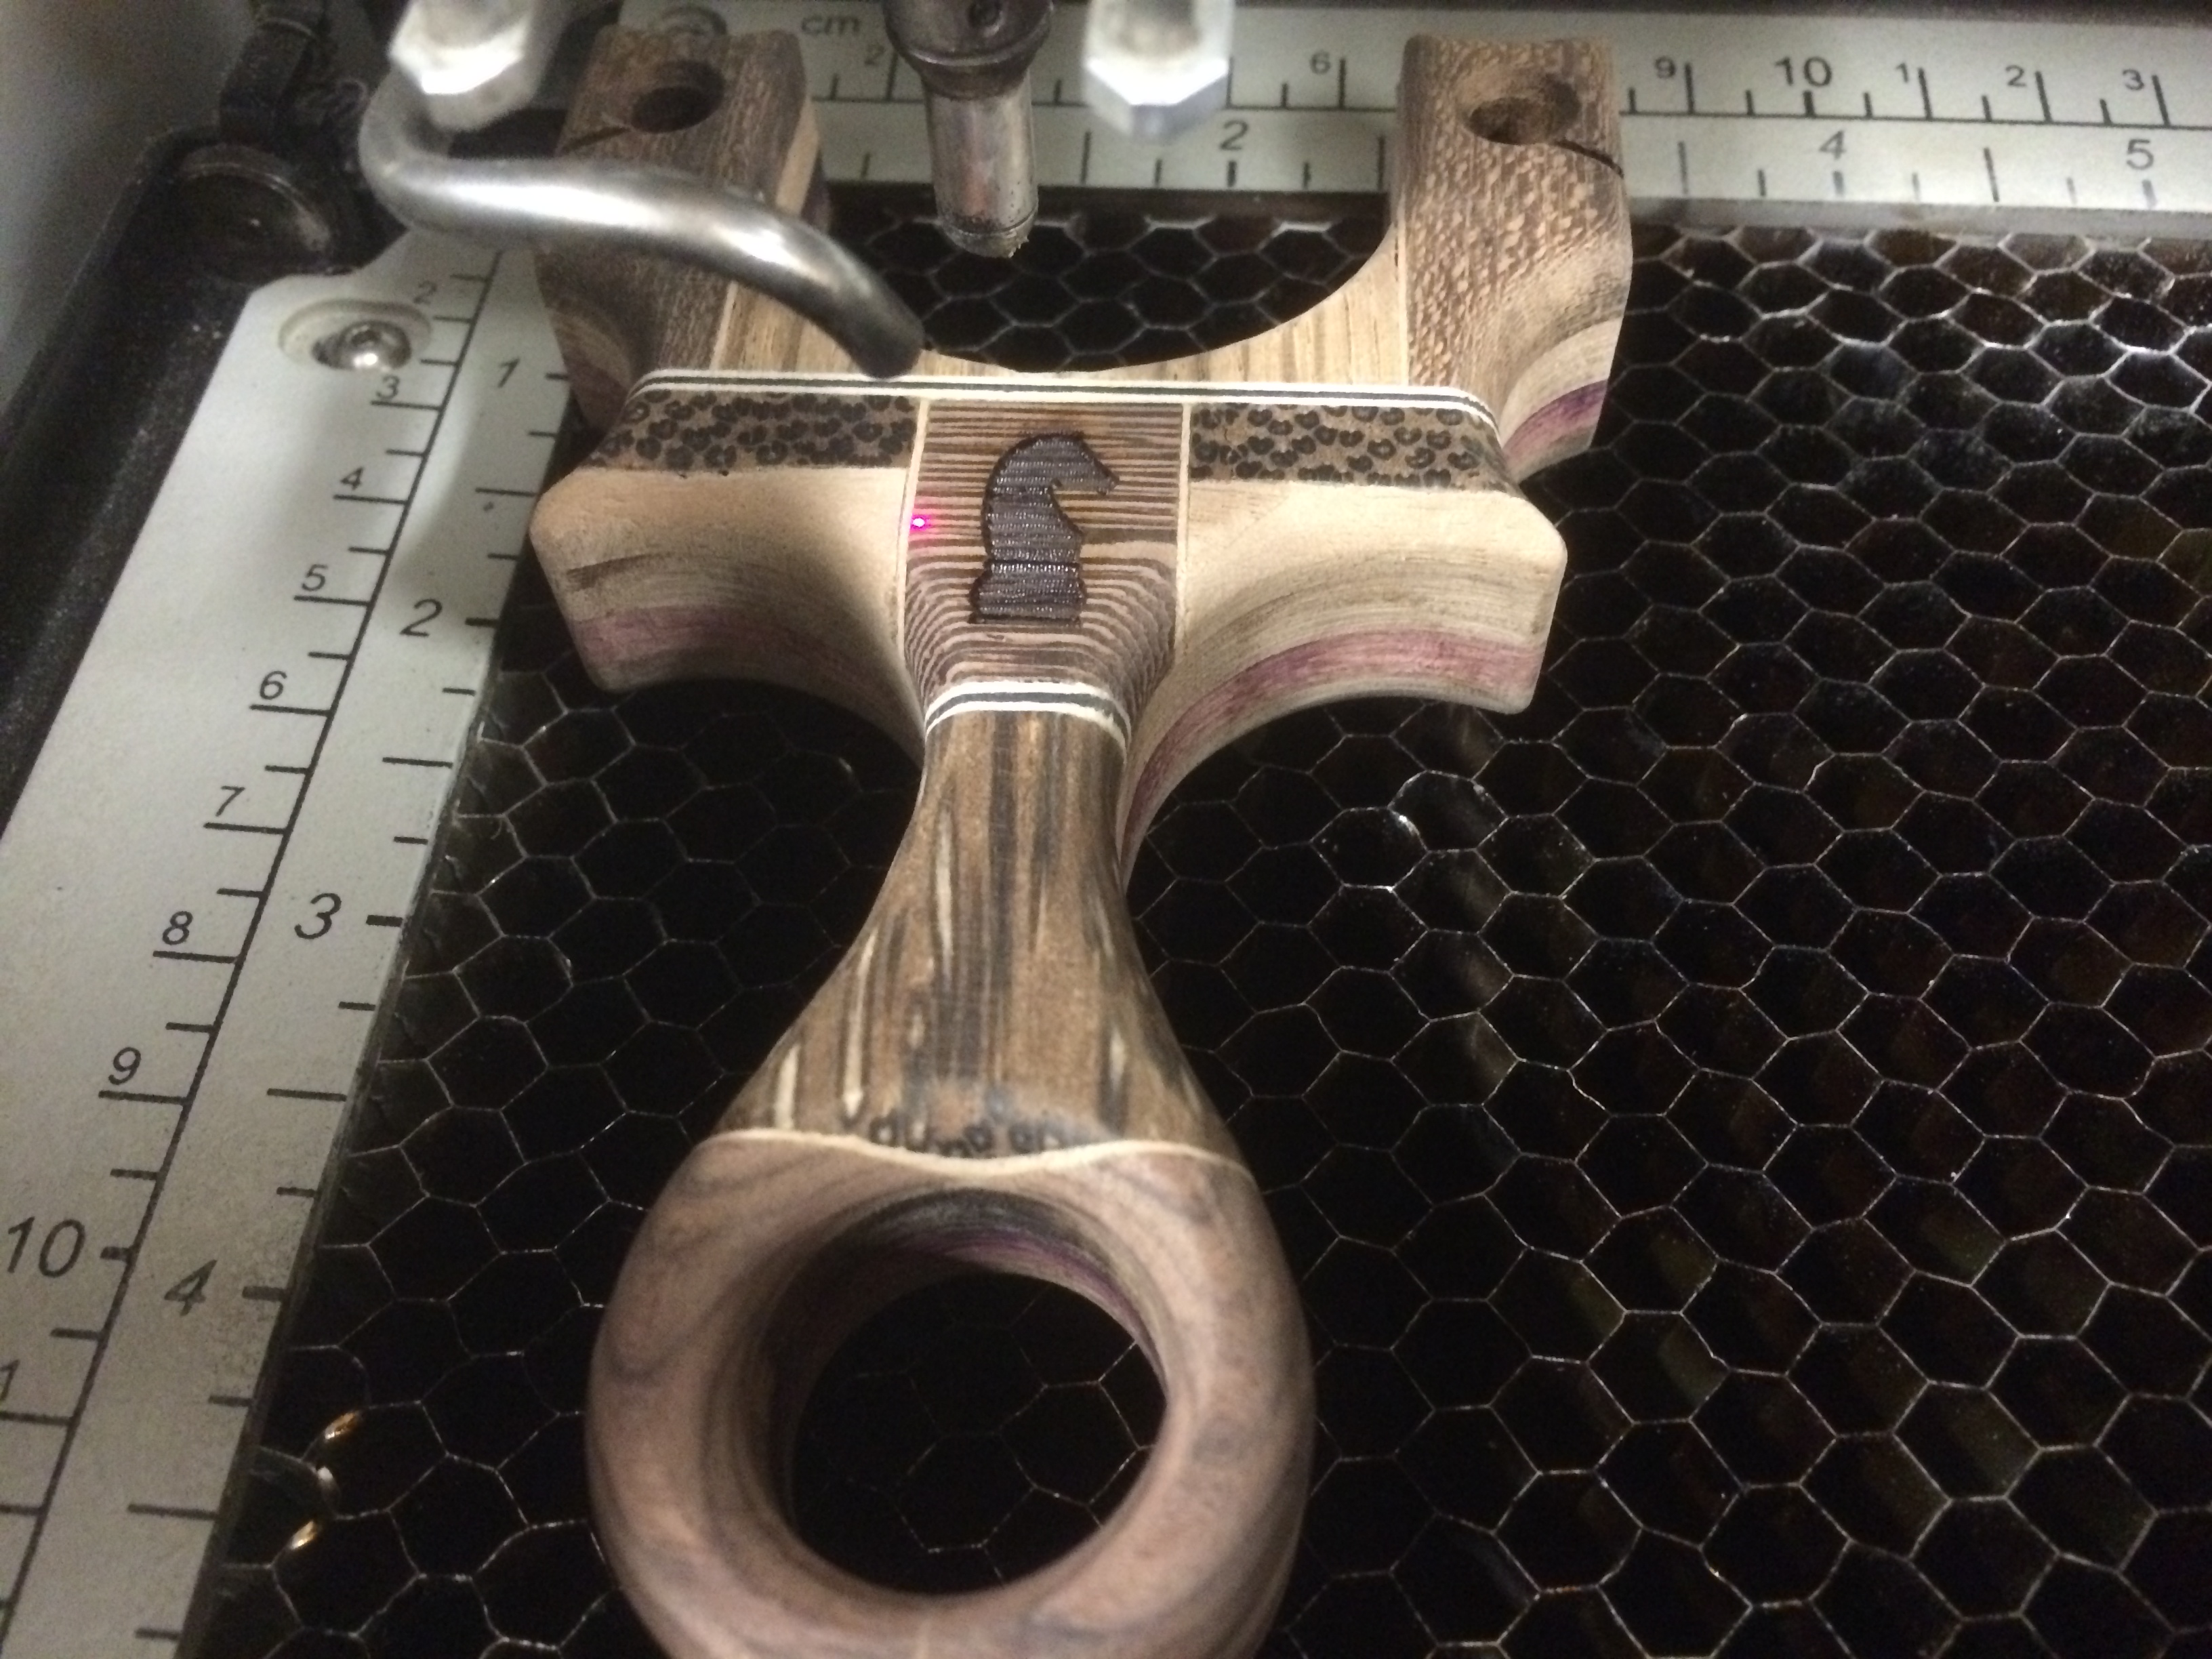
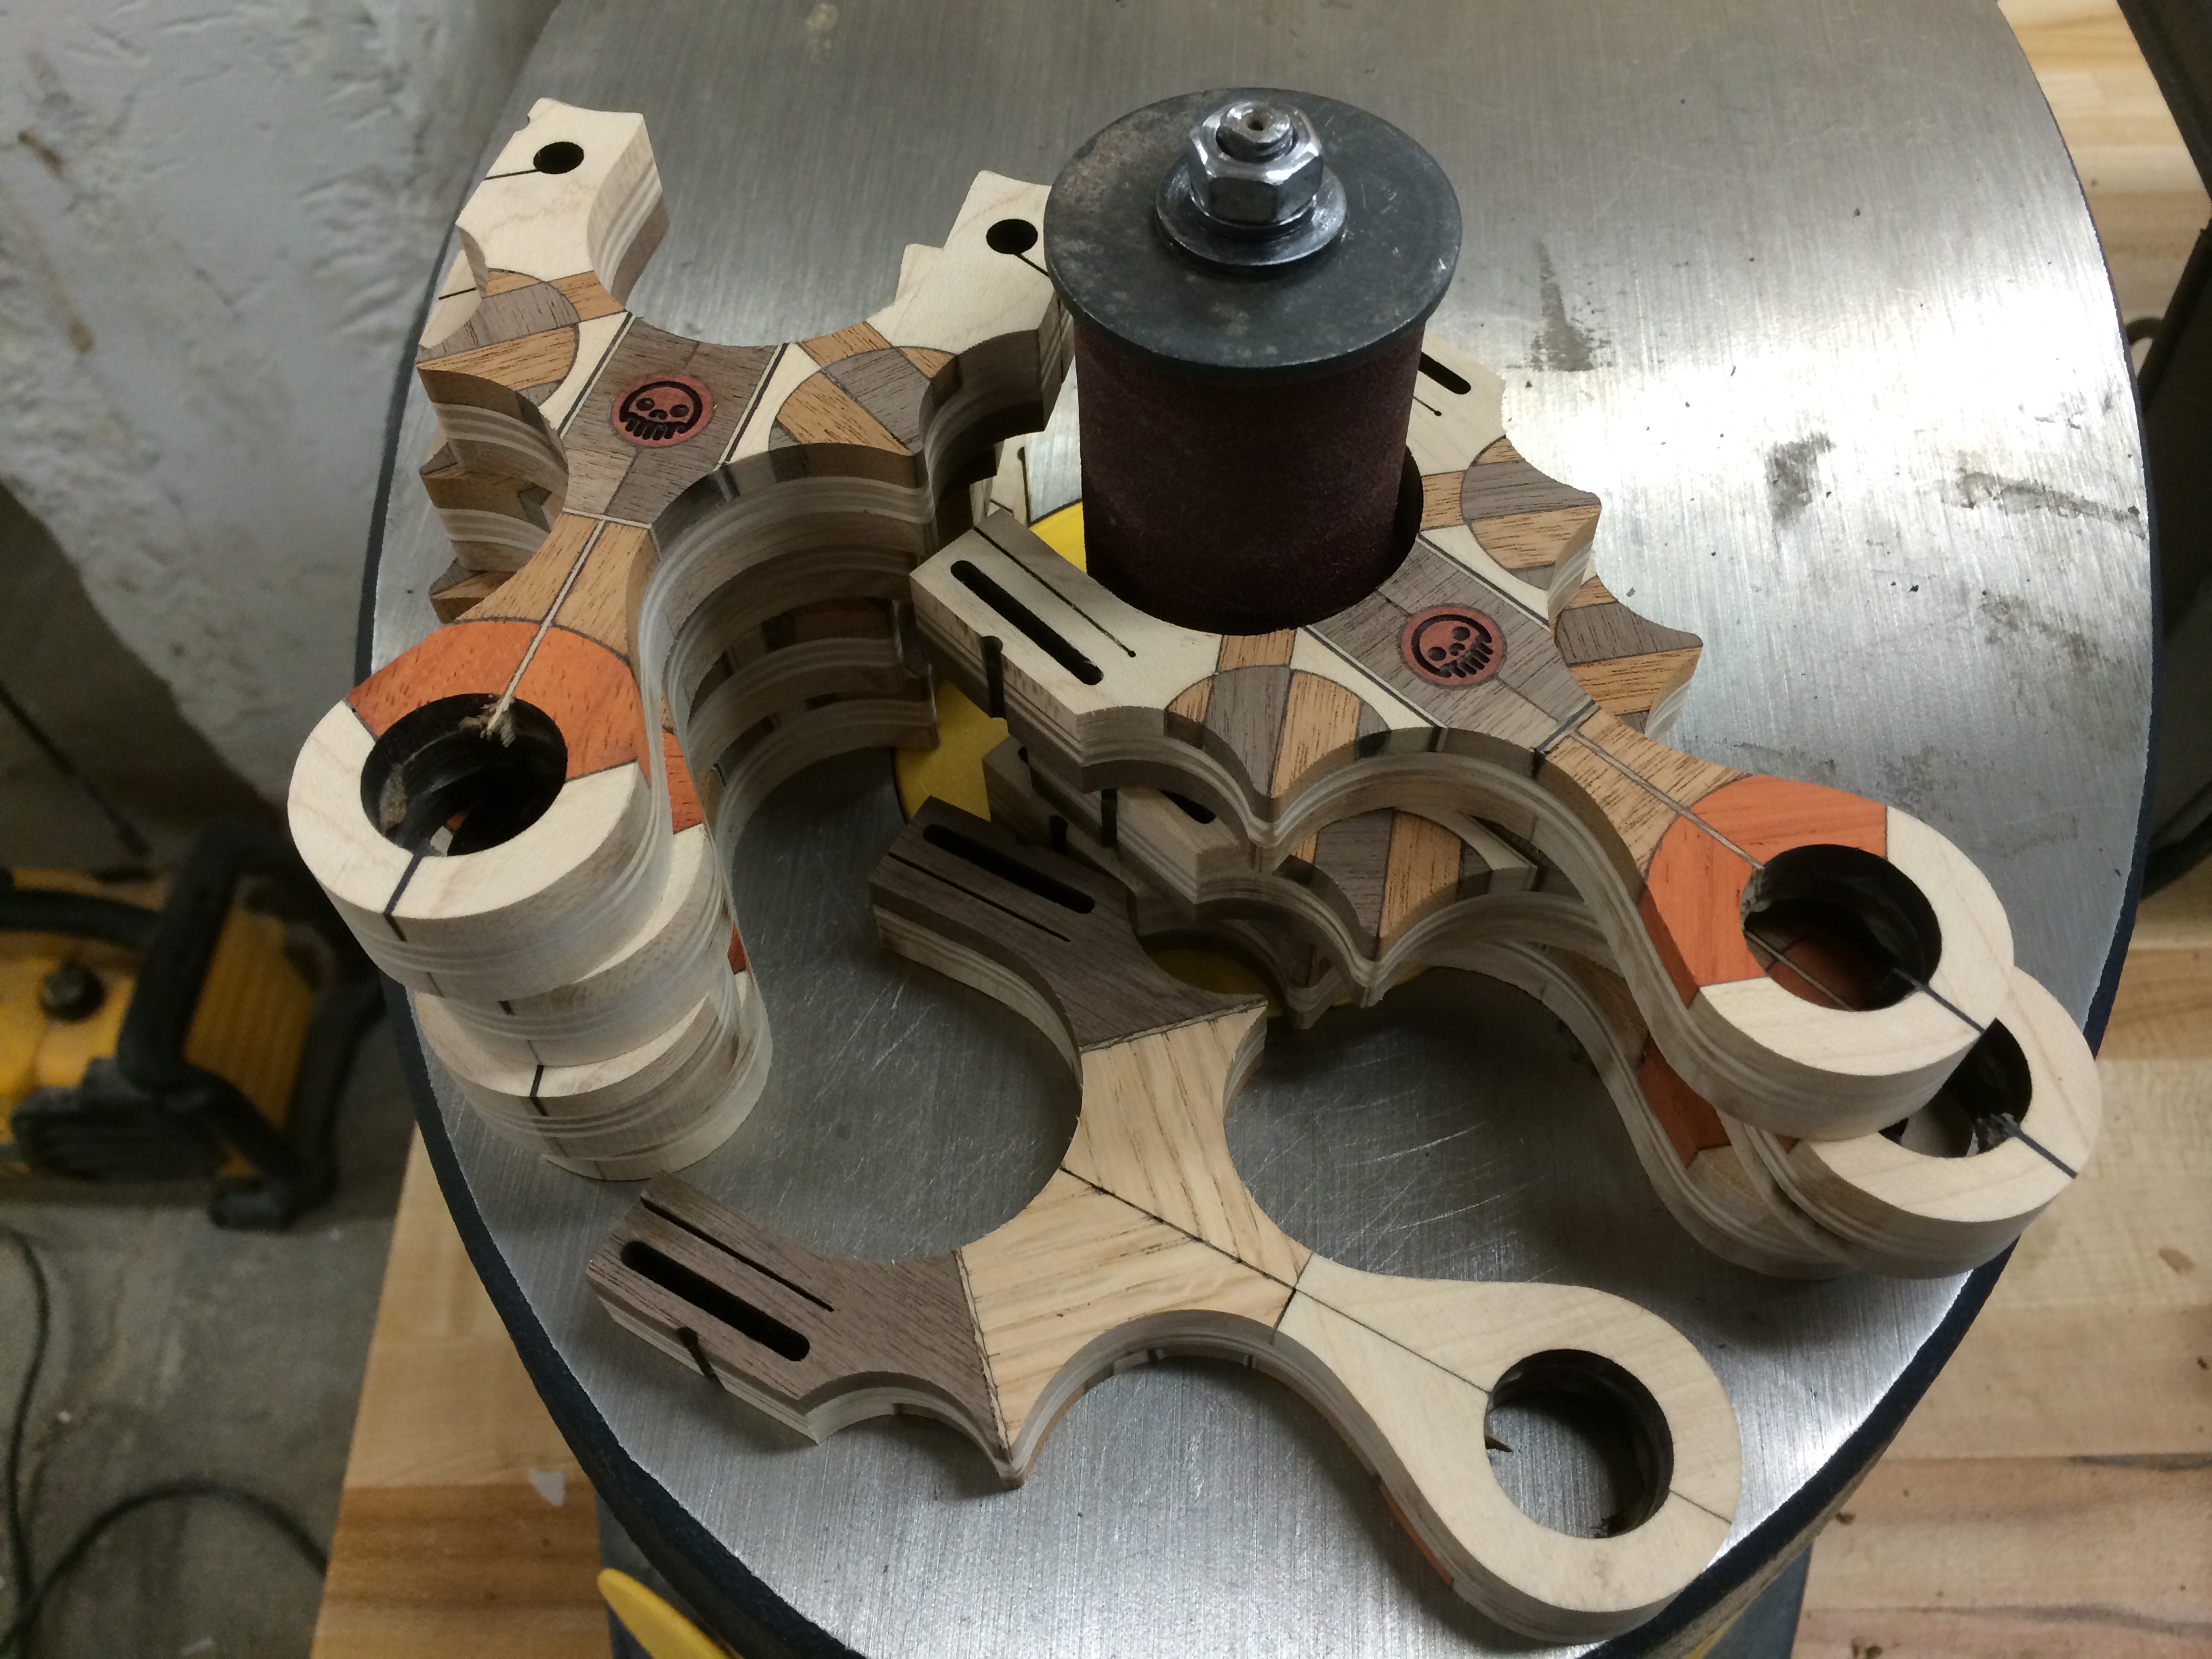
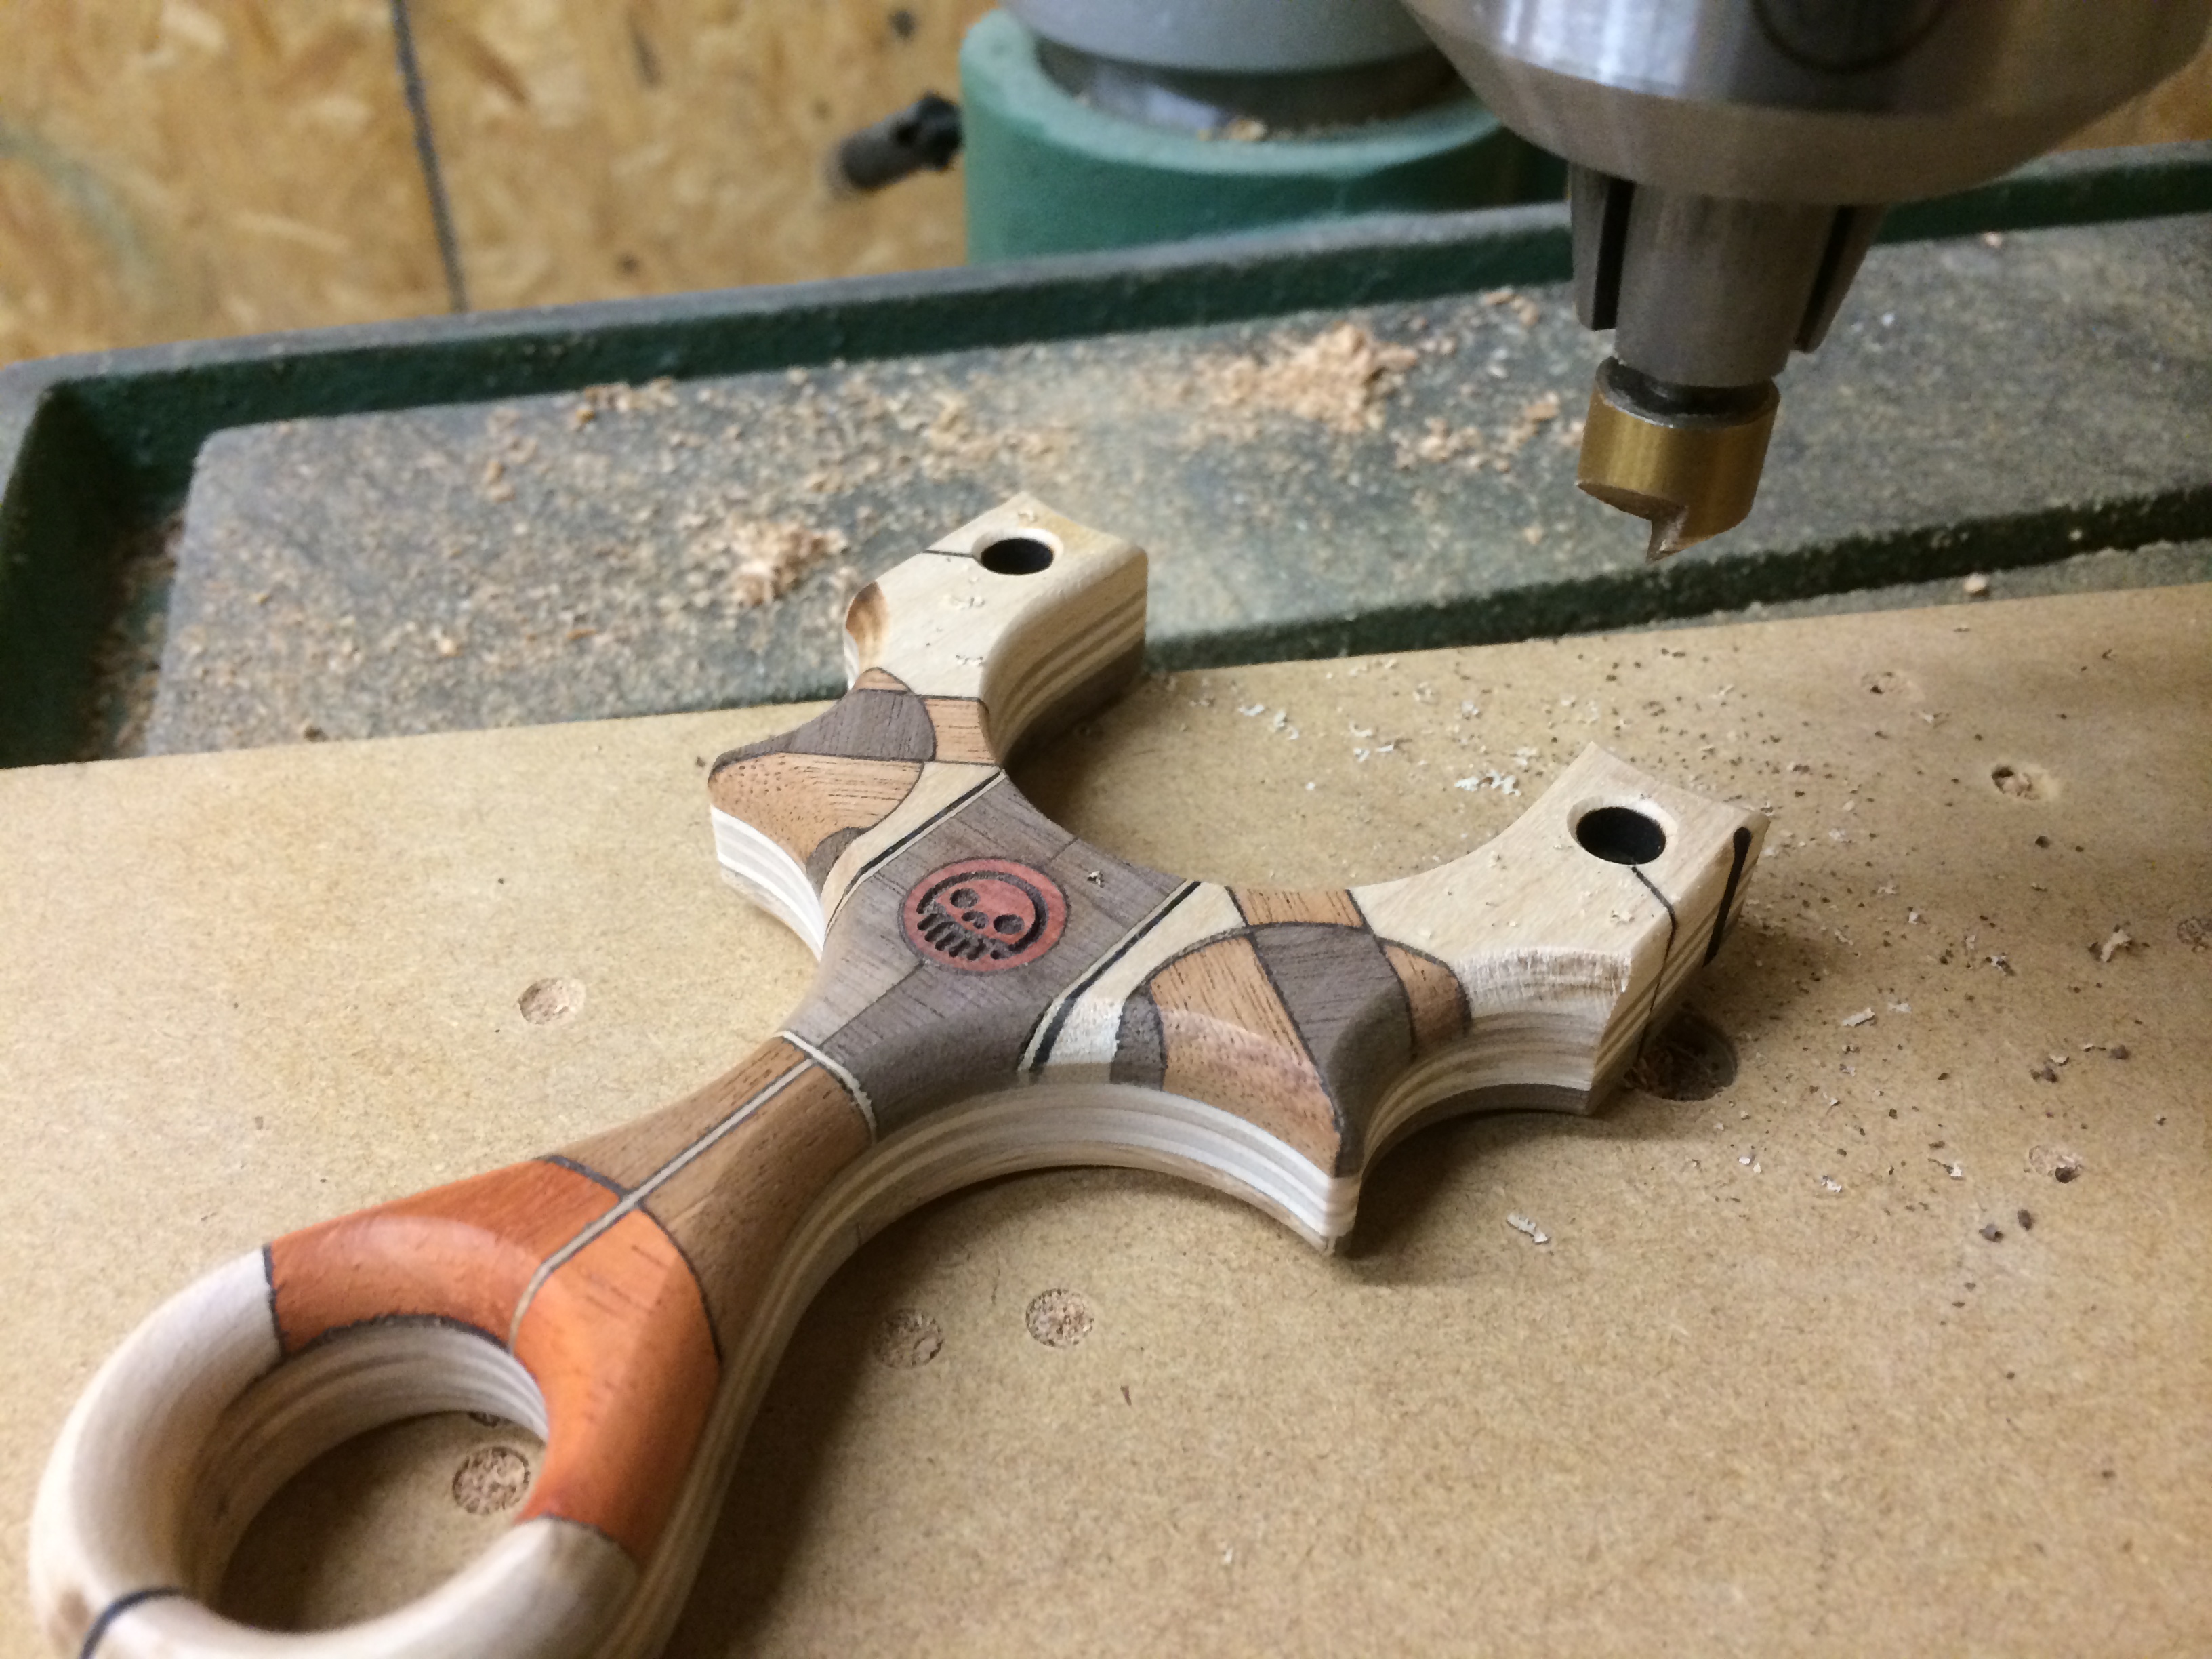
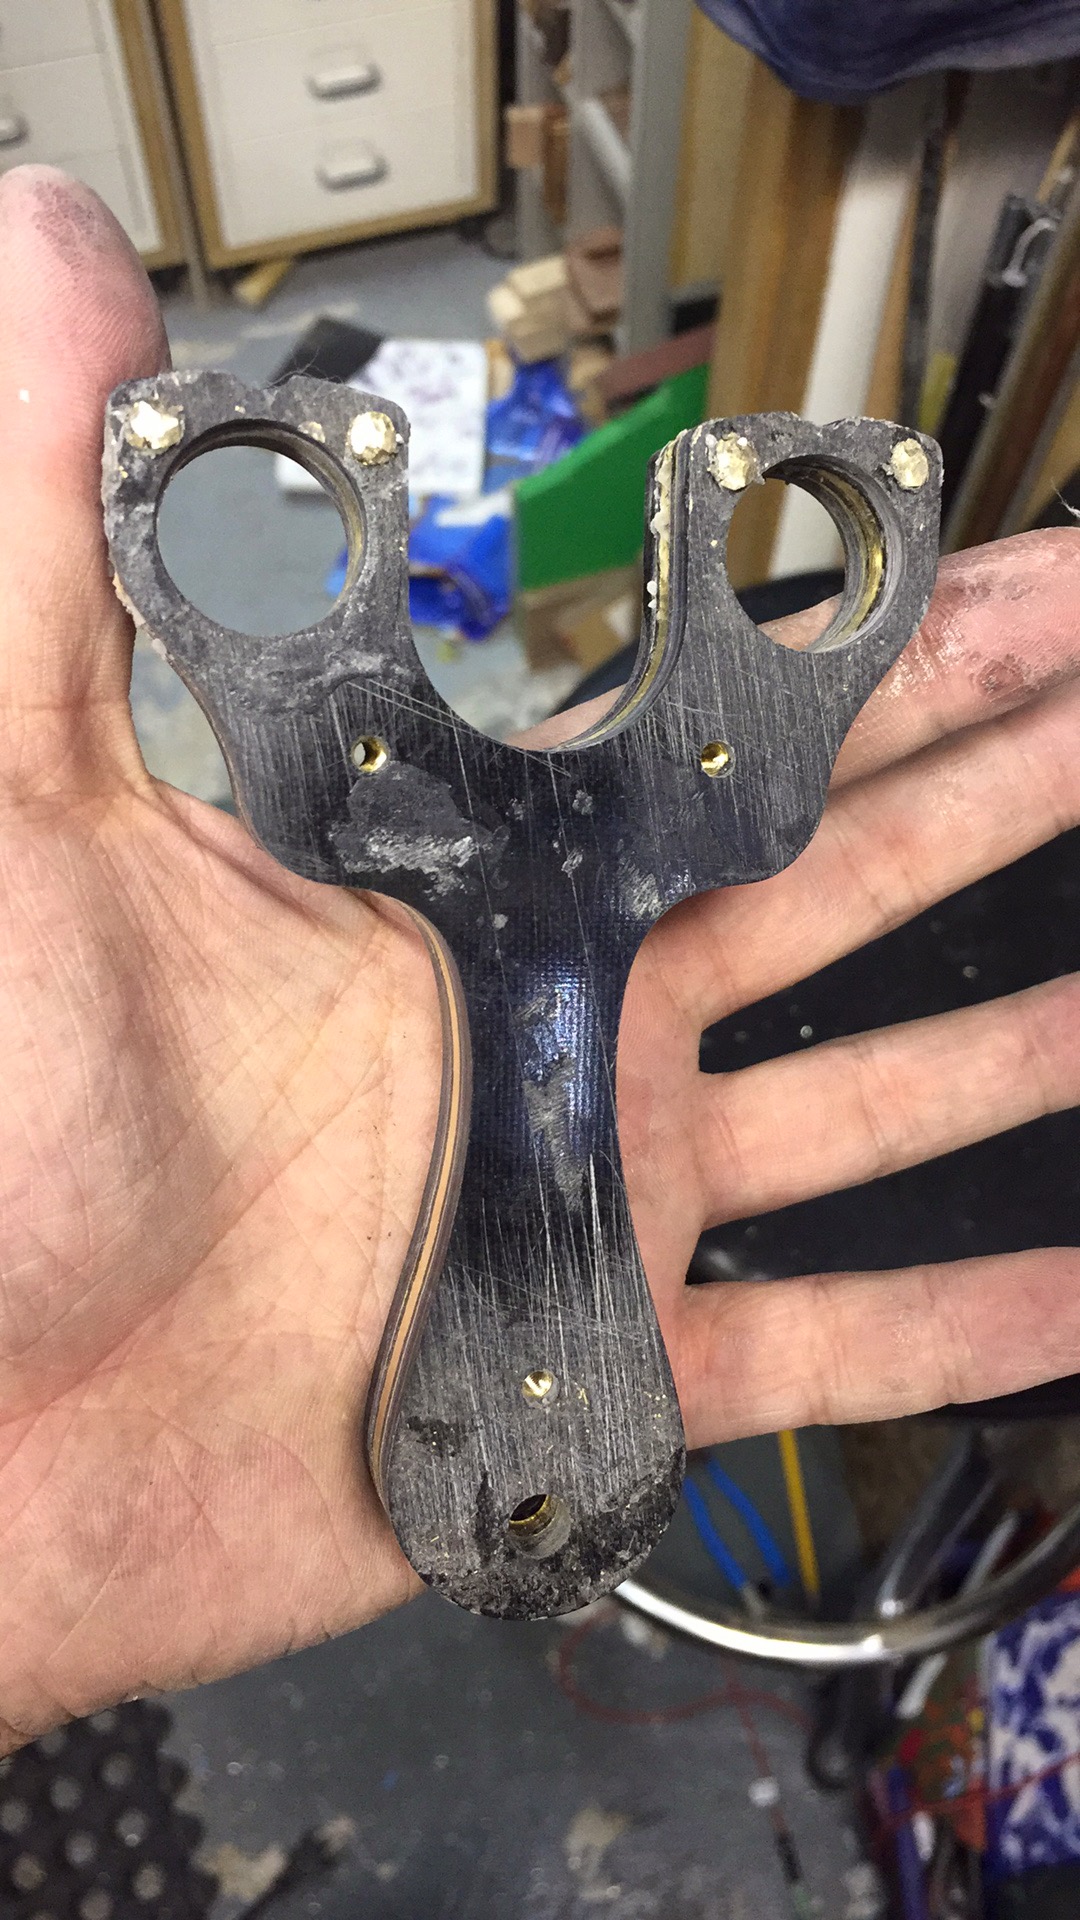
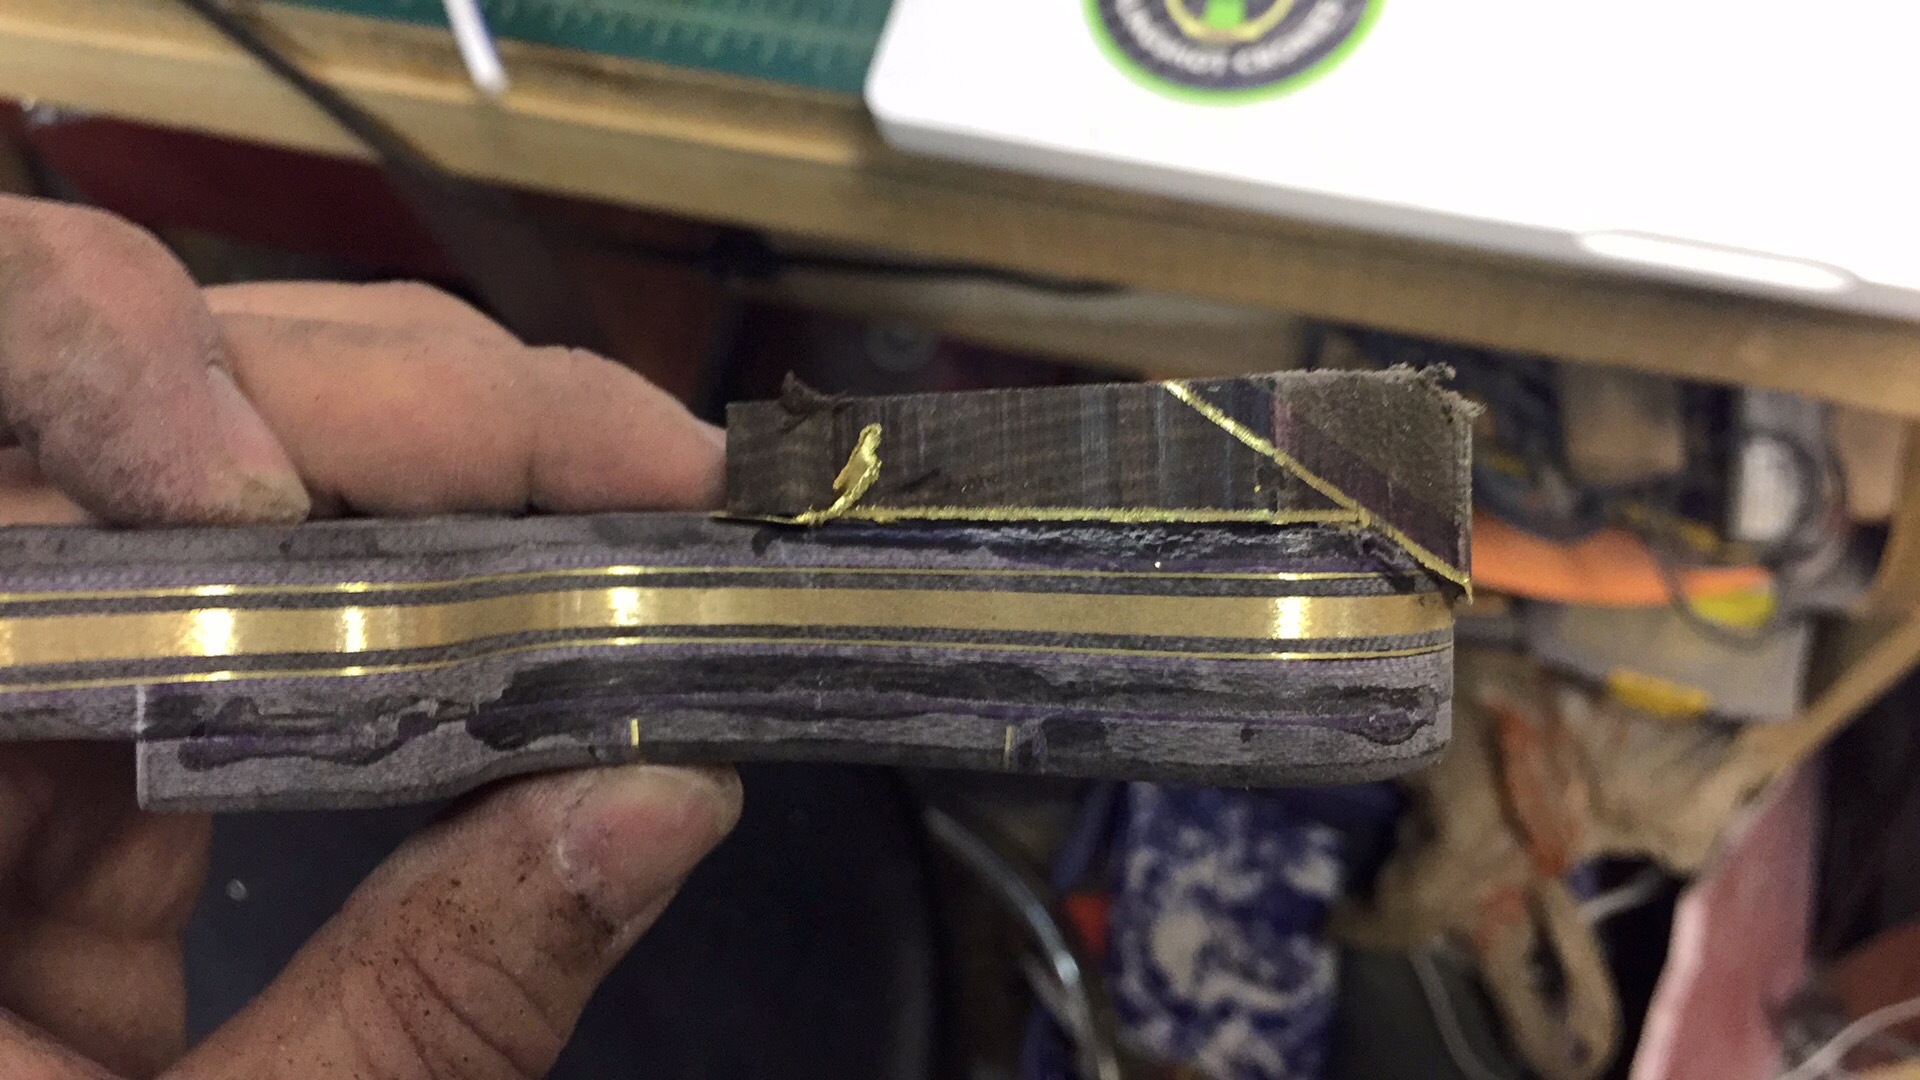
After sitting on the frame for a day (which was mostly to build up the courage) it was time to tackle the brass core with a flush trim bit via the router. My router jig to hold slingshots was crucial for this step as I wanted nothing to do with holding work with my hands near this potentially dangerous step. Luckily with some tweaking of the router bit and feed speed (and some light lubricant on the brass), the majority of the brass and other stacked layers were trimmed away revealing the very attractive core.

img_0554

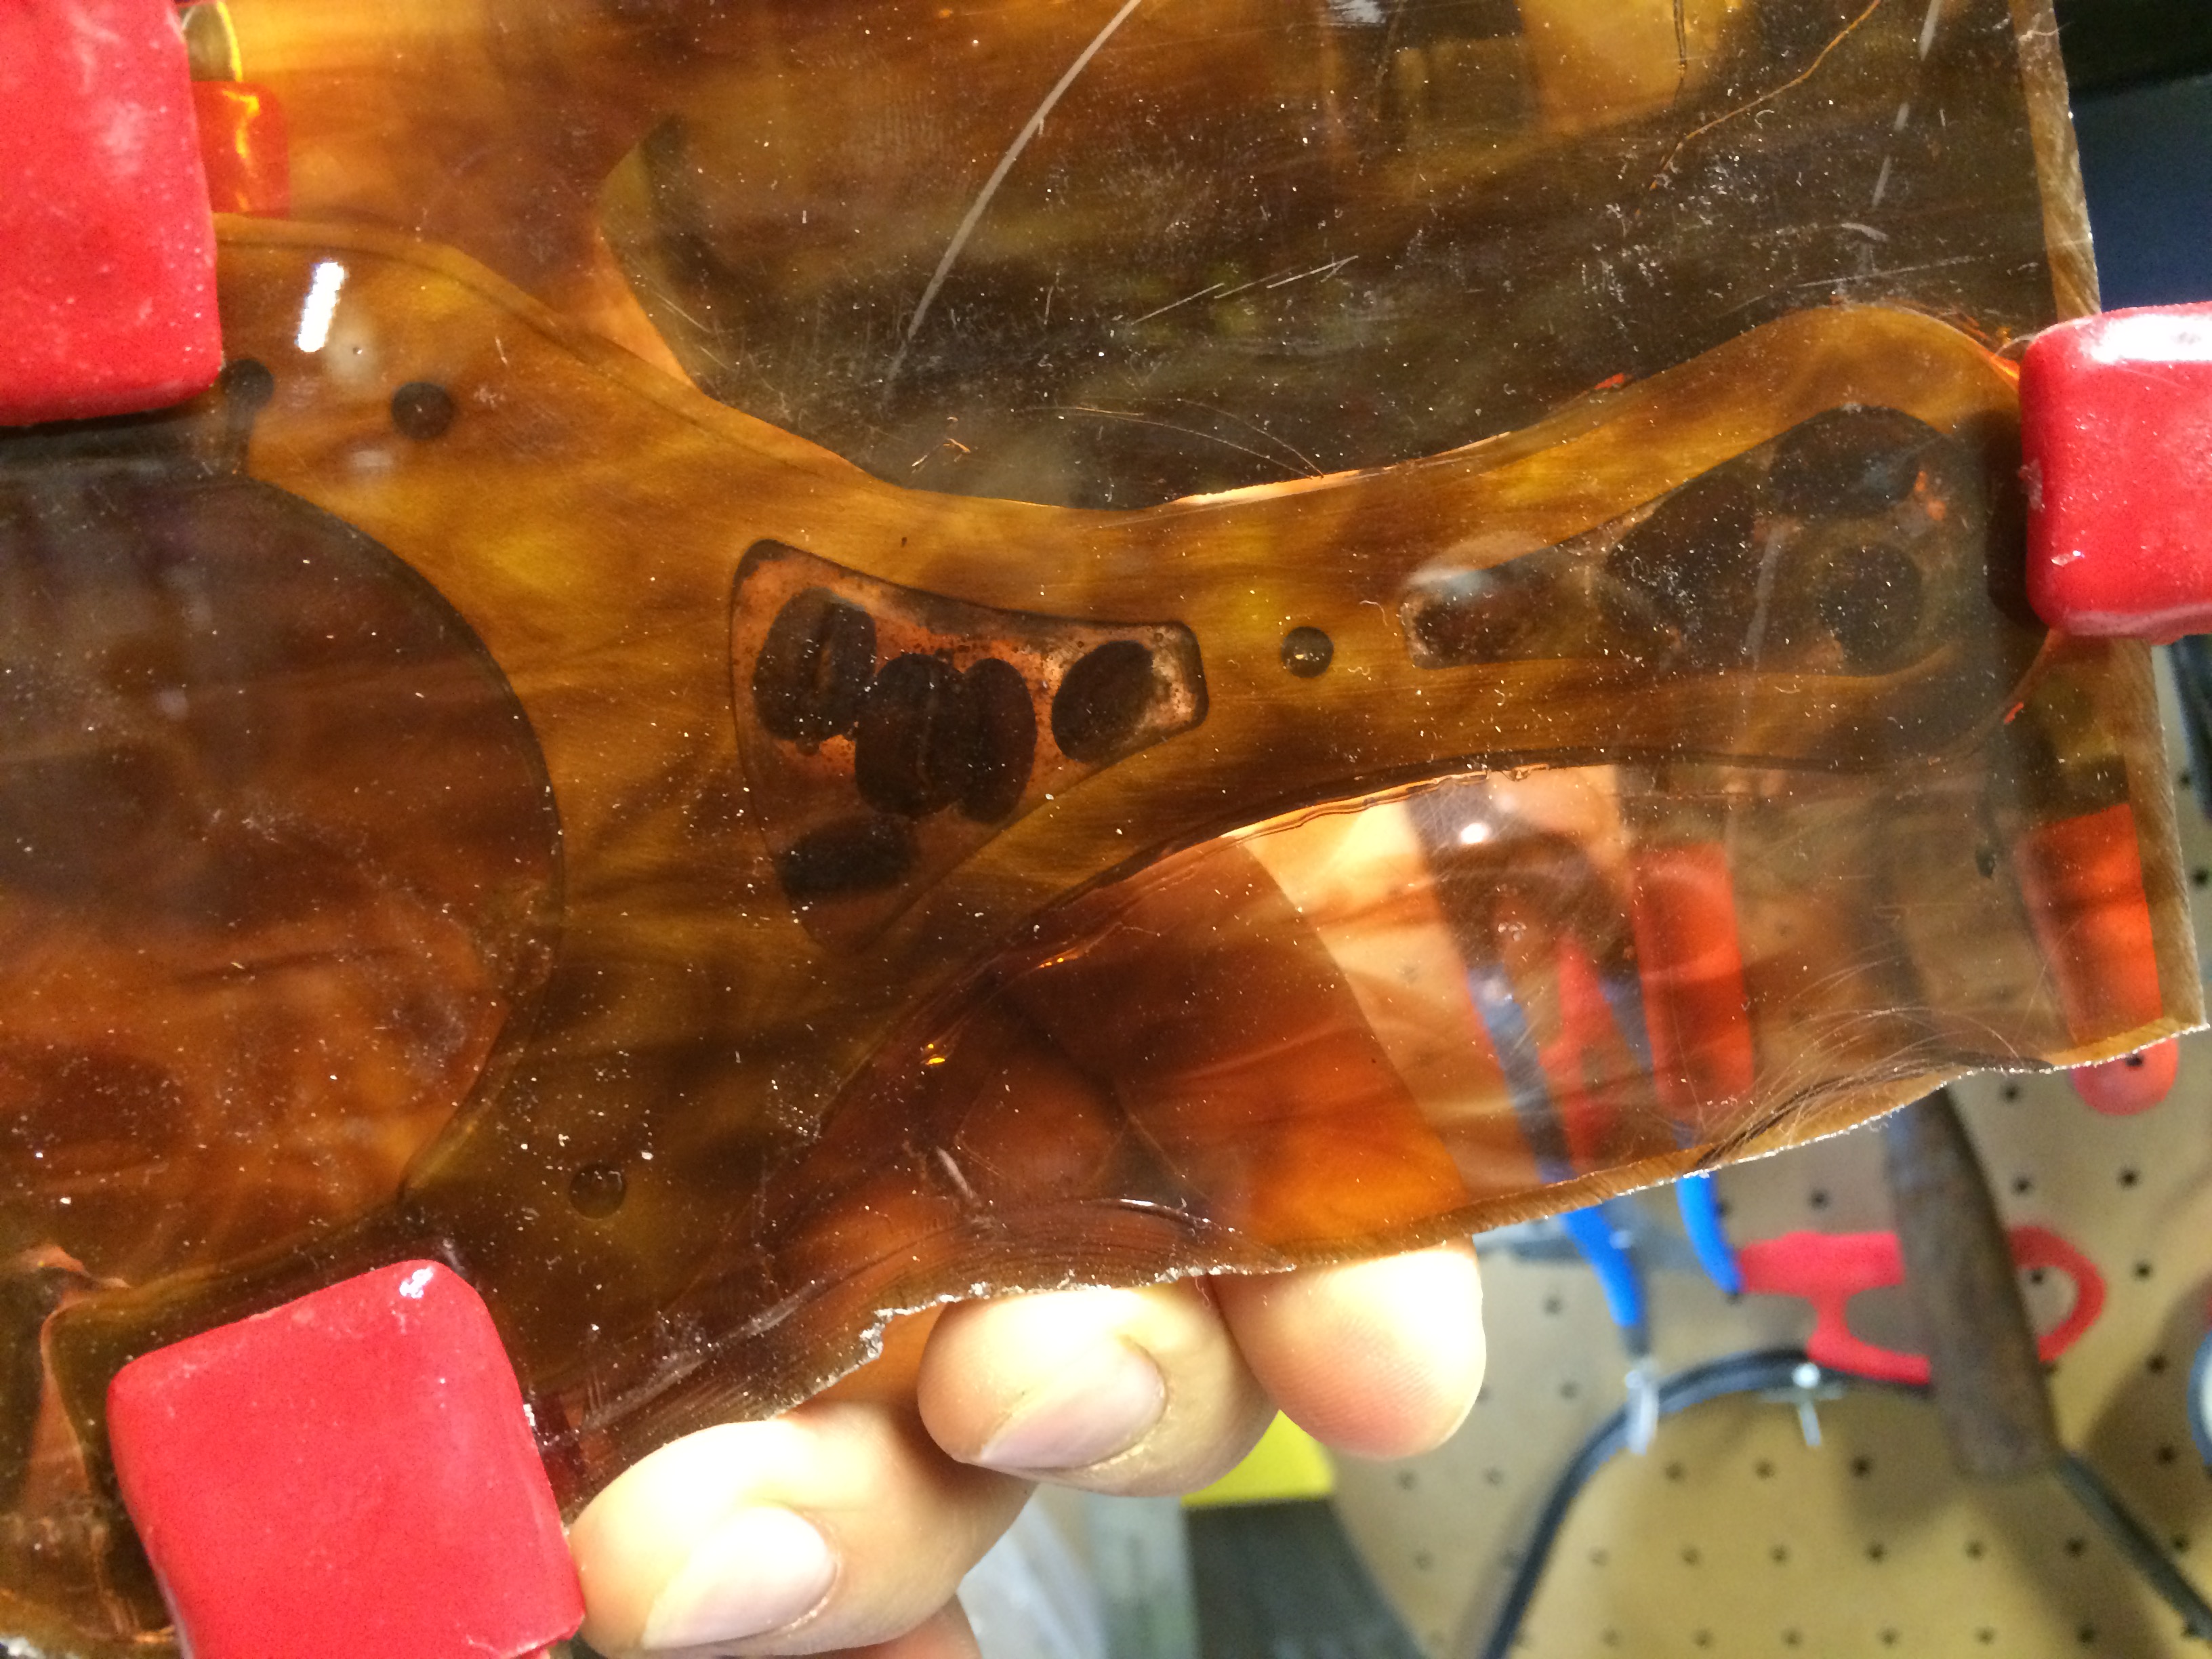
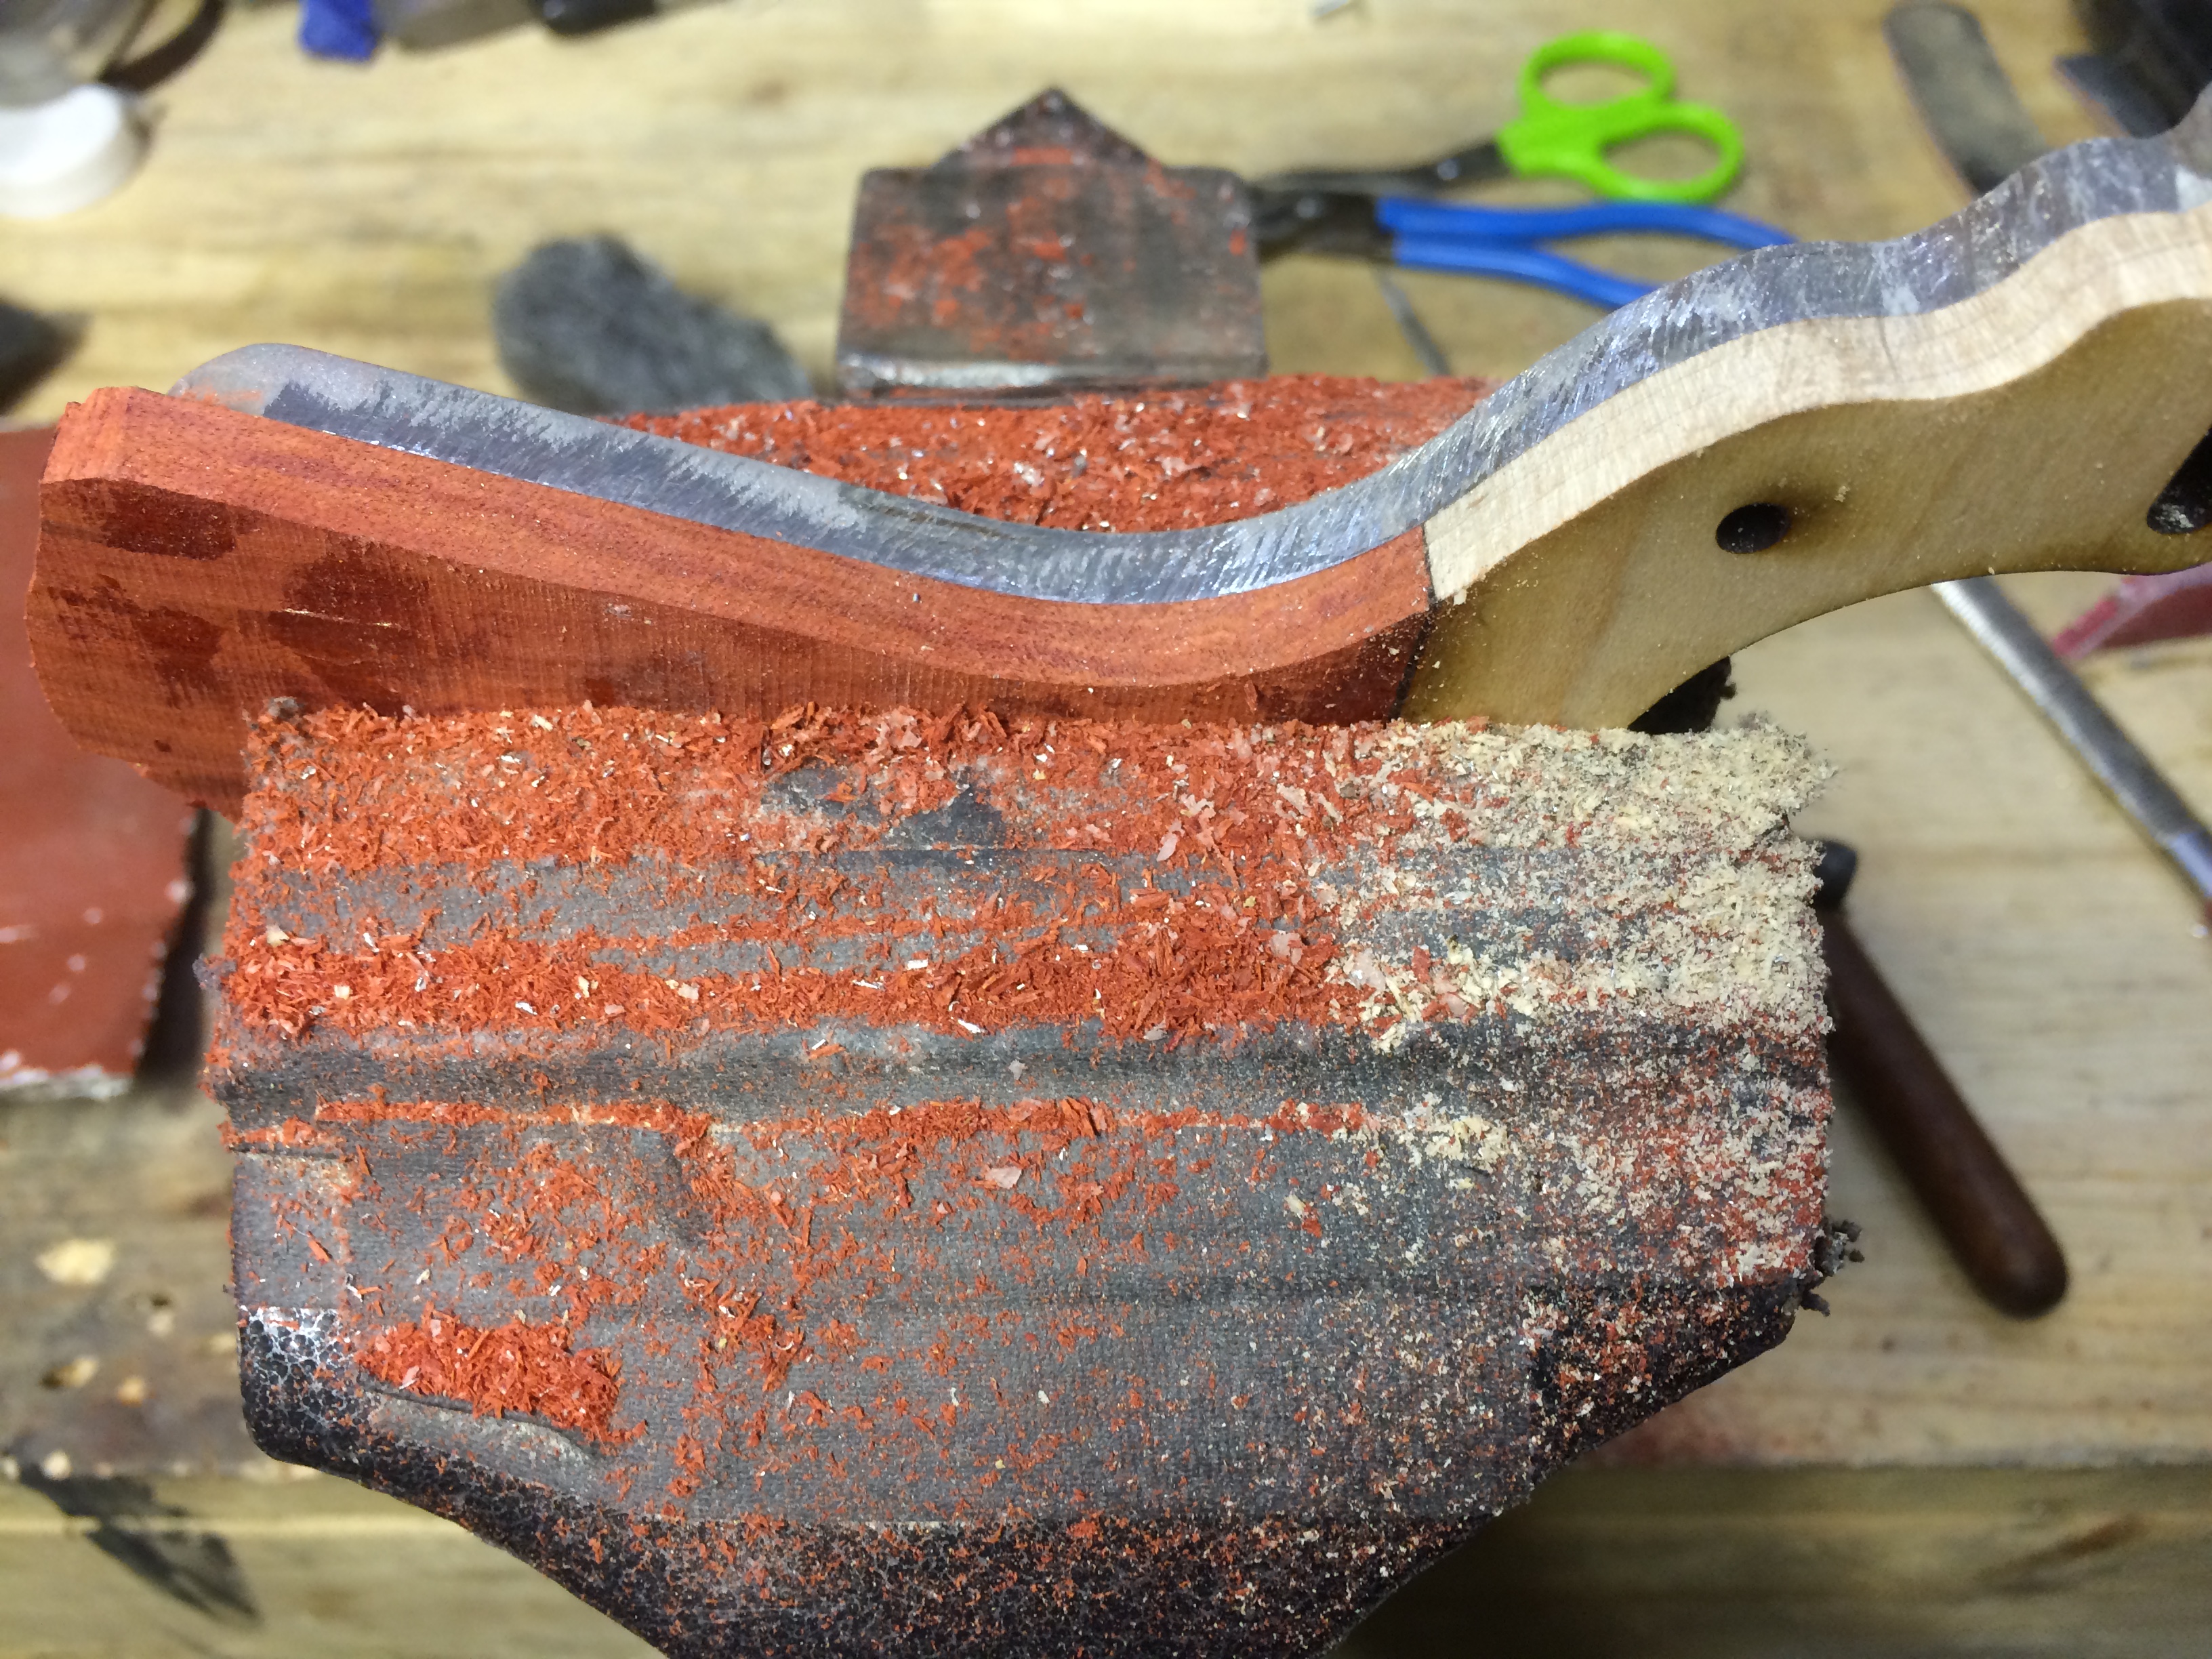
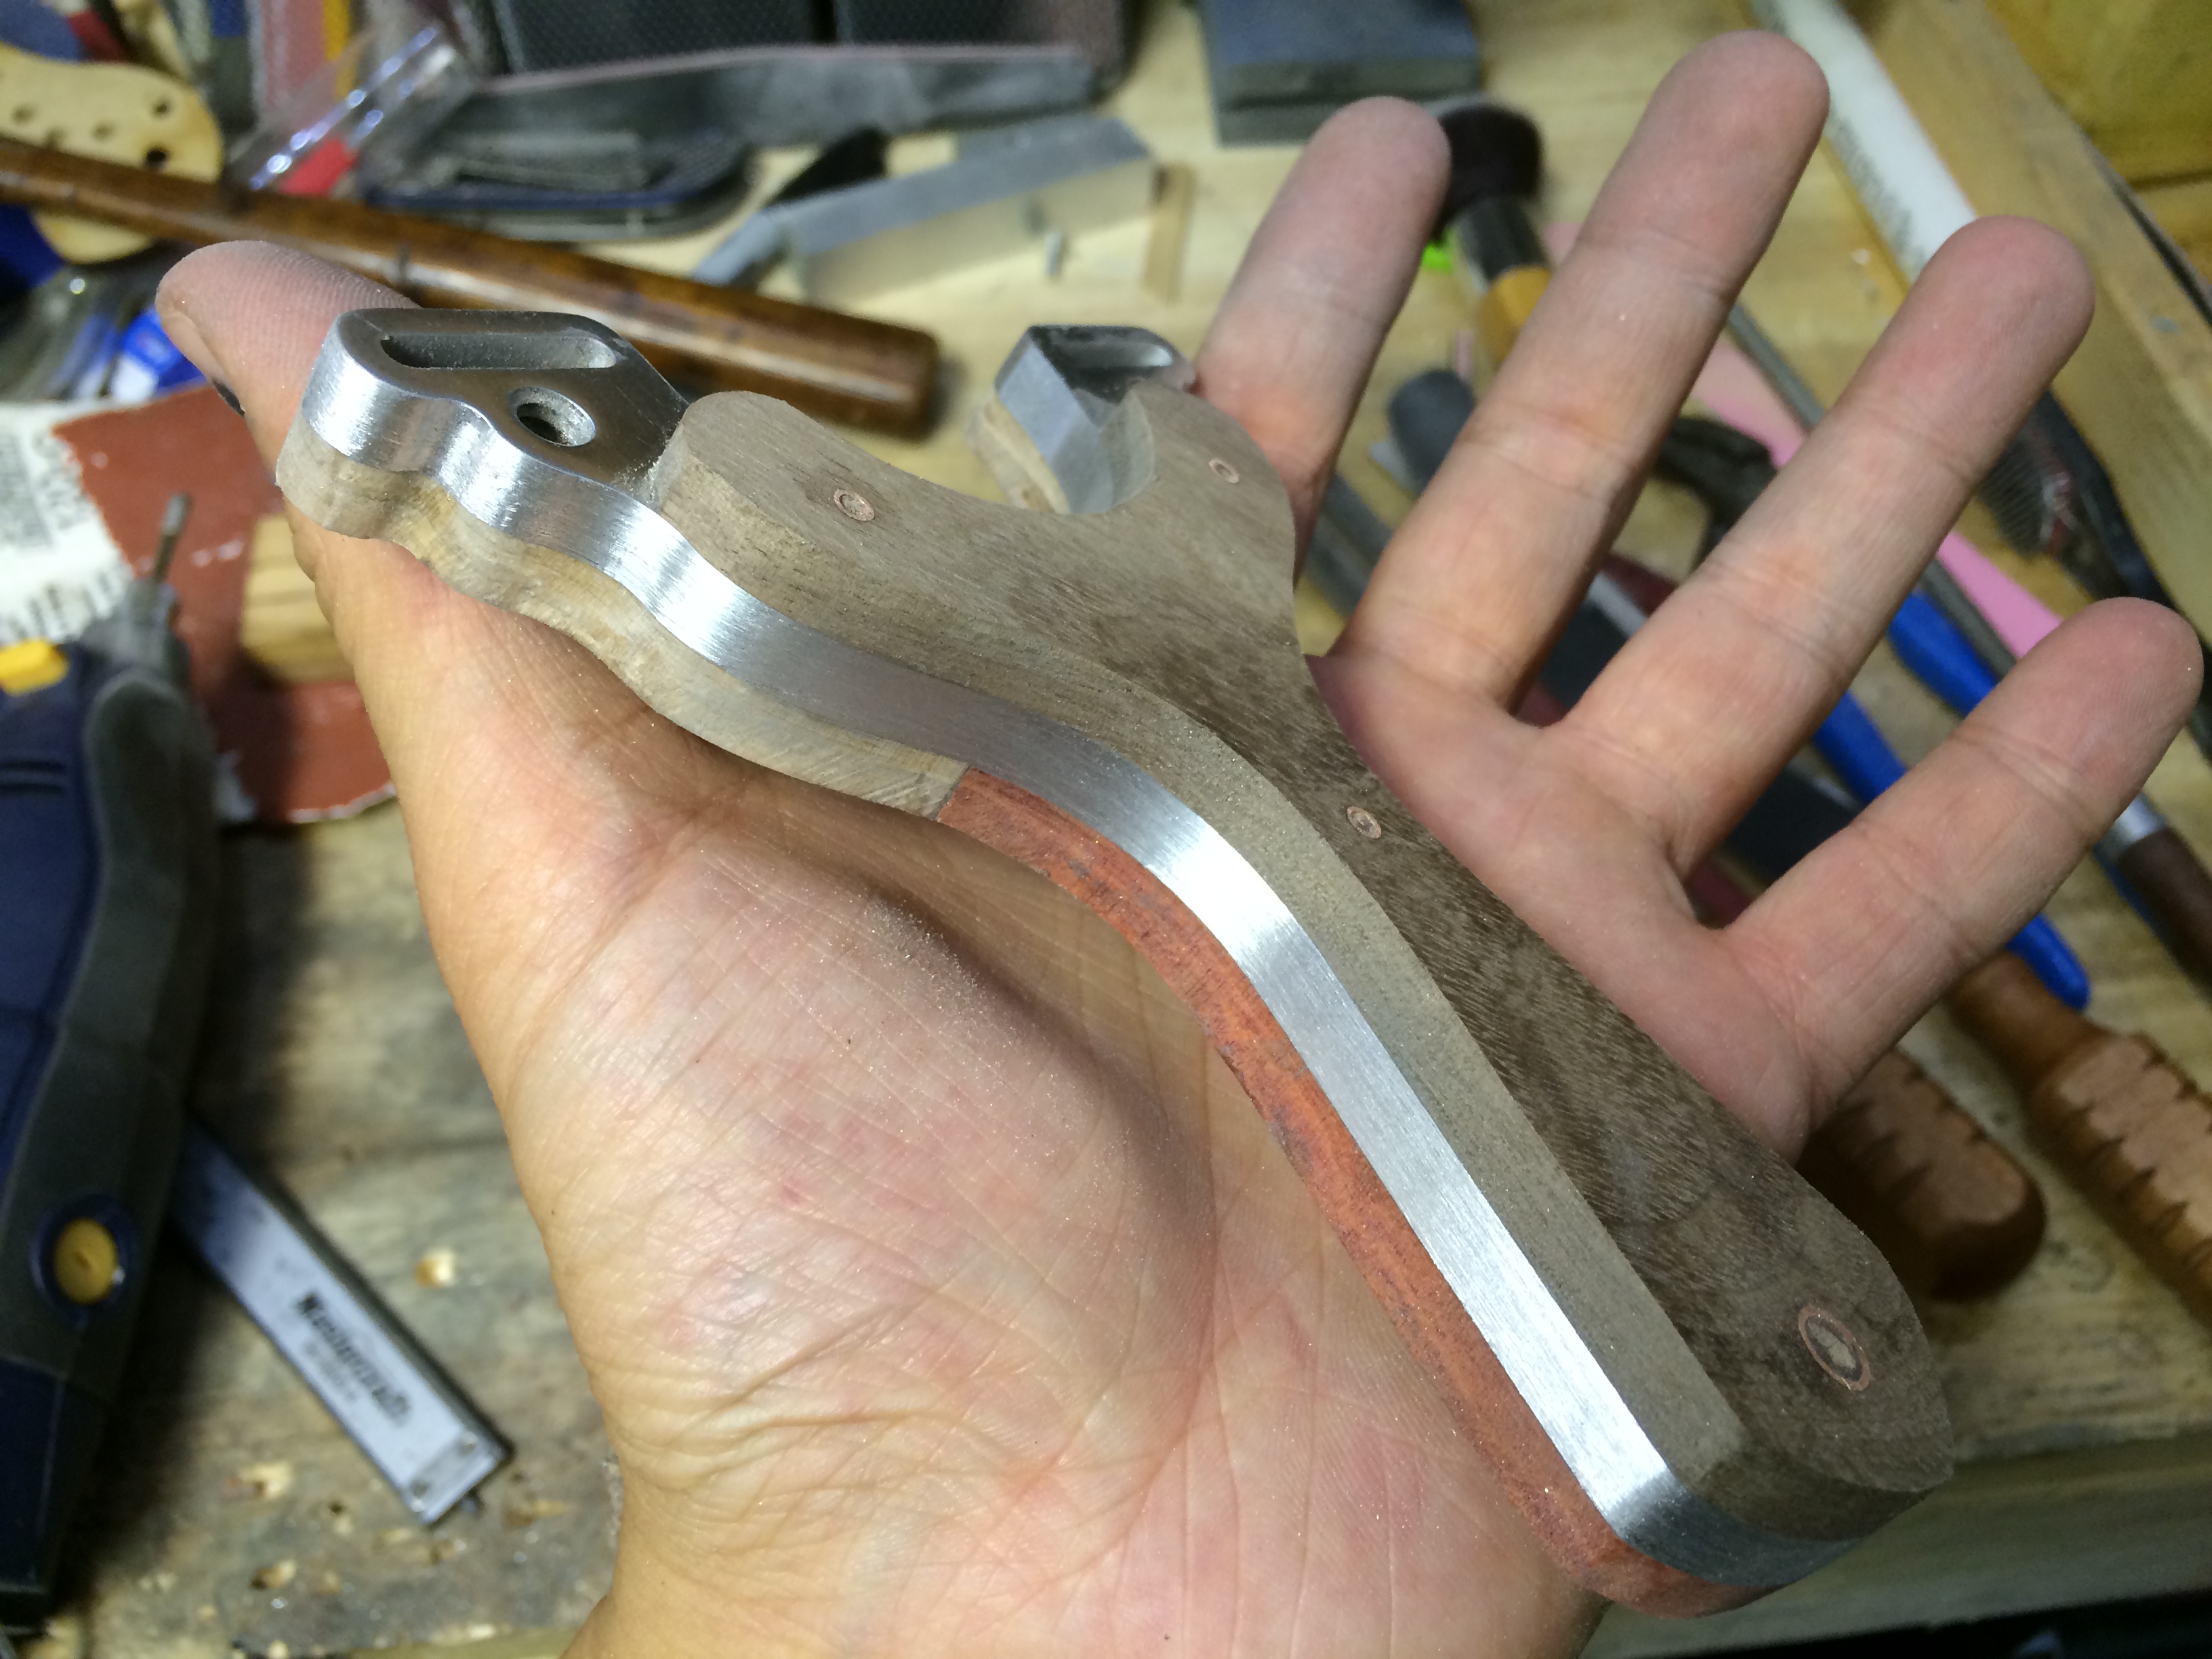
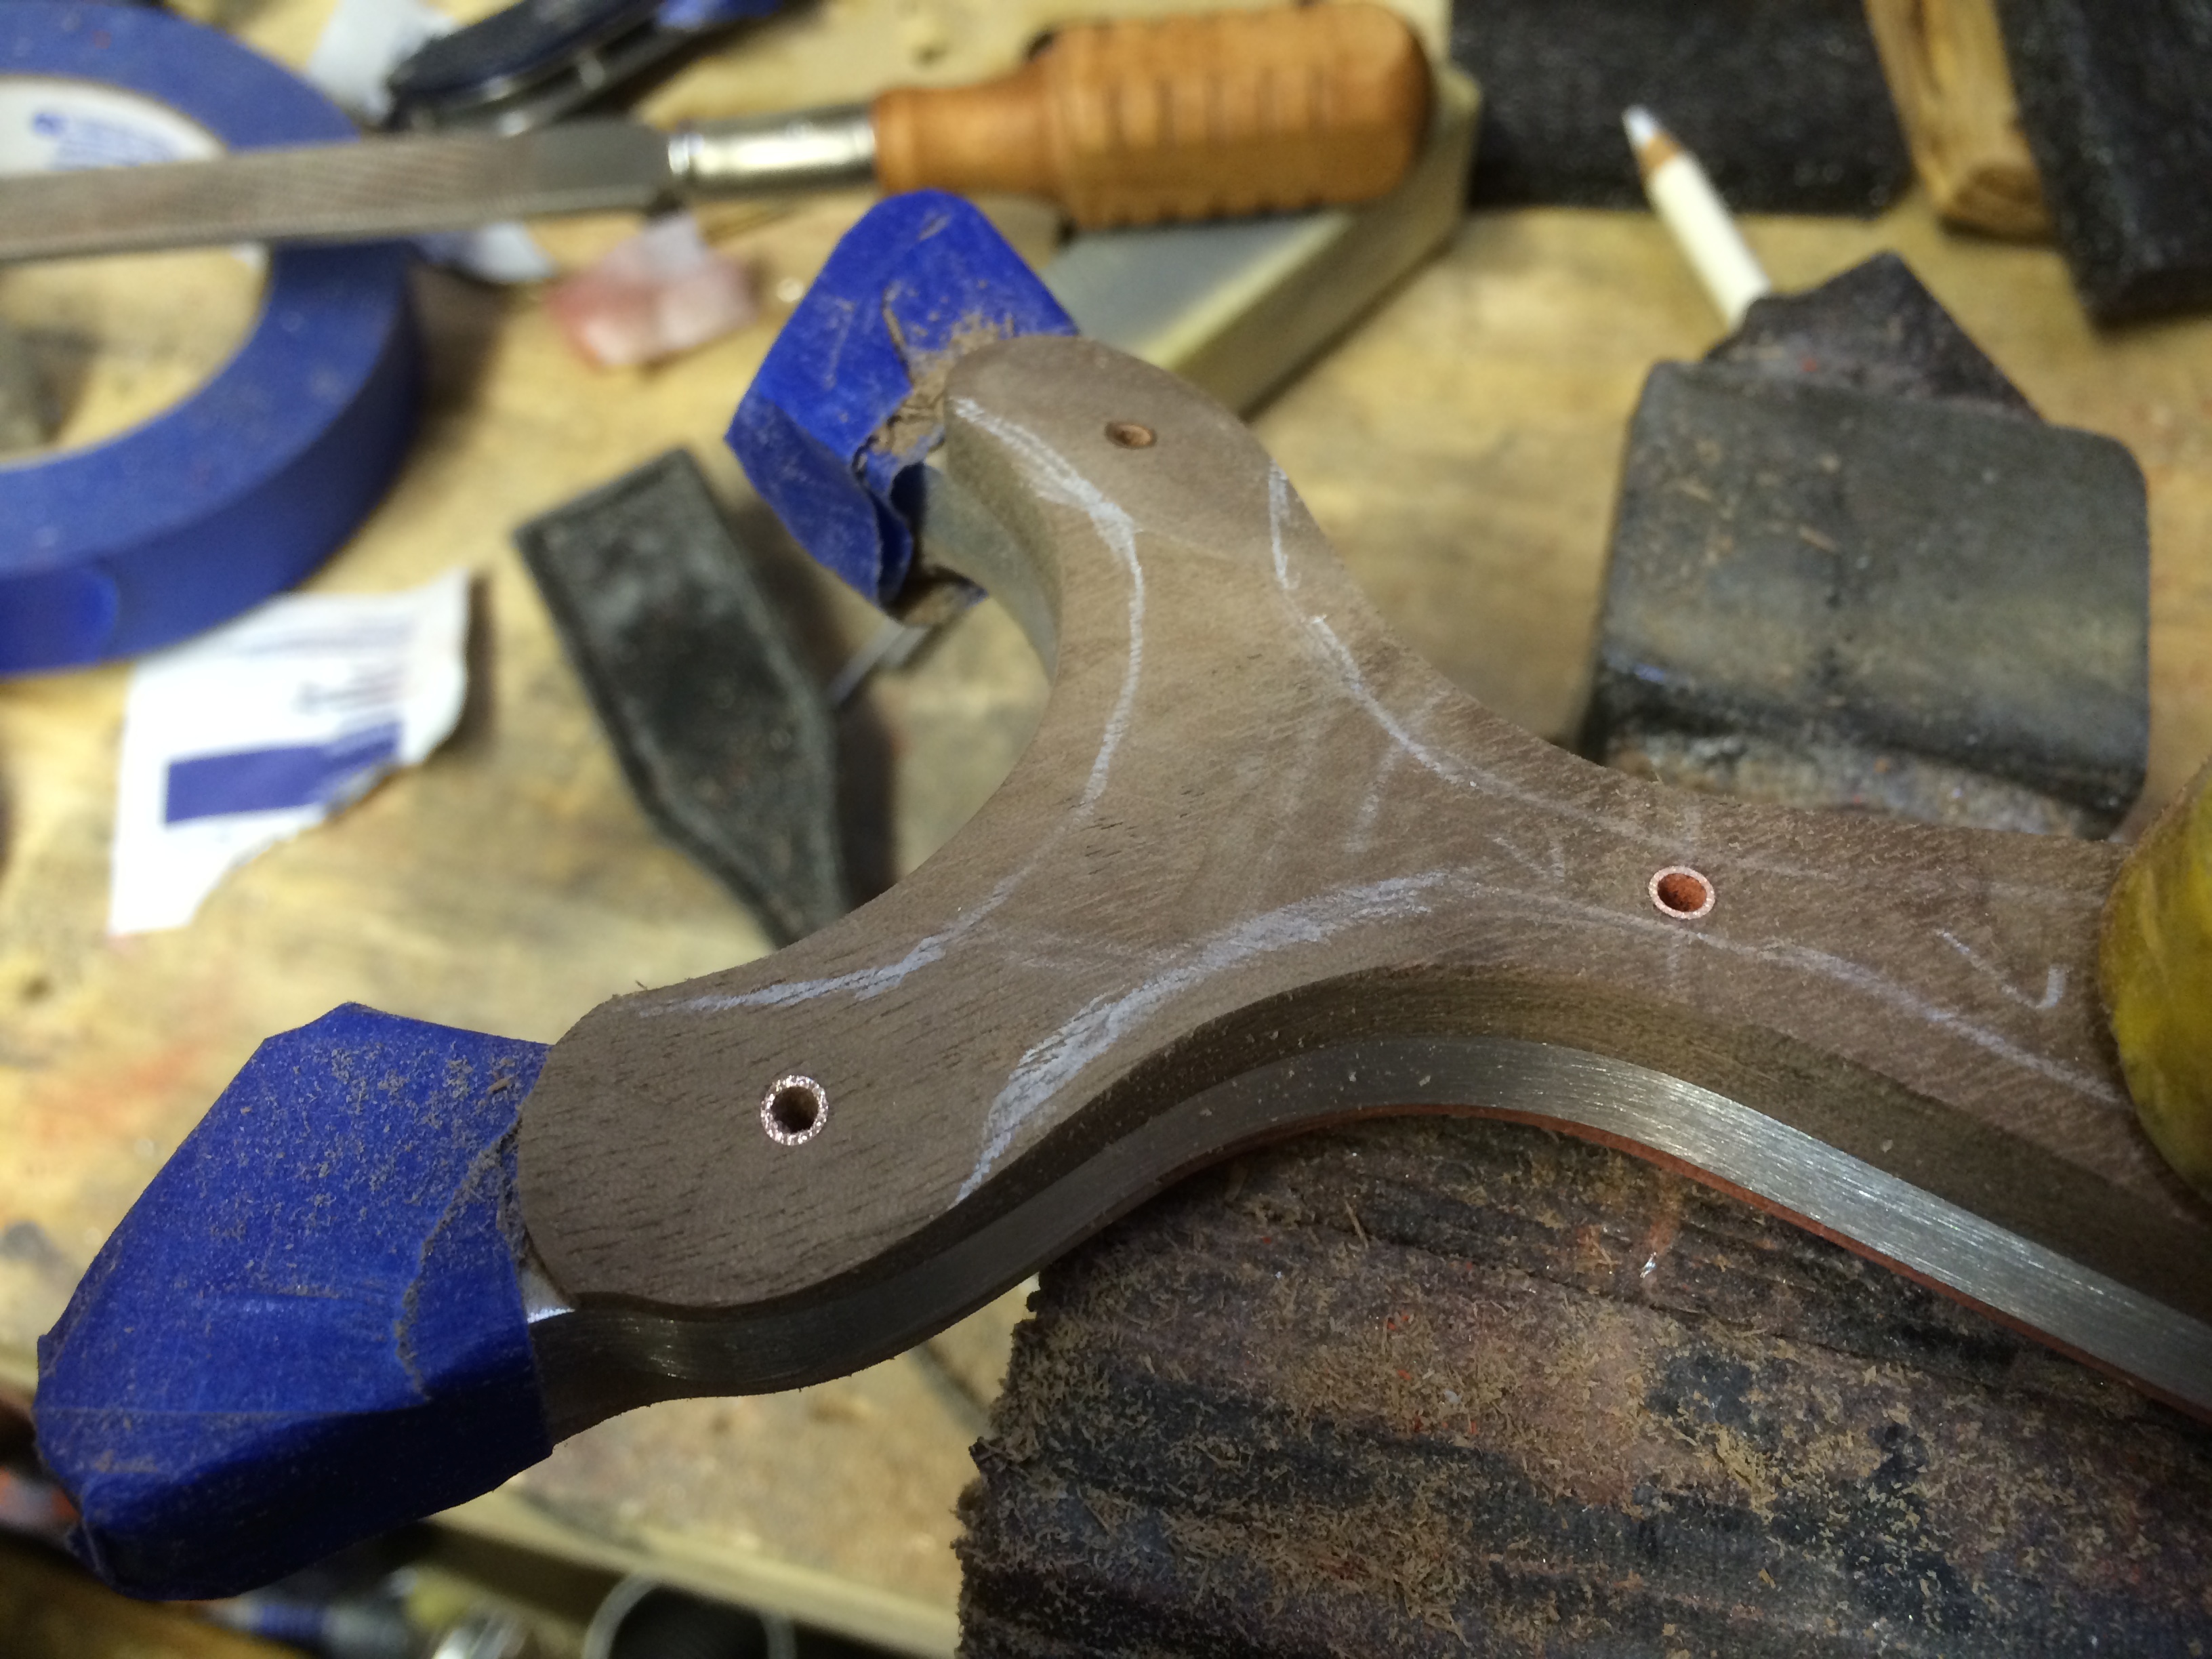
The heat of the machining separated some of the layers, no matter, a quick flood with some viscous CA glue and some pressure cured that problem. This also gave a quick preview of what the final core would look like.

img_0553

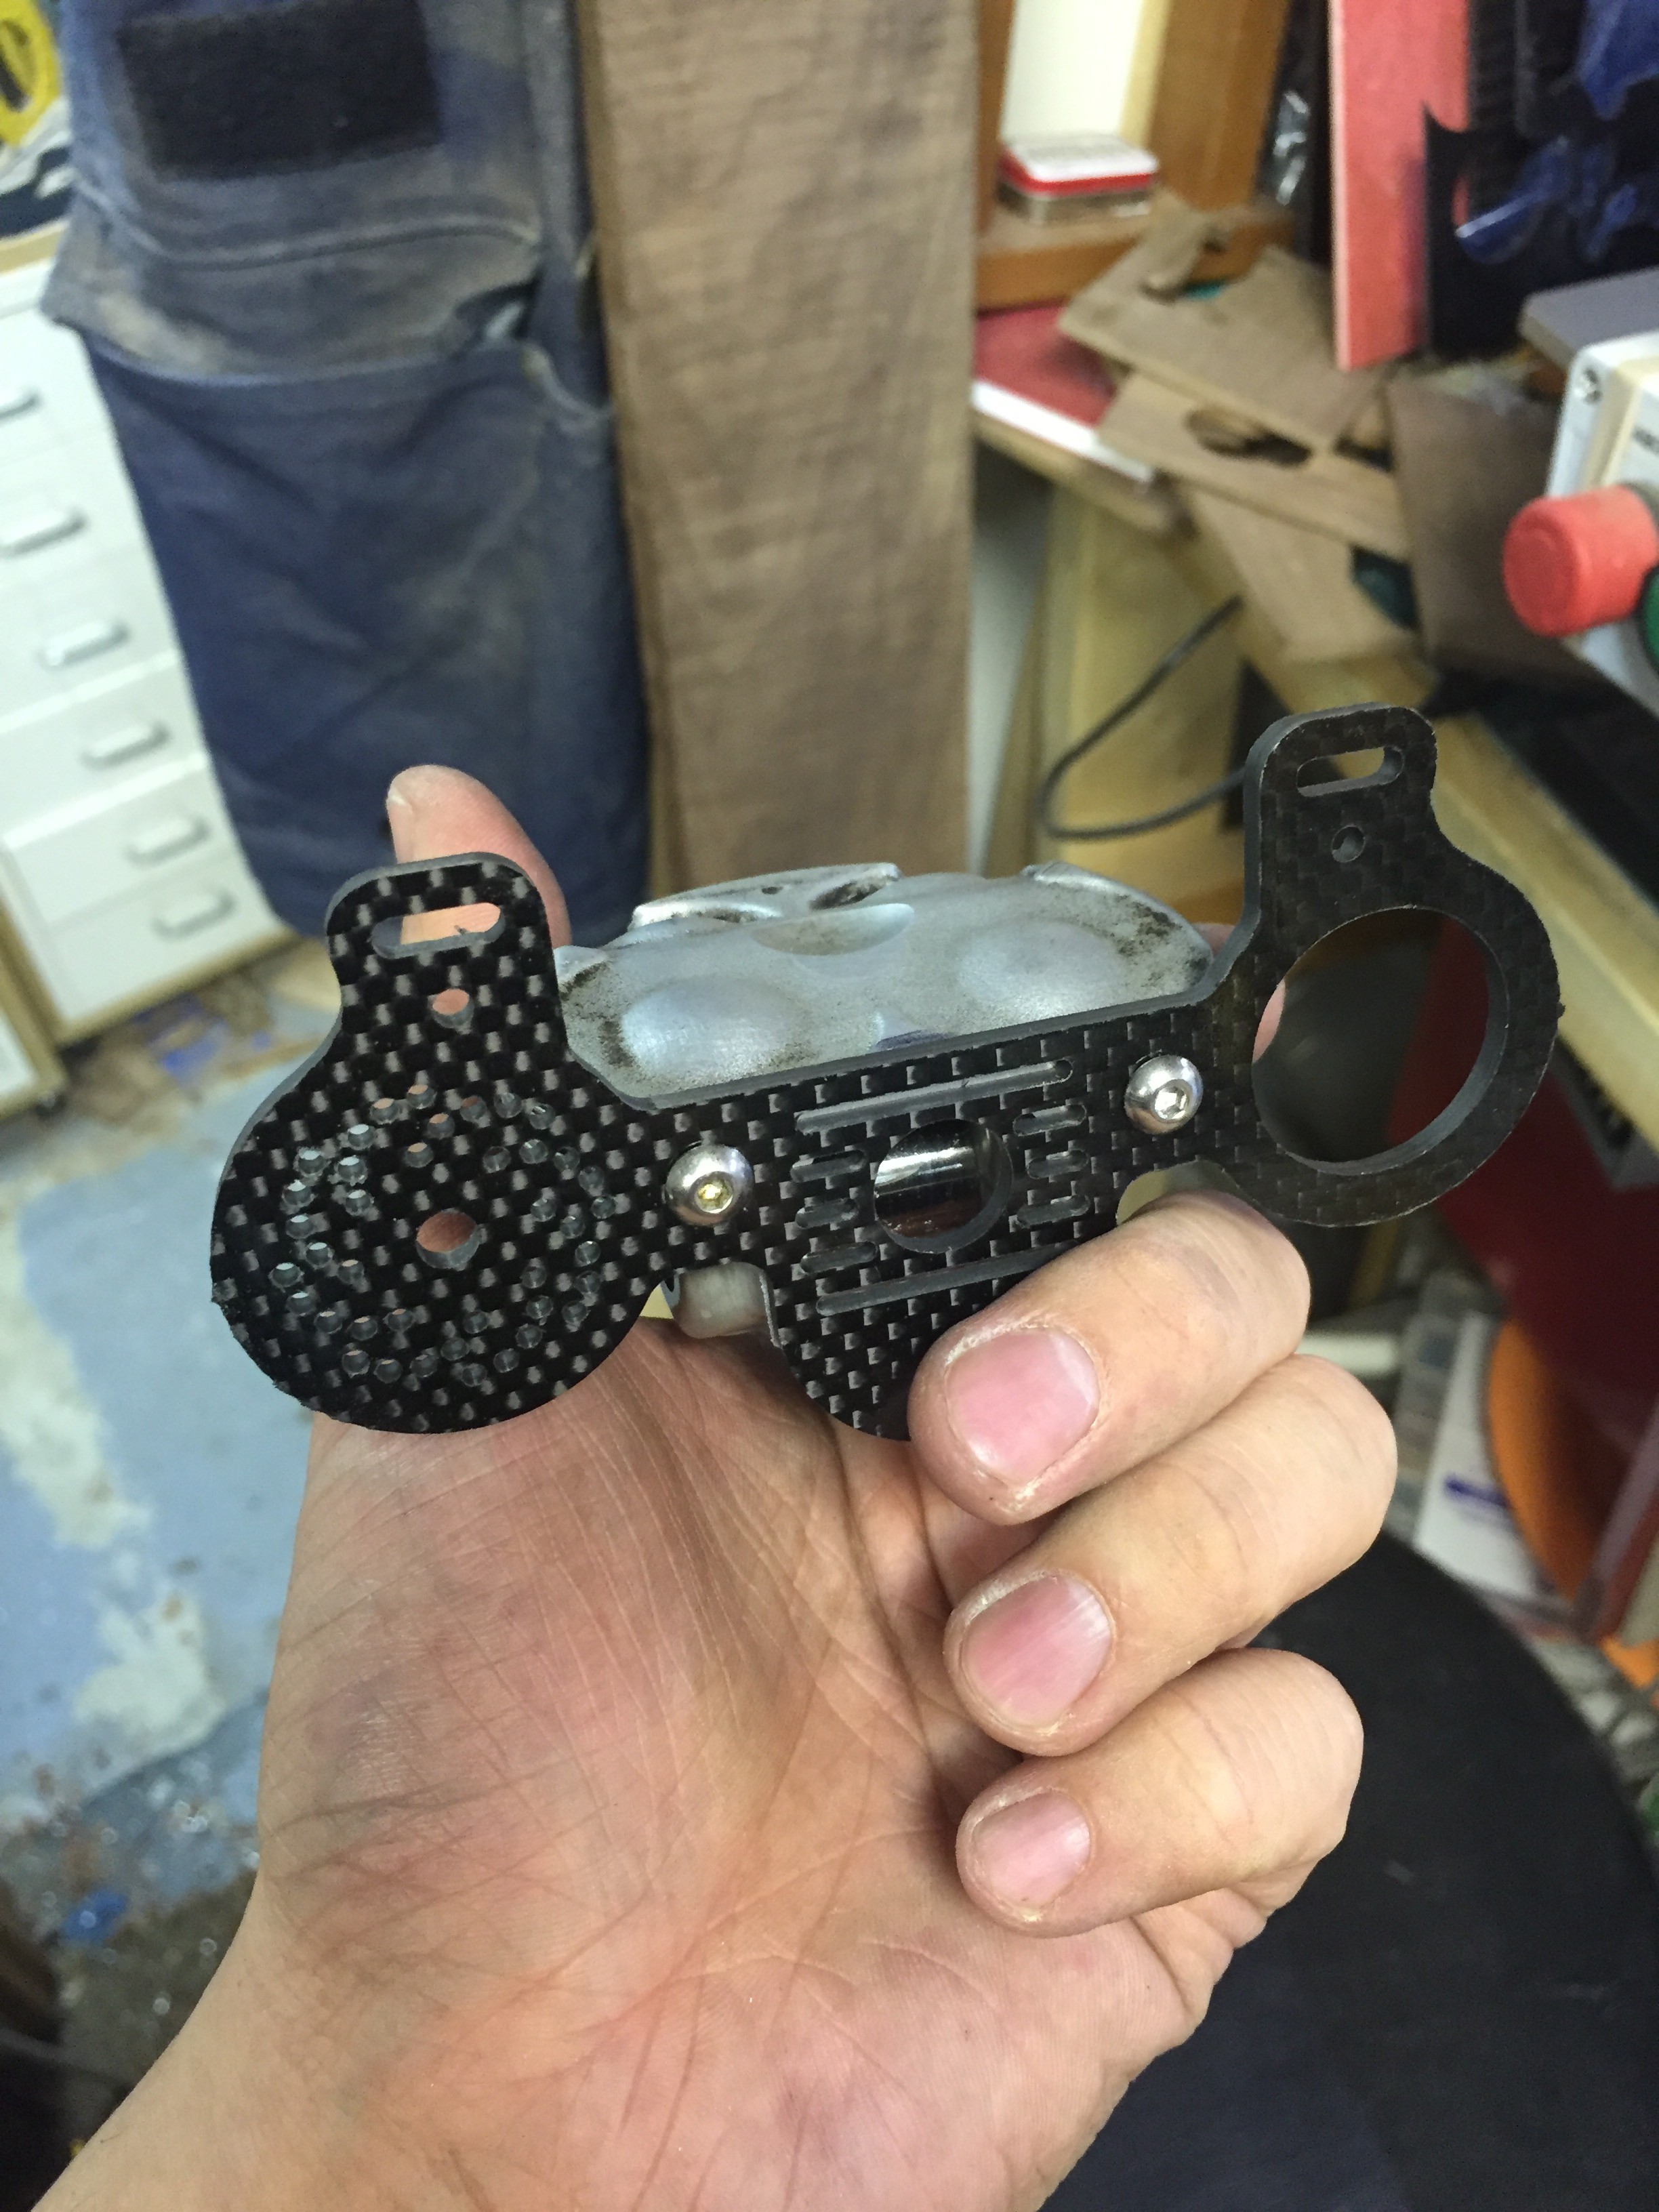
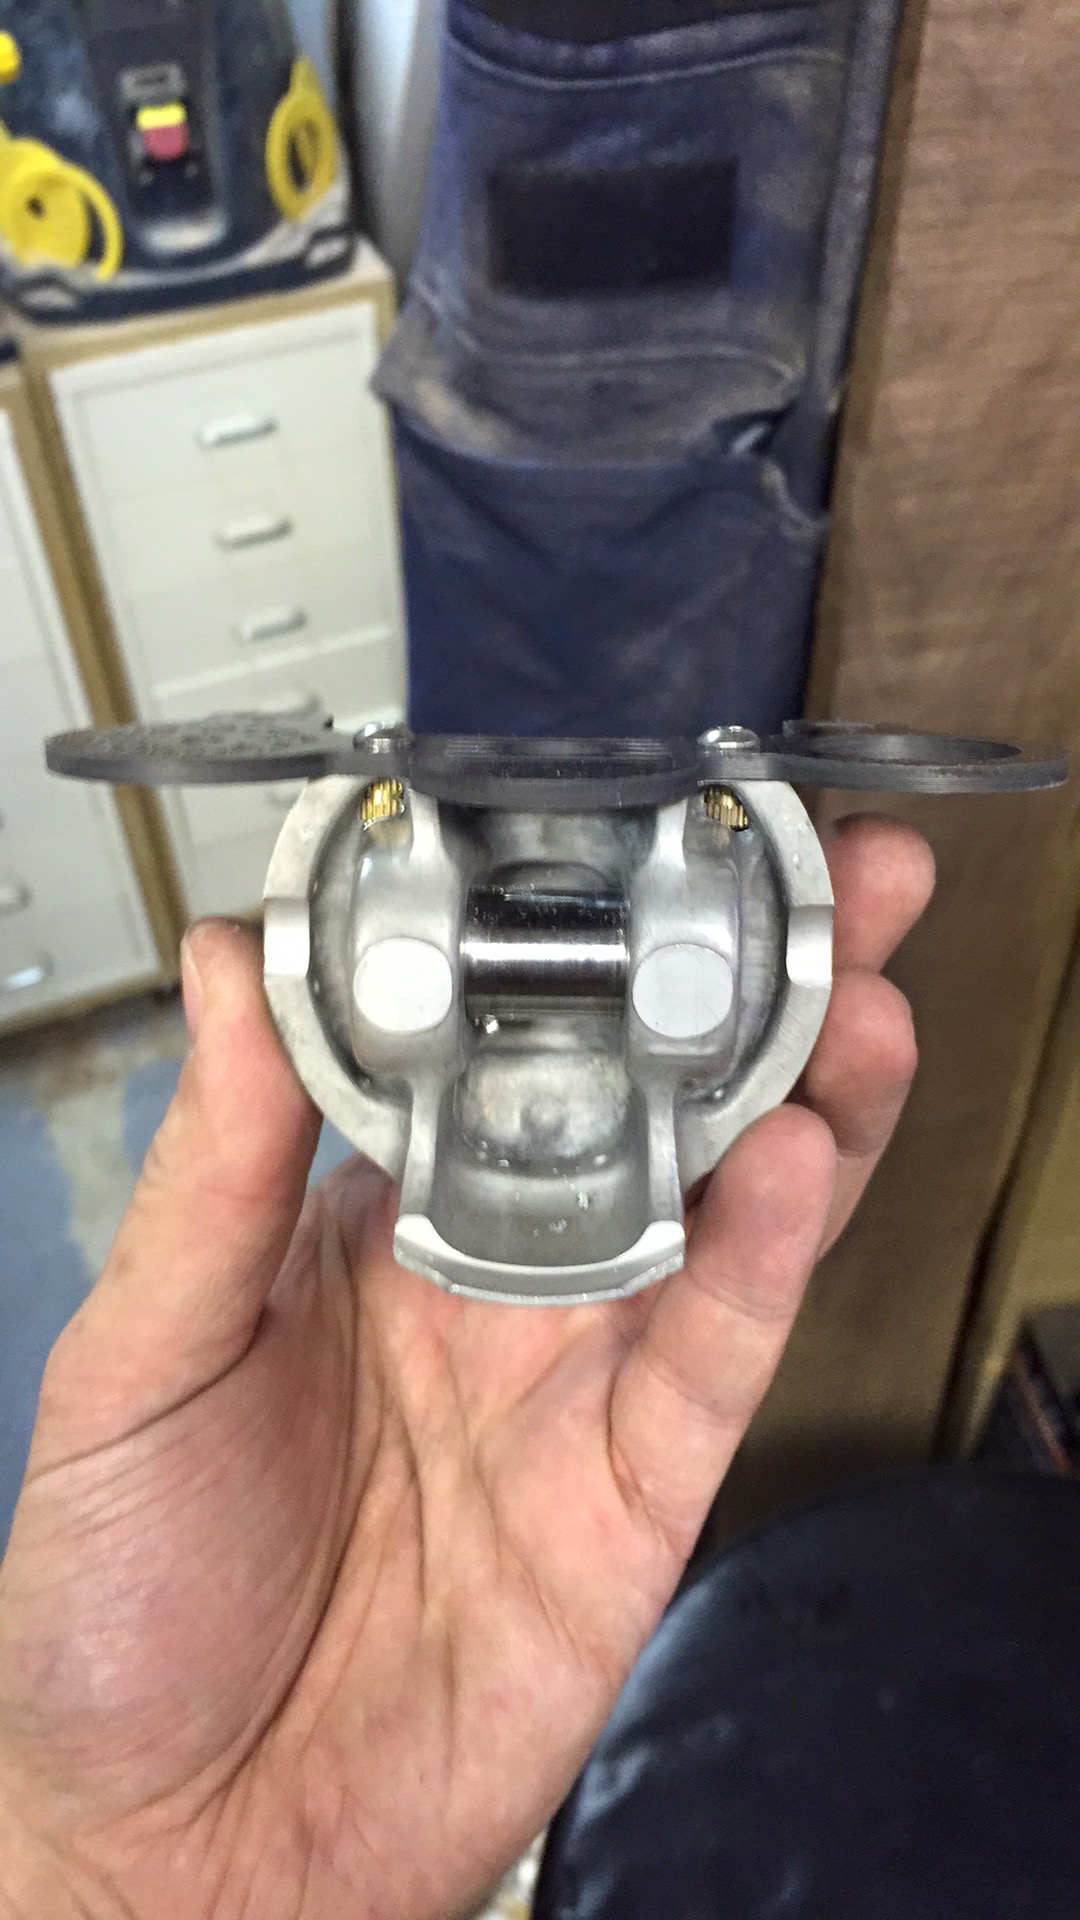
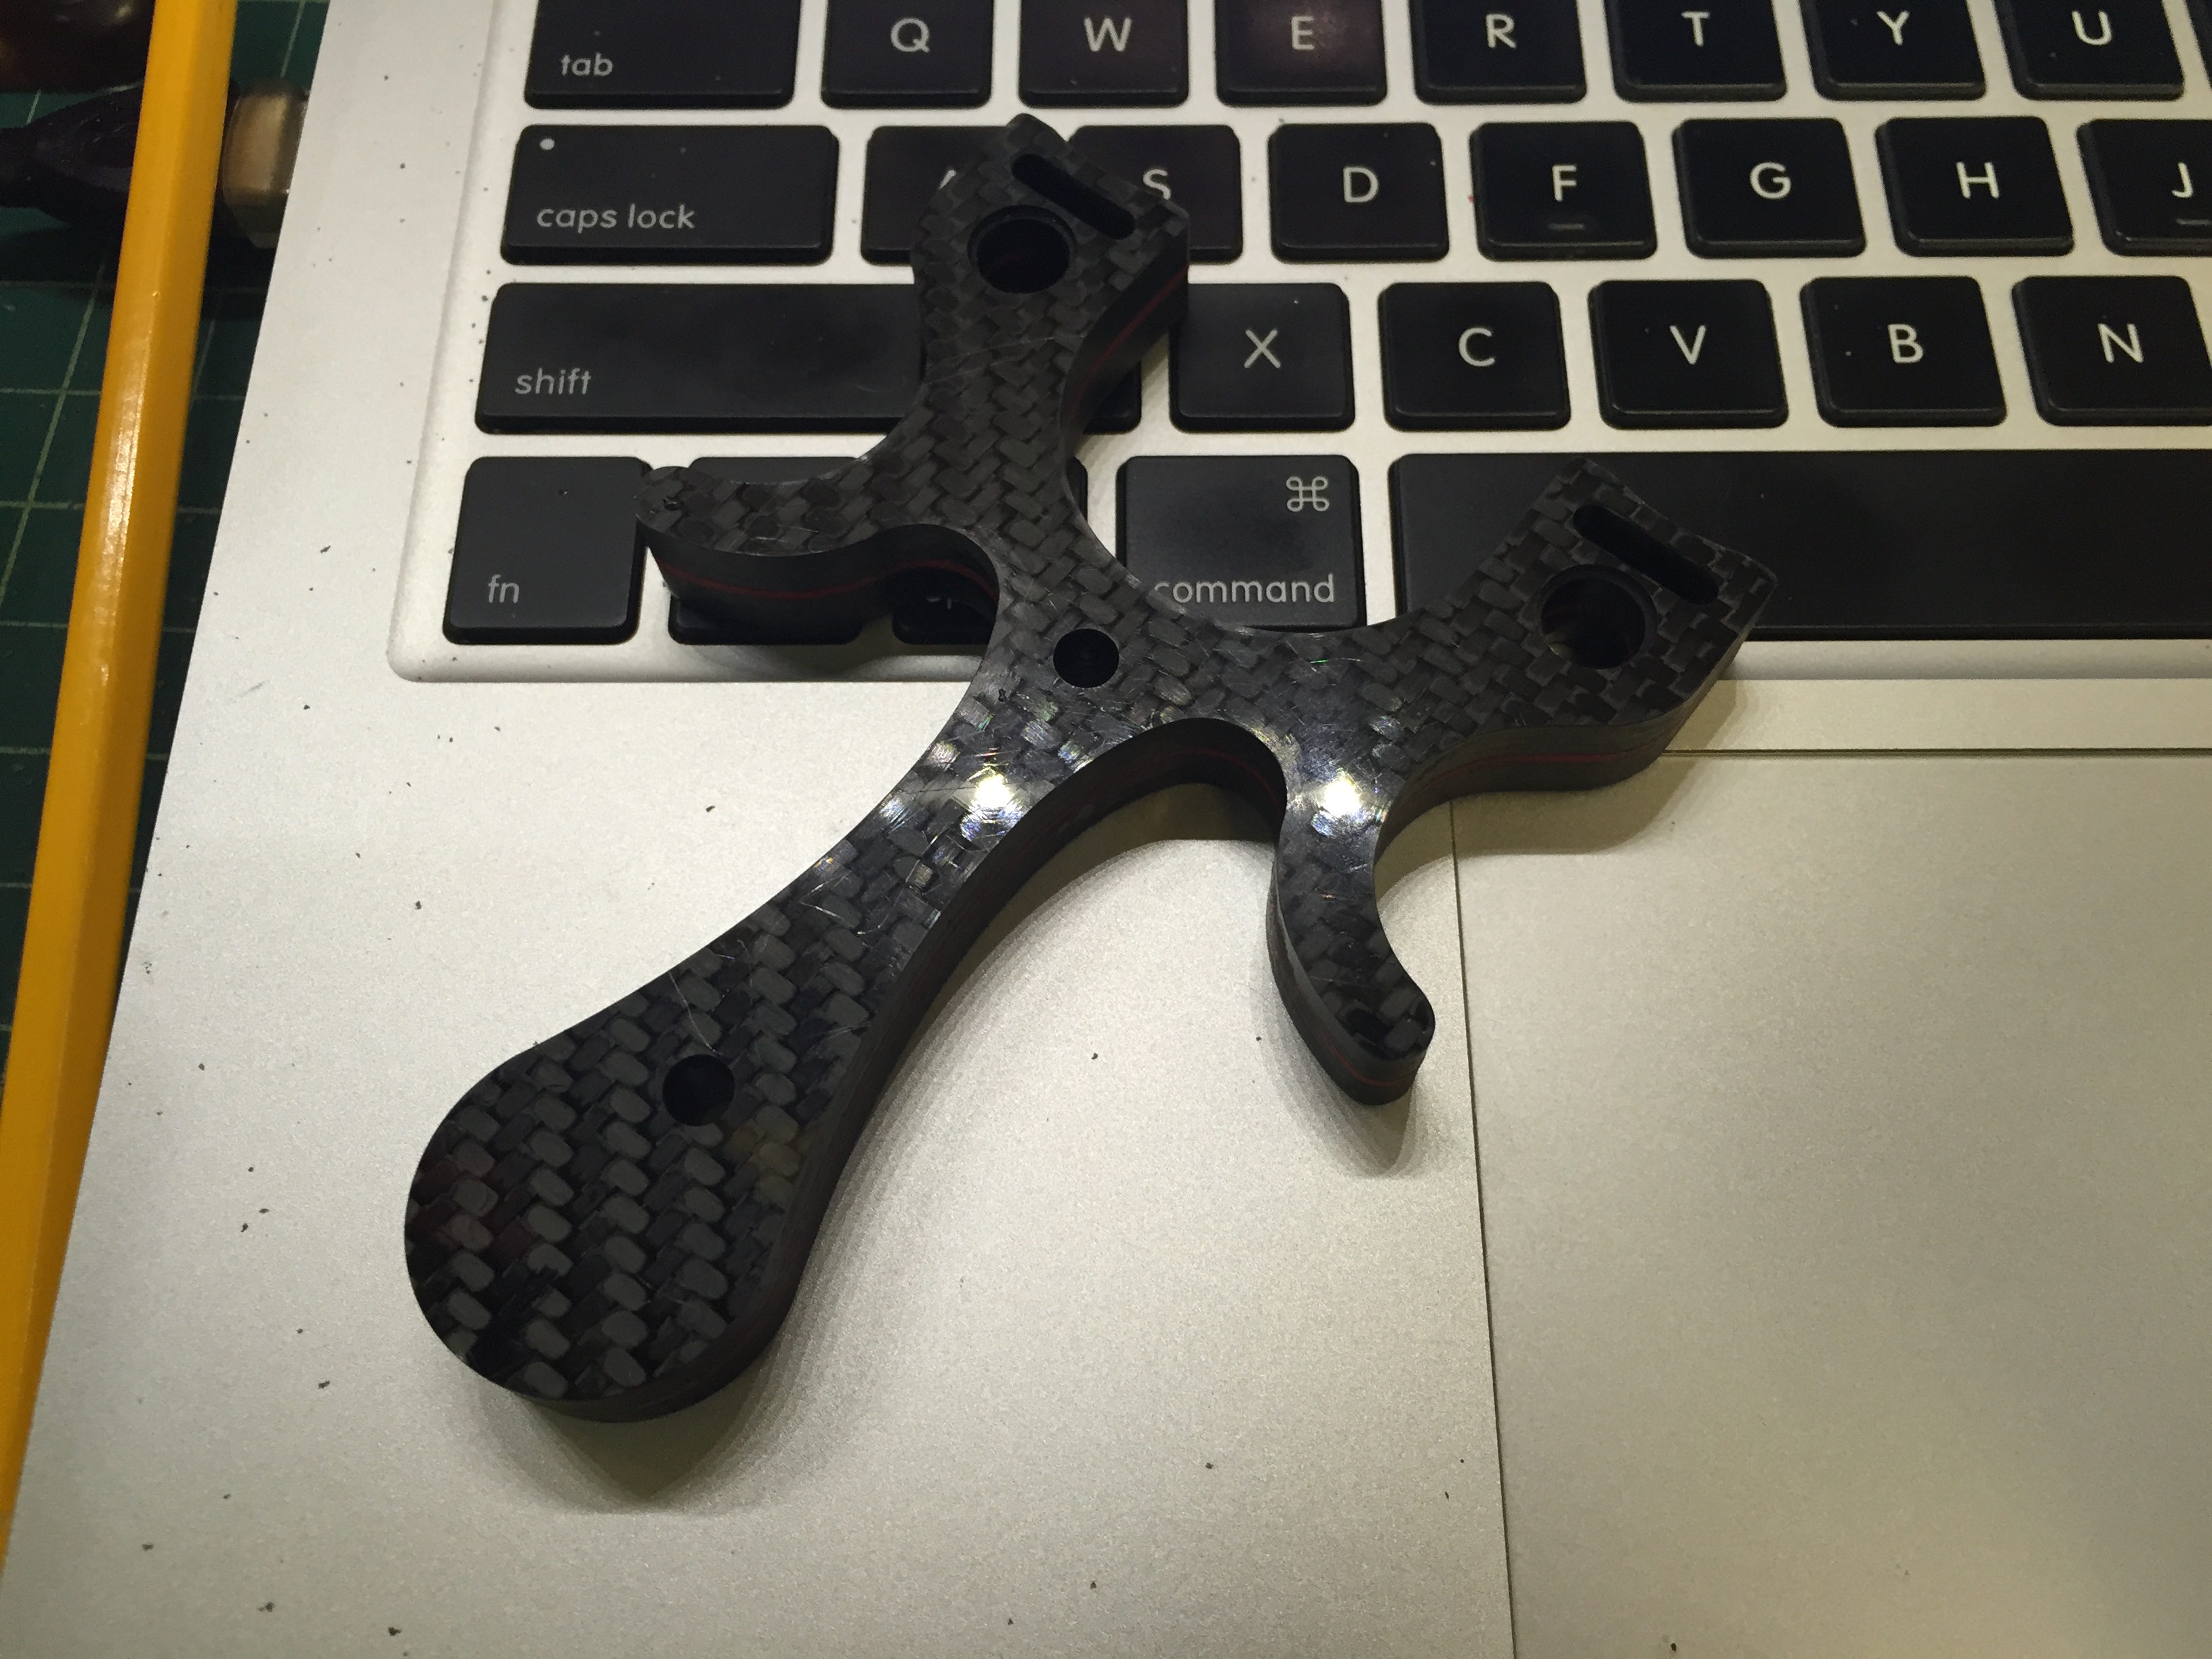
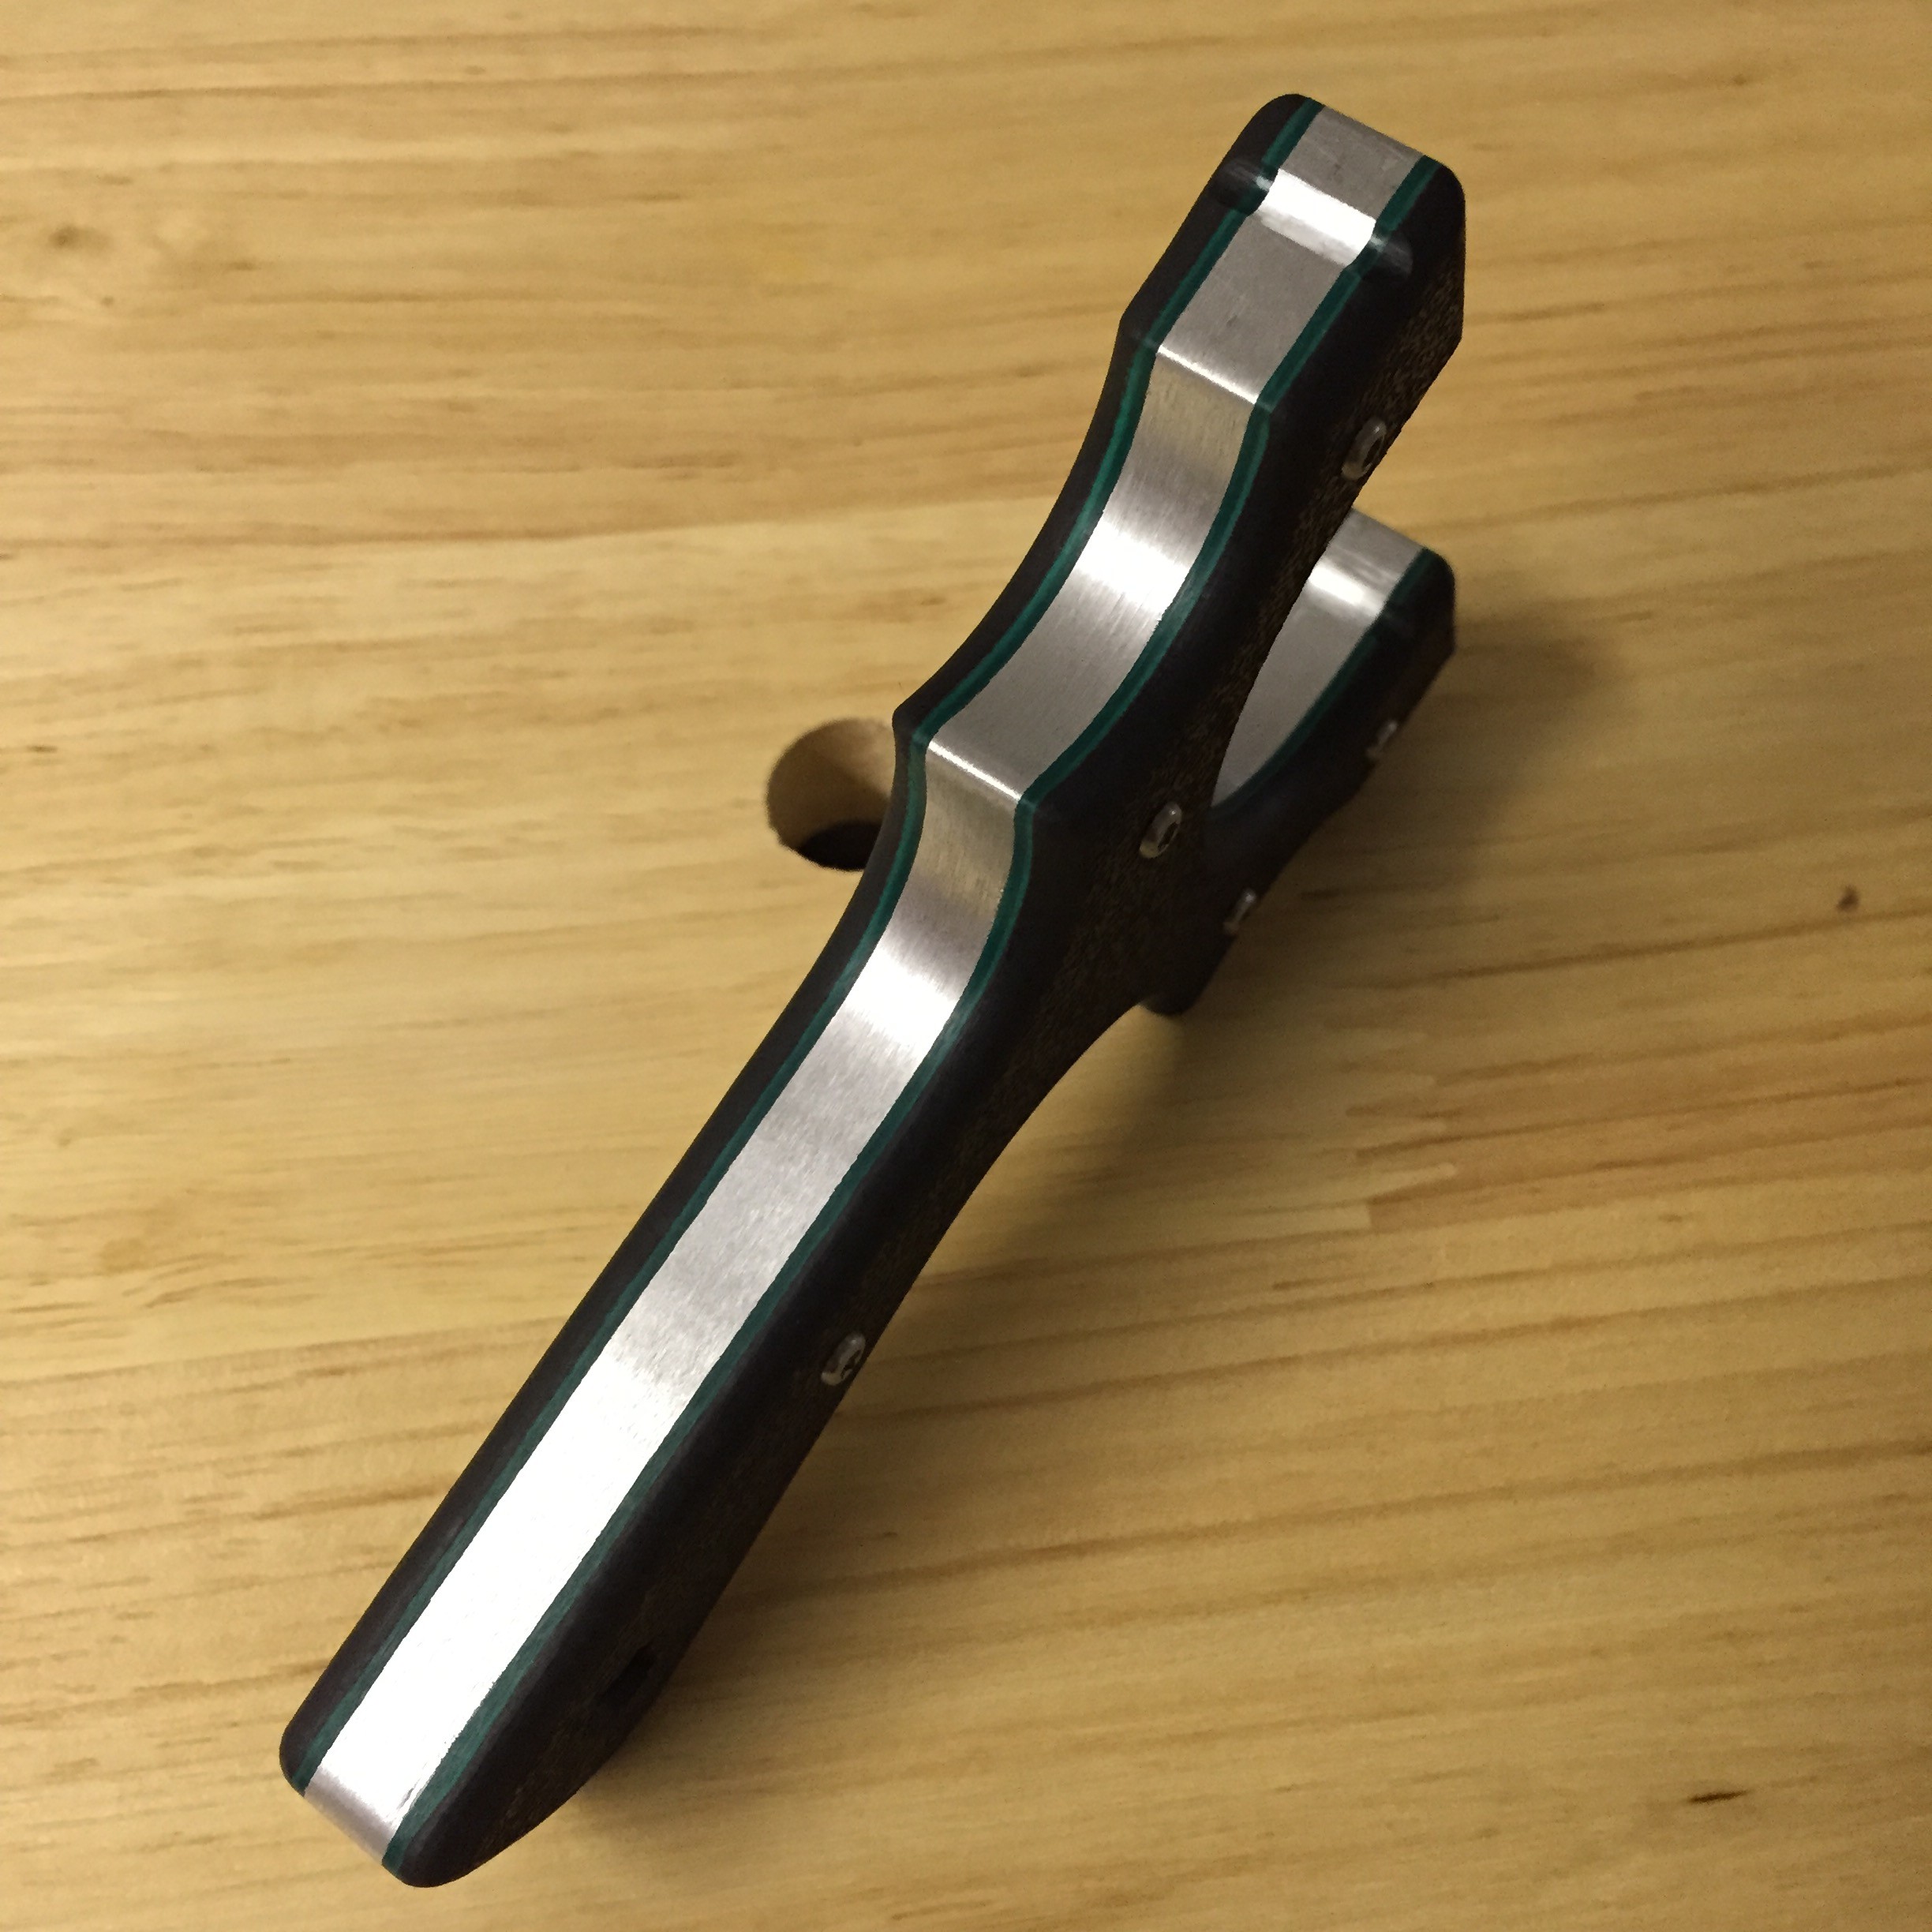
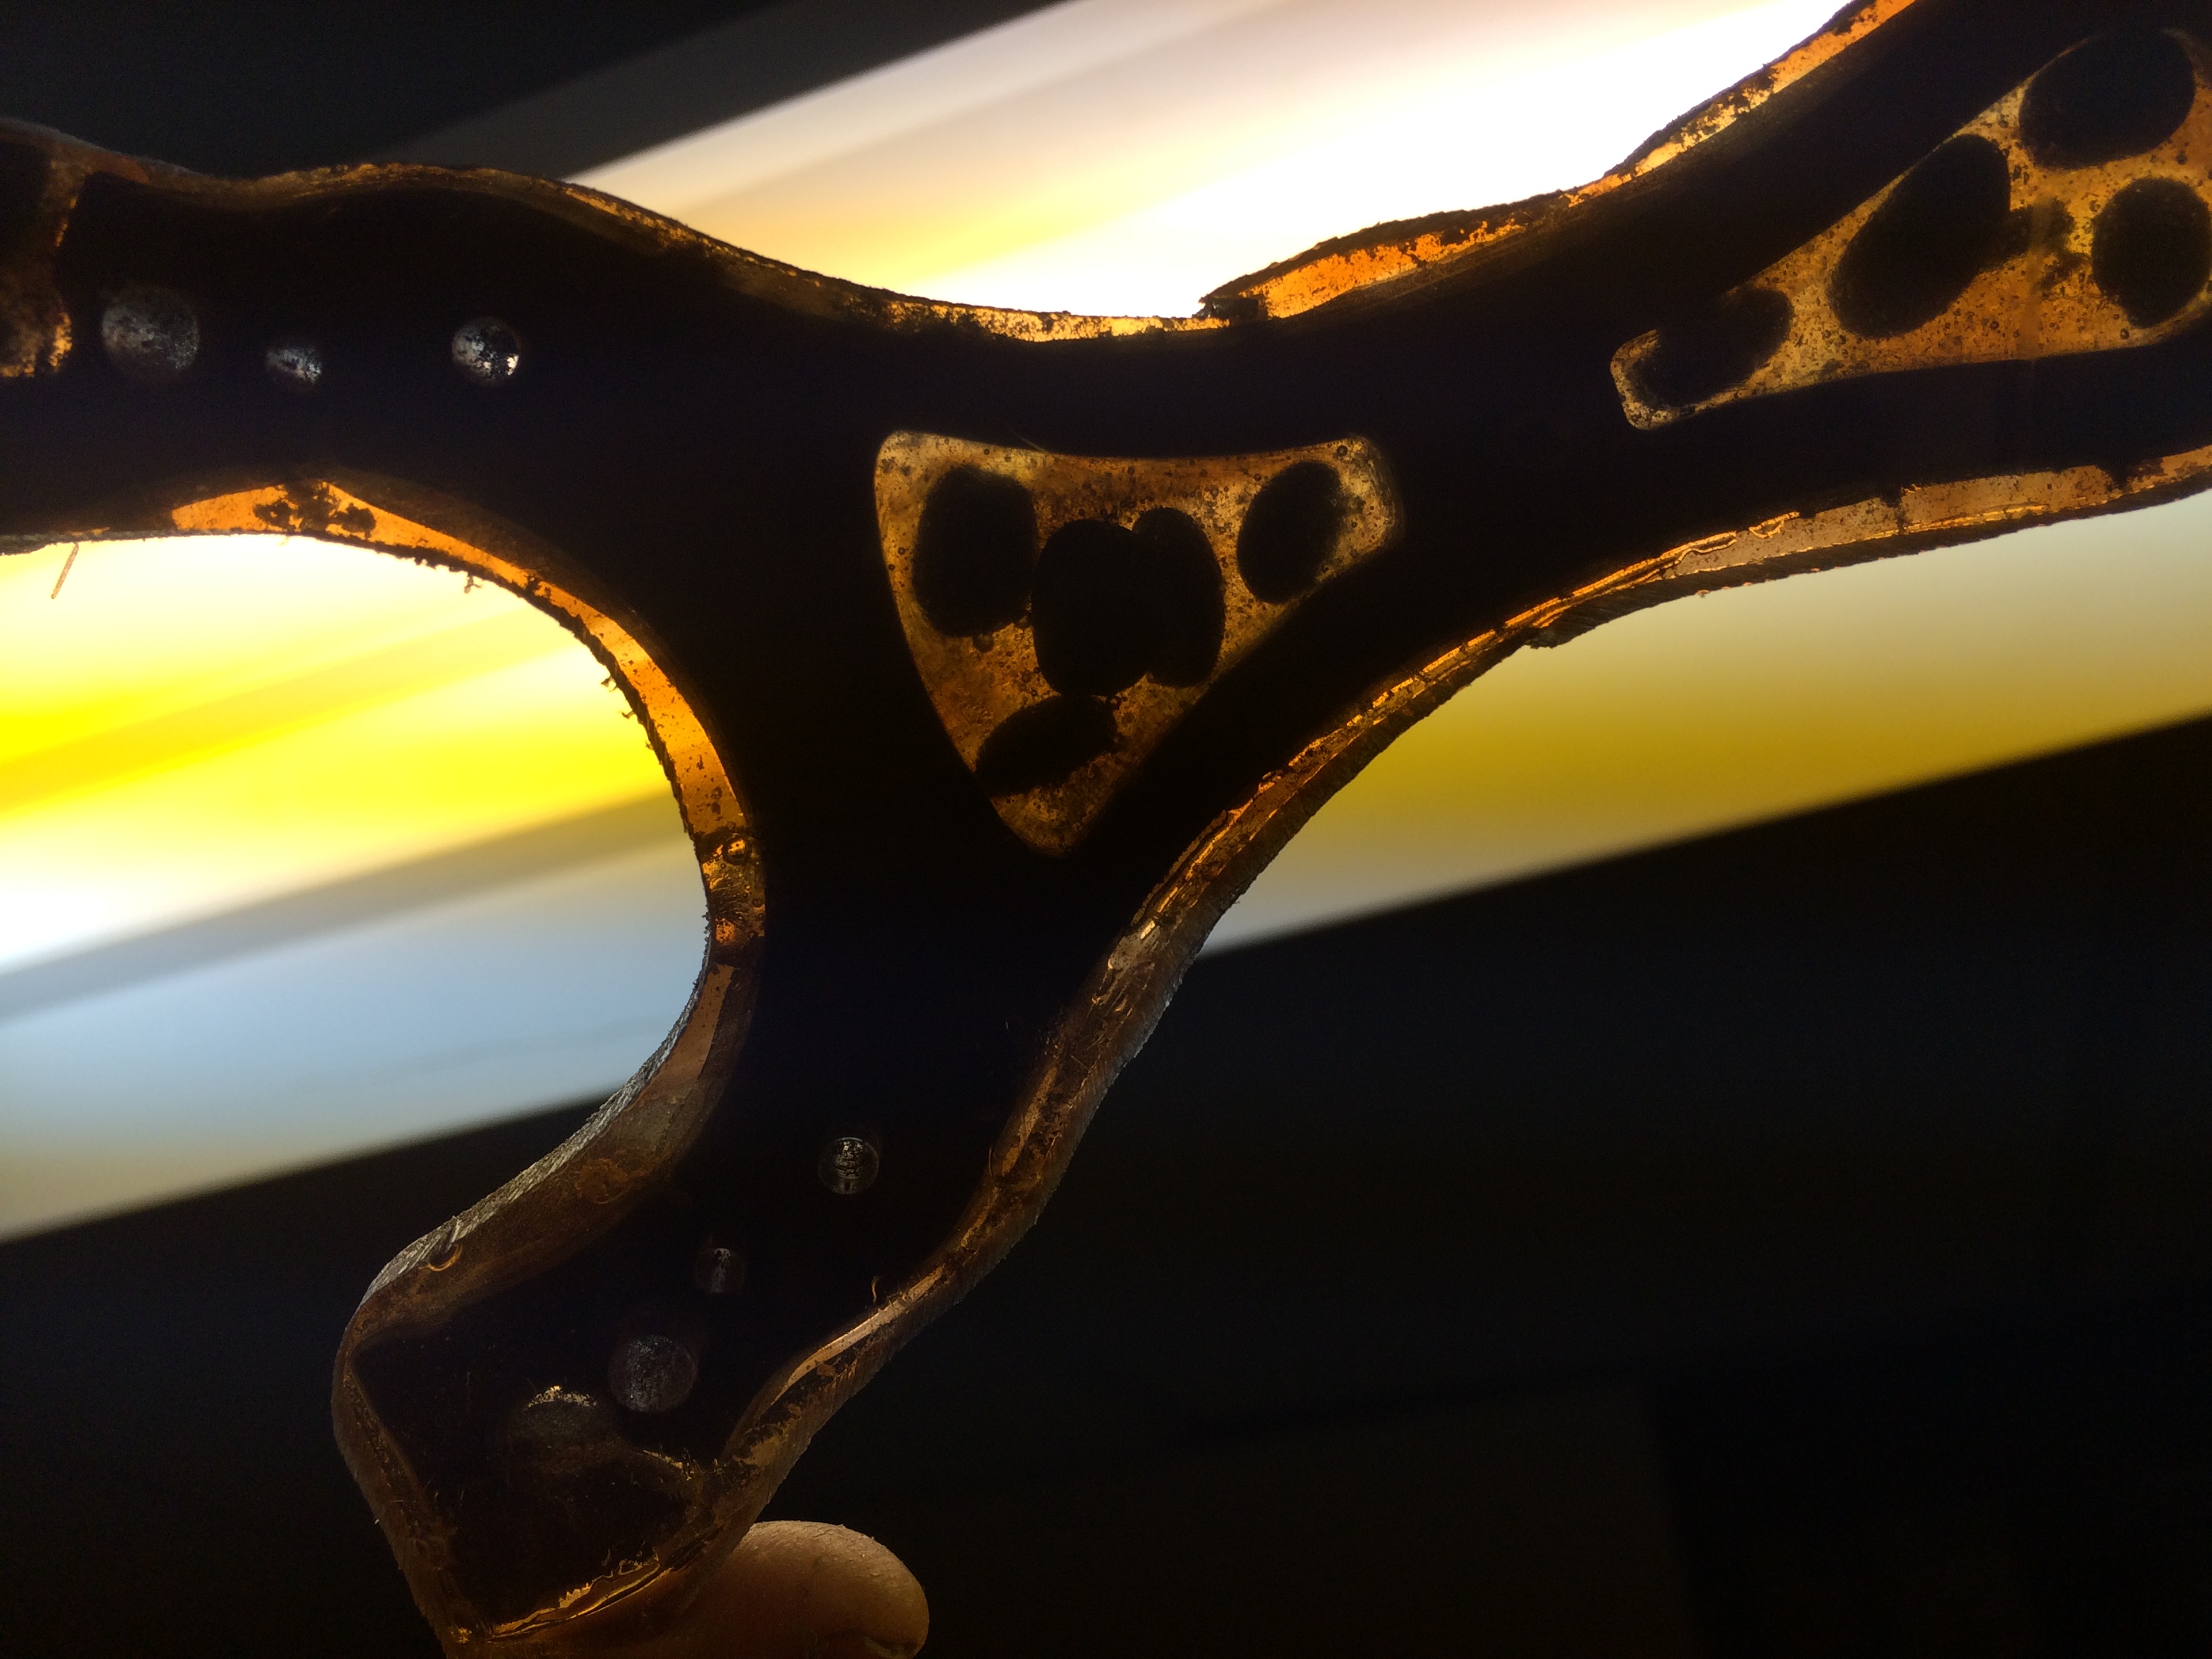
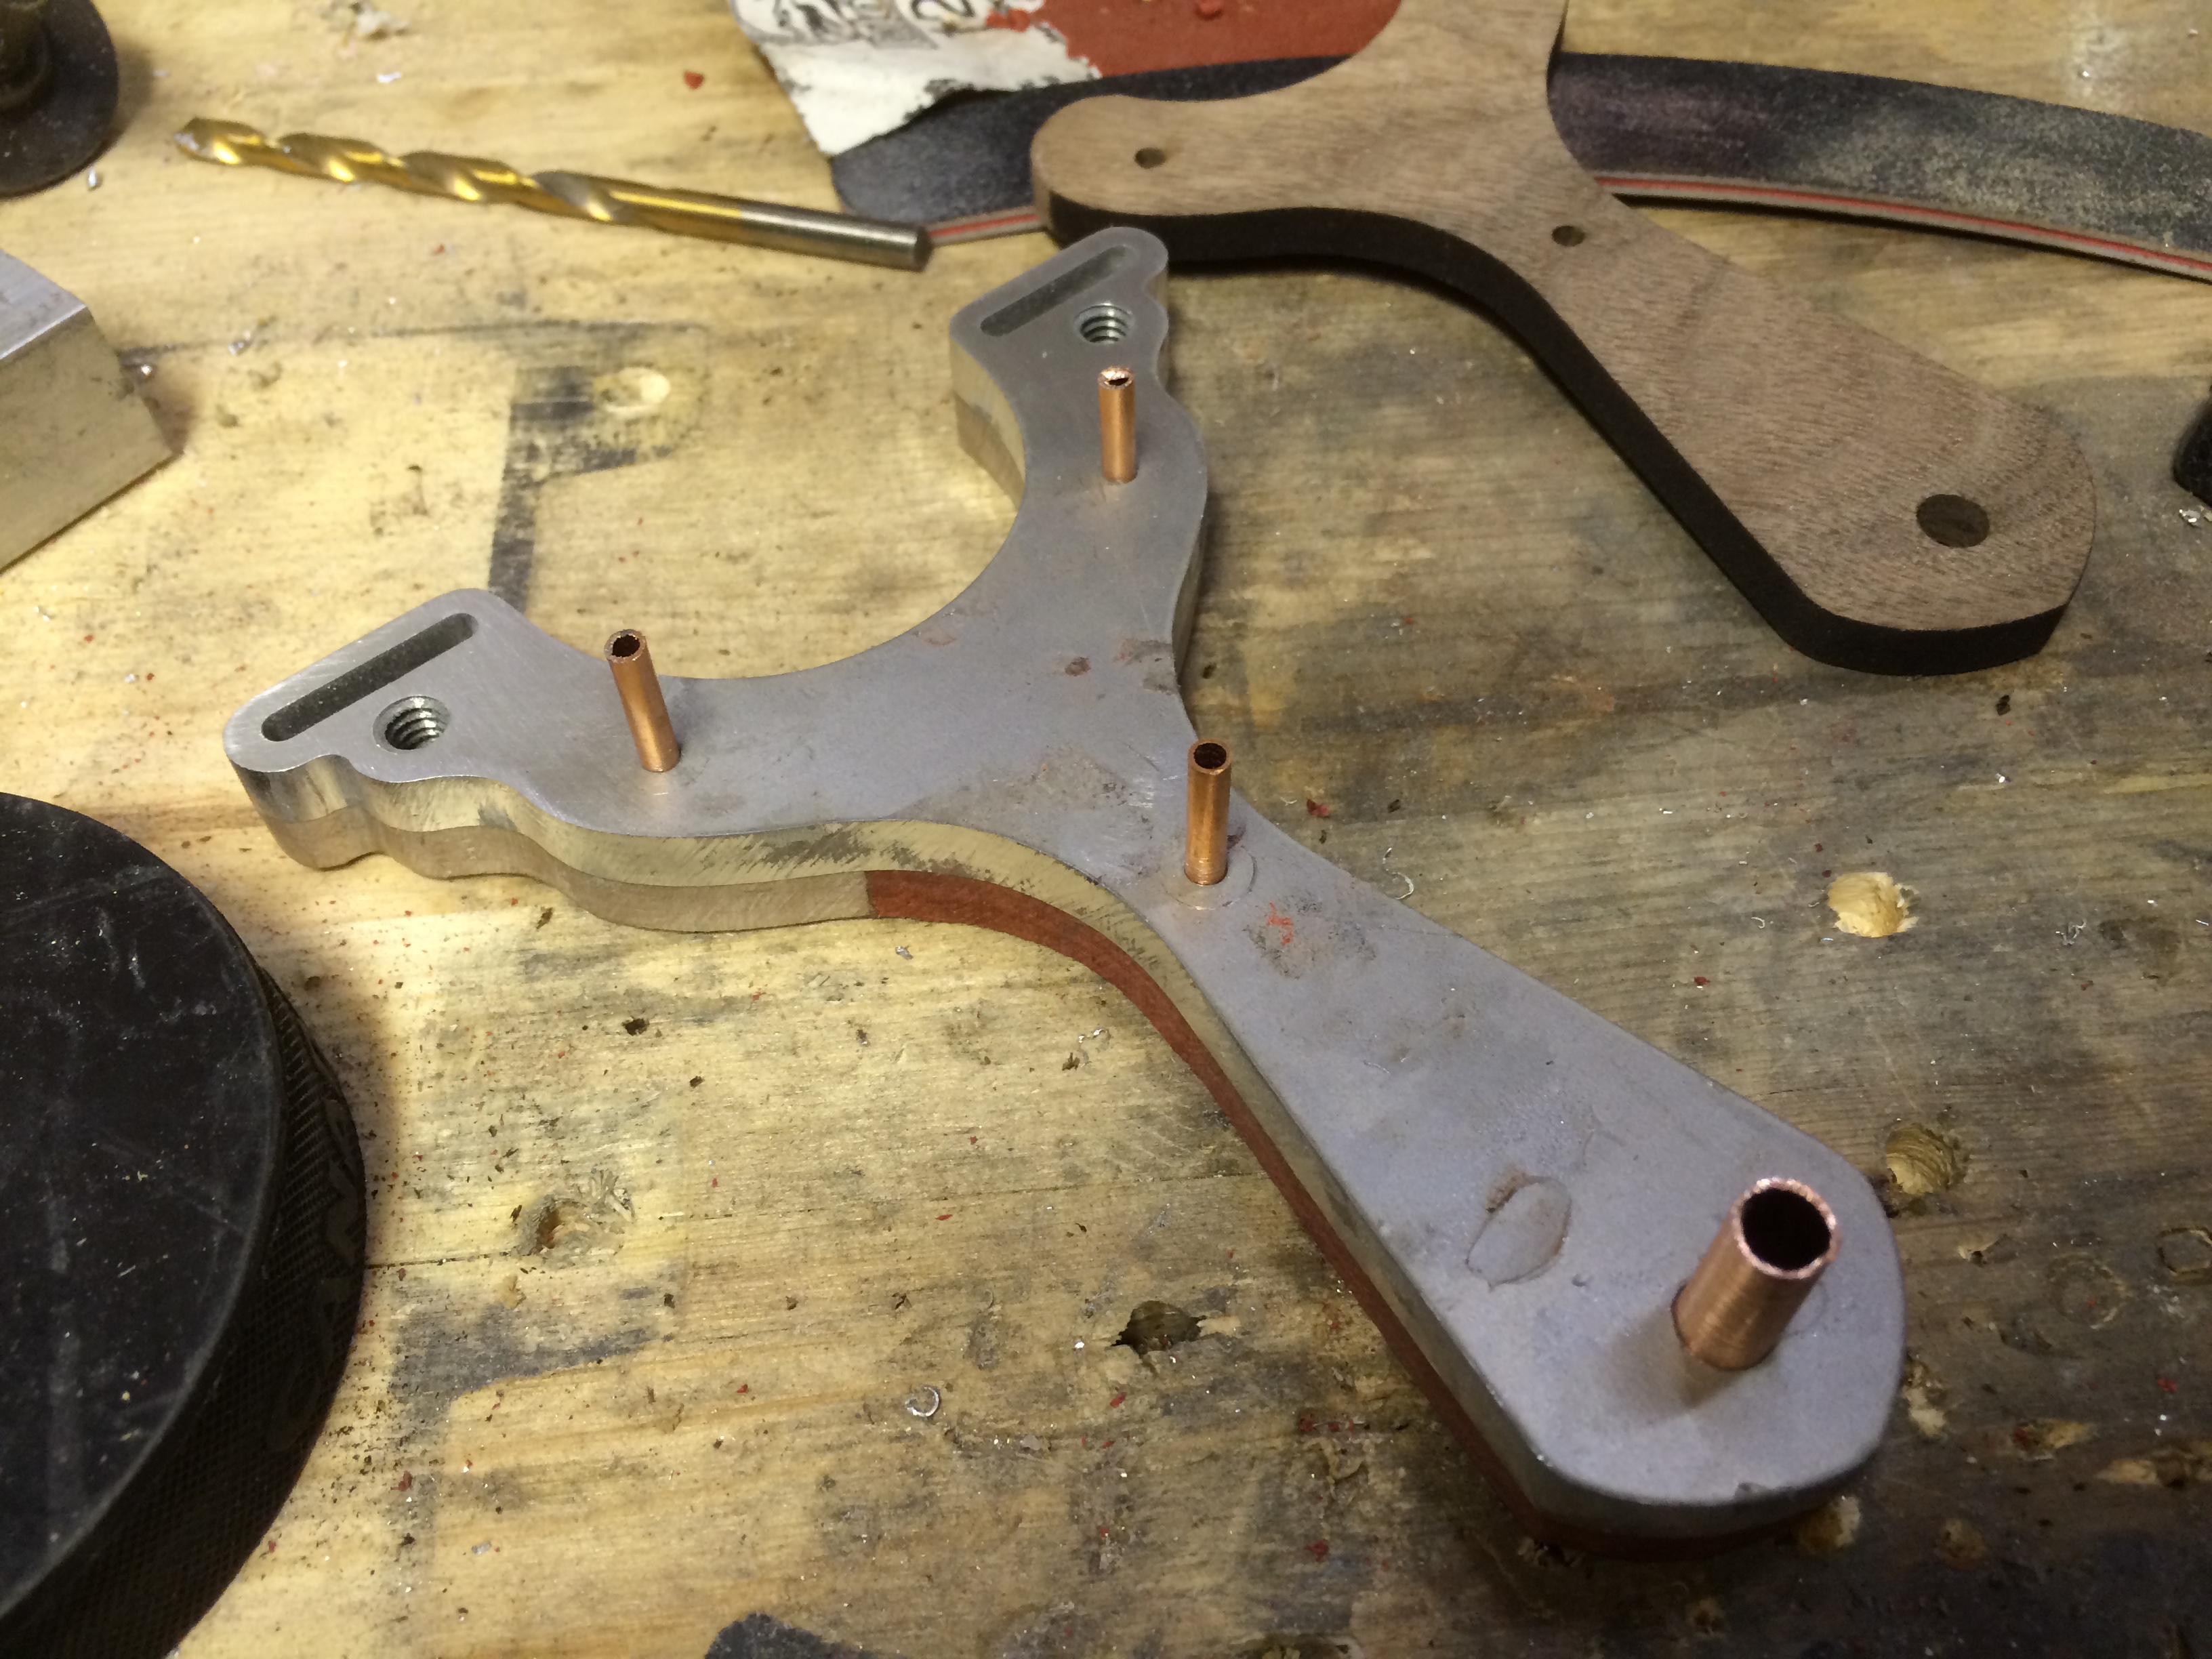
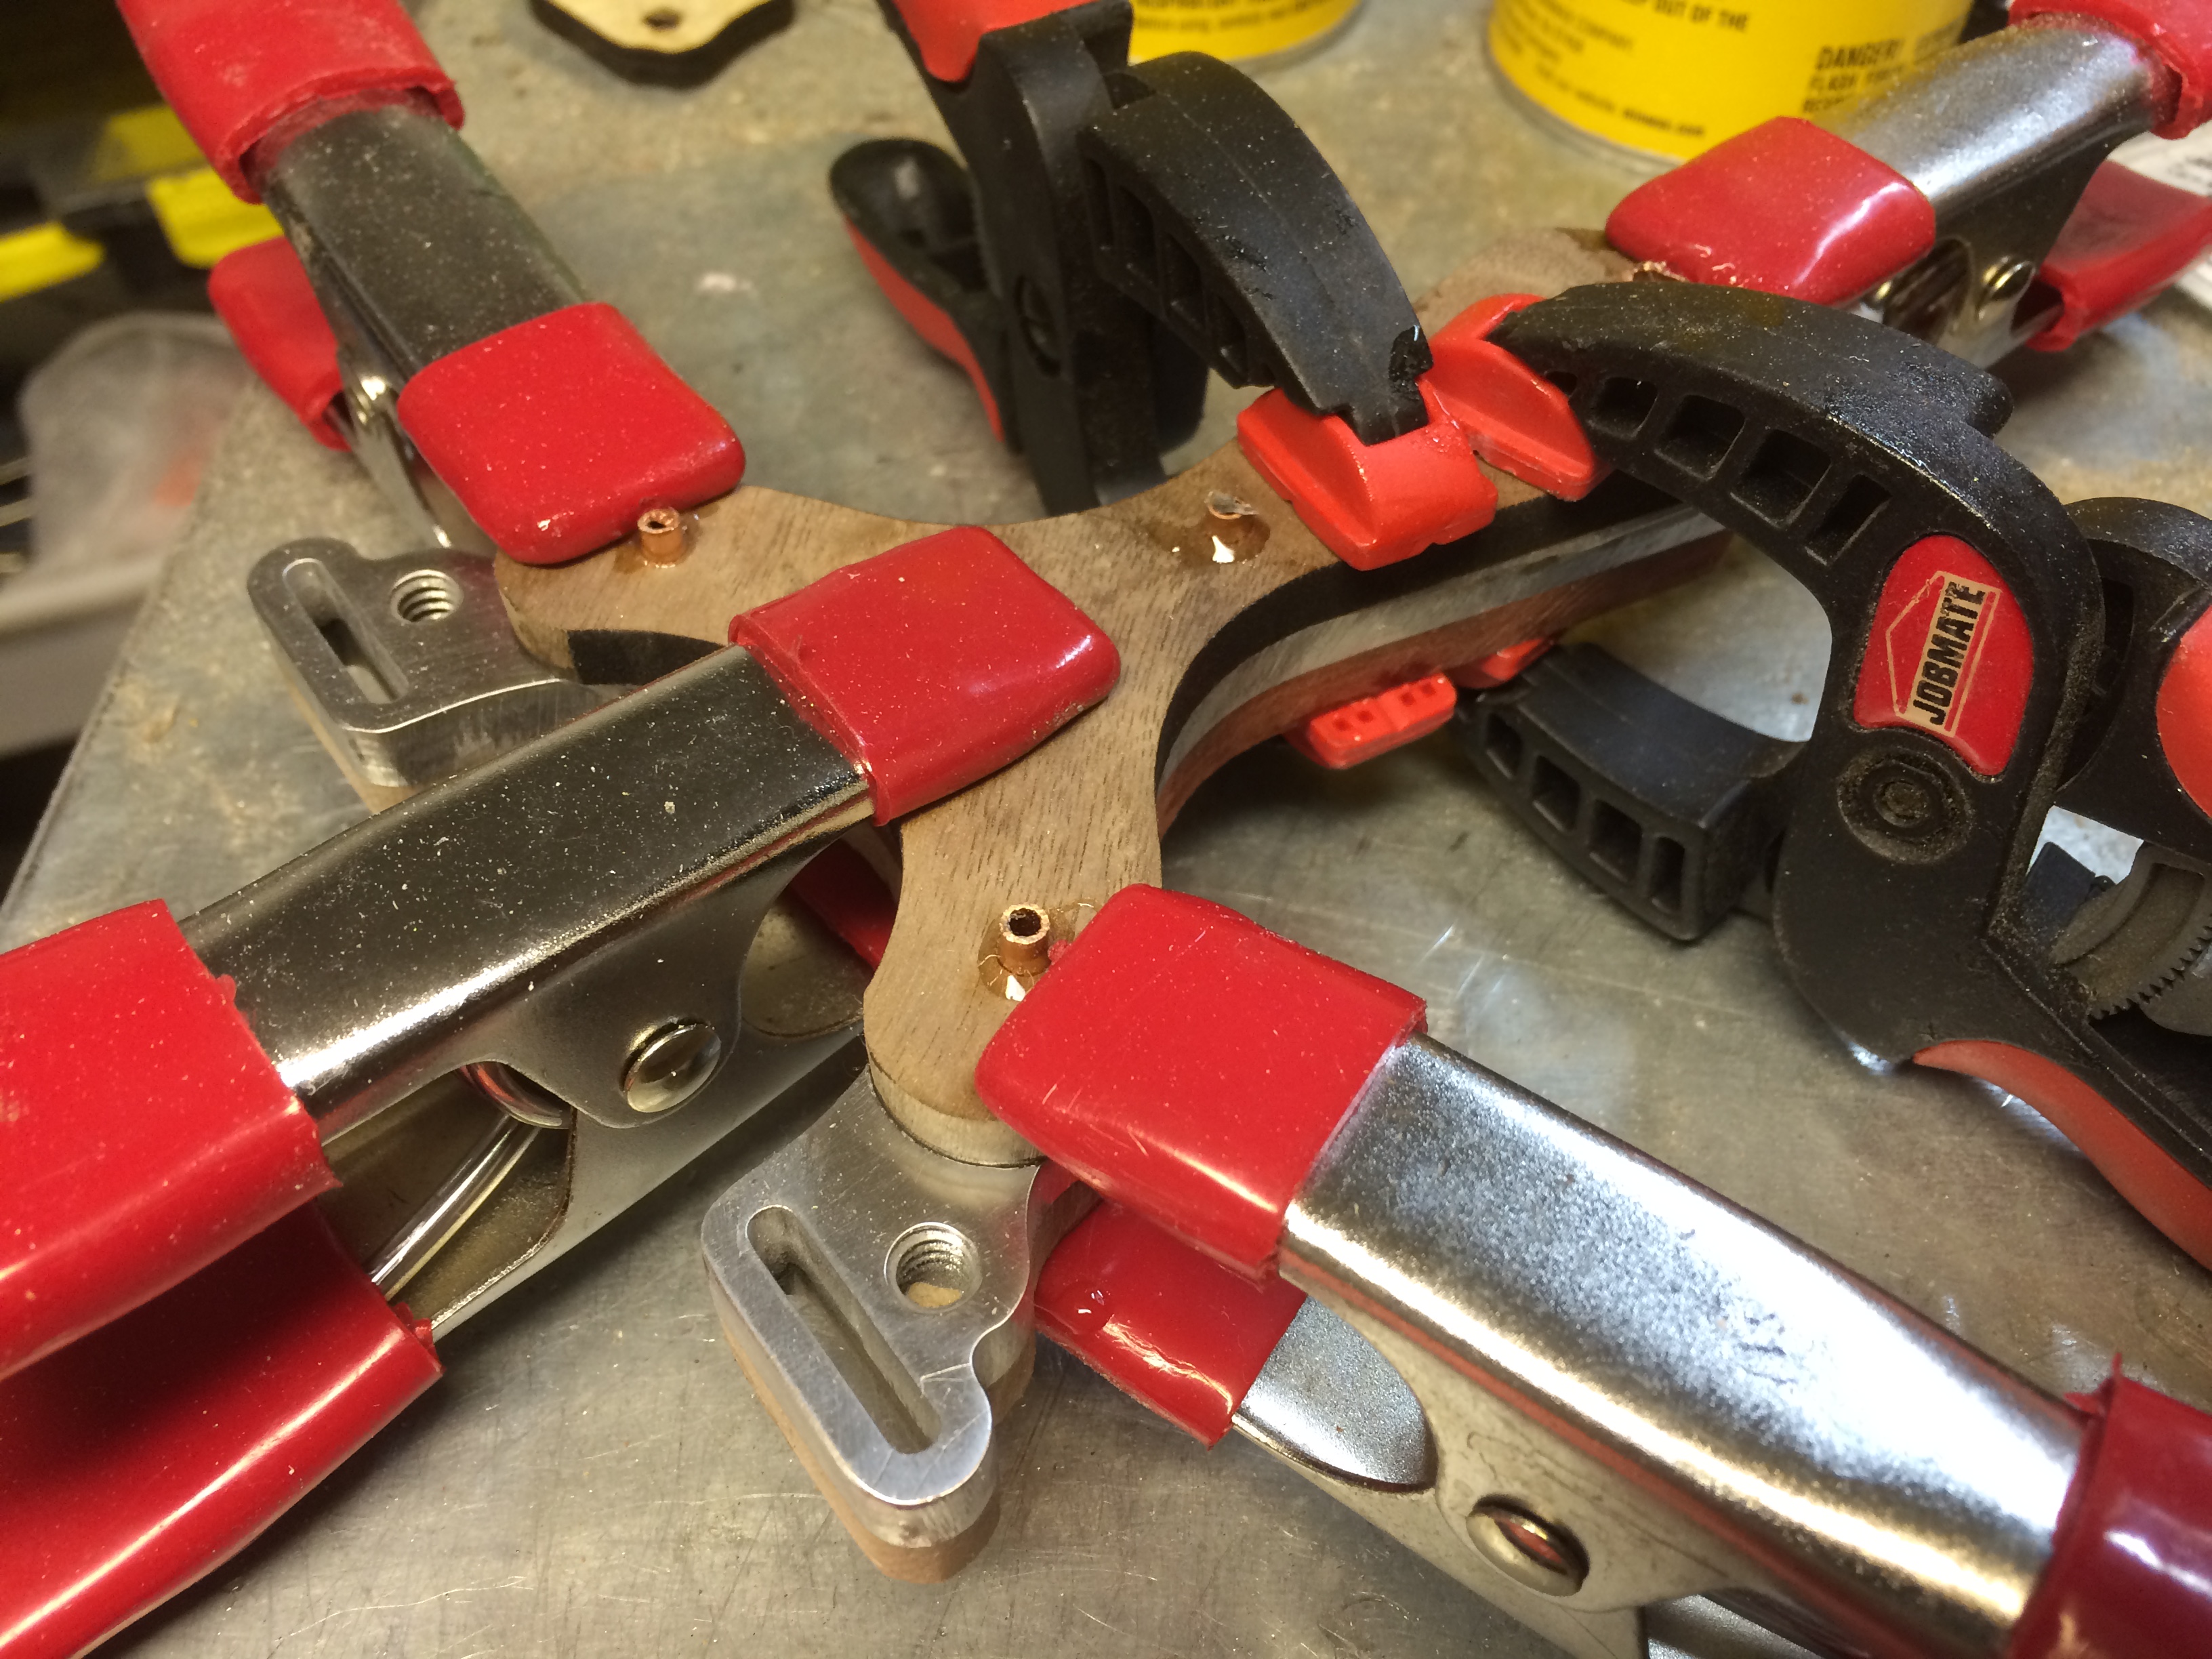
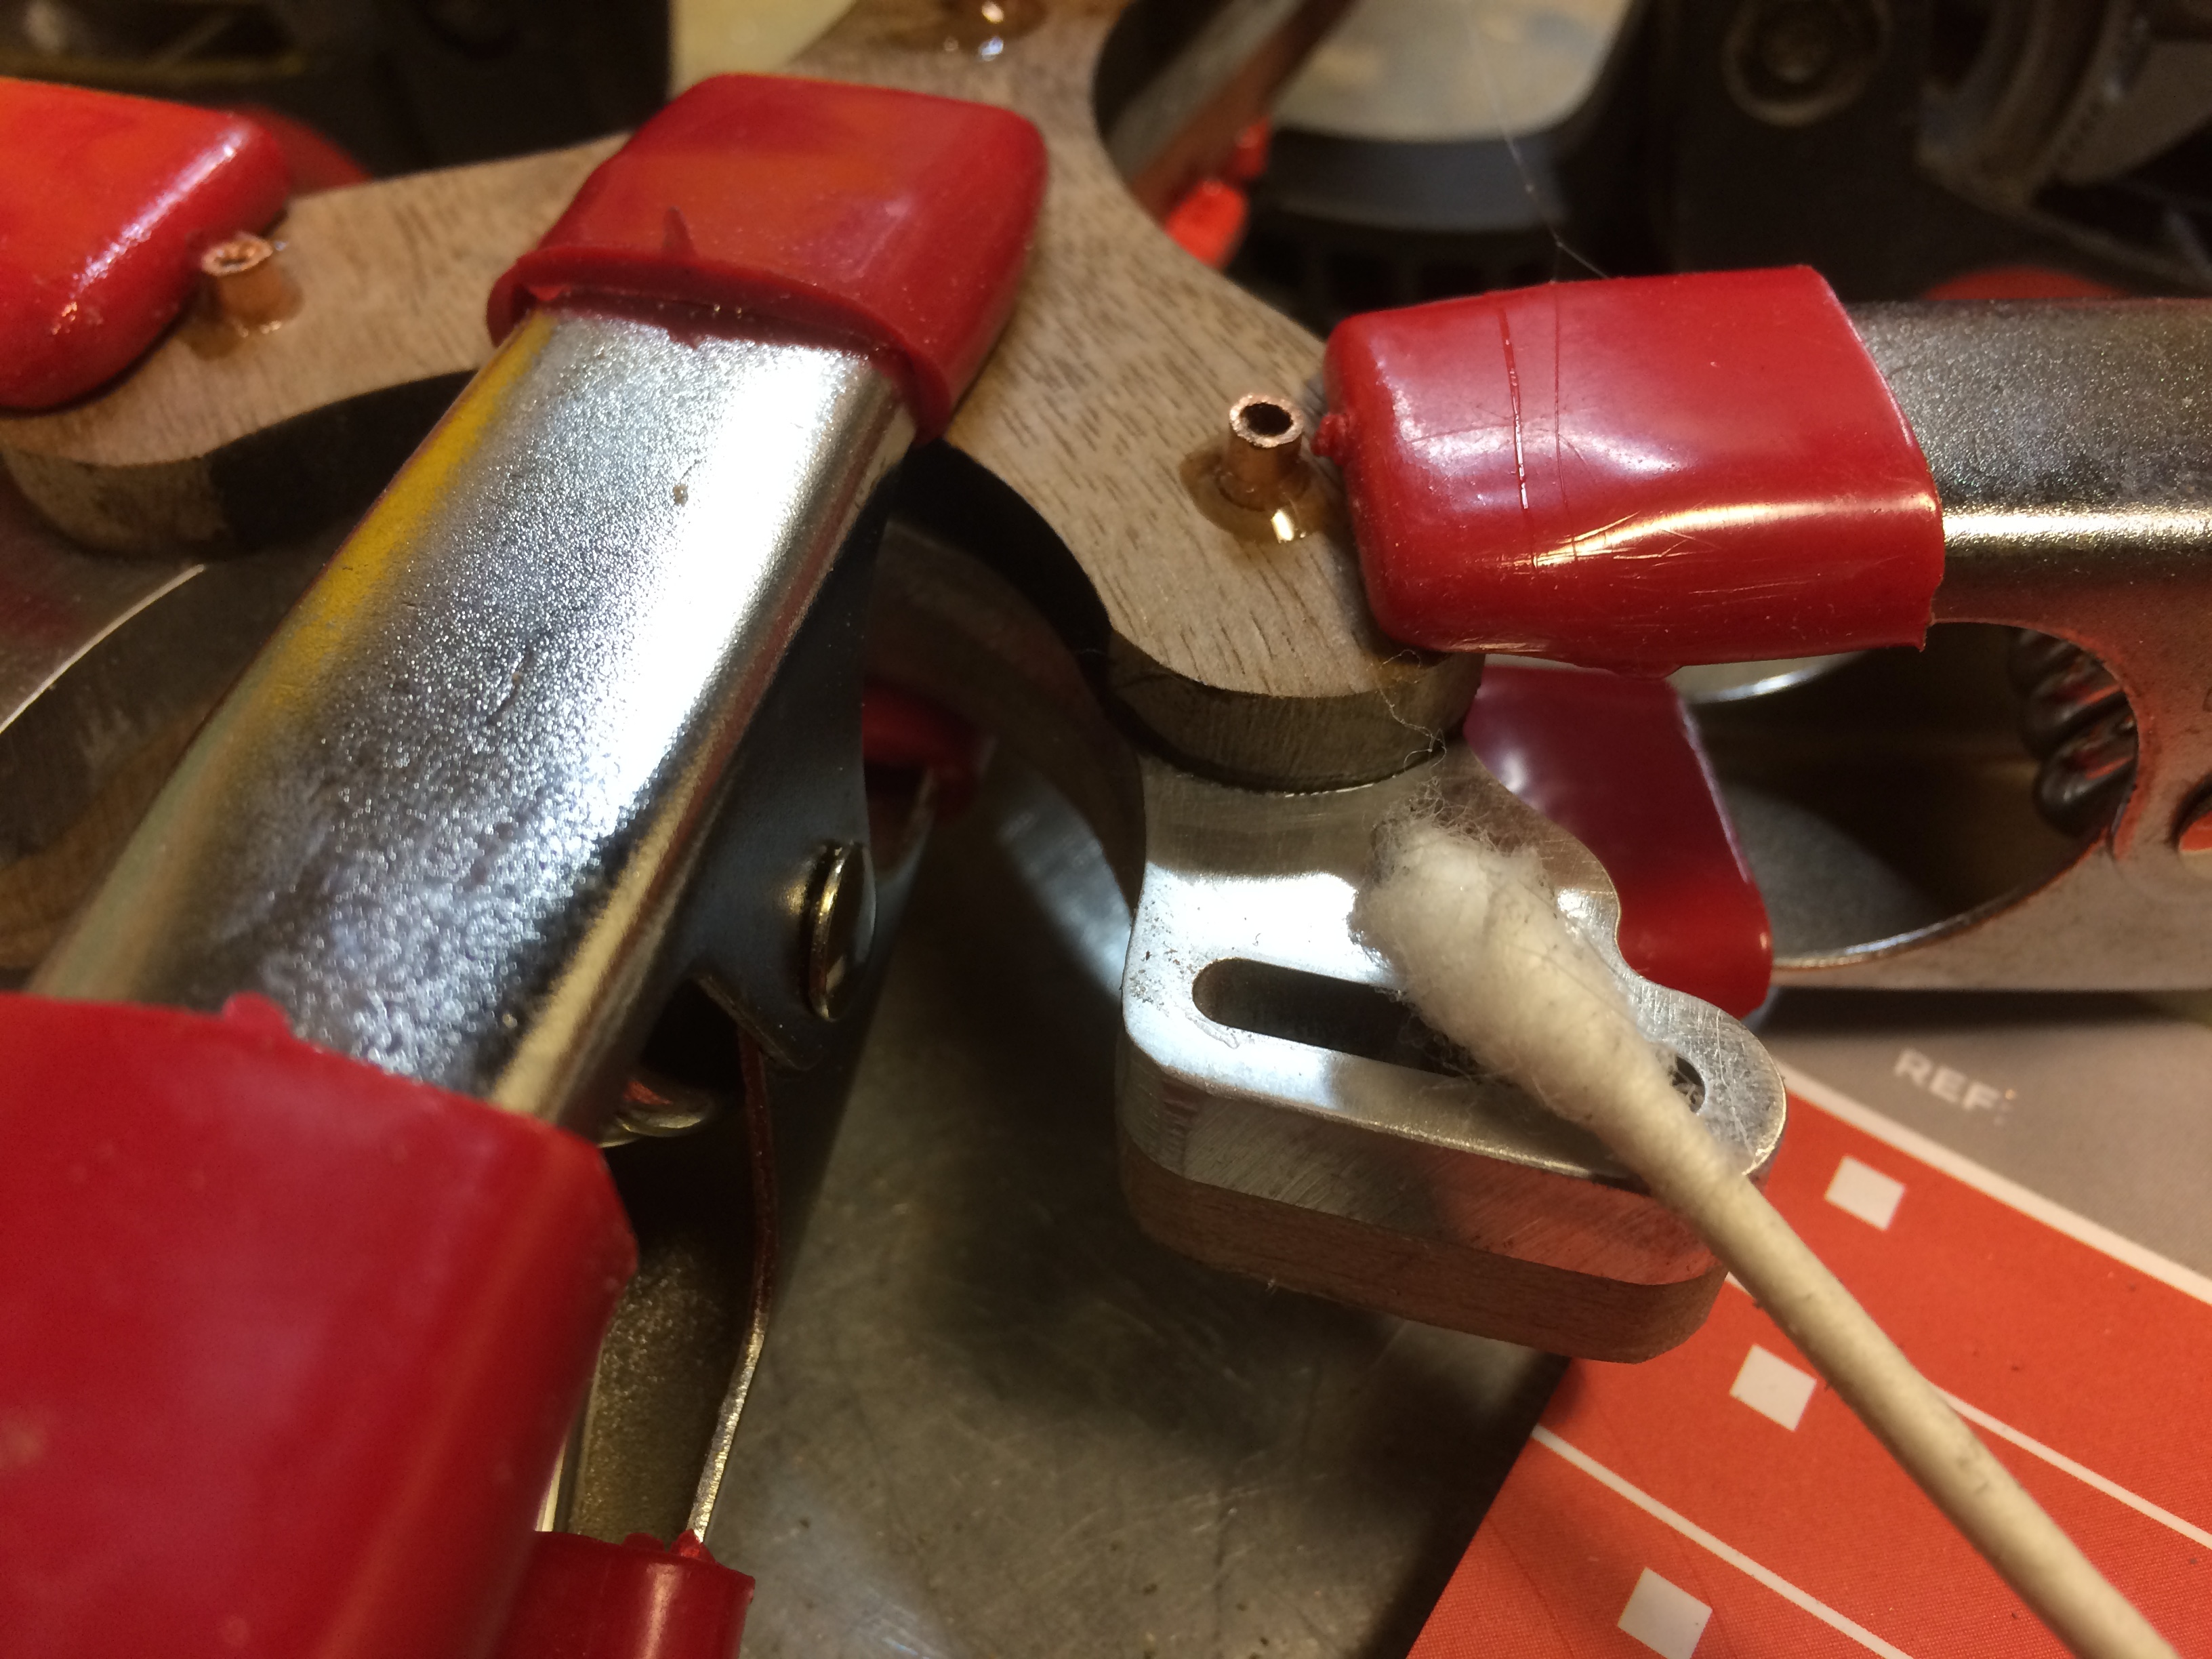
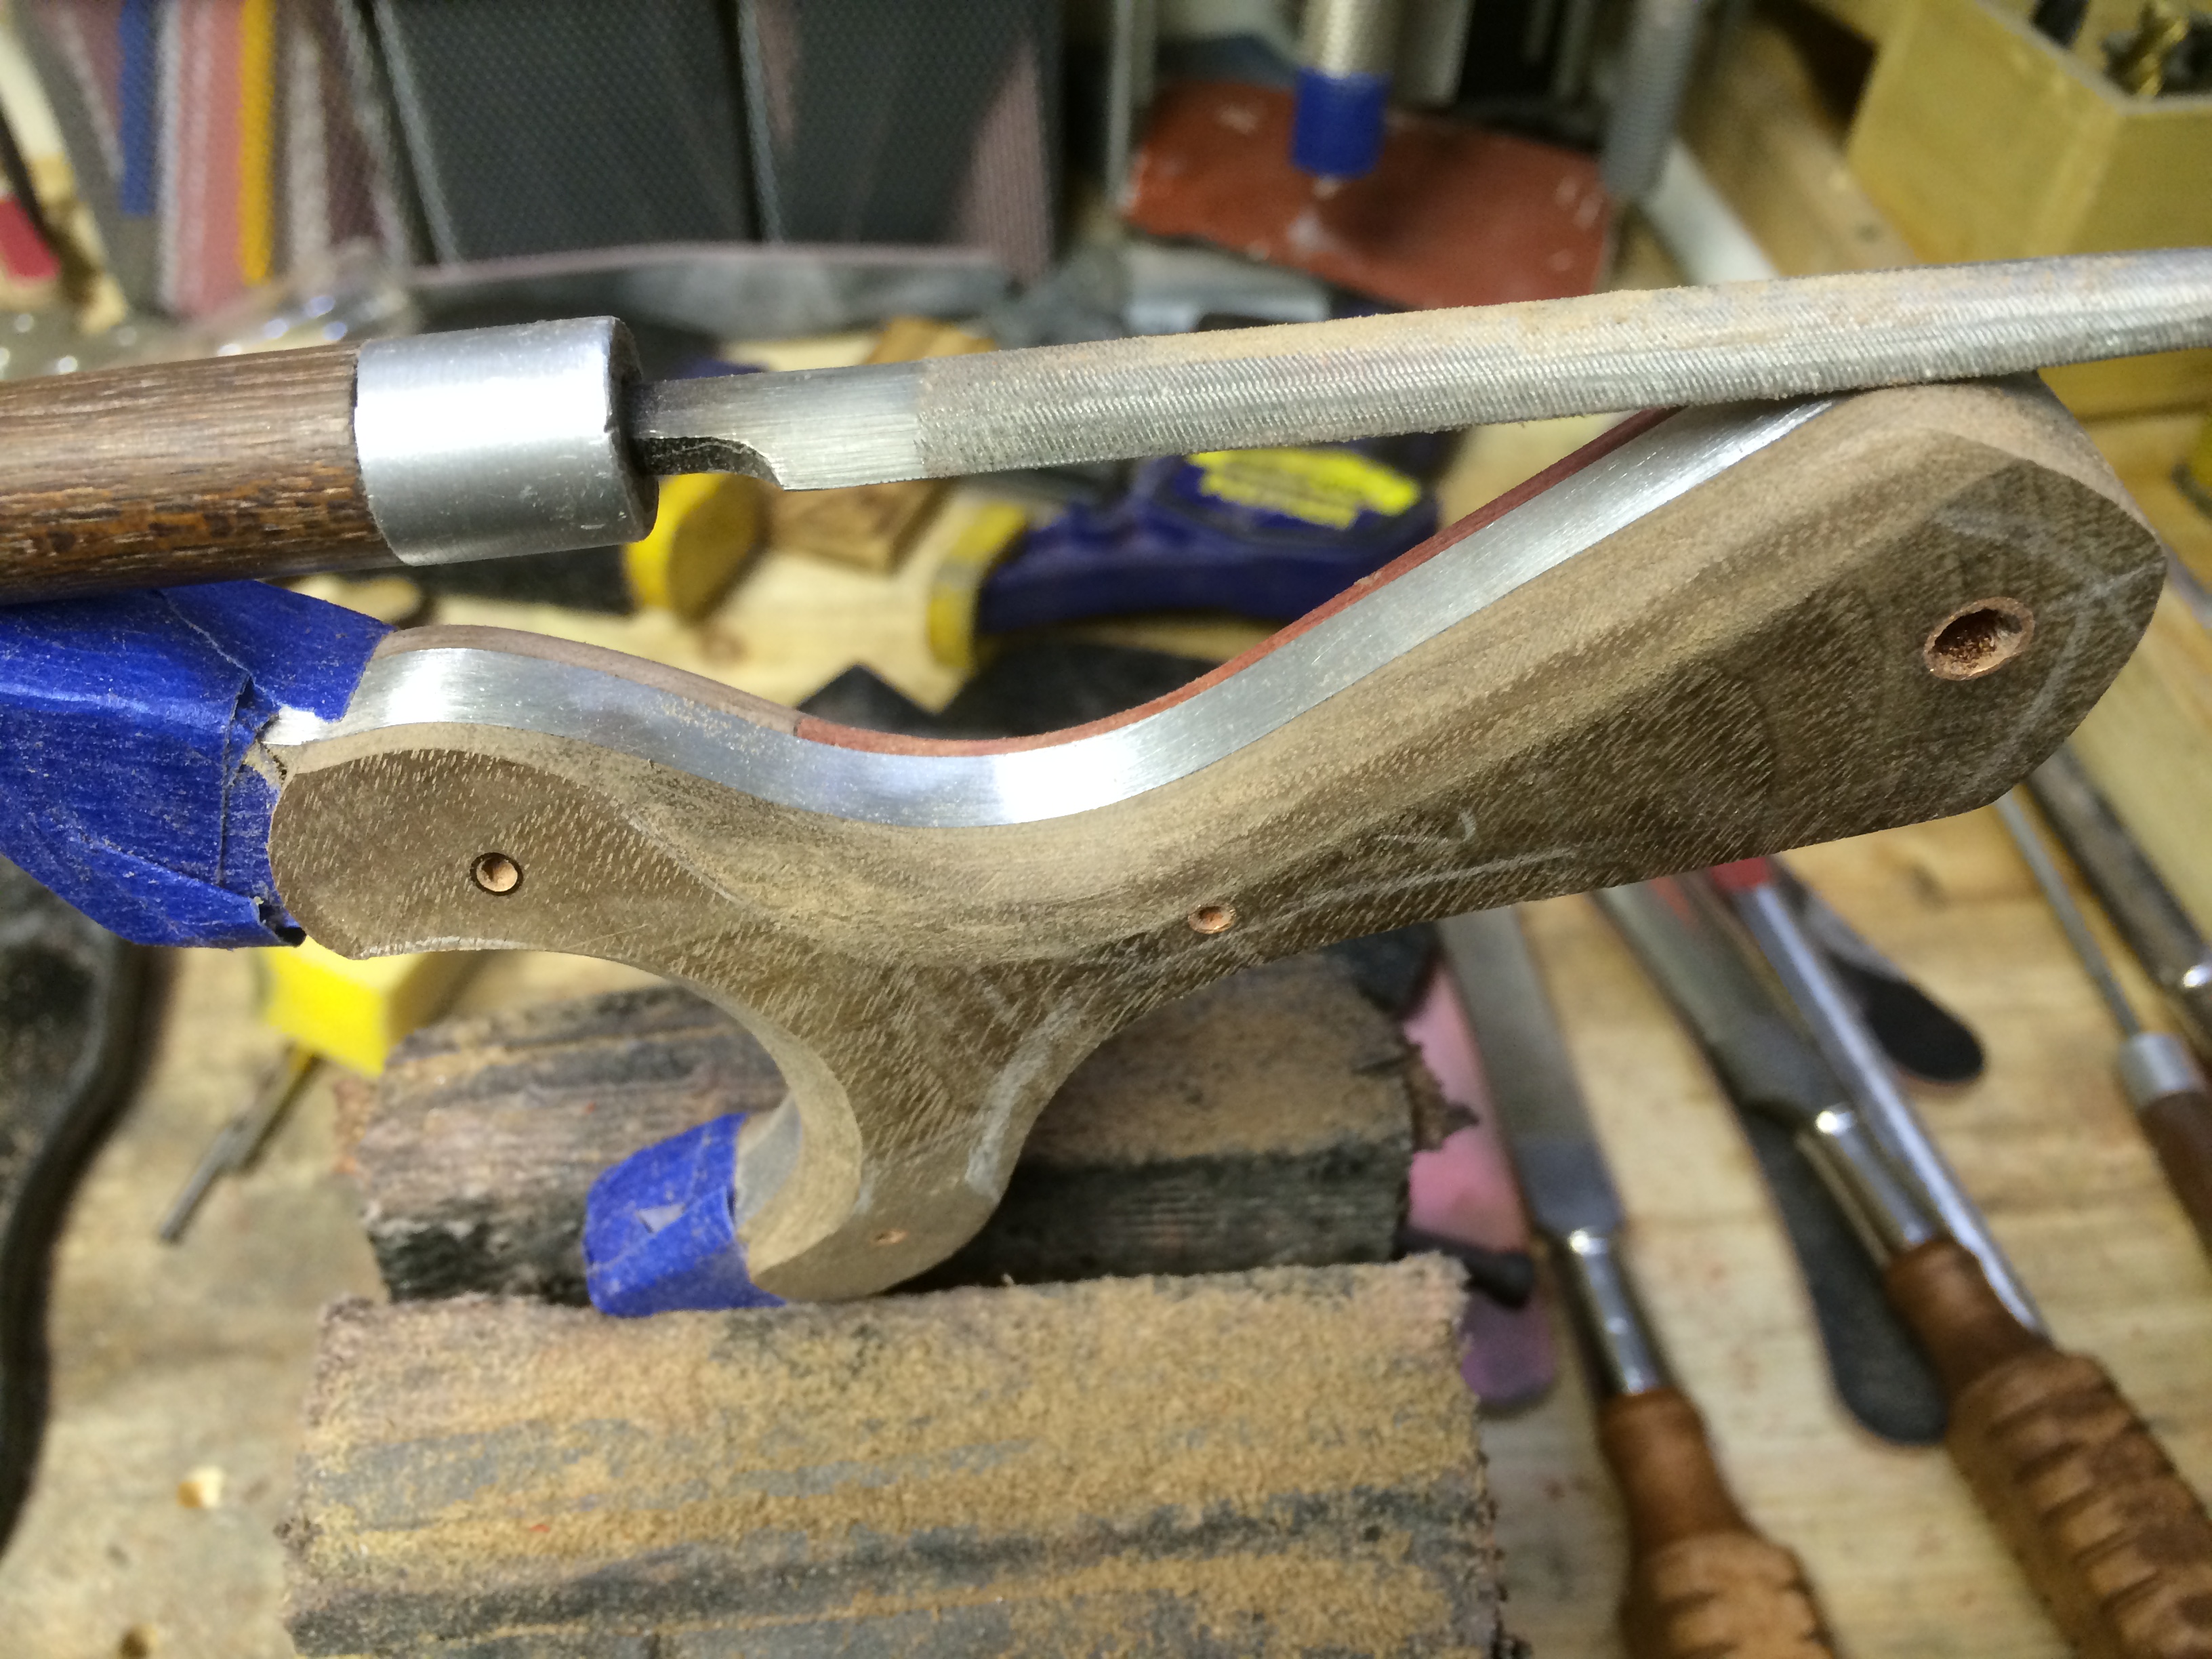
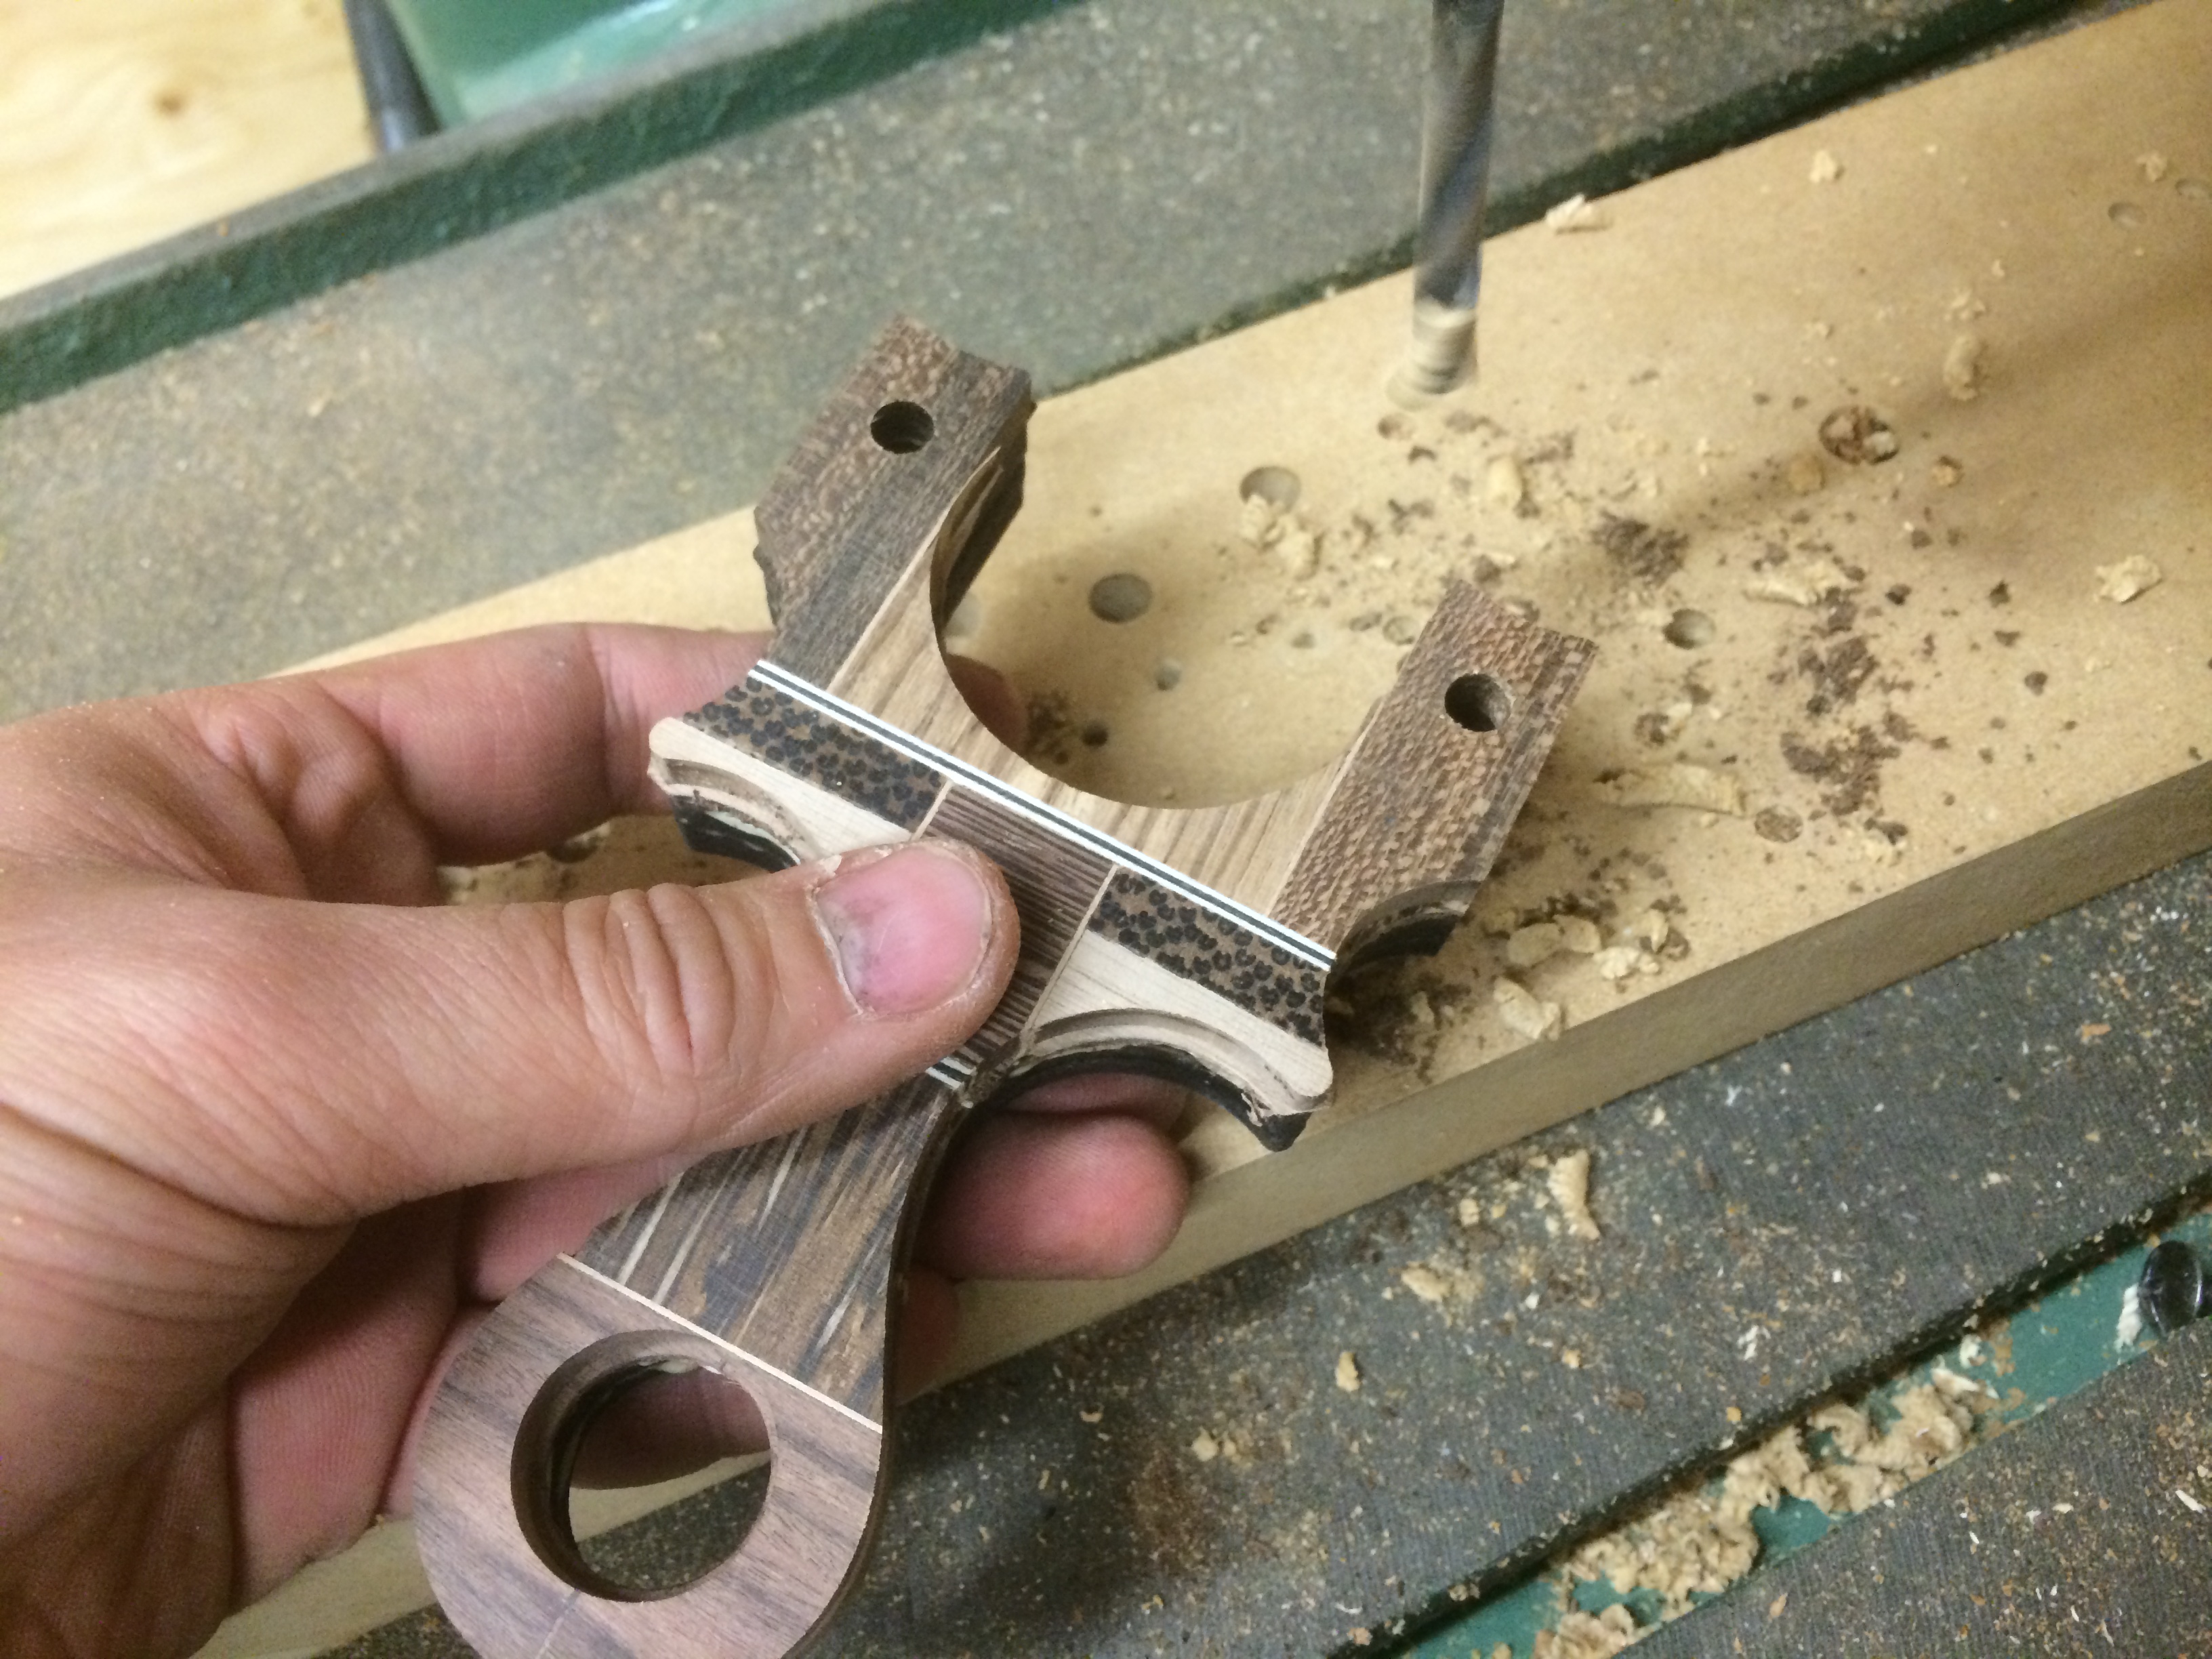
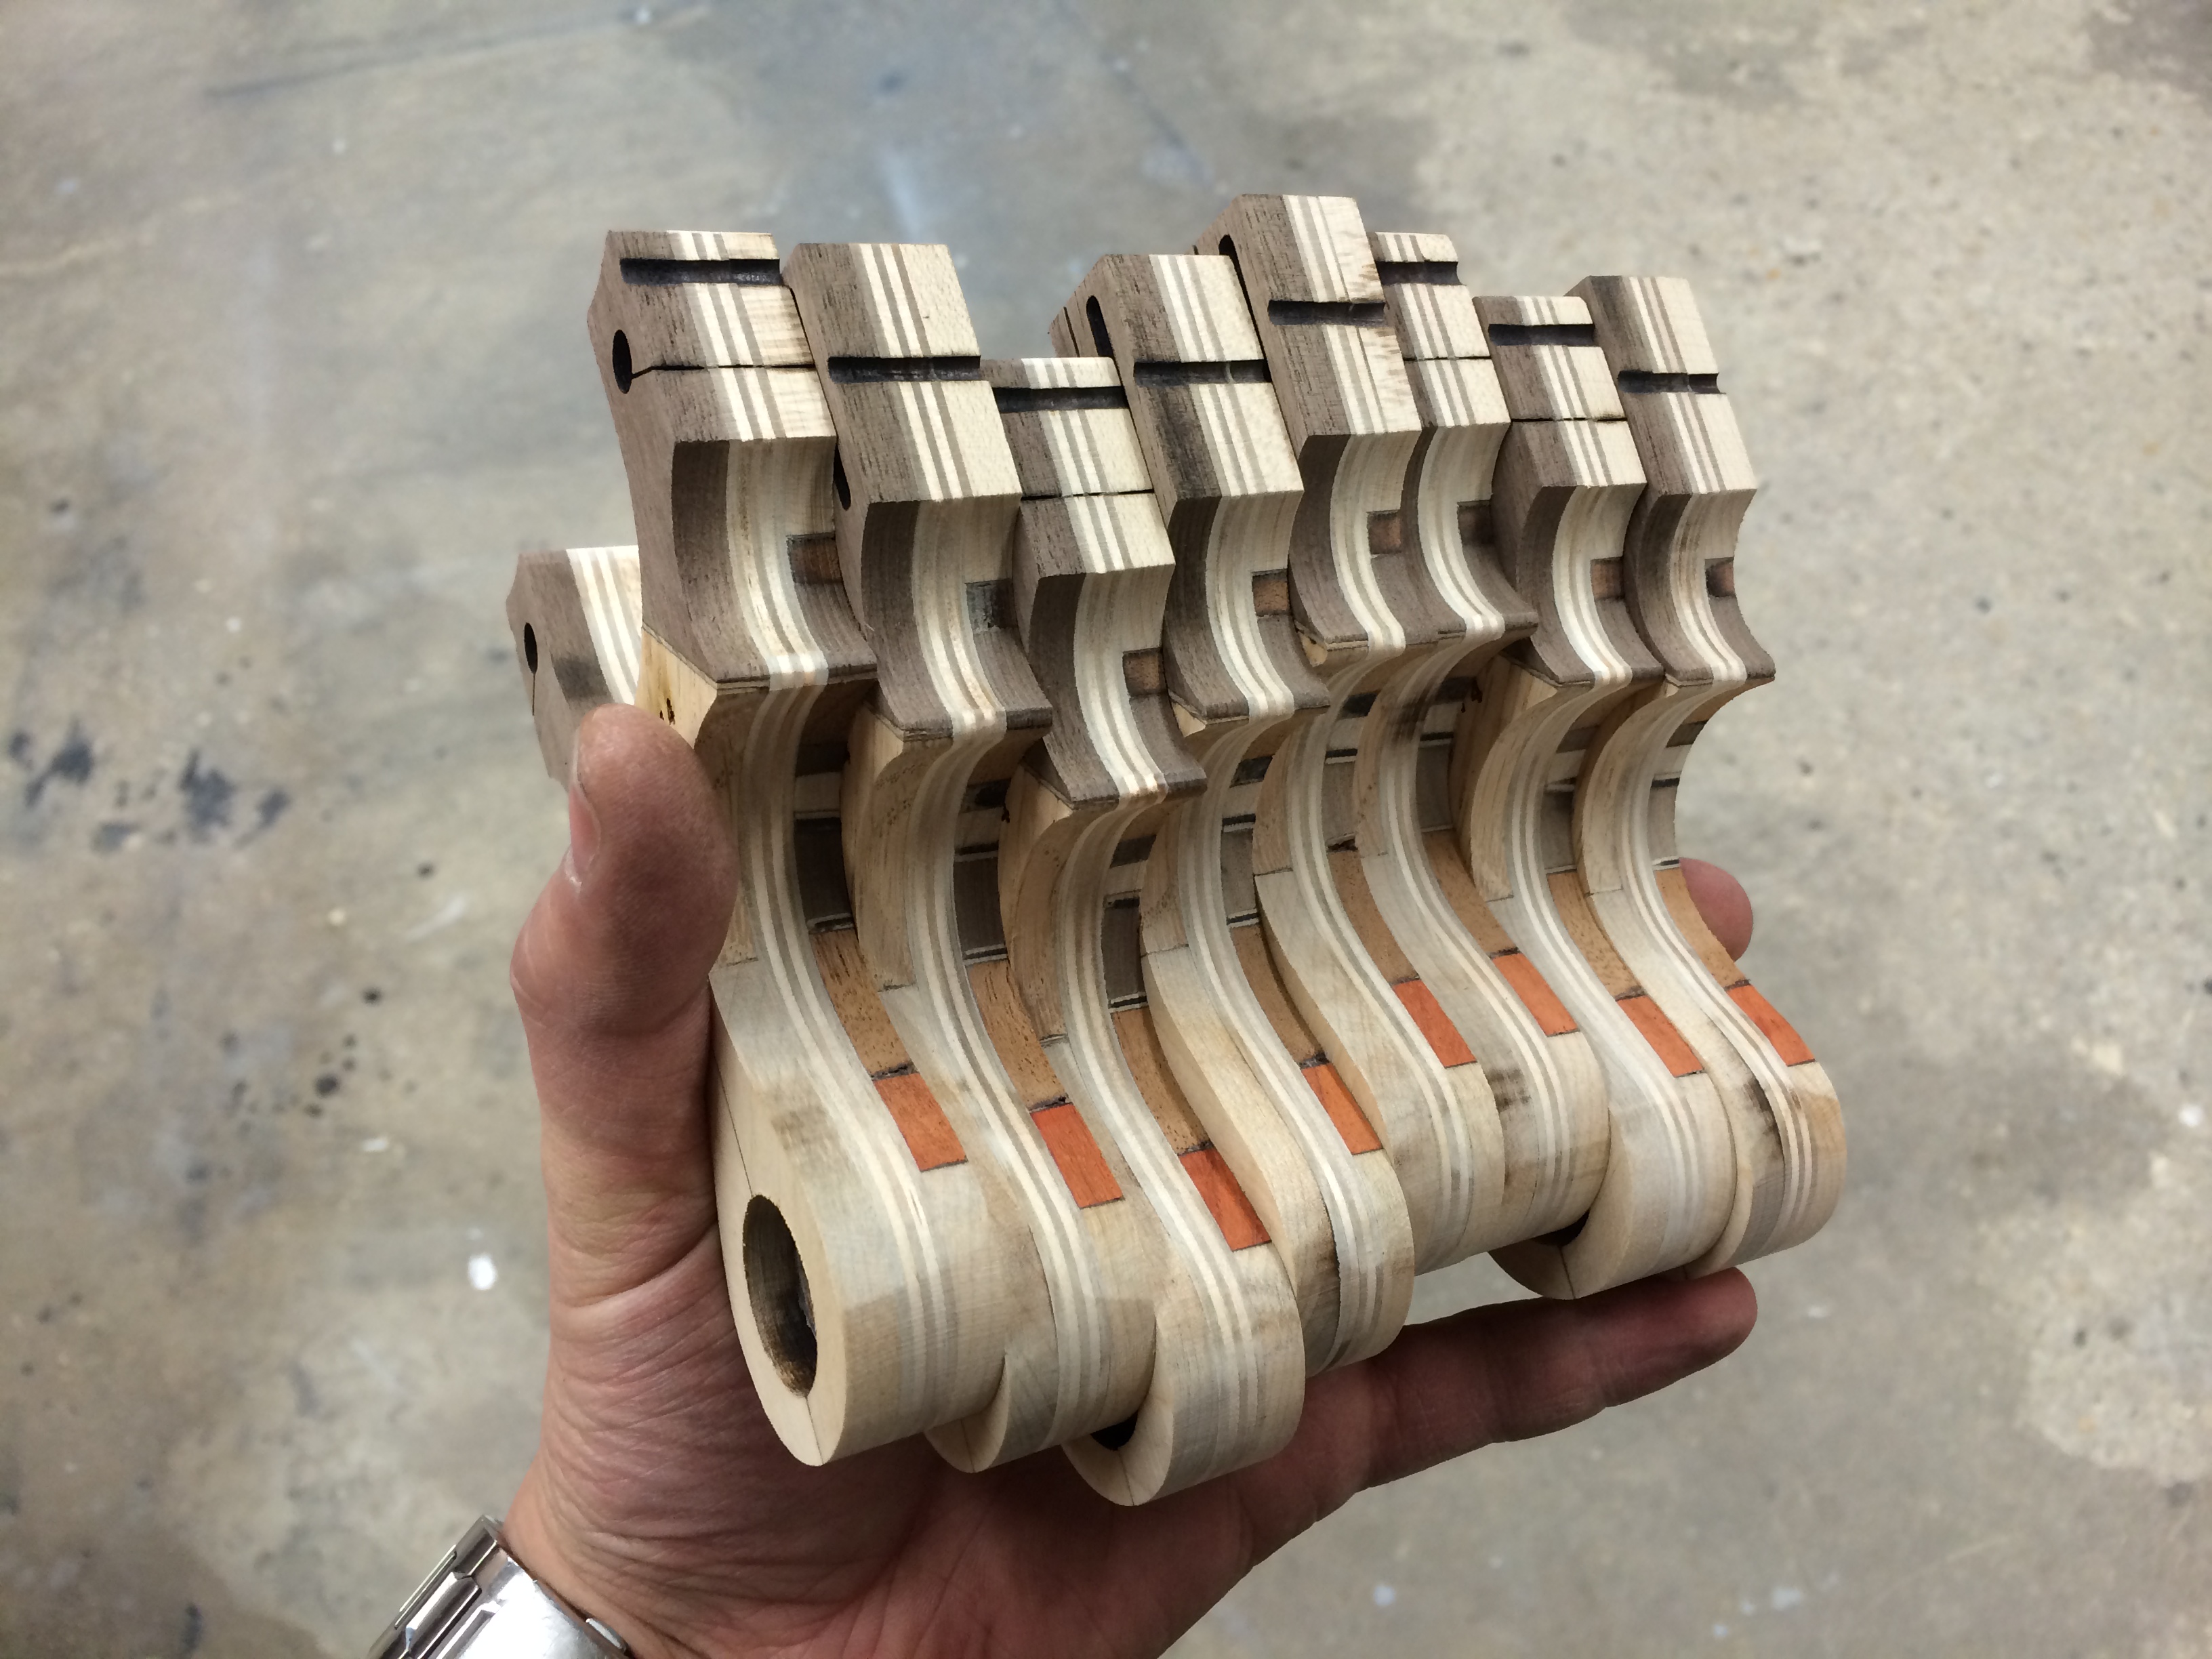
With so many layers combining to make the main body, I had planned on peening over some brass rod at the tips, which is what I did. This locked the layers down for good. The added thickness of the OTT tips allowed for two pins per tip.

img_0555

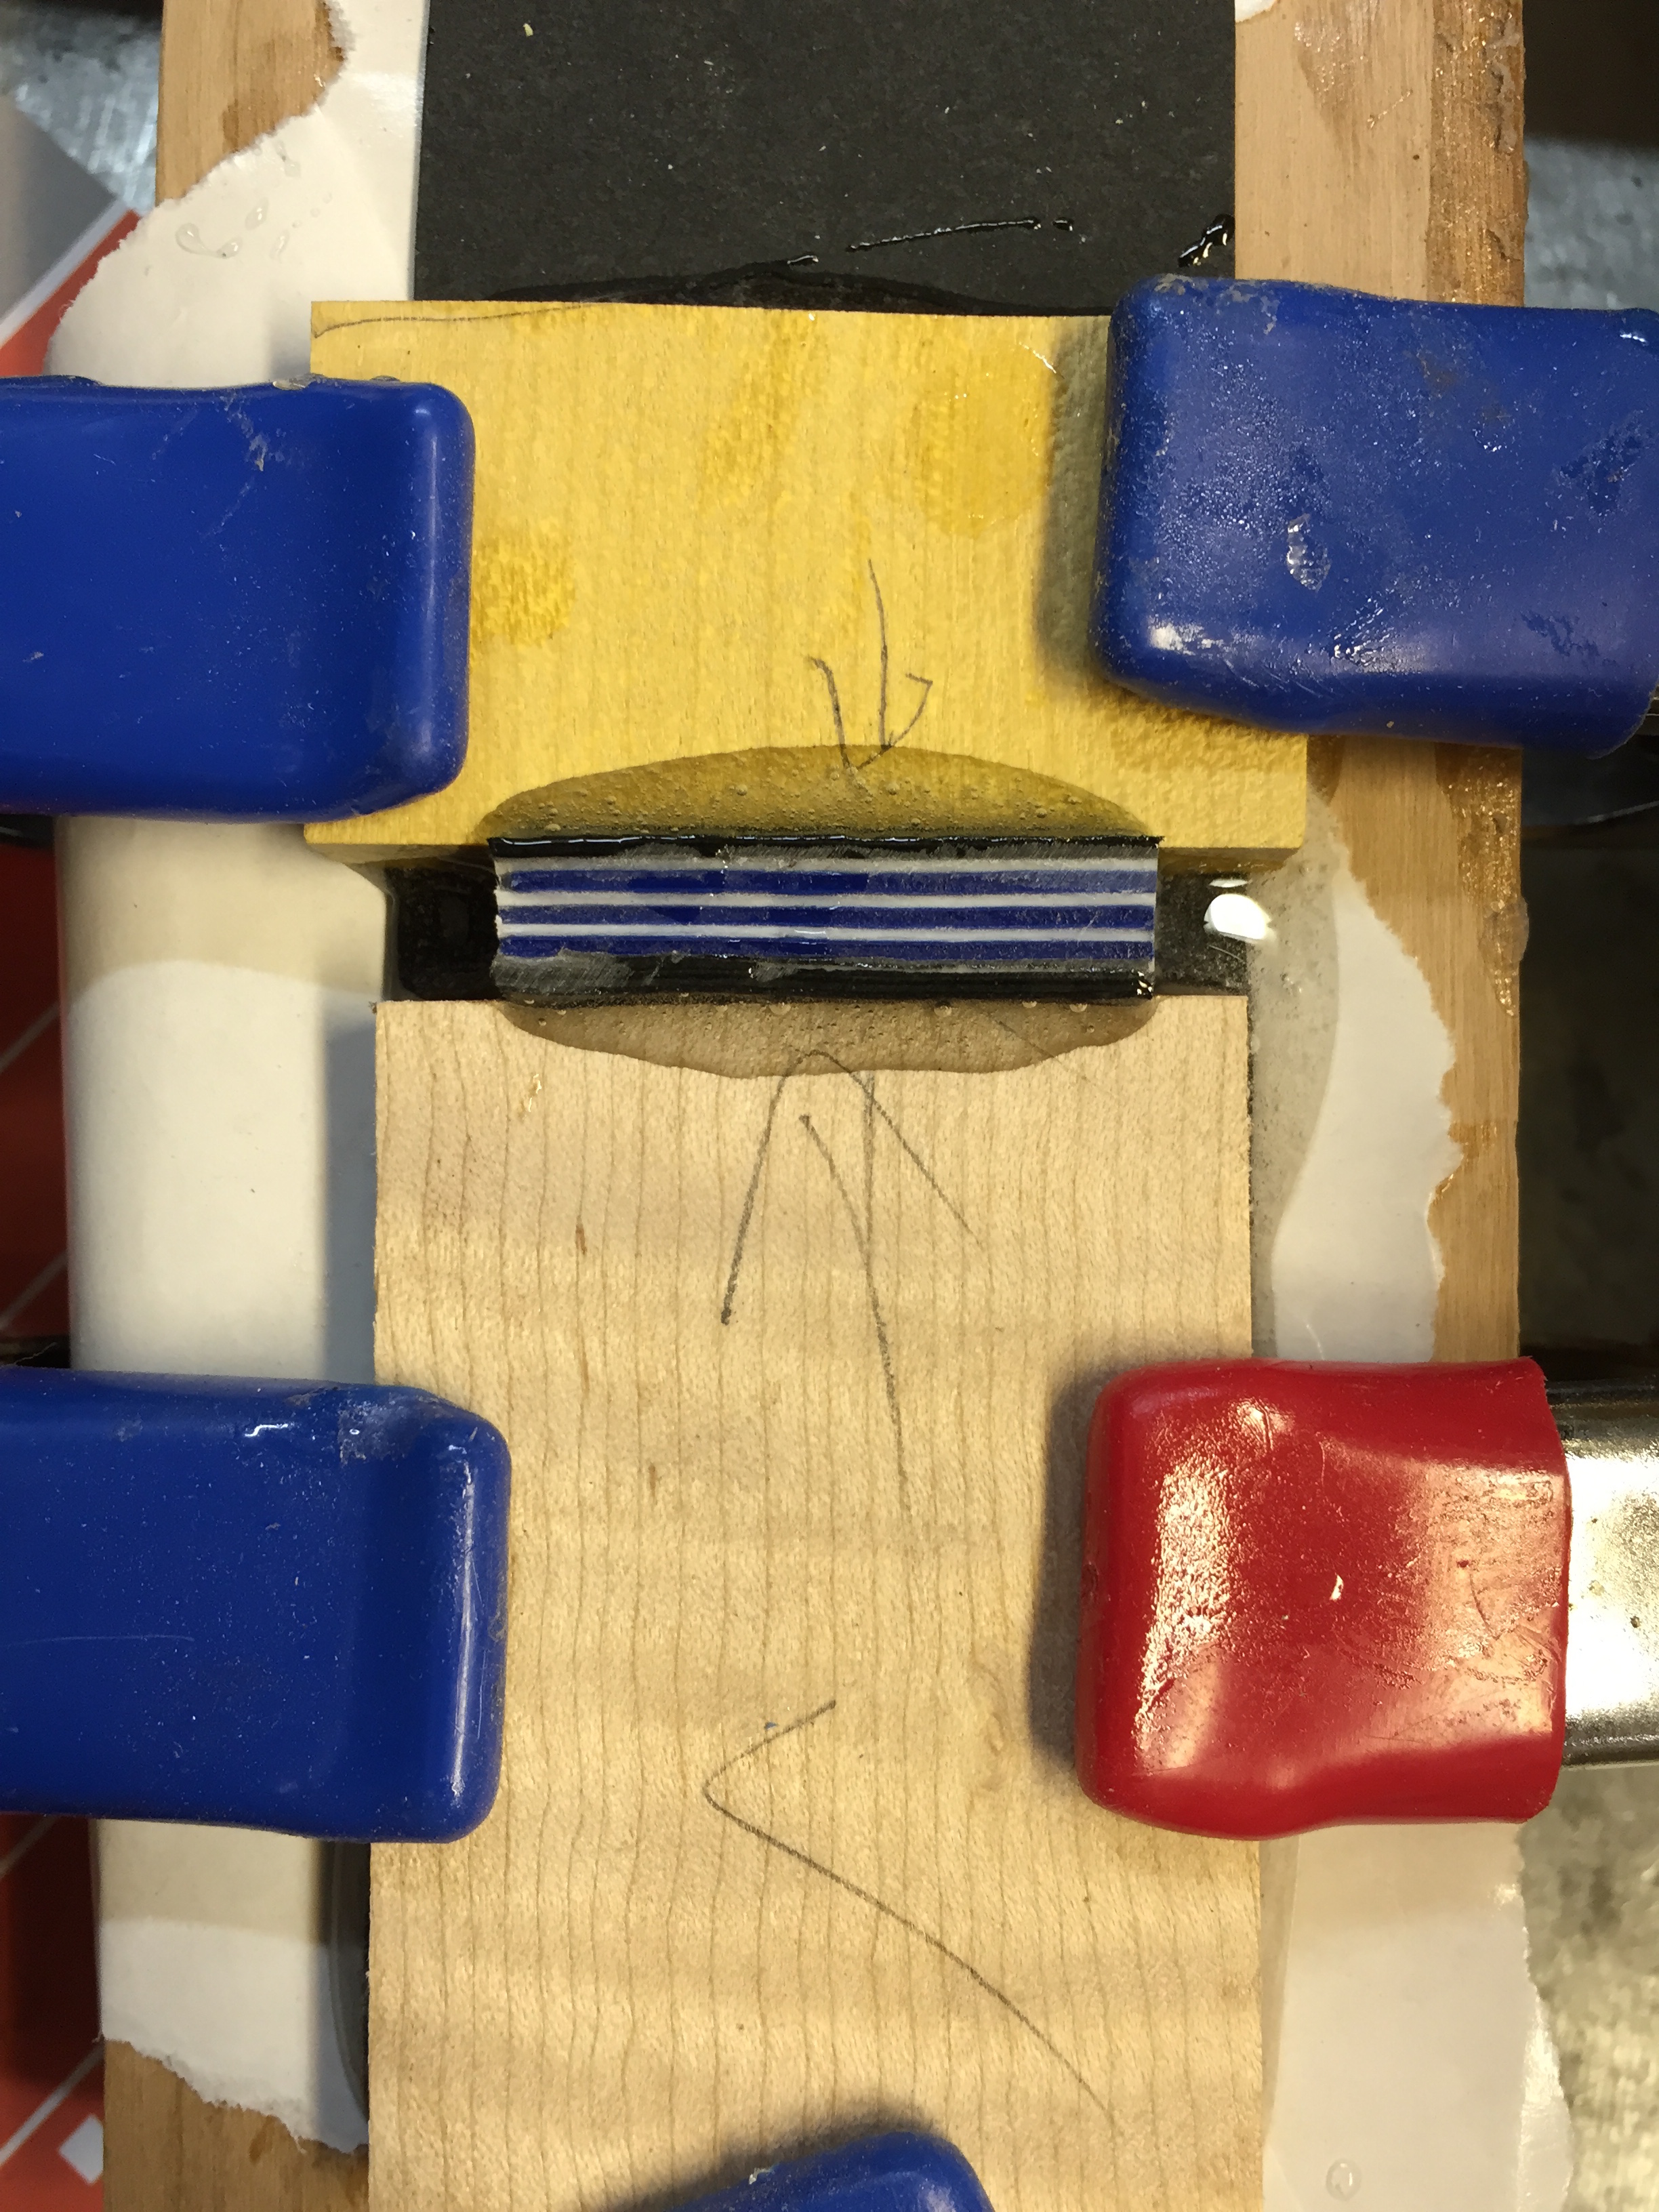
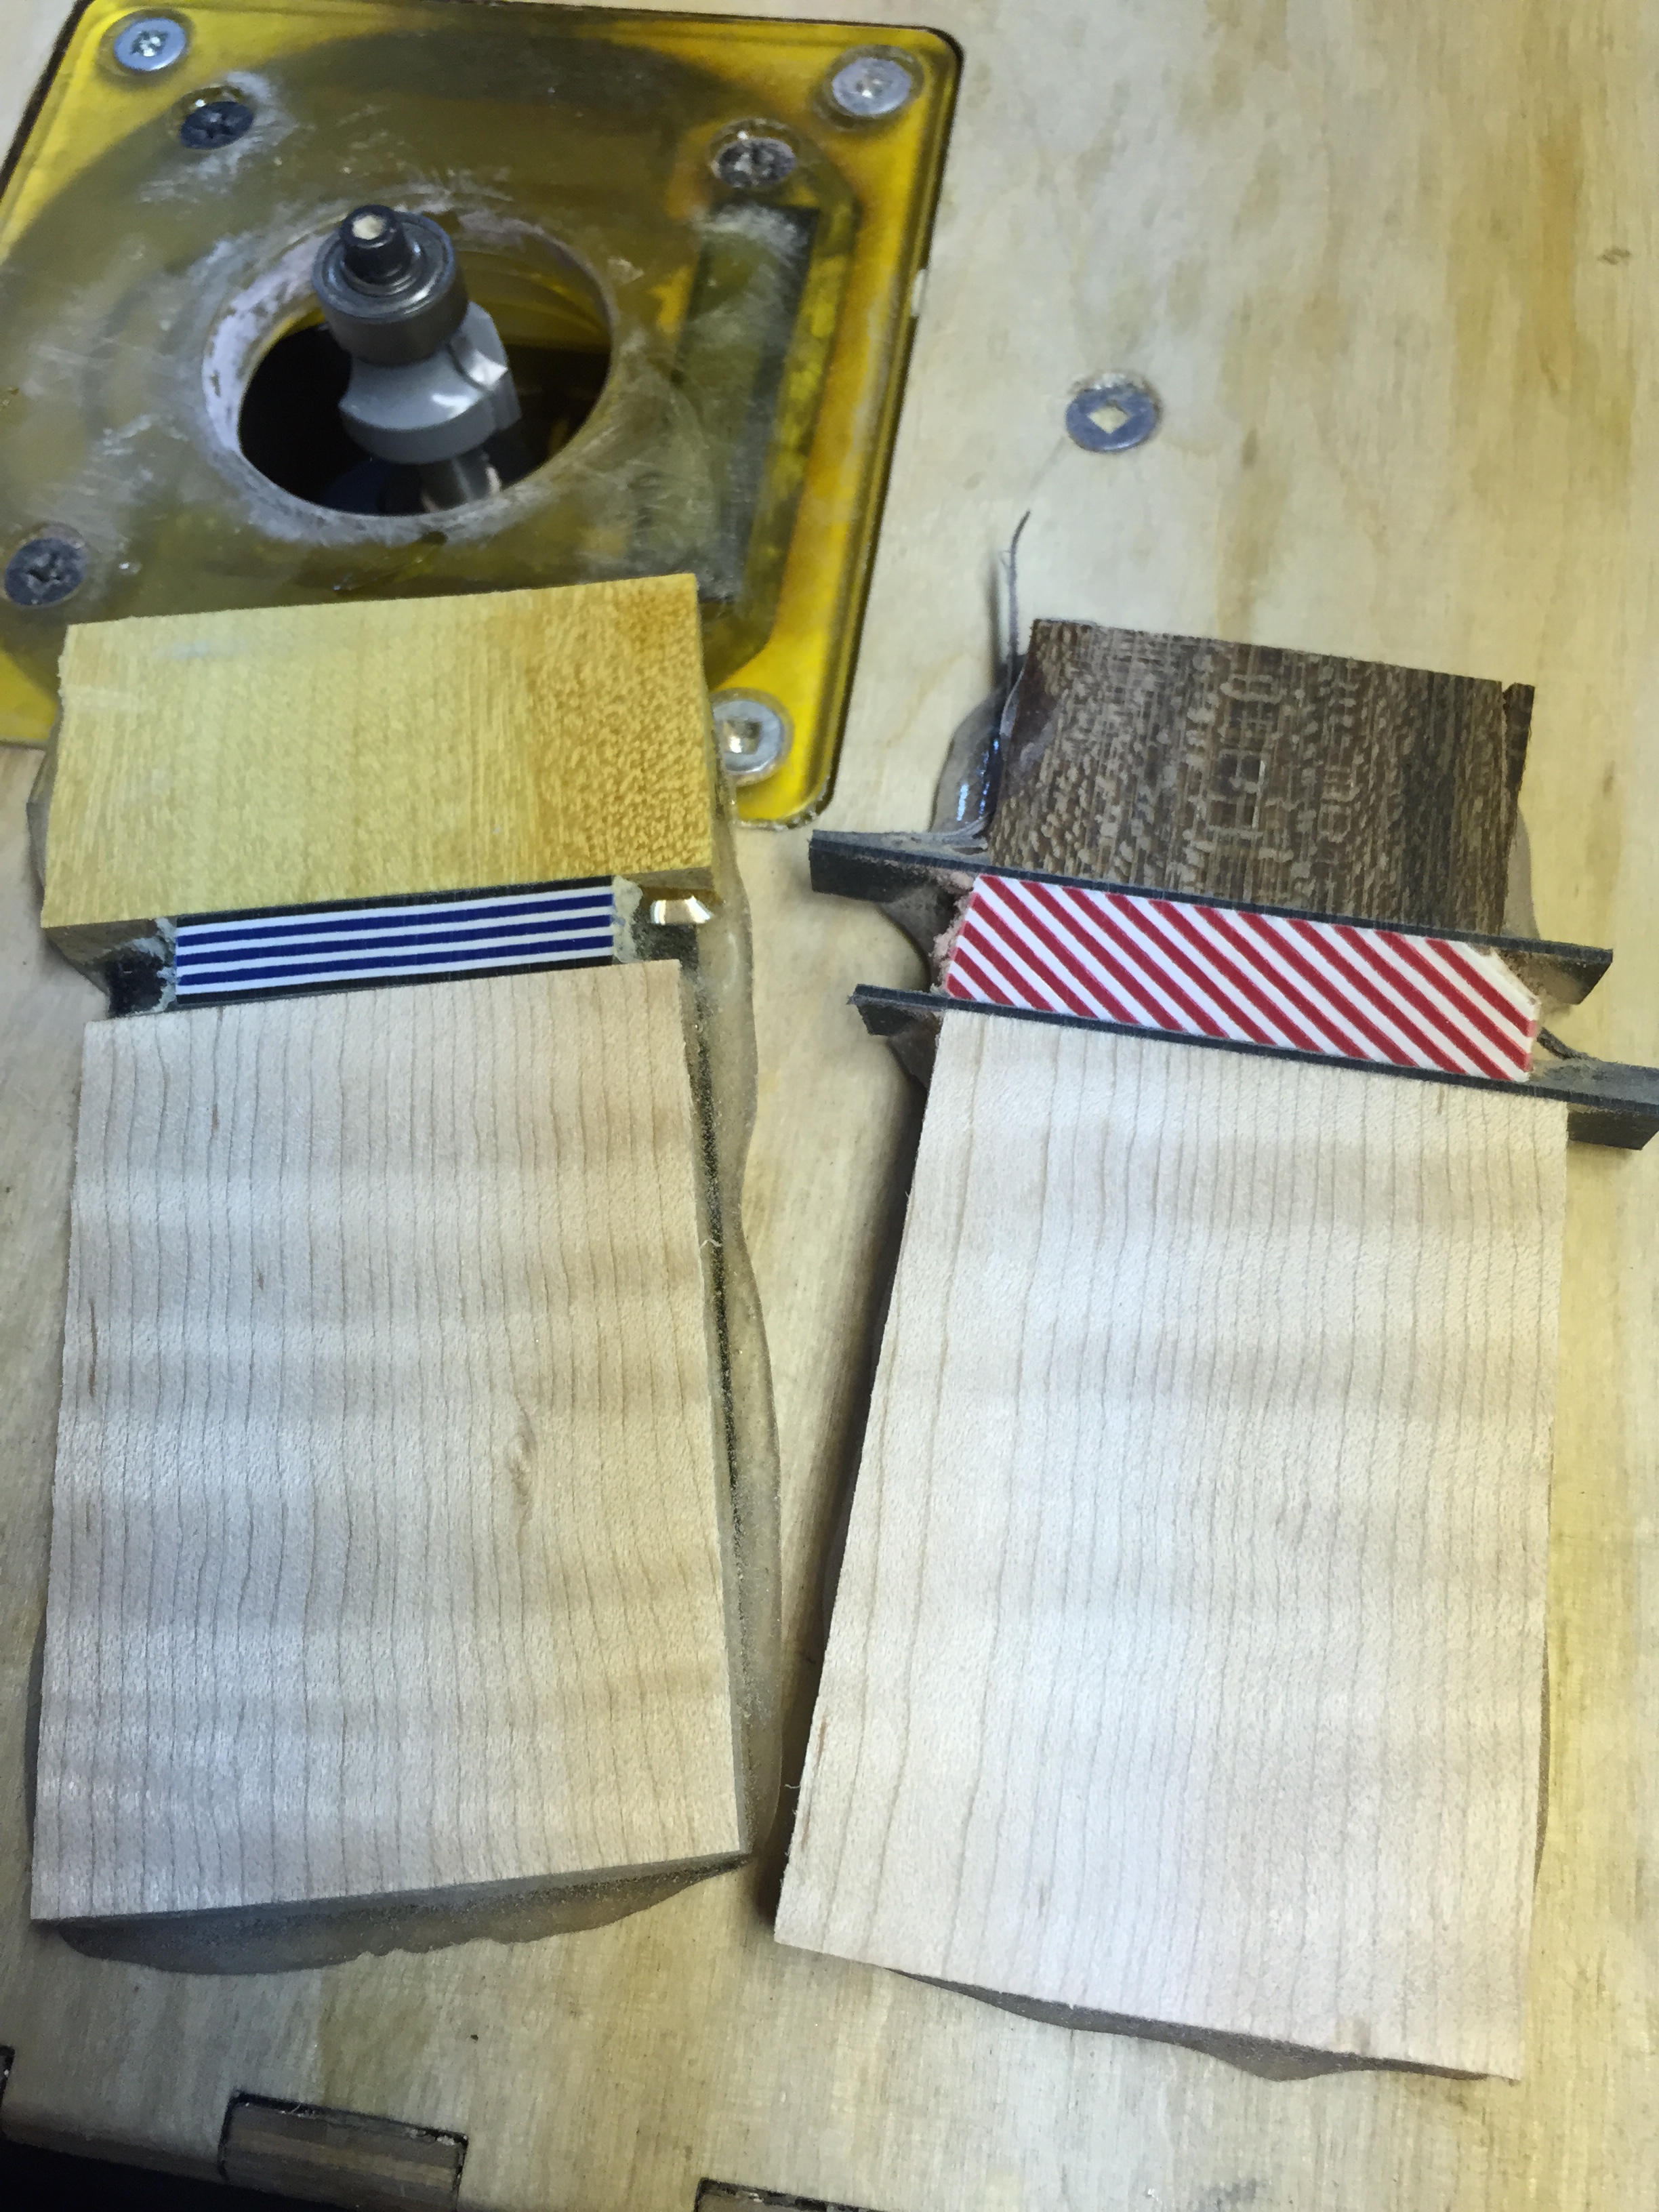
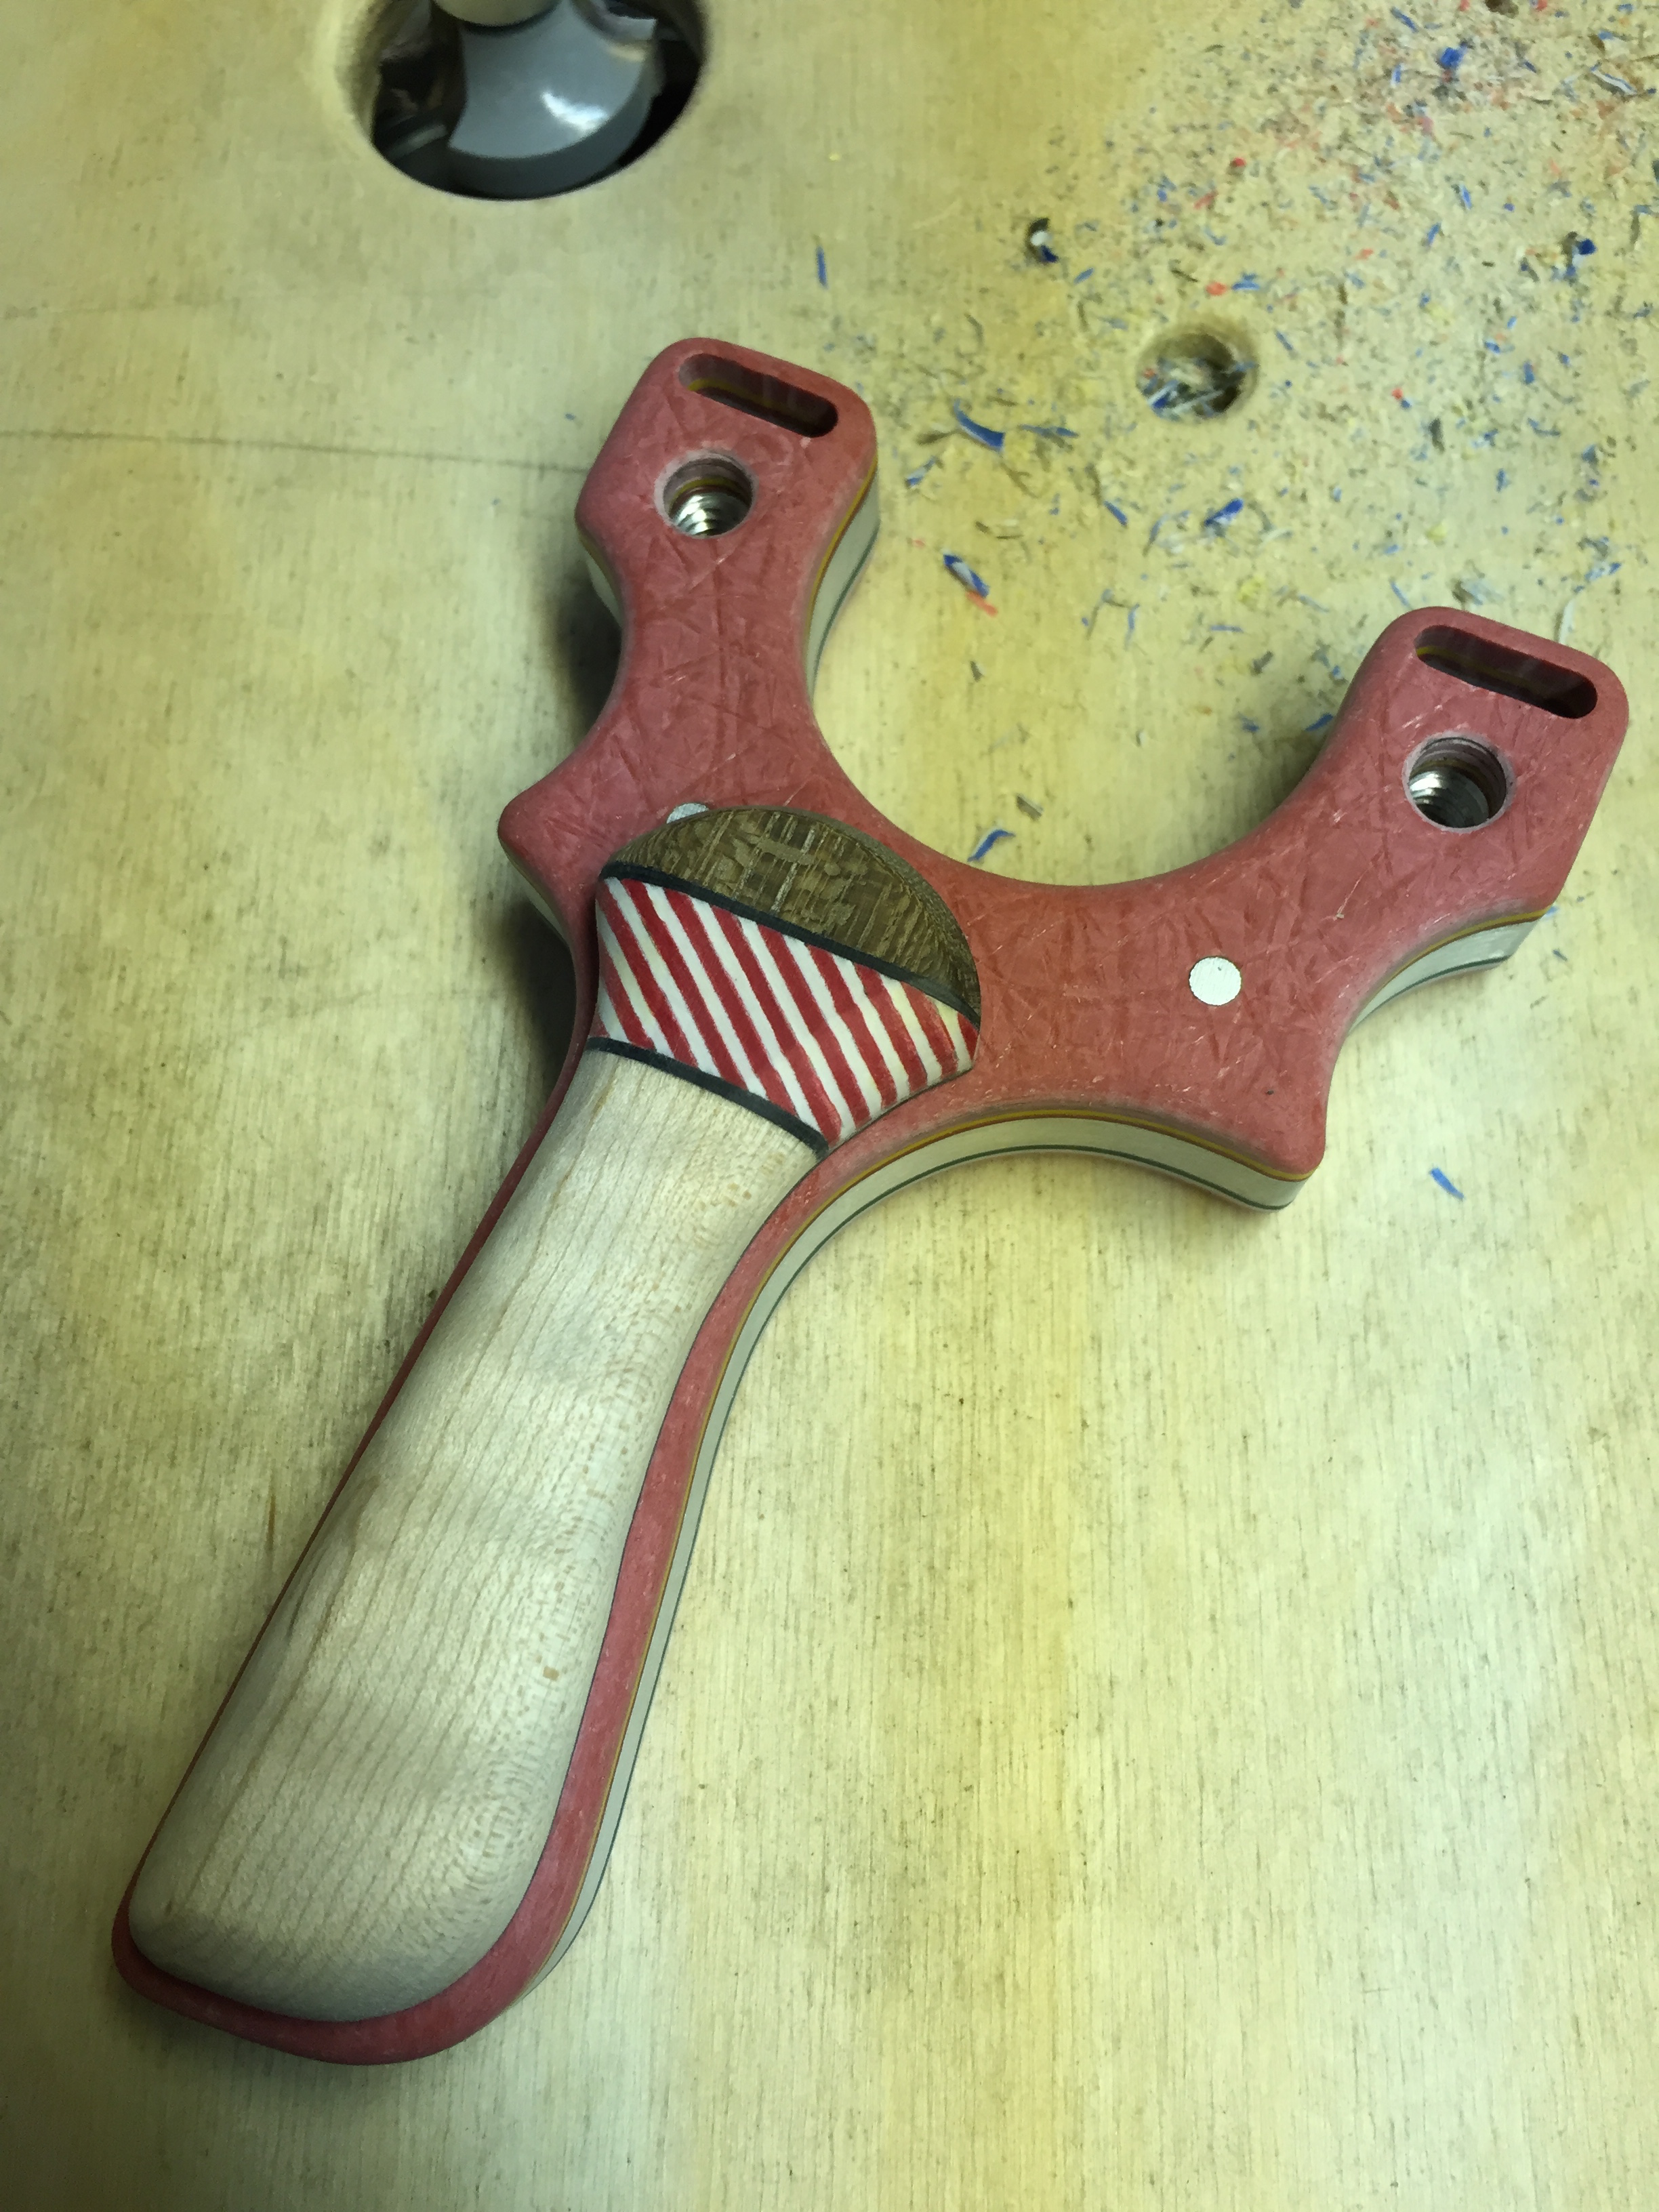
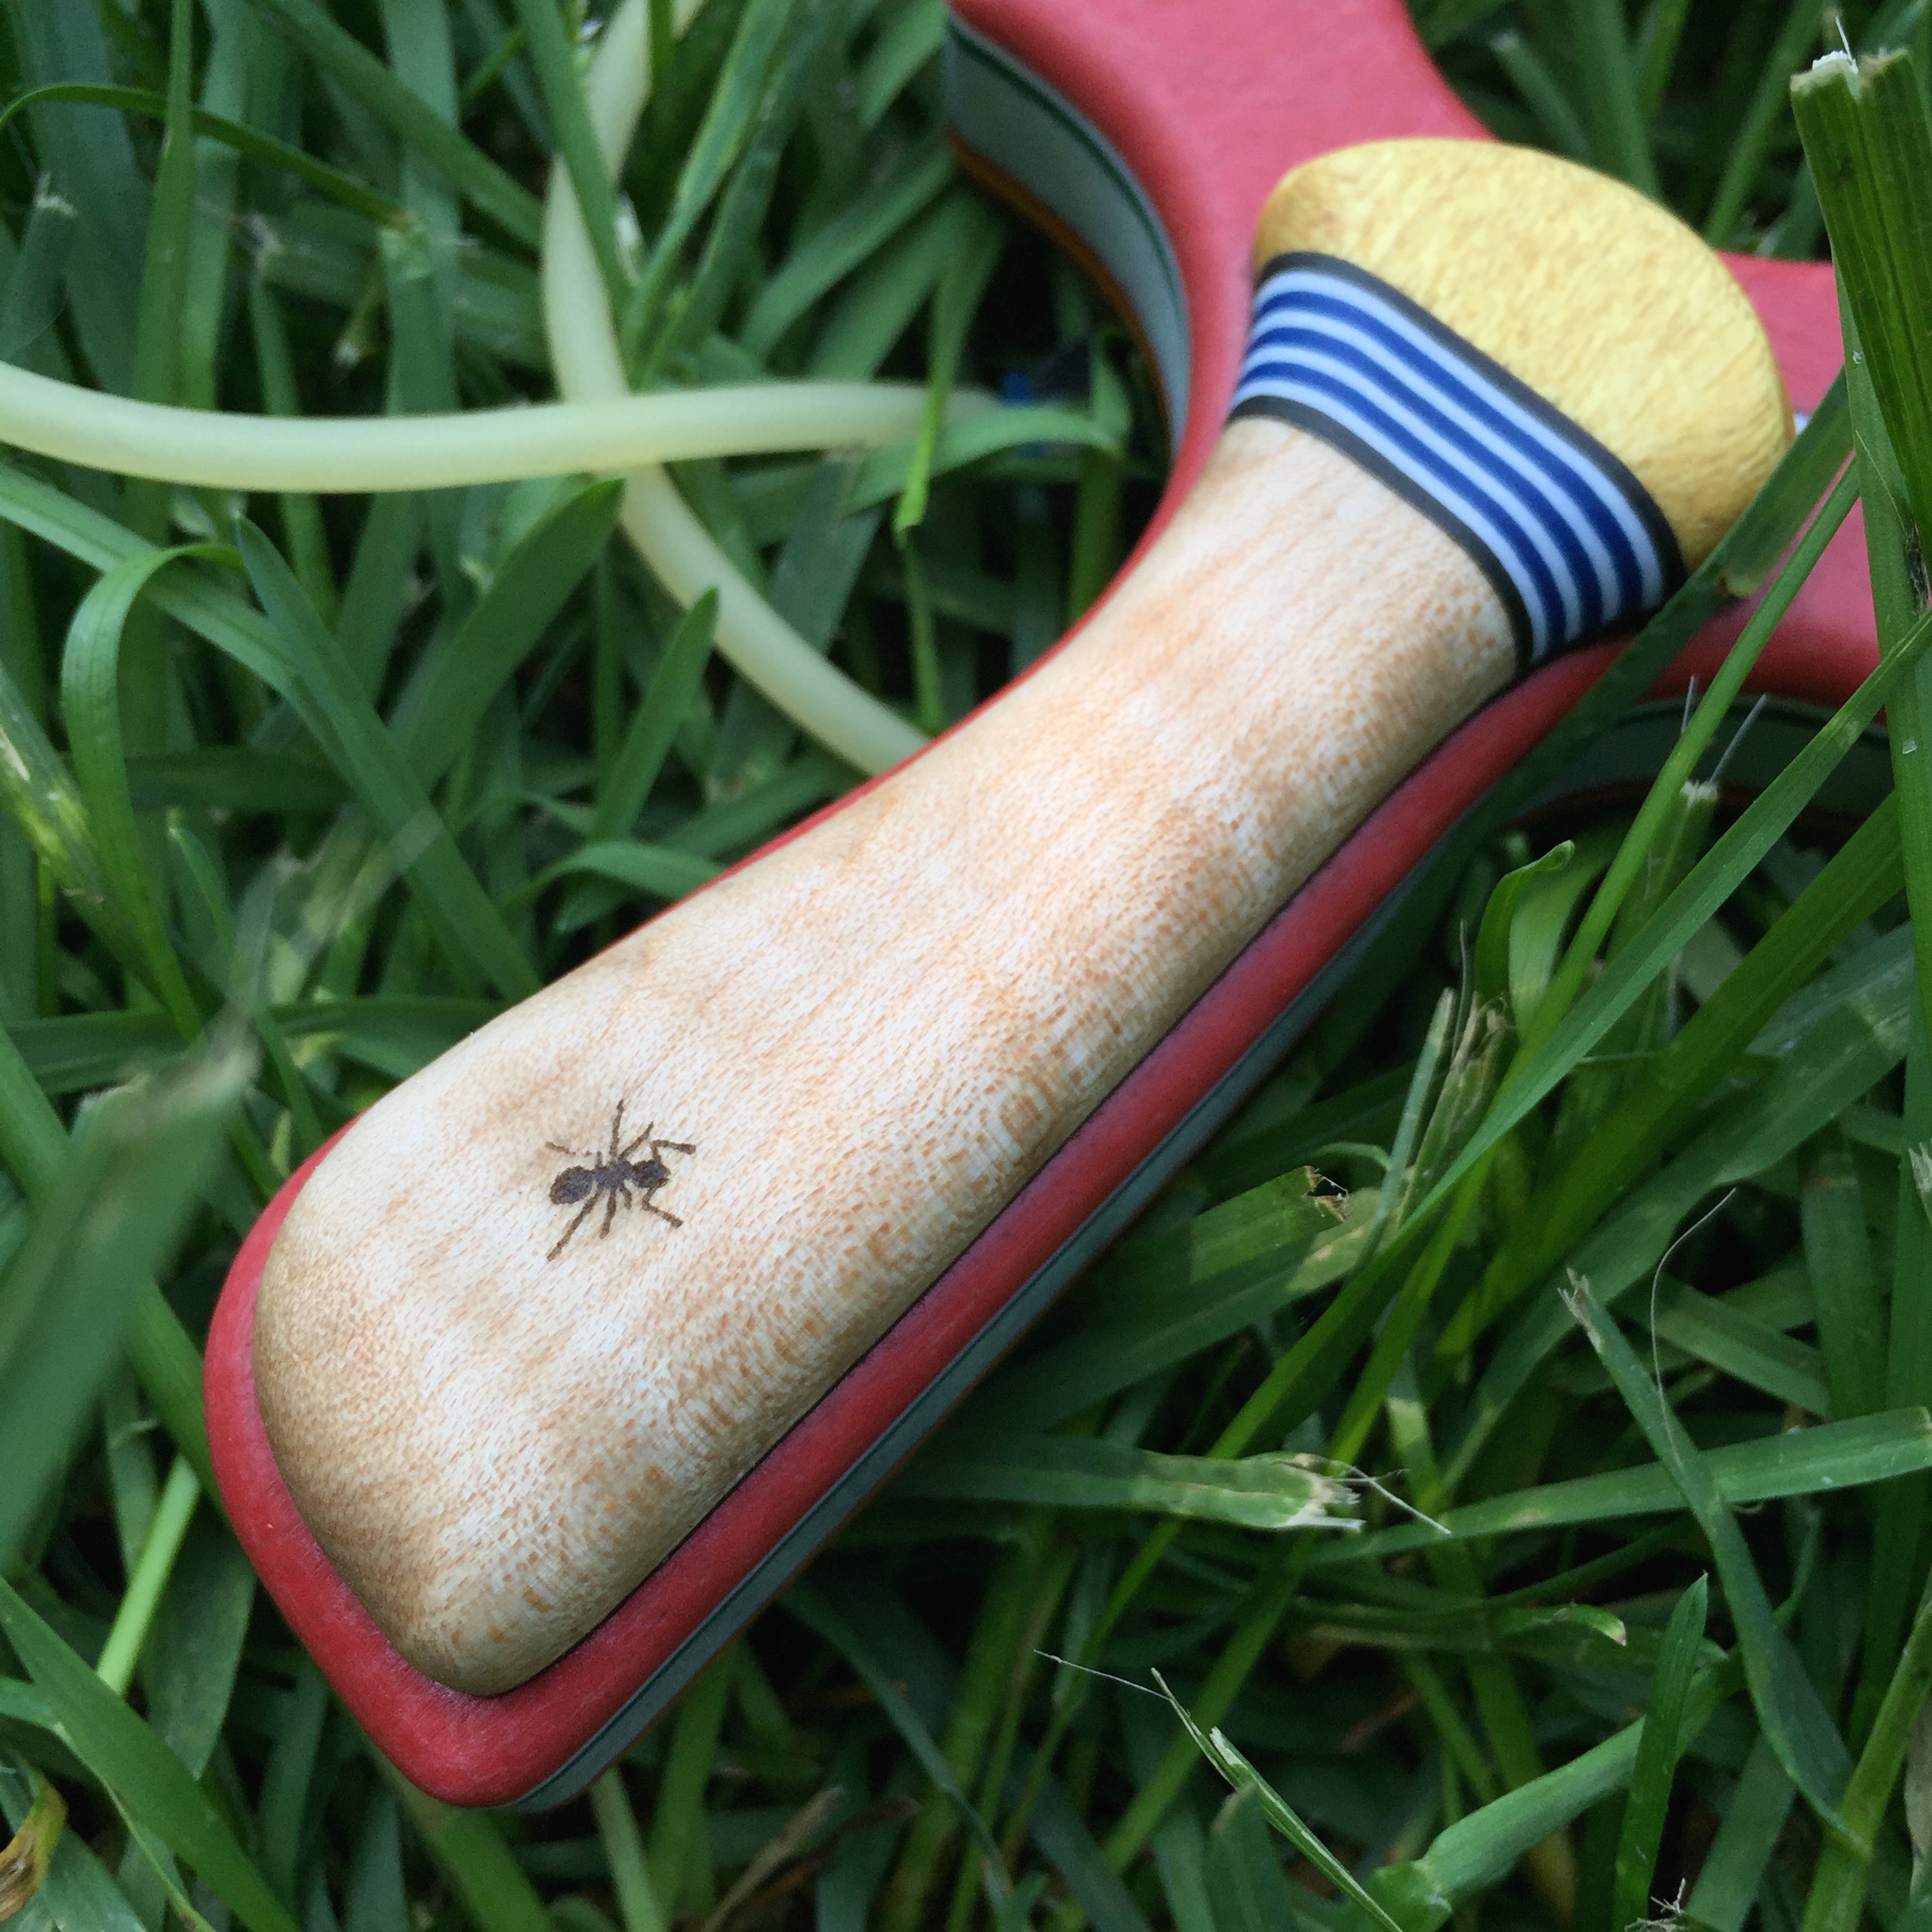
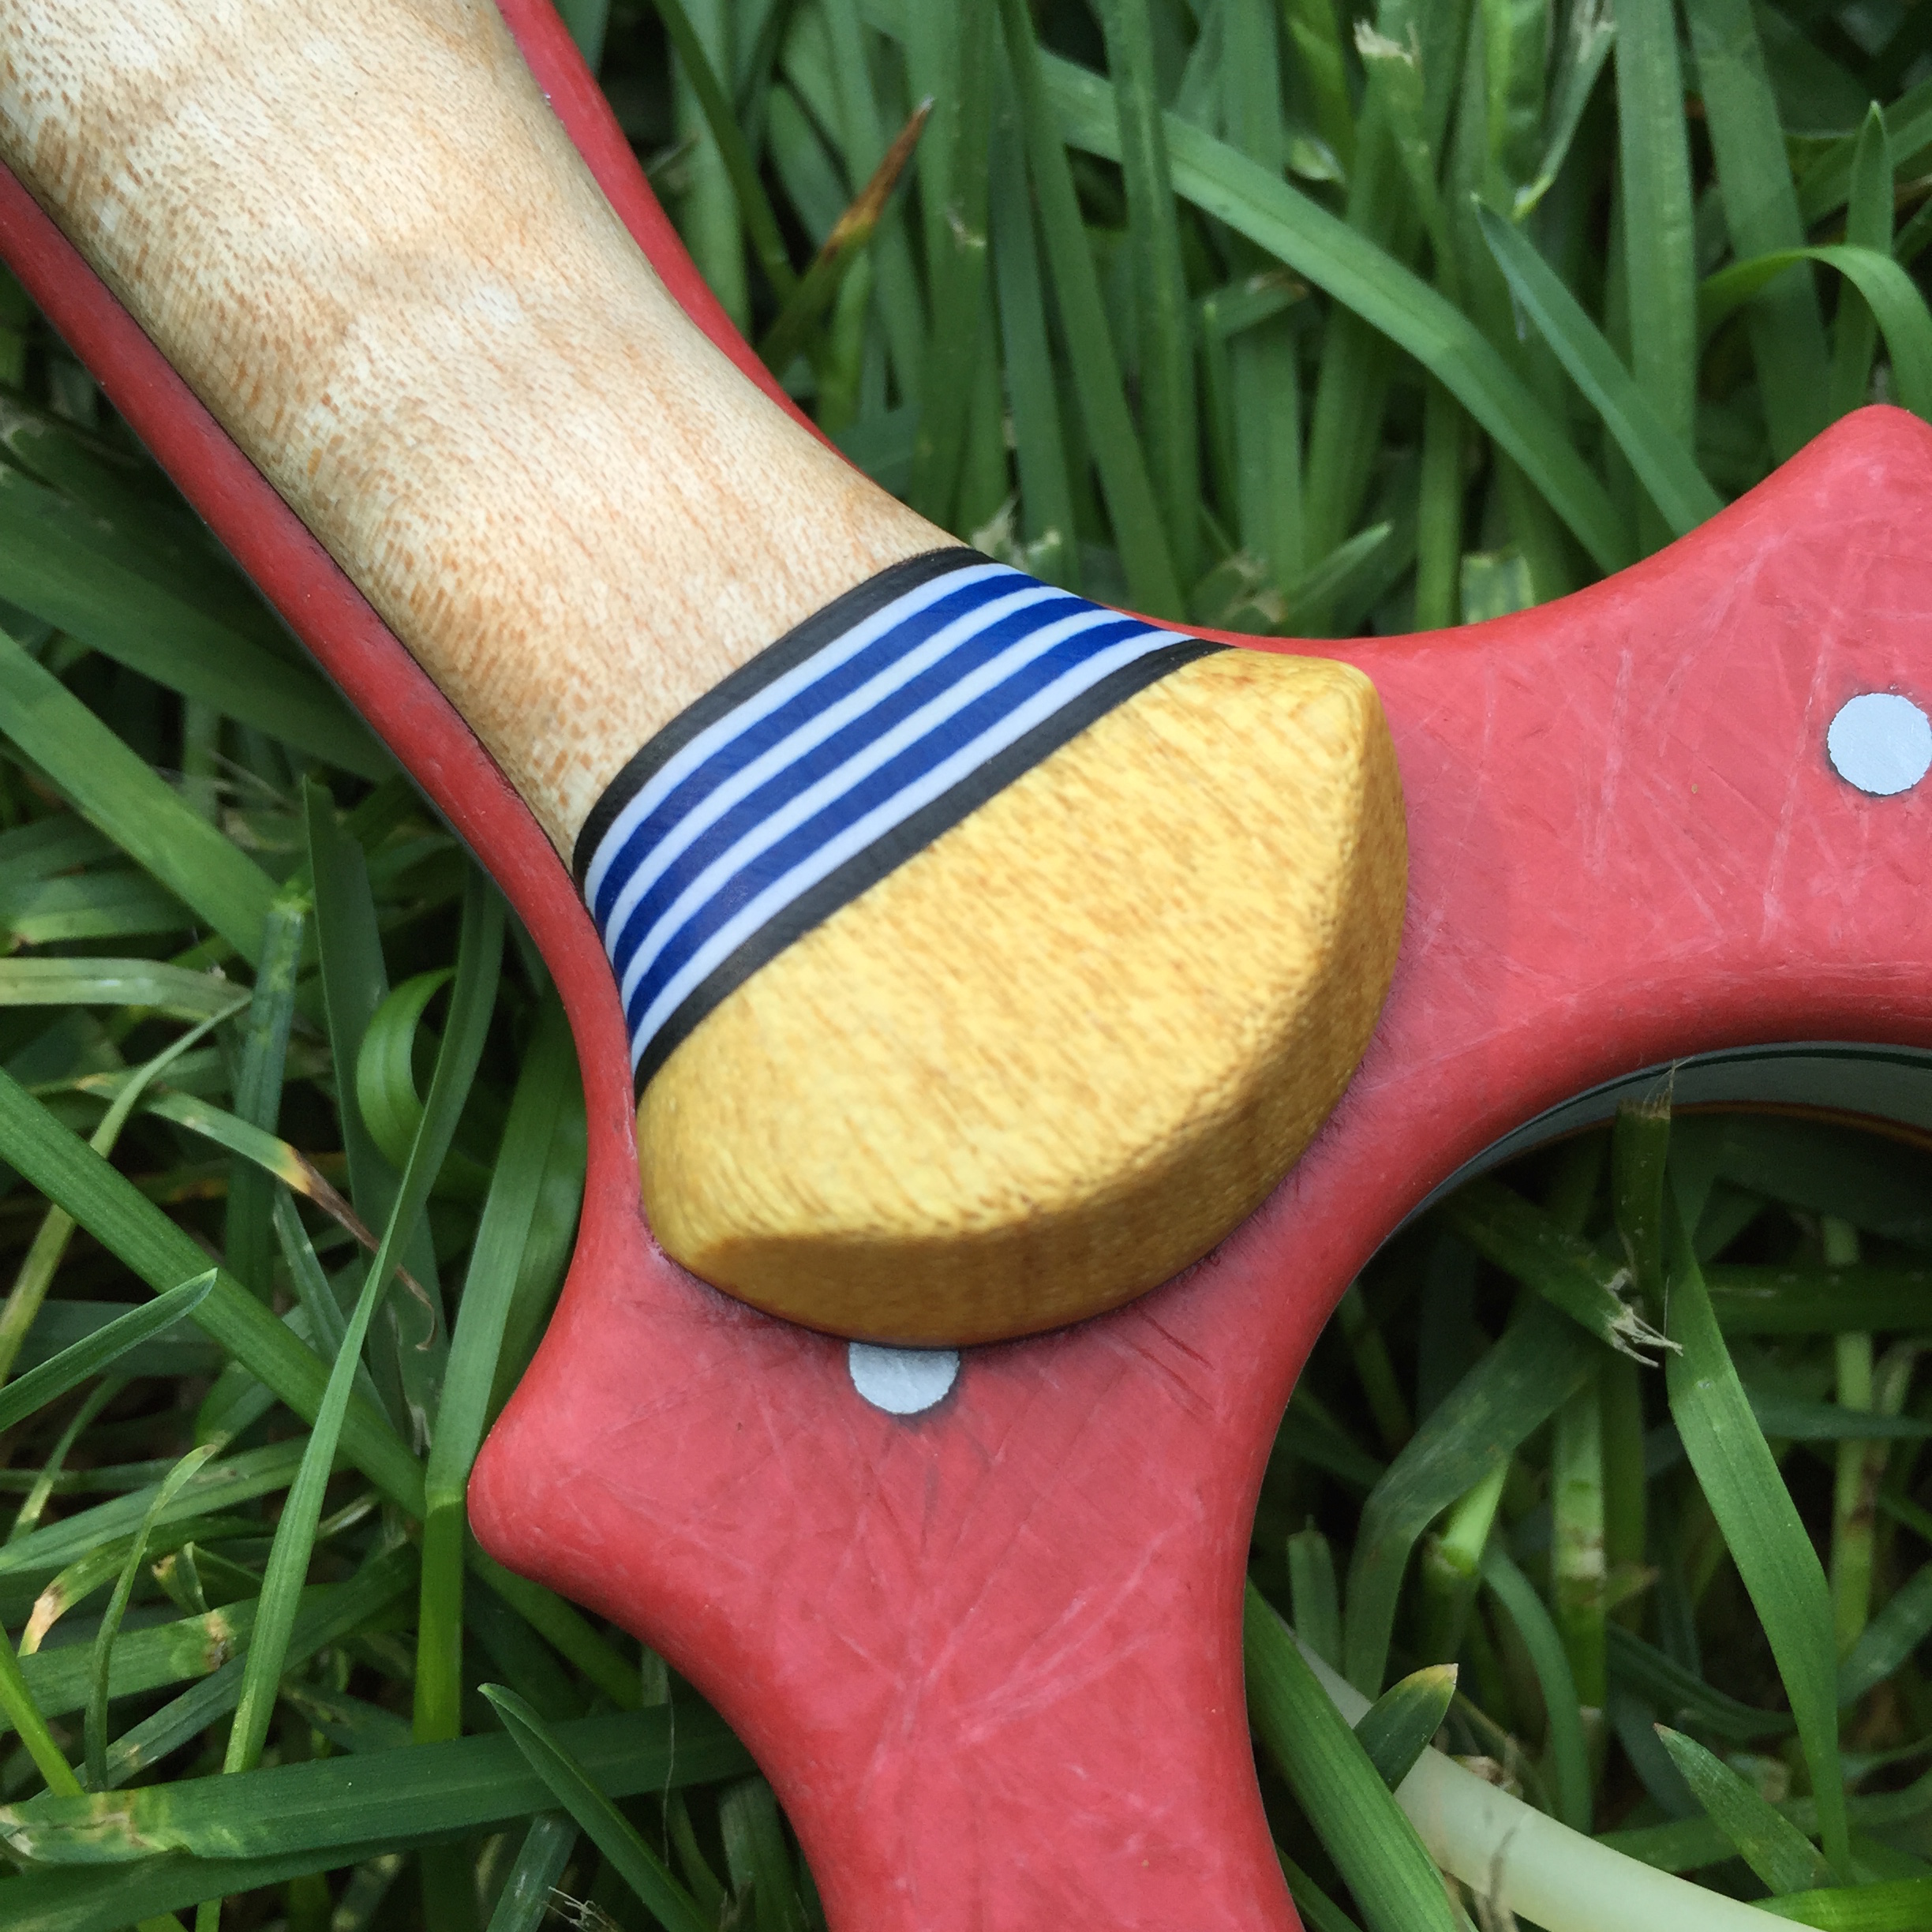
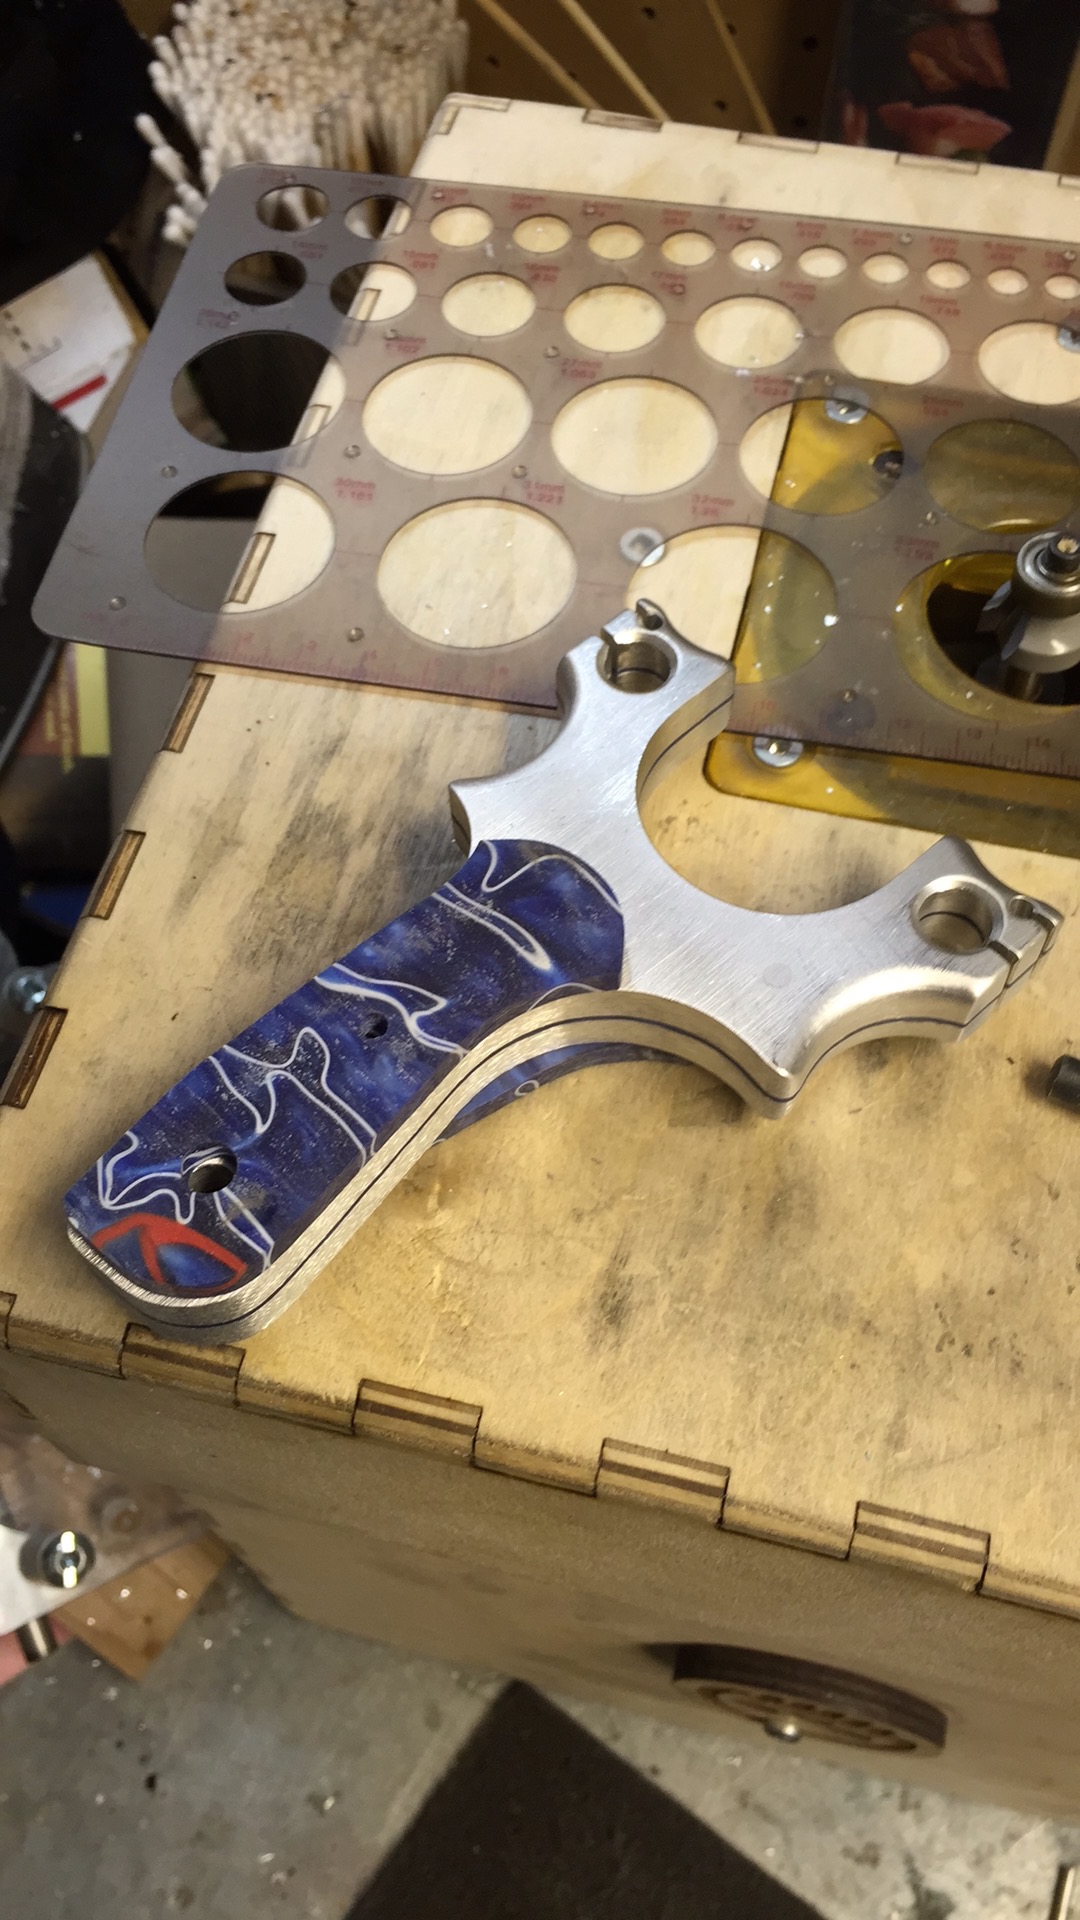
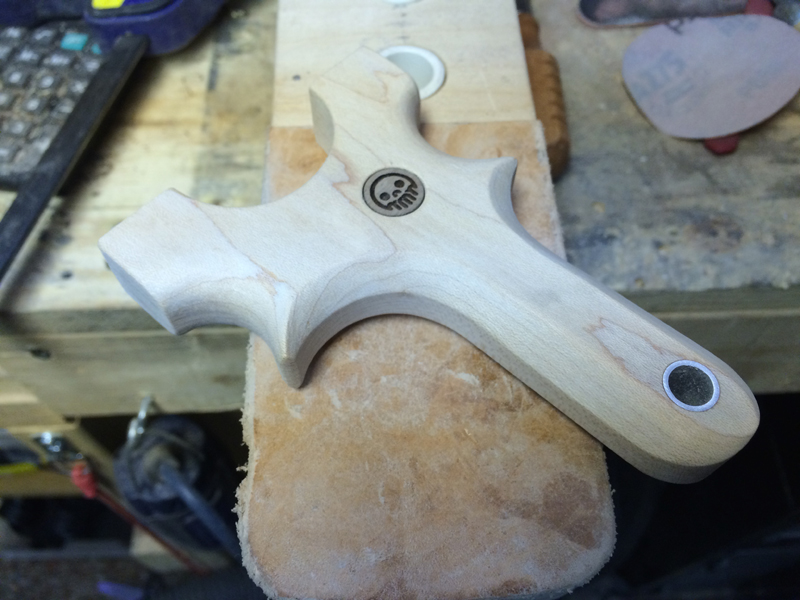
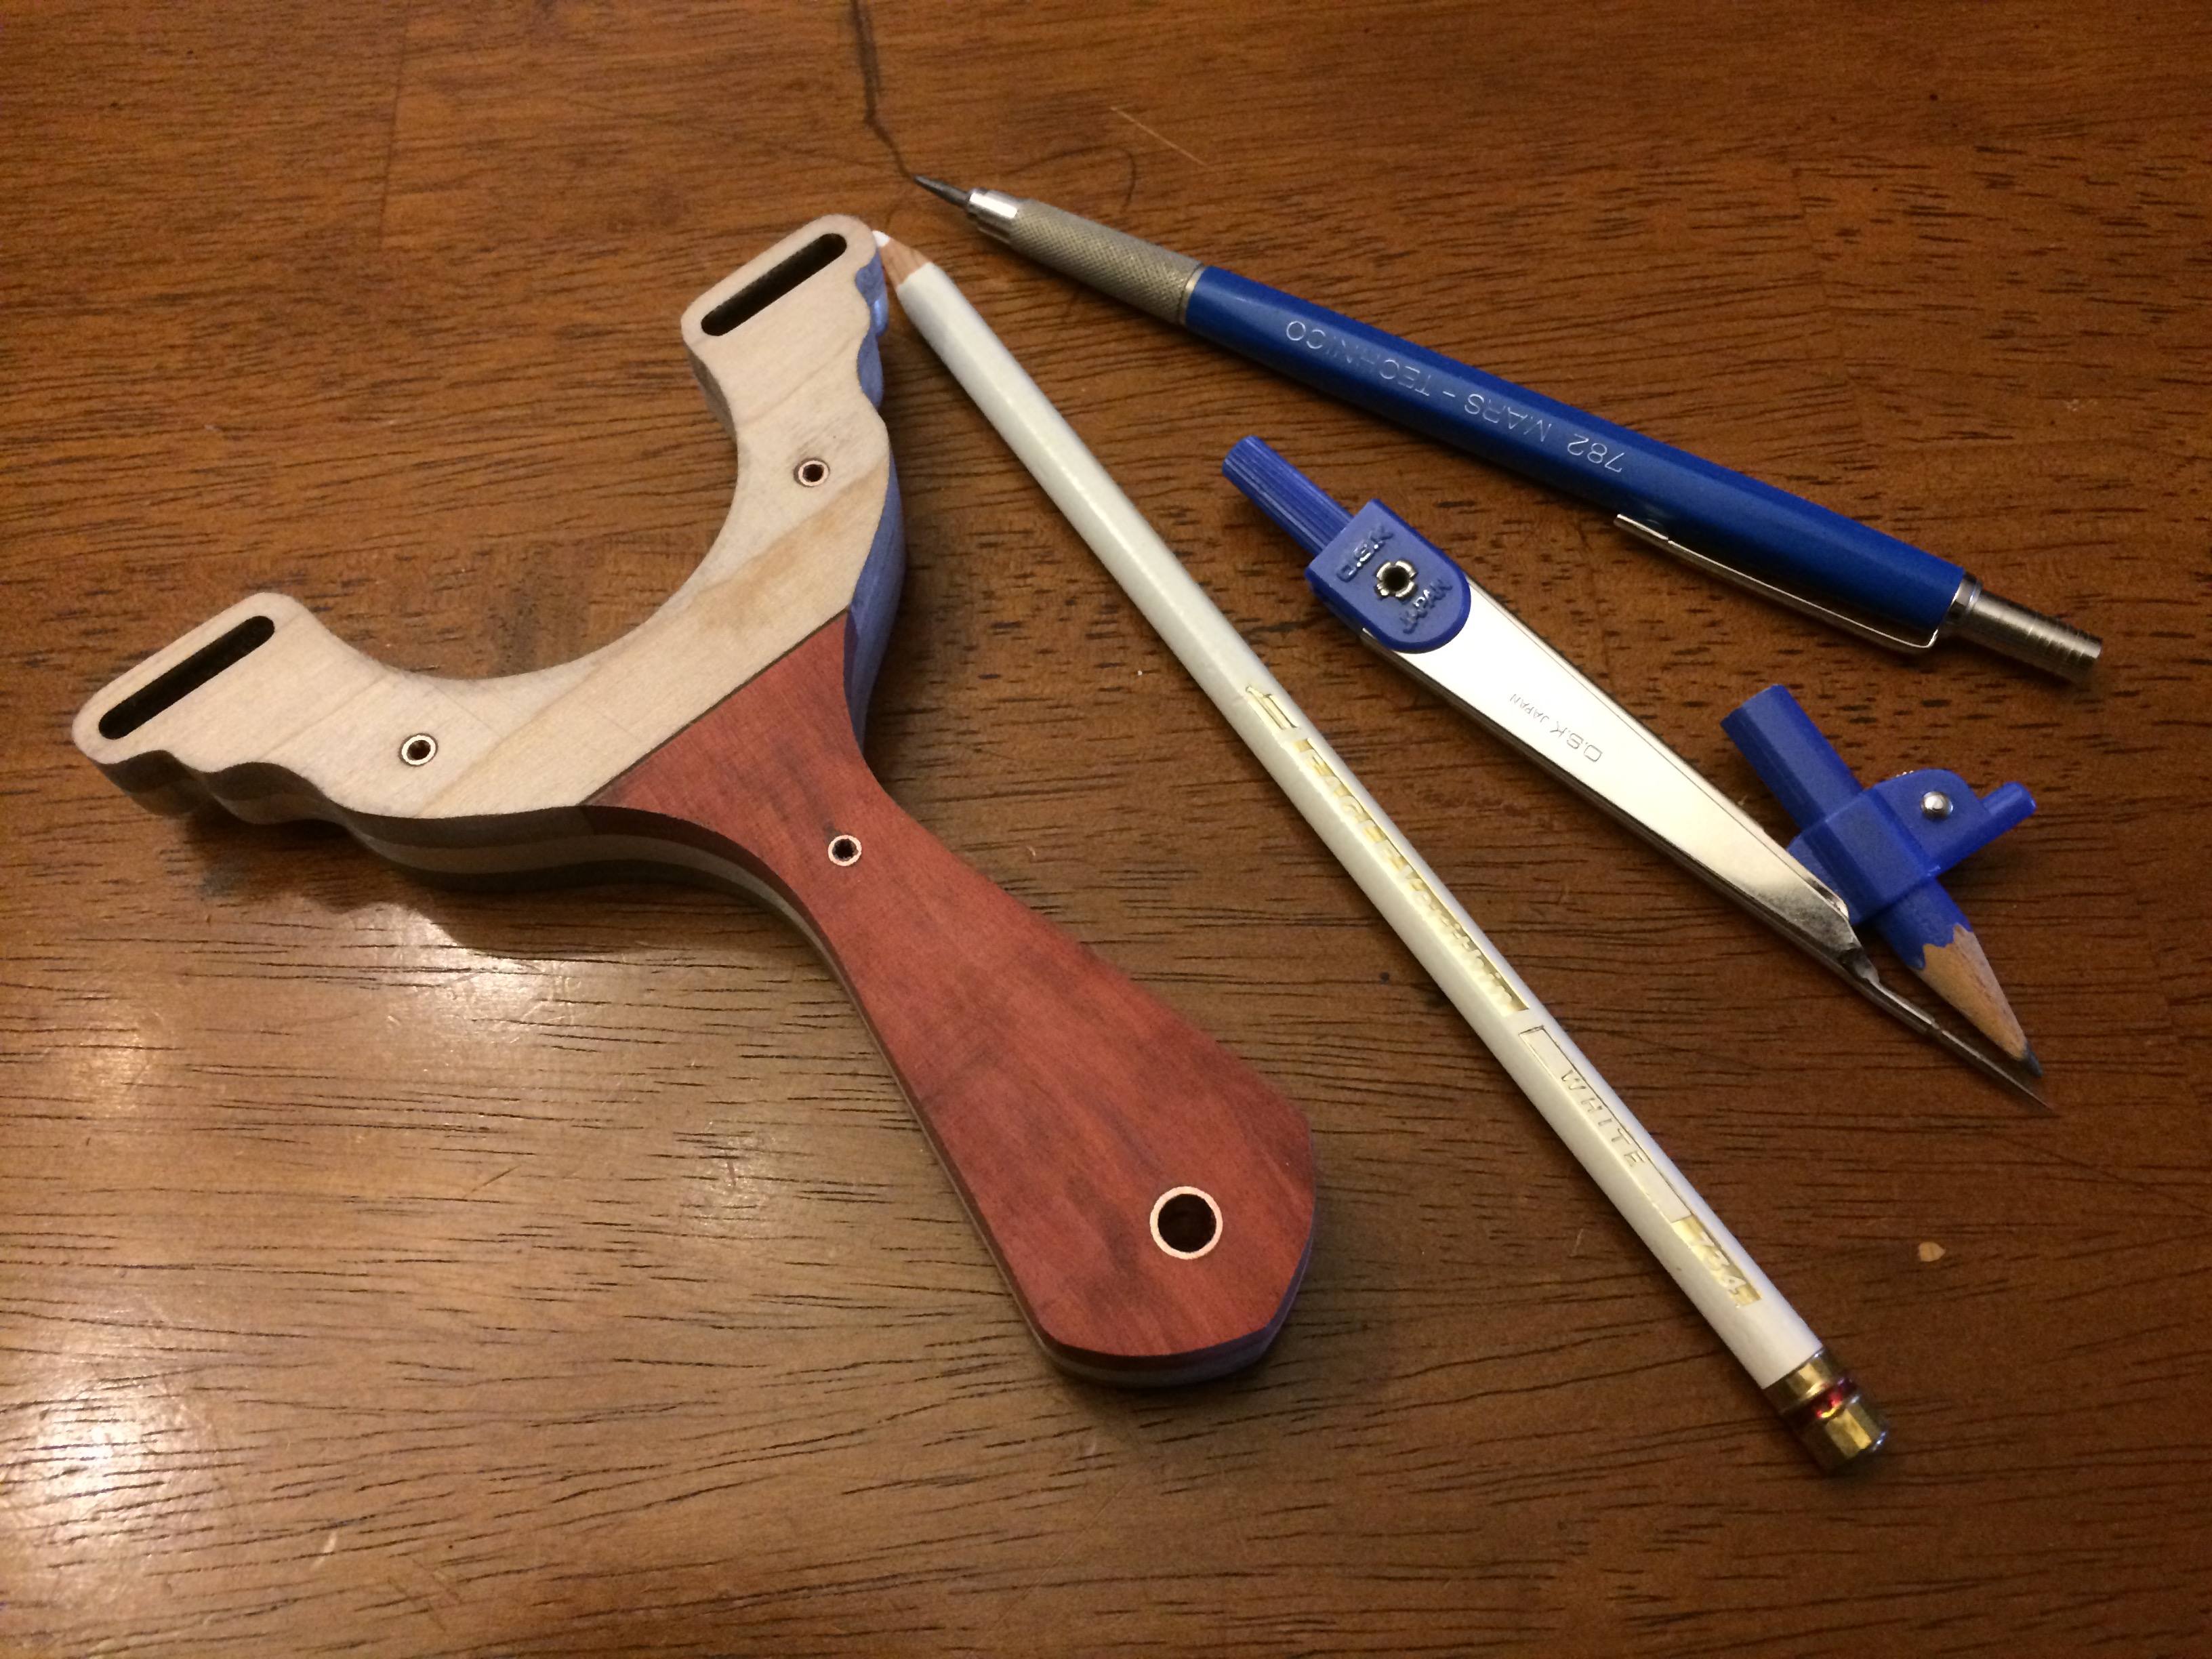
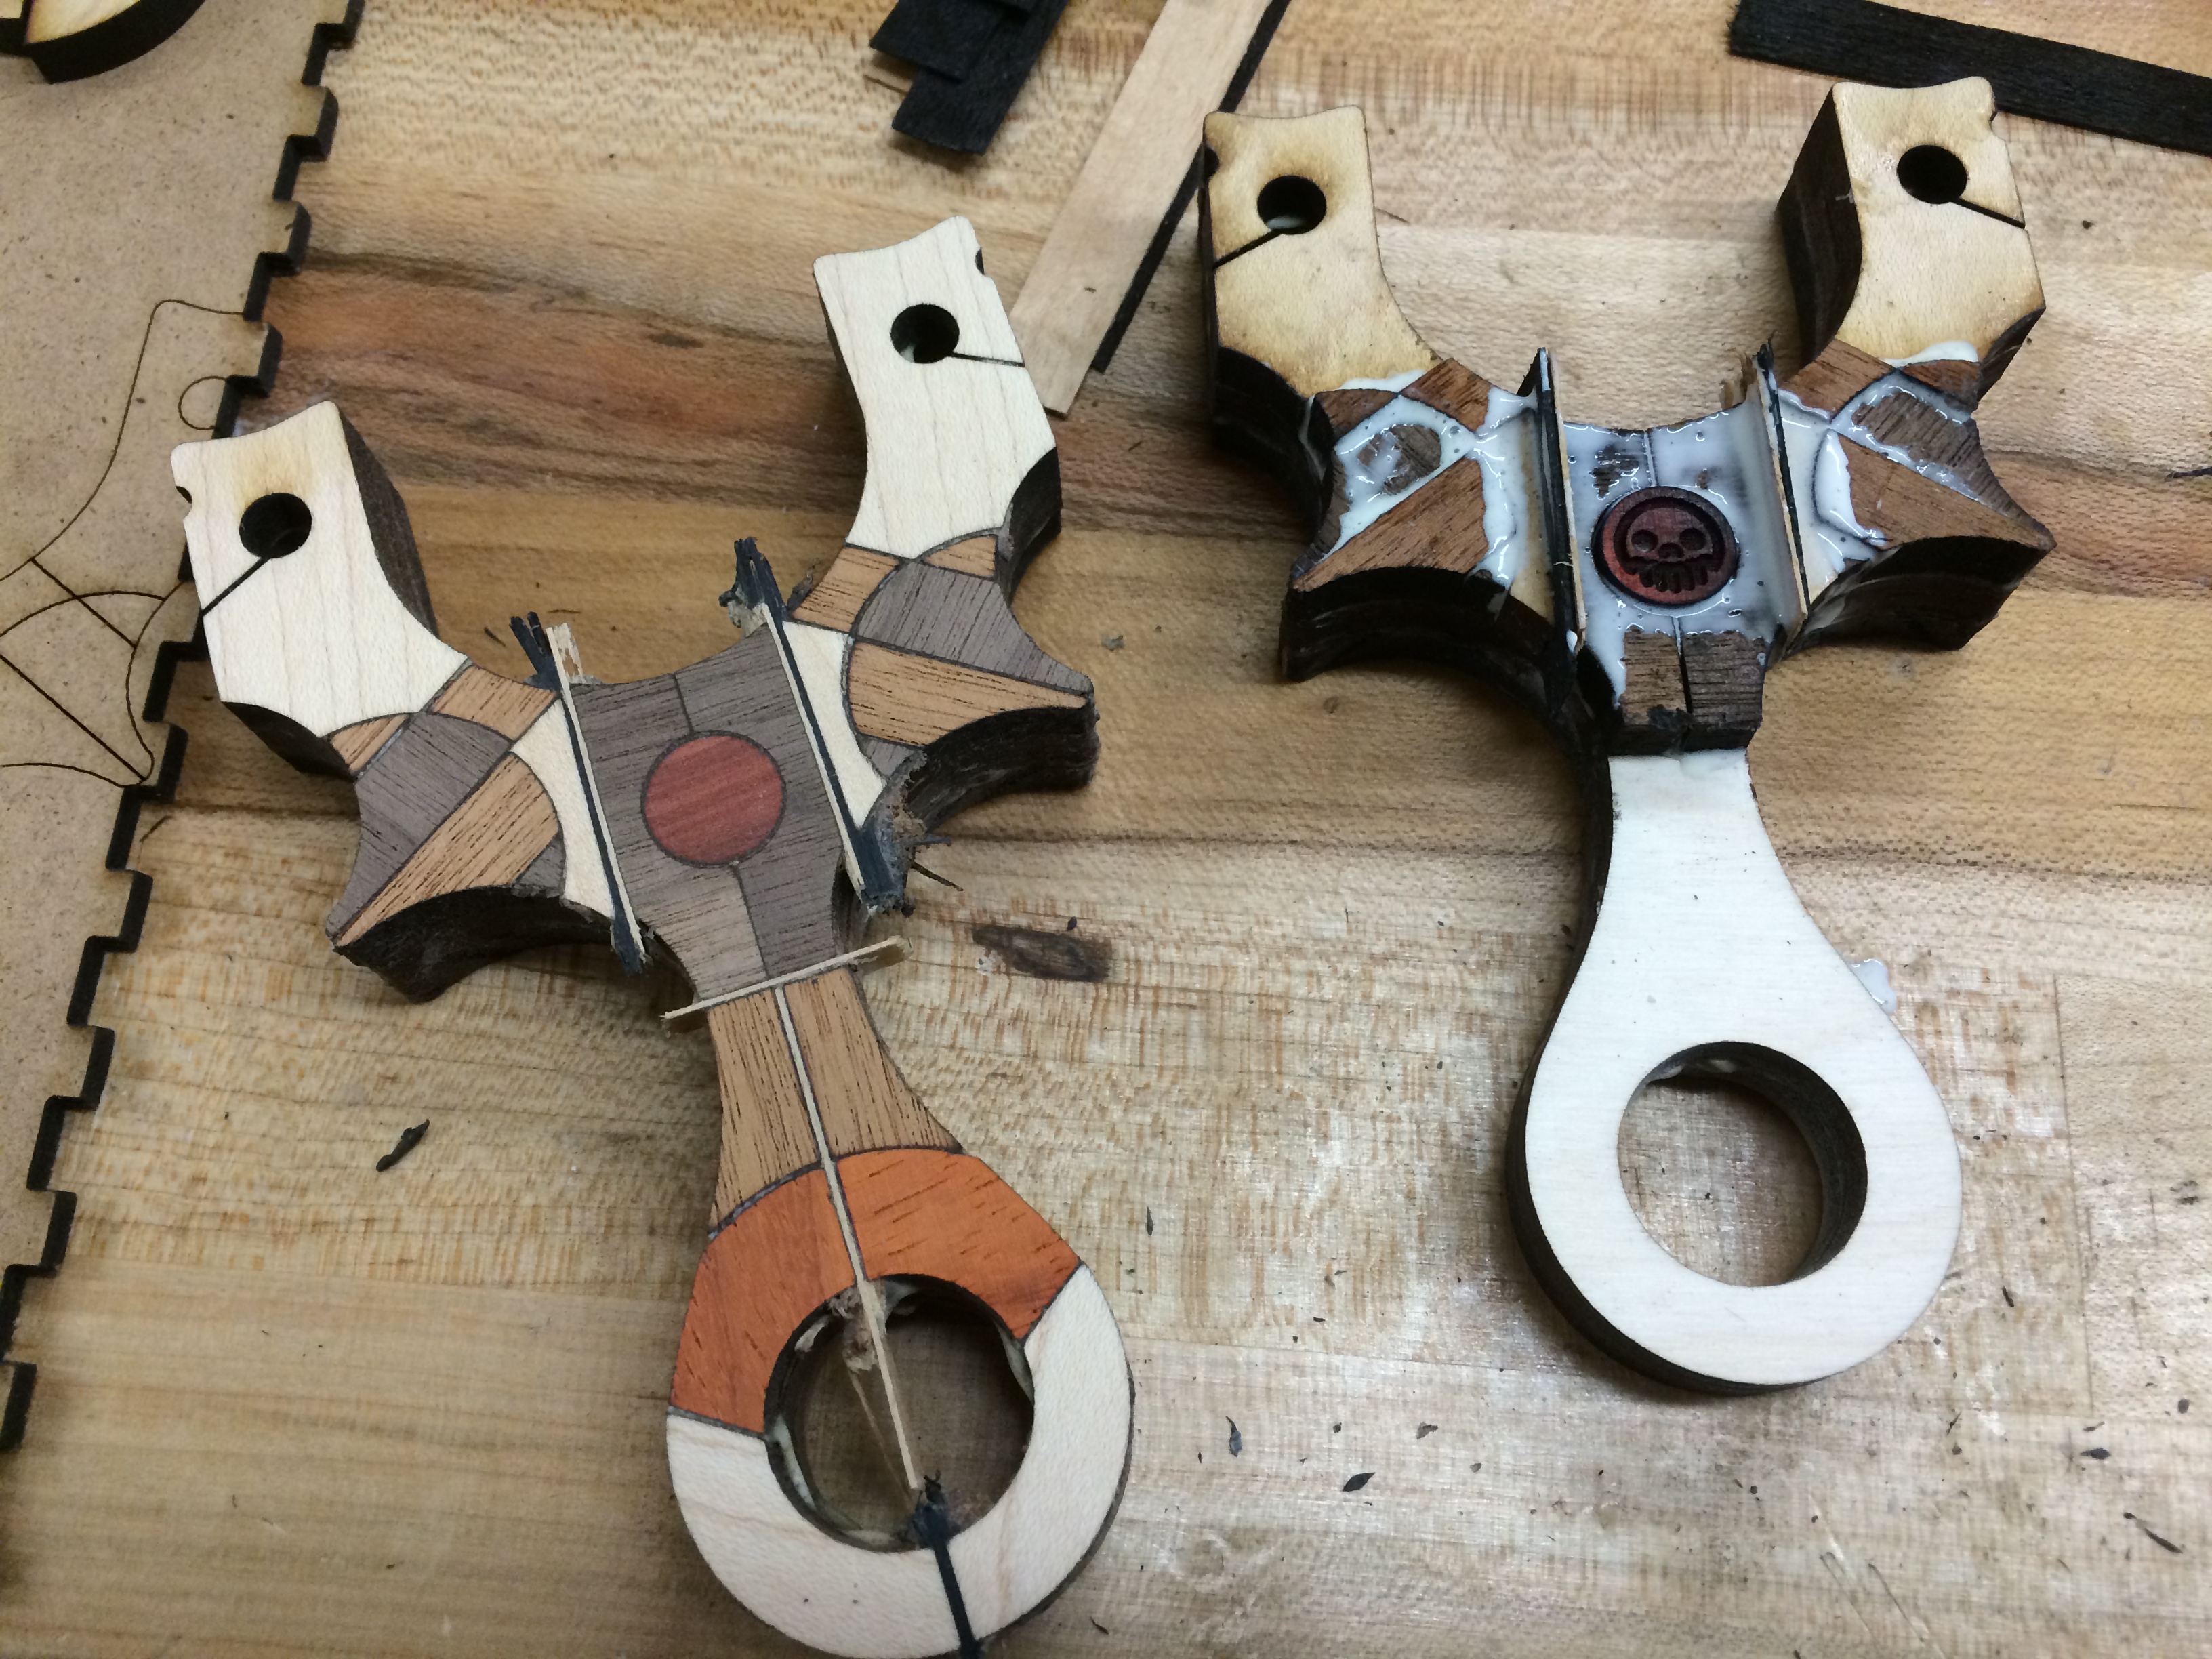
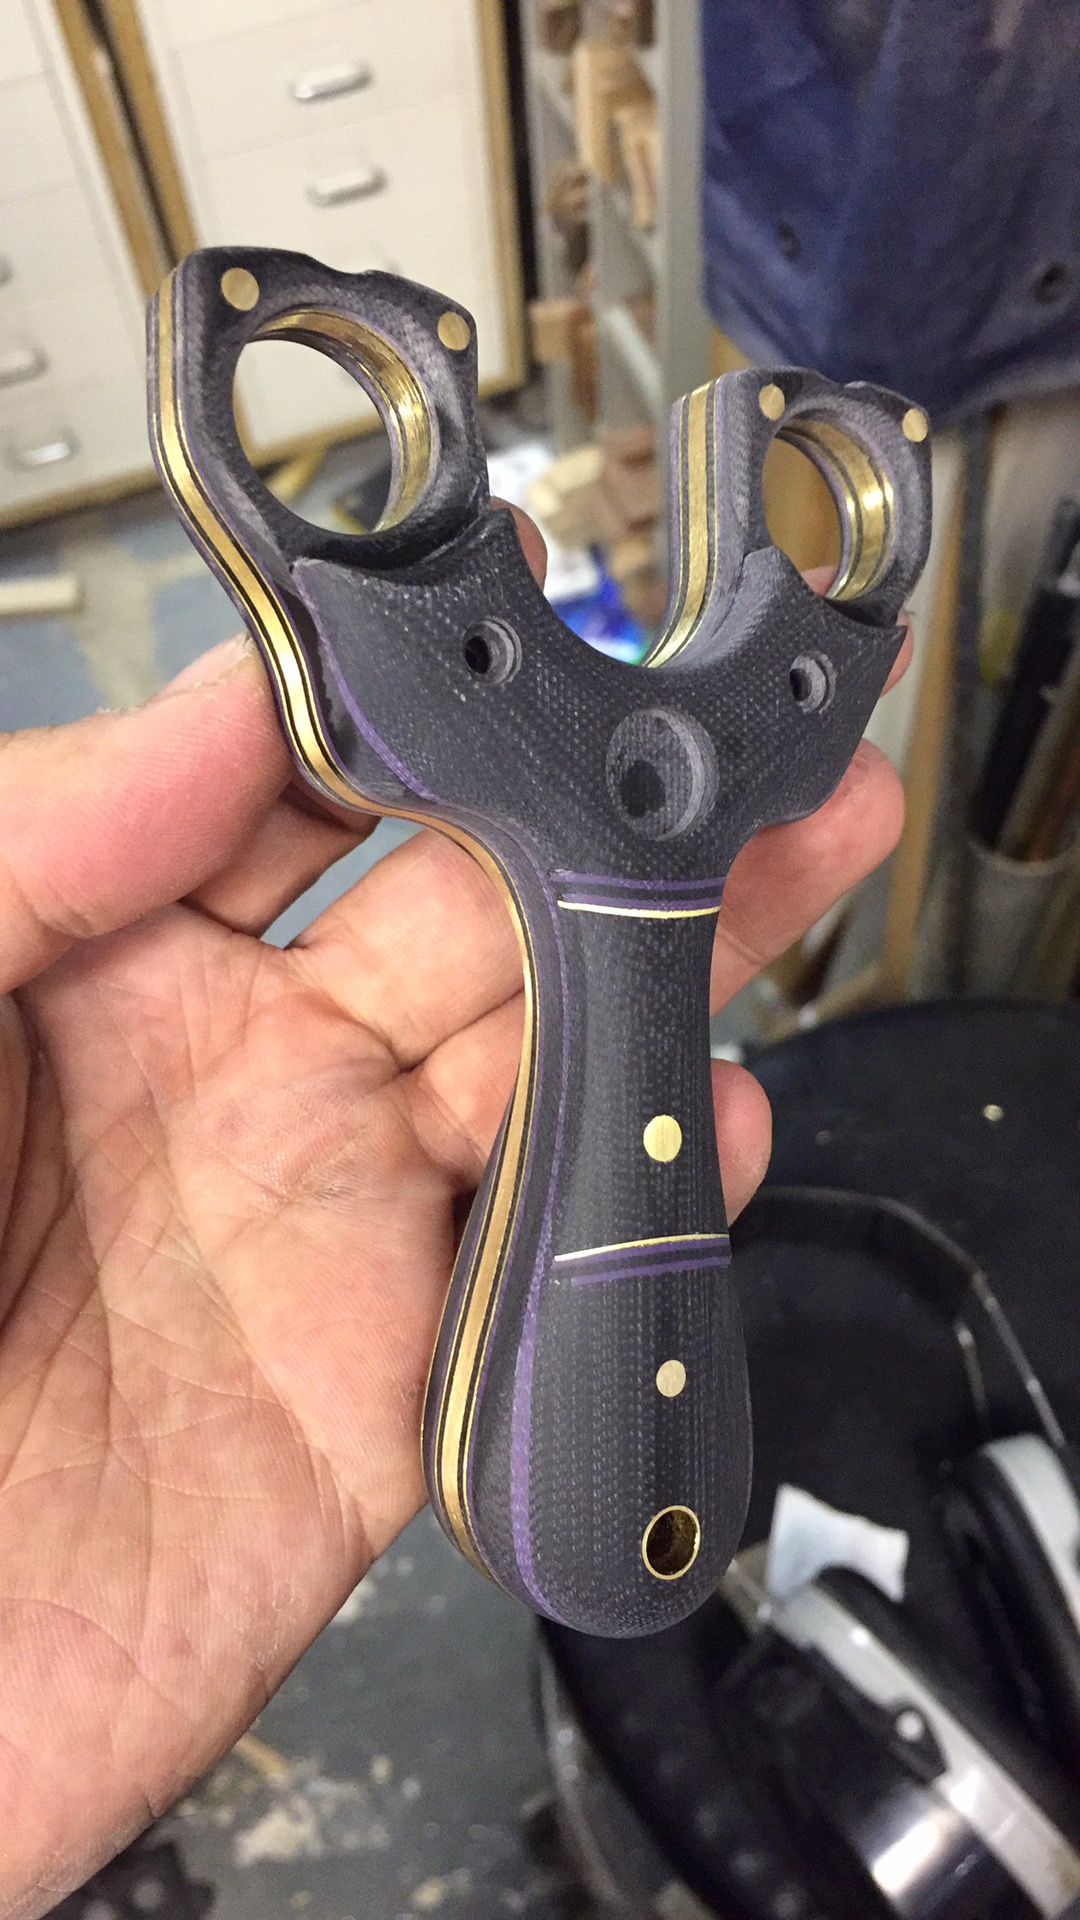
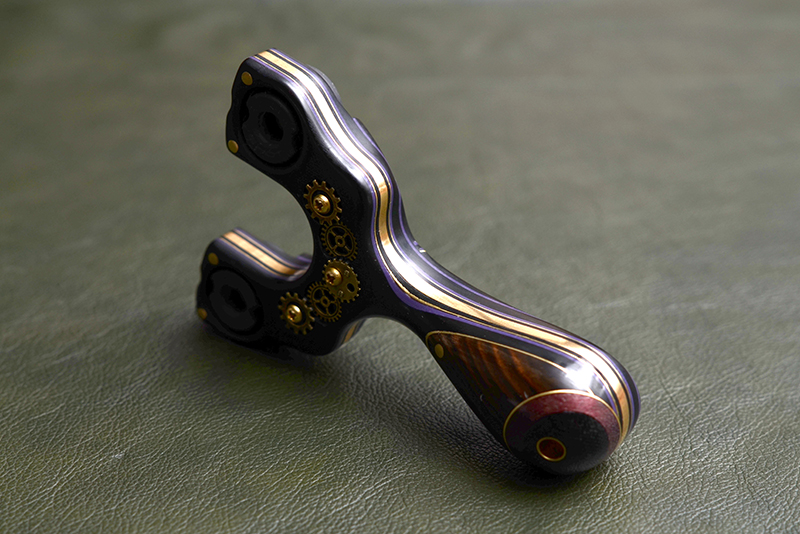
This next step I couldn’t document very well since it required a lot of hands on manipulation, but the front scale was cut from .185 G10 with the same .03″ purple G10 liner. On this surface a pocket for the maker’s mark was machined and two channels for inlays to be put in. Strips of brass, black and purple G10 were set into place and then sanded flush with the surface to create a faux separation between the handle and the tip area. The channels aren’t straight, they have a slight curve to them, a feature impossible to do by hand but only with the aid of CNC. A quick router trip with .125 bit cleaned up the side and the surface roughed to 100 grit in prep for more shaping and the fine hand work. Having made this shape dozens of times, the compound curves of the shooter side scale is complex but familiar.

img_0556

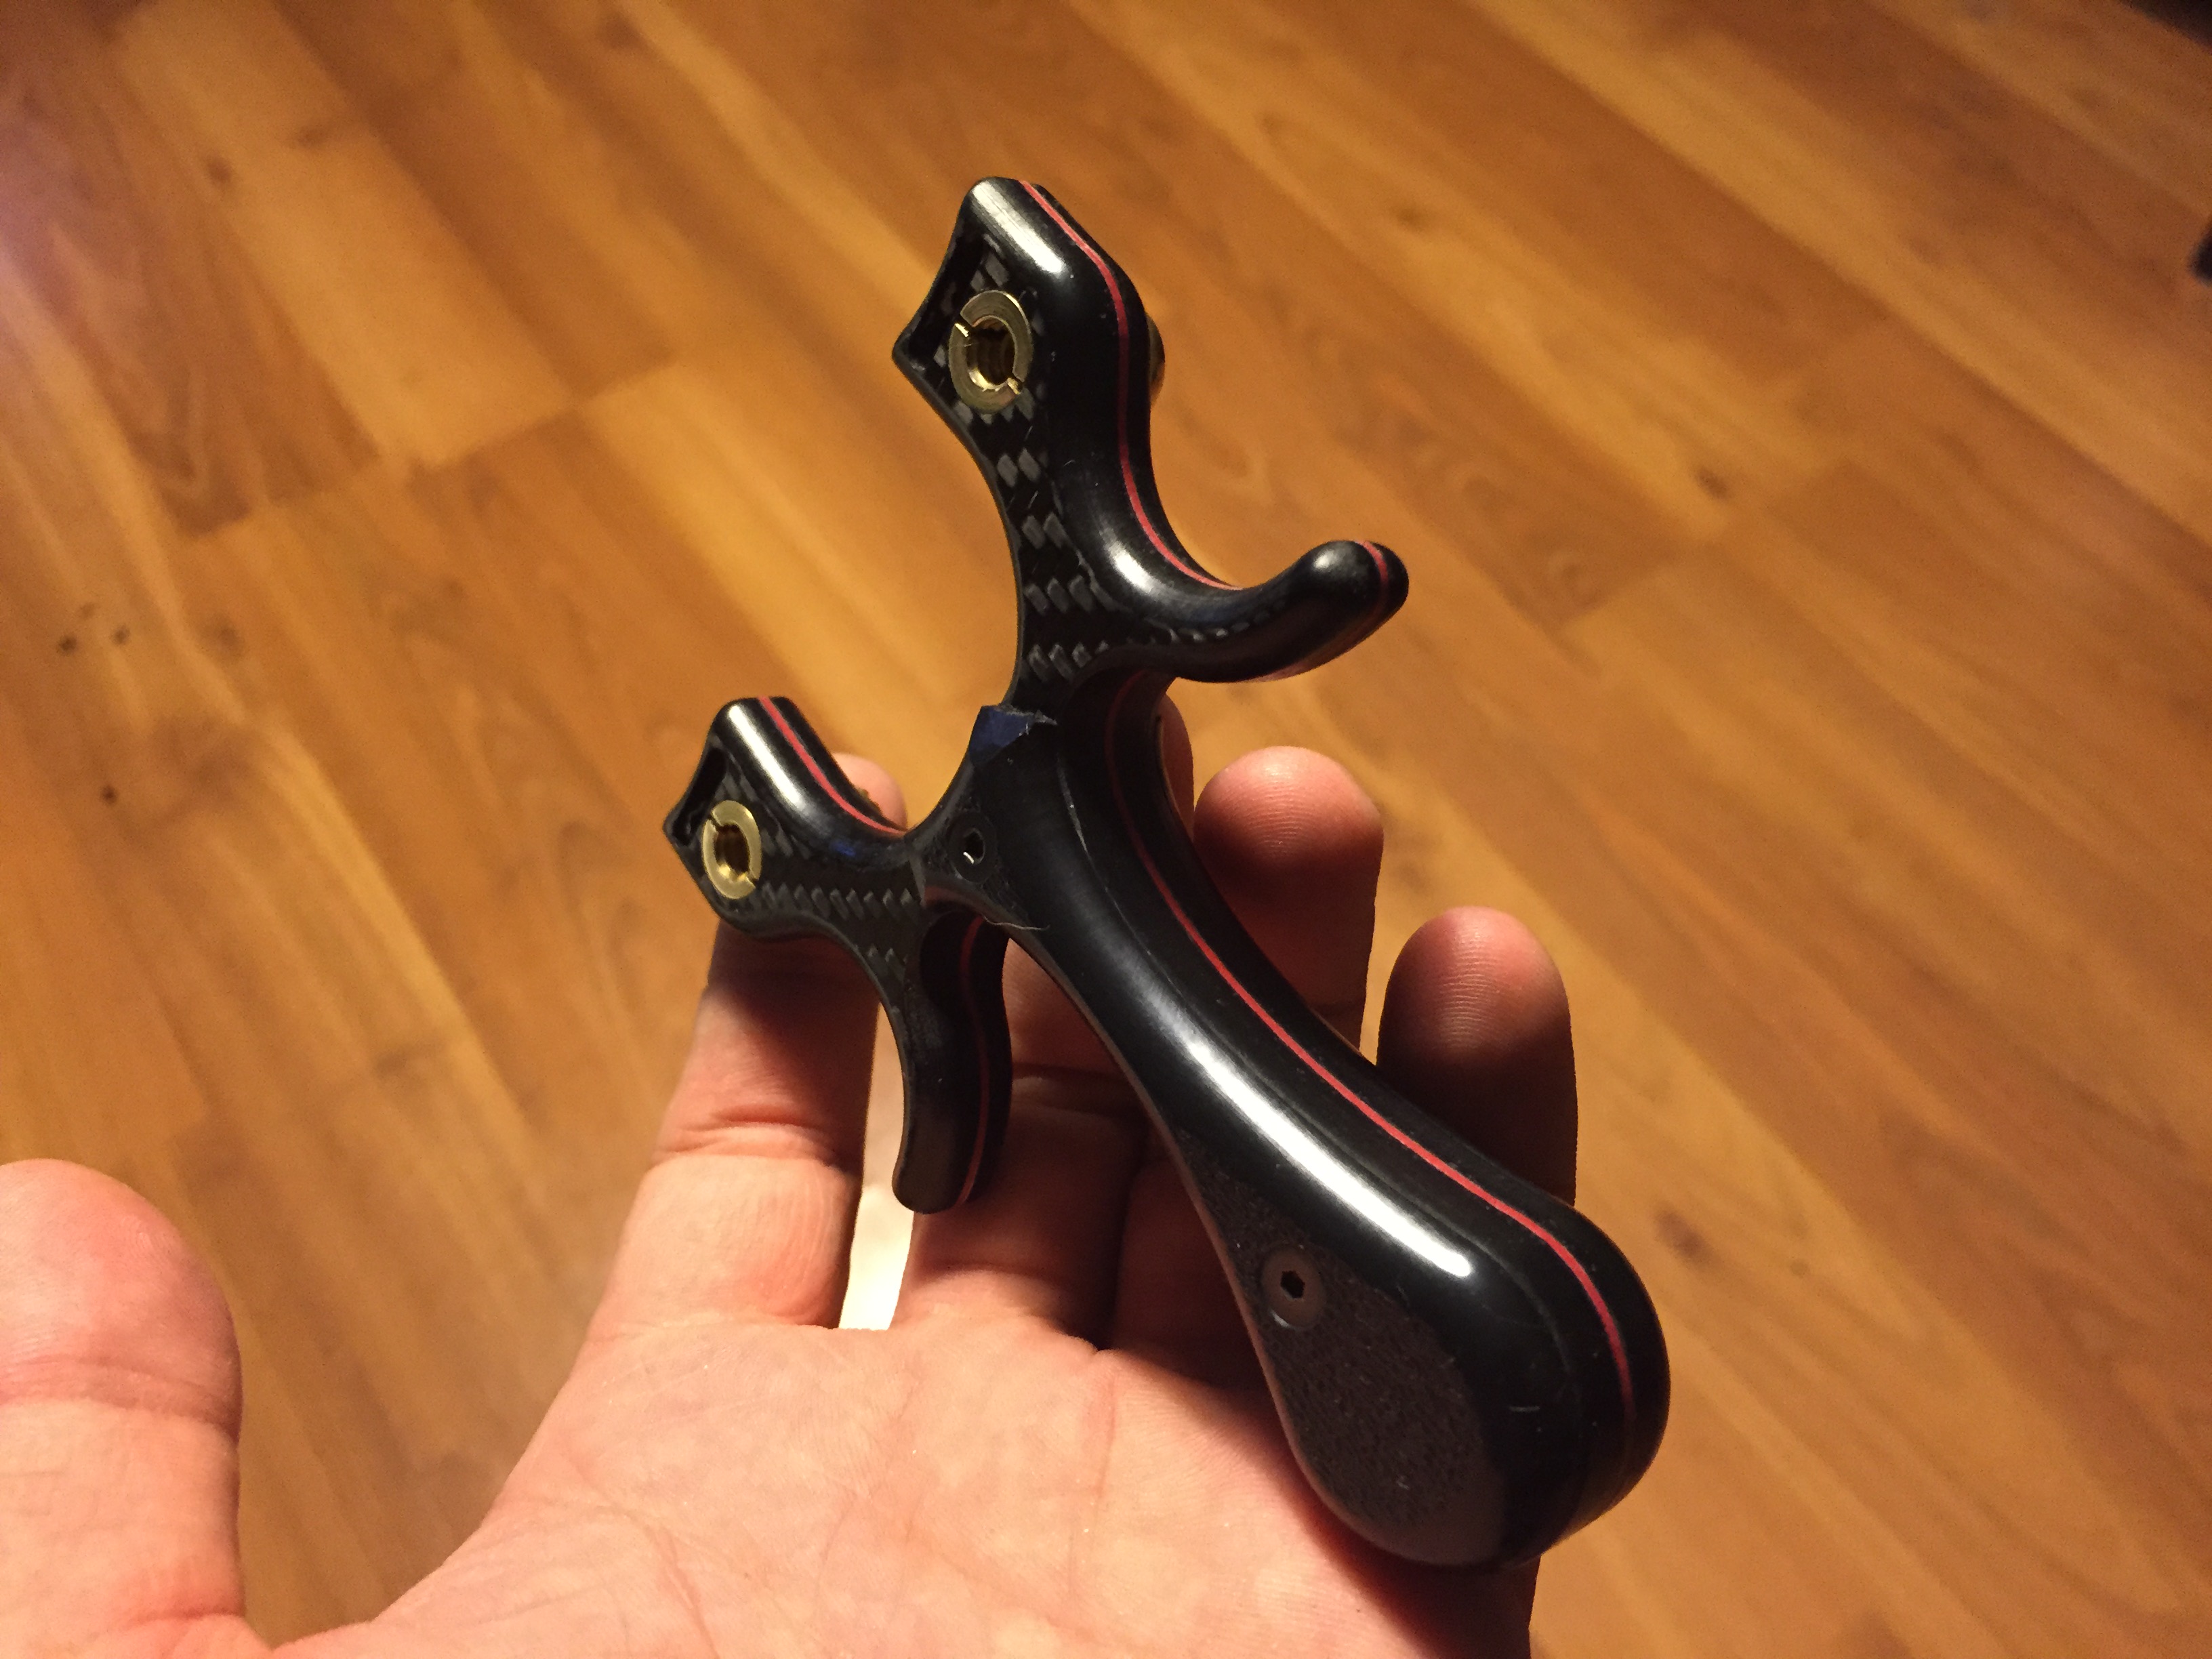
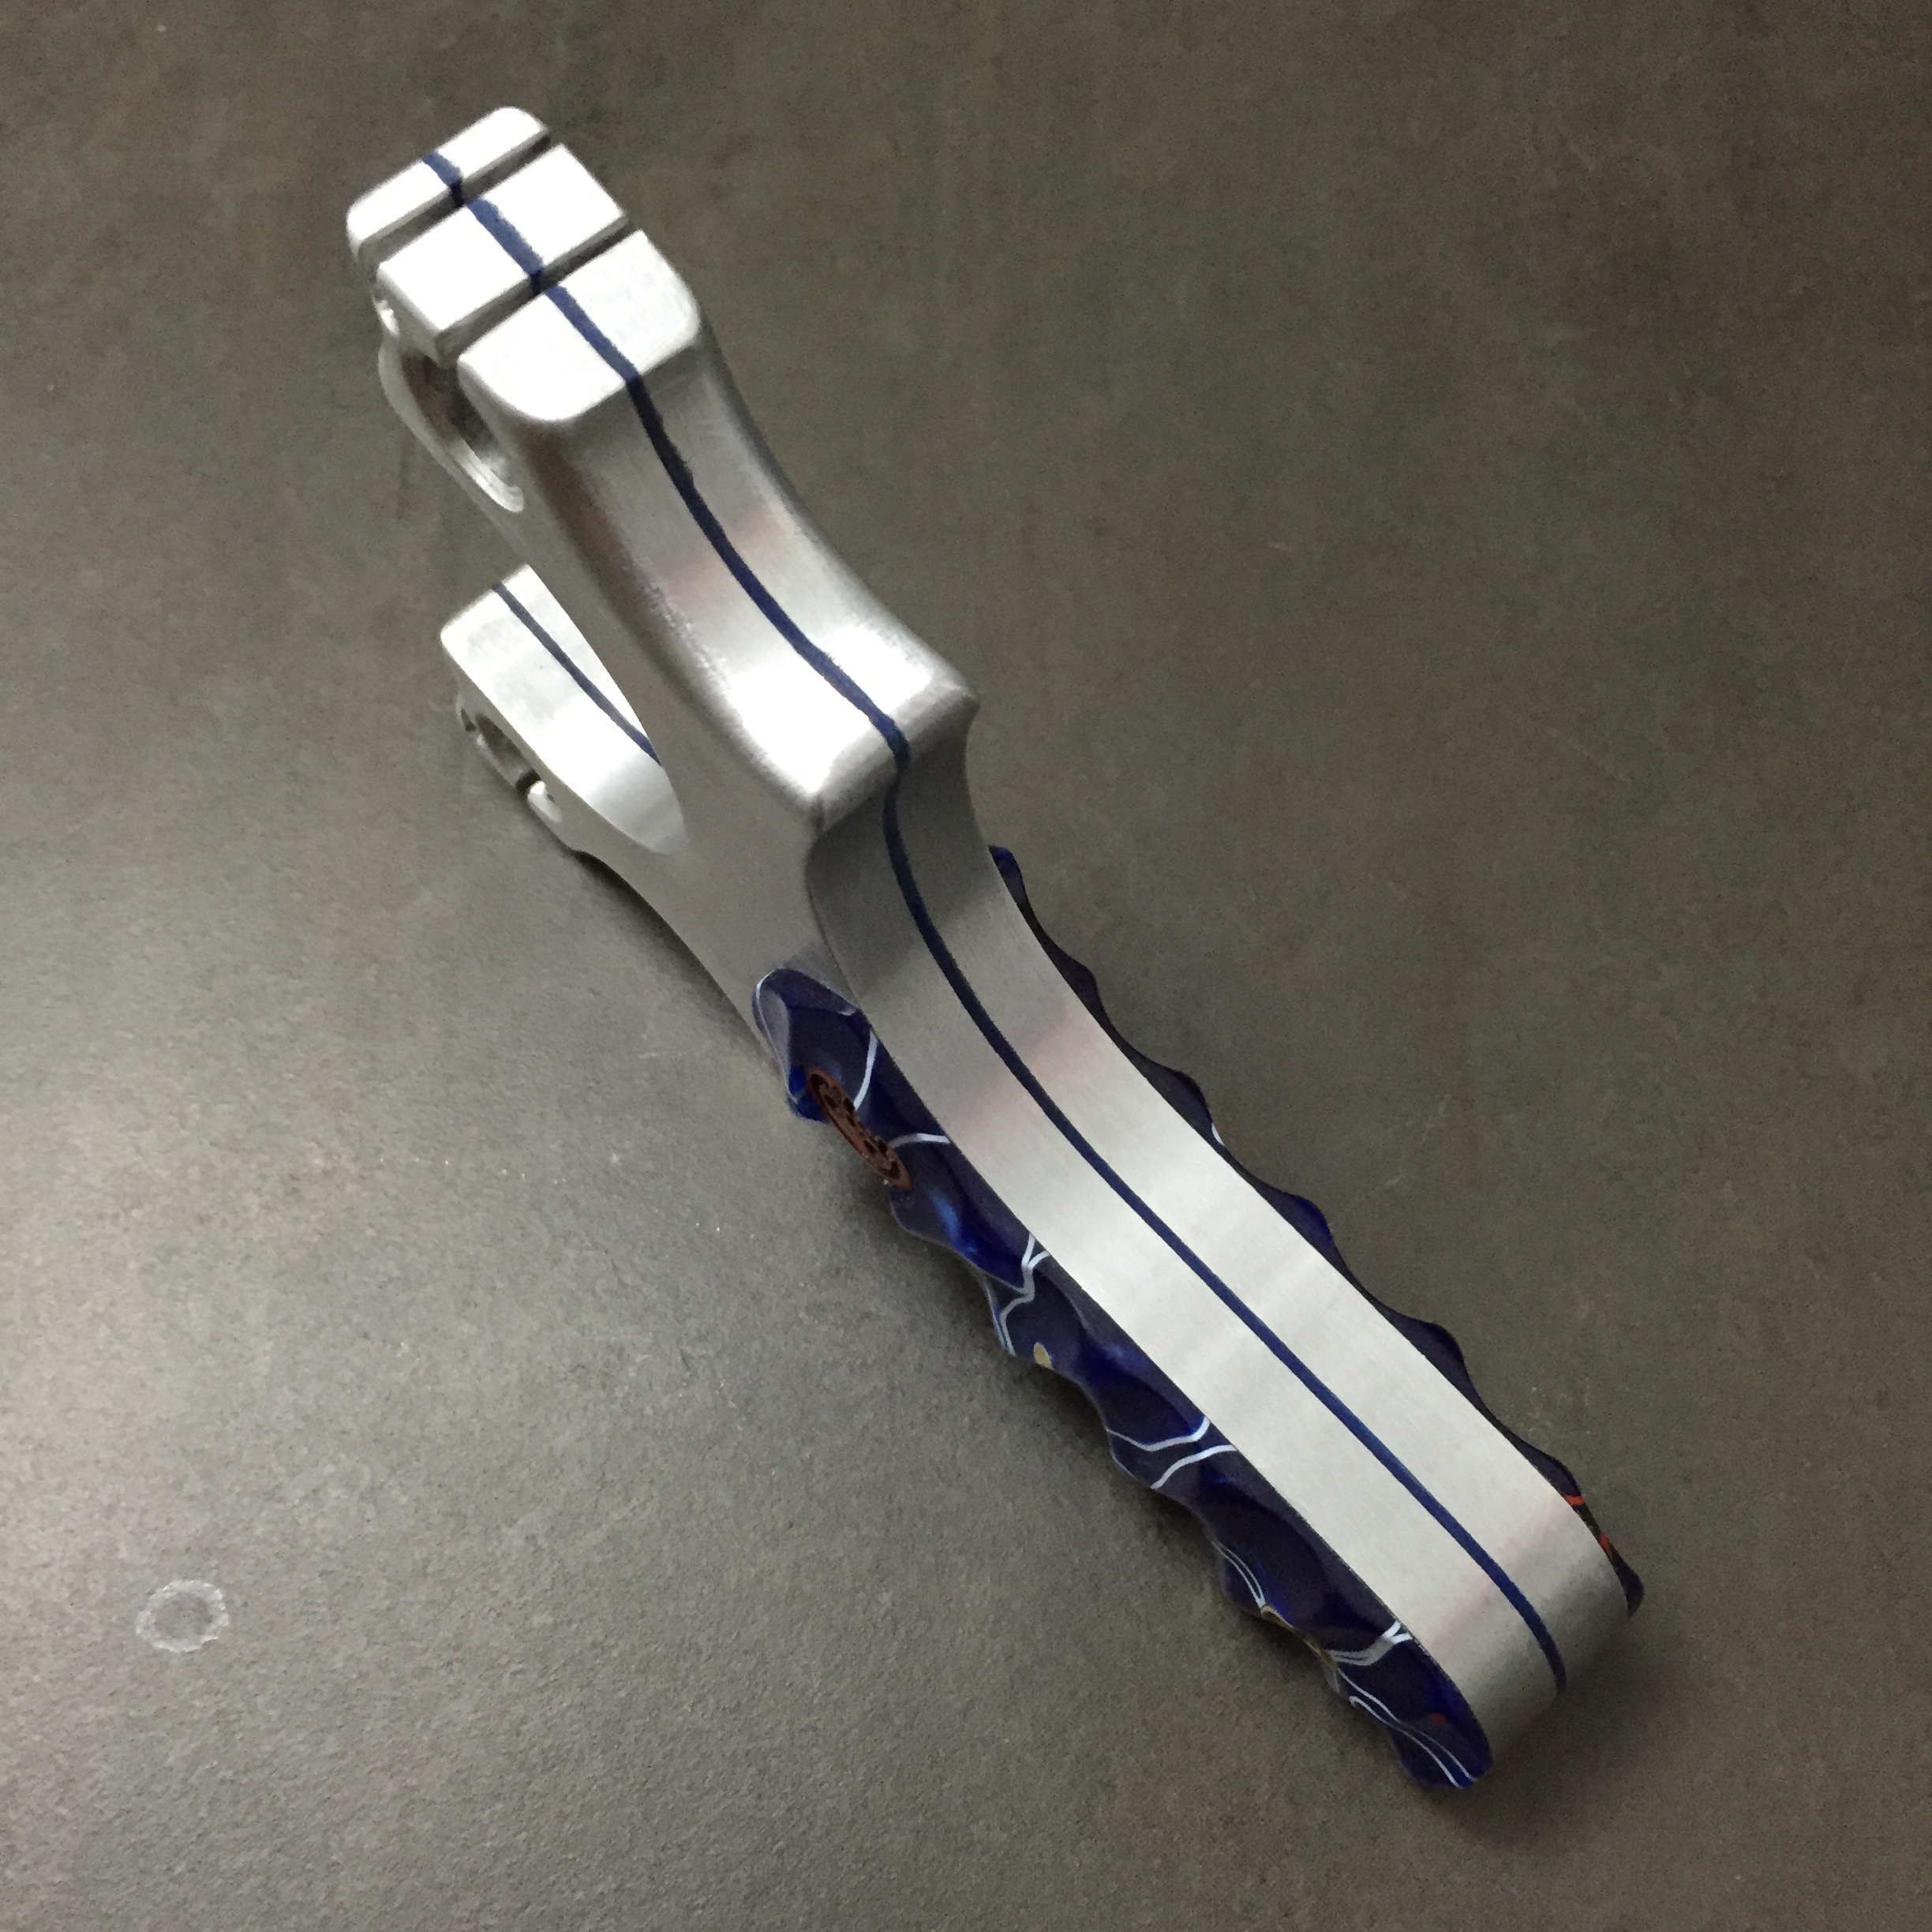
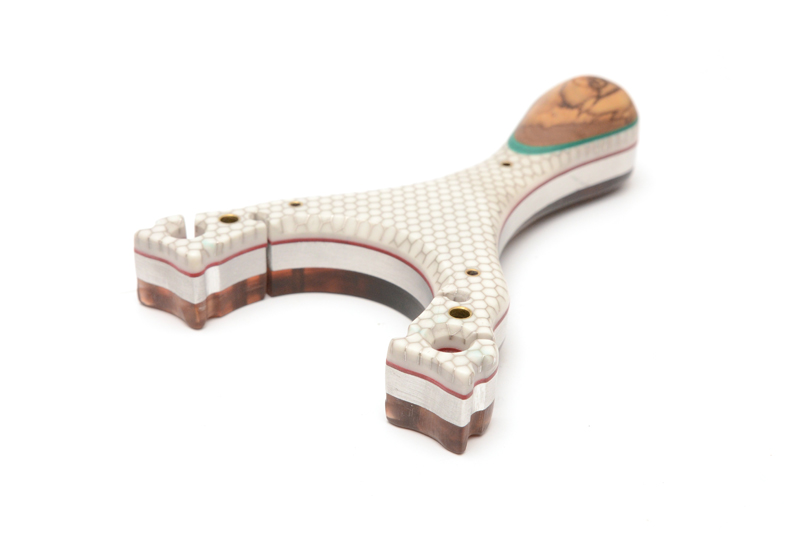
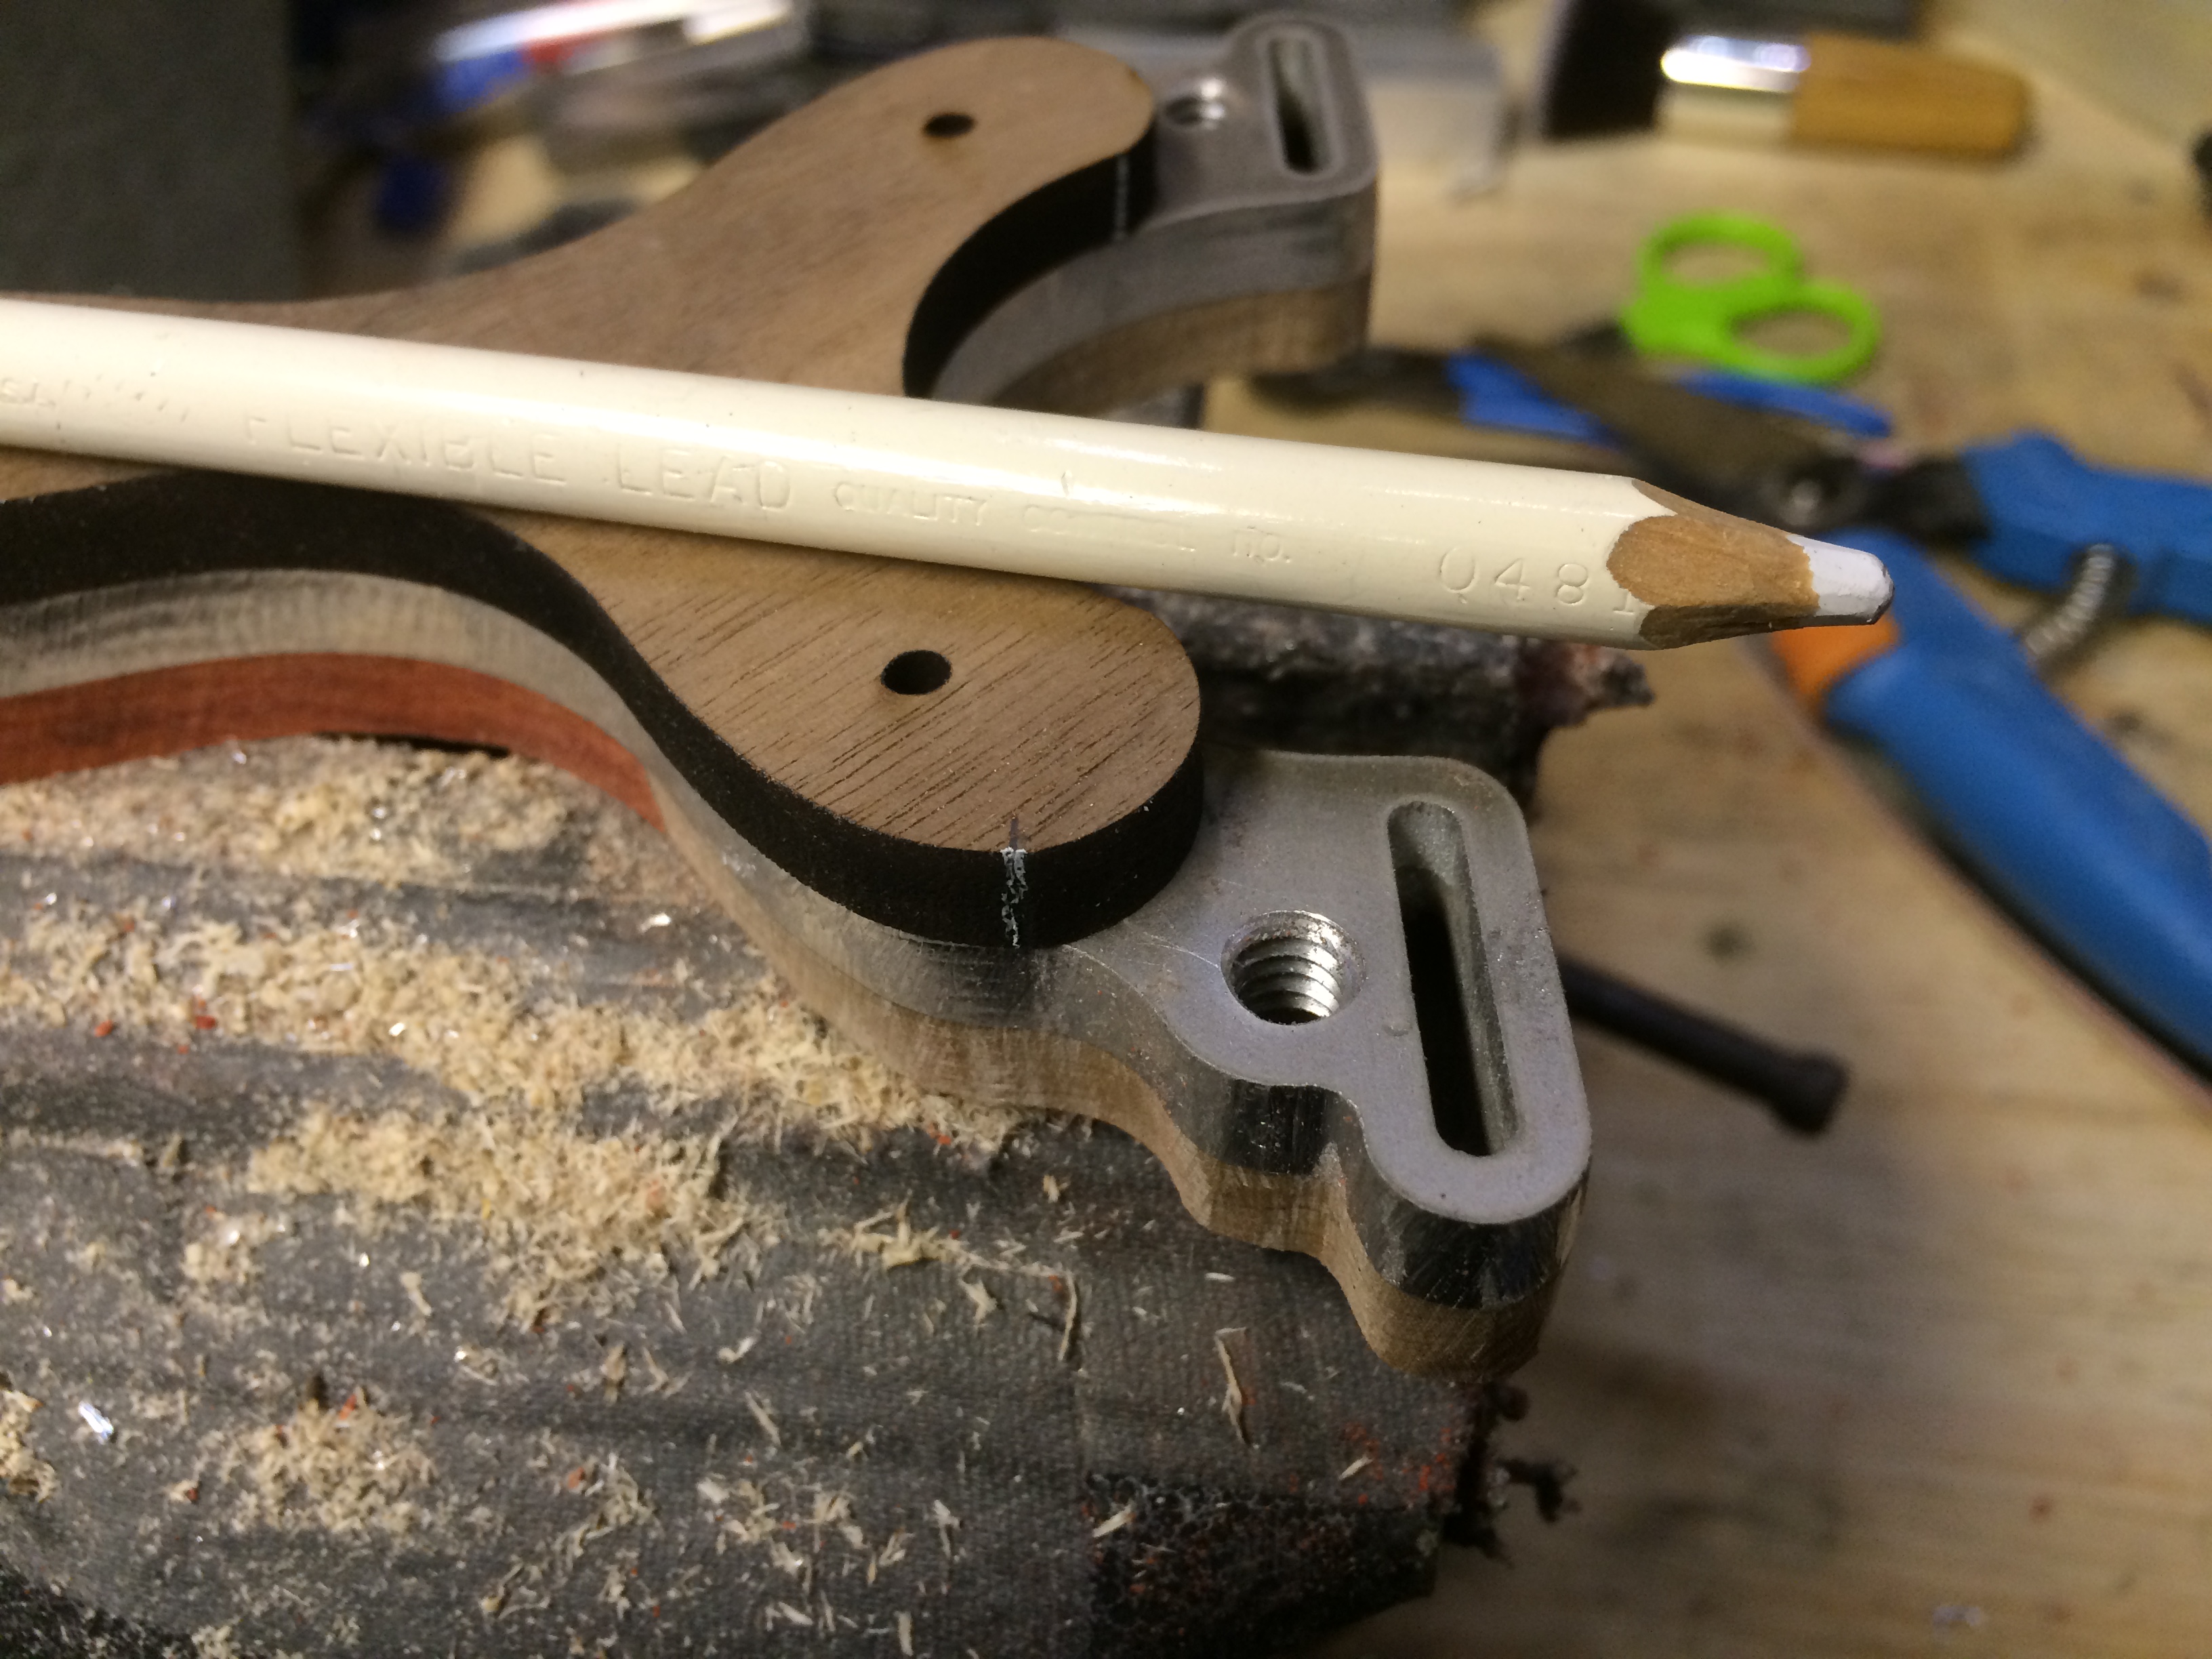
Now to flip it over and pay attention to the target side, this is where it got a little crazy. I had to estimate where the lanyard hole would eventually be and select the correct materials to suit the theme. Not only did the materials need to match, but I also like designing these types of features to wear nicely when the slingshot is put on a table or surface or replaced many times into a holster/bag.

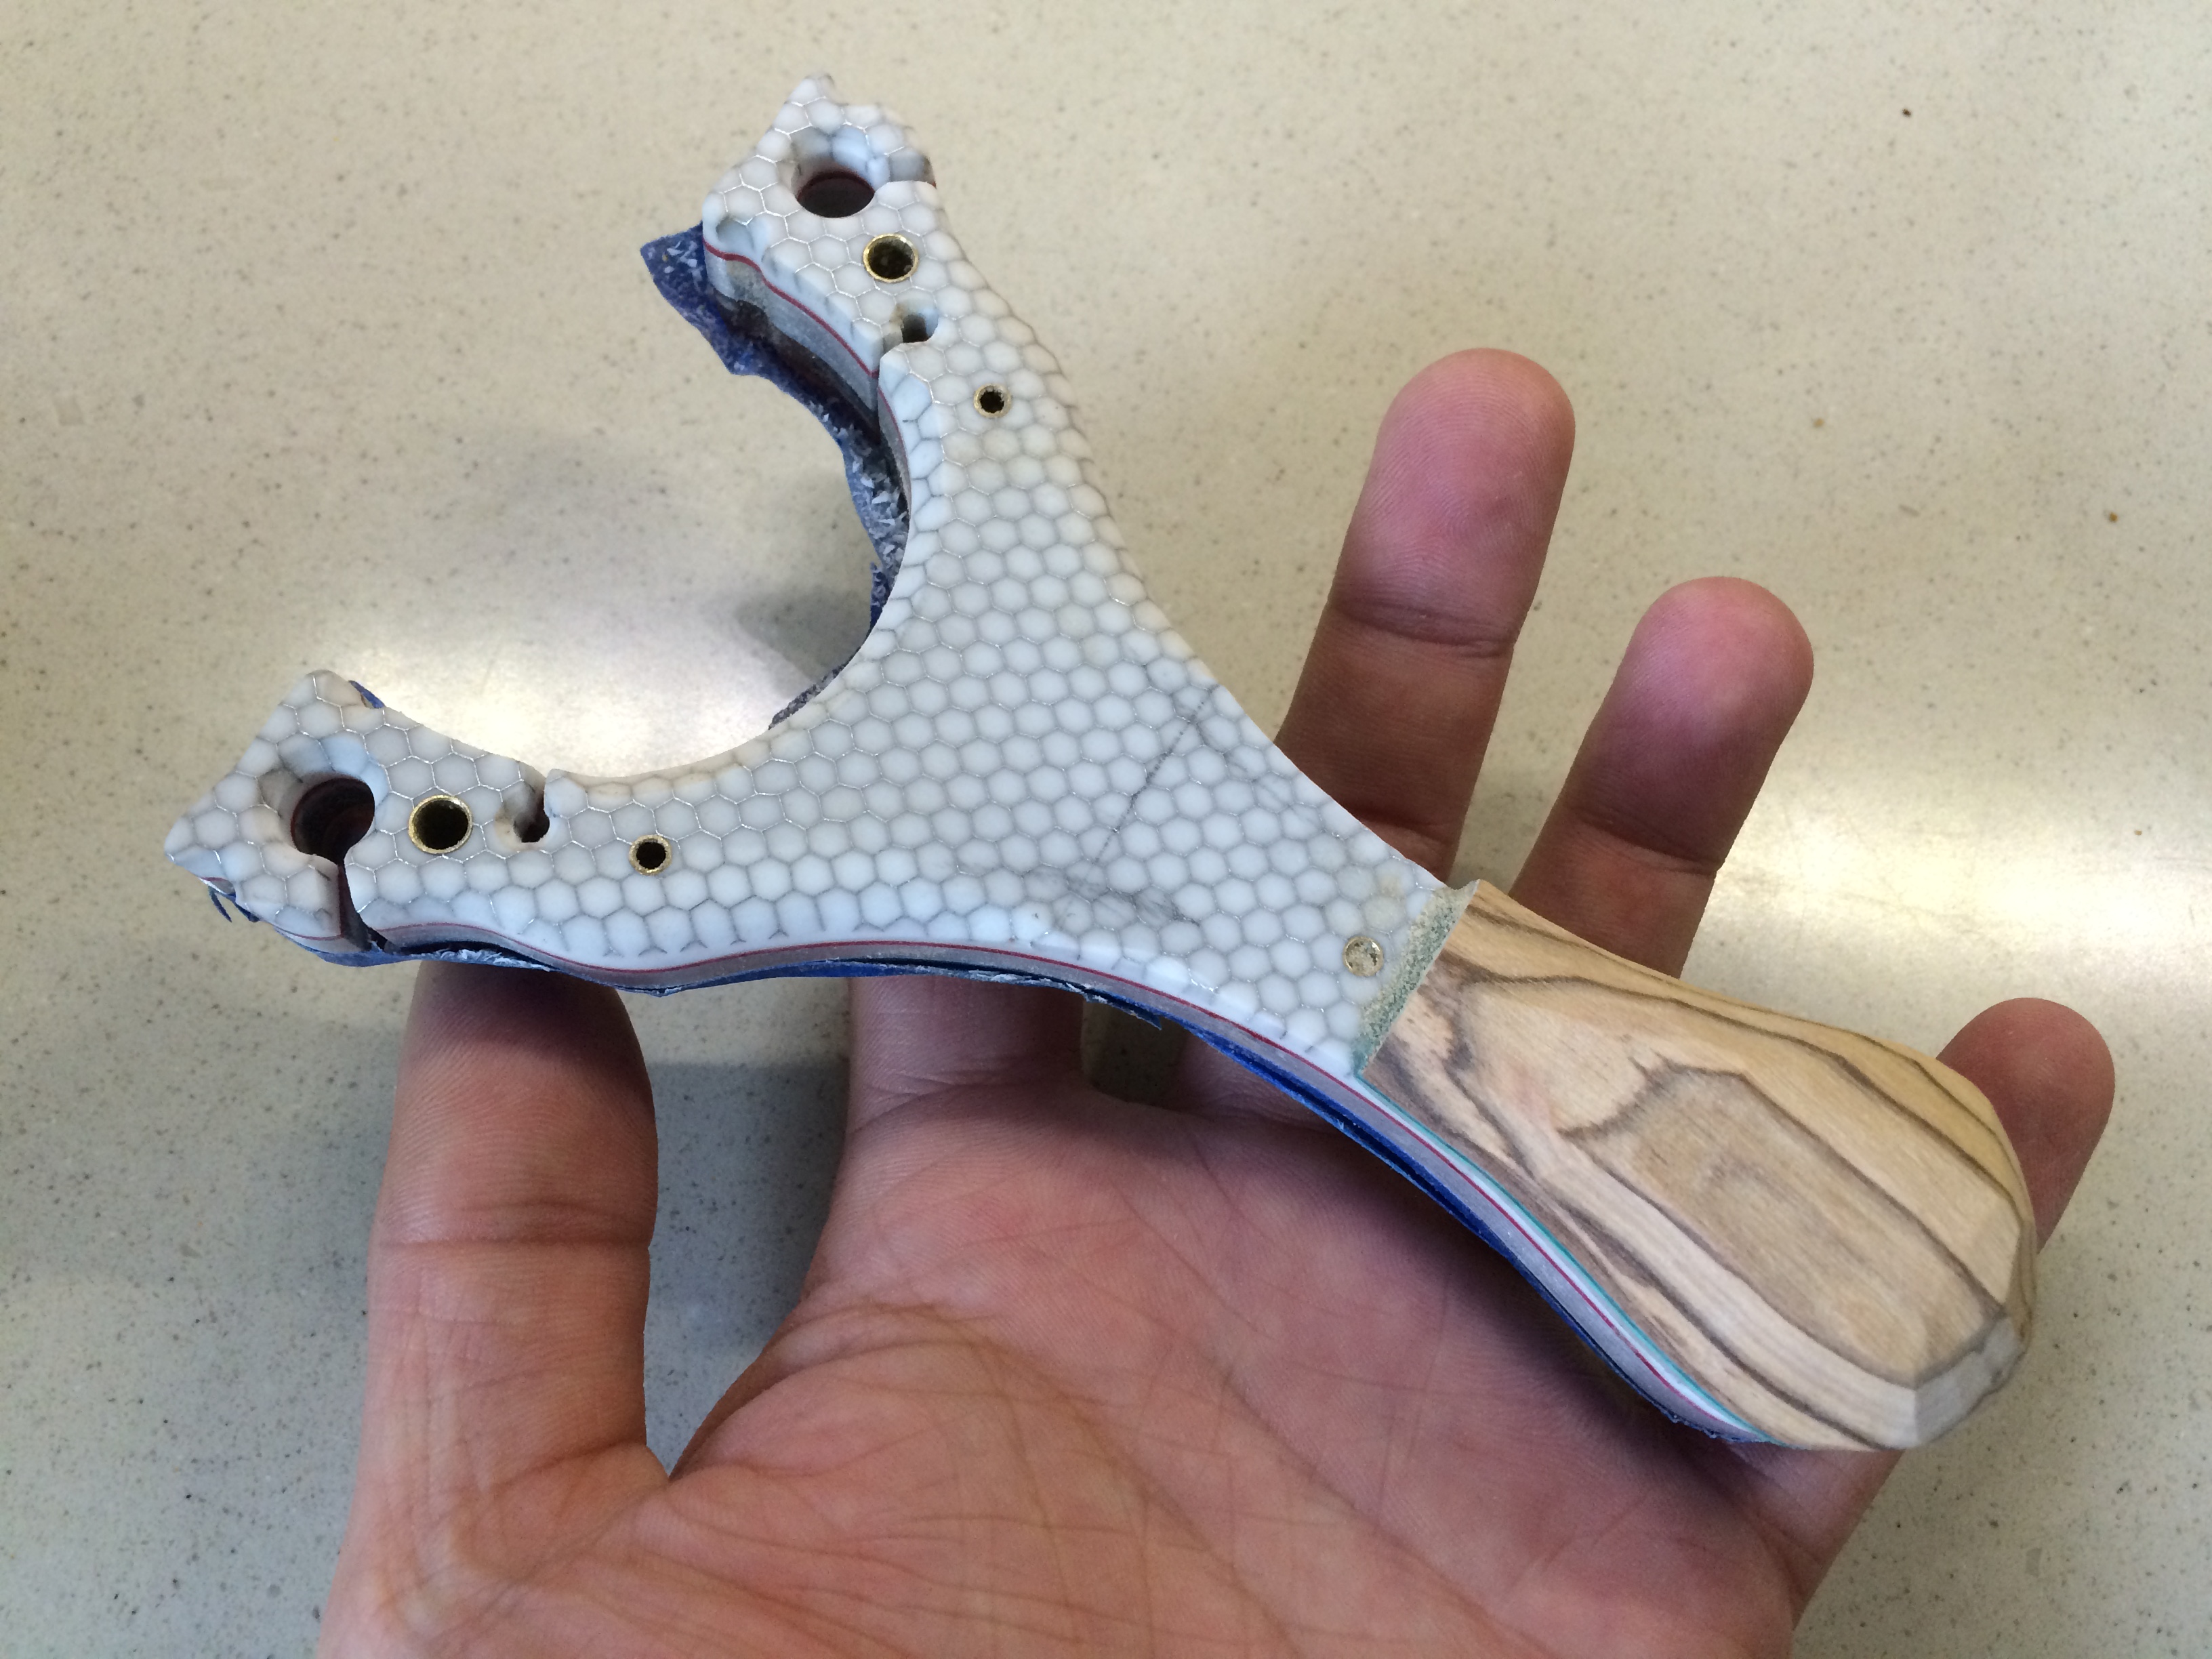
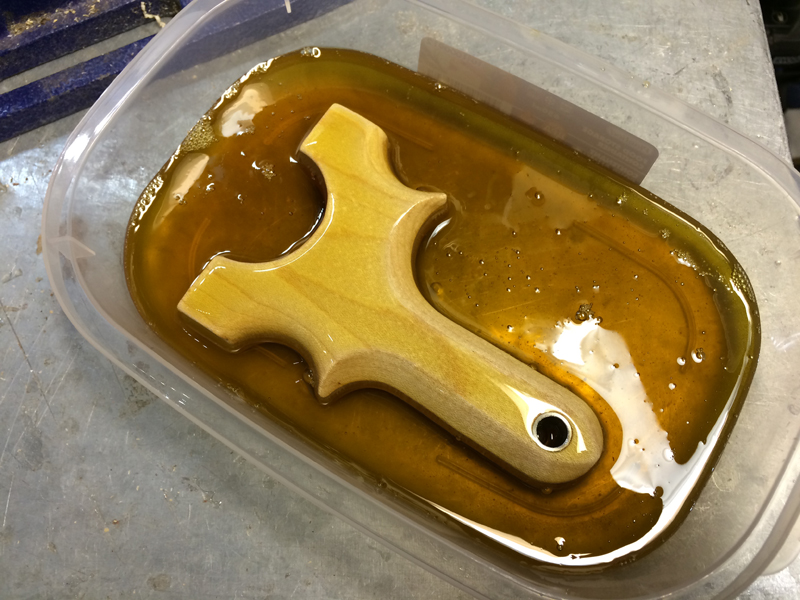
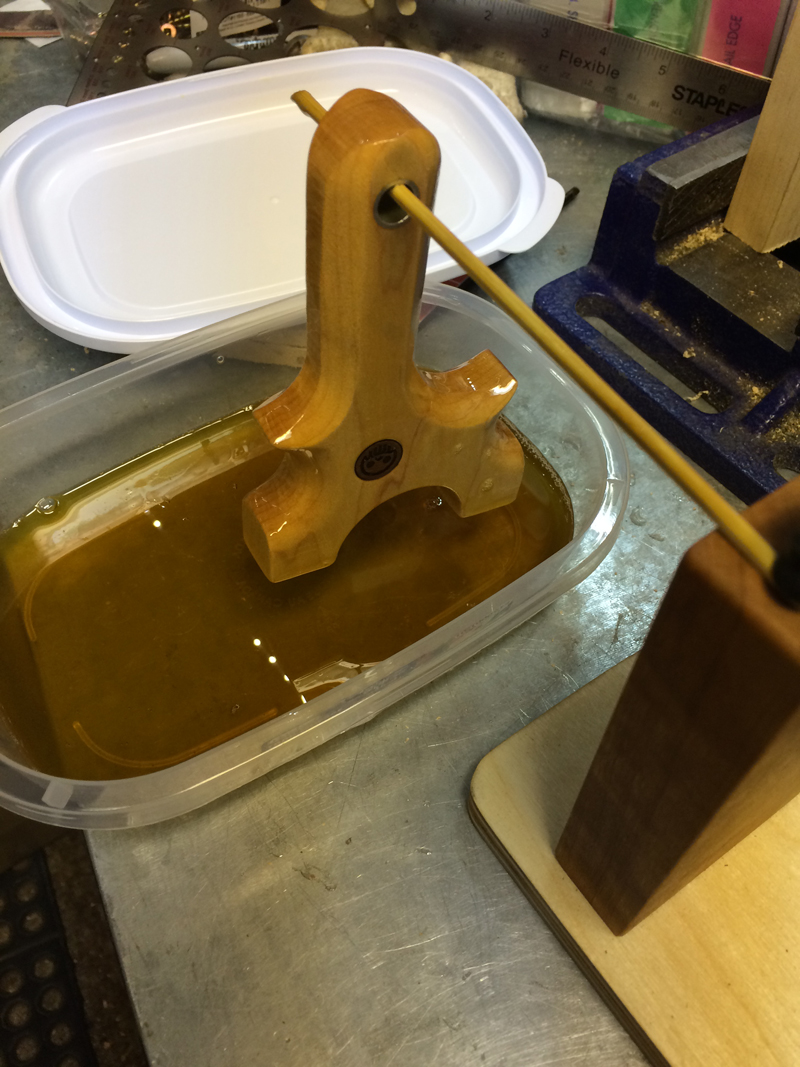
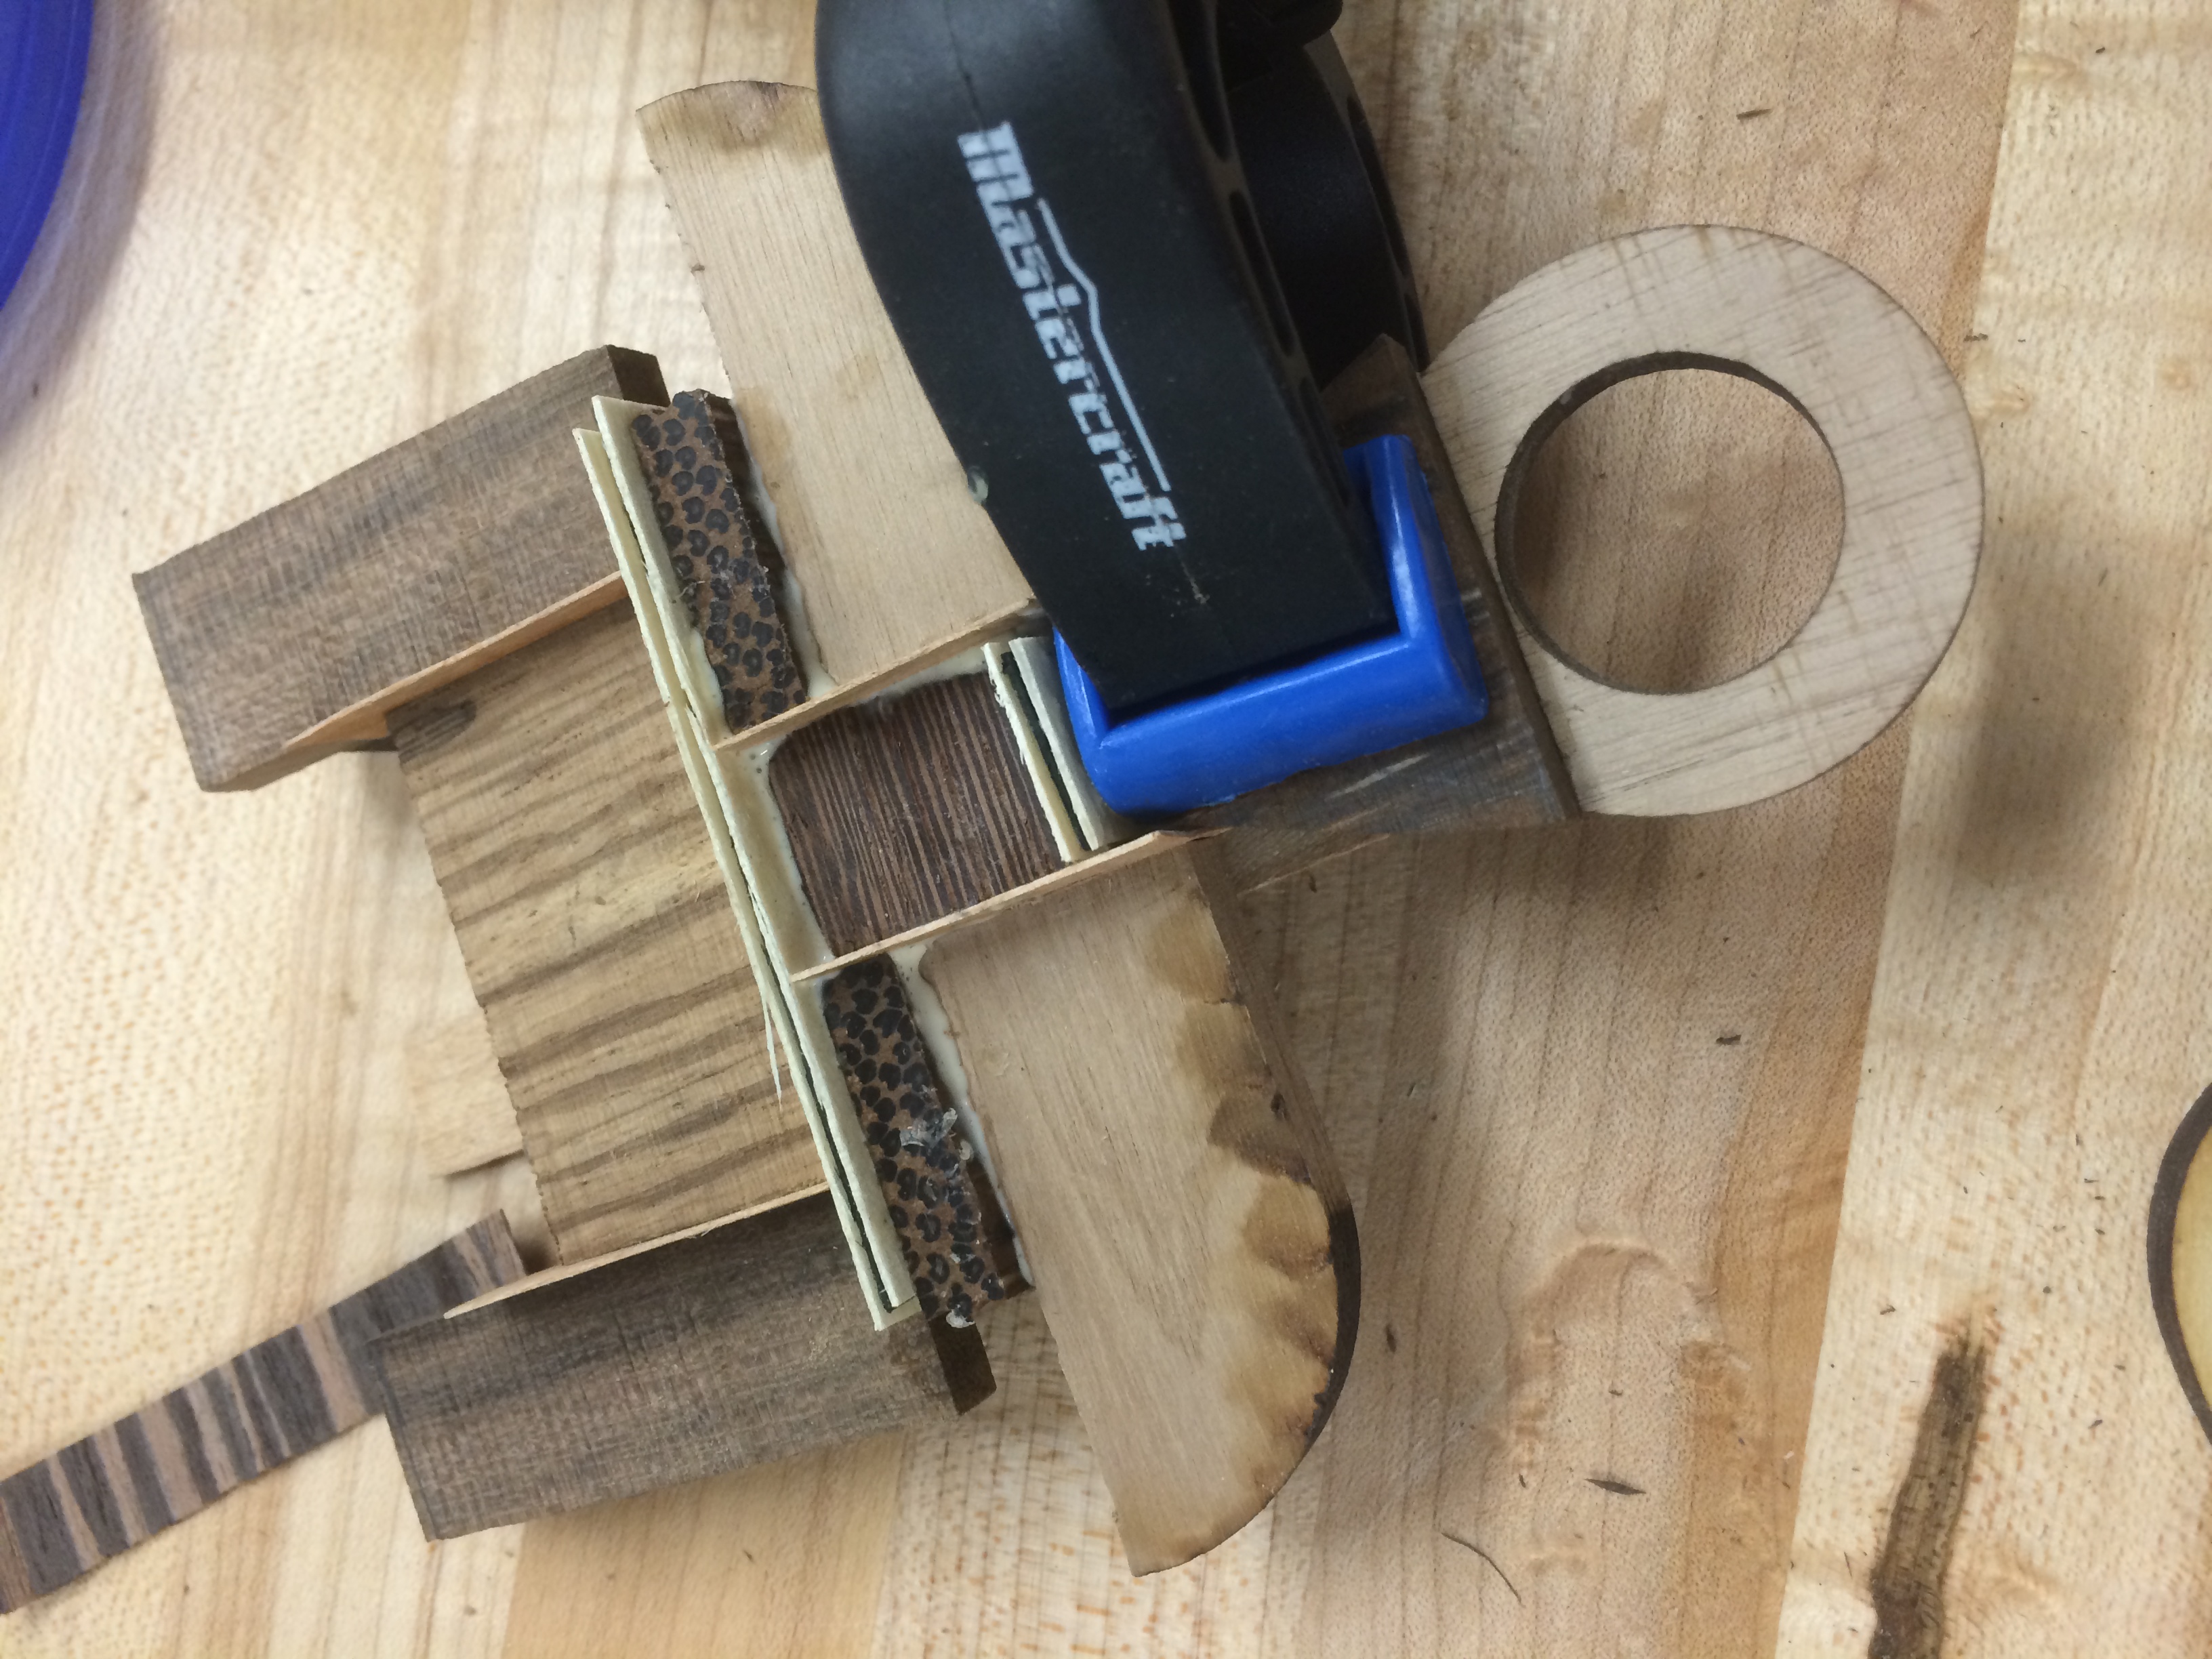
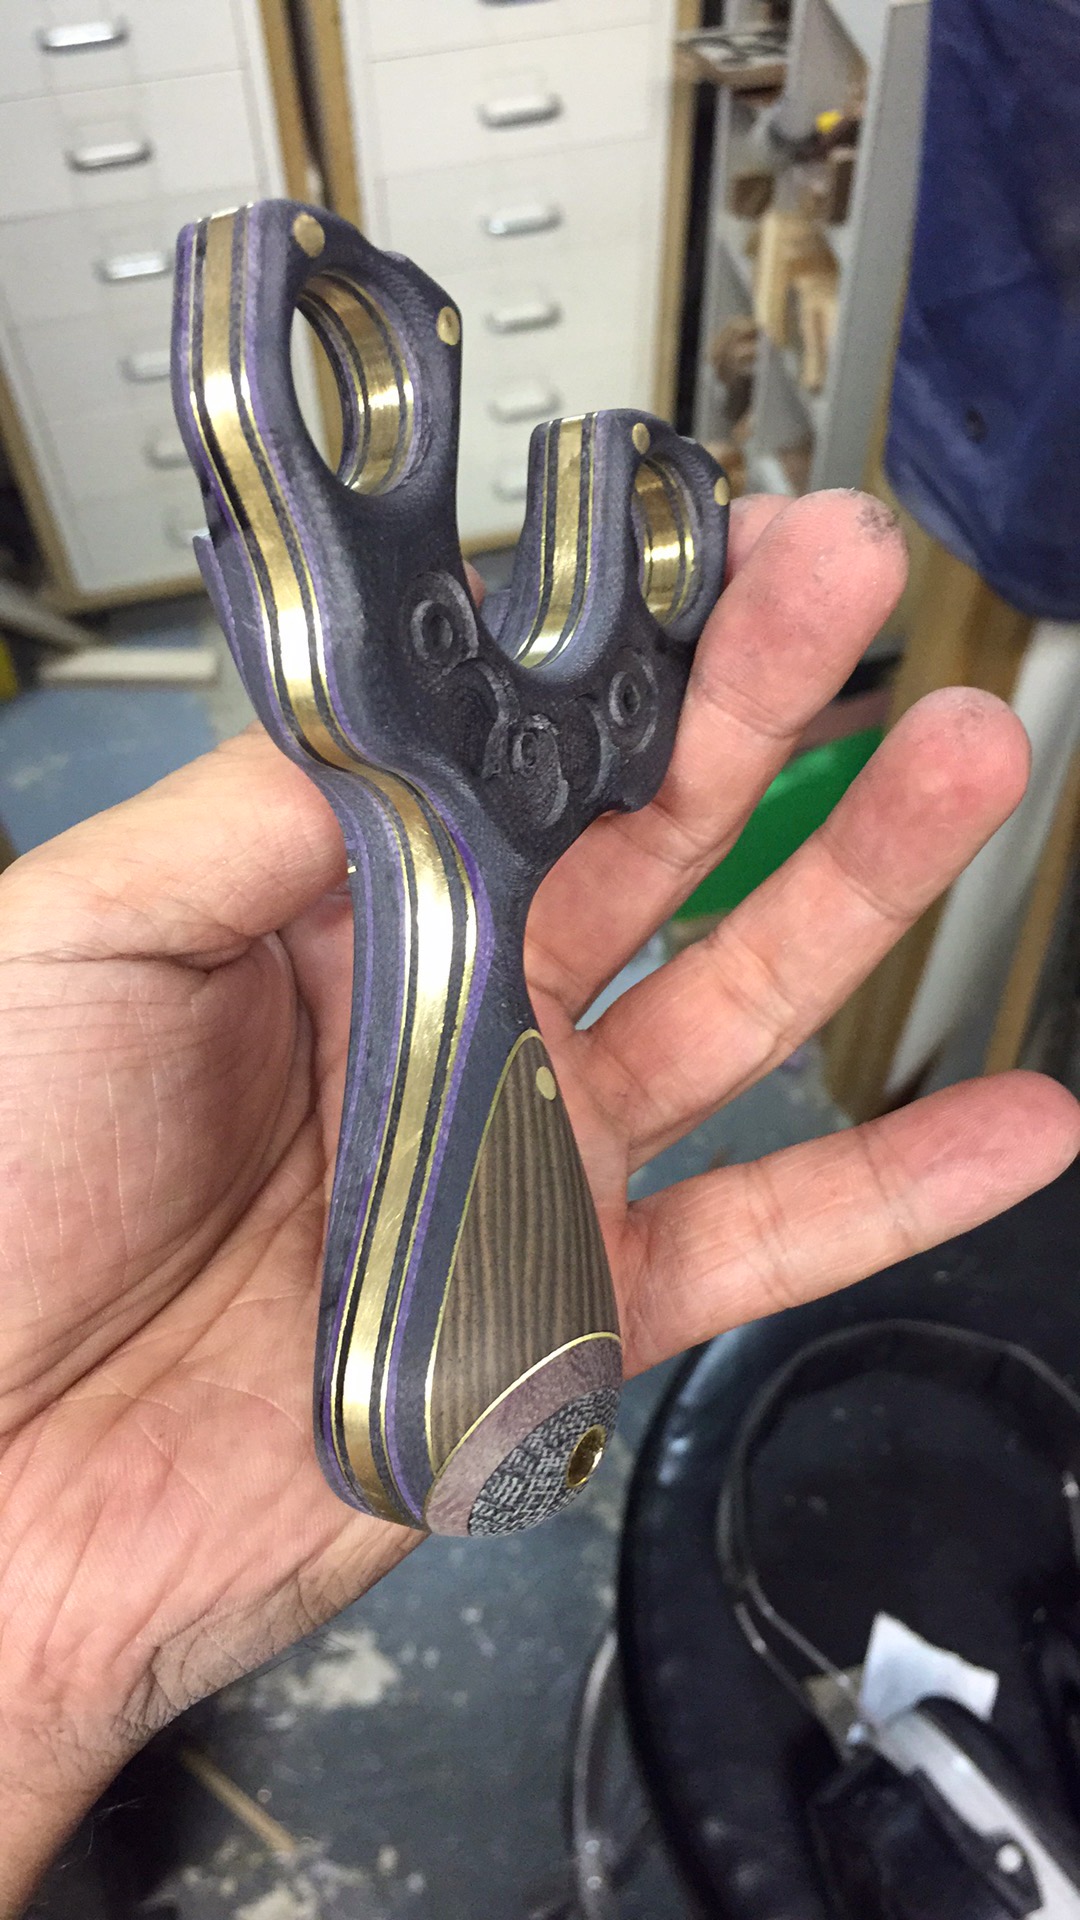
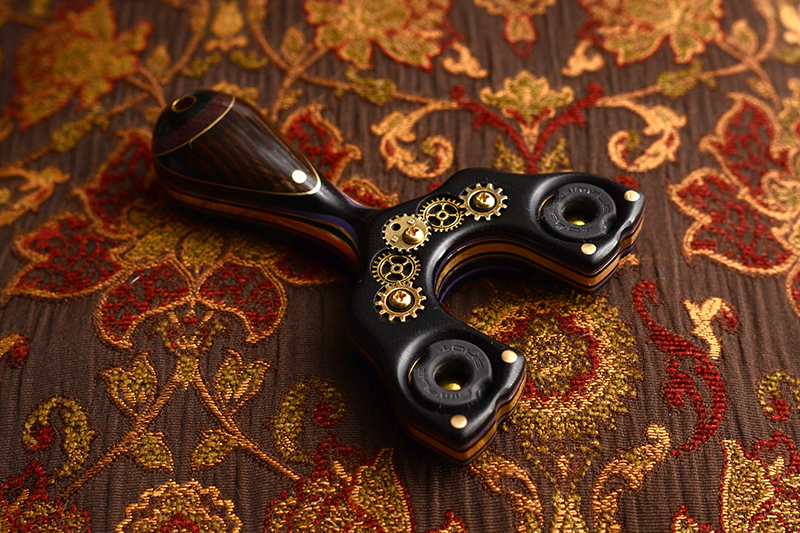
So, first was a layer of .5mm brass, then a nice selection of brown ebony (with the grain oriented vertically). Once that cured, the end was ground off with some aggressive 80 grit belt sanding. On that off-axis surface, more brass, purple heart and finally a chunk of canvas micarta. I felt the brown ebony was precious enough to stay within the theme, the purple heart being a natural version of purple tones and the canvas being a little bit of a ‘rougher’ visual texture, it would combine into an interesting composition with the delineated, intersection of brass lines. This is something I’ve been experimenting with for a little while and this was a perfect opportunity to apply it.

img_0557

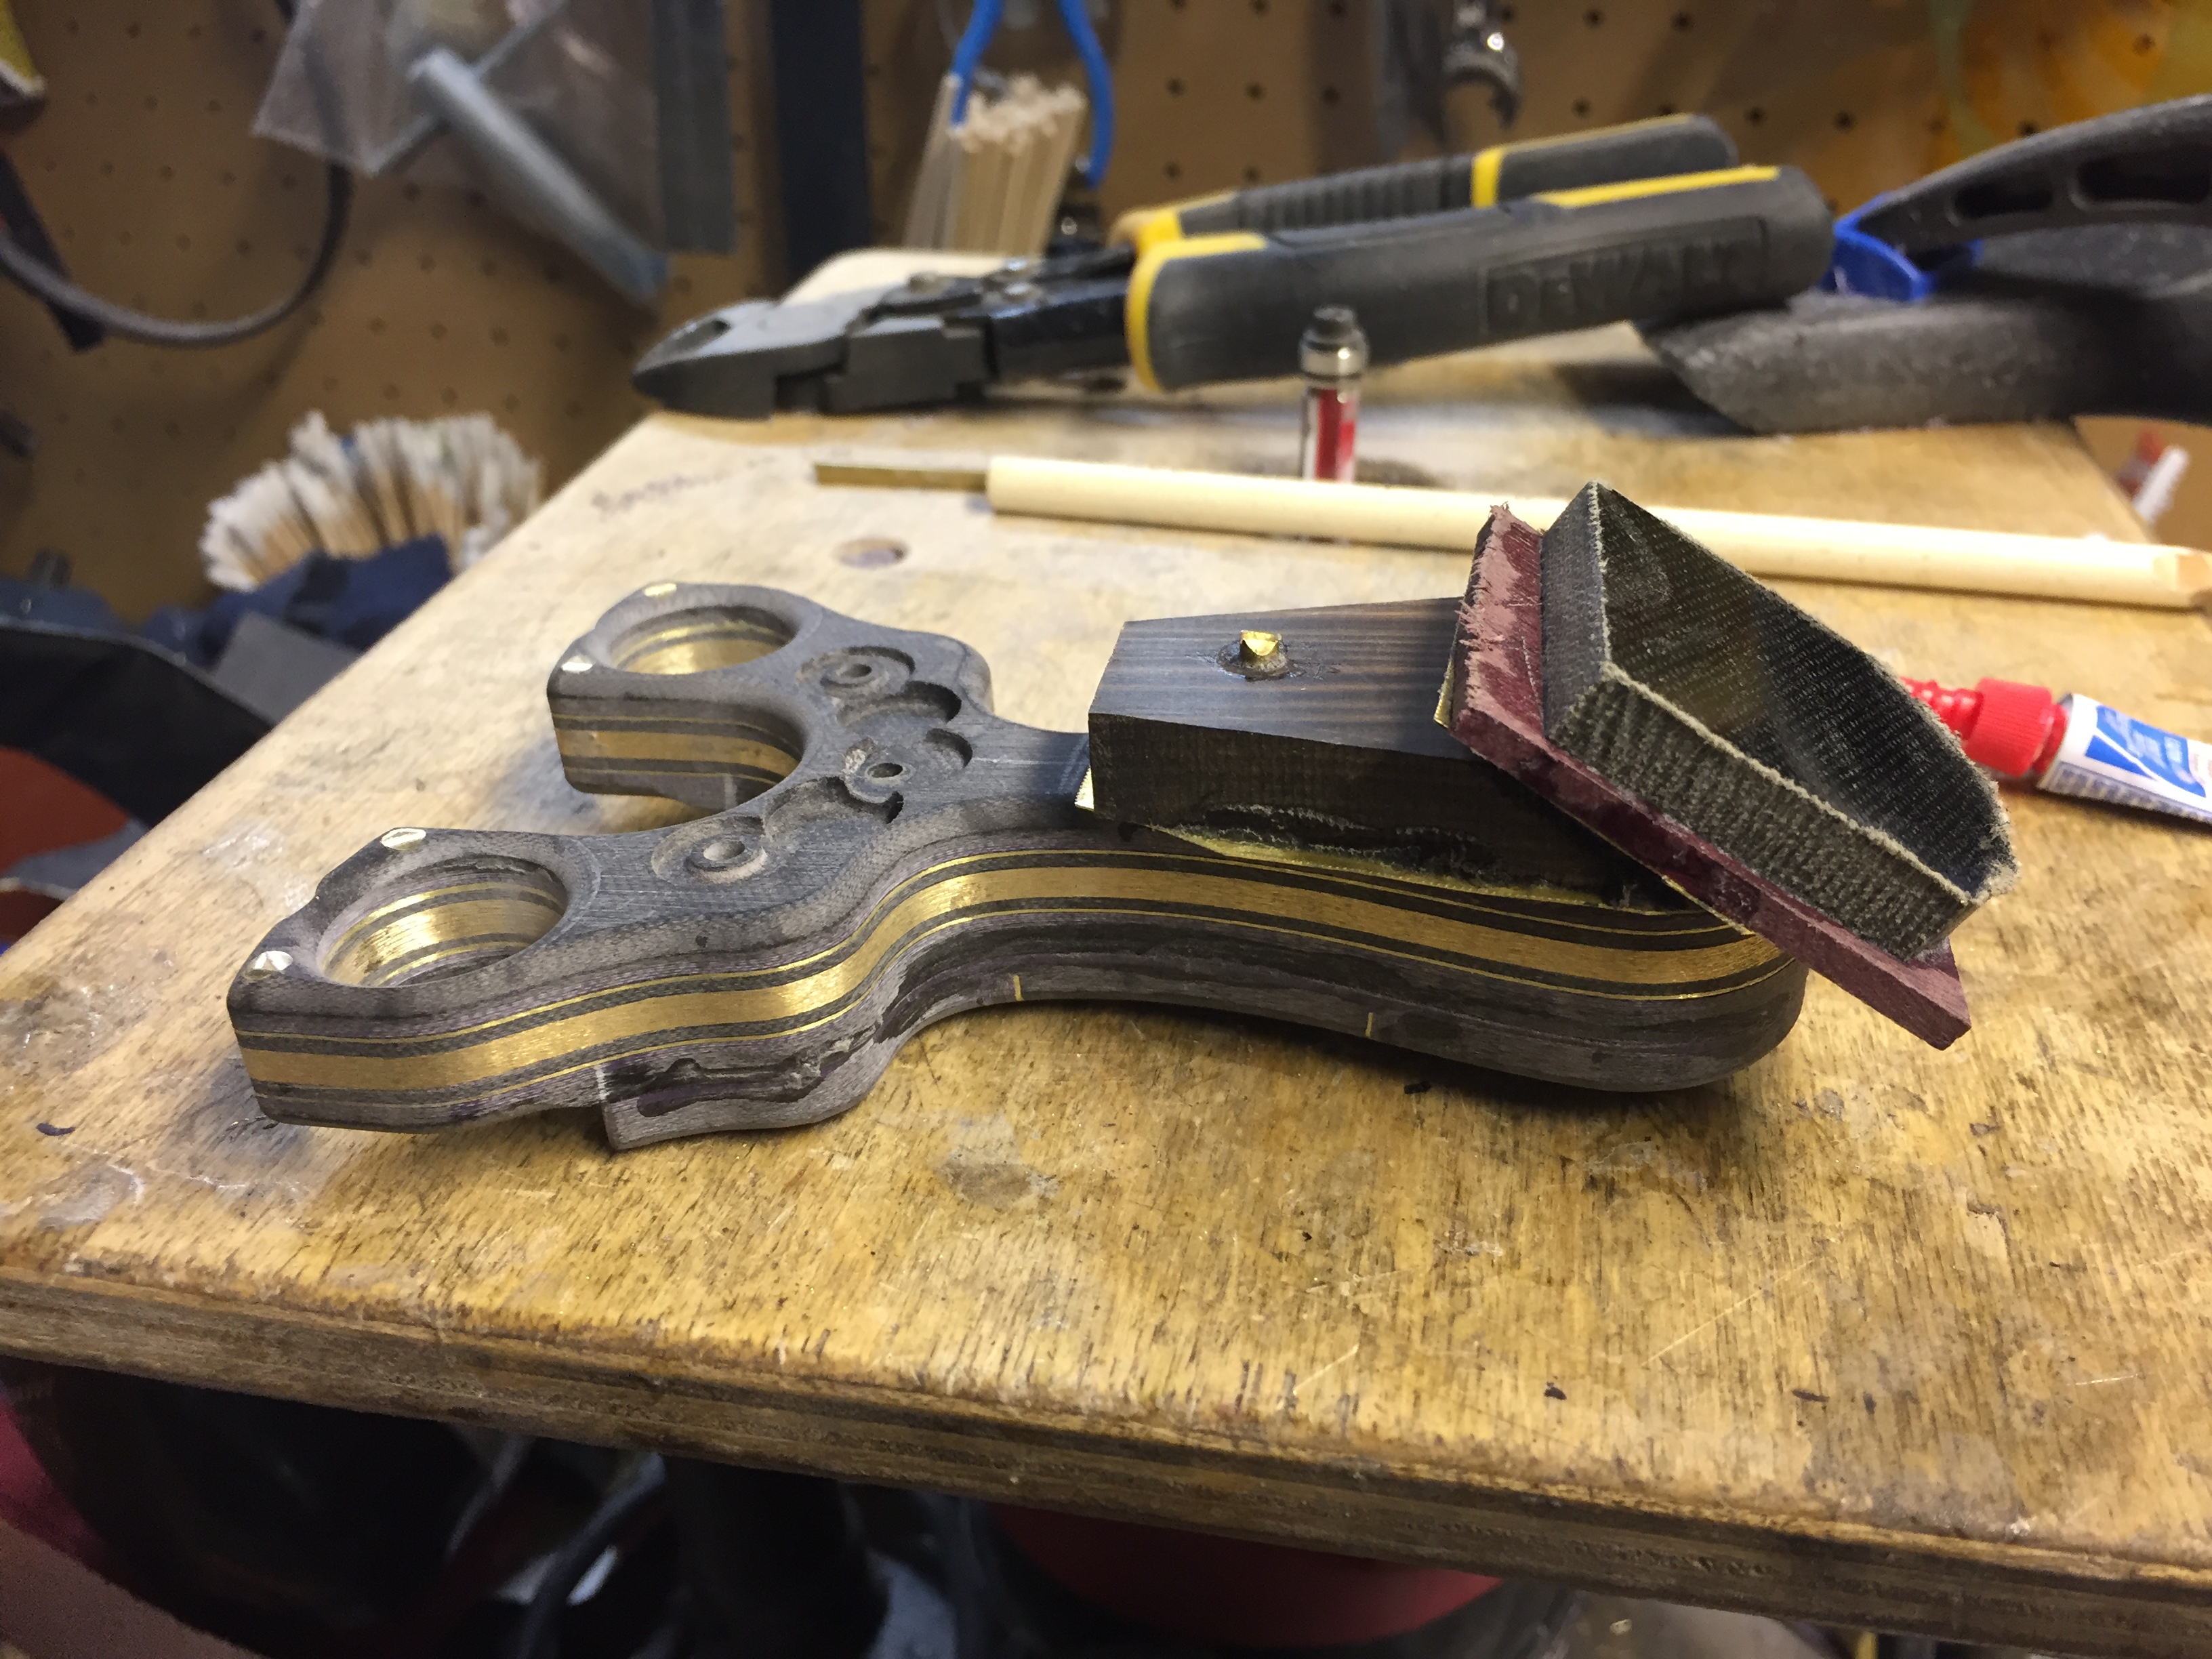
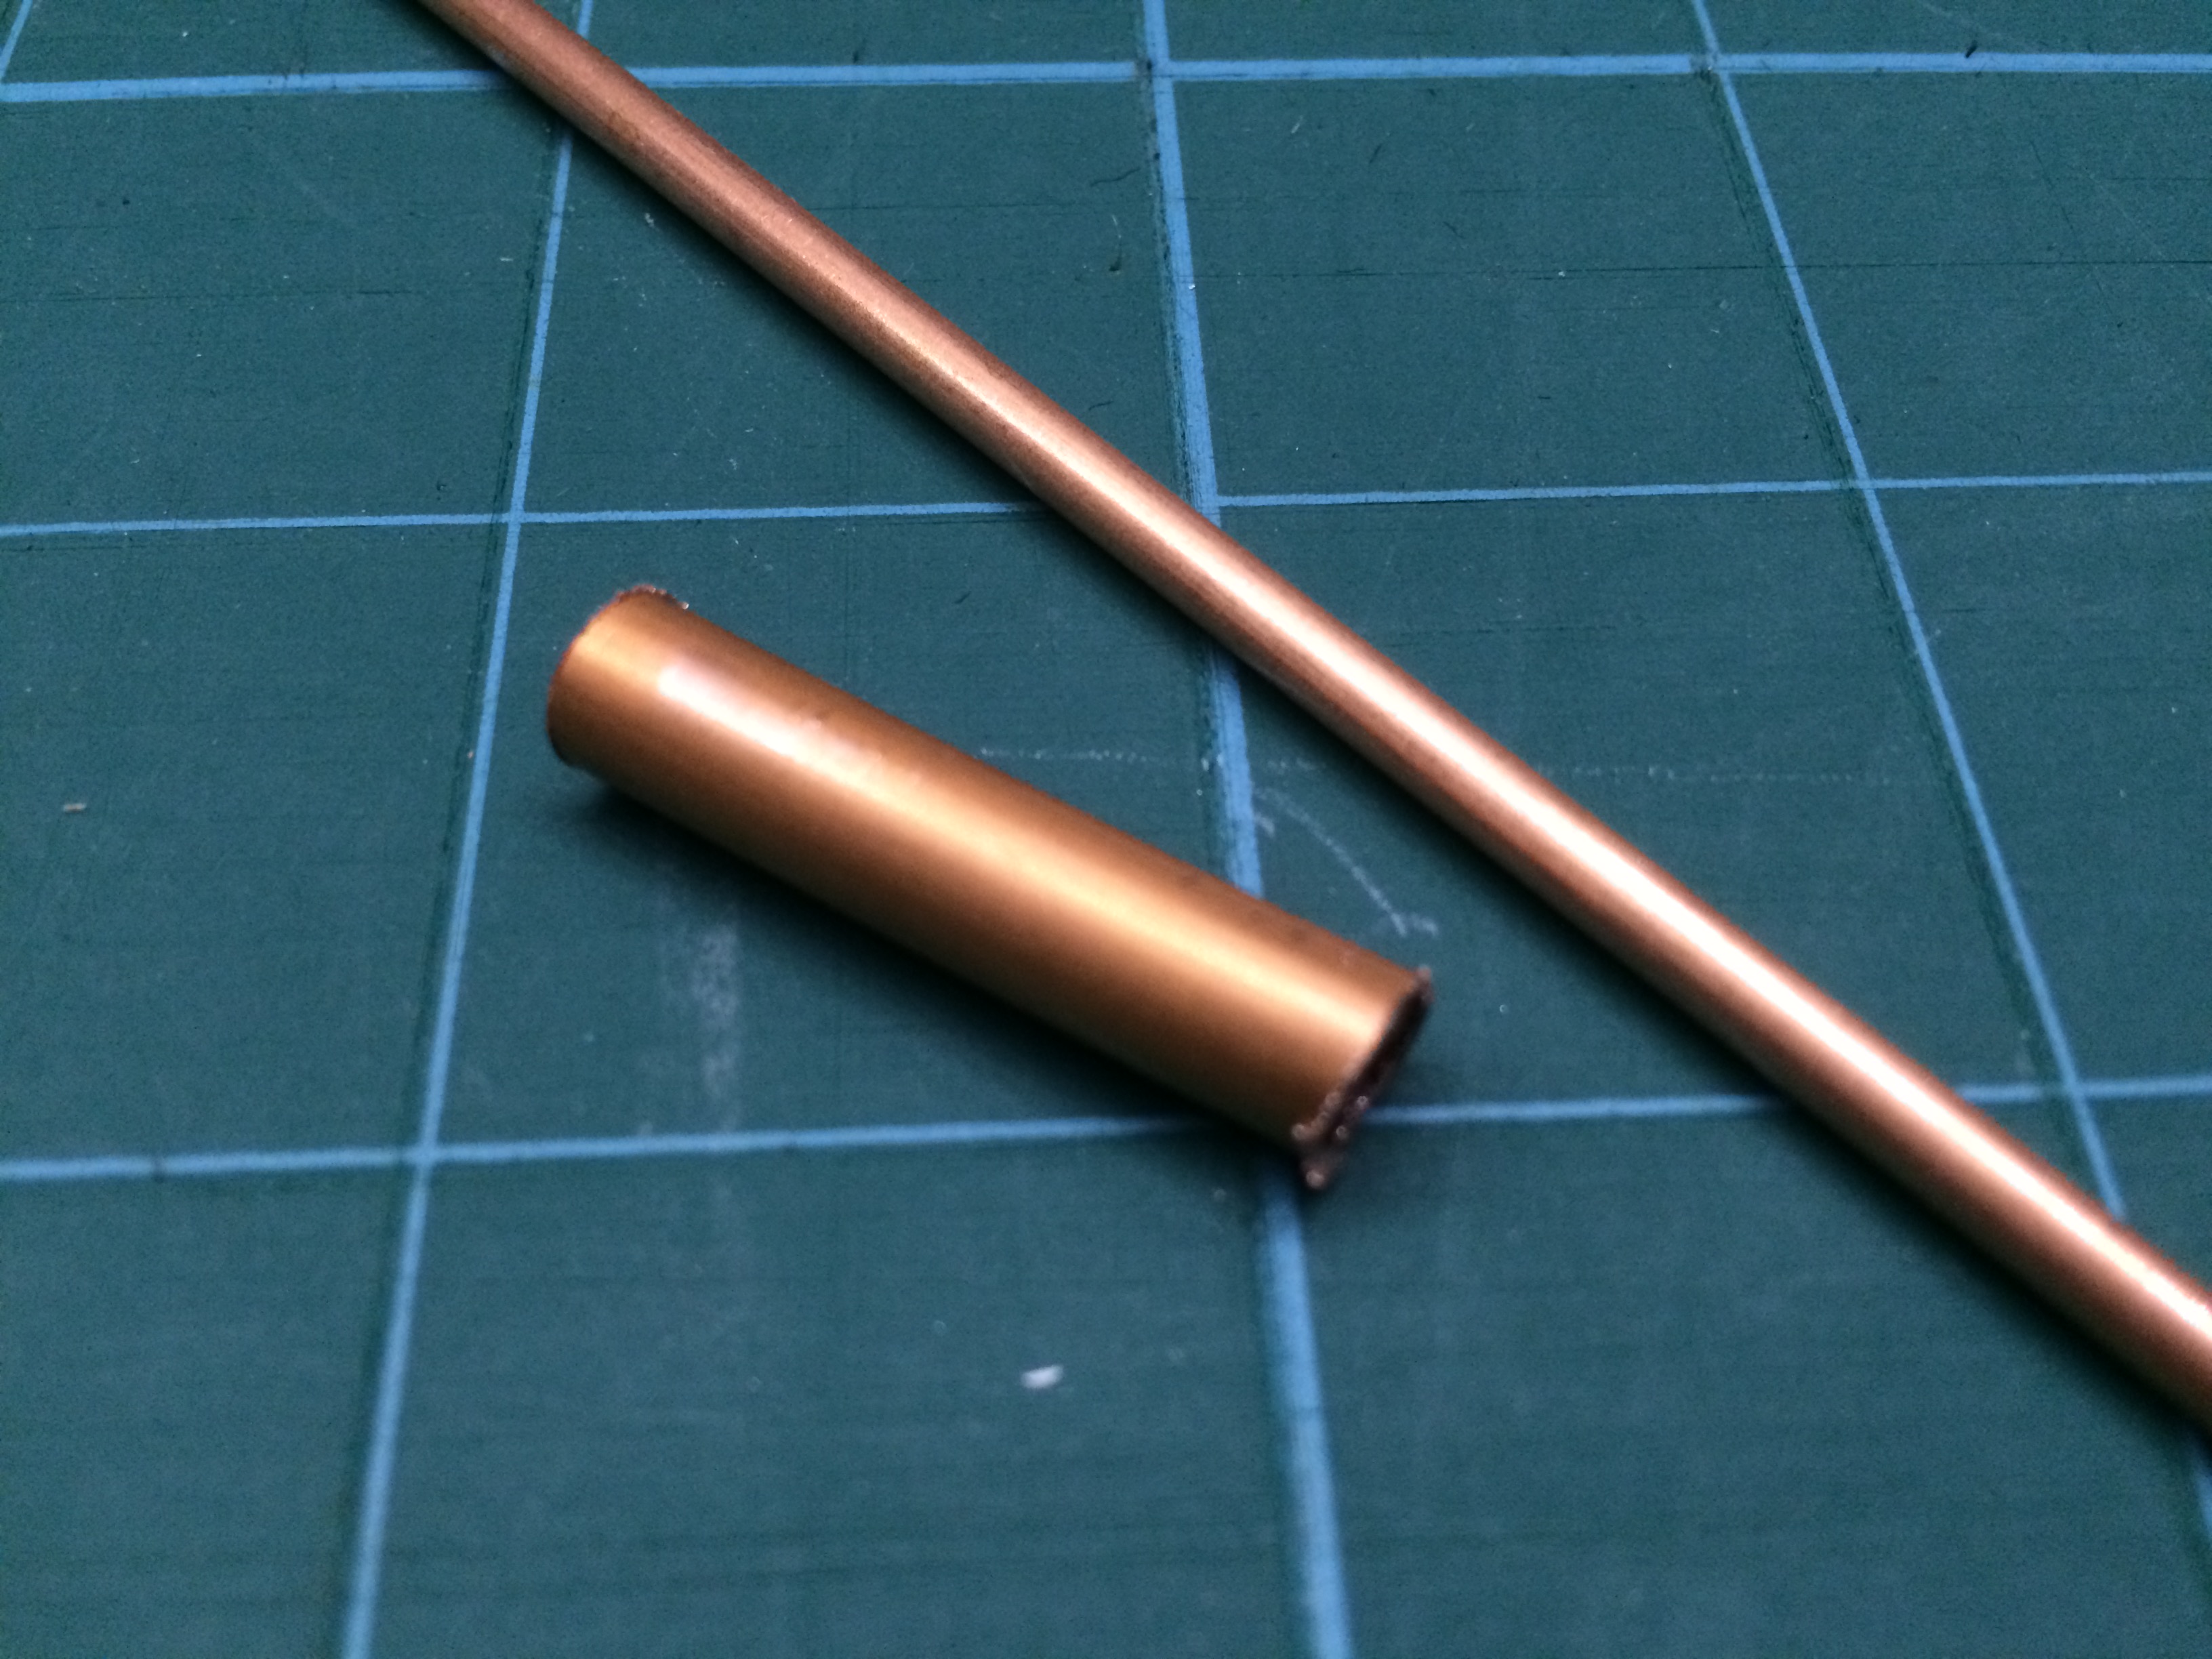
Rough trimming the excess material away. The ebony is HARD stuff! The ebony section is pinned in place with a brass rod. The offset purpleheart/micarta is held in place with a .25″ brass tube (itself offset to the rotation so it won’t be going anywhere)

img_0559

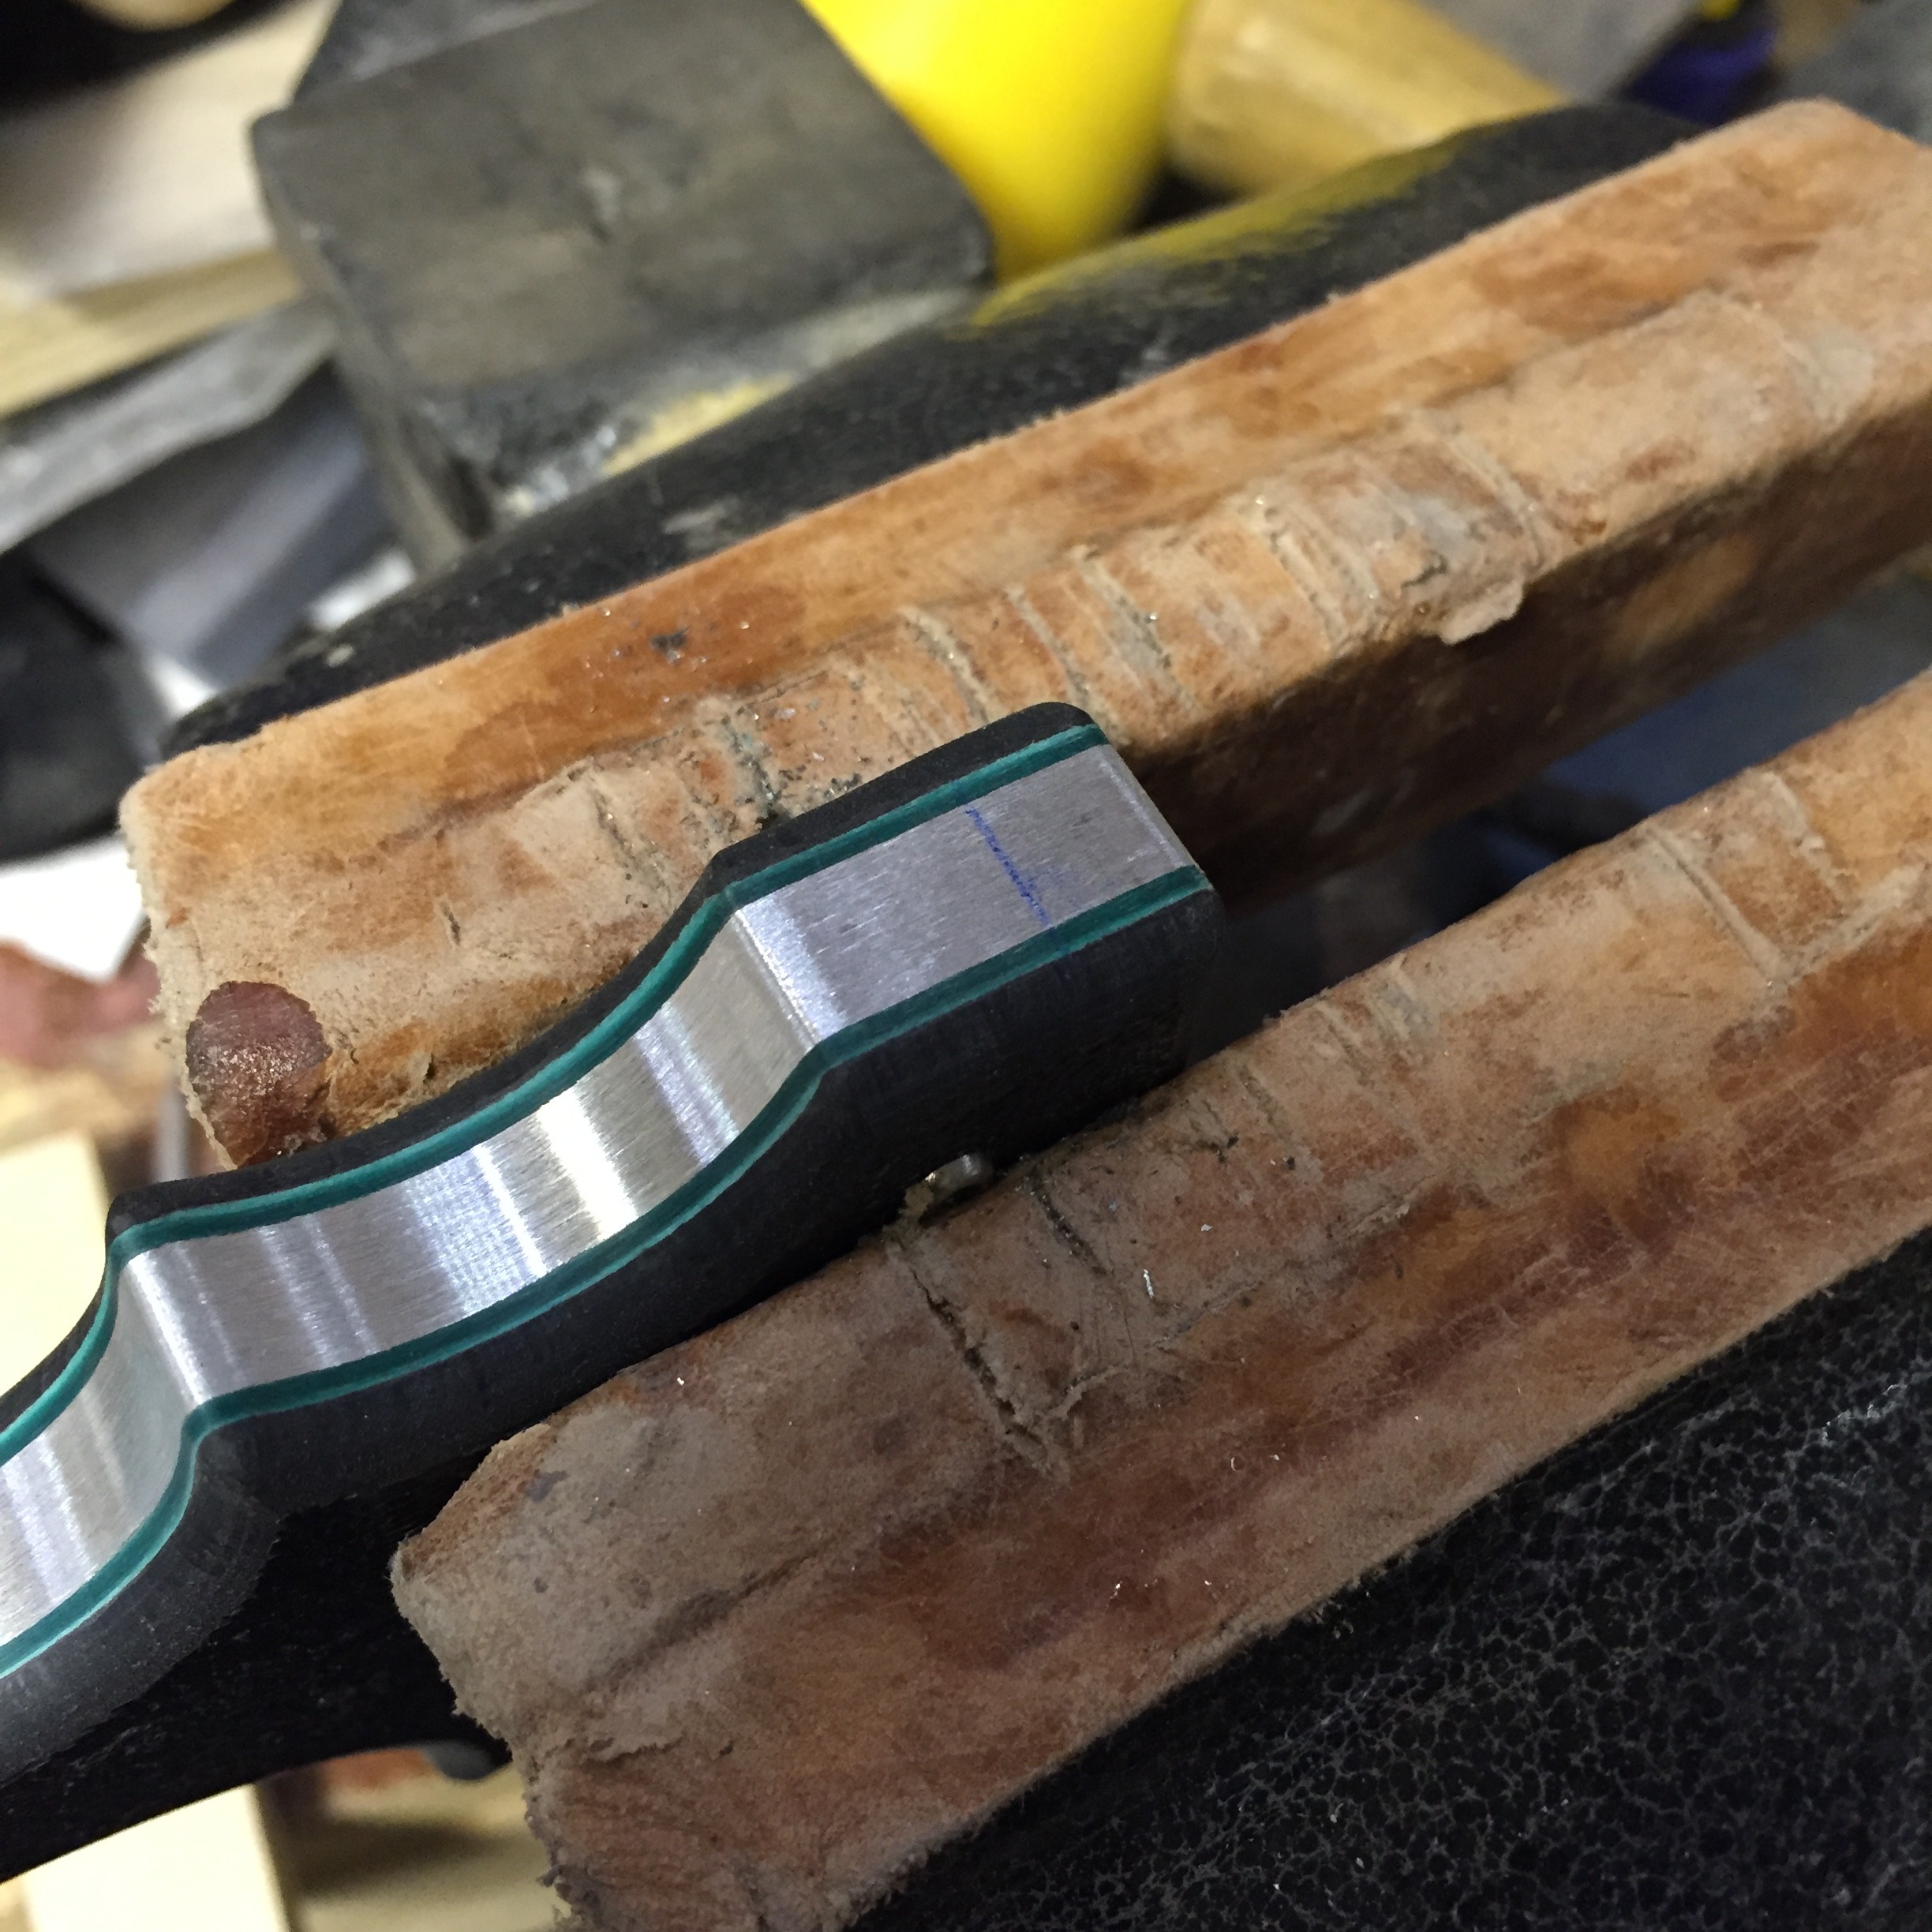
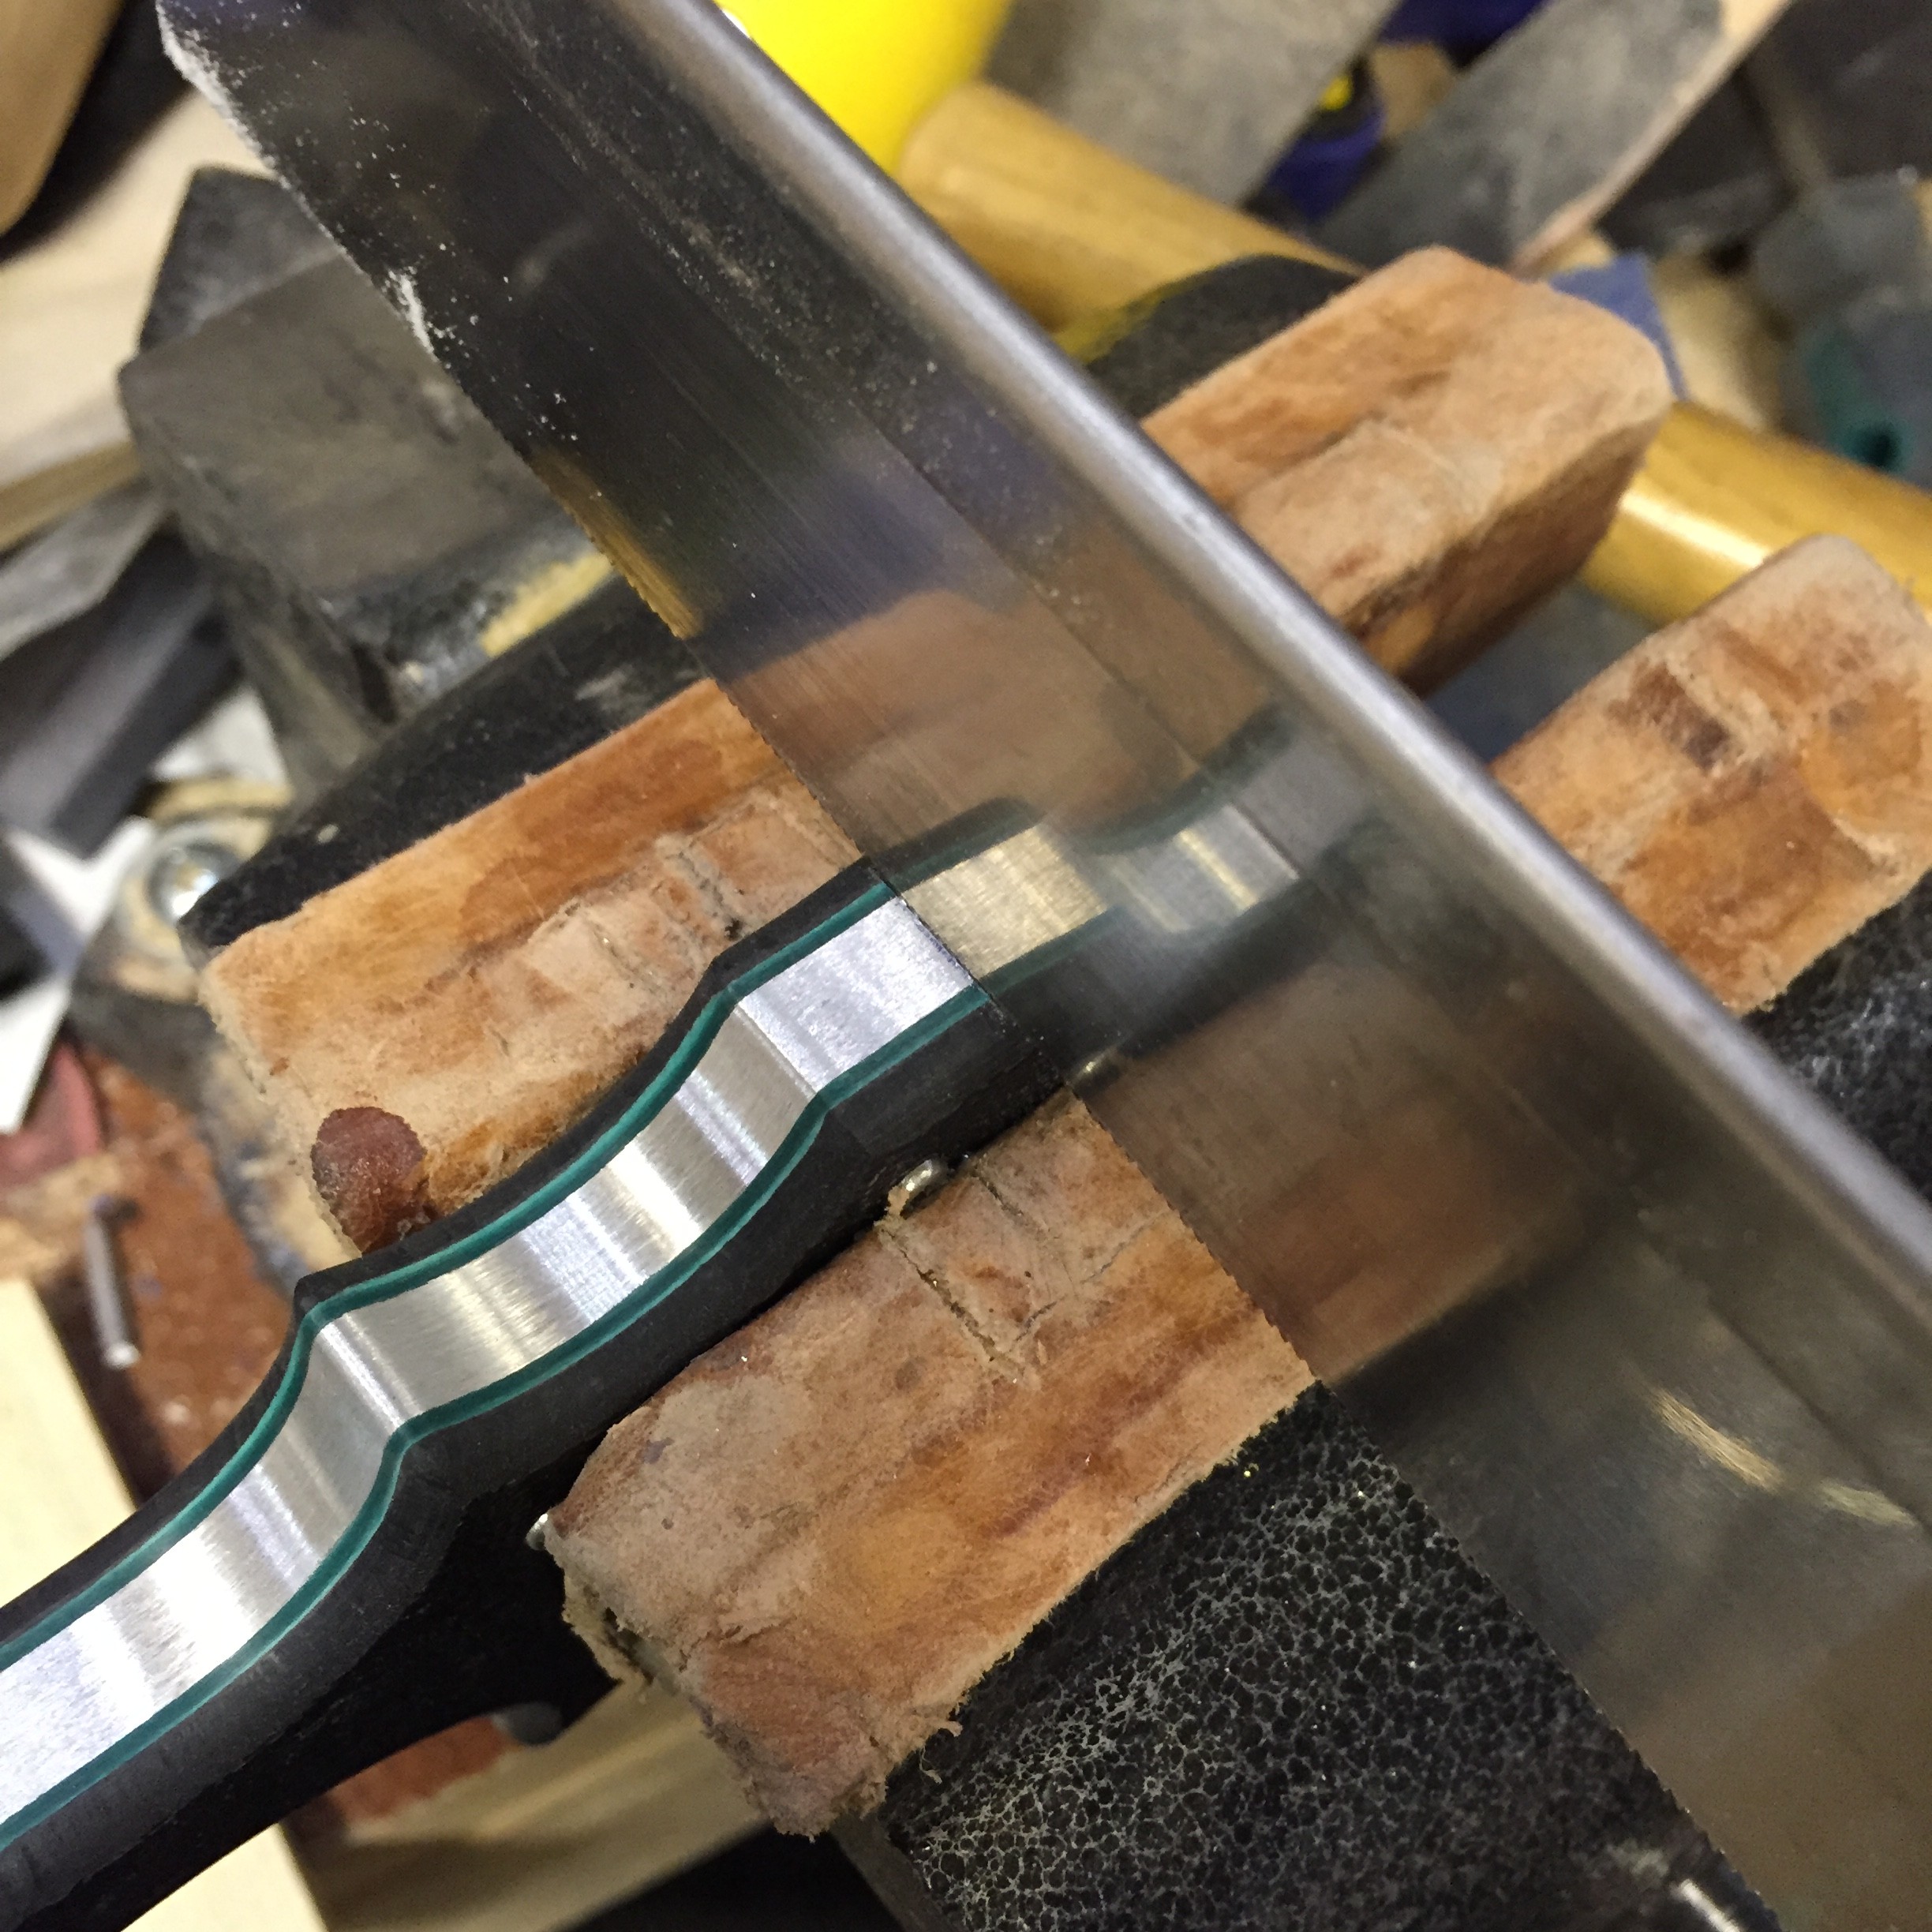
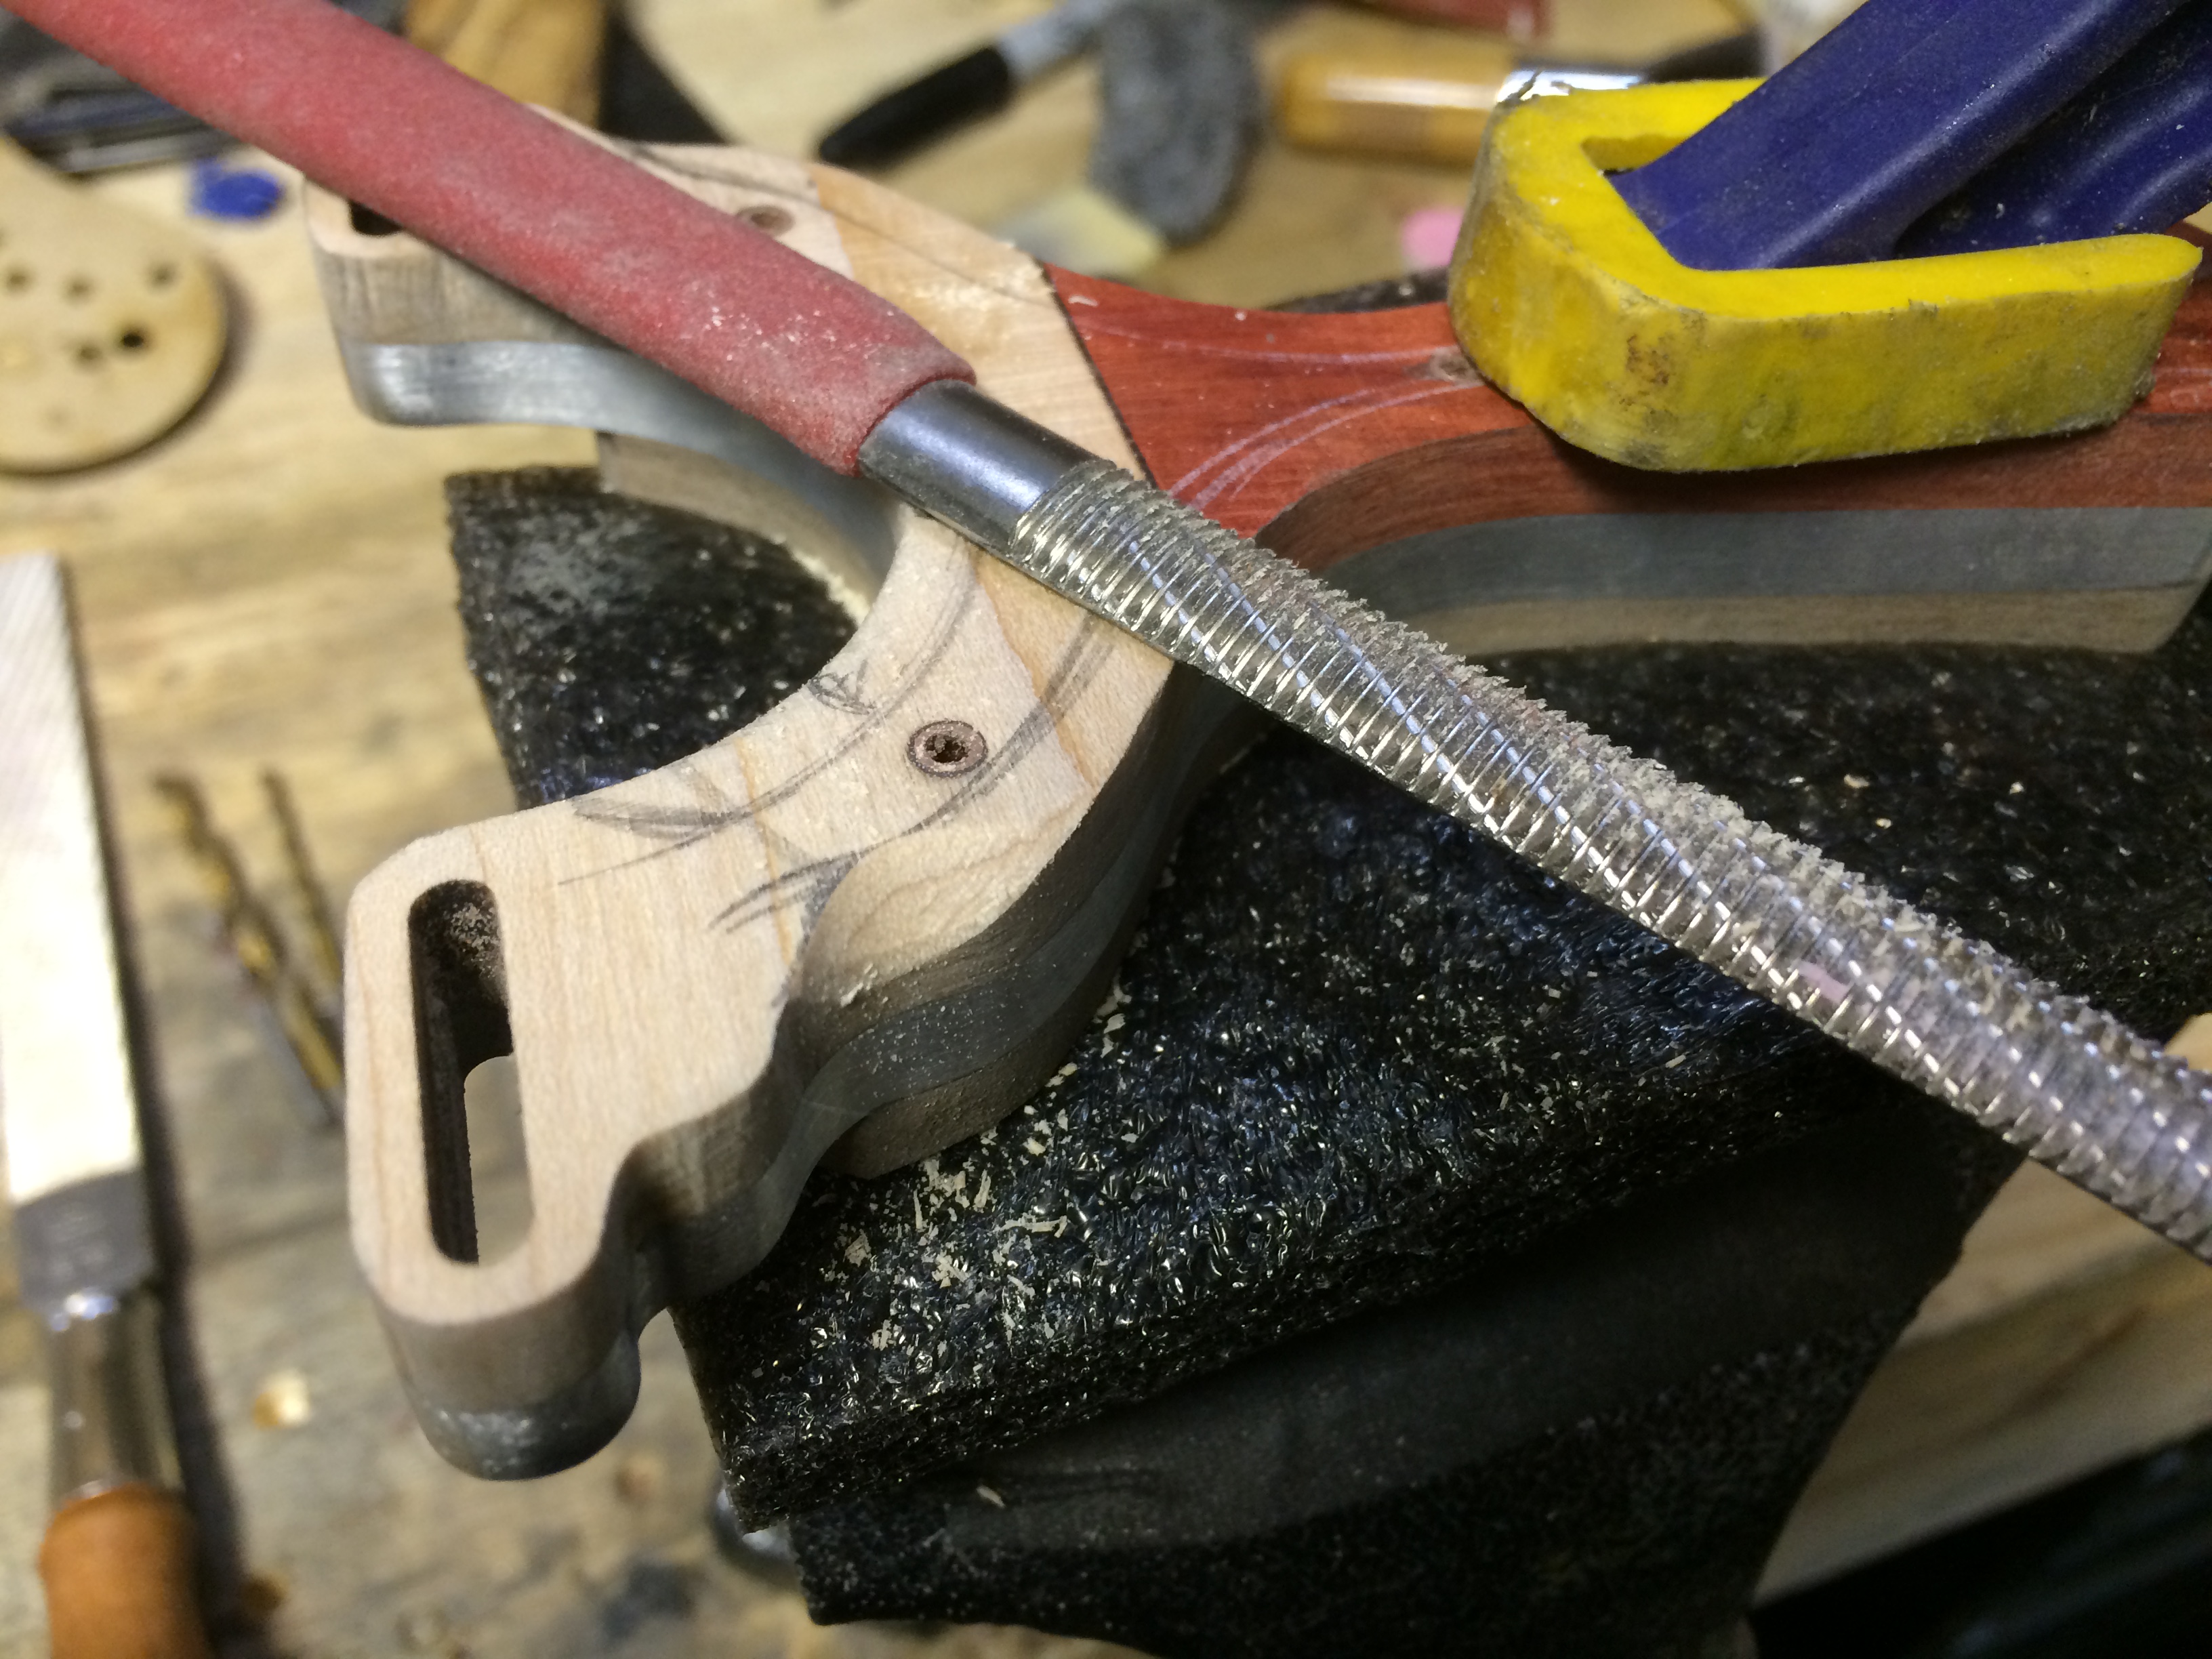
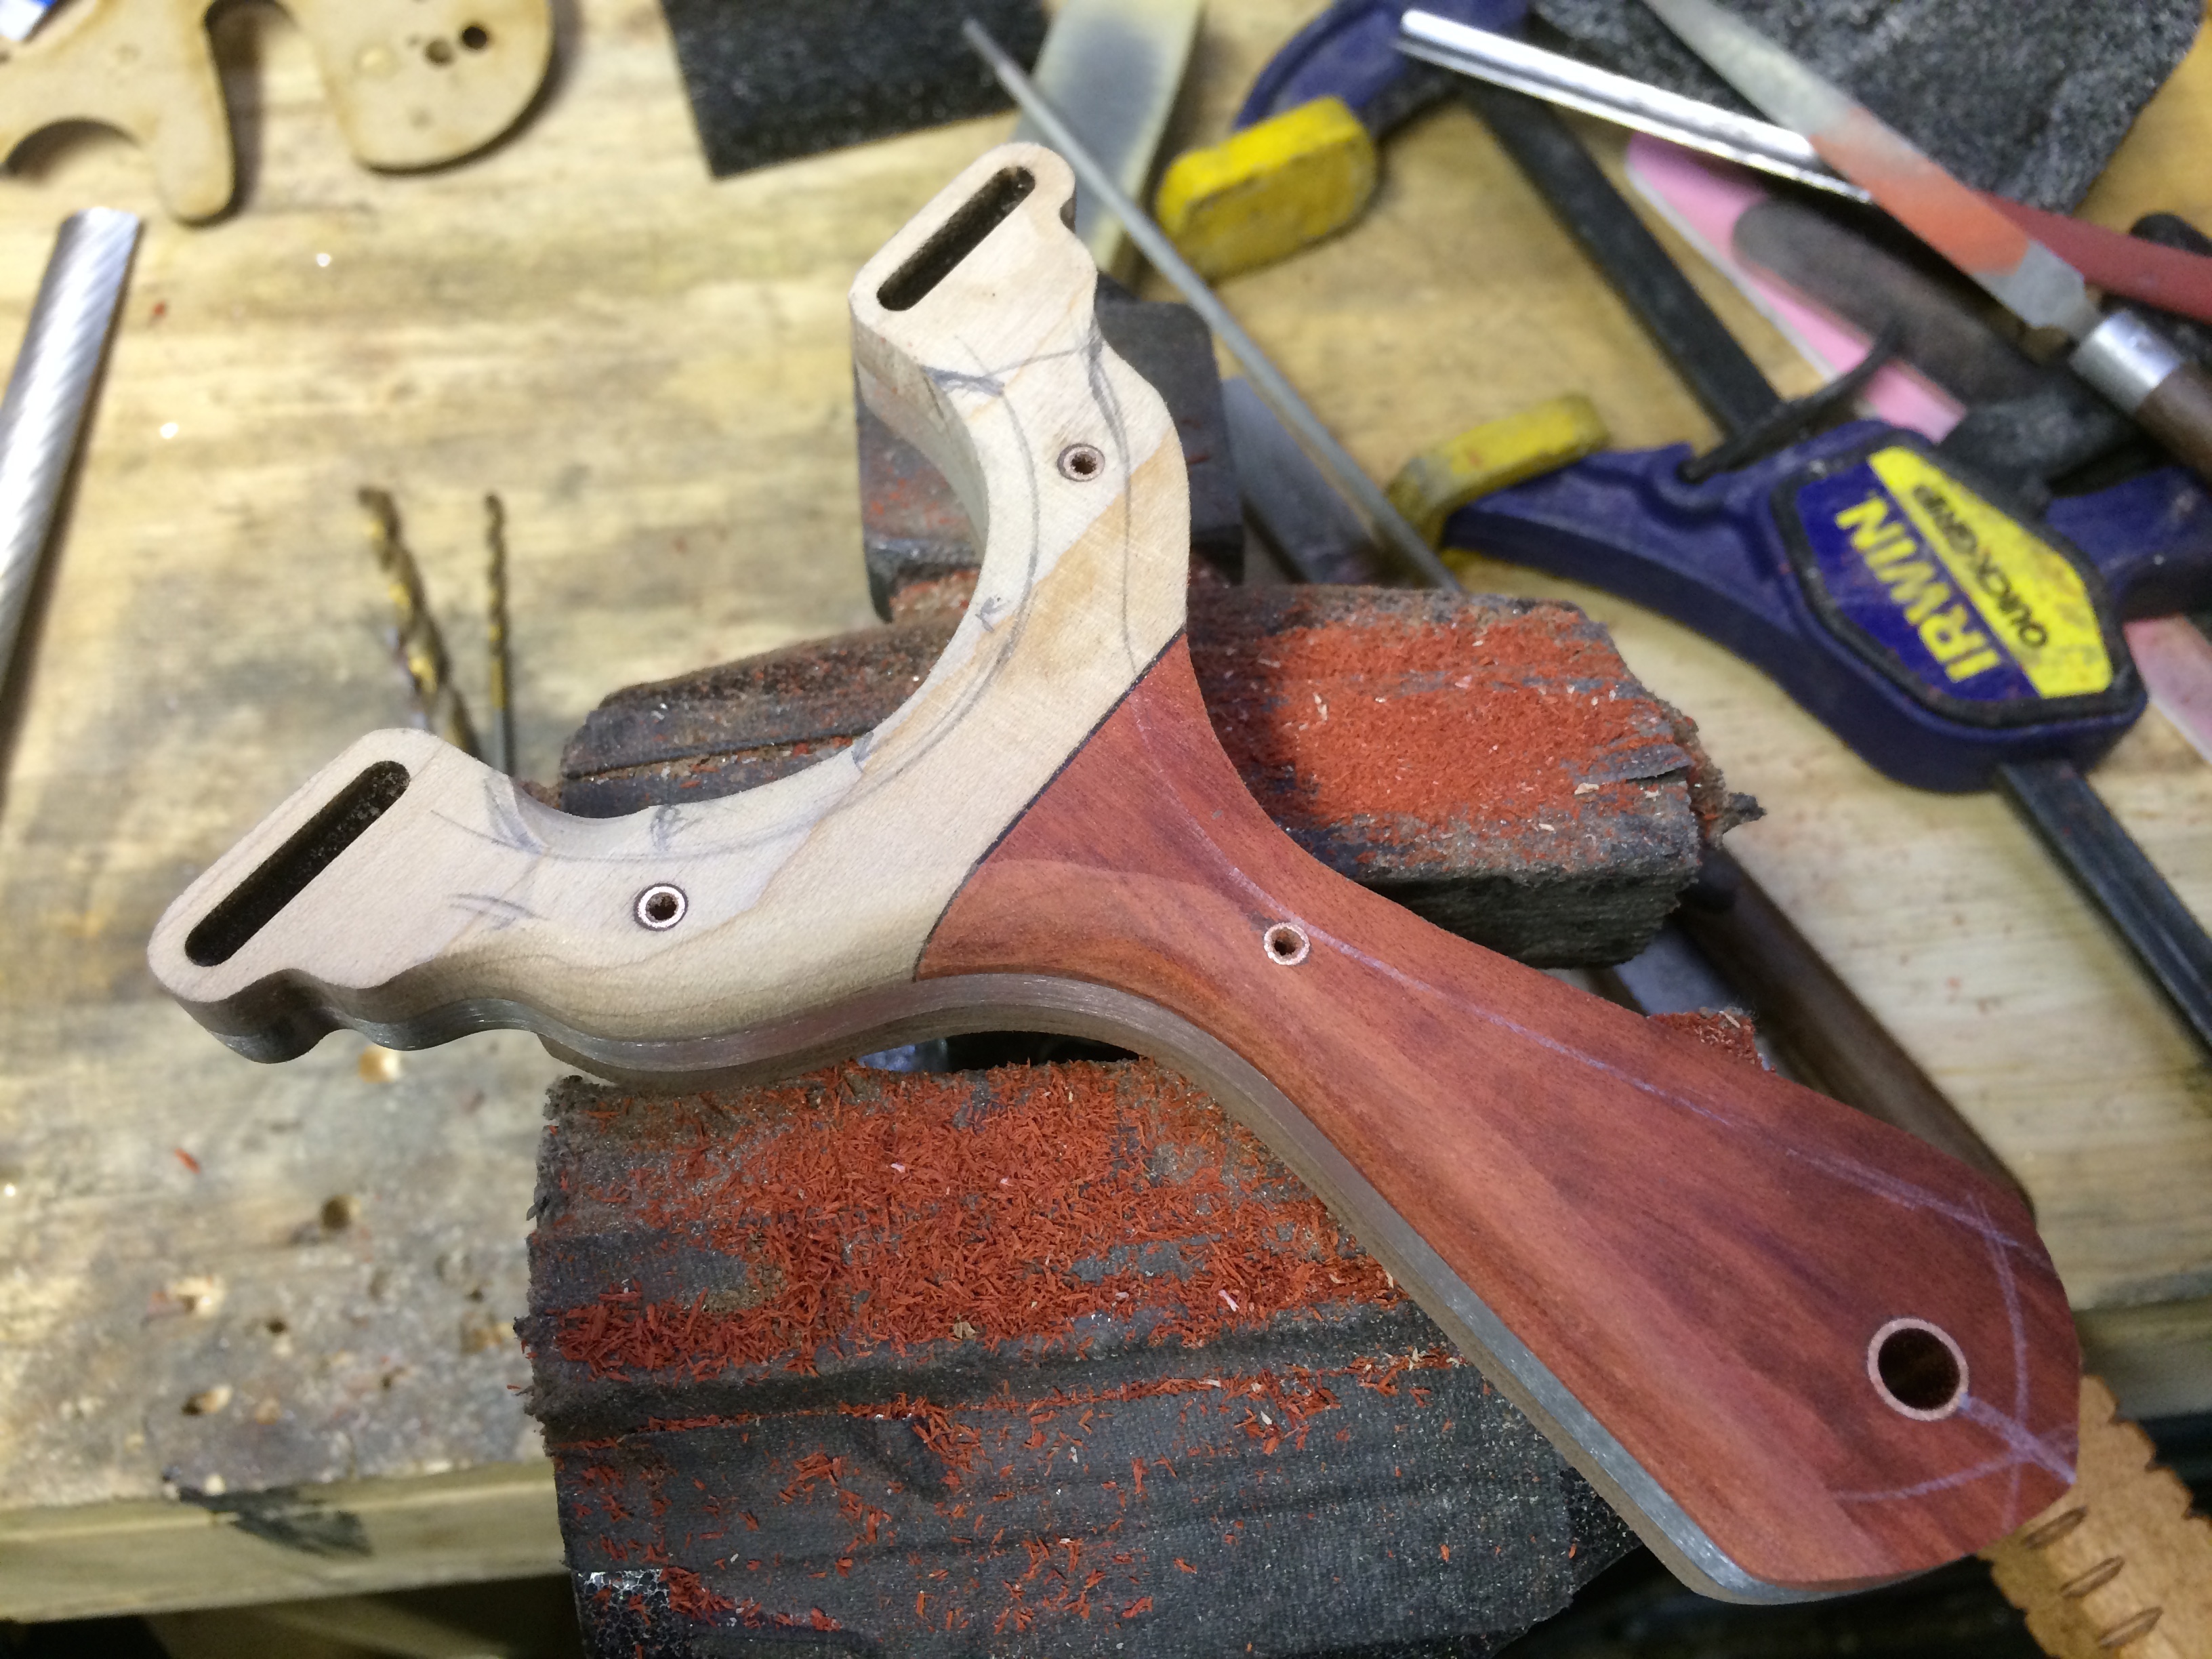
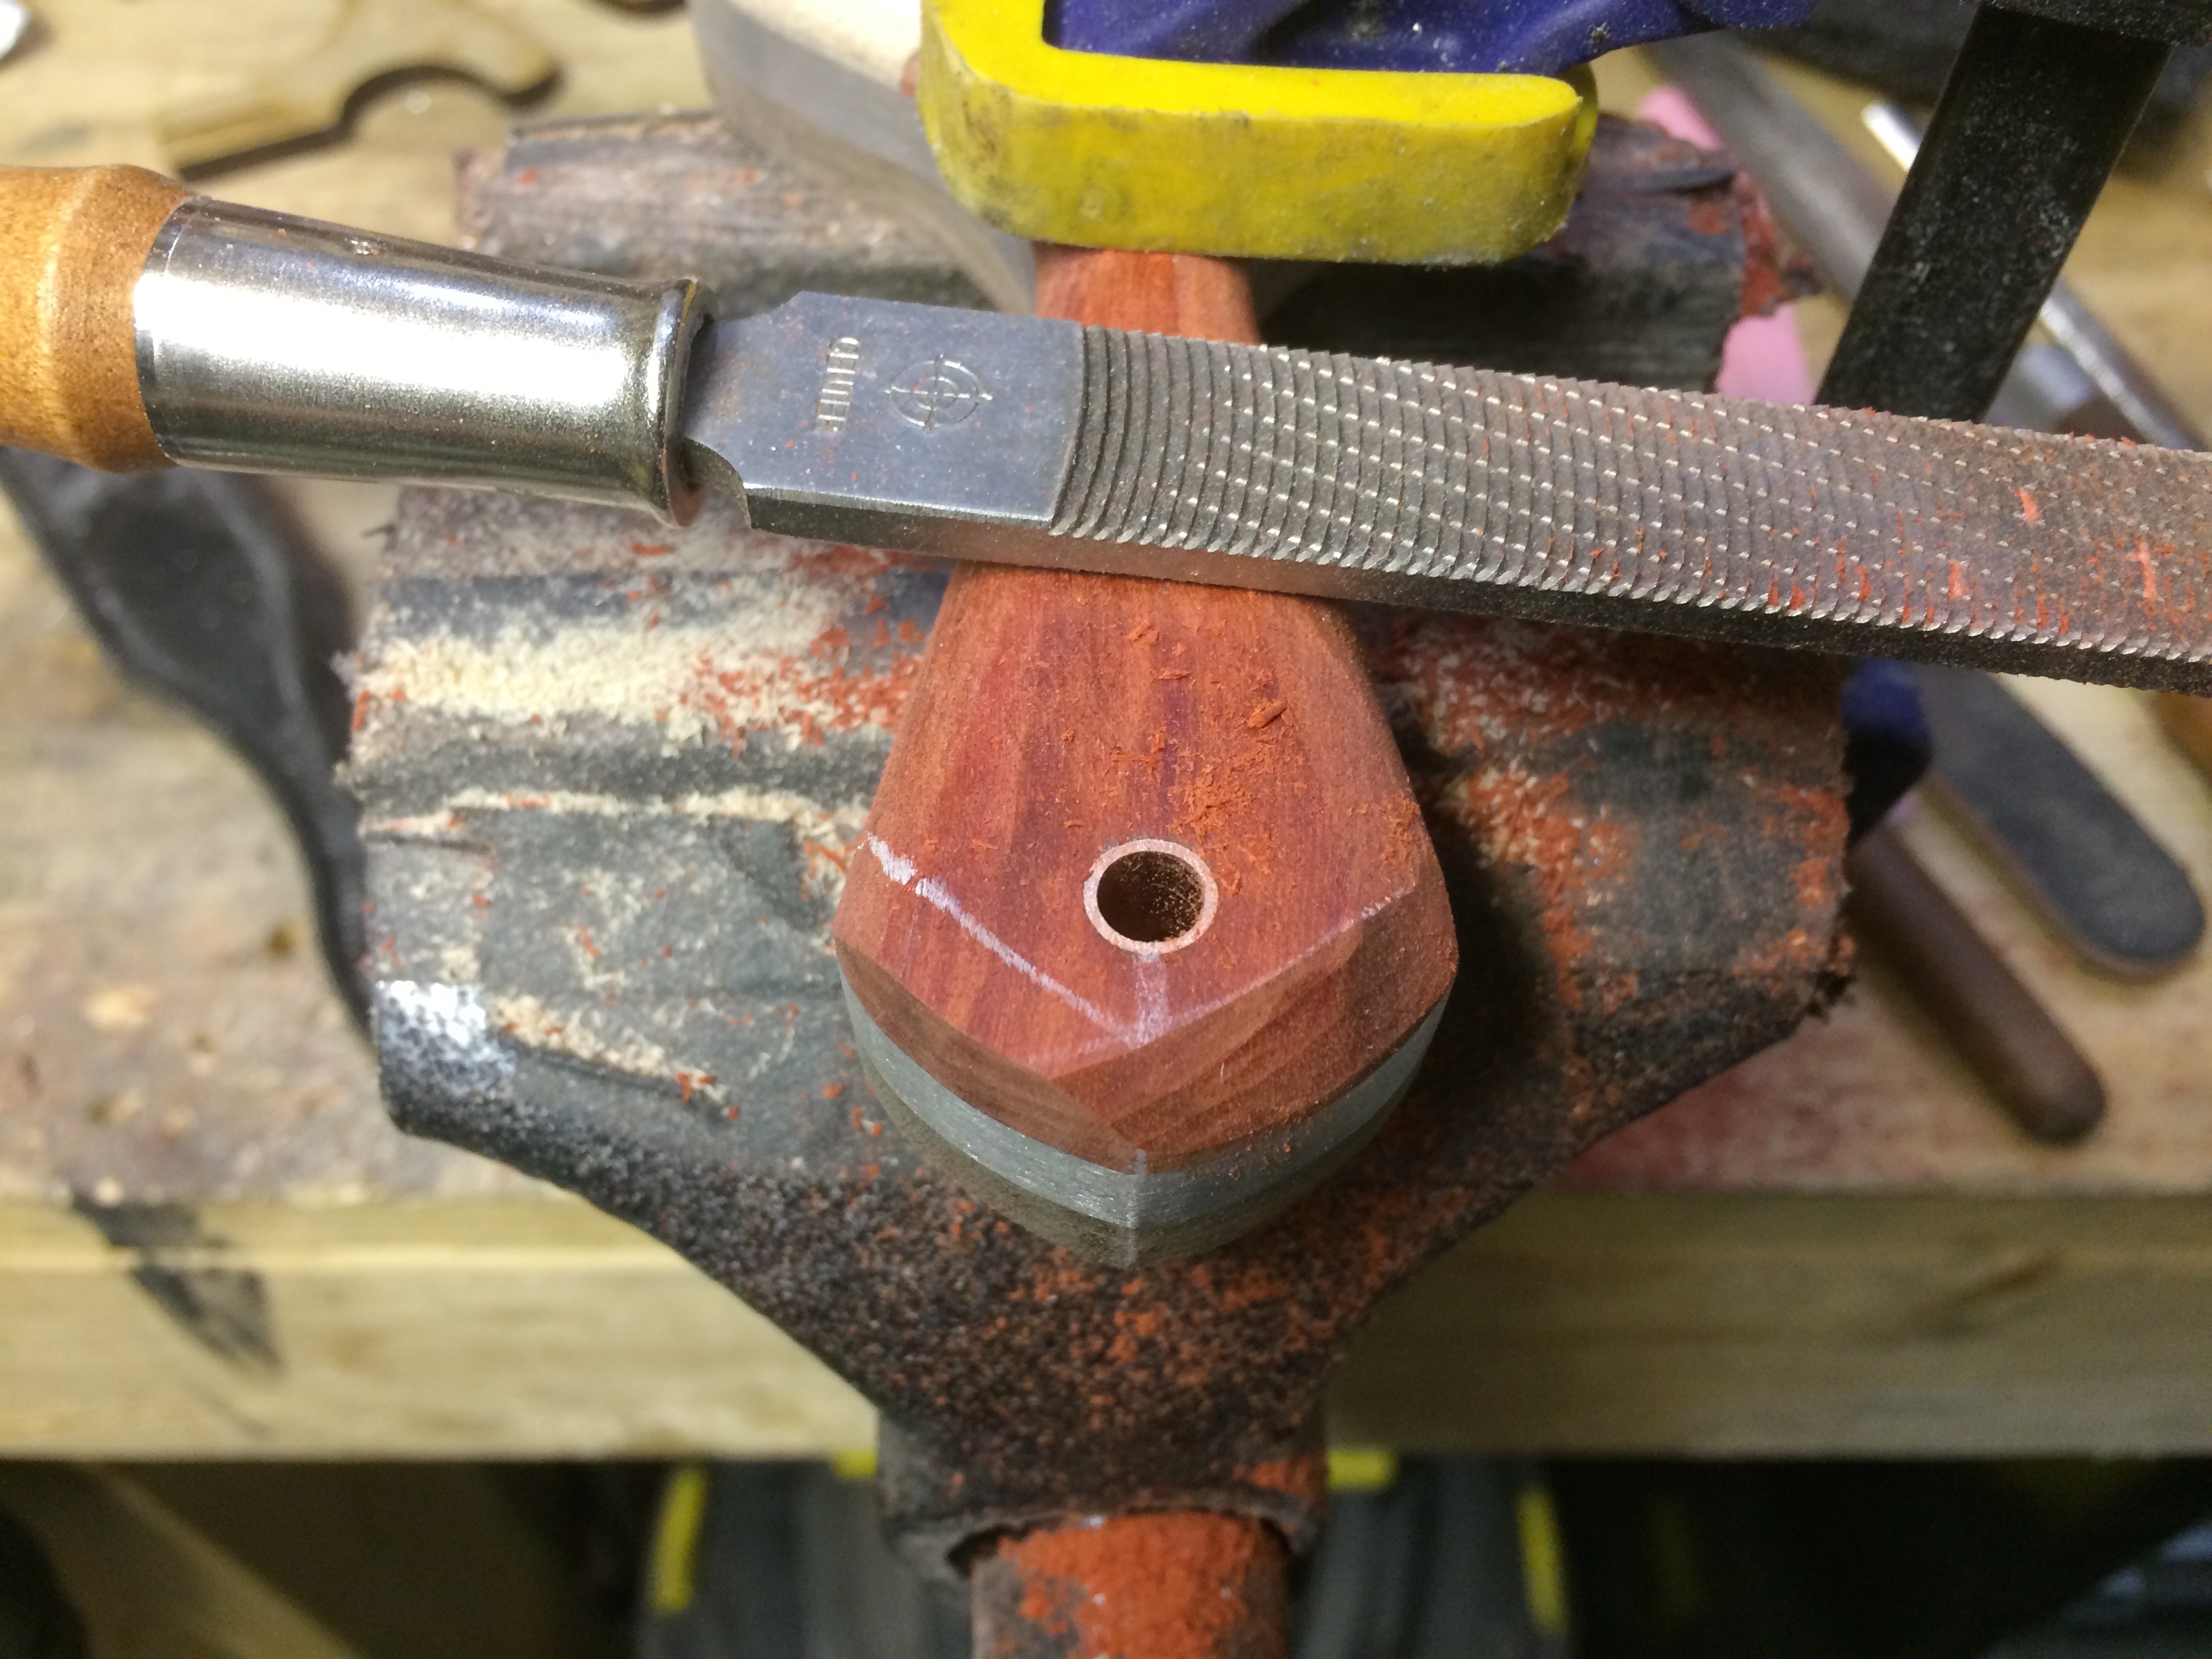
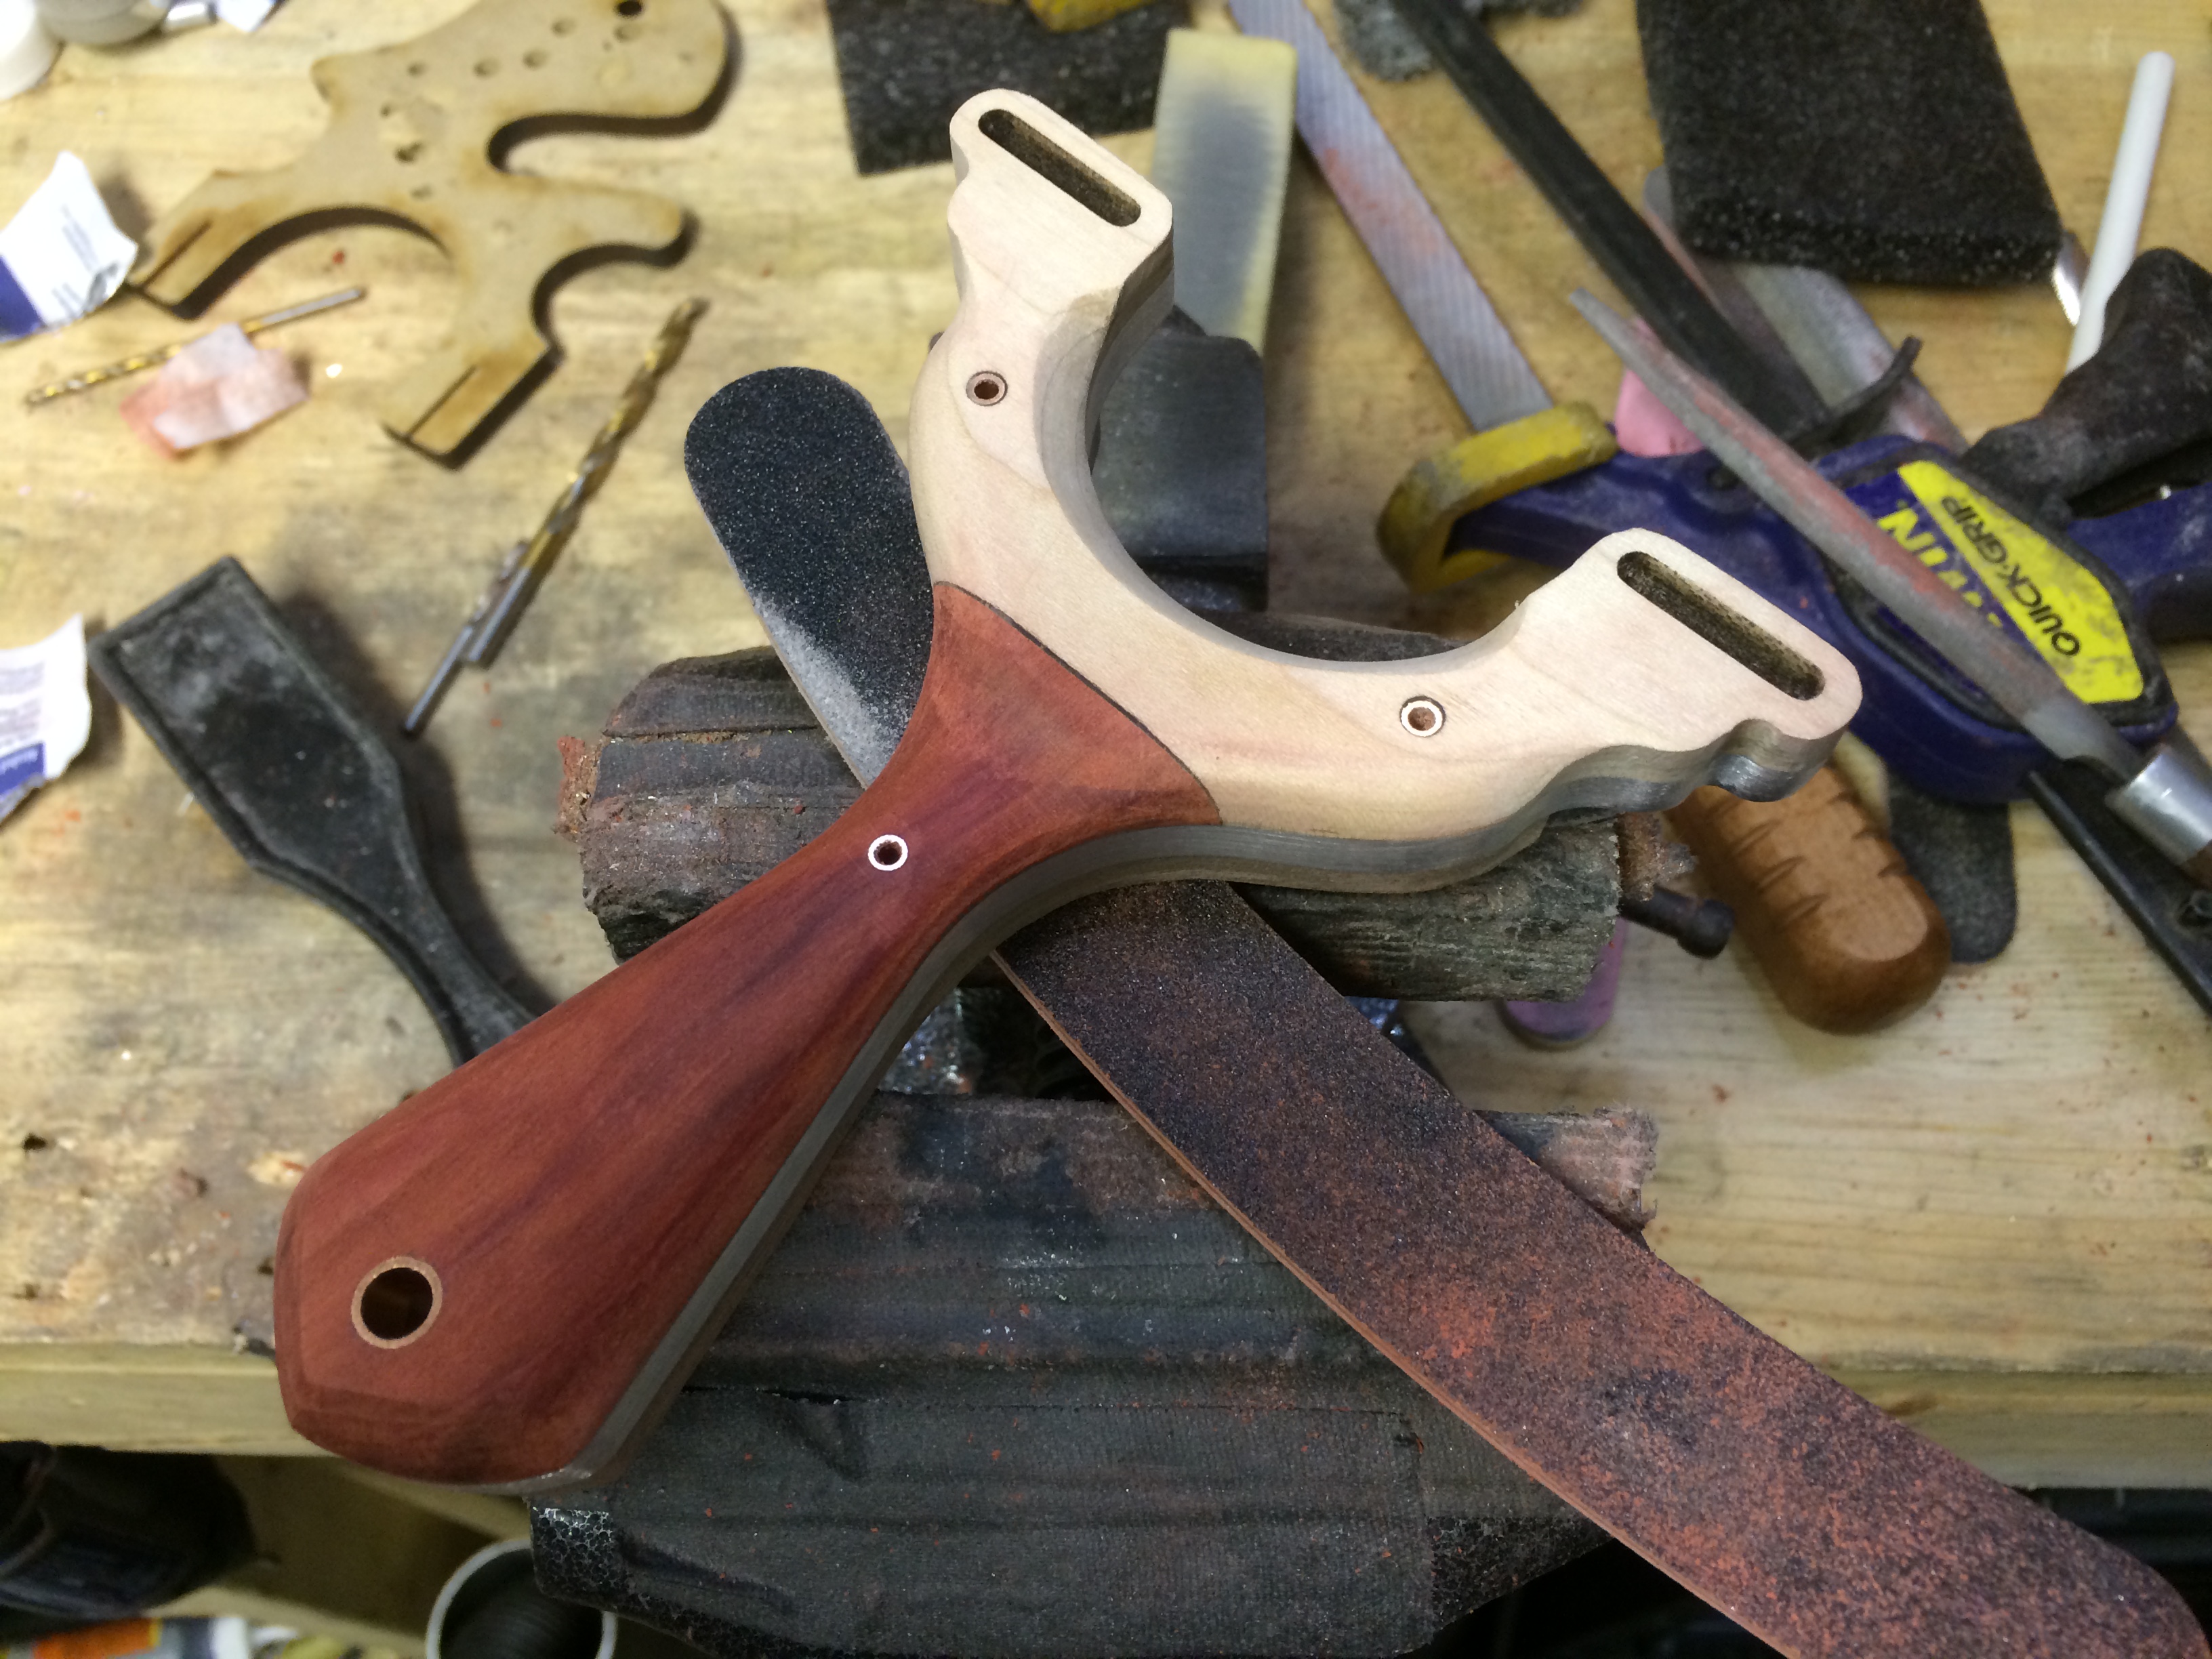
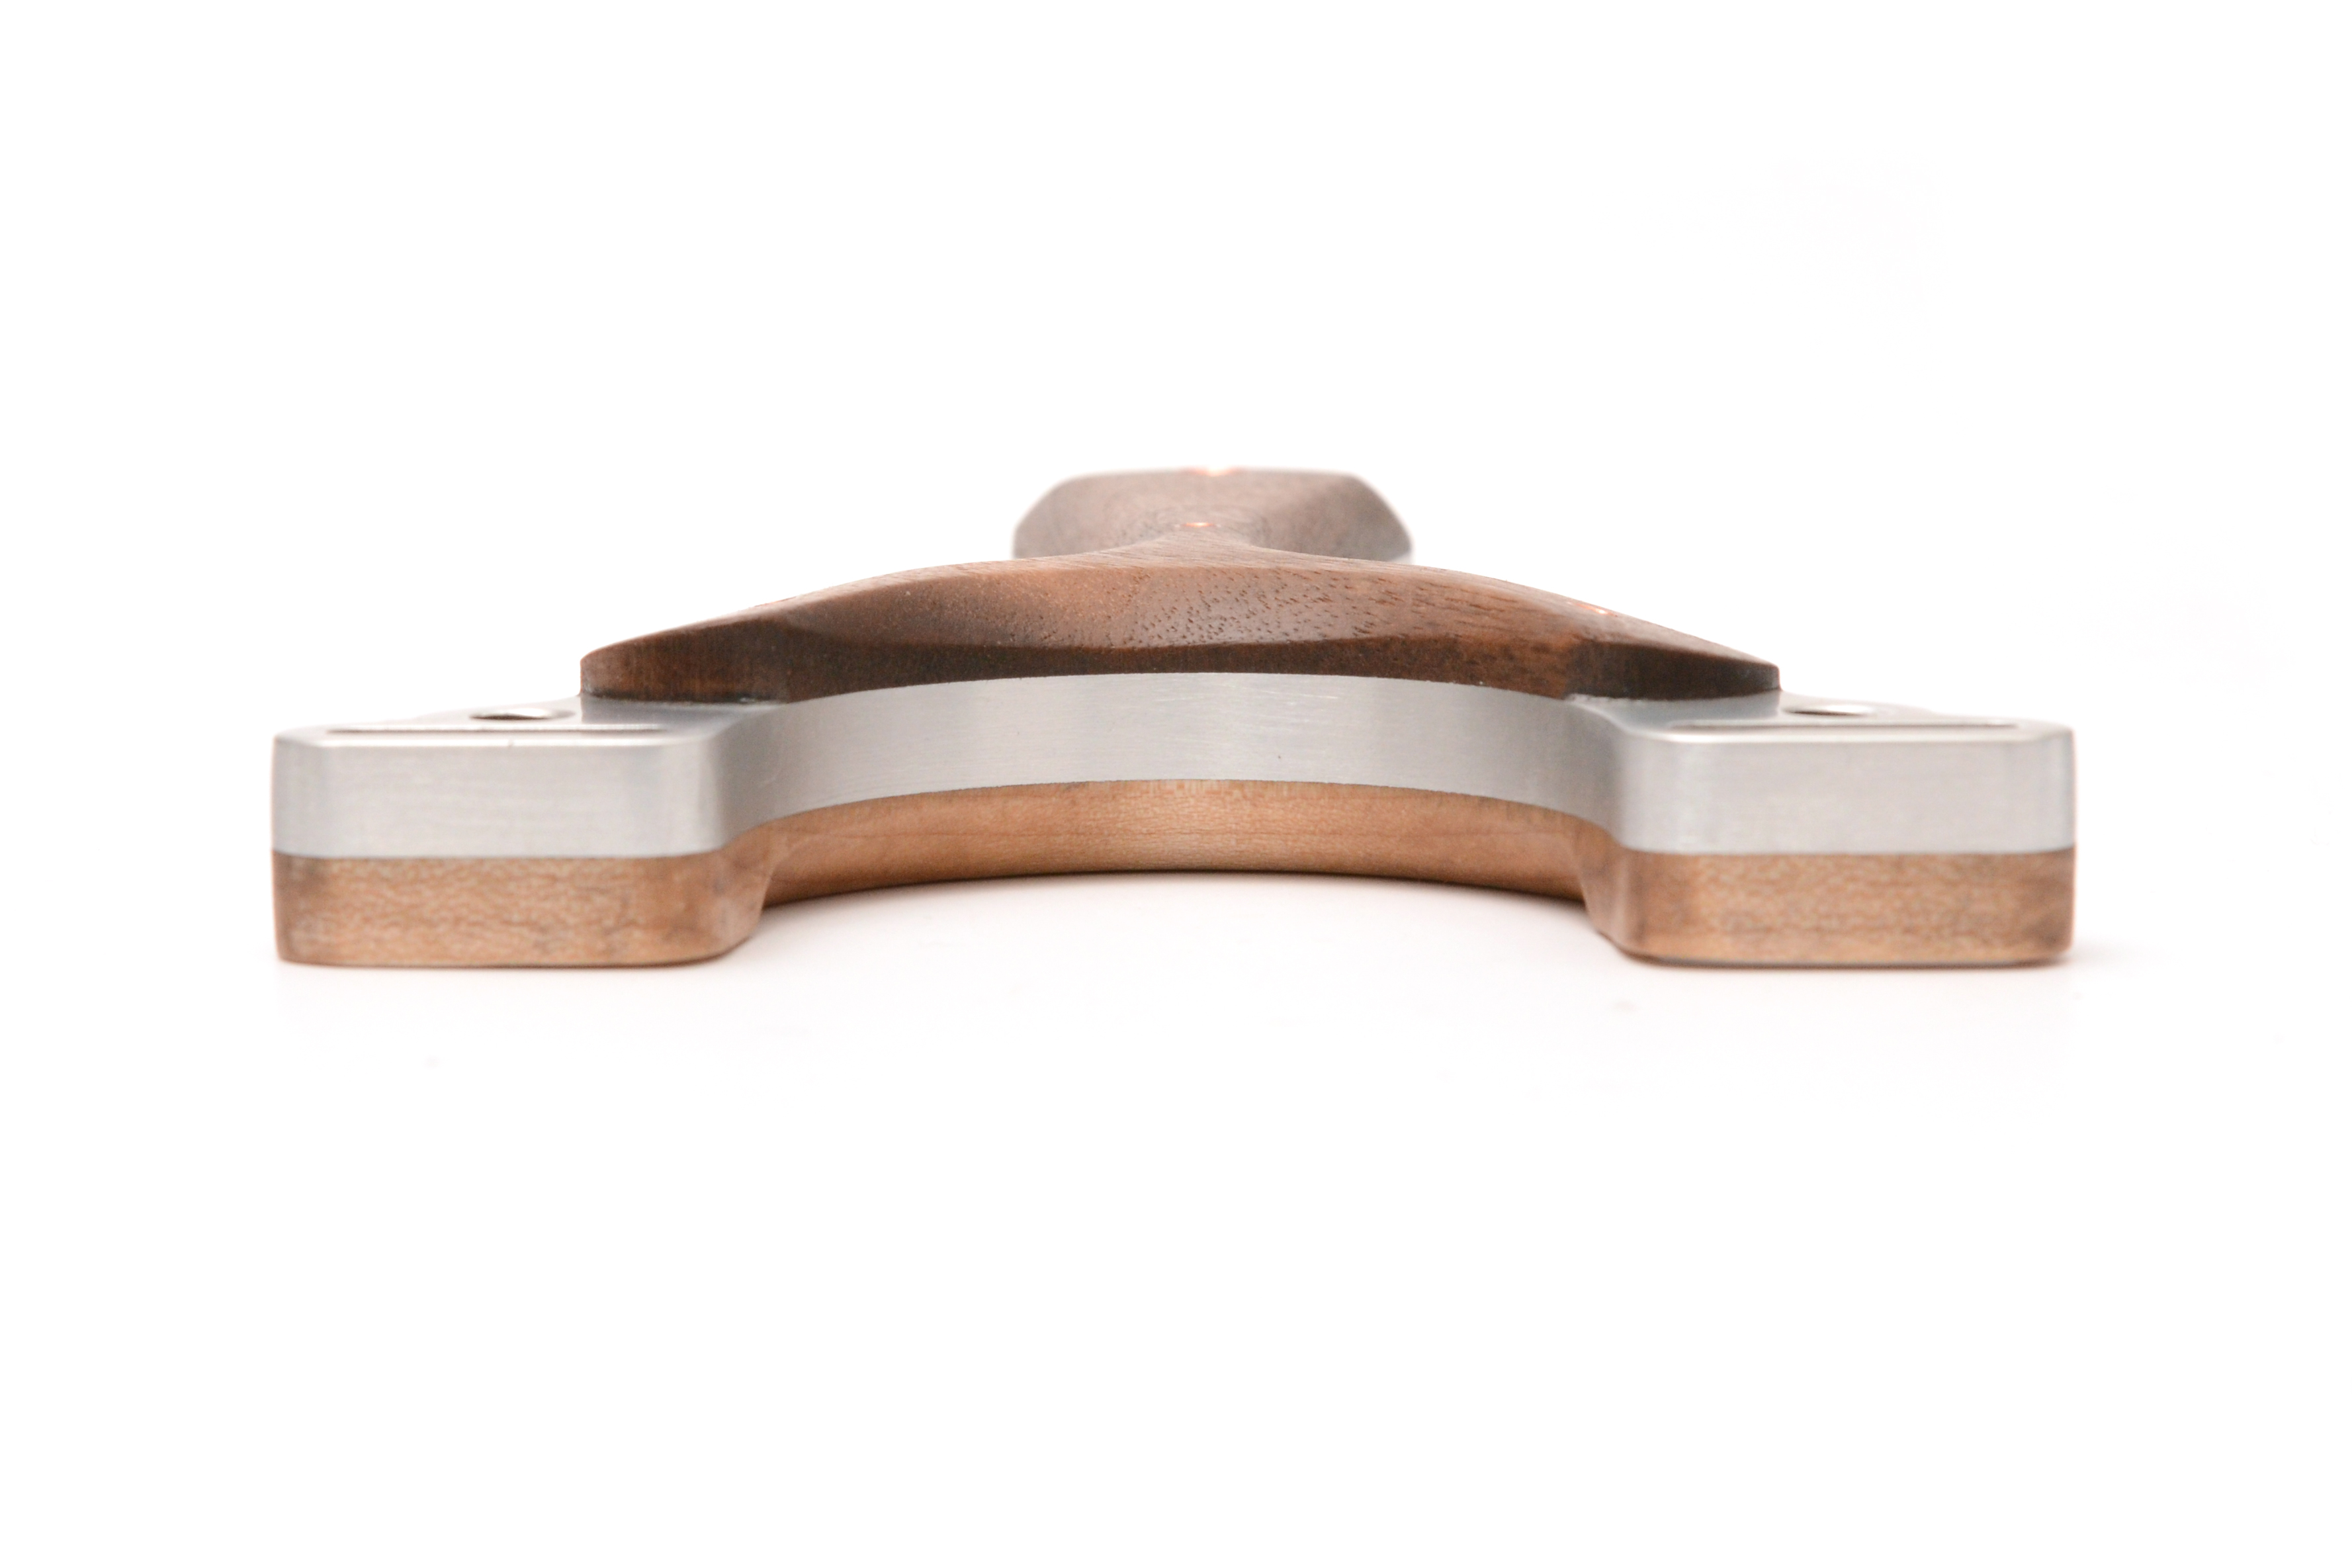
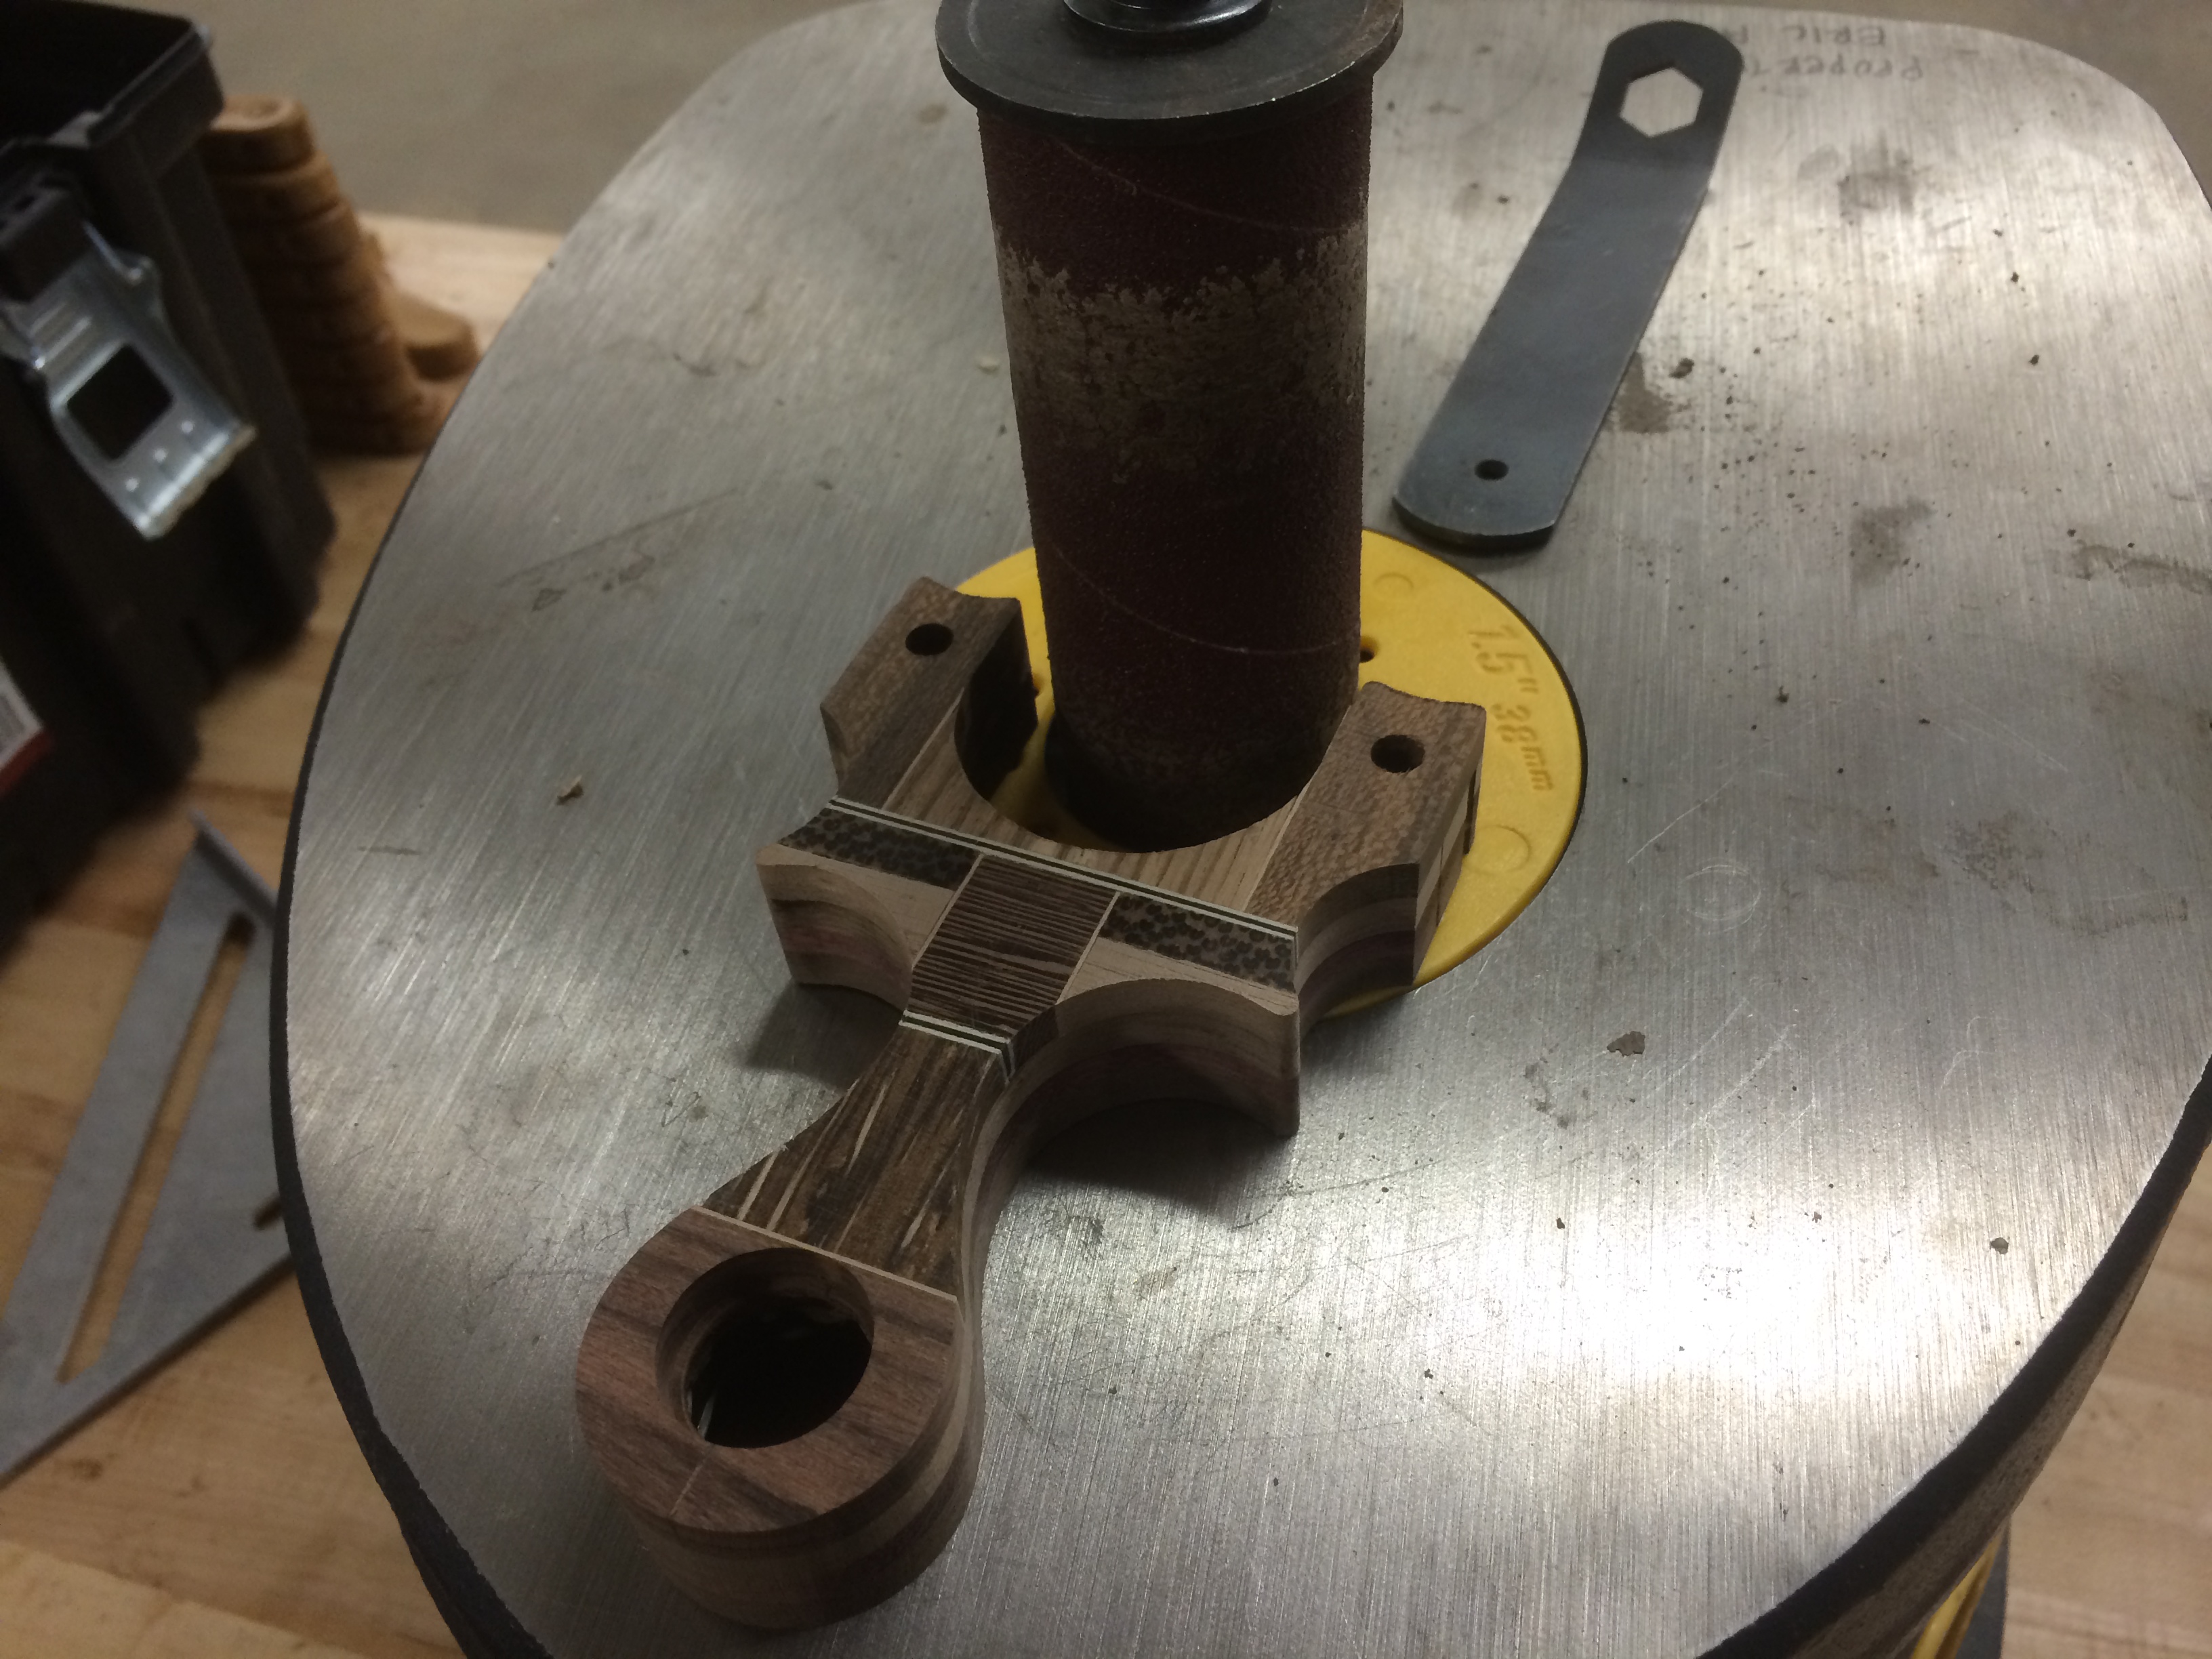
Again, one of those times when taking process photos would have ruined the flow of creation, but fast-forward to the part where the pinky swell is rough shaped, then tweaked with file work and sanded to 400 grit. Ebony being so hard and oily, it took to wetsanding very well.

img_0560

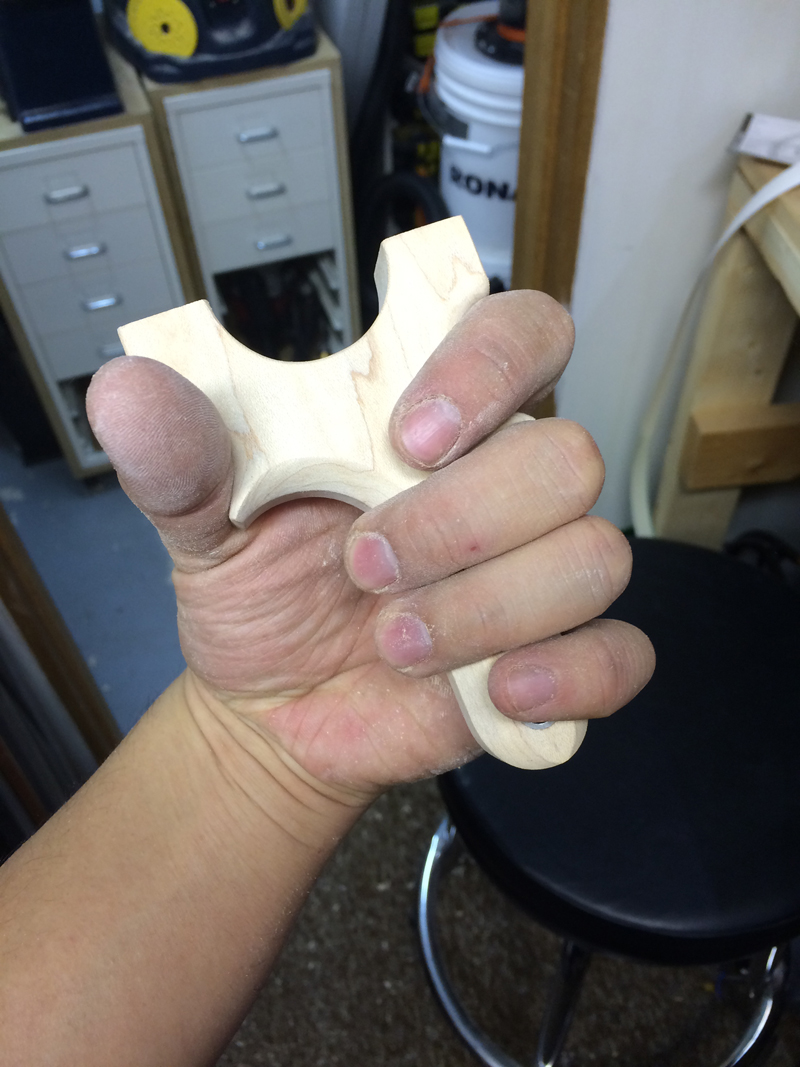
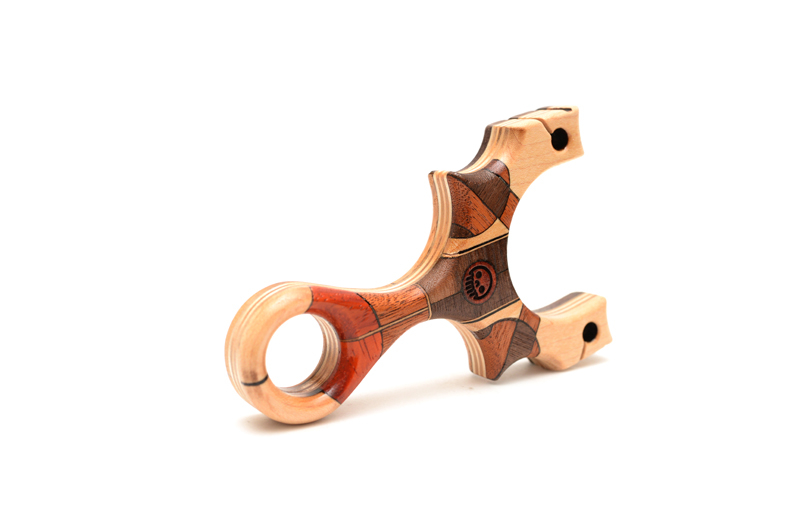
Some of my favourite parts about this design is how the pinky swell melds into the middle finger indentation near the center of the handle. This makes for a seamless shape, but the material makes is even more interesting.

img_0561

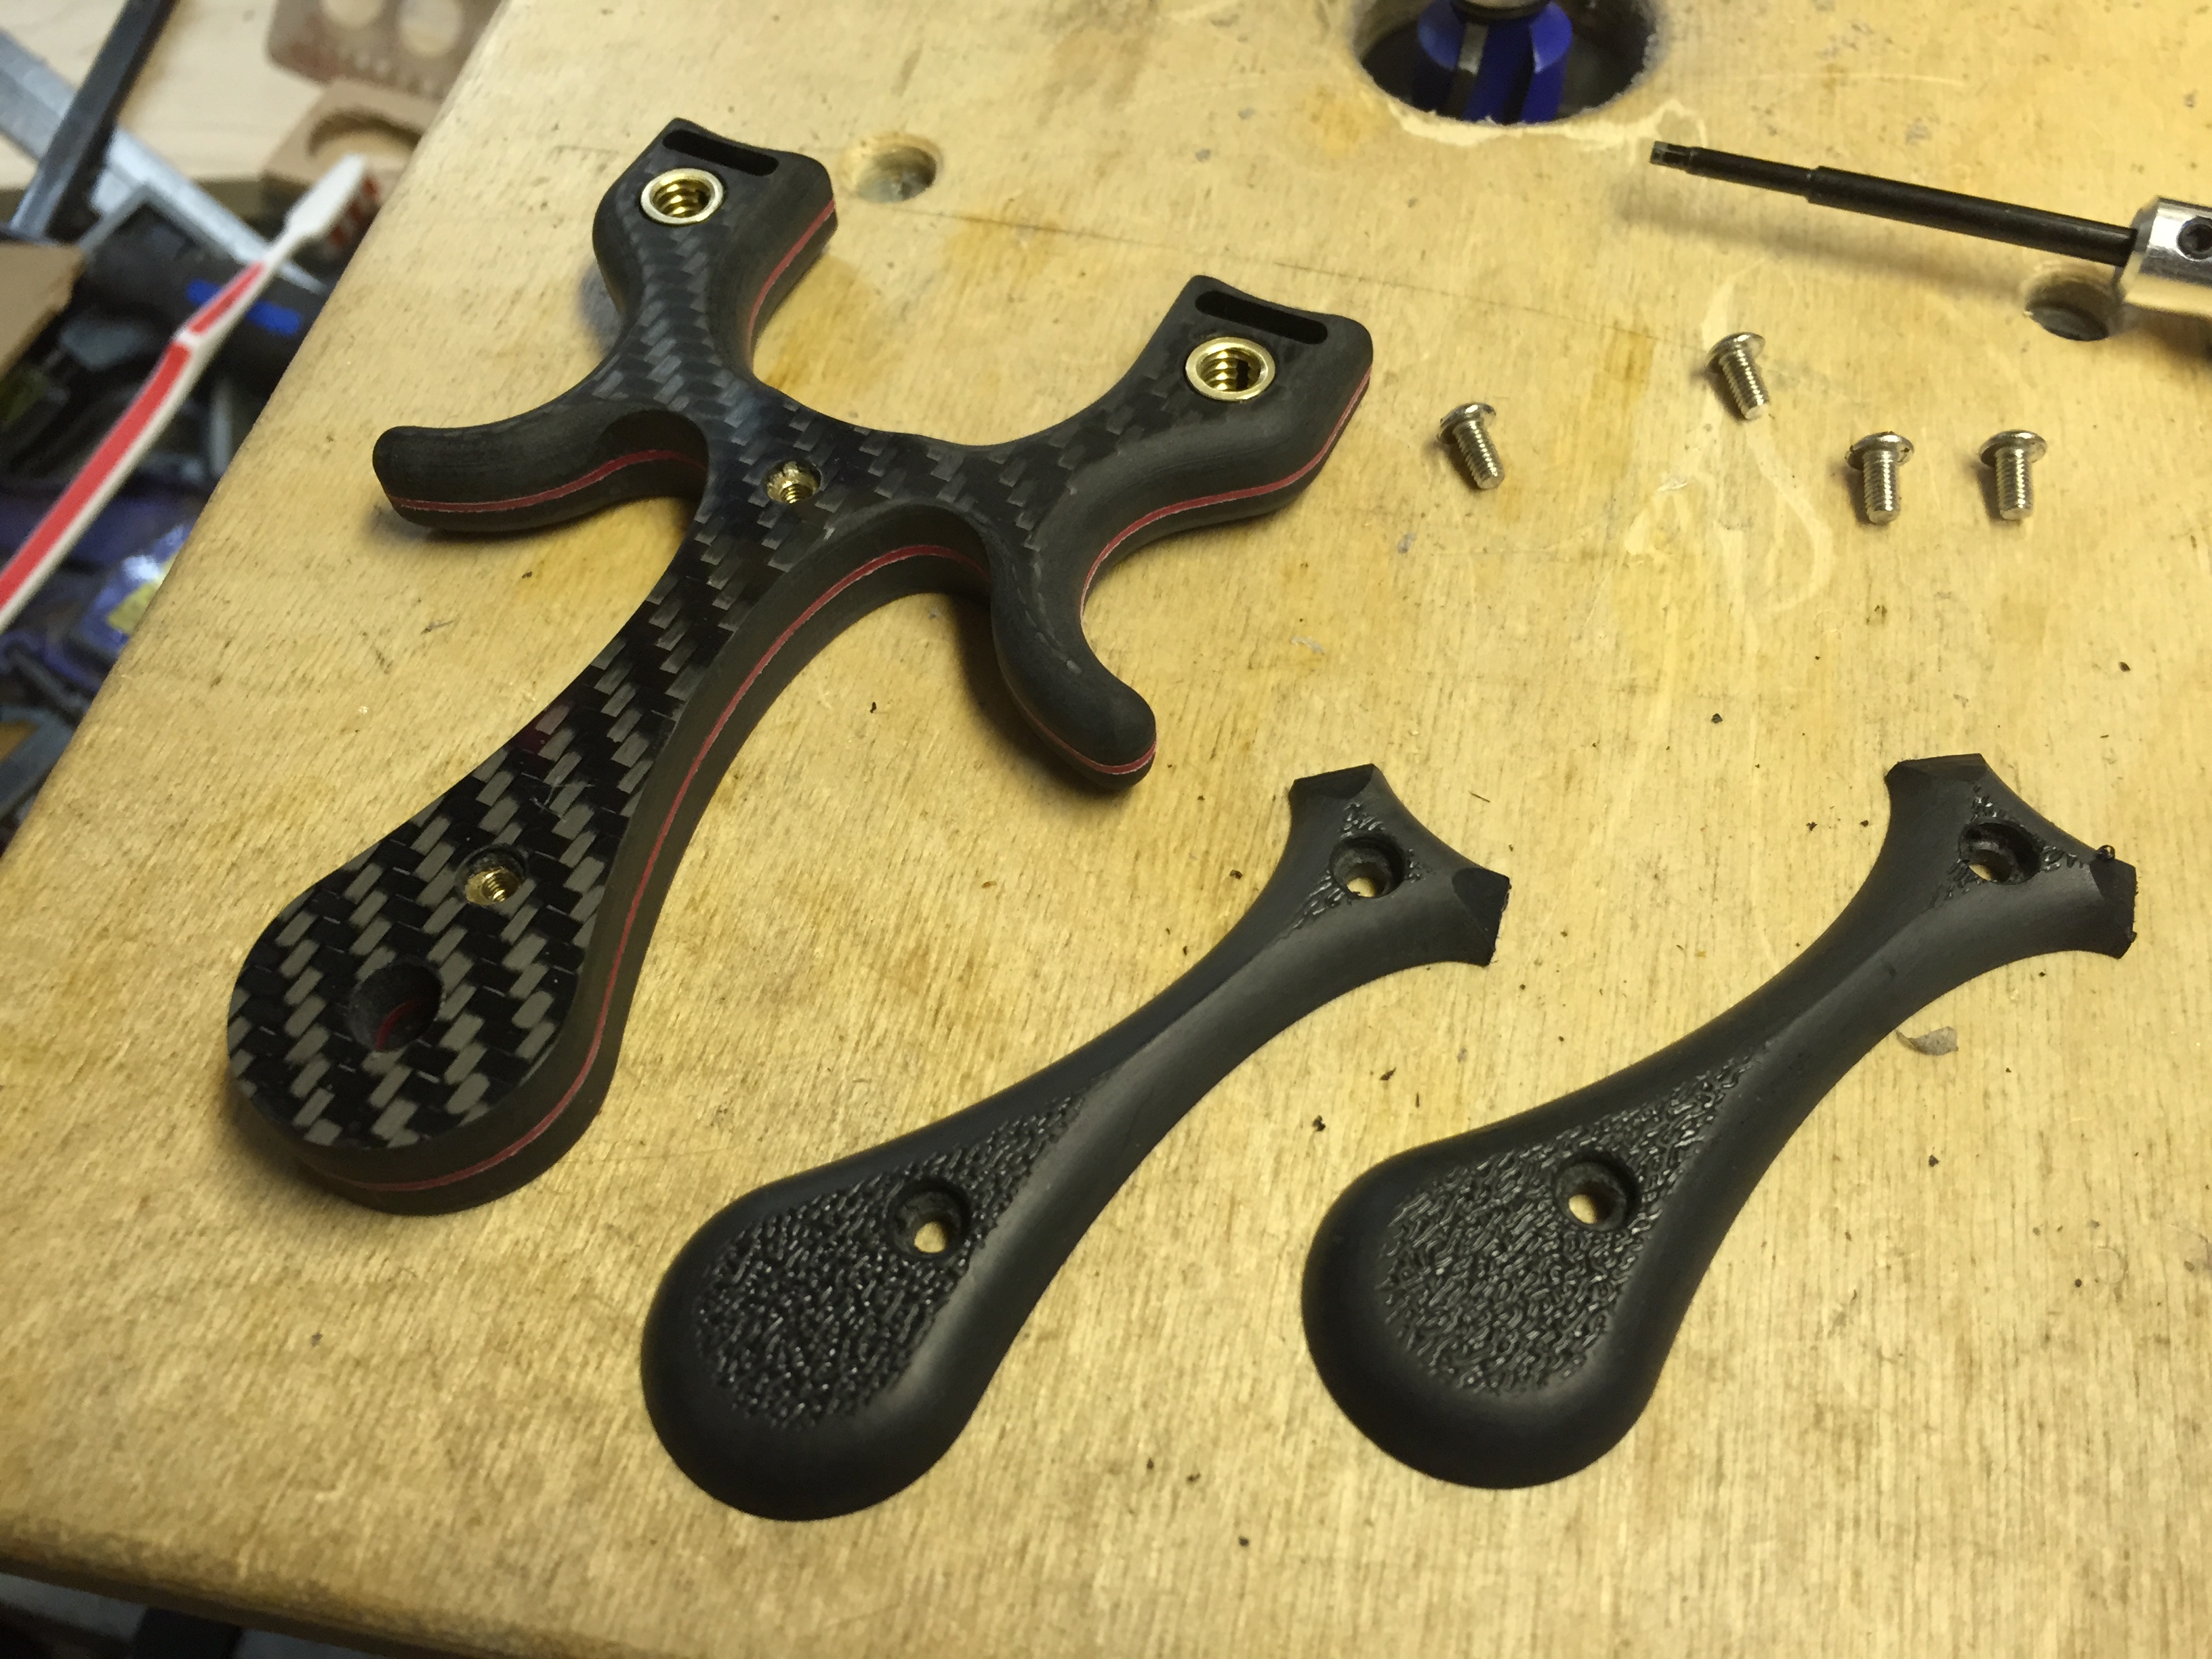
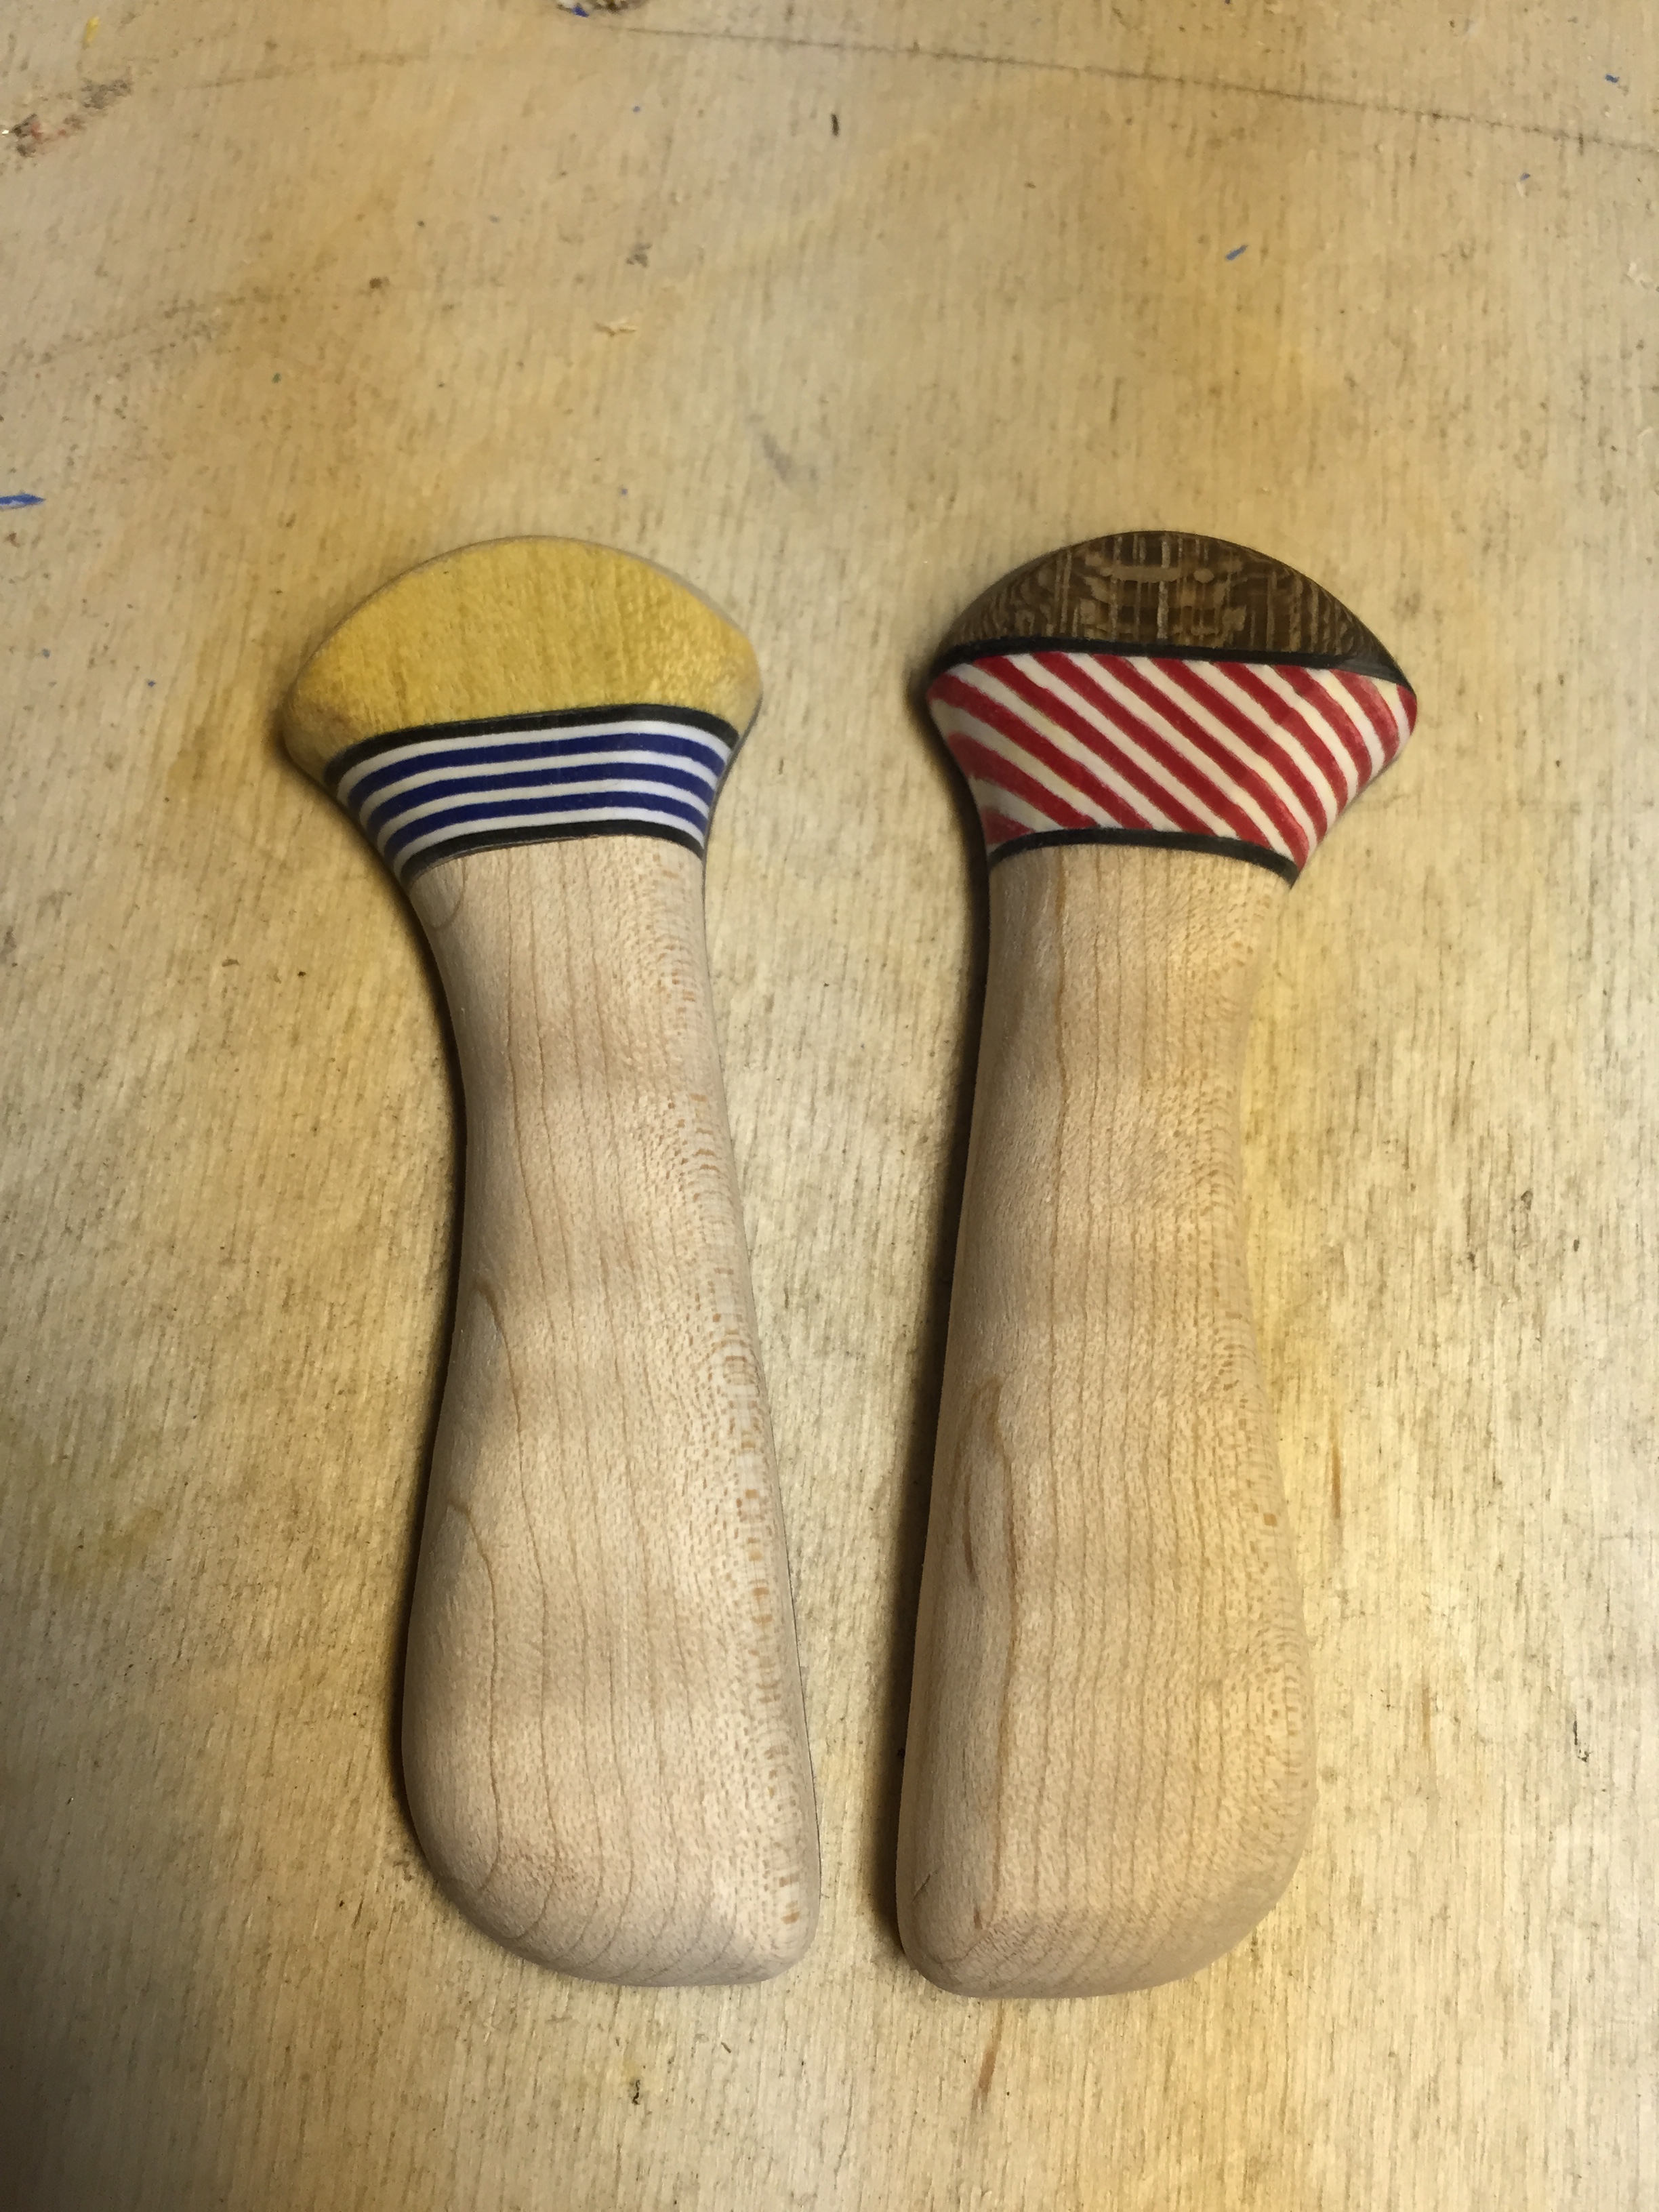
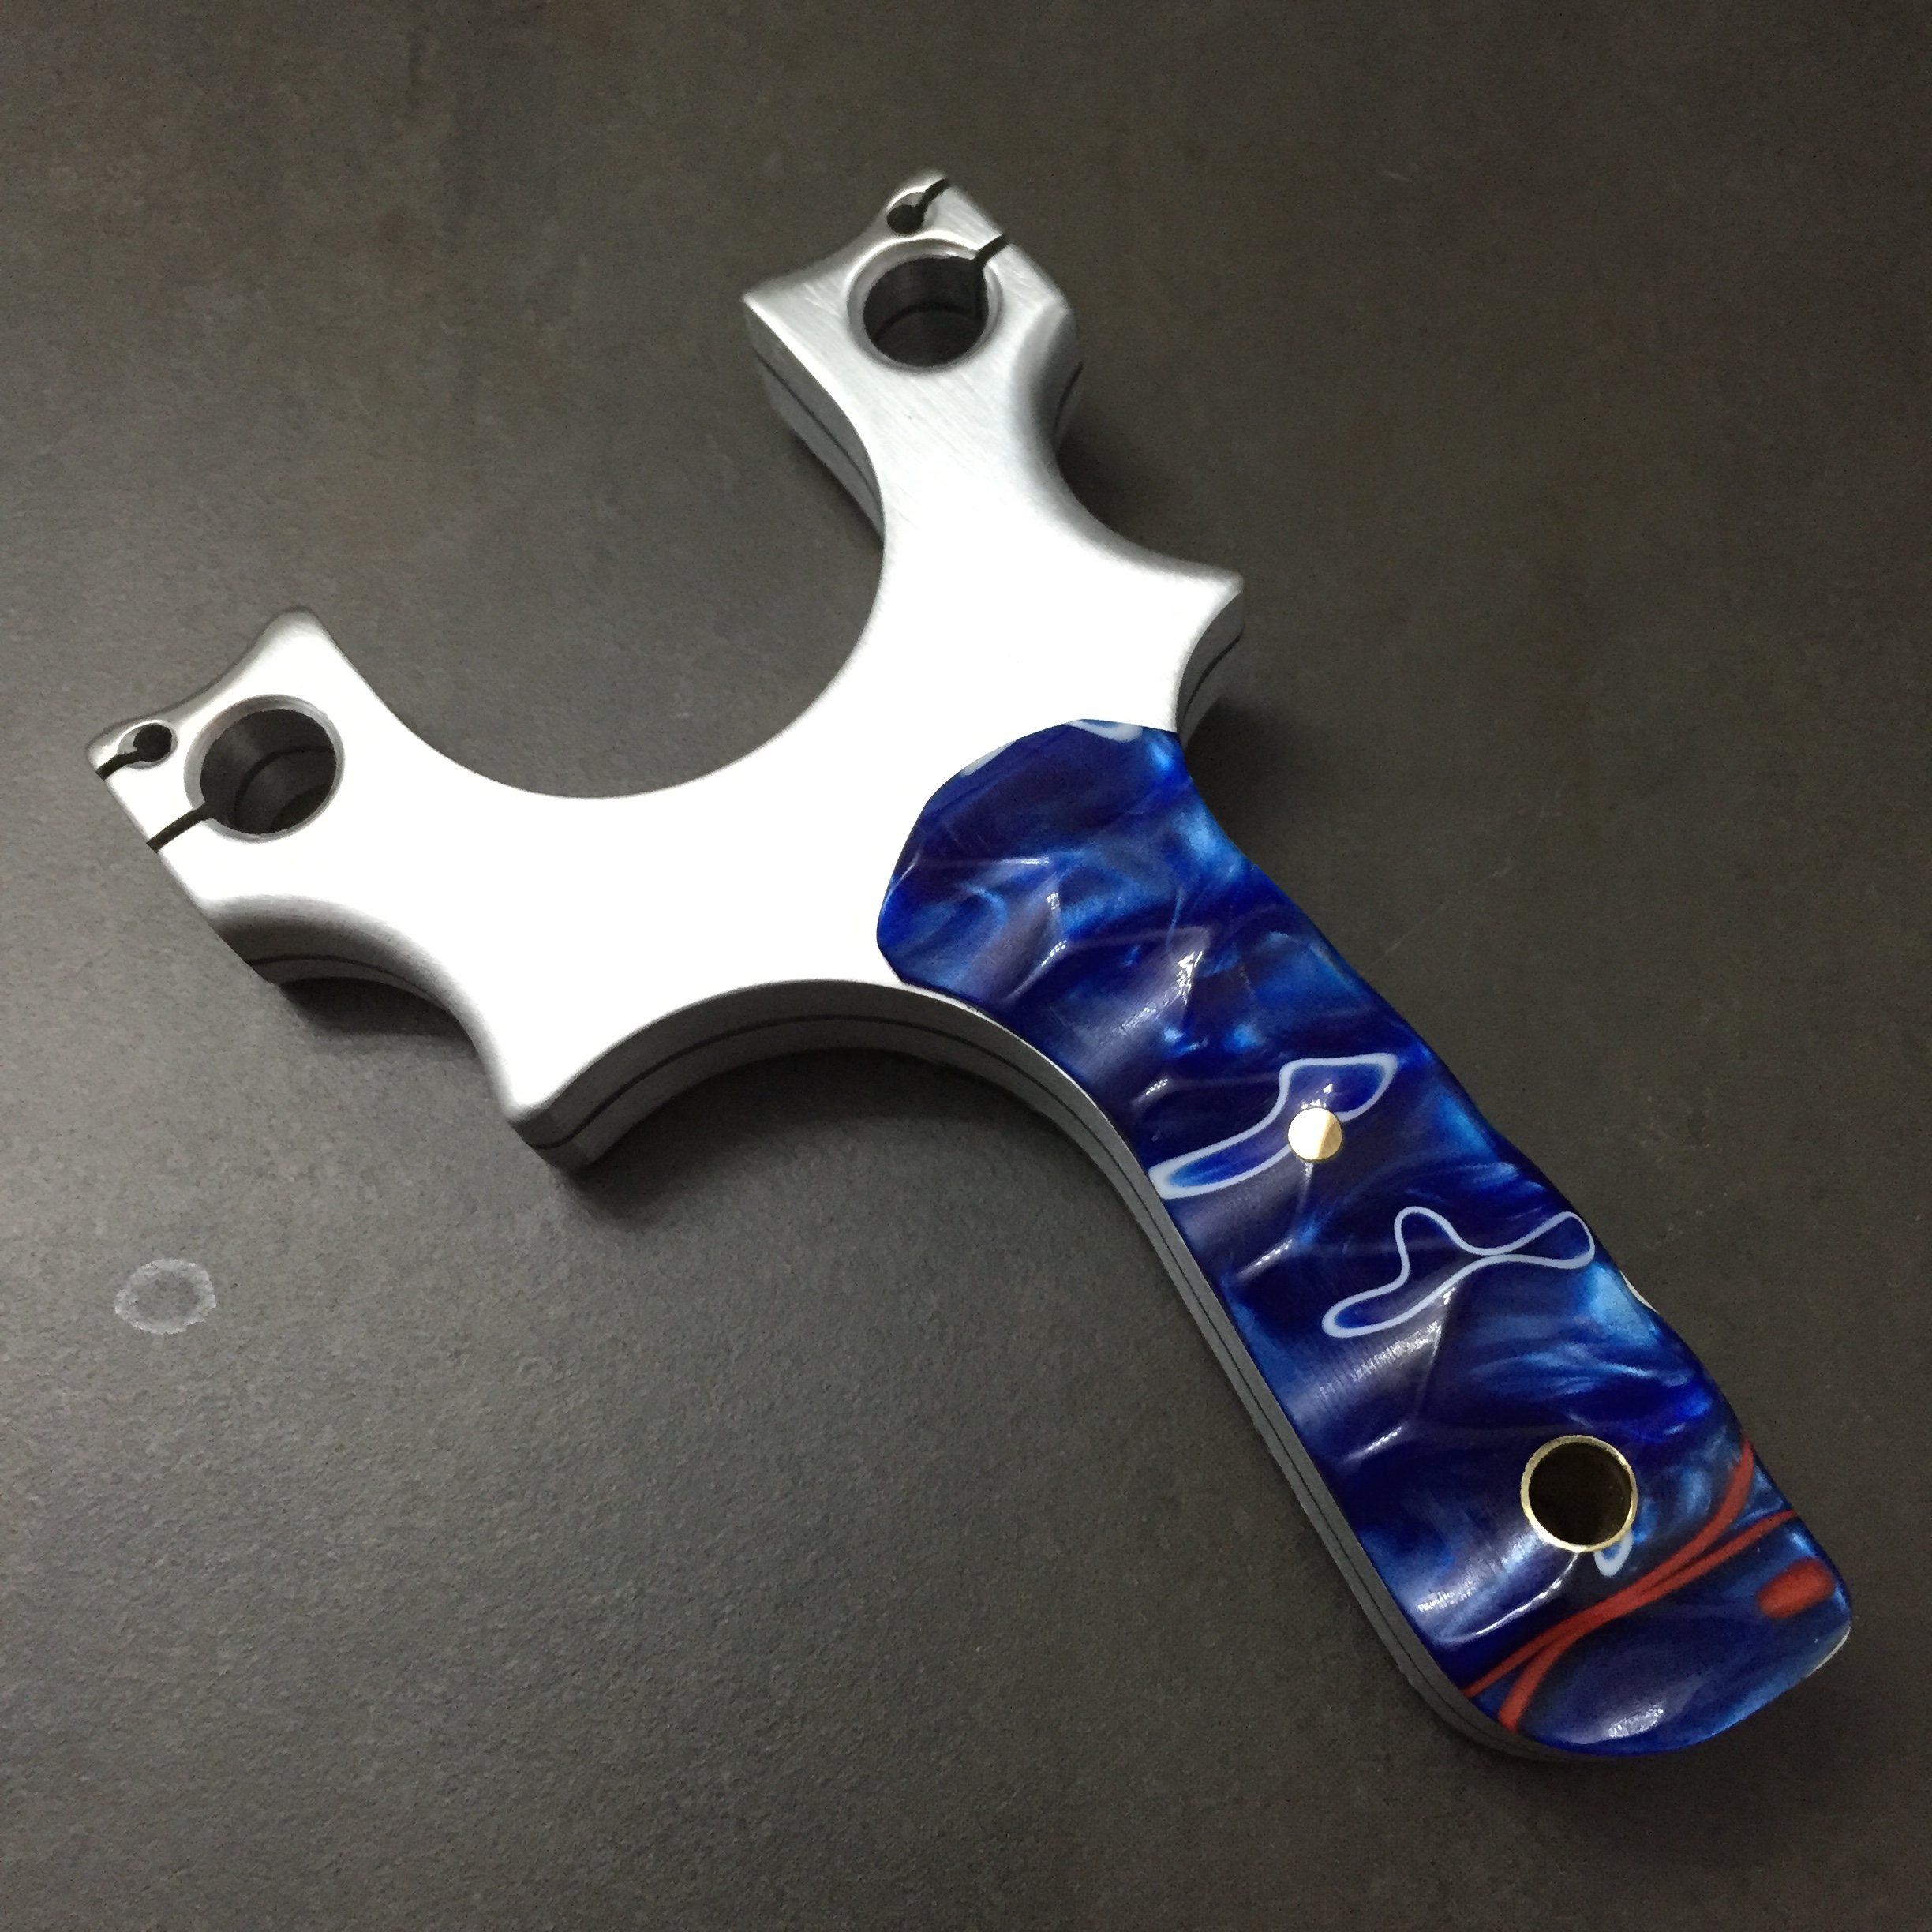
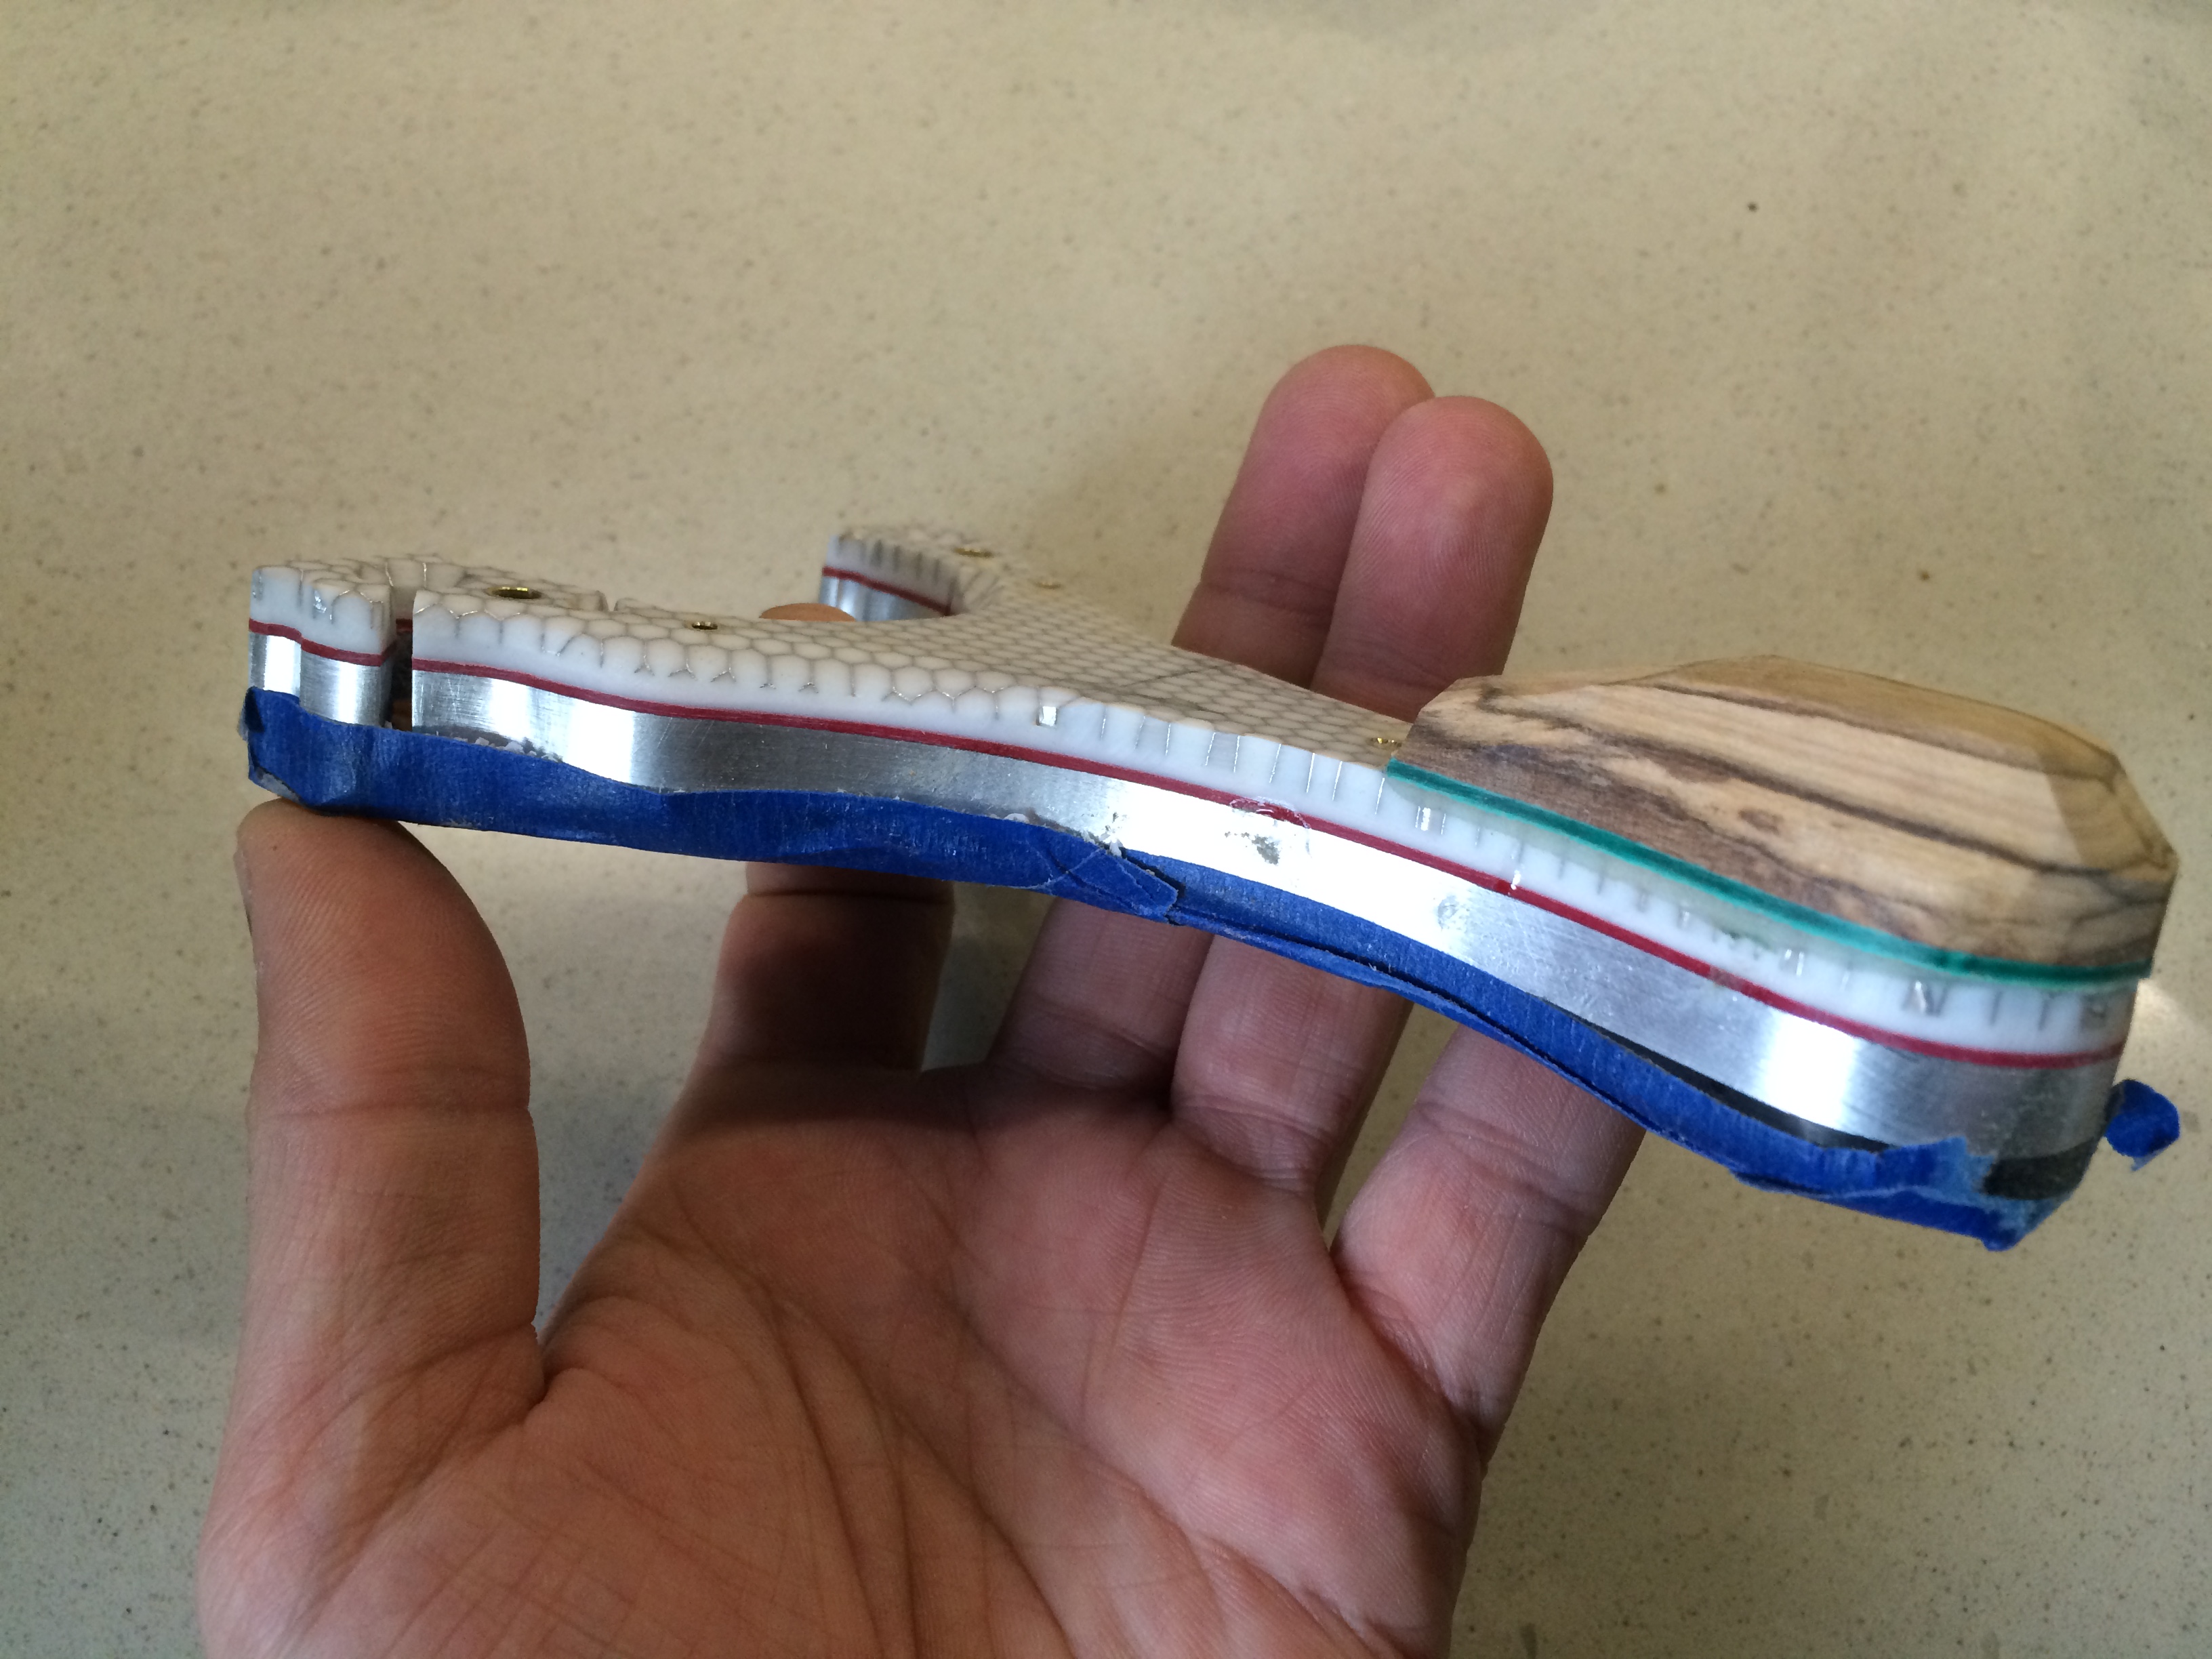
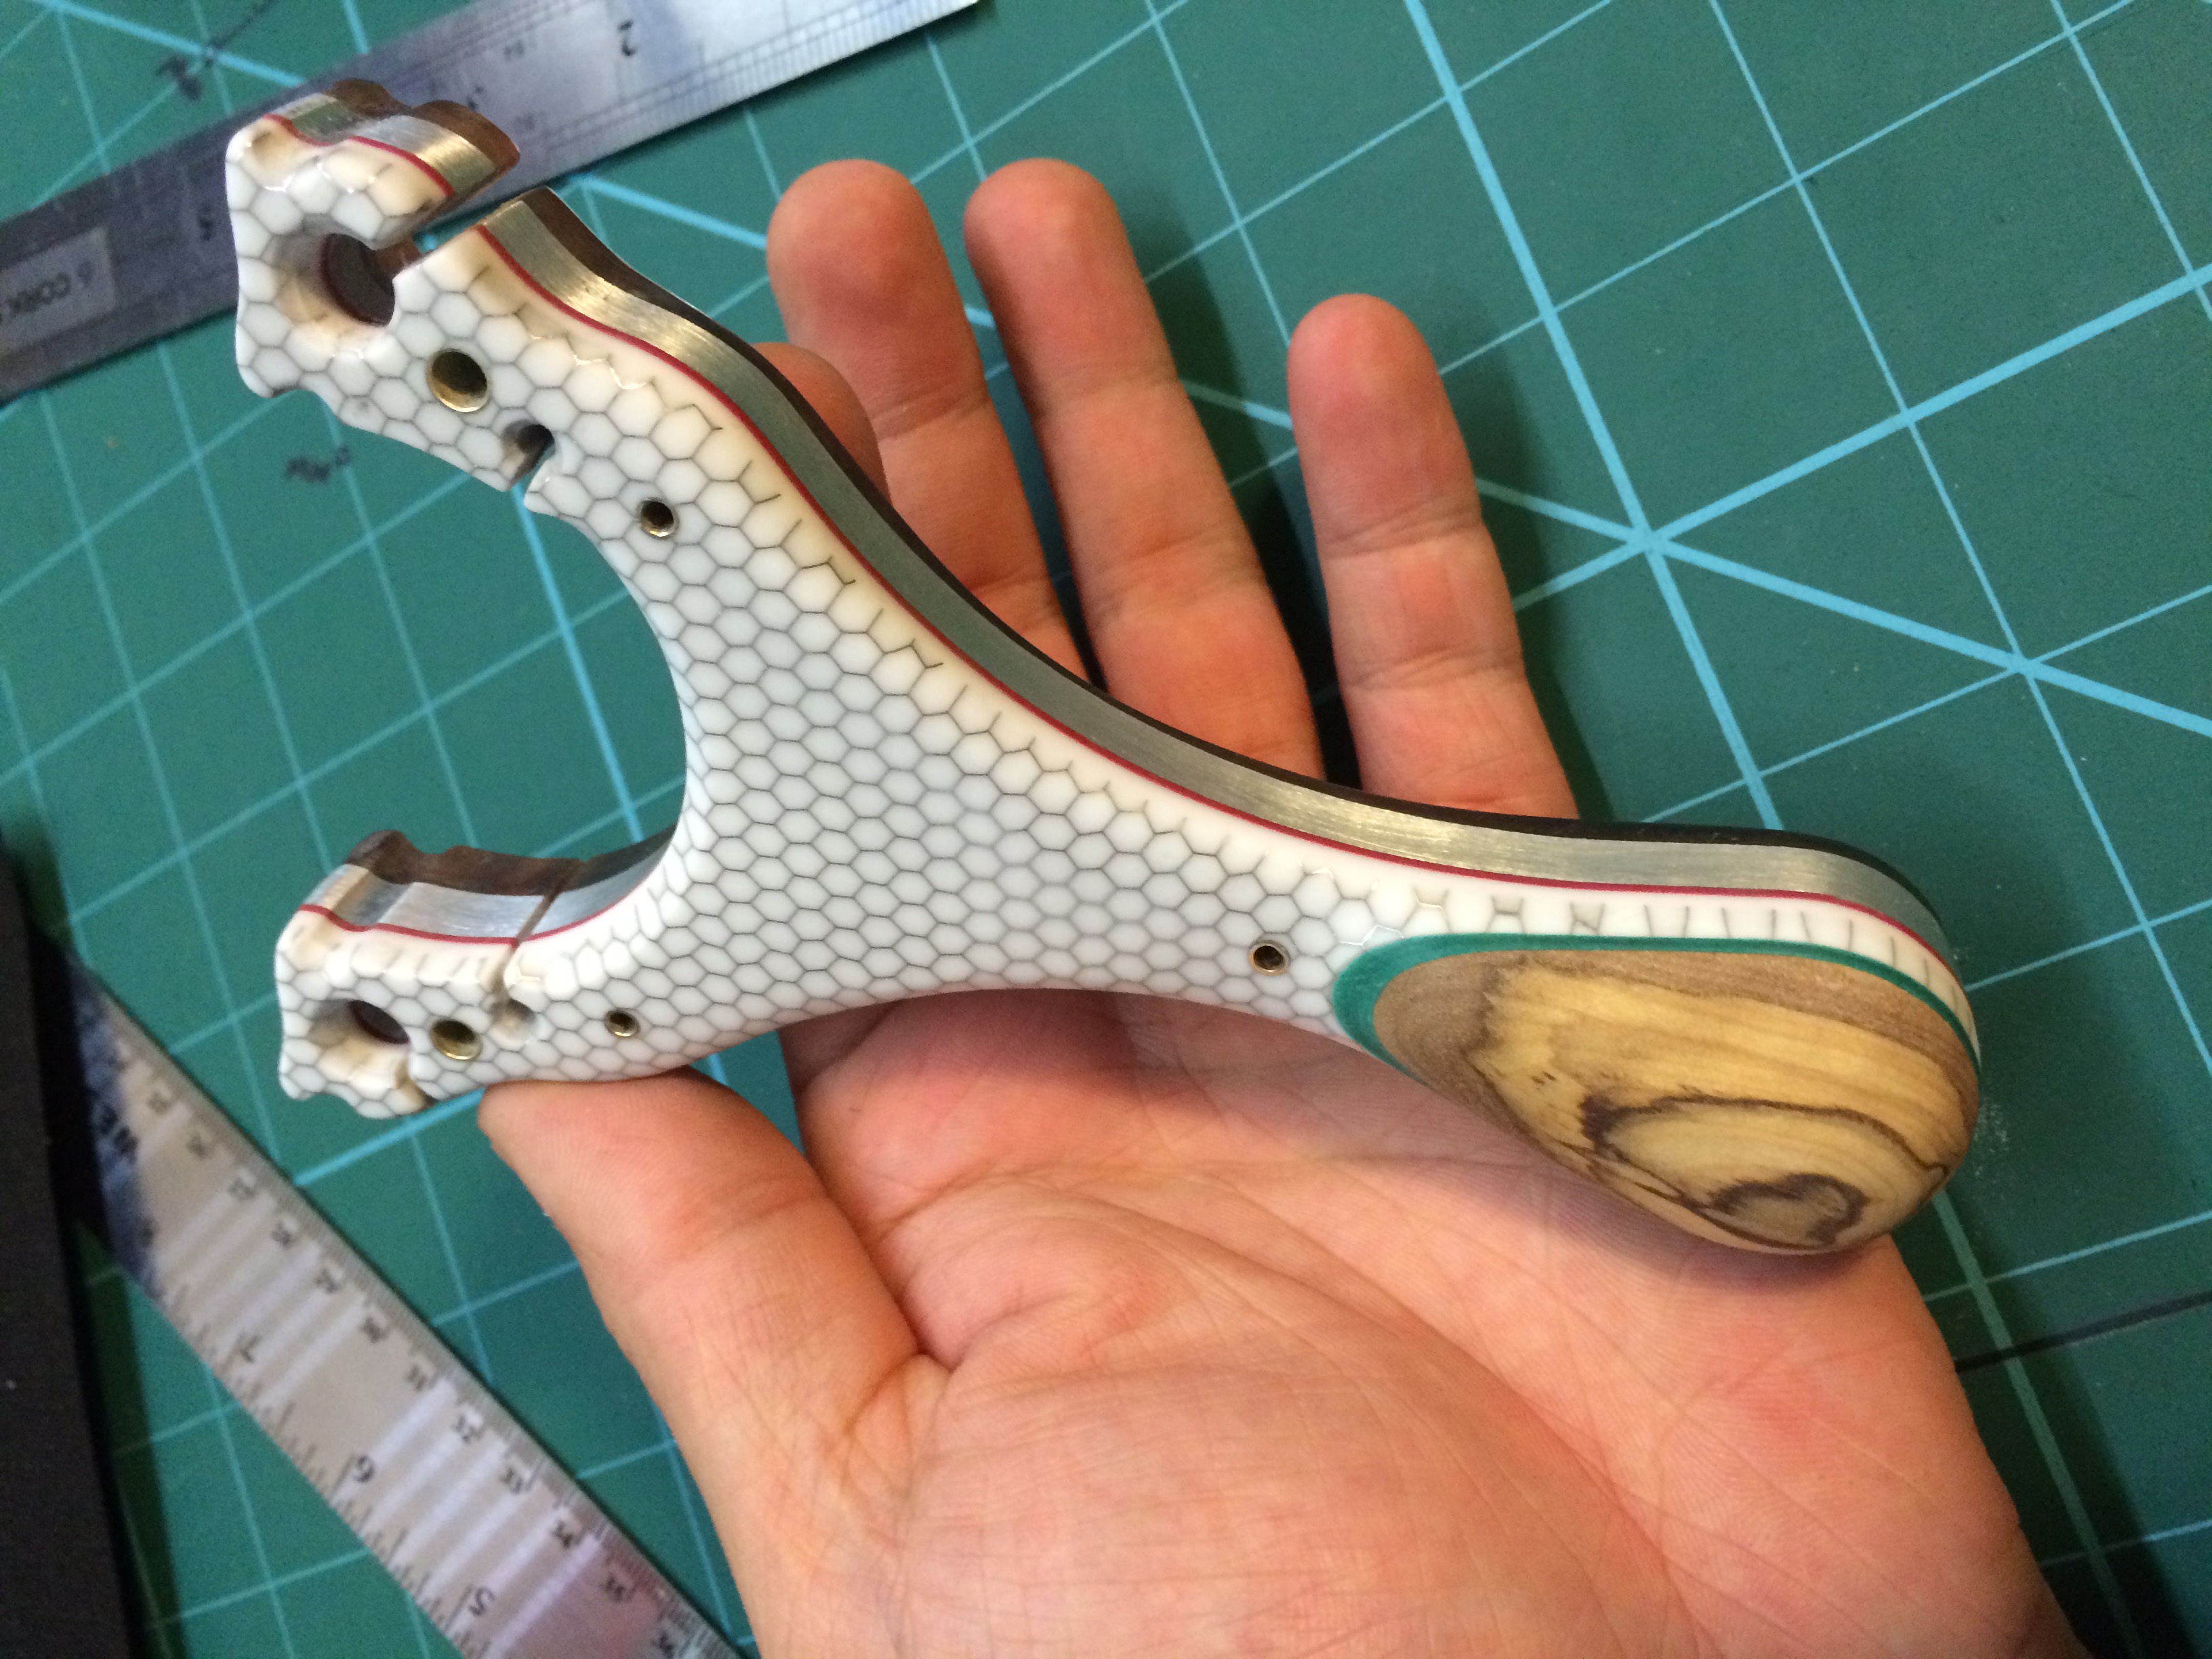
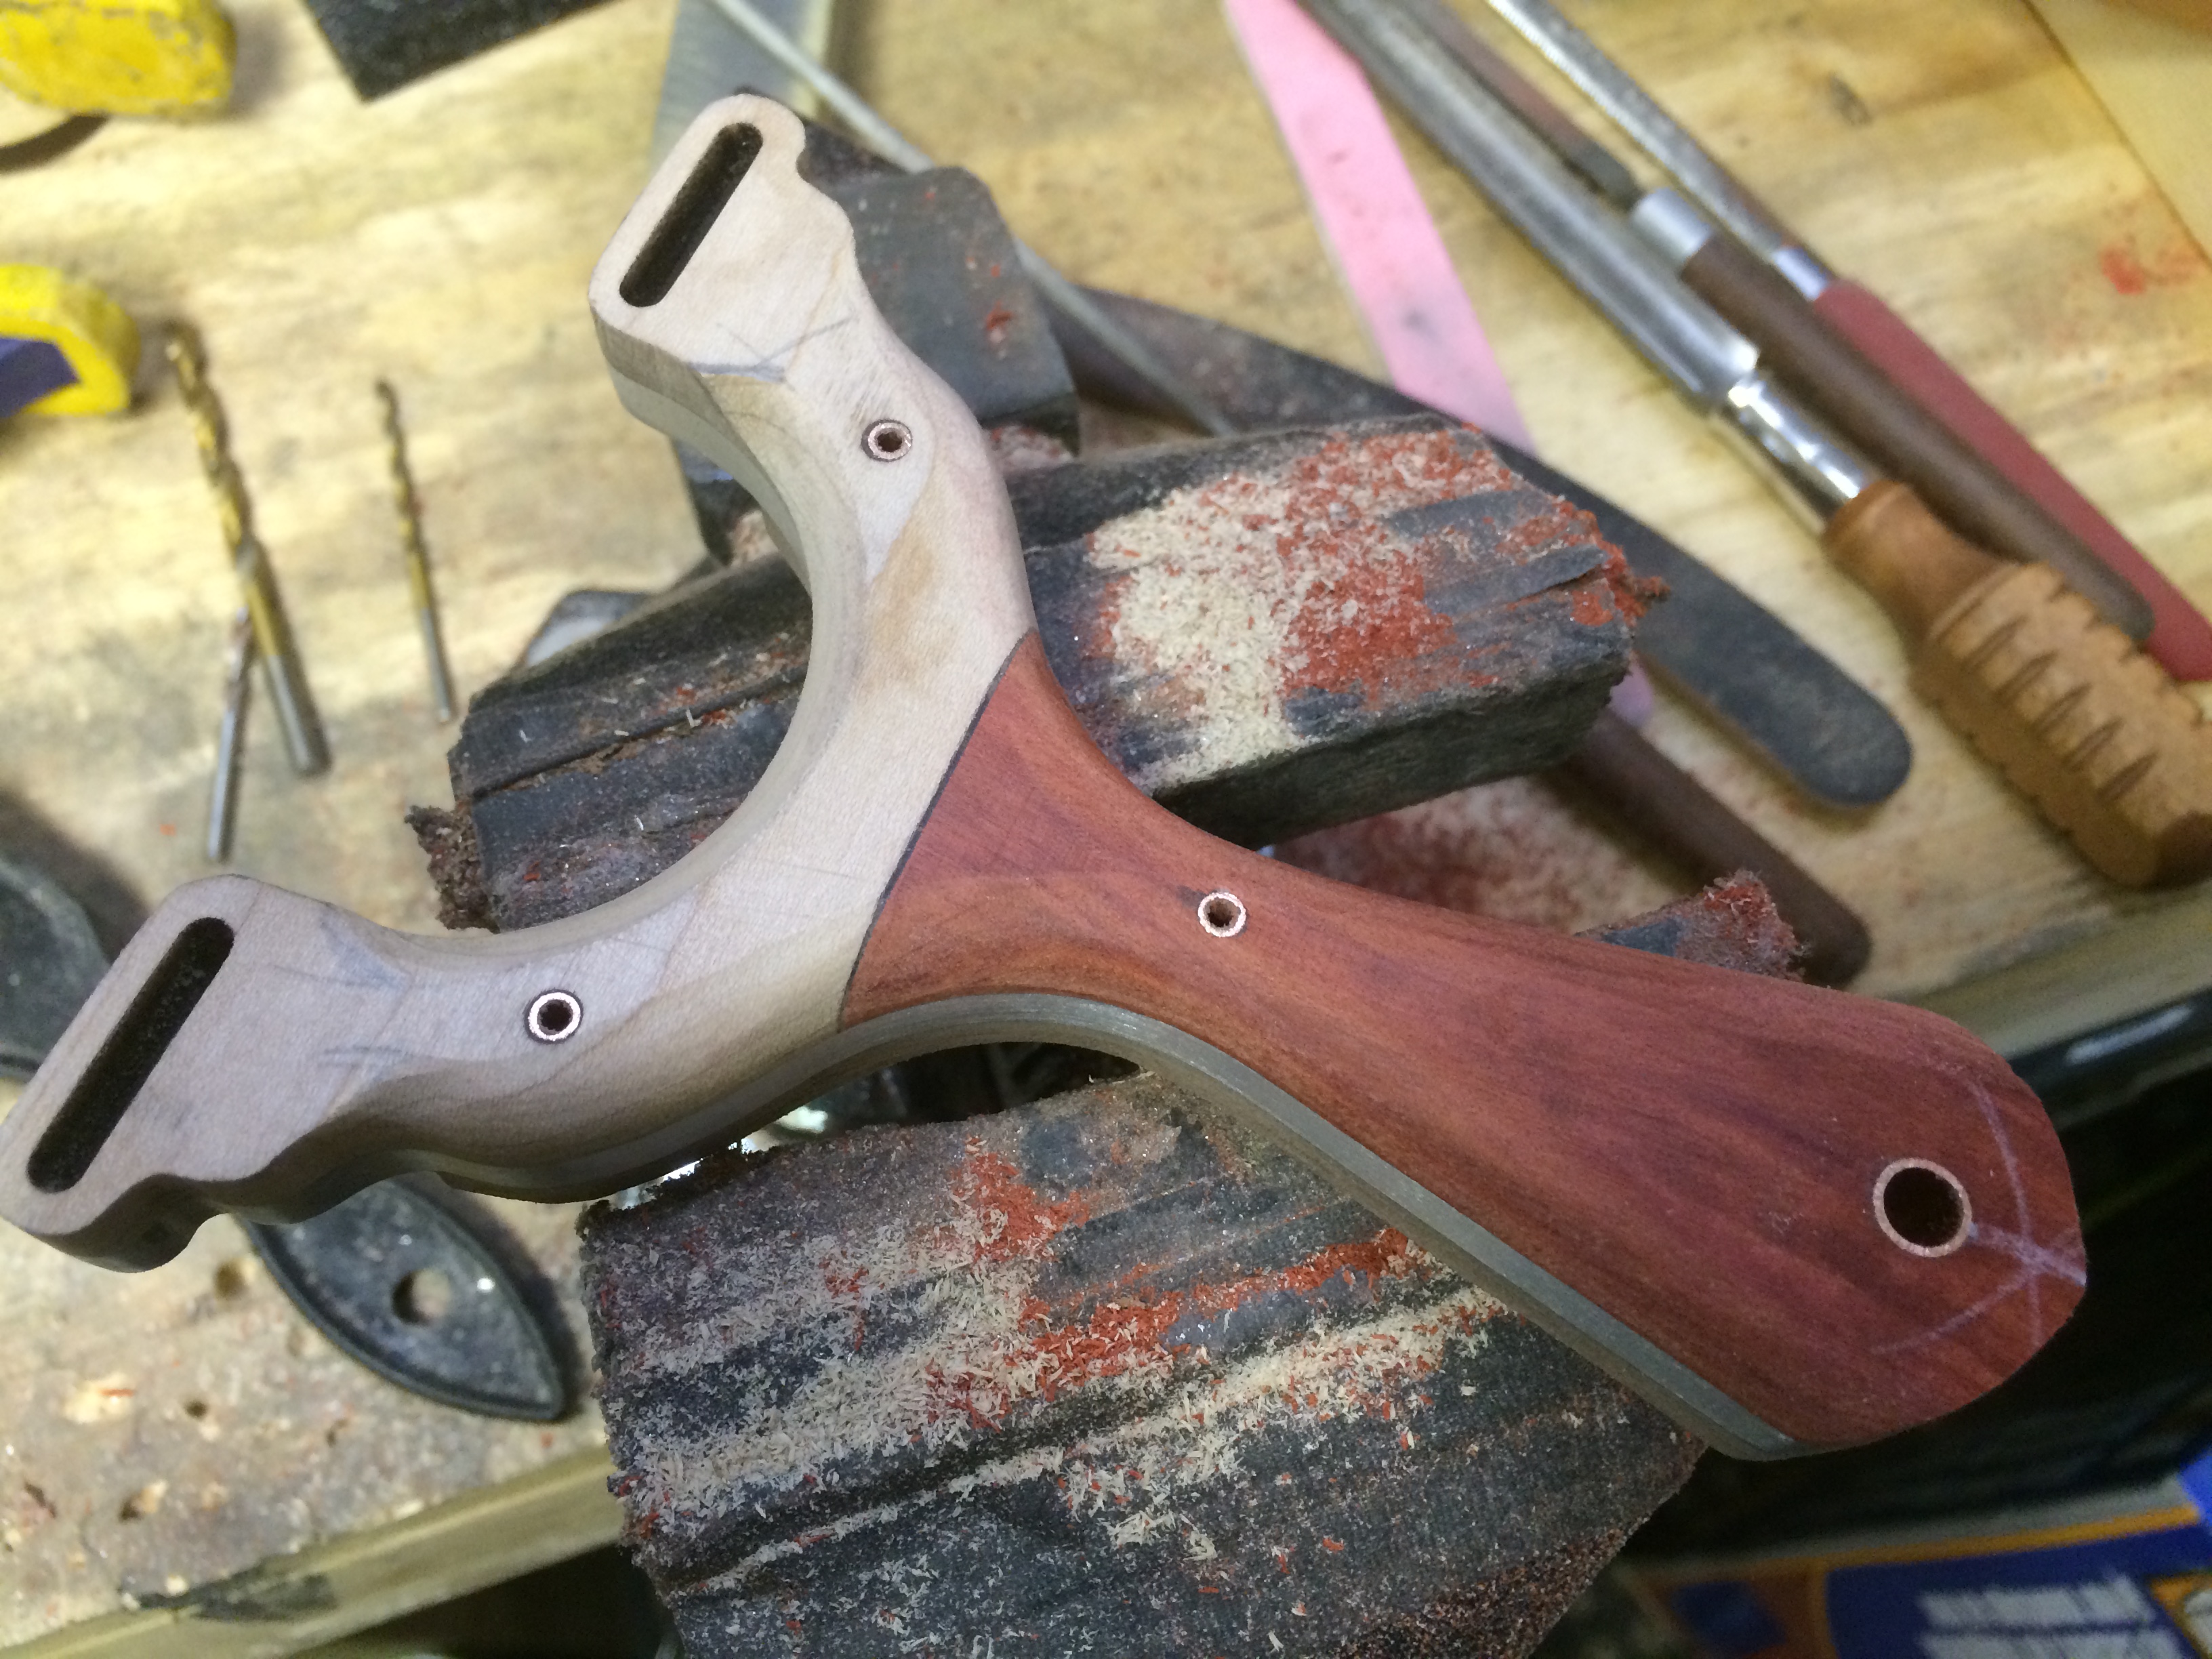
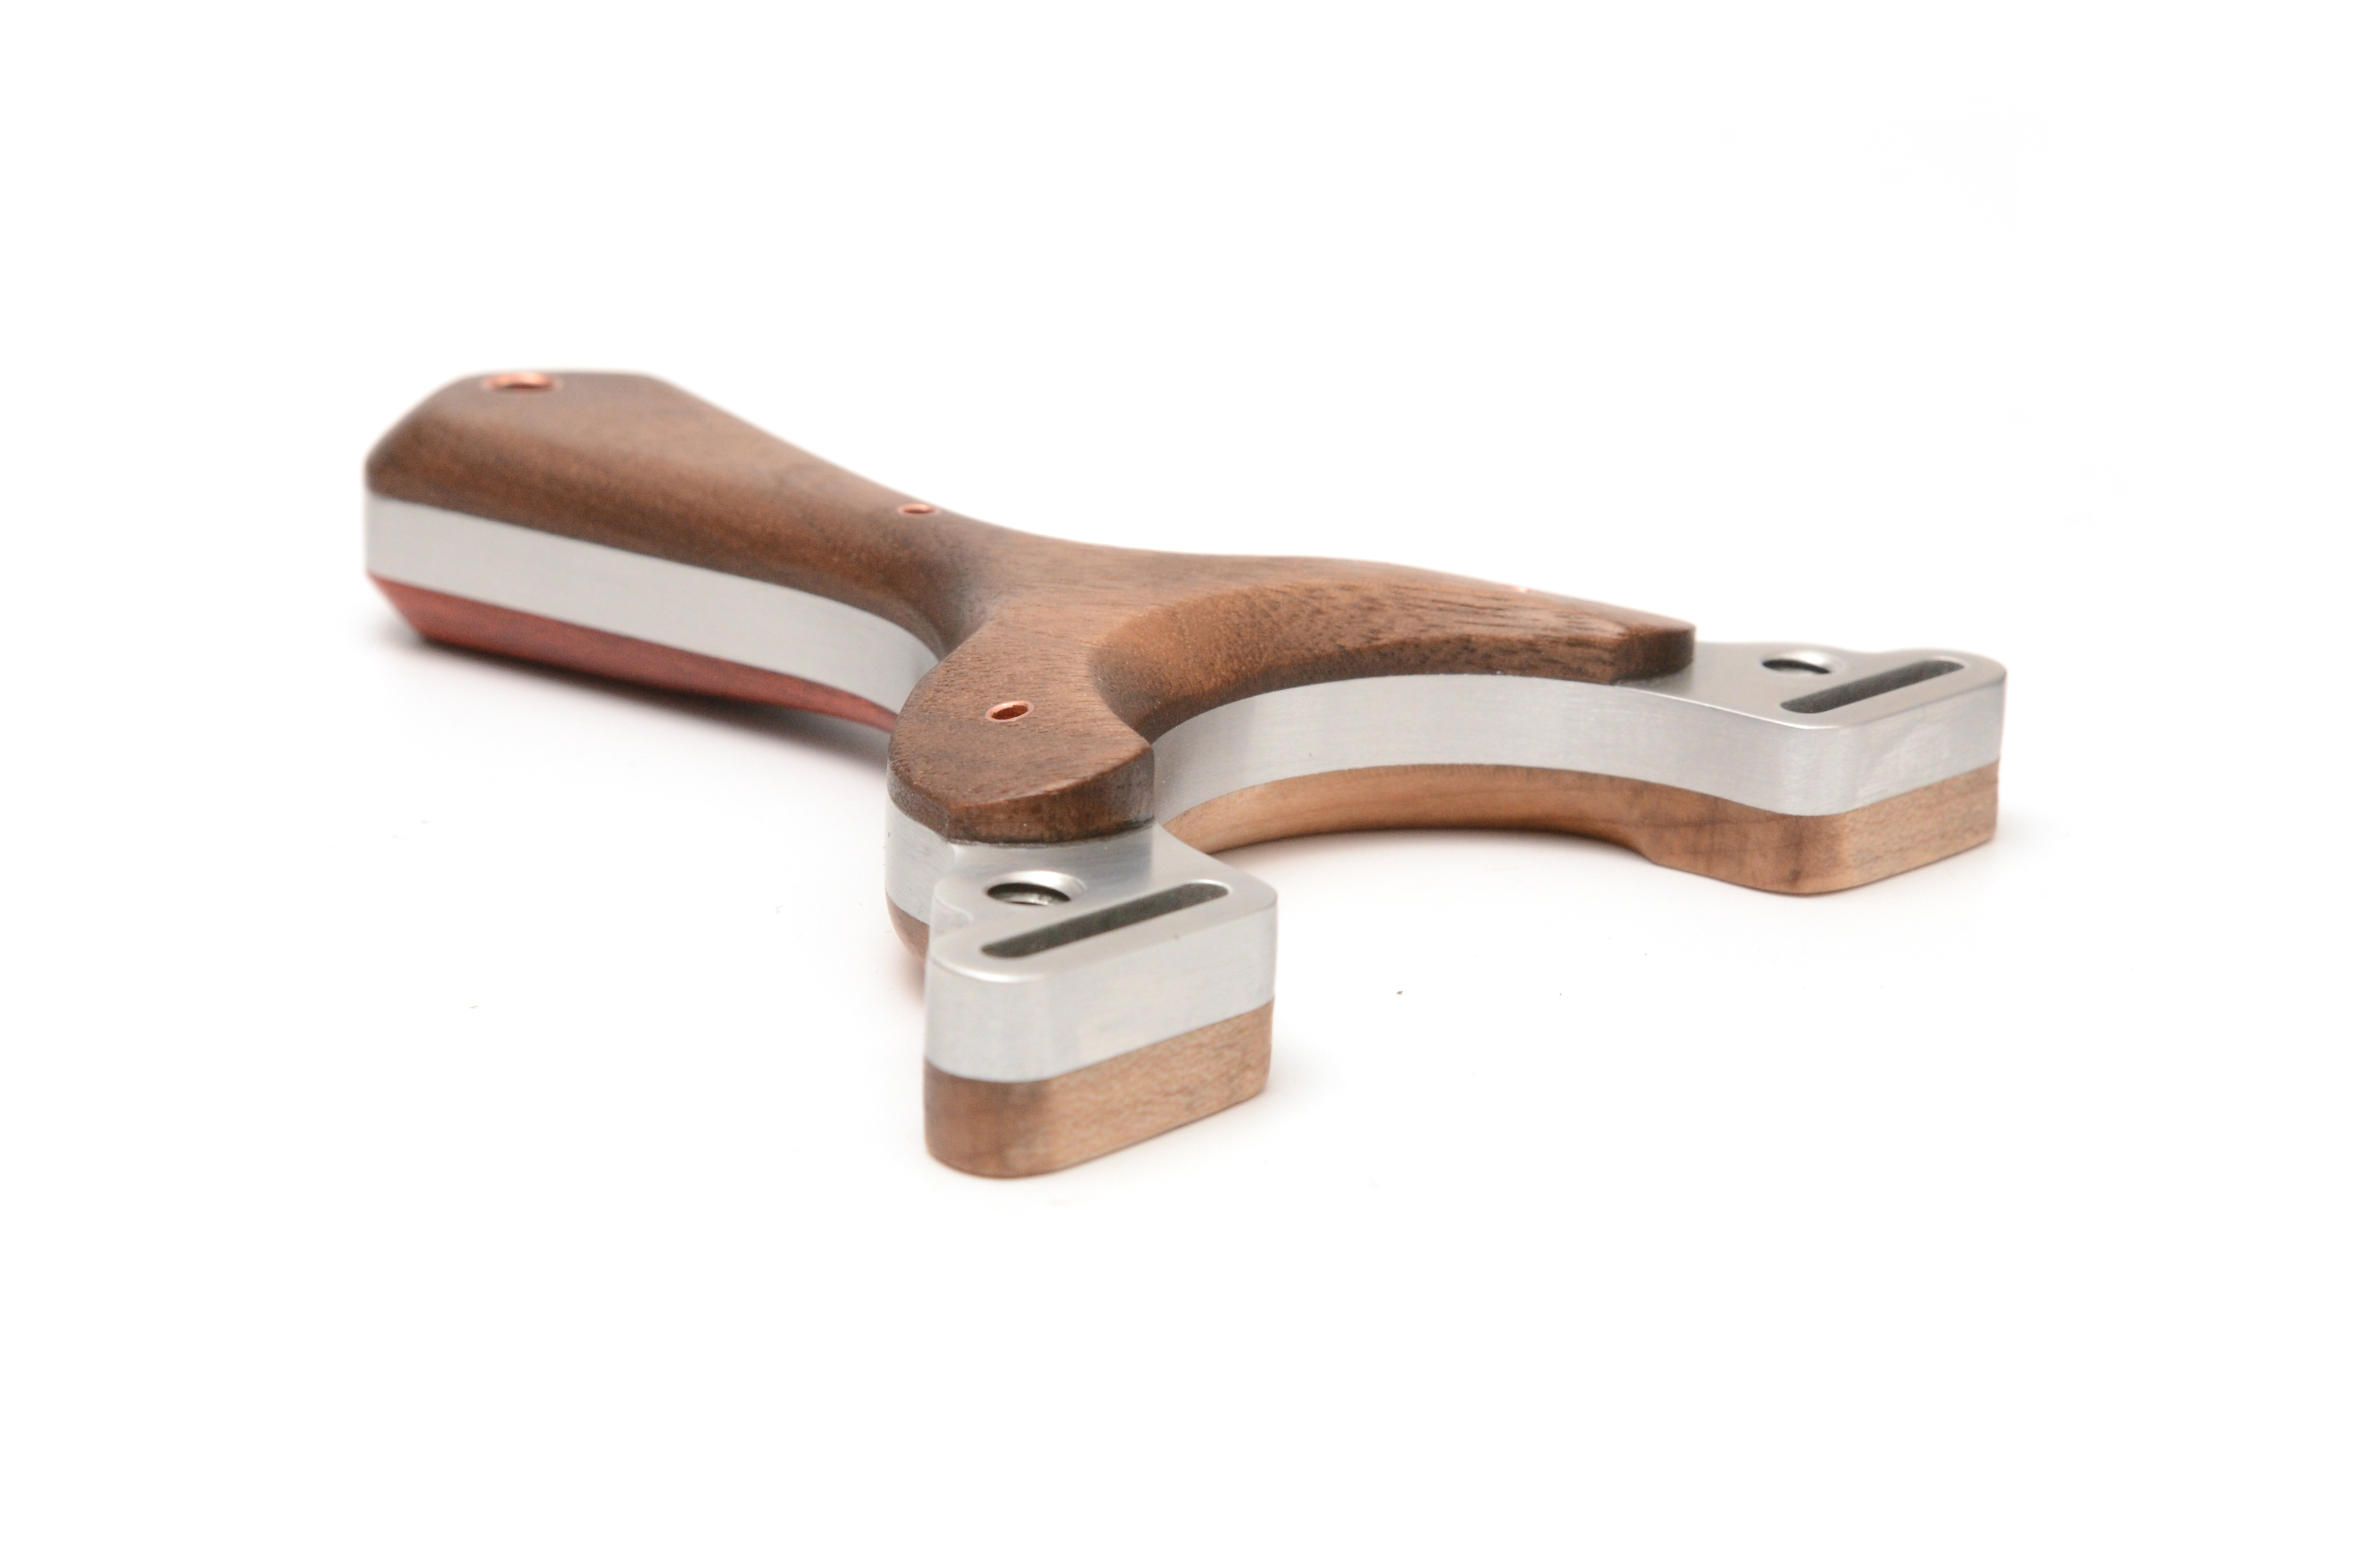
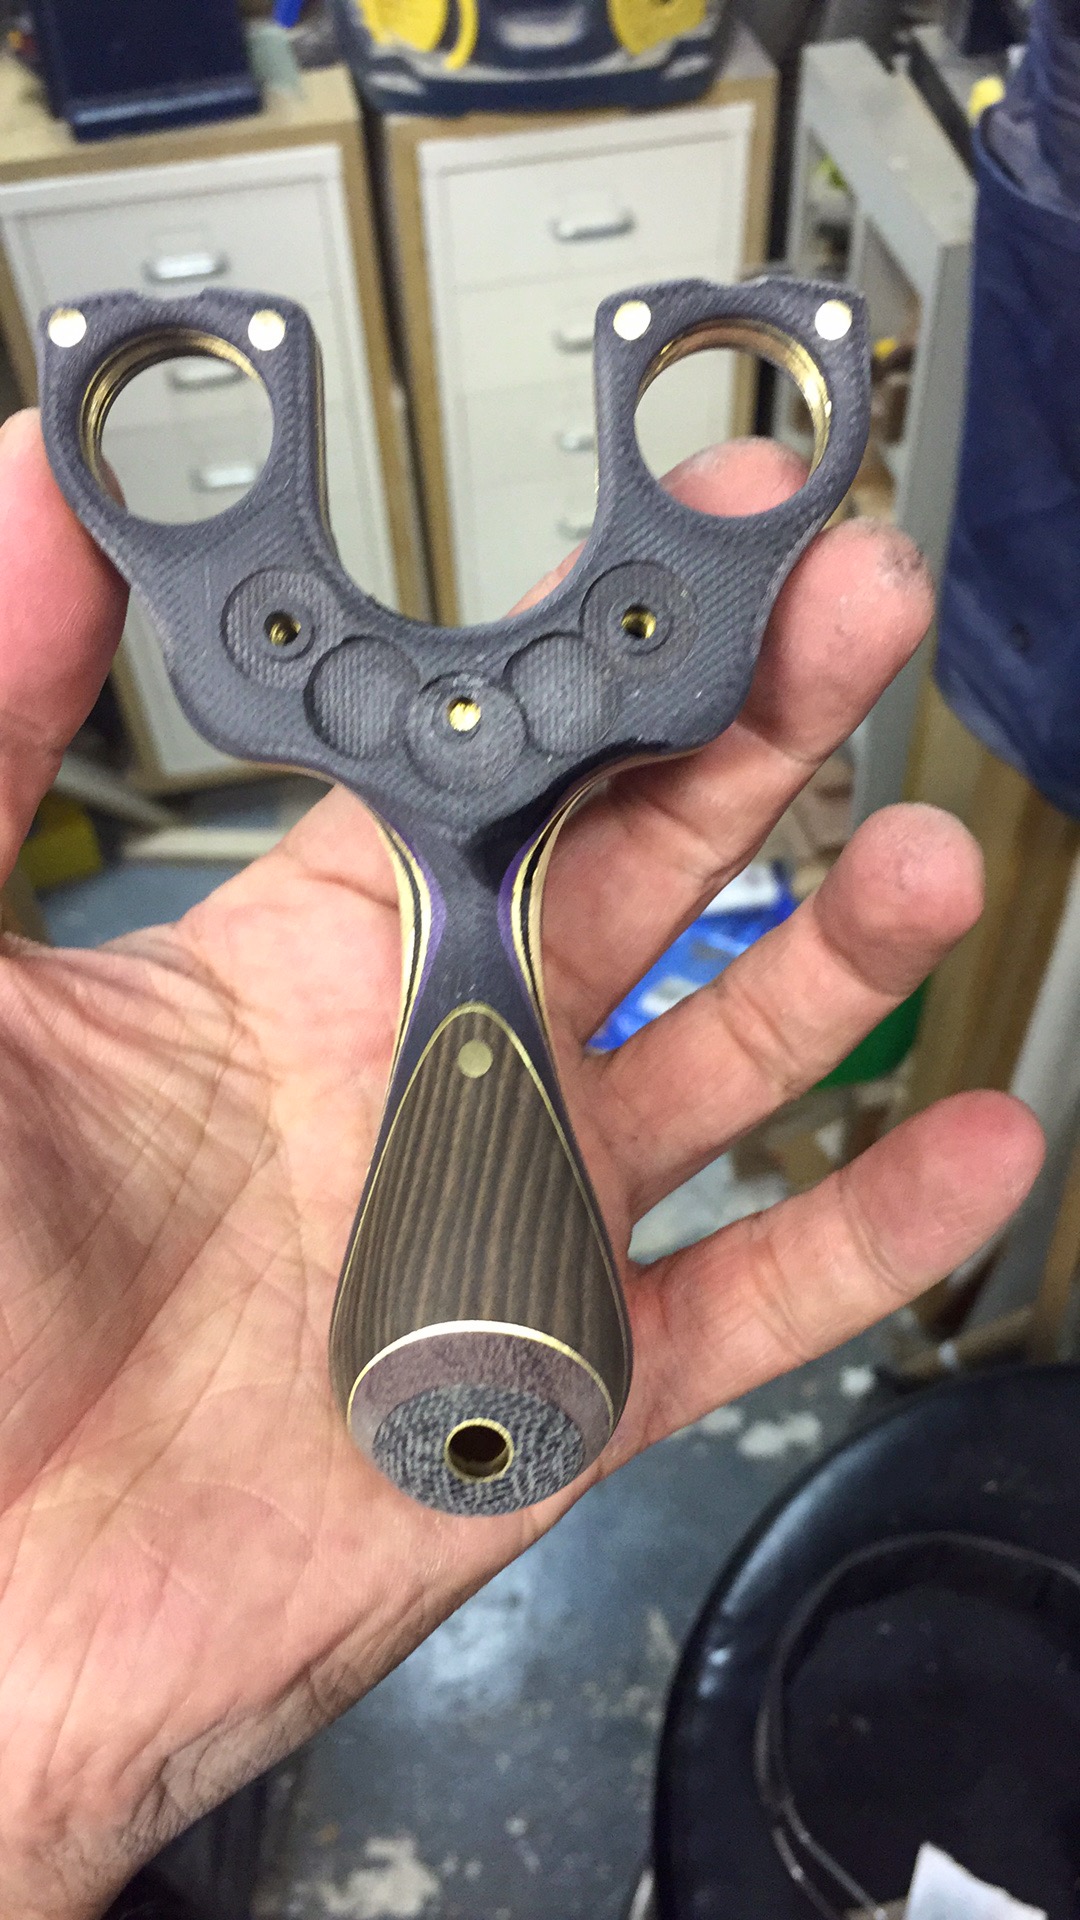
Fast-foward view on the front scale. The process is very much the same, rough shape after drawing on the lines and then lots of file work, abrasive papers and some cloth backed 400 grit. The design of the front scale has been refined over the various iterations of the Oren, but essentially it’s a removal of all the material that would hit a hot spot in the palm. By placing the liner under the thinner scale material, a nice contour of colour is revealed when filing it back.

img_0562

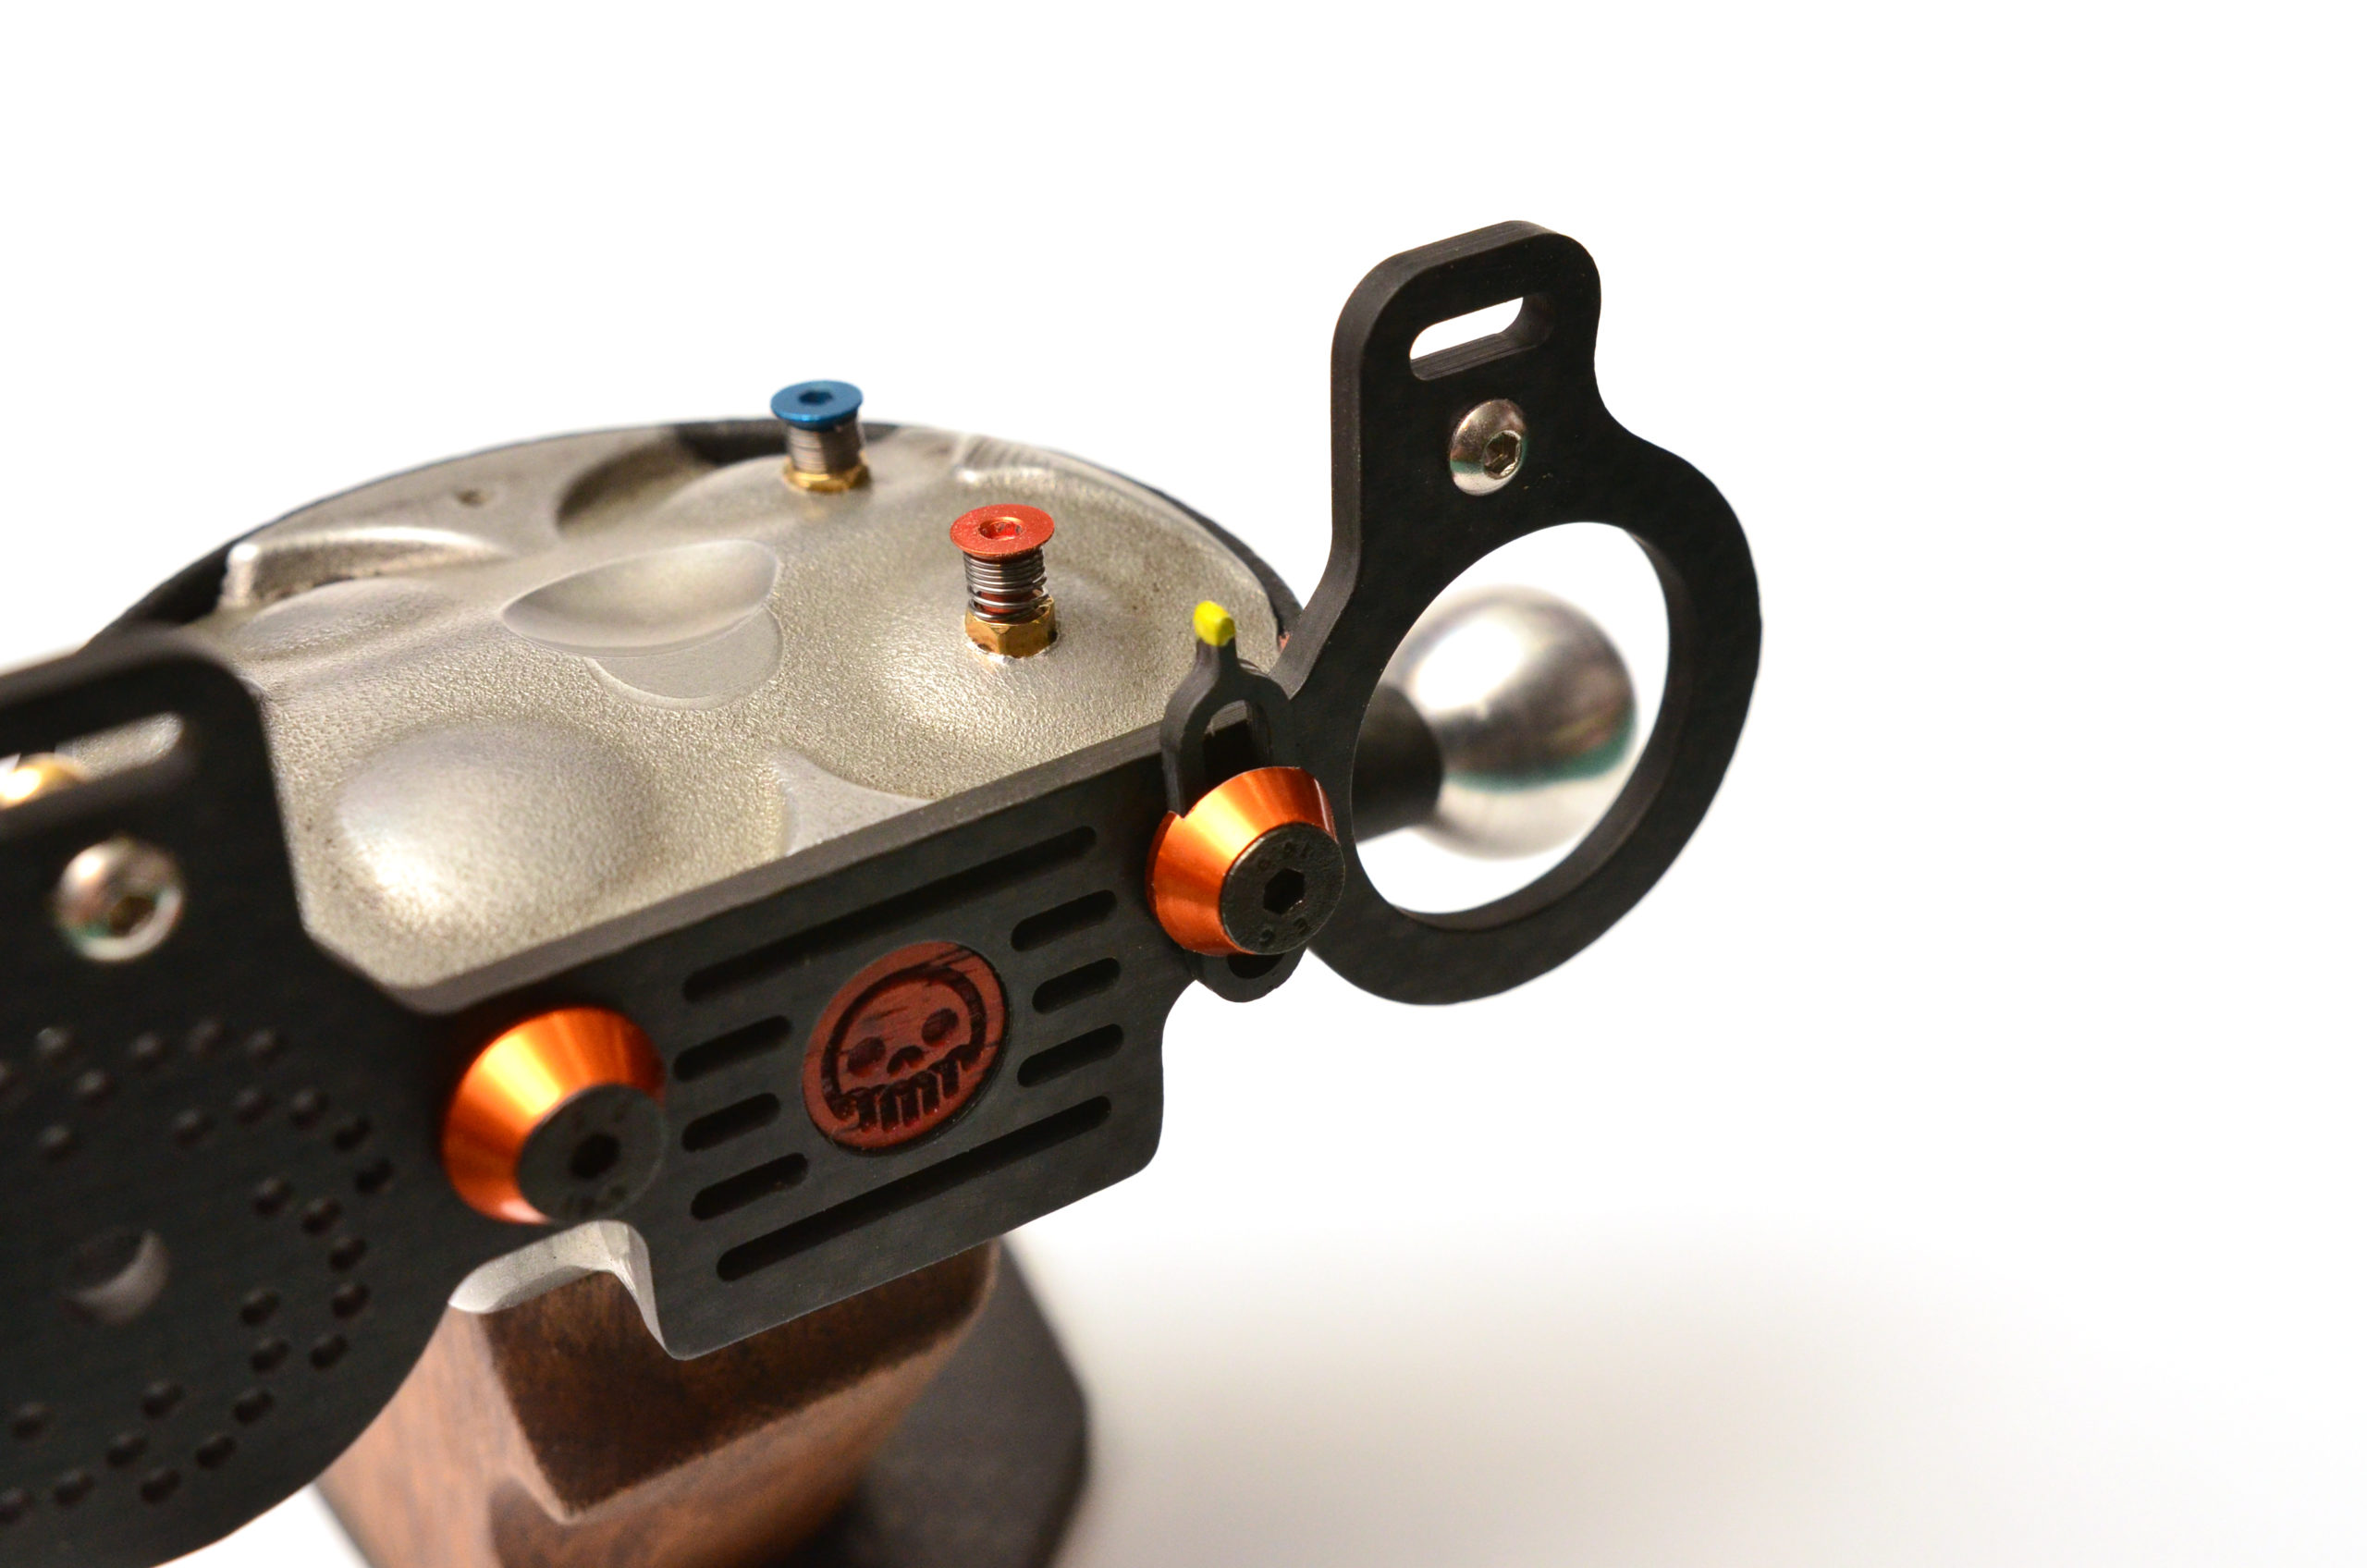
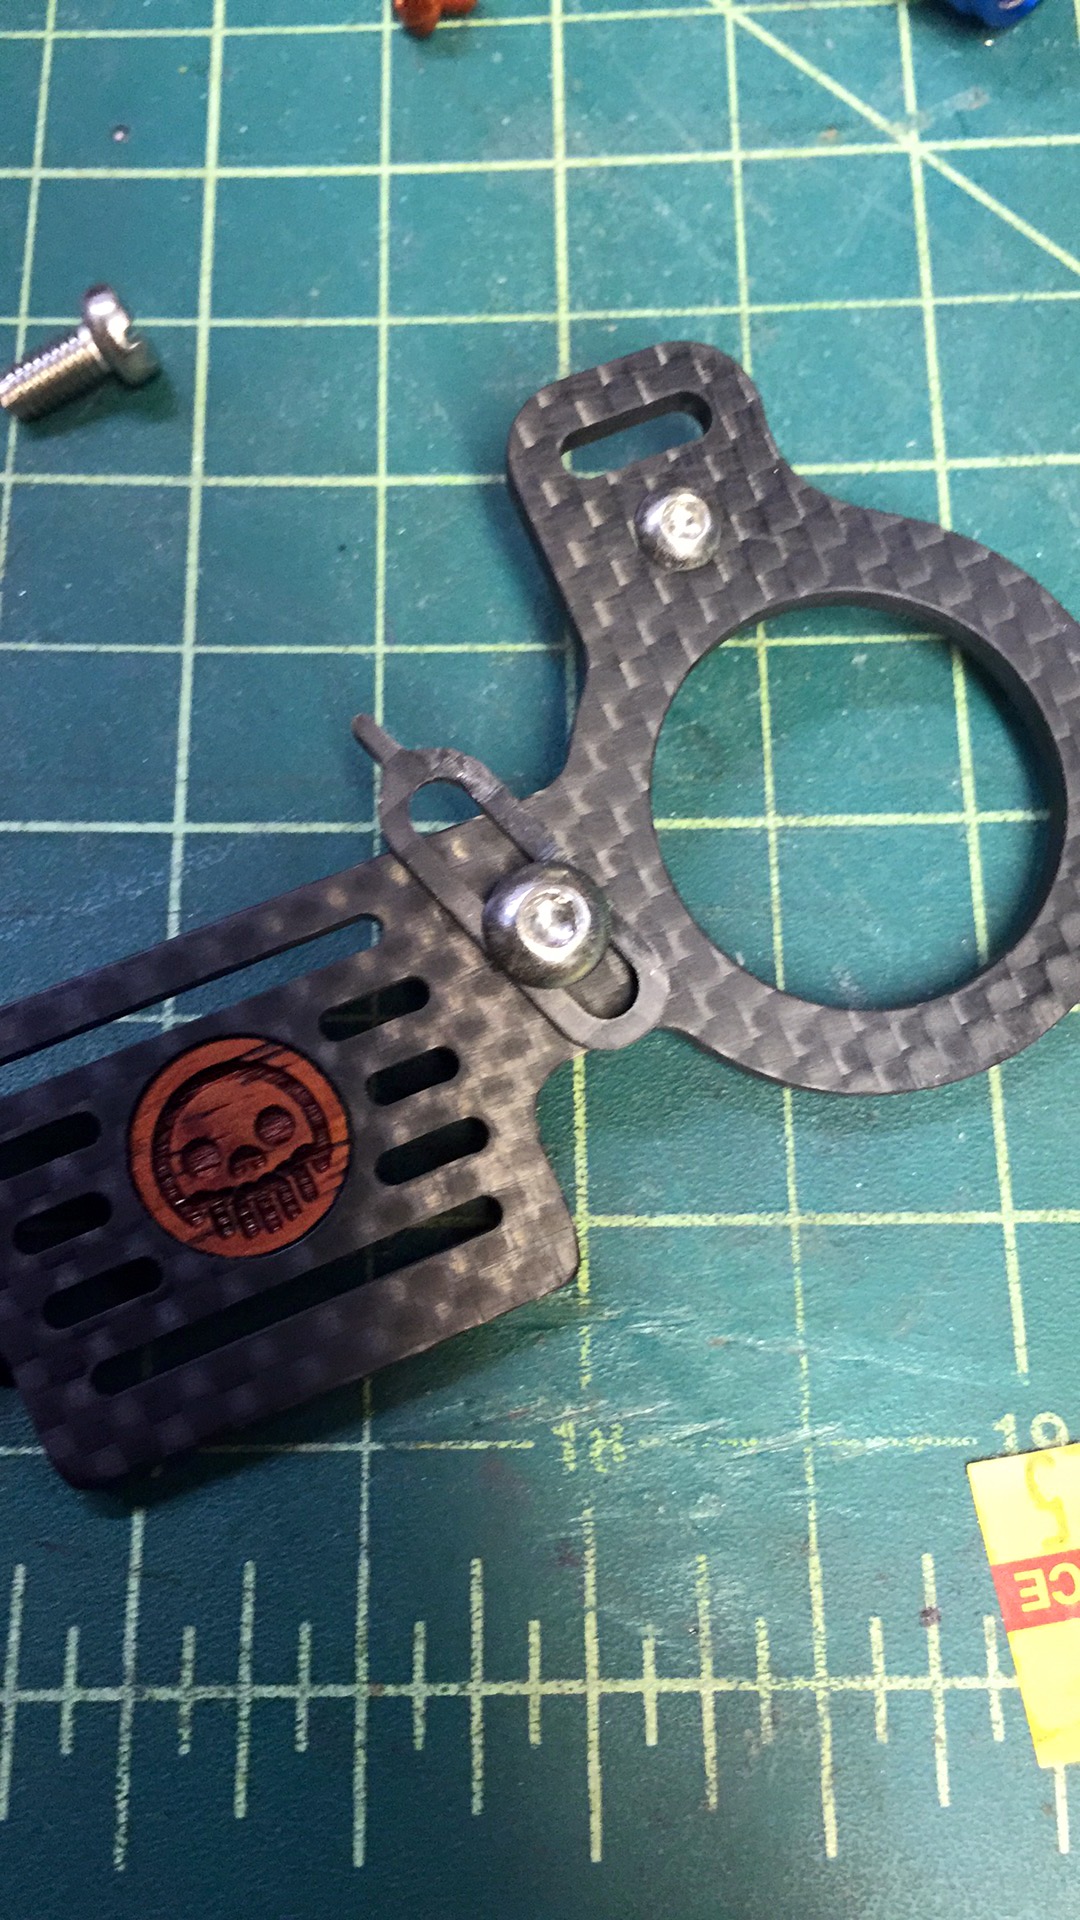
Test fitting the gears before the final sanding and polish.

img_0563

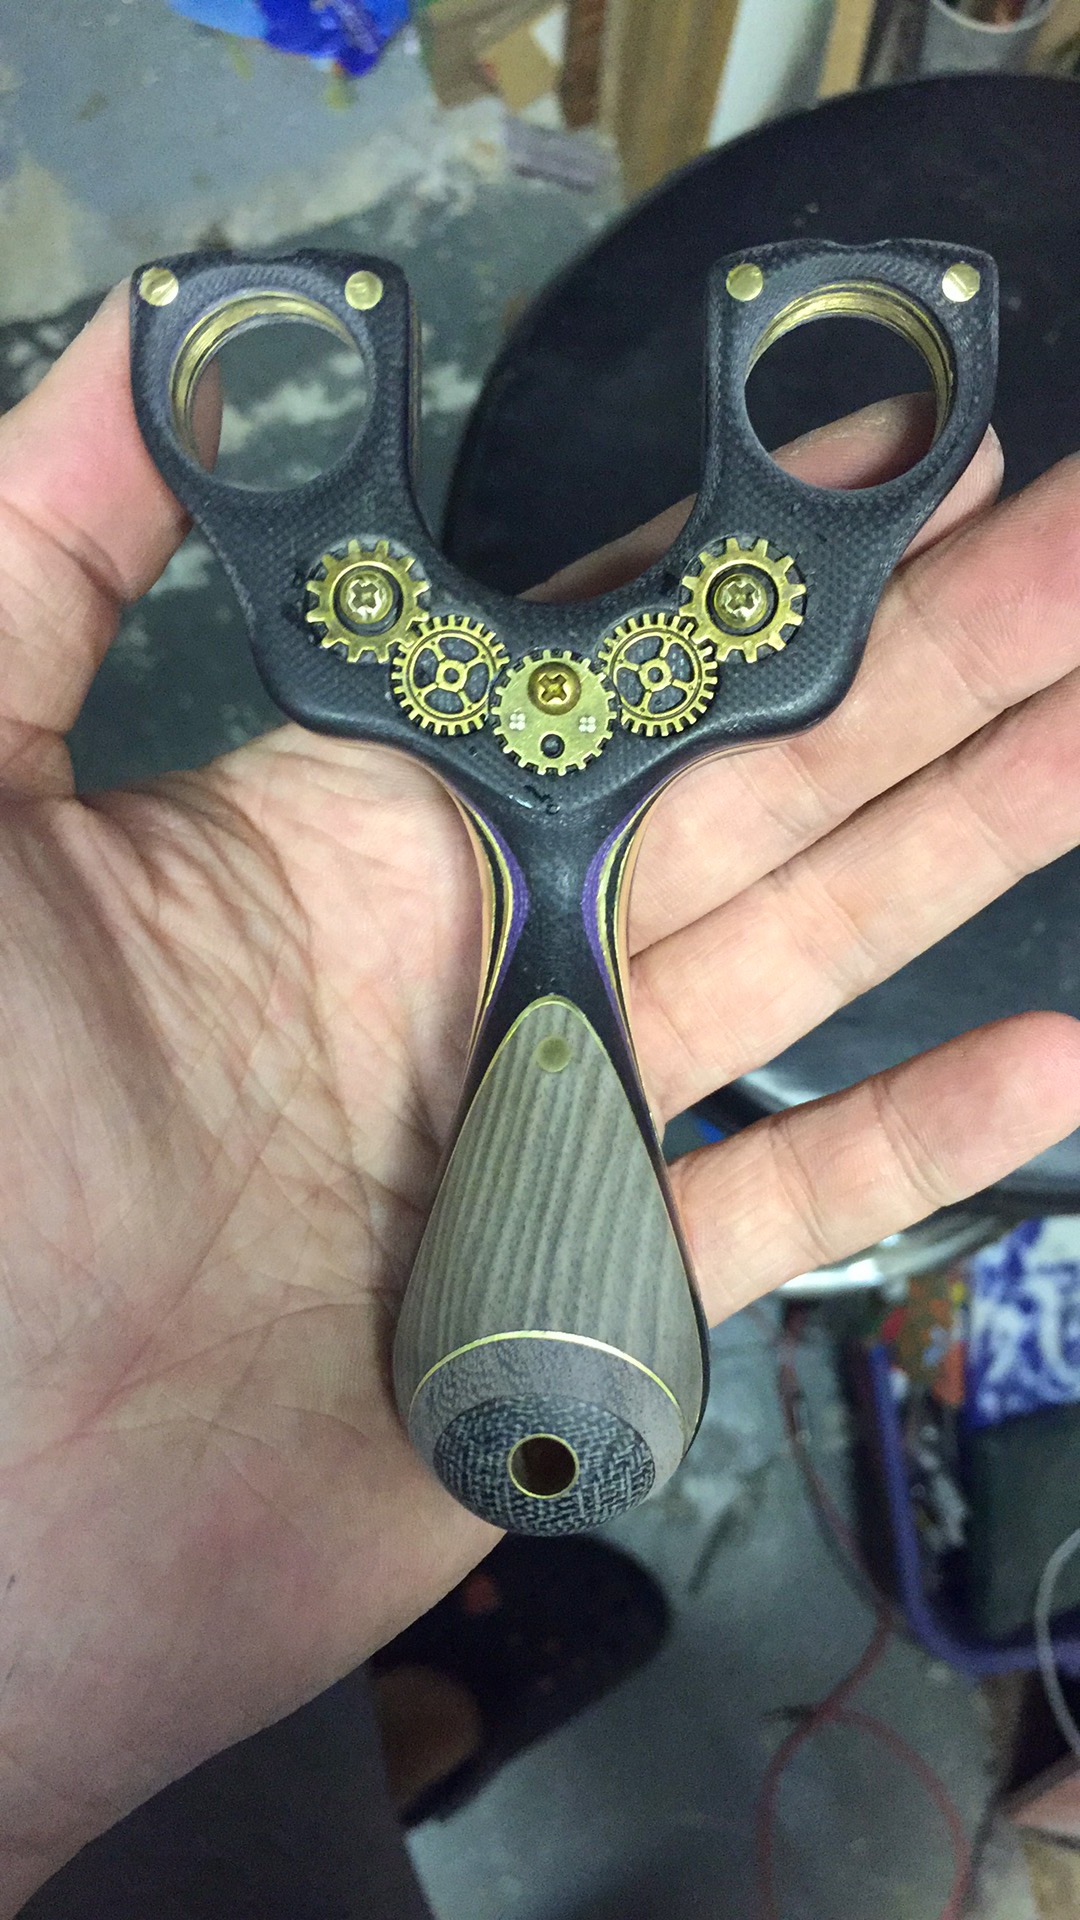
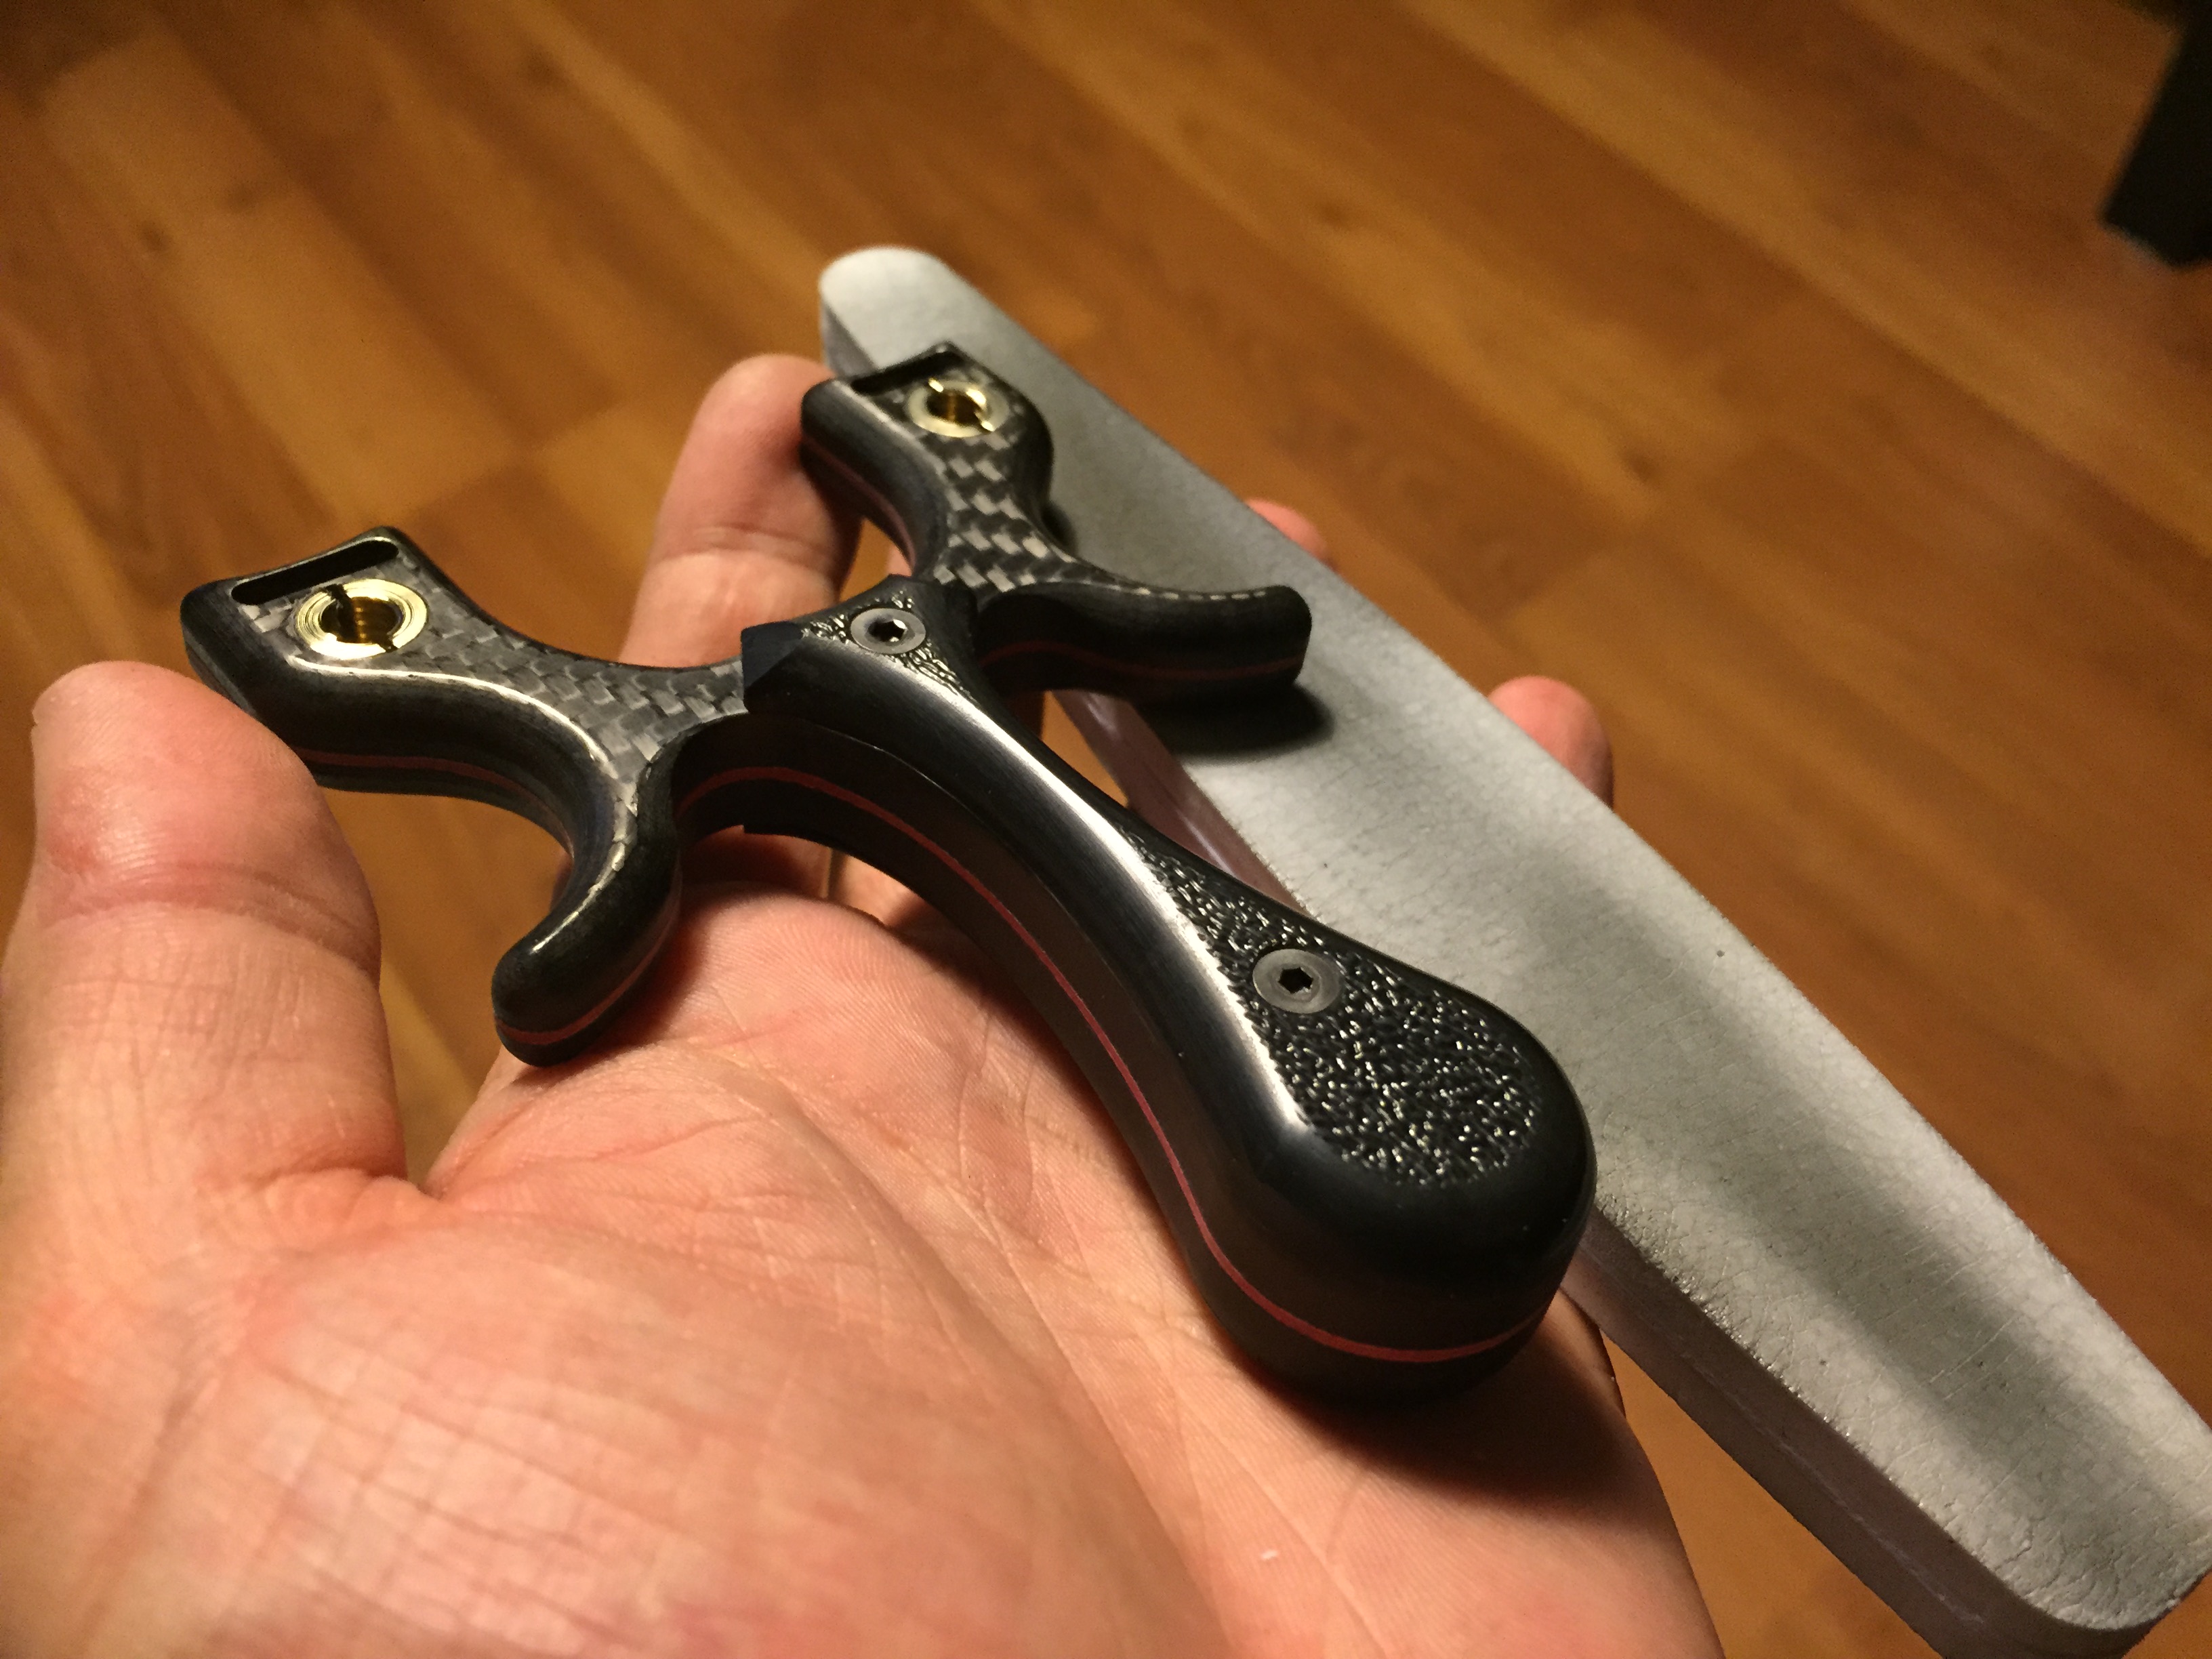
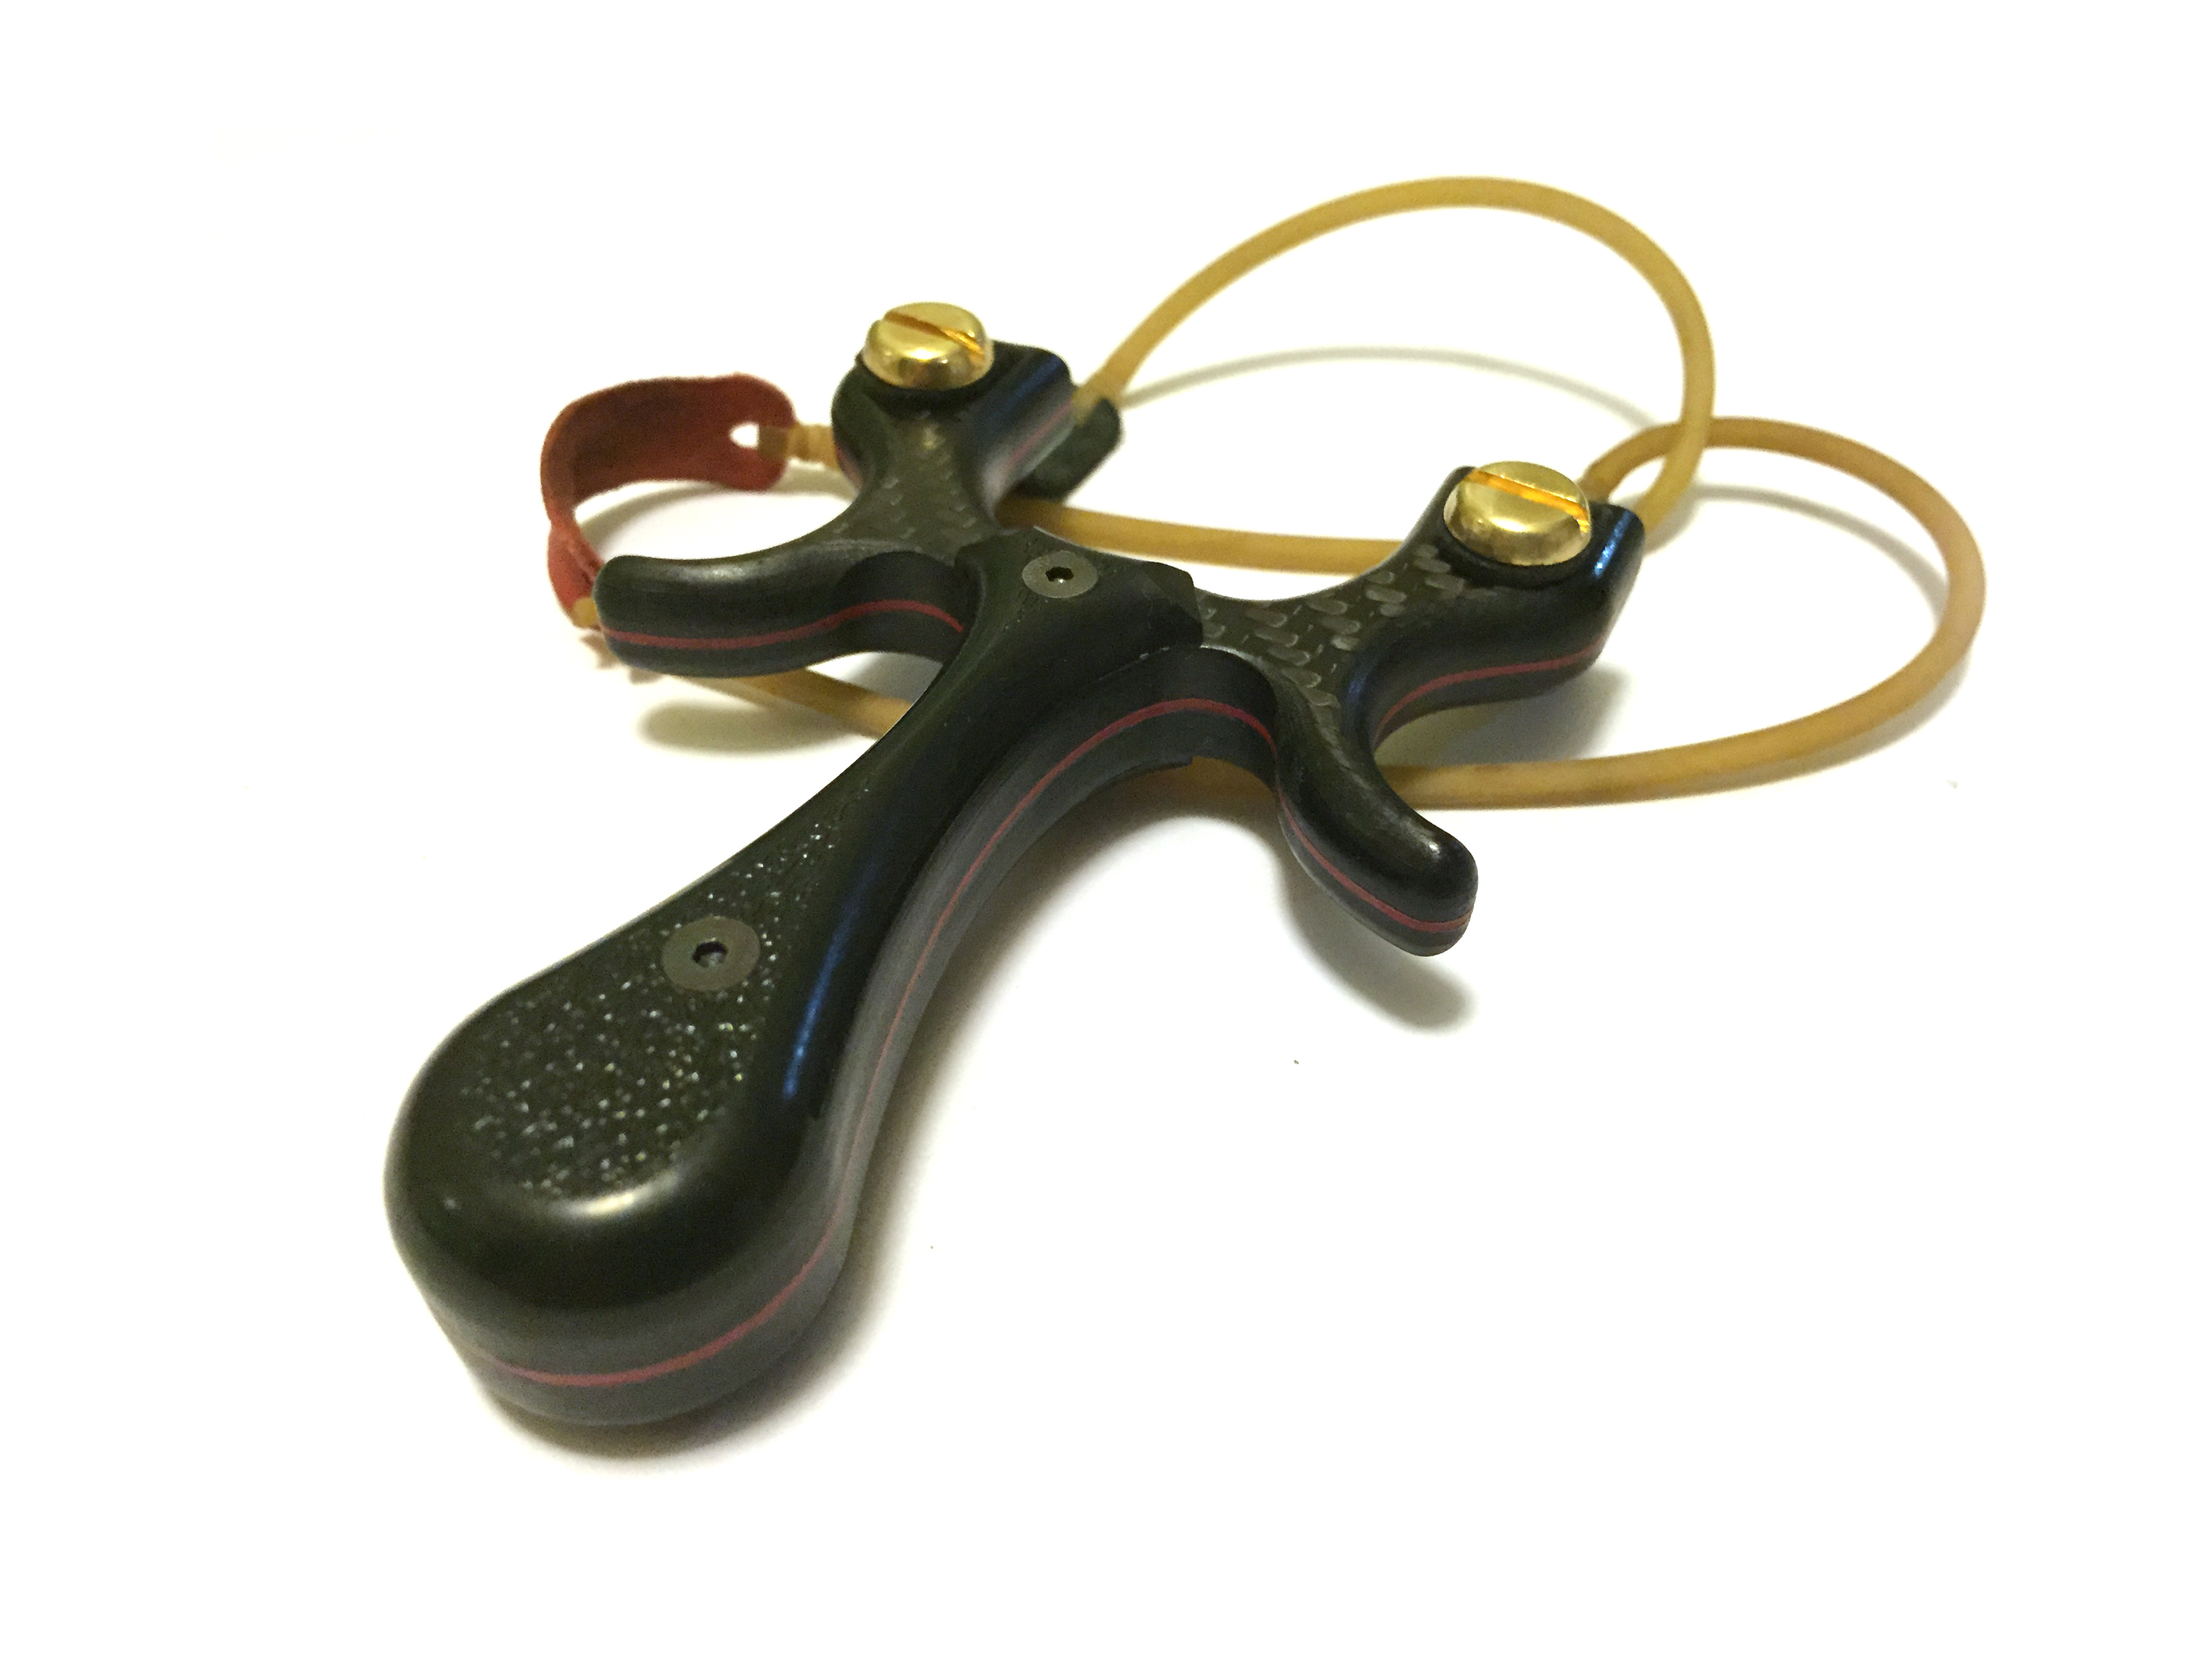
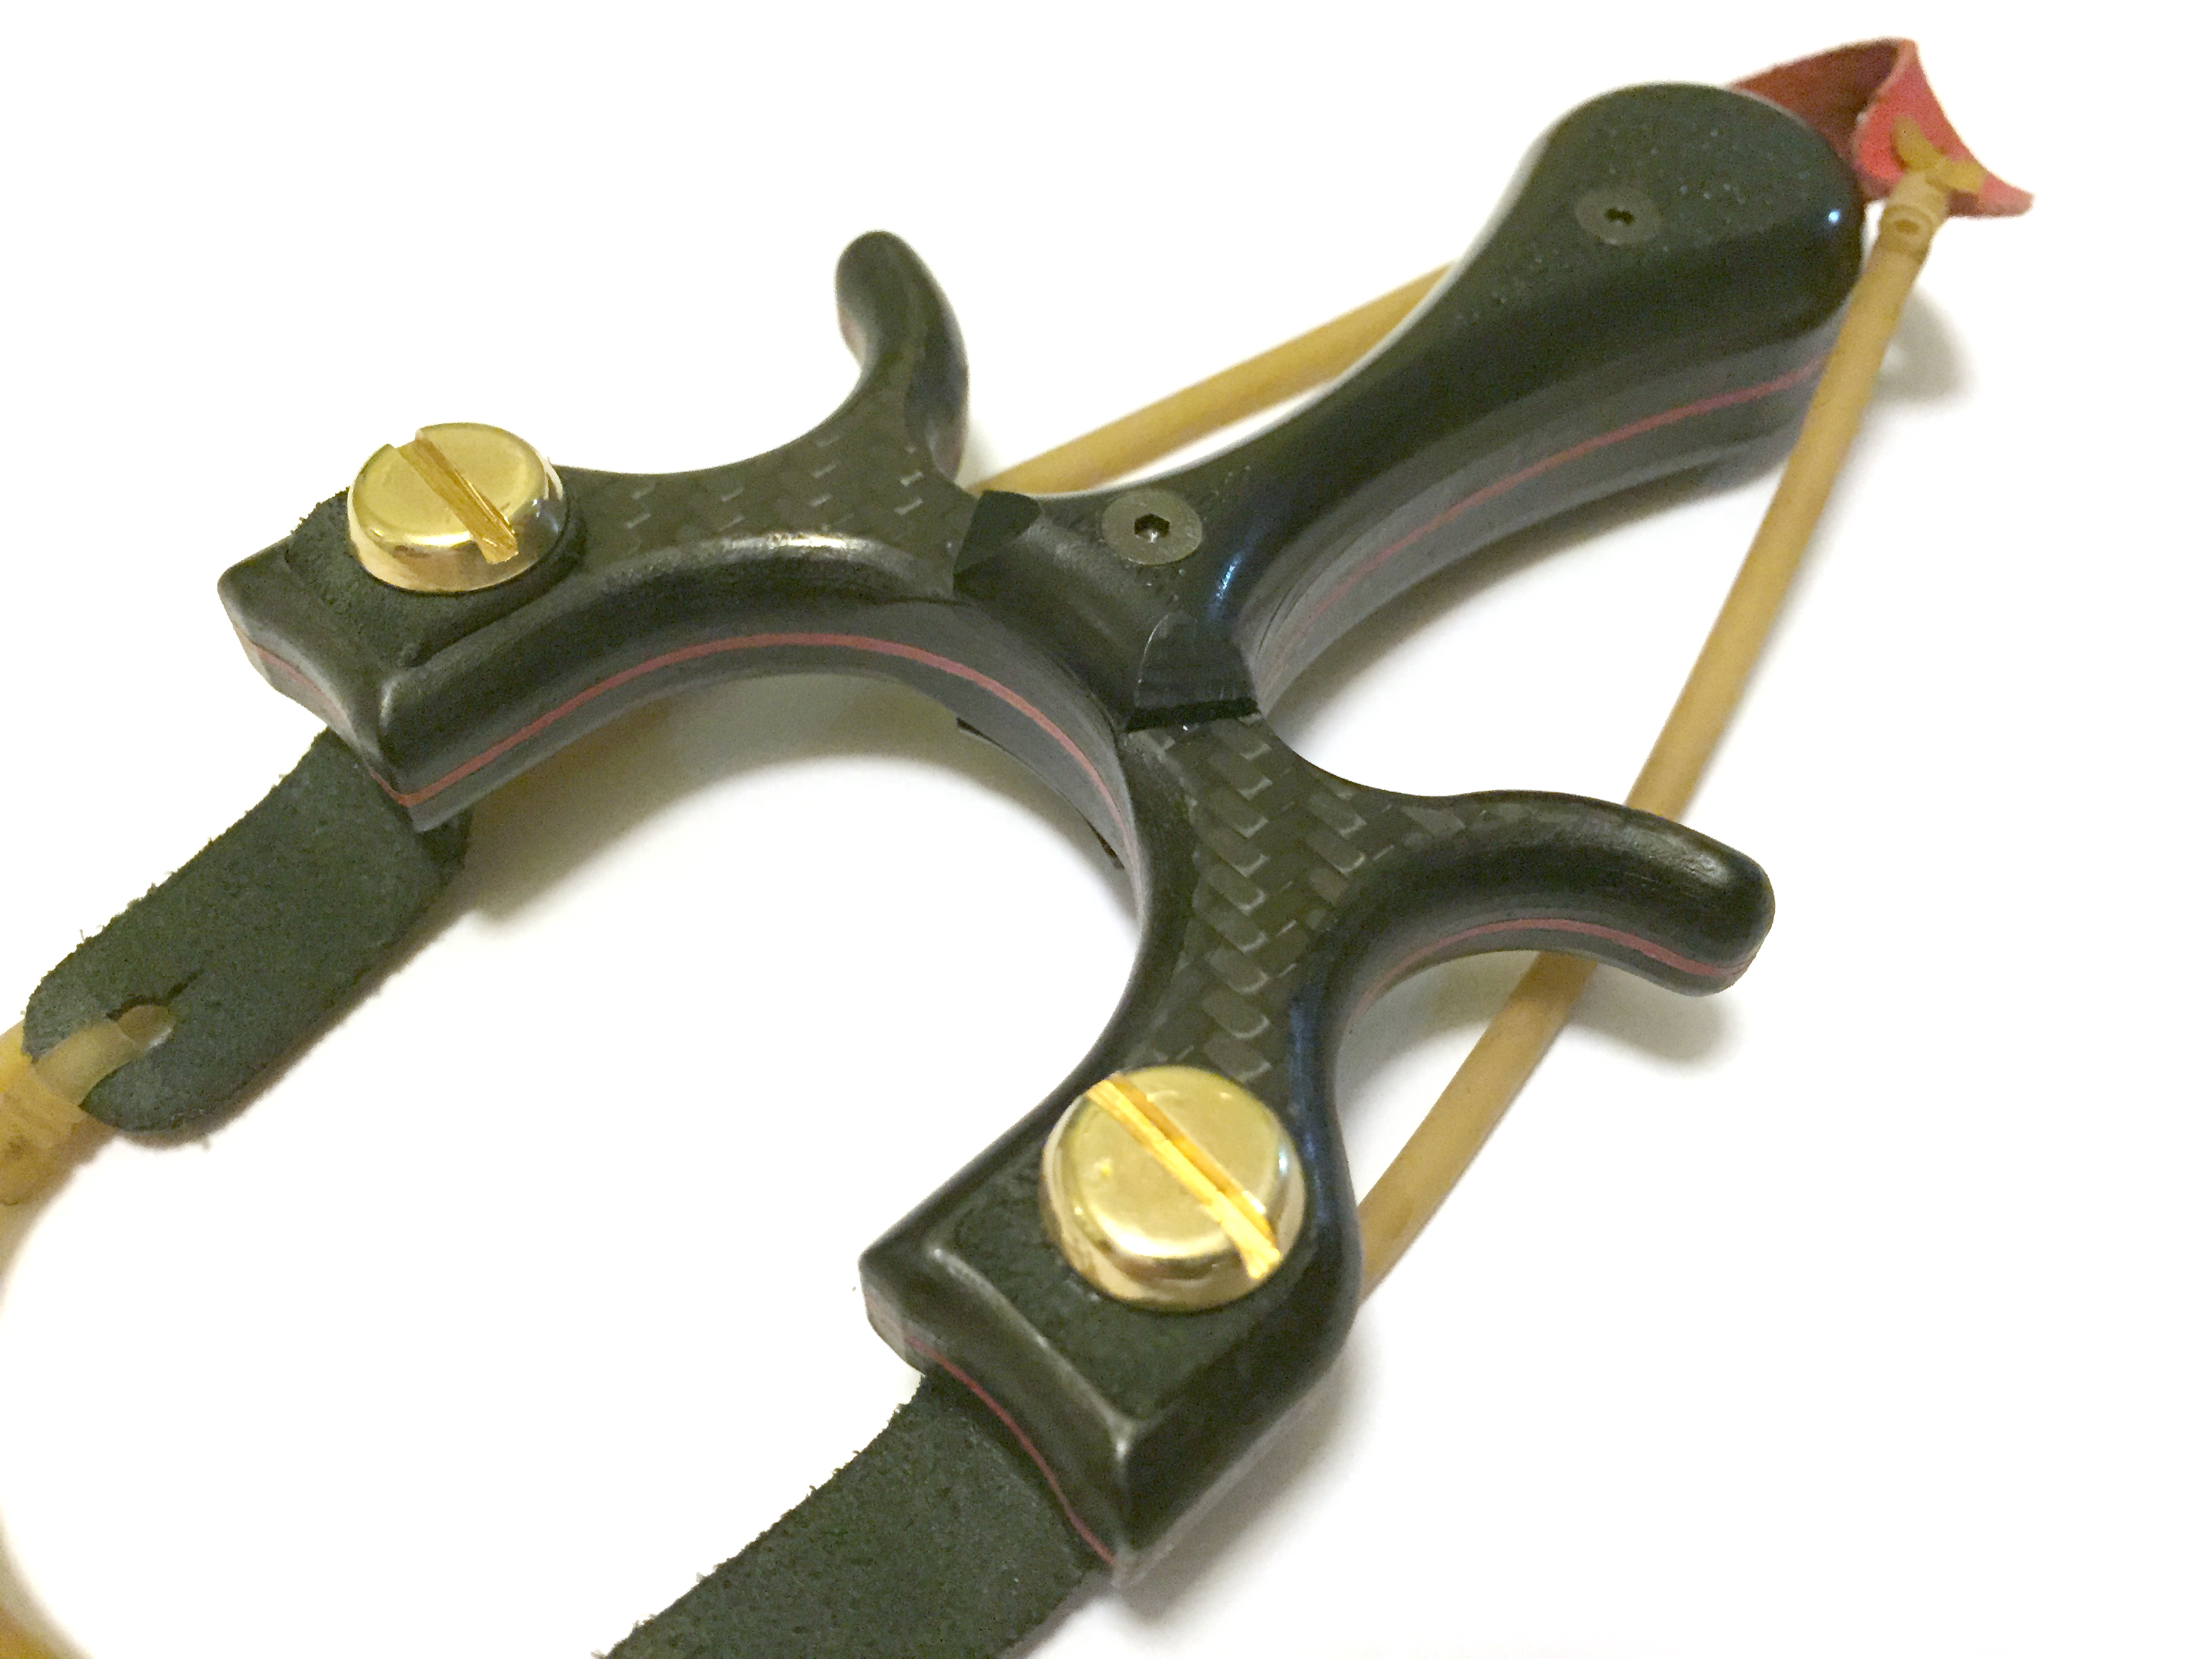
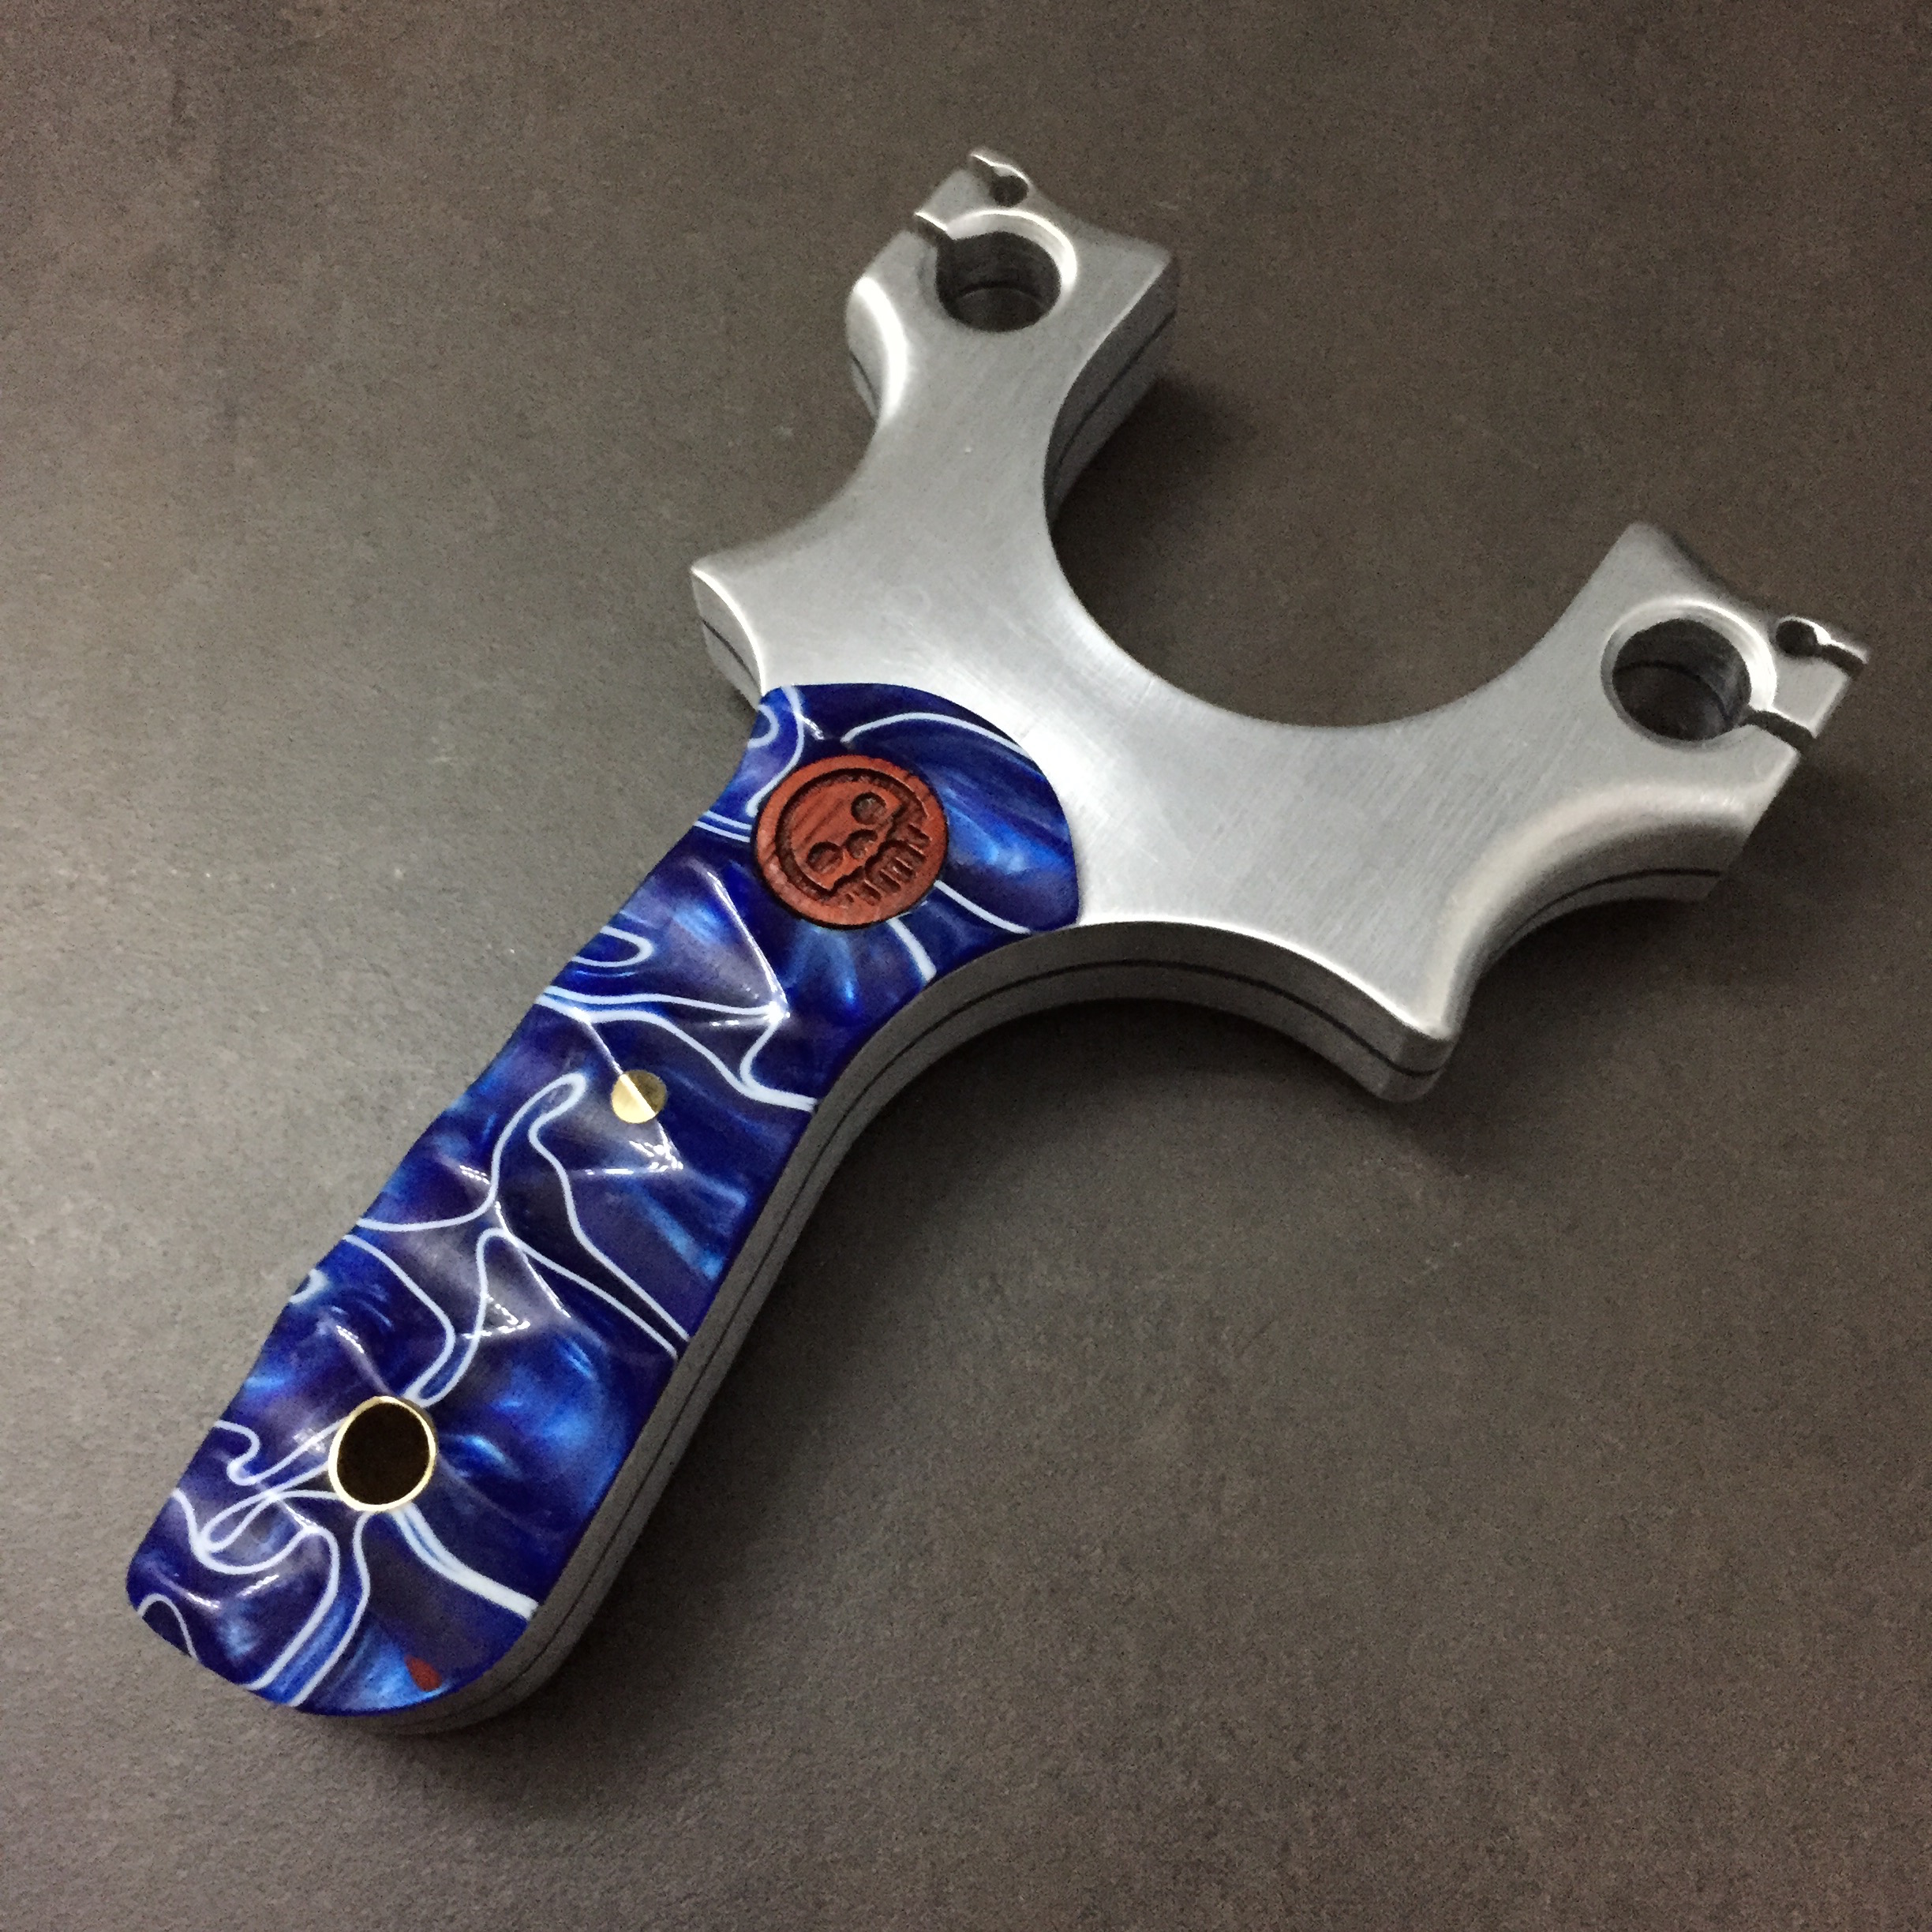
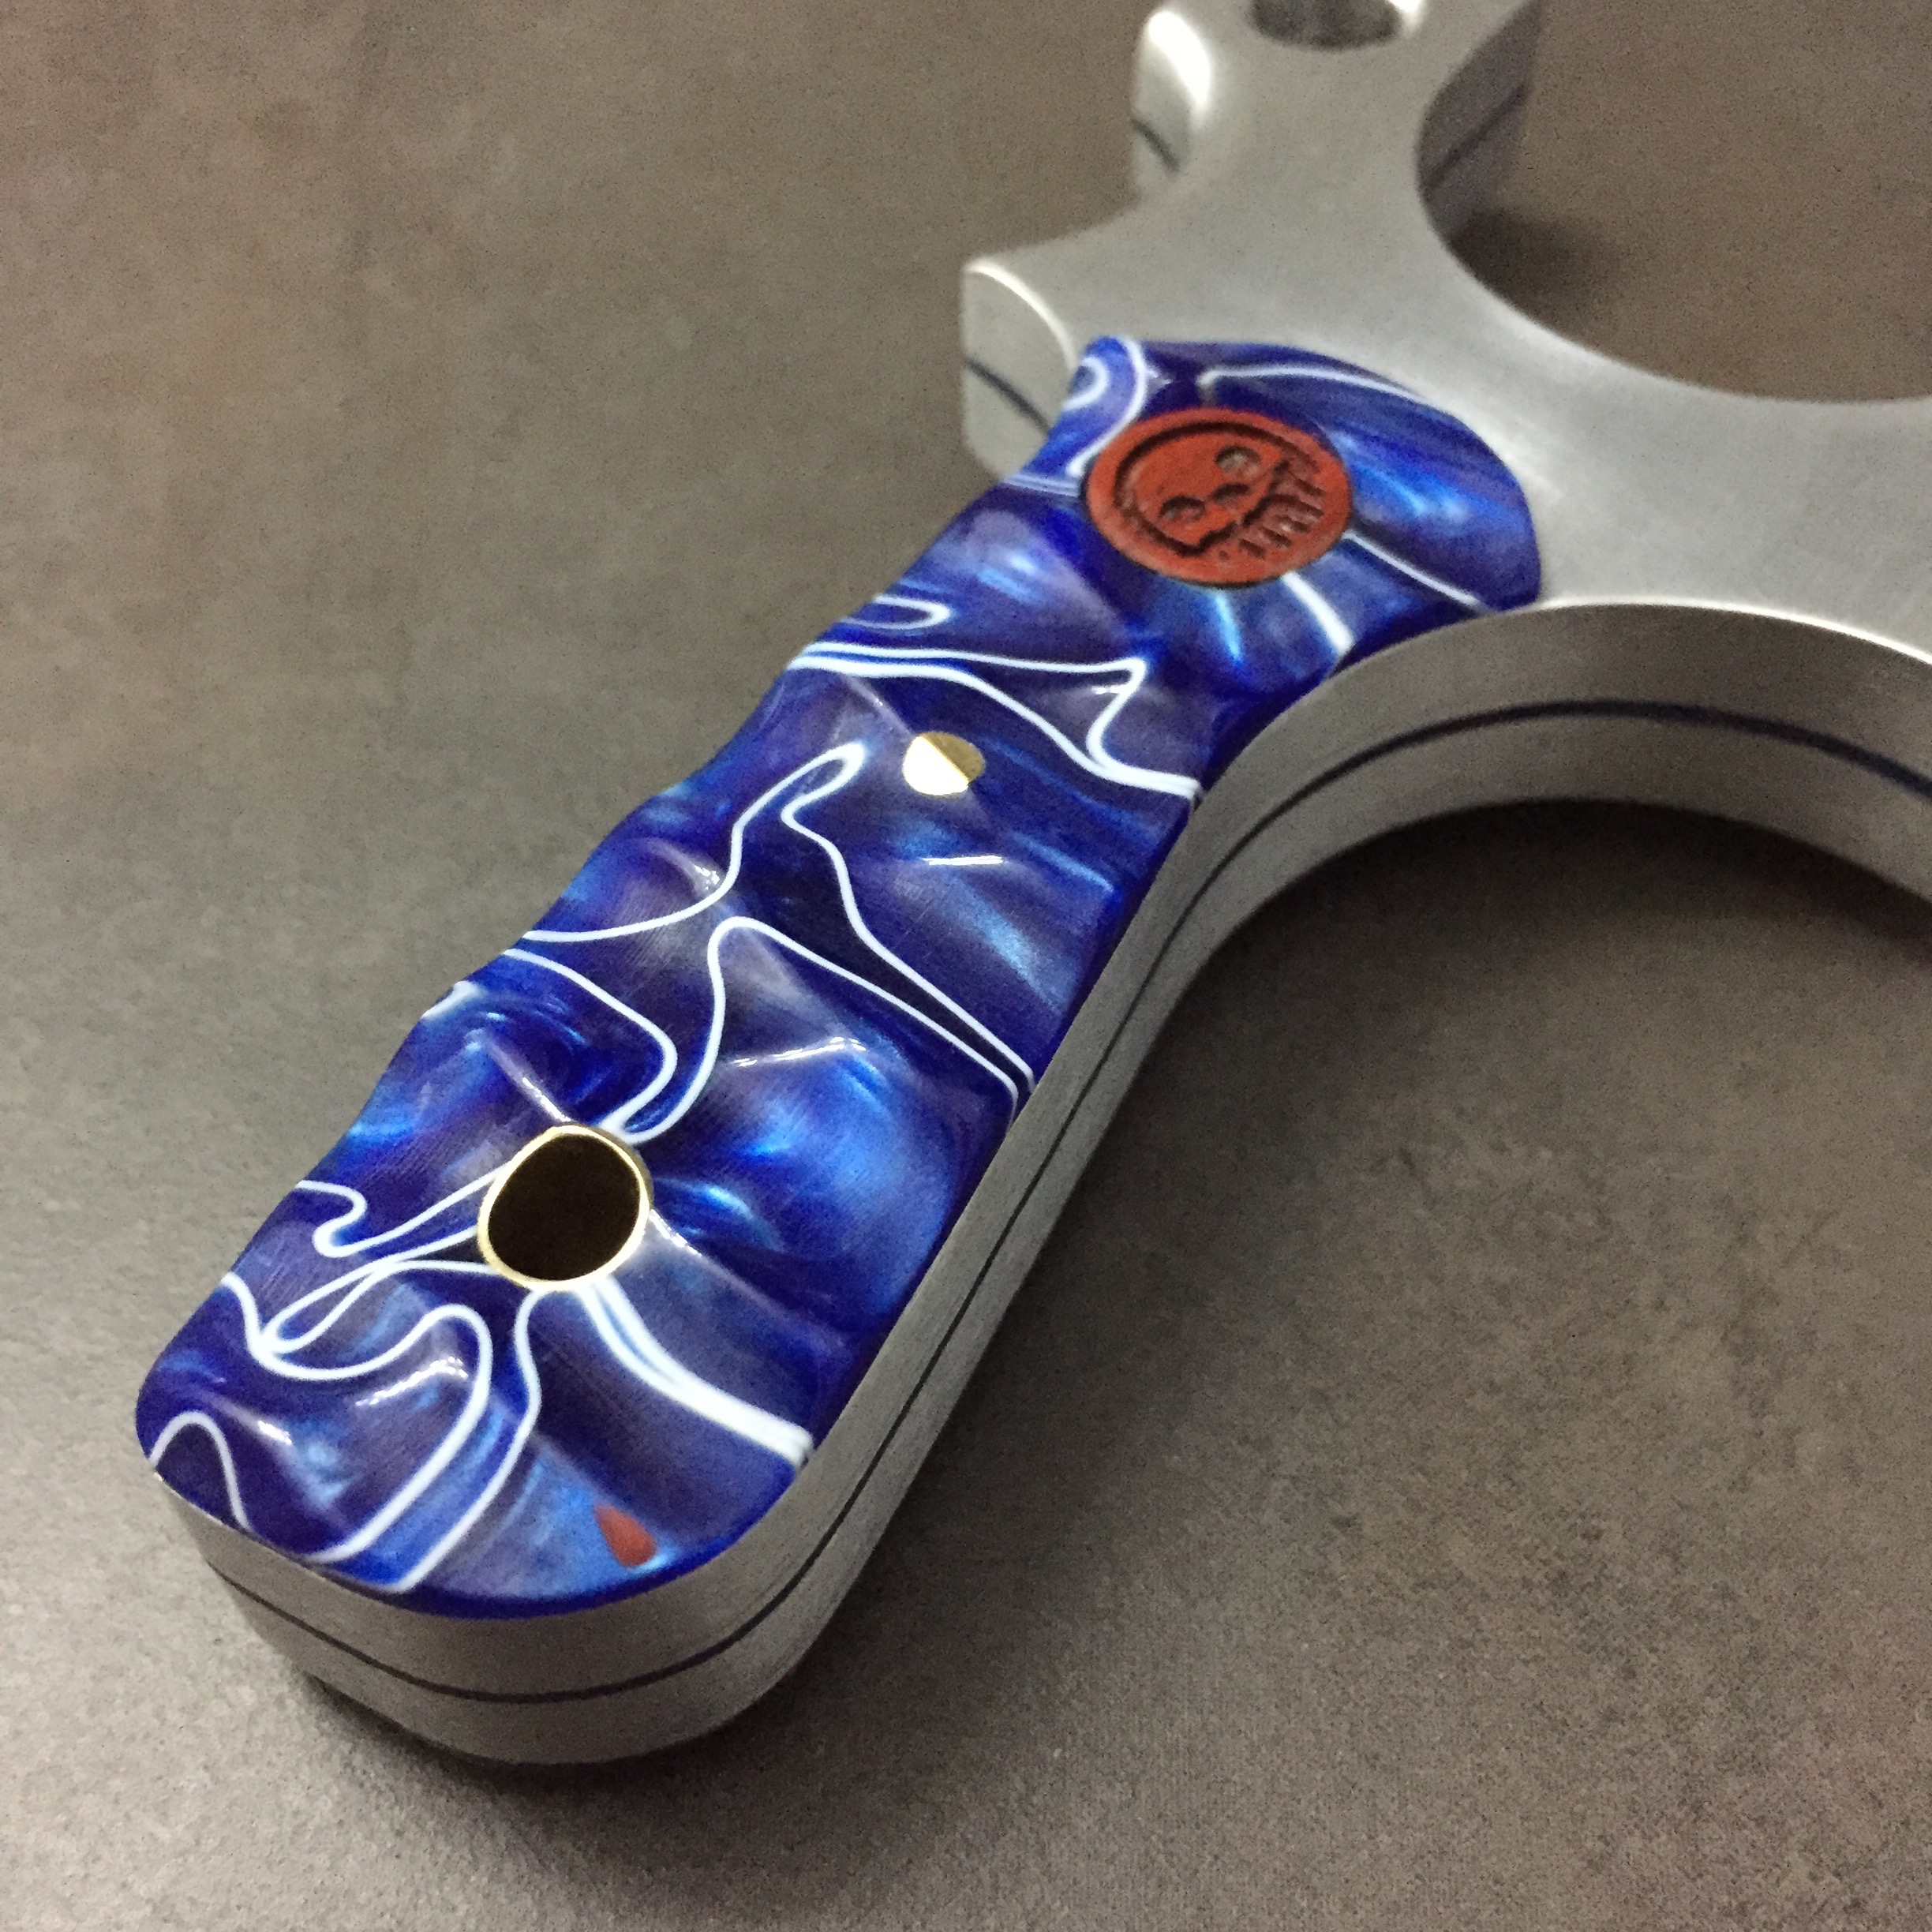
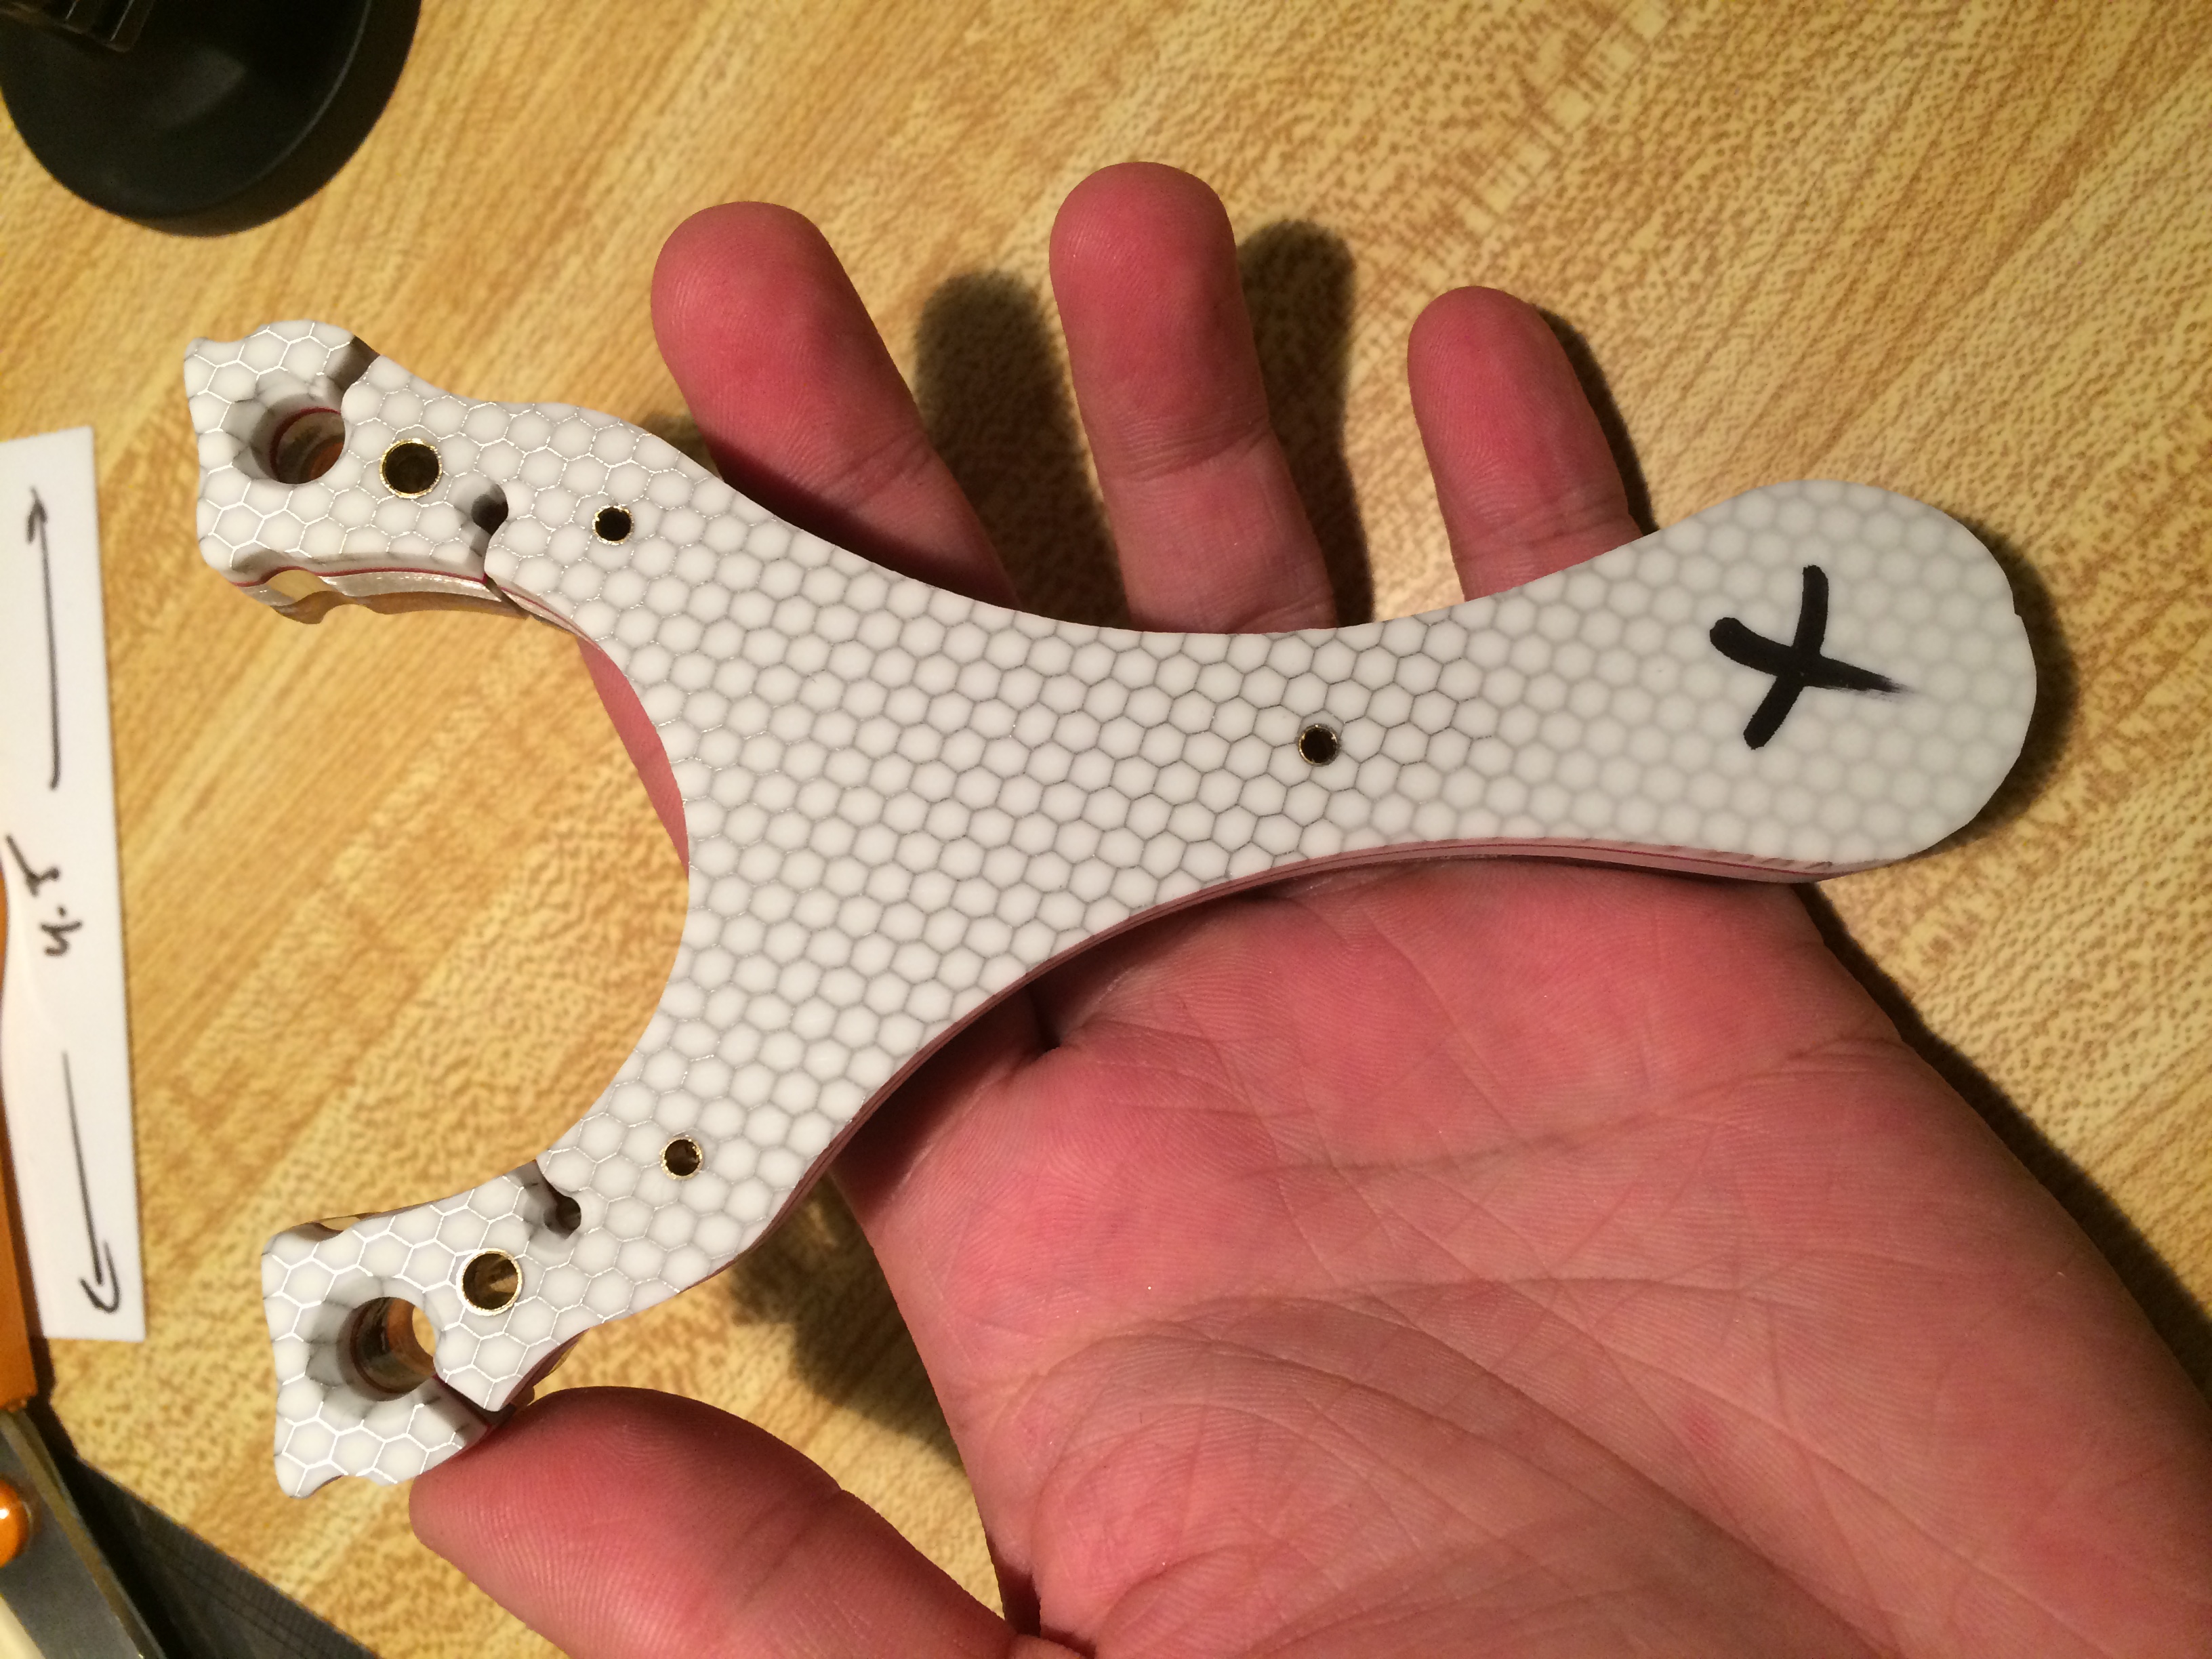
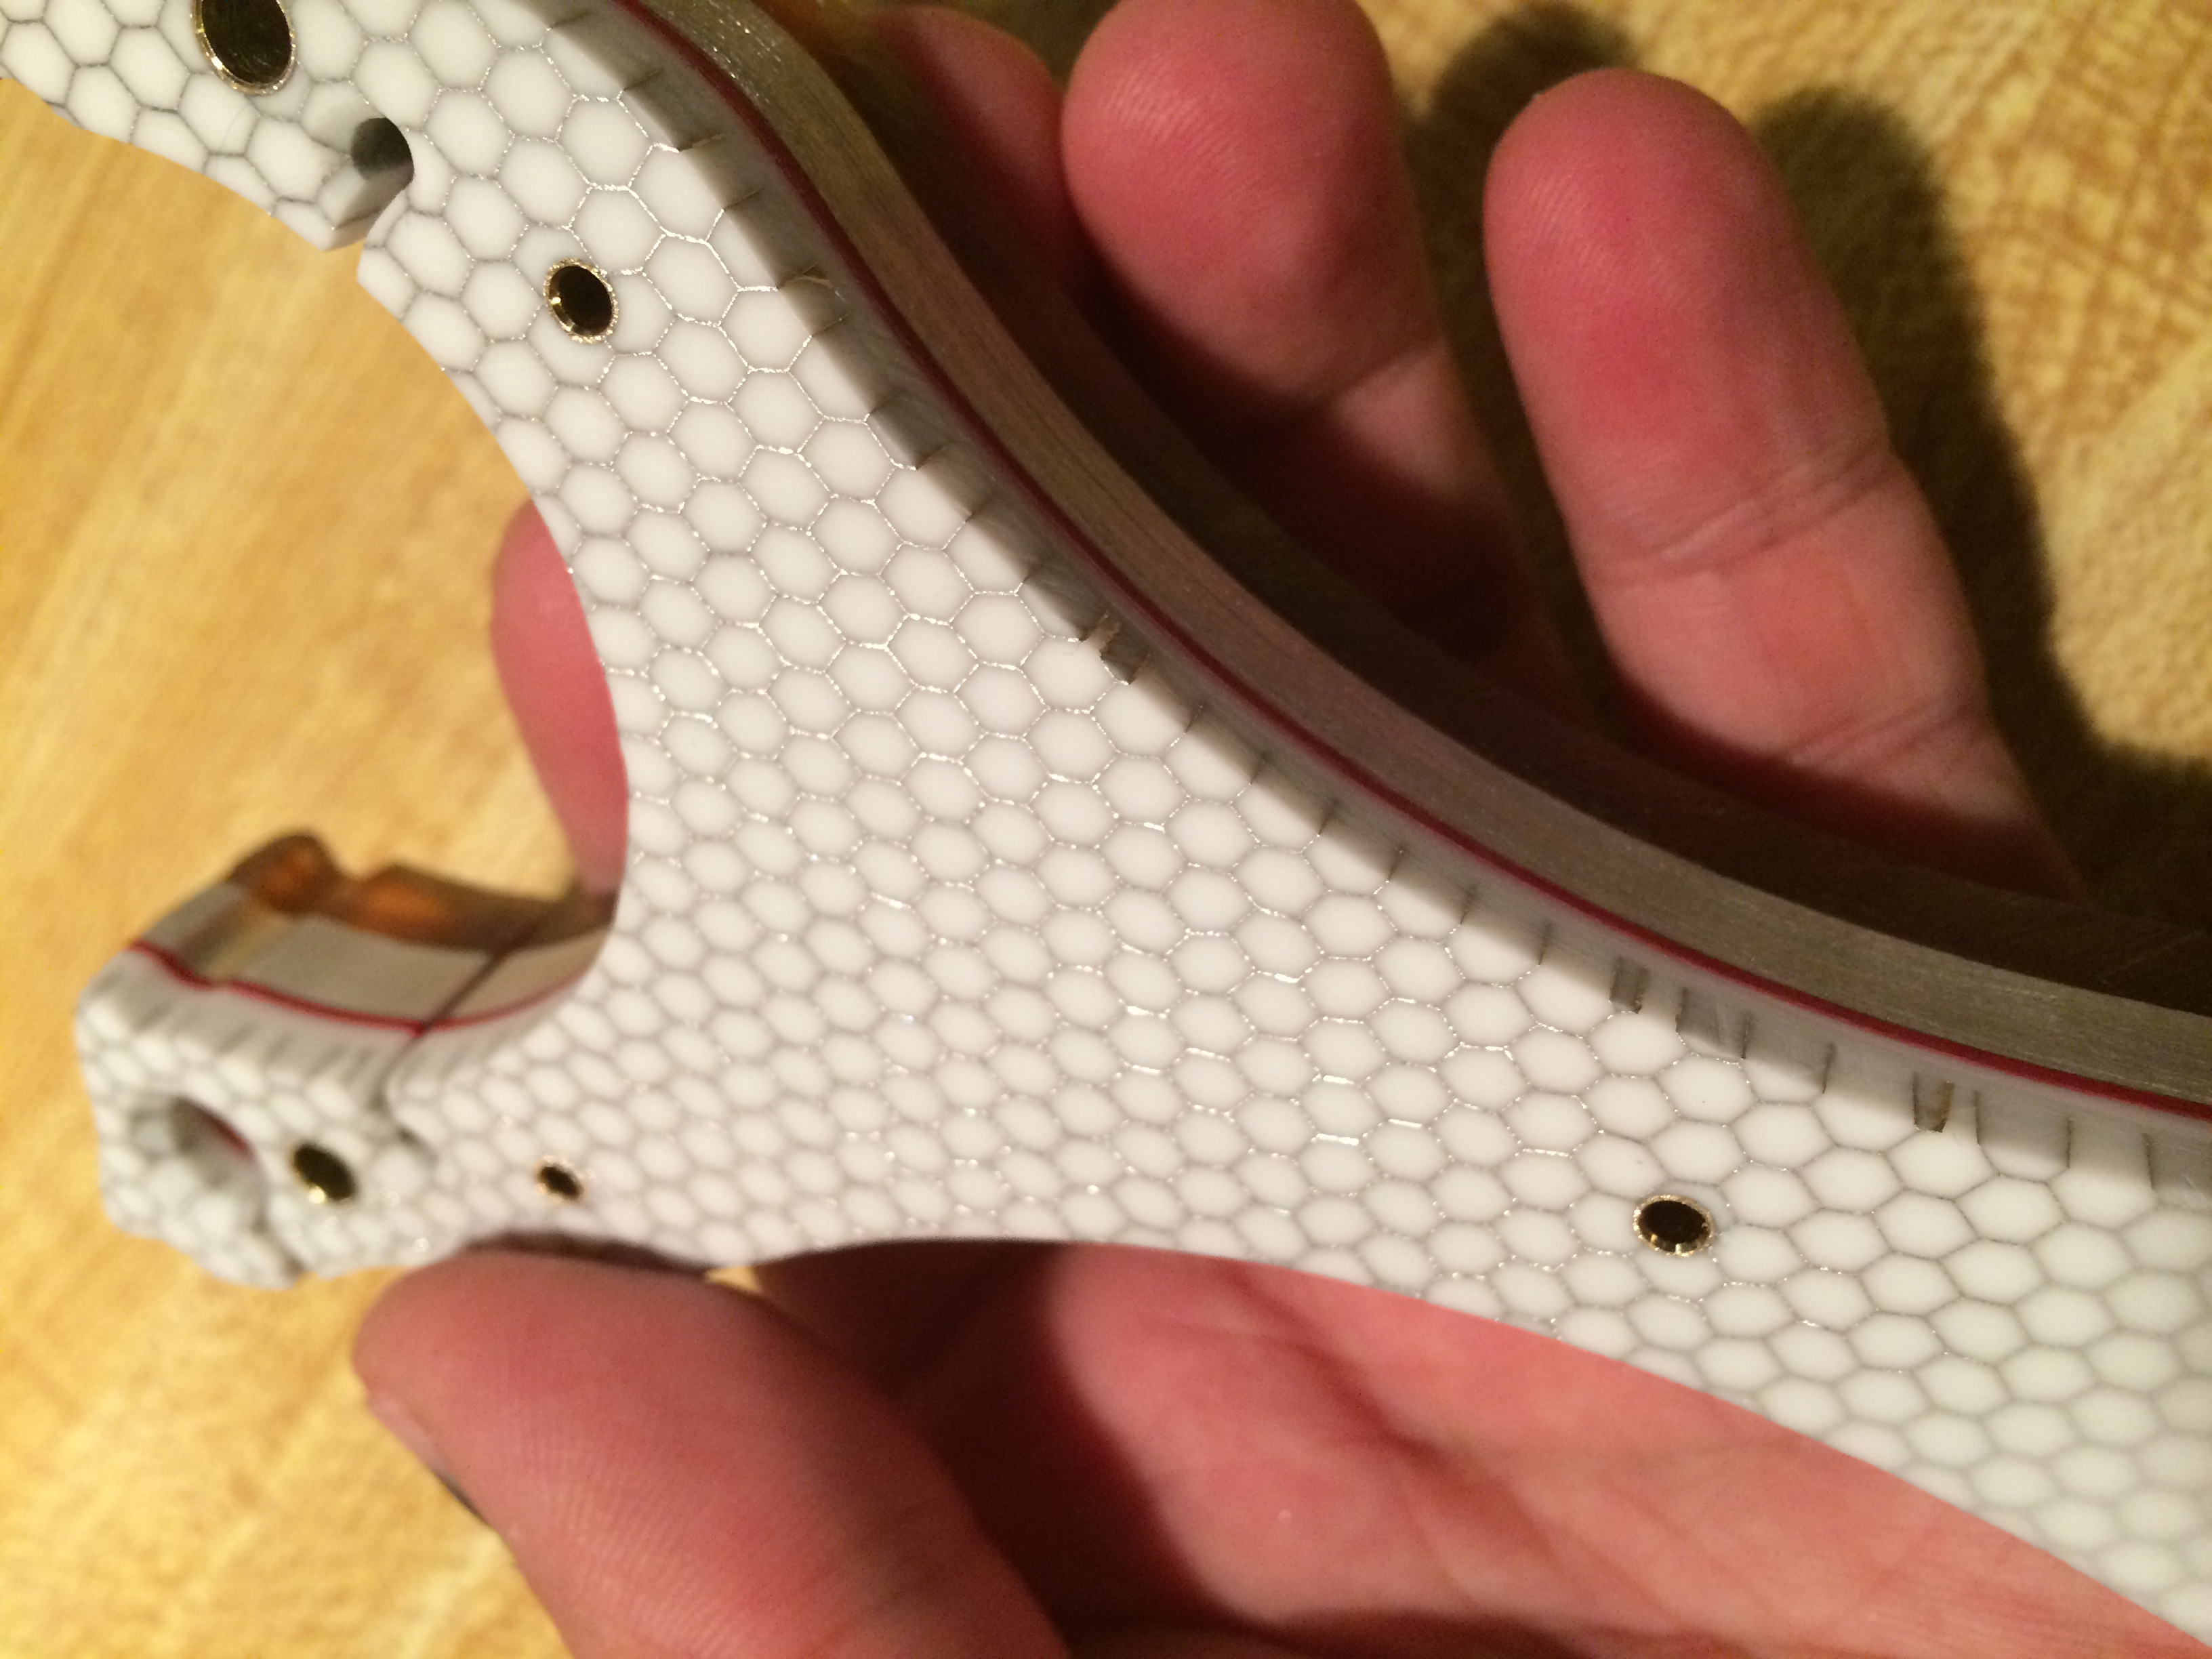
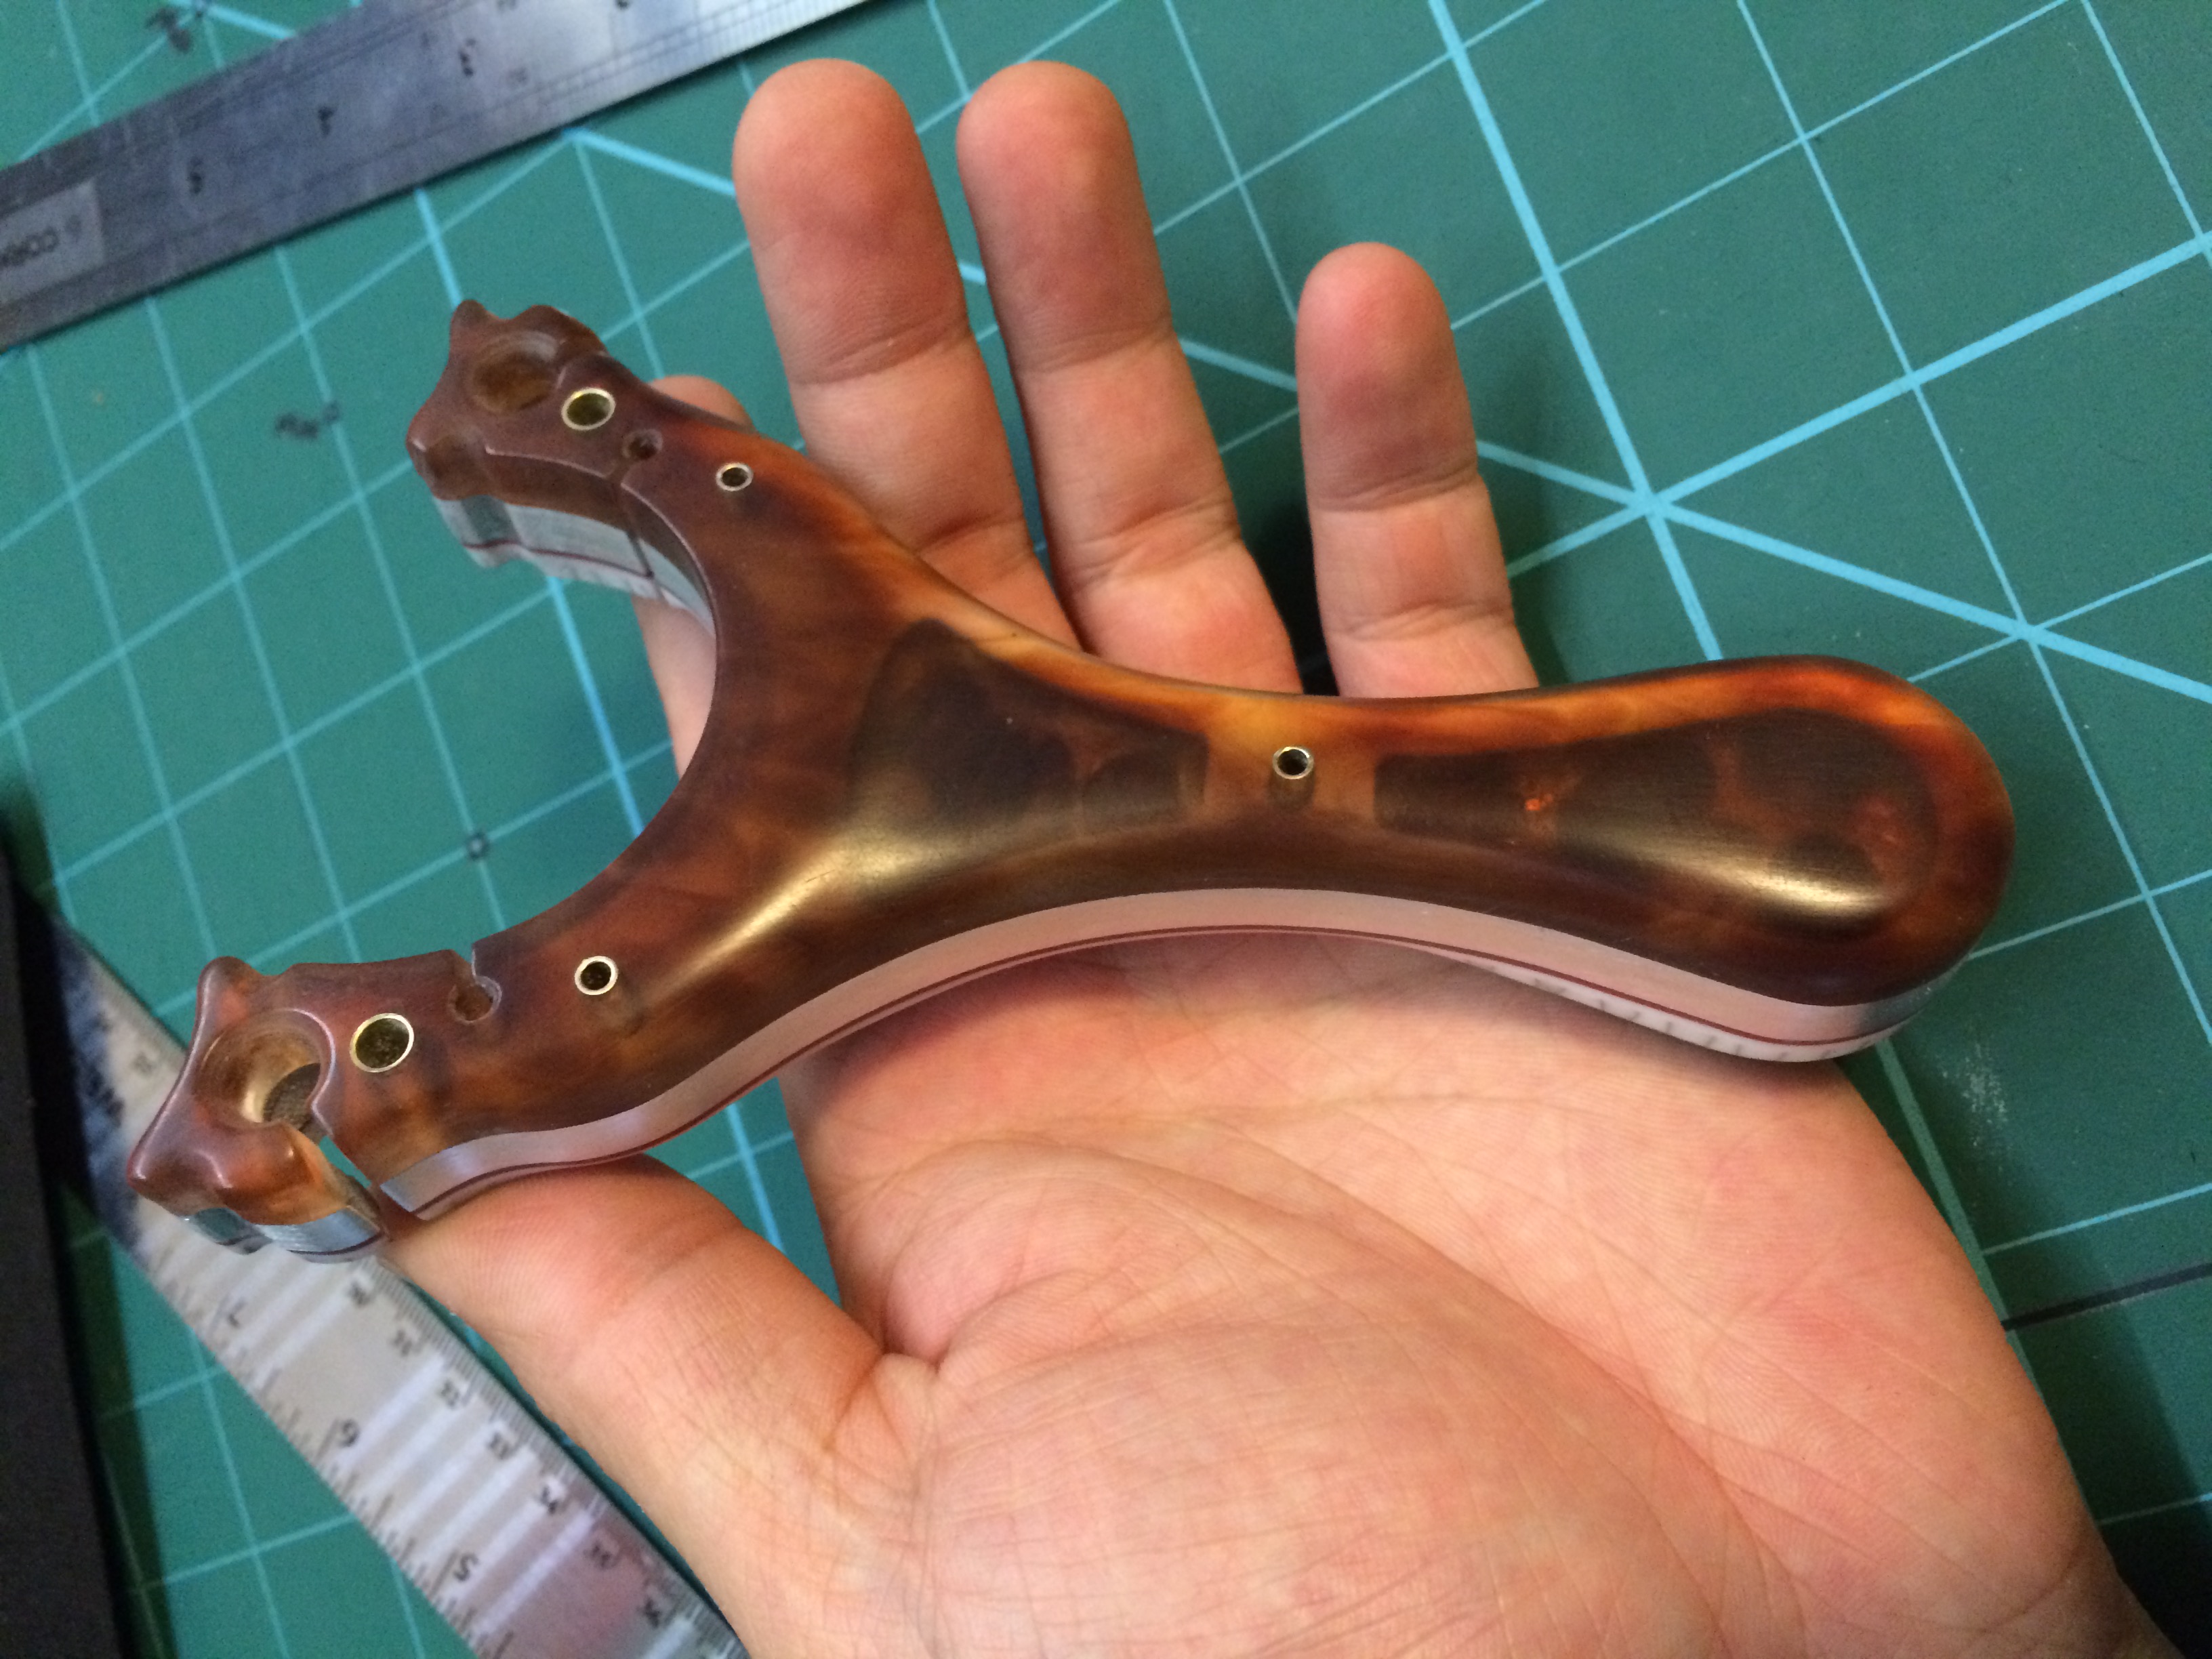
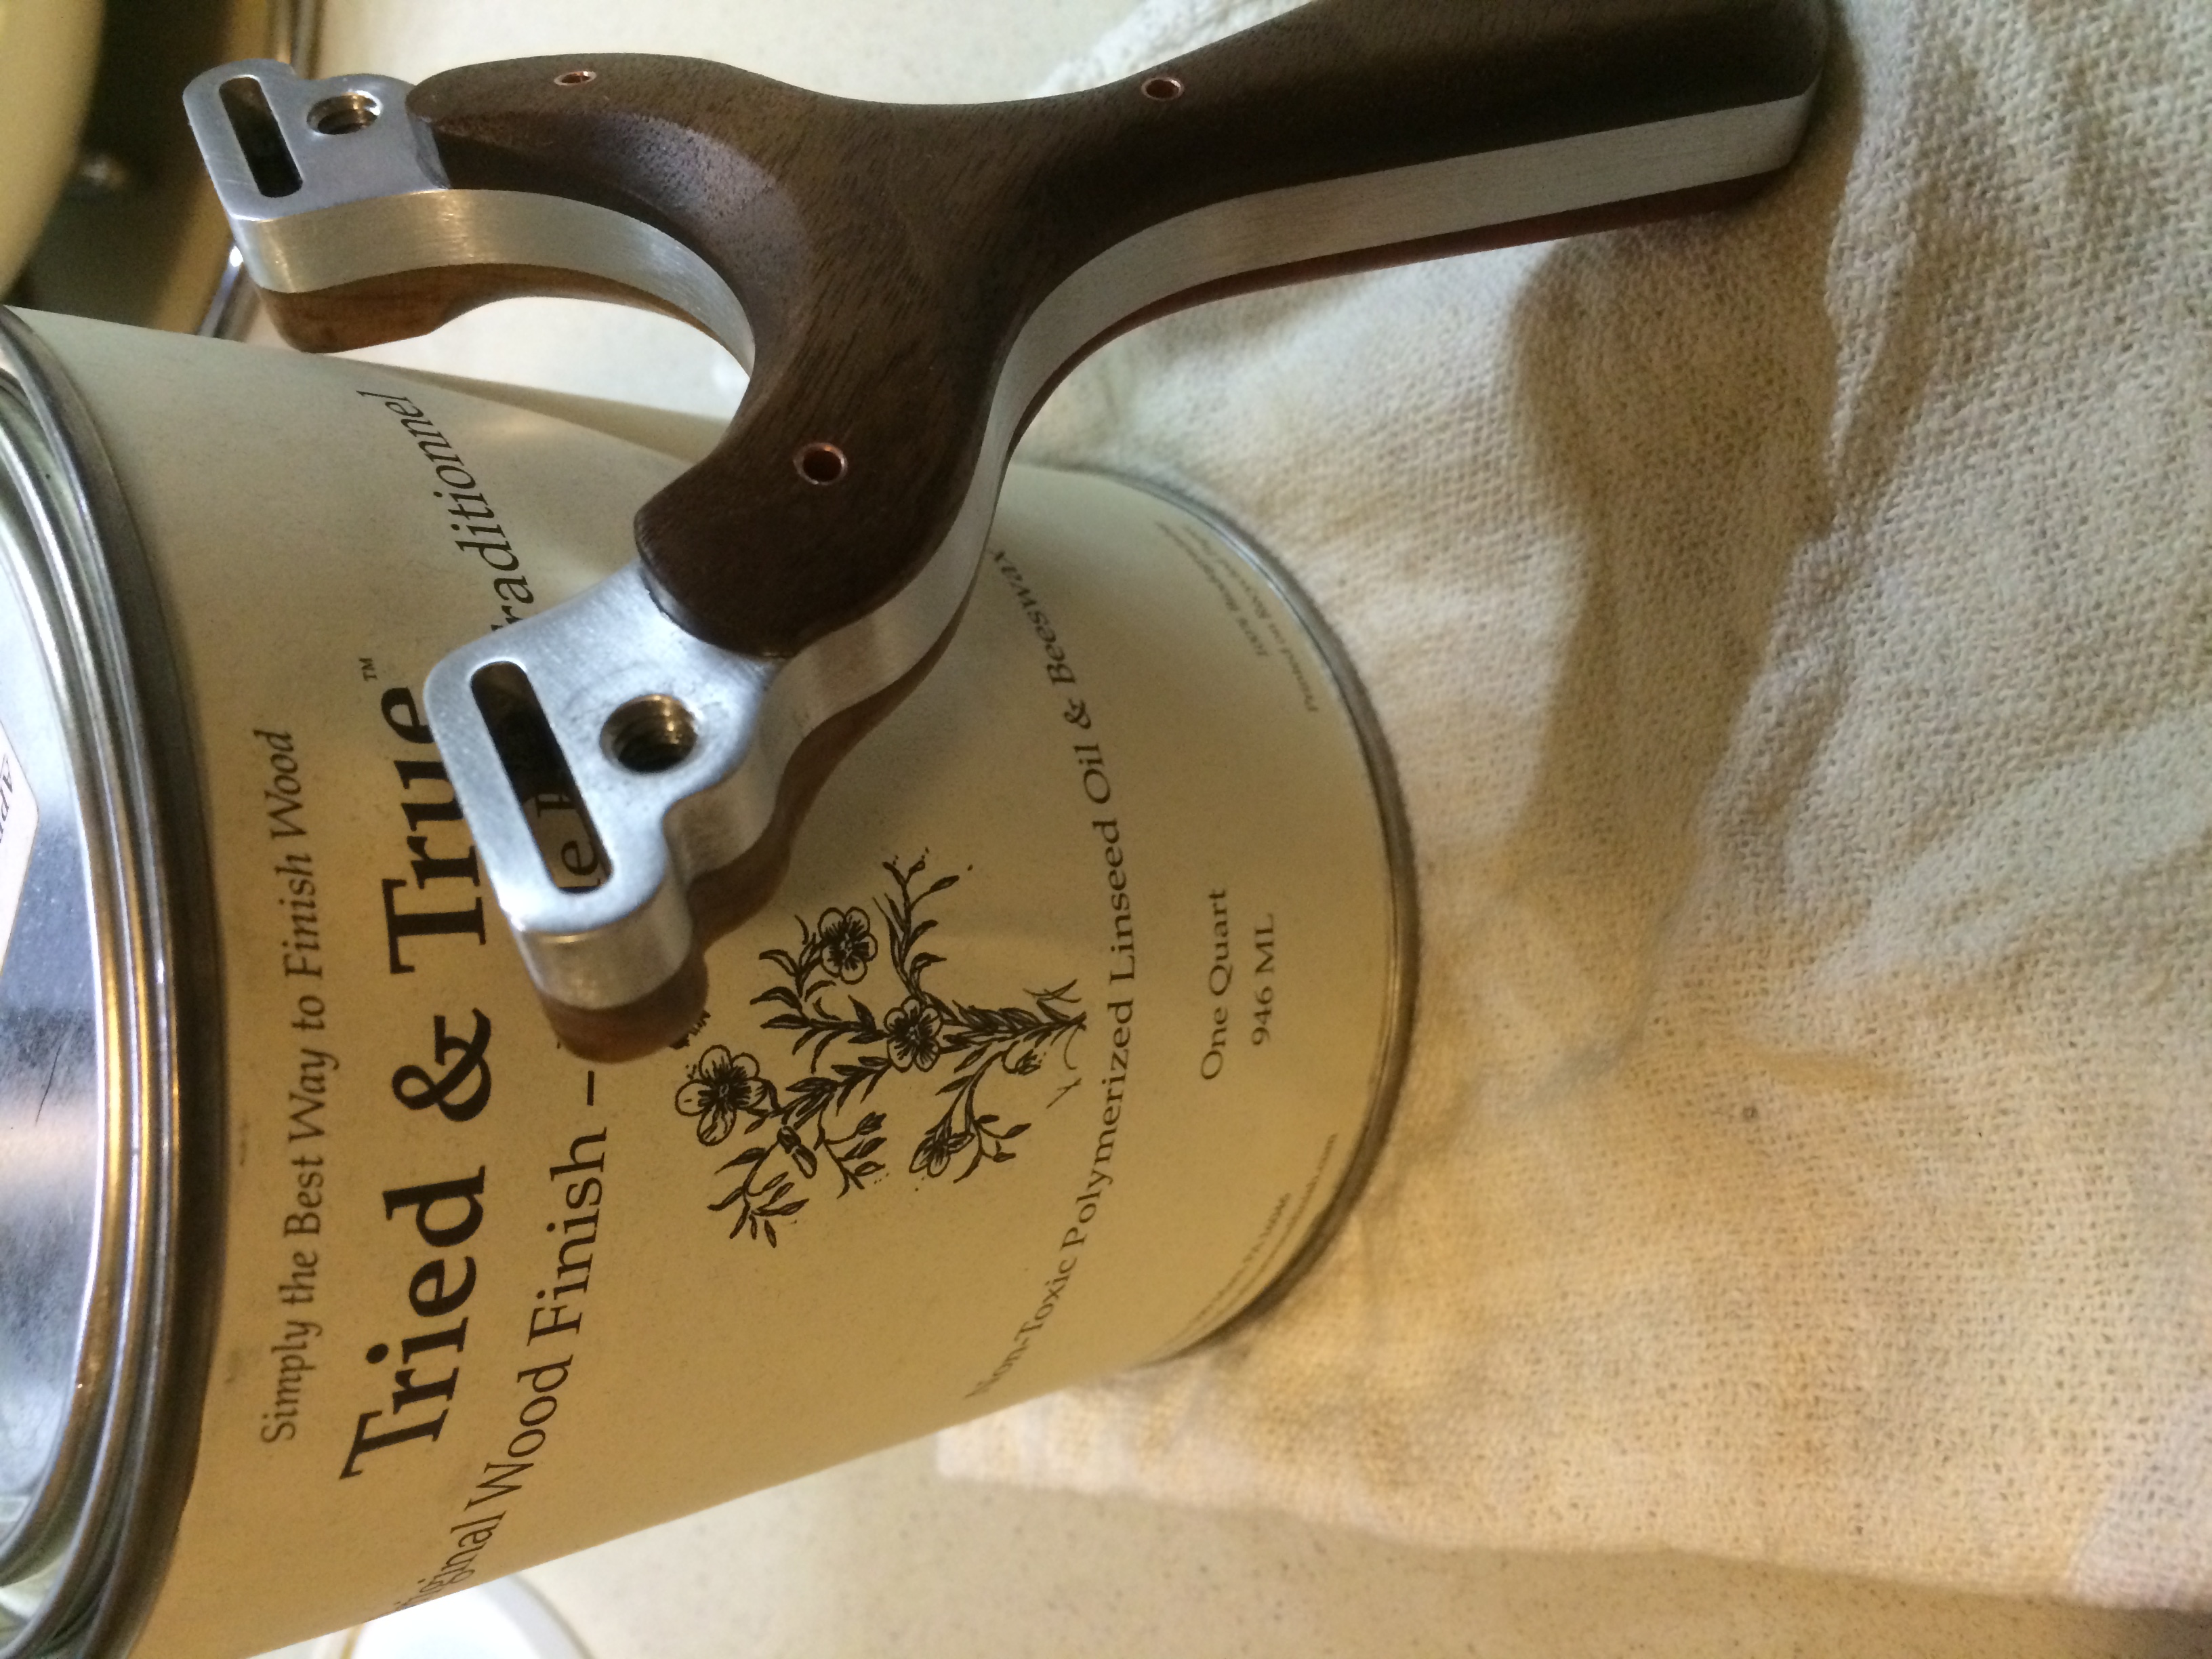
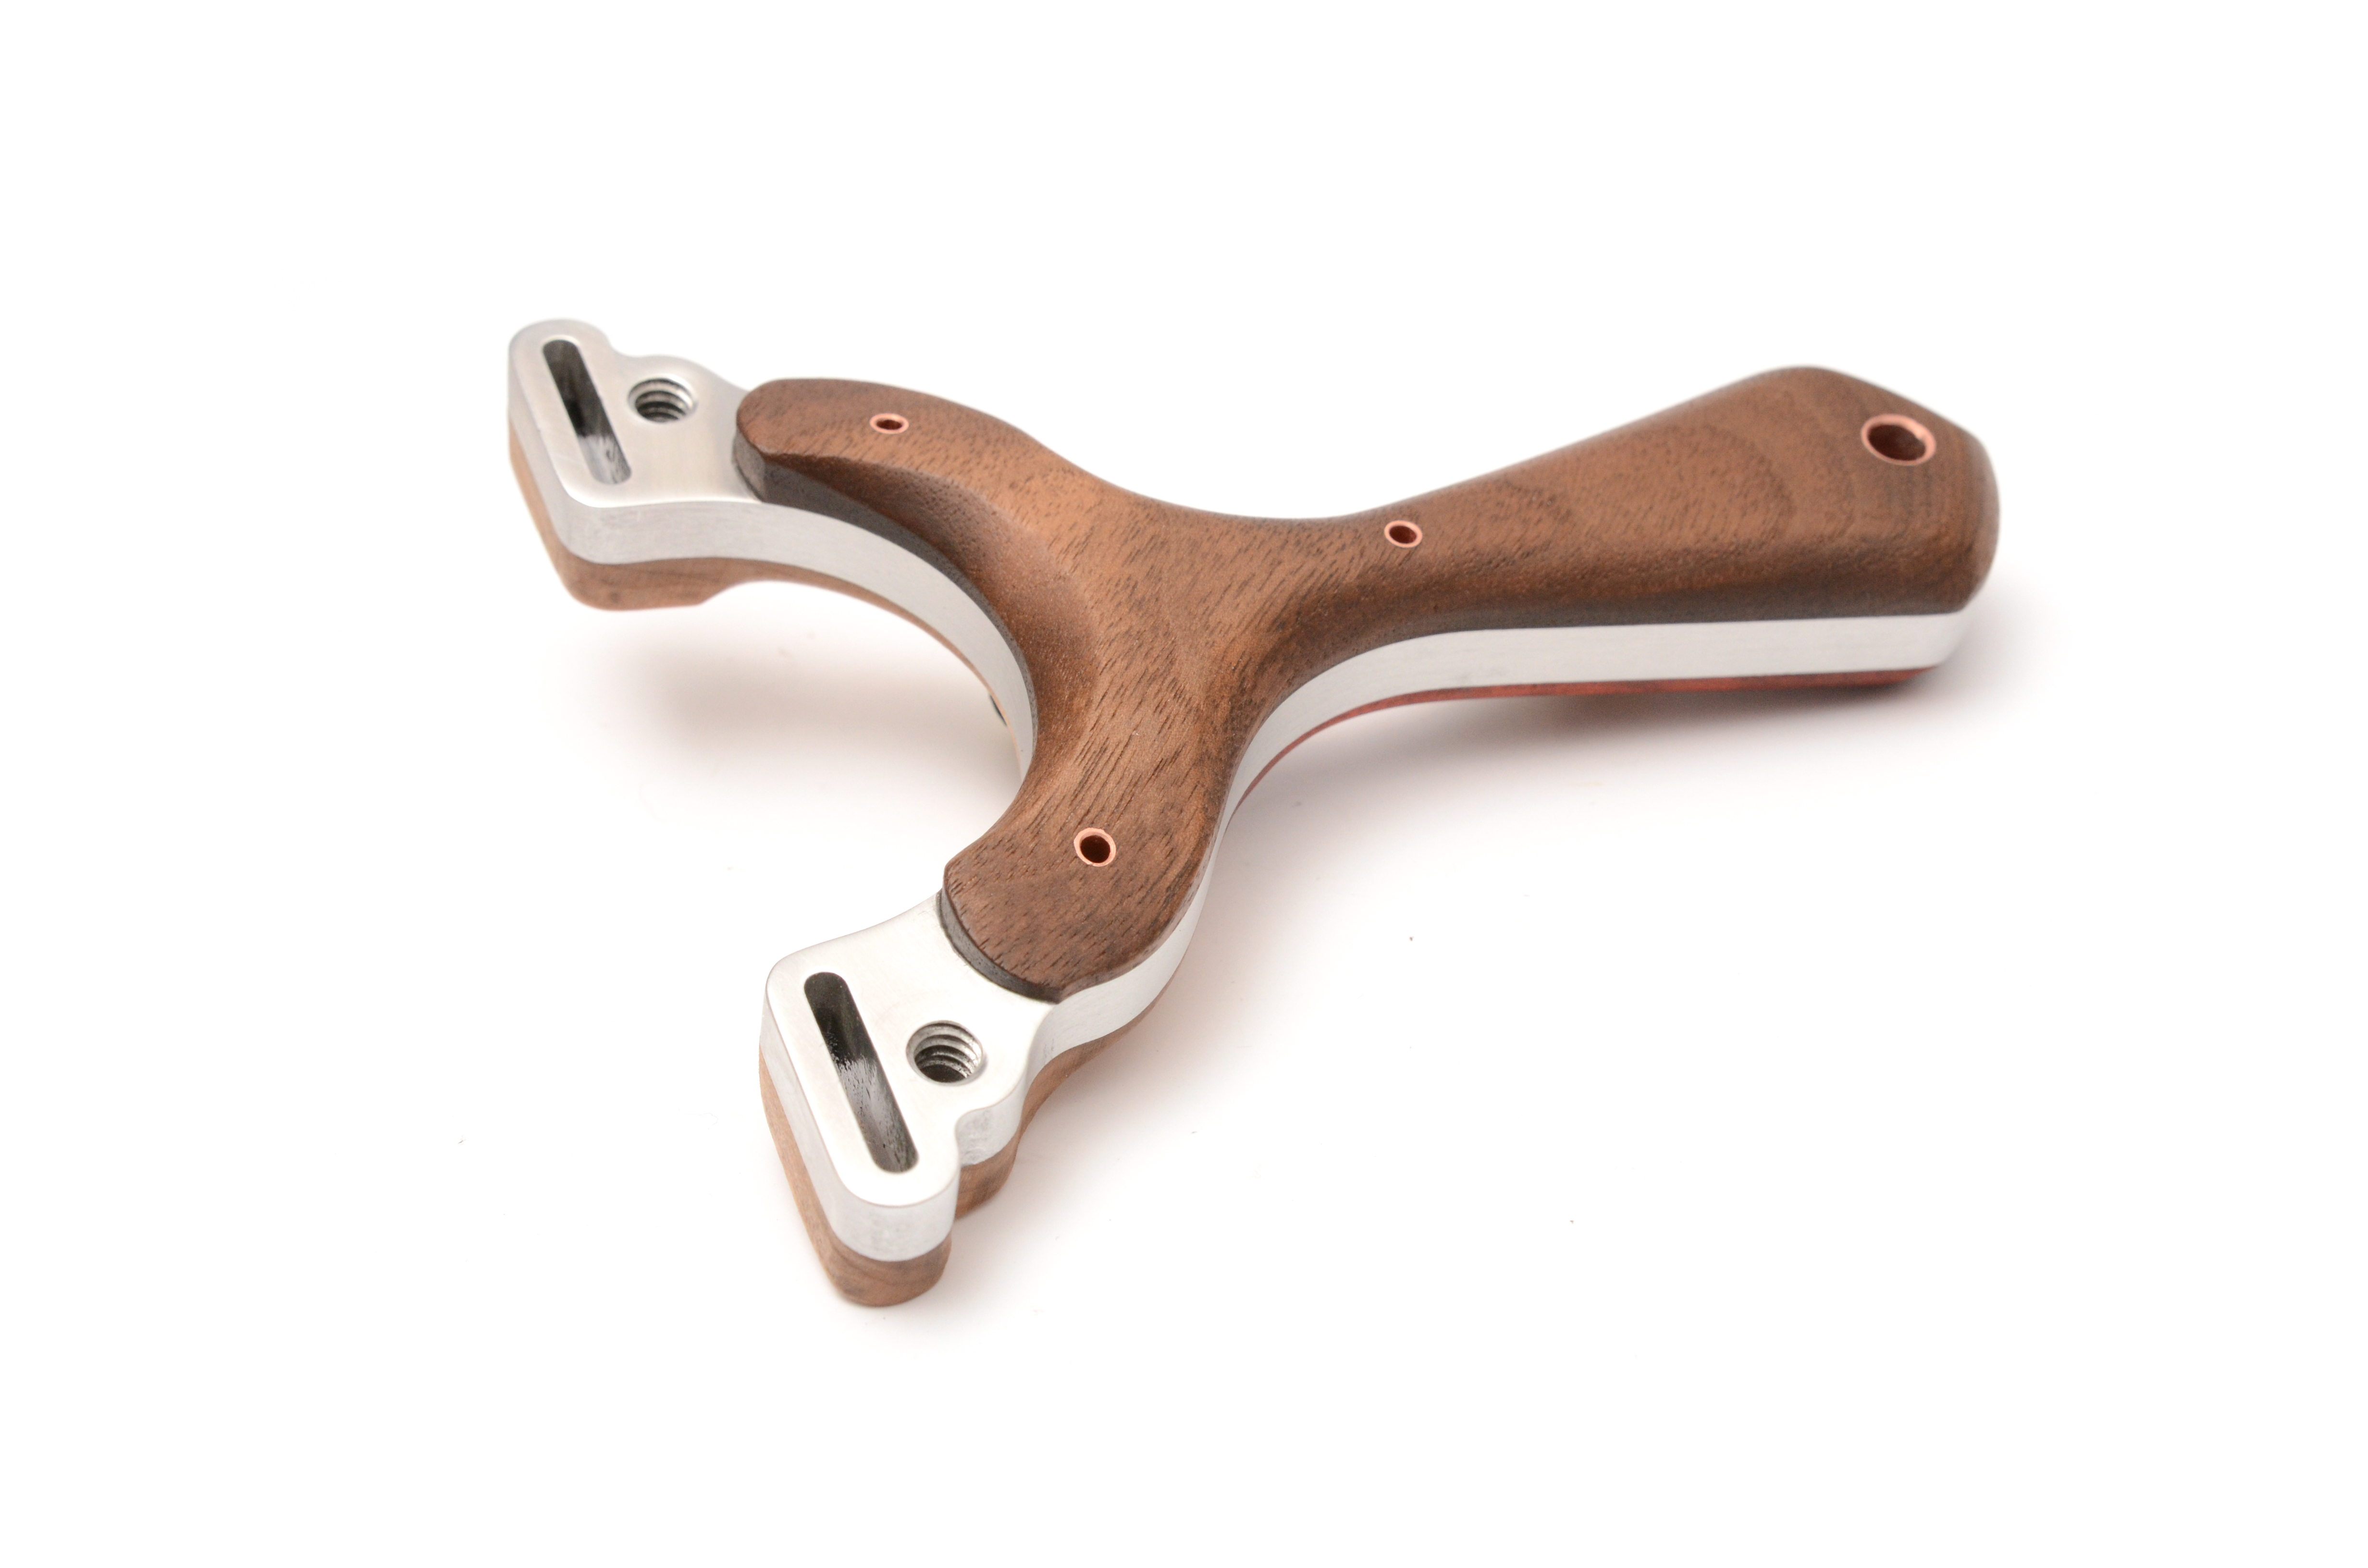
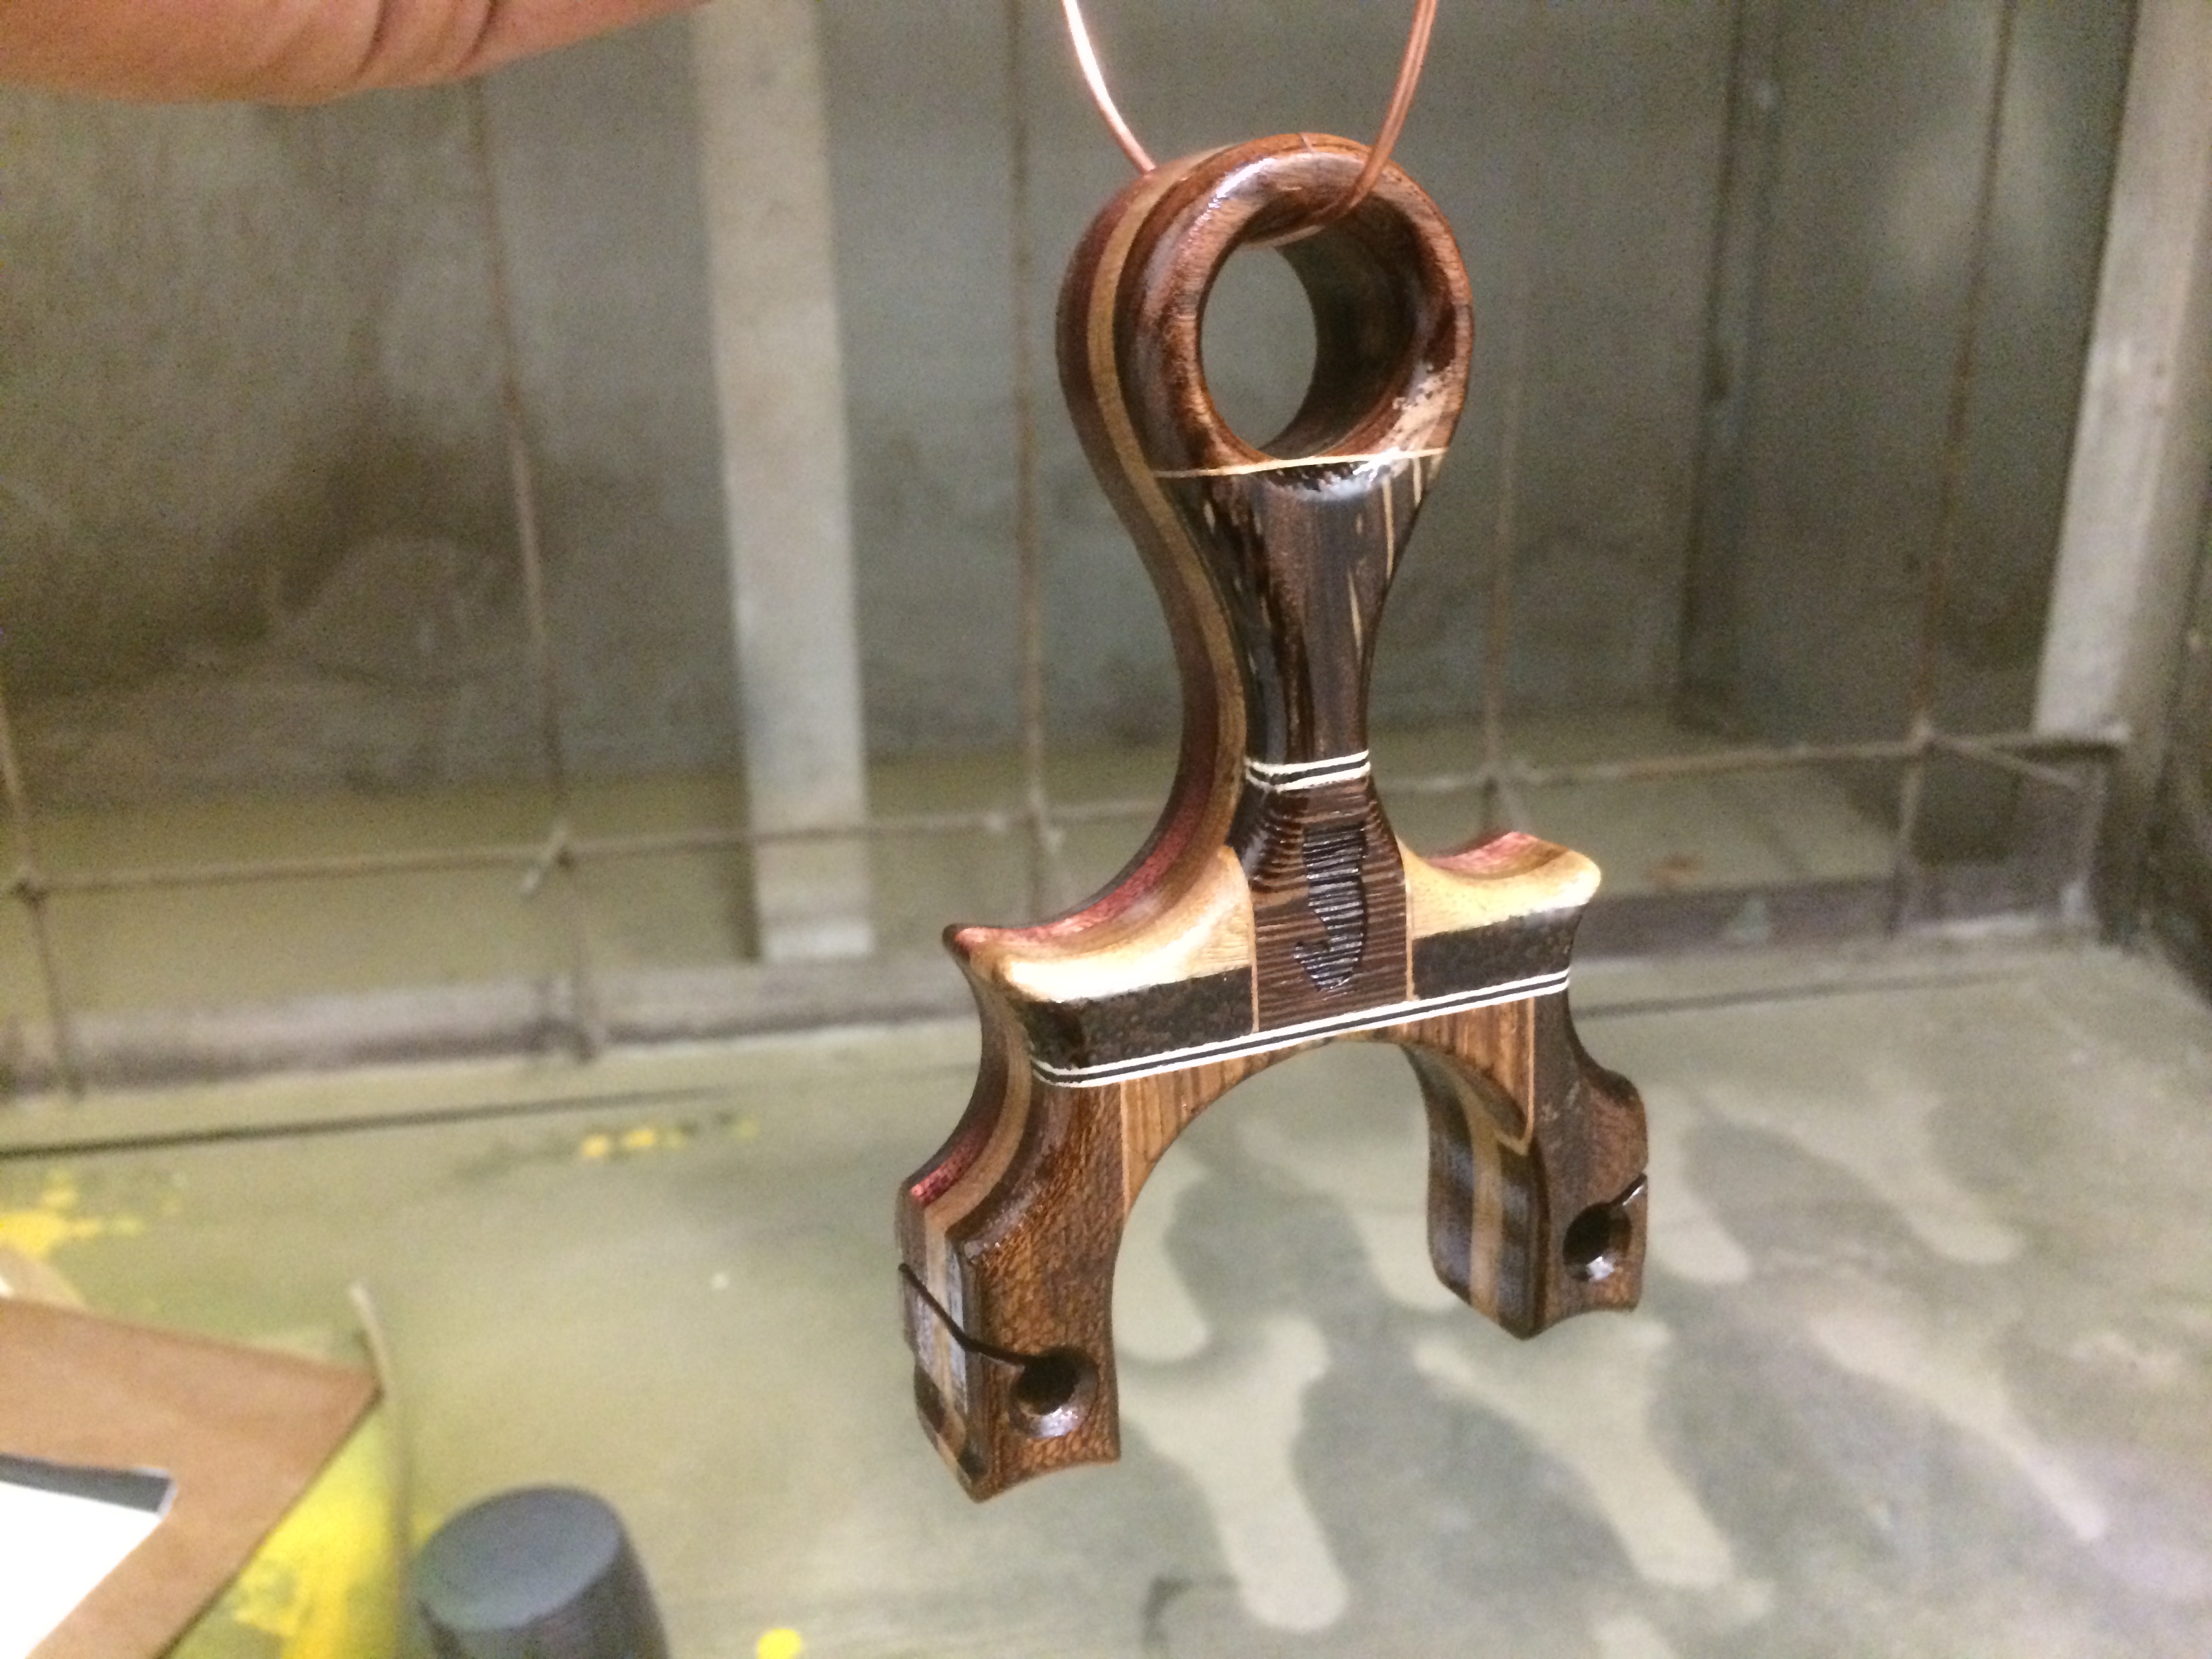
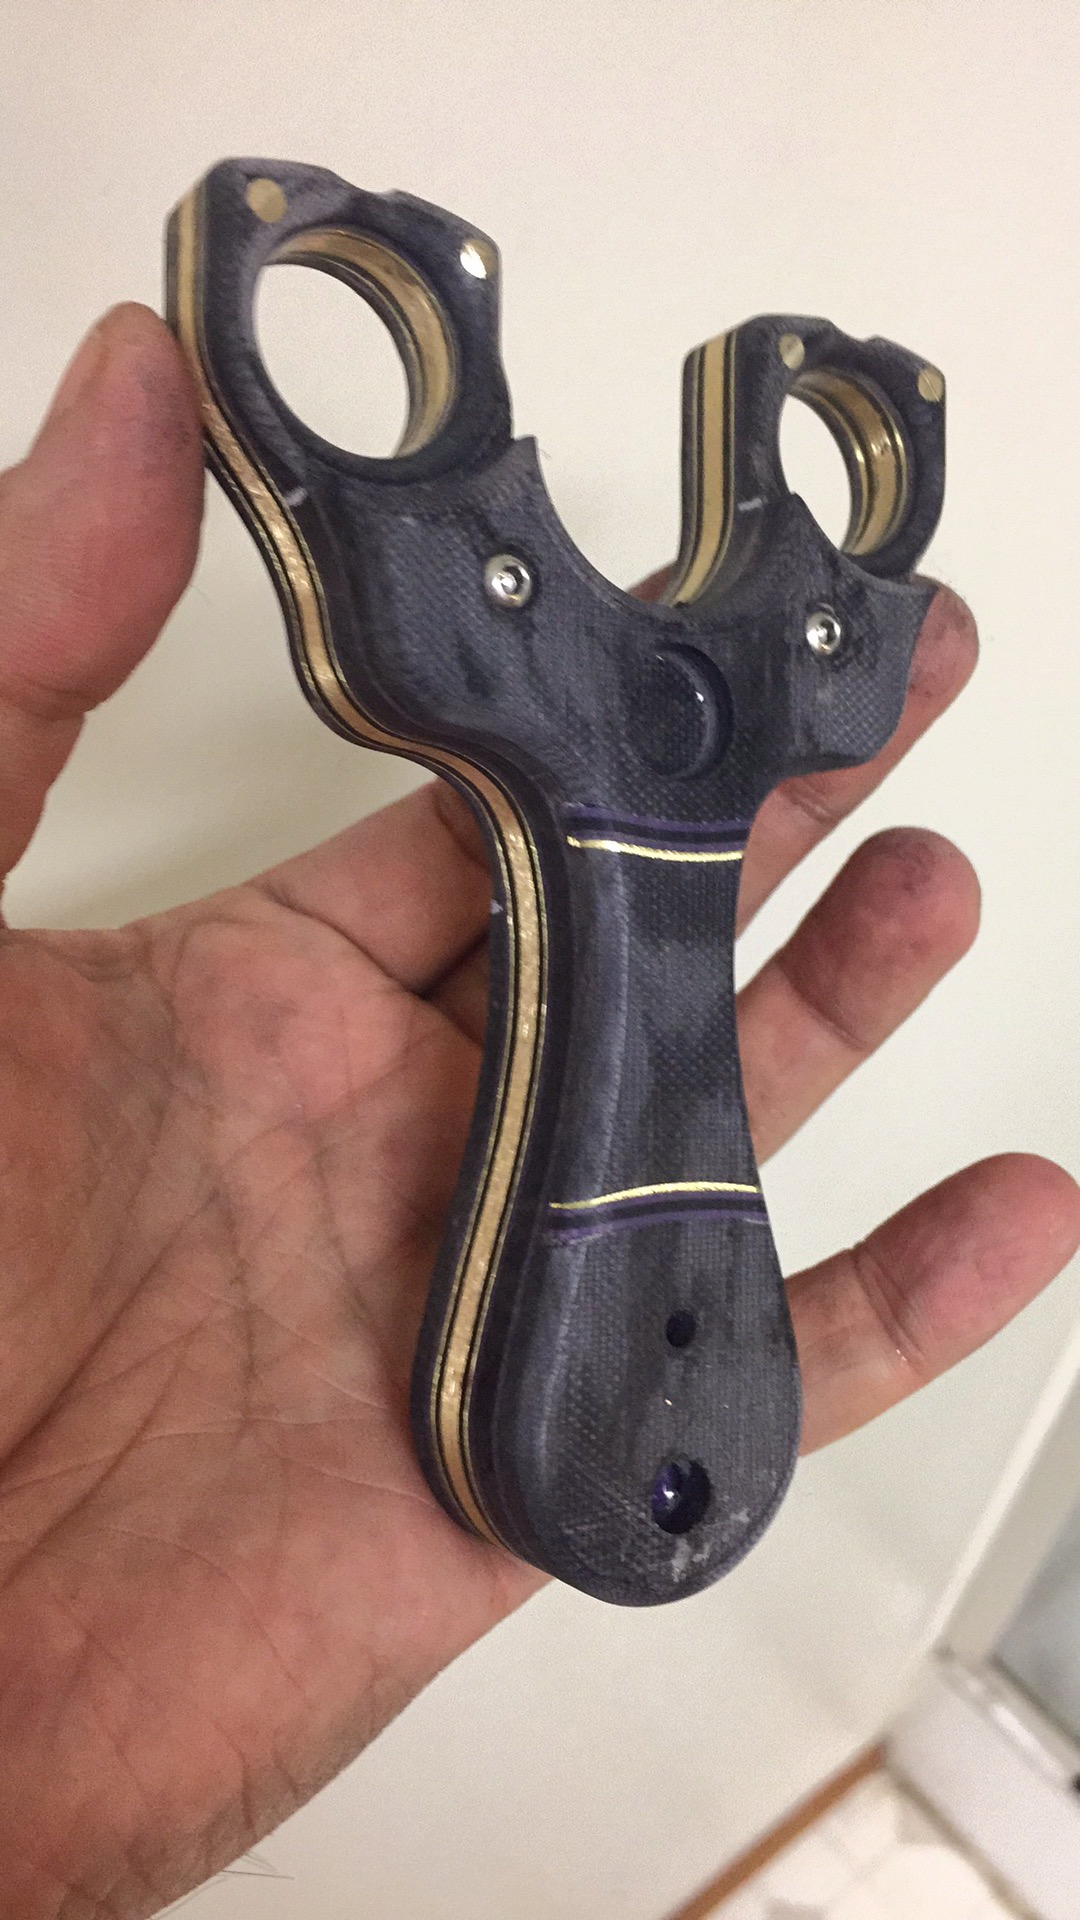
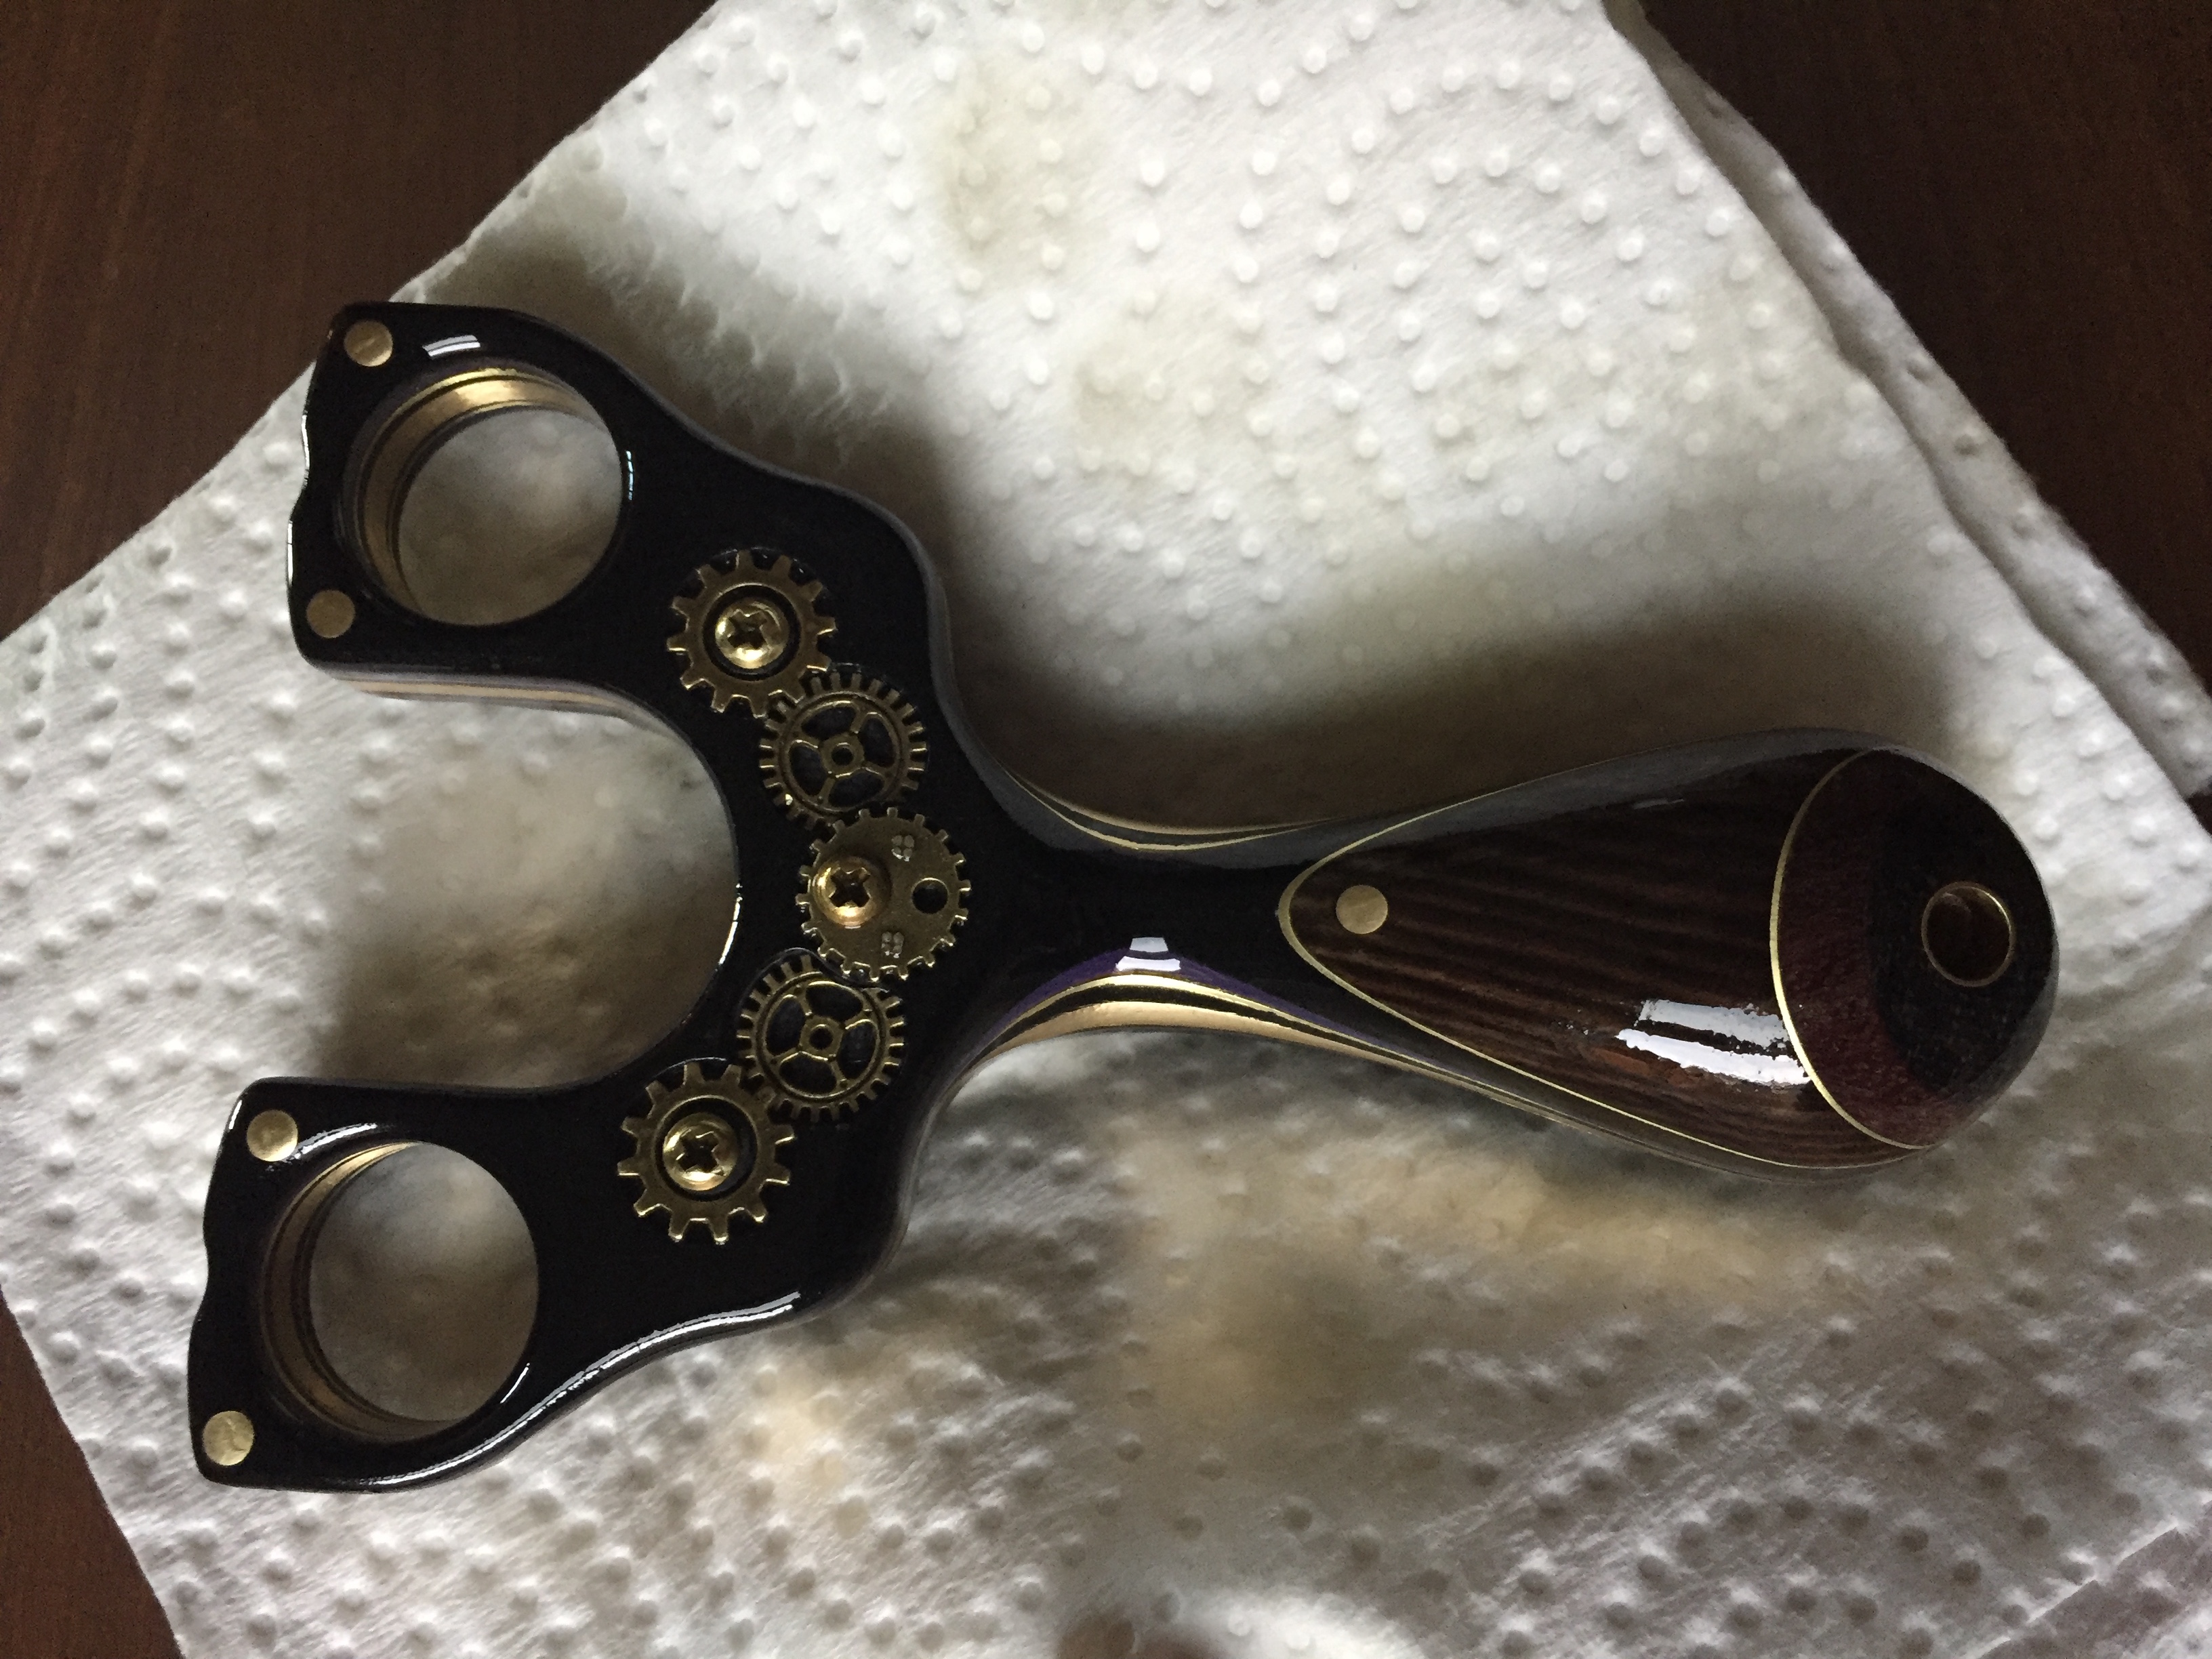
I had tried using the MicroMesh polishing system before on a few other G10 frames and the results were amazing, so there was no reason to skimp on the finish for this. After going through the grits (1500 to 12,000), the surface of the g10 and wood would be as smooth as it would ever get without polishing. The trick to G10, I found, was to leave it unpolished and use some mineral oil to return the jet back colour to the surface since sanding clouds the finish. I may still buff this to a high high shine but the high gloss pinky swell, the matte finish of the g10 and the gleam of the shiny brass makes for a combination of textures that I highly enjoy.

img_0564

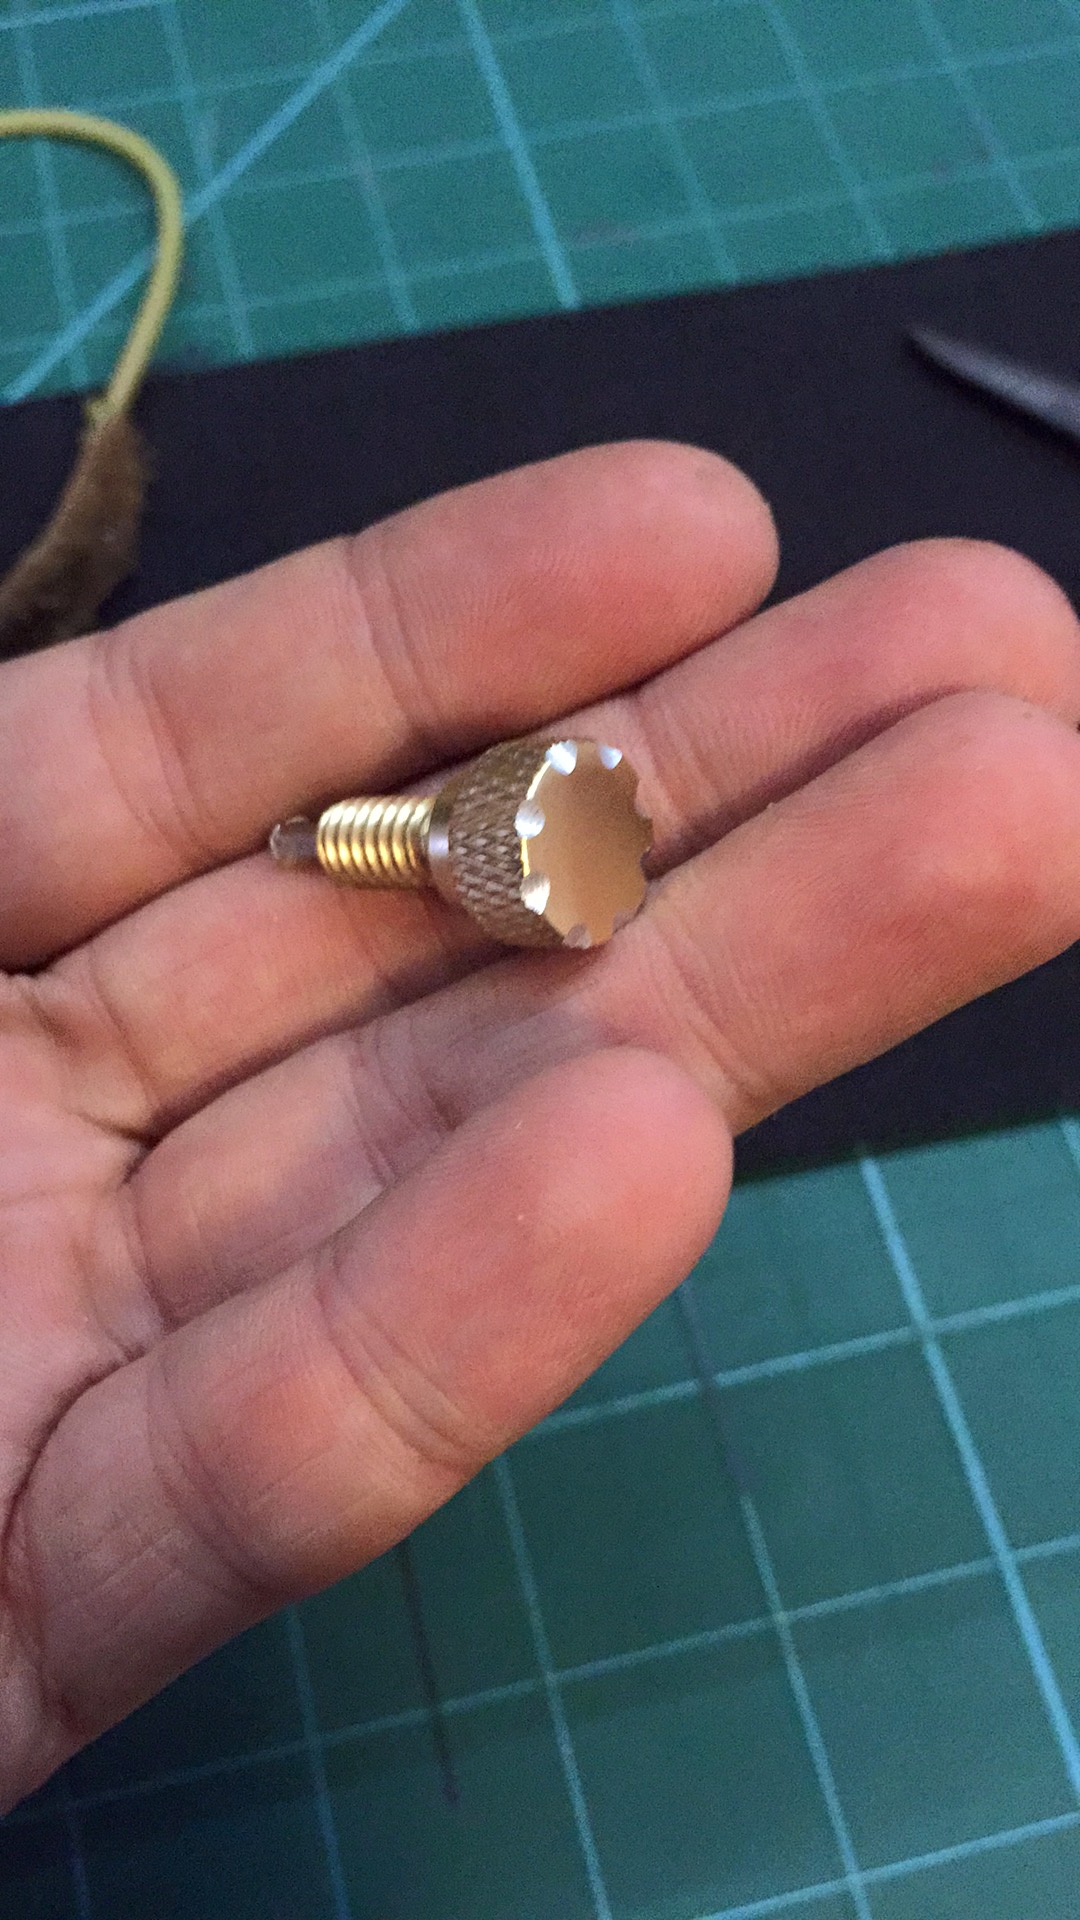
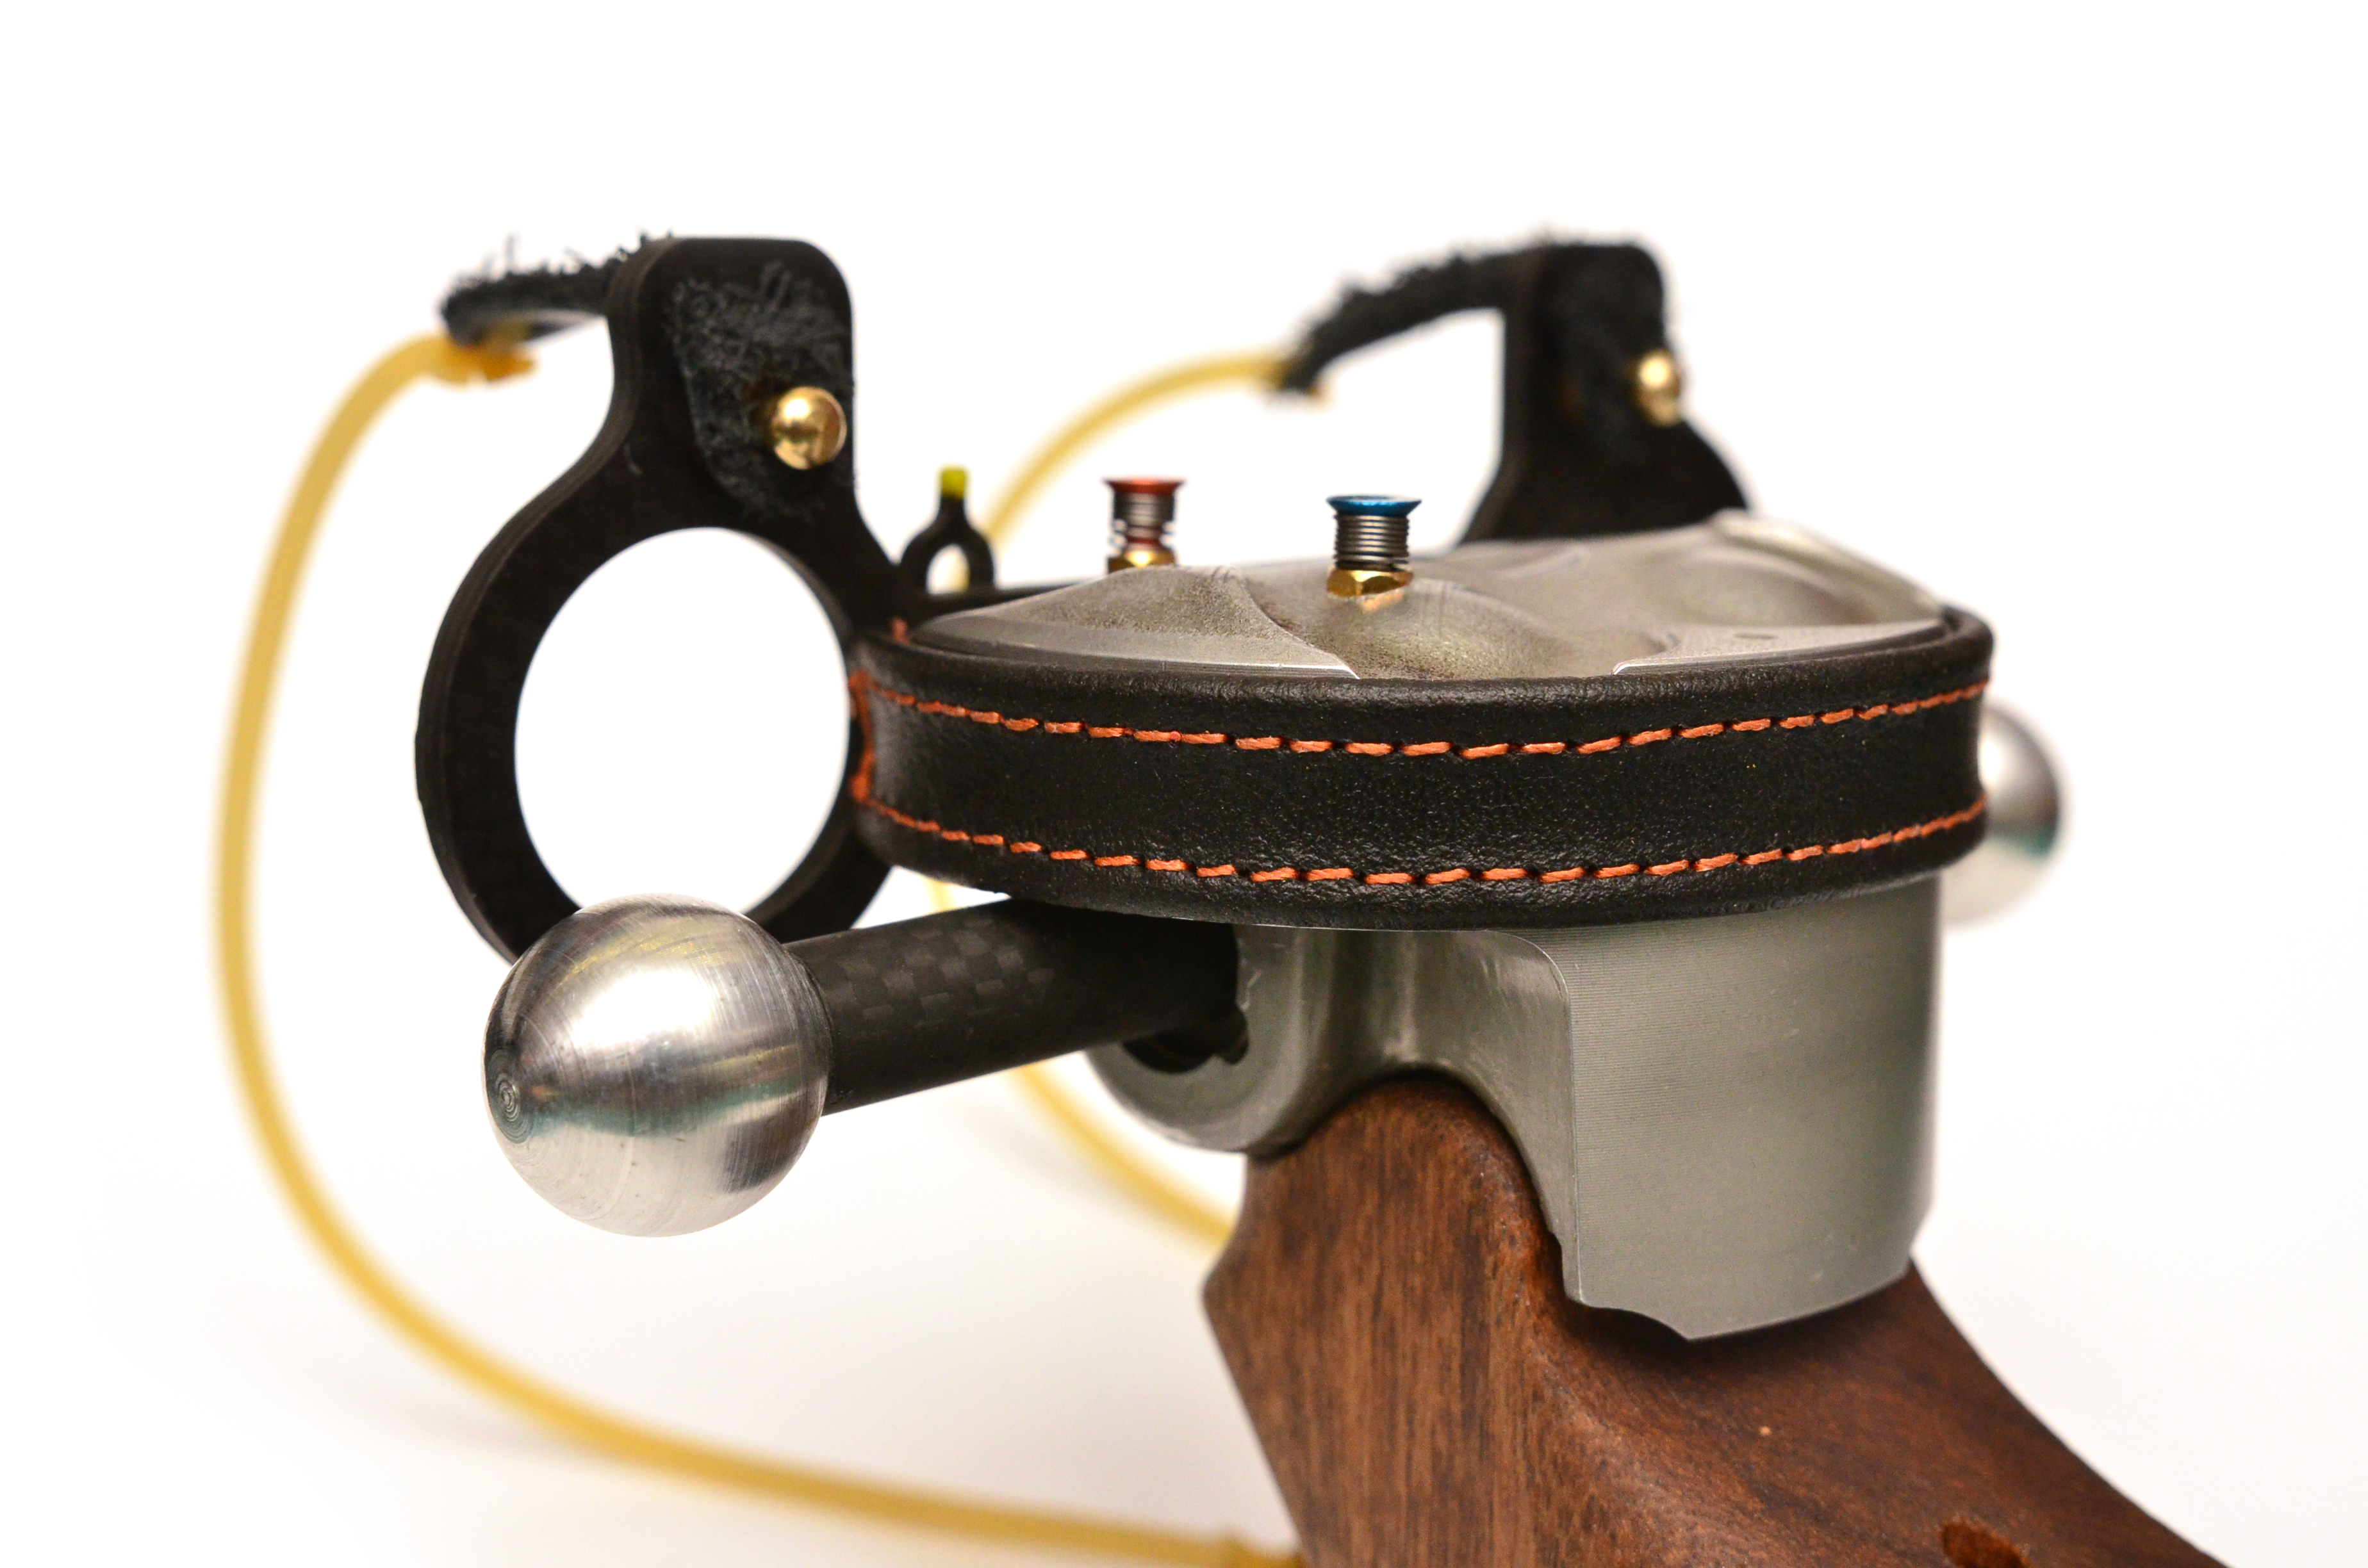
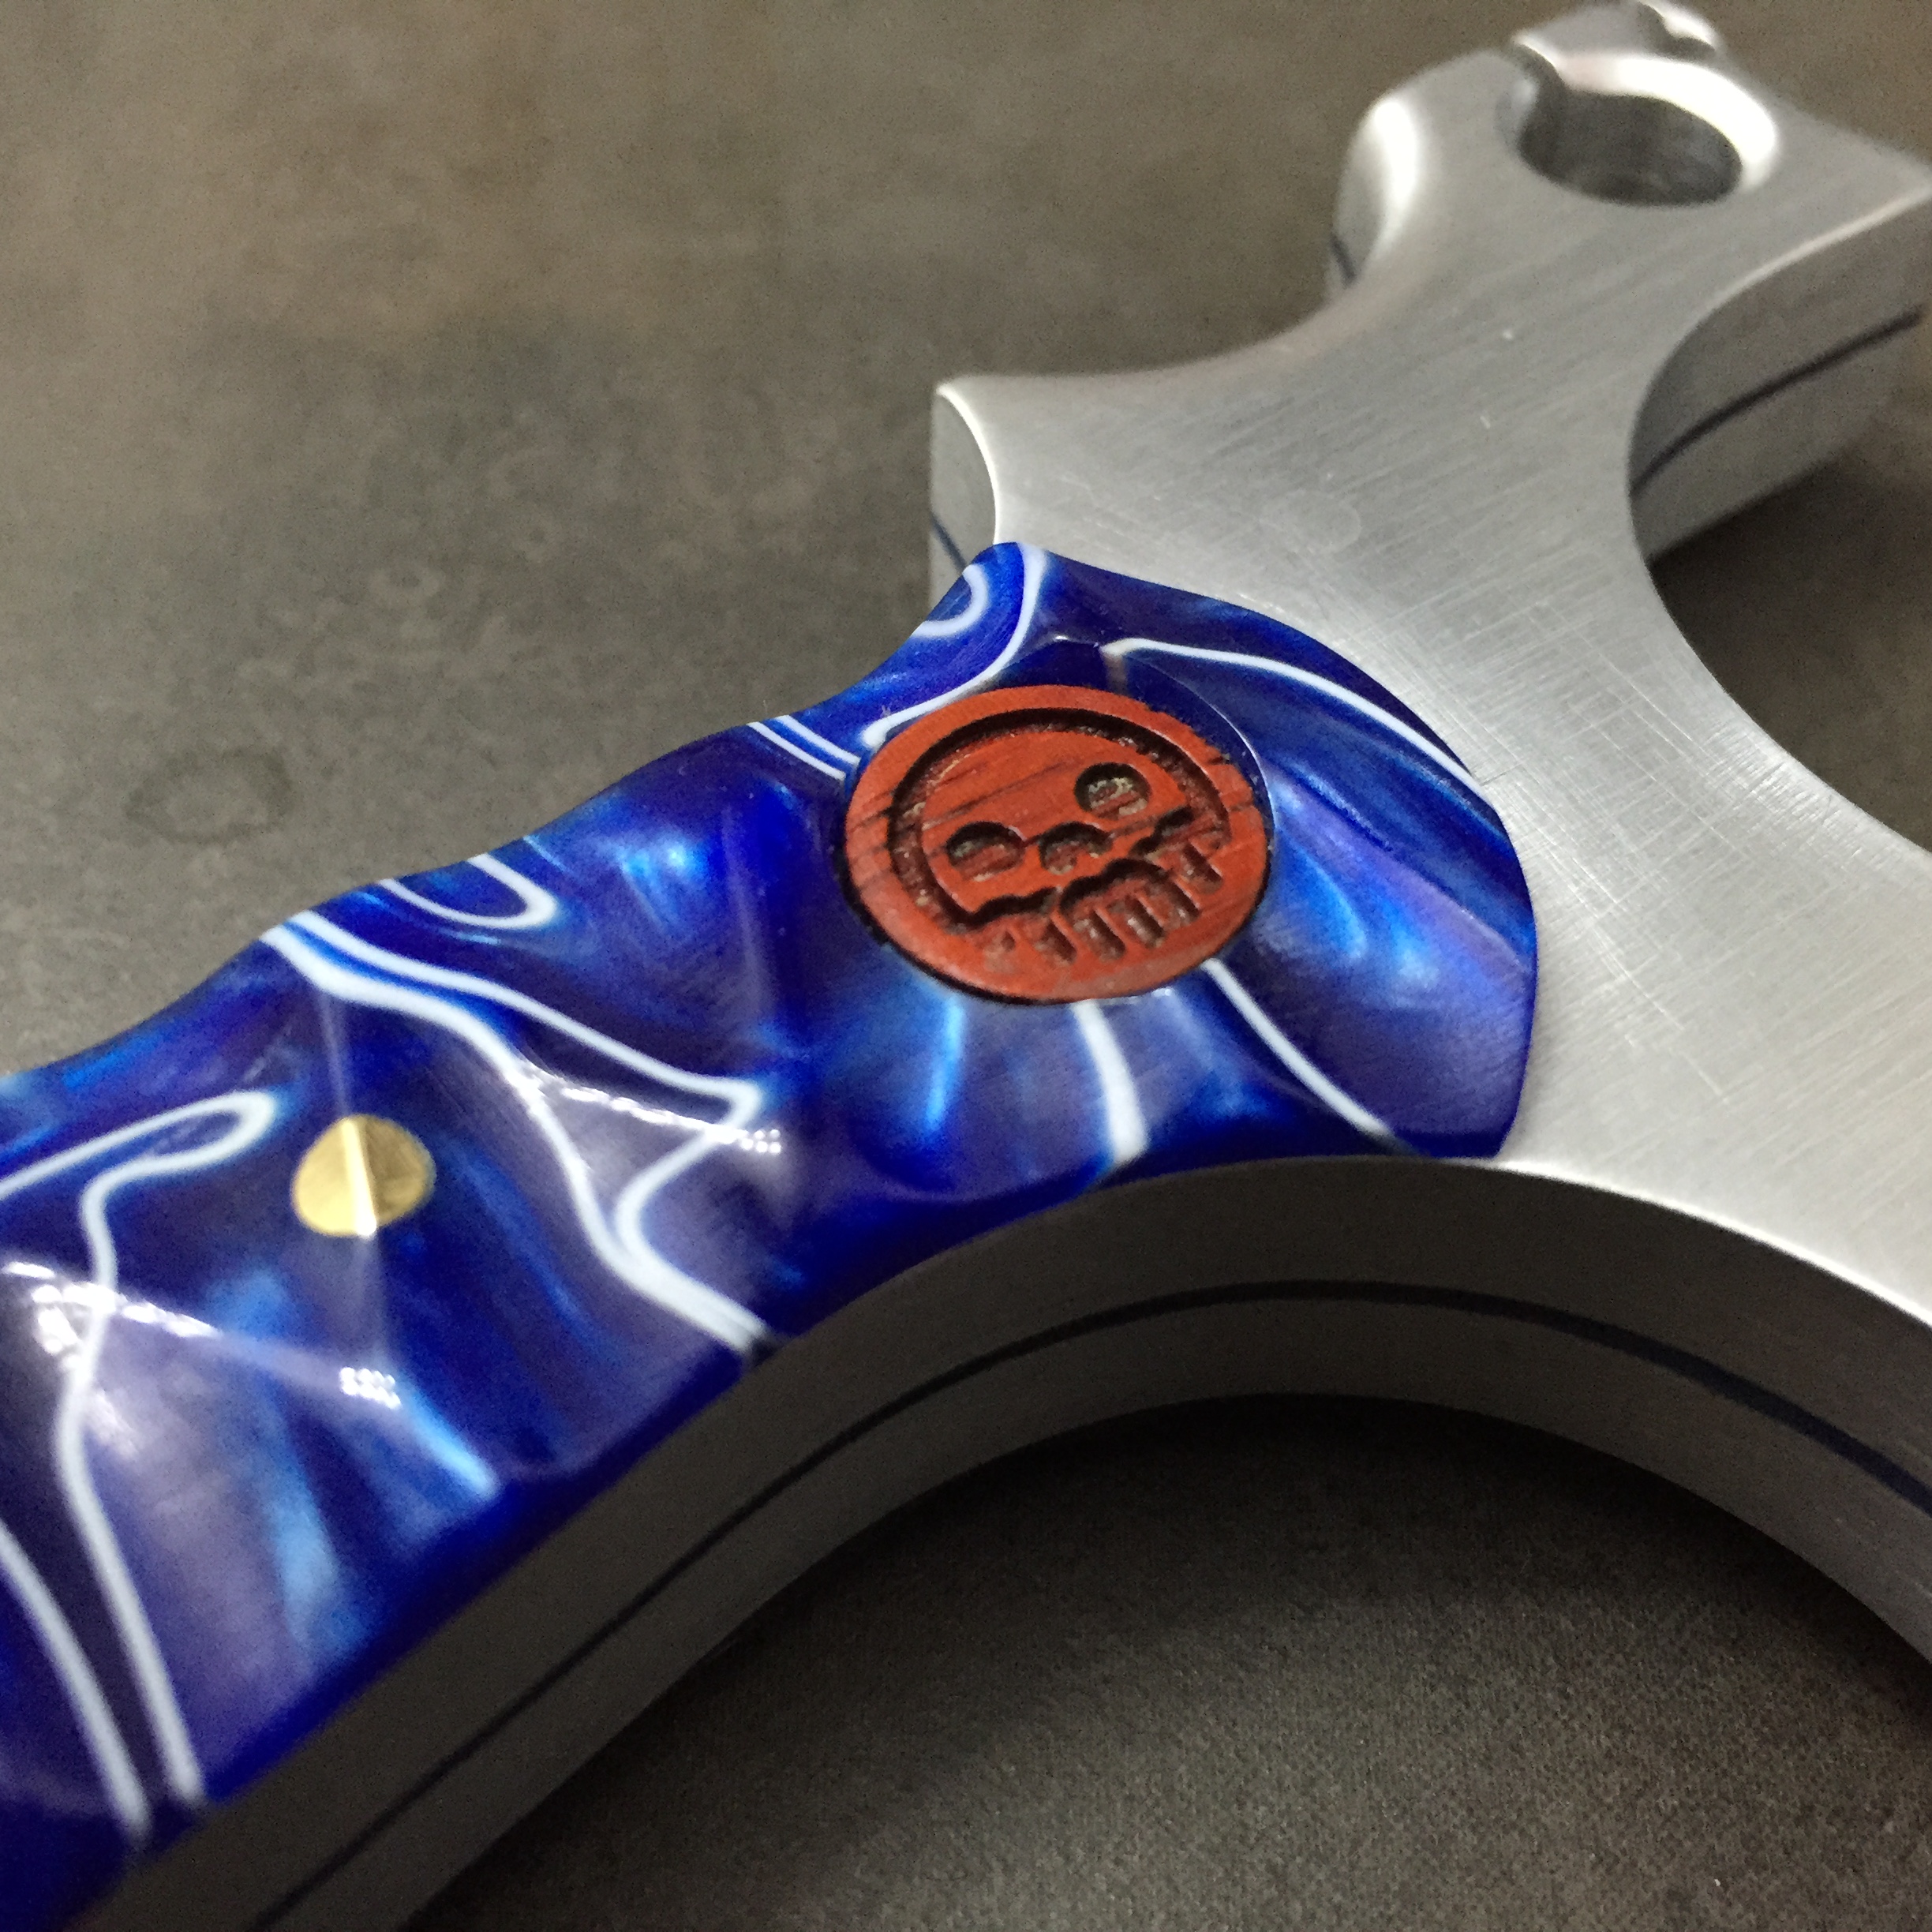
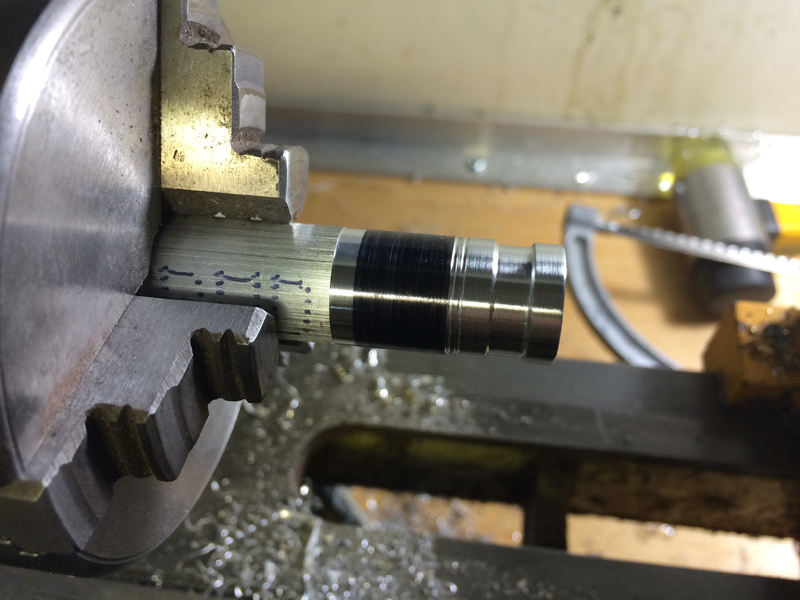
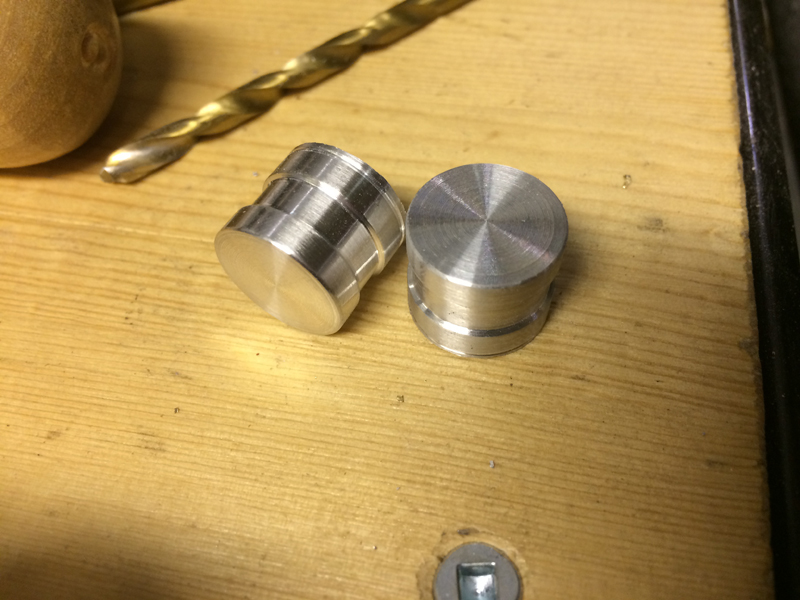
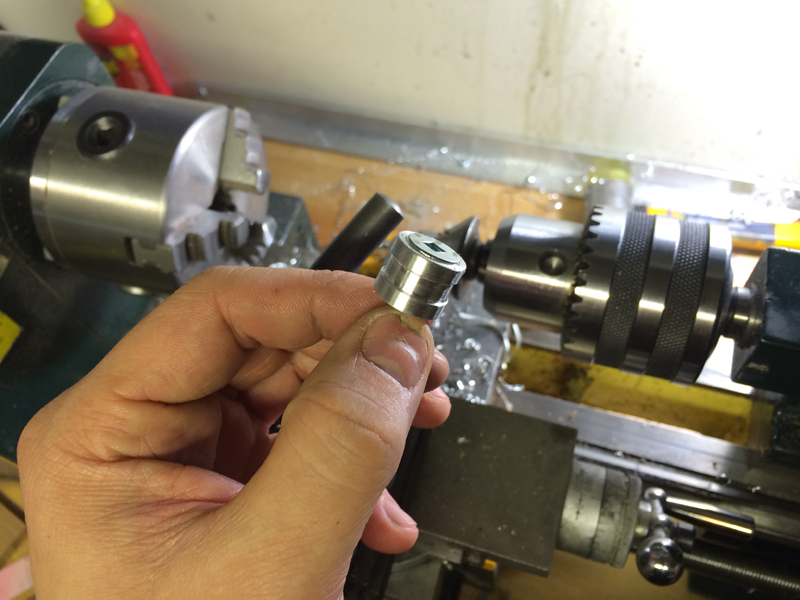
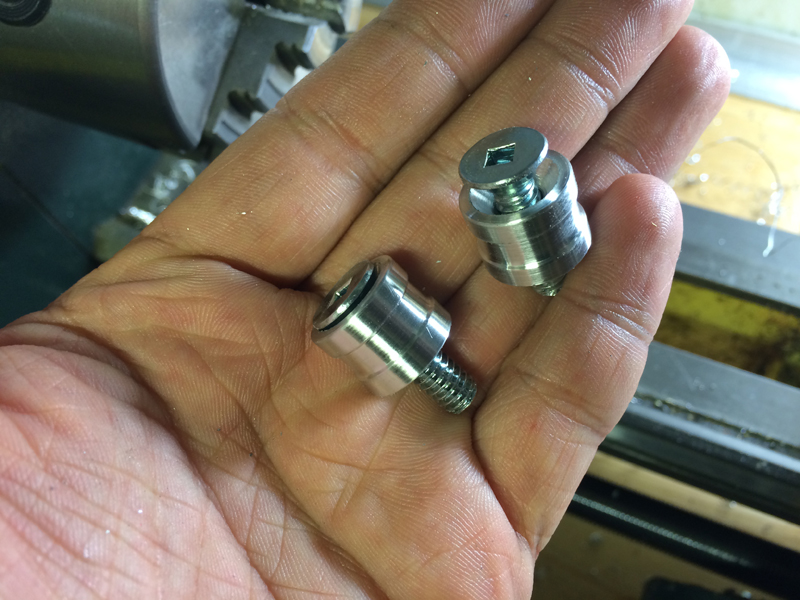
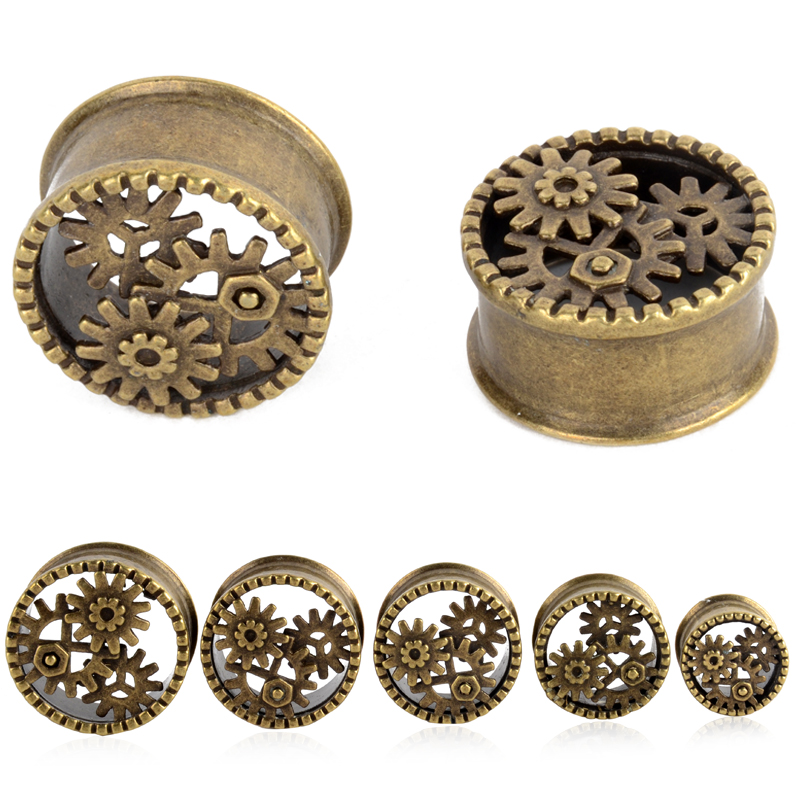
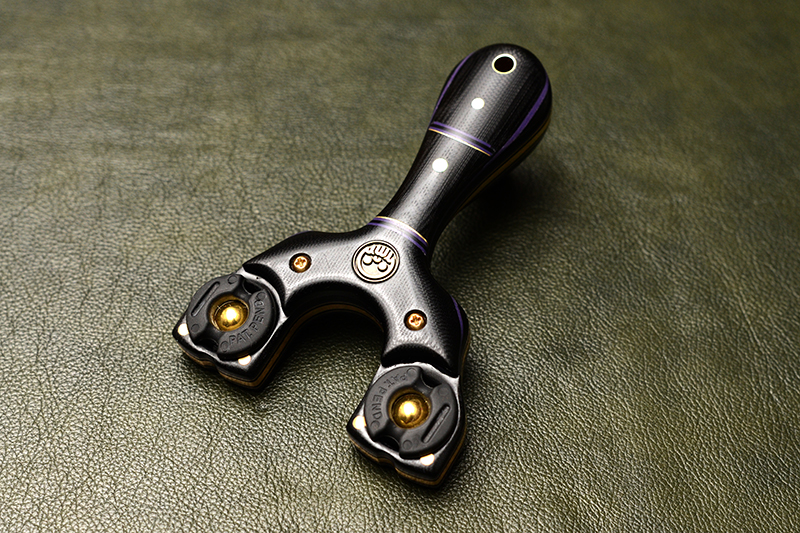
I am still waiting for ONE more hardware piece to come in, which put this deep custom slingshot into the next level. Some 10mm ear tunnel gauges. While I sourced 7/16″ G2000 brass balls for the Ocularis plugs, the gear laden era plugs will give the shooter side some interest beyond the maker’s mark.

d2f58e09-6b7e-469f-a1c1-7638ea5e896f

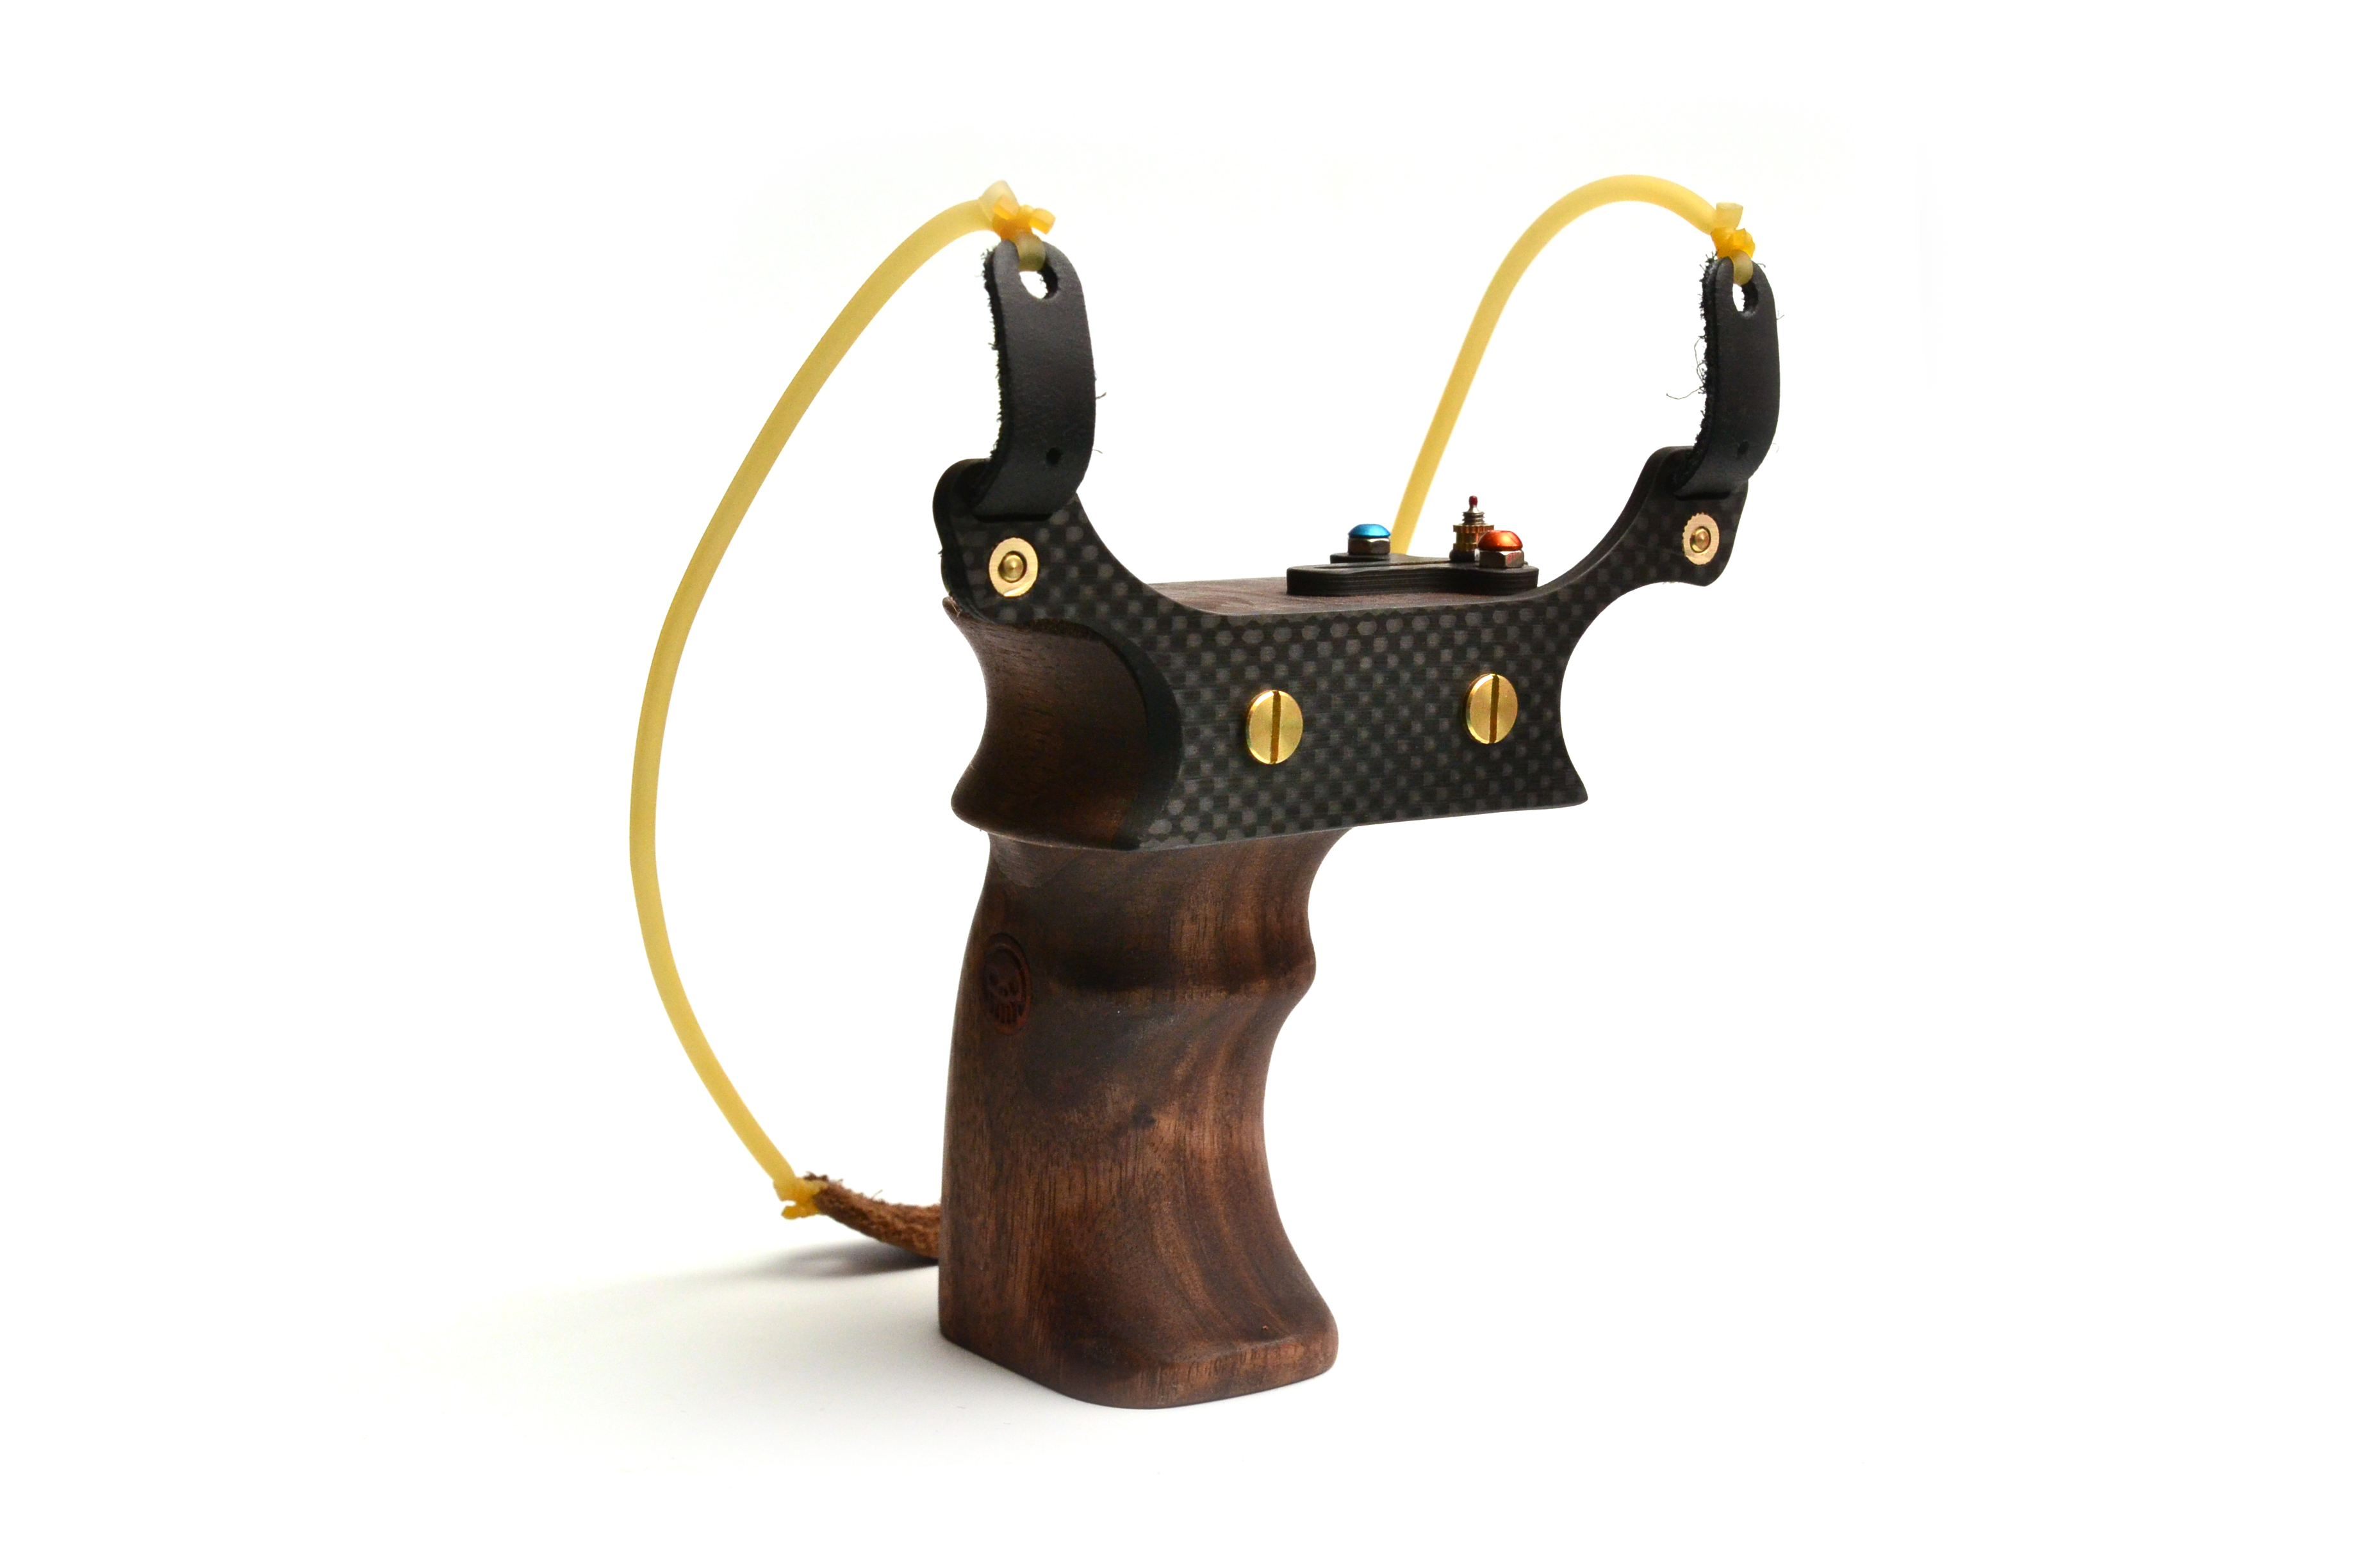
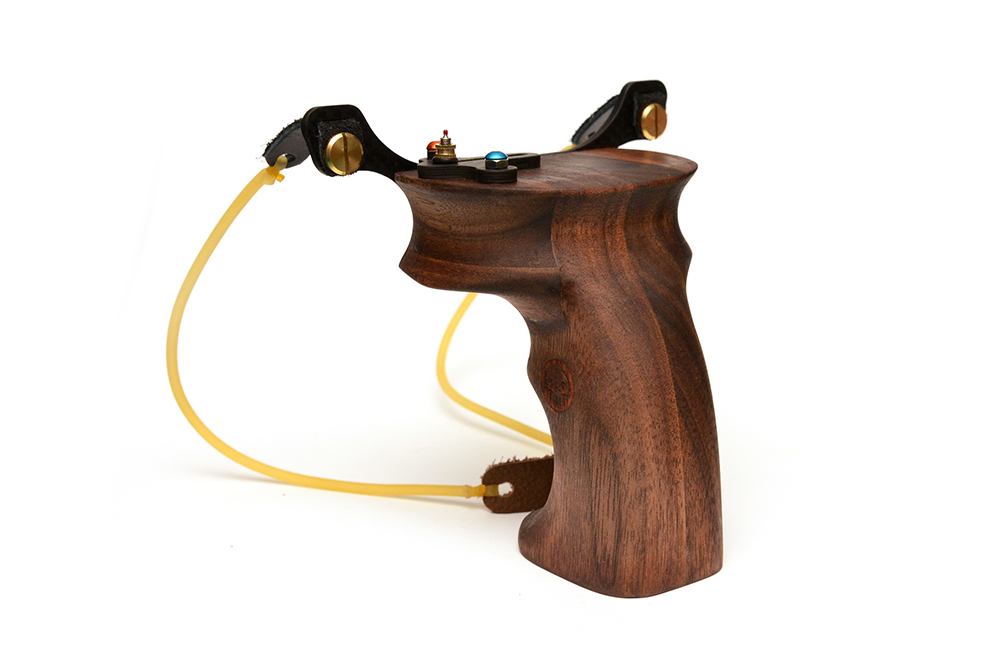
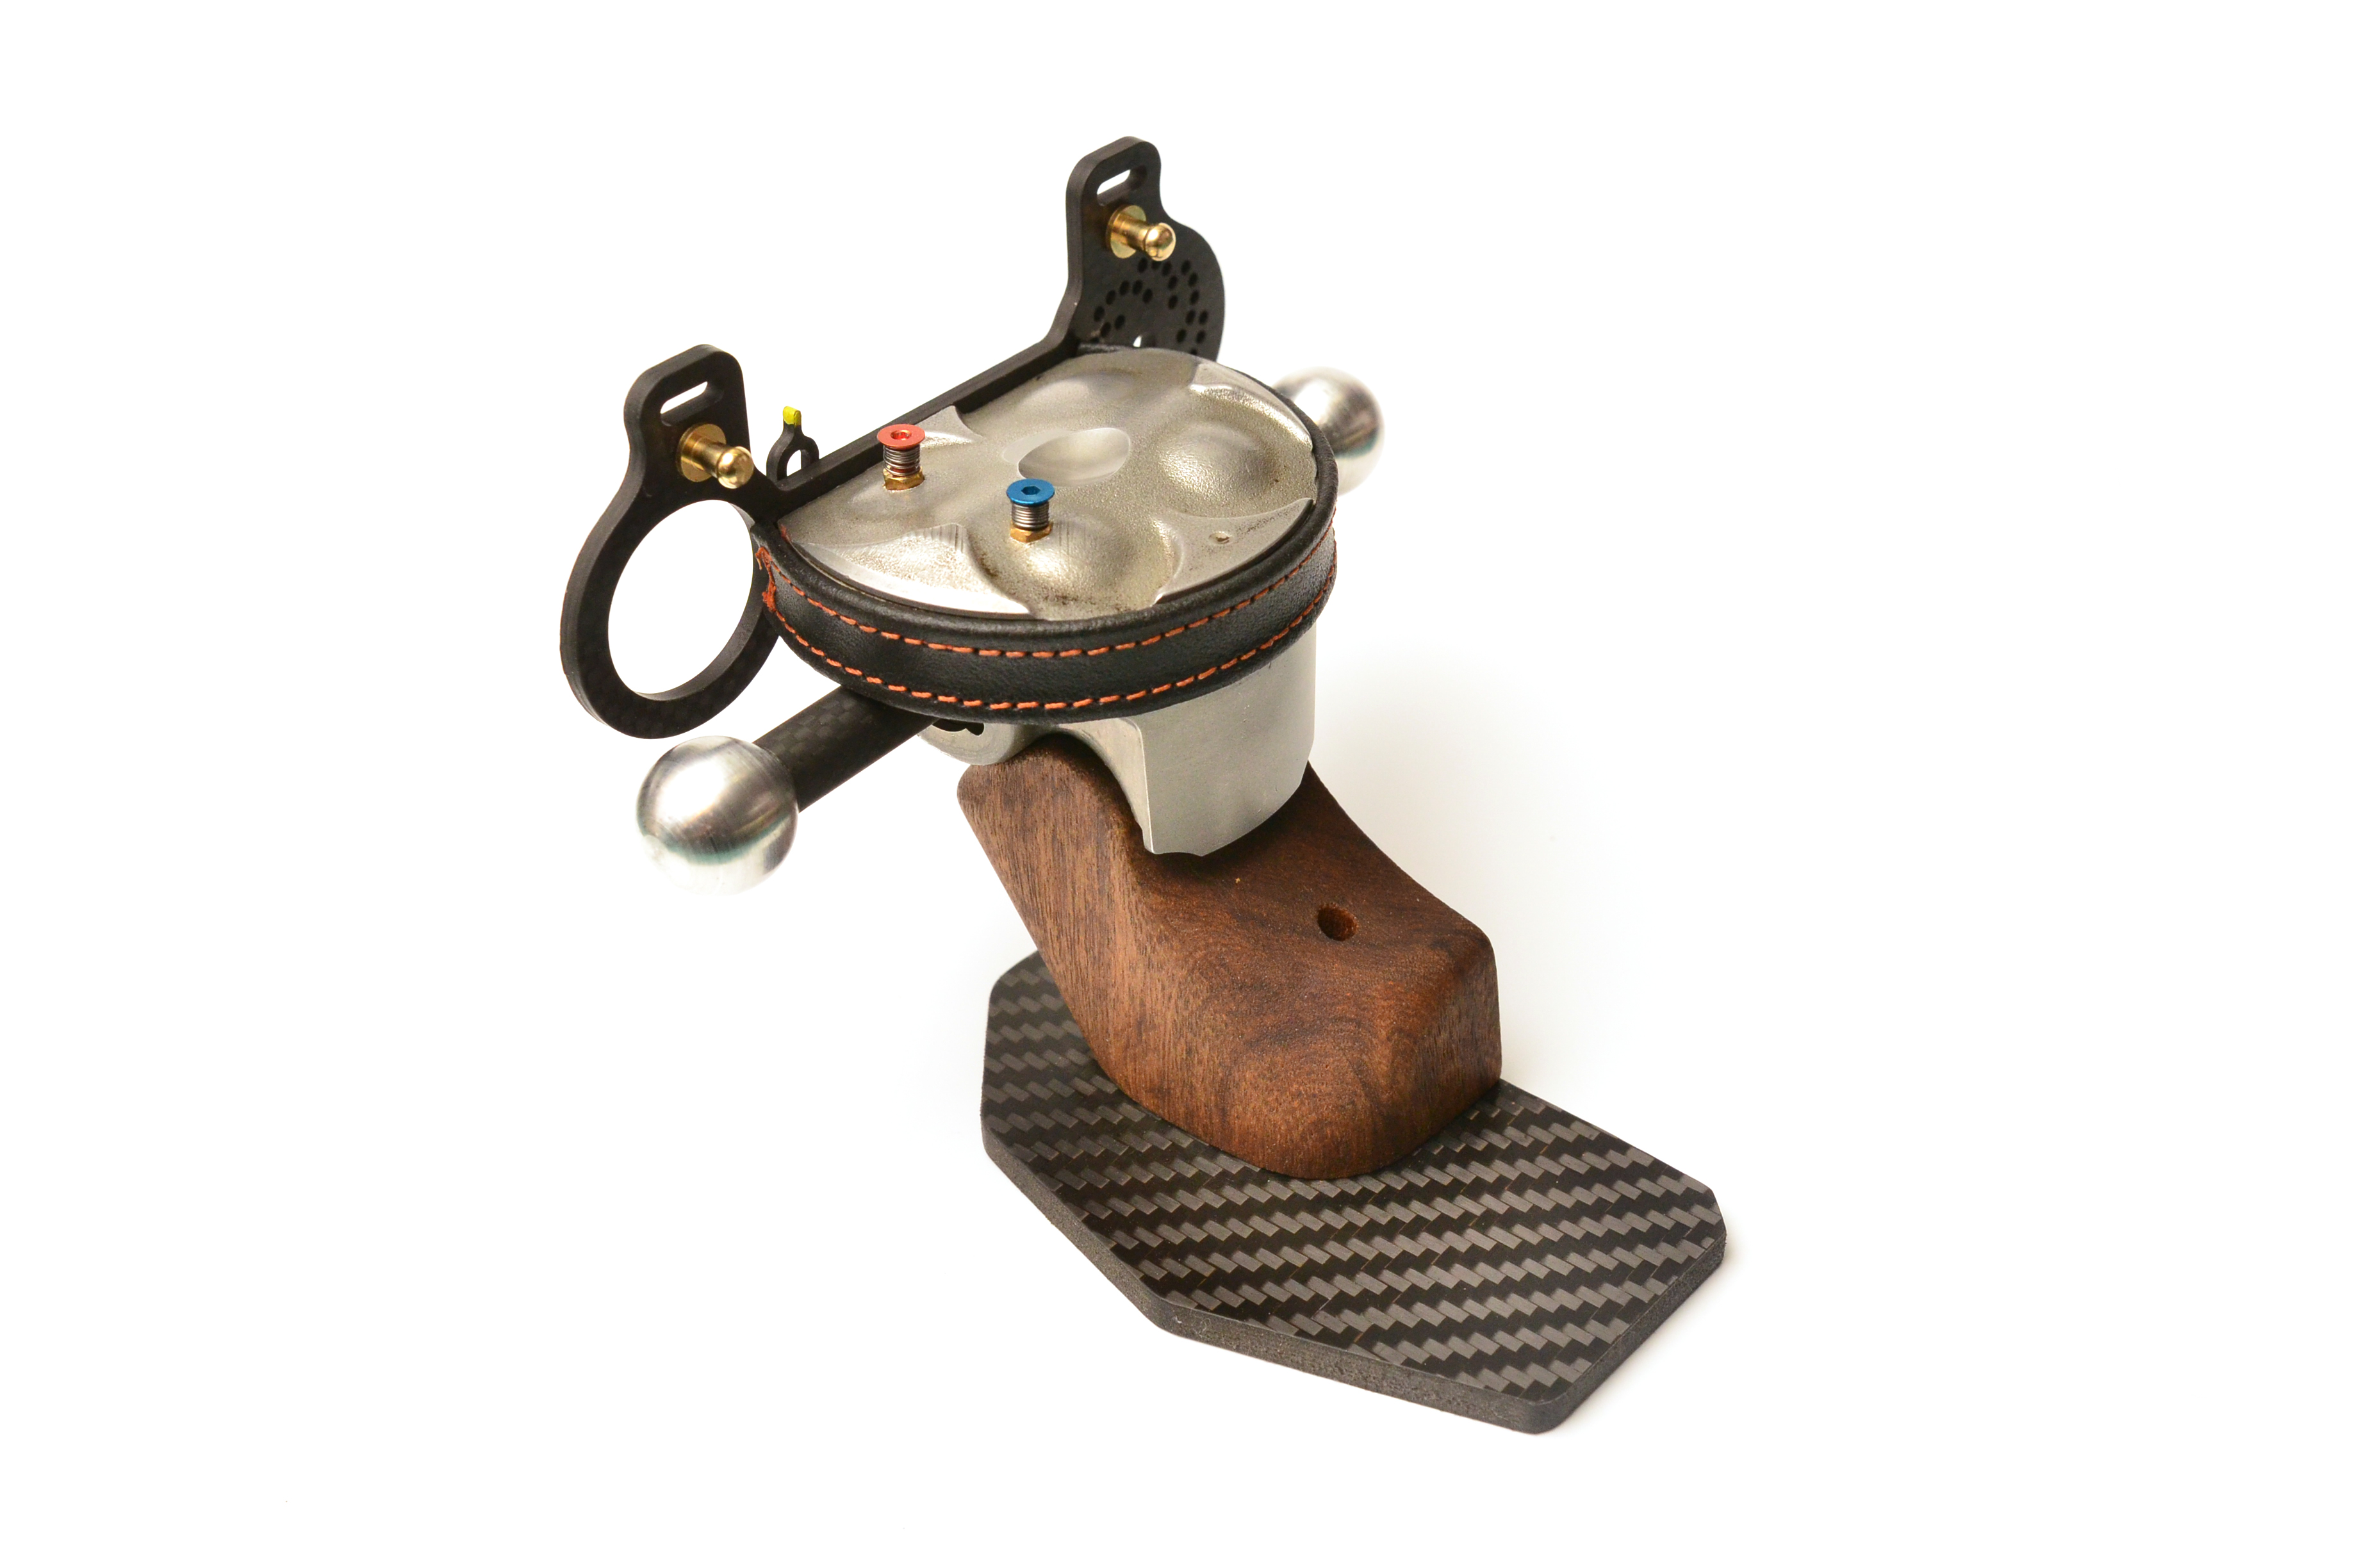
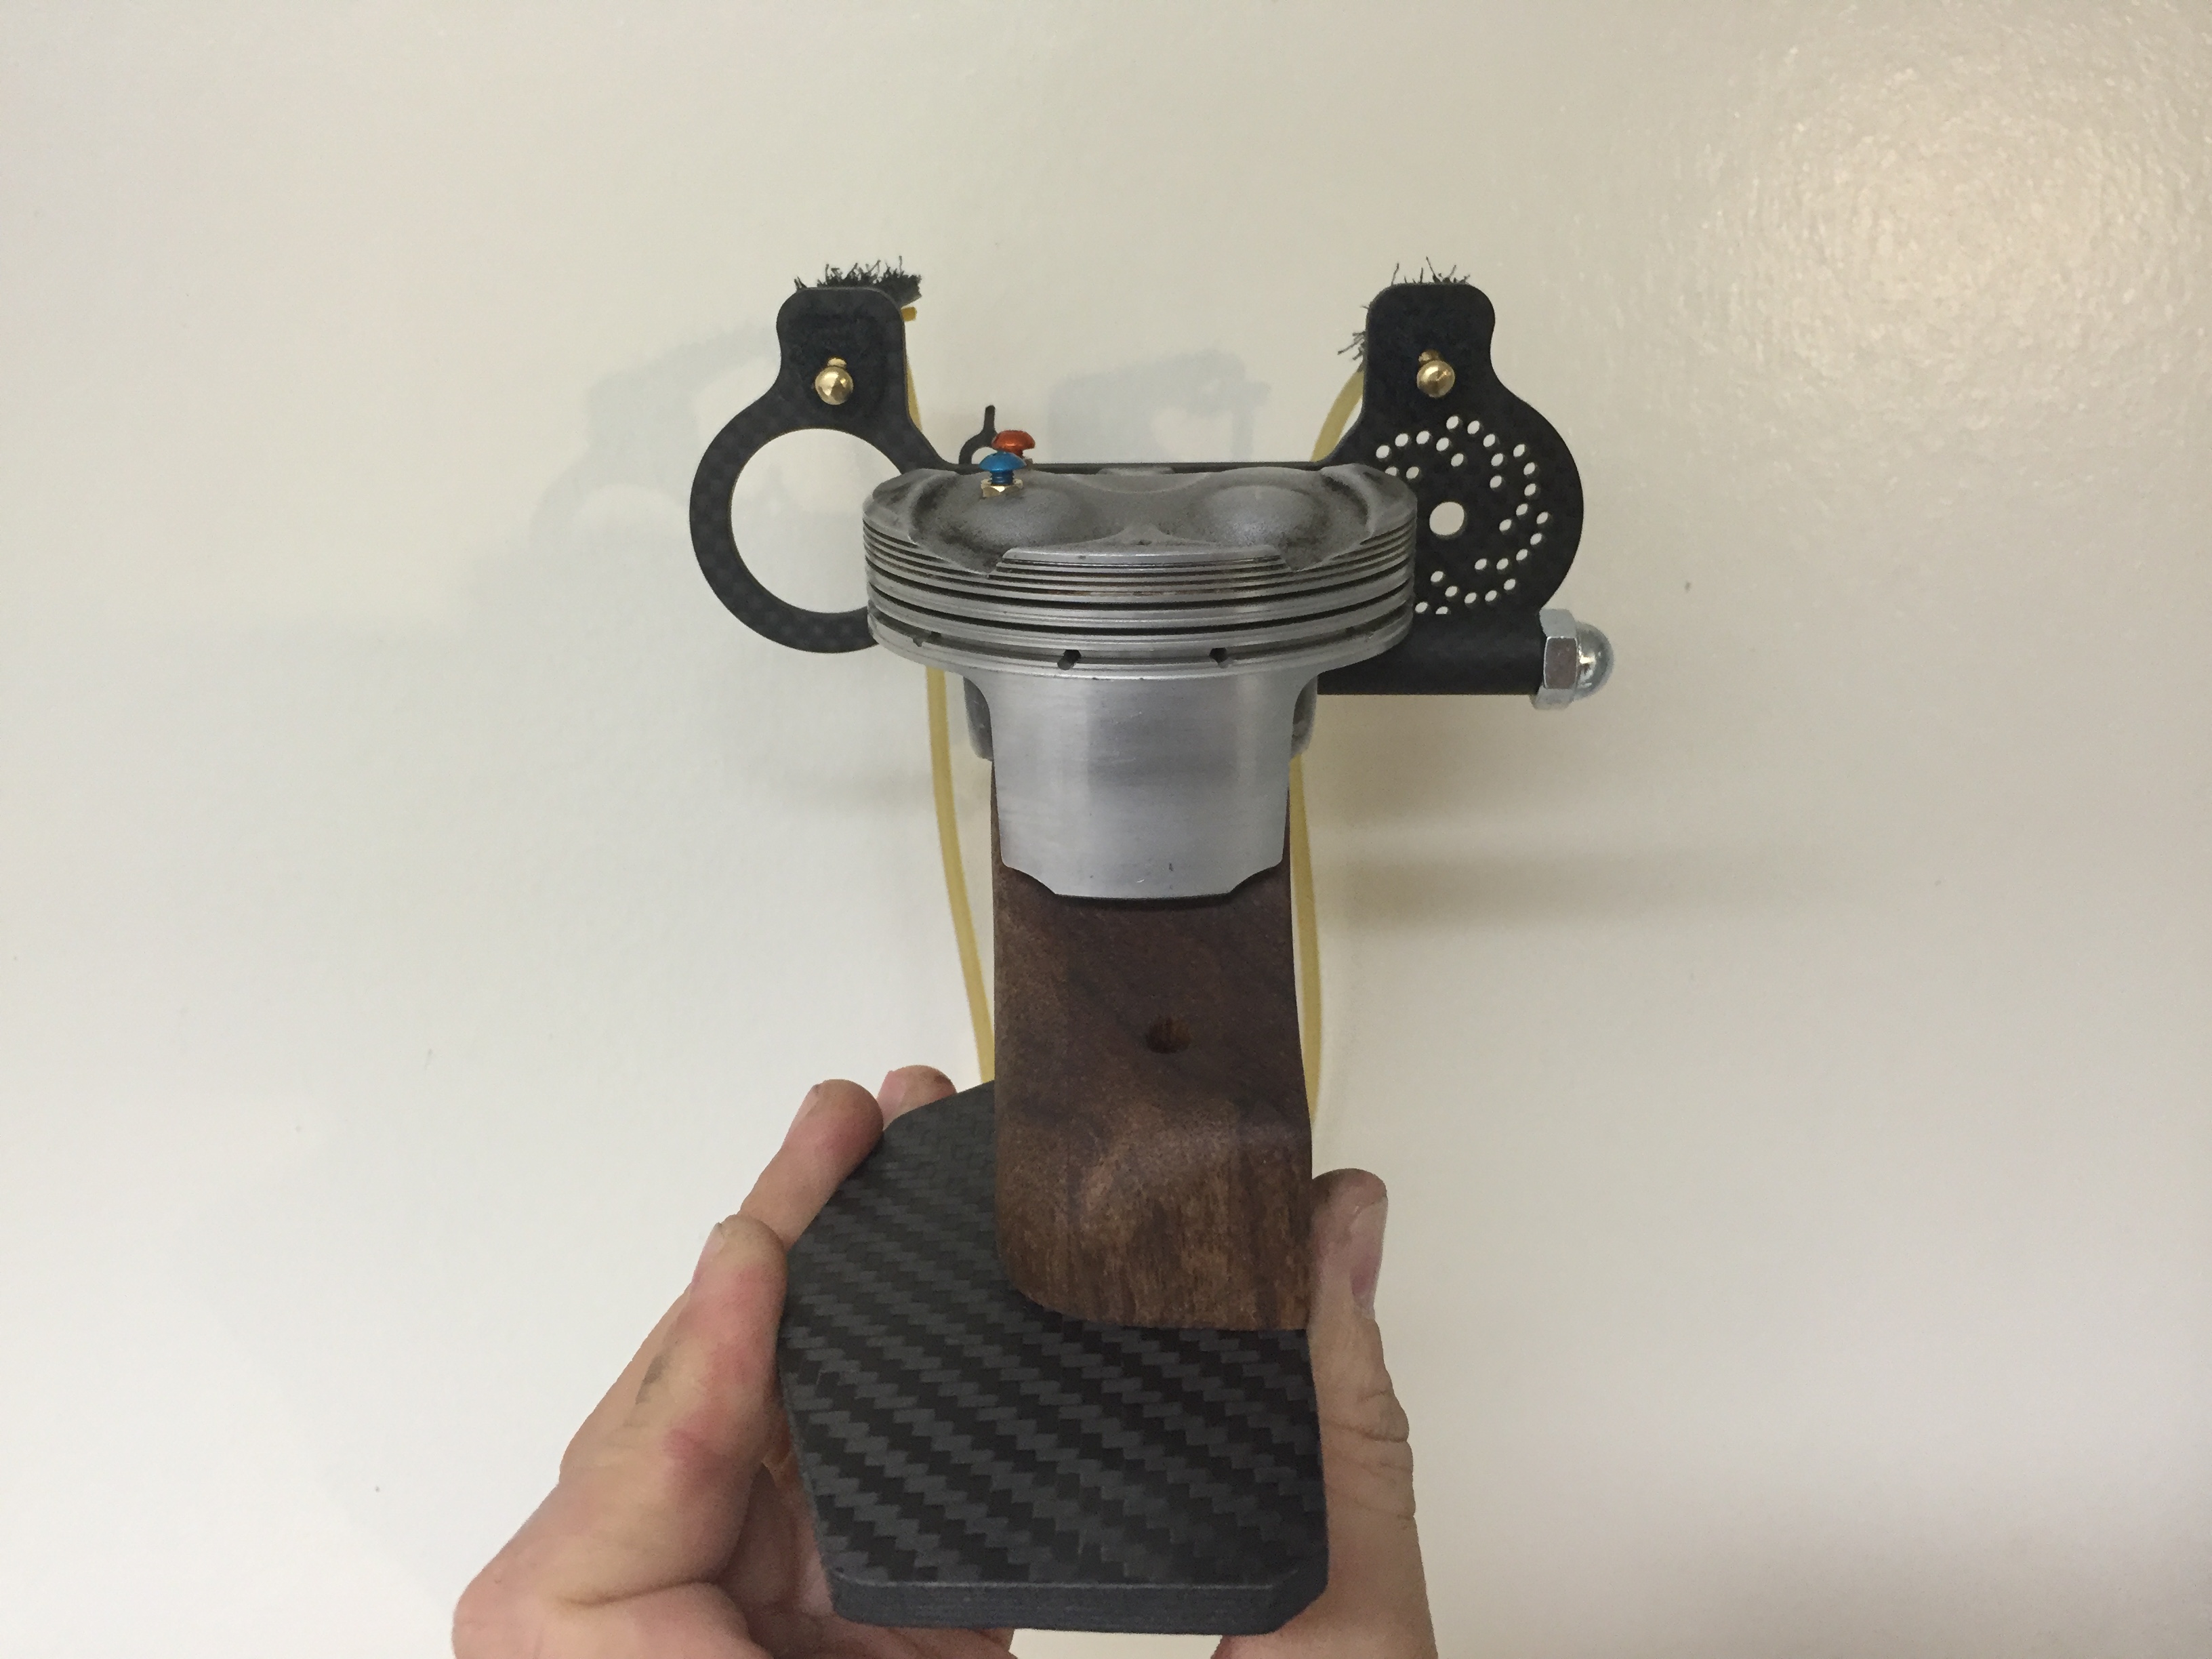
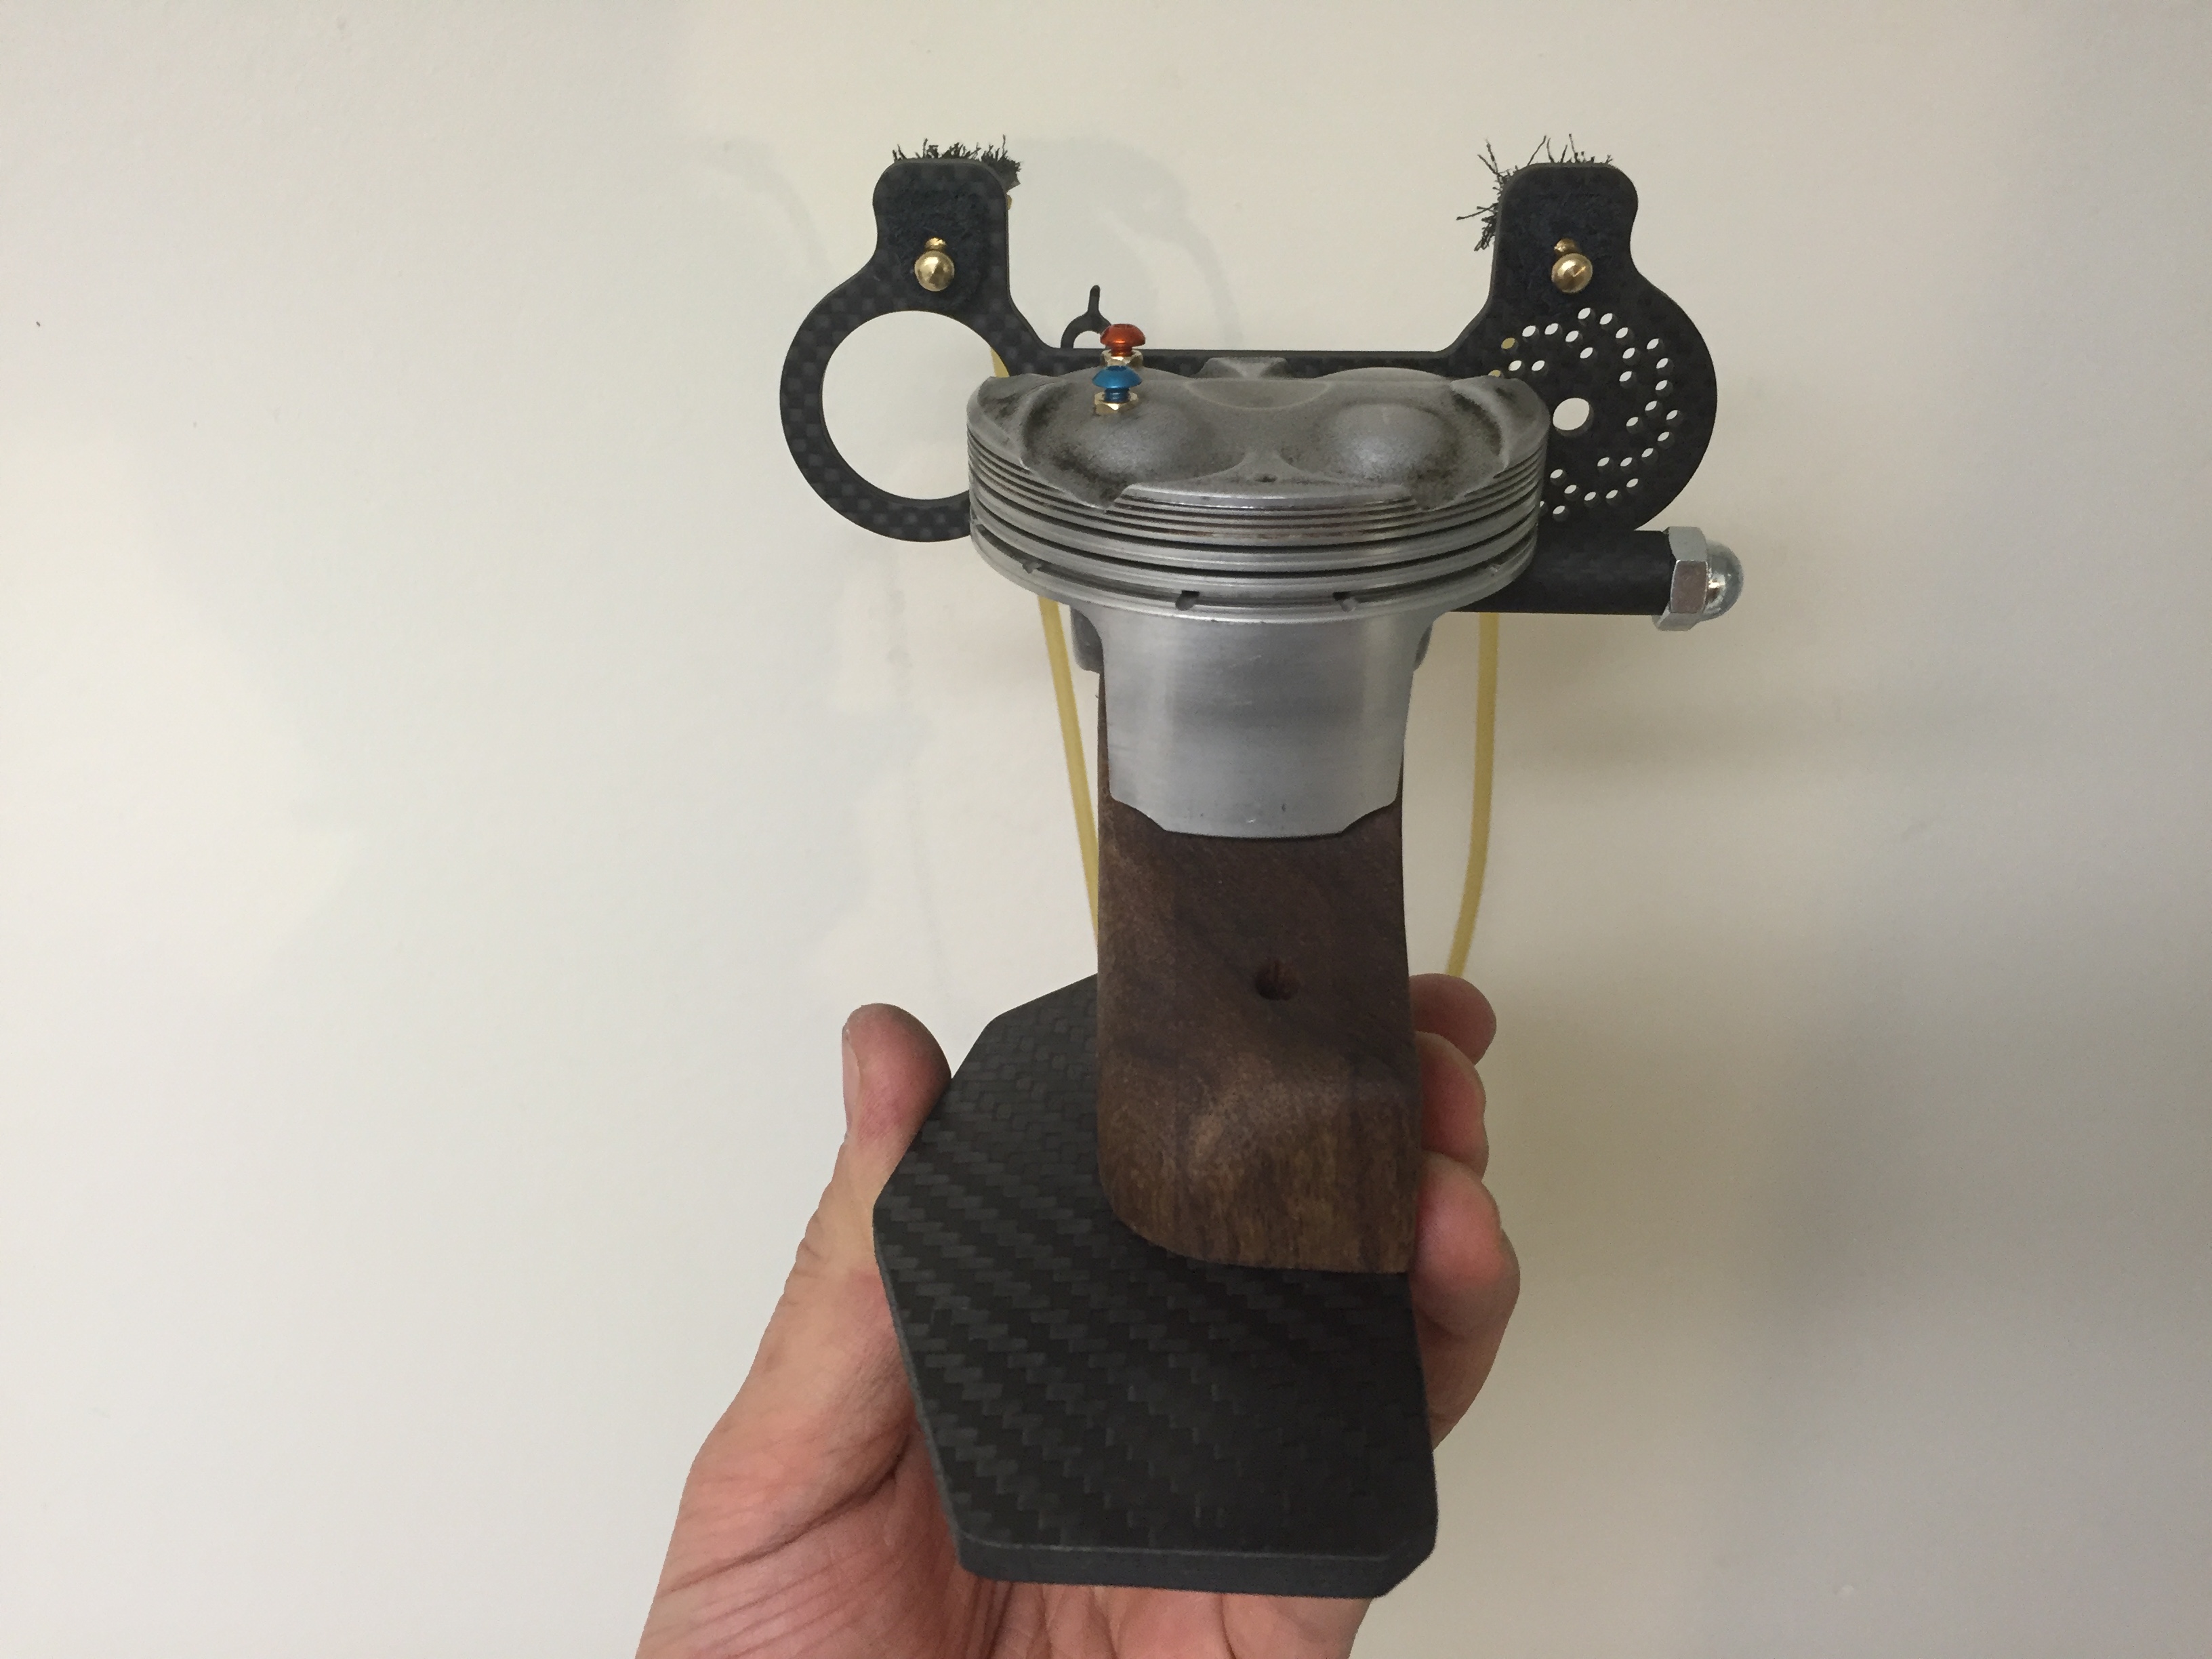
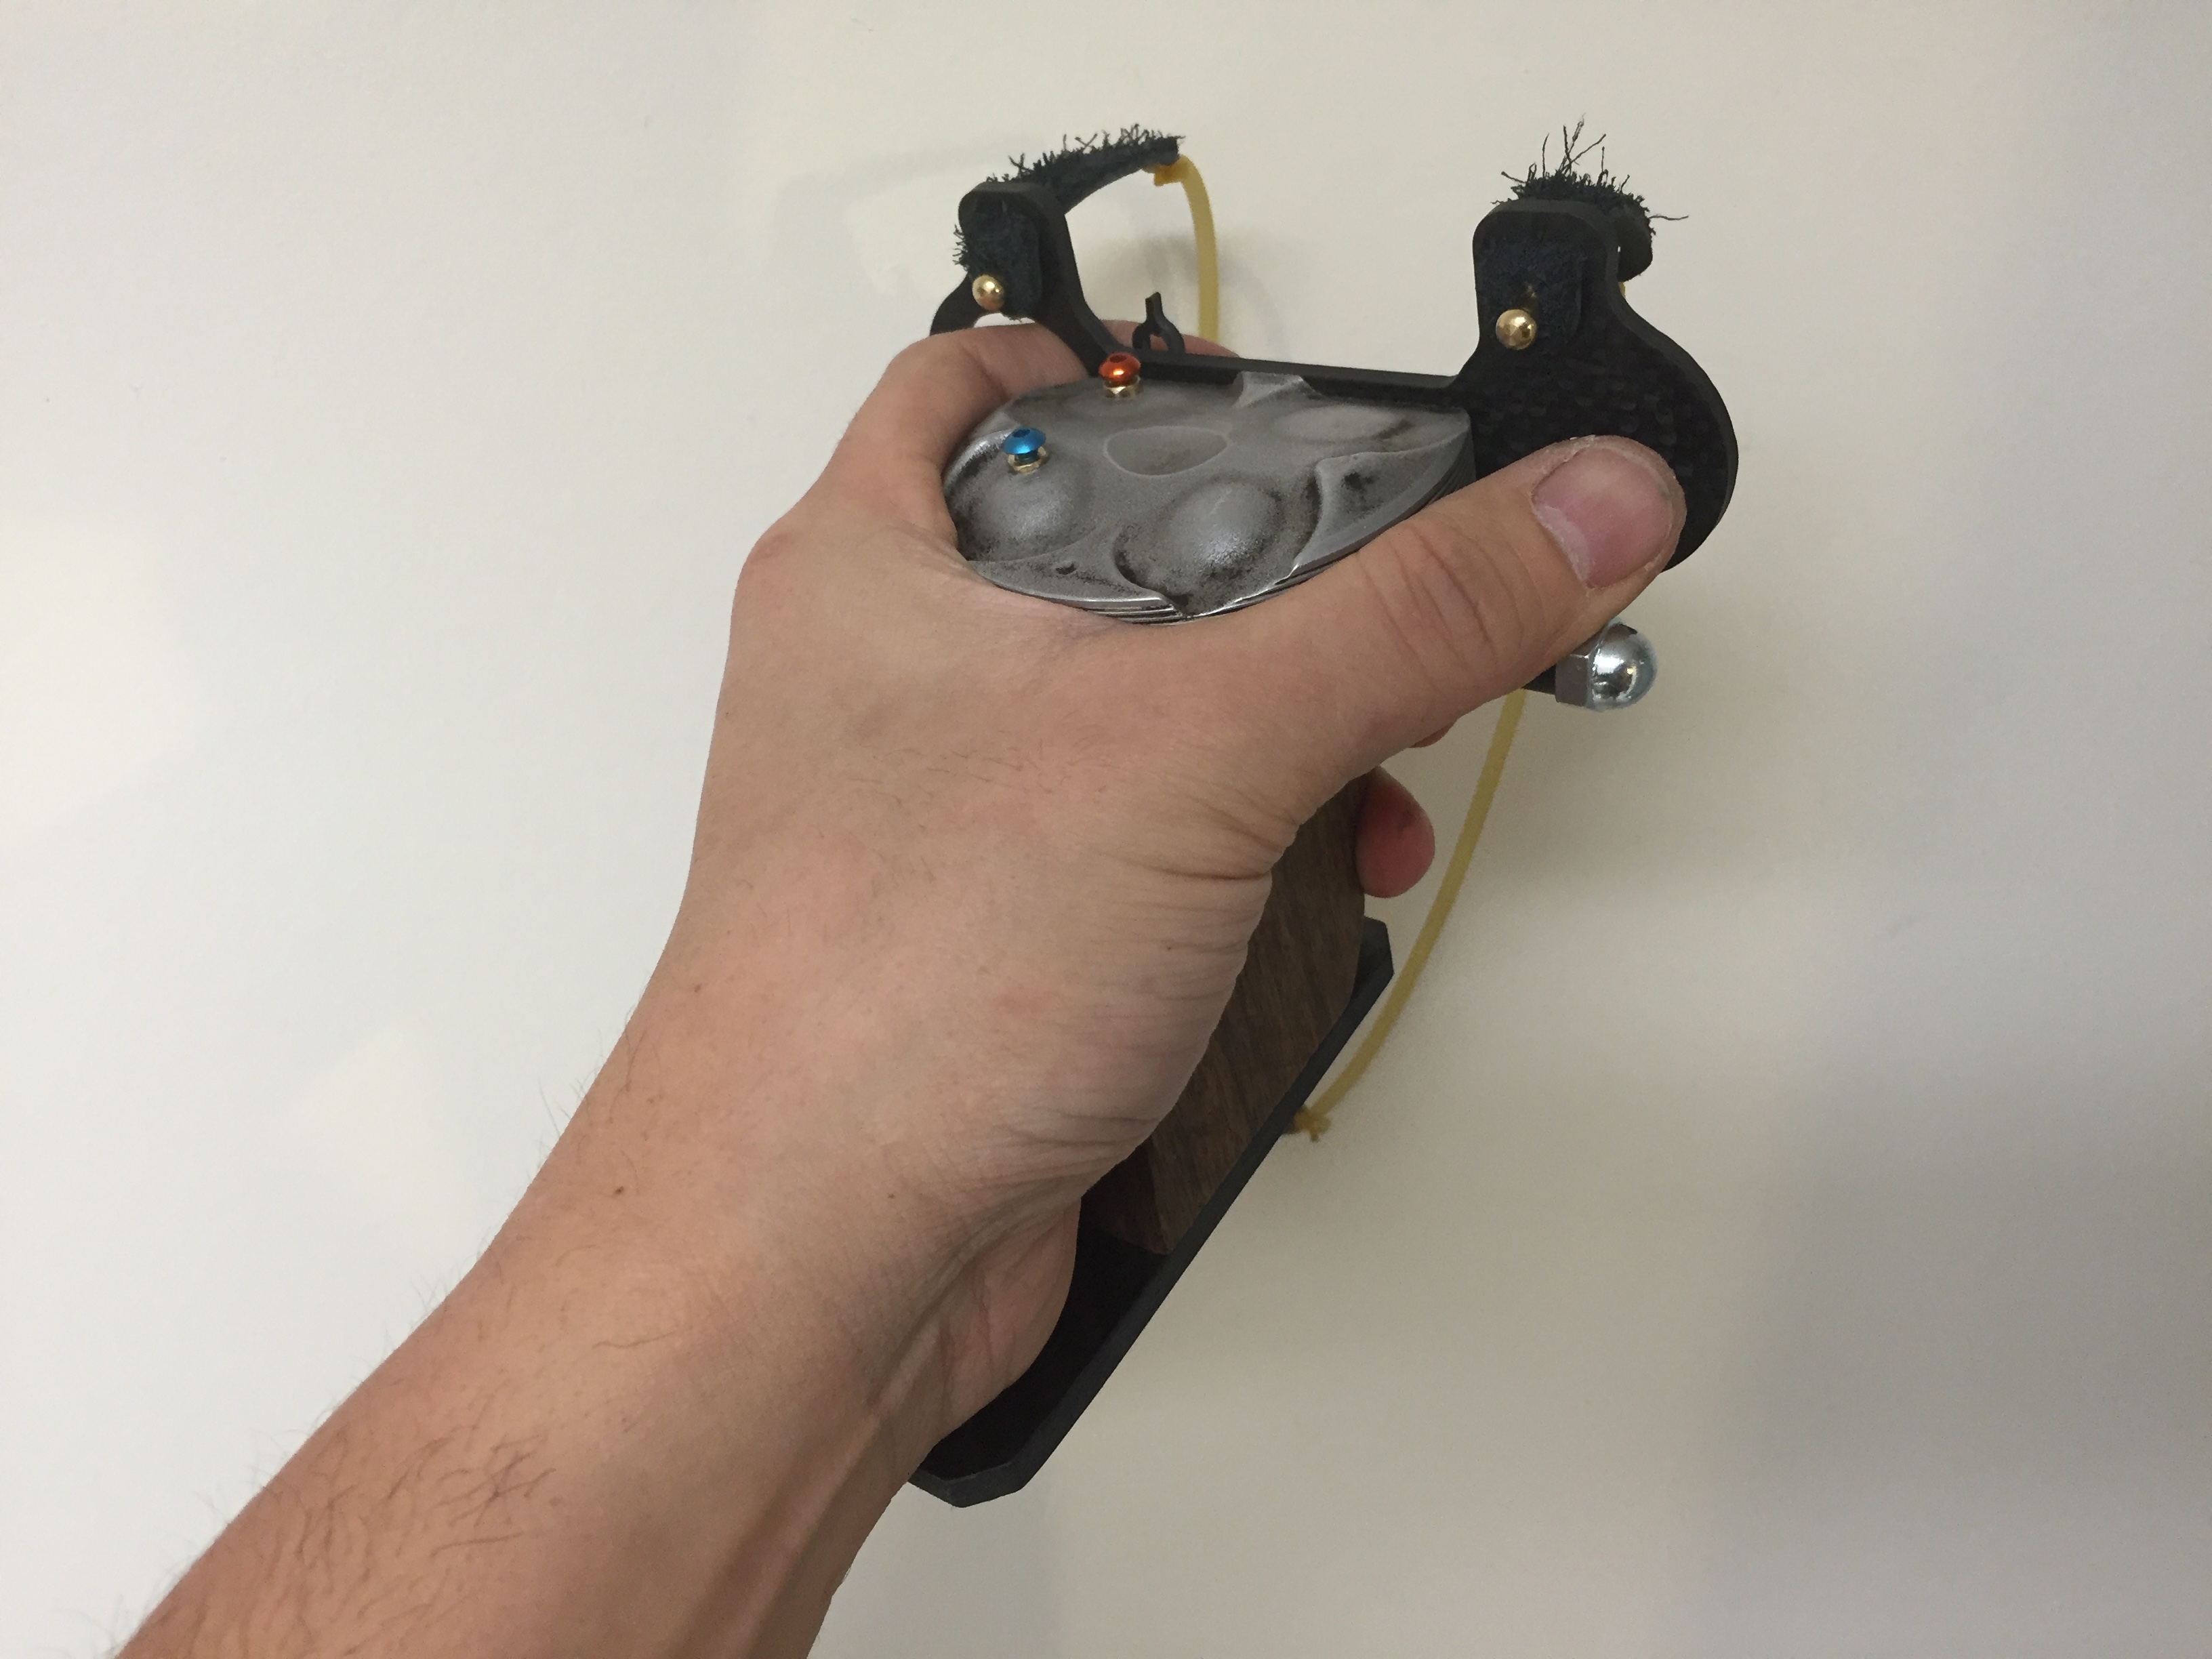
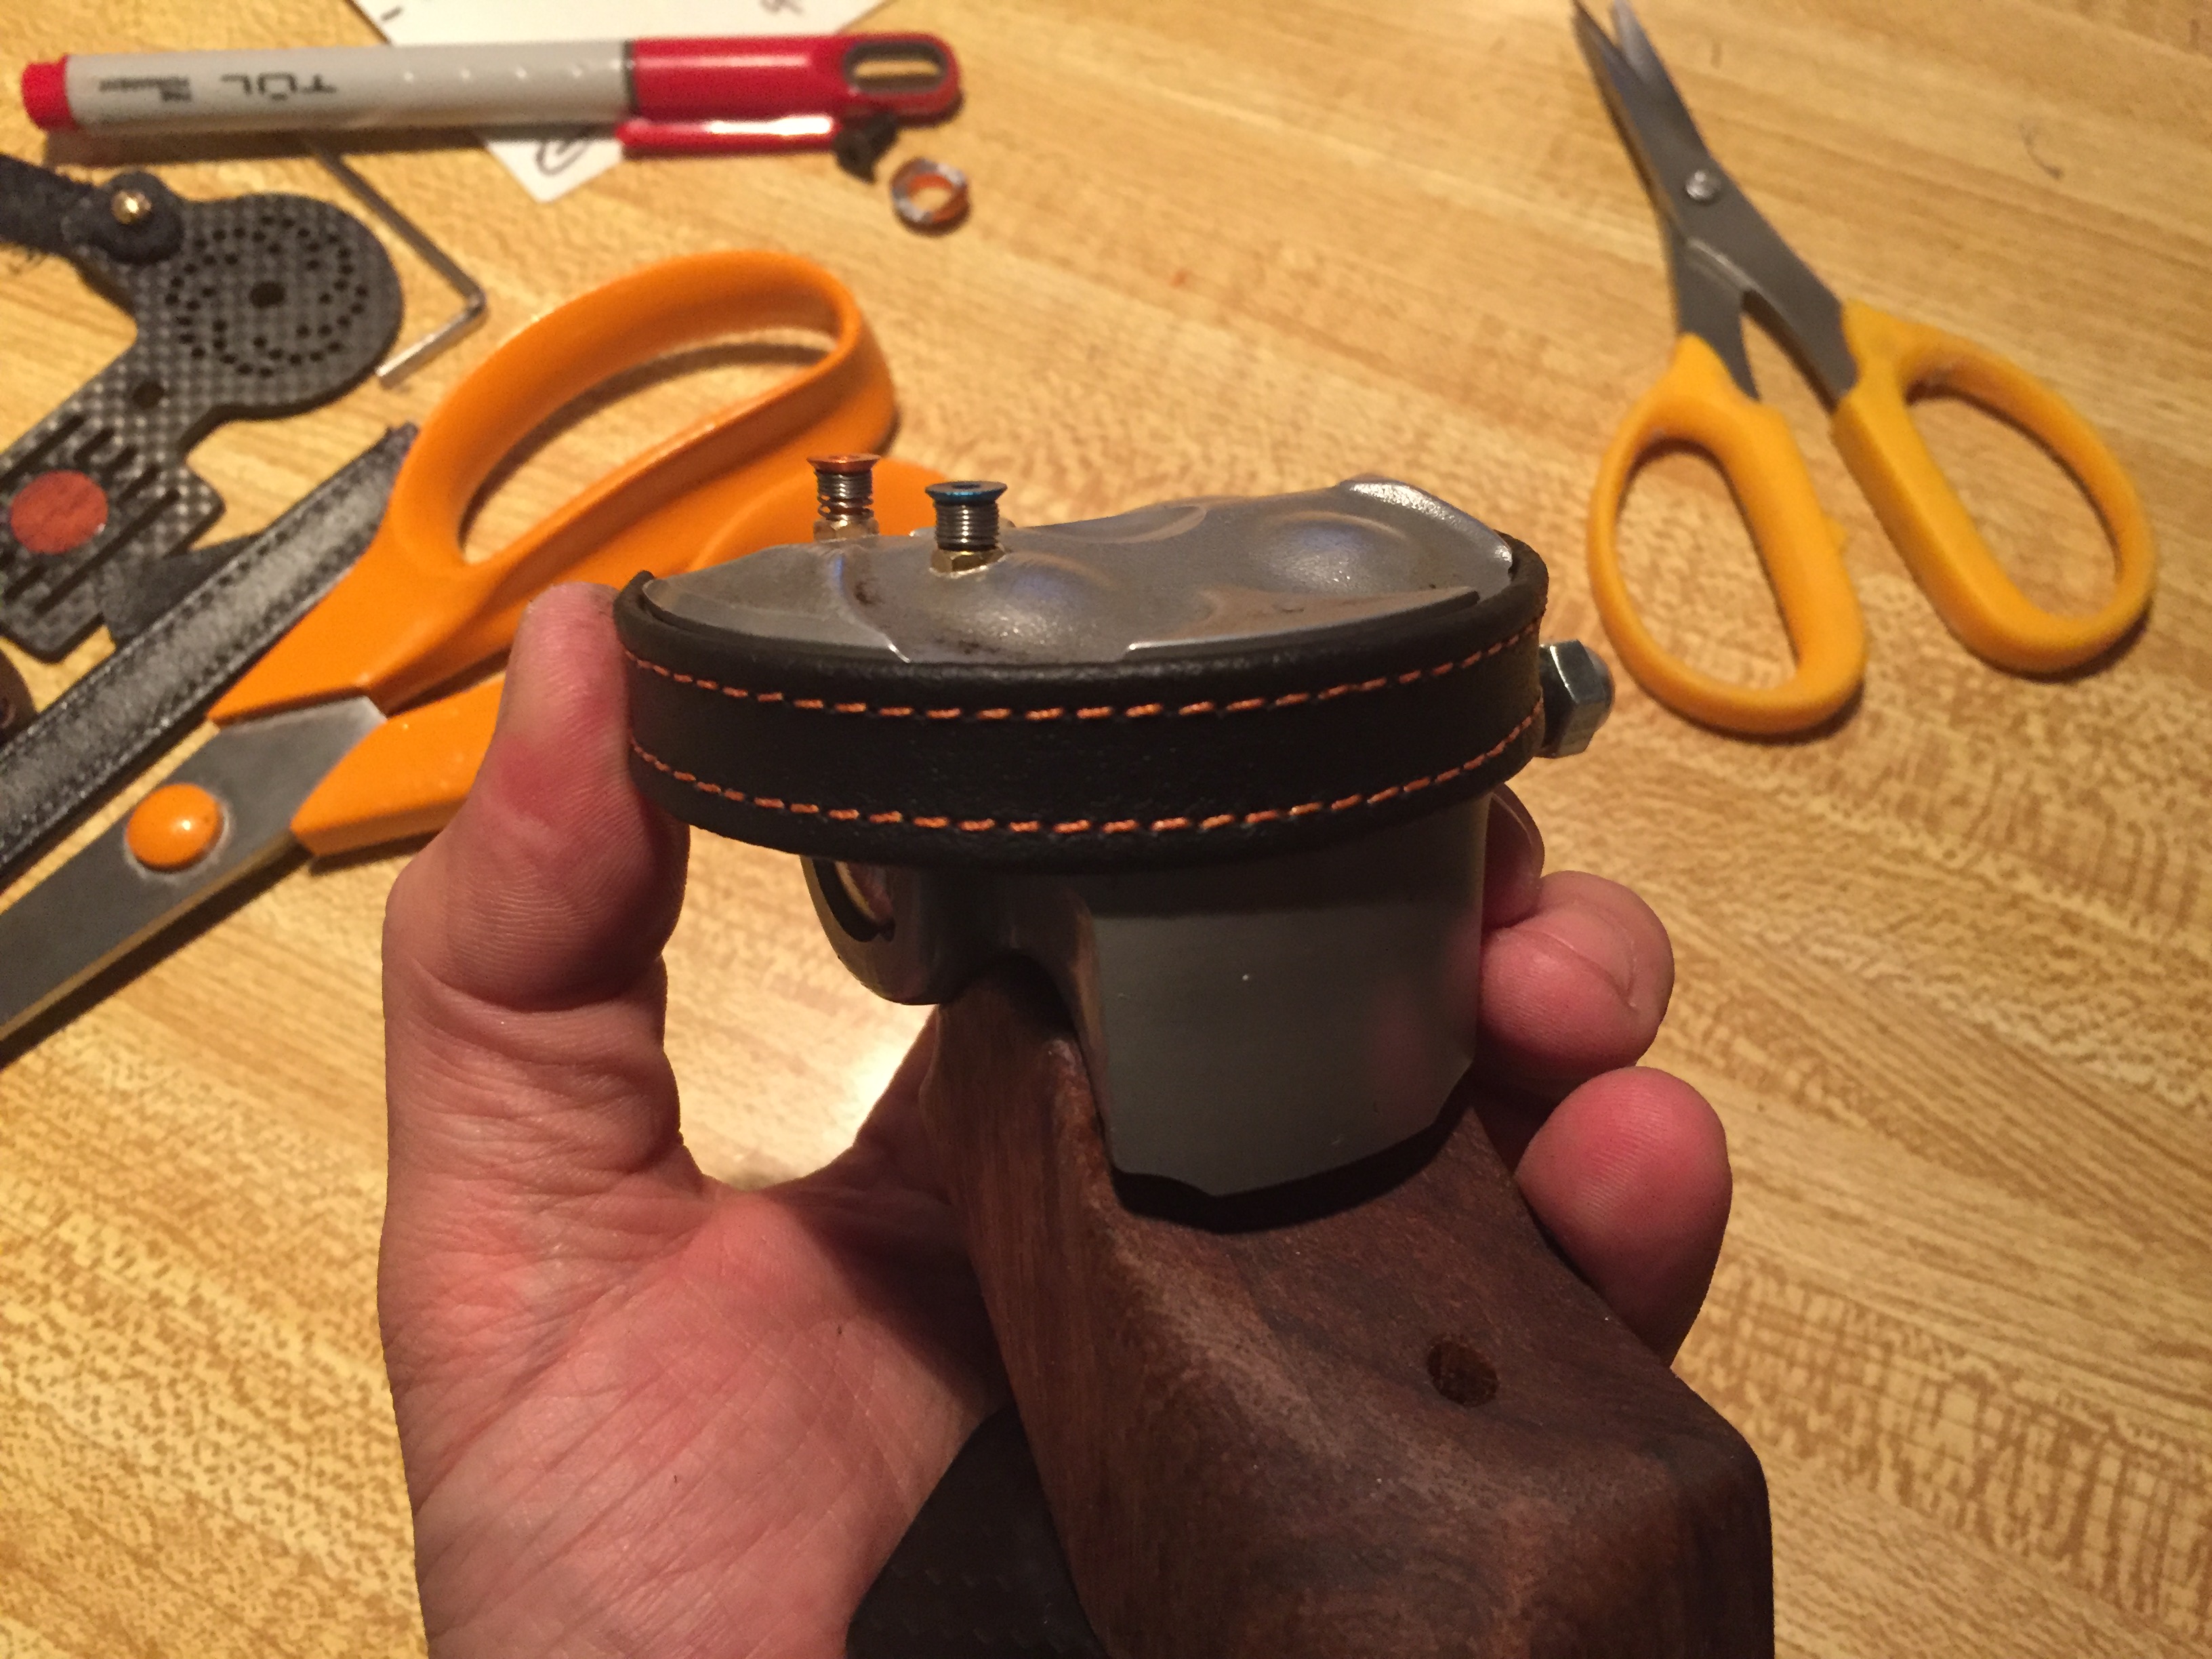
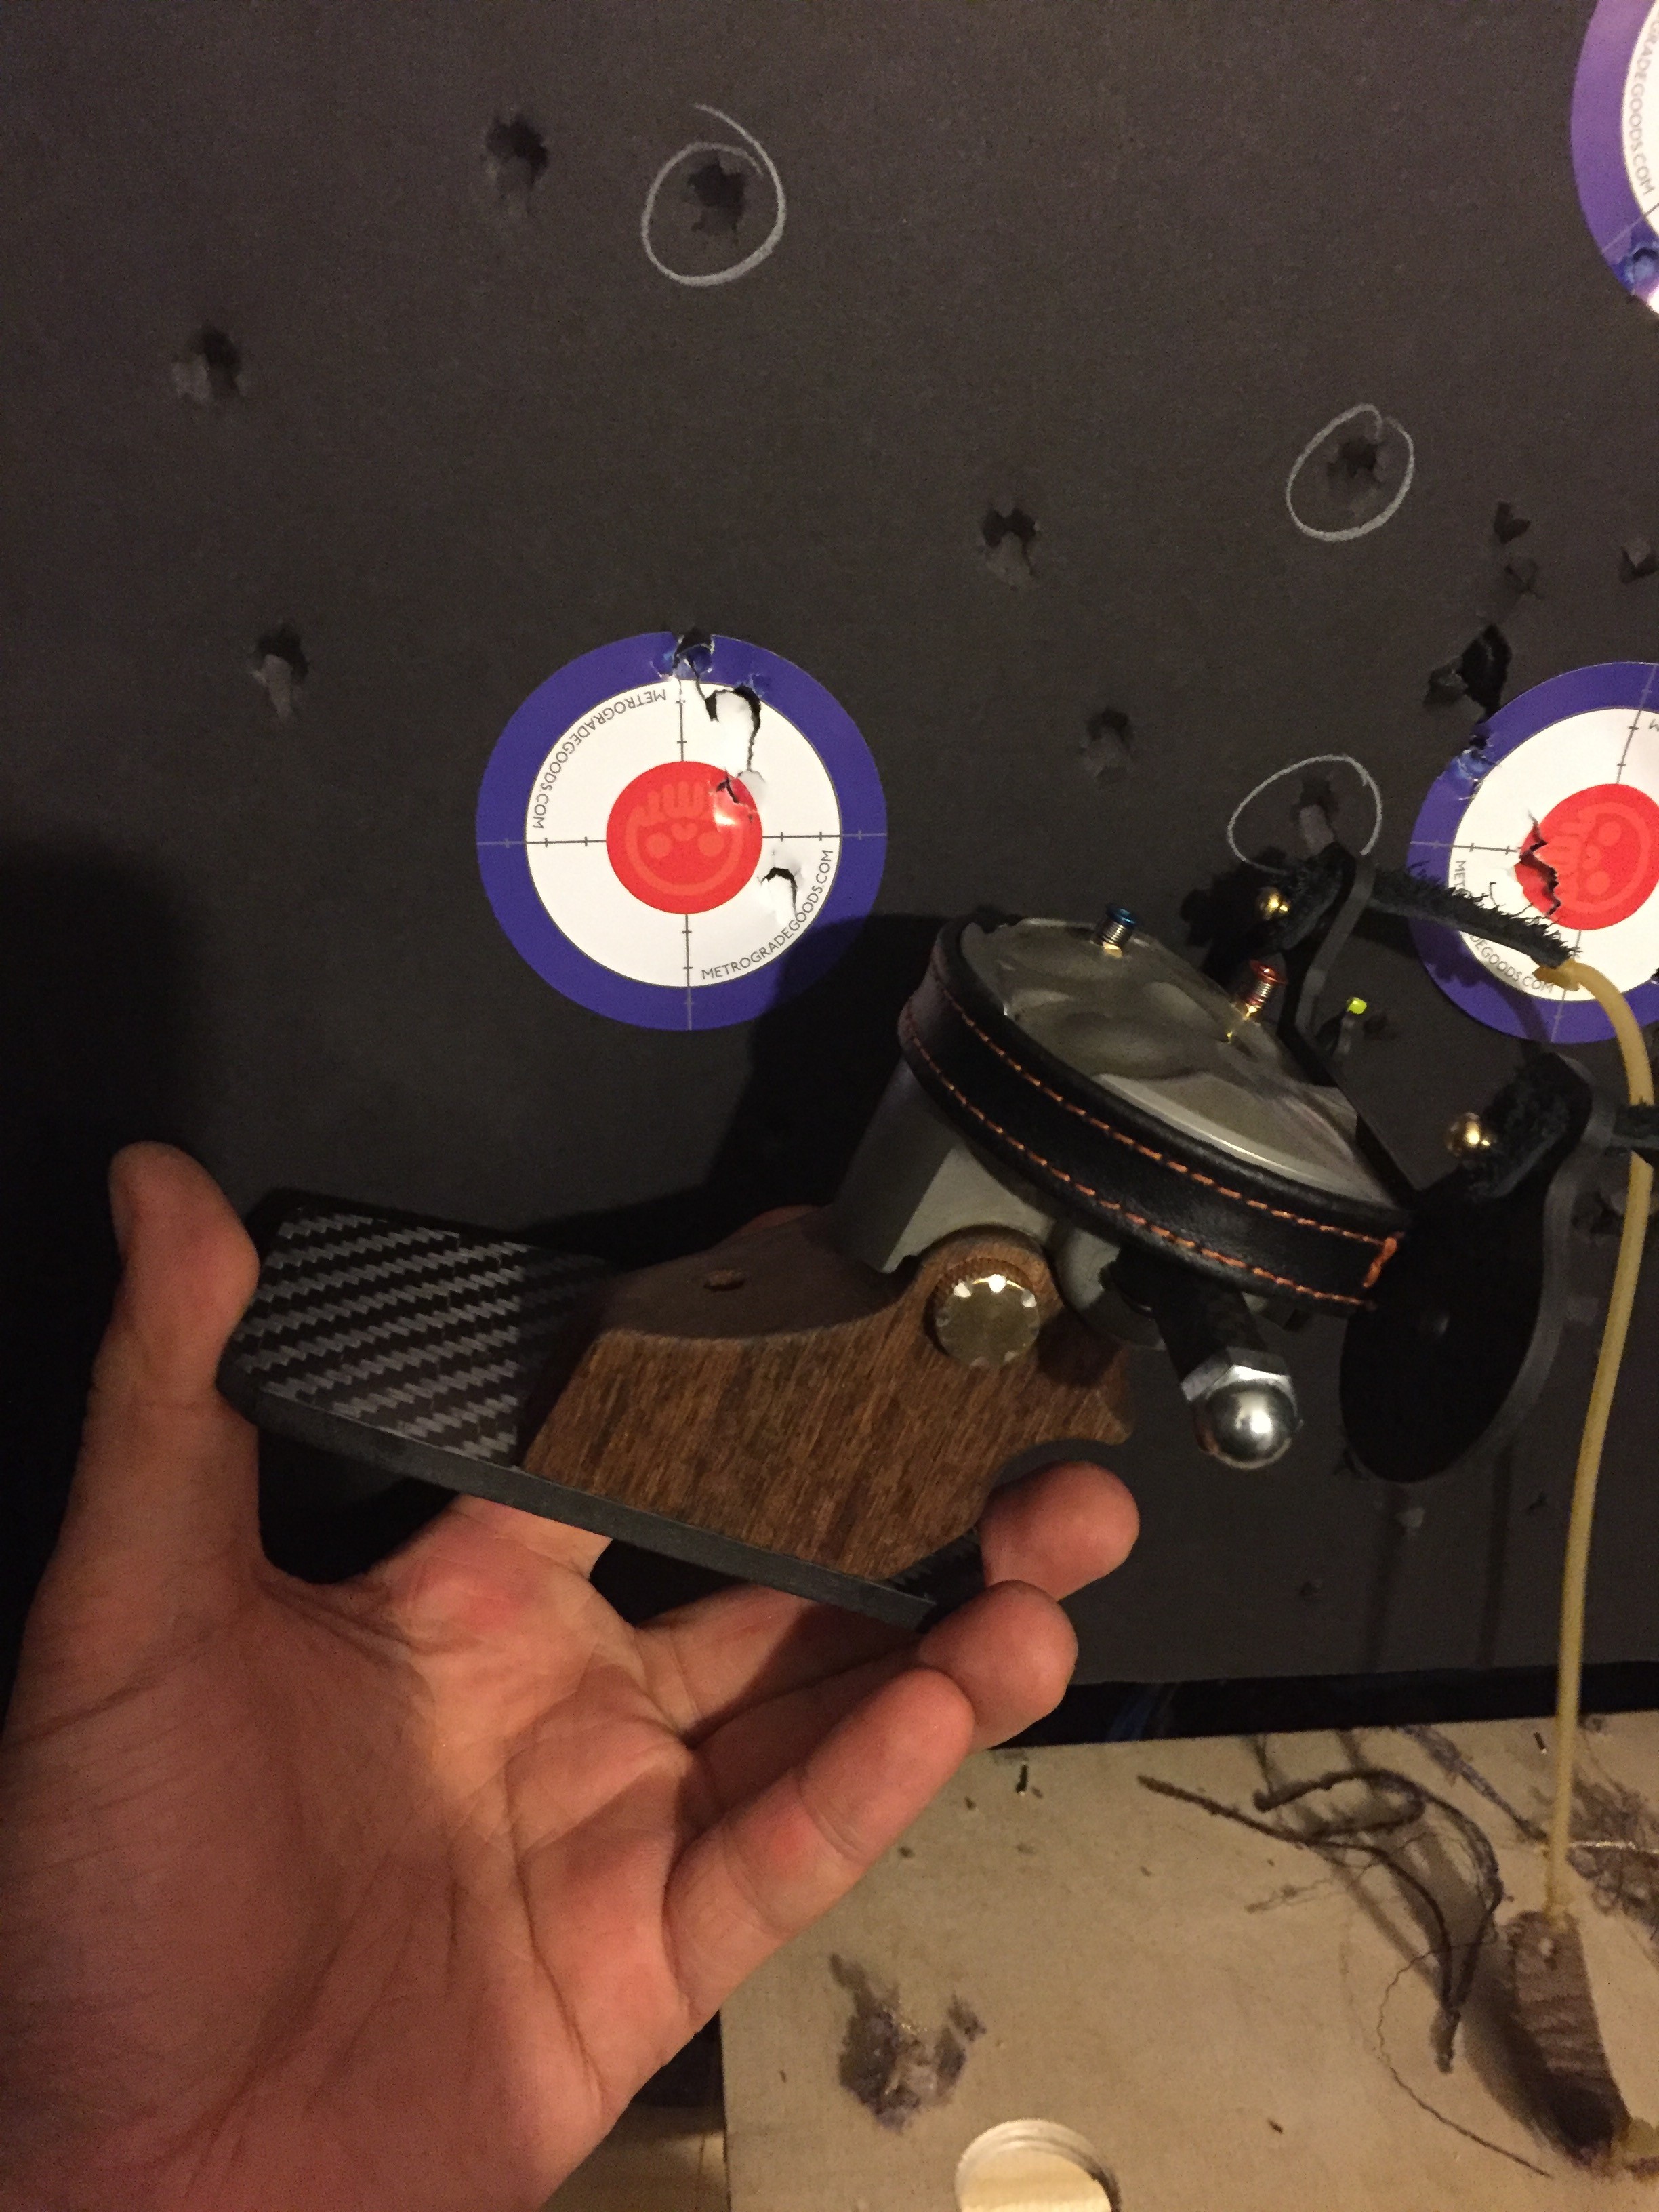
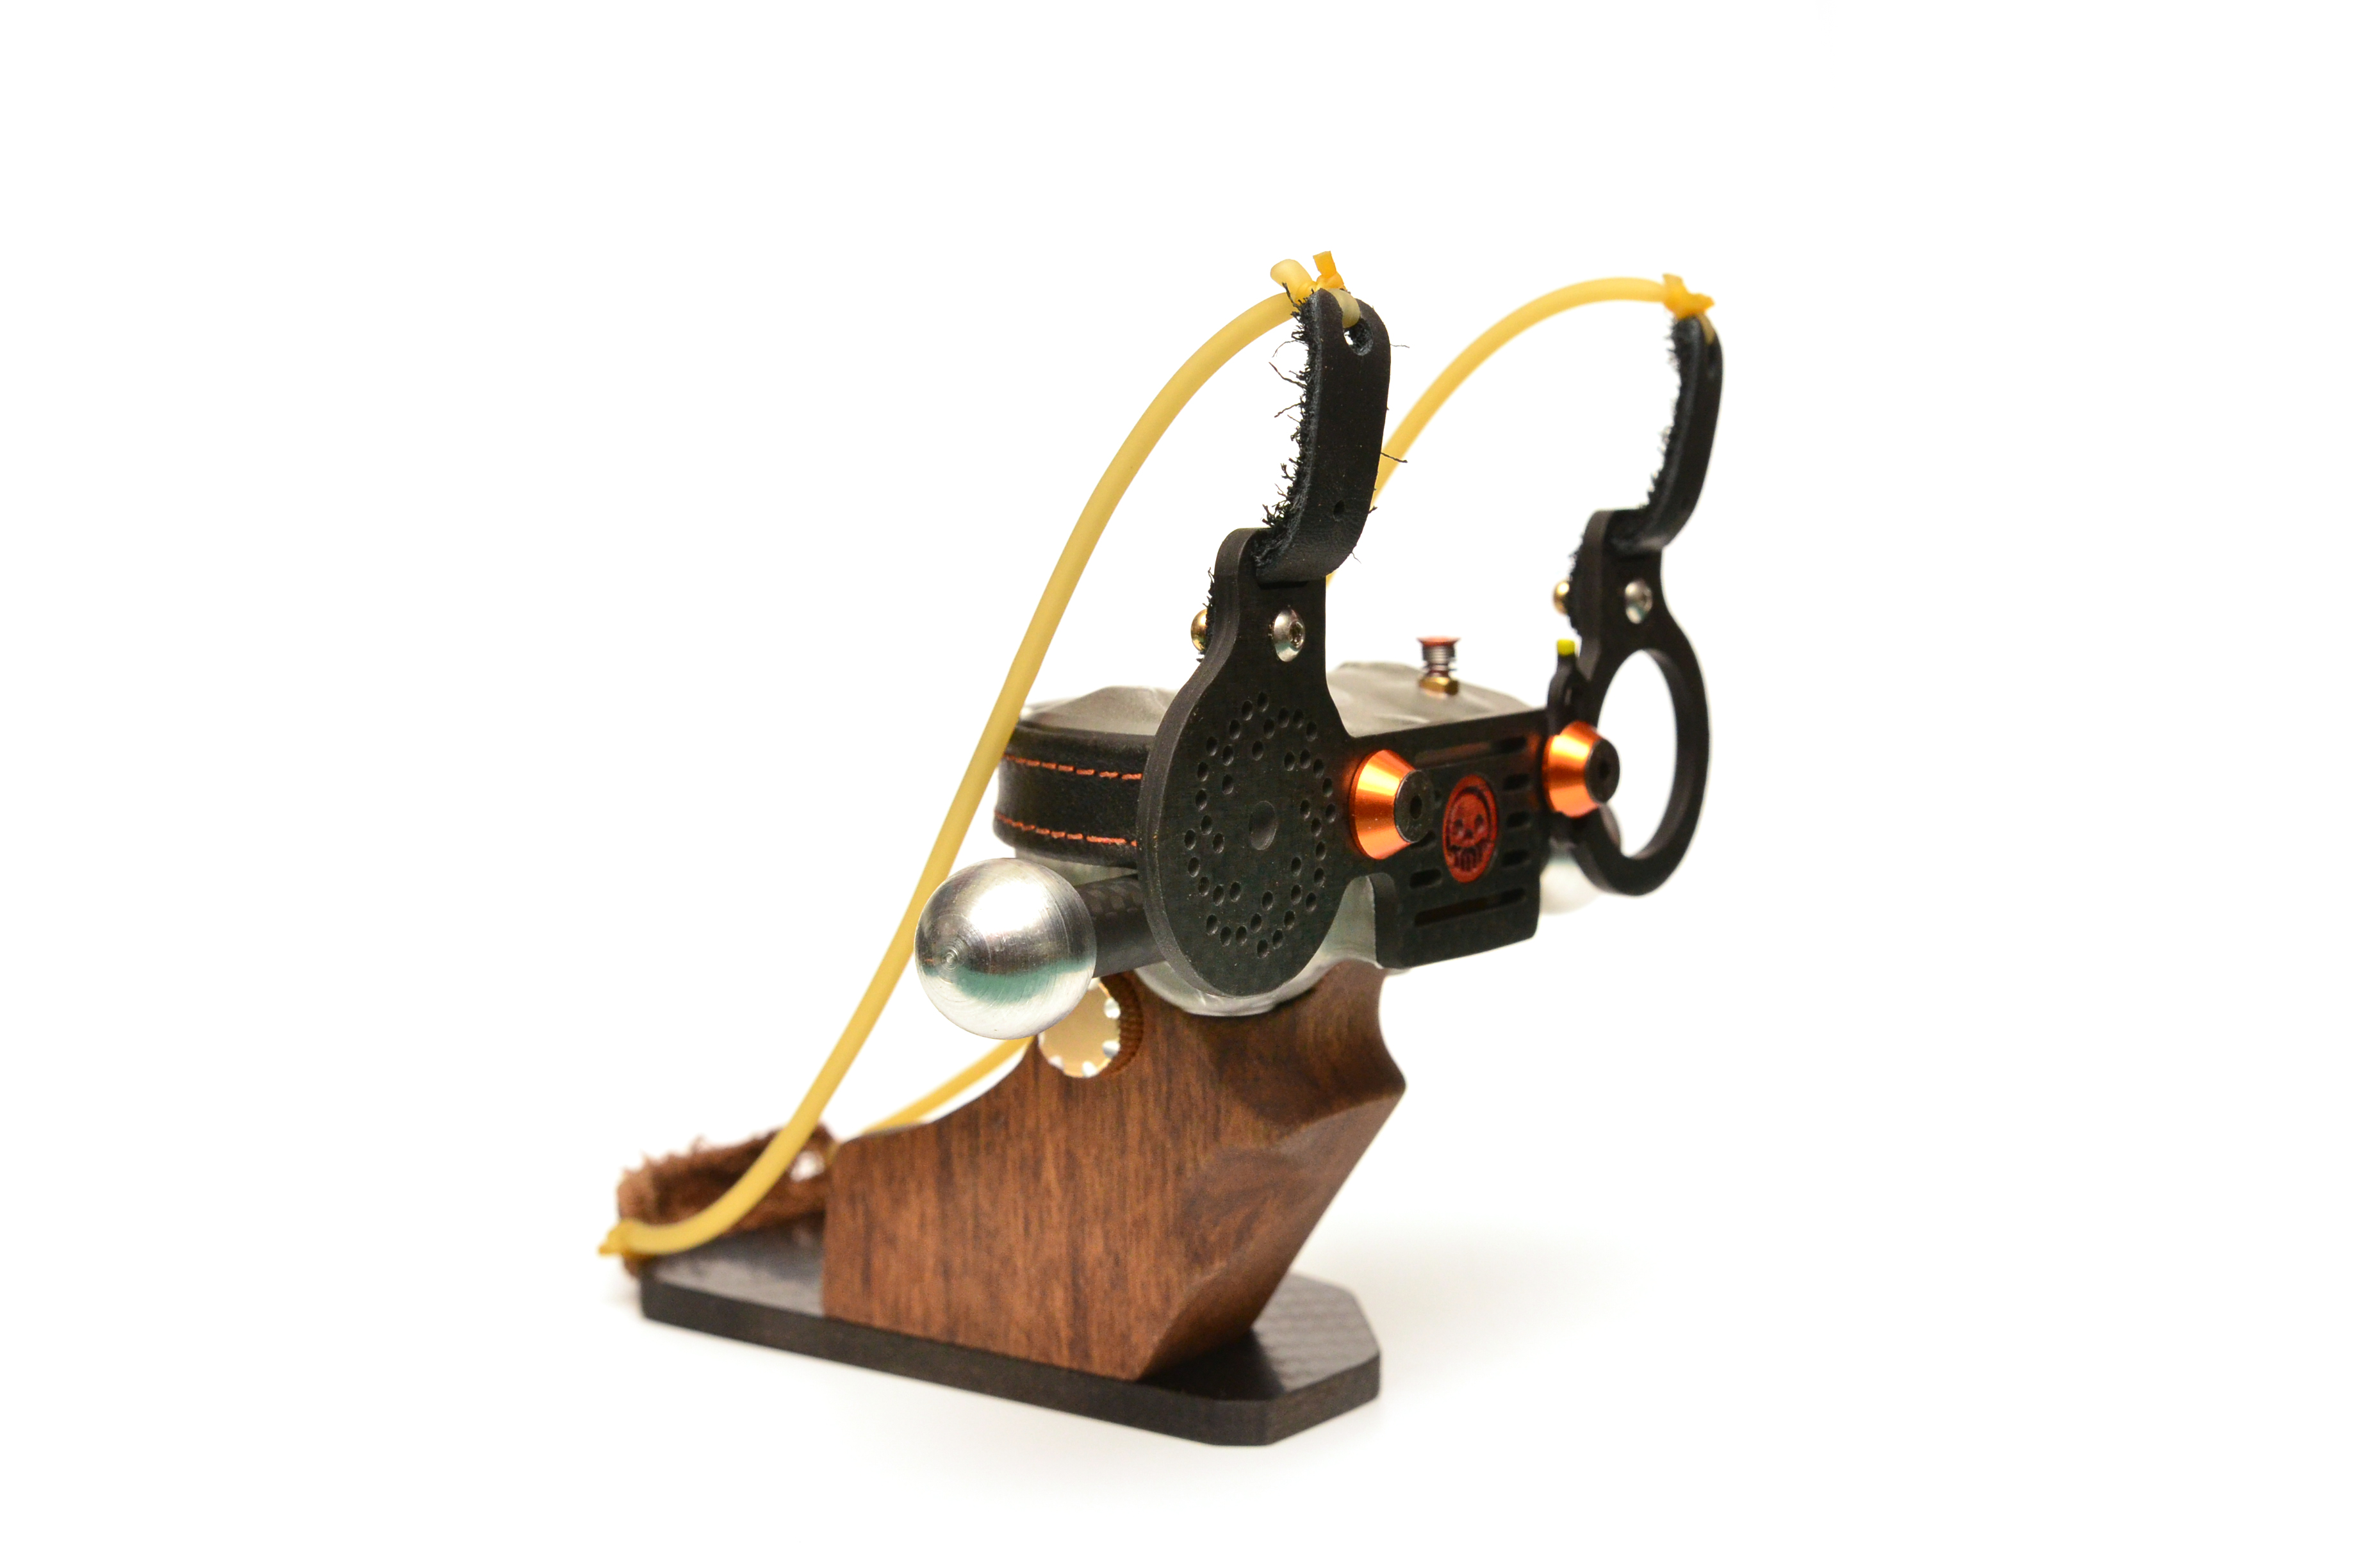
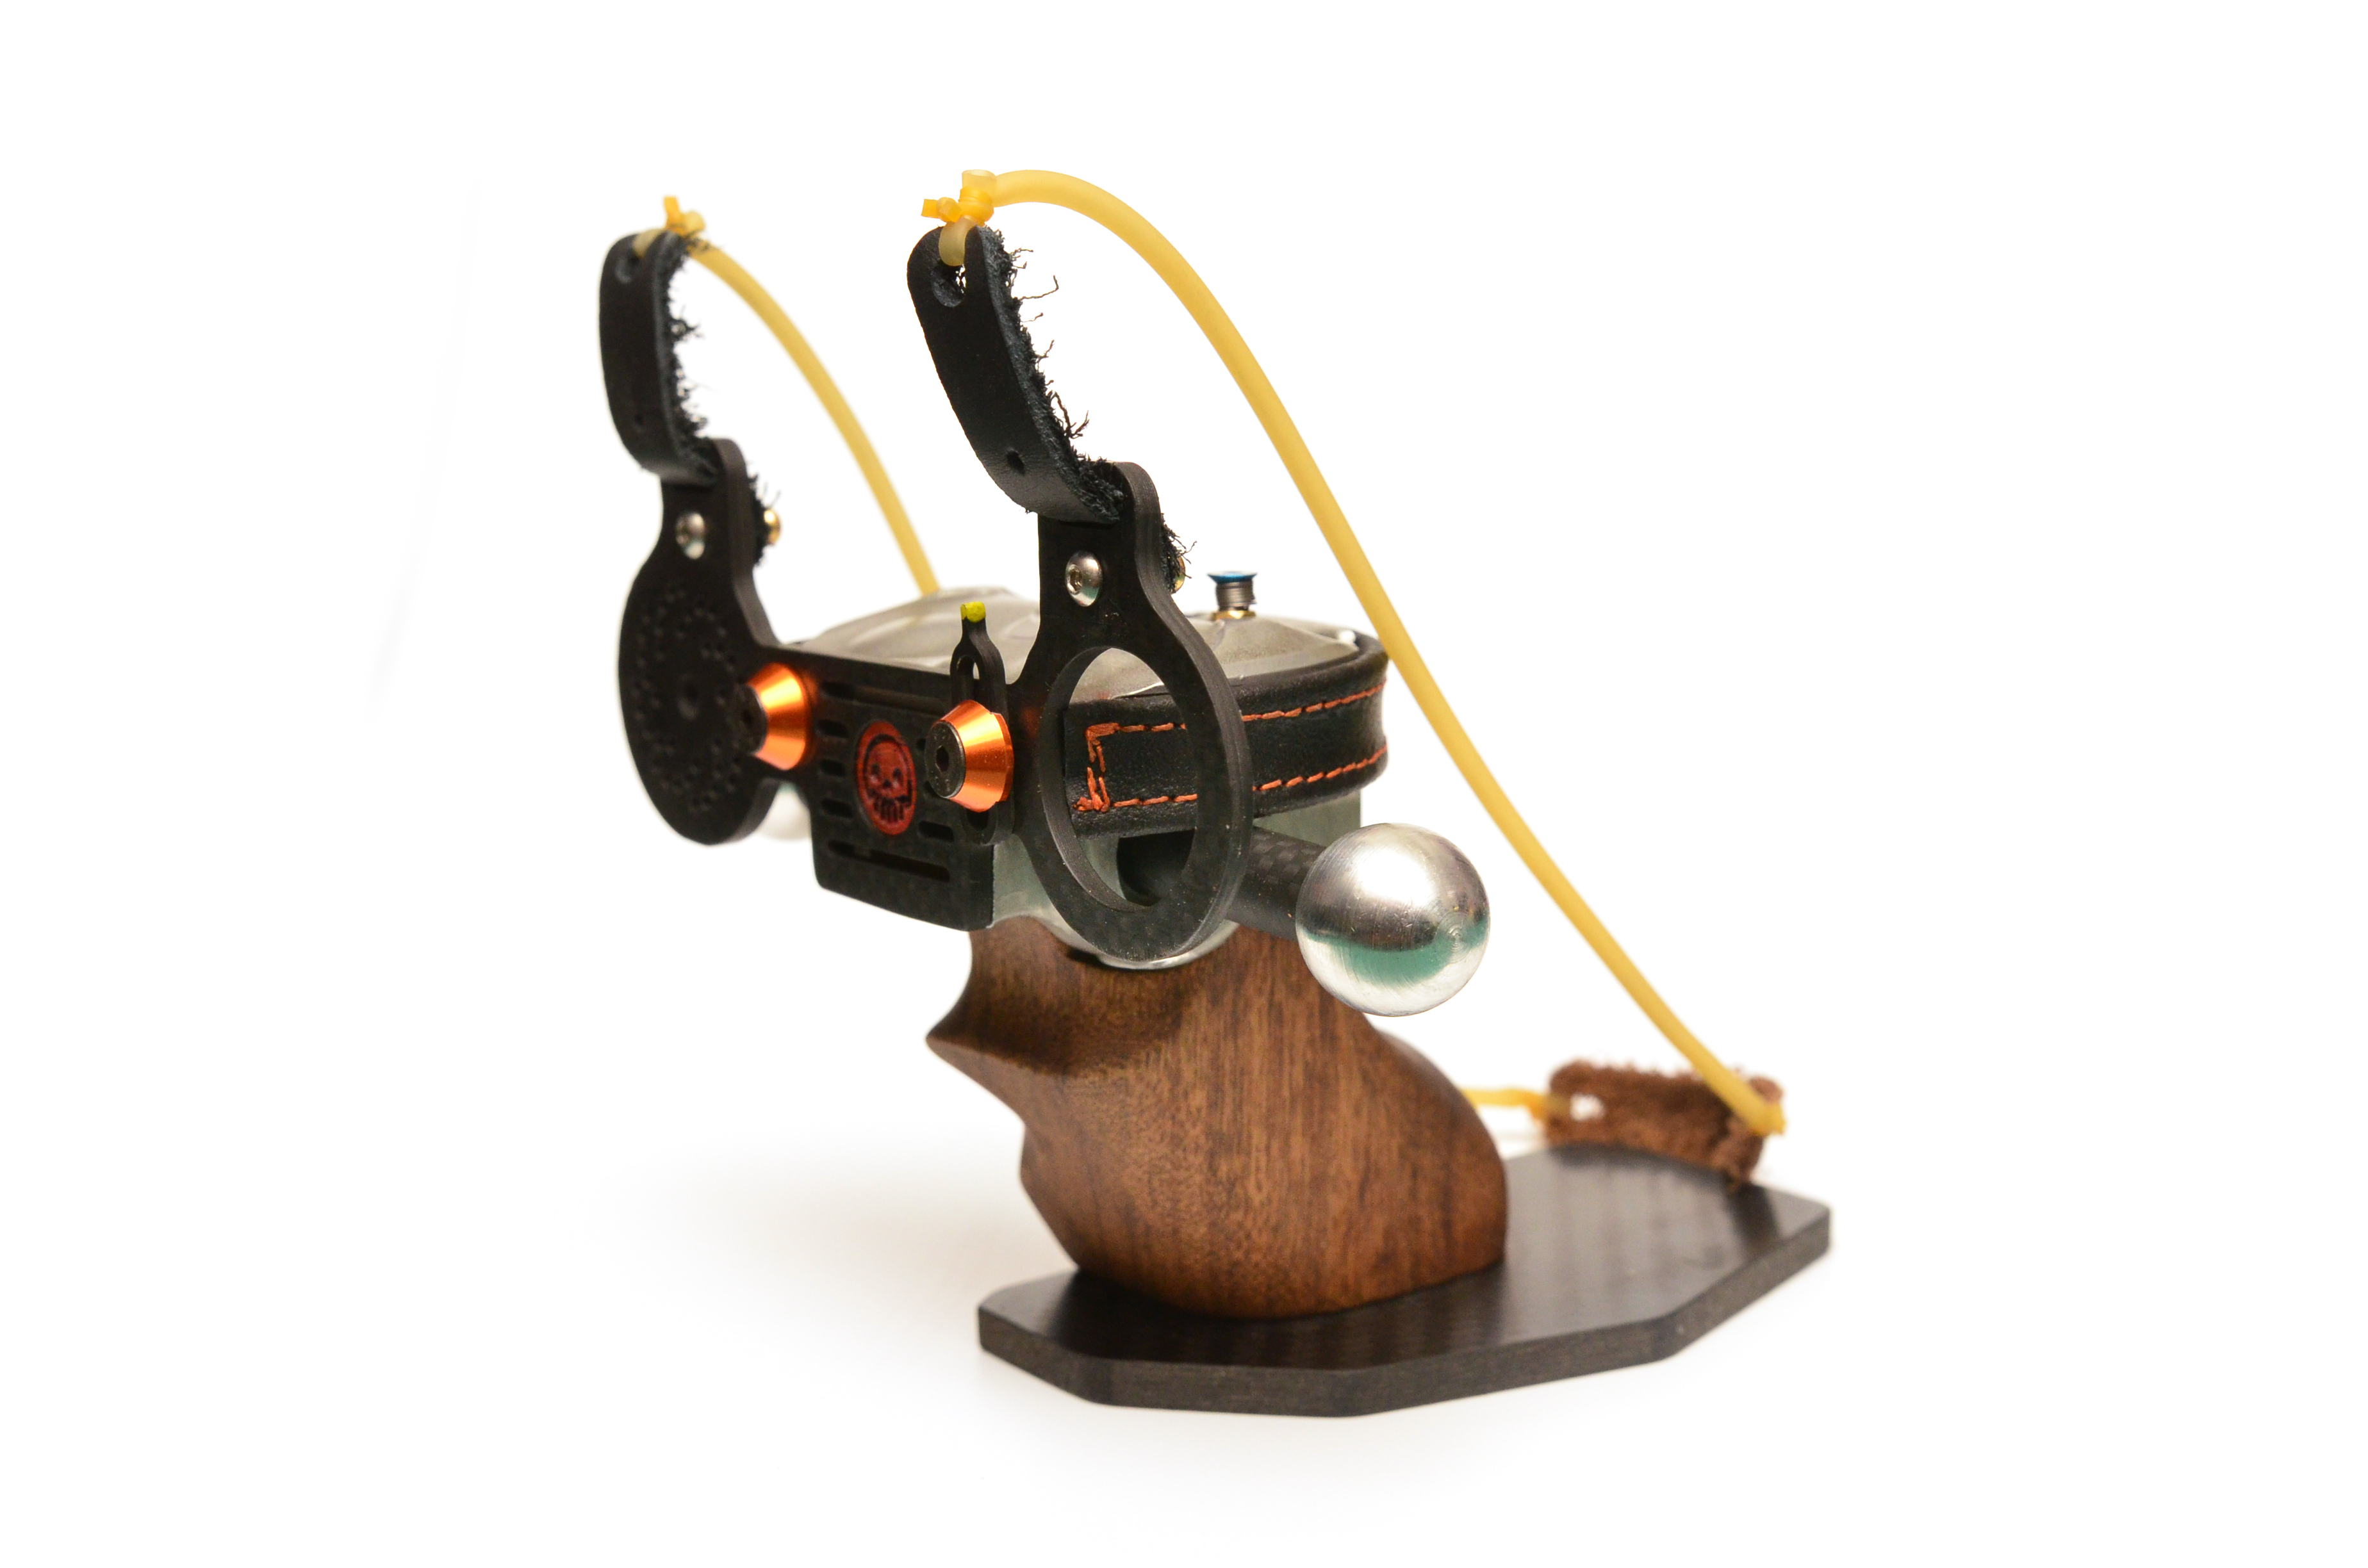
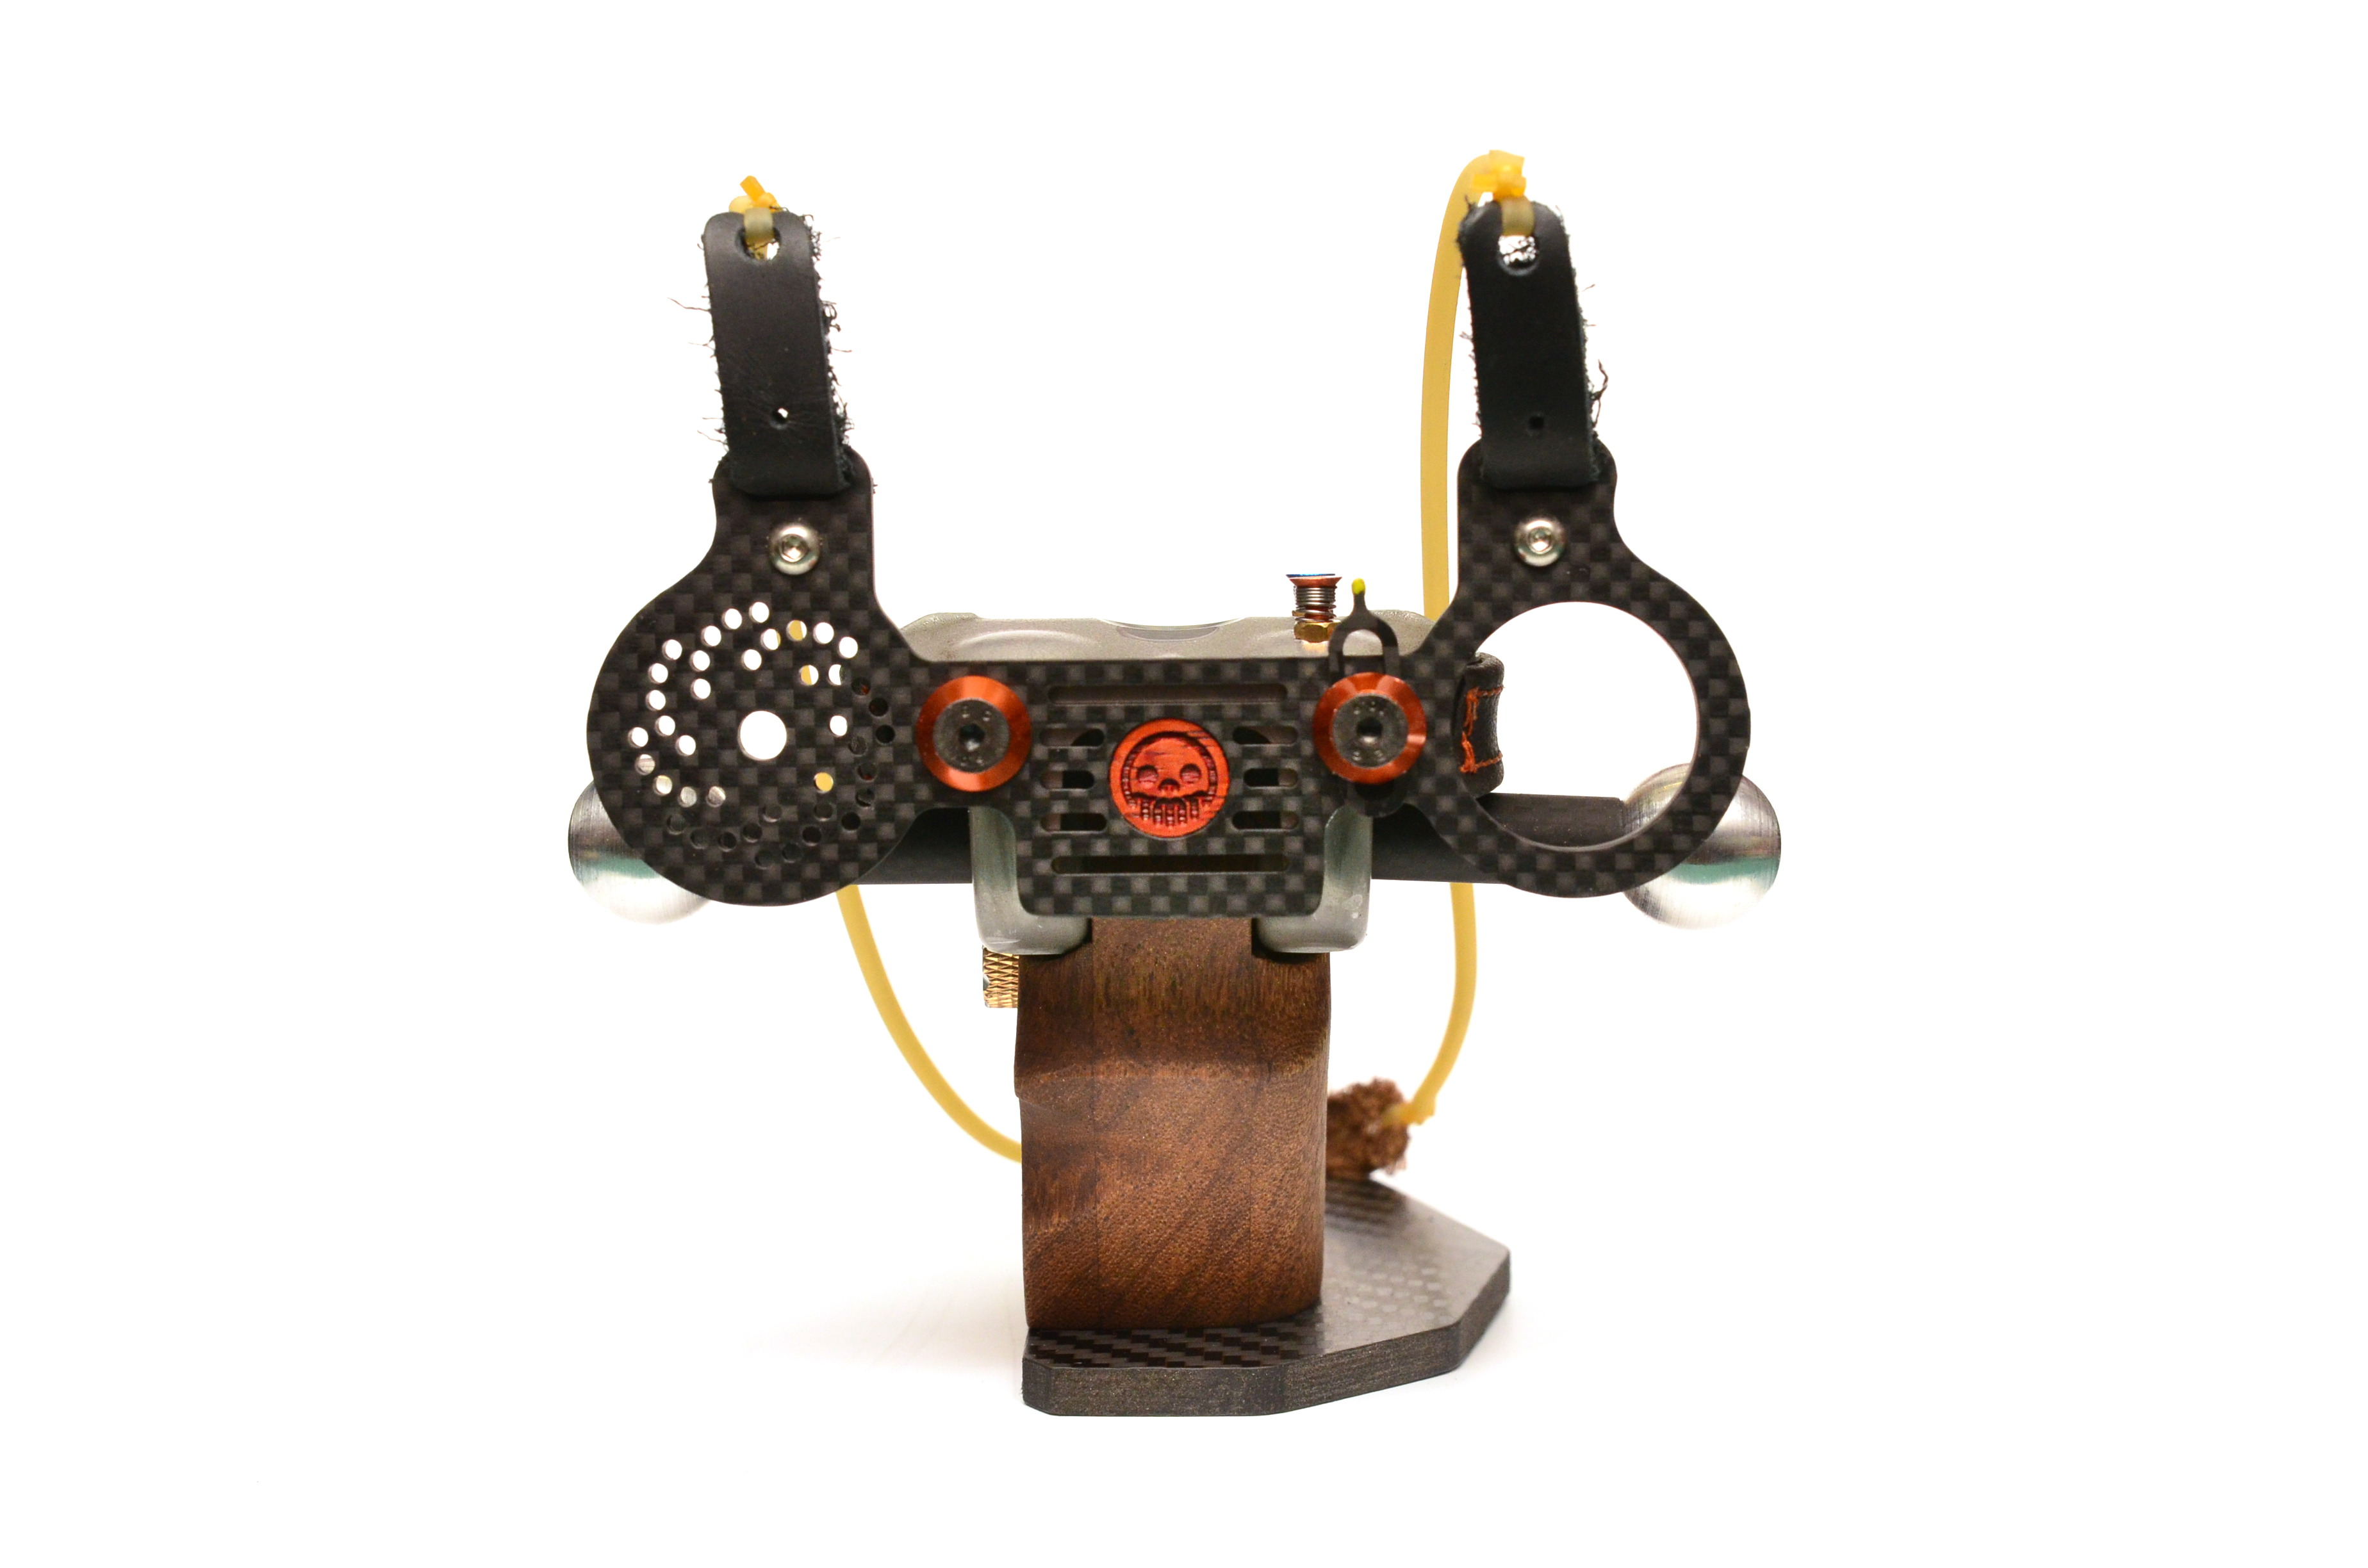
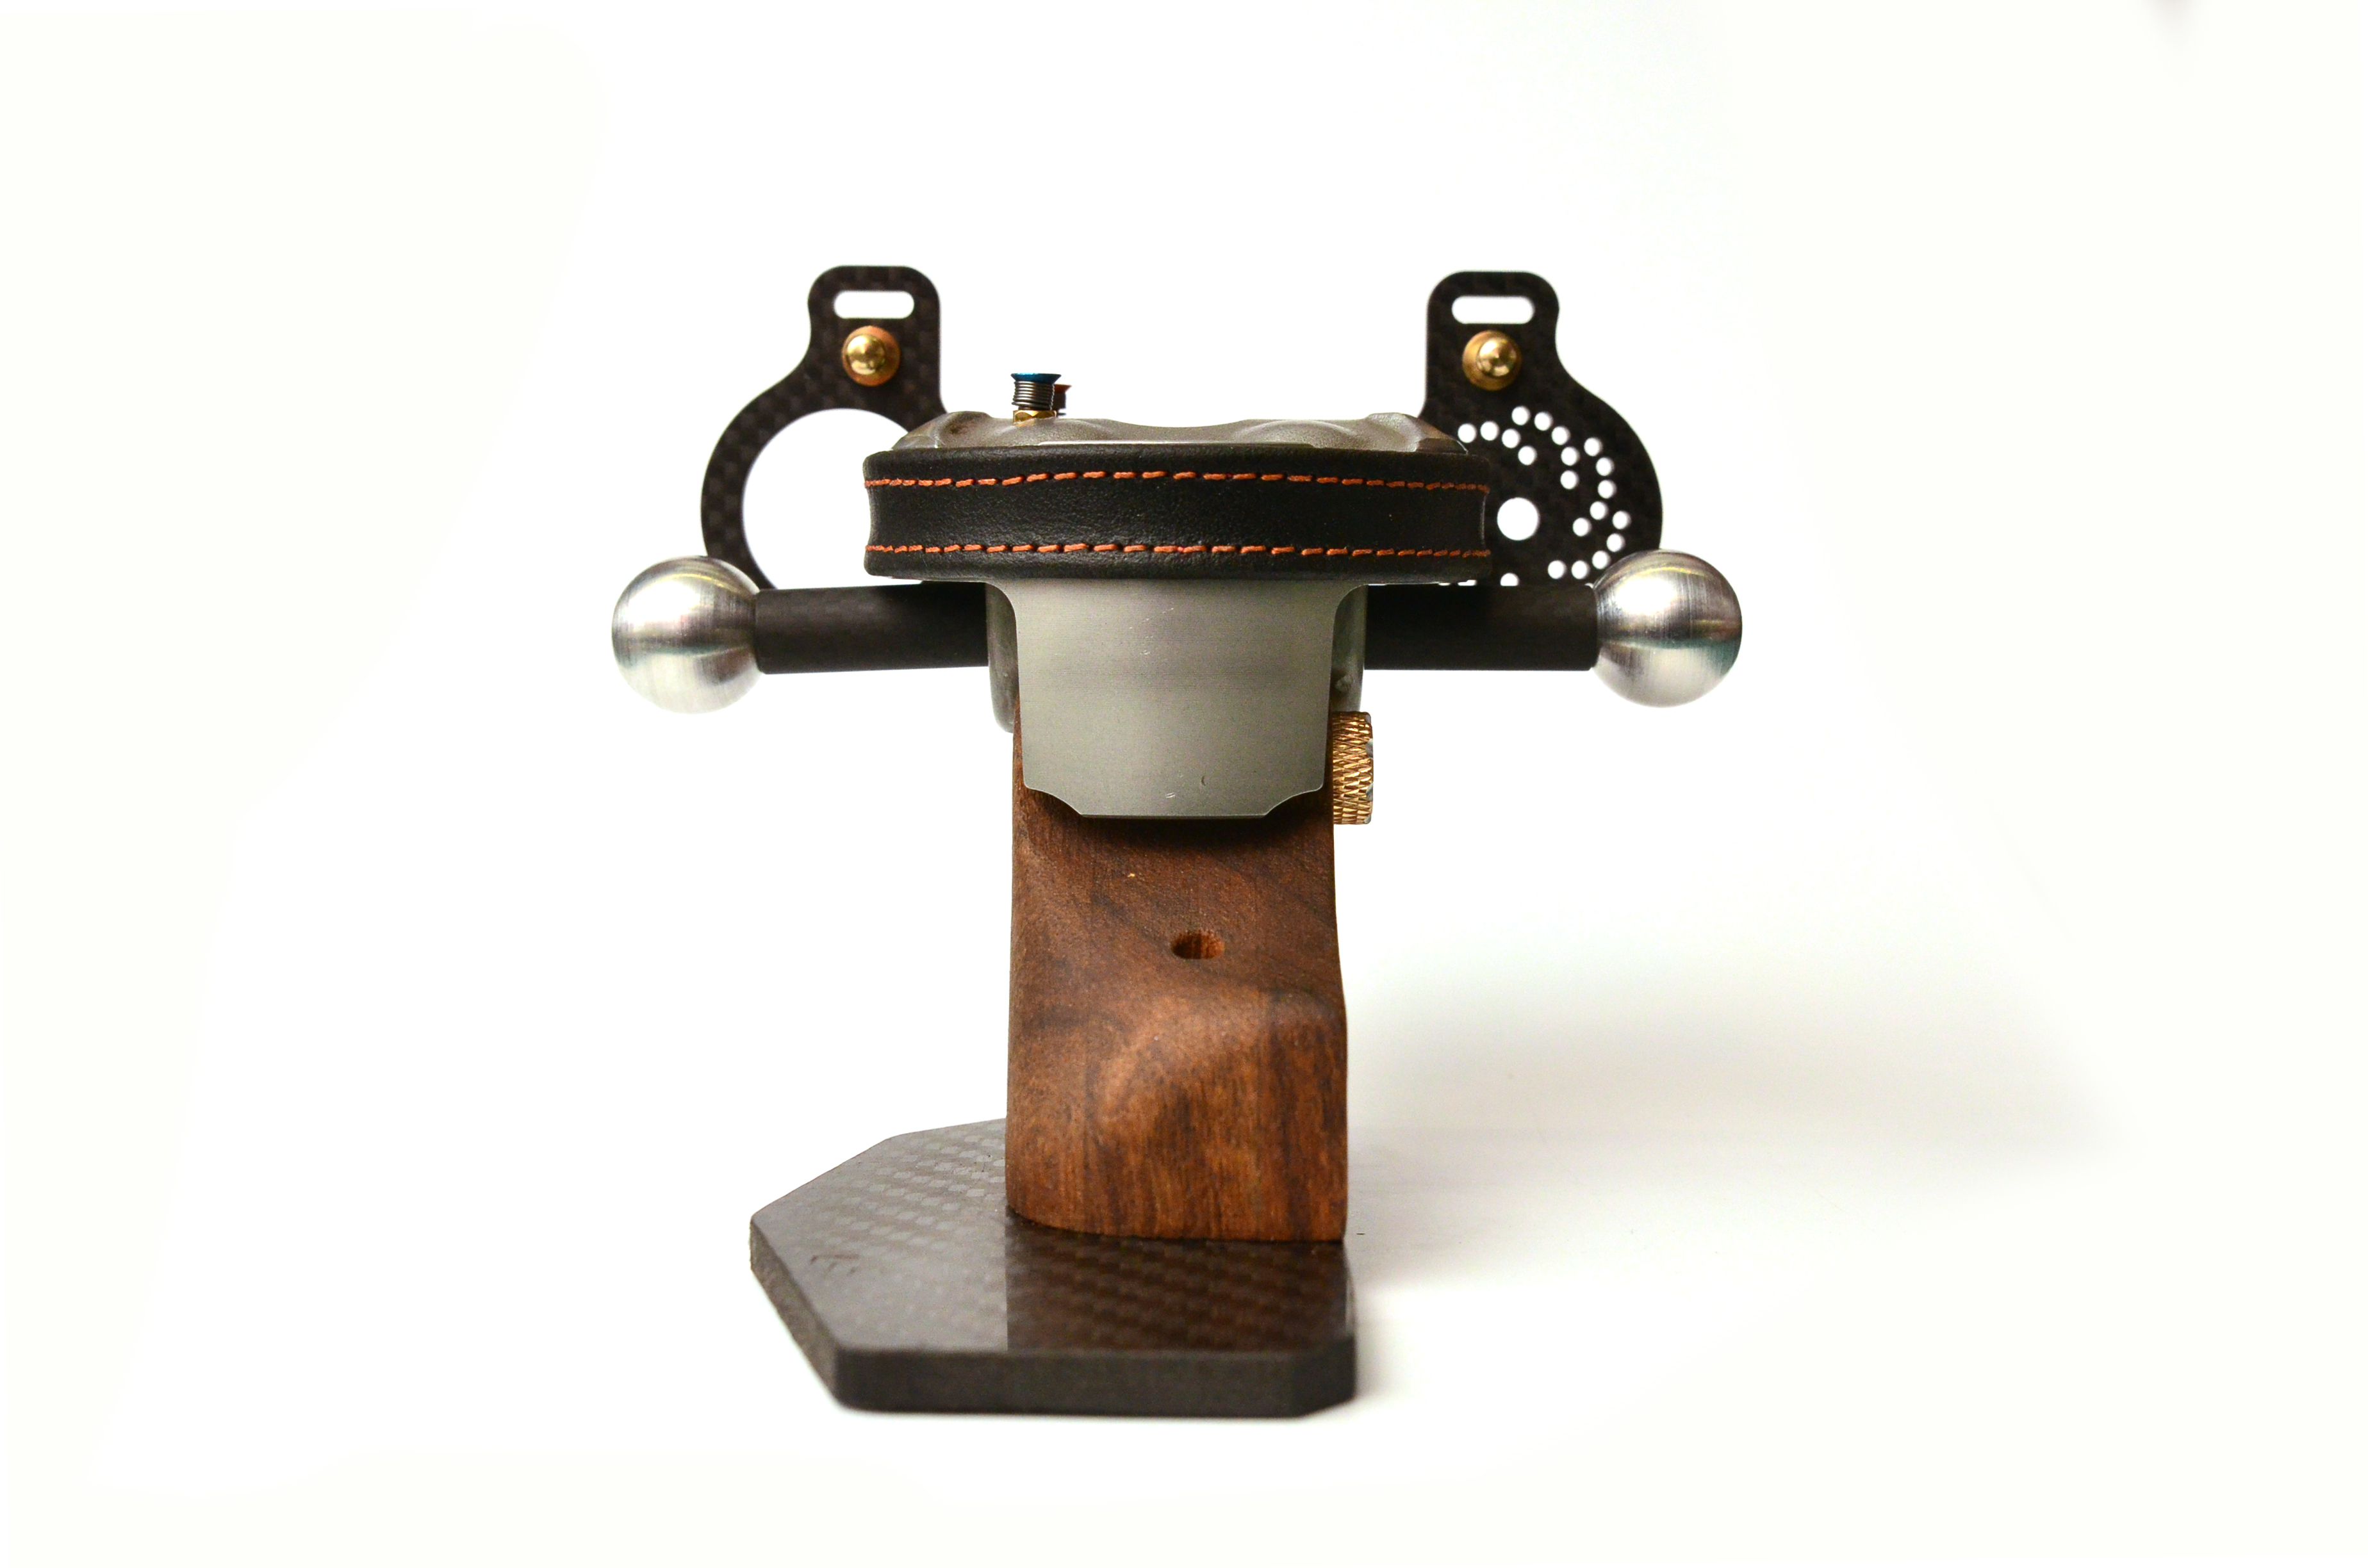
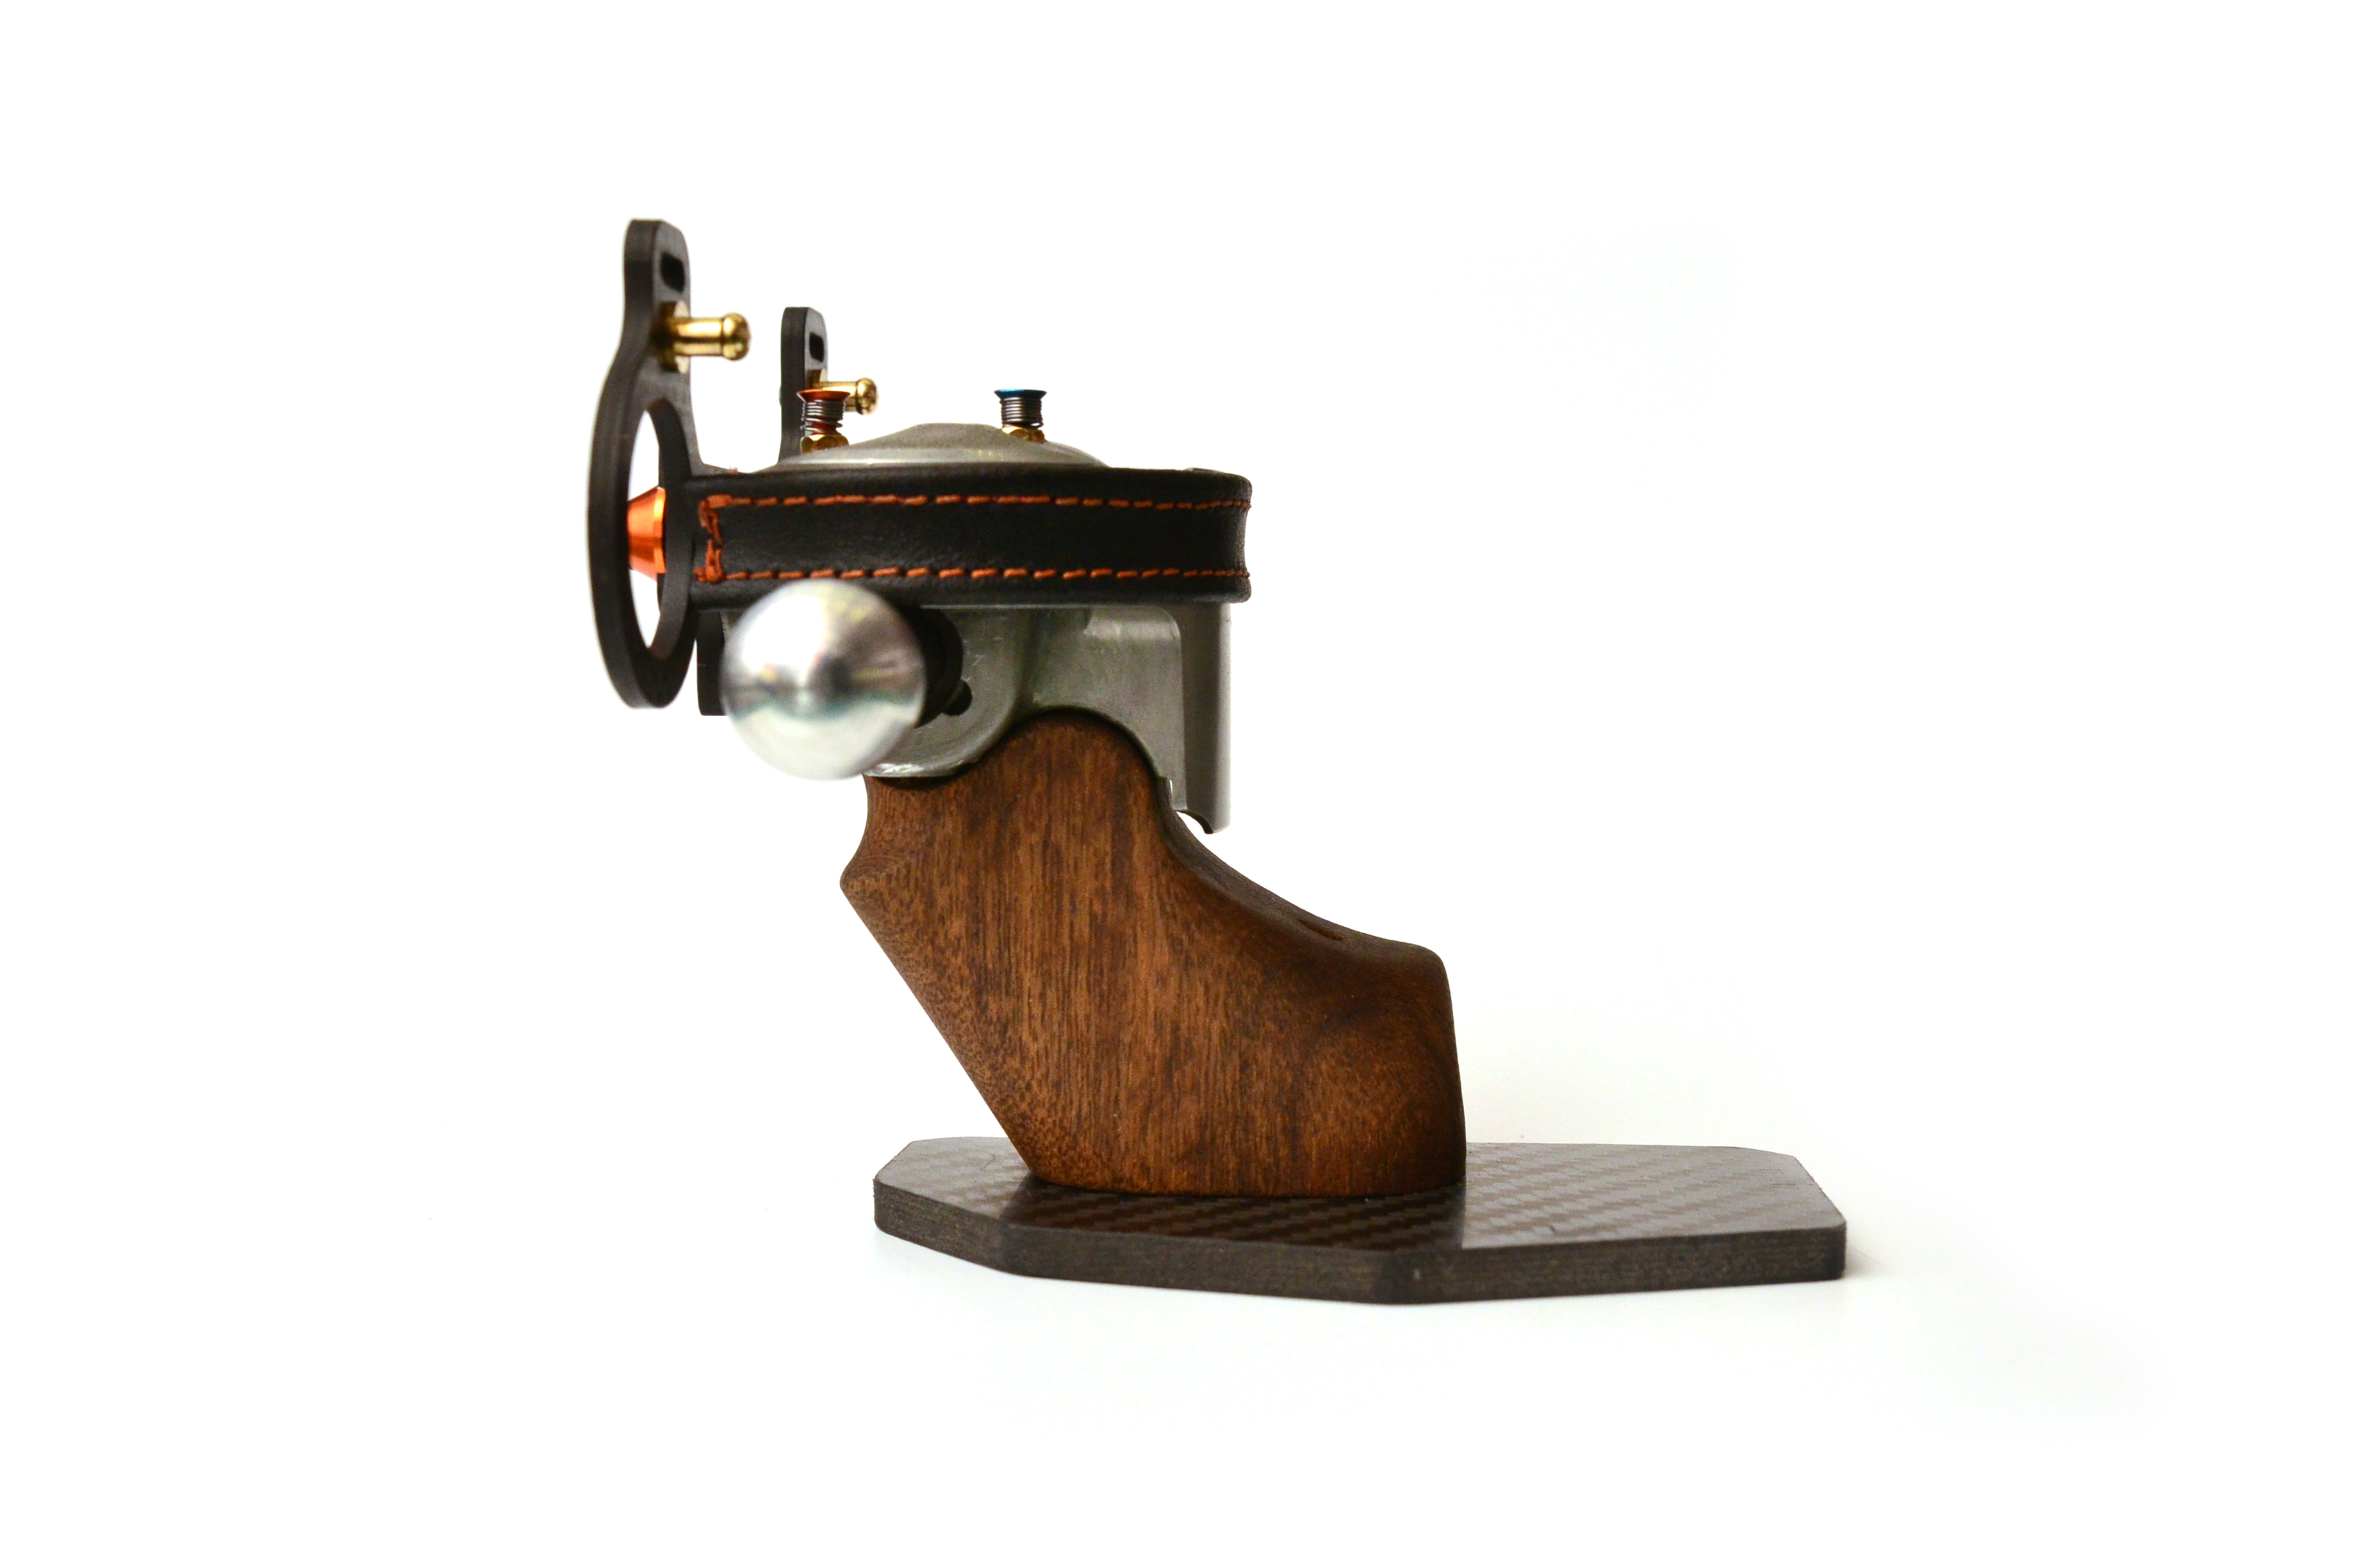
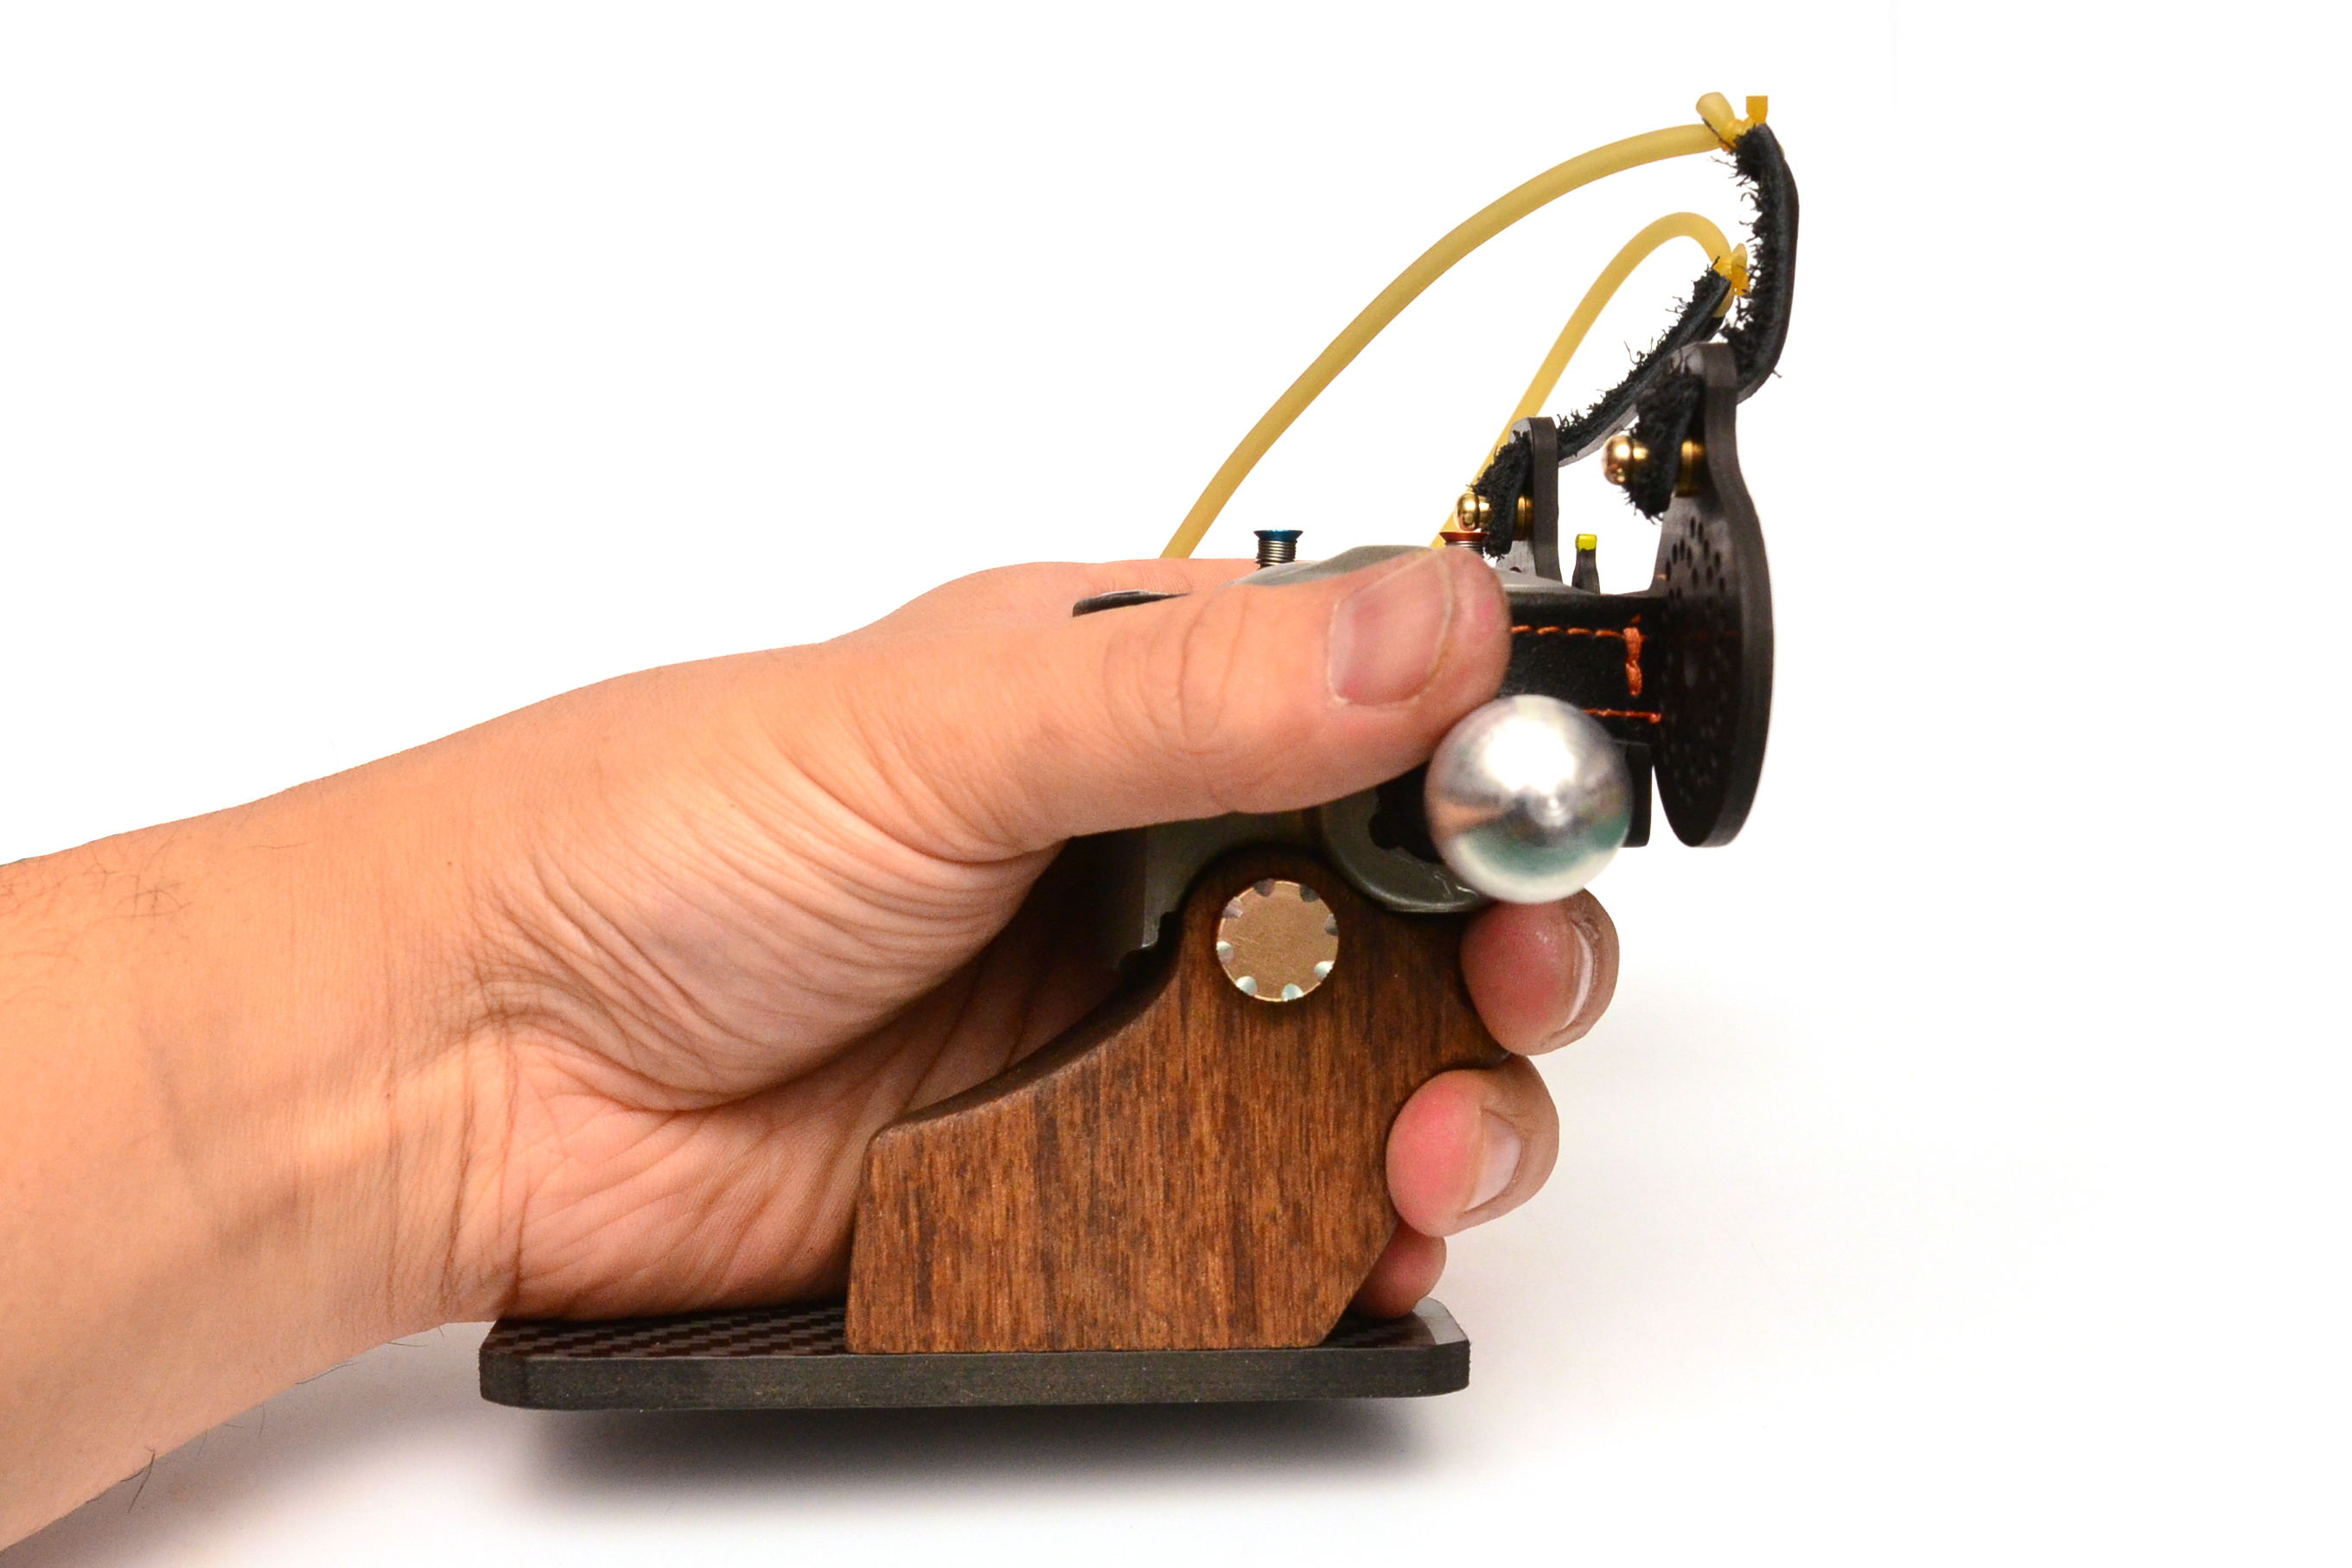
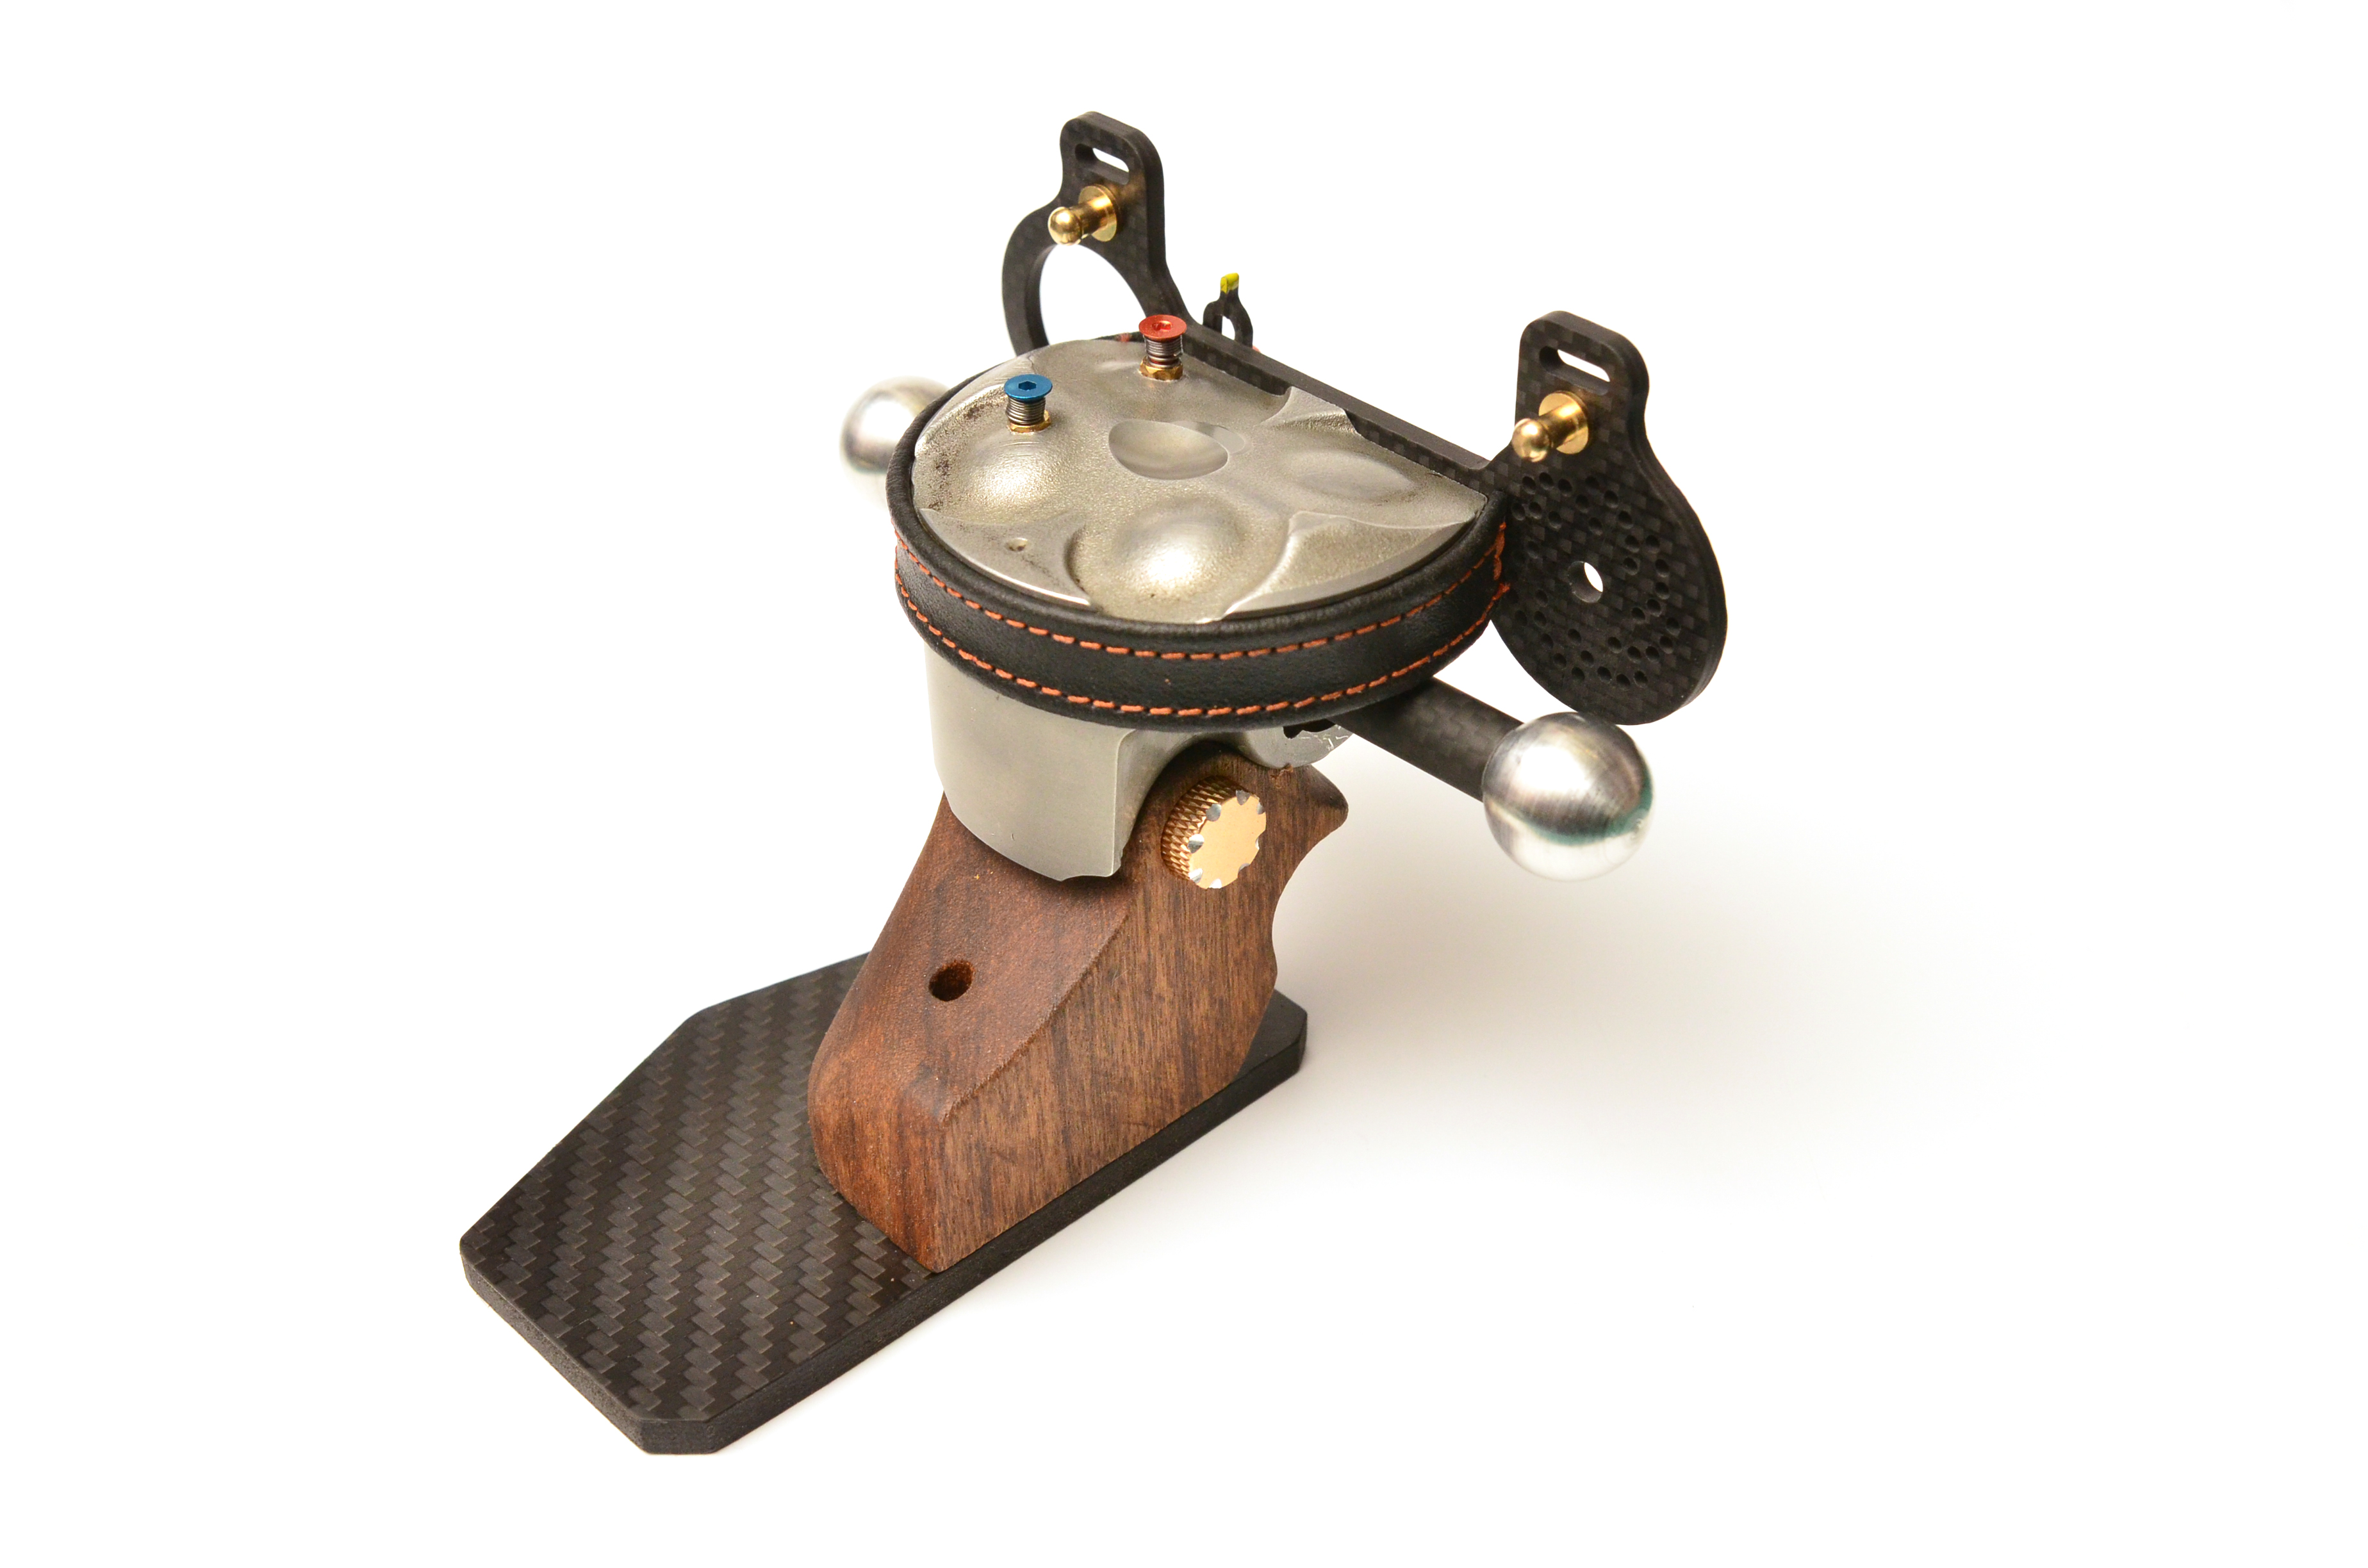
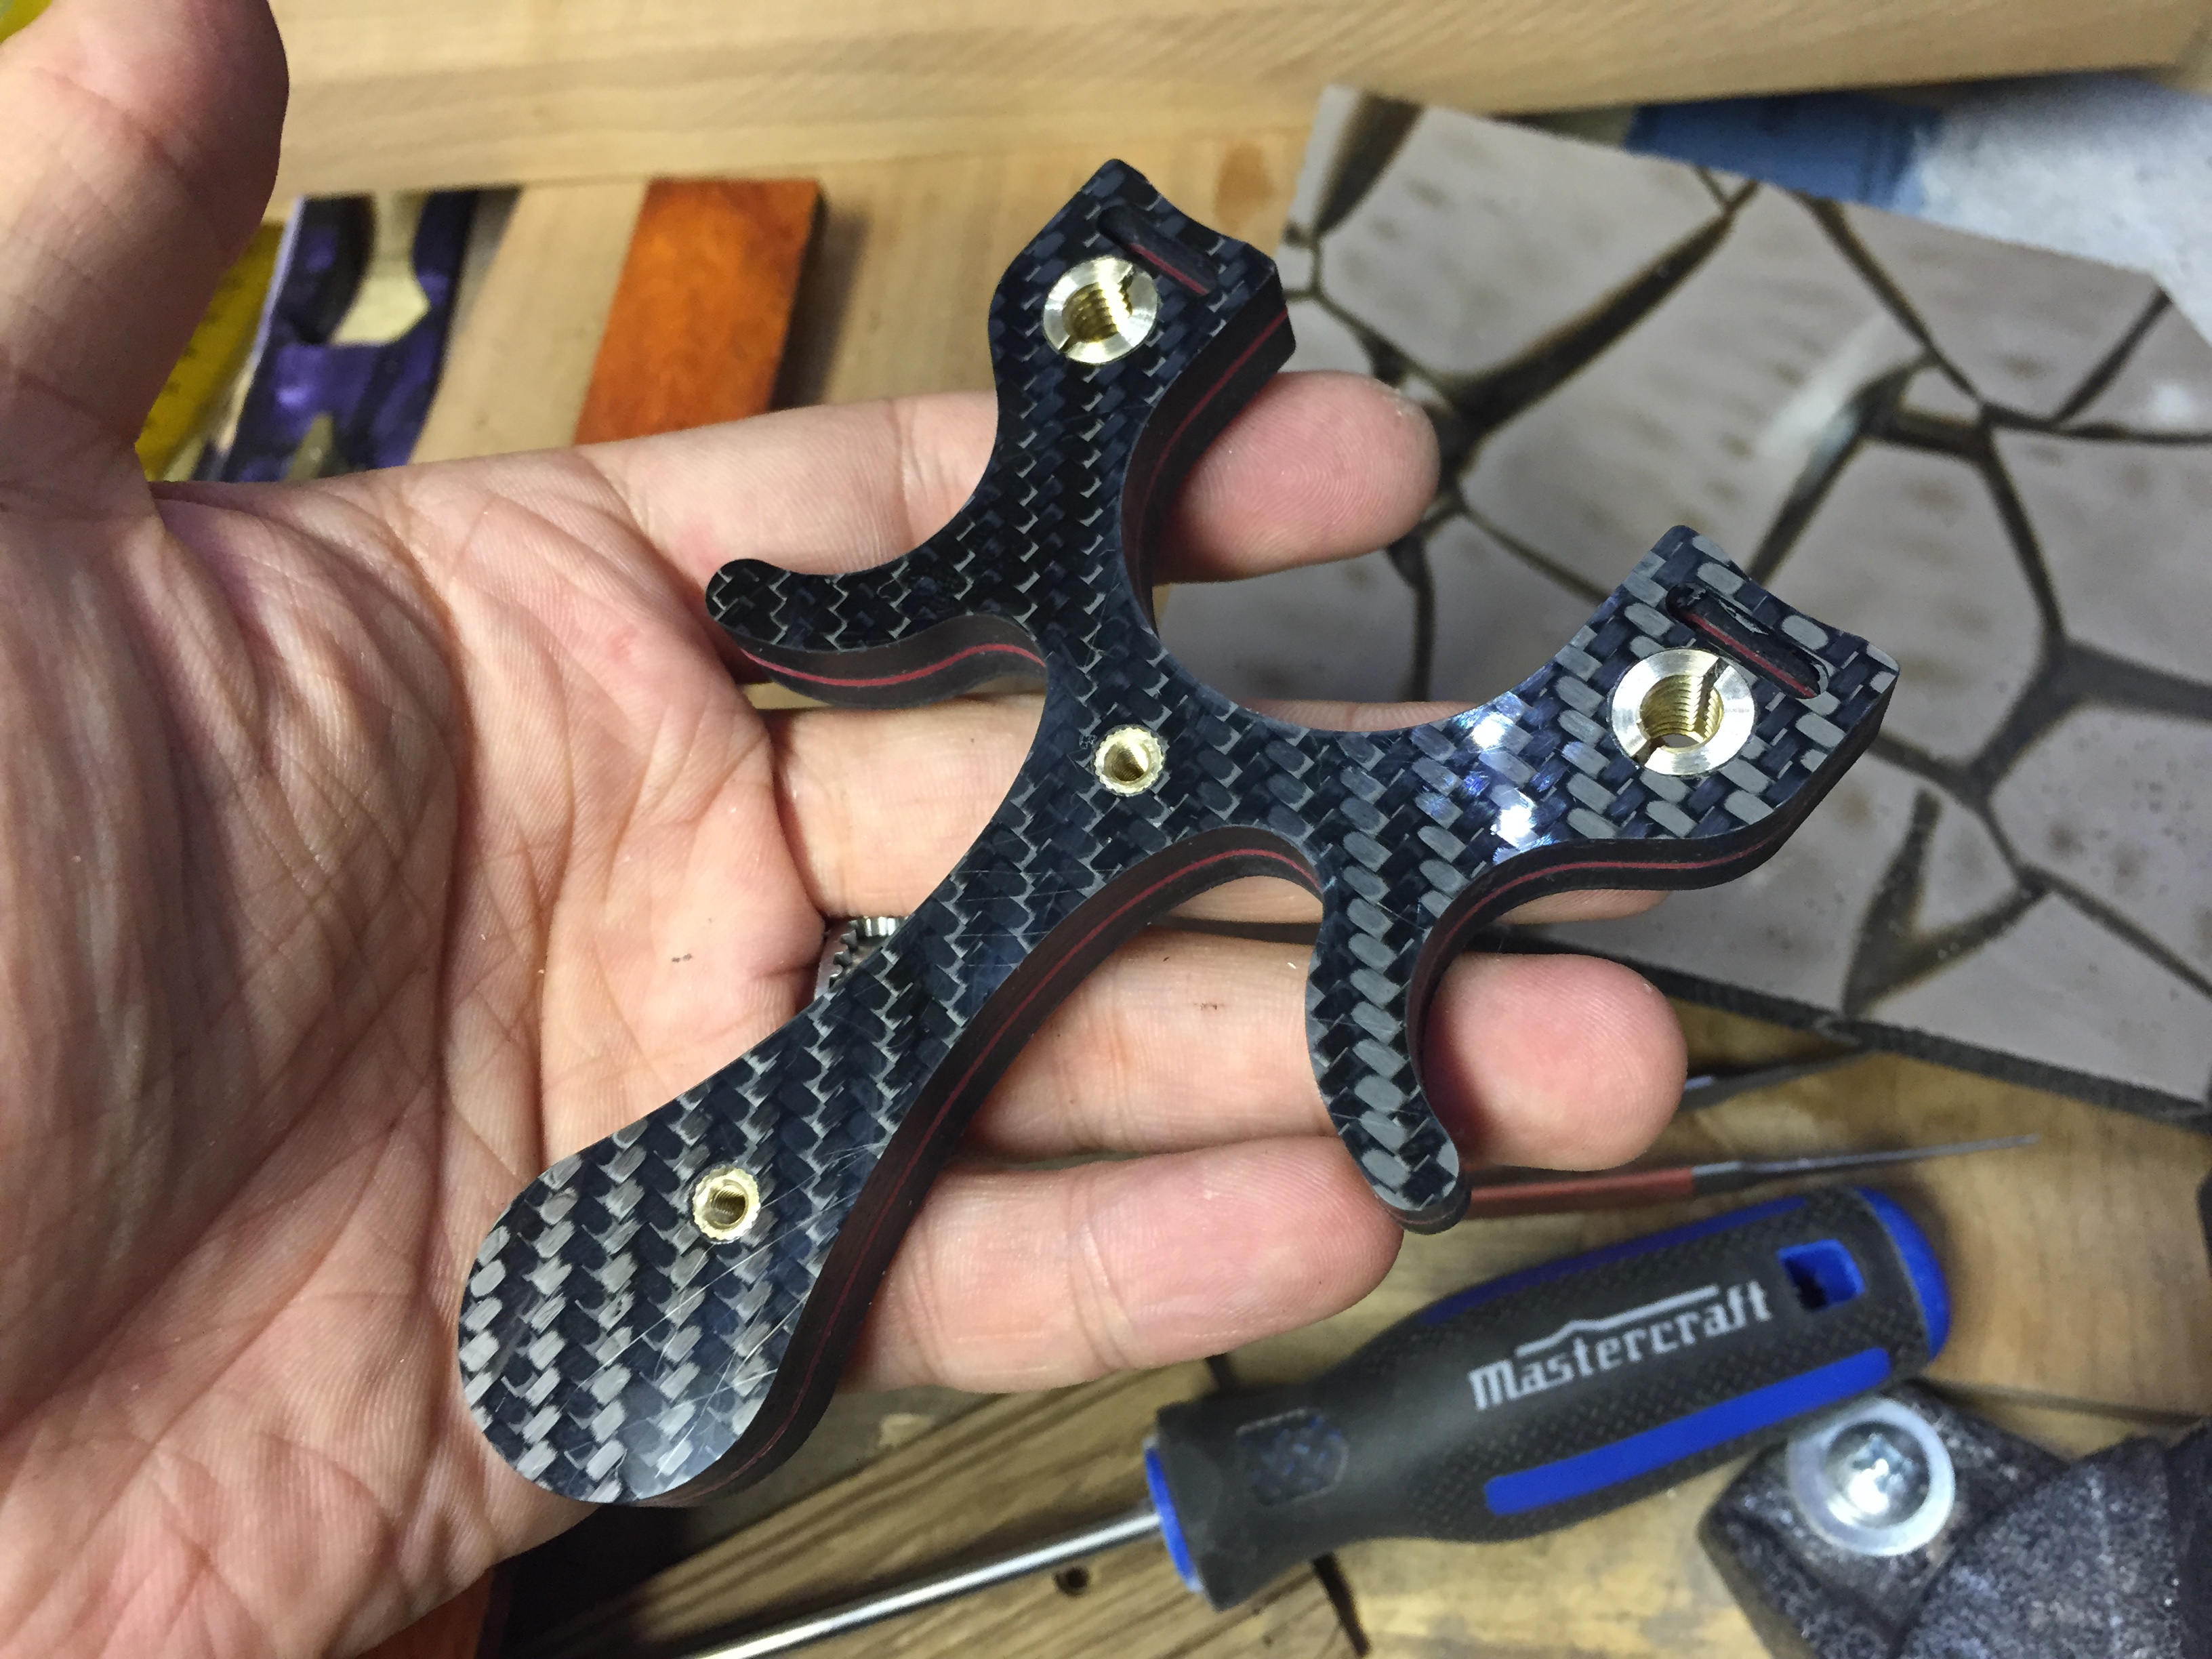
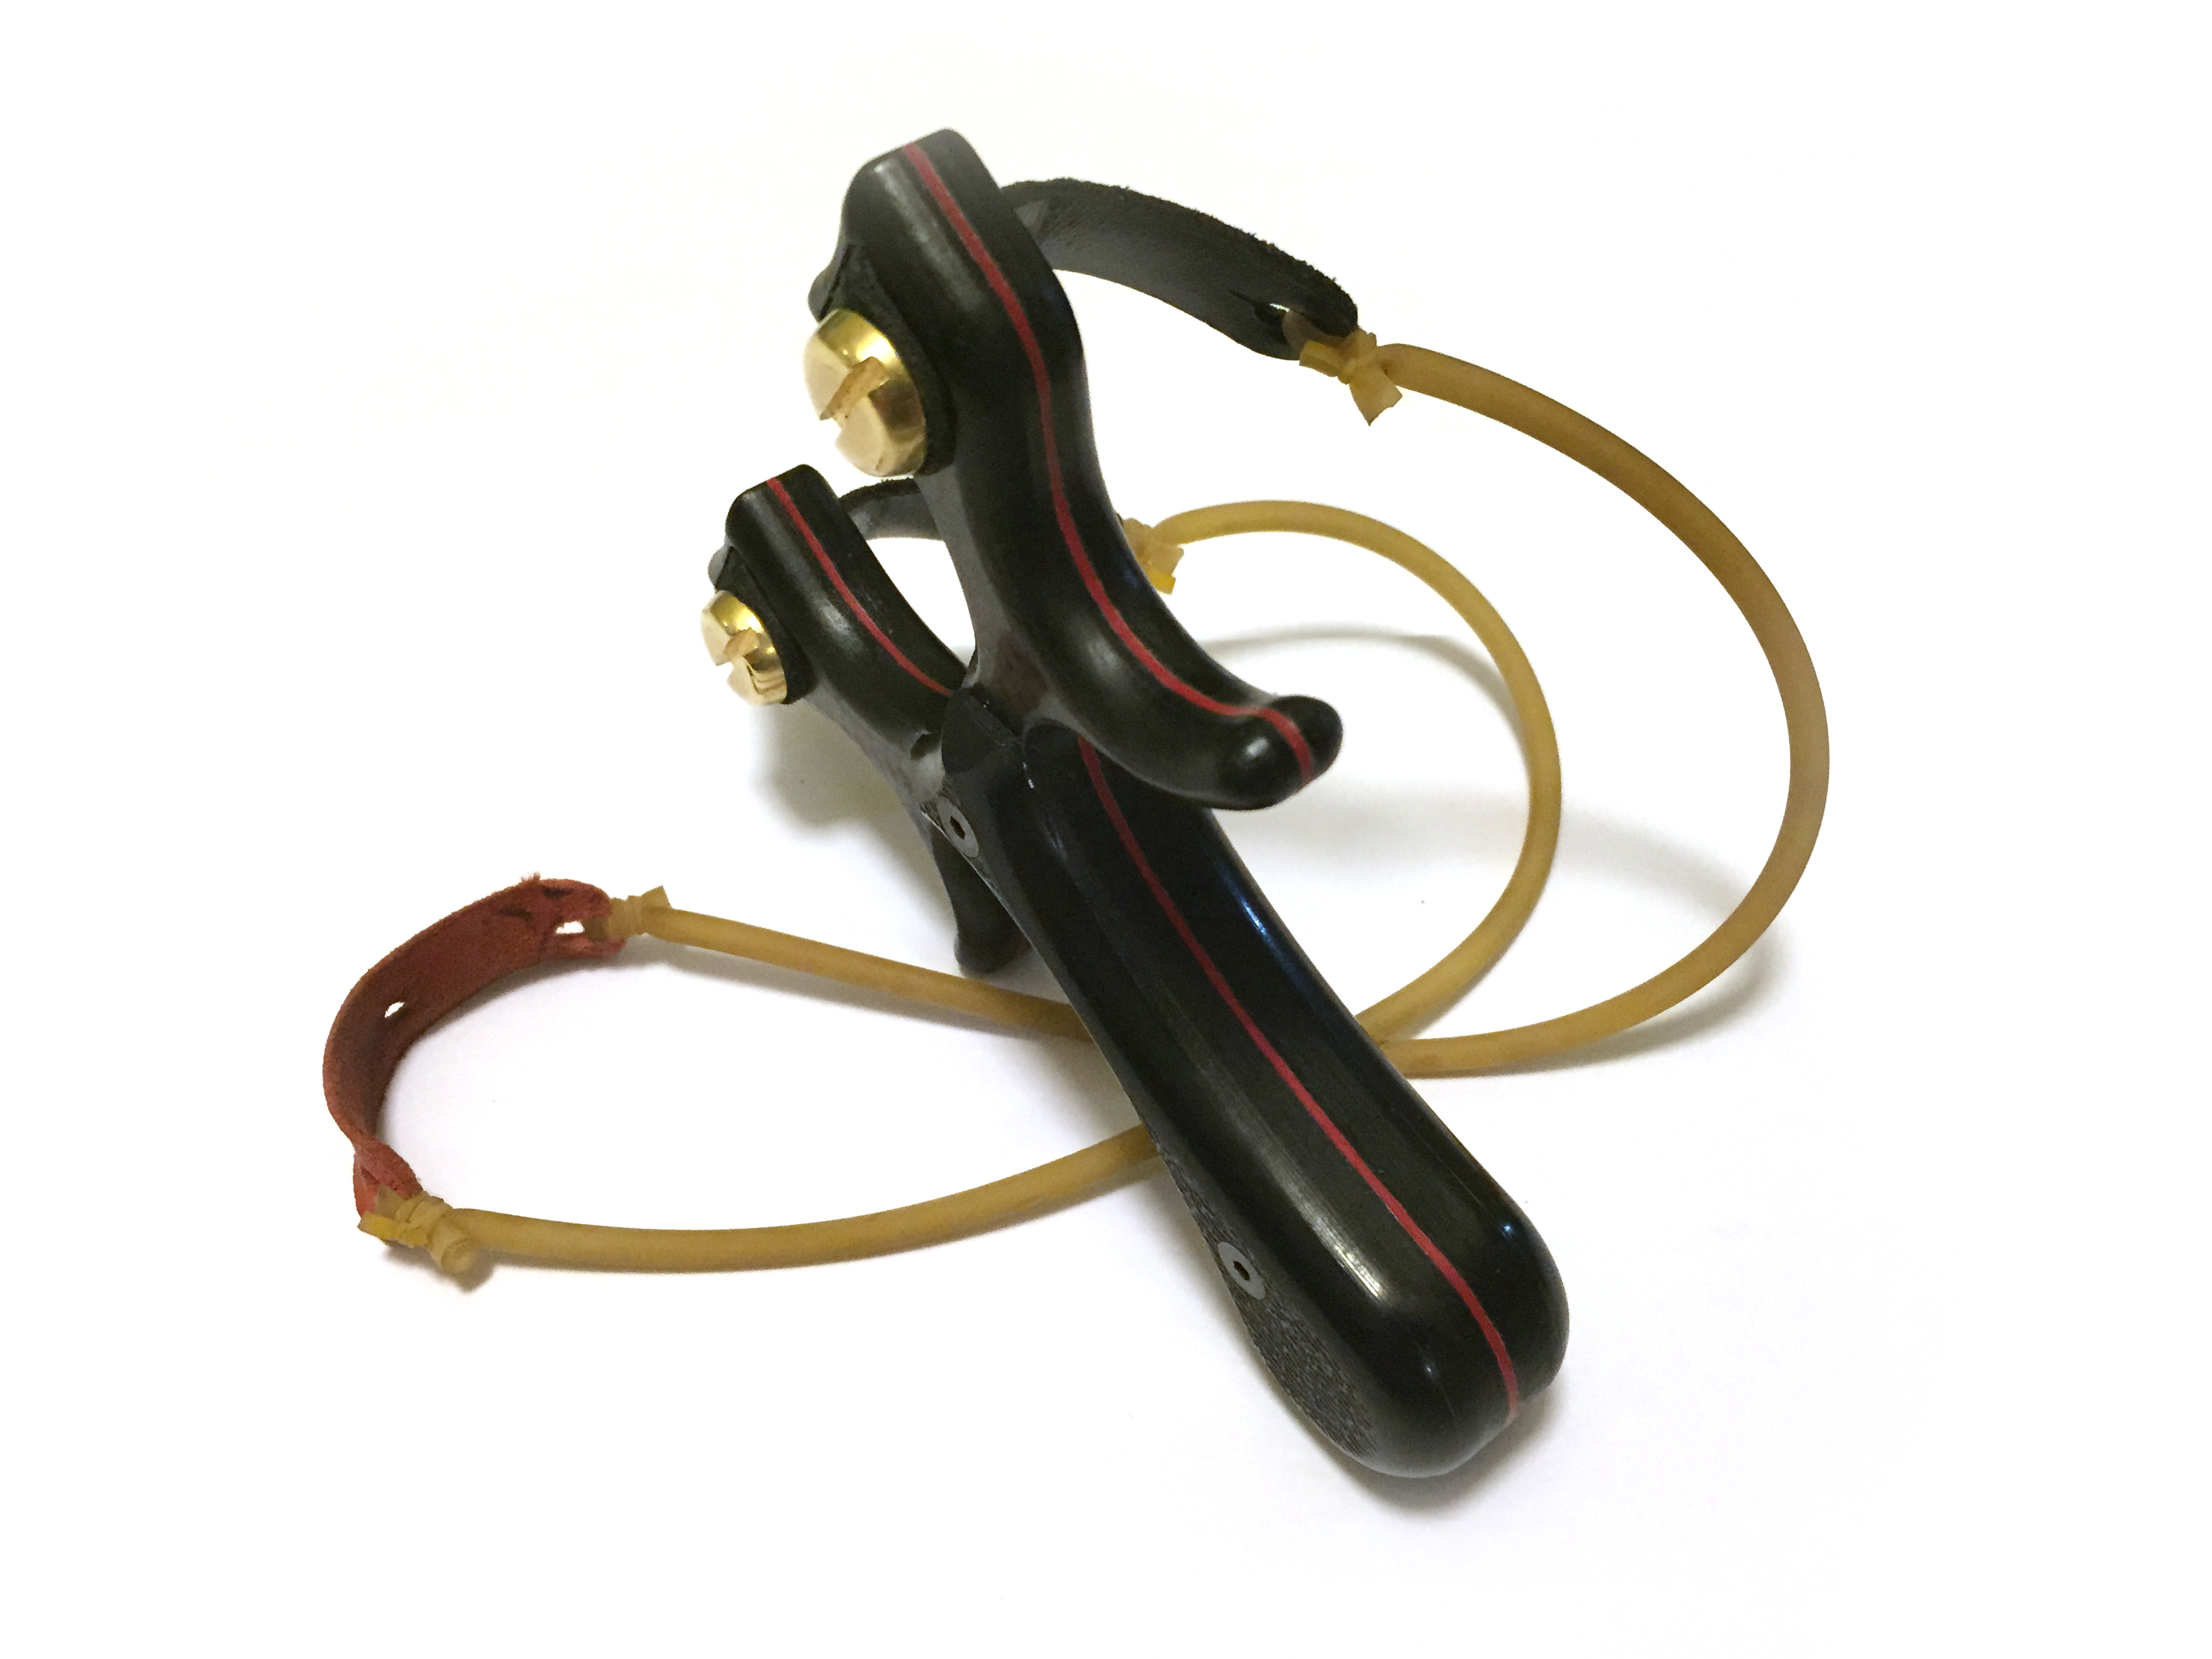
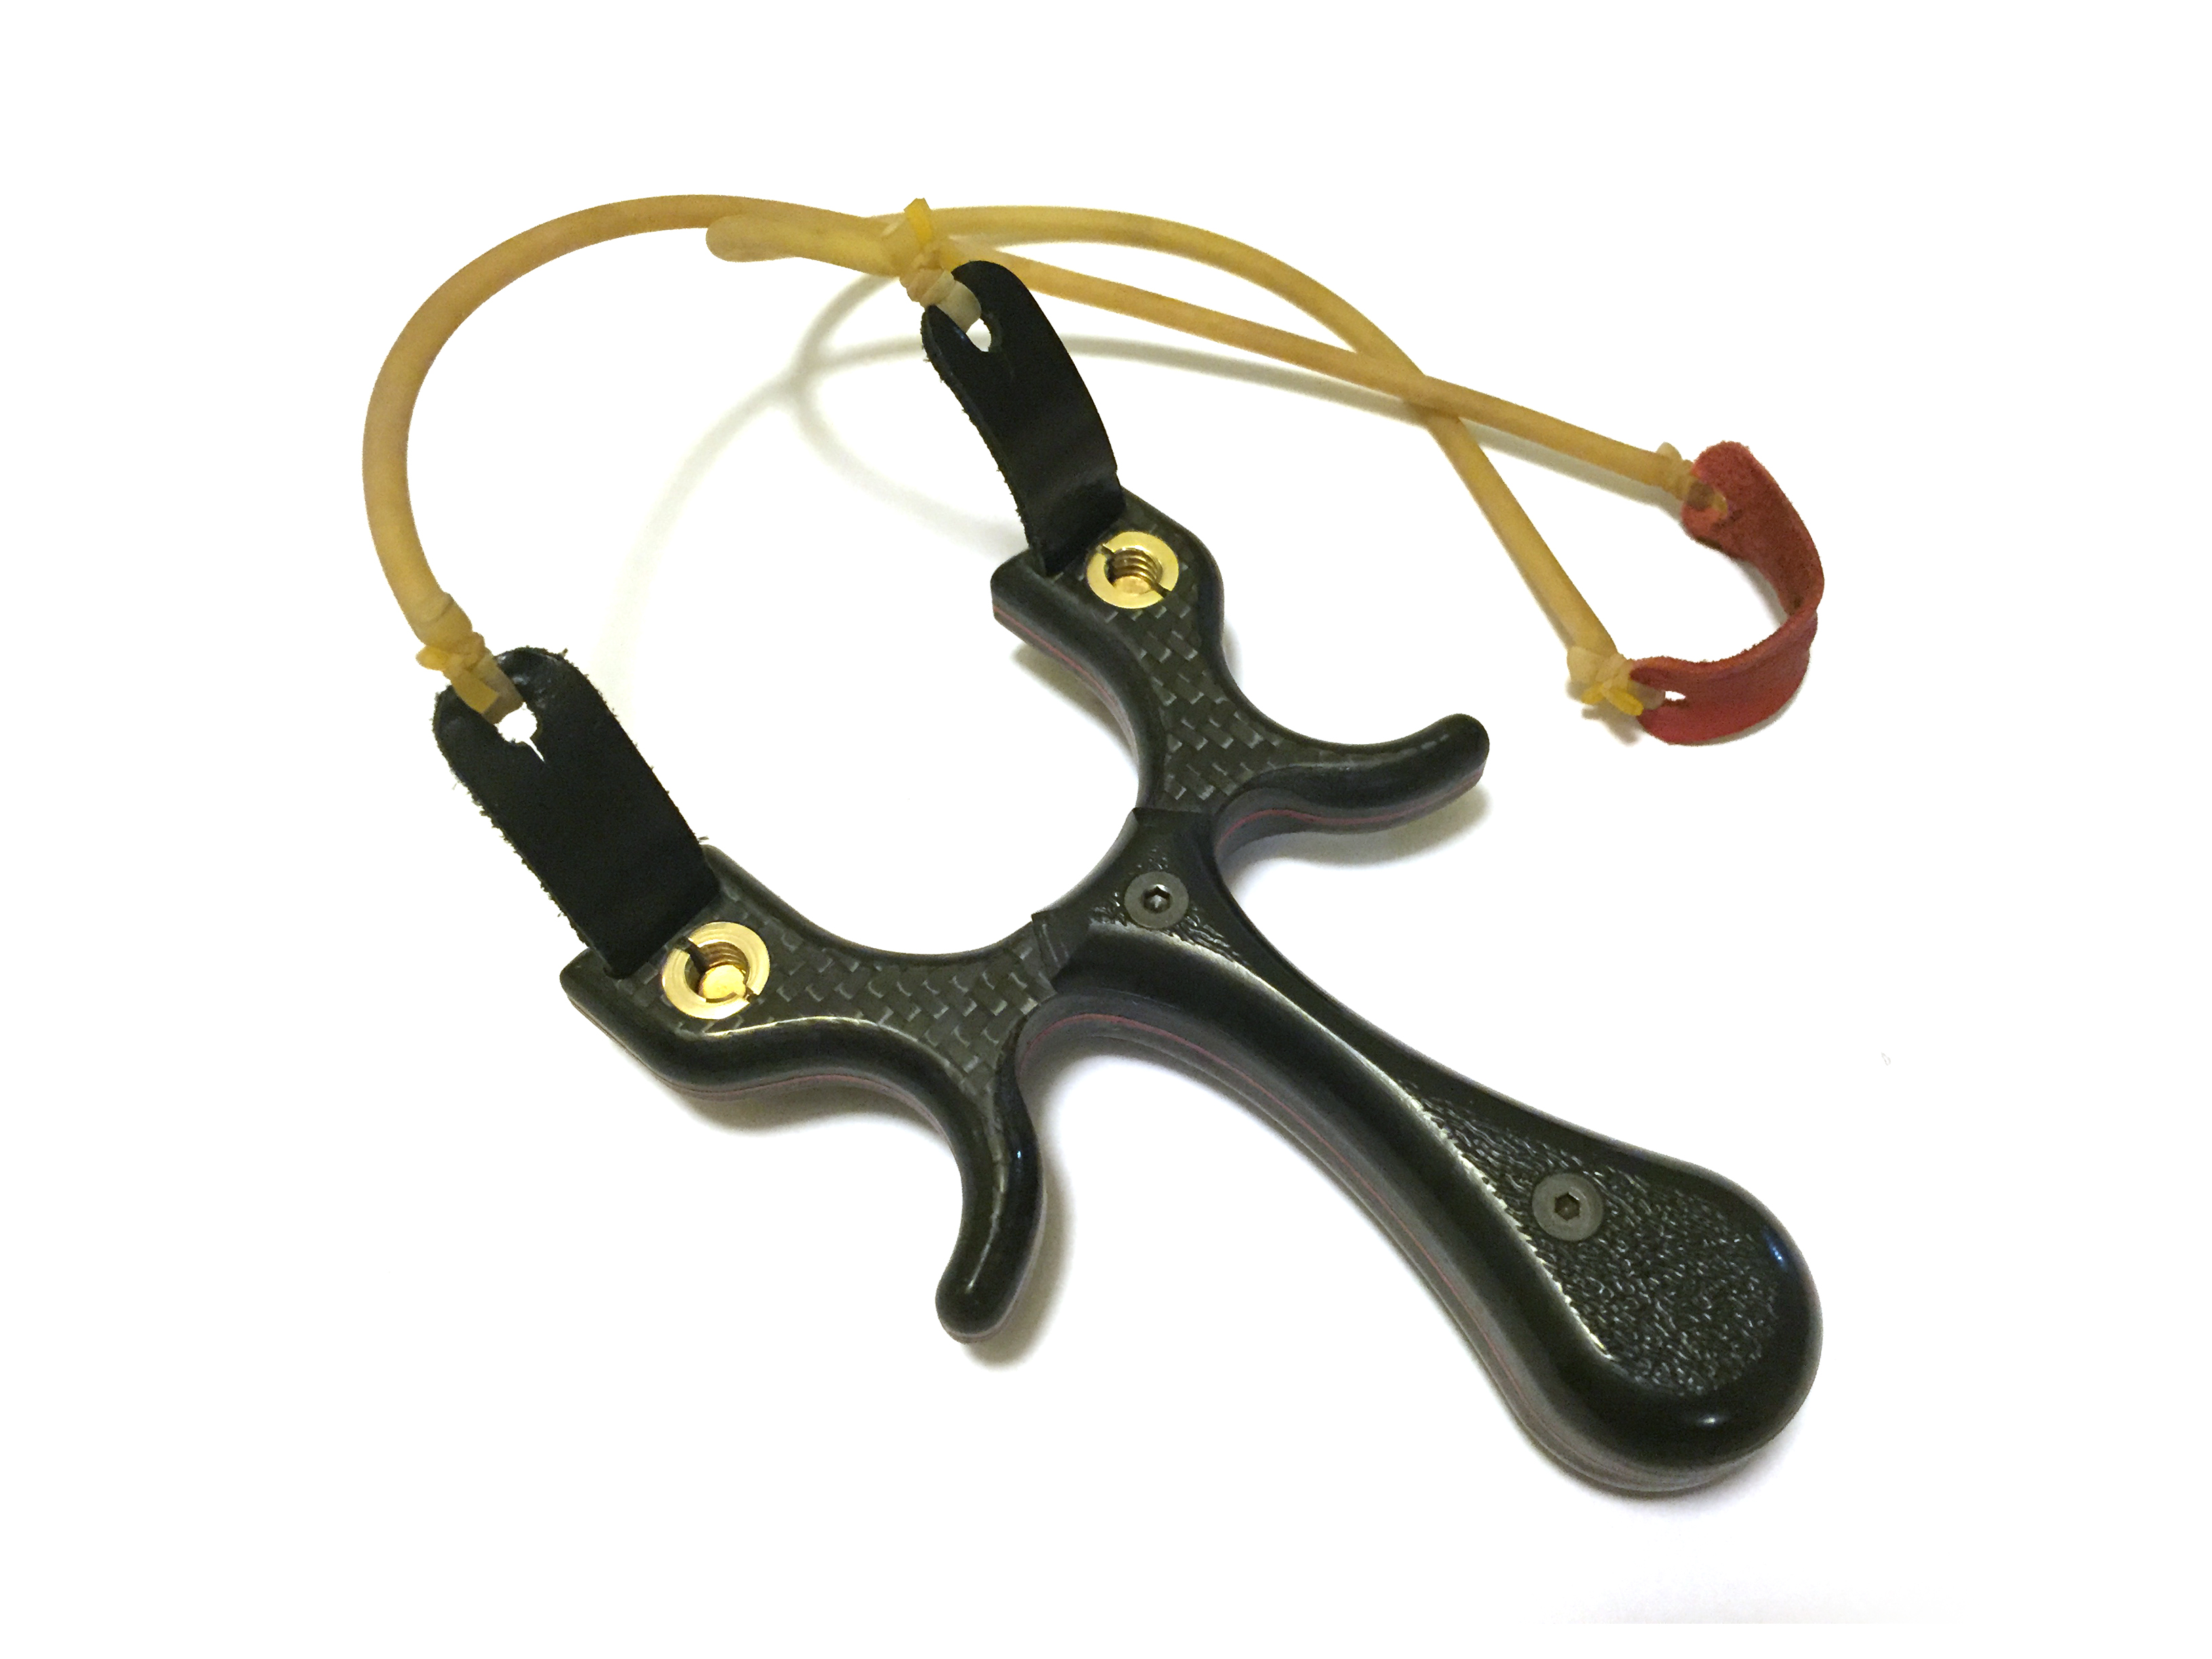
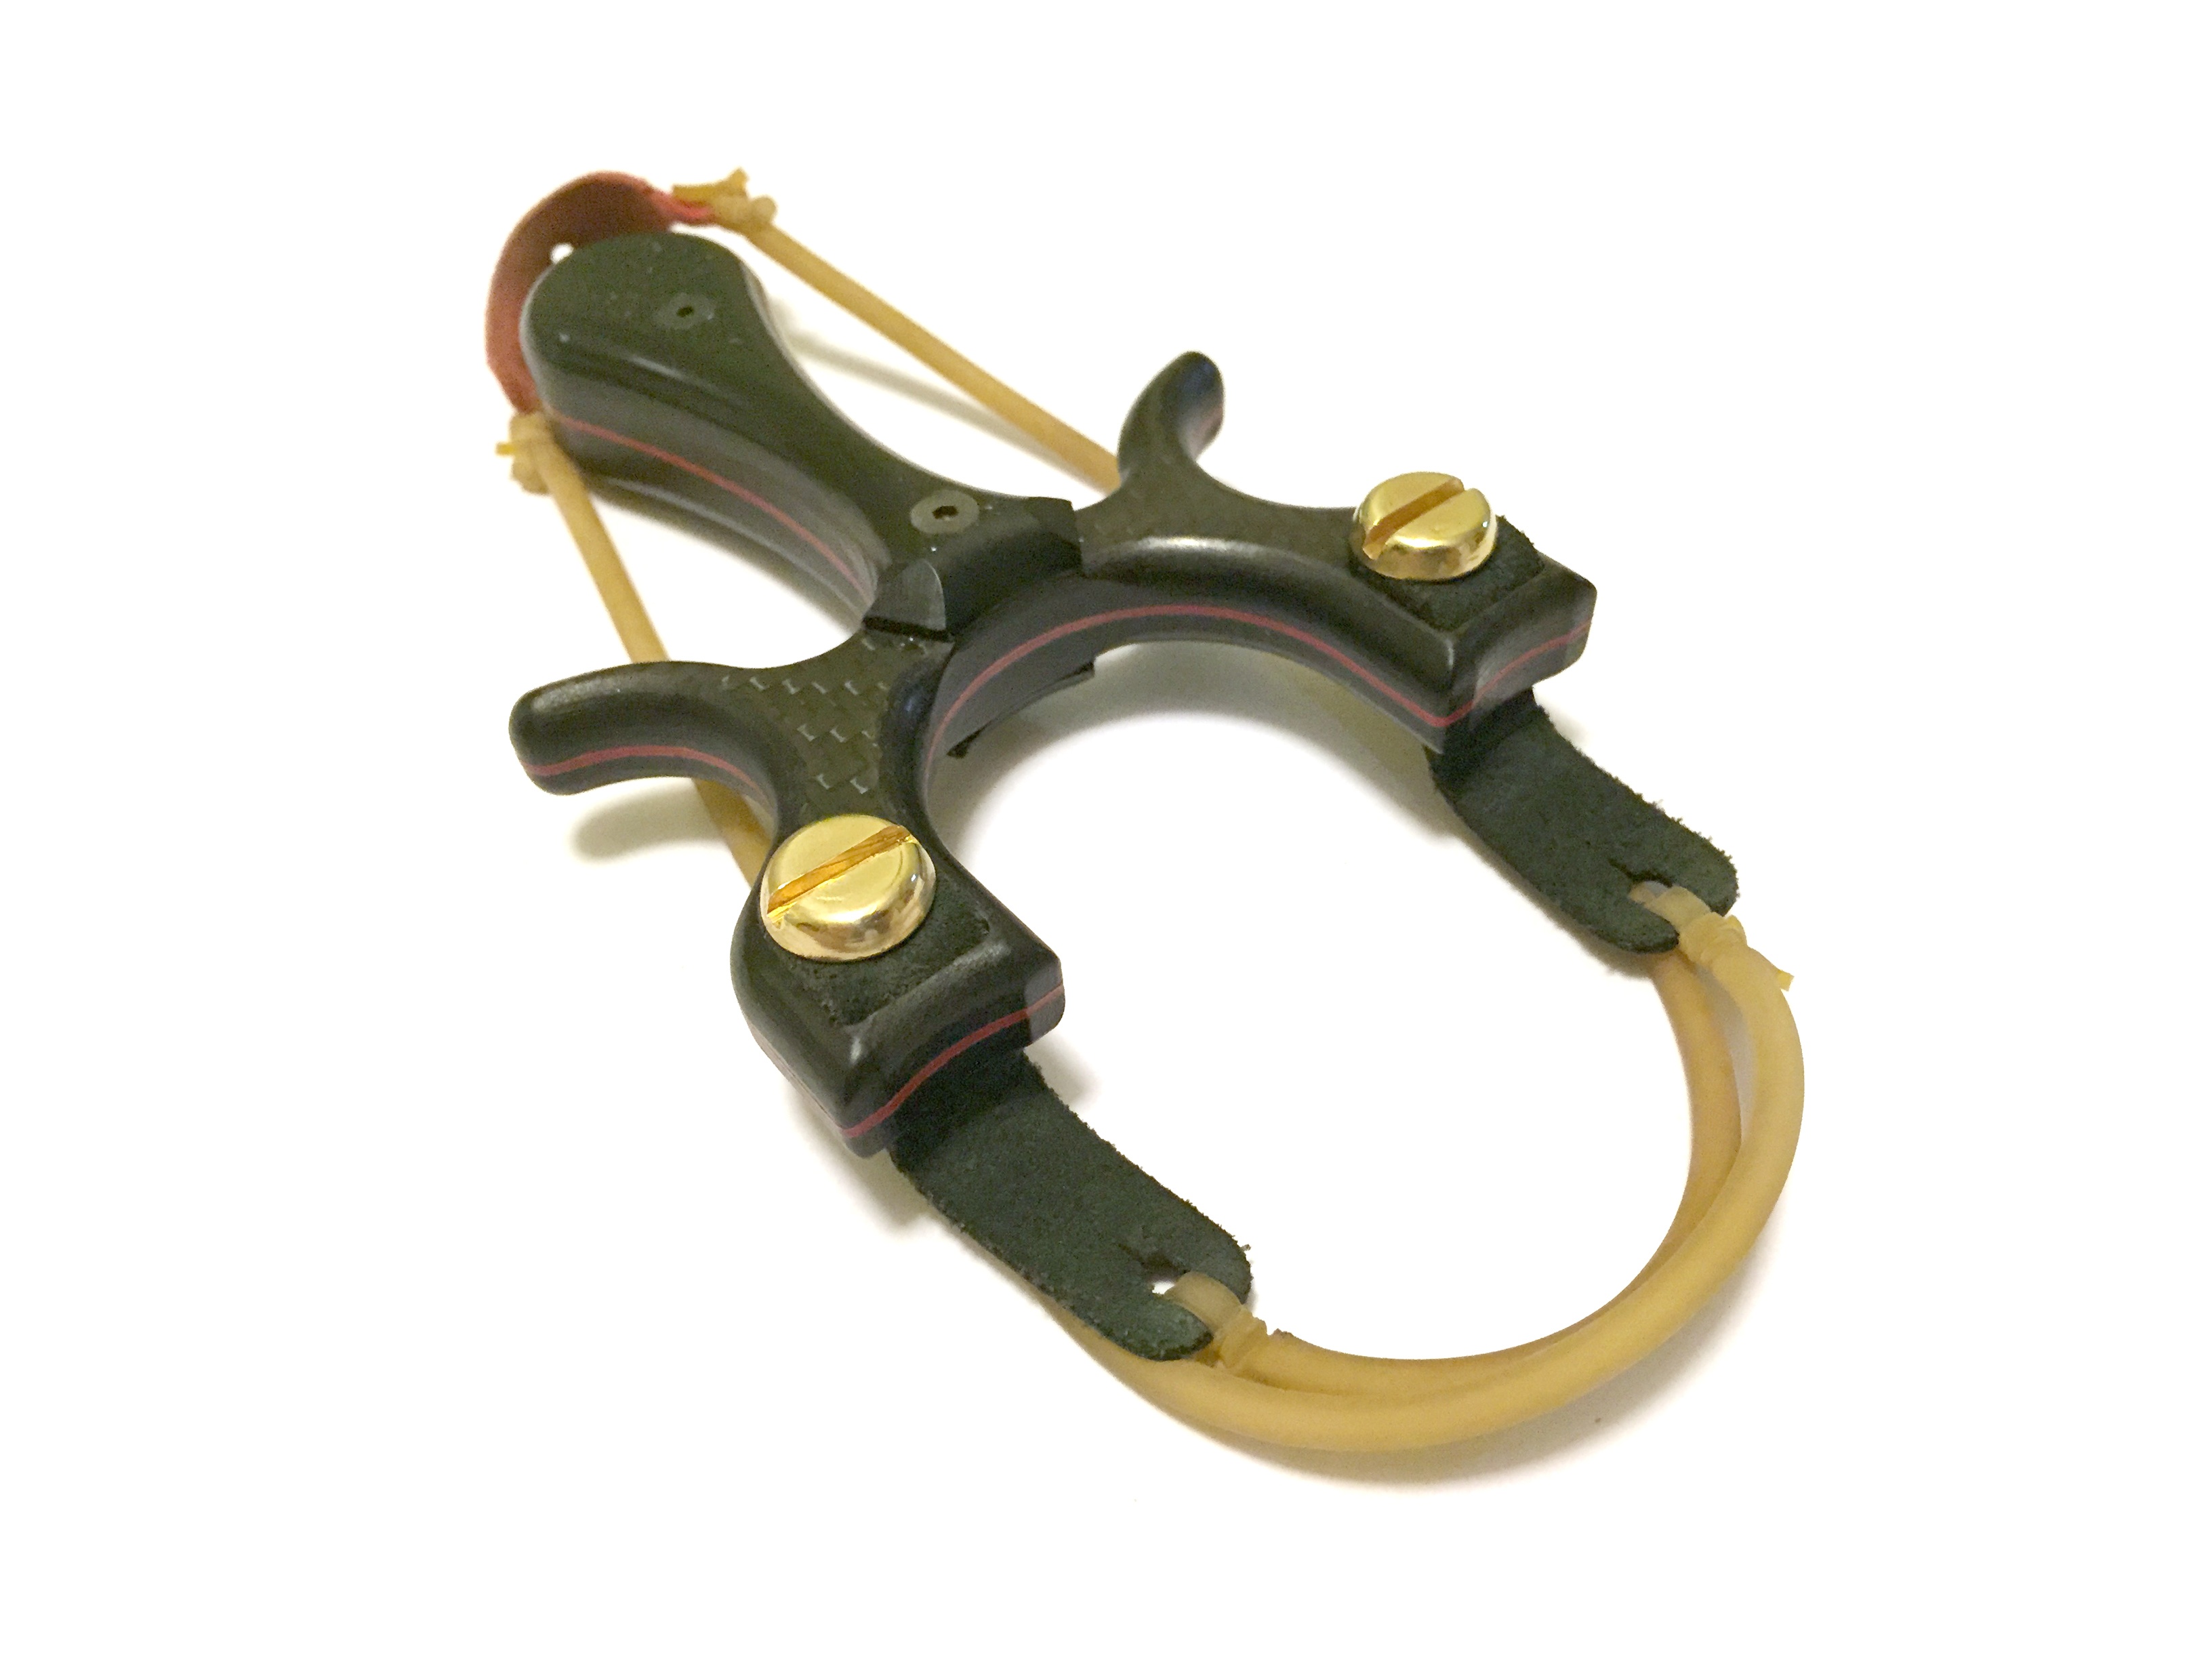
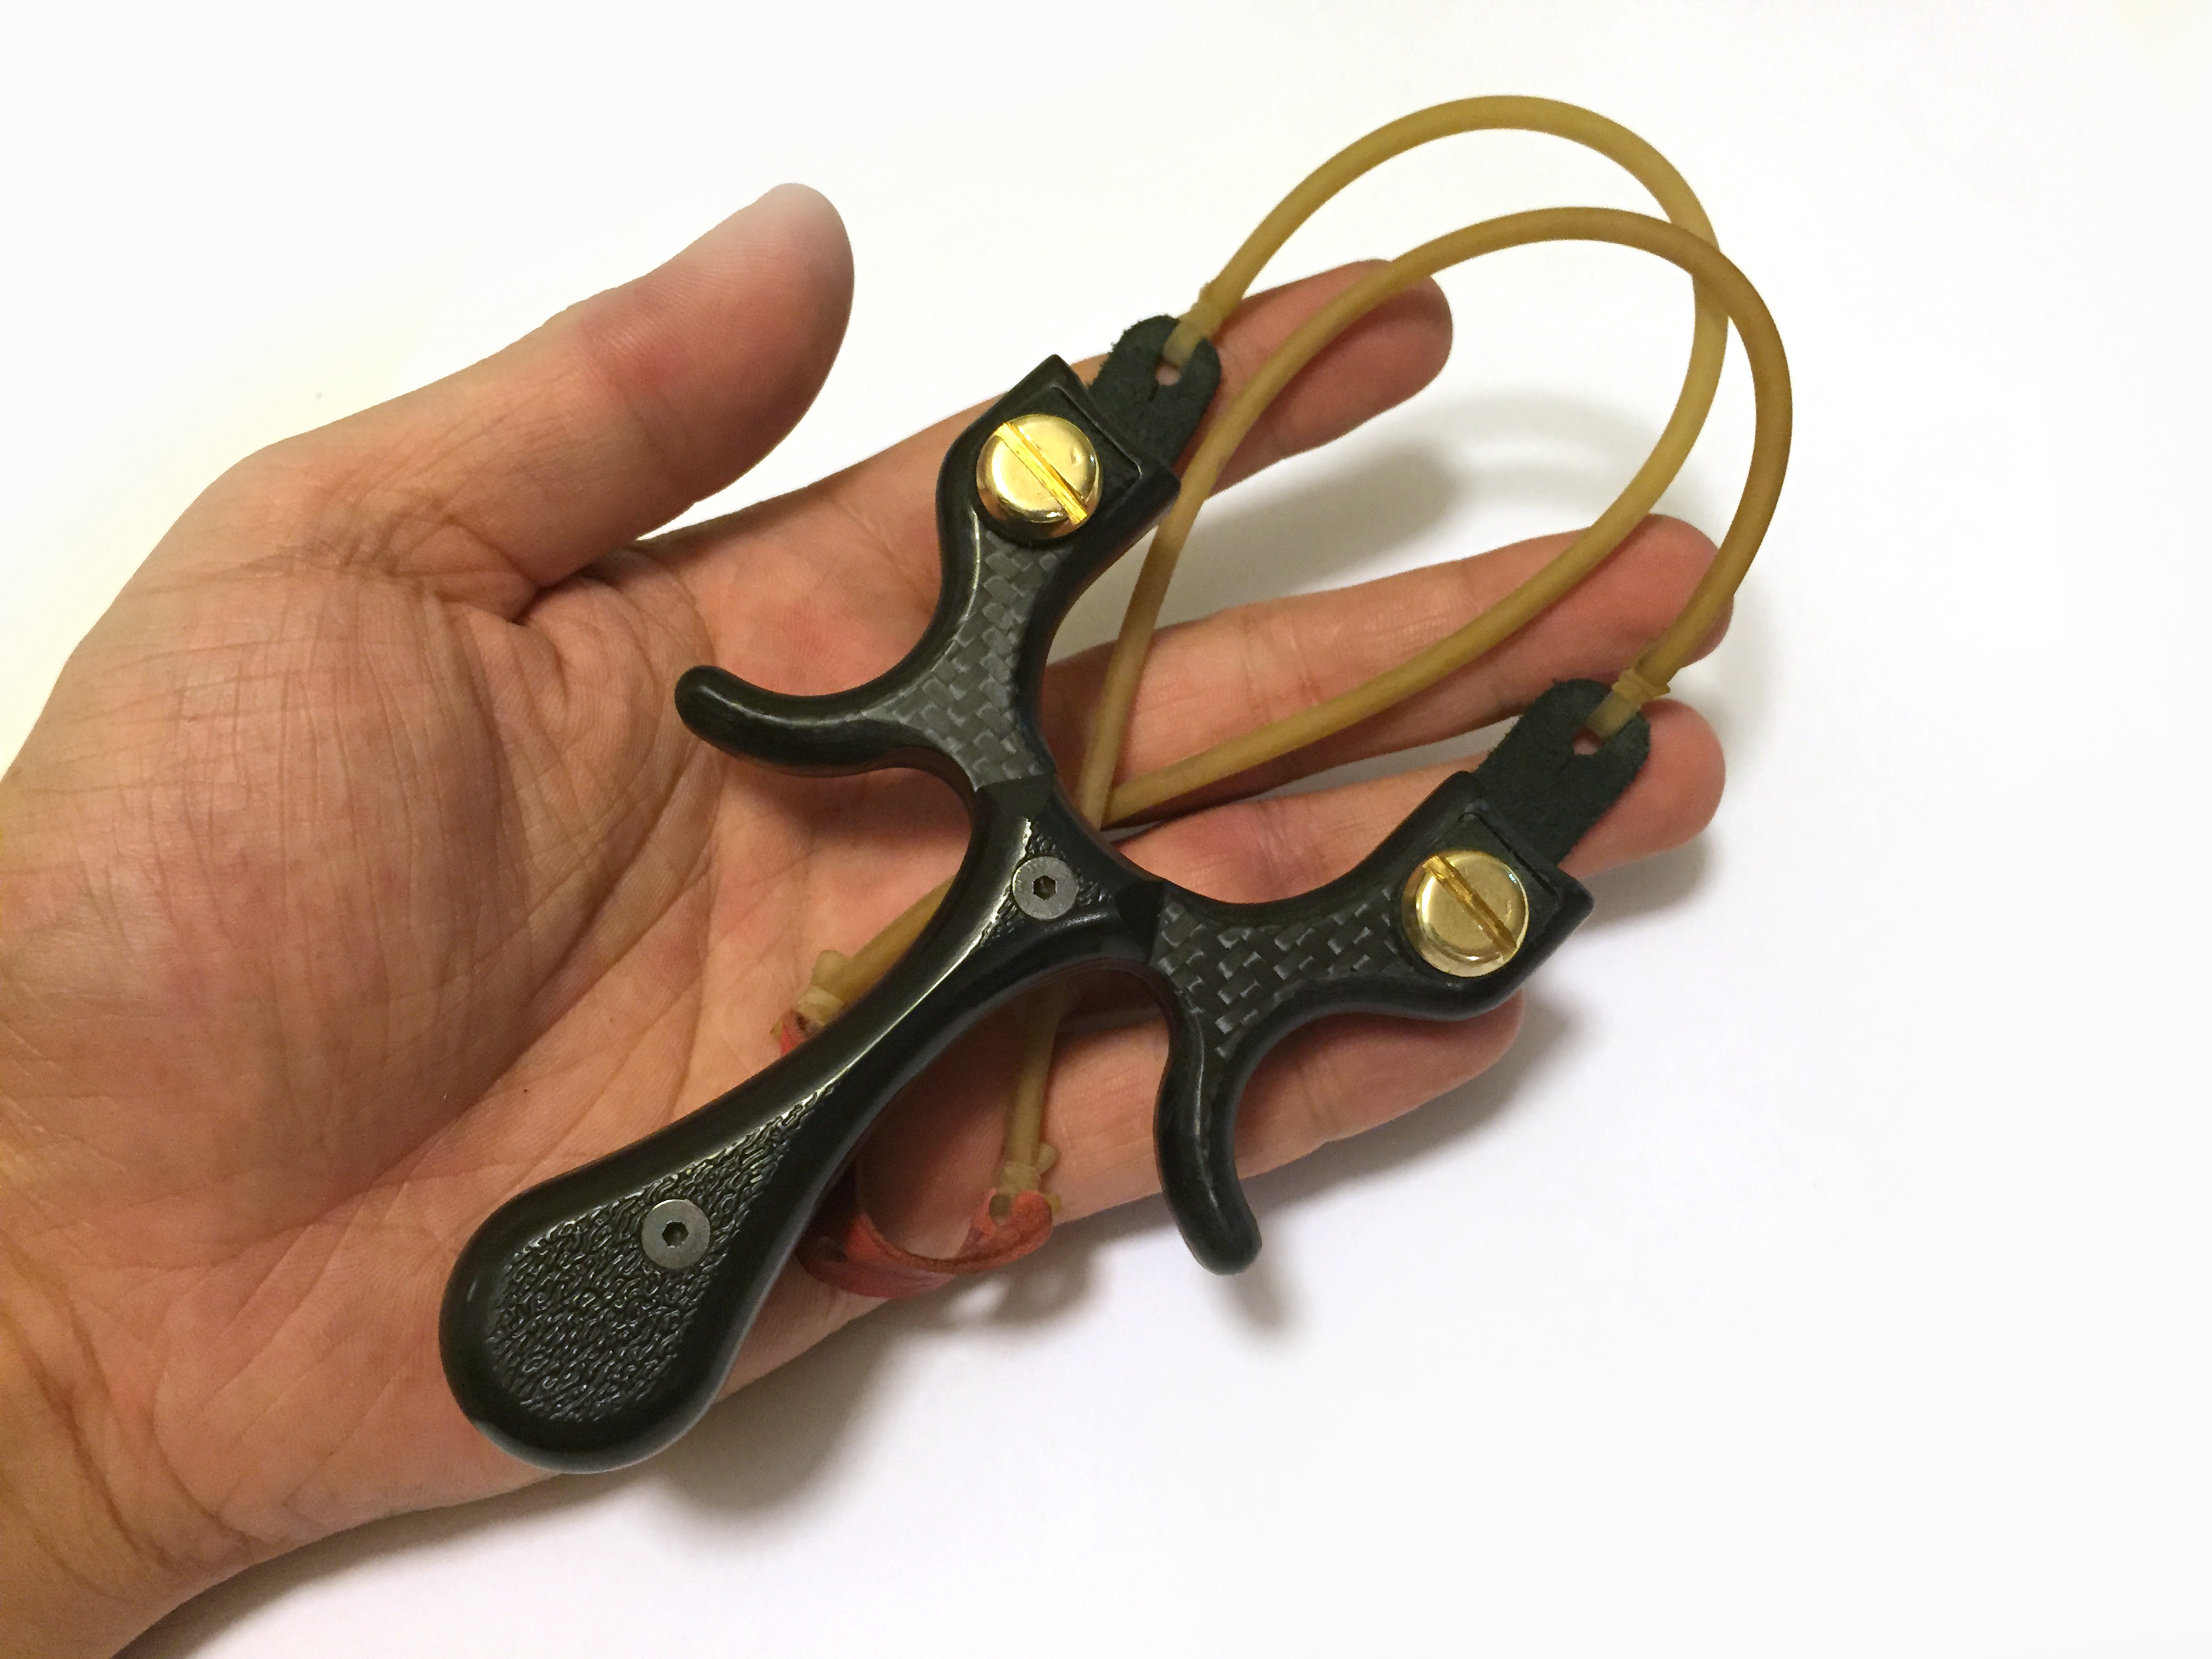
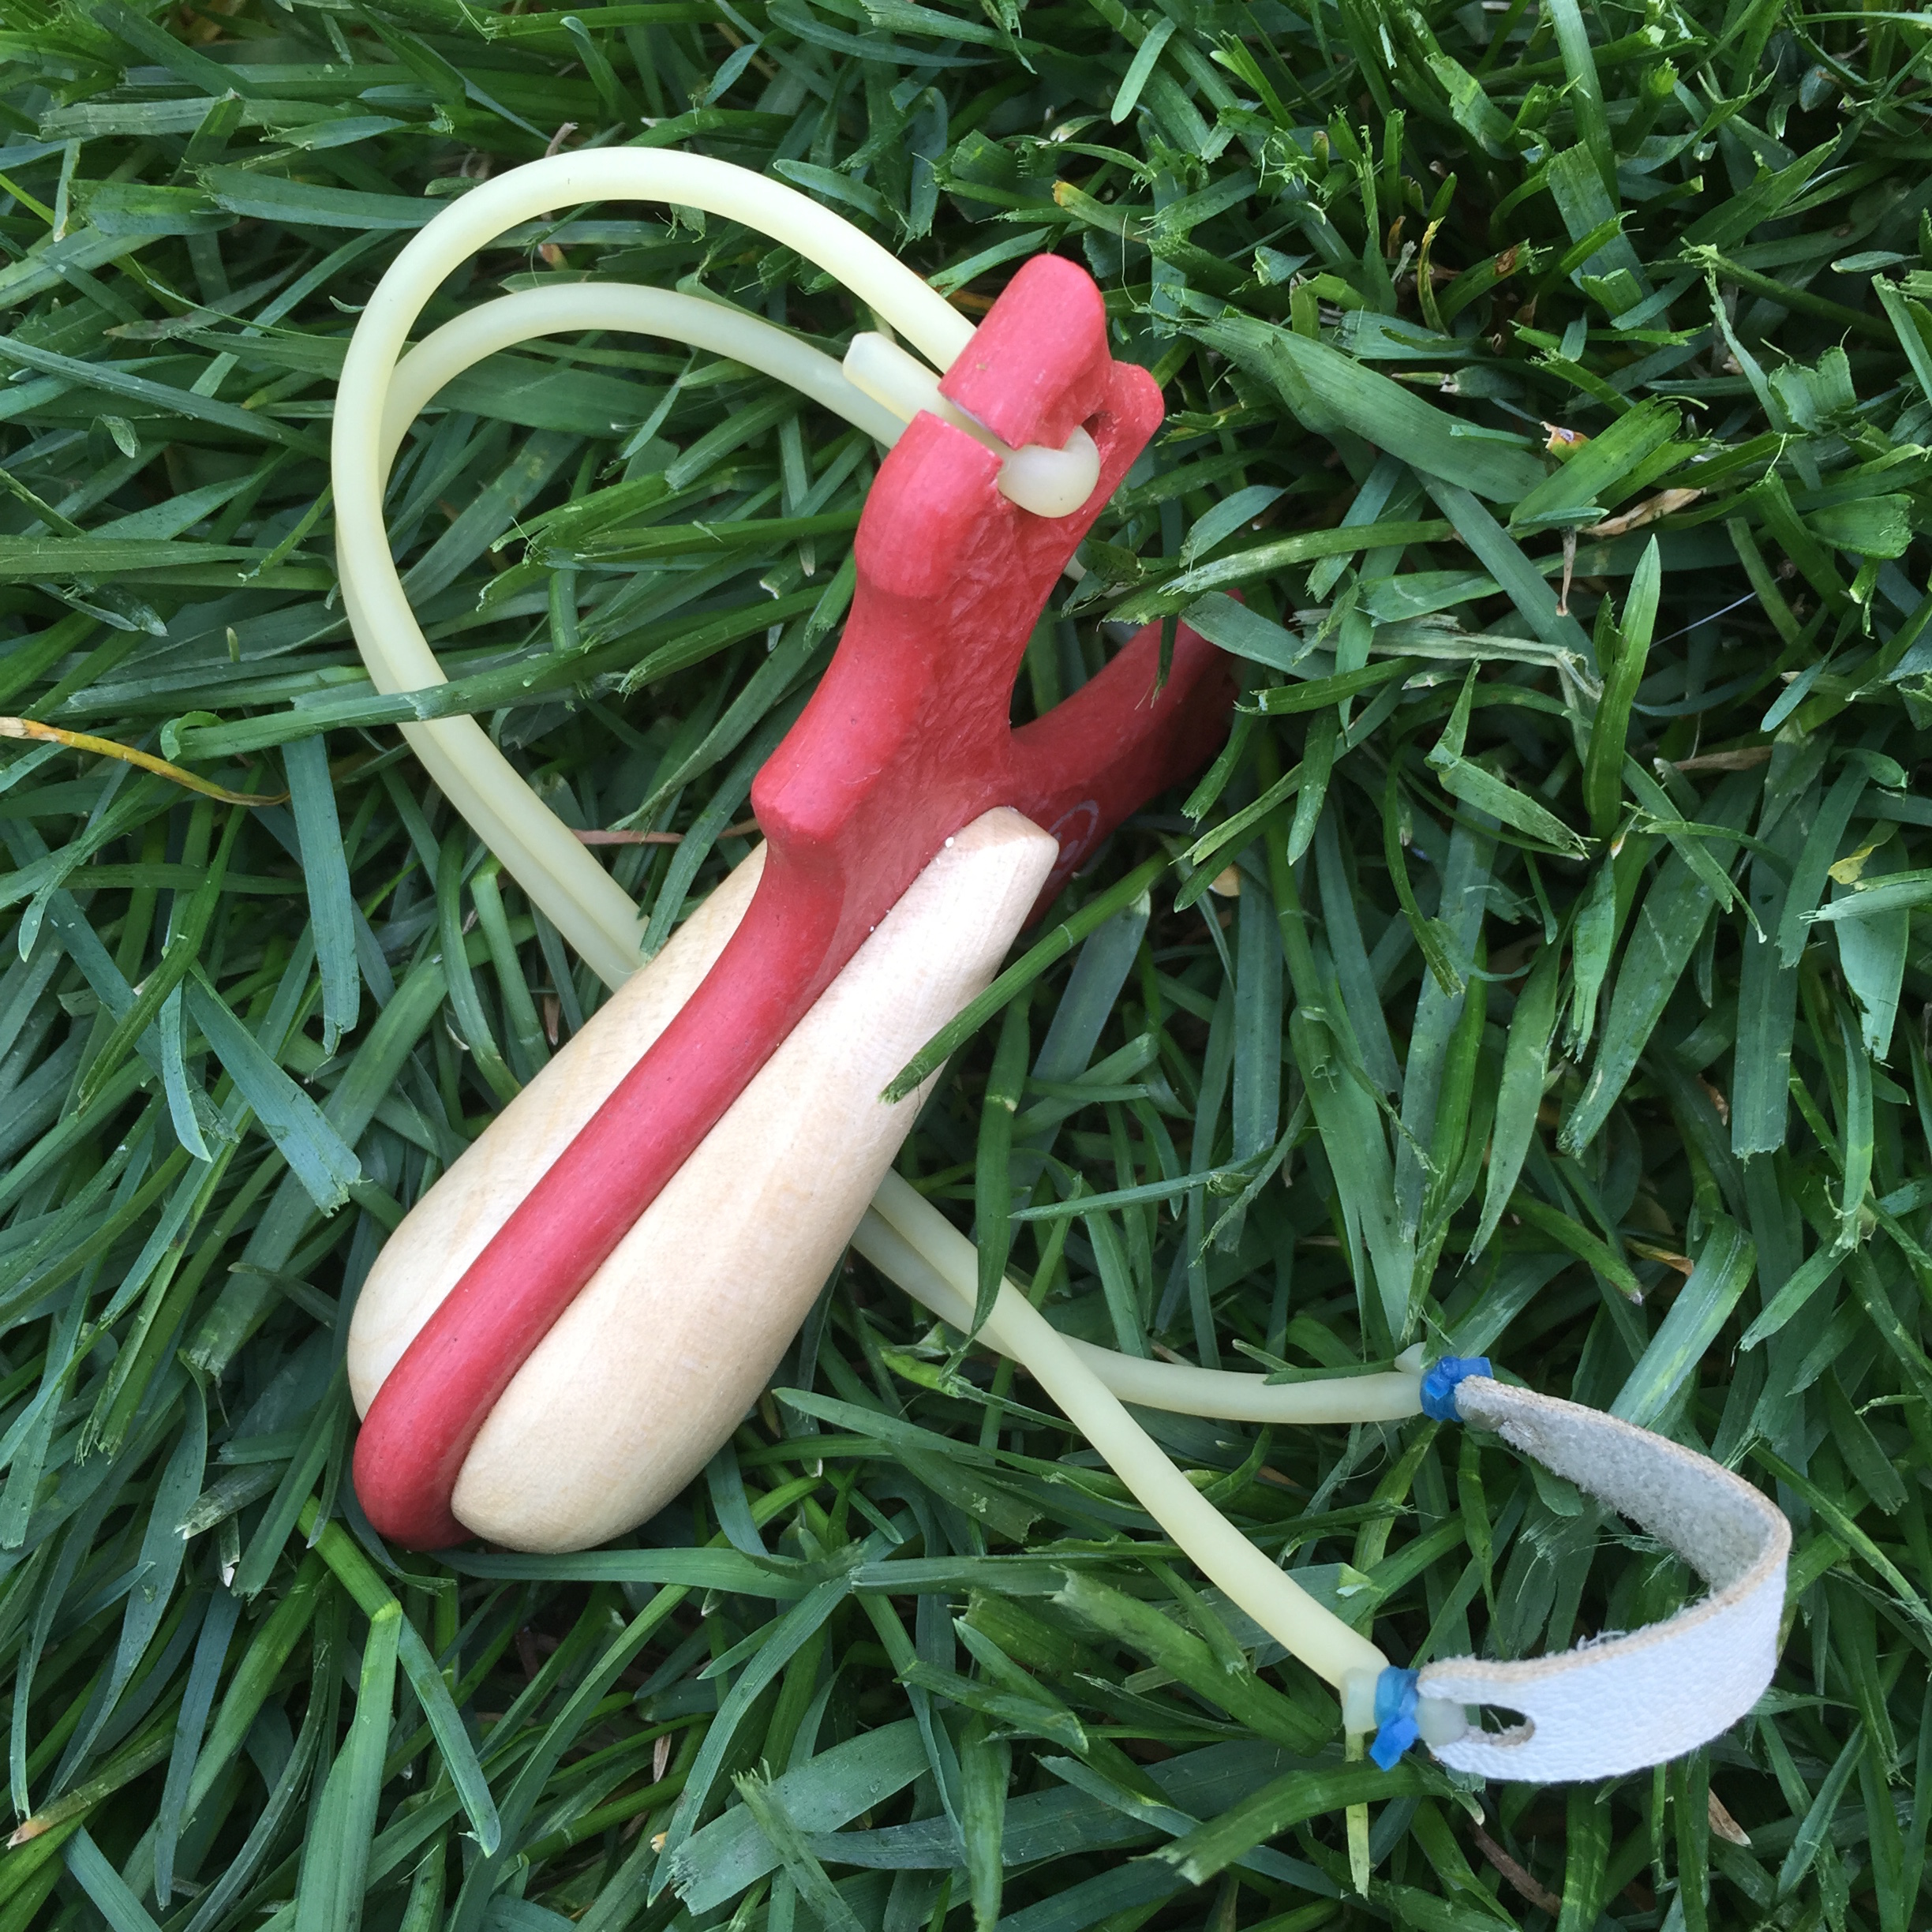
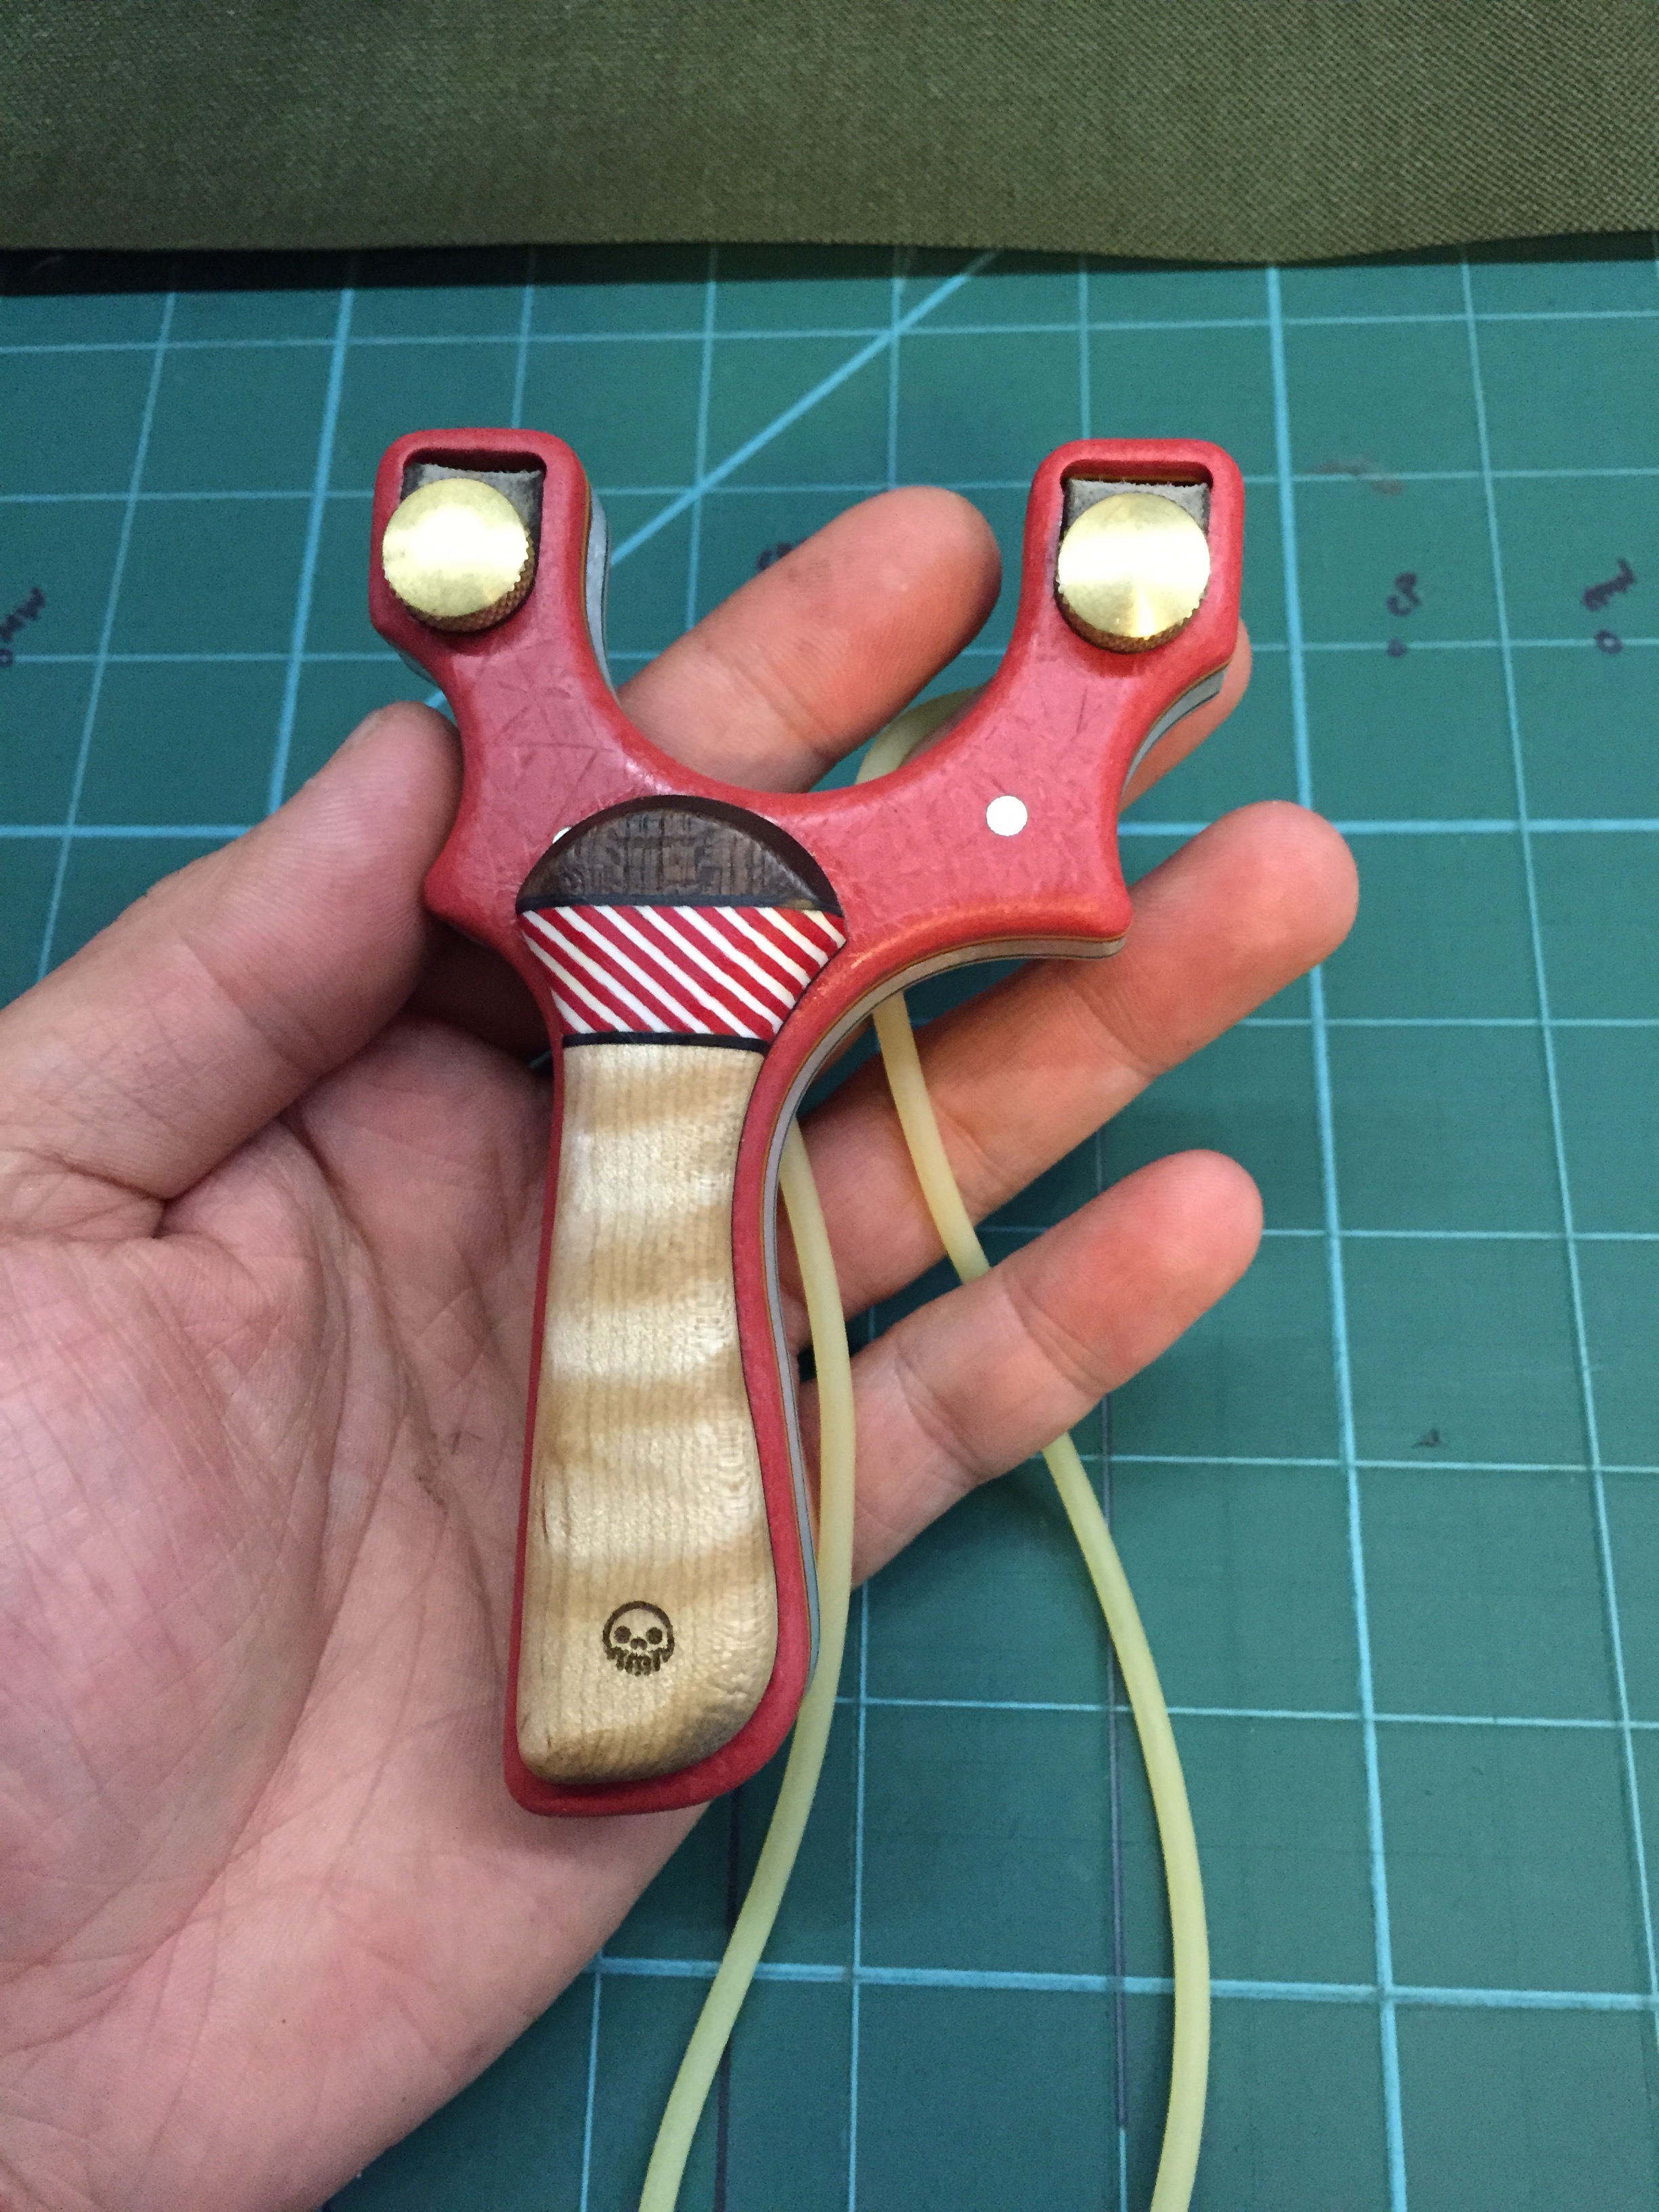
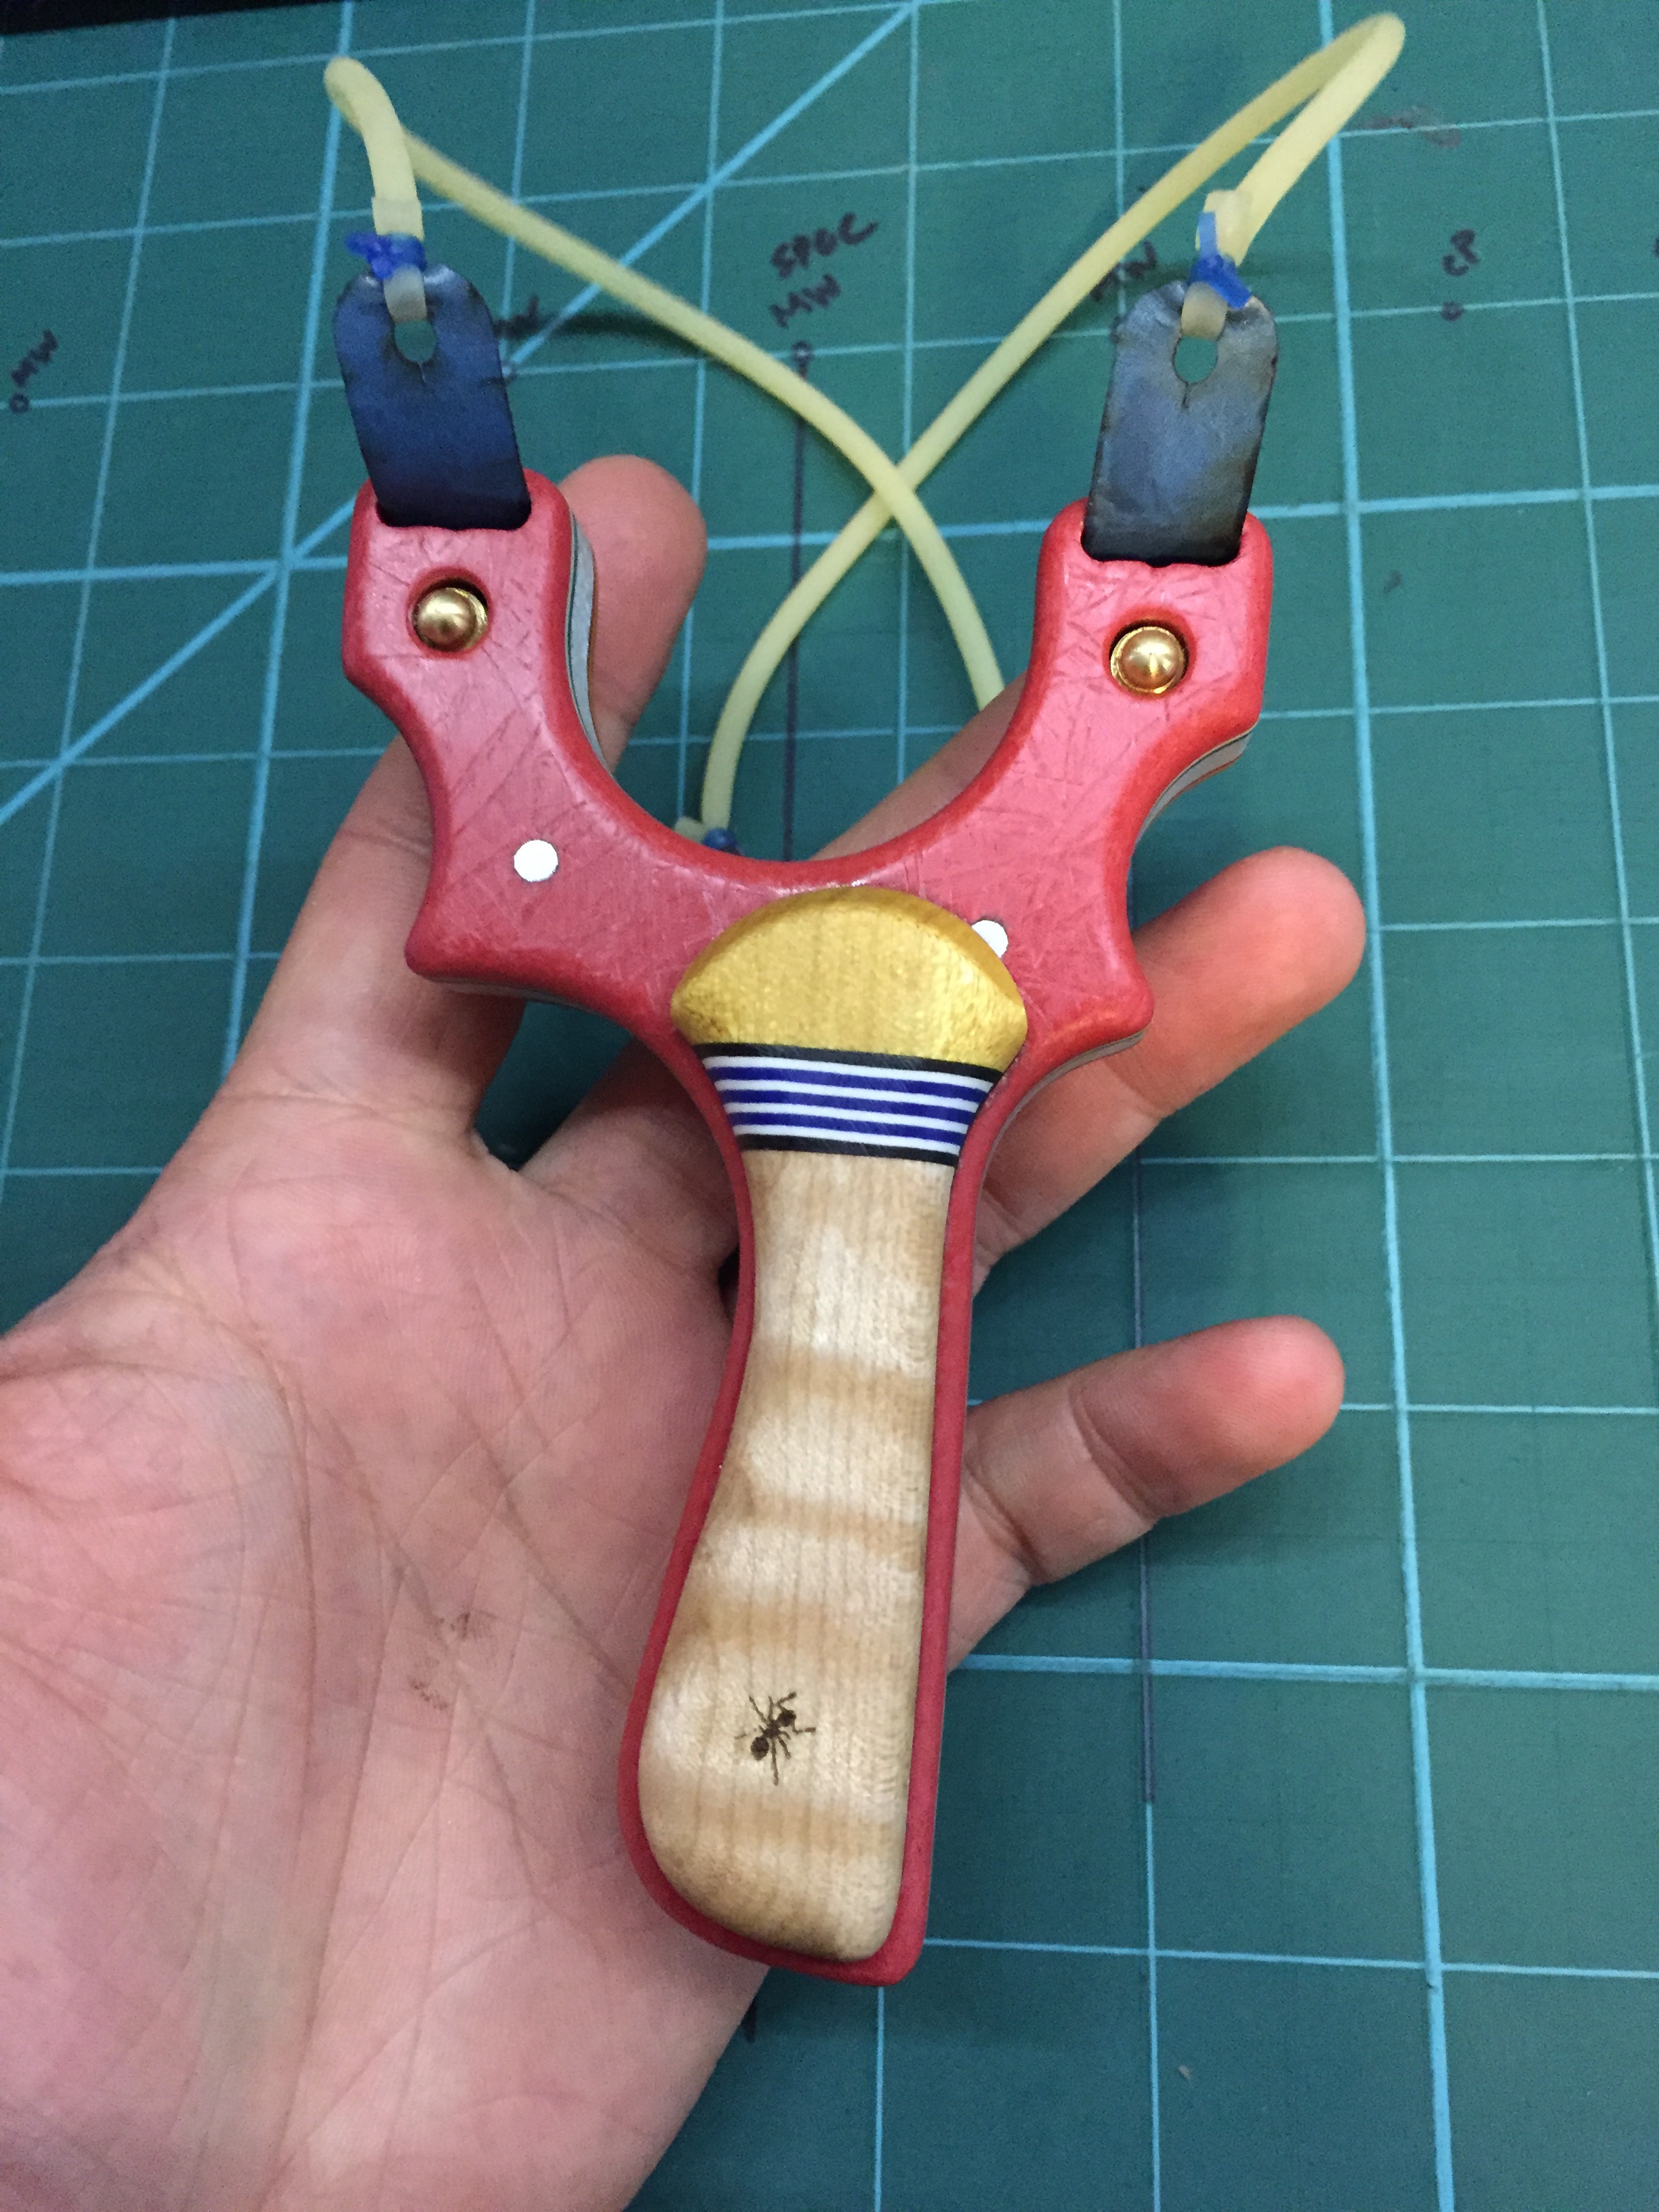
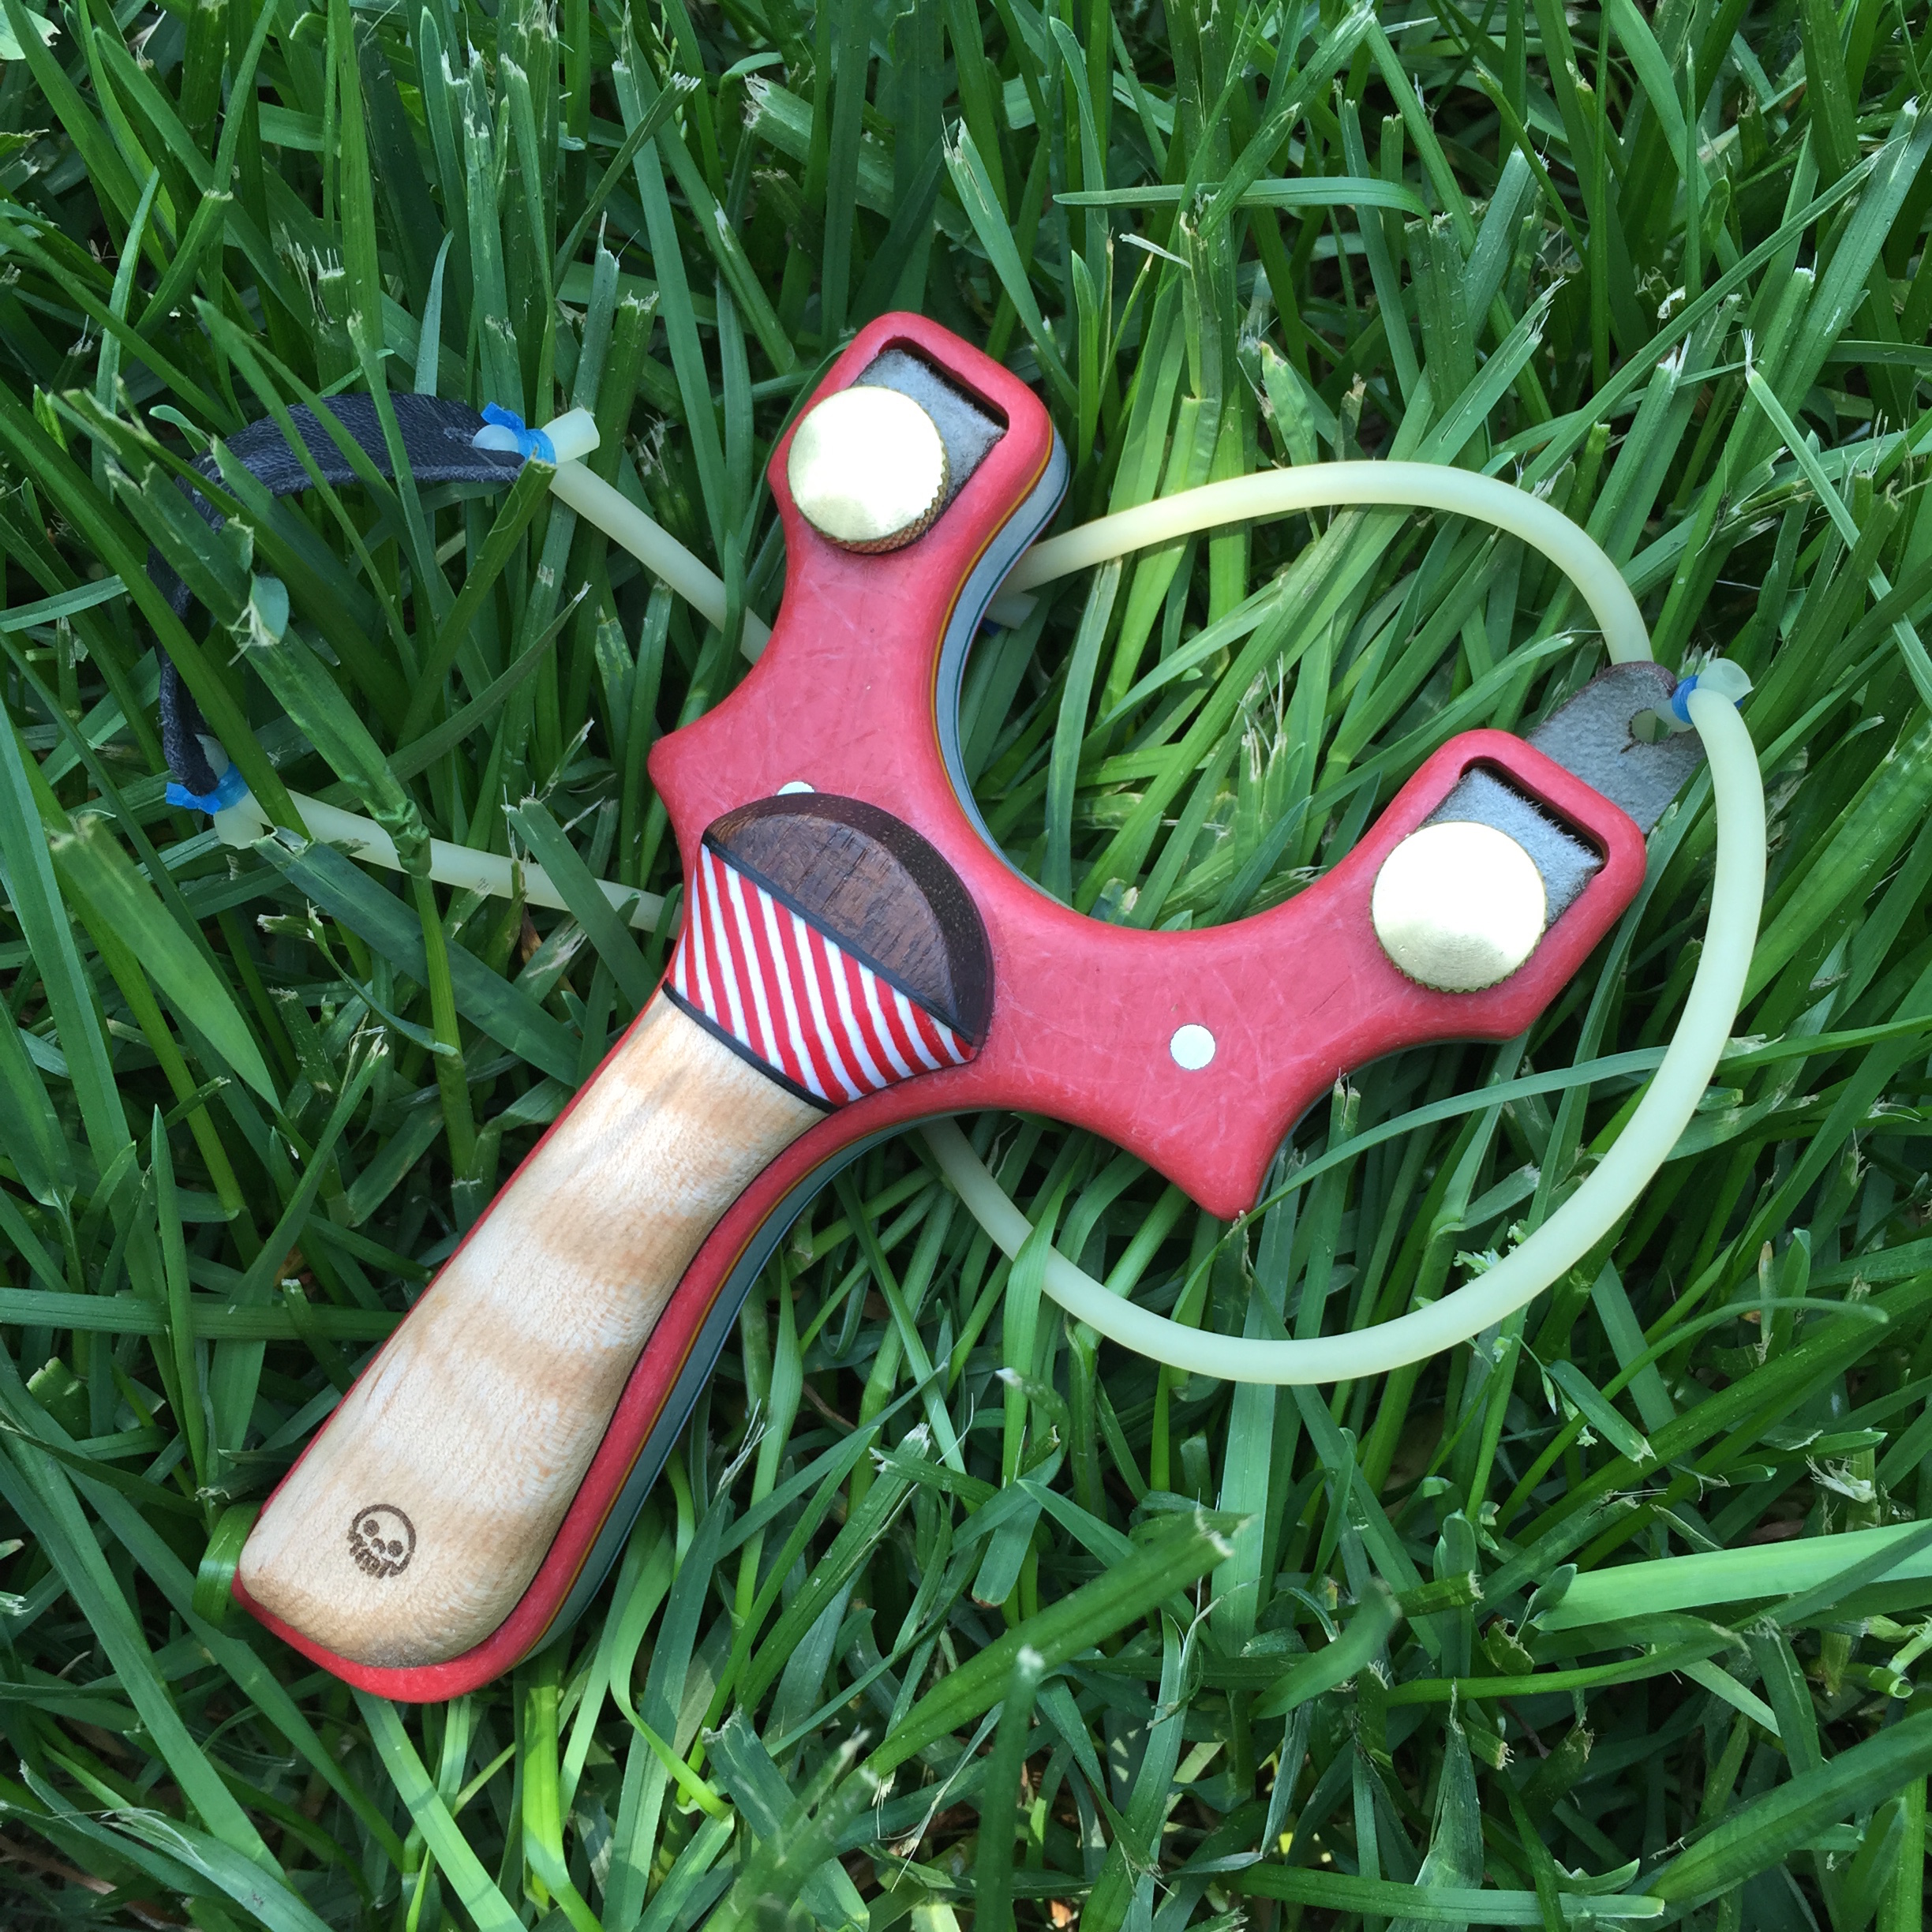
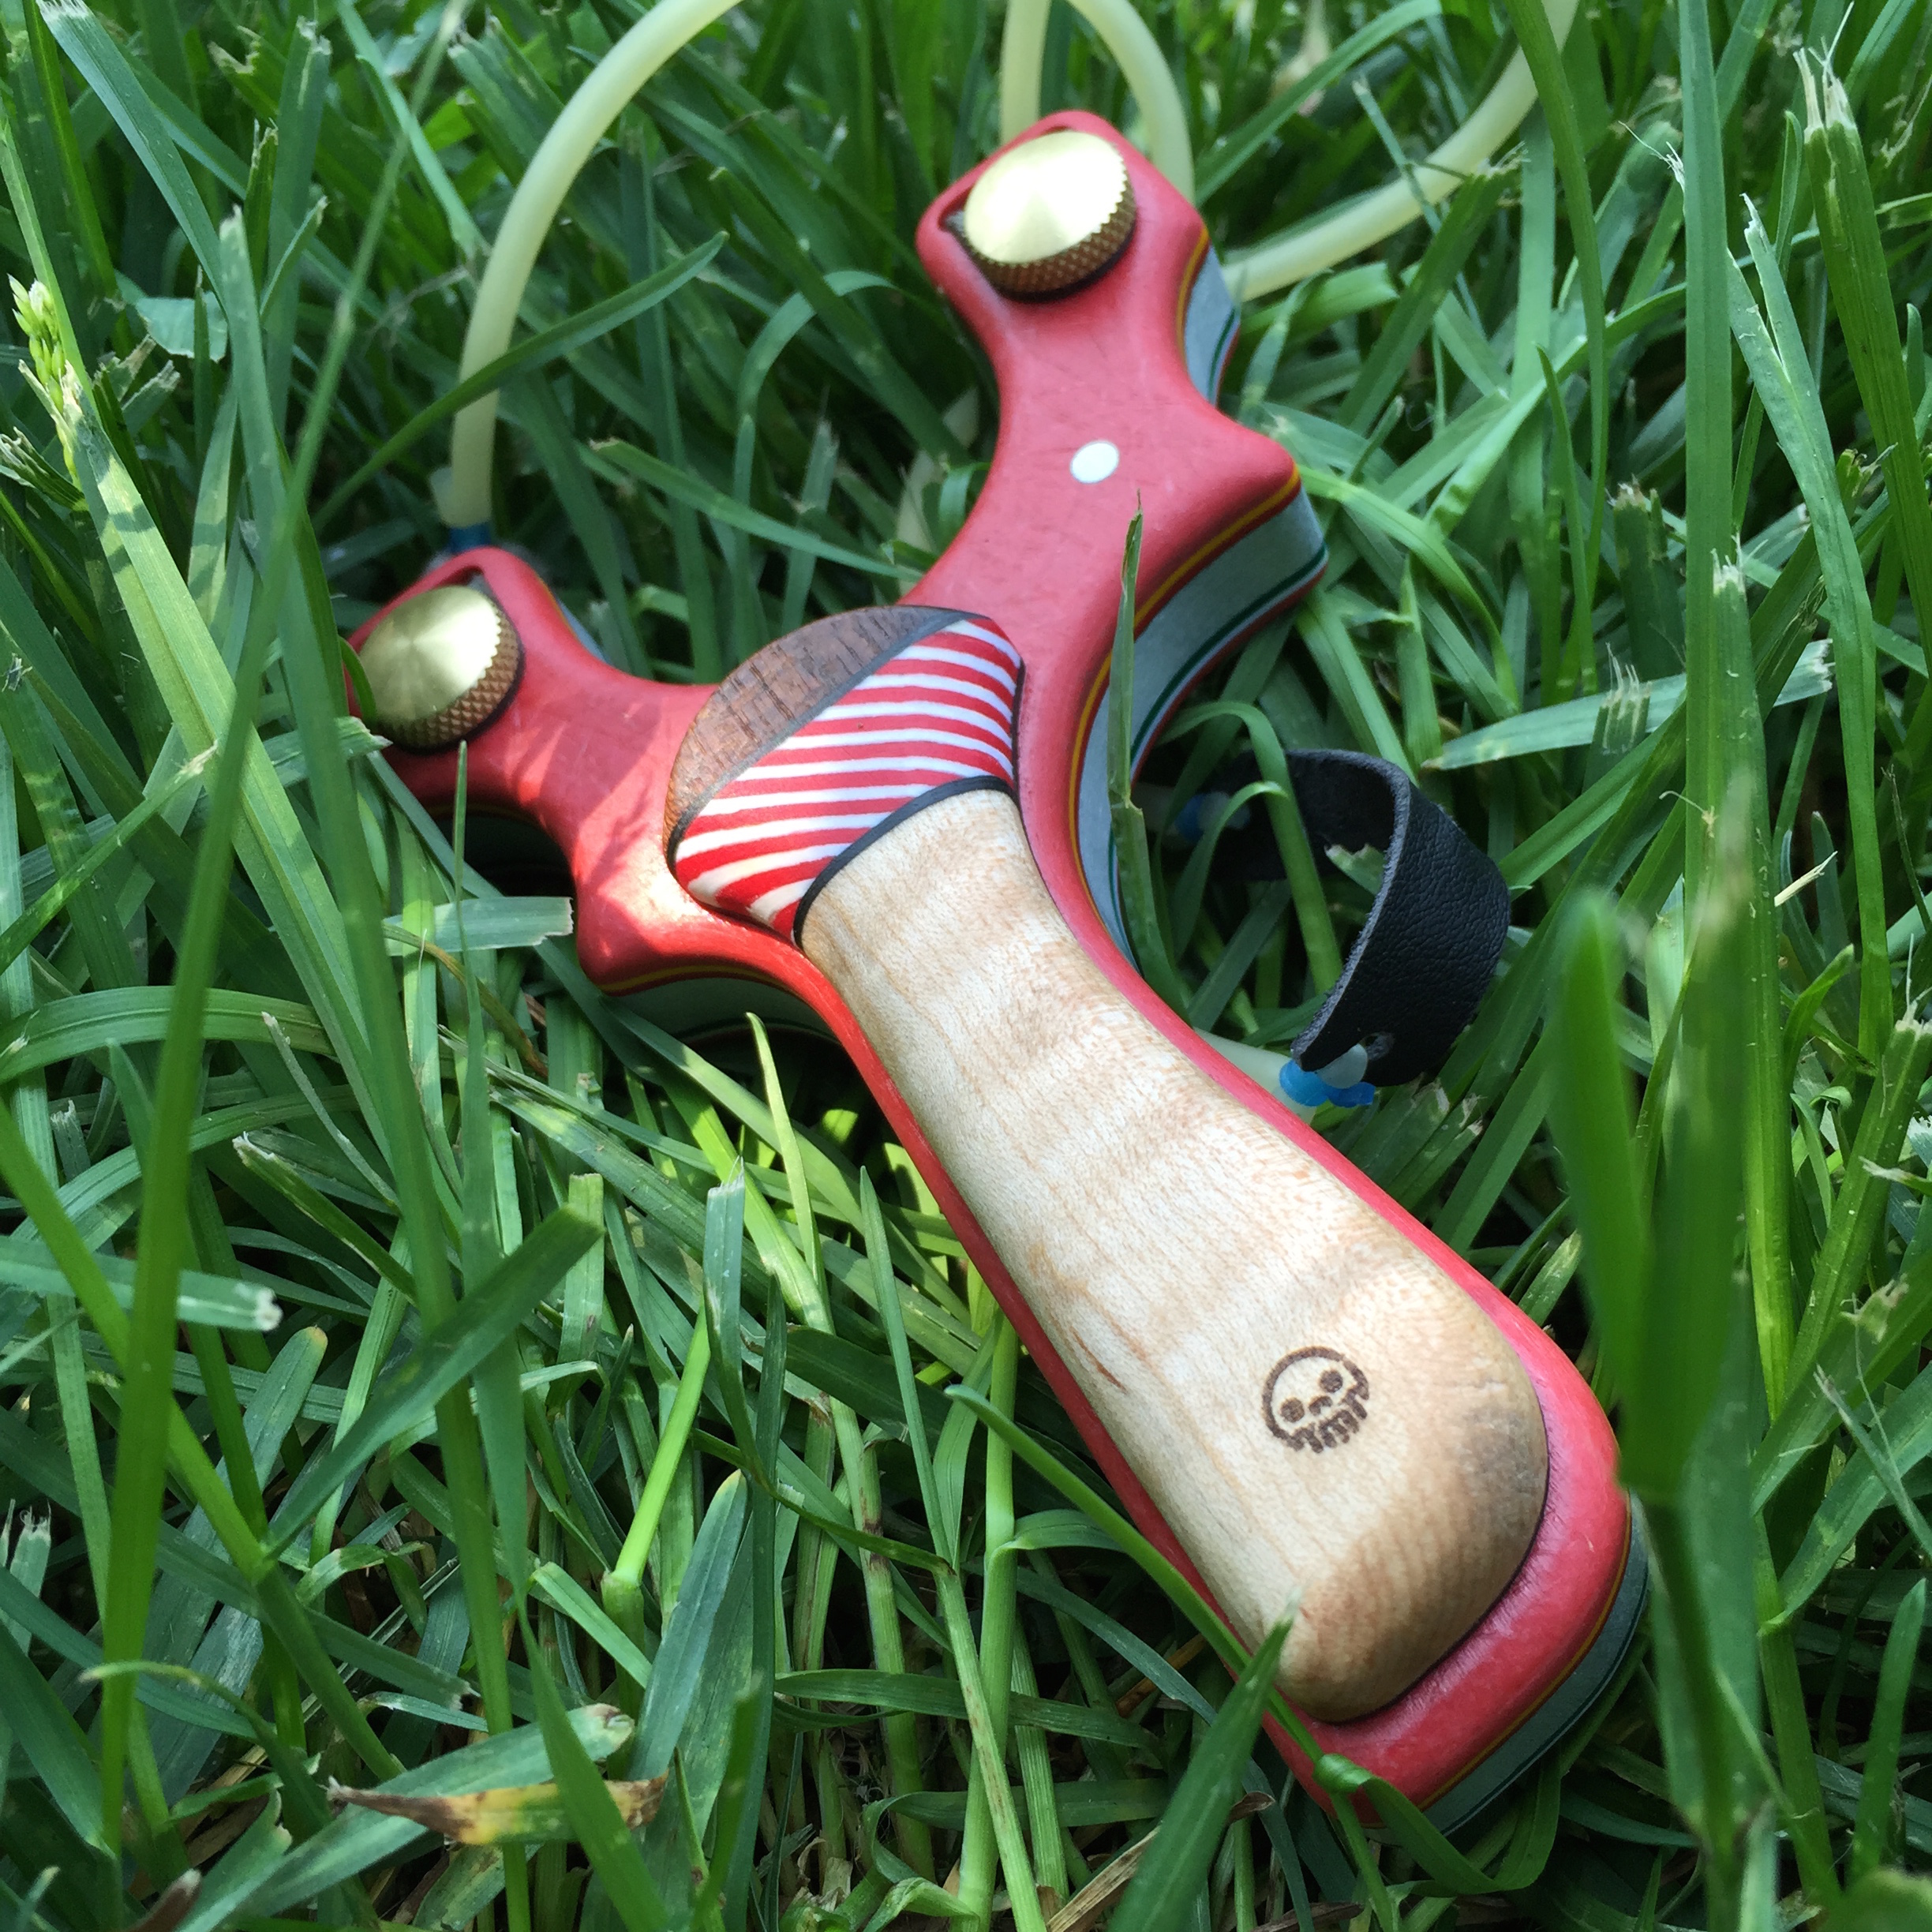
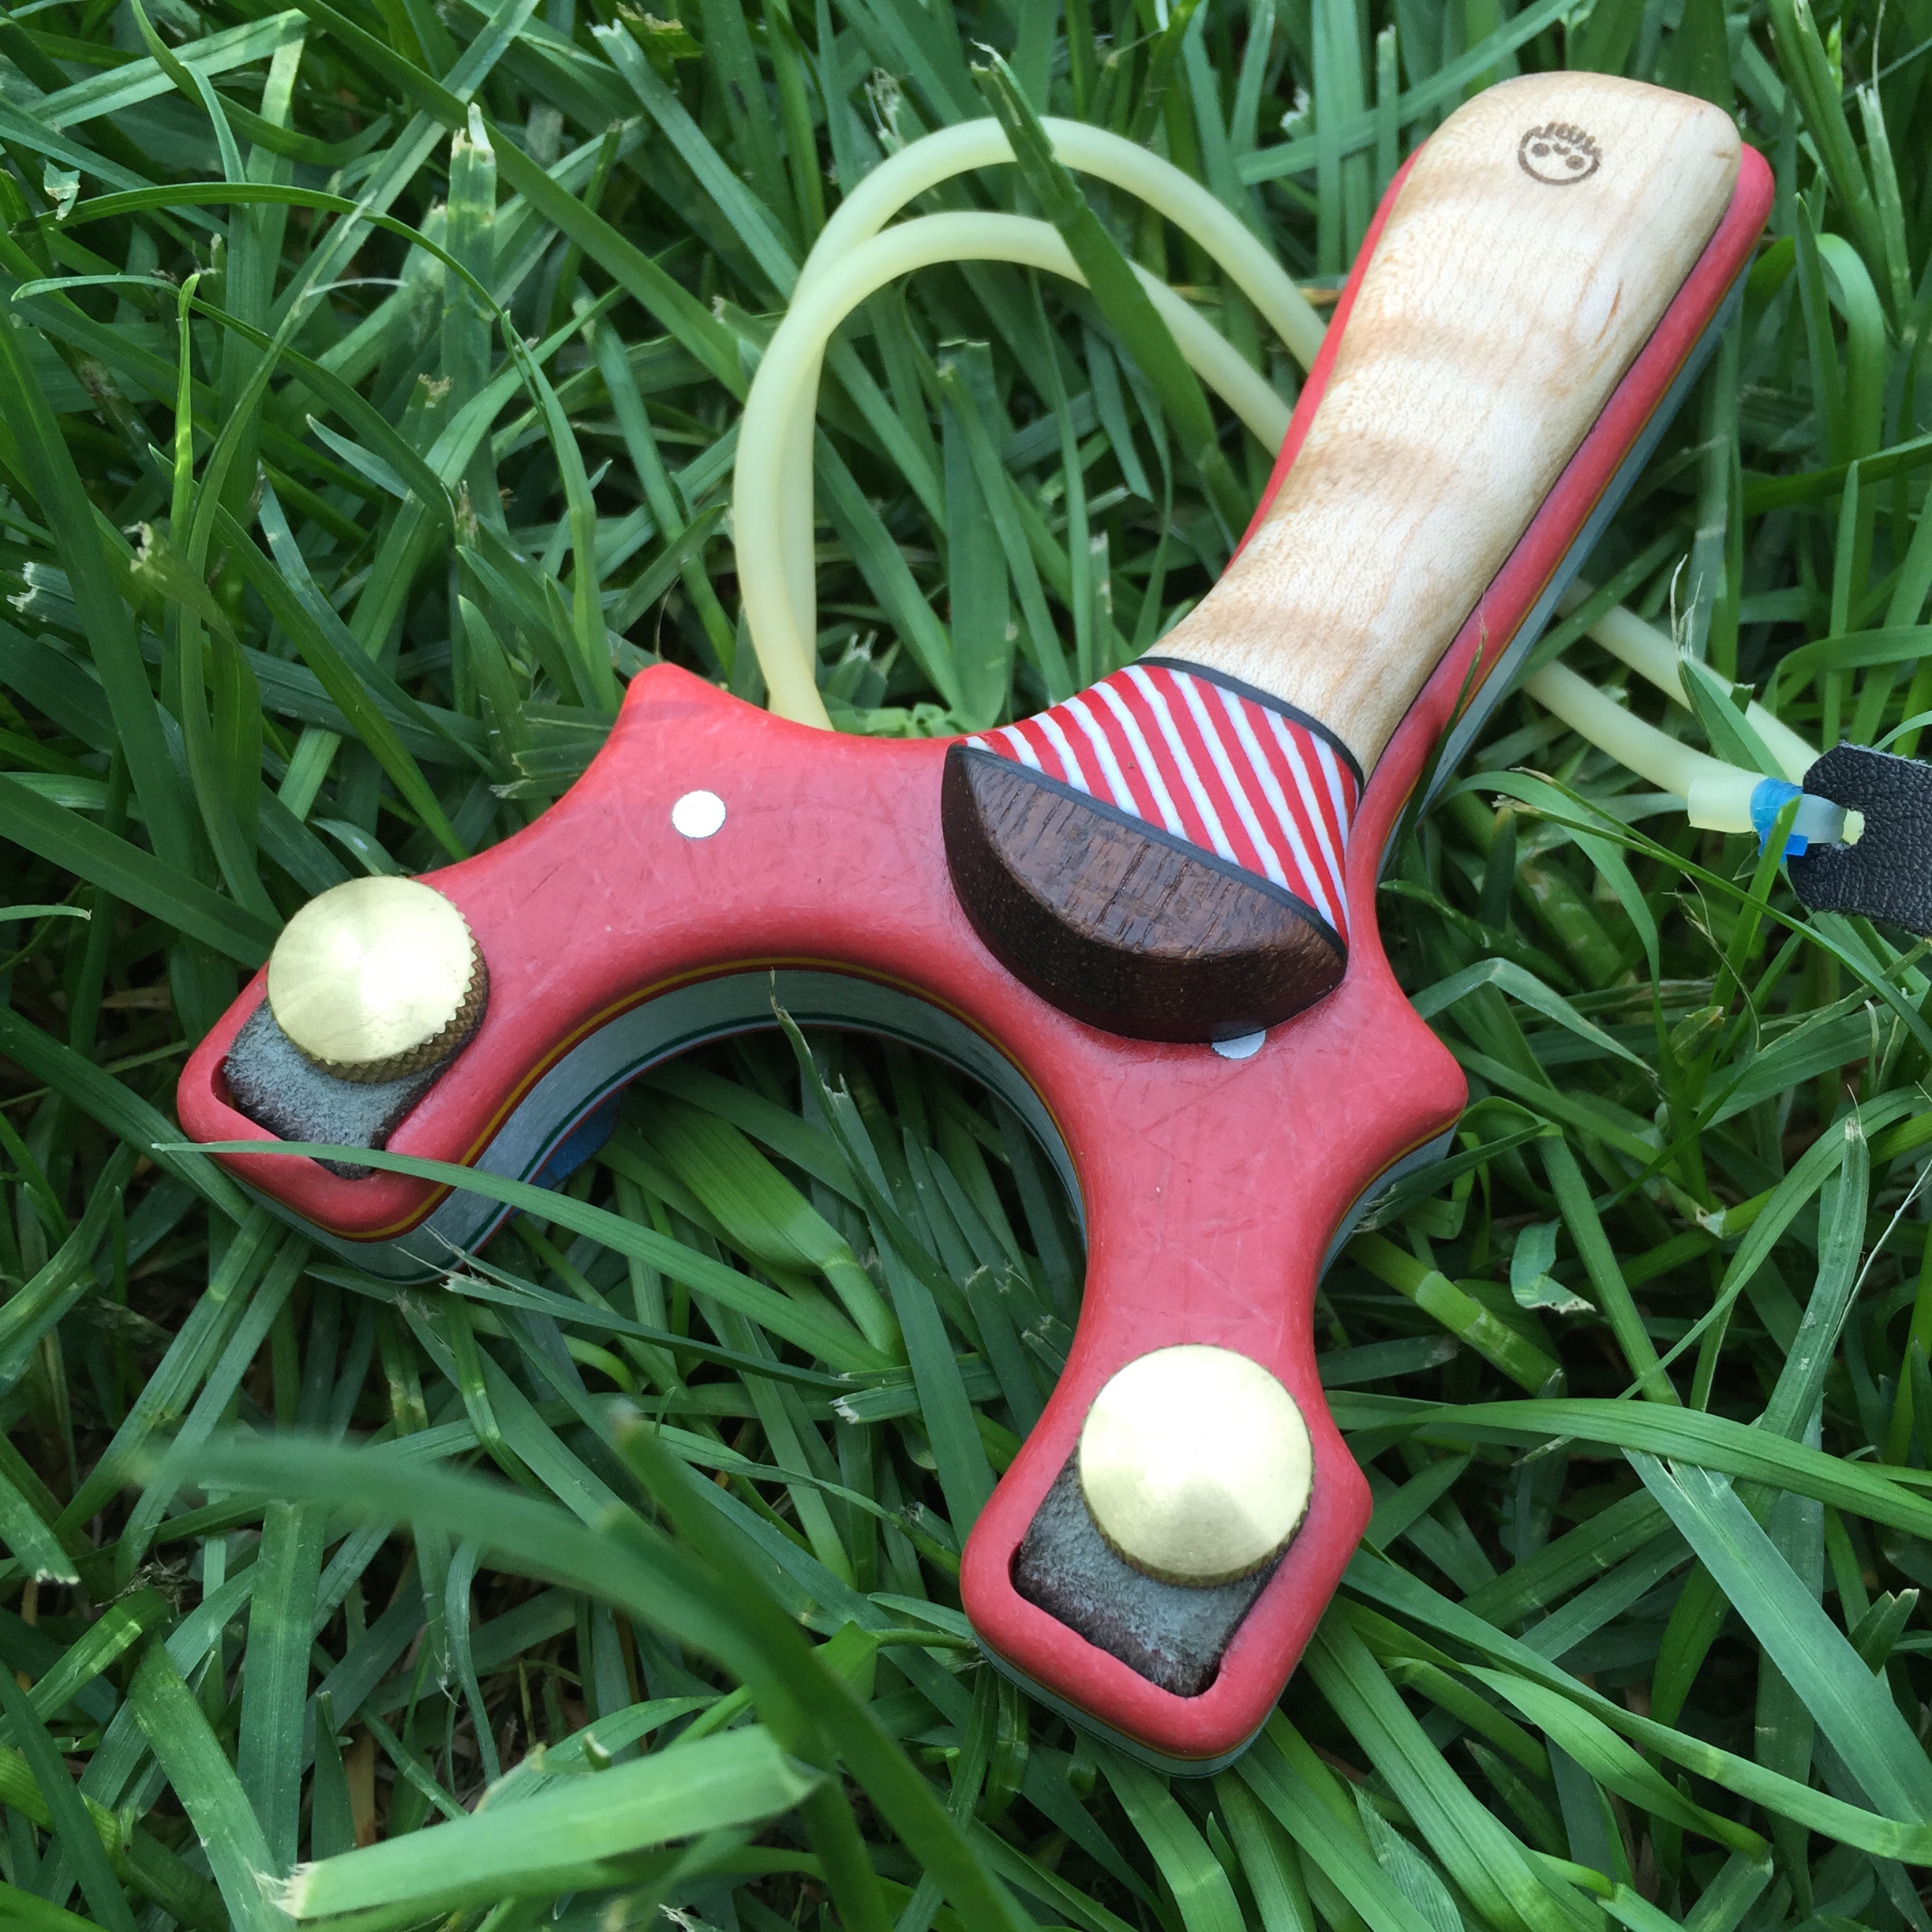
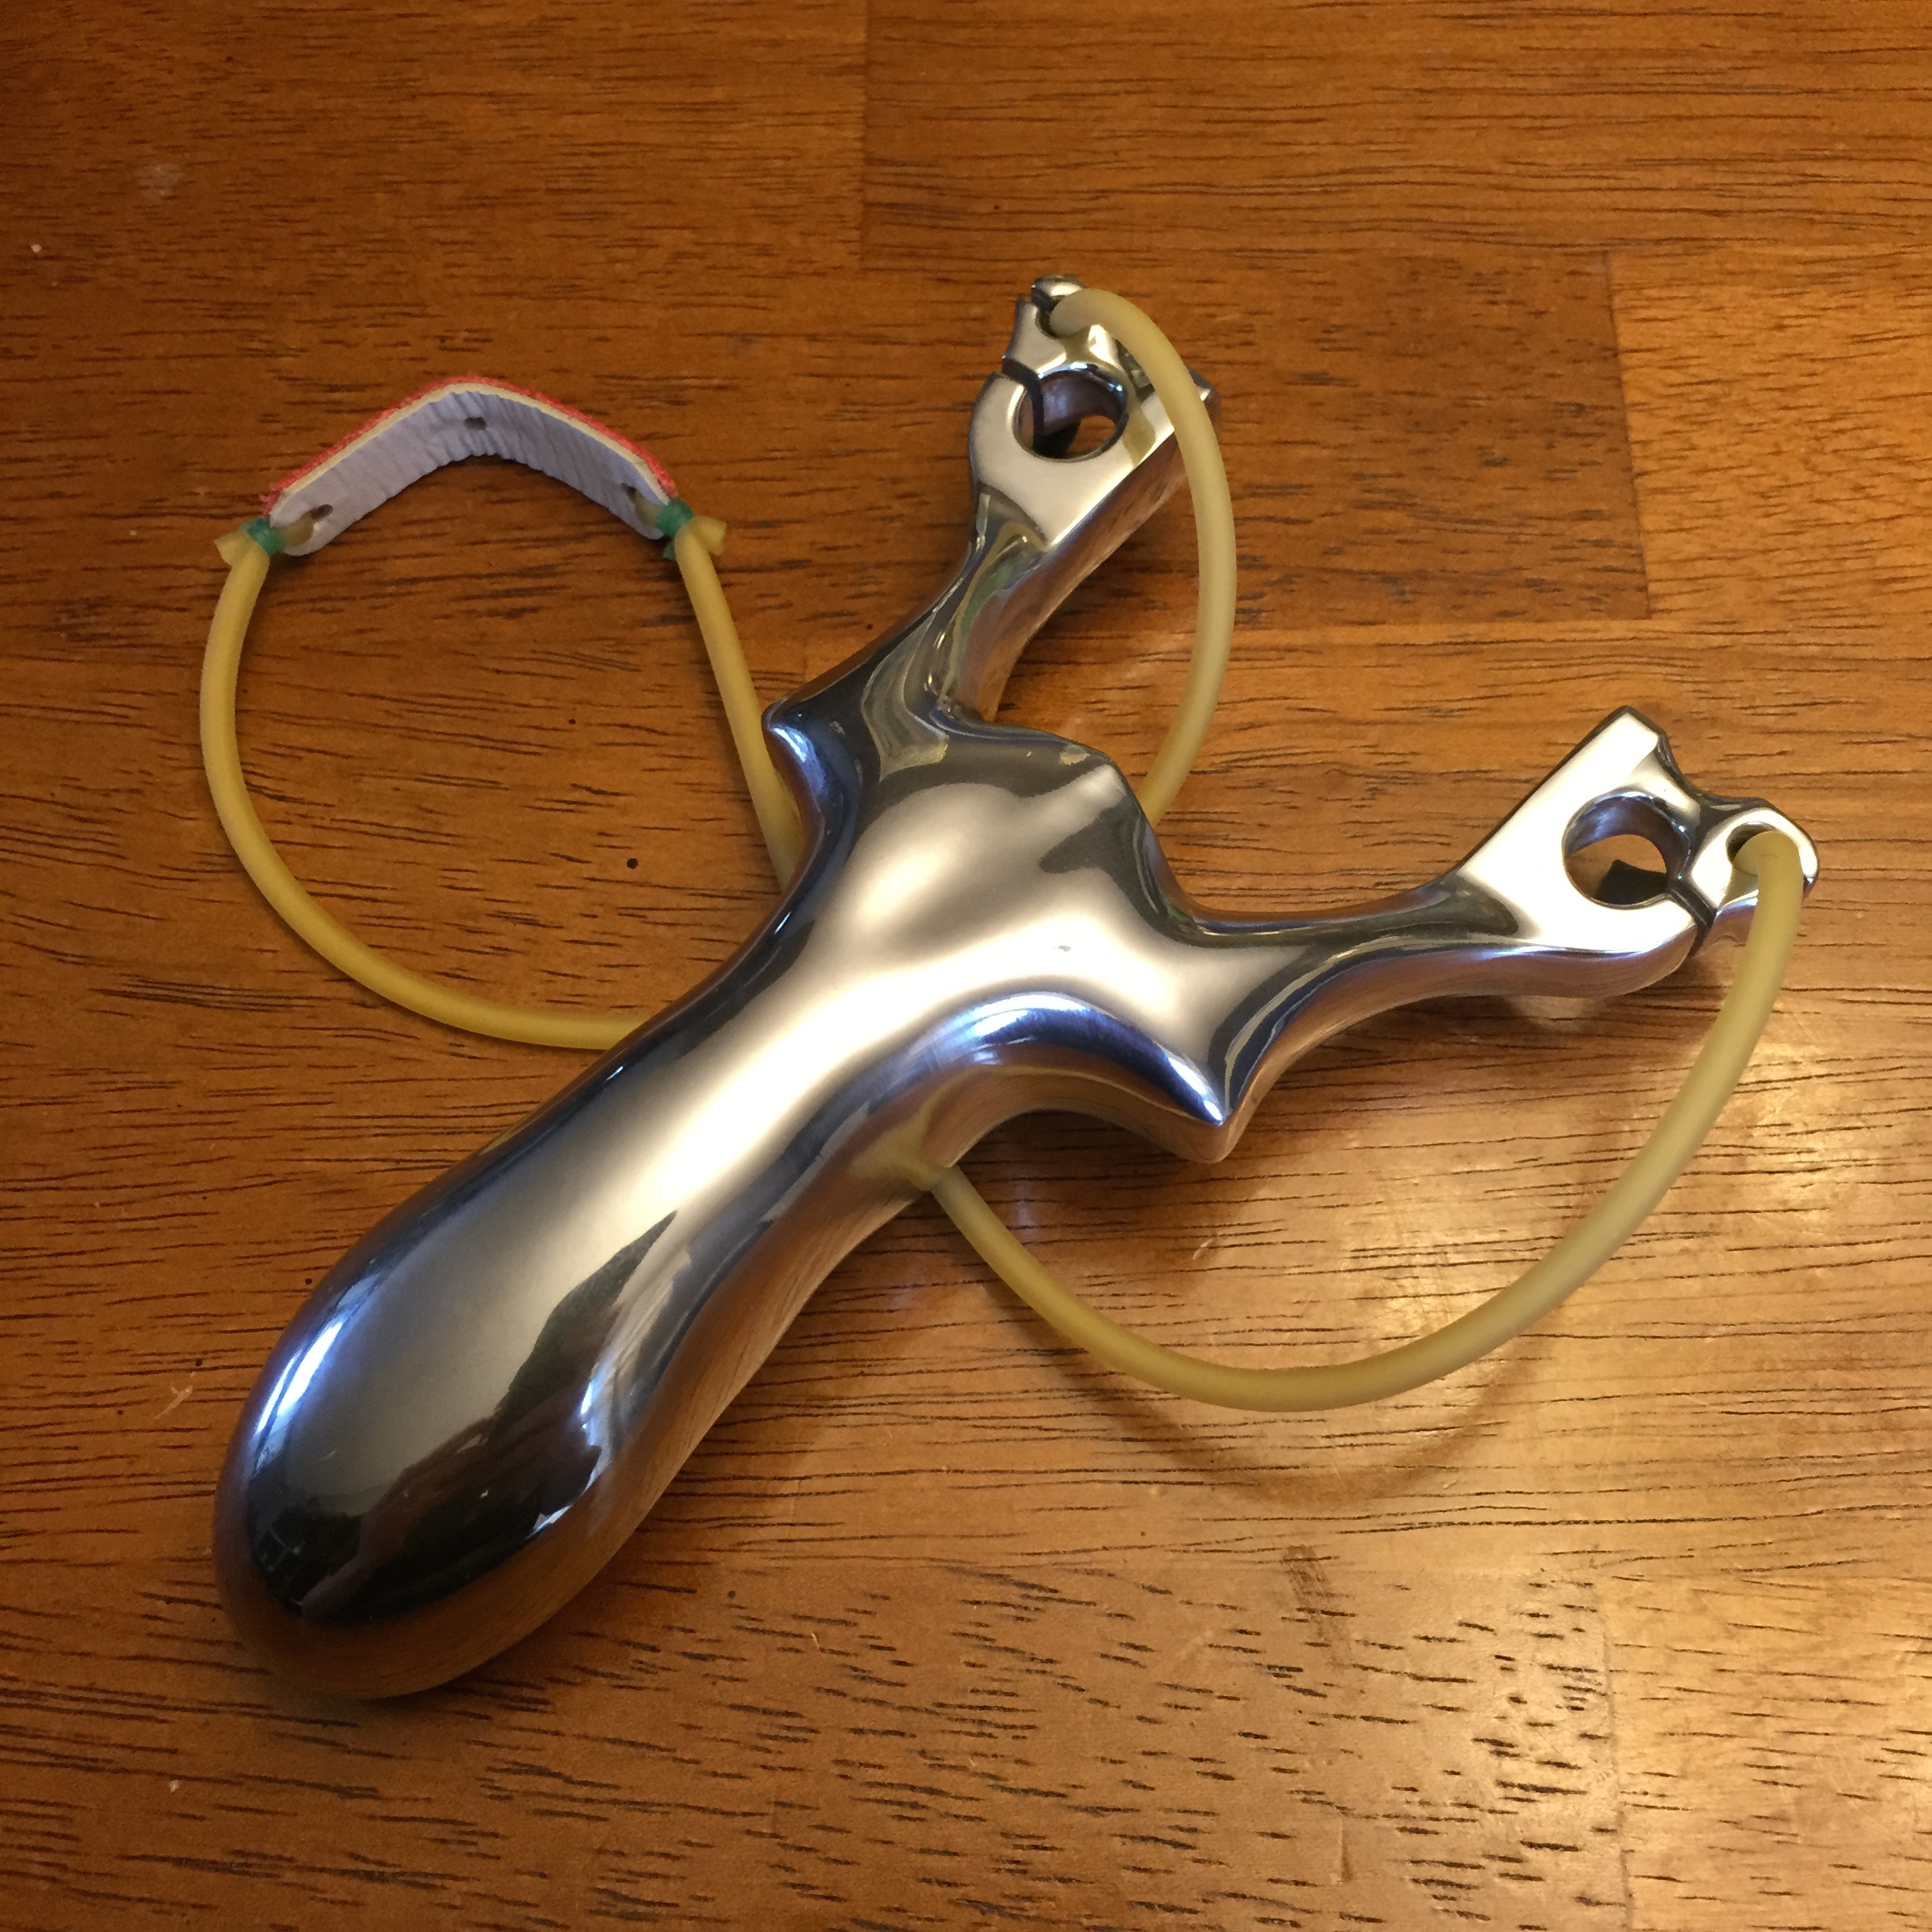
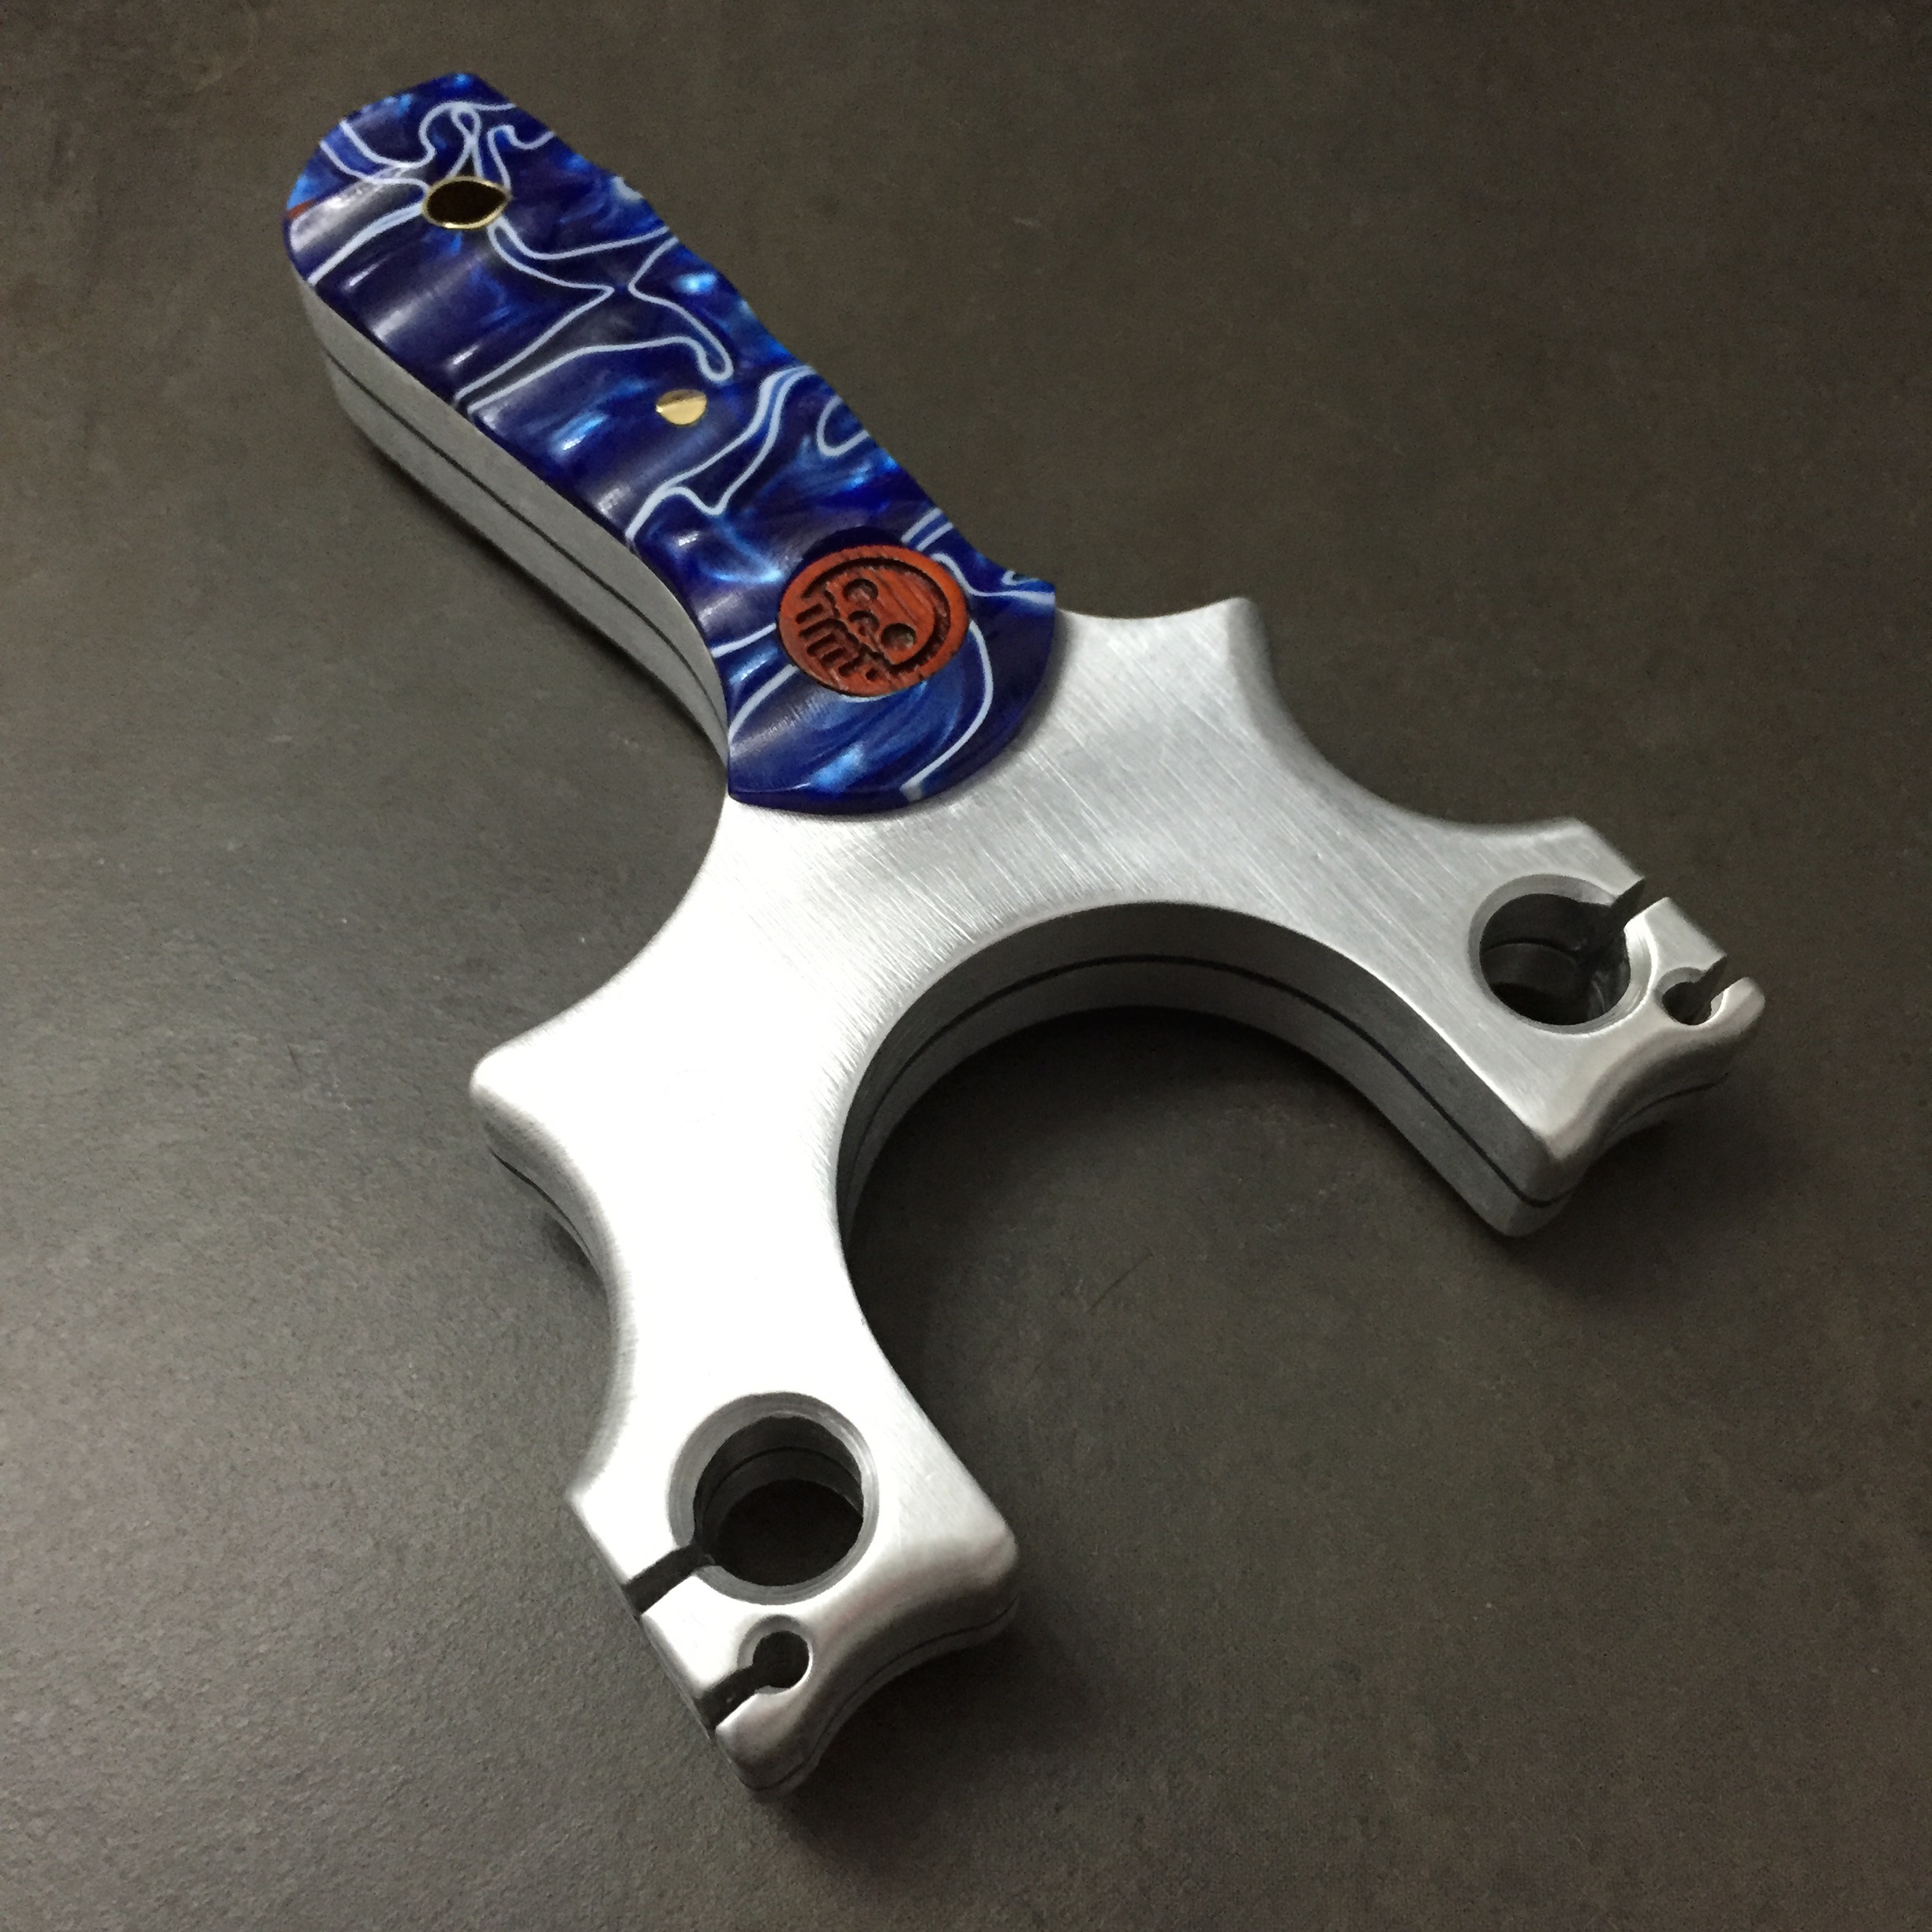
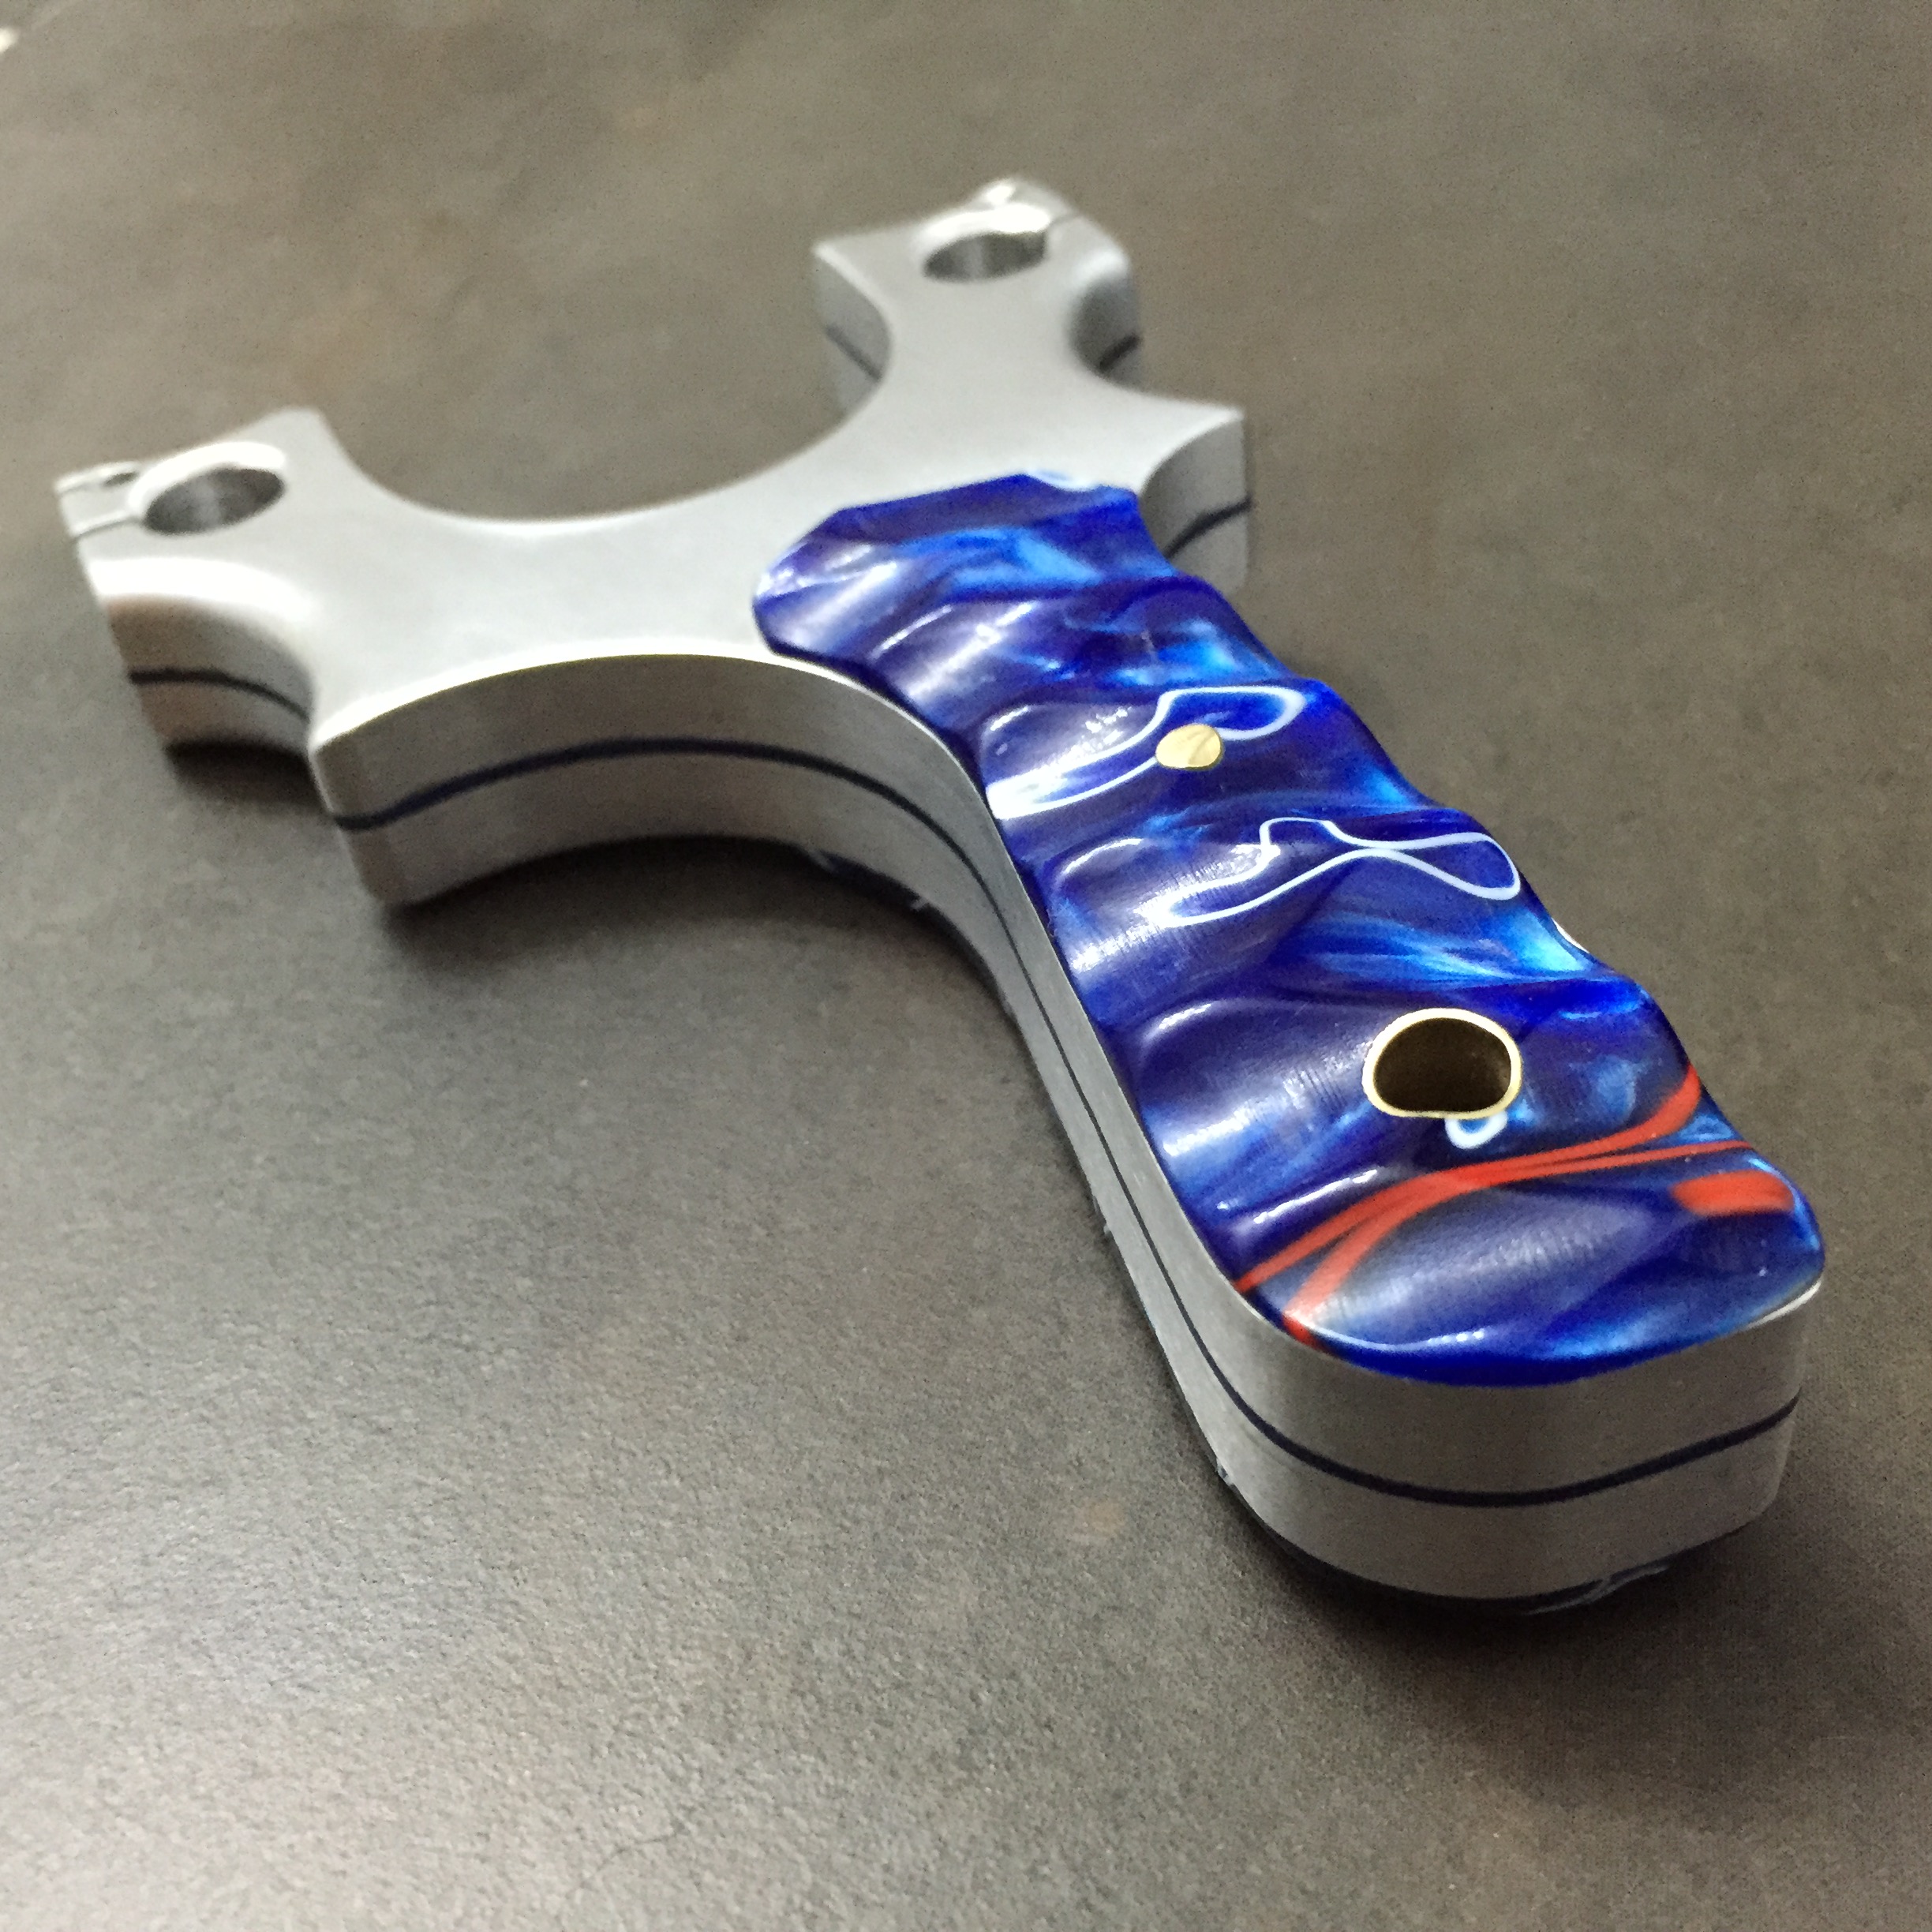
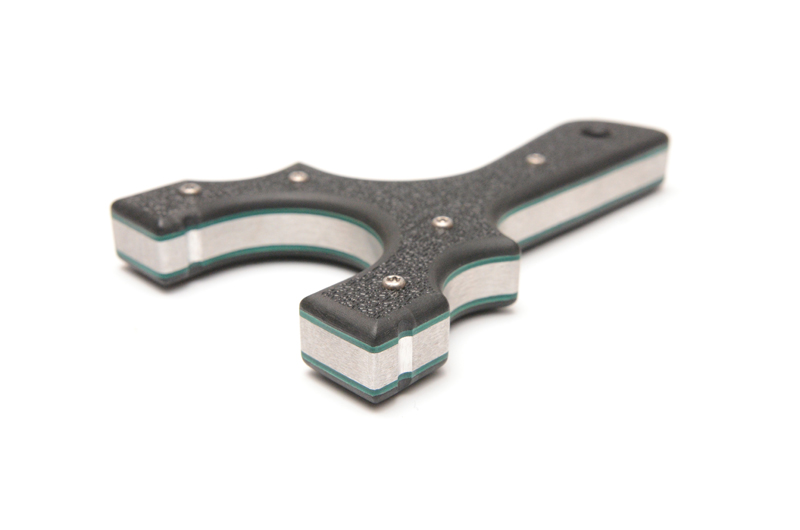
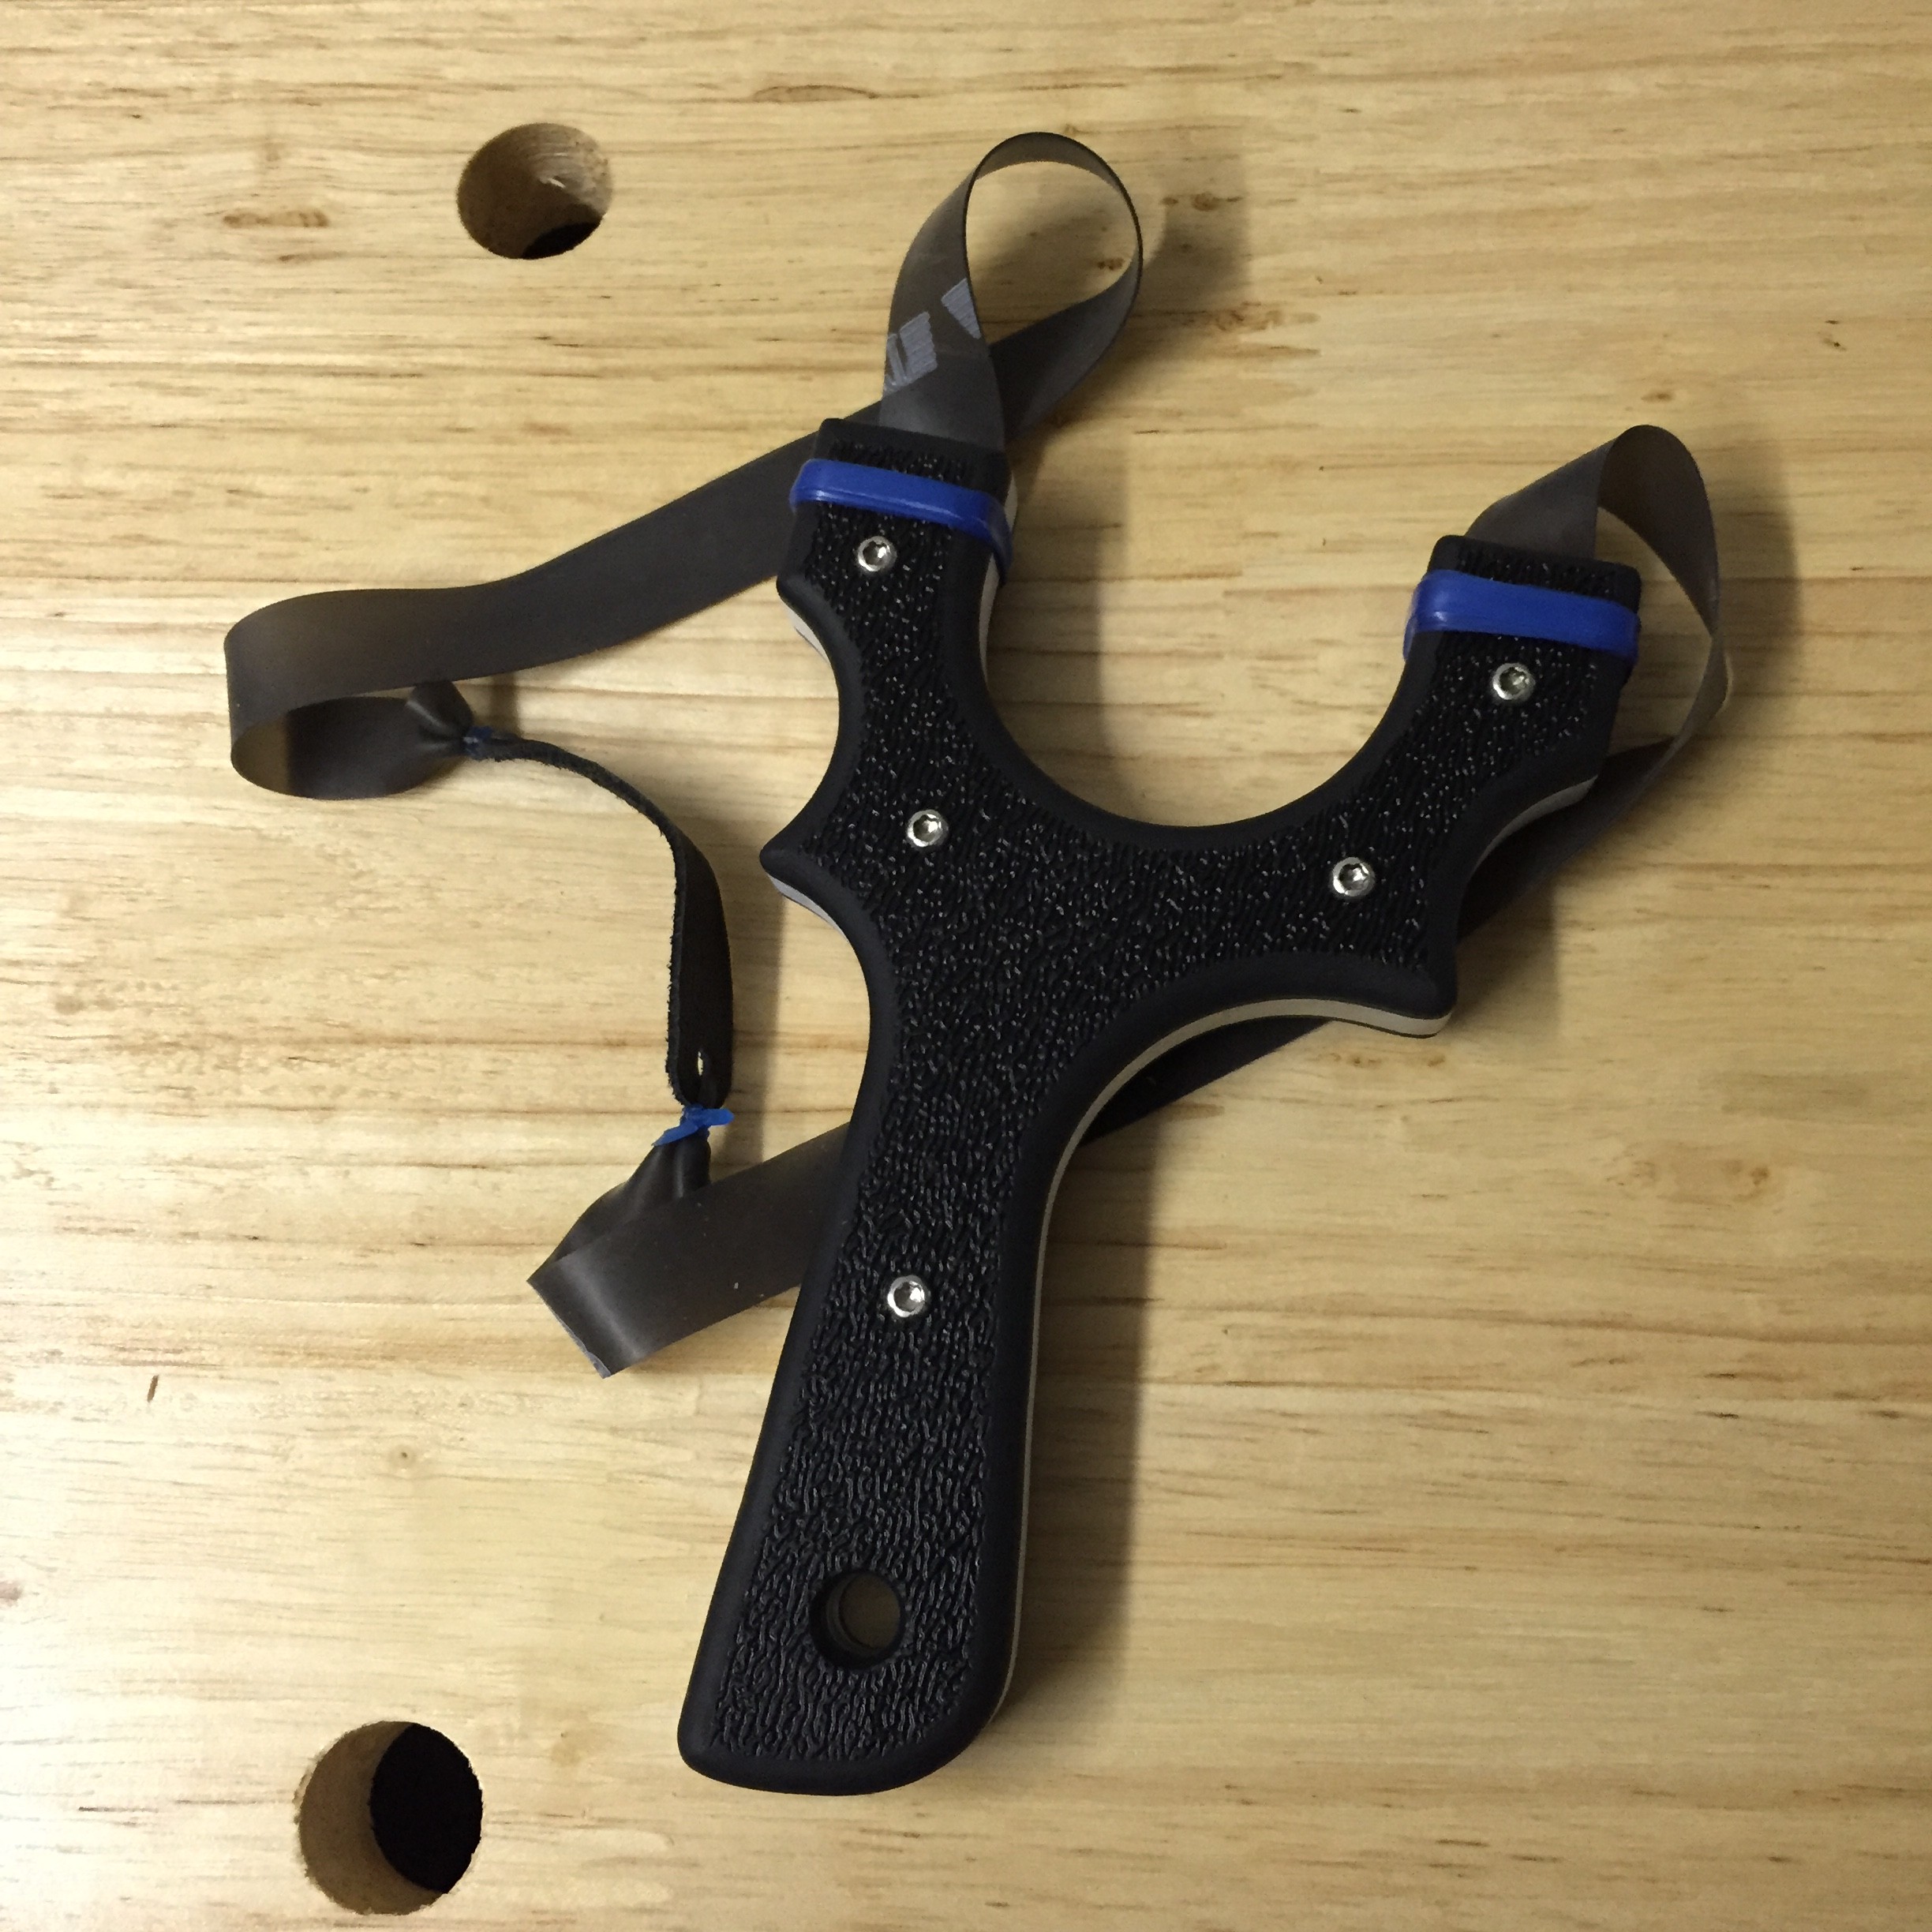
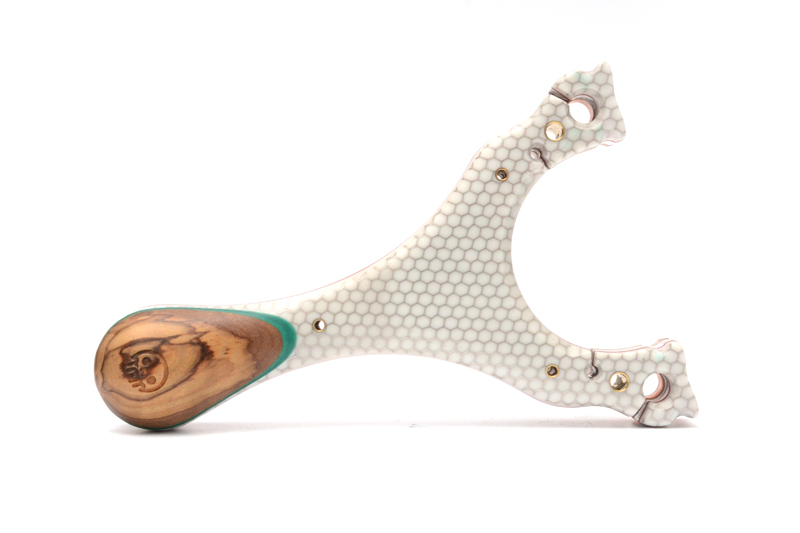
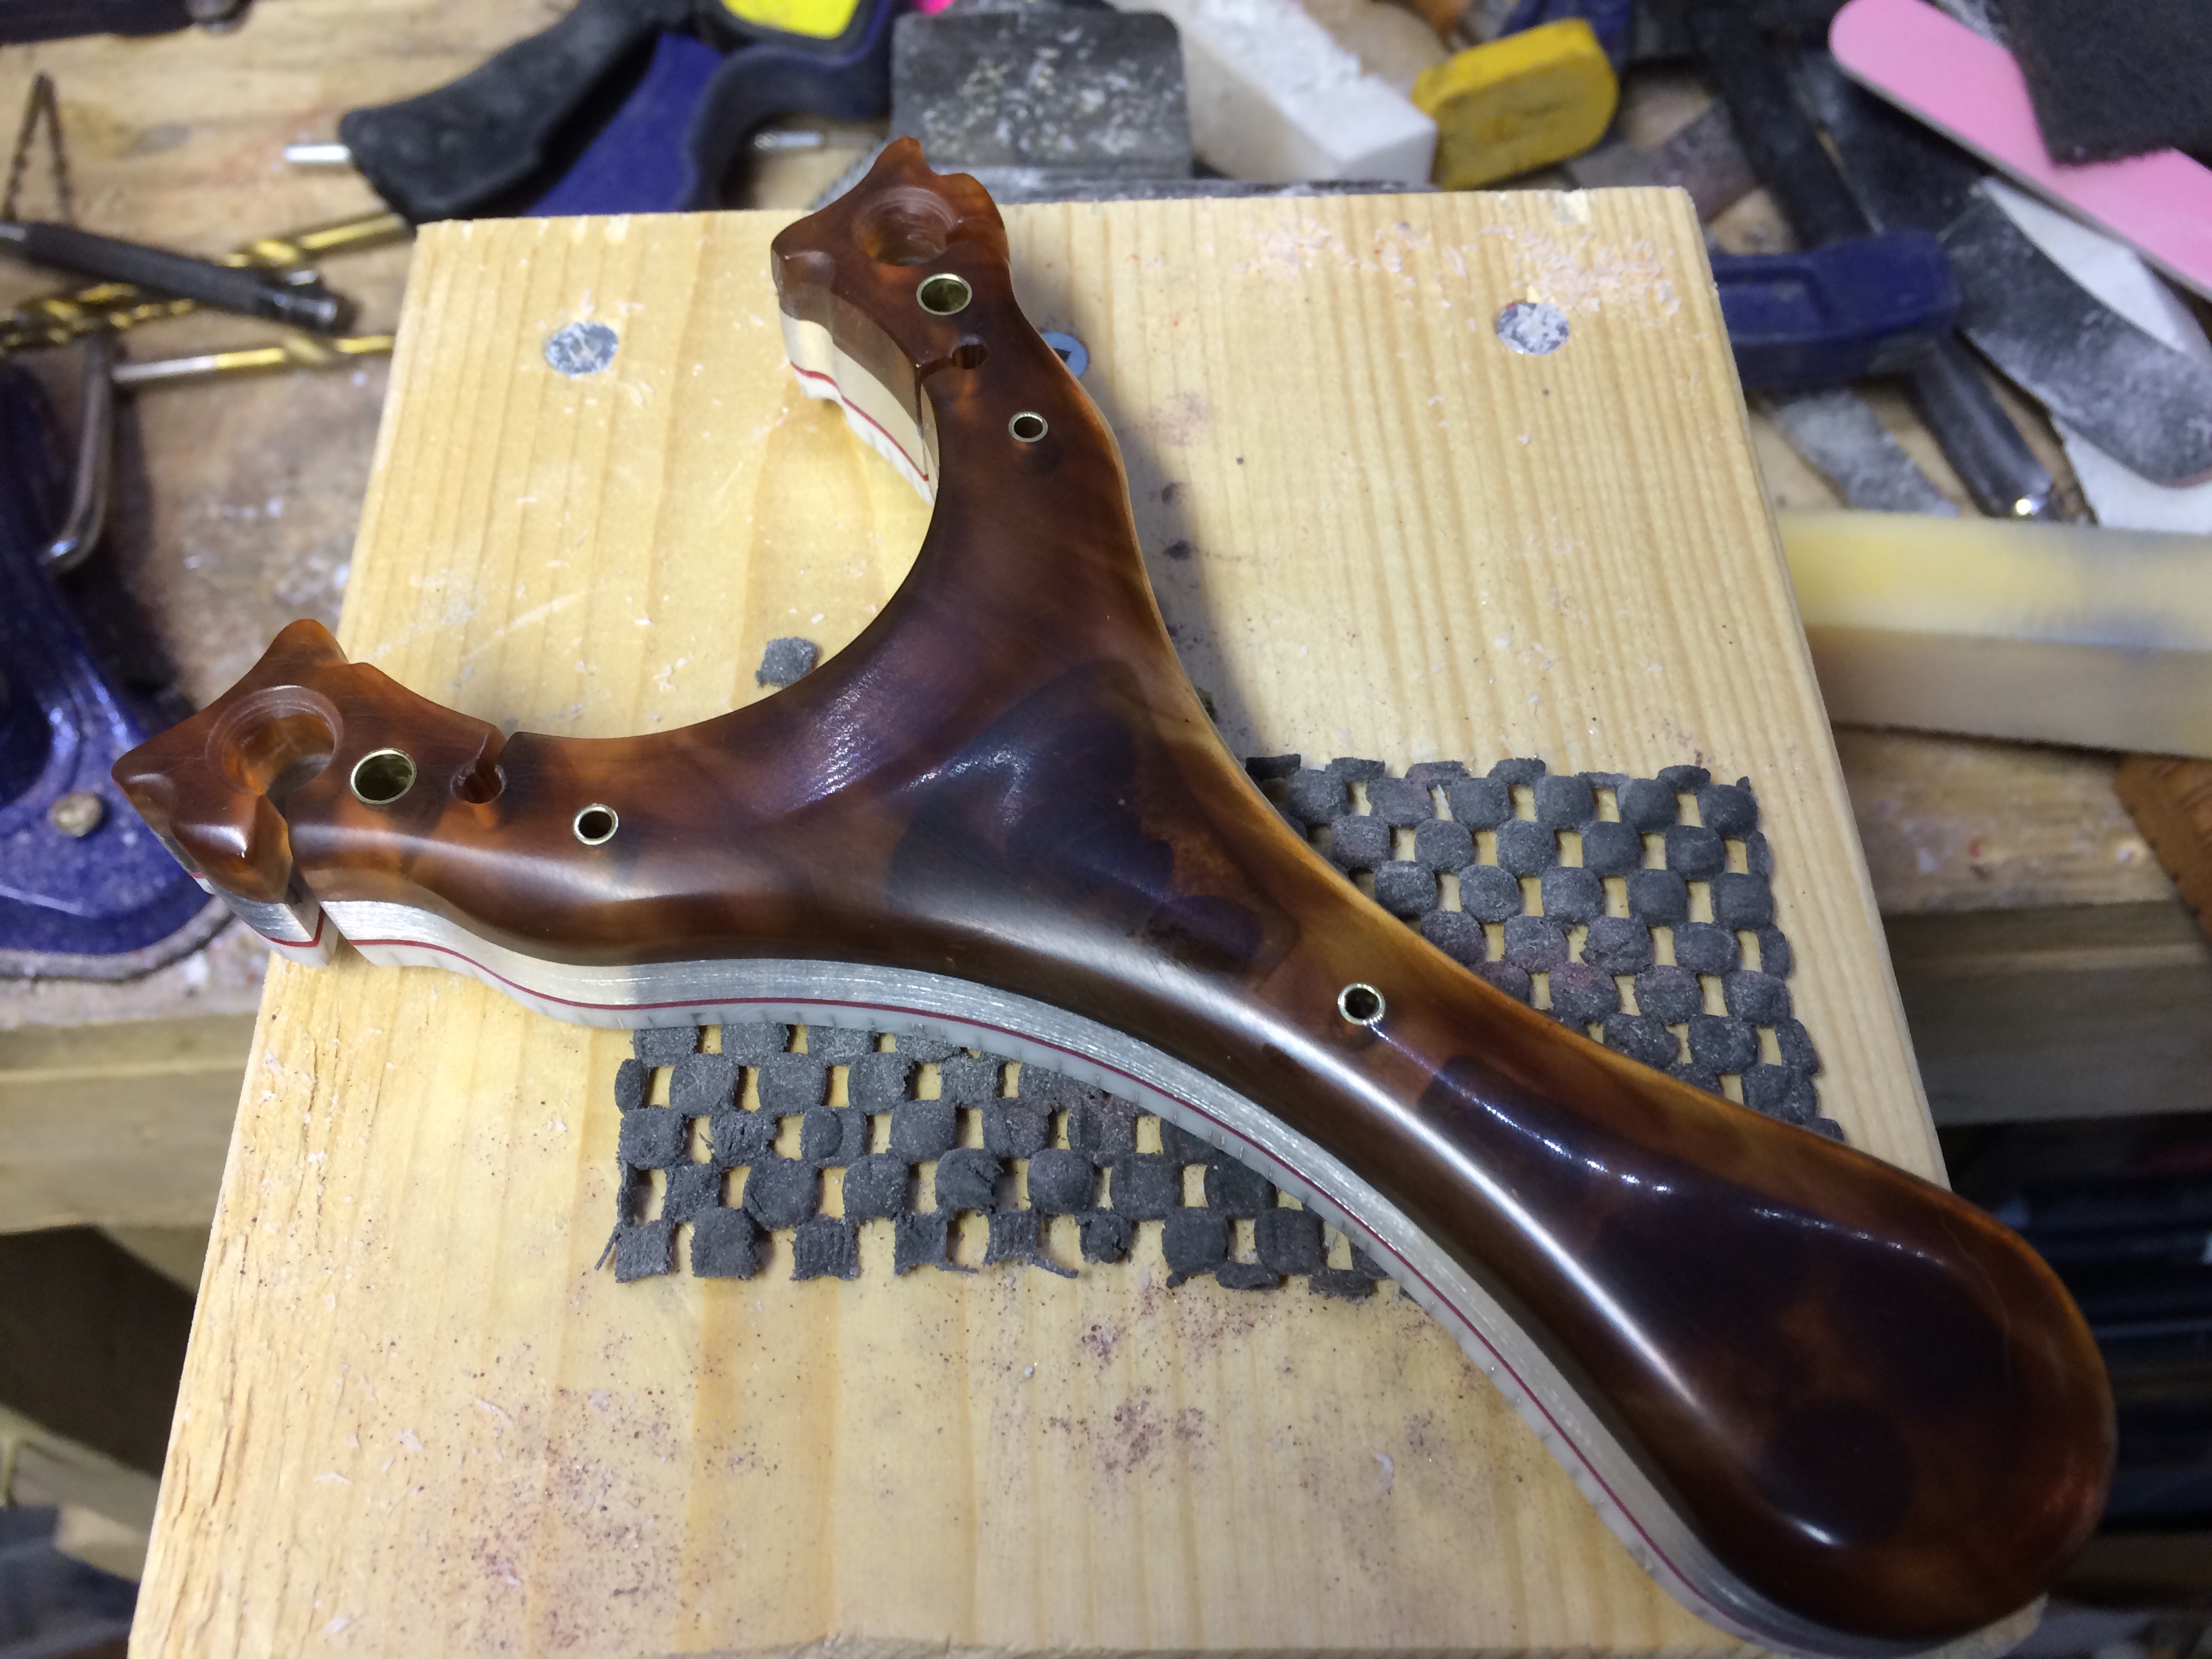
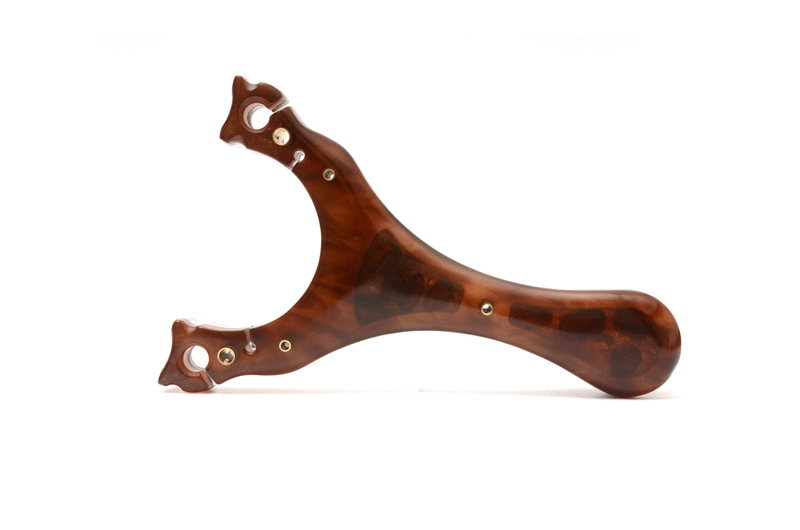
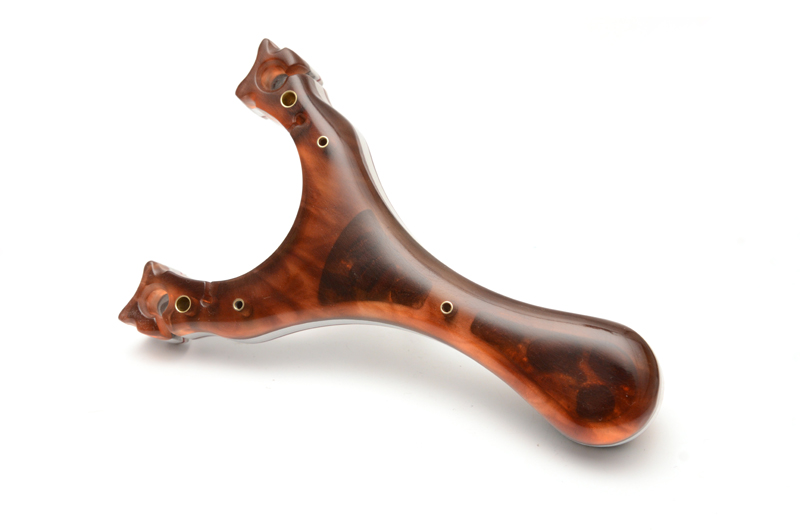
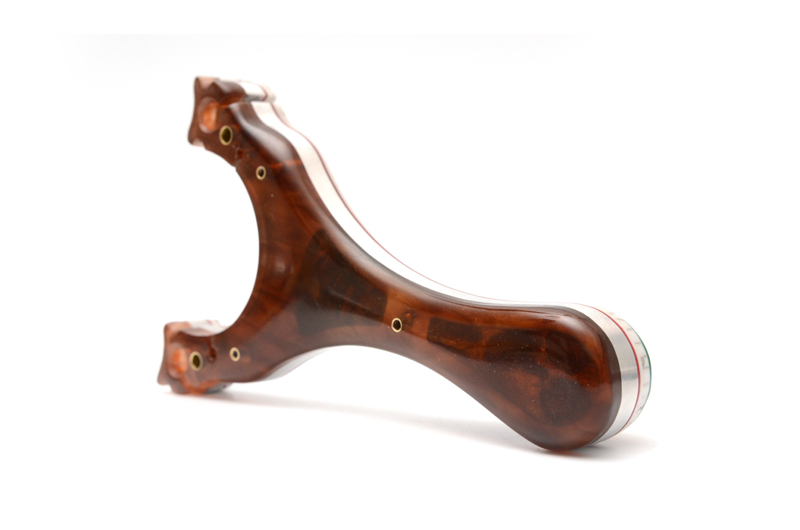
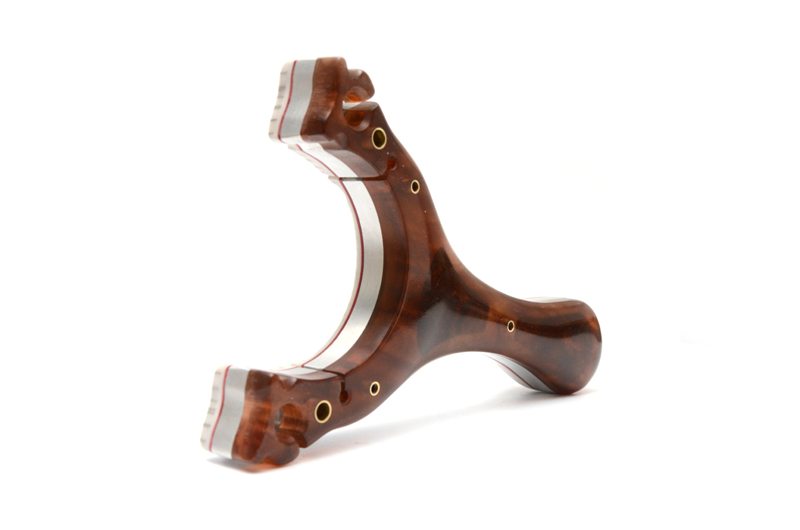
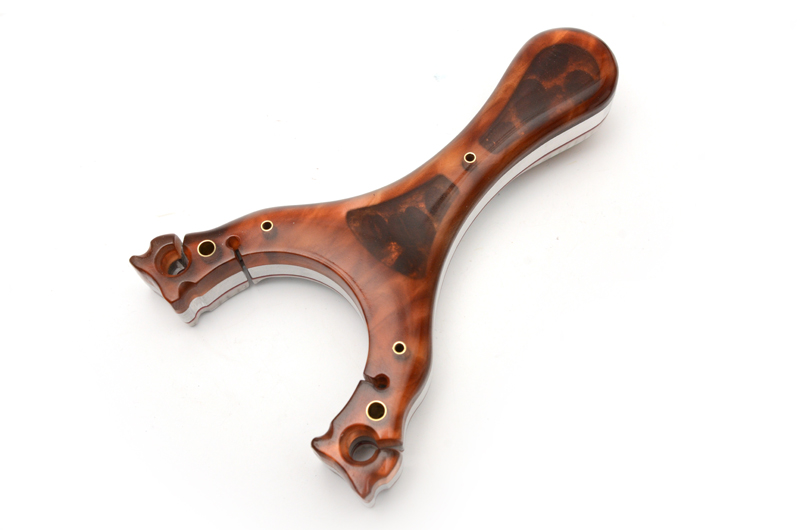
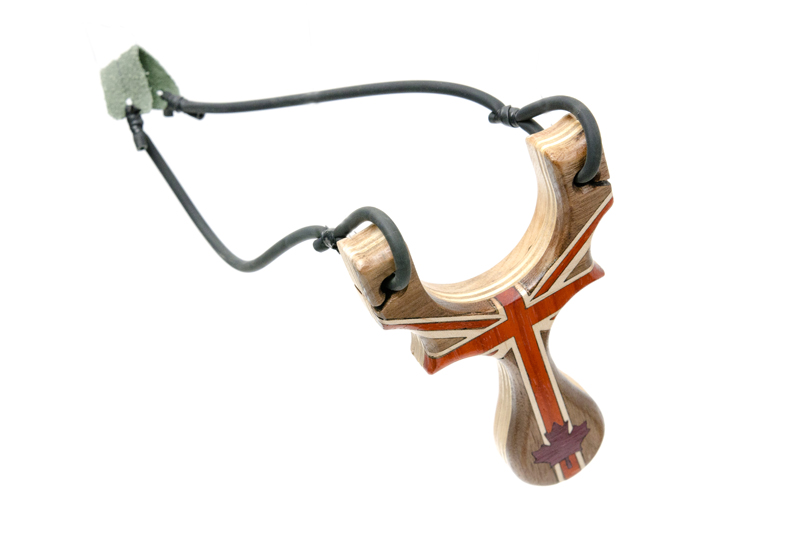
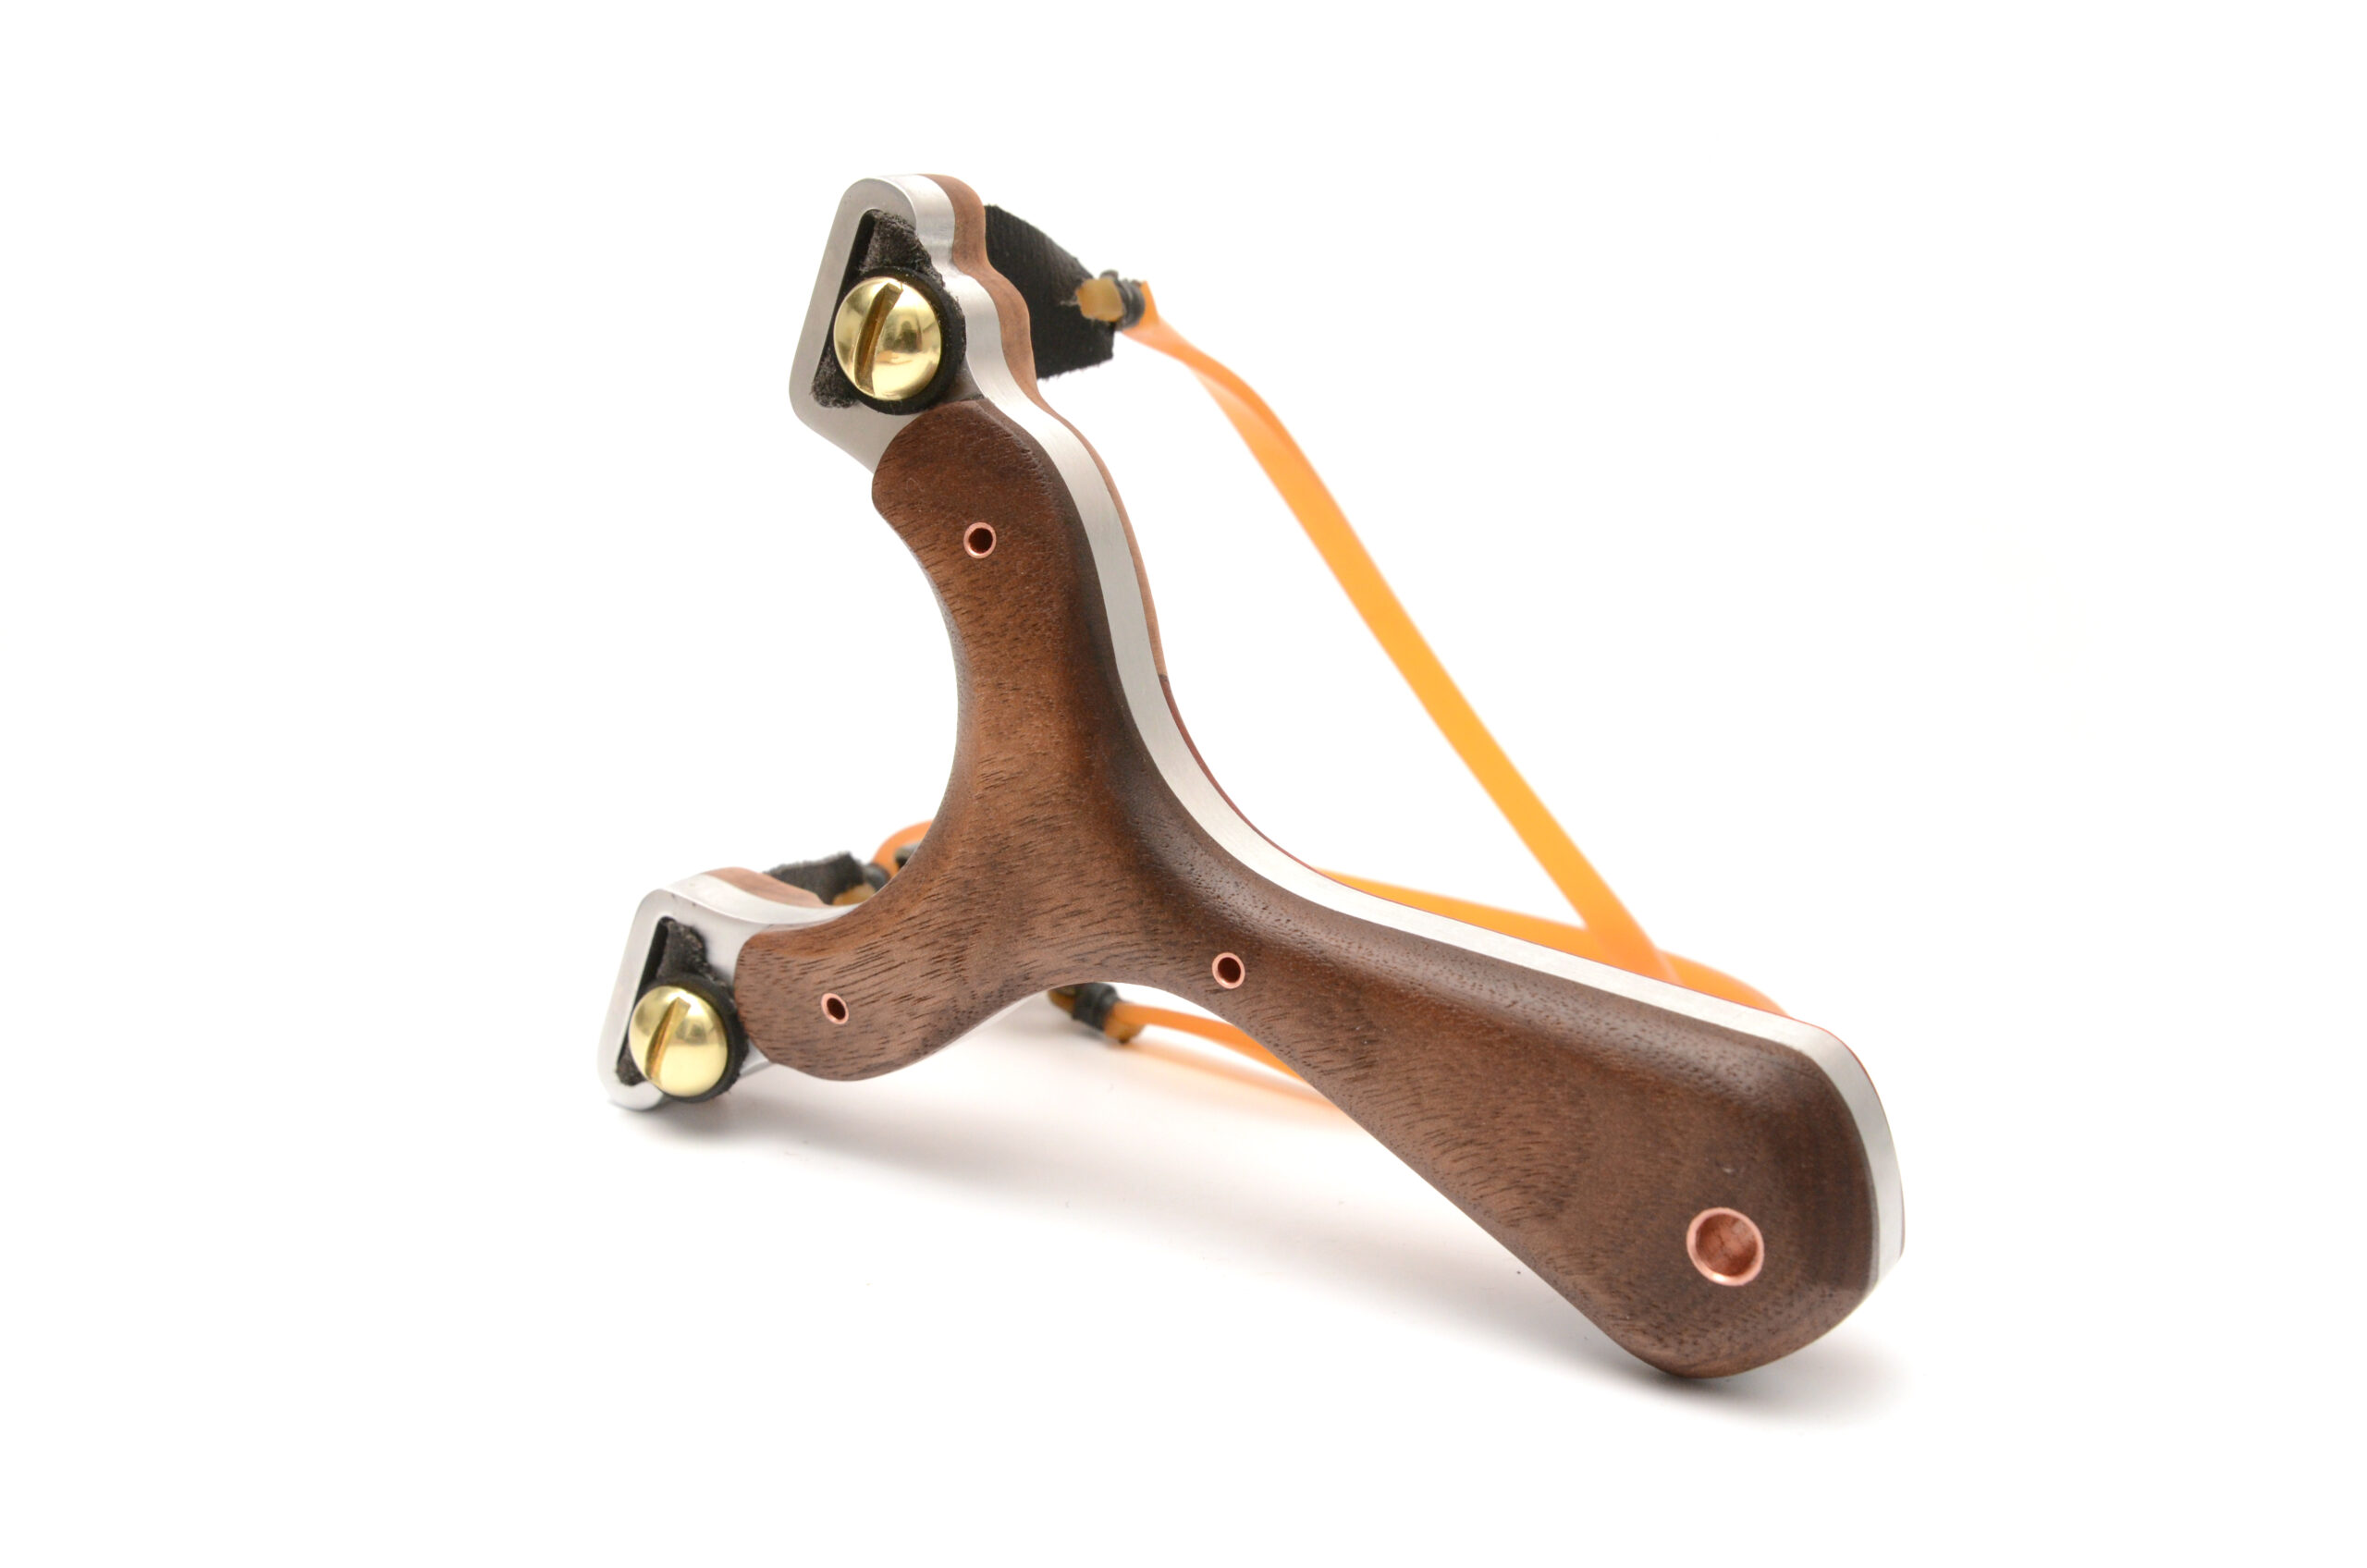
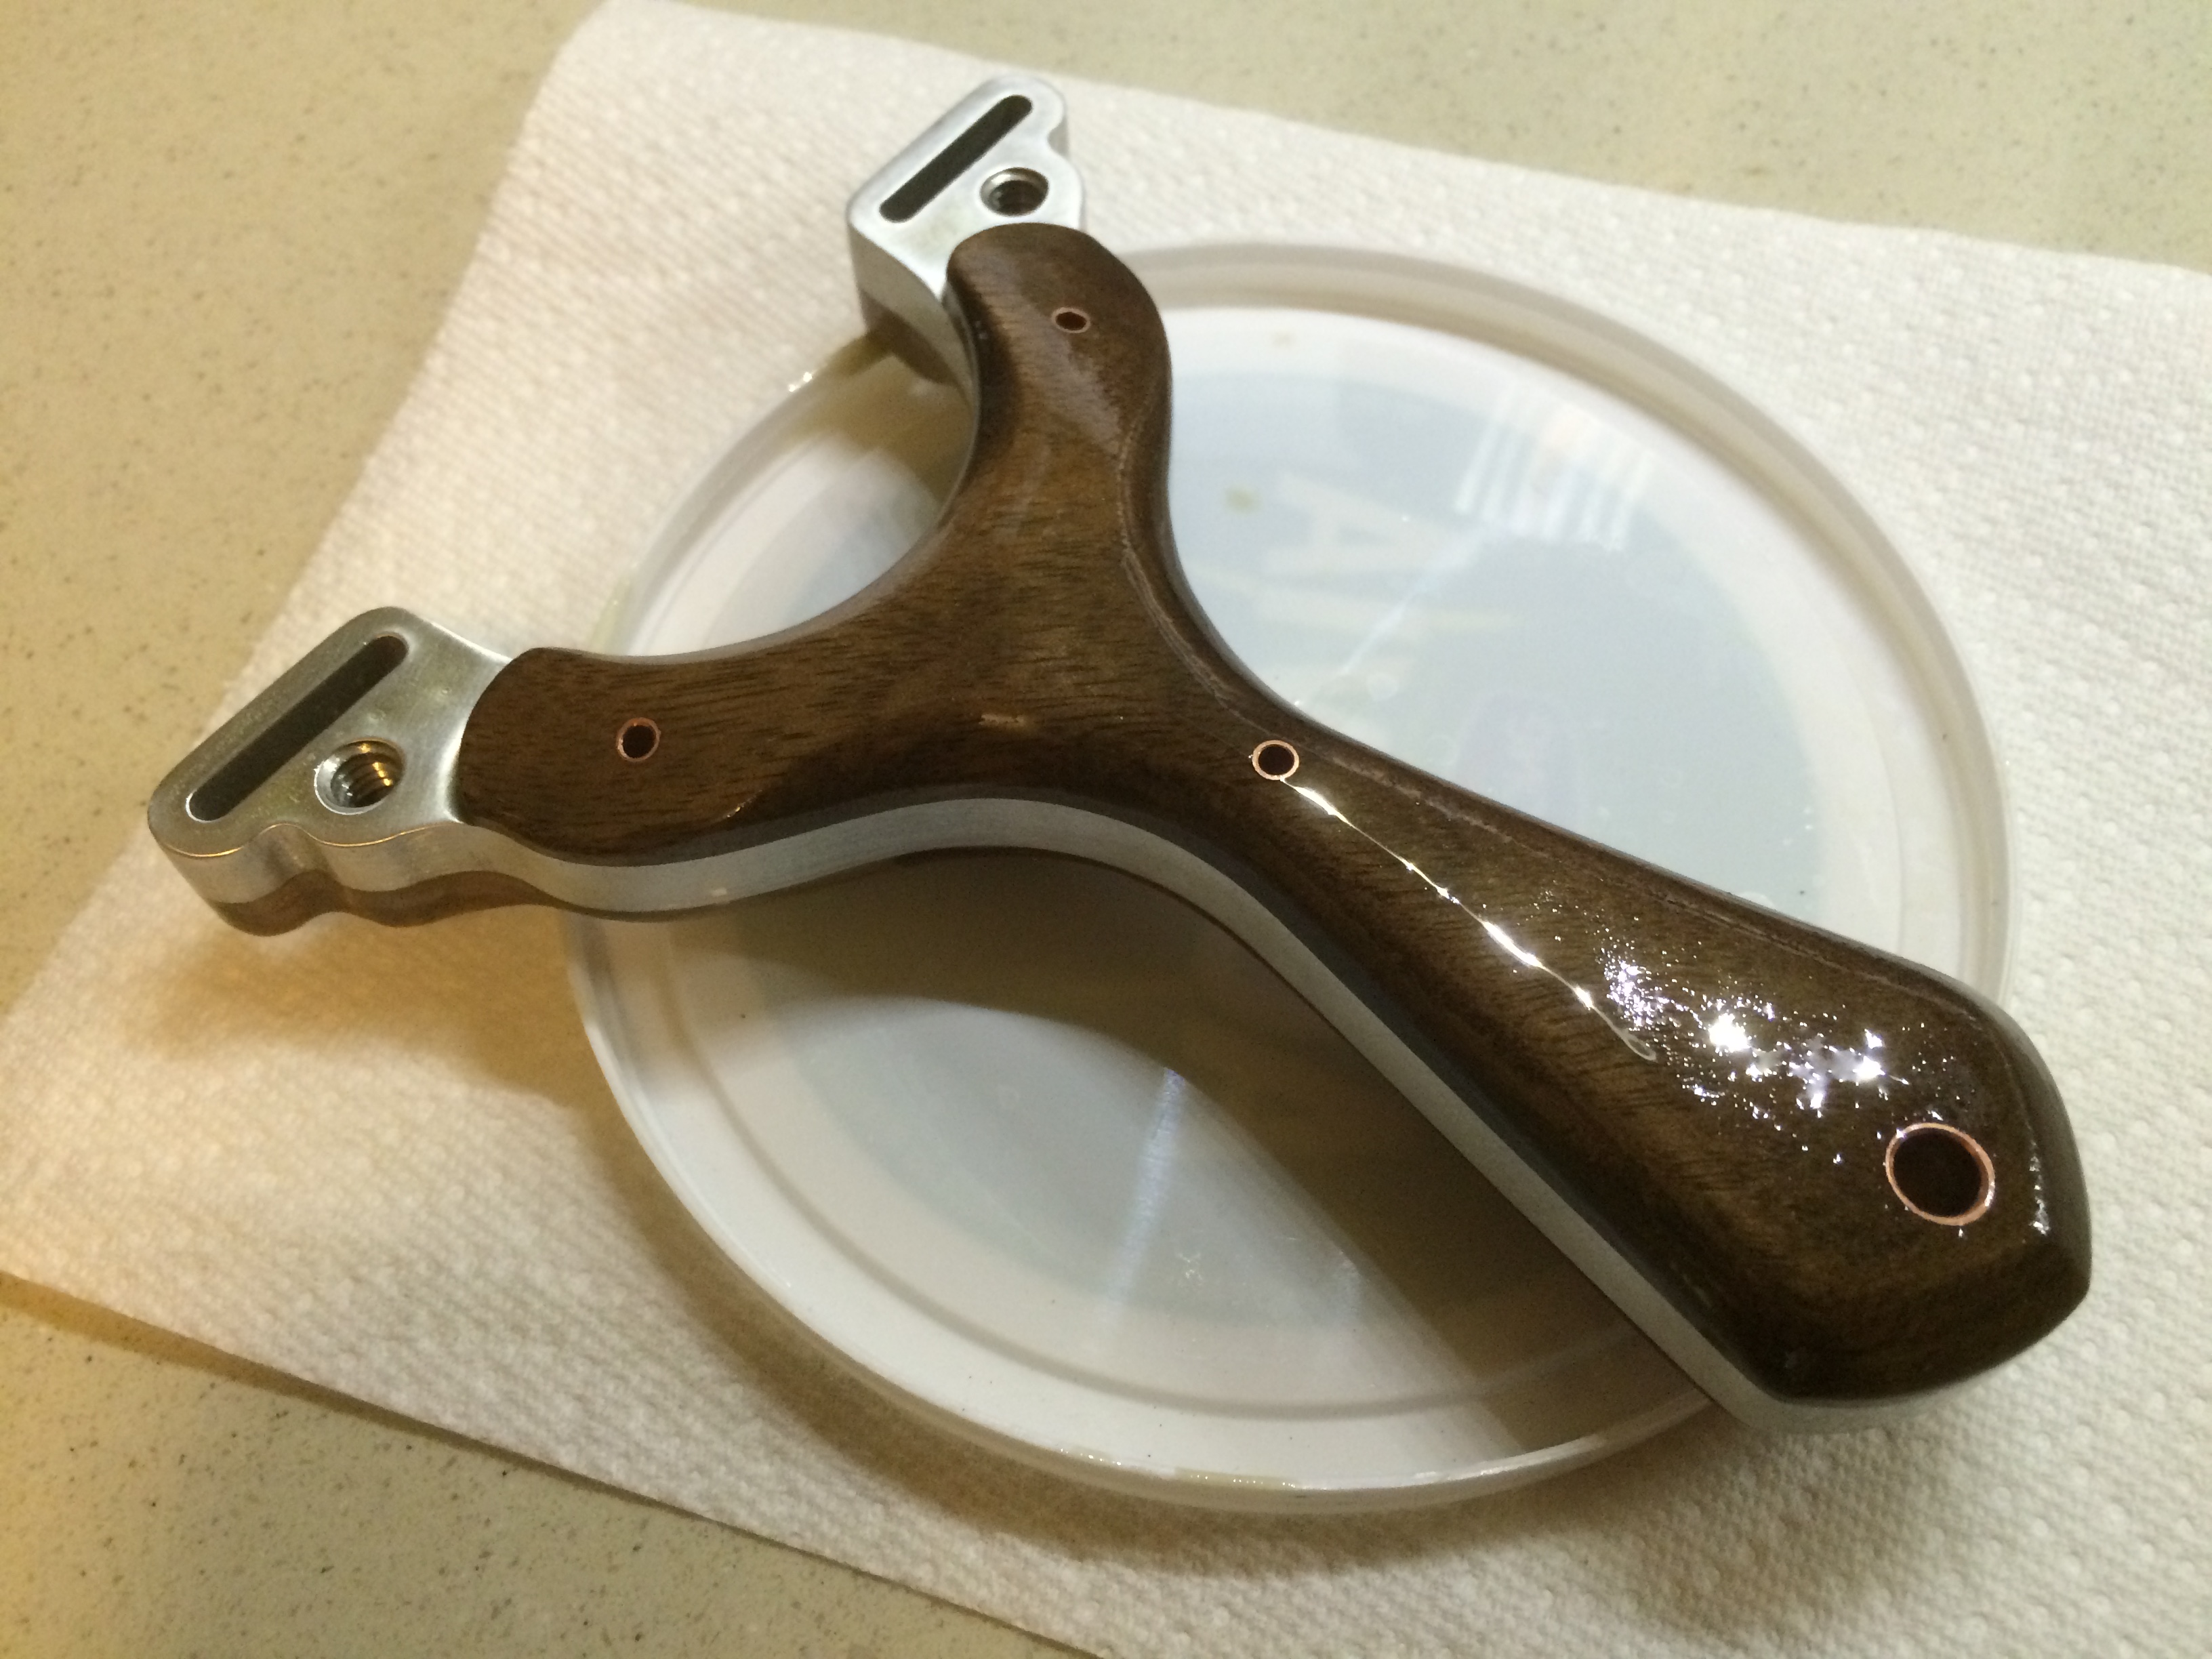
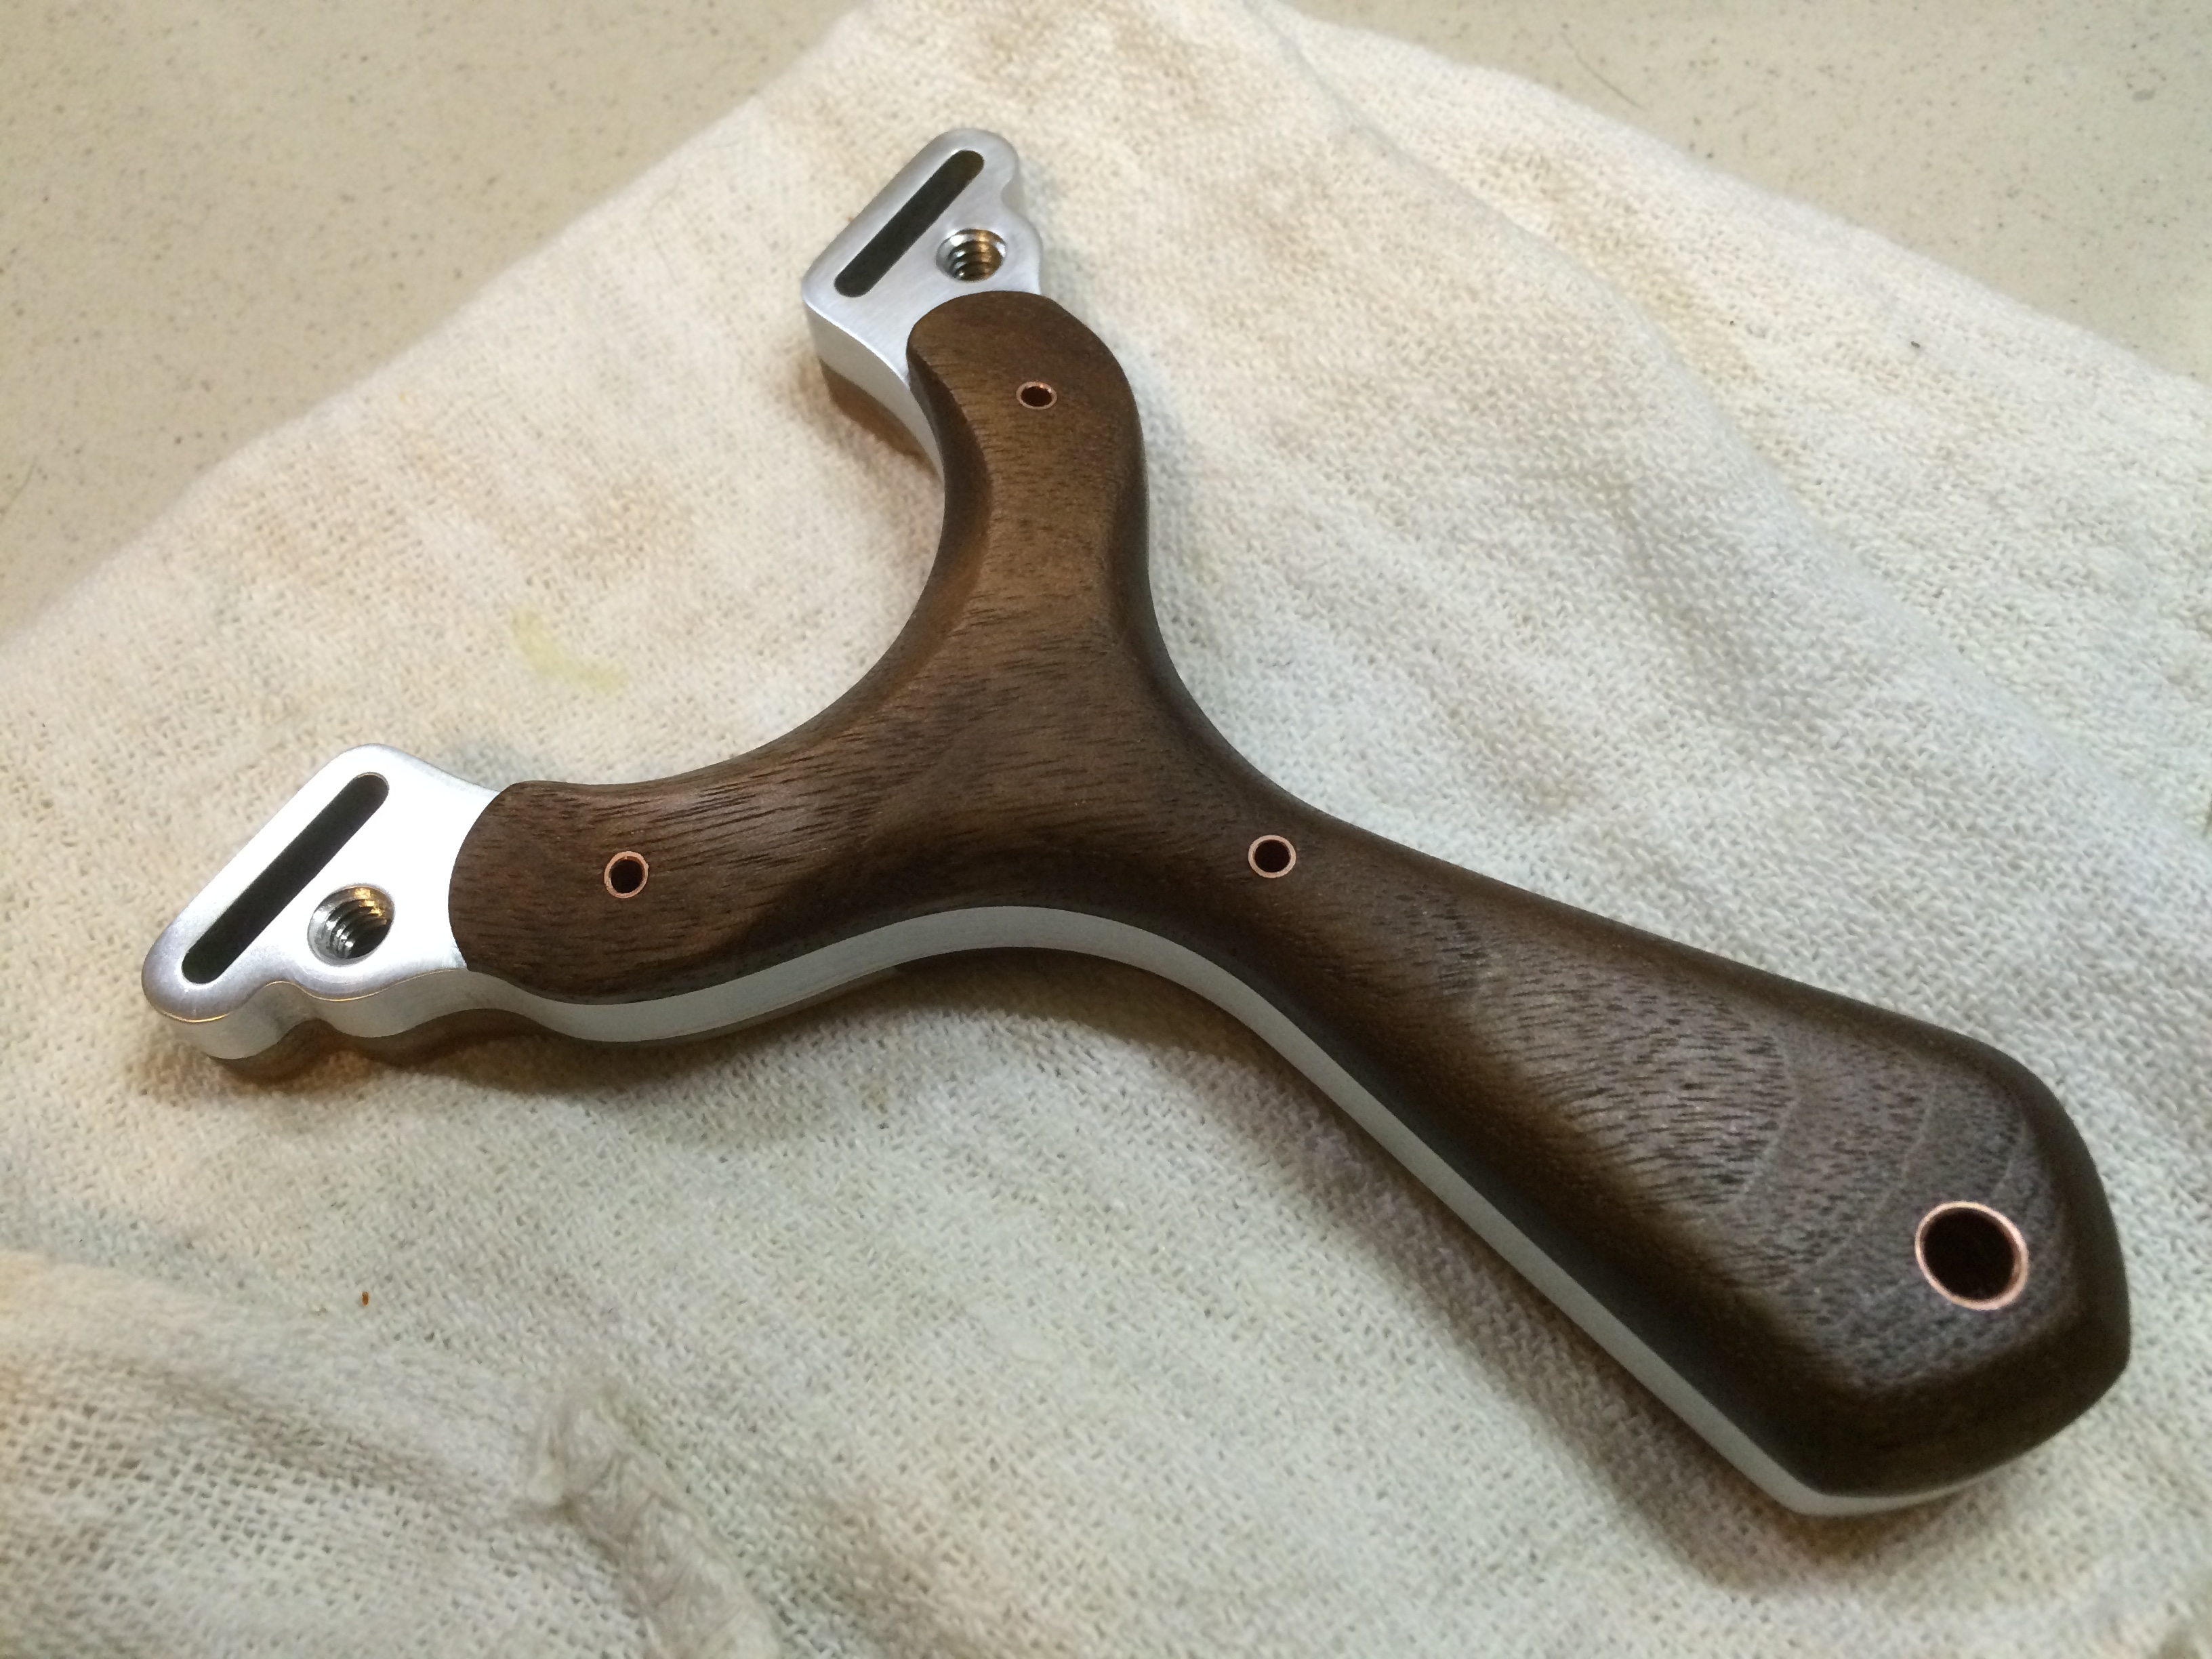
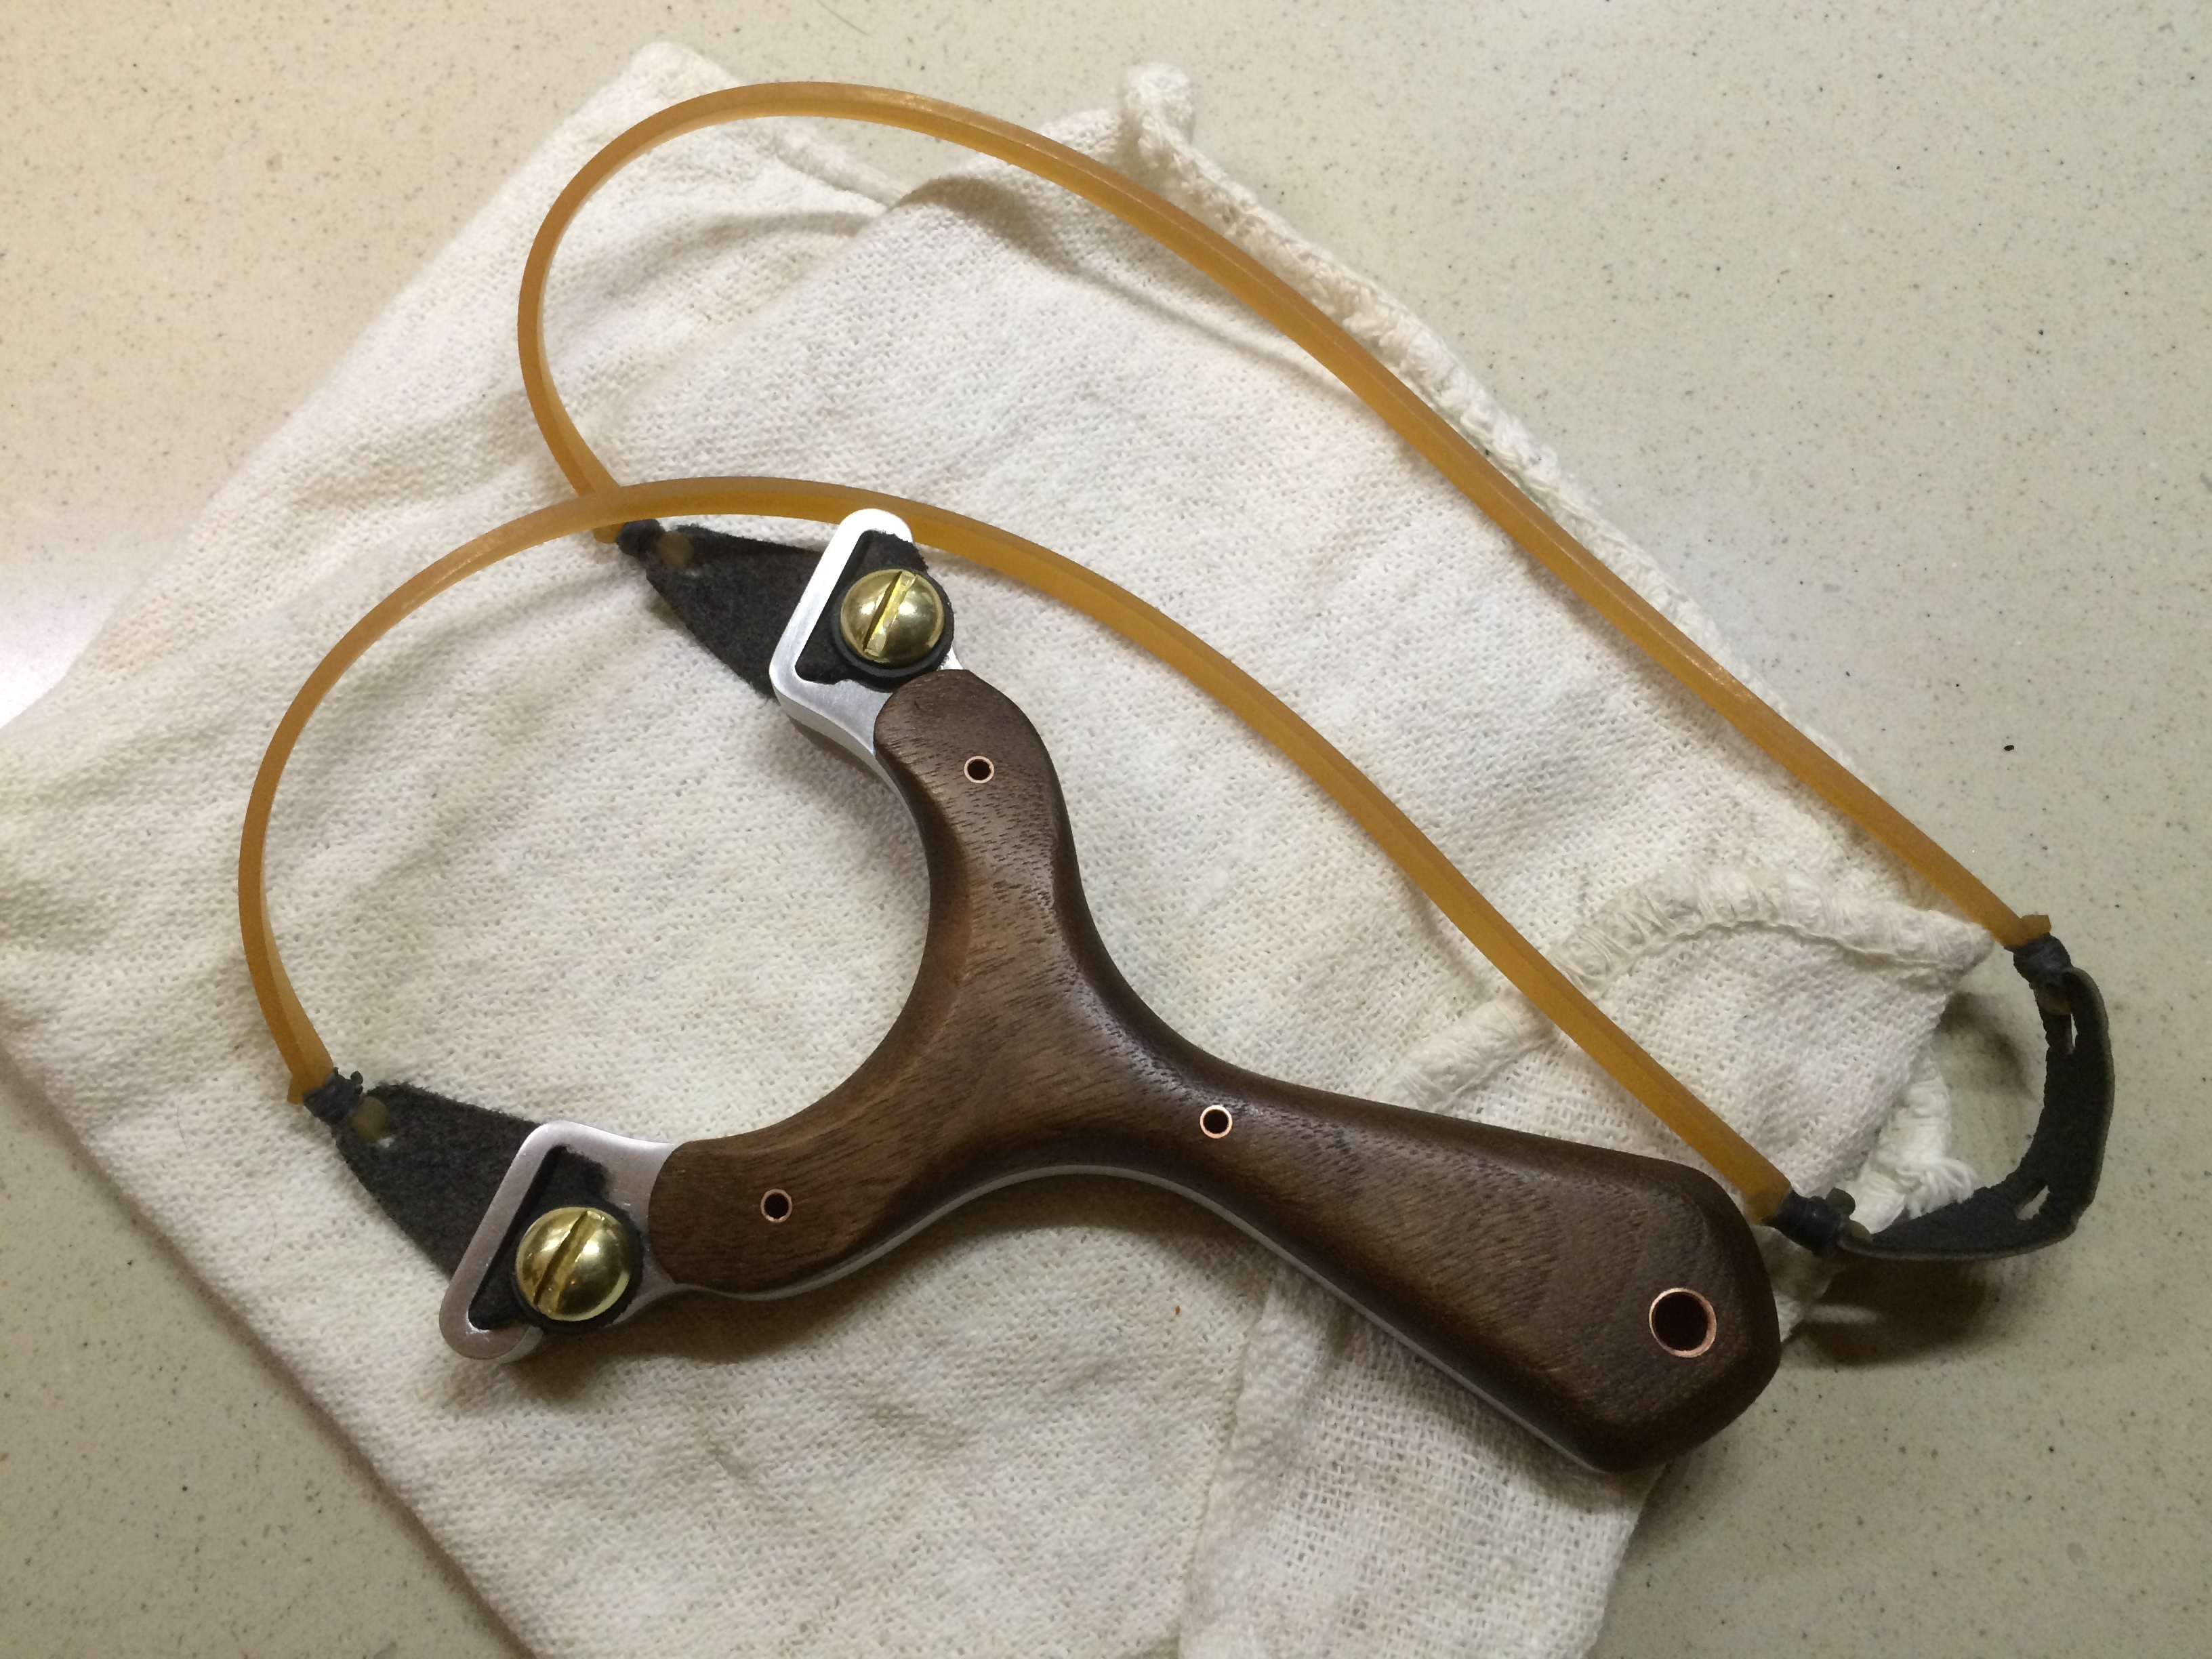
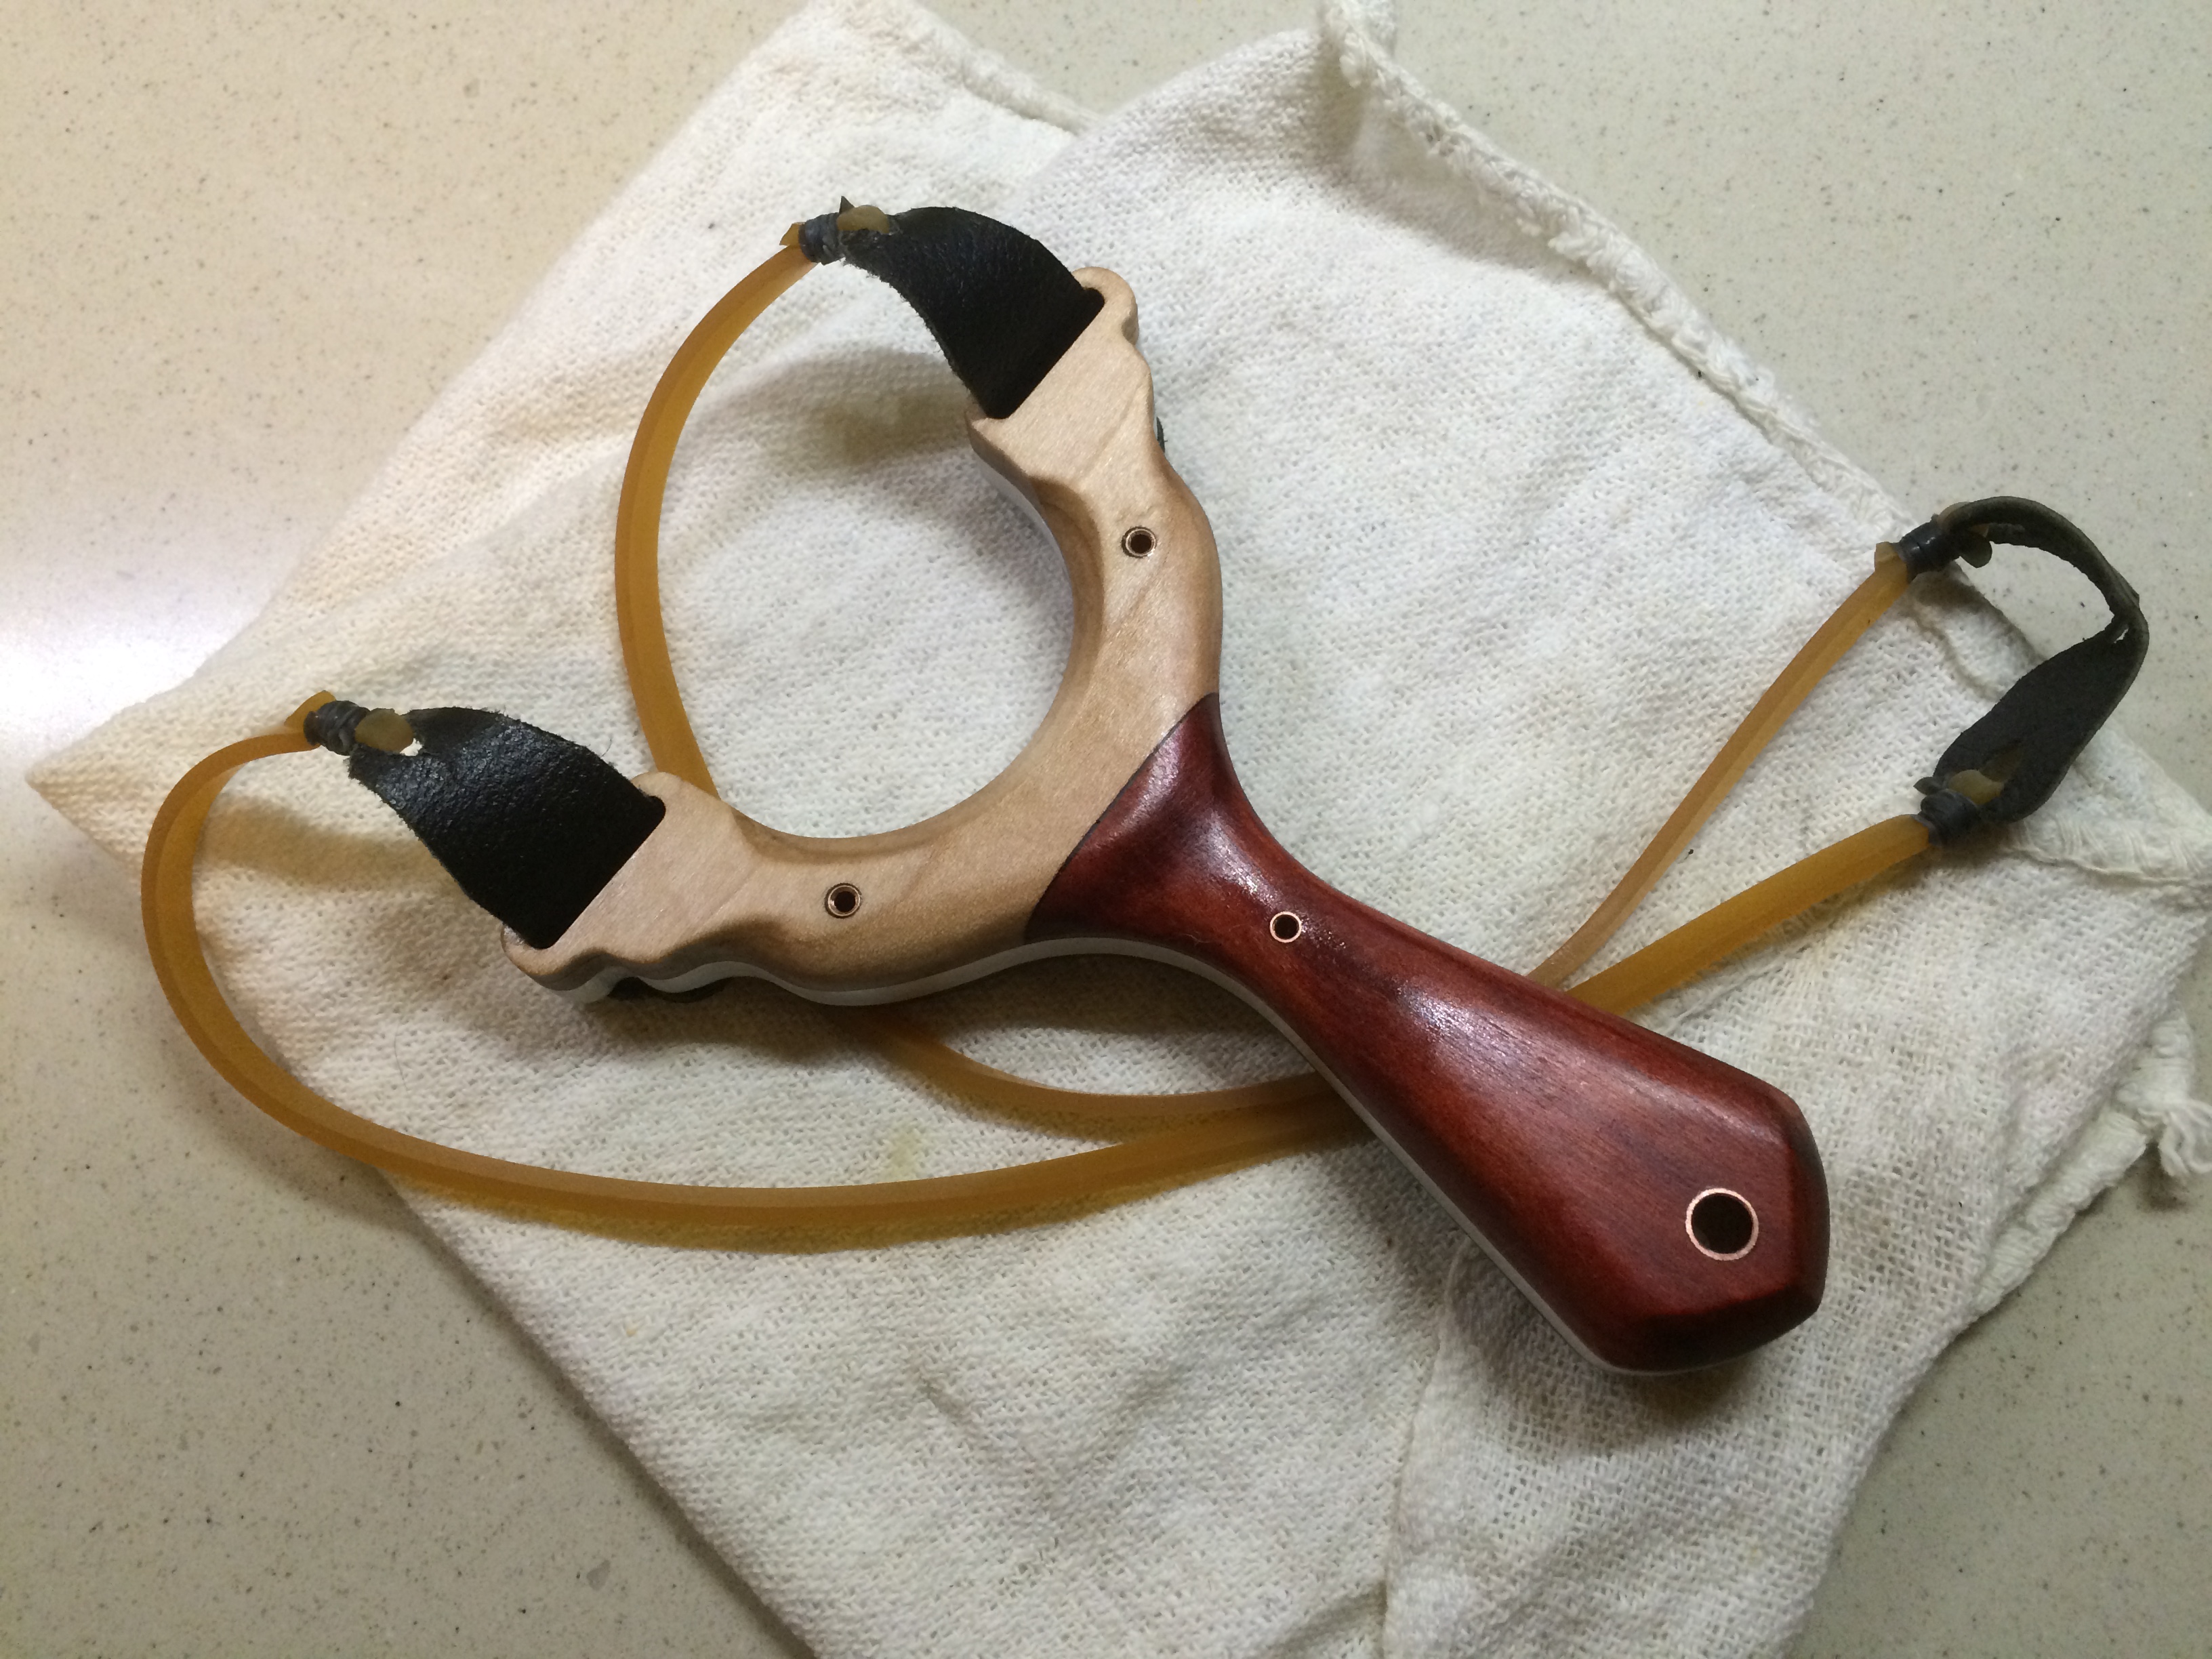
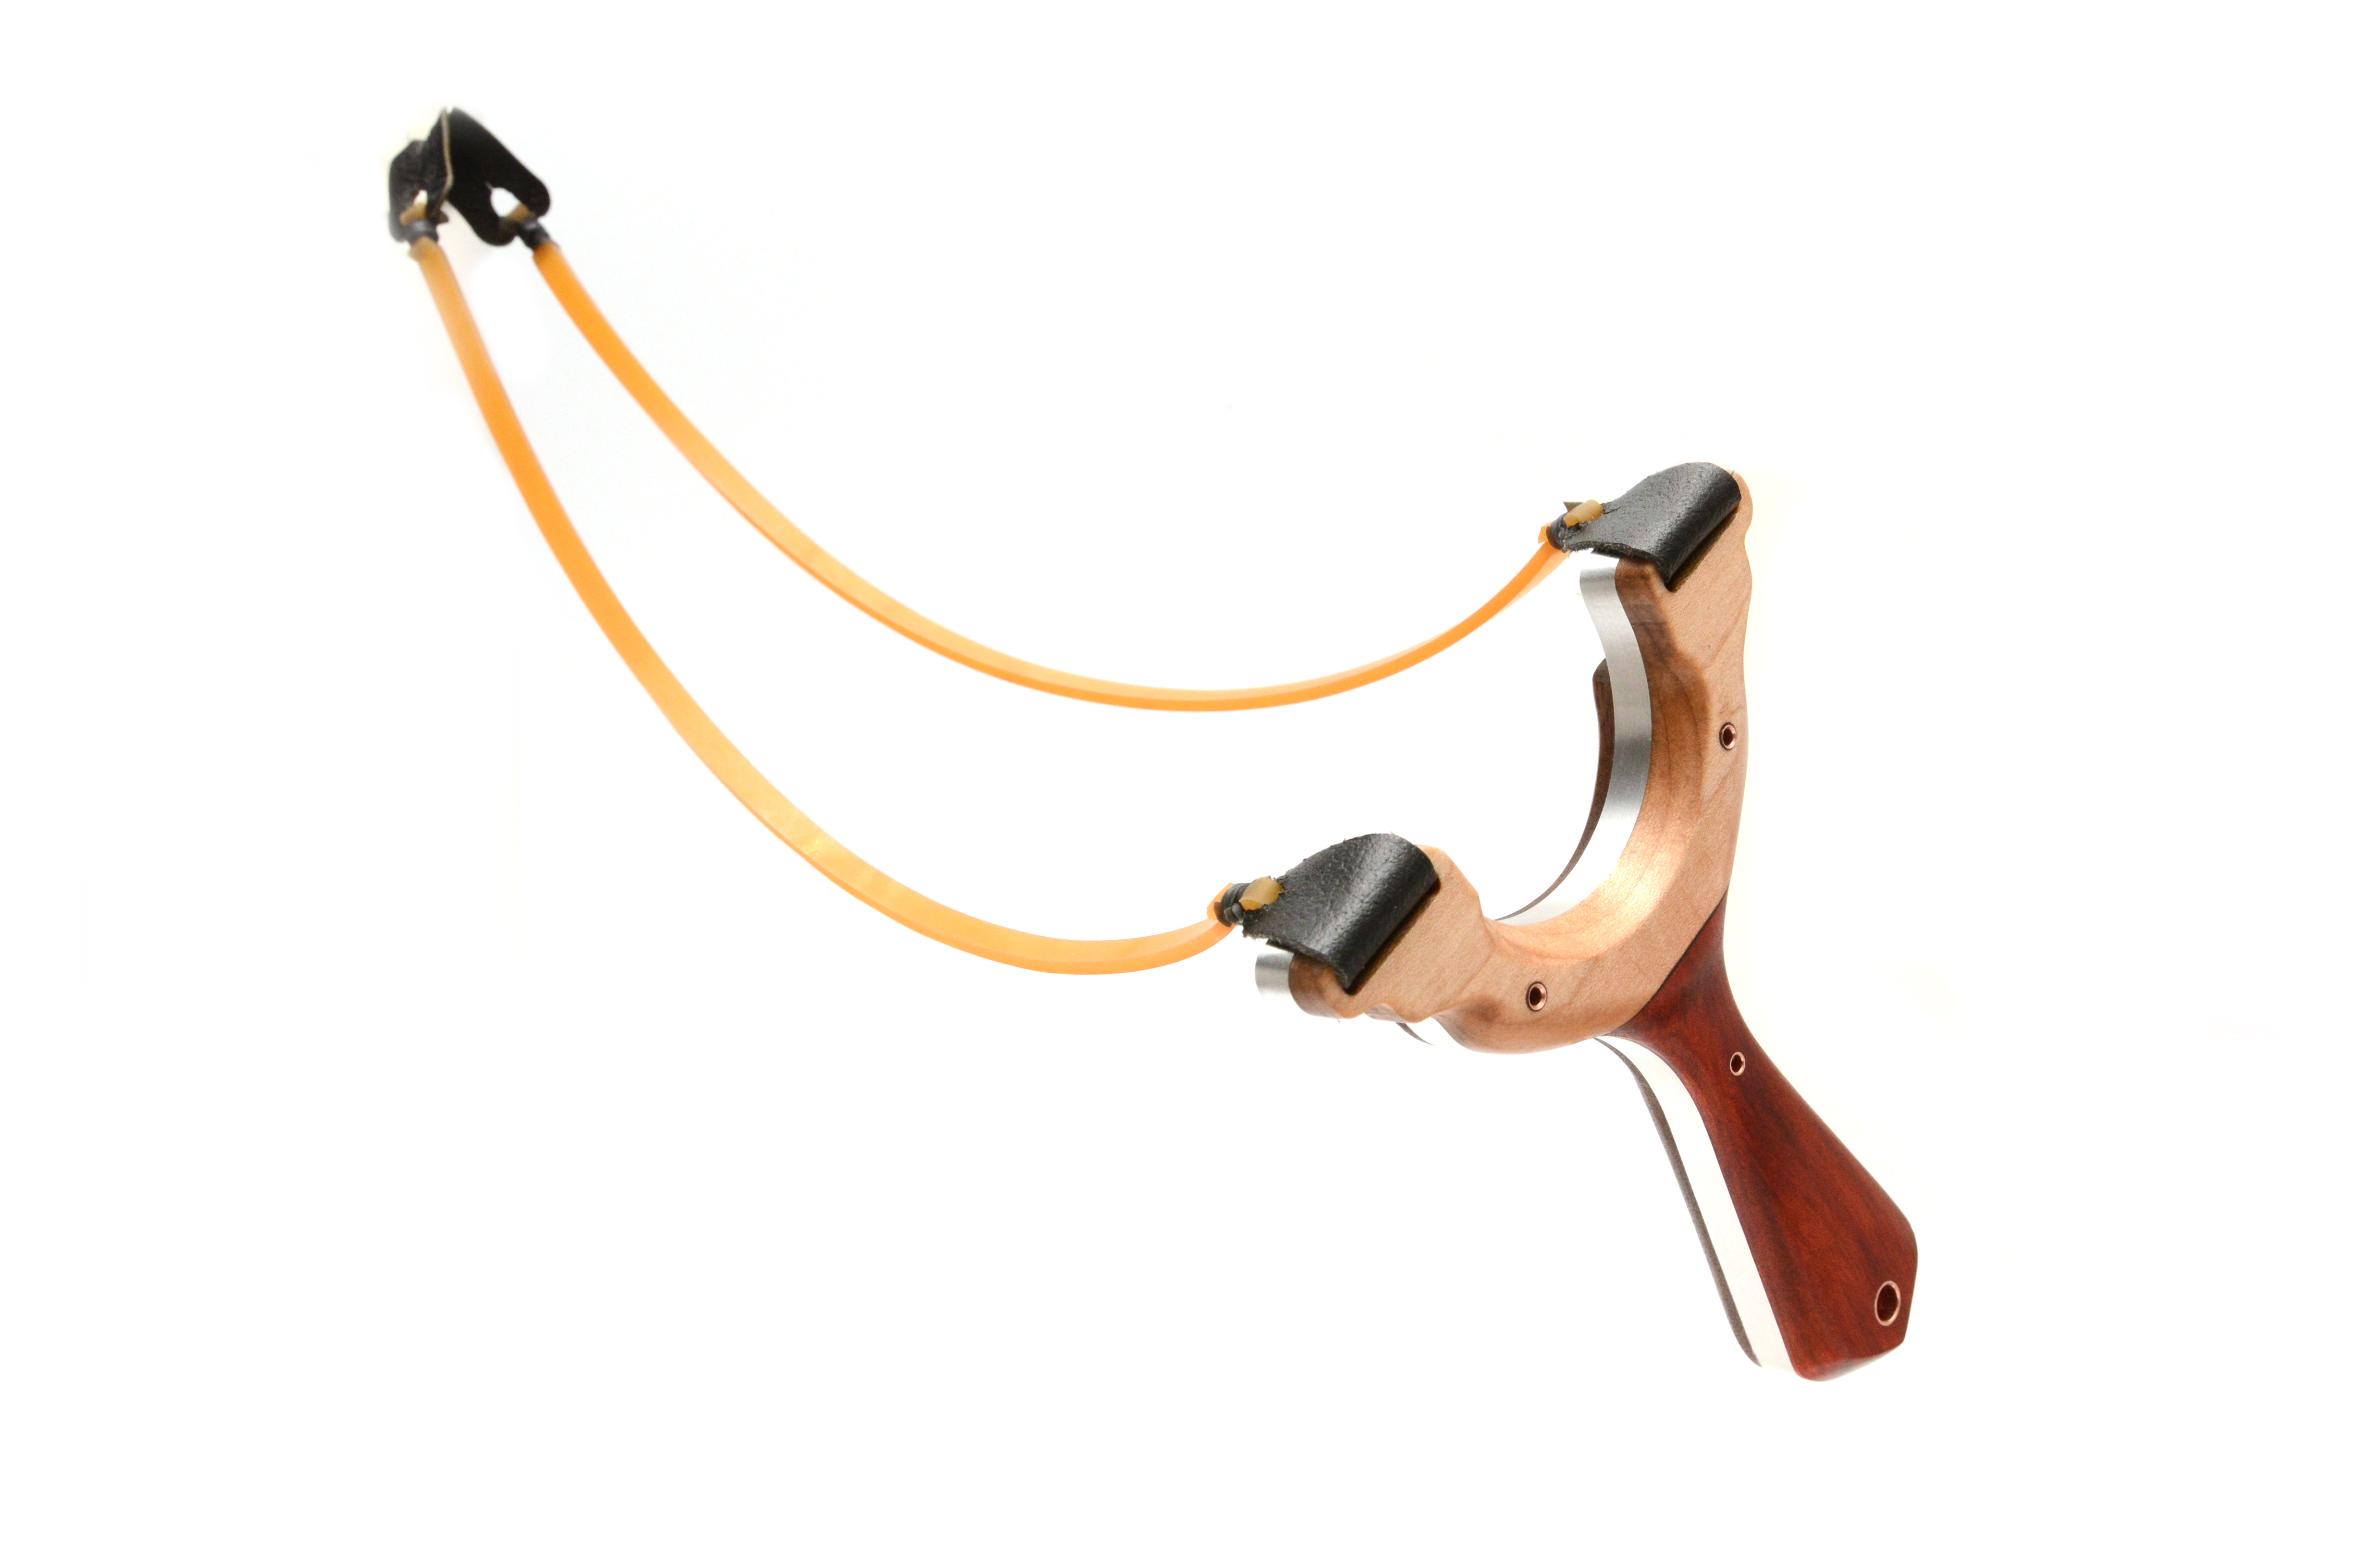
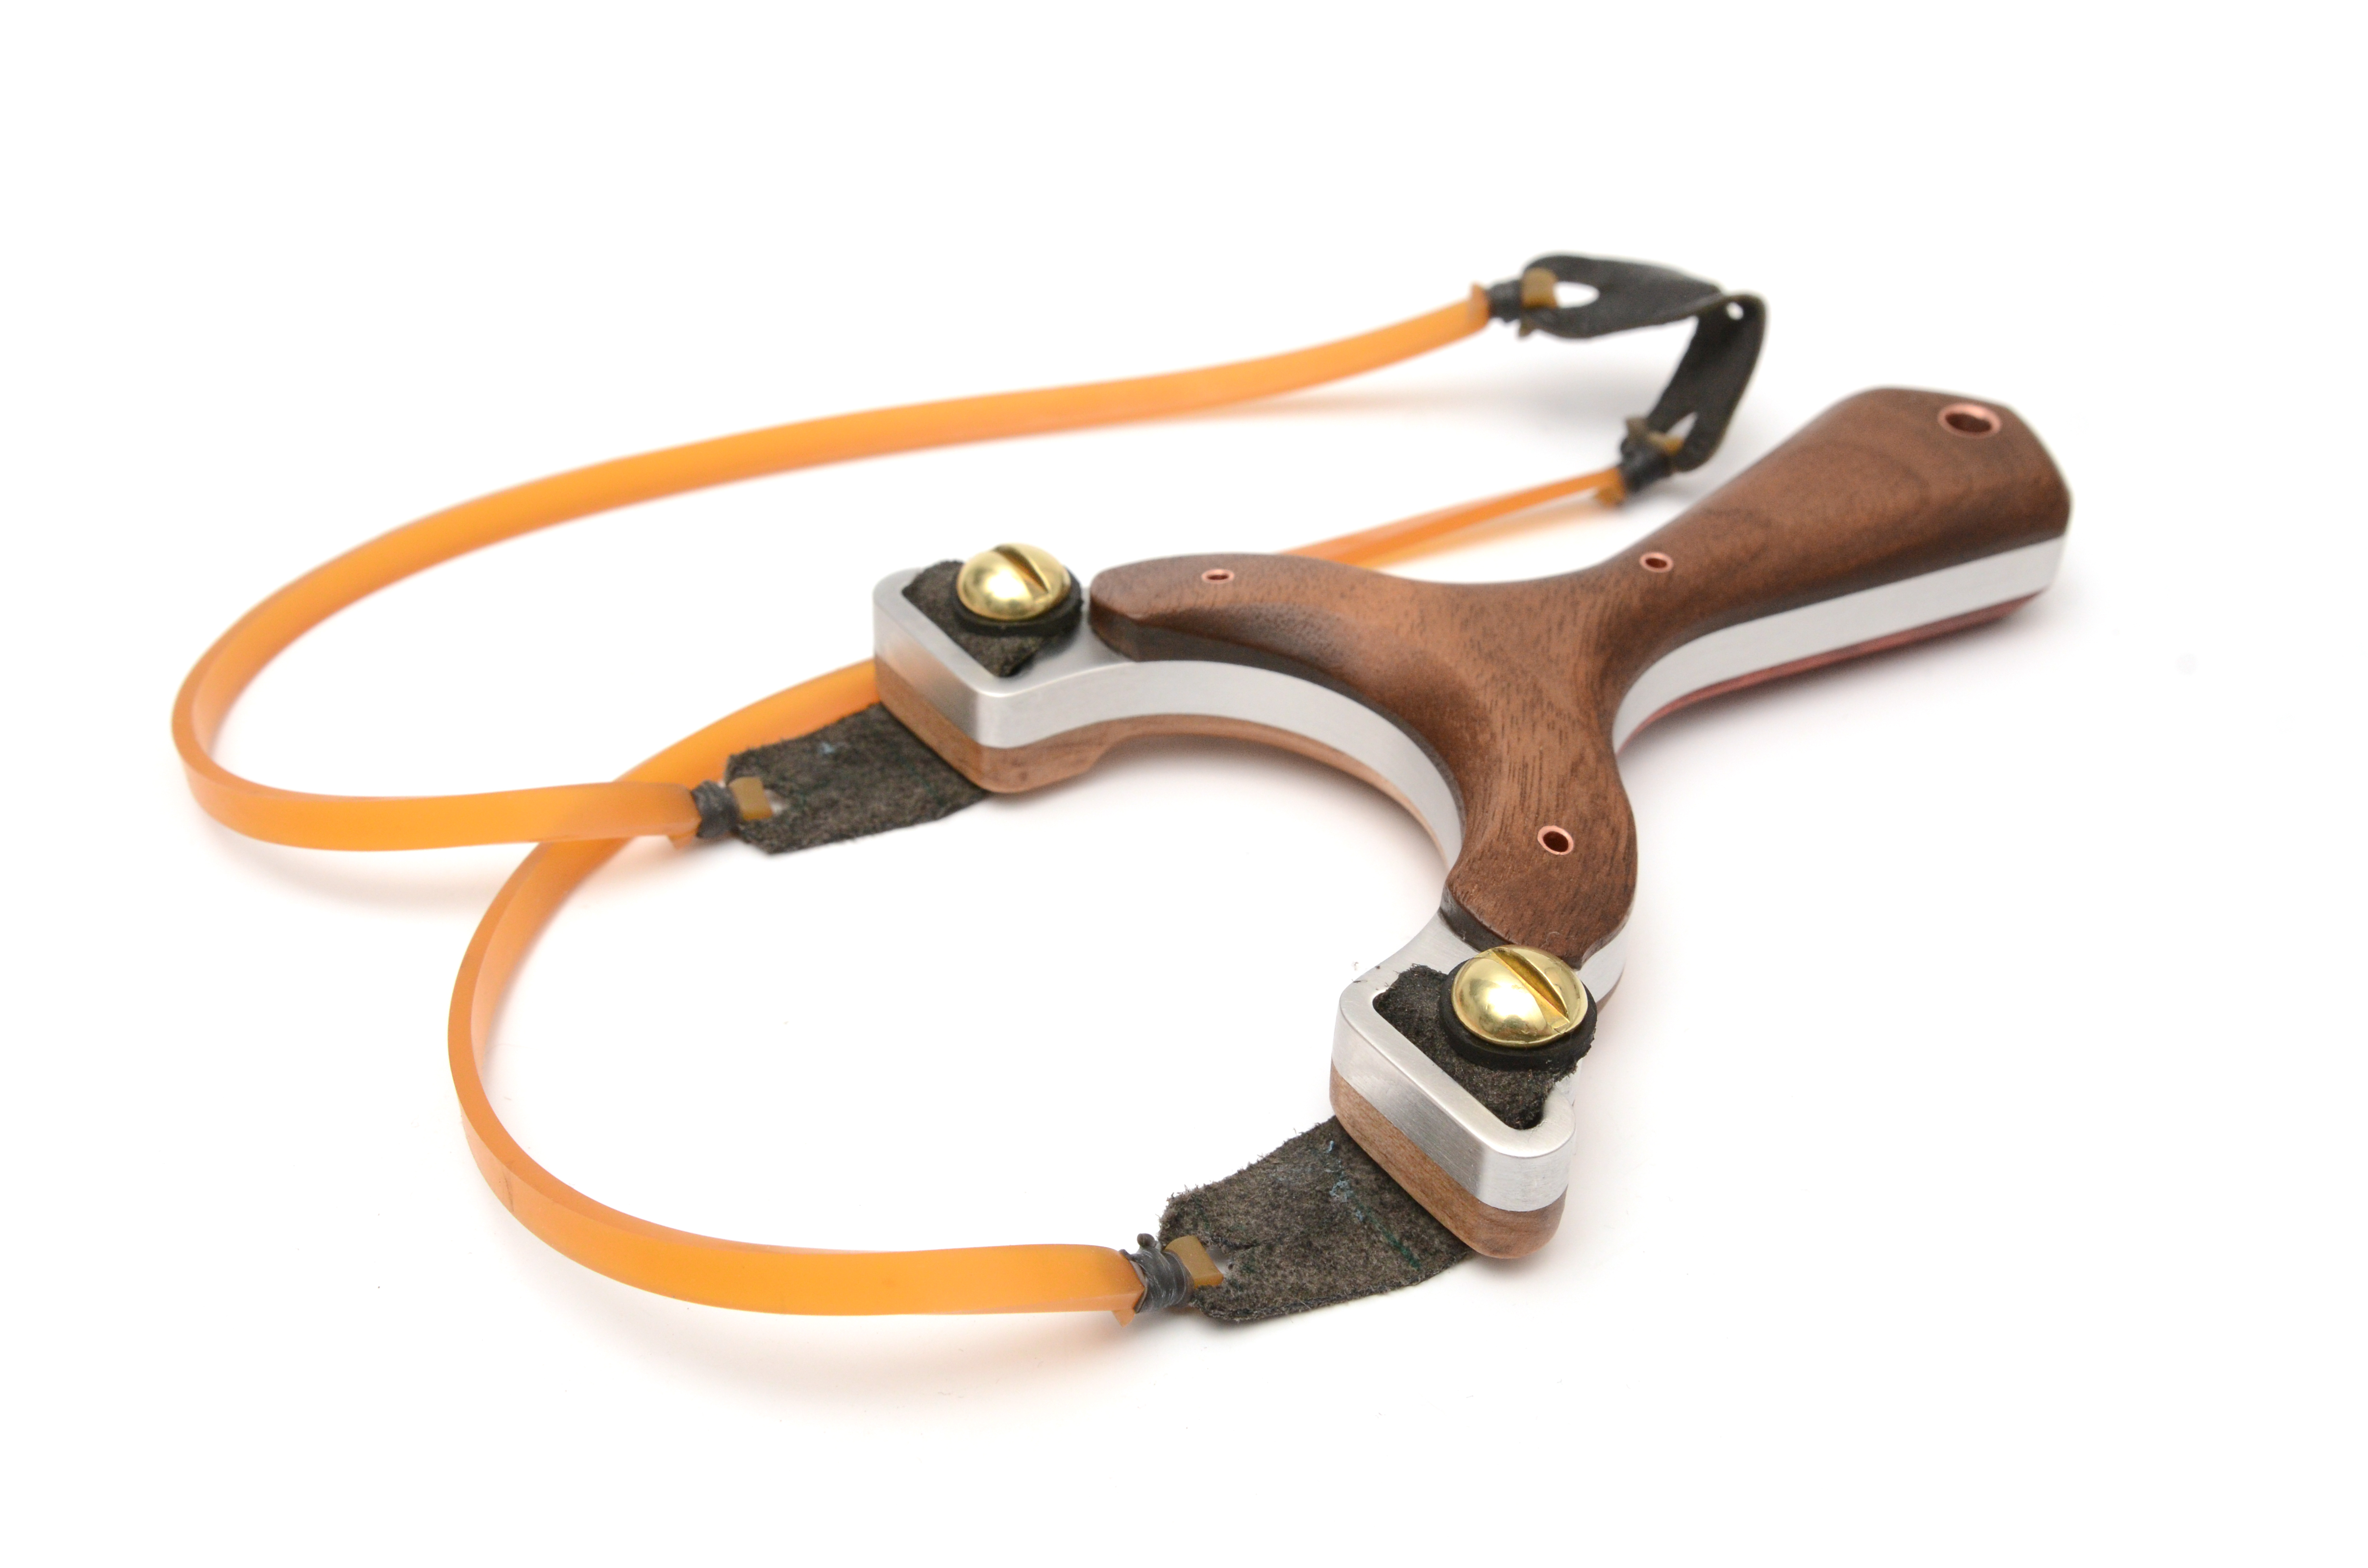
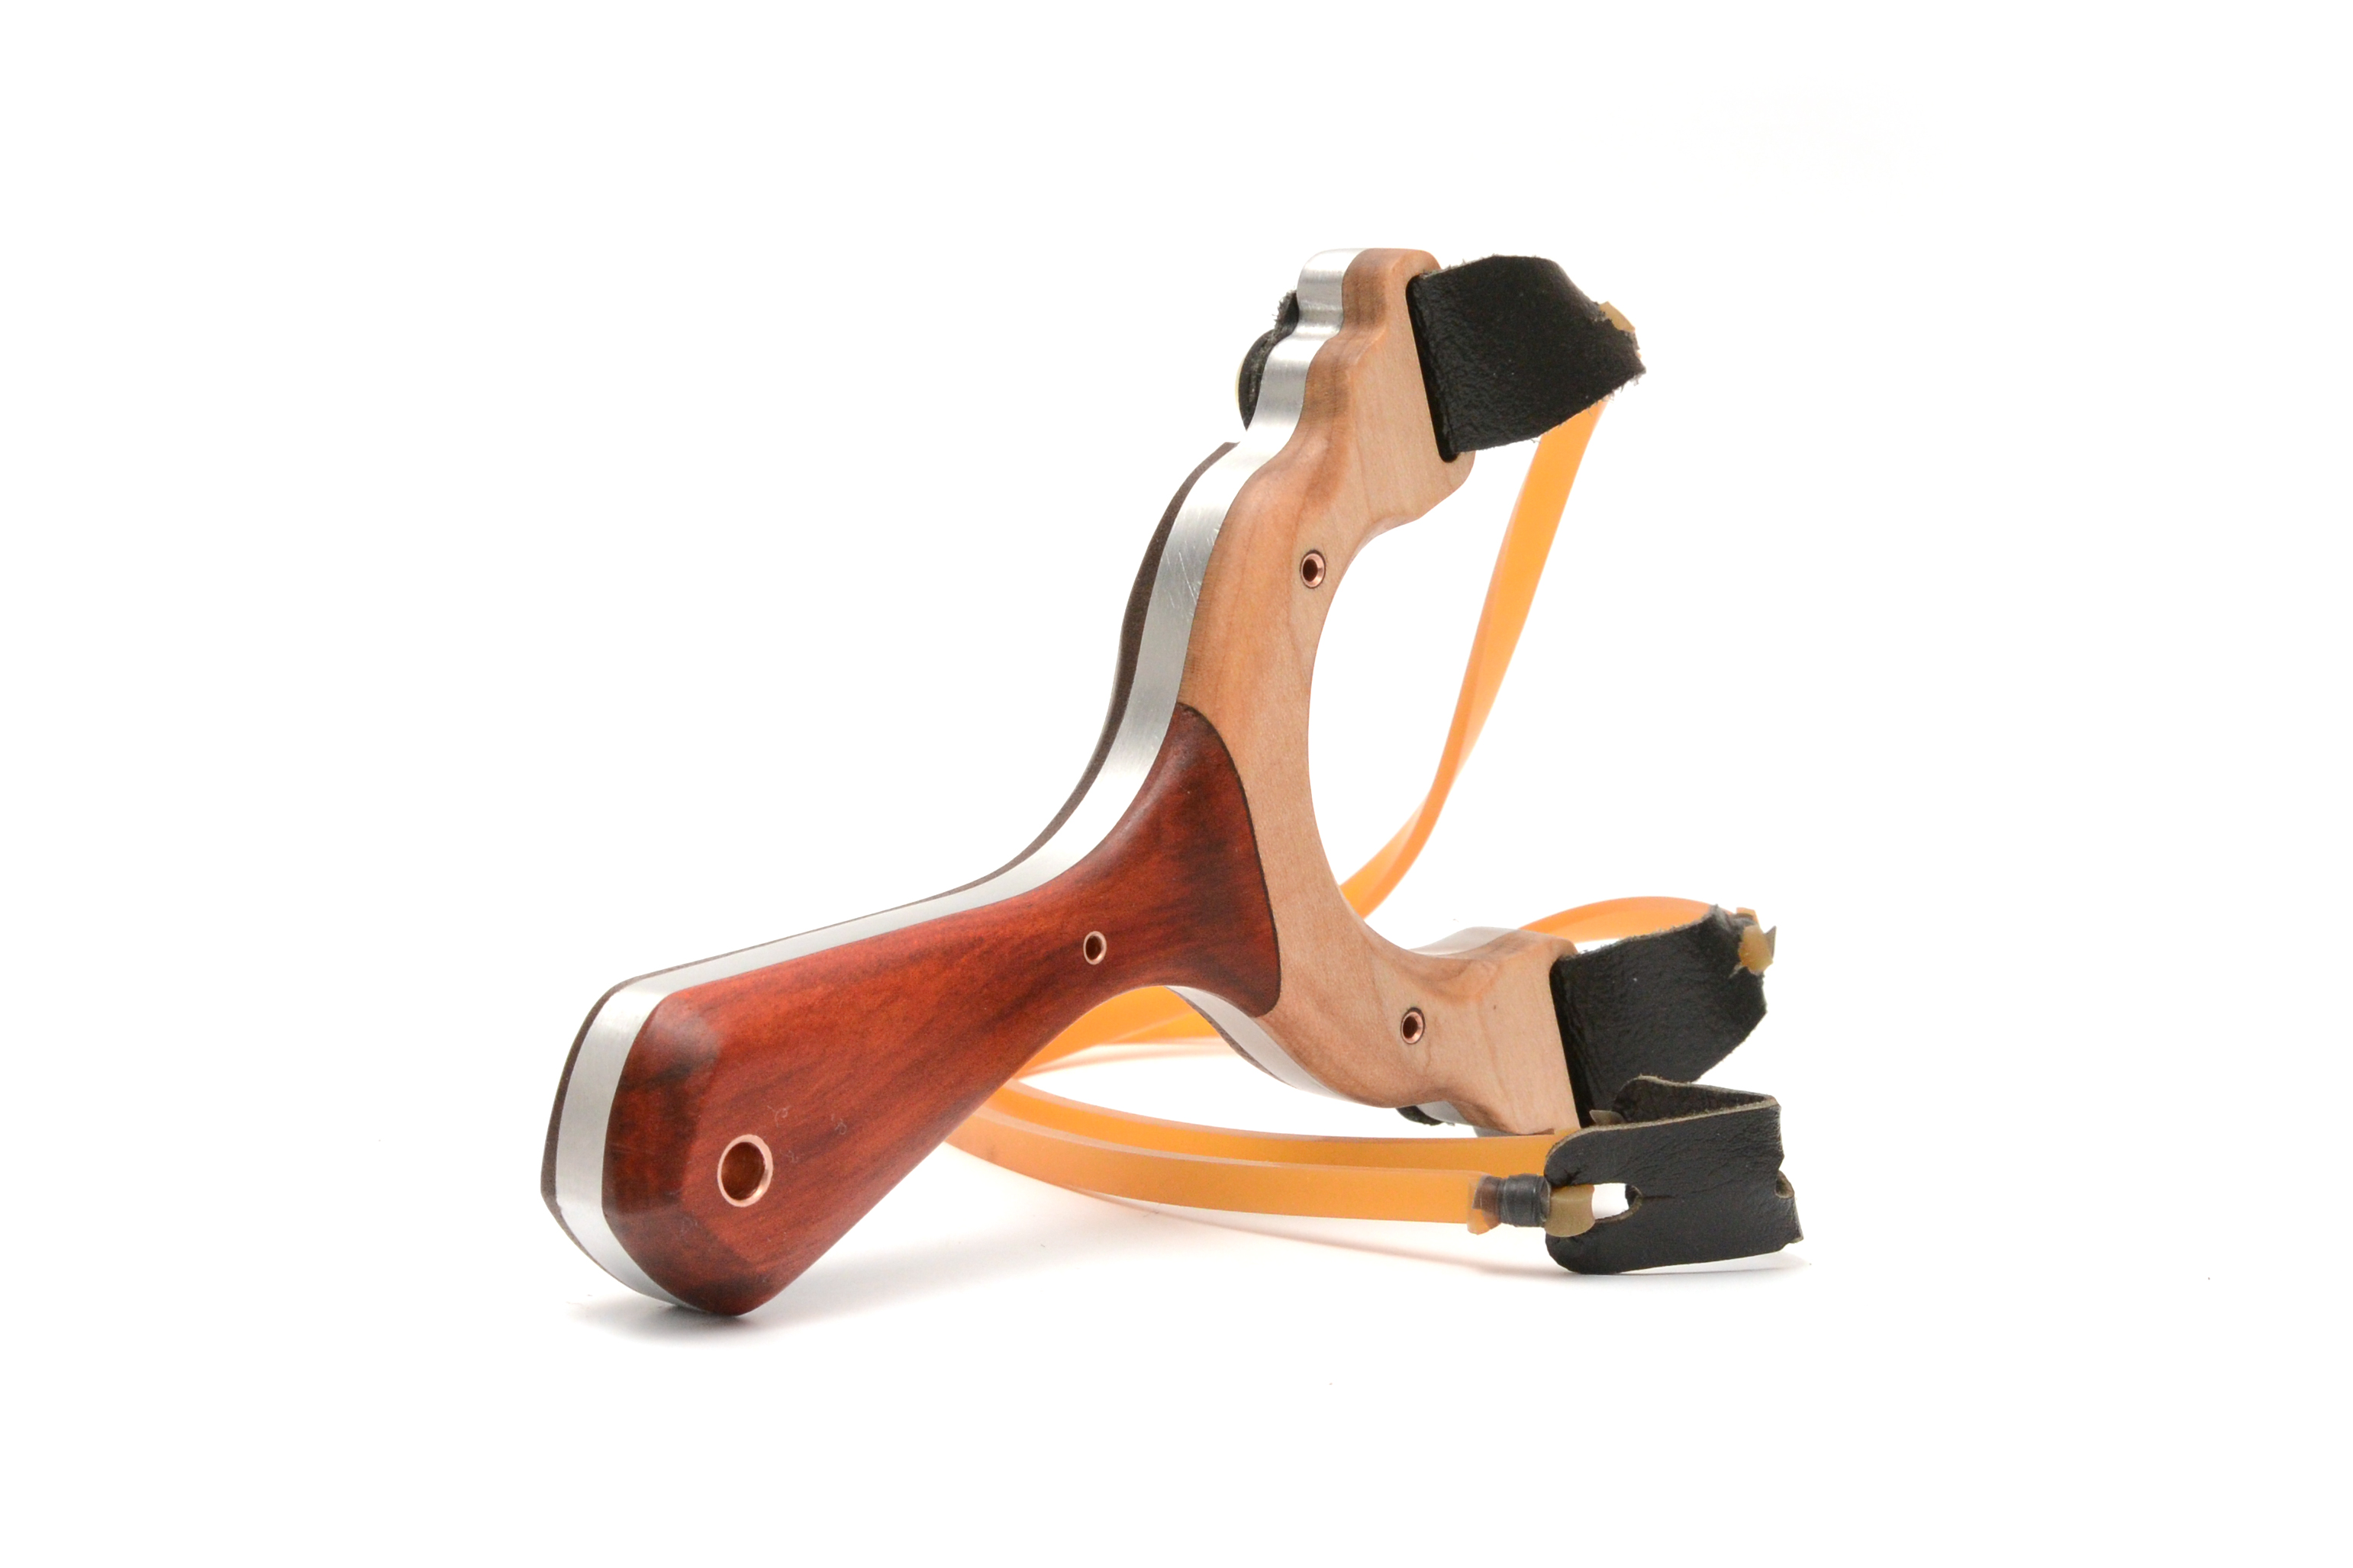
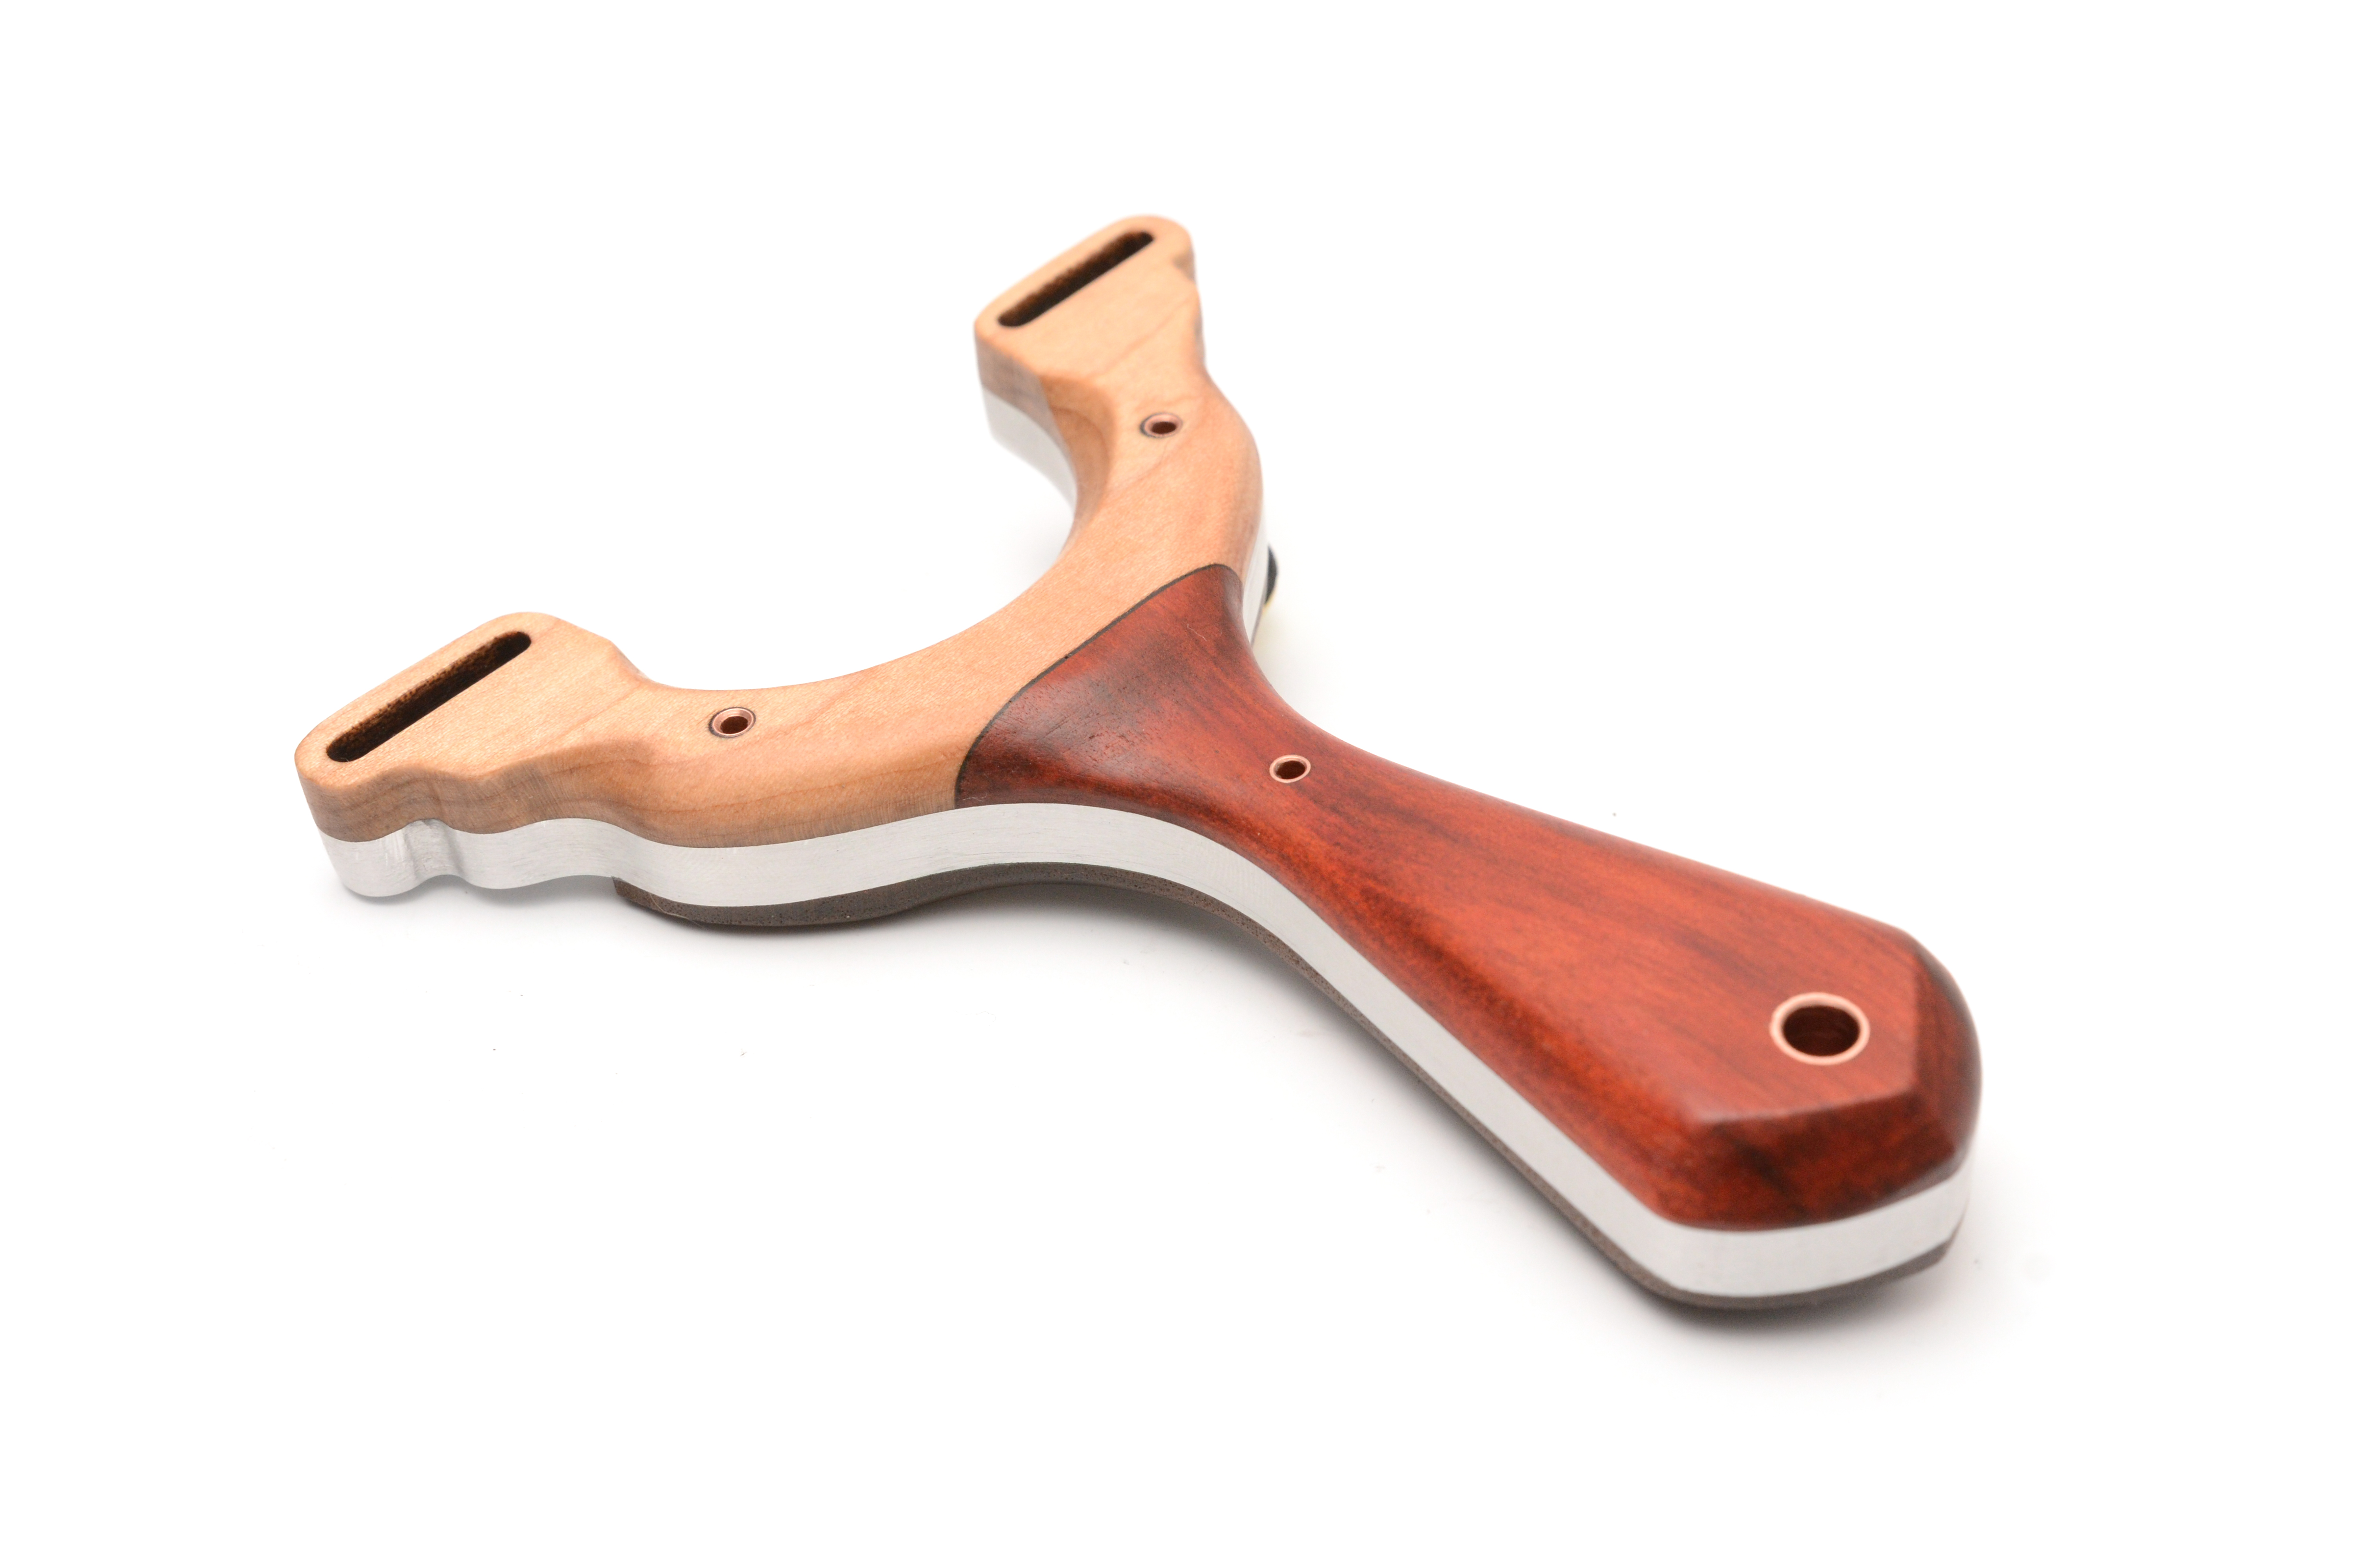
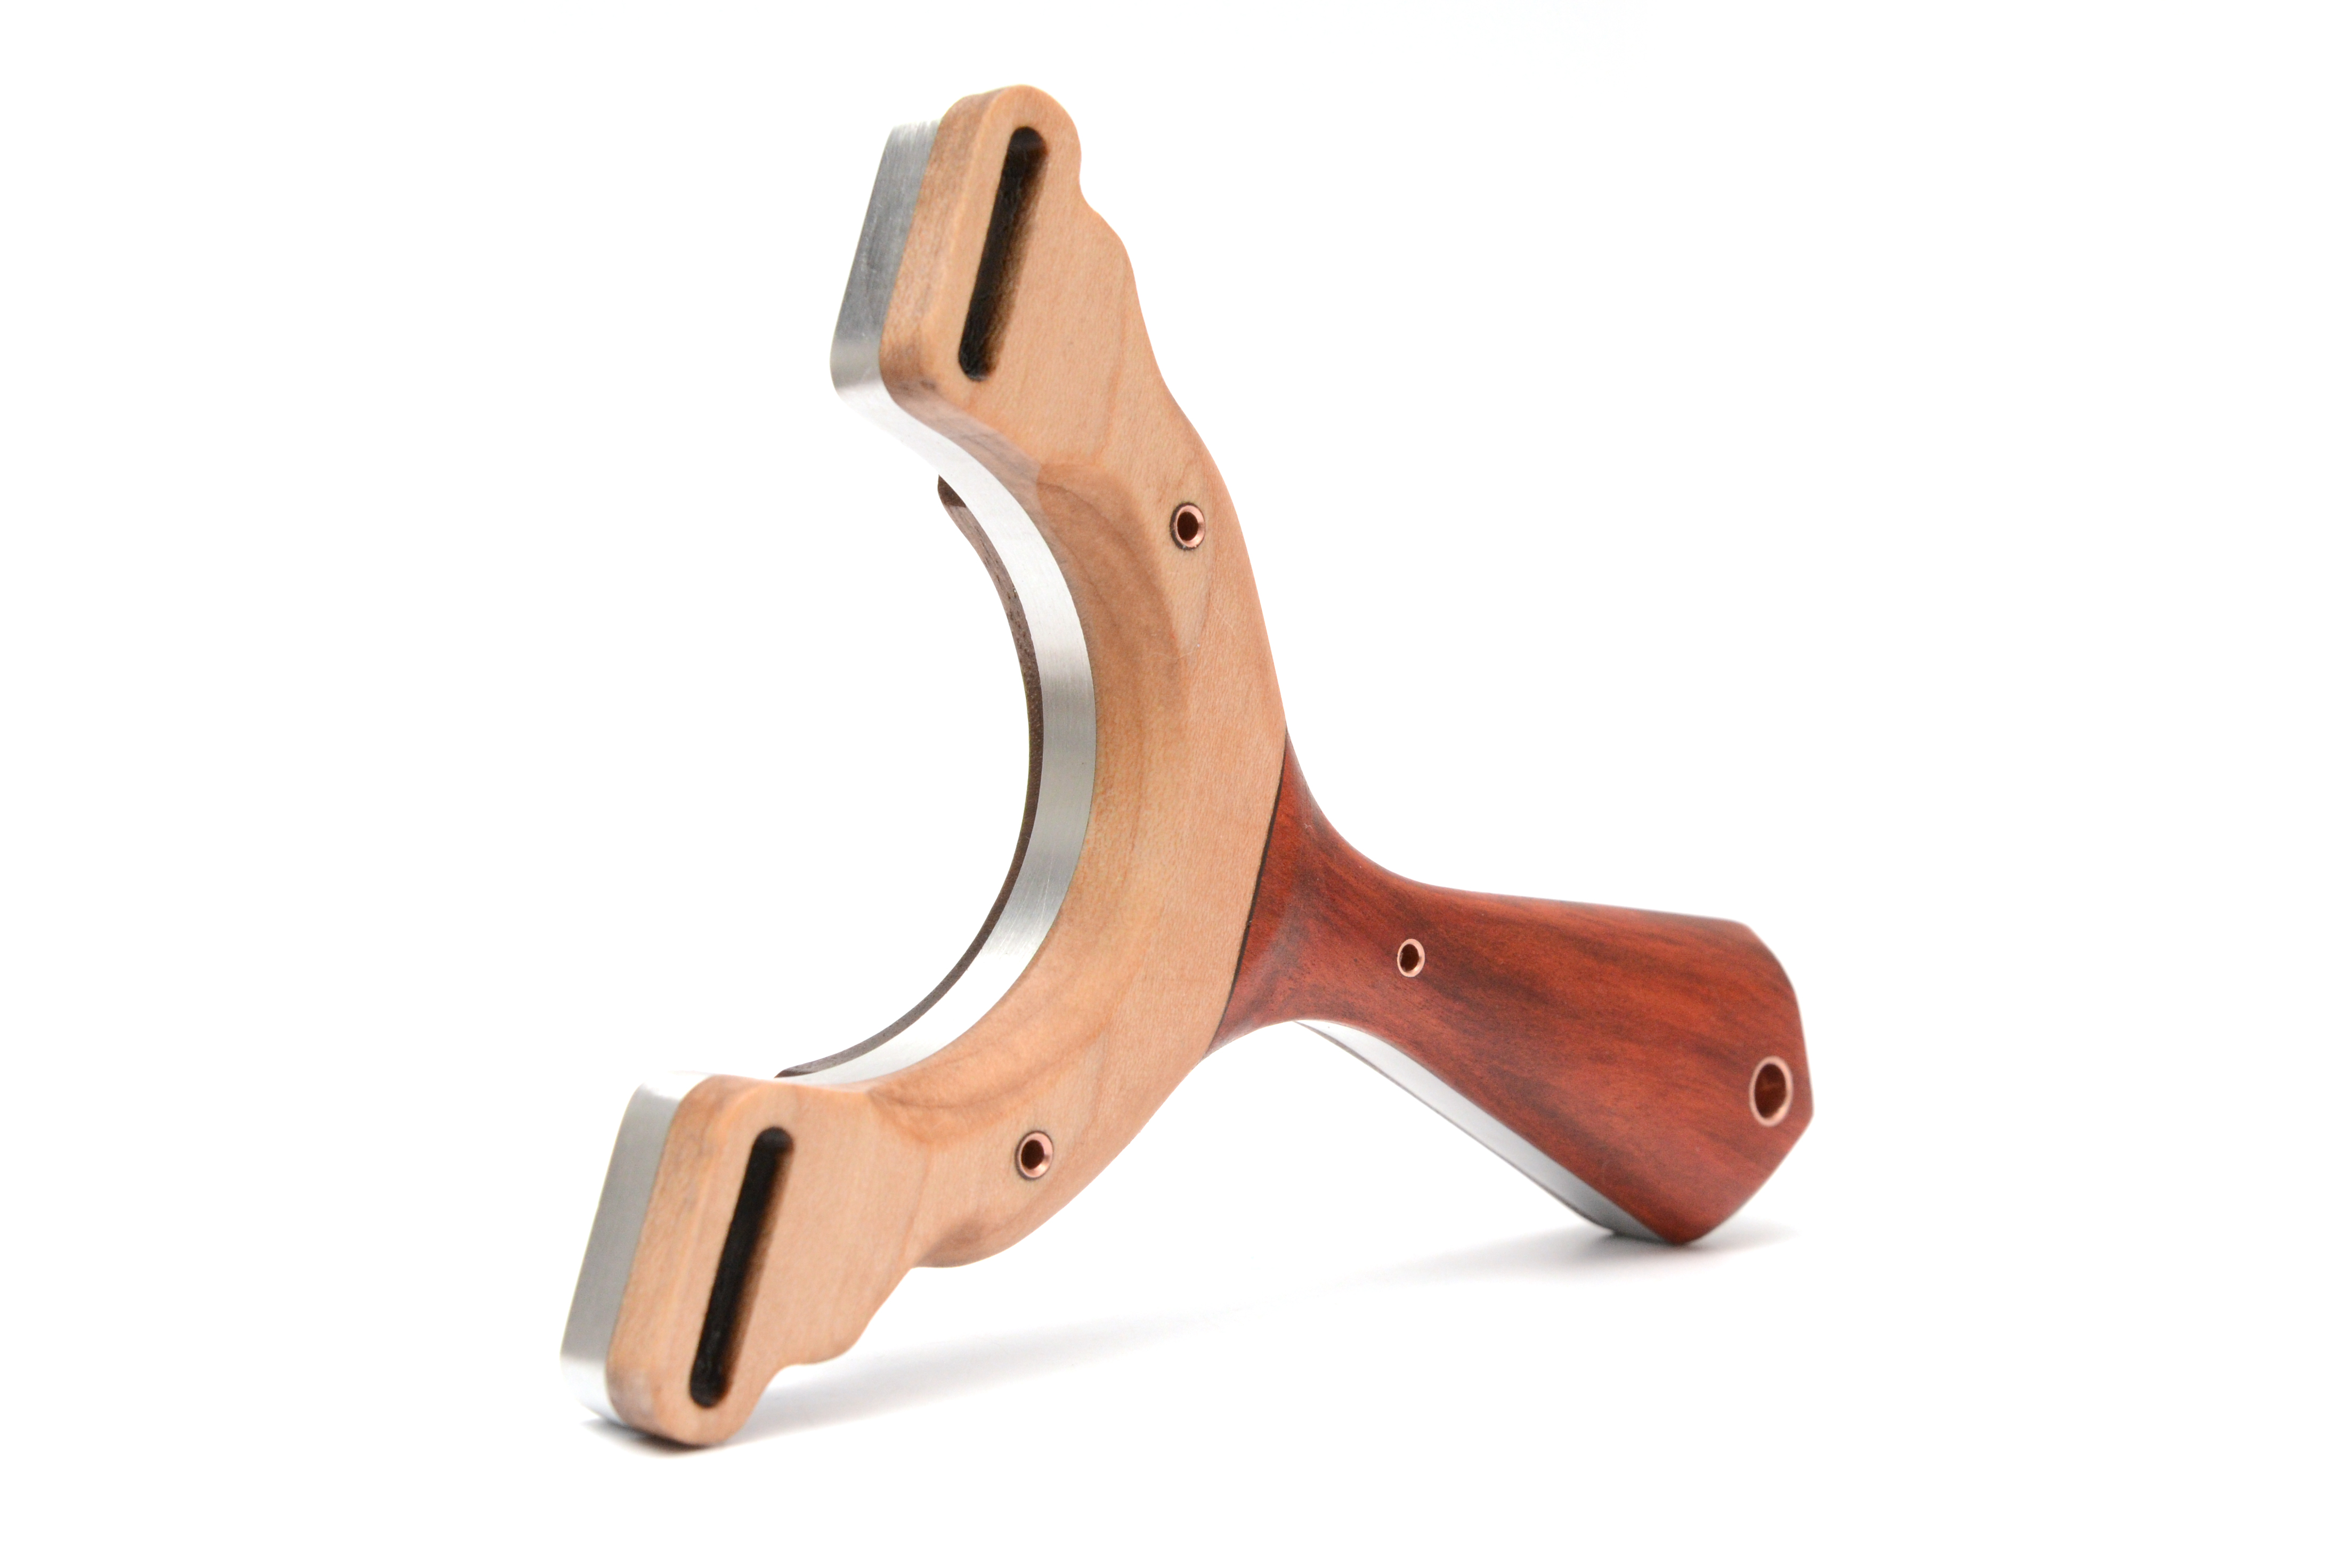
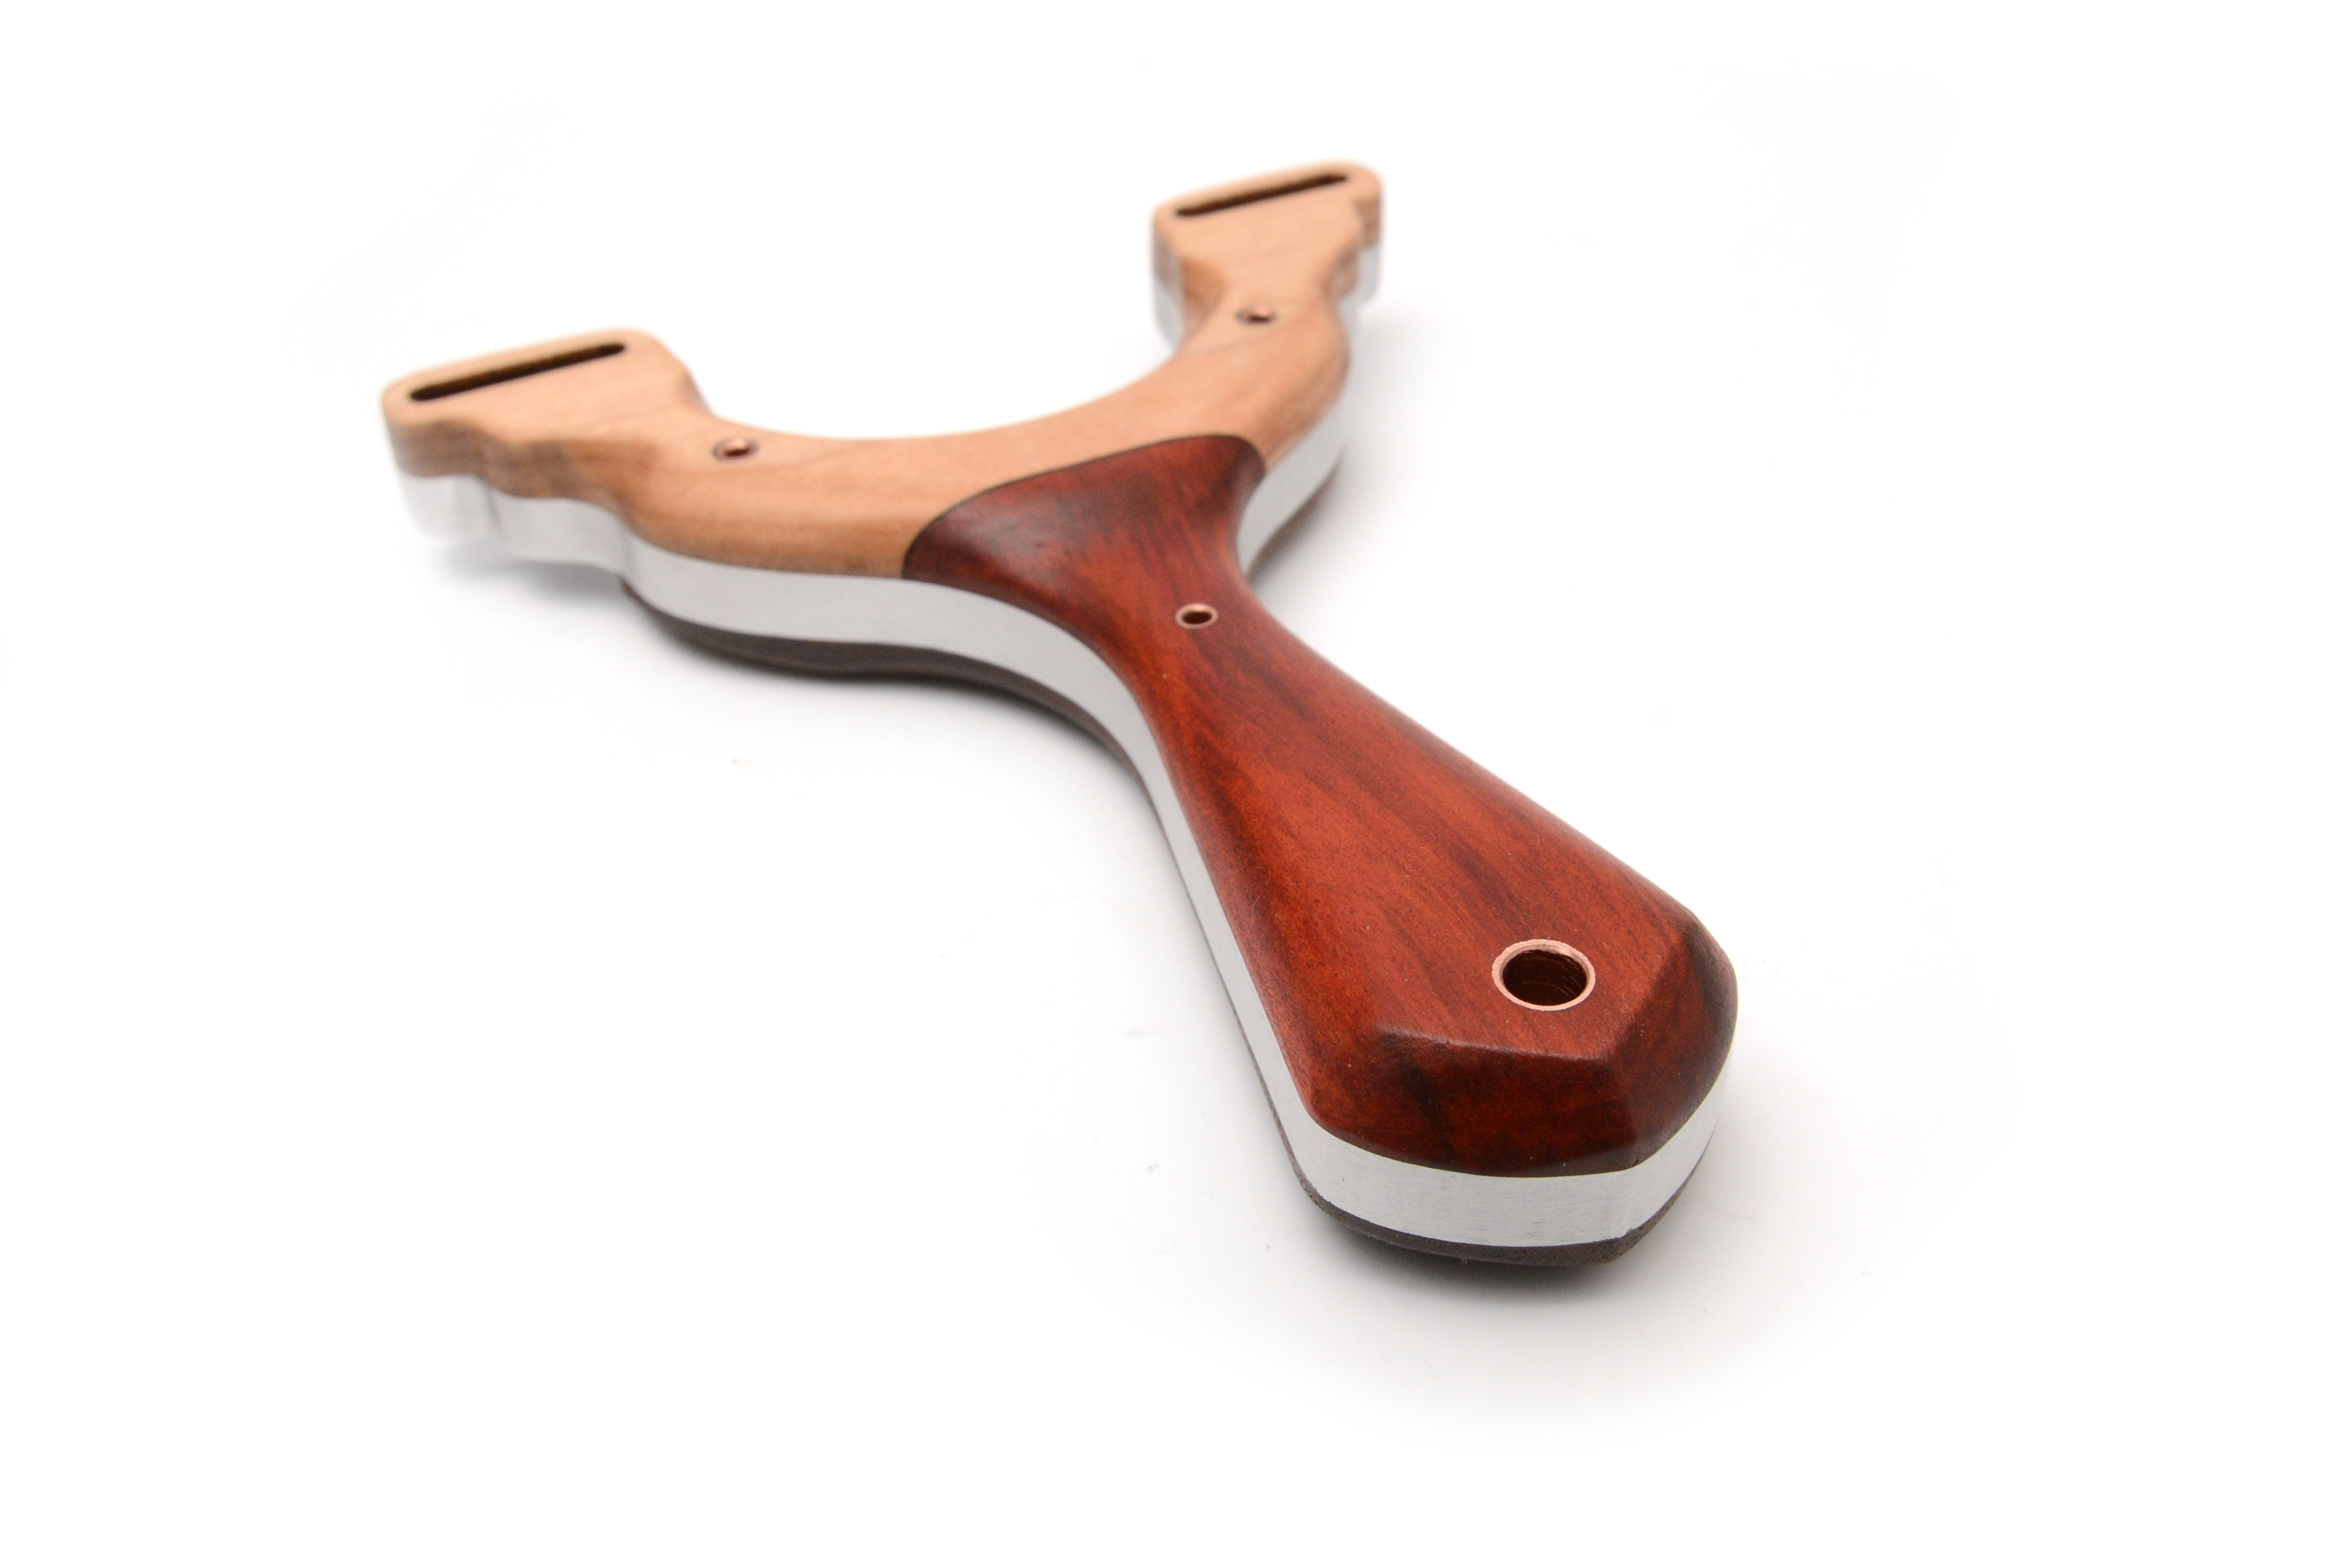
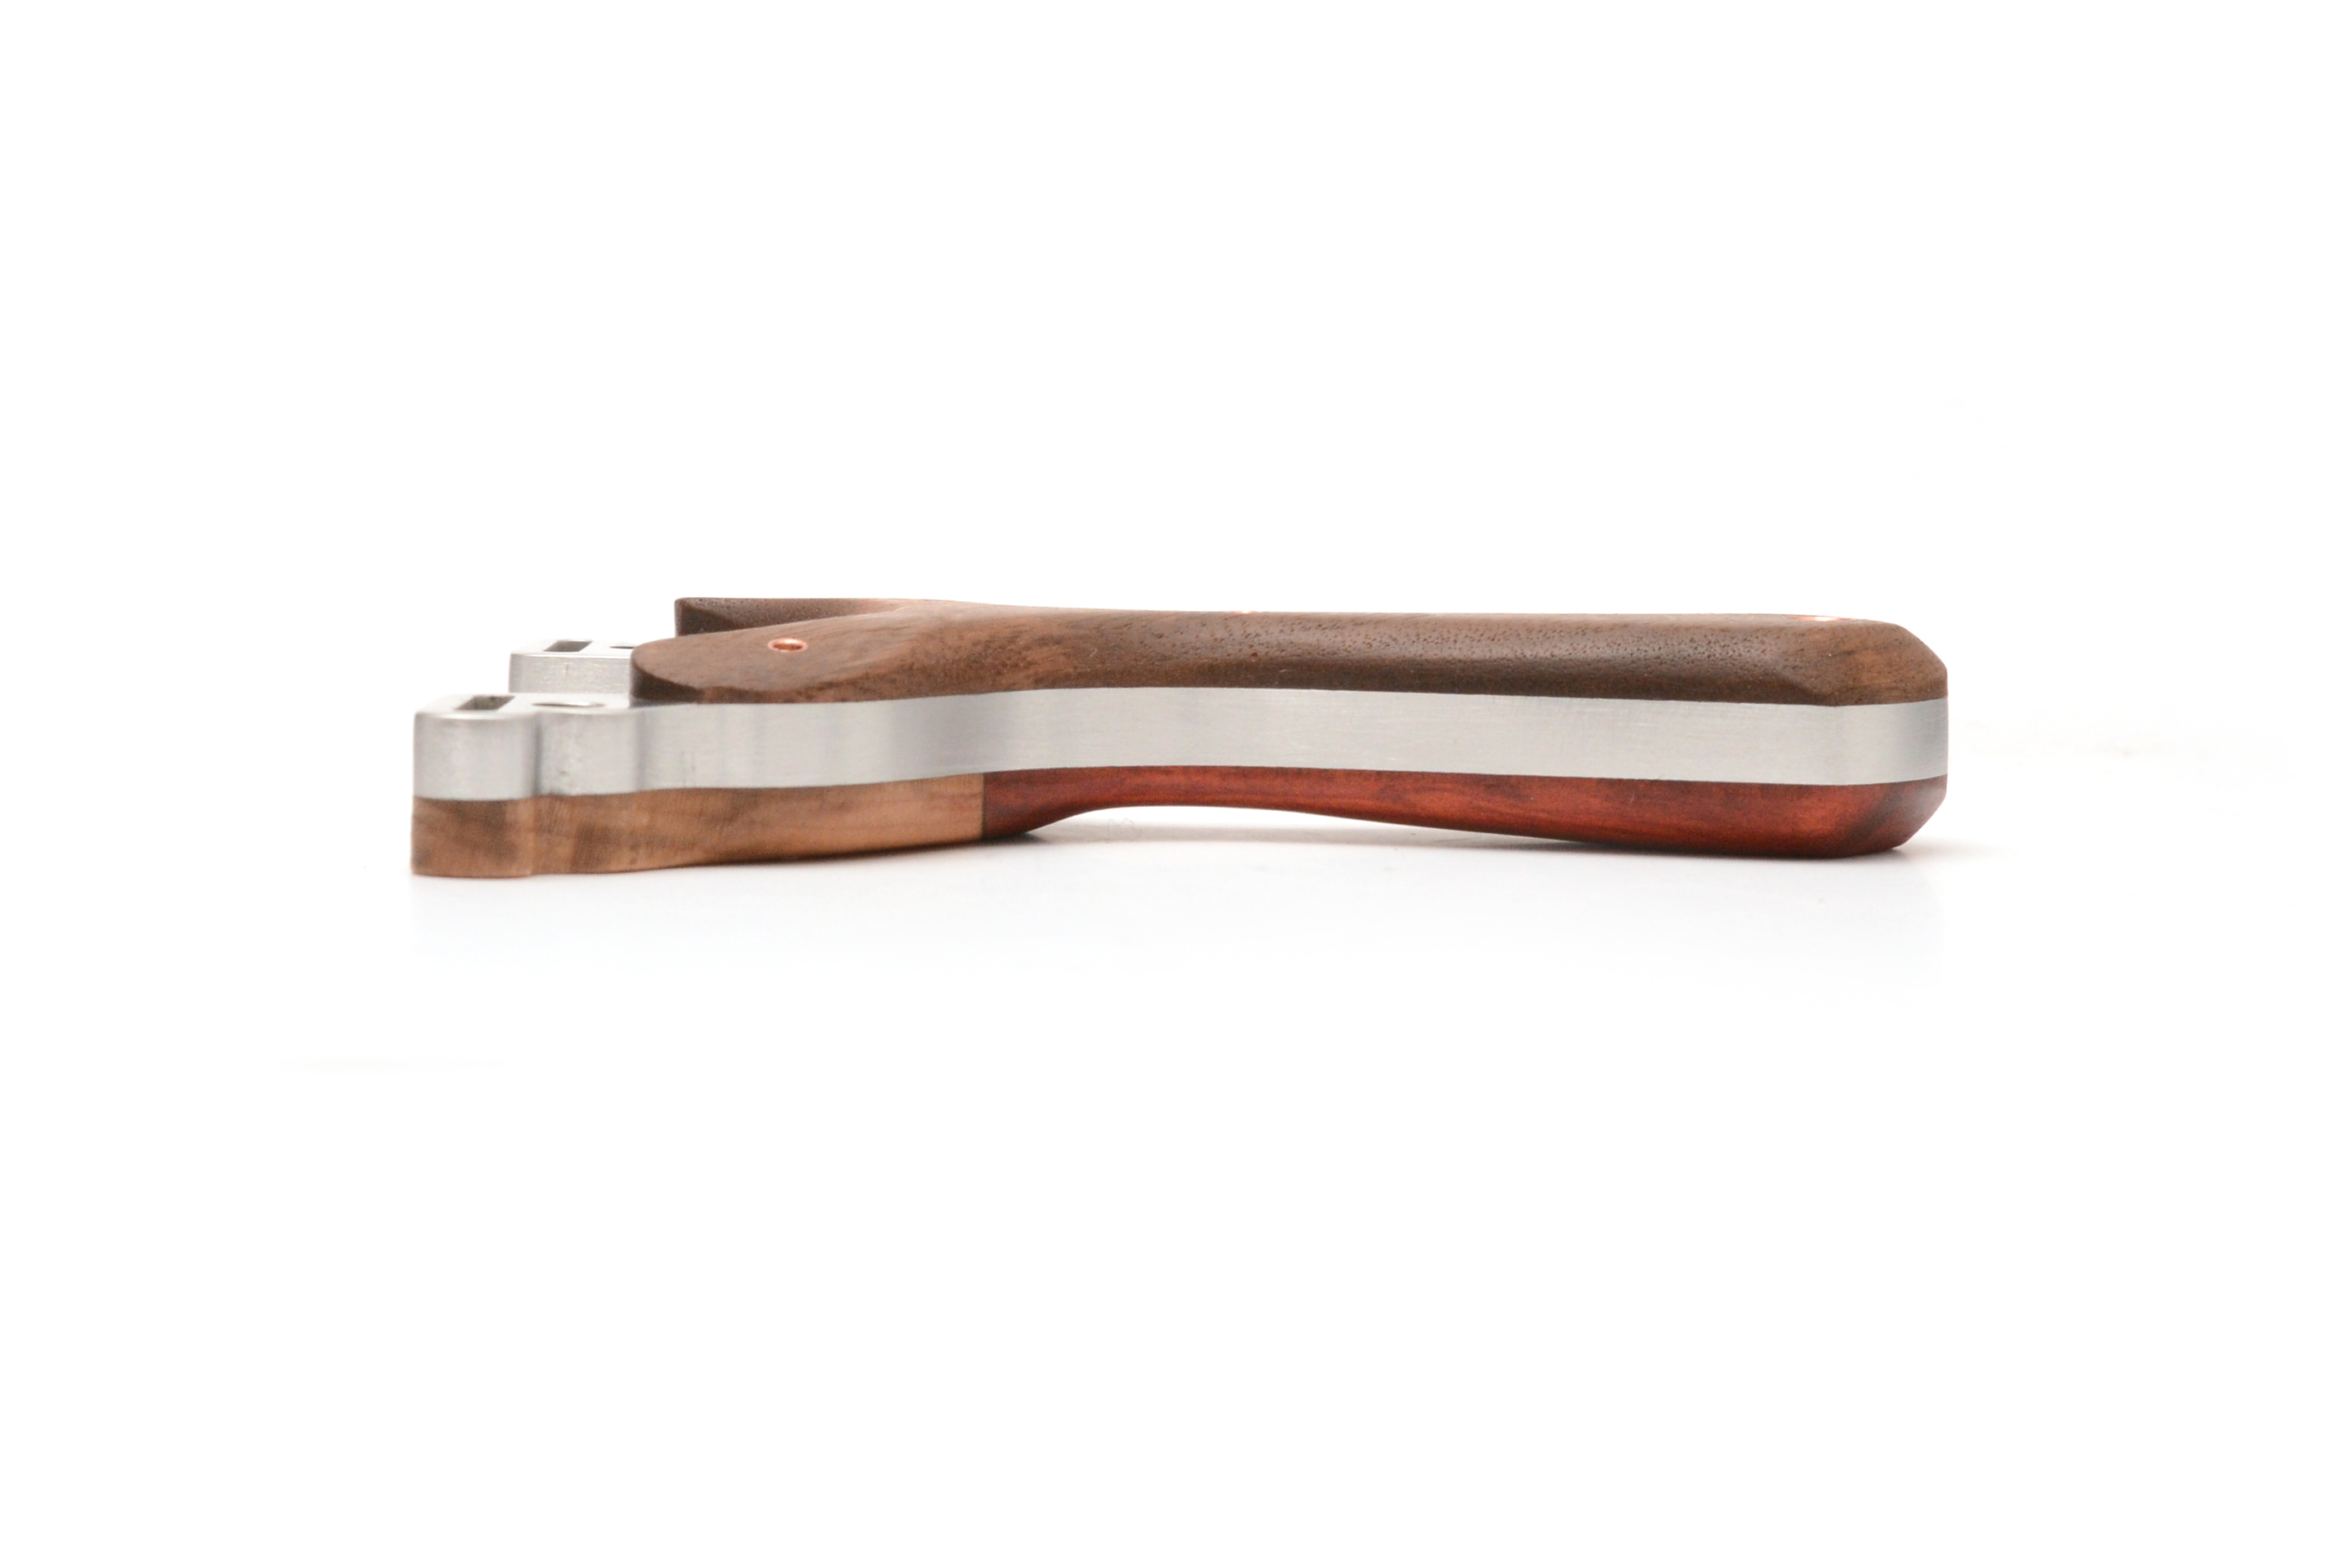
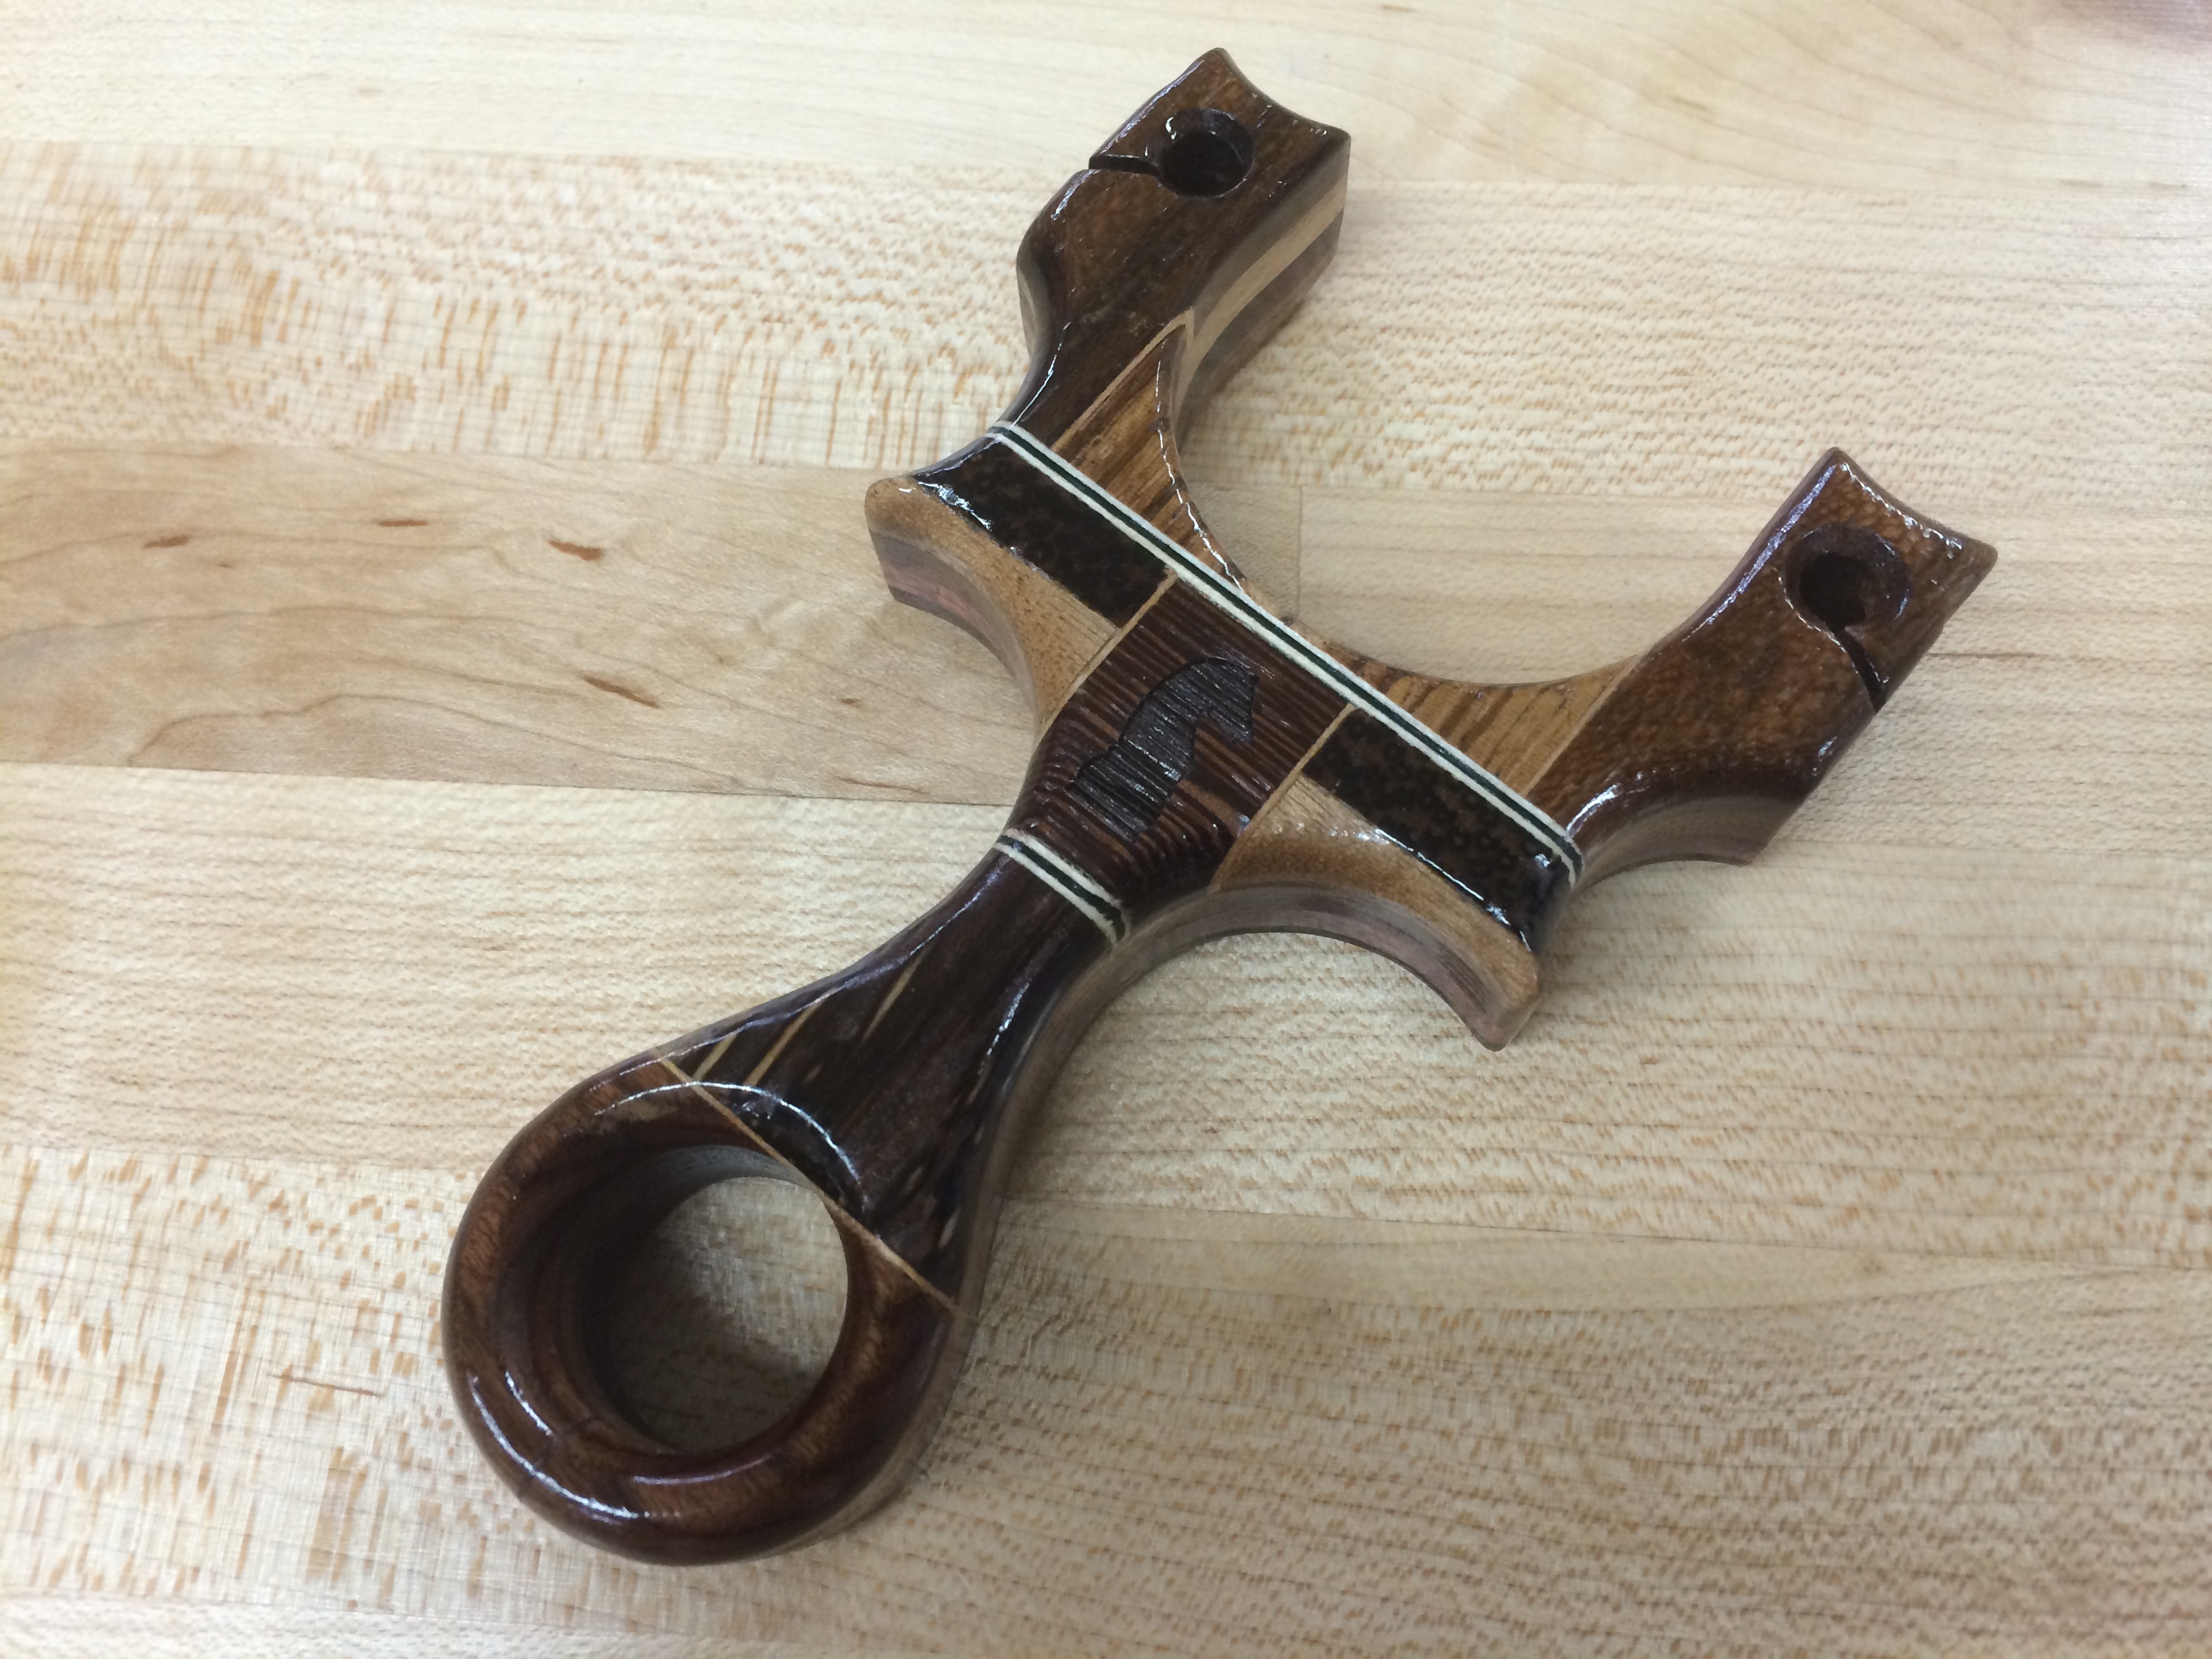
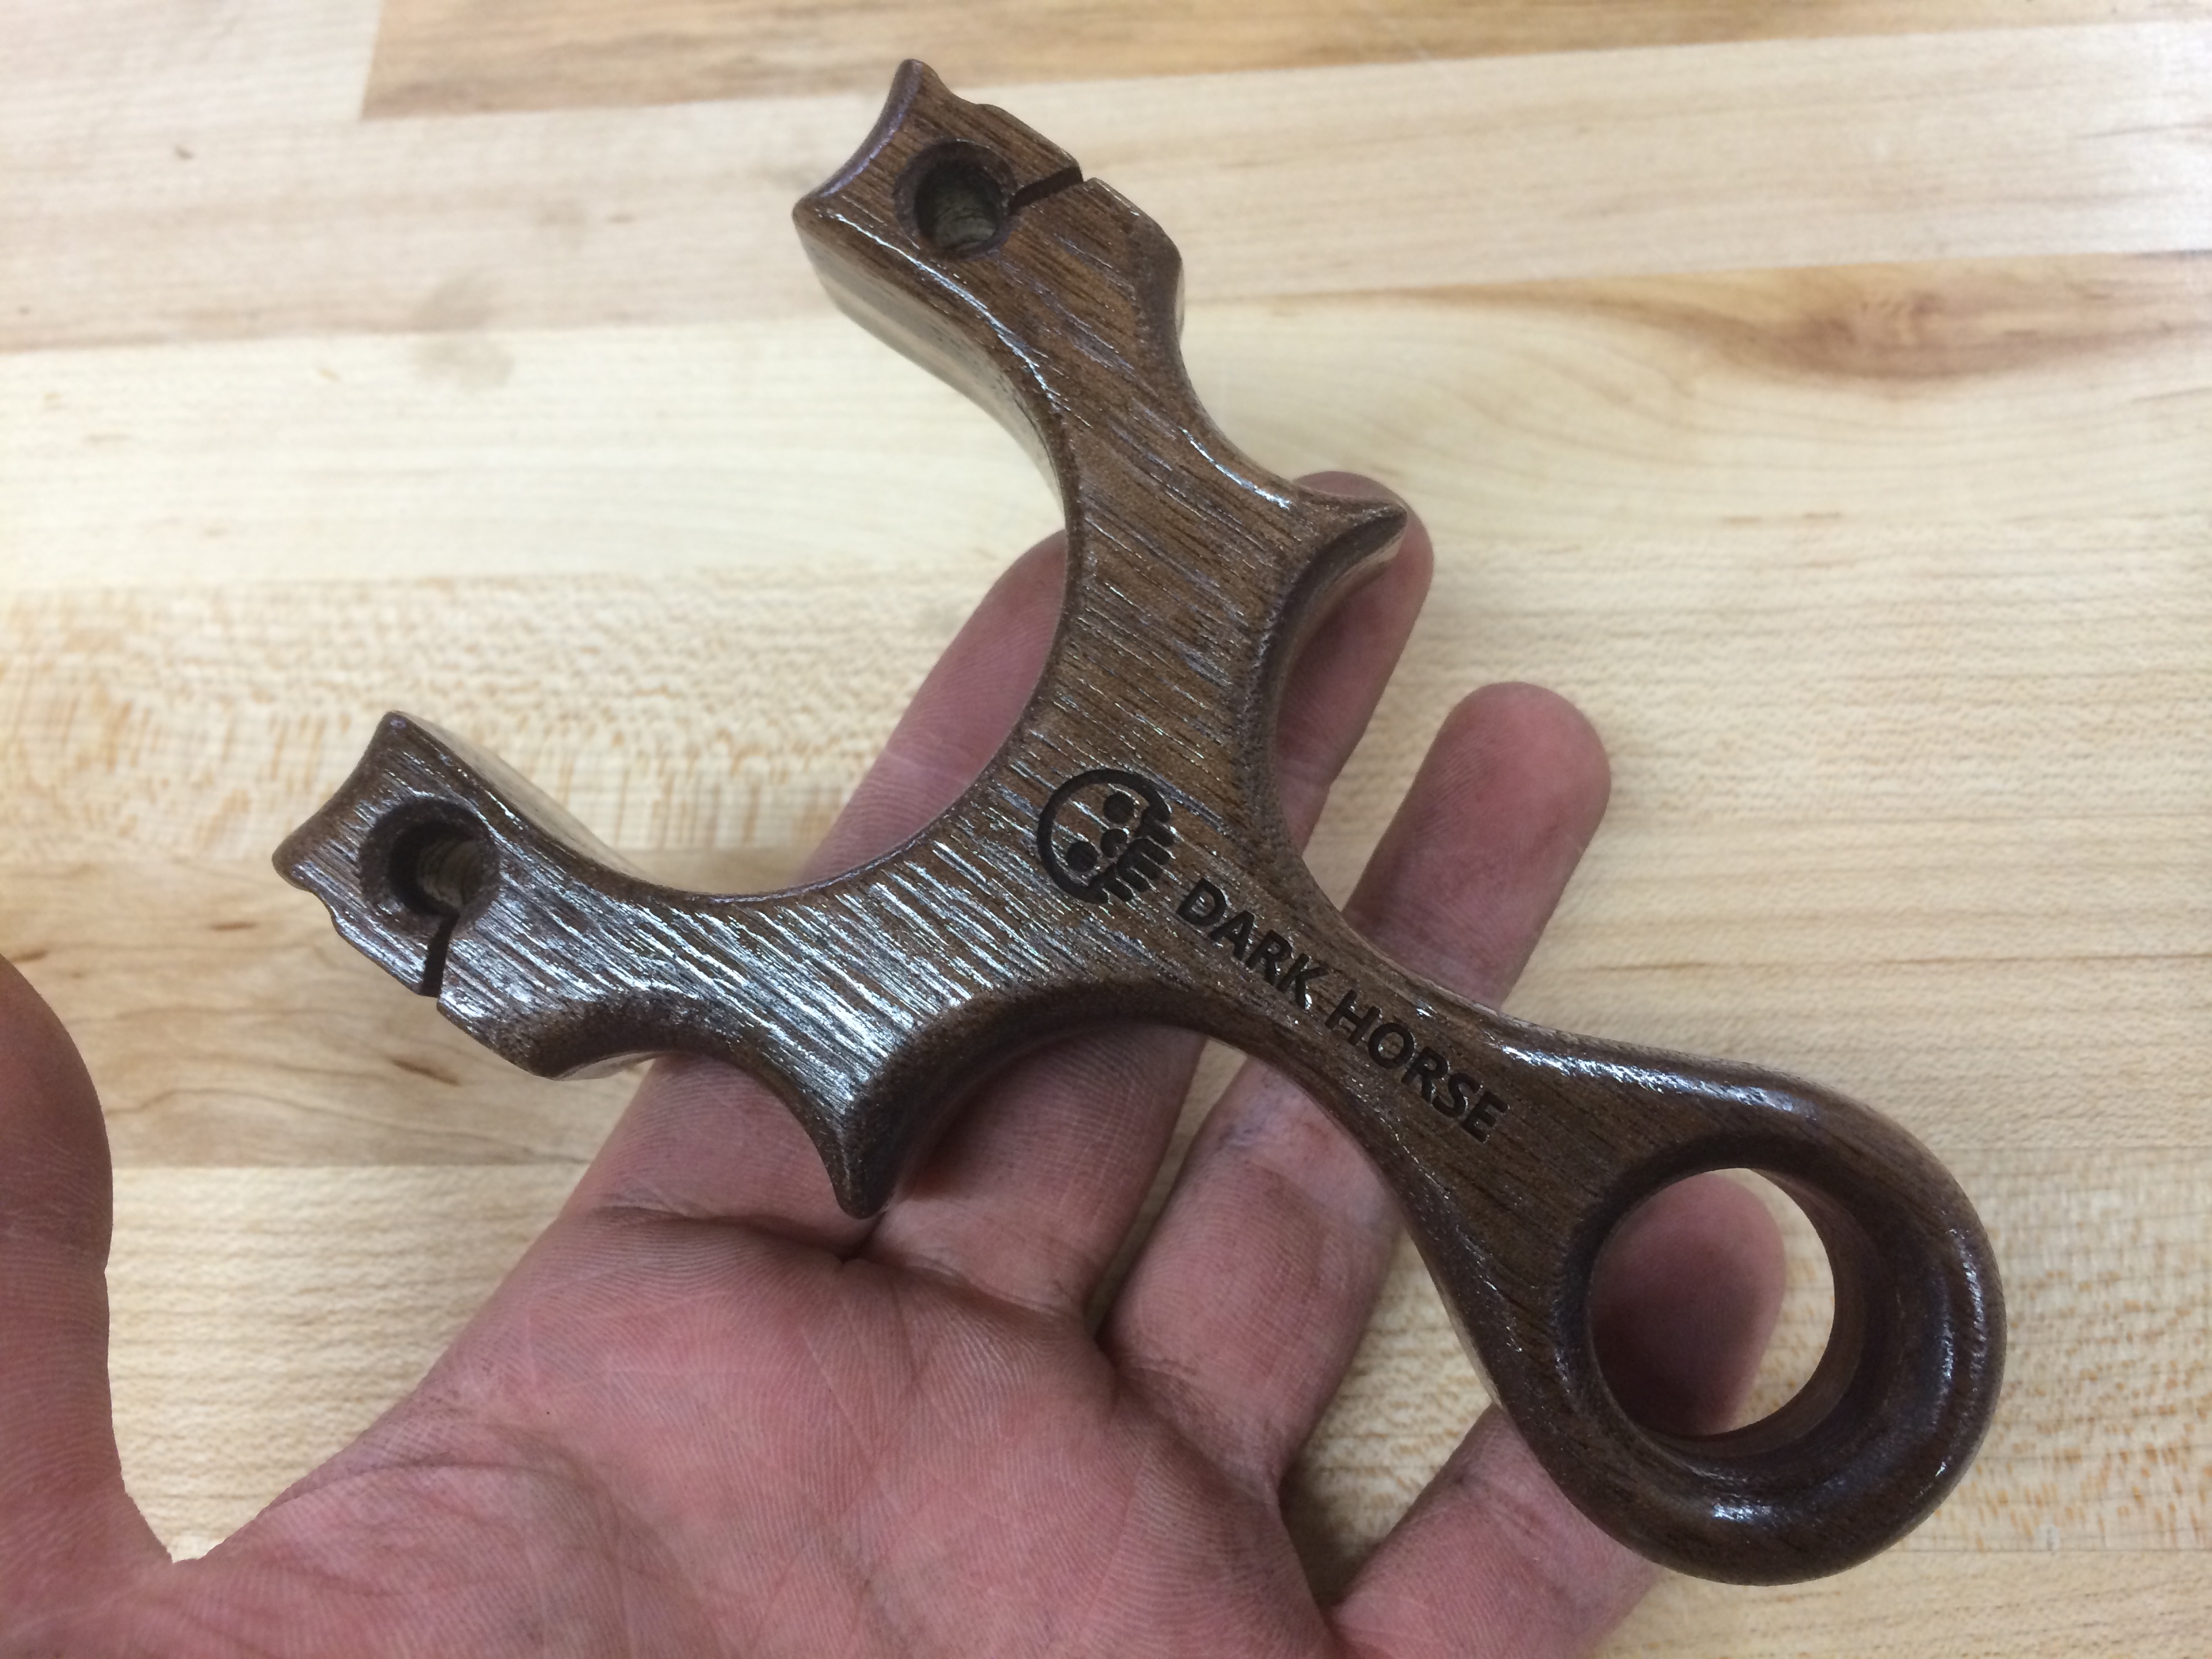
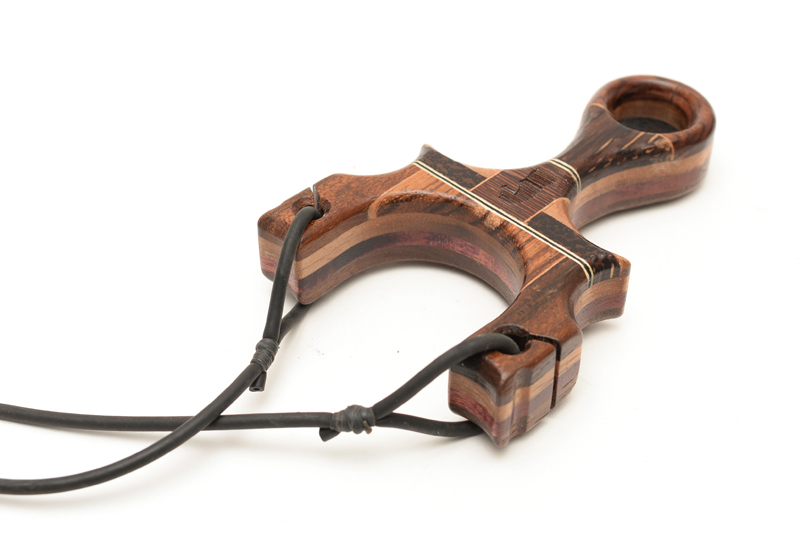
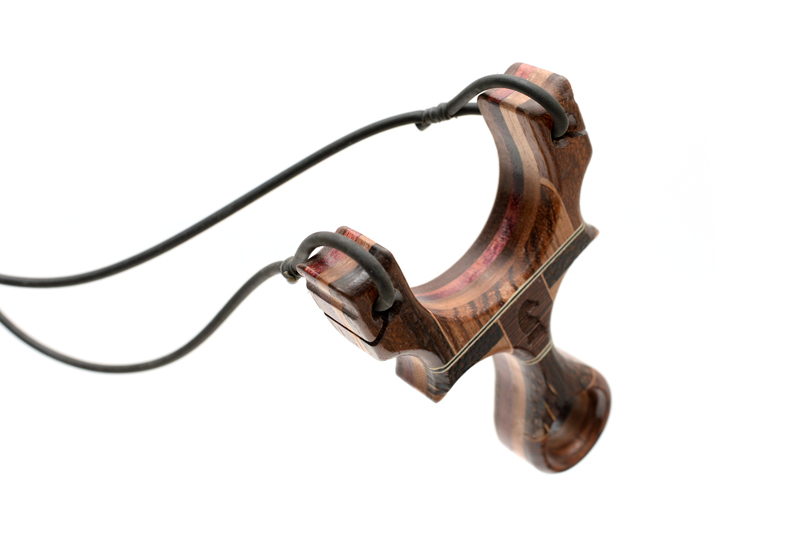
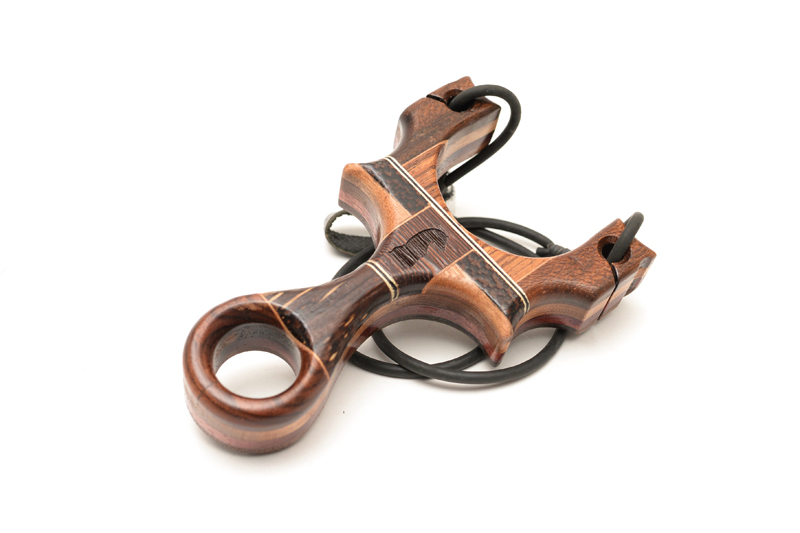
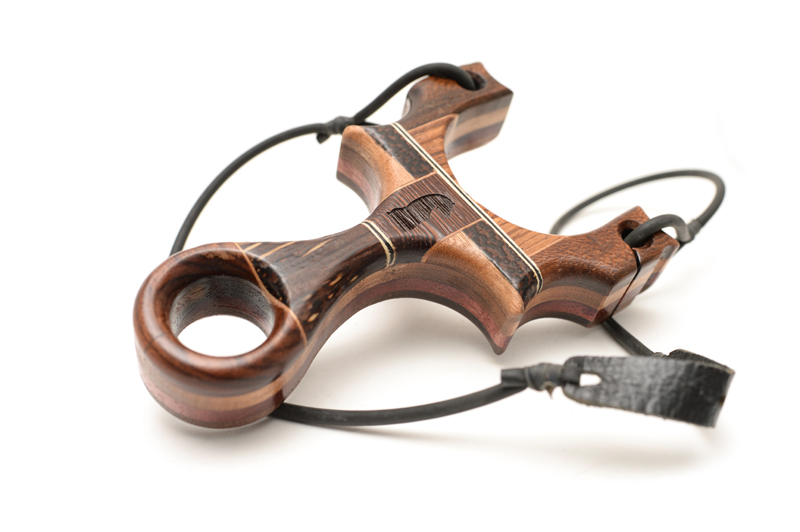
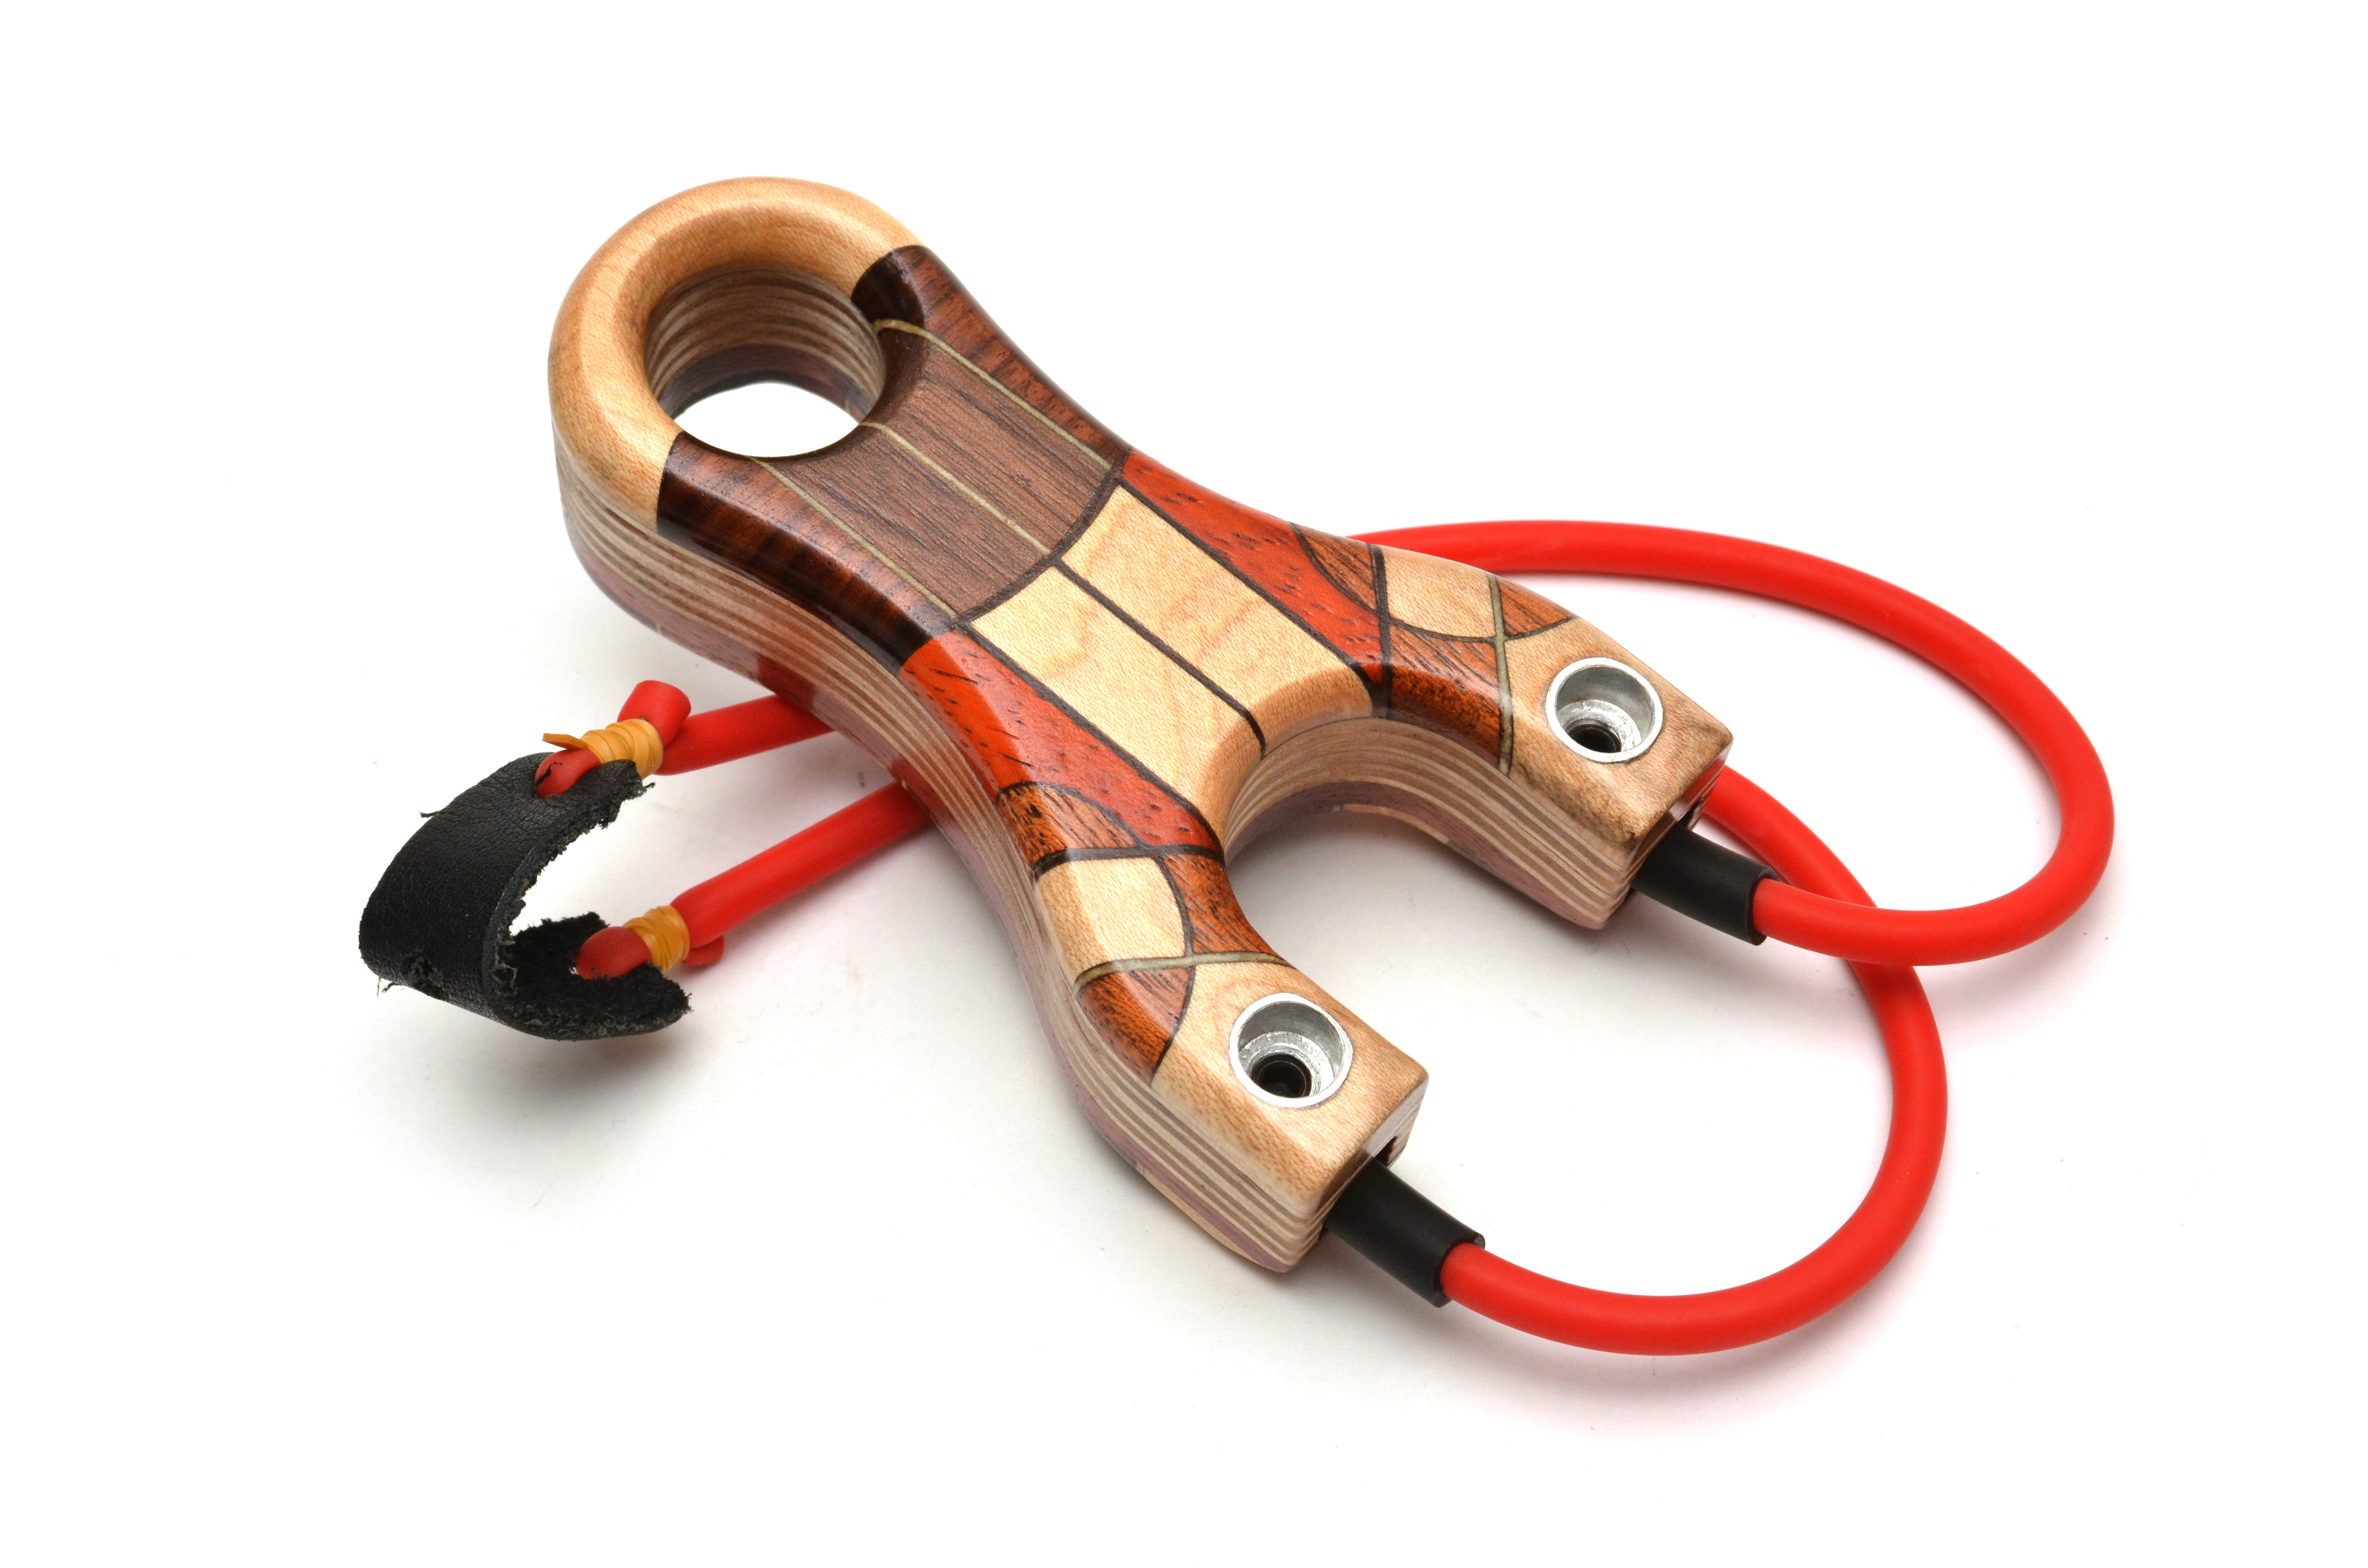
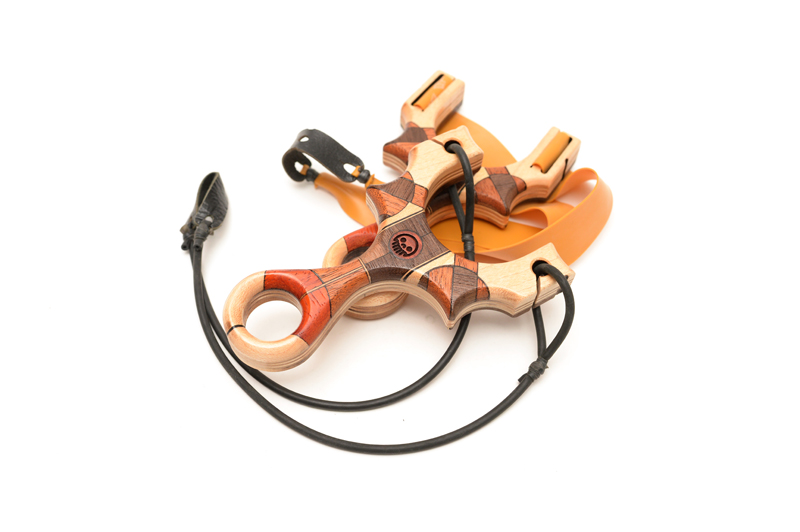
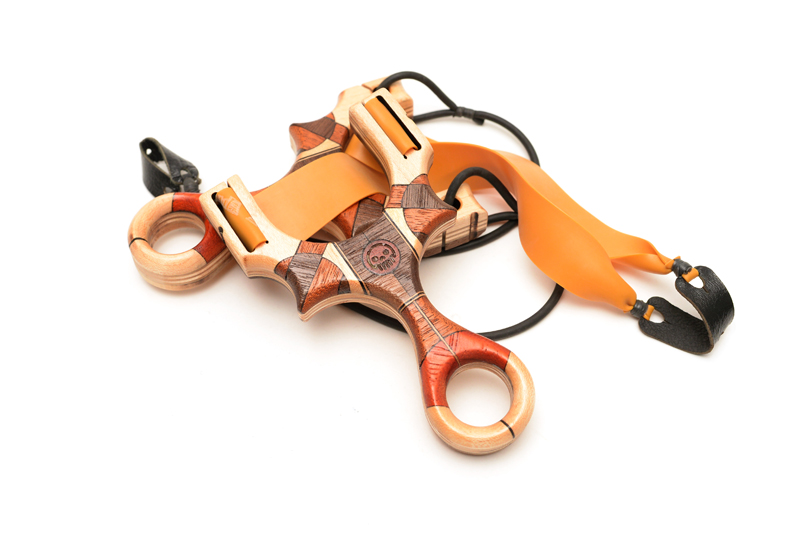
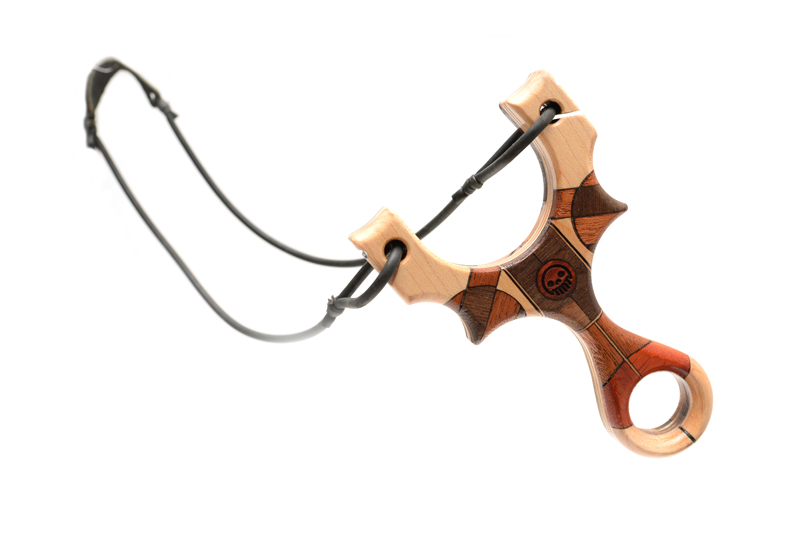
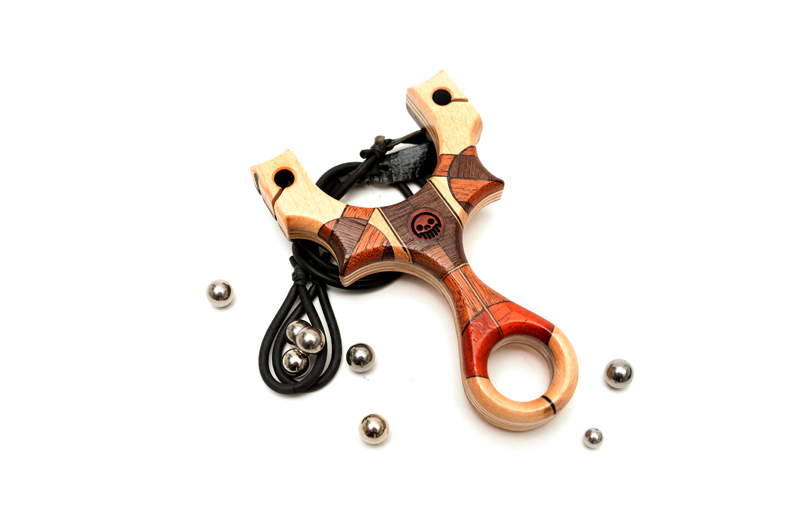
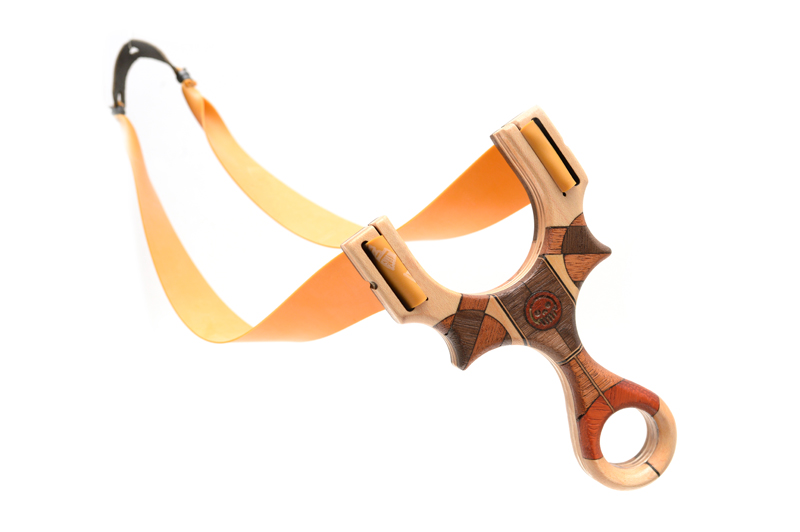
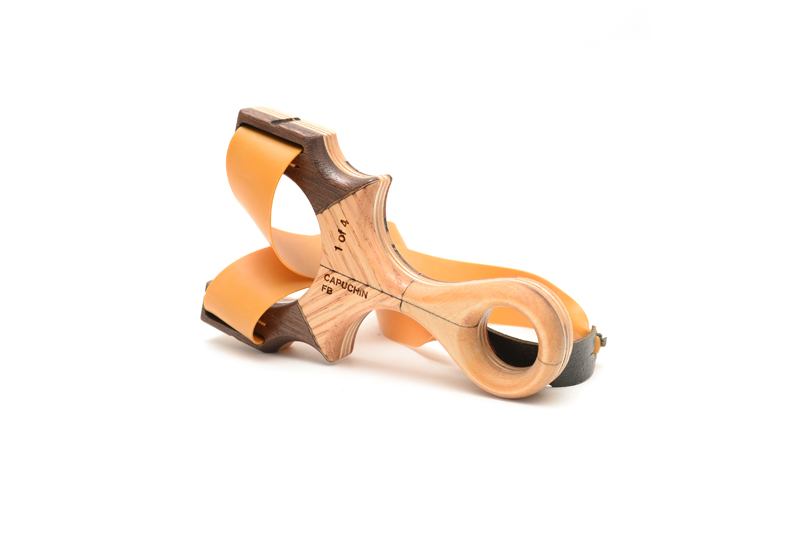
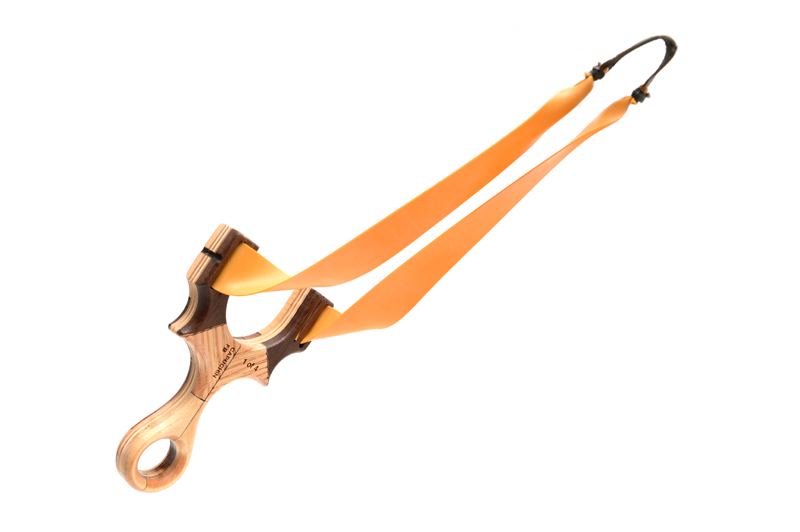
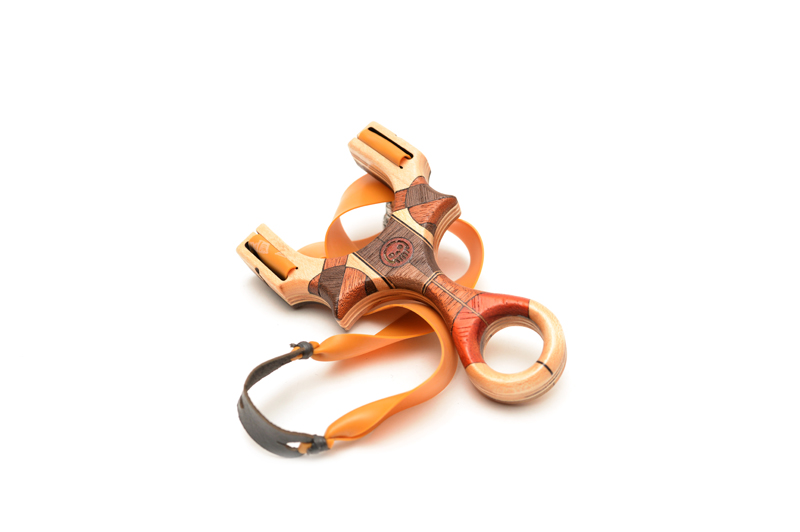
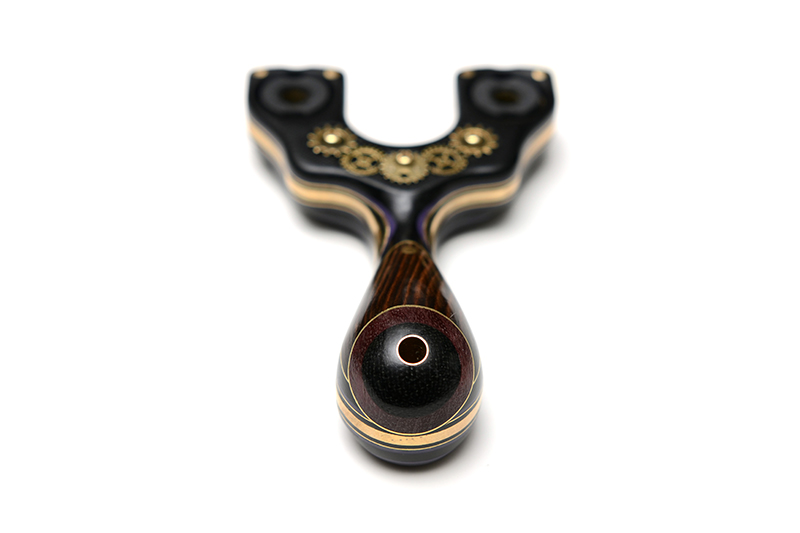
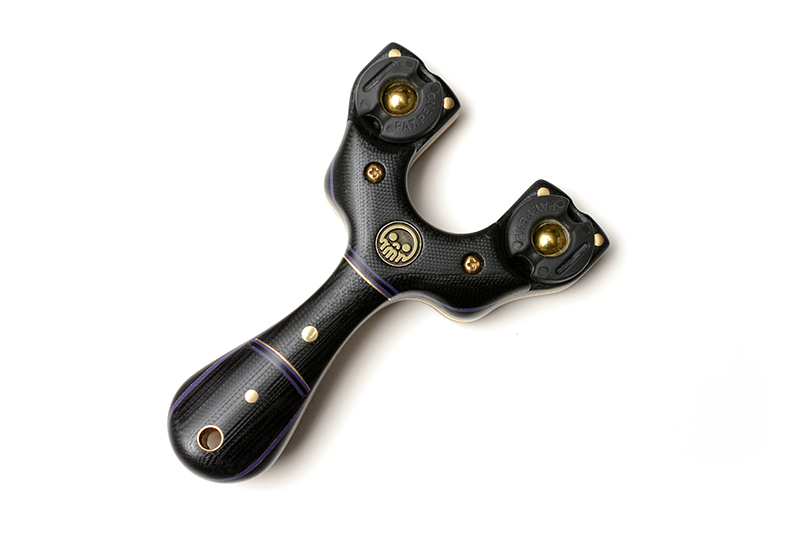
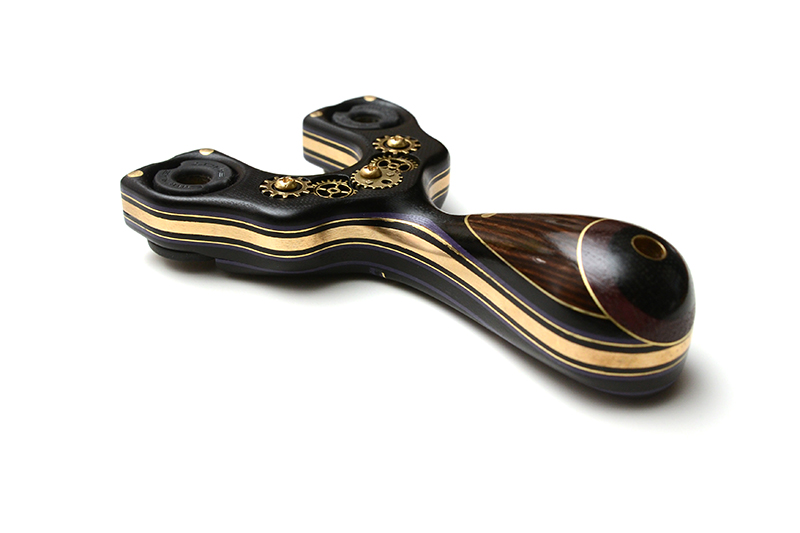
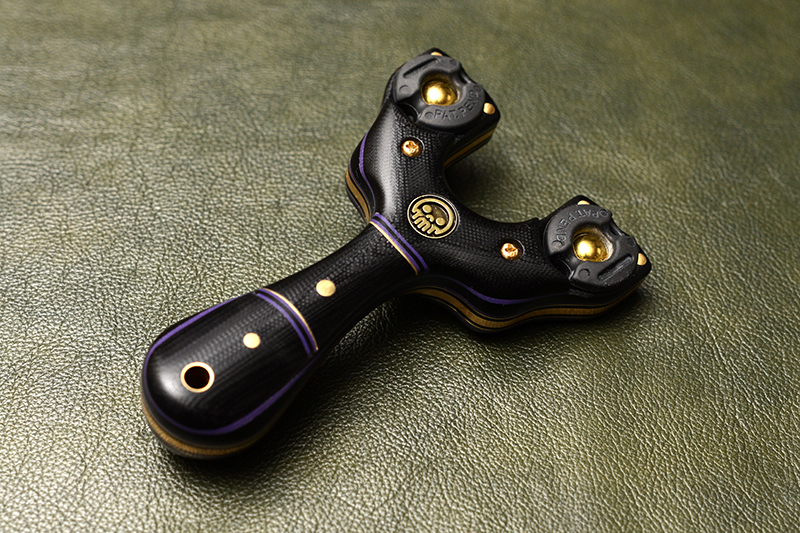
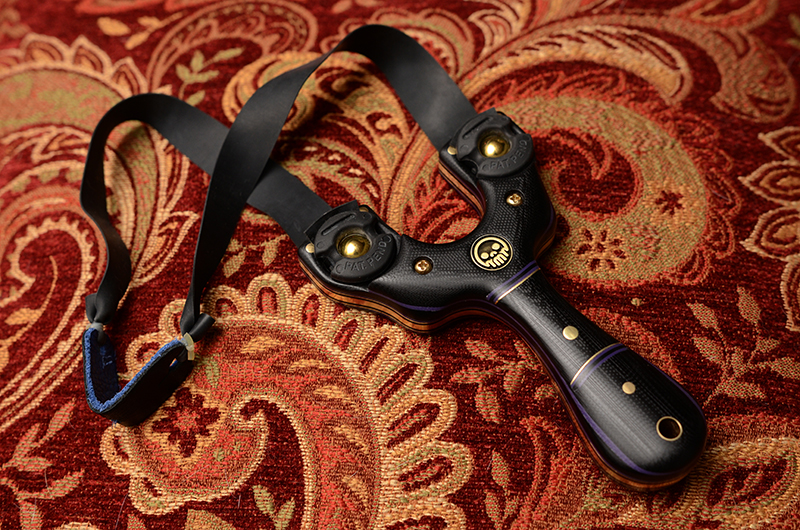
Despite the ‘proper’ hardware missing, I couldn’t help but take some archival photos of the finished slingshot.

mar_3258

mar_3259

mar_3266-1


mar_3269

mar_3241

mar_3242

mar_3251

mar_3252

mar_3237

mar_3271

If you’ve made it to here, it means you are truly dedicated to slingshots! Thank you for reading!

• Stay True •

-Metro/Eric

Posted on 1 Comment

Metro Made | The Spanish Cafe Racer Slingshot

The best thing about slingshots is that it is like a very large pie, each slice a different flavour. One particular slingshot flavour is the legendary Spanish target style shooter. The Spanish Target Style has more in common with Olympic style free pistol and recurve bow target shooting than slingshots. With ergonomically shaped handles, adjustable band position and sights, the Spanish Target Style slingshot is a very tailored fit to the shooter.

It has been a very long time since I’ve posted a build log, just too many projects and too many details to write about. This late but better than never, post is one I am very proud of. Here’s the story of how the Spanish Cafe Racer was created.

Cafe Racer, after the classic naked sport bikes that favour speed over comfort for short races between watering holes.

The idea came to me after I had finished another Spanish style slingshot, named the Jawa. It differs from other Spanish style slings because it has a moveable sight and fixed band positions. Typically, the bands are moved to match up with a fixed sight. The grip is a hybrid pinch/pistol grip which is based off a semi semicircular hand web shaped and a long pistol style handle.

IZA_0636

IZA_0638 copy

I had received a connector rod and piston combination (from a Triumph TT 600 for you motorheads) I was more excited about the piston than the con-rod (which can be converted into slingshot as well). The circumference and and over all shape was going to be perfect for the project I had in mind. Here’s a photo of the final product so you have an idea of where we are going.

IZA_0732

Here’s a shot of what kind of raw material I was working with: a solid cast aluminum piston head. The recesses for the con-rod movement were a great jumping off point on the design of the handle.

IMG_7247

After some very careful planning and digital alteration of the piston head (lopping off a section of the front of it). This is what I came up with for the front fork plate, handle and base plate. The fork plate design is a meld of aesthetic and functional choices; the fork tips, the index finger hole, attachment holes and maker’s mark position ALL in one part. The handle is a 3 part sandwich where the middle section is sunk into the base of the piston and held in with the con-rod pin.

IMG_7256

A quick and dirty digital mock up of the fork plate. It is out of scale, but the general idea was there. After 2 days of planning, I was ready to go into the shop and start crafting this speed machine.

IMG_7267

–Shop Time–

First step was to mill off some of the piston head to reveal a face to attach the fork plate to.

IMG_7284

Then it was time to cut the for plate, something very satisfying seeing a part you’ve poured hours into designing come out exactly how you imagined it. 3mm carbon fiber was the material of choice for its high strength properties.

IMG_7283

The first unholy matrimony of the fork plate and the piston. At this point…I was getting really anxious to surge ahead.

IMG_7286

Front view

IMG_7287

The plate is attached via two M4 inserts pressed into the newly milled face, you can see them peeking when looking under the piston (the brass bits).

IMG_7288

The handle blocked into place waiting to be shaped.

IMG_7289

I had thought I had chosen some mahogany, but mistakingly selected some teak. No matter, teak was a better choice in the end. Funny thing happened when I laminated the three parts together, using only a thin CA glue as the bonding agent, the CA glue fizzed, hissed and froze nearly instantly when the two parts where pressed together. Never seen that happen before.

IMG_7290

IMG_7291

After some quick shaping, removing only what was needed to make it work, the handle was done. Soaked in linseed oil for 10-15 mins and buffed with some paste wax.

IMG_7301

A 3/4 view of the handle installed.

IMG_7292IMG_7295

The right side view shows that the the handle profile wasn’t altered since no fingers or palm would be touching it. However you will notice that the middle finger curve is subtly in place as is a little notch for the ring finger. These two little recesses were crucial for the proper and repeated hand placement when gripping this frame.

IMG_7293

The rear view shows that the left portion of the handle was removed so that the meat of the palm has a place to sit and support. The peg on the right is a place holder for a bar that will span the entire width of the slingshot, serving as a finger and thumb shelves.

IMG_7296

You’ll also see a the base plate was cut from some loose fiber filled carbon fiber place. The plate sandwiches the fist and handle, so the more I squeeze with my ring and pinky fingers, the more the frame snugs up into my palm.

IMG_7298

This pic shows the M4 inserts for the fork plate attachment and the two M3 inserts on the top that will become the alignment pins to ensure the frame is square to the target.

IMG_7299

The machining process left the edges sharp and there were some stubborn carbon deposits on the top of the piston head so into the tumbler it went for an overnight toss up with steel pin media.

IMG_7300

While that was working itself into a frenzy, a quick sight pin was made from 1mm carbon fiber board. This will attach via the same screw as the fork plate attachment.

IMG_7302

The edges of the piston head where the gaskets used to be were too sharp so some thin leather with some contrasting stitching was applied. This covered up the sharp areas but also gave it a nice upholstered look.

IMG_7314

The last thing to add was a 2.5mm hex tool (made from a 1/4-20 thumb screw and a saw off section of Allen key). Some details were hand filed into the head so make it look like a gas cap.

IMG_7317

First 10 shots on a 2.4″ target, 3 landed in the circles and 1 bulls eye.

IMG_7316

A final spit polish: some orange M4 washers, a threaded rod with carbon fiber sleeves and .75″ aluminum balls completed the Spanish Cafe Racer. Enjoy the slide show!

IZA_0727

IZA_0728

IZA_0729

IZA_0732

IZA_0735

IZA_0737

IZA_0738

IZA_0741

IZA_0744

IZA_0736

IZA_0734

IZA_0733

See you all very soon at the first Annual South East Slingshot Tournament, March 11-12!

If the pictures weren’t enough, here’s a video of the road/range/shooting case I made for it!

Posted on 6 Comments

Enzo Carbon Fiber Hydra Slingshot

I’ve had this carbon fiber board in my shop for half a year, waiting to be made into something awesome, my recent CNC adventures (see my LunchBox CNC instructable) have allowed me to actually USE this material and take advantage of the awesomeness that is CF.

IMG_4451

The CF board I have has one shiny side and one rough side, this is likely why I was able to buy it so inexpensively. To achieve the correct thickness to start with, two sections of this board were glued together to make one solid sheet of material. I rough cut the 4″ wide board with hack saw, you always want to use a saw with lots of teeth so not to tear out the fibers.

Using 5 min 2-part epoxy and a similarly sized sheet of vulcanized fiberboard (plastic cardboard spacer material), the two halves of the sheet were bonded and clamped to cure for 24 hours.

IMG_4461

When using epoxy, it is important to properly mix the two parts for a good amount of time. 5 mins epoxy is a WORKING time, not setting up time, so take an extra 30-45 seconds to really whip it up. Normally, you would key the mating surfaces so that there would be a lot of texture for the epoxy to grab on to, in this case, since the CF was already textured and rough, that part was already done.

It also critical not to put too much pressure on your parts, you want good coverage and bonding of the epoxy, but you don’t want to squeeze it all out with too much pressure from clamps. I use a number of pony spring clamps of various strengths, light duty ones to light clamp on the sandwich so not to have the two parts skate around. Then slowly add more medium duty spring clamps until the pressure is evenly distributed.

IMG_4462

This is where I may lose some of you…but stay with me..it’ll be worth it.

This slingshot design, which I call the Hydra (see more Hydras here) is one my favourites. I basically designed it to be done with metal or a composite like CF or G10. The skinny arms just can’t be made from wood. I altered the design a bit to accept a special attachment method for leather band tabs.

Leather band tabs are just another way to attach rubber to a slingshot frame. A piece of leather is either lashed, glued, clamped otherwise attached to the slingshot tip and then the rubber is tied on to that, it’s a very common attachment method and favoured by the Spanish target style of slingshot.

My method of attaching tabs to a frame is called the ‘Tapped Tab’, because the frame’s tip is tapped with a 1/4-20 thread and the tab is attached via a bolt. The tab is also threaded through a horizontal slot to equalize the pressure on the fork tips. This type of attachment requires the materials of the slingshot to be very strong and stable, typically aluminum or a composite.

To design the slingshot, I used Adobe Illustrator to create the 2D pattern and accurately size the holes. From there, the pattern is saved out to an SVG (scaleable vector graphic) and opened up in to MakerCAM (a free CAM software to generate G-code). MakerCAM will allow me to program the feed rates and types of cuts I want (pockets, drilling, profile cuts etc).

I believe I ended up with these settings:

15 Inches per Min Feed

5 Inches per Min Plunge

.05 Depth of Cut

It was slow, but it was very accurate.

I used my LunchBox CNC to cut it out.

IMG_4463

Instead of tapping the CF directly, I opted for a press fit threaded insert. I also made holes to accept a M3 threaded insert for attaching the handle scales to.

IMG_4464

Then it was time to press ‘start’ on the CNC machine.

The bit used was an 1/8″, single flute, downcut carbide end mill. This gave the biggest chips and the downcut left the surface very clean.

I chased the bit with the shop vac hose to eliminate any carbon dust and debris that may fly away during the milling process. With the bit spinning at 10,000 RPM but taking very light .05″ cuts, the job took 23 mins. The result was a very clean and accurate representation of the 2D CAD model.

IMG_4465

IMG_4466

IMG_4467

IMG_4468

IMG_4469

The final thickness of the CF slab was .47″ and the 1/4-20 threaded inserts are .5 so I had to shave off .03″ on with my lathe to get them to seat flush with the surfaces.

When installing these inserts, it’s easiest to thread a bolt into them and then press them into place. I added a bit of CA glue when it was 2/3 in to really set them into the hole.

The M3 inserts (can be found on eBay for a few dollars for 100’s) are 10mm long and were just pressed into place. M3 screws are very common as well as most electronics are assembled with that size screw.

IMG_4470

IMG_4471

The Hydra is what is know as “pinch grip side shooter”, the deep round sections near the middle are pinched between the pointer finger and the thumb and the frame is held sideways (forks parallel to the ground). The slingshot is already looking pretty cool, but it’s a pain to hold. To make it a more comfortable shape, the edges need to be rounded and some more beef needs to be added to the handle area.

I didn’t take any pics of the CNC cut of the handle scales, but the process is essentially the same. The material is 3/16″ thick haircell texture ABS sheet. My previous incarnations of this design had 1/4″ thick scales, but for this special one off Hydra, I wanted the scales to blend into the frame.

IMG_4475

IMG_4476

My though process about using the 3/16″ thick ABS was if I used a 1/4″ round over bit, the entire edge and a tiny bit of the CF frame would be rounded over, resulting in seamless transition between scale and frame. It worked out very well.

After shaping both the scales and labeling them to their mated side, I focused my attention to the frame. I switched to a 3/16″ round over bit and sped up the router speed. I took careful note of how far to plunge when machining the ‘arm pit’ areas so that the transition between the raised scale and the flat frame would be even and smooth. The same amount of attention was paid when I was machining the inner fork area.

IMG_4477

CF is nasty stuff, if you sand it, it turns everything black and the dust is awful. To avoid this, you can wet sand. It takes a bit longer but the result can be washed away and the CF dust is virtually eliminated.

The CNC machine and the router left the surface pretty smooth, but really give it a nice finish, sanding it required. I wet sanded with 150, 320 and 800 grit papers. This evened out the surface and preps it for final polishing.

The scales will be attached with some counter sink 6mm long M3 black oxide screws.

We are almost there.

The ‘end grain’ of the CF is now exposed and to make it a bit more stable, I sealed the edge with some cheap, super thin CA glue. This is a pen maker’s trick. Be in a well ventilated area wear nitrile gloves. You just need to put a tiny drop of glue on the edge of the slingshot and rub it with a single finger till it dries. This should only be seconds.

Repeat the process until all of the edges are coated with a thin layer of super glue, BUT if you are using ABS, be careful not to use it on the ABS surface as CA glue reacts to it and will ruin any smooth surface.

IMG_4484

Now it’s time to really make it shine. I use one of my favourite tools, which isn’t even a proper tool at all, a nail buffer. With 1000 grit on one side and 4000 on the other, the foam backed buffing stick is the perfect low tech polishing tool. Slowly but surely buff the whole surface with the 1000 grit side and then follow up with the 4000 grit.

Once you’ve achieved the level of shine you like, take an alcohol swab and wipe off the slingshot. This will remove any transfer of materials and clean up any residues. DO NOT USE ACETONE, acetone will react ABS and just melt it.

IMG_4478

IMG_4479

I also shined up the brass screws I am going to use to attach the tabs, the same buffing stick was used

IMG_4480

IMG_4481

IMG_4482

I don’t know about you, but I photograph my work as soon as I am done with it. This way, it’s in the best possible condition it can be in. This project was so much fun and it really tested my materials knowledge, having never worked with CF before, I relied on my previous knowledge of composites and plastics to inform my machining strategies.

I am quite pleased with the result and the heirloom quality combined with the high tech material and methods make for a great end result.

IMG_4485

IMG_4486

IMG_4487

IMG_4488

IMG_4489

IMG_4490

IMG_4491

Thanks for hanging out and I hope you get something out of this.

-Eric/Metro


Posted on 1 Comment

Metro Made | The Molly Pick-Nick Slingshot

A few weeks ago, I was fortunate to come across some new materials gifted to me by a fellow slingshot crafter, something called GPO3. GPO3 is a loose fill fibreglass composite, commonly used to insulate electrical installations. Like all things that are flat and tough, most times knife makers will use it to graft onto their handles. GPO3 has a nice consistent red colour throughout with some subtle, long fibrous texture.

When I got my hands on it, I didn’t know what to do with it, use it as a core, use it as a scale material. I had a few thicknesses, 1/4″, 1/8″ and a 1/16″ stock. I finally go to making something, using the 1/4″ as a core, call it an experiment. GPO3 is strong enough to be a stand along slingshot as the long fibres combine for a very tough composite with very little flex.

What came out of the experiment was this:

IMG_2799

IMG_2800

Resemble anything? Did you think…hot dog? I did. So that was aptly named the Hot Dogger. Here’s a quick video of me shooting it.

I enjoyed the feeling and look of the GPO3 so I went for something a little more ambitious, something kind of colourful and not everyone’s taste but I felt I needed to make something for once and not have to post rationalize features or design choices. This would be a through and through concept to completion build.

The inspiration, this picnic pin-up painting by Harry Ekman.

Harry_Ekman__1

So let’s start with the core of it. Recently, I have heavily favoured the OTT Tapped Tab Tyton slingshot. I can shoot it sideways and upright and have great success for both, each have their advantages and disadvantages. So to make this build extra special, I decided to stick to something I knew.

I am going to skip the part about laminating, if this is your first time reading, you should check out this post to get up to speed: The Spanish Knight. The 1/4″ aluminum core was laminated with some specifically chosen coloured liners followed by an outer layer of 1/8″ GPO3. The colours chosen by the most common, and my most favourite hot dog condiments: yellow for mustard, red for ketchup, green for relish and white for sauerkraut. The laminatatins are all held in place 4 solid aluminum pins. Here you can see the partially finished core with pins glued in. Pretty standard stuff when gluing differential materials together.

IMG_2880

Leaving to set up over night and coming back to it in the morning, the pins were ground flush and then the edges of the entire slingshot where passed over a 1/8″ round over bit on the router.

IMG_2881

Now..the fun part. Instead of just using regular maple, I went with a nice selection of quilted curly maple.
Using small strips of spacer material, I built up a candy stripe pattern found on old school drinking straws and then selected a small bit of zircote to reference my favourite picnic beverage, cola.

IMG_2882

Here is the slab, overflowth with epoxy resin to fill in any gaps.

IMG_2885

The back side scale was done in much the same way but I went back to the pin-up image to pull some colour choices. Some yellow heart from her dress, the white and blue from the picnic blanket. At this point, I’ve decided her name is Molly, so shall the slingshot’s name be.

IMG_2884

Letting the epoxy slabs cure over night once again, and in the morning sand the surface flush to reveal the contrasting, almost graphic novel style material slab.

IMG_2889

Once the shape of the scale was traced out on one of the slabs, I taped them together to work on them simultaneously. This also made pulling them across the router bit a lot easier. These were sanded to 600 grit and it was beginning to look like I was going to pull it off.

IMG_2890

Laying the scale on top of the core, it was all coming together.

IMG_2892

…and a quick mock up to see how it would look. The hot dog is strong with this one.

IMG_2895

I had previously posted about a new tool I got in the shop, a mini laser engraver. To add more detail, I etched an ant on one scale and a scaled down (6mm) Metro Grade skull on the other.

IMG_2898

IMG_2898b

In the above picture, I already had attached the scales onto the frame. Seeing how these were decorative and weren’t structural, I felt there was no need to pin them into place. CA glue (super glue) bites onto GPO3 very hard and is a fairly secure bond.

Once everything has set up and permanent, it was finishing time. The GPO3 really needs no finishing, but the surface is dry, dull in colour and often will shed tiny fibreglass shards that will itch for days, so something to tame the mane would be helpful. On the Hot Dogger, I used just paste wax to finish the GPO3 and it worked very well, so I knew that waxes would help. The wood needed an oil and wax finish so my best choice was to use my trusty linseed/beeswax combination finish, literally named Tried and True (available at Lee Valley).

I slathered it on liberally and let is set up for about an hour before touching it, then I hit it with some heat from a hair drier to open up the fibres of the wood to let the finish penetrate and liquify the wax too. The colours really pop when the finish gets applied.

IMG_2897

While I waited for the finish to set up, I made up a set of BB bands and selected some hardware to attach them on to it. These particular brass thumb screws are $4 each, but are well worth it.

IMG_2899

IMG_2900

Rubbing down the wax for a final time with clean cloth, it was time to take Molly out for a nice sit in the grass.

IMG_2902

IMG_2903

IMG_2905

IMG_2906

IMG_2907

IMG_2908

IMG_2910

IMG_2911

I hope you enjoy this build, I know I did. It’s not for everyone, but then again, I usually build what I like to see and hope others enjoy it too.

If you are headed to the 2015 East Coast Slingshot Tournament, you will be able to see this and many more of my personal custom slingshots in the flesh. I will also be hosting the Craftsman Roundtable discussion with master builder Nathan Masters of Flippinout Slingshots and SimpleShot.

-Eric

Posted on 3 Comments

Metro Made | The Wormhole Attachment (Lumbri Tyton Slingshot)

I recently bought a new Chinese cast aluminum slingshot called the Tiger Scorpion, while the attachment system wasn’t new (I have a few frames with the same style tip), the shape was kind of neat.

So I banded it up with some bb tubes and played around with shooting it..it was neat! I had set it up with a single tube with a ball in the tube end, then after one particular shot, the single tube slipped into the big hole as well as the small hole….bling..lightbulb. I quickly undid the bands and ‘wormed’ it through both the big and small holes, terminating at the small hole. Kind of like the Wave attachment.

IMG_2696

IMG_2697

Boom, instant OTT single tube attachment…this got me thinking..the Tiger Scorpion, while cool, wasn’t 100% what I liked. What I do like is my Tyton. I have practically packed up everything to send to Peppermack of Cracked Pepper Cataplts, so when the urge and inspiration hit…I was nearly devastated, BUT I have never been so happy to have found two extra cores in my shop.

I took my digital file of the plain tipped Tyton frames I got cut for modding and discovered that there would be room for a big and small hole set up like the Tiger Scorpion, but what I wanted to do was make the smaller hole, even smaller than it was on the T/S so it would be more of a friction fit with no ball in tube needed. Thus the Wormhole attachment was born, and the namesake for this slingshot, the lumbricus terrestris: an earthworm.

I started by gluing up two plain tipped Tyton frames with a blue spacer in the middle. I pinned the top two pin holes with aluminum and peened them into place before flush sanding the face.

I layed out the new hole patterns, a big 5/16 and a smaller 3/32, with connecting channels to the outside of the fork tips. This would allow for single tubes or looped tubes if I fancied it. From there, I shaped the tips till they were rounded and a divot was filed into the top of the tips to center the bands. I also shaped the finger and thumb grooves like my other Tyton mods.

IMG_2699

IMG_2700

You can see here how the Worm attachment works. Since the band makes a 180 degree turn before rolling over the tips, there is no way the band will slip out.

IMG_2701

IMG_2703

From there it was time to dress the Lumbri up! I shaped a small bit of ‘patriot’ pattern Kirinite. It was just wide enough to get to the base of the handle. After profiling it, I resawed it into to identical halves and flushed the faces. From there shaped and finsihed the front edge of the scale that touches the surface of the slingshot, like building a knife since you can’t access that area with out really damaging the surface of the slingshot.

After fitting a 1/4 brass tube a 1/8 pin, I decided to try something I’ve seen 1000’s of times on custom knives, the very popular Anso texture pattern, an intersecting series of scalloped grooves. After plunging in for my first couple of grooves, I could already tell this was going to look sweeeeeet.

The Anso pattern is named after Jens Anso, an fellow industrial designer, custom knife and gear maker. Jens first did the pattern and has since been used on many custom knives and equipment. Here he is adding this trademark texture:

Rough cut and shaped scales.

IMG_2704

The rest are final pics, I didn’t want to ruin my work flow as the dust from the Kirinte is heavy and gets EVERYWHERE. In the end, I buffed the scales and matt finished the aluminum. I also added a Paduak makers mark and coated it in superglue to seal it up.

IMG_2708

IMG_2709

IMG_2710

IMG_2711

IMG_2712

IMG_2713

IMG_2714

Thanks for stopping! See you at ECST 2015!


-Metro


Posted on Leave a comment

Metro Made | Cutting Band Grooves in Slingshot Forks

This is a short tutorial and some would consider it a minor detail, but as they say, the devil is in those said details. In this Metro Made, I show you how to I cut band grooves in slingshot tips.

Band grooves are important as they aid in the attachment of bands when using the wrap and tuck method. The grooves also improve safety as they seat the band tying rubber and prevent it from slipping off the tips of the forks. Having evenly space and equally spaced band grooves improves the accuracy of the slingshot as the bands would be tied equally on the slingshot’s fork tips.

How far from the fork tips edge is completely up to you but I generally go with a minimum of 1/4″ish from the edge of the band groove to the tip. It really depends on what kind of bands you shoot, how much band attachment rubber you tend to use…but here’s what I like. I enjoy using single cuts of the thinner Therbands, blue & black, for a lighter draw and faster retraction, as such I don’t need much of a band groove, but I still need one there.

I begin by marking where my band groove’s center will be. To mark them evenly on all the sides of the fork tips with the same distance from the tips, I use my trusty drop compasses.

Here, I’ve used my blue lead to mark. Why blue? It’s the first drop compass I picked up.

IMG_2136

I use a very fine tooth razor saw and cut down the line. With the a lot of teeth per inch, the razor saw won’t cut much but the surface of the metal or wood, but the point isn’t to cut the through the tip, just to make the blue line indelible.

IMG_2137

The blue line is no more, but replaced with a shallow, straight cut.

IMG_2138


I then pick up a triangle file and seat one of the tips and pull 4-5 stokes to deepen the line into a shallow groove. You want to open up the material so that a round file will have a place to sit in and not skip around. I typically use a 1/8″ diameter round file but if you want a bigger one like a 3/16 or 1/4 groove, you may want to go a bit deeper with the triangle file to ensure the larger round is placed accurately.

Remember, slow is smooth, smooth is fast. You can check your work after each stroke or two, if you mess up, you can correct it.

IMG_2139

Now for the real magic.

Use the round file to open up the channel to a round groove. I usually don’t go past 1/2 the depth of the file, approx 2/5 of the way. Again, slow is smooth, smooth is fast. Check your work as you go, if it’s deviated left or right, you can correct it.

IMG_2140

After about 10-12 strokes with the file. If there is any material blowing out the back side, you can run the file in the opposite direction to clean it up.

IMG_2141

Now do this 3 more times and your band grooves are good to go!

You could also do this to the front and back of the frames, but I usually don’t.

IMG_2142

A better look at the whole package.

IMG_2144

In case you were wondering, the frame is a new aluminum core we have yet to release, based on our Tyton design.

IMG_2145

With some Theraband Black tied to it, a 15mm-10mm tapered cut at 7.5″ active length, my formula for deadly fast bb bands.

IMG_2148


So that’s it.

A quick demo of how to cut accurate band grooves on pretty much any board cut style slingshot.

Thanks for reading!

-Eric


Posted on 1 Comment

Metro Made | The Italian Job Slingshot

Since I started making slingshots, there have been a lot that have gone out the door. More and more I have less and less time to appreciate them before they do leave my shop. It was time to build one for me and me alone, one for the ages, one for me to take to tournaments and show off my skills as craftsman. I call this build…the Italian Job.

This all started when I came across a unique material, a vintage, hand cast acetate tortoise shell made by the famous Italian house, Mazzucchelli. This amazing fluid, subtly textured, semi transparent material is common used for eyewear but I managed to acquire a few sheets at 8mm thick. This was the anchor to my flagship slingshot.

I used one of my most comfortable frames, a modified Mule (designed by Mark Toddy) I like to call the Three-Trick-Pony. The tips are able to use three types of bands, hence its three trick monicker. The 1/4″ thick aluminum frame was scuffed and then tortoise shell was laminated onto it. I then mixed up some more epoxy and incorporated some espresso beans which filled the hollow voids in the aluminum core. This was the 2nd nod to the Italian theme.

IMG_9857

IMG_9858

Once the epoxy had cured, a  quick sanding on the belt sander made the cast beans flush with the surface of the frame.

IMG_9859

IMG_9860

After trimming and sanding the tortoise shell flush with the frame’s perimeter, I chose to use another very unique material: C-Tek. This white C-Tek was chosen as I felt it mimicked the hexagonal ties found in many Italian cafes. It was at this time, the pin holes where filled with brass tubing.

IMG_9866

Separating the C-tek is a red vulcanized fiber spacer, this will play into the theme as you will see later.

IMG_9867

The pattern of the tortoise shell beginning to show up.

IMG_9868

The espresso beans are barely visible, but after some buffing, they will be easily seen.

IMG_9869

A close up of the C-Tek. The opaque white with aluminum honeycomb really does come out looking very nice.

IMG_9870

For a better ergonomic grip, a pinky stop made of highly figured olive wood separated by another fibreboard space, but in emerald green. Completing the Italian national colours, the green spacer helped interface the natural wood material and the synthetic C-tek.

IMG_9871

I didn’t take too many process pics of the shaping of the tortoise shell, but I used my favourite shaping tools, an Iwaski file followed by an ultra fine 1/2 round file then various grits of sand paper till I hit 1000. I then use a hard buffing wheel with some green compound and buffed it to a dull shine.

IMG_9872

In certain lights, the cast beans are much more visable. You can also see how I used some tin foil to back the casting to prevent the red from showing up.

IMG_9874

IMG_9875

Then it was time to shape the C-Tek. The soft resin behaves poorly to power tools since it heats up very quickly so again, it was time to use the Iwasaki carving files and various grits of sand paper. I could only do so much shaping as the epoxy for the pinky stop was still curing.

IMG_9876

Before rough shaping of the pinky stop, the corners and bulk of the olive wood was bandsawed off.

IMG_9877

The olive wood sands very nicely as it is very oily and dense, so the belt sander was a good way to do a very rough shaping into a tear drop shape.

IMG_9878

IMG_9879

There is no really fast was of doing a palm/pinky swell. Manual tools again come to aid, as the roundness of the pinky swell took shape, the swirly grain also revealed itself.

IMG_9881

After some high gri sanding, and then some light buffing, this slingshot is complete.

IMG_9882

IMG_9883

Sexy archive photos, note the Metro Grade skull etched into the pinky swell

MAR_1867

MAR_1868

MAR_1871

MAR_1873

MAR_1875

MAR_1876

MAR_1878

Thanks for reading yet another slingshot build.

-Eric


Posted on 3 Comments

Metro Made | Bloodlines Slingshots – Meeting Prince Charles

May 21, 2014. The Prince of Whales visits the shop, I am tasked to present him with a unique gift made in the shop. I am proud to say, I have 2 Metro Grade slingshots in the Royal gift collection.

I call these two slingshots, the Bloodlines, as you see, one is for Prince Charles himself and one for his brand new grandson, George. These had to be unique, classic and well crafted, so I didn’t fool around with an unfamiliar shape, I went with my classic Capuchin side shooter.

My goal for the pattern design is to meld a little bit of Brit with a little bit of Canuck. Using the Union Jack as inspiration, maple, paduak and walnut is utilized to make a slightly modified version of it. Here you can see the laser cut maple as the skinny lines of the Union Jack are formed.

image (4)

As the each piece of paduak is set in place, the ‘Jack comes to life.

image

As I said, a little bit of Brit and a little but of Canuck. After dry fitting and making sure all the parts fit, it was time for glue up.

image (1)

Once the glue was set up, the surface was face sanded to reveal the gestalt pattern of the Union Jack being anchored by a purple heart Canadian Leaf. The paste at the bottom is a bit of ghetto wood filler for some gaps left in the lay up.

image (3)


On one slingshot, I decided to document the date, the event and the location. Also the Assentworks logo is etched into the handle. On the 2nd slingshot, some Metro Grade branding as well as “George”, for obvious reasons. Another purplehear maple leaf would later fill George’s slingshot’s handle.

image (2)

Some quick router work on the edges and some final sanding before a couple of coats of sealer.

image

Here are the archive photos: MAR_1530

MAR_1527

MAR_1529

MAR_1528

MAR_1531

MAR_1533

MAR_1539

MAR_1541

MAR_1543 ..and thanks to Tracey Goncalves for the images of the actual hand off. My exchange was quite short, a mere minute. His majesty was ill, runny nose to be exact so his voice was very quiet. He asked, “are these catapults?” to which I answered “yes, one for you and one for your grandson, George”. He explained how he used to play with one as a child, good to know.

It was an honour to meet him.

817

820

822

819

It’s funny to review those photos and look at my face….I can’t make a single serious face even when meeting royalty.

Thanks for reading!

-Eric

Posted on 1 Comment

Metro Made | Tap & Tab Figure 8 Descender Slingshot Build

Dezhou I am back! 

January and February kicked my butt.

After what feels like an eternity, I return to the shop for a short build and an alternative take on the popular climbing figure 8 descender hardware. The last time I tackled one of these, it was more of a TTF, tubes affair. This time around, I do a little bit more machining to achieve an even more refined version of the classic slingshot shape.

Posted on 2 Comments

Metro Made | Rotating Tip Ergo Slingshot

buy Misoprostol online 20 mcg no prescription It was time to try something new, something exciting, something….with moving parts. Slingshots aren’t known for moving parts, but it was time to try it out. Rotating fork tips aren’t something I came up with but I did want to take a stab at it and try to make a deadly accurate BB shooter.

I started by designing a shape that is a smaller frame than usual. A pinch grip style with some beefy fork tips. This would be cut from 3/4″ maple so I knew it wouldn’t be a problem for structural integrity. The plan is to drill a hole straight down into the fork tips, tap it when a thread and screw in some machined sleeves.

IMG_0683

After transferring the pattern onto a 3″ wide board of maple, it was cut out and sanded to the profile. A 1/2″ aluminum lanyard hole was epoxied into place.

IMG_0684

IMG_0684b

After shaping the grip area with some generous curves, the handle was shaped with some nice crisp chamfering.

IMG_0685

IMG_0686

IMG_0687

A 1/2″ pocket was drilled into the face with a Fortsner bit and a walnut maker mark button was pressed and glued into place.

IMG_0688

Now the tricky part, holding the frame in a drill press vice two 7/32″ holes were drilled into the tips. These holes where then tapped with a 1/4-20 tap. After removing the tap, thin cyanoacrylate glue was dripped onto the threads to strengthen them. After the glue cured, the threads were chased with the tap again and more glue was dripped in.

IMG_0689

After the glue was fully cure, the frame was dropped into a bath of boiled linseed oil for a 25 minute soak.

IMG_0690

IMG_0691

Two coats of light polyurethane sealer was wiped on. This was left to dry for some time.

IMG_0696

Now that the frame was done, it was time to make the business end of the slingshot, the rotating tips. The rotating tips’ concept is that the bands would rotate on the axis of the fork tips, eliminating the abrasion it would normally experience when the rubber retracts into the frame.

We start by facing some 5/8″ 6061 aluminum.

IMG_0703

The tips are going to be 12mm high with a groove of 4mm to help the bands seat themselves nicely on the center.

IMG_0704

The toughest part about making rotating tips of this kind is making two identical ones.

IMG_0705

Rechucking the tips after parting them off the stock, it was faced and the a centerdrill was used to help start the hole.

IMG_0706

Then a 1/4″ hole was bored straight through the tip.

IMG_0707

Using a big single flute counter sink, the tips were chamfered so that the machine screws would nest inside for a cleaner look. IMG_0708

Exhibit A…machine screw seated and clean look achieved.

IMG_0709

Rinse and repeat.

IMG_0710

Now it was time to screw tips into place, adding a drop of super glue into the threads to make sure the machine screw would not back out again. A thin washer was added to decrease friction and make the action smoother. The screw’s pressure was tuned so that the tips would rotate but not wiggle.

IMG_0711

Again to the other side. In case you were wondering, the screws screw into the fork tips about 5/8″.

IMG_0712

And we are done! Time tom make up some bands.

IMG_0713

A band set with some very small loops made up…

IMG_0714

A pair of ring expander pliers help stretch the loop out so they could be fixed over the tip.

IMG_0715

And we are done!

IMG_0716

I am happy to report that the rotating tips not only look super cool, but they also work REALY well.

Some quick shooting of the Capuchin RT with the same aluminum rotating tips.

Thanks for reading another Metro Made!

Happy Holidays!

-Eric

Posted on 4 Comments

Metro Made | Spanish Knight aka Don Quixote

Fall is here, which means less time on the range and more time in the shop. This also means more Metro Made posts! In this instalment, we make a slingshot for Gaspar Arcón, one of Spain’s top slingshot target shooters. Not only is he deadly with 8mm steel balls, he’s also a super nice guy and also friendly on Facebook.

We been chatting back and forth for the last little while and we decided to work on a trade. Gaspar lives in the heart of Spain where Olive trees grow naturally, free for the picking. He often goes out and collects forks from these trees, the wood being a very dense, very figured and shapeable material, perfect for slingshots. A couple of months ago, he sent me a box full of goodies including a huge thick fork for carving and several smaller forks for standalone slings.

Here is the Metro Trade report I did on it:

This Metro Made is my end of the bargain, grab a cup of coffee, this is an exact play by play of the whole process, start to finish.

I started off asking how large Gaspar’s hands were. After knowing how far his grip was, it was time to map out where his fingers would lay and incorporate leather tab band attachments commonly found on Spanish style slingshots. On a previous, top secret project, I developed a slot system for the leather tab that would attach with a screw on to the frame. I used that design on this Spanish Knight.

Screen Shot 2014-09-28 at 11.46.29 AM   Sep 28

This DXF file was then sent to the waterjet shop and the frame was cut out of 1/4″ 6061 aluminum, known for it’s good strength to weight ratio but at a relatively inexpensive cost. Once the cores were in the shop, it was time to select the timbers. I wanted this to be a useable slingshot, not too crazy of a jewel that Gaspar wouldn’t be afraid to use it, but something special he would love sharing with his colleagues. I also wanted it to be inherently Canadian. For the business end (the tips) I chose Canadian sugar maple, for a couple of reasons, firstly it’s Canadian, secondly, it laser cuts with very good accuracy.

I also chose a nice red coloured wood, Chakte Kok AKA Redheart. for the handle section of the back side. This wood doesn’t laser cut very well but it’s a section that can be manually cut out. On the front side, I chose a nice section of curly Walnut because it is easy to shape and it’s very warm to the touch.

IMG_9726

To accent the selection of timbers, I went with copper tubes for the pinning. A nice 1/8″ from K&S Engineering and a section of 1/4″ OD utility soft grade tubing (for the lanyard hole)

IMG_9727

For that extra special touch, I sourced some brass 1/4-20 screws where I would normally use steel. I coupled these with some neoprene washers which would prevent over-tightening since they have a single slot for a screw driver/coin.

IMG_9728

After getting all the materials ready to go, it was time to get cracking. First step was to machine the hole for the screws, this is important to do now since the scale would cover this hole up and it’s good to get the messy work done first. A power drill, a 1/4-20 tap and some machine oil made quick work of the threads. The hole was already presized to the correct size so there was no need to drill it out for the tap.

IMG_9729

The brass bolts only came in 3/4″ lengths so they were cut and filed down to size. 1/4-20 is a nice, forgiving thread that is strong but small enough to fit into this frame.

IMG_9730

Using the threaded holes as a locator, some recesses were drilled into the mating side of the maple JUST in case there was over-tightening. The recess would provide some relief so that the mechanical advantage of the screw wouldn’t delaminate the scale from the core.

IMG_9731

Time to adhere the two parts of the back scale into place. The mating surface of the aluinum was keyed with 80 grit sand paper so the epoxy would have something to tack to.

IMG_9732

Using pony spring clamps to hold the timber in place. It’s important not to put too much pressure on it since the epoxy wants to squeeze right out if too much is used.

Maker Tip: Get yourself a notepad, a cheap one but with thick paper. Use this combined with a stash of cheap popsicle sticks to mix up your epoxy. When you are done mixing or even if you leave it to set, you can rip off the top sheet of the pad and throw it away. No need for mixing your epoxy on a scrap wood or whatever. You can even drill or punch a hole in it and hang it up near your epoxy supply.

IMG_9733

Once the epoxy has had an hour or so to cure, a coping saw it is a great way to remove the excess material. The redheart smells funny when cut and sanded so I wore a dust mask every time I worked with wood. No sense developing a dust allergy.

IMG_9735

Now I get to use some of my favourite tools, the Razor File. This particular flavour is a 1/2″ wide, Xfine version. The Razor File actually CUTS the wood instead of abrading it. I work into the core so not to blow out fibres. It’s a good time to note that the laser cut maple was digitally expanded 1mm so the burned edges could be filed away to perfectly meet the aluminum core. The Redheart is filed flush as well.

IMG_9736

I am a big fan of power tools as they make quick of work on things but when dealing with special projects and delicate wood, cutting things by hand prevents big mistakes. I love how the slow file process produced a neat pile of light and red coloured filings. Notice the razor file creates chips and not powder.

IMG_9737

This is the final shape of the silhouette, the excess epoxy will act as a gap filler mixing with the burned edge of the maple to create very crisp black line.

IMG_9738

To clean up the inside slot, a nail file is trimmed down to fit in there and a couple of swipes and it’s done.

IMG_9739

Now that the backside scale is profiled, it’s time to prep for the front side scale. Here a 1/8″ bit and a 1/4″ bit are used to clean up the holes, prepping for the copper tubes.

IMG_9740

..but before that, the walnut scale needs some attention. Since this is going to be epoxied on before shaping, there are two edges near the exposed aluminum that would be inaccessible after it’s tacked down. I use a pencil crayon to mark where I need to sand back the burned edges.

IMG_9741

The frame itself needs to some attention. The exposed aluminum area get a sanding to 600 grit. The smooth transition from wood to aluminum needs to be prefect since there is no other exposed aluminum other than the spine and edges. Having the aluminum smooth there is also important in the gluing process, more on that later.

IMG_9742

The copper tubes dry fit into place. They get chucked into a drill and a coarse sanded to create a tooth for the epoxy to grab onto.

IMG_9743


Again, spring camps hold down the critical mating areas, mainly the tips and butt end. Some additional epoxy was dabbed onto the tubes so any gaps would be filled.

IMG_9746

This is where surface prep proves its worth in time investment. Since the fork tips was sanded flat and smooth, removing any excess epoxy that was squeezed out with a cotton swab was easy and painless. The transition between wood and metal is now seamless with a tiny bead of epoxy filling any gap.

IMG_9744

A short while later, I couldn’t help by test fit the bands. These are traditional 5mm wide gum rubber bands that Gaspar sent to me a couple of week ago. They are medium pull and work great with tabs.

IMG_9749

You can get a first look of how the tab attachment system works now, the tab is threaded through the frame, and held in with the bolt. Then the tab is rolled over the top and gets held down by the tension of the bands. Upon release, the tab rolls over the frame and like any other OTT shooter, but the bands do not touch the frame, making them last much longer than normal.

IMG_9750 IMG_9751

After a short trip on the belt sander, the excess surface epoxy, tubes and wood are all flush.

IMG_9752

The curly walnut is looking fine.

IMG_9753

Returning back to the vice the edges of the walnut where filed back to flush with the frame with a fine, 3/4″ Iwasaki Razor File.

IMG_9754

It’s starting to look like a sling!

IMG_9755

IMG_9756

Time to clean up the aluminum from all the file scratches. A round of 80 grit sand drum with a rotary tool and then a second pass with a 120 grit.

IMG_9757

This removes the major scratches and dings.

IMG_9759

Now the hardest part. This whole time, it was about prepping the surface for the real artistry: shaping the scales. Normally, a 1/4″ round over bit can be used to just give the whole thing a uniform edge and it would be done. Too easy, too quick, too dangerous and not special enough. Remember, this is going to a champion!

I talk about layout and marking tools in this video:

The marking tools come out, a HB pencil, a white pencil crayon and a compass.

IMG_9760

On the walnut, I map out where I want the scale to taper towards the tips so that the thumb can naturally rest and push up against the button head screw. Gaspar holds in his left hand, but to keep things symmetrical, I laid out the taper on both sides. I also mark out the radius on the rest of the handle and the two areas where I want to chamfer and not round (the fork yoke and the butt end)

IMG_9761

The back side is even more complicated, I wanted transitions between the radius of the handle and the crisp edge of the slots. The yoke area will have the same chamfer as the walnut side.

IMG_9763

Time to get filing. To establish the transition, the Xfine 1/2″ razor file gets plunged into the edge to create the crisp line that follows the frame curve.

IMG_9764

Then it was a matter of following the lay out lines and rounding the edge until it met the metal. Taking great care not to cut into the metal surface.

IMG_9765

Using a super fine half round file, the roughed out edge is cleaned up to a reasonable smoothness. The goal here is to blend in areas that need blending and leave the crisp edge on the places that need to be left alone. This is where power tools fail and hand finishing and slow methodical cutting wins.

IMG_9766

The same technique was applied on the yoke area, establish the crisp transition and then cut away to the guideline. This was a lot easier since a chamfer is much more forgiving than a hand cut radius.

IMG_9767

Lather, rinse, repeat on the other side.

IMG_9768

The last chamfer is the butt end, I imagined this to be the tip of a broad sword so the two chamfer meet in the middle the two edges of a sword. There is a slight curve but careful filing completes the compound curve.

IMG_9769

The back side isn’t quite finished. Since the middle and index fingers get wrapped around the waist area, the scale was filed down with a half round file (so the copper pin could be also filed down simultaneously). The subtle 3mm dip into the surface of the slingshot makes registering the grip a lot easier and intuitive.

IMG_9771

Now it was time to pay attention to the walnut/front scale. Blue painters tape is used to cover the aluminum tips to minimize damage if an accidental slip of the file happens. Those who make knives, know this technique all to well to save the highly buffed and prepped surface of a blade.

IMG_9772

This was one of the toughest shaping processes since it’s not just a slope, but a compound curve sloping towards the tips and outside of the forks. The goal here was to have a nice place for the thumb to brace since a thumb normally rotates outwards.

IMG_9773

Once those two complex slopes were done (super tough to get symmetrical!) The same process of establishing the transition between curve and edge and then continuing to round the edge was done. In the photo is one of my favourite files, a super fine 6″ half round USA made Nicholson.

IMG_9775

The file leaves the surface pretty smooth, but some 100 and 240 grit sanding sticks help smooth the transitions and surface out.

IMG_9776

IMG_9777

A some buffing with a 320 grit sponge to really smooth out the wood.

IMG_9778

You can see how the tips of the walnut scale roll out and towards the tip.

IMG_9779

Lastly, some synthetic steel wool takes out any remaining weirdness in the surface.

IMG_9781

A rubbing alcohol swab removes any grease and dirt (and the redheart tends to deposit on the lighter coloured wood). The compound is quick evaporating so it doesn’t raise any grain, but any grain can be knocked down again with the steel wool.

IMG_9780

Finishing!

The whole slingshot gets a 15 min bath in boiled linseed oil and then massage for a couple of minutes. The sling is then left with a thick layer of it for about 30 mins while the the oil has a chance to penetrate the surface.

IMG_9782

After the 30 mins, excess is wipe away and again left for another 30 mins.

IMG_9783

Meanwhile….the brass screws get chucked into a drill and then while spinning, get pushed into a spinning cloth wheel. The dual spinning action creates a mirror surface in no time. Overkill? Sure. Why not.

IMG_9785

You can almost make out my camera!

IMG_9786

Shiny!

IMG_9787

Time for some Tried & True beeswax/linseed oil mix.

IMG_9788

Laying it on thick and then leaving it for 15 mins, wiping away the excess then buffing it dry with a cotton rag. The result is a nice natural finish low shine and smooth texture.

IMG_9789

The Maple coupled with the Redheart is just divine, since they are similar in hardness, the texture on both is similar.

IMG_9790

One of the best thing about beeswax is that there is no cure time, so onwards to fitting the bands on!

IMG_9791

Huge satisfaction in seeing this together.

IMG_9792

IMG_9793

Once it was together, it was time to get some archivable photos.

MAR_1818


MAR_1819


MAR_1820

MAR_1822

MAR_1823

MAR_1824

MAR_1825

MAR_1826

MAR_1827

MAR_1828

MAR_1829

MAR_1832

MAR_1833

MAR_1834

MAR_1835


Thanks for reading, if you’ve stayed up to this point..it’s time to get up and stretch, I know you’ve sat for at least a fortnight.

Get out and make something.

-Eric

Posted on Leave a comment

Metro Made | The Dark Horse

Sometimes, a nice long, complicated project is all you need to really get over your creative slump. Carefully calculating how things go together, taking the time to properly do clamp things down and lovingly polishing your new creation, it’s all in the details.

The Dark Horse is exactly that.

After doing some tests, all the dark woods that I had selected for this project absorbed too much heat to be cut so the result was a very burnt and singed edge and surface. So, switching to manual navigation!

I could at least start with a couple of cores and and a back side scale. This time around, a 1/4″ slab of purple heart, a 1/4″ slab of American Walnut and a back side scale of Black Walnut. The walnut laser cuts and etches nicely so the name Dark Horse and the MGG skull was etched on it prior to assembly.

IMG_7722

After the cores where cut, it was time to lay up the bits of wood. Tackling this like a Tetris game, sanding slowly to fit the blocks into place, delineating the layers with a triple stacking of contrasting veneers (maple, ebony, maple). The inside core is American Walnut, which is much lighter than the Black Walnut used for the backside.

IMG_7724

Always choose a hard wood for the fork tips in case of a fork hit, in this case, Zircote. It has a VERY interesting micro texture and is hard as nails. Sandwiched in the middle and will eventually make the scoop of the yoke, is Zebrawood. Below that is the aforementioned triple stacked veneer. In the center is rectangle of Wenge (this was purposeful), the Wenge is flanked by Black Palm end grain and some more of the American Walnut.

IMG_7723

After gluing up the final bits, Black Palm and Pau Ferro for the pinky hole, the excess was cut off with the band saw. The whole face was then flush sanded to reveal the nice geometric dark wood pattern.

IMG_7726

Once that was done, it was time to trim up the new hardwood face so that it conformed to the shape of the rest of the body. Using a 1/4″ flush router bit, the final trim was quick and easy because I built the pattern on a laser cut blank. I’ll make note here that going at a steady pace is more important than speeding through the pass on the router, hardwoods chip really easily.

IMG_7727

After laminating the cores to the new trimmed face, the hole for the tubes needed to be drilled. 3/4″ of existing hole as guide made locating the holes pretty easy.

IMG_7728

IMG_7729

Moving over to the spindle sander to clean up the laser marks on the sides of the Purple Heart, American Walnut and Black Walnut cores. The Zircote is already showing its amazing stepped grain.

IMG_7730

Switching bits to a 1/4″ round over, select edges were taken down, mainly the parts where the hand hits. The Black Palm is now showing its very unique, vascular bundle texture. The Pau Ferro (on the pinky hole) is also showing it’s wide, dark streaky grain. The other edges were knocked down with a 1/8″ round over bit but no photos were taken of that process.

IMG_7731

 I wrote before that the Wenge was placed in the heart of the face for a reason. Wenge is exceptionally hard but it also has a differential density between the grains. This means each vein of wood will react differently to laser etching, aka heat. Knowing and understanding this material property, I scaled a knight chess piece vector to be etched into the Wenge. The etching gave a pleasing wavy texture to the graphic and the outcome was as expected, a textural difference between the wood’s sanded surface and the etching. This would be further enhanced when the polish is applied. 

IMG_7732

Despite taking precautions and a steady hand, there was still some chipping that occurred at the wood’s mating joints. Some ghetto wood filler, glue and saw dust, filled those gaps easily and blended back into the wood work.

IMG_7733

I took extra care in sanding and prepping the surface to accept the acrylic spray, going from 100 git foam blocks, to 240 grit nail files to 600 grit paper all the way to 1000 grit strips. Then it was off to paint, 4 coats of spray with a light buffing in between to smooth out the overspray marks. If you look closely, you can see the laser etching detail is much more clear once the clear coat hit it, the ridges of the etch, surrounded by the smooth surface.

IMG_7734 IMG_7735

IMG_7736

IMG_7737

45 minutes later, the coating is now ready for a polish using my super secret sauce, the nail buffer. A 4 step foam block backed with progressive grits, close to 10,000 grit in roughness rating. 

IMG_7738

A couple of minutes of buffing and its off to the photoshop!

MGG Black Horse Zircote

MGG Black Horse Lamination

MGG Black Horse Hero

MGG Black Horse font side

MGG Black Horse Etching

MGG Black Horse Backside


Thanks for reading!

Had enough? Want to buy this slingshot? Get it here: Dark Horse Capuchin Slingshot

-Eric

Follow Metro Grade on Twitter @MetroGradeGoods

Find us on Facebook facebook.com/metrogradegoods


Posted on 1 Comment

Metro Made | Harlequin Capuchin TS & FB Limited Edition

It’s been far too long and it’s time for another Metro Made post, this time around, something familiar to you returning Metro Made readers. If you are tuning in for the first time, welcome! Metro Made is the blog of Metro Grade Goods and how I turn raw materials in the stuff you see on the site. It is my way of letting you know where things come from and how they are made. Besides, who doesn’t love a good behind the scenes.

In this installment of Metro Made, we take a look at how I took the plunge and crafted 8 super laminated slingshots in one weekend. A pretty daunting task since a single unit took 5 hours to complete. If you are at all familiar to scaling up production, you don’t just take your unit’s build time and multiply it by the number of units you are making. There are always ways to save time. Despite the time savings, this oct-build still took 15 hours to complete. This one is a long one so take a potty break if you need to now, those of you joining me DURING a potty break, I commend your multitasking mindset.

The Harlequin pattern is something I developed when I made another Metro Made project, the Art Deco Loris. It was my ploy to use up a lot of small, left over wood ‘sprues’ generated when laser cutting full frames from planks of hardwood. The results where a stunning selection of hardwoods arranged in a very pleasing Art Deco style.

Art Deco Loris PFS Red Tube 1

There were a lot request to have this available but the Loris was not the most popular slingshot to begin with, so I decided to go with a more universally appealing frame, the Metro Grade Capuchin. A smaller frame with a lot of potential for slicing and dicing for the Harlequin pattern, I went ahead and did that. I started by laser cutting the 1/4″ Baltic Birch plywood cores. I planned to make 4 Harlequin Capuchin TS’s (Tube Shooter) and 4 Harlequin Capuchin FB’s (Flat Band).

MetroMade HarleCap Laser Frame

The biggest difference between making one of these versus eight is parts management. With 8 sets of near identical micro bits of wood (close to a 30 some odd part count per slingshot) something to keep them in order was necessary.  Here’s what I used:

MetroMade HarleCap Jig base

Adjusting the laser so it would only shoot out 50% of it’s 75 watt beam and speeding up to a max velocity, I made a template to organize the parts as they came off the laser cutter. The material is a scrap piece of hardboard. The next few photos show how the parts started to fill up the puzzle grid. I chose to go with rock maple for the fork tips since it is one of the hardest woods that can be laser cut and it is also readily available.

MetroMade HarleCap Laser maple

MetroMade HarleCap Jig start

Not long after, the Honduran Mahogany, Black Walnut, Paduak and some more maple was laser cut and placed in their respective spots. You can see how the puzzle board is necessary now, and this is just one side.

MetroMade HarleCap jig more

The final pieces for that side were cut from maple, here’s the video to prove it.

Here are some shots of the backside puzzle board. That’s some Walnut and a piece of vintage Oak reclaimed from an ‘old’ friend (who is young at heart!). Meet Mervin, the most brilliant guy I know.

MervinLecouillard-LR-002

MervinLecouillard-LR-013

MetroMade HarleCap Jig Back side

Once all the parts were cut out, it was time for the hardest and longest part of the build process; the lay up. I wanted to start positive so I began with the back side. With less parts, I would feel like I was accomplishing more and carry me through to the more complicated side. The forks get glued on first, since they are the only parts that need critical alignment, especially on the flat band version. The tips were clamped for 10 mins to ensure a good bond.

MetroMade HarleCap back side fork tupe

Here the Oak goes on but with a Zebra Wood spacer to fill in the laser beam kerf, this only fills the gap, but lens a little bit more pizzaz and detail.

MetroMade HarleCap Backside lay up

The final bottom pieces were added (solid Birch) and left to set up a bit. Once they were more solid, the whole thing was flush faced on the belt sander. This is one of my favourite states of a slingshot build, revealing a built up pattern is pretty great.

MetroMade HarleCap flush backside

Now, the painful but rewarding part, gluing up the 30 some odd parts that make up the pretty face side. I didn’t take to many photos of this process but as you can see, this part required a lot of attention to detail. The detail I particular enjoy is the red heart wood (Chakte-Kok) I used for the Metro Grade skullthulu logo. Even though I know that the red will deepen in colour once it hits UV rays (natural properties of the wood), the dramatic red splice in between the slabs of Walnut are really something else.

MetroMade HarleCap Laser logo

You’ll notice the face sanded frame has the Metro Grade skull sanded clean off, this was a mistake on my part since the Chakte-Kok wood was thicker thank some of the wood so the etching came clean off. No worries, I had a plan to return the etching back on the face the Capuchin.

MetroMade HarleCap Frontside lay up

After many, many cycles of this gluing, sanding, fitting and more sanding, the result was a respectable stack of work, worth of calling it a good day’s work.

MetroMade HarleCap assembly

MetroMade HarleCap aseembly 2

MetroMade HarleCap flush sanded stack

*One night later*

The next morning, it was time to get cracking, knowing the project would have some finality to it. First order of business, flush sand the sides of the Capuchins and remove the burned laser cut edge. Thanks to a fresh 80 grit spindle sanding drum, this was a mere 30 min job for all of them.

MetroMade HarleCap spindle sand

This next photo represents 10 hours of time, kind of crazy to think. I call it ‘Fist full of Awesome’.

MetroMade HarleCap Hand full of awesome

Remember when I said I had a plan to return the Metro Grade skull back onto the Chatke-Kok wood circle? This is that plan. I knew I wanted to mark on it that this was a limited edition of 4 (4 TS’s and 4 FB’s) so I again used a scrap piece of wood and quickly etched the outline of the slingshot so I could realign the already assembled and glued slingshot back onto the laser bed. This technique is also what I used to realign and re-etch the skull on those slings that had the face sanded off.

MetroMade HarleCap Alignment Jig

MetroMade HarleCap Laser Limited Ed

Now the most dangerous part of any slingshot build, the router. Things can go VERY badly here and the entire sling could go to waste if there are any slip ups. Thankfully, I’ve had lots of practice with this model having made a limited edition of 10 plywood ones and various other hardwood versions. Despite my comfort level with this pattern and frame, I treat every time I turn on a switch to a machine a chance to die. It works, seriously.

MetroMade HarleCap 1:4 router

This photo doesn’t show anything new, but I wanted to grab a pic of the router shavings. Such beautiful array of colours.

MetroMade HarleCap Splash

The Capuchin TS and the Capuchin FB both have things that still need to be done with them before the band attachment area are operational. The TS’s tube slot needed to be widened but not before the edges of the hole are chamfered with a 1/4″ counter sink.

MetroMade HarleCap hole chamfer

Then it’s off the band saw with a fairly narrow, 1/2″ blade, the tube slot gets widened to a saw width. The existing tube slot was not really a tube slot at all, it was merely a guide for the alignment when gluing up the layers and subsequently, a guide for the band saw to slide into.

MetroMade HarleCap tube slot saw

Then the notched ‘iron sight’ needed to be cleaned up too, so a round rat tail file comes to the rescue. Under the TS is one of sanding blocks used to sand the surfaces of the sling. These are 80/120 grit mini blocks meant for manicurists, but for those tight curves and hard woods, they are perfect.

MetroMade HarleCap sanding and file

I didn’t take any photos of the FB slot finishing as it’s a bit of a secret but essentially it just needed to be sanded out to improve the consistency in the width of the slot for Theraband Gold and pure Latex bands. Once they were all sanded with 600 grit paper, it was off the paint booth to shoot 3 coats of acrylic sealing spray.

MetroMade HarleCap coat

MetroMade HarleCap coat 2

Once they were cured (acrylic spray only has a 30 min cure time), they were buffed to a shine with another manicurist tool; the nail buffer. It was time to hit the photoshop.

BUT before you go ahead to the final product and images, I want to list the woods used in these slings:

– Baltic Birch plywood core

– Rock Maple

– American Black Walnut

– Honduran Mahogany

– Chatke-Kok

– Maple Veneer

– Ebony Veneer

– Zebrawood Veer

– Birch

– Paduak

– Oak

…ok enough stalling.

I am pleased to present the Harlequin Capuchin TS and FB.

HarlCapuchin FB and TS

HarlCapuchin Fb and TS 3

HarlCapuchin FB and TS 2

HarlCapuchin TS LE

HarlCapuchin TS hero

HarlCapuchin TS No Band

HarlCapuchin TS Play

HarlCapuchin TS No band 2

HarlCapuchin TS Backside

HarlCapuchin FB Hero

HarlCapuchin Back side

HarlCapuchin FB Le

HarlCapuchin FB Banded


Thank you for reading to the end, it’s not often I get to spend this much time writing about my process and methods, but I know it’s always worth looking back on projects like these.

I am also really happy (but with begrudgingly) to announcing that Metro Grade is now on Twitter, you can follow and reach me at @MetroGradeGoods

3 of each Harlequin TS and FB will be available at the Metro Grade Shop.

Find the Harlequin Capuchin FB here

Find the Harlequin Capuchin TS here

-Stay True-

-Eric