Basildon I’ve had this carbon fiber board in my shop for half a year, waiting to be made into something awesome, my recent CNC adventures (see my LunchBox CNC instructable) have allowed me to actually USE this material and take advantage of the awesomeness that is CF.
The CF board I have has one shiny side and one rough side, this is likely why I was able to buy it so inexpensively. To achieve the correct thickness to start with, two sections of this board were glued together to make one solid sheet of material. I rough cut the 4″ wide board with hack saw, you always want to use a saw with lots of teeth so not to tear out the fibers.
Using 5 min 2-part epoxy and a similarly sized sheet of vulcanized fiberboard (plastic cardboard spacer material), the two halves of the sheet were bonded and clamped to cure for 24 hours.
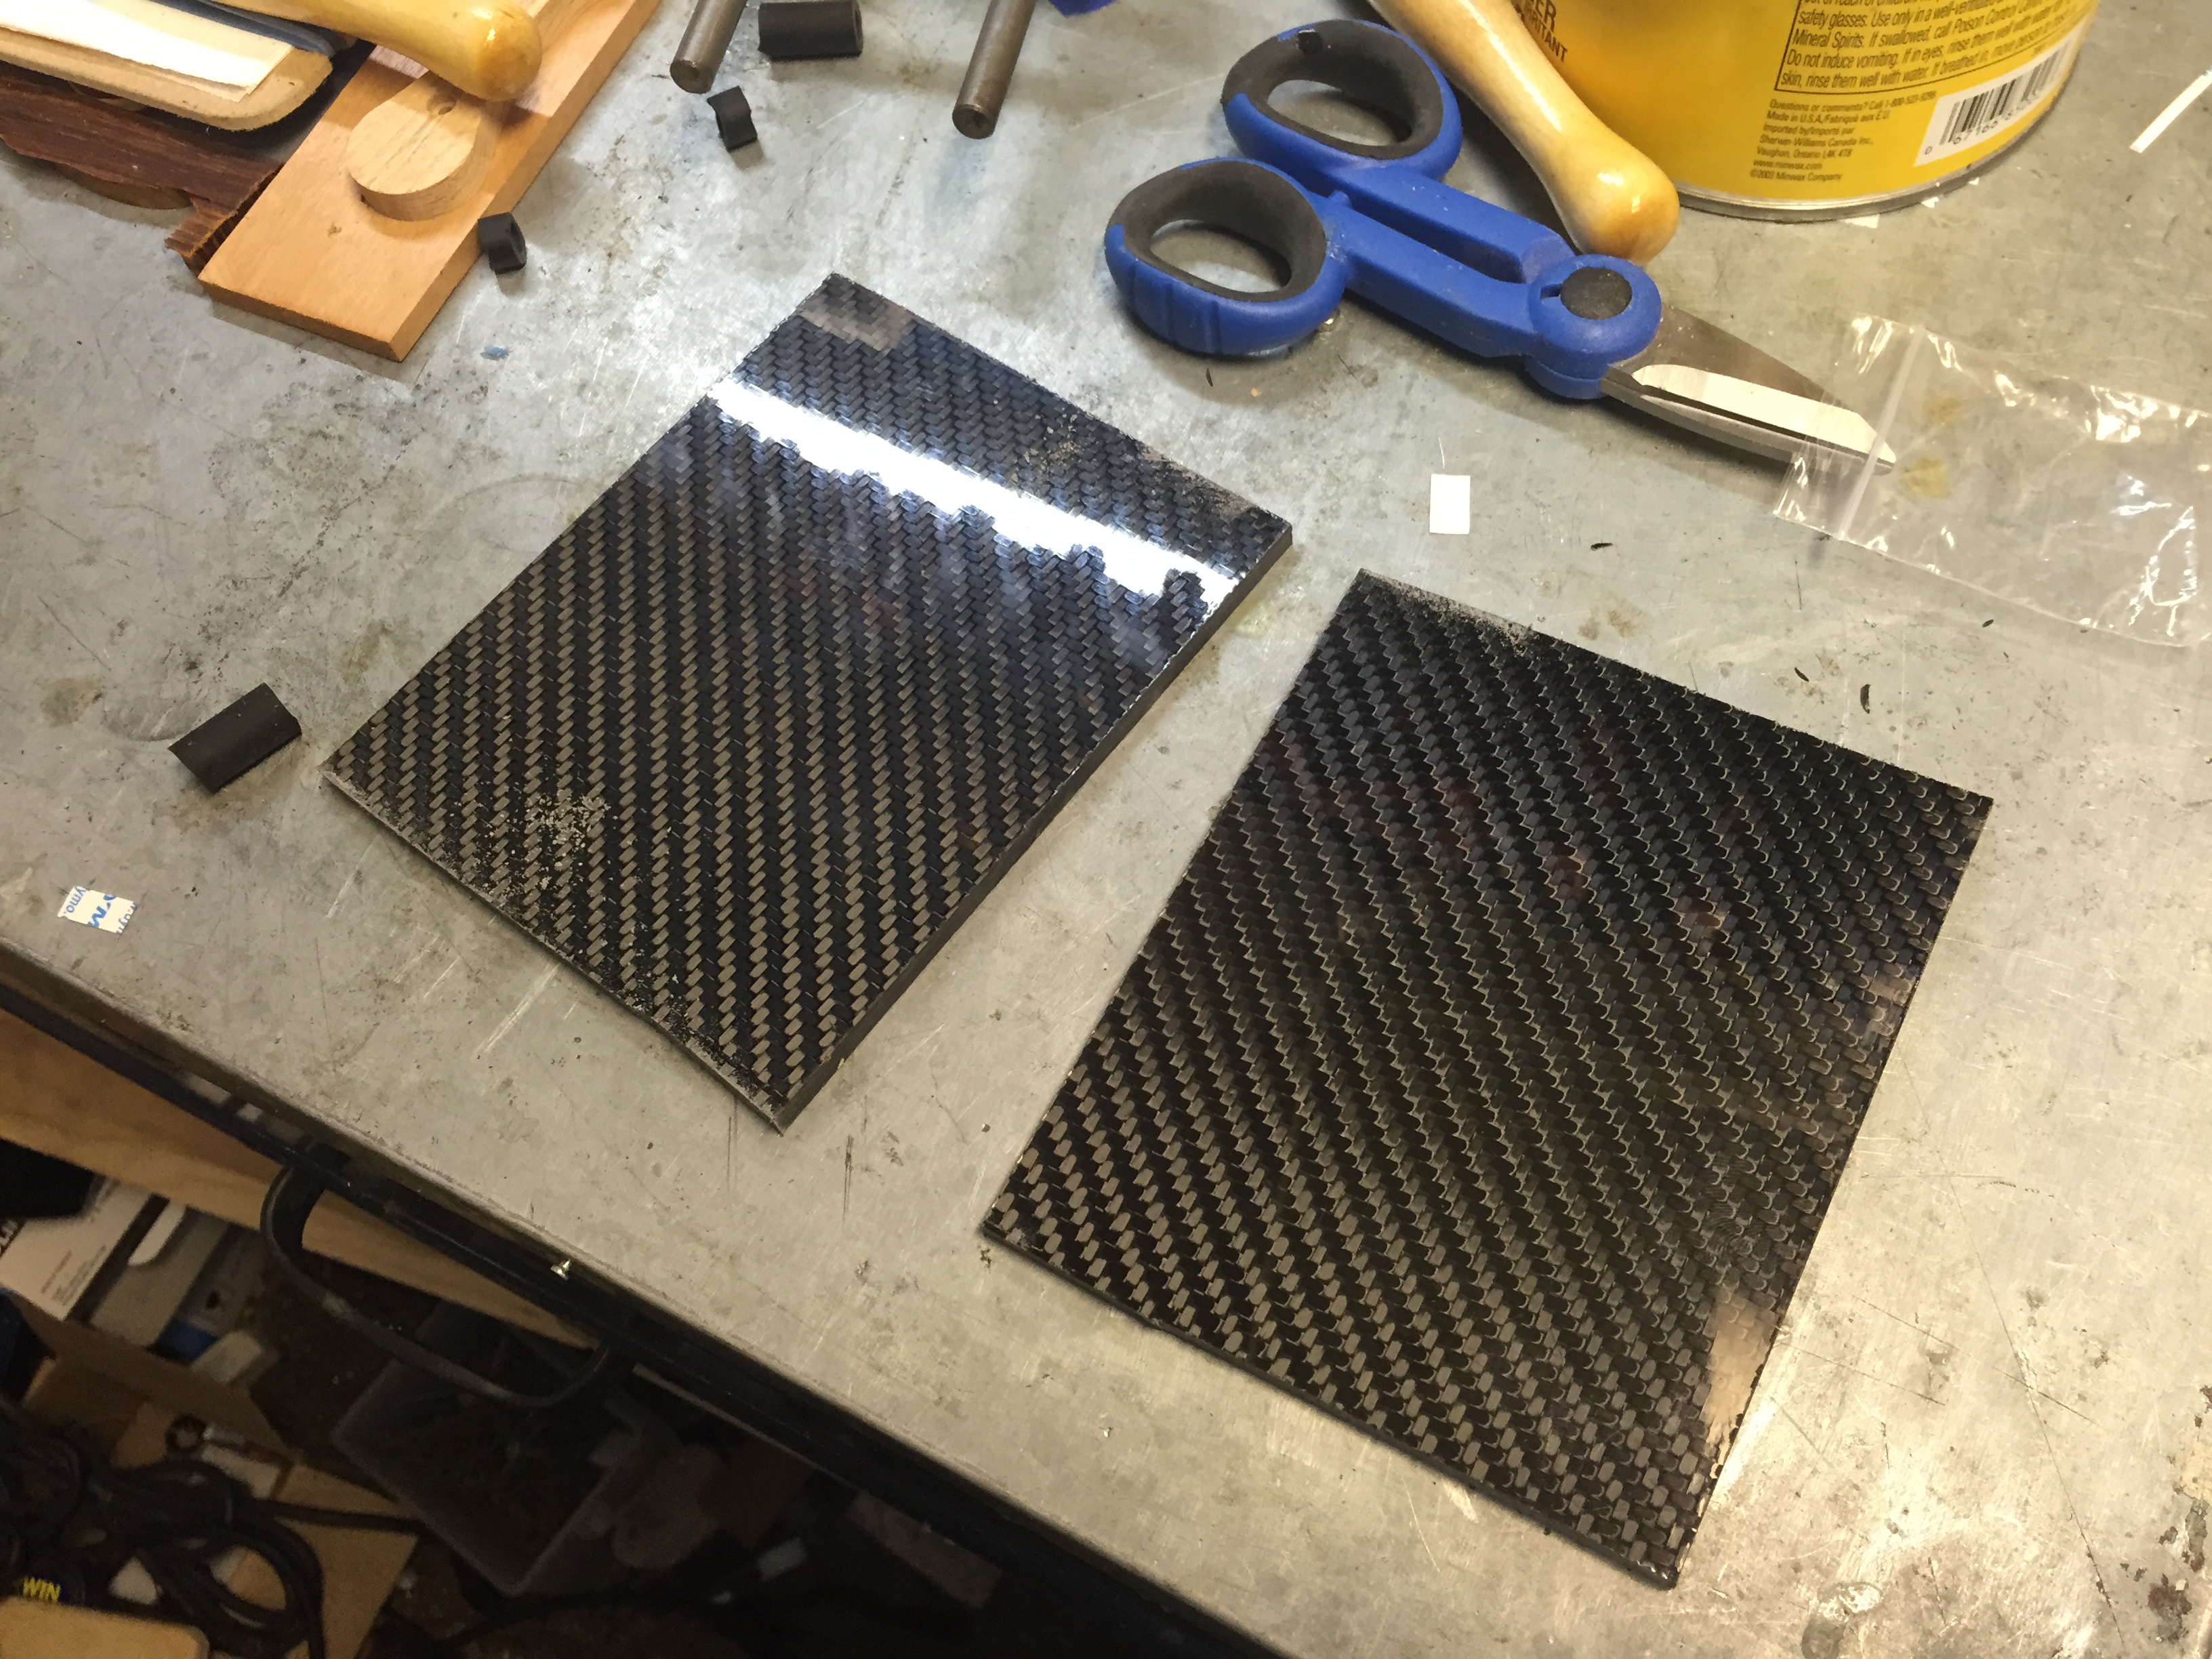
When using epoxy, it is important to properly mix the two parts for a good amount of time. 5 mins epoxy is a WORKING time, not setting up time, so take an extra 30-45 seconds to really whip it up. Normally, you would key the mating surfaces so that there would be a lot of texture for the epoxy to grab on to, in this case, since the CF was already textured and rough, that part was already done.
It also critical not to put too much pressure on your parts, you want good coverage and bonding of the epoxy, but you don’t want to squeeze it all out with too much pressure from clamps. I use a number of pony spring clamps of various strengths, light duty ones to light clamp on the sandwich so not to have the two parts skate around. Then slowly add more medium duty spring clamps until the pressure is evenly distributed.

This is where I may lose some of you…but stay with me..it’ll be worth it.
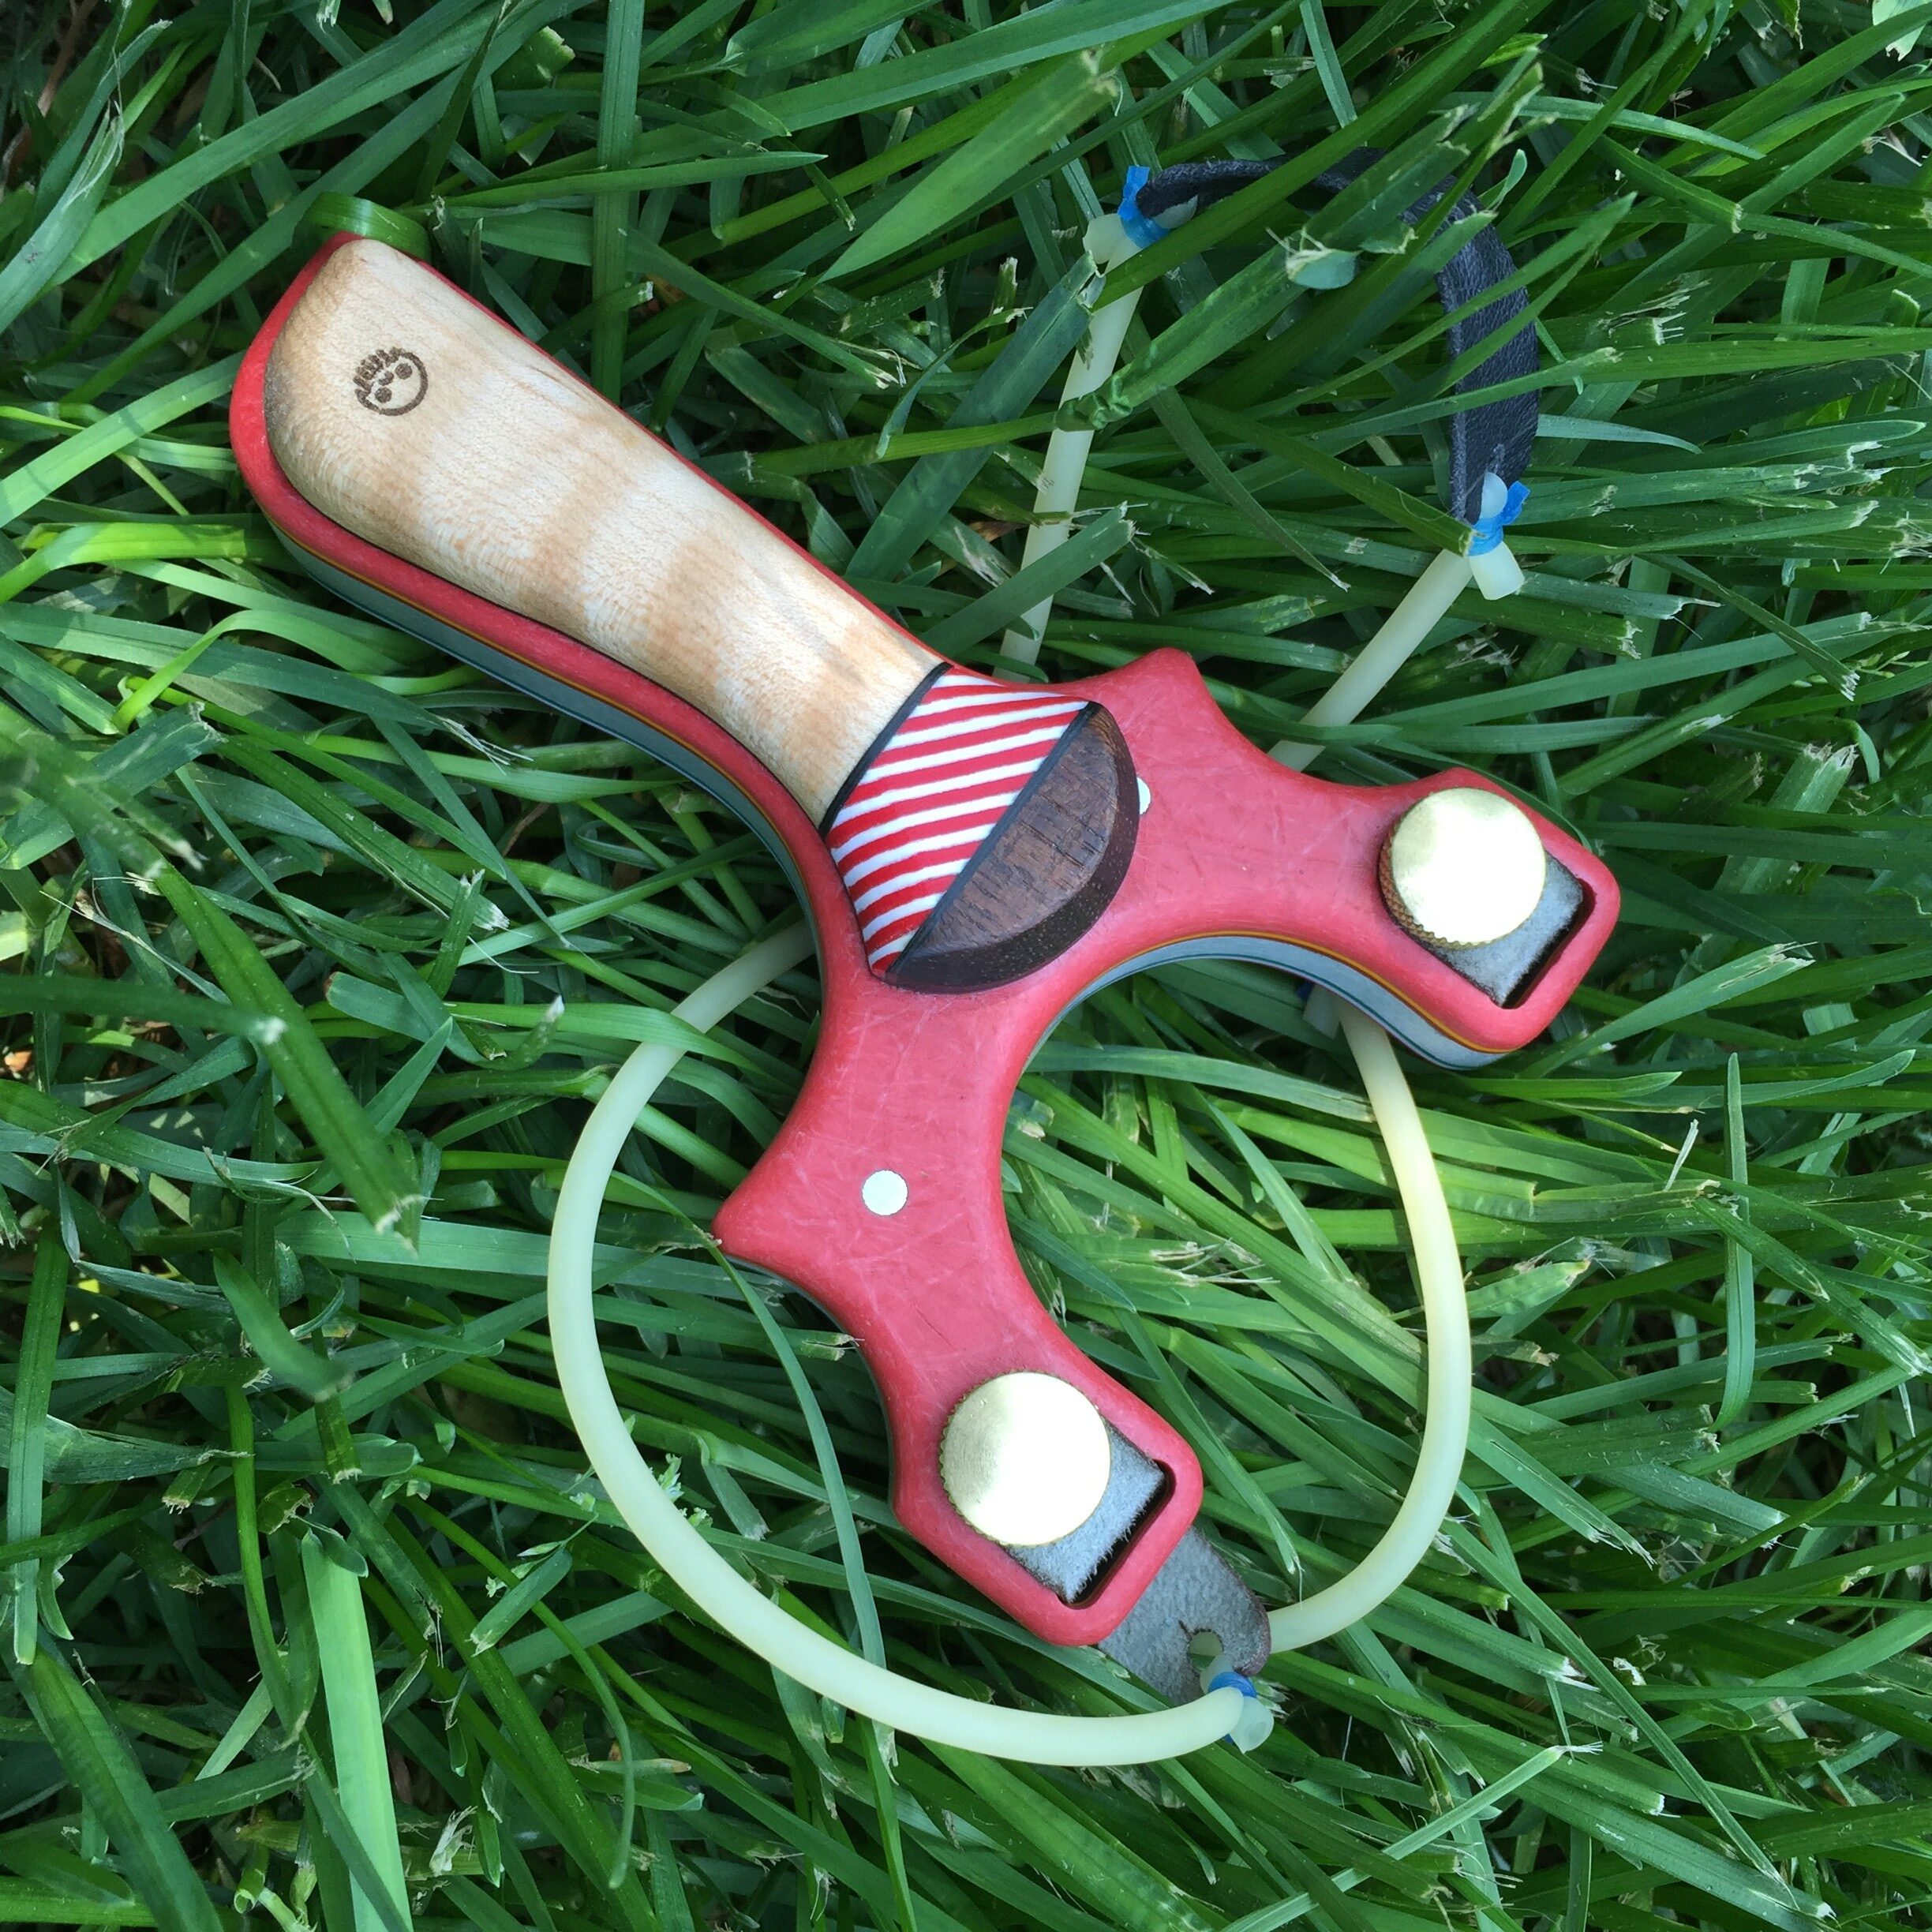
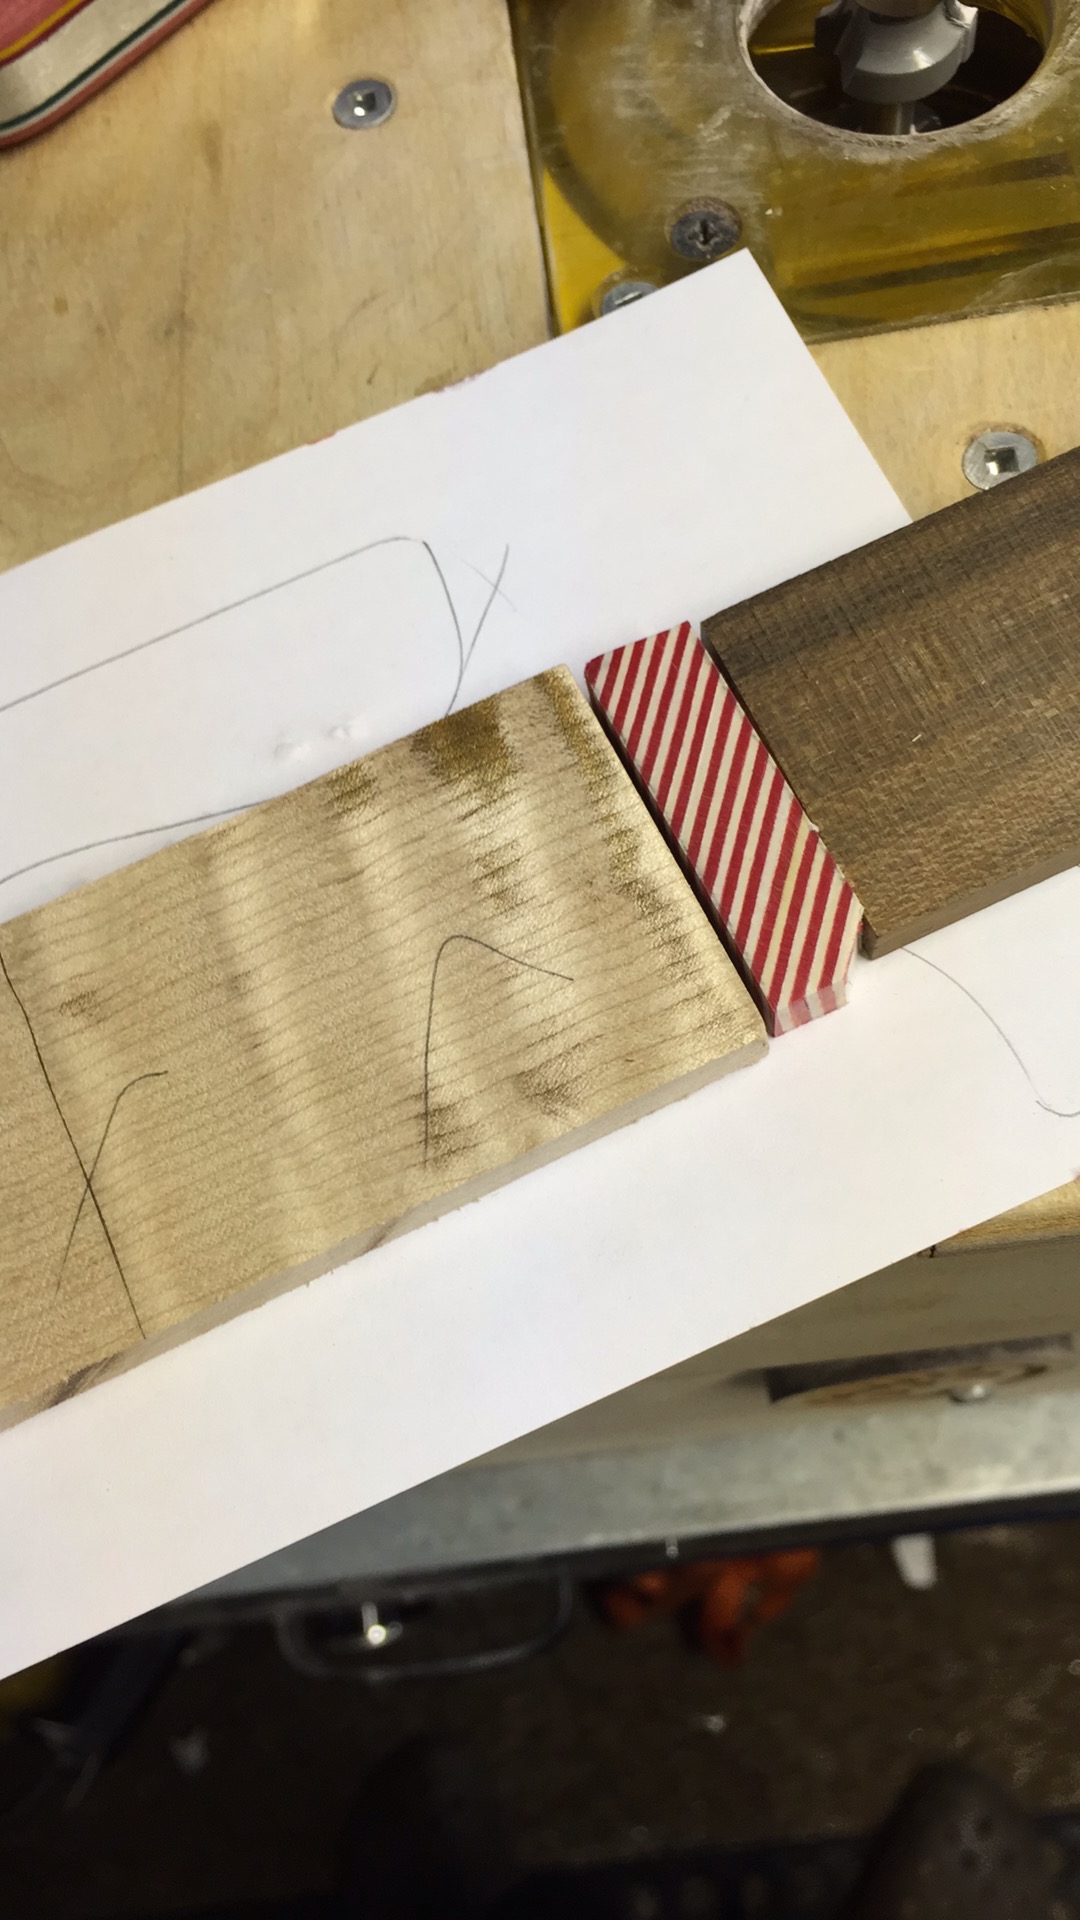
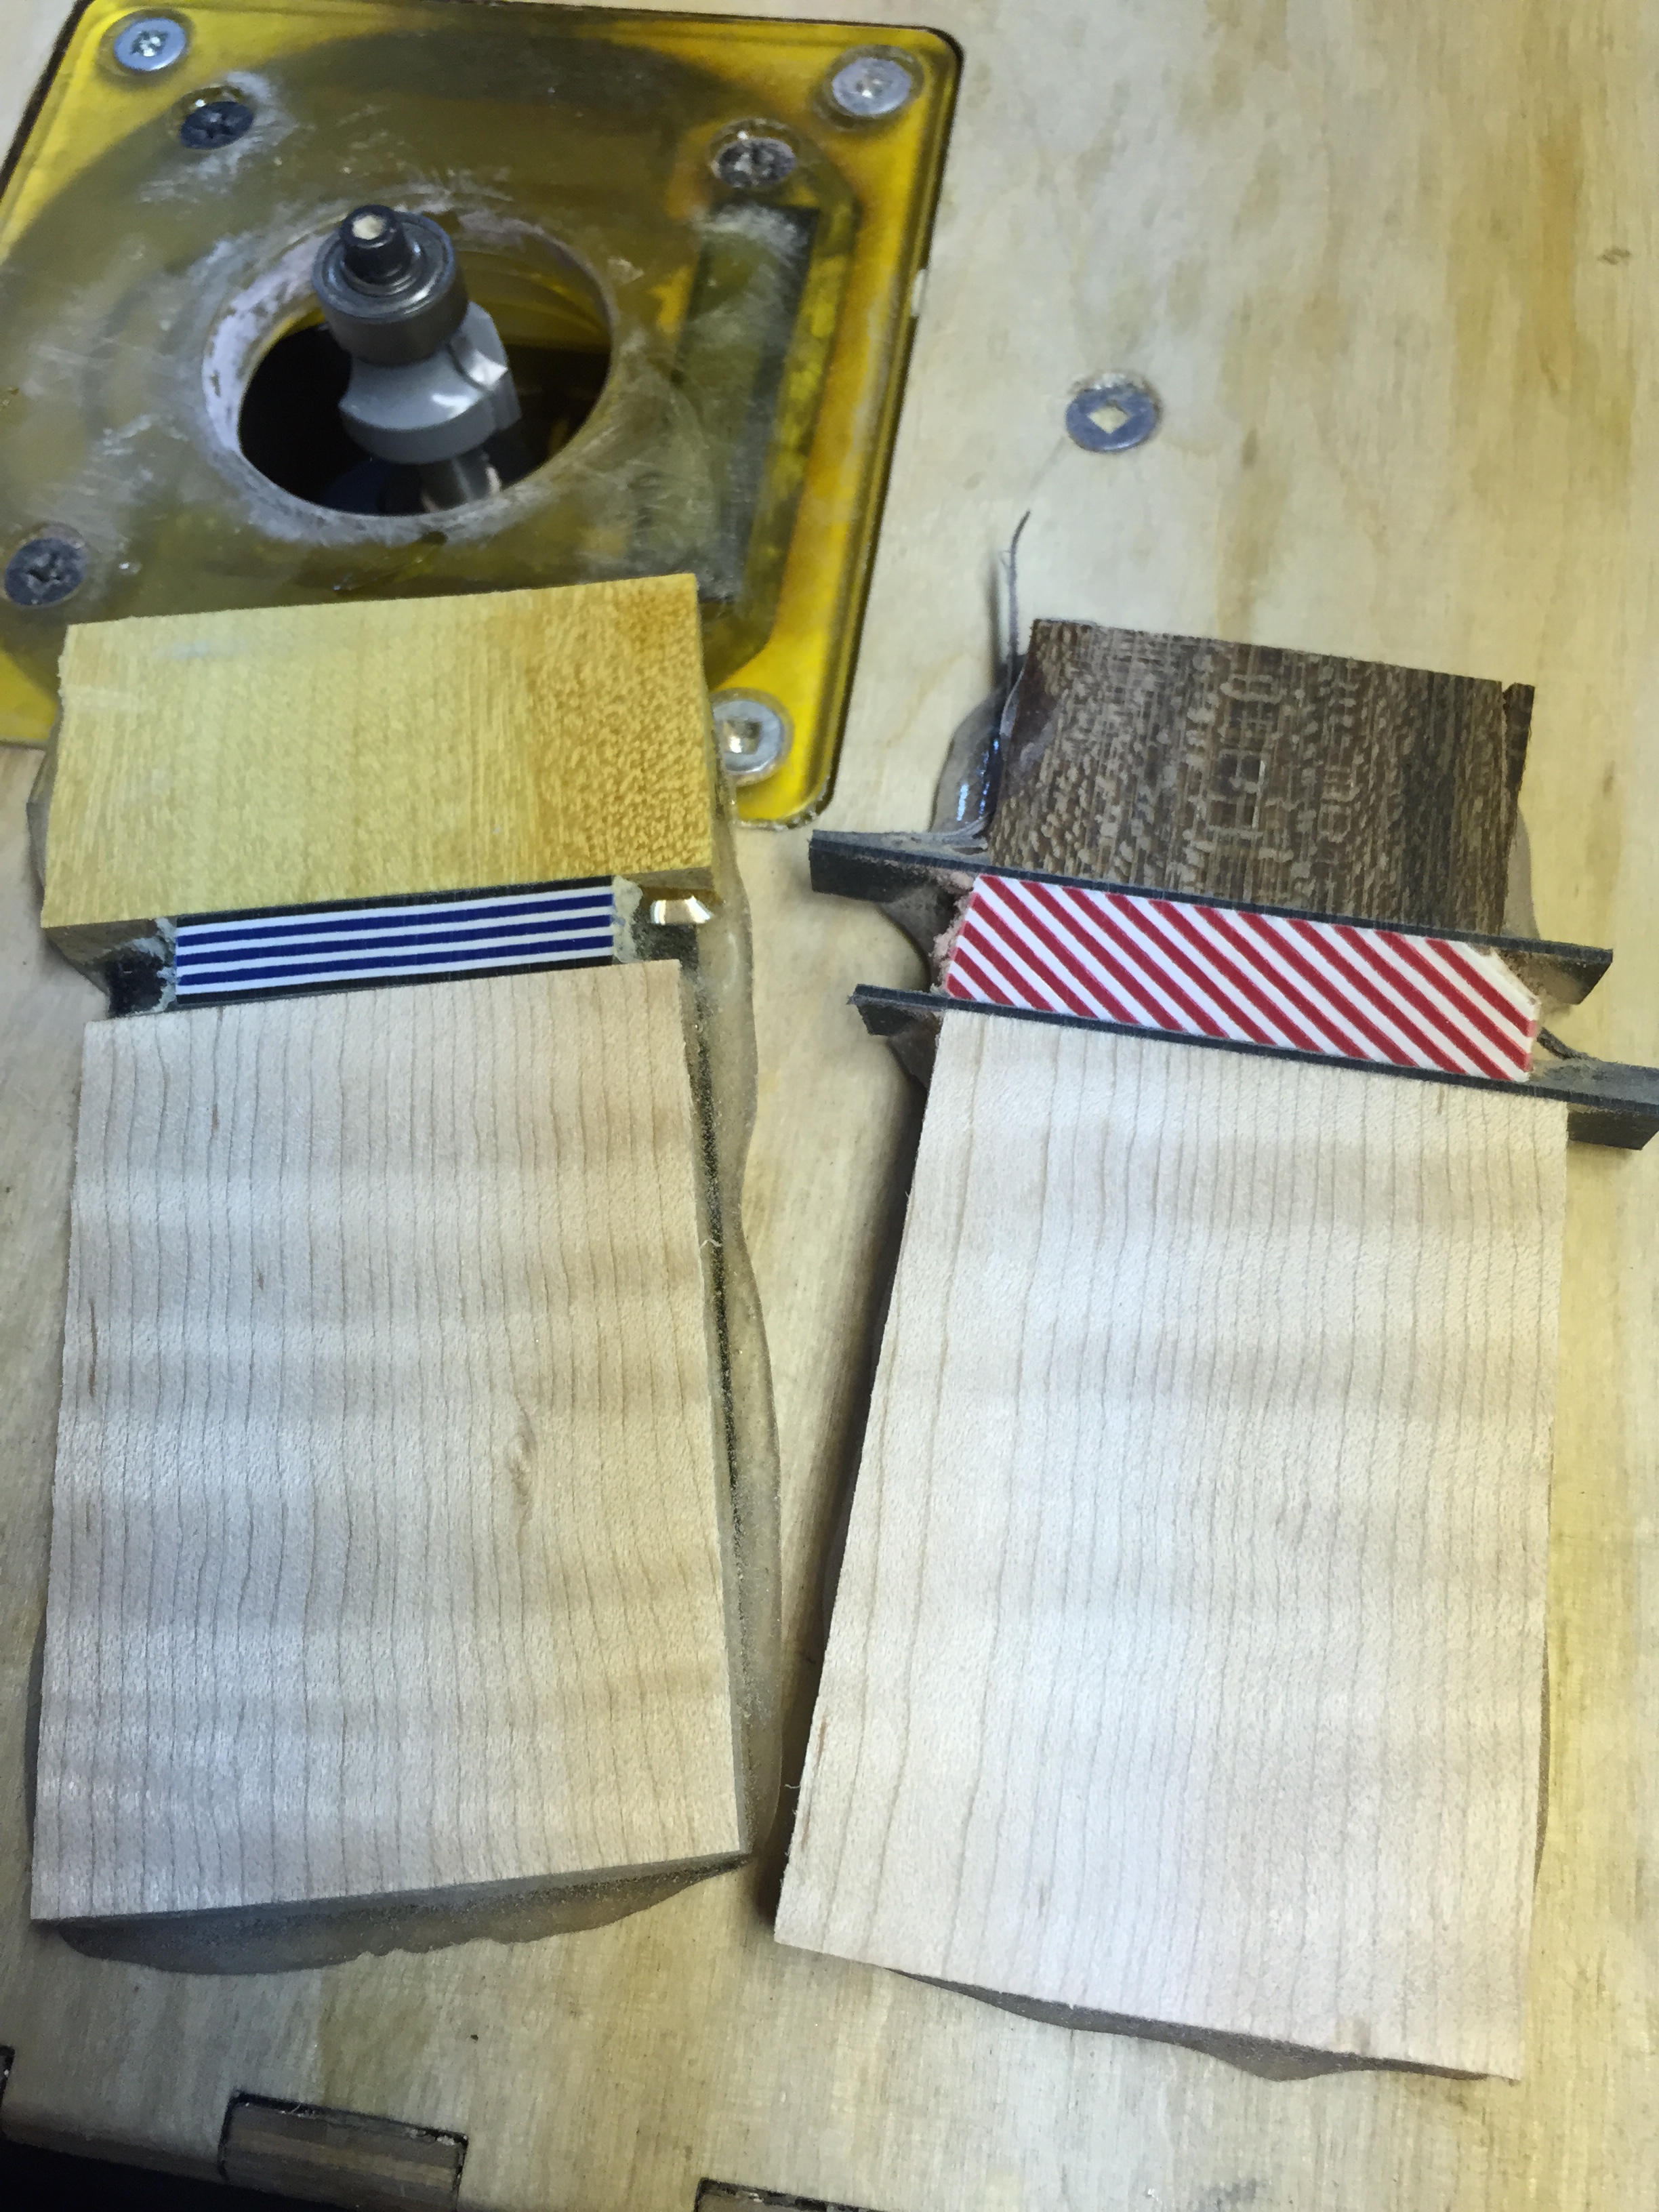
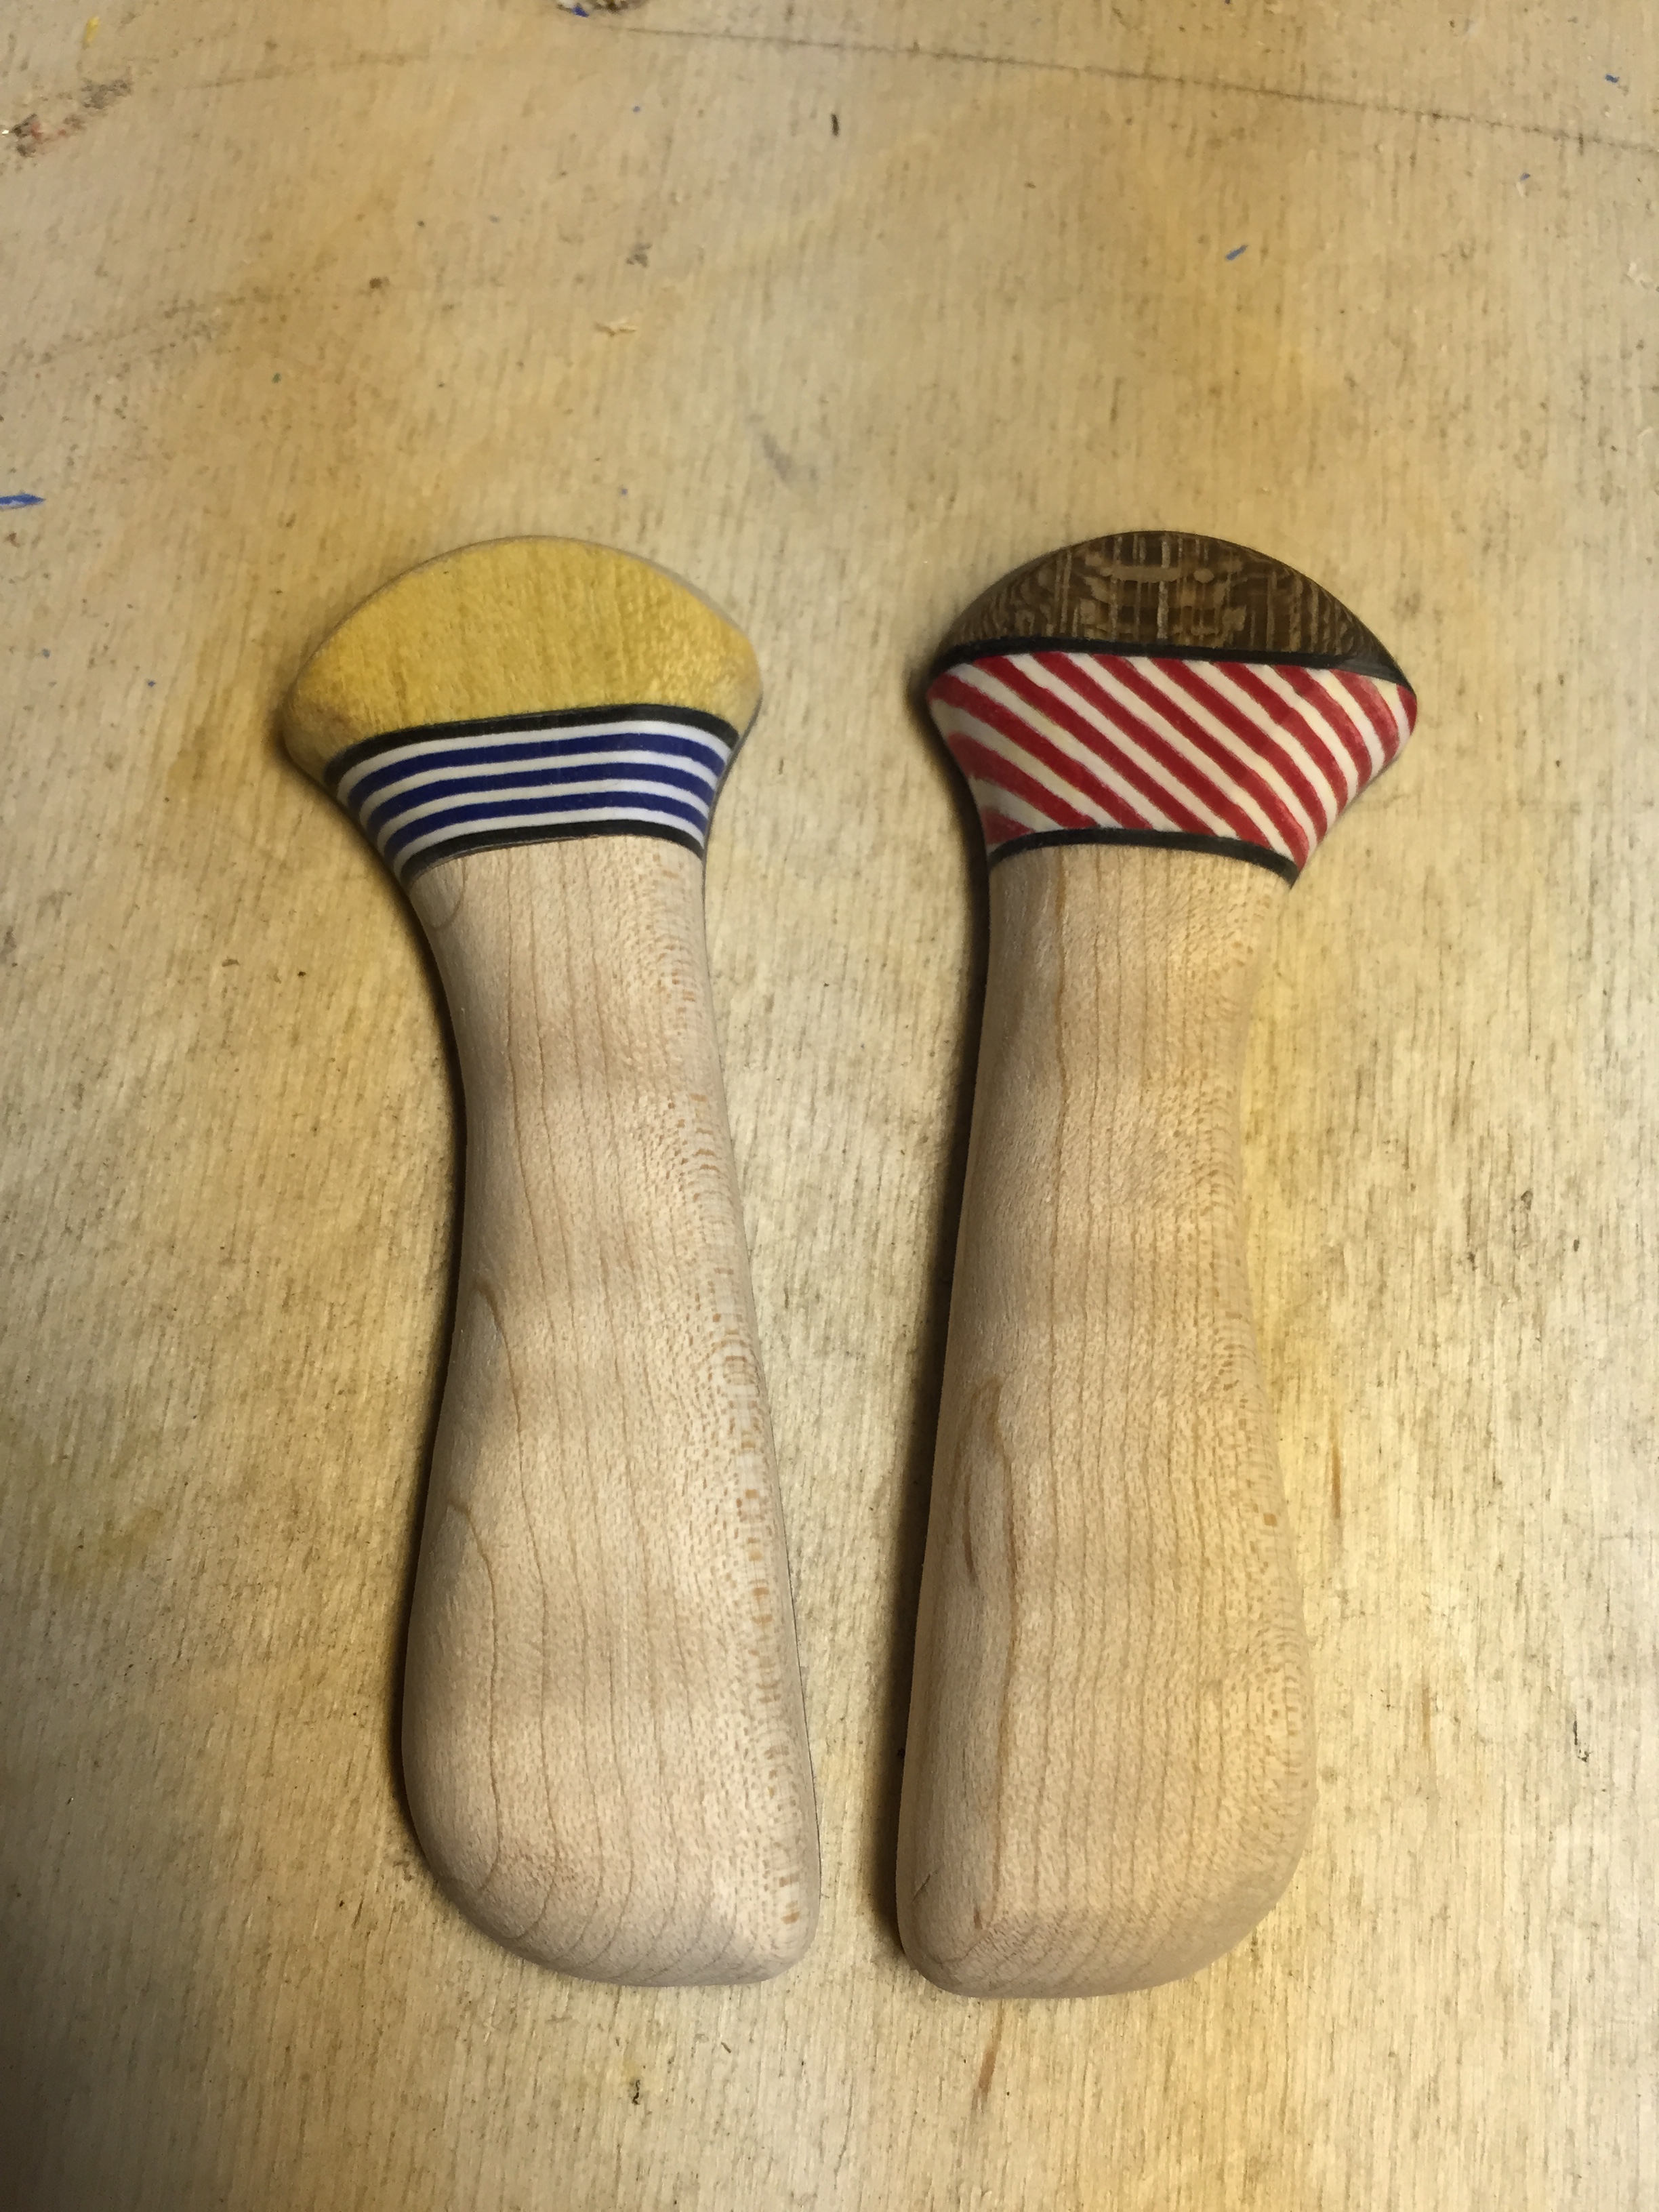
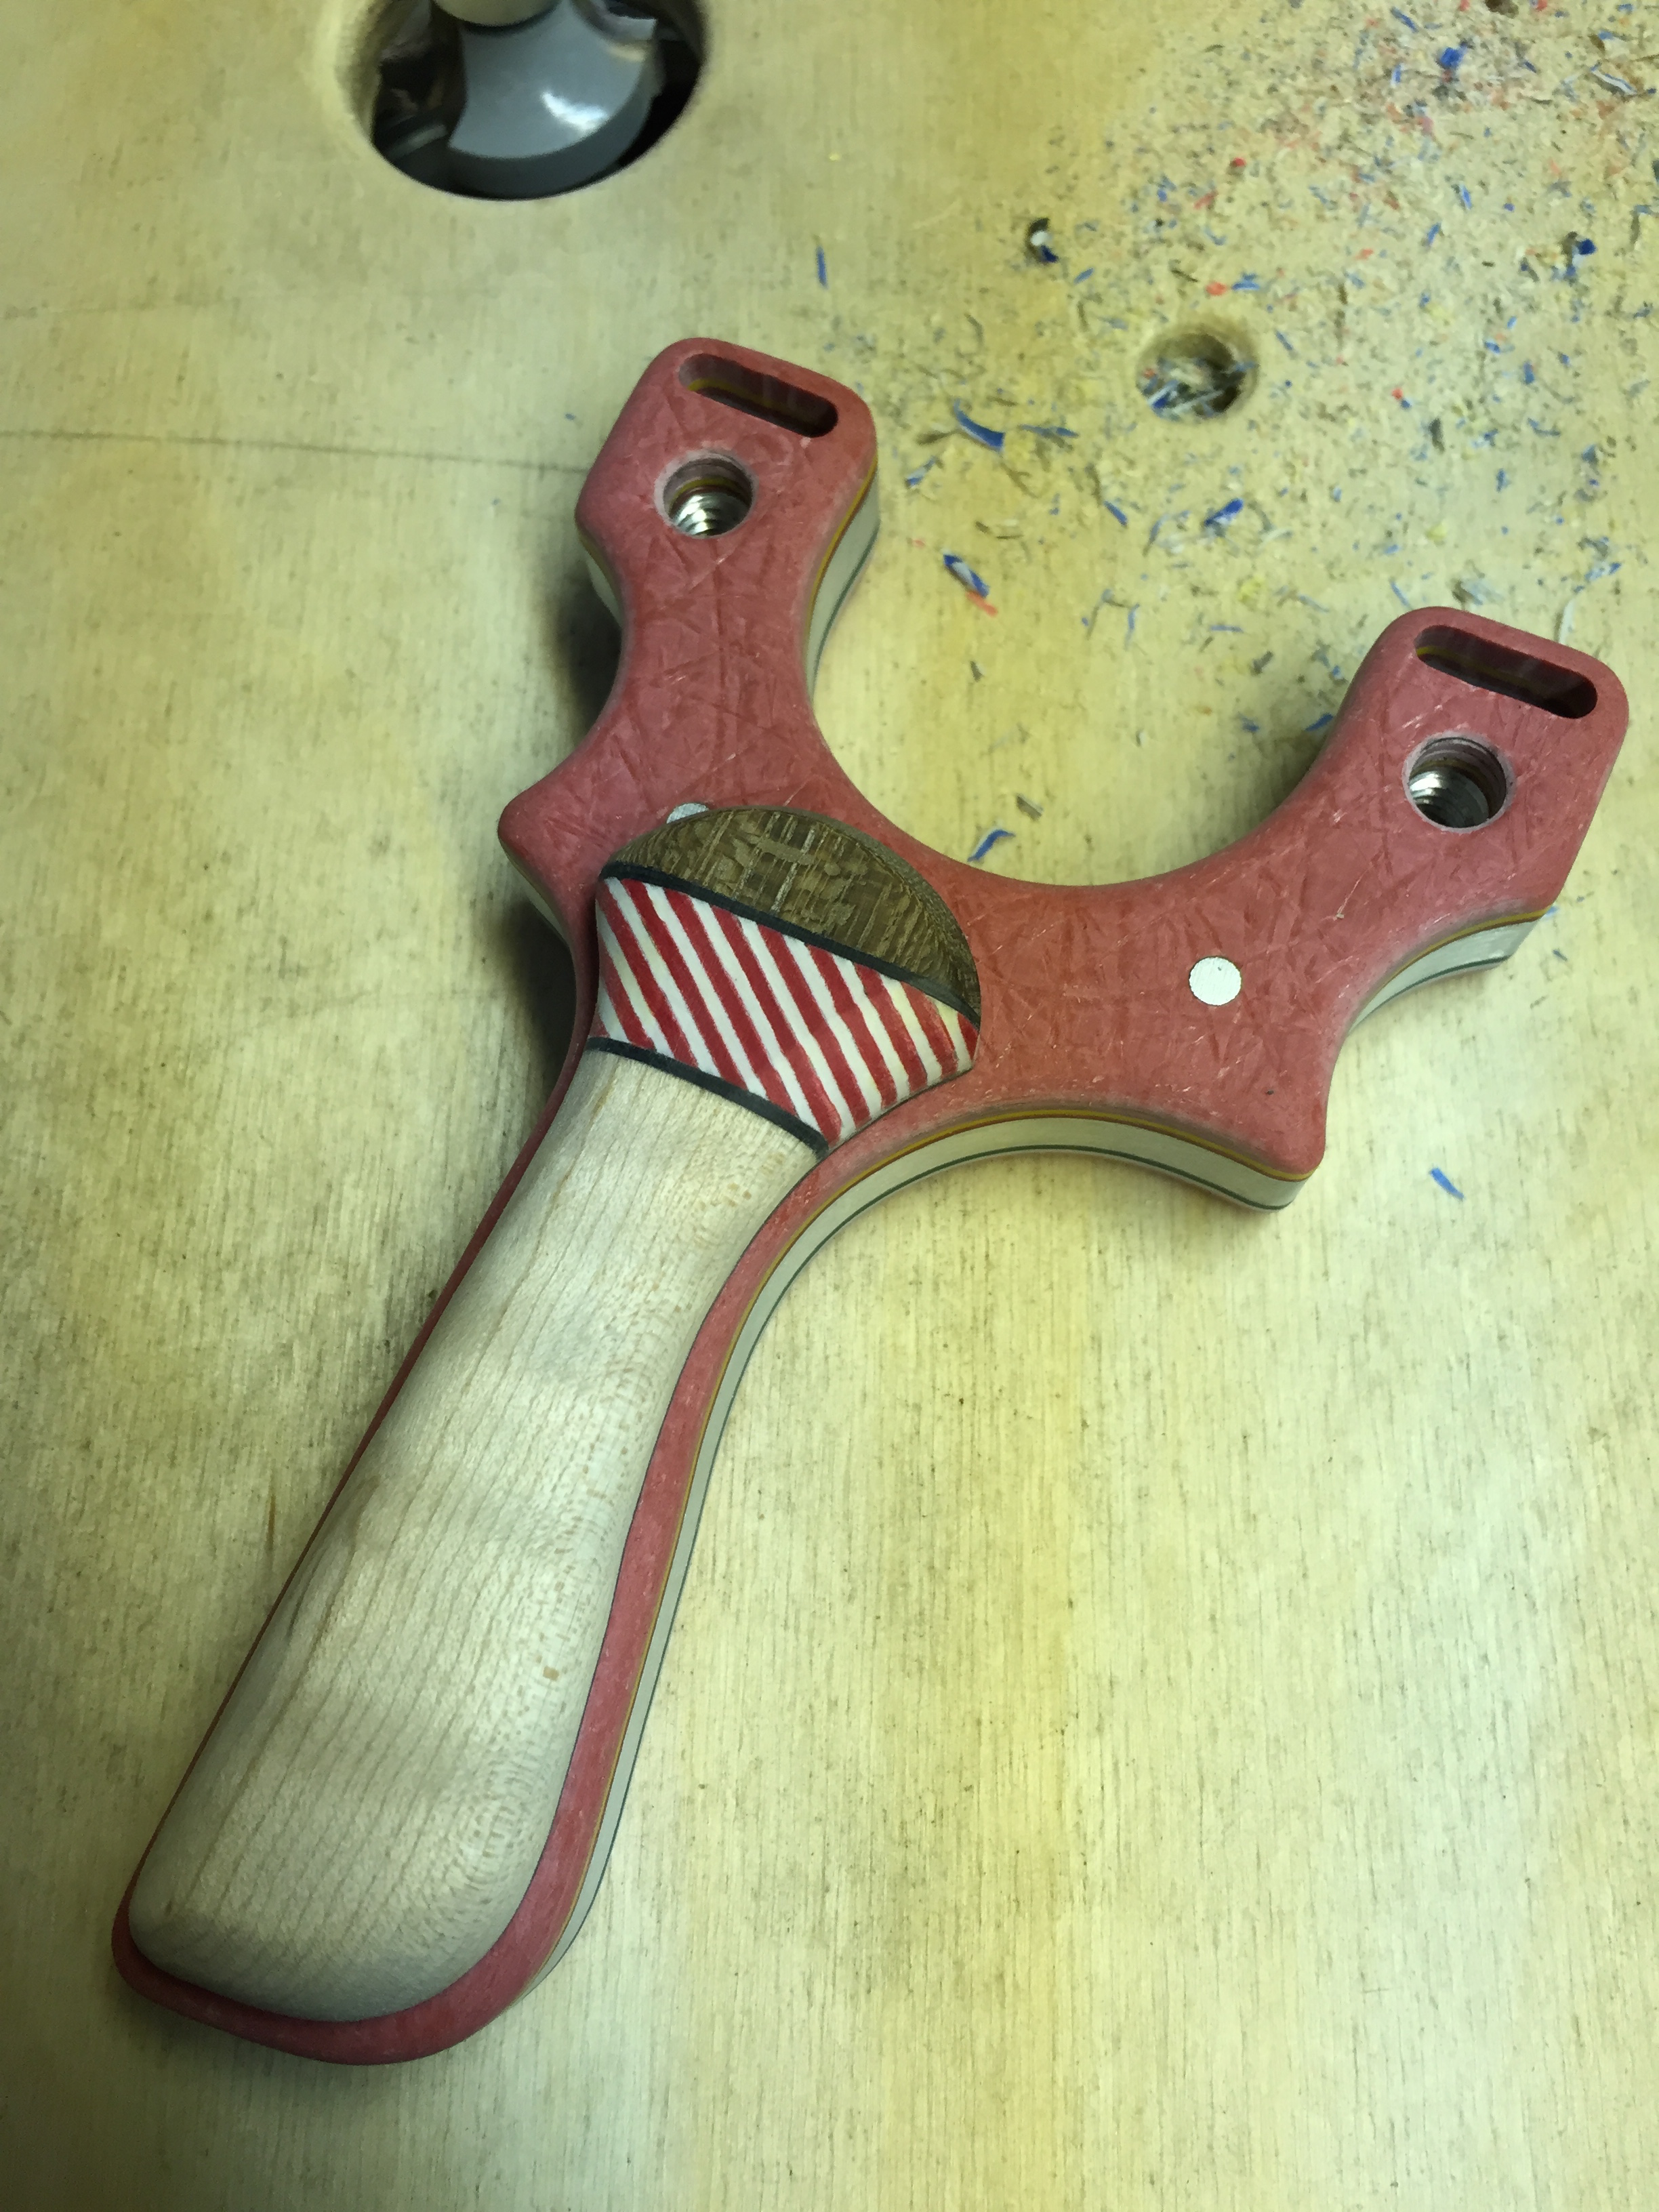
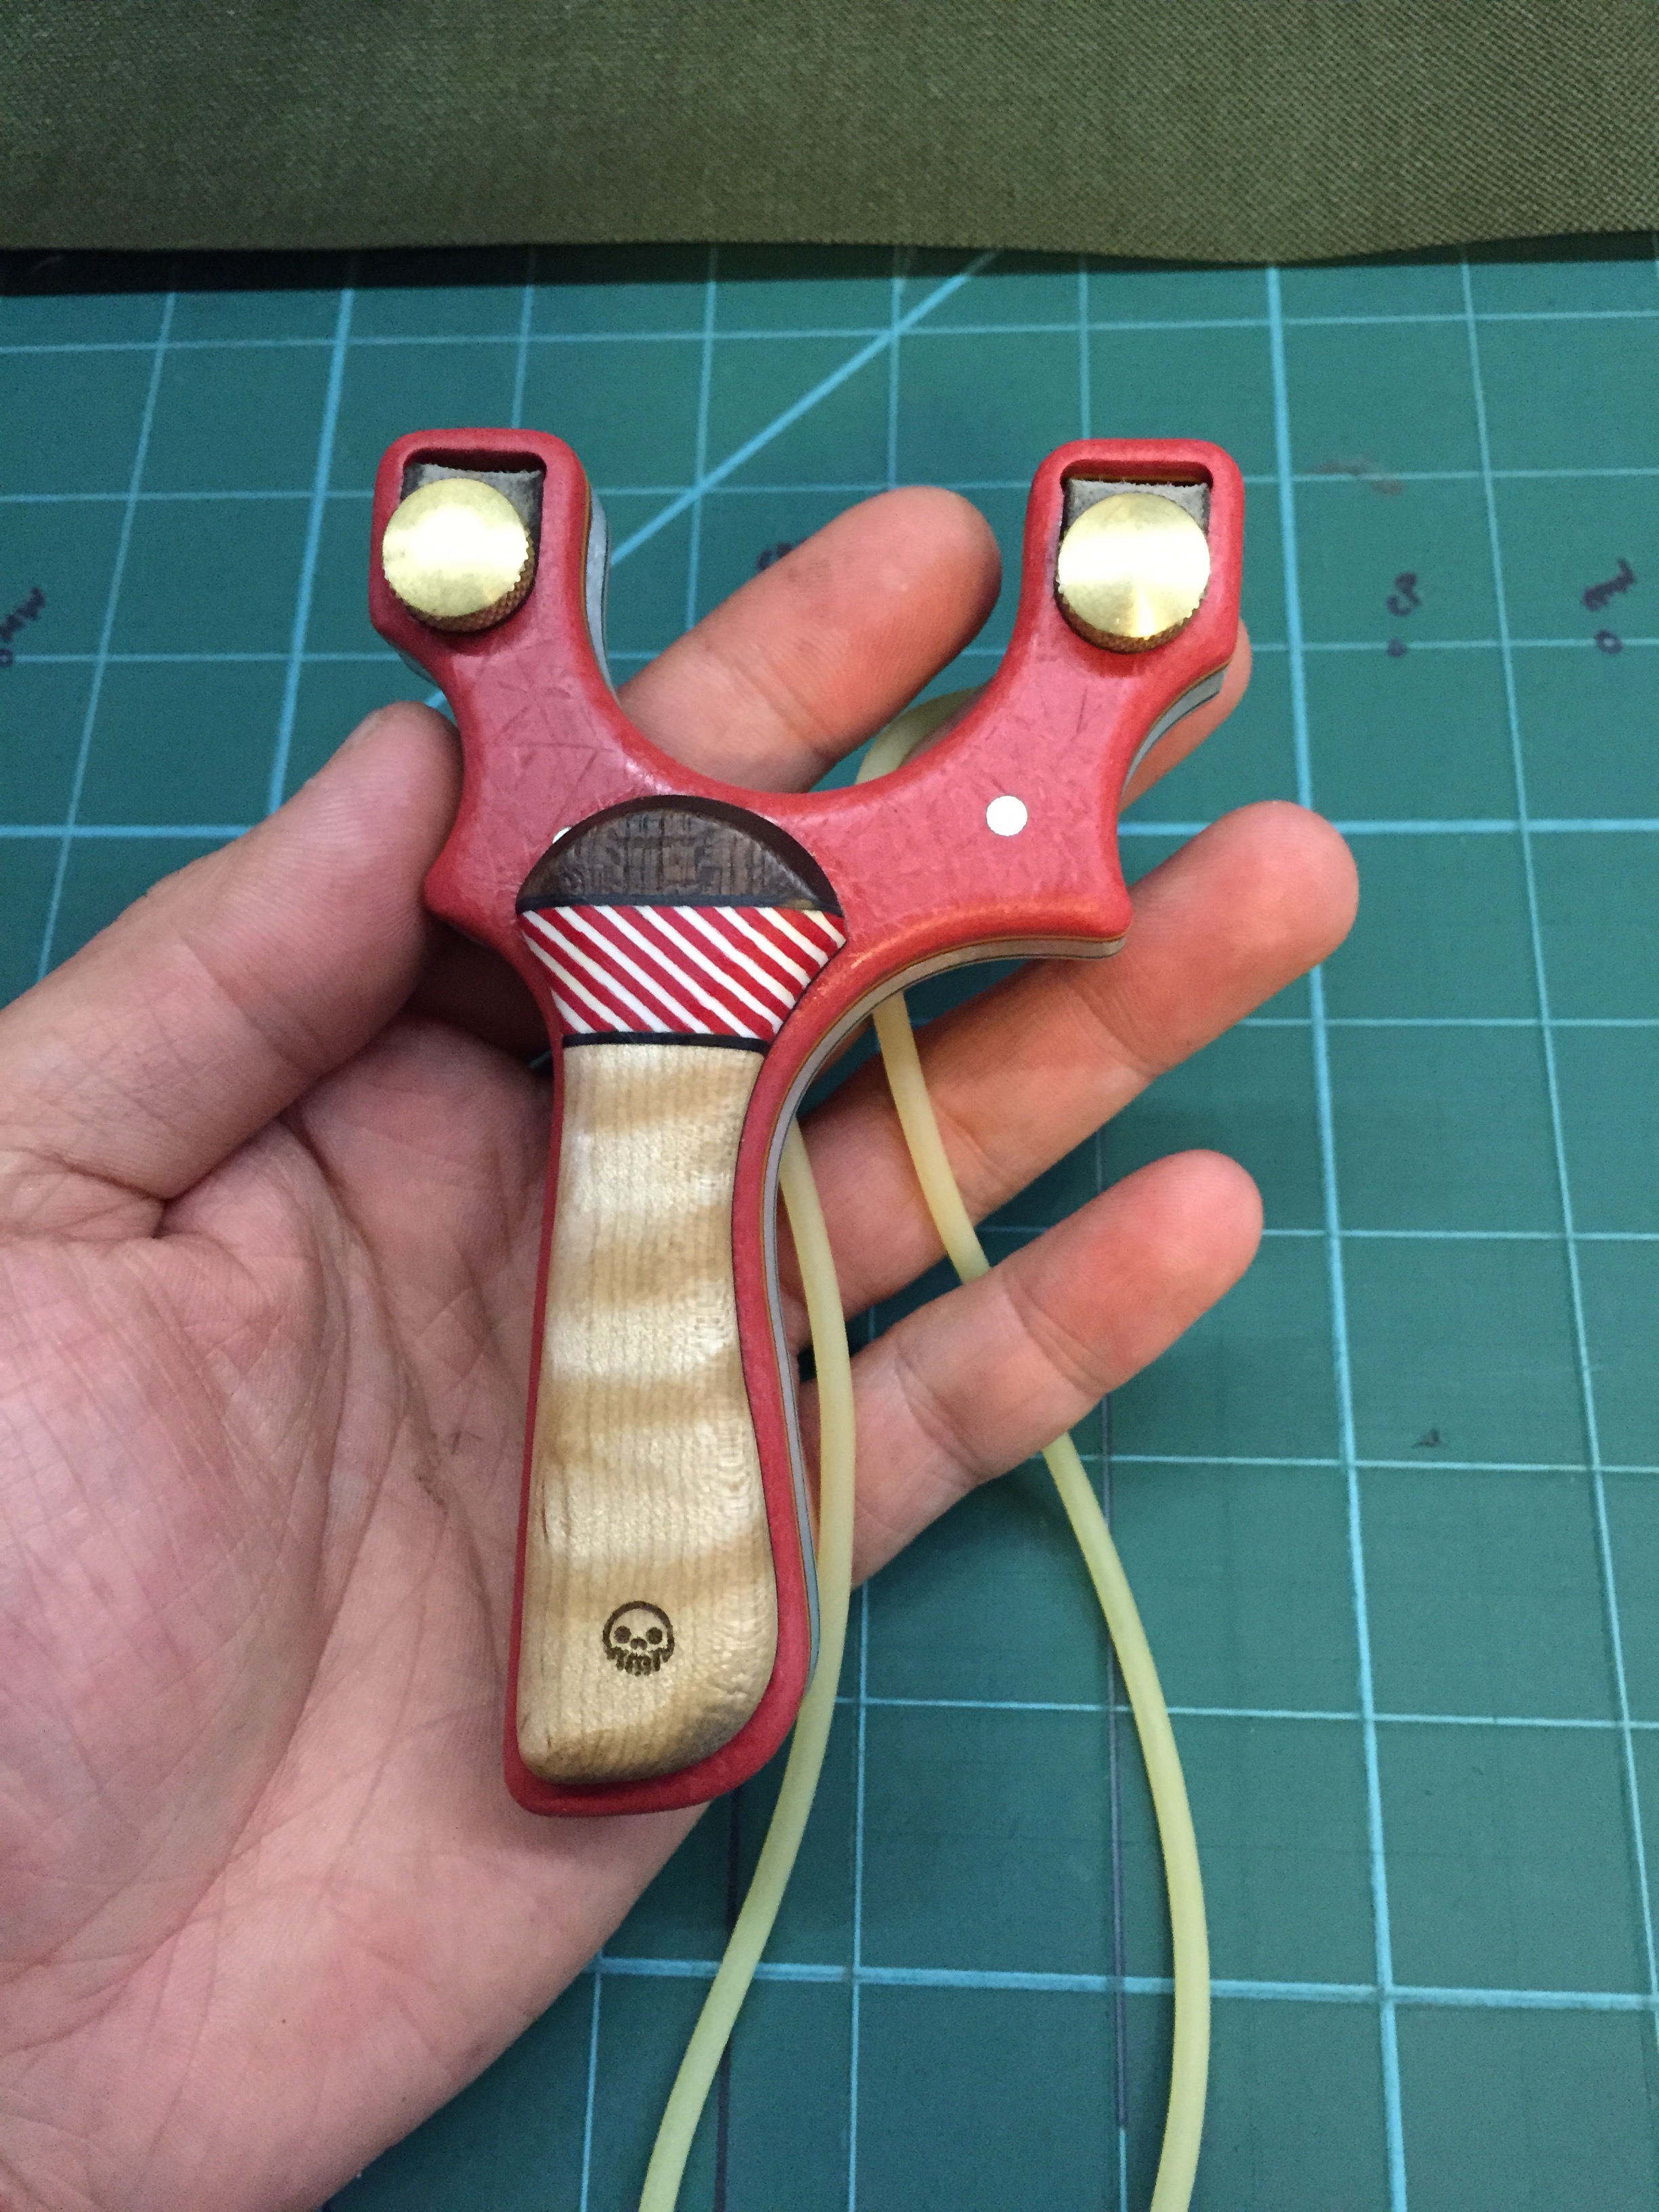
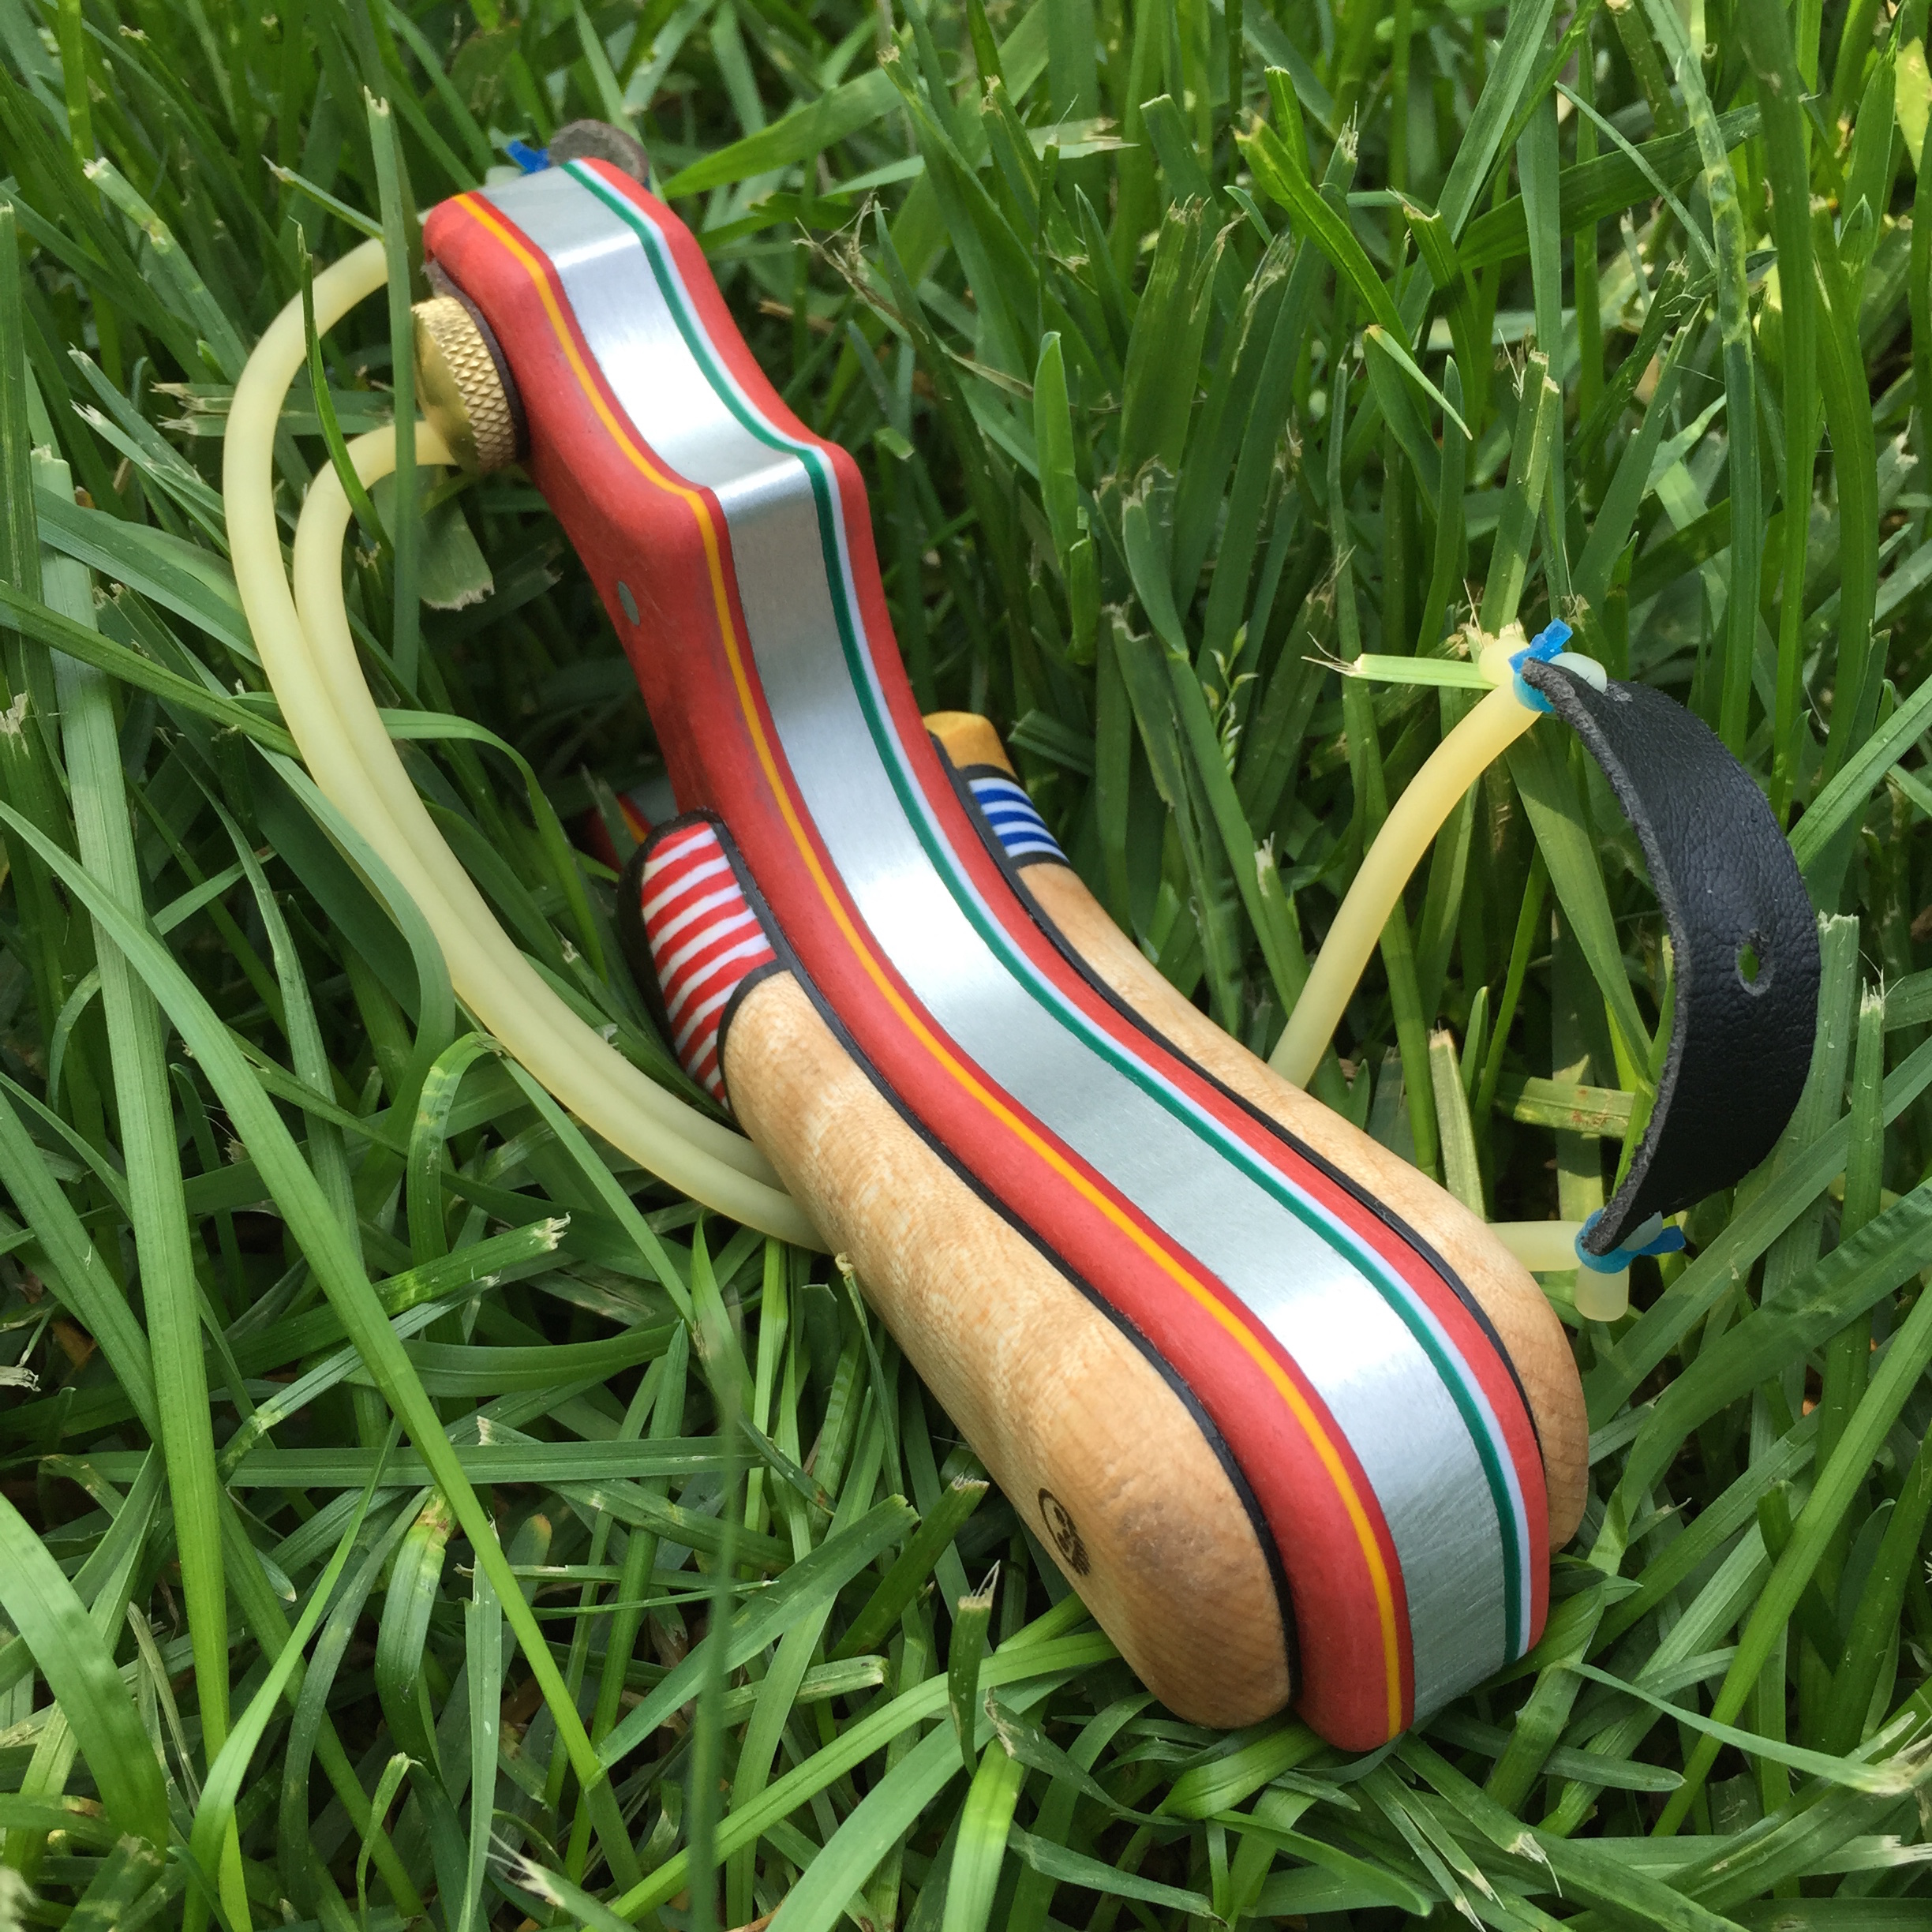
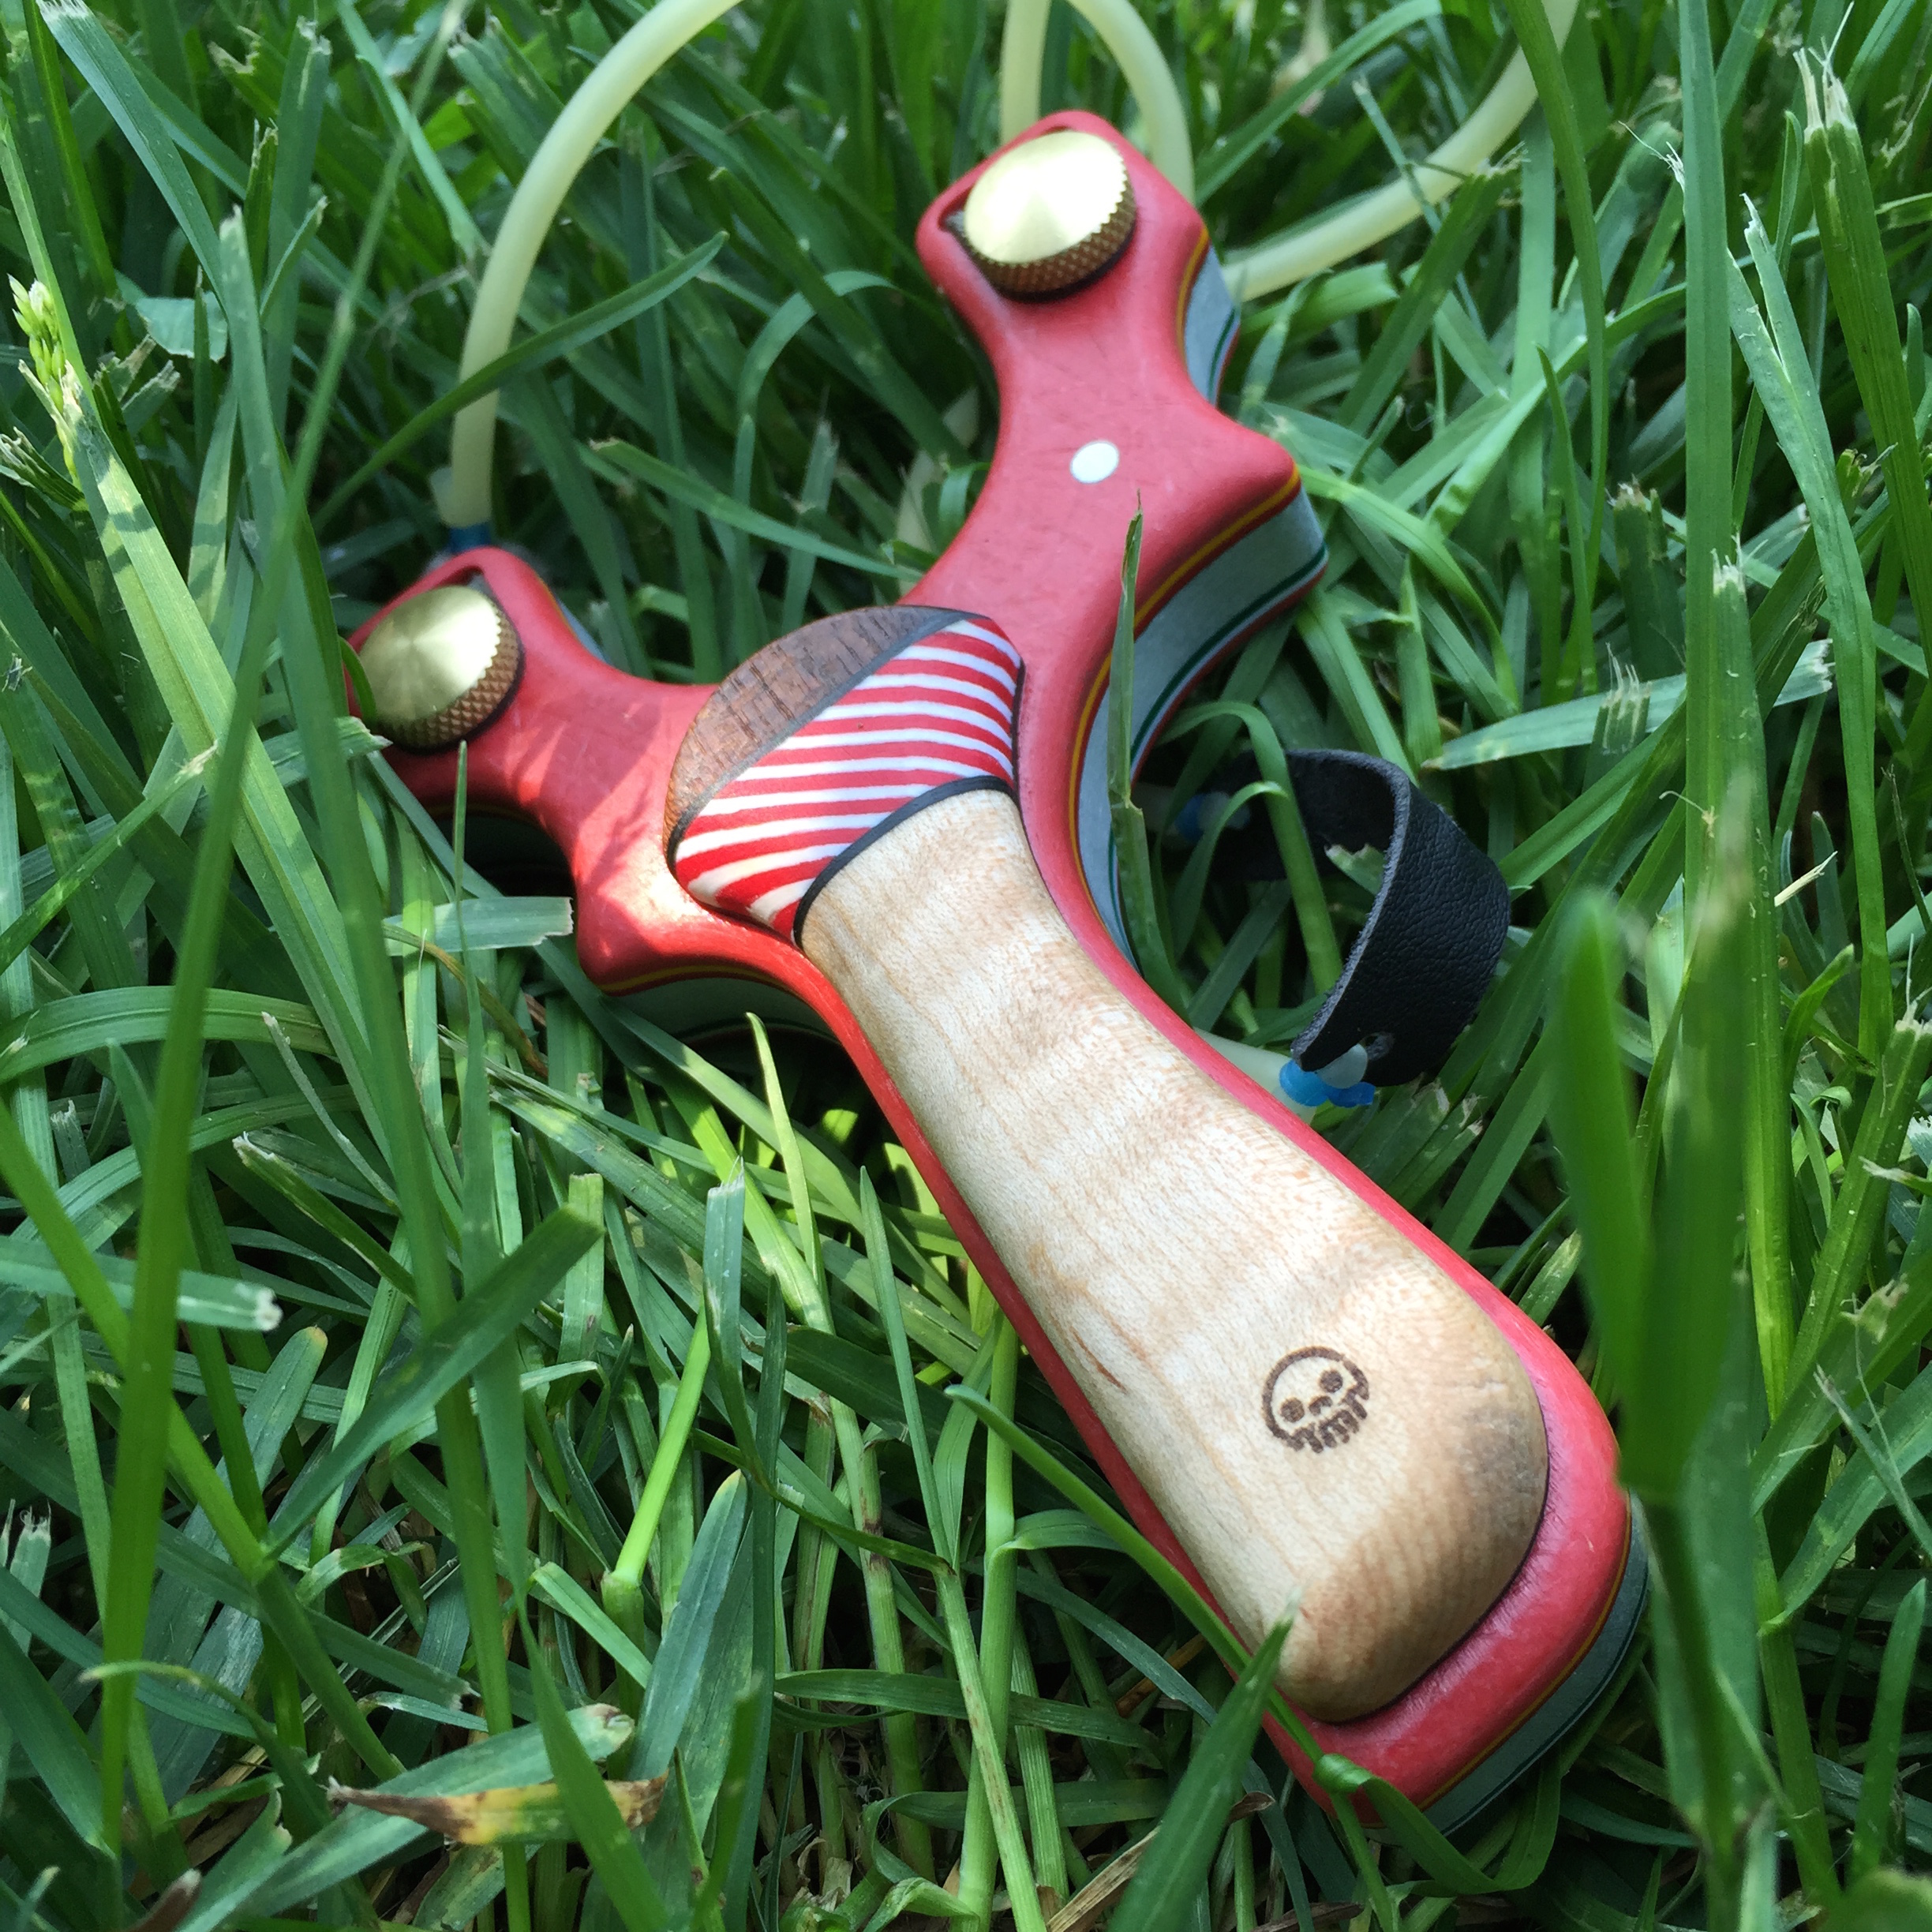
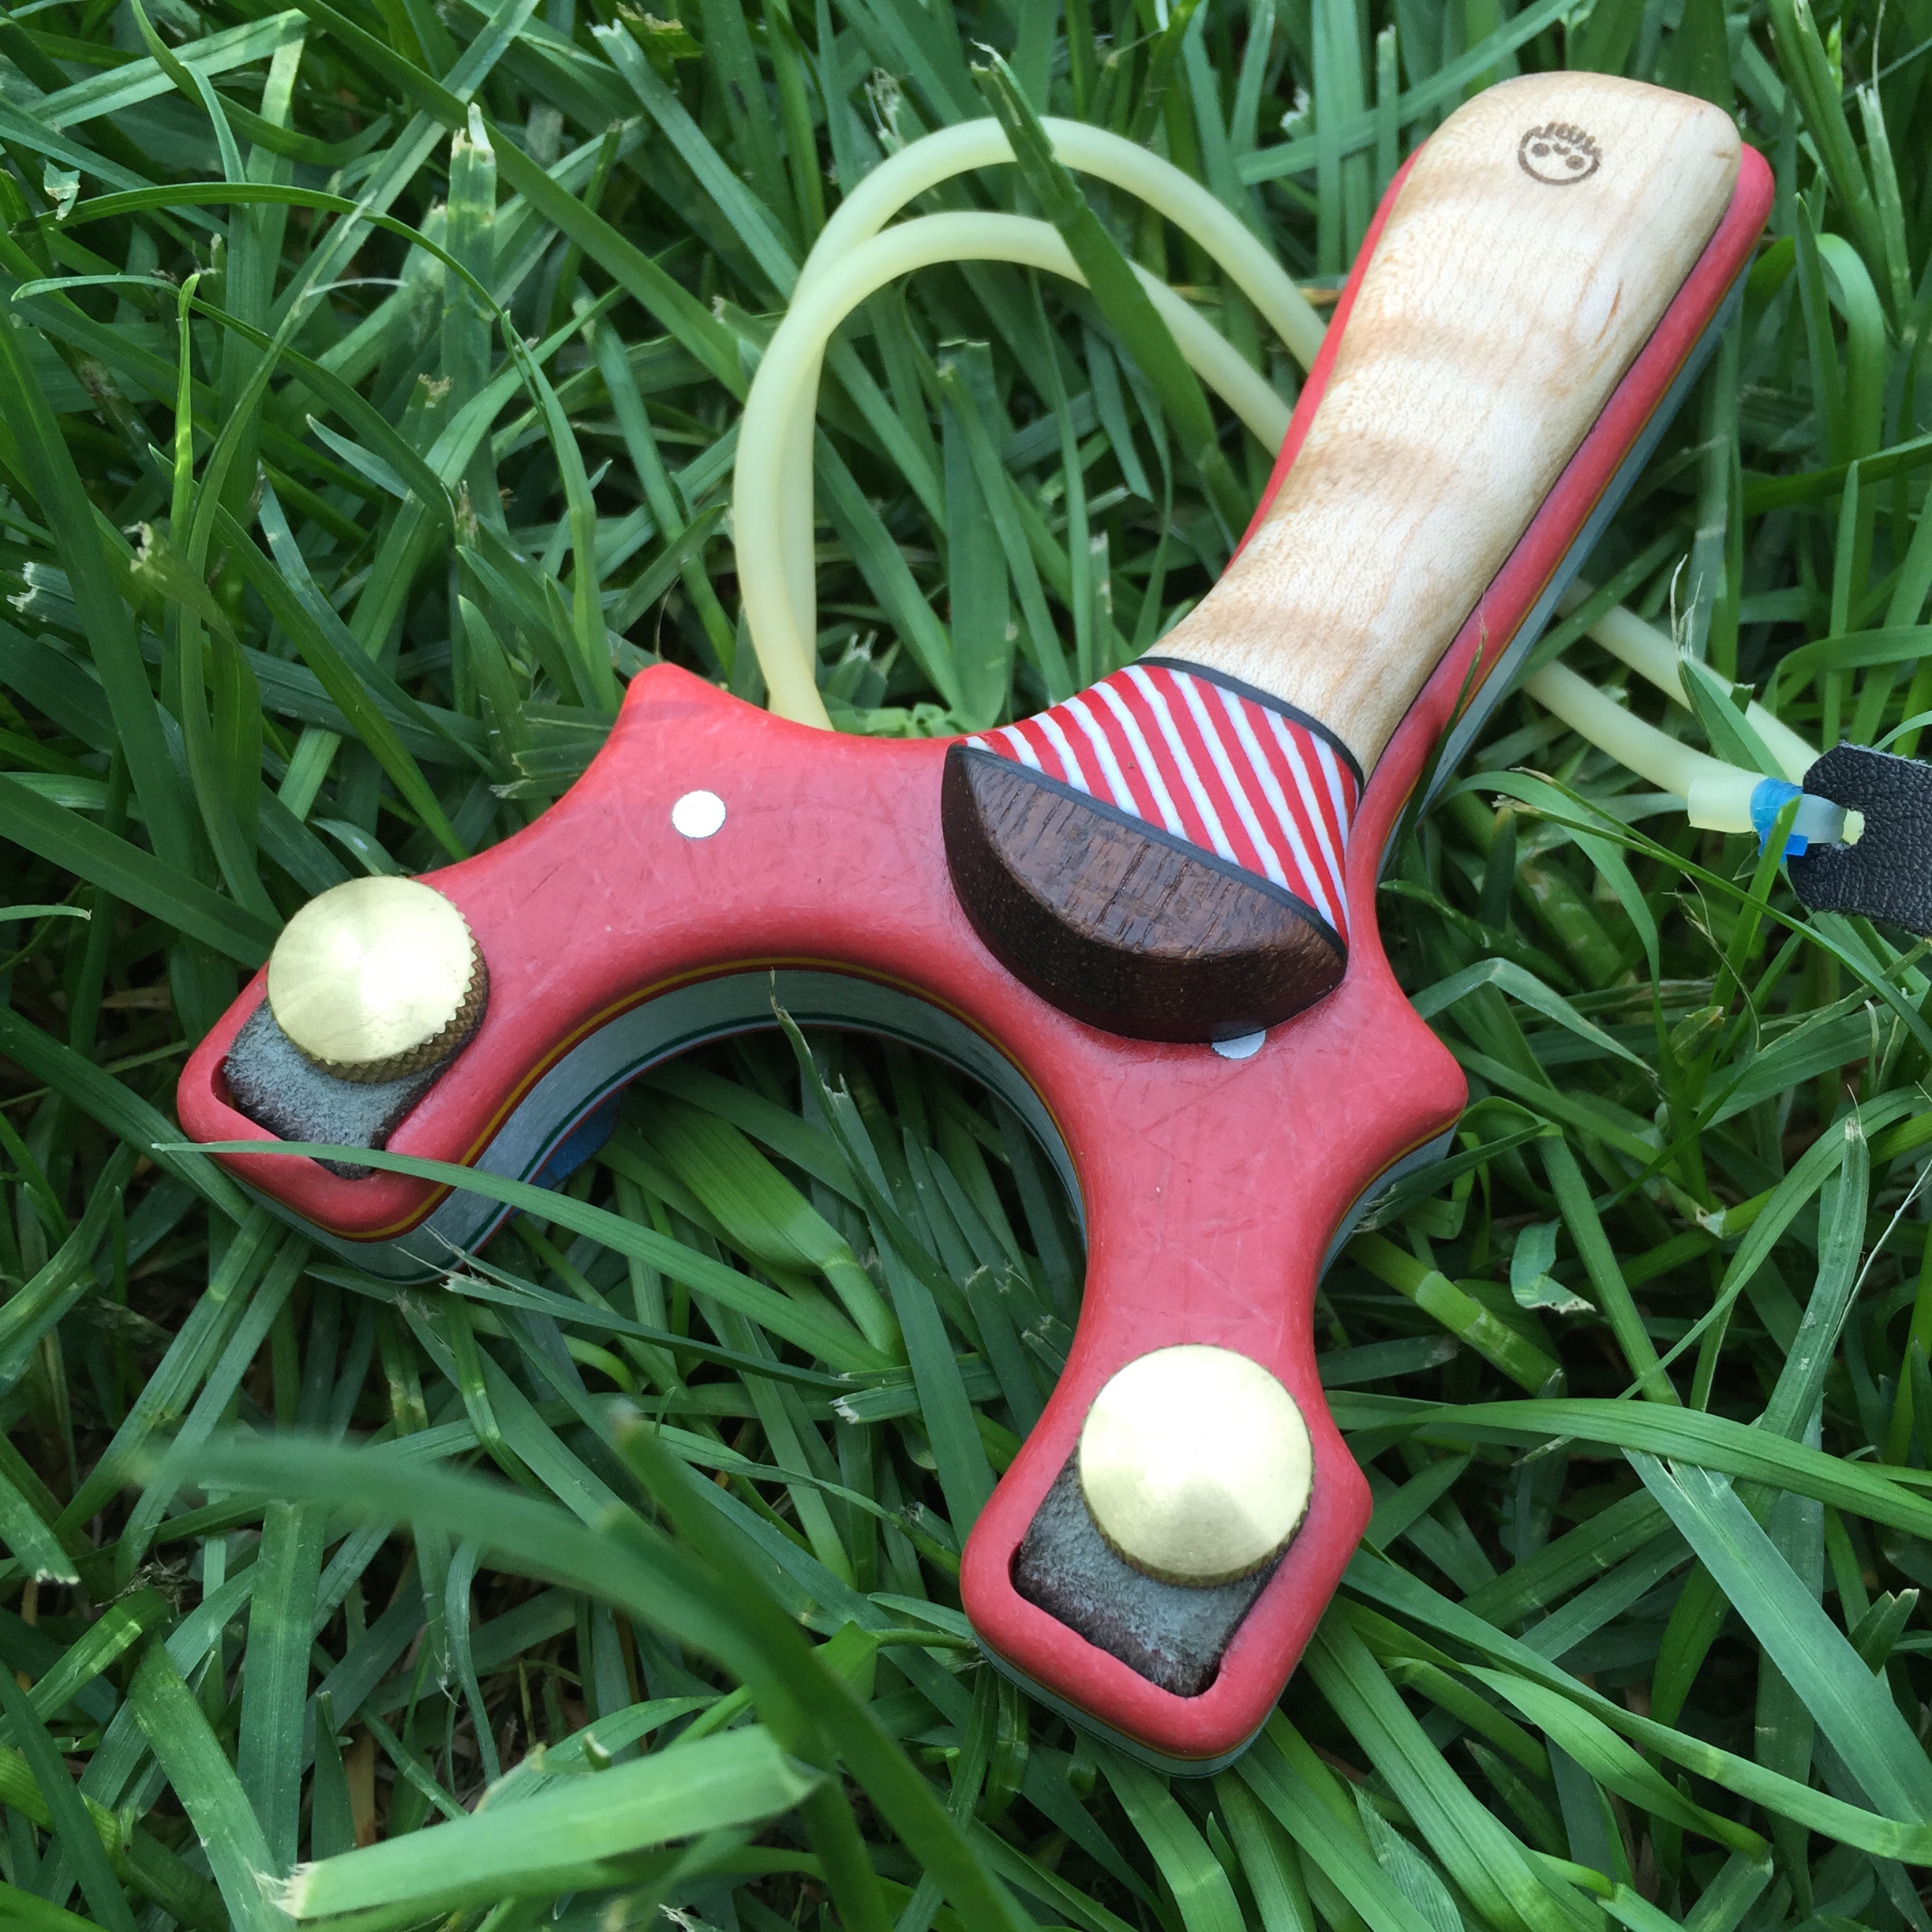
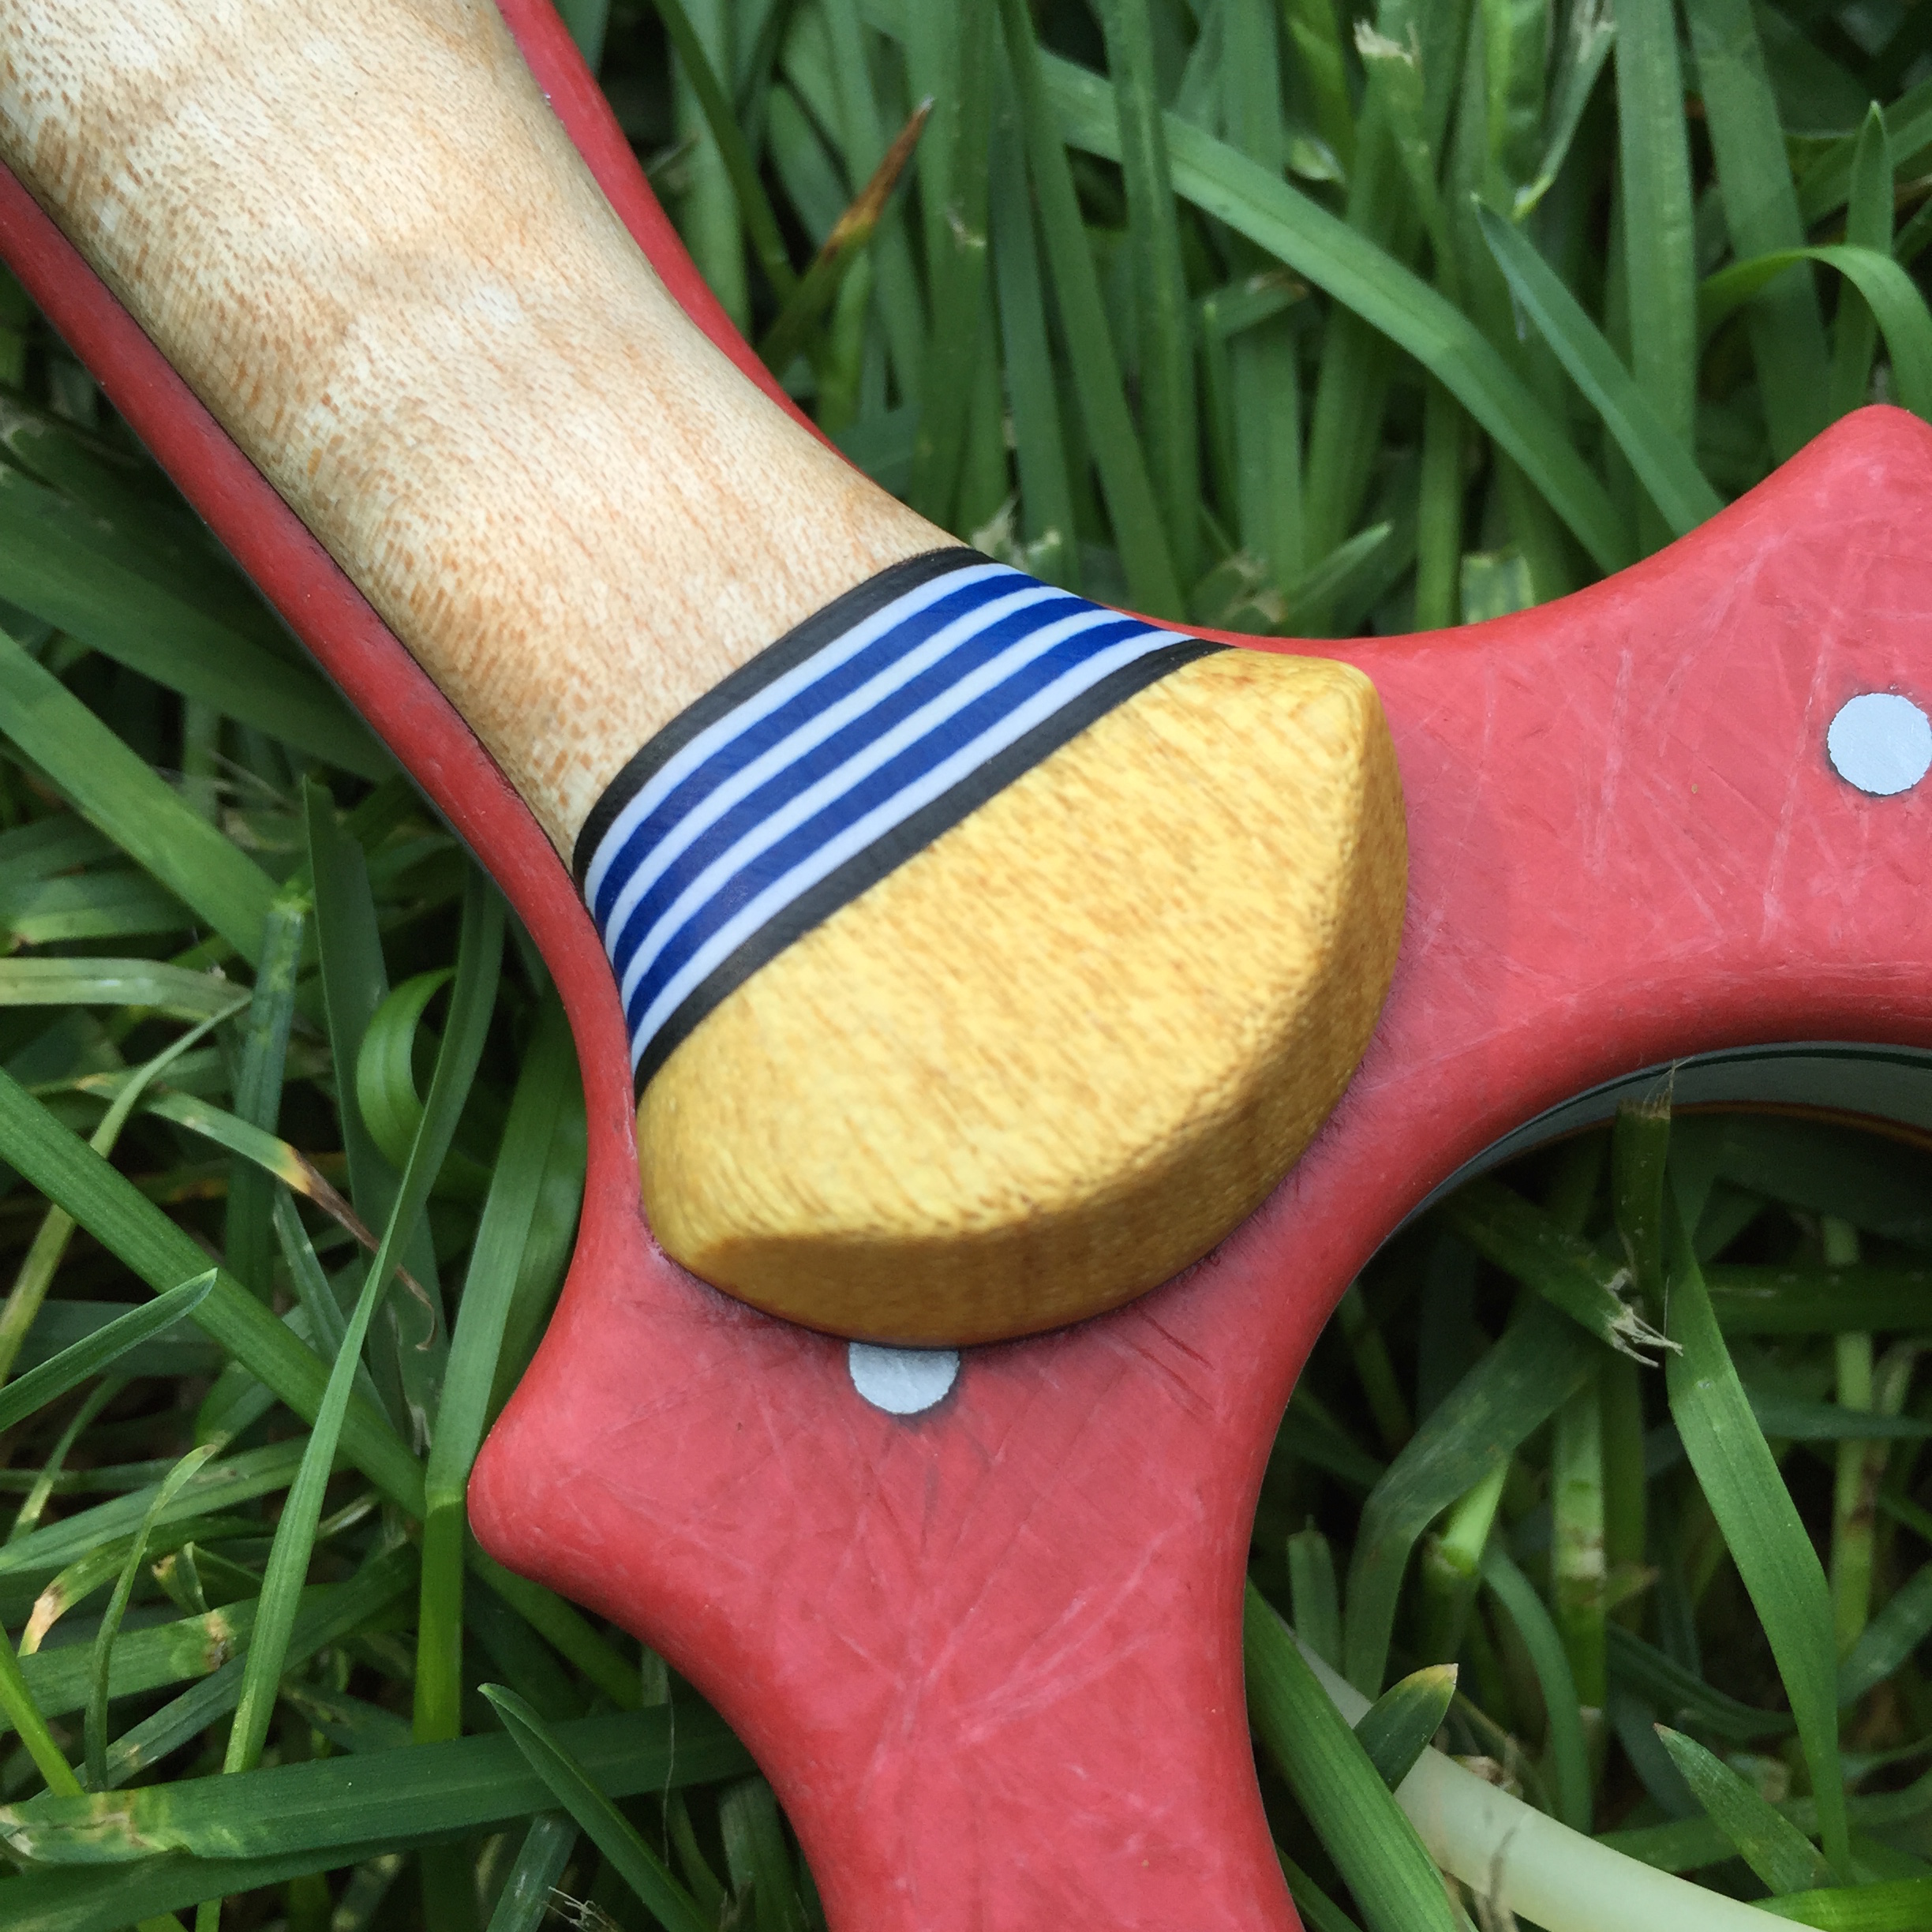
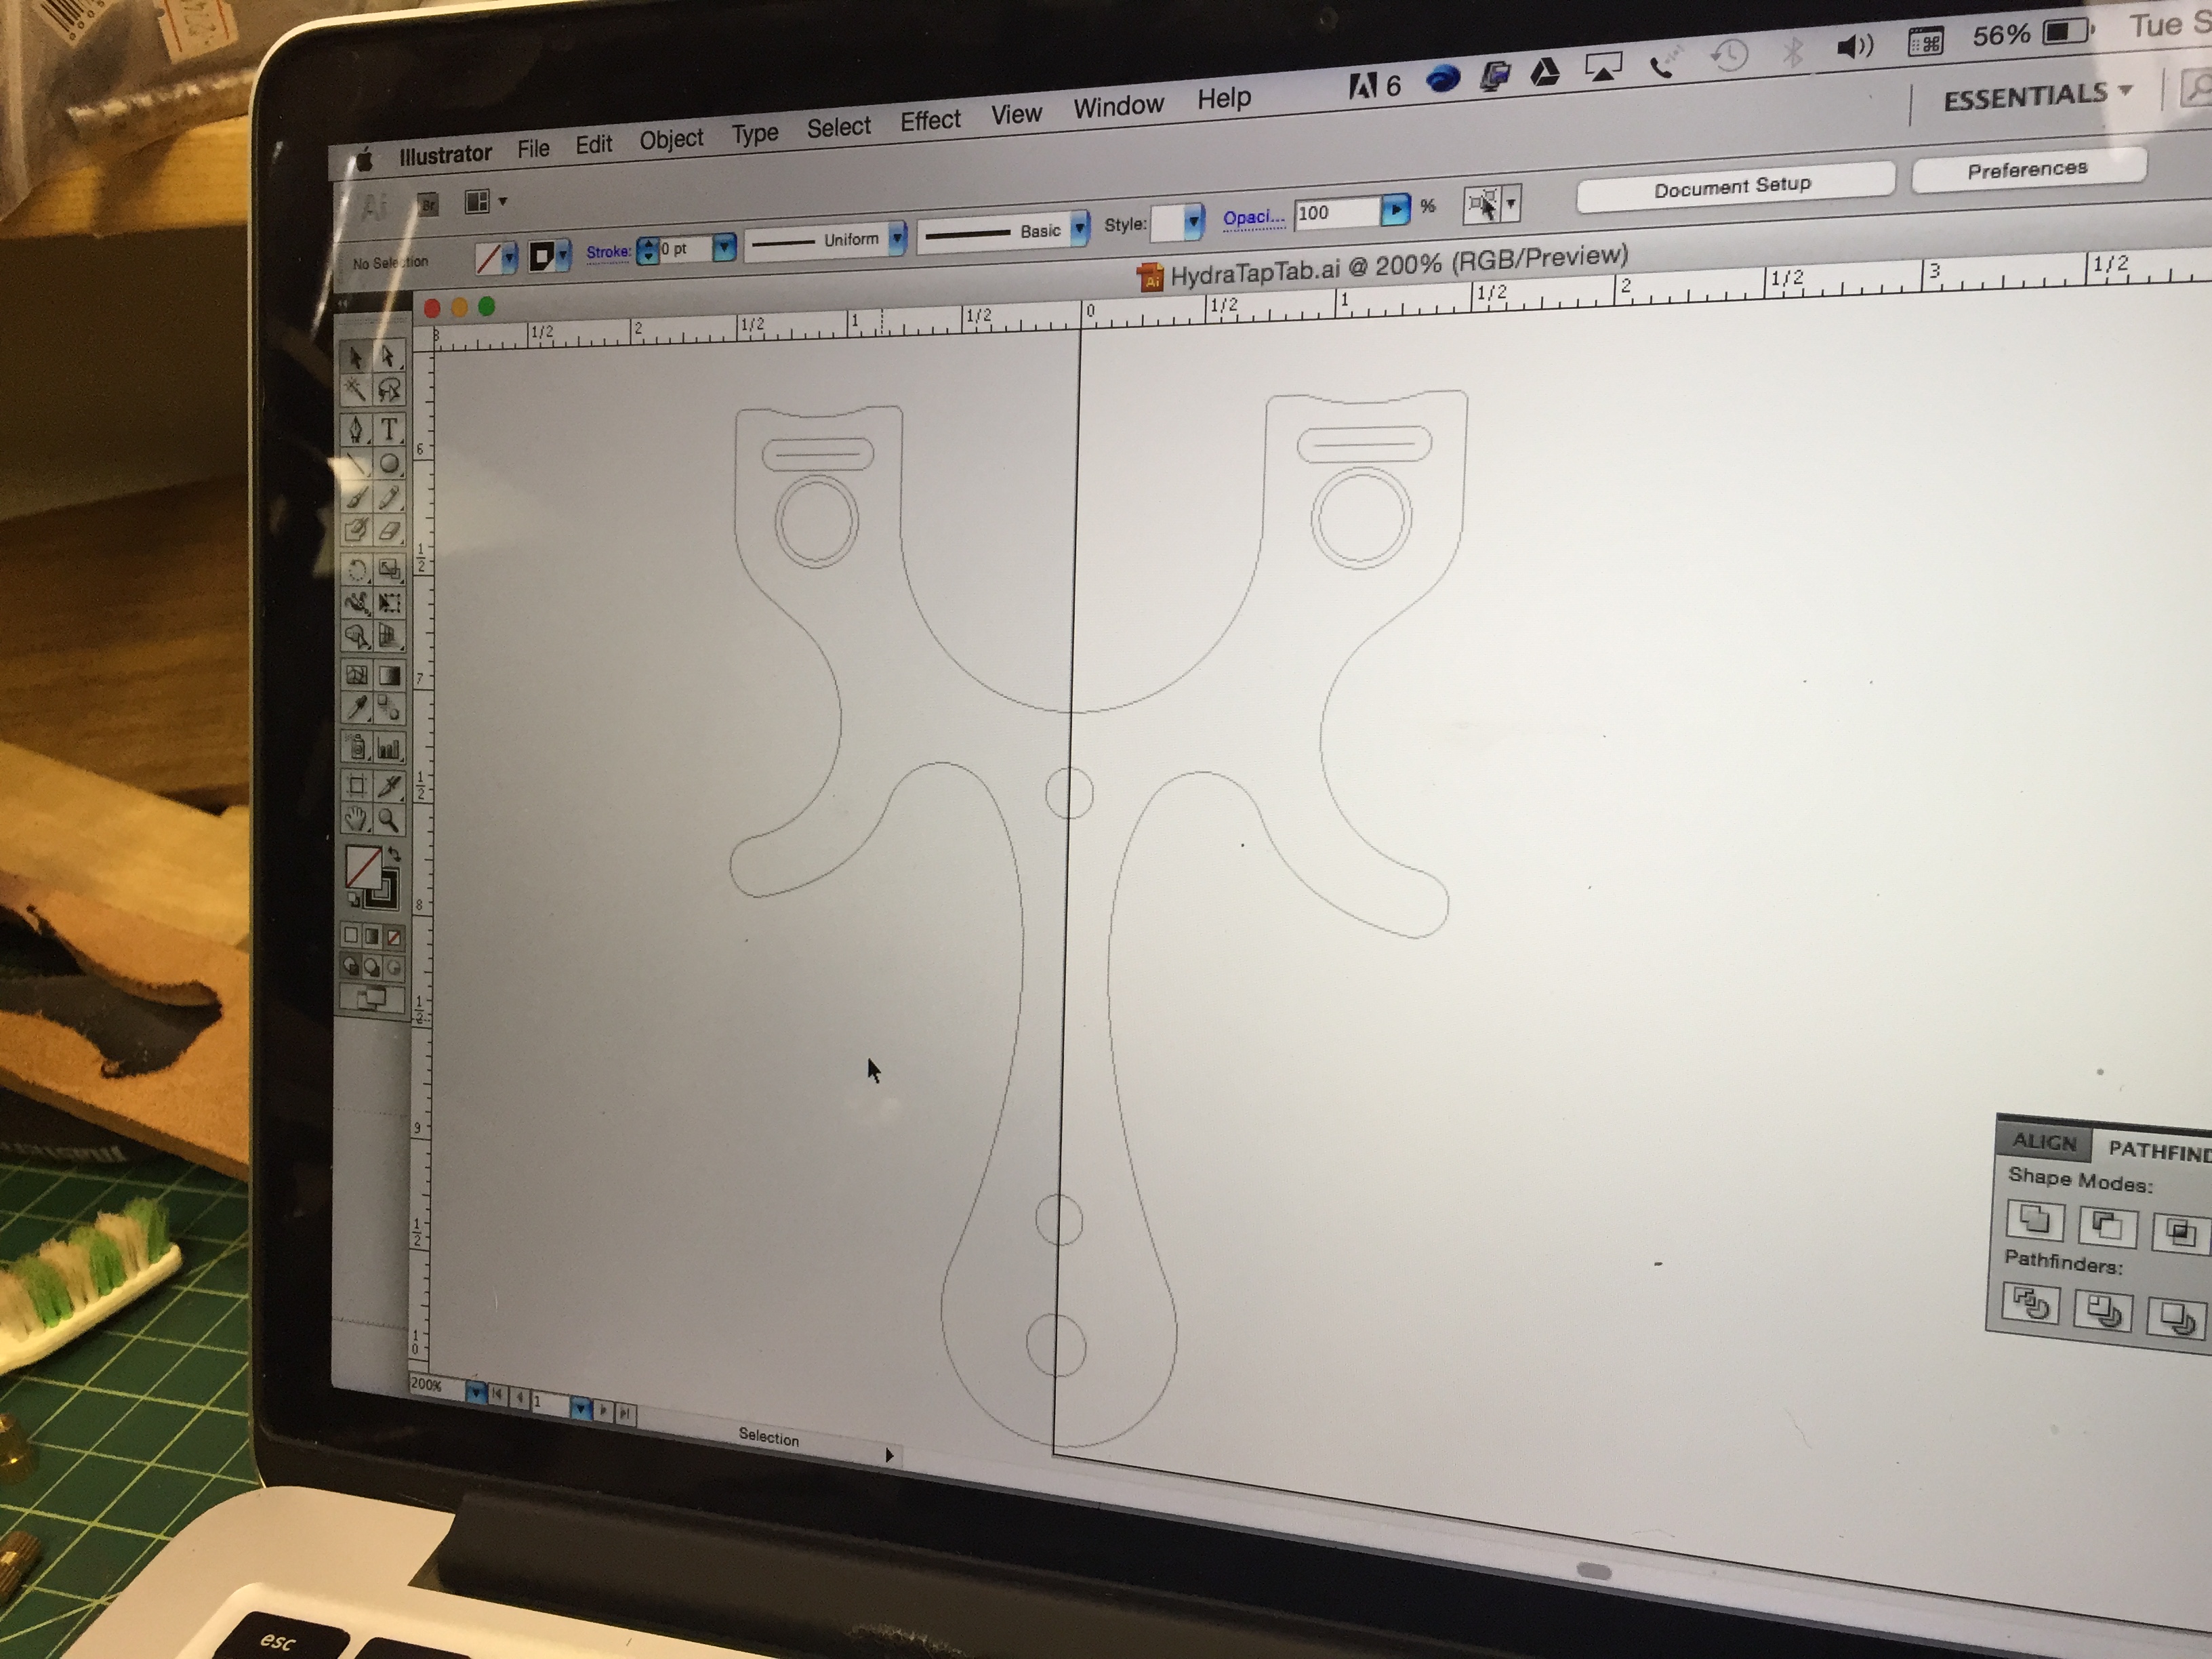
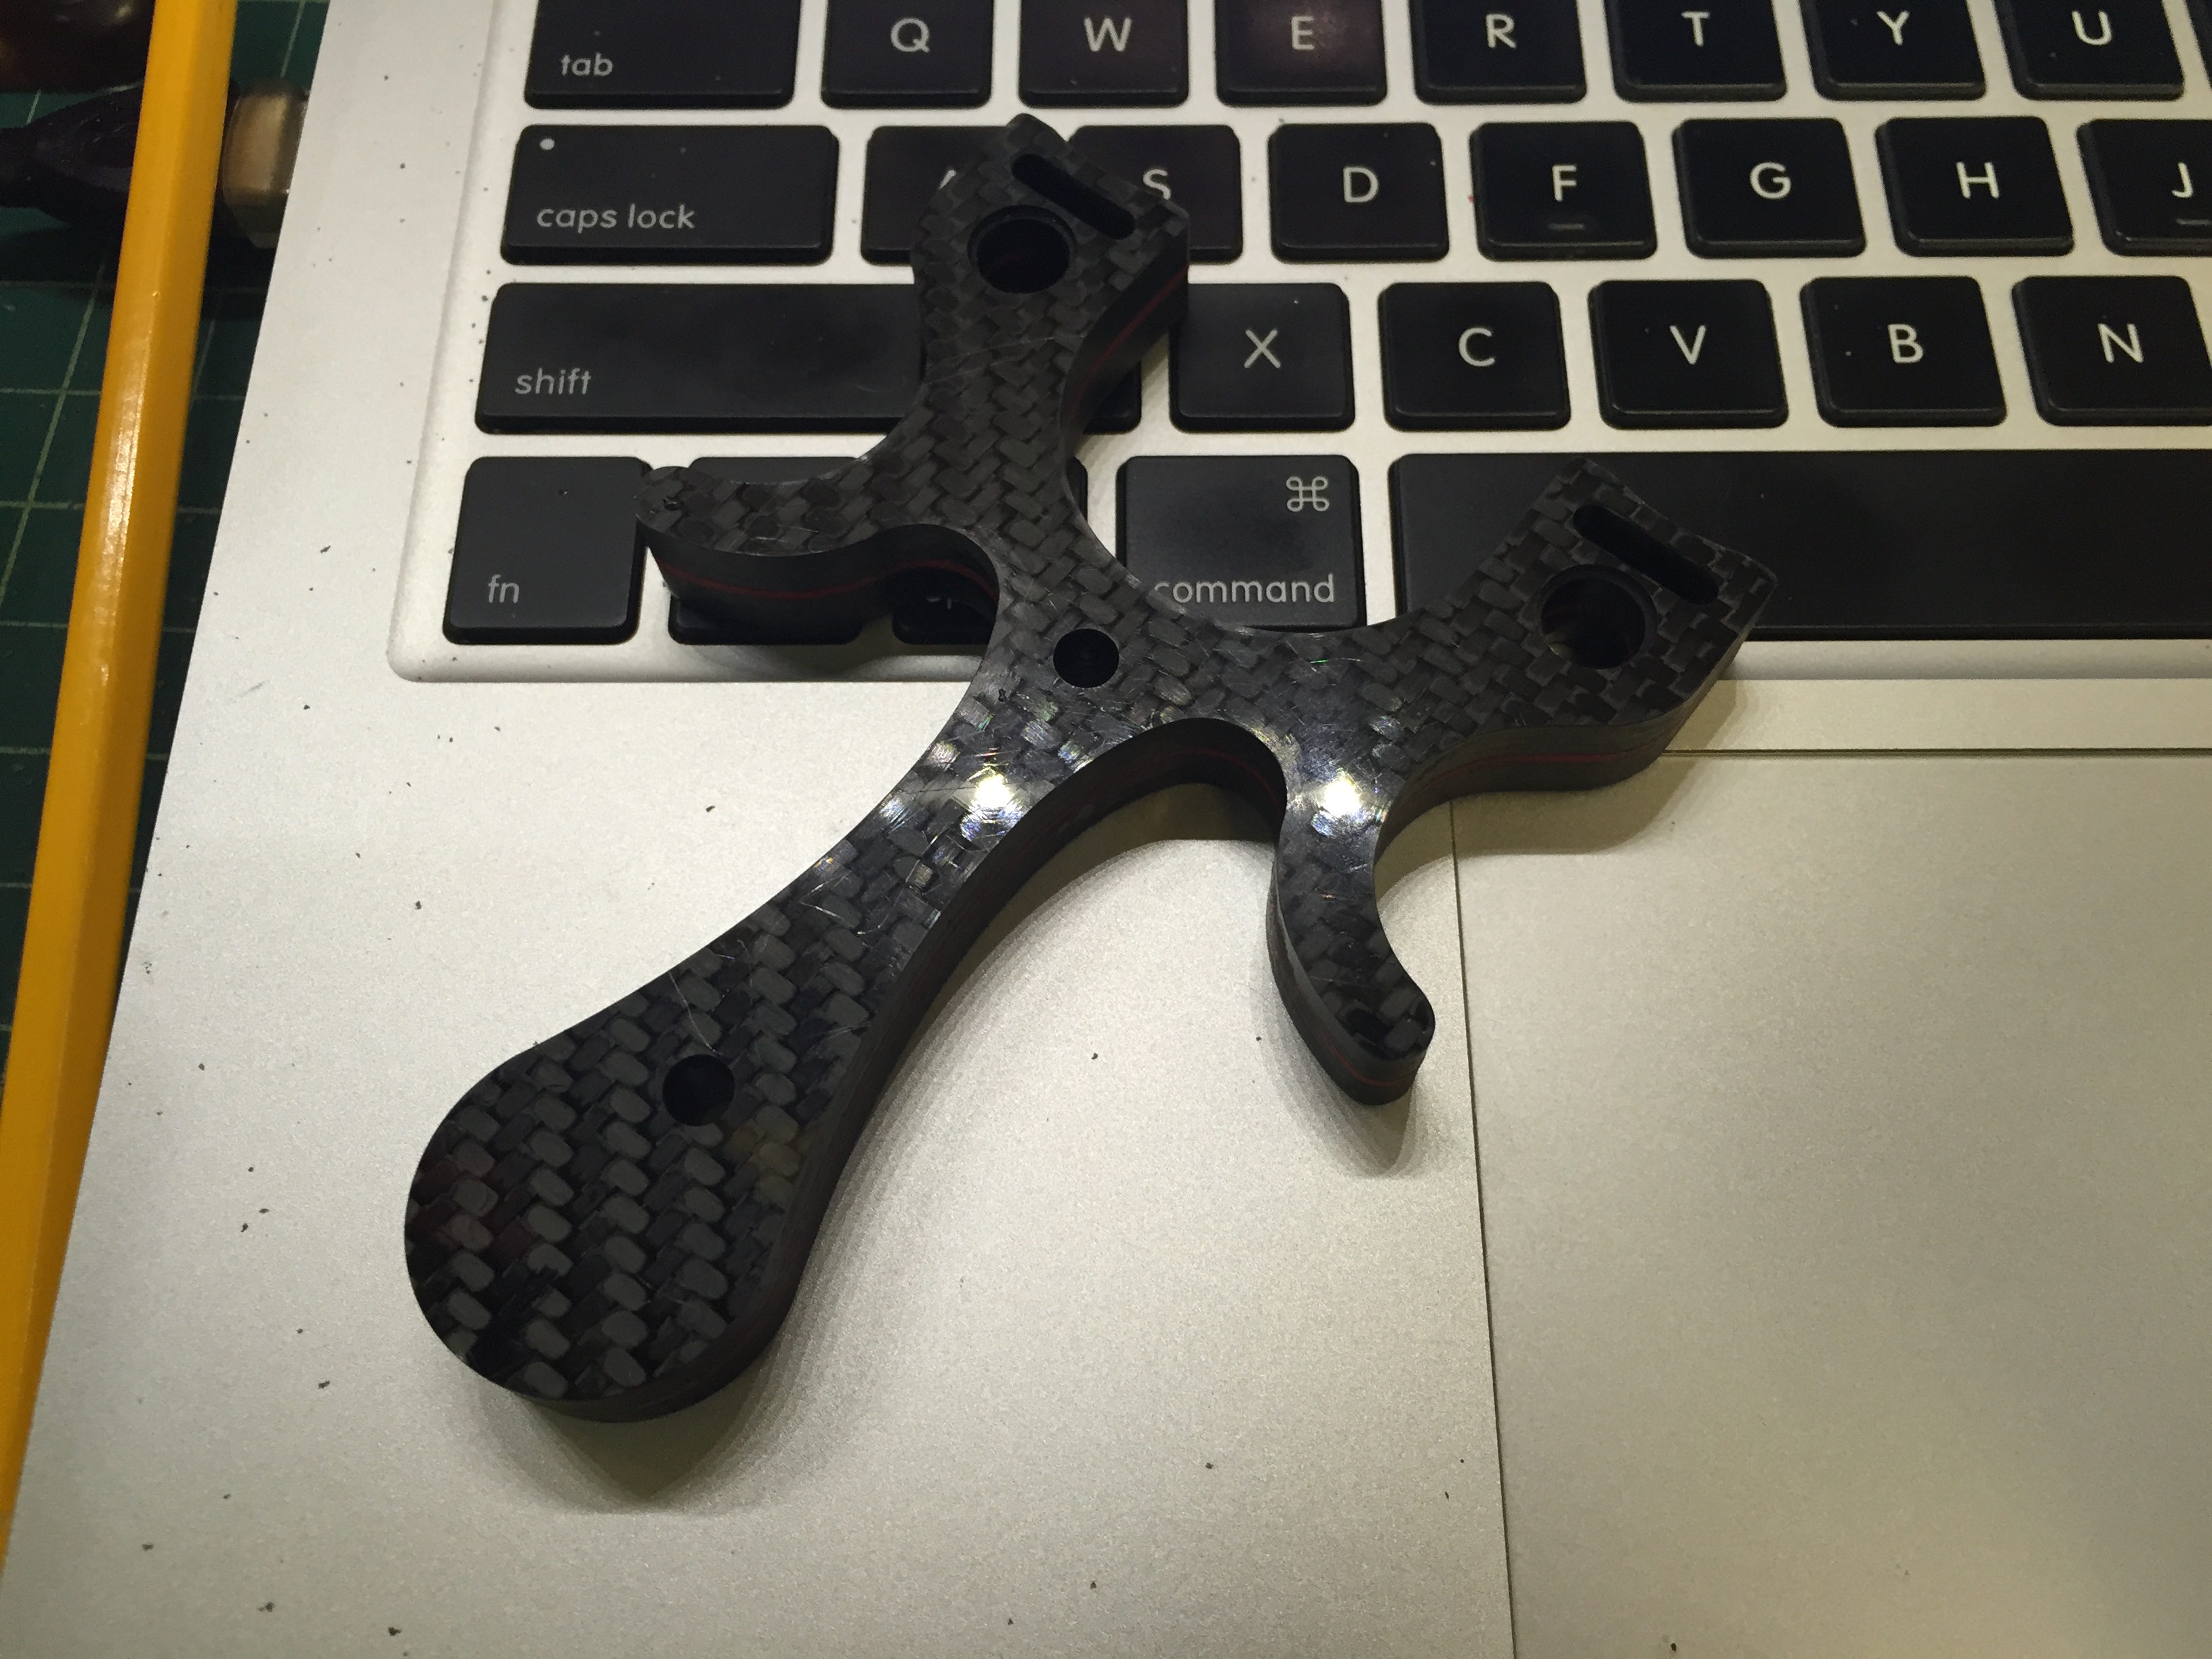
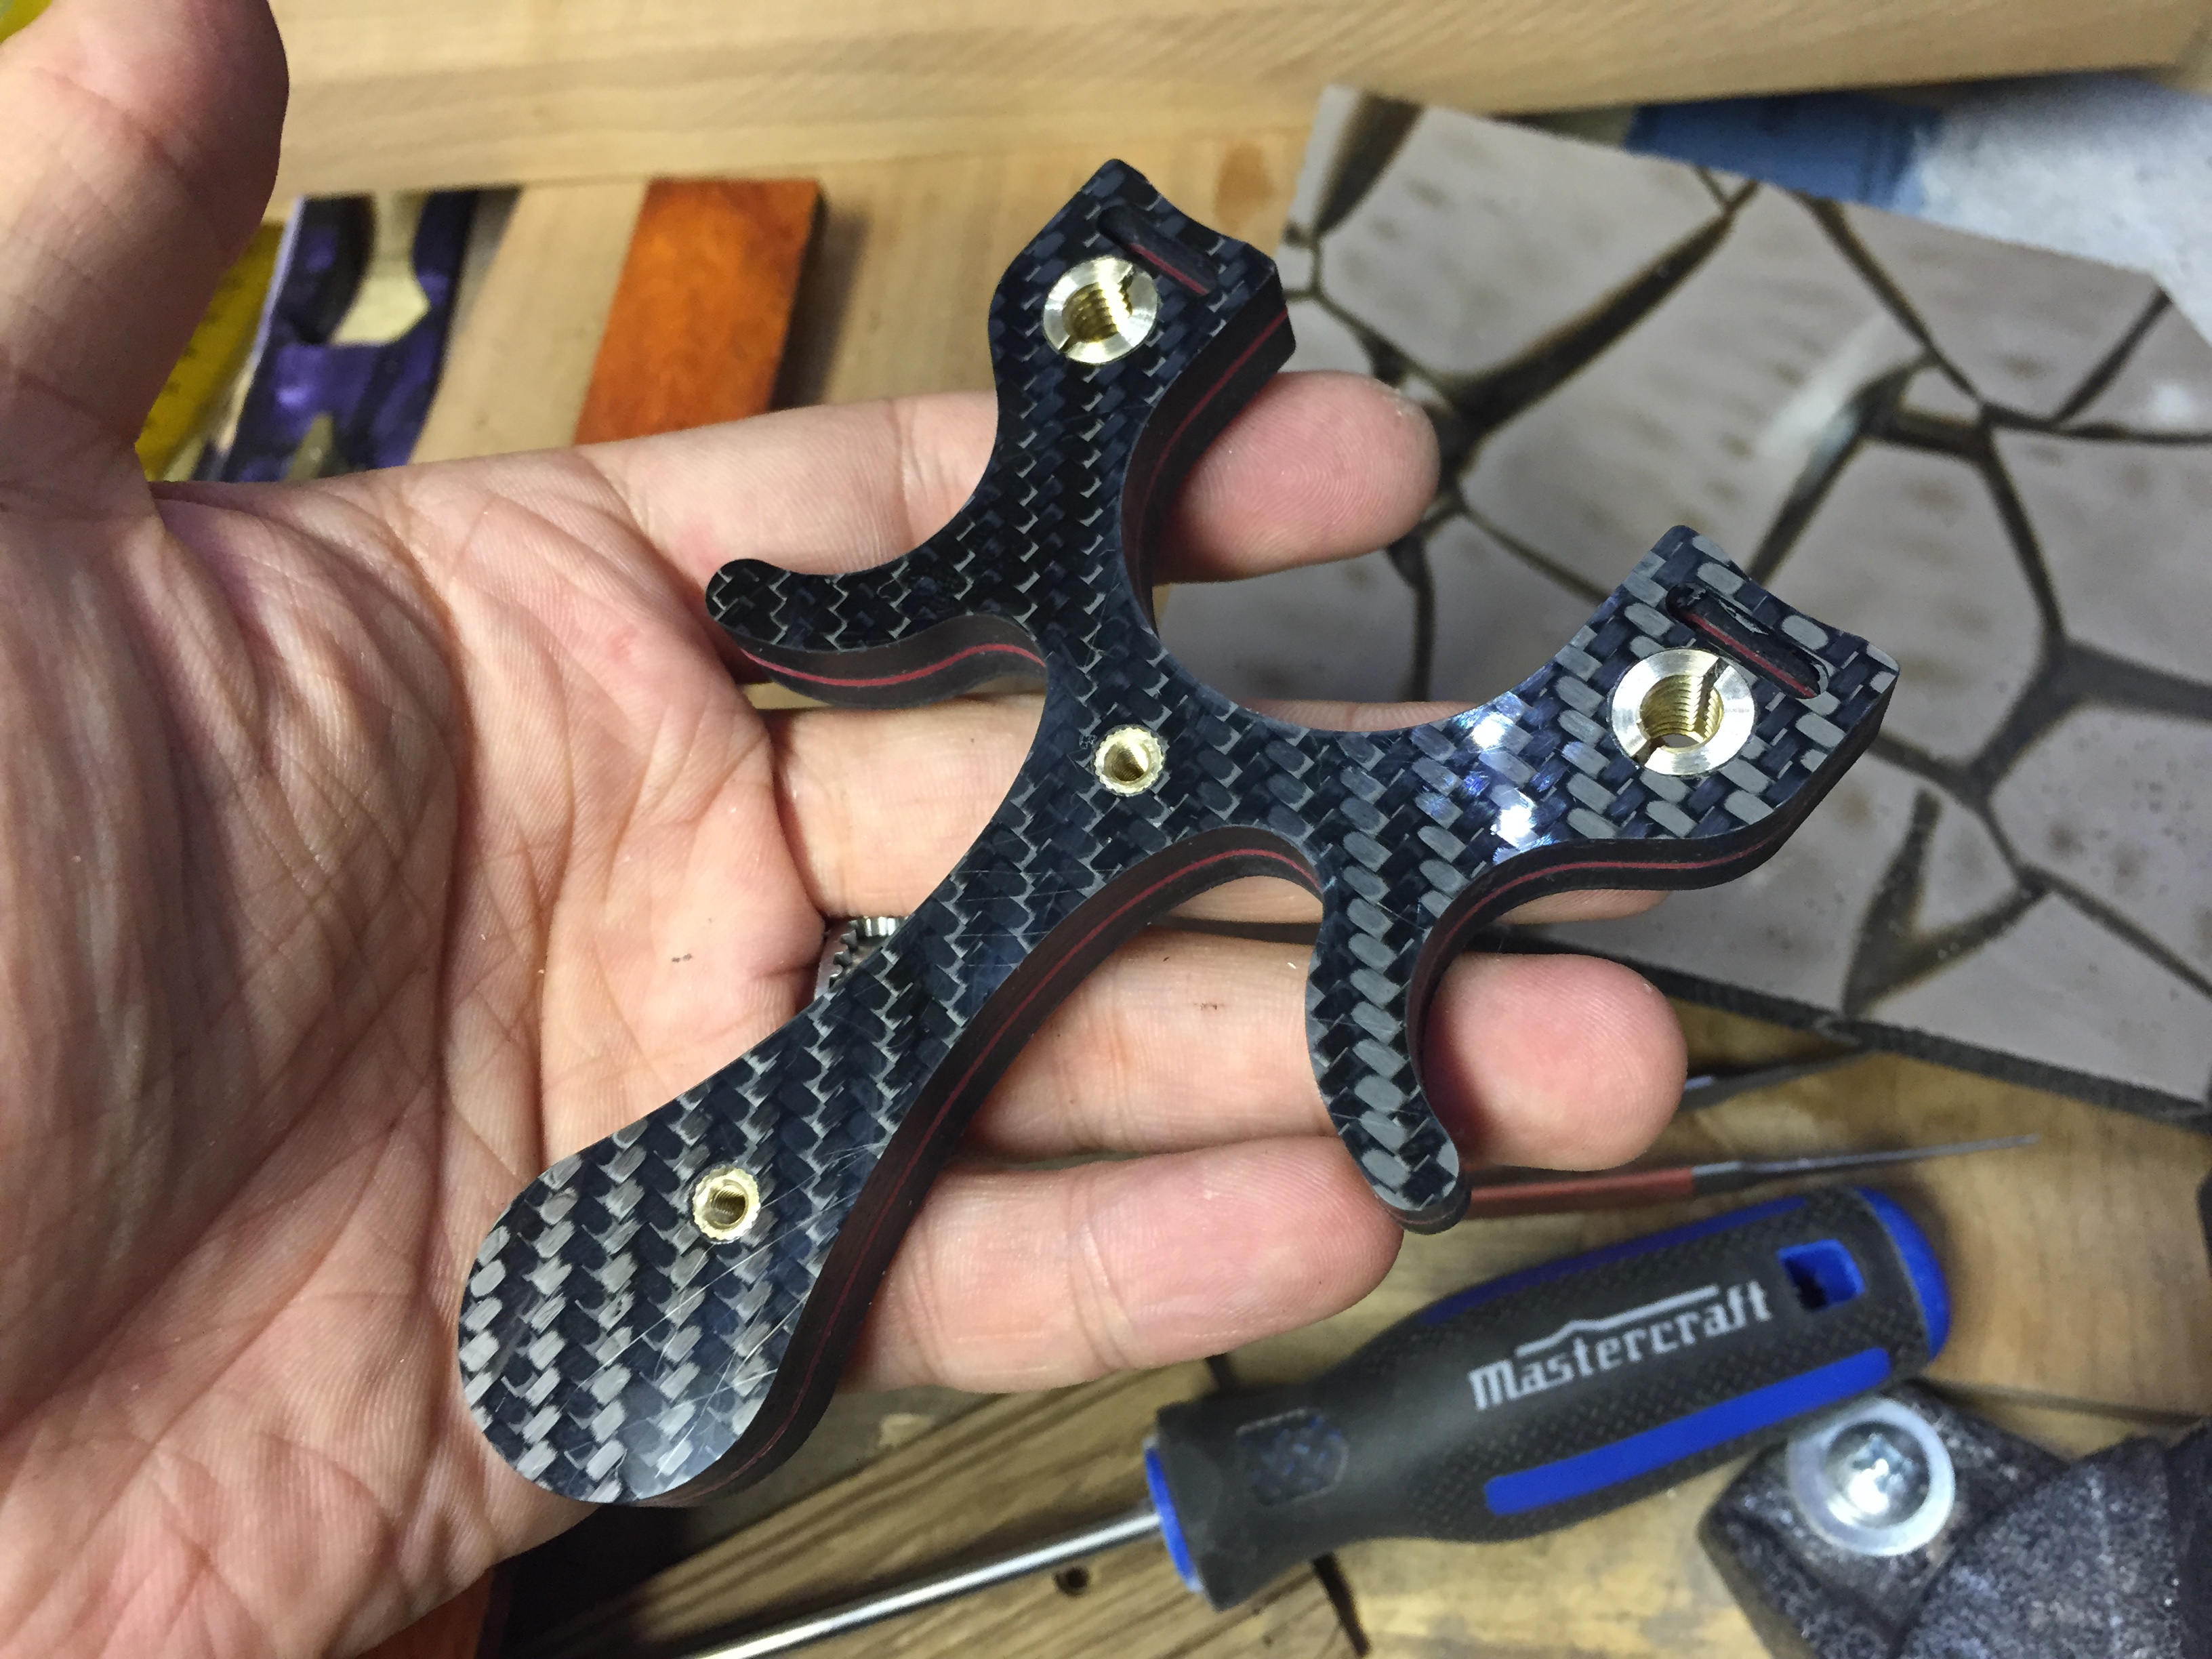
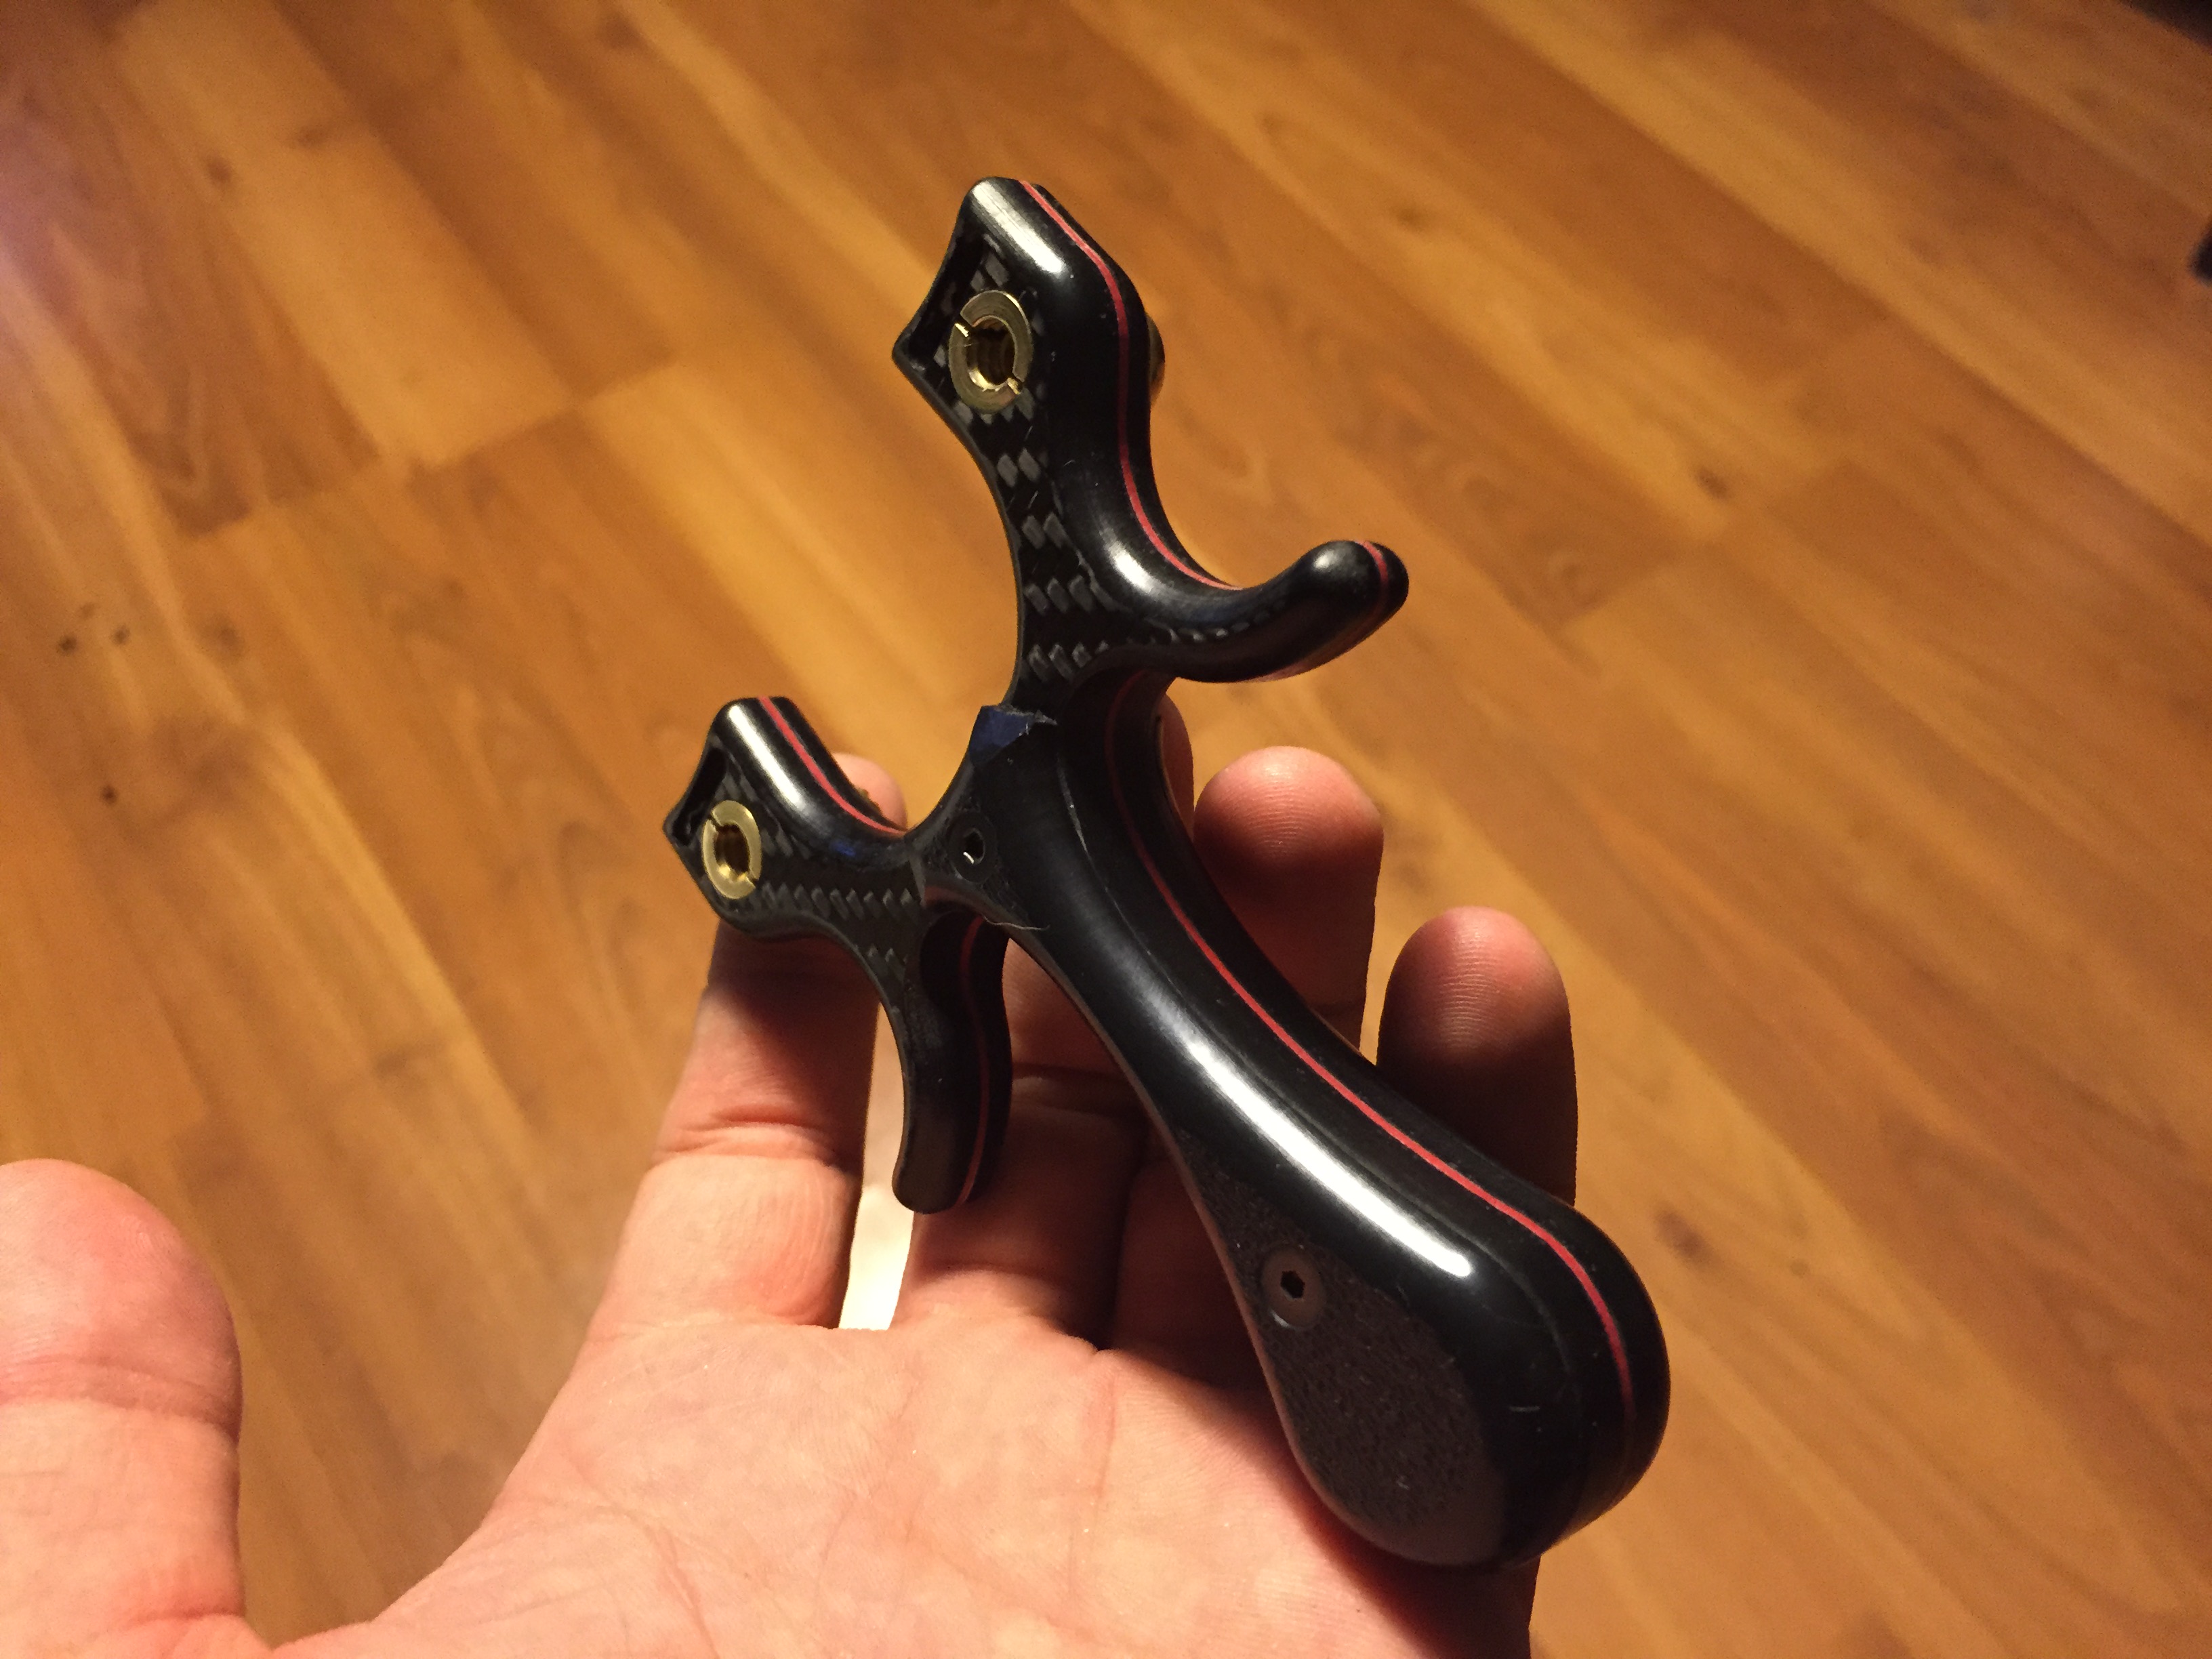
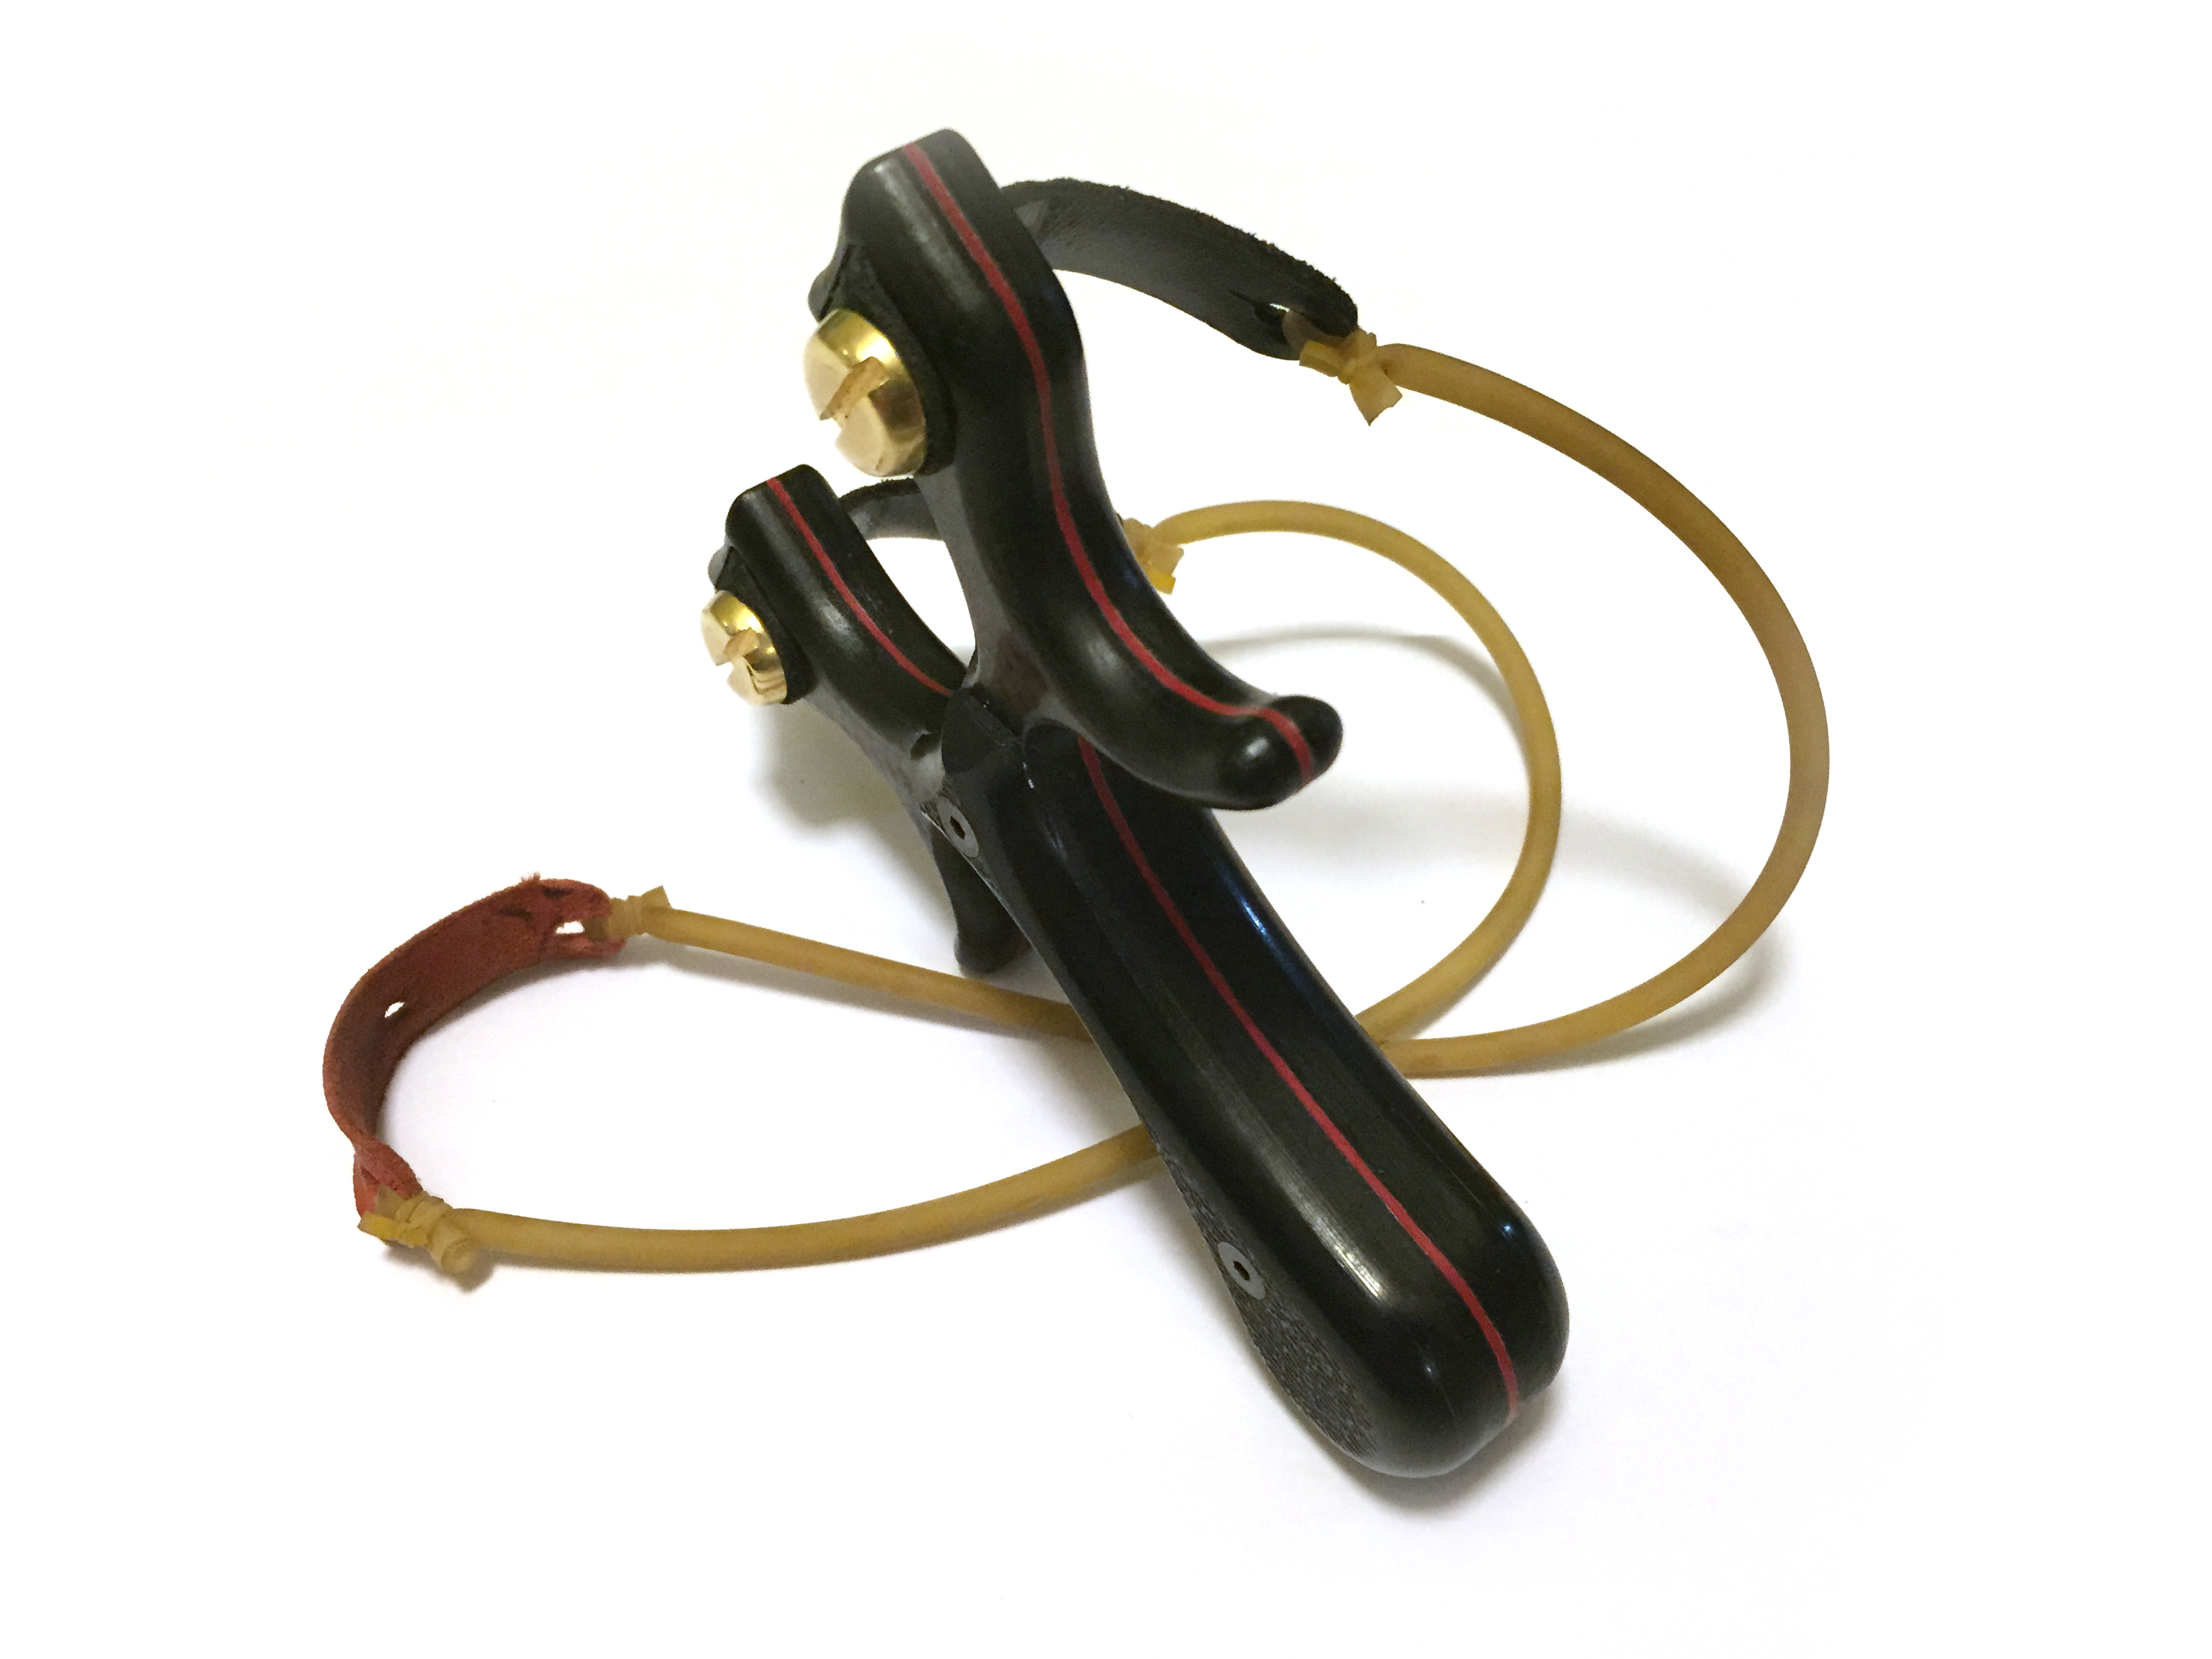
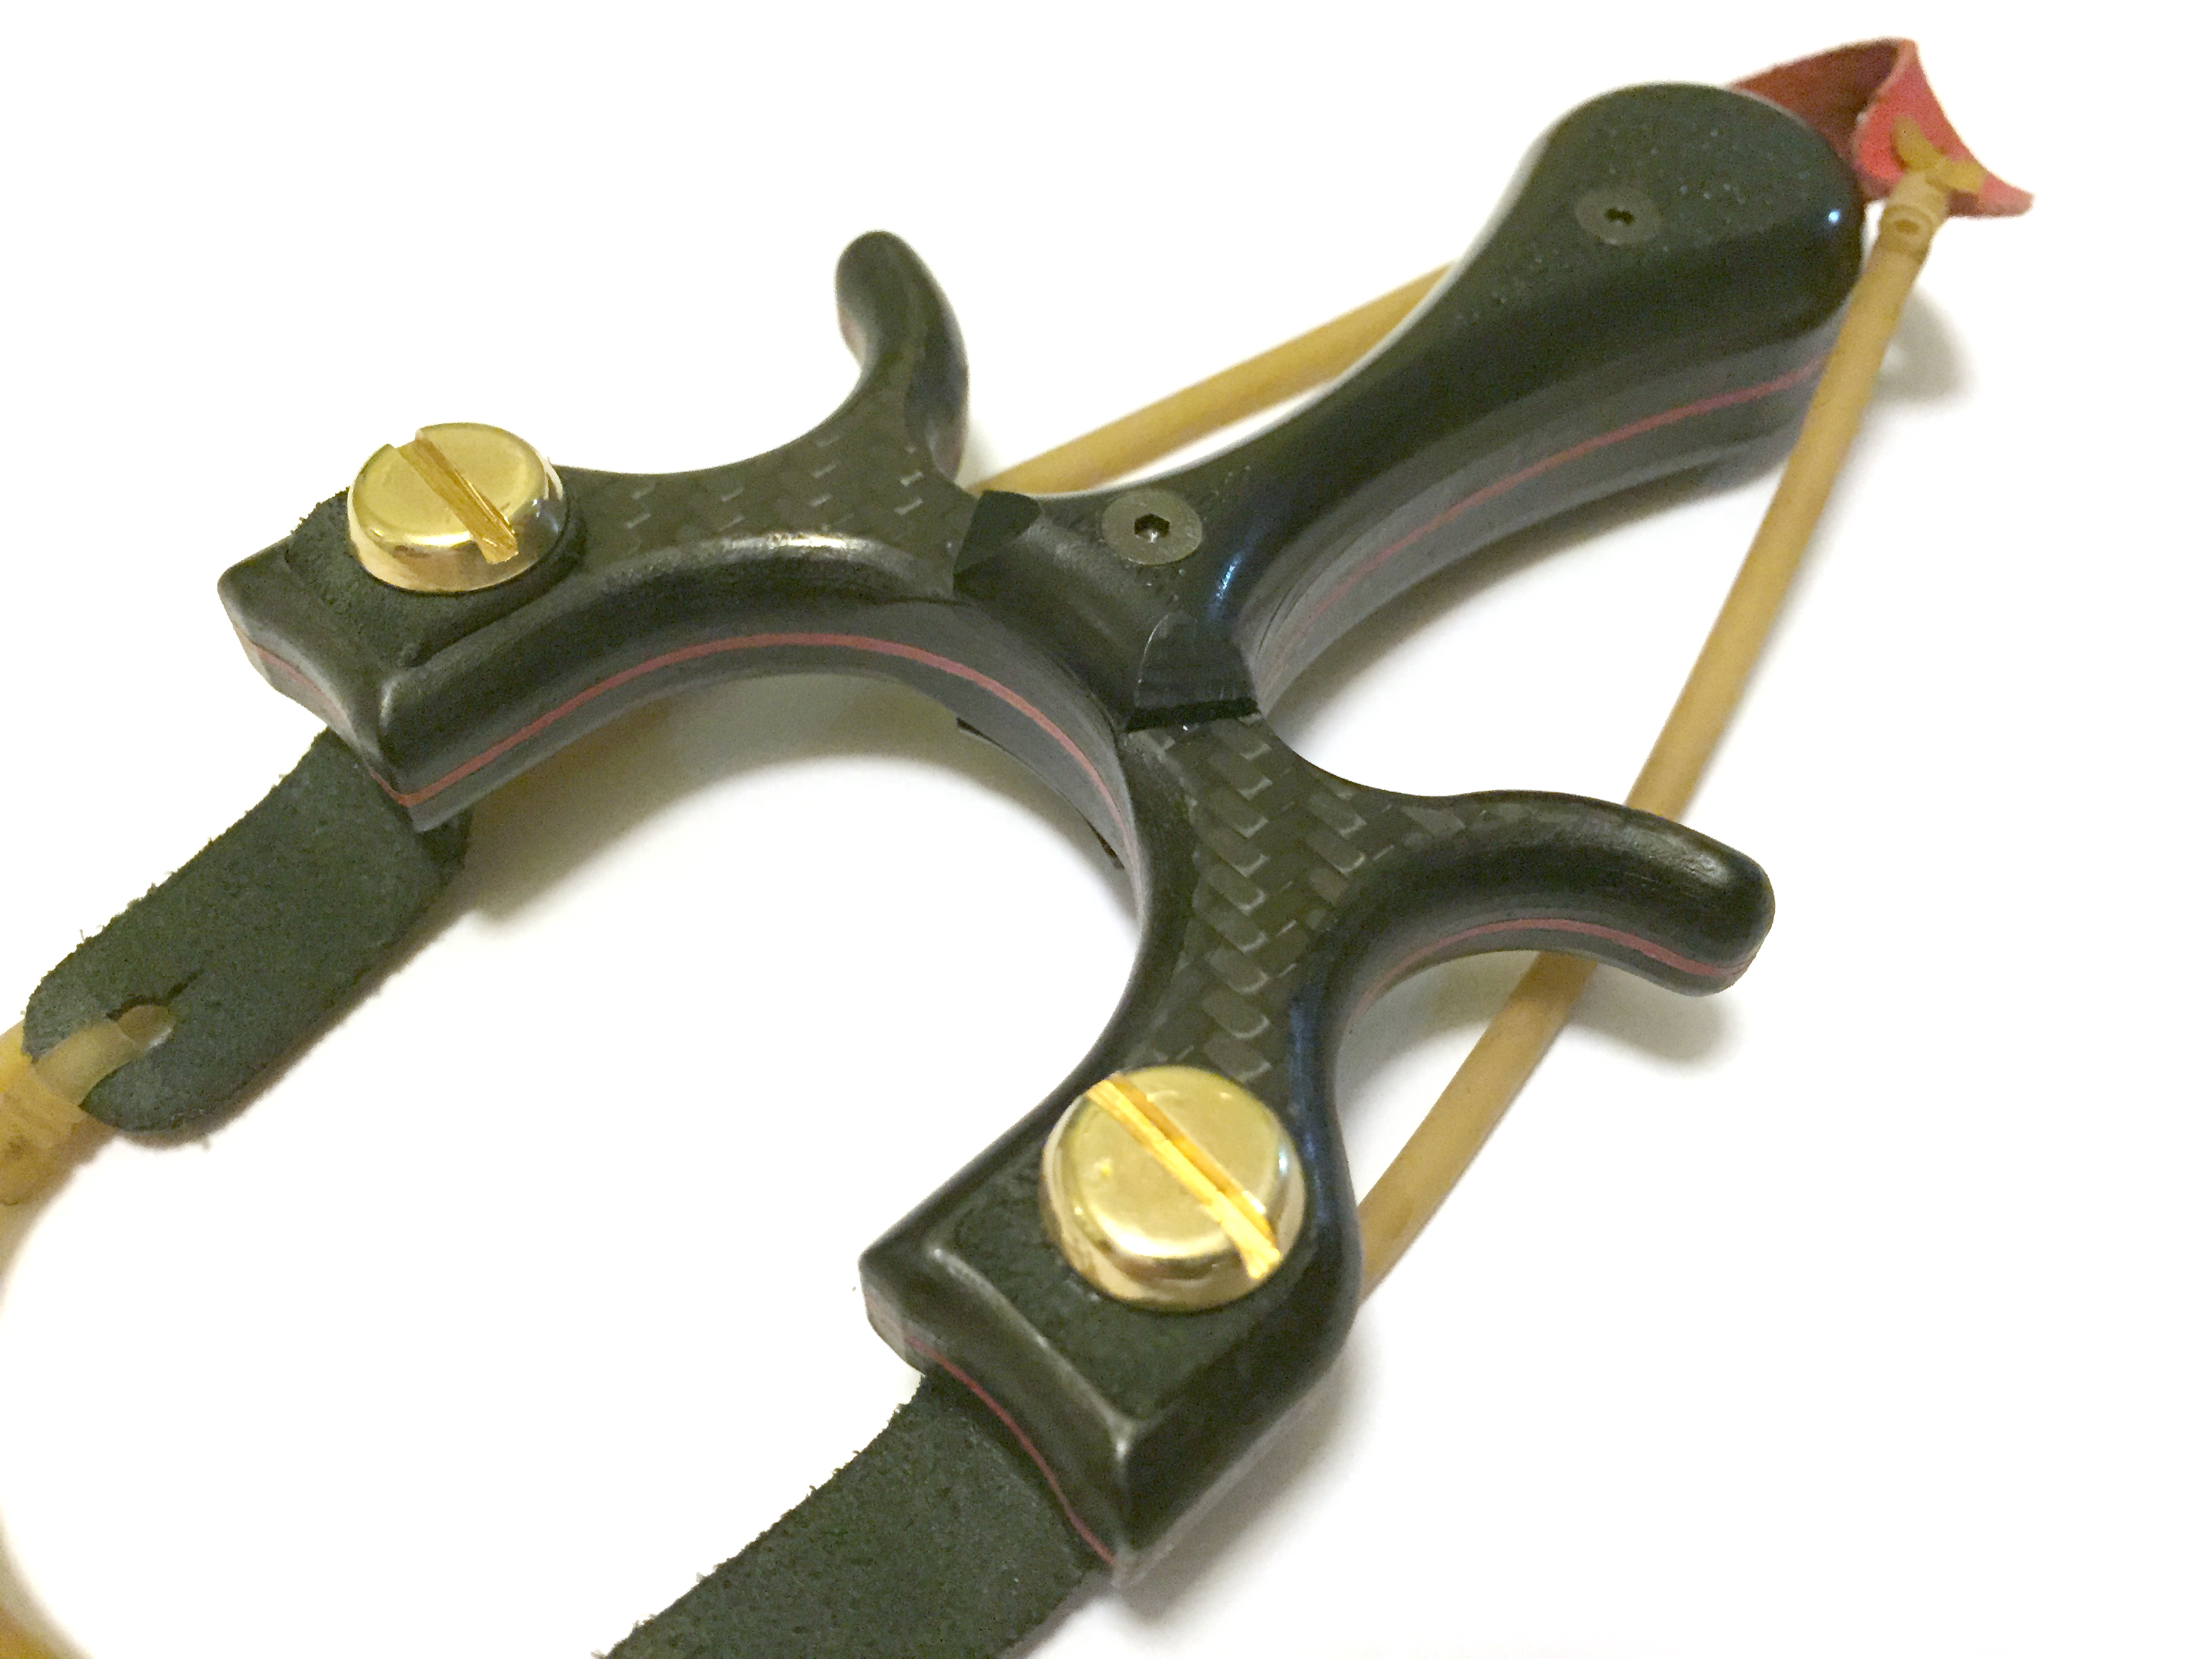
This slingshot design, which I call the Hydra (see more Hydras here) is one my favourites. I basically designed it to be done with metal or a composite like CF or G10. The skinny arms just can’t be made from wood. I altered the design a bit to accept a special attachment method for leather band tabs.
Leather band tabs are just another way to attach rubber to a slingshot frame. A piece of leather is either lashed, glued, clamped otherwise attached to the slingshot tip and then the rubber is tied on to that, it’s a very common attachment method and favoured by the Spanish target style of slingshot.
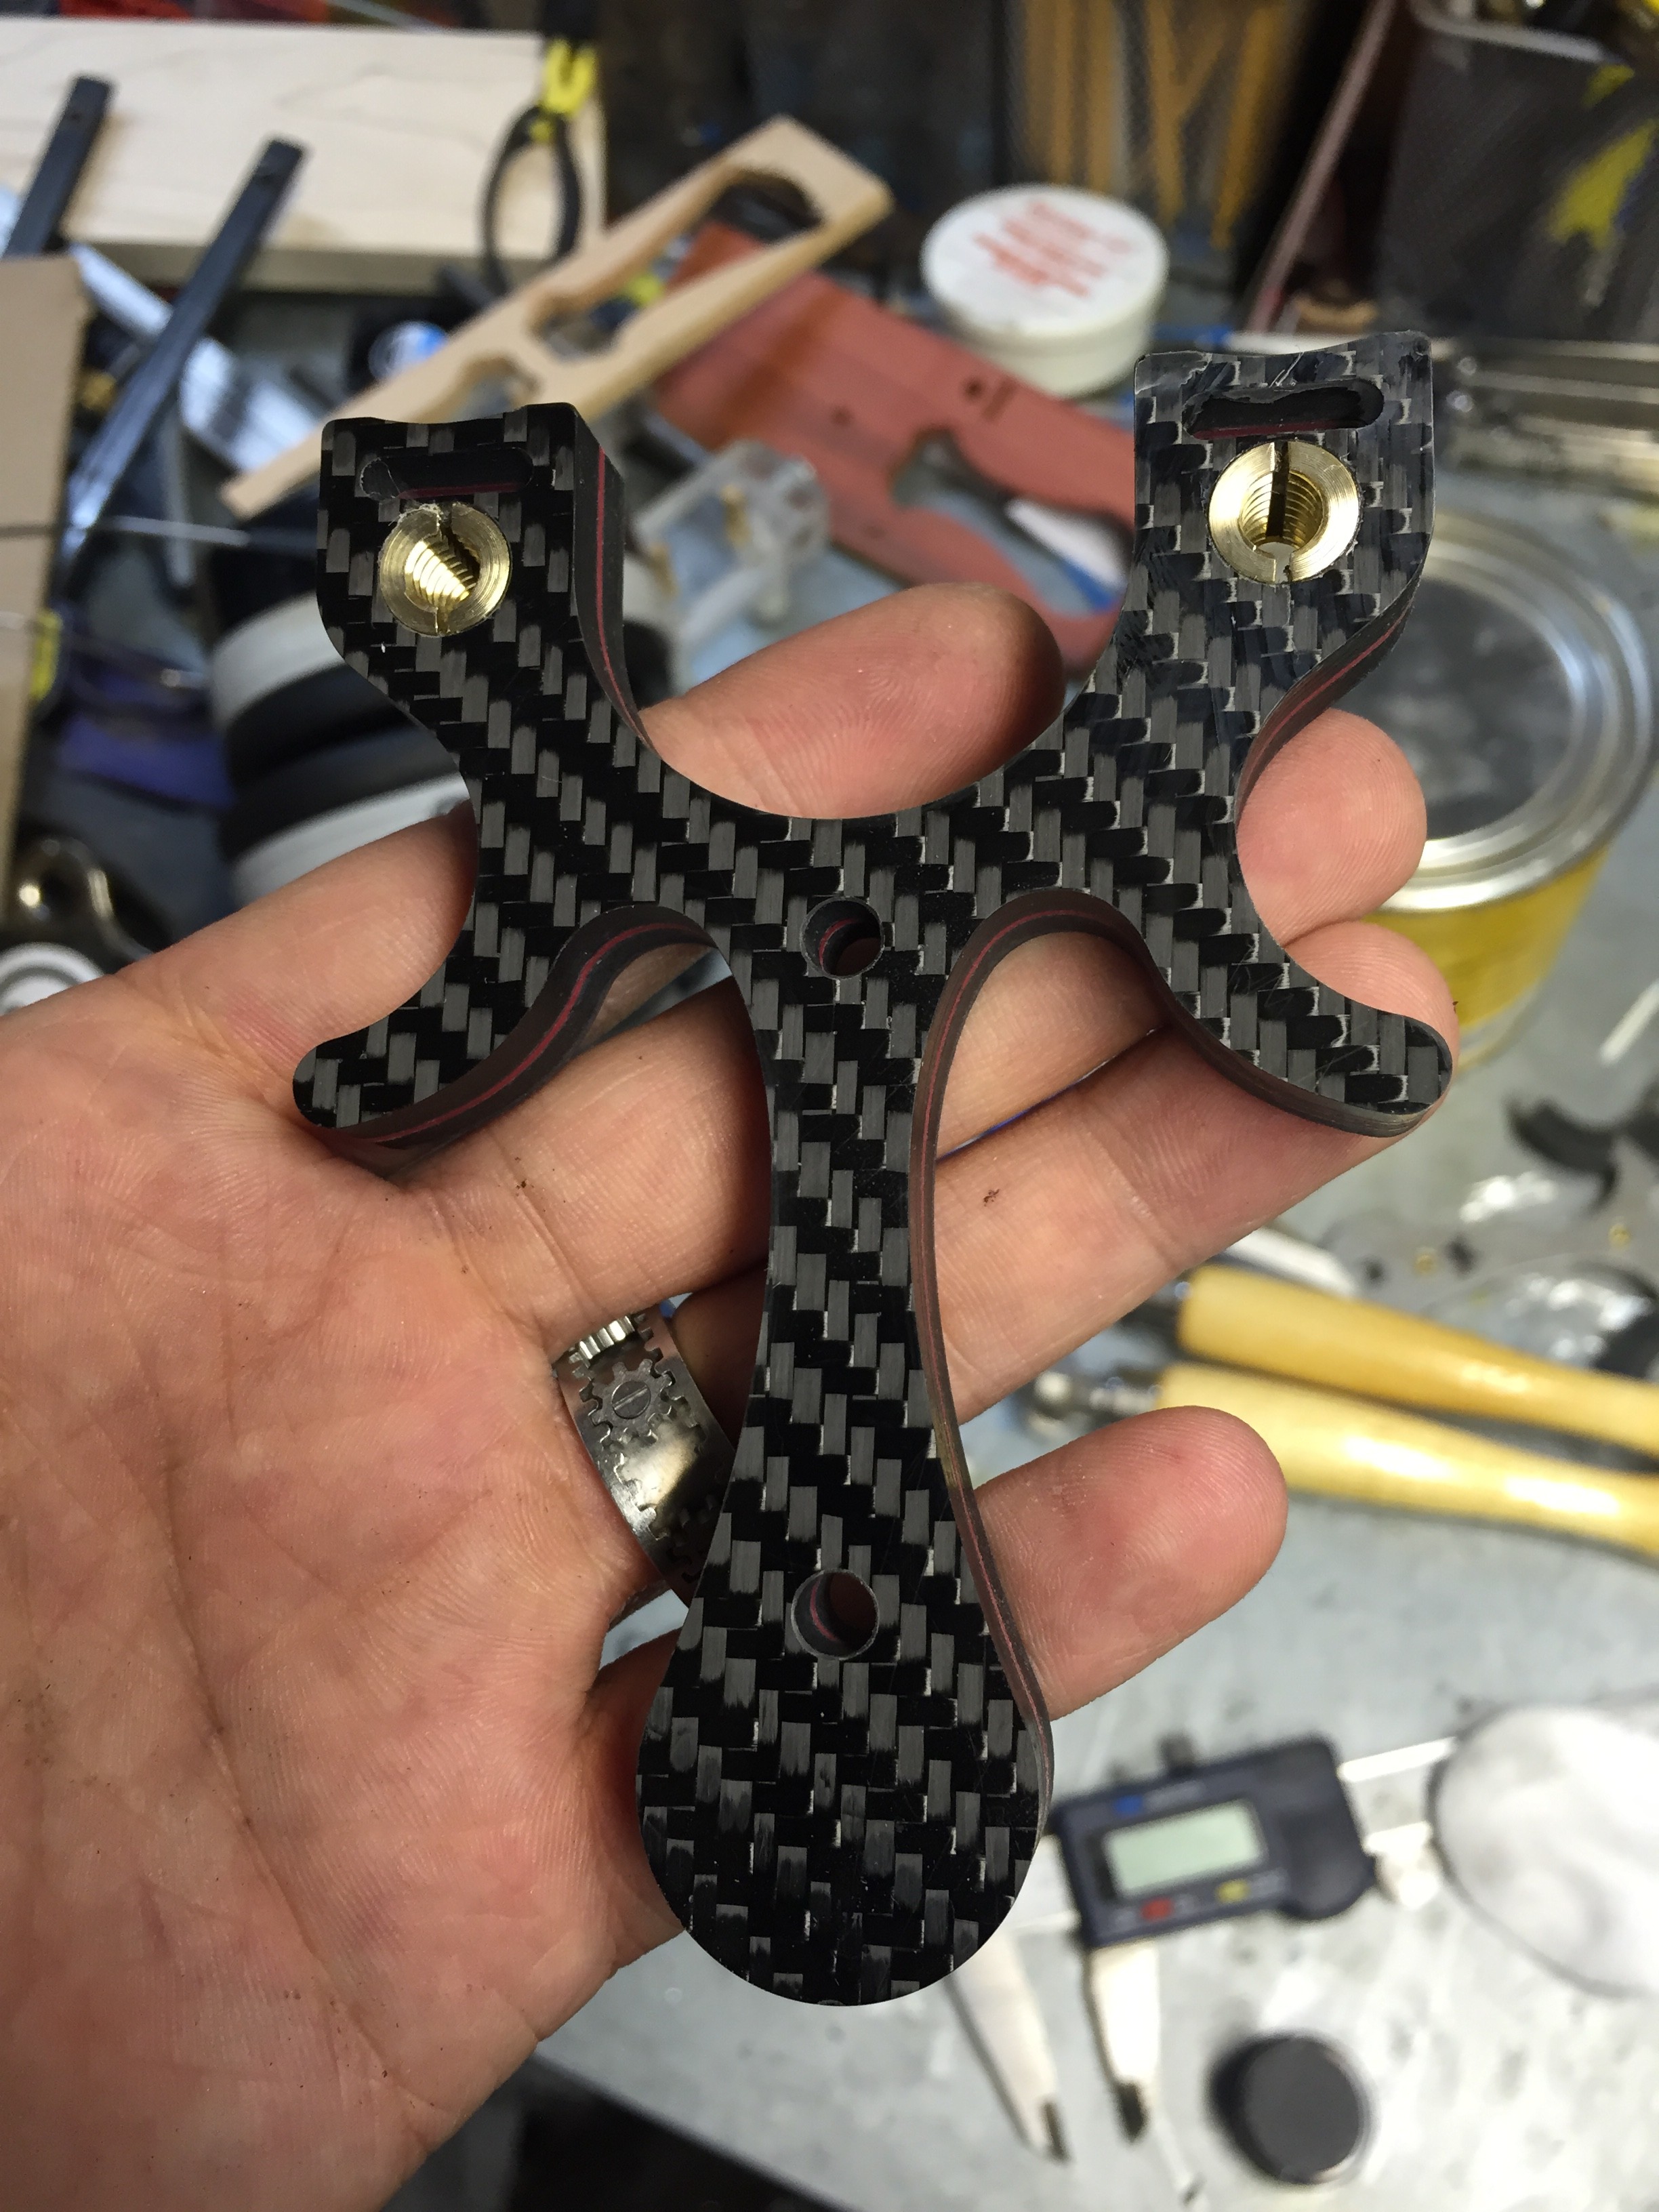
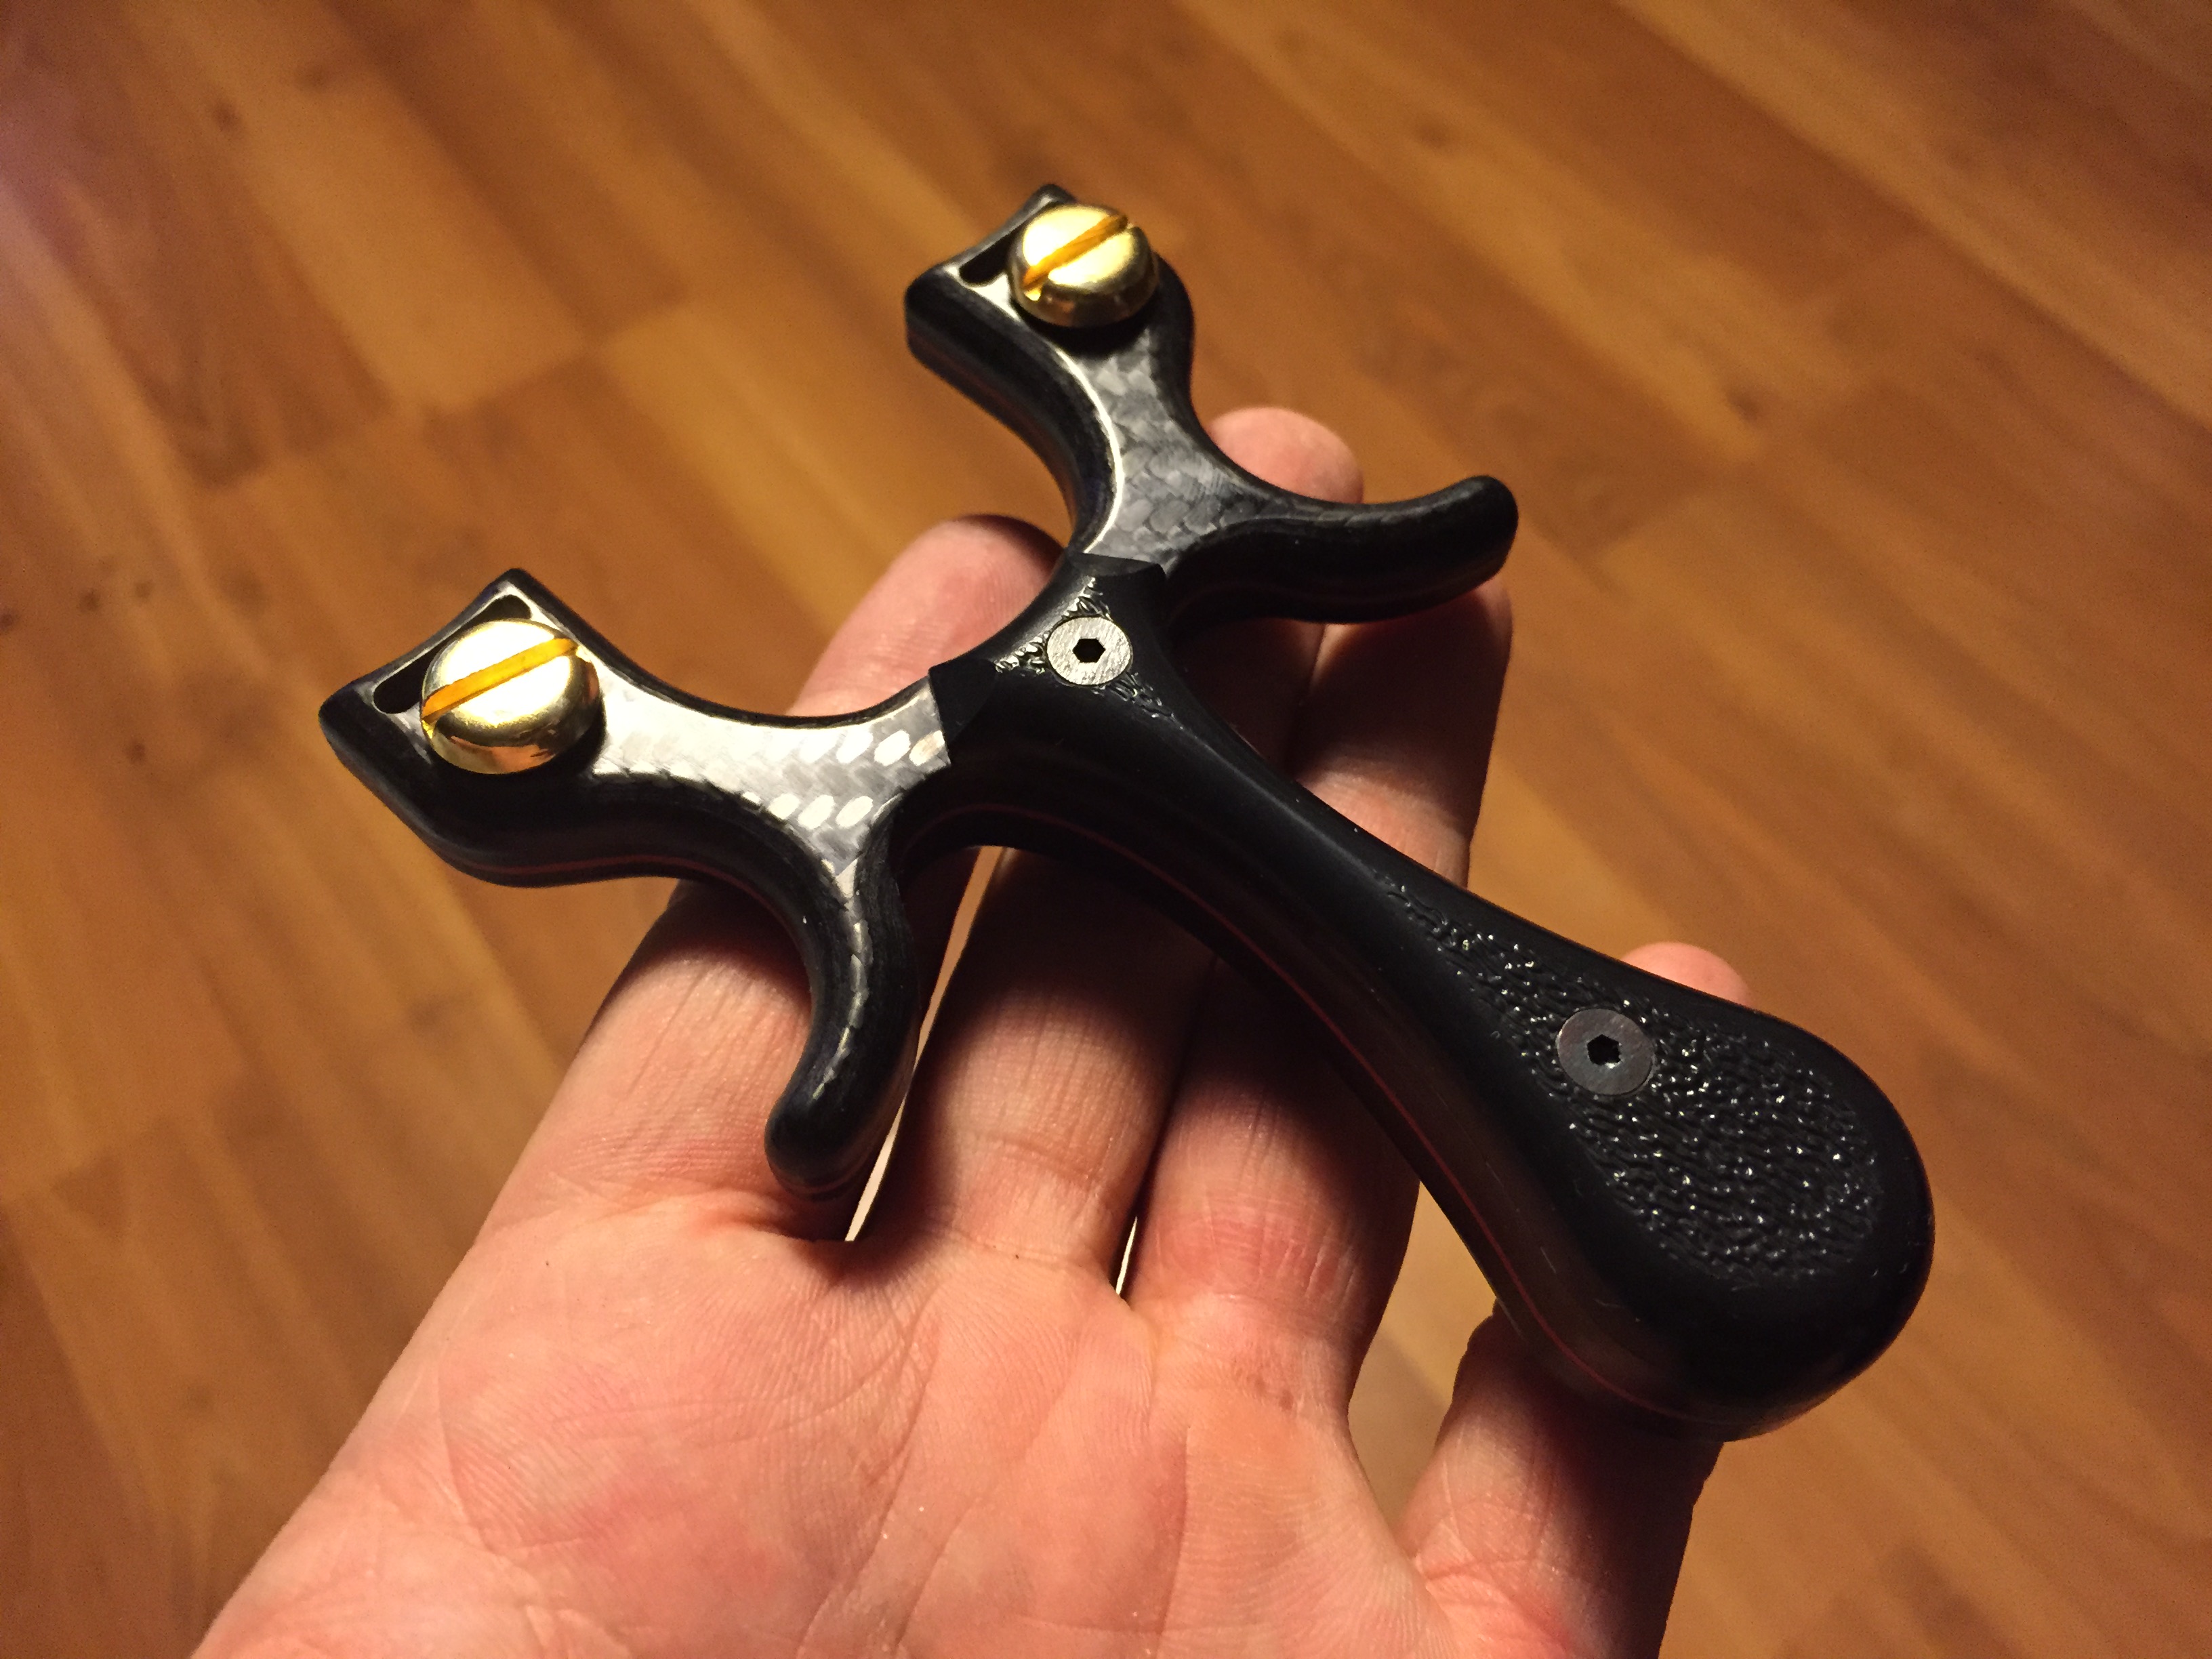
My method of attaching tabs to a frame is called the ‘Tapped Tab’, because the frame’s tip is tapped with a 1/4-20 thread and the tab is attached via a bolt. The tab is also threaded through a horizontal slot to equalize the pressure on the fork tips. This type of attachment requires the materials of the slingshot to be very strong and stable, typically aluminum or a composite.
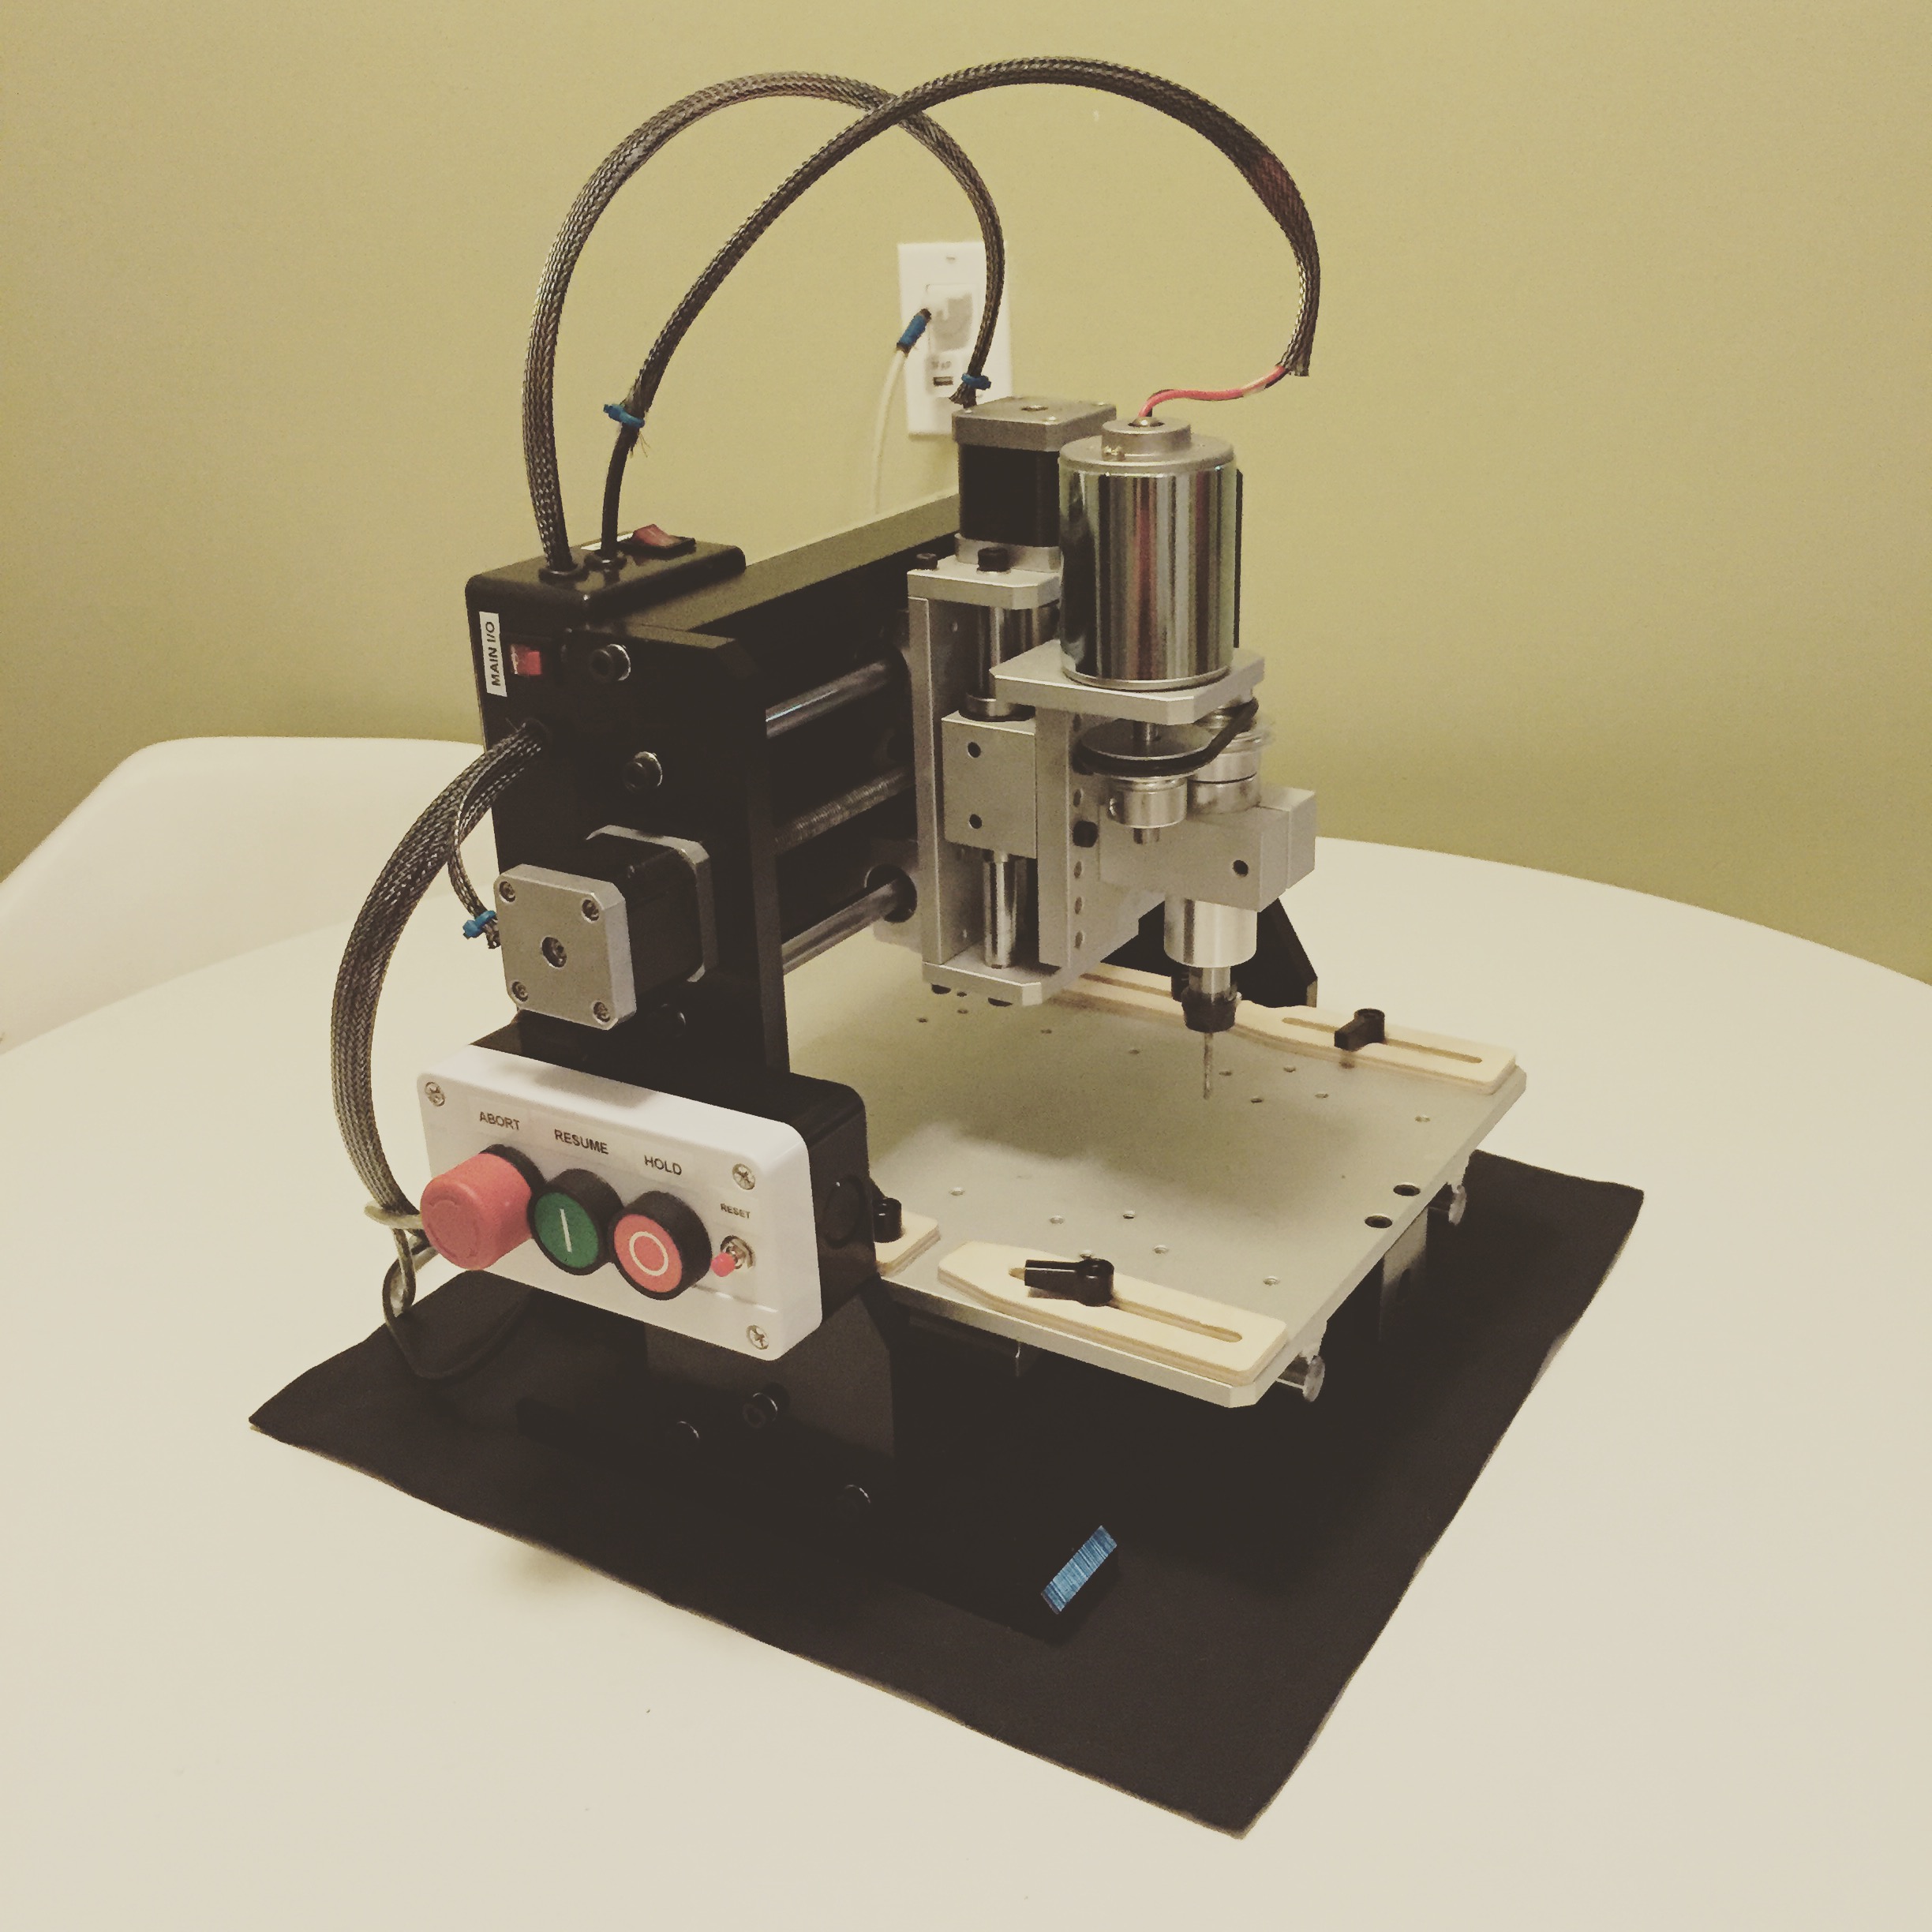
To design the slingshot, I used Adobe Illustrator to create the 2D pattern and accurately size the holes. From there, the pattern is saved out to an SVG (scaleable vector graphic) and opened up in to MakerCAM (a free CAM software to generate G-code). MakerCAM will allow me to program the feed rates and types of cuts I want (pockets, drilling, profile cuts etc).
I believe I ended up with these settings:
15 Inches per Min Feed
5 Inches per Min Plunge
.05 Depth of Cut
It was slow, but it was very accurate.
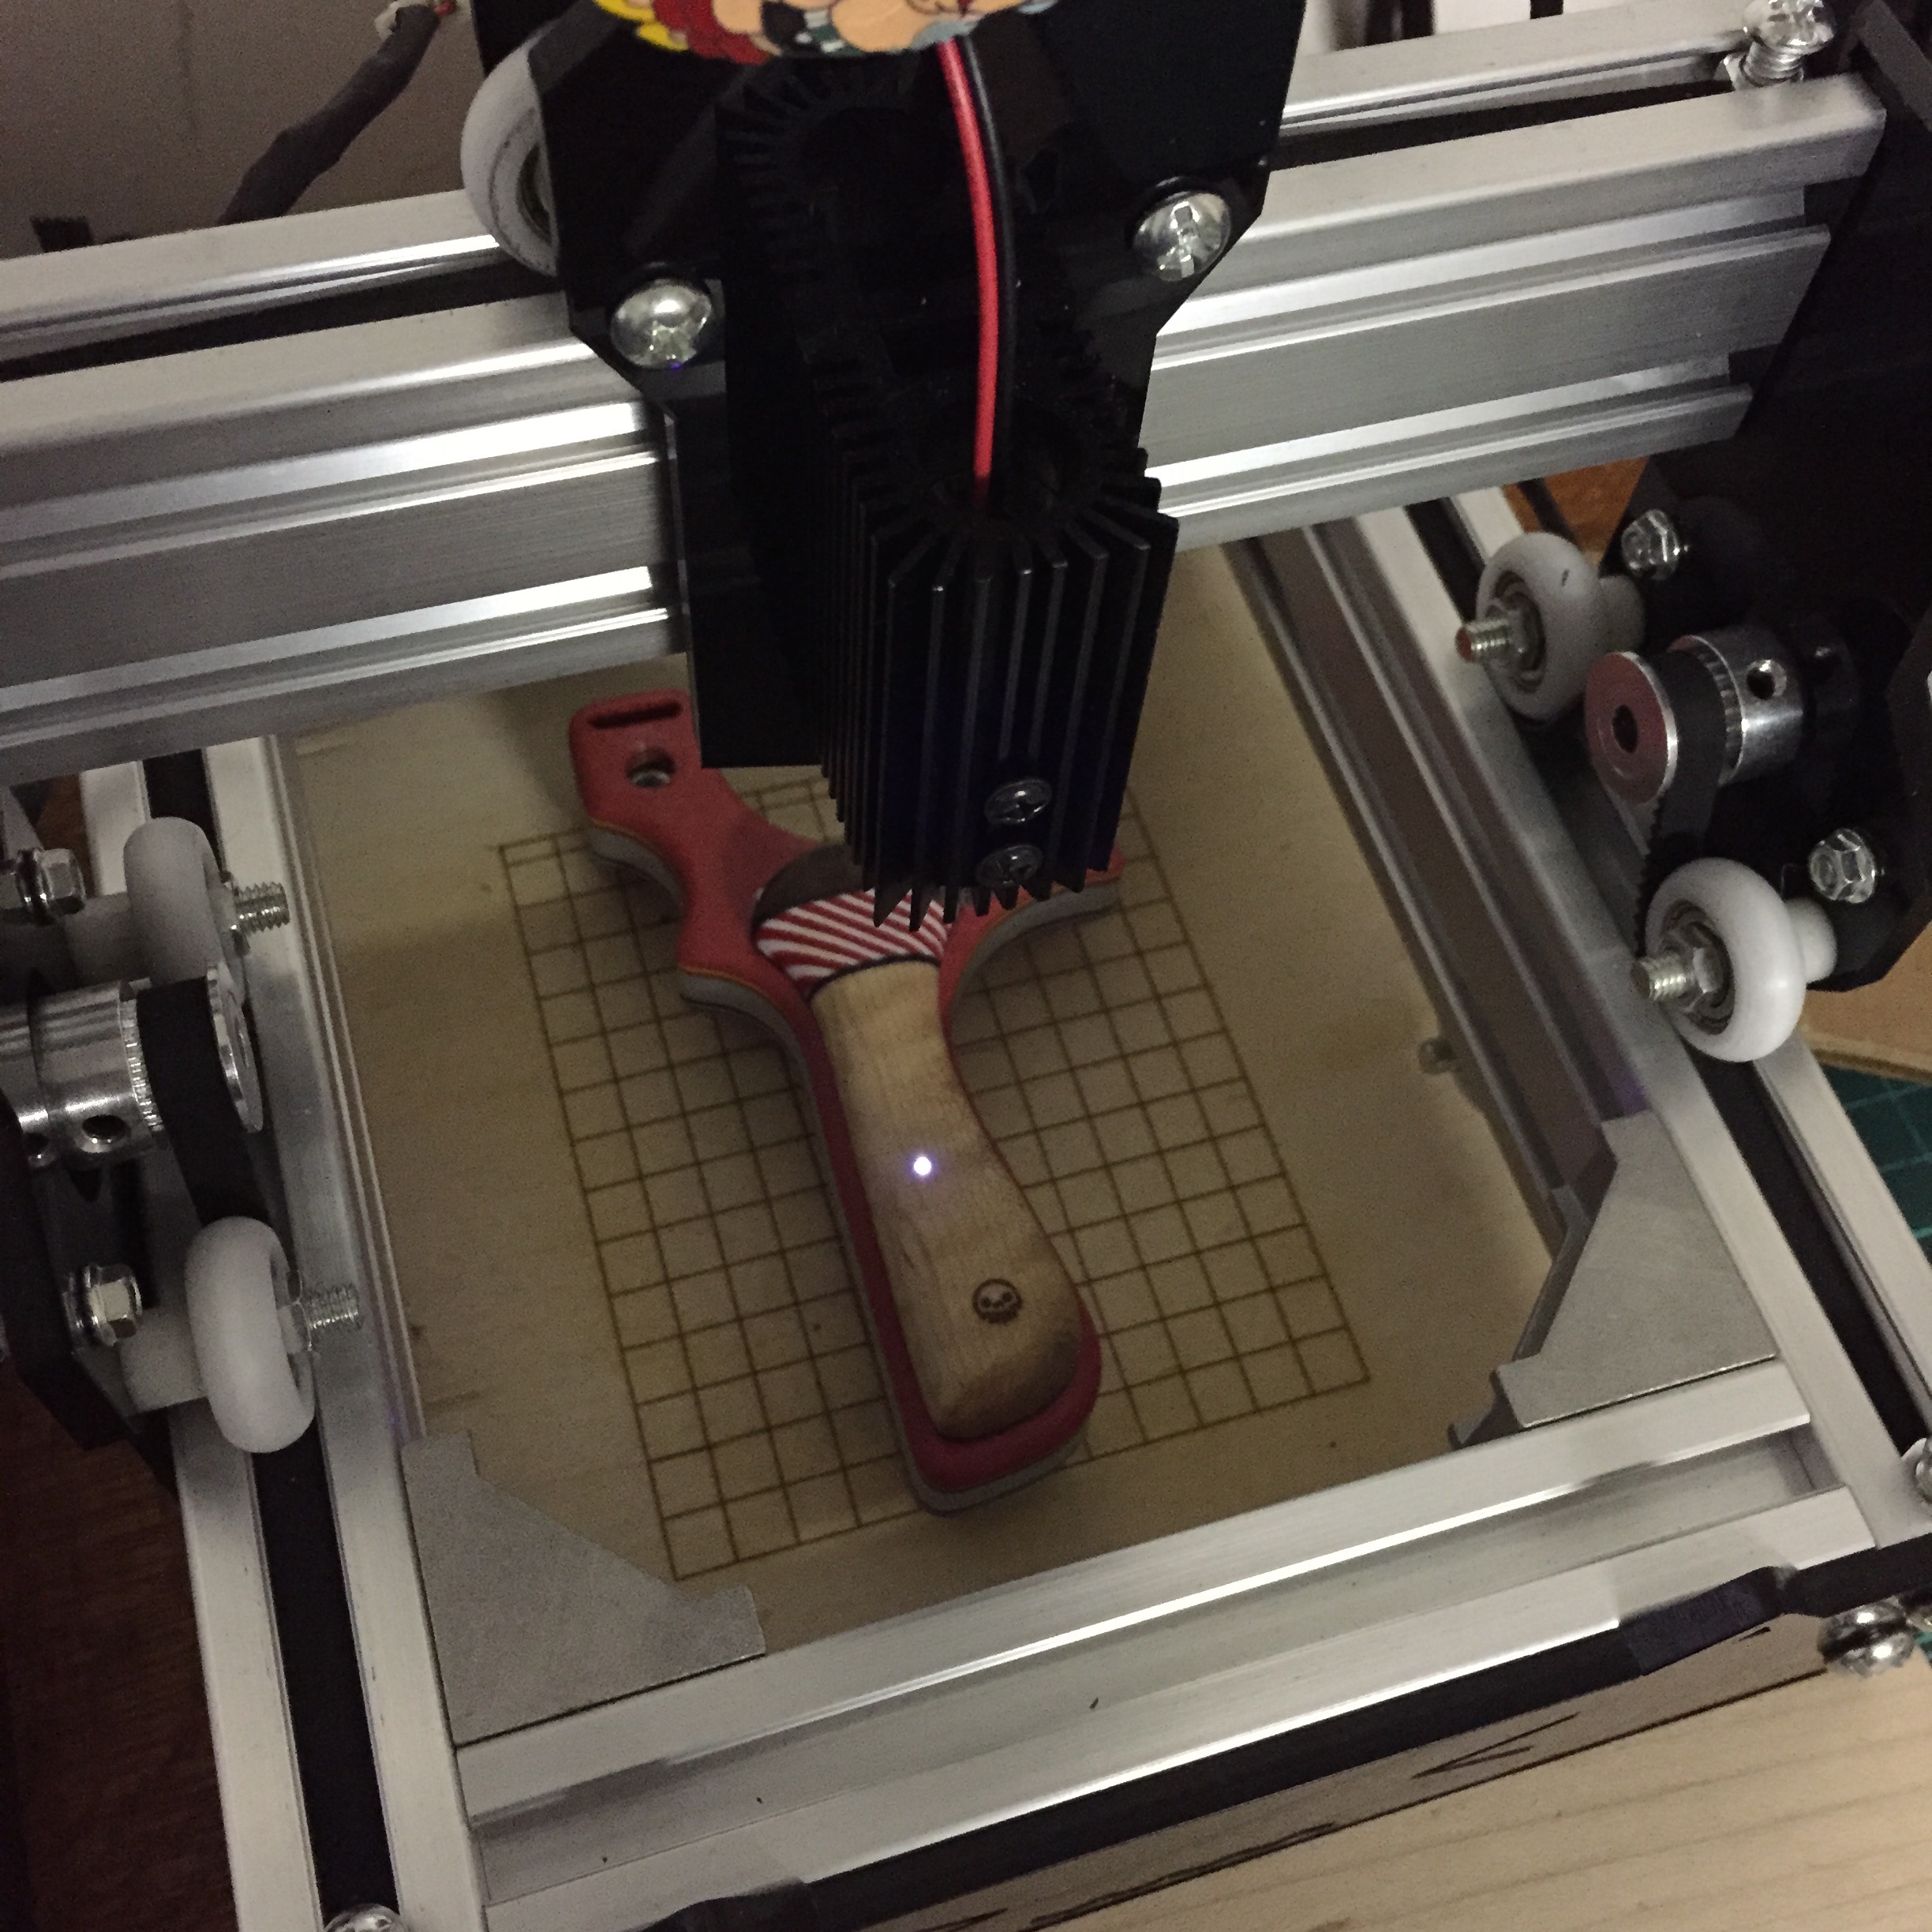
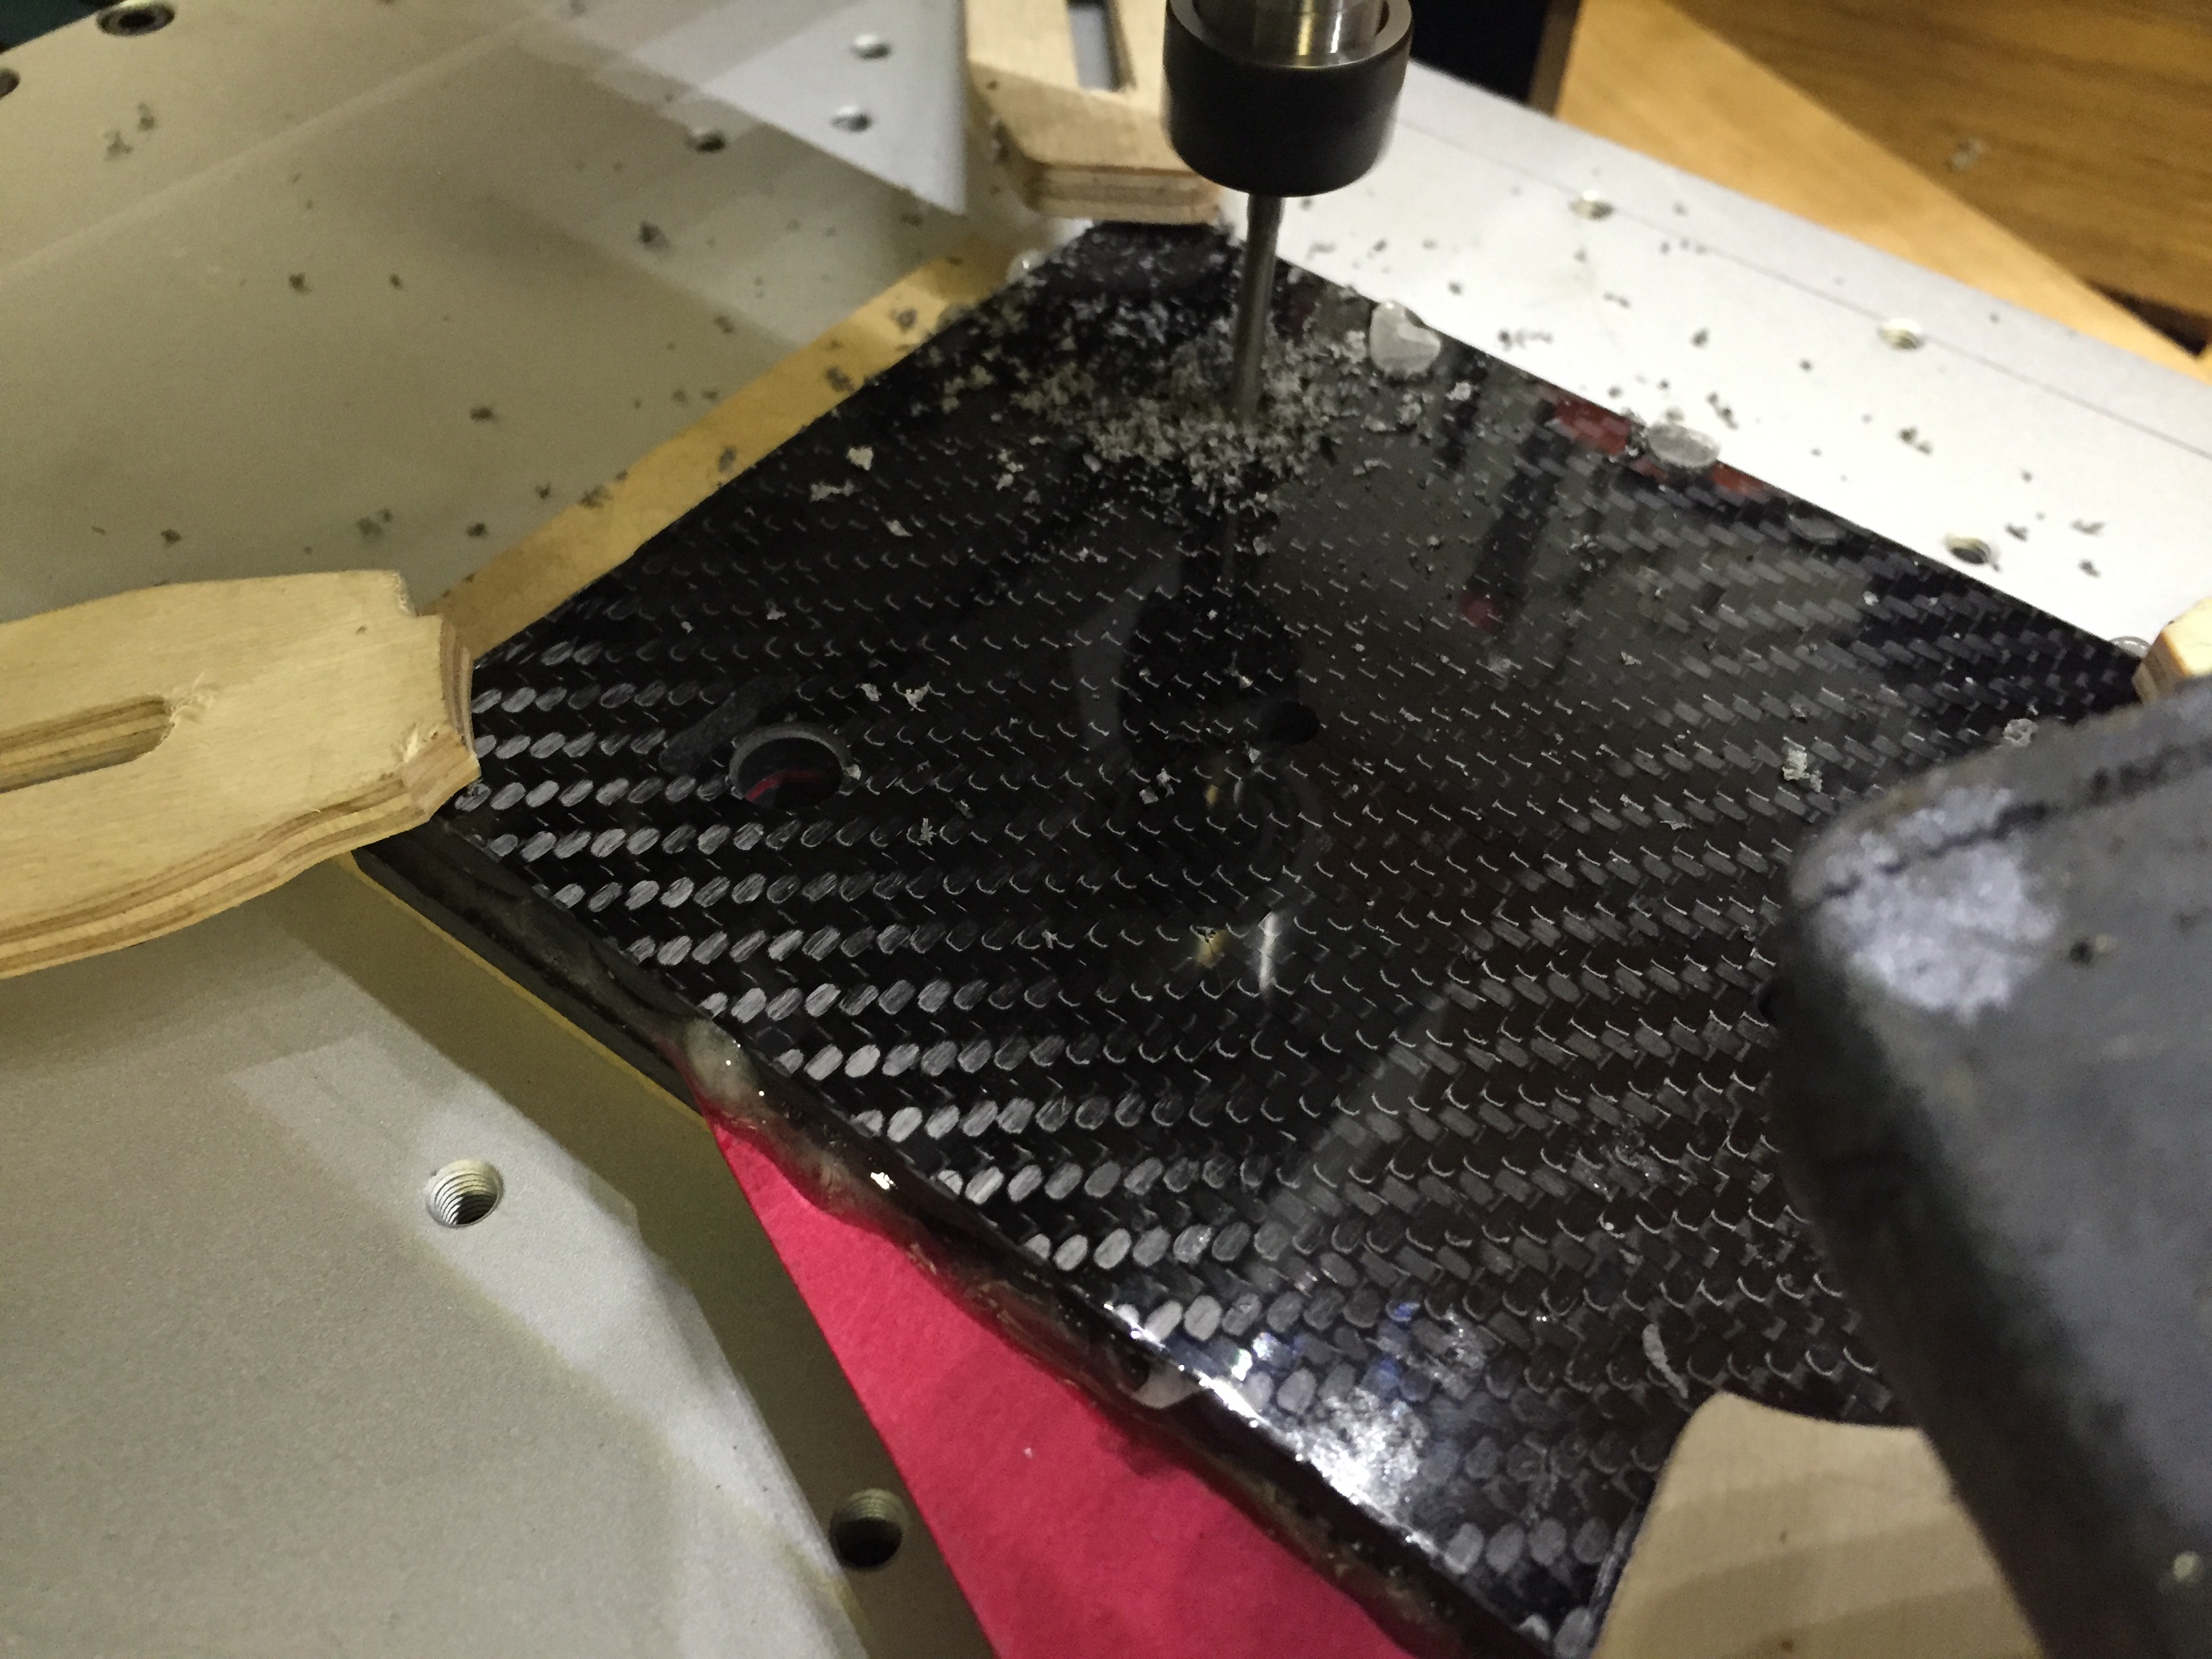
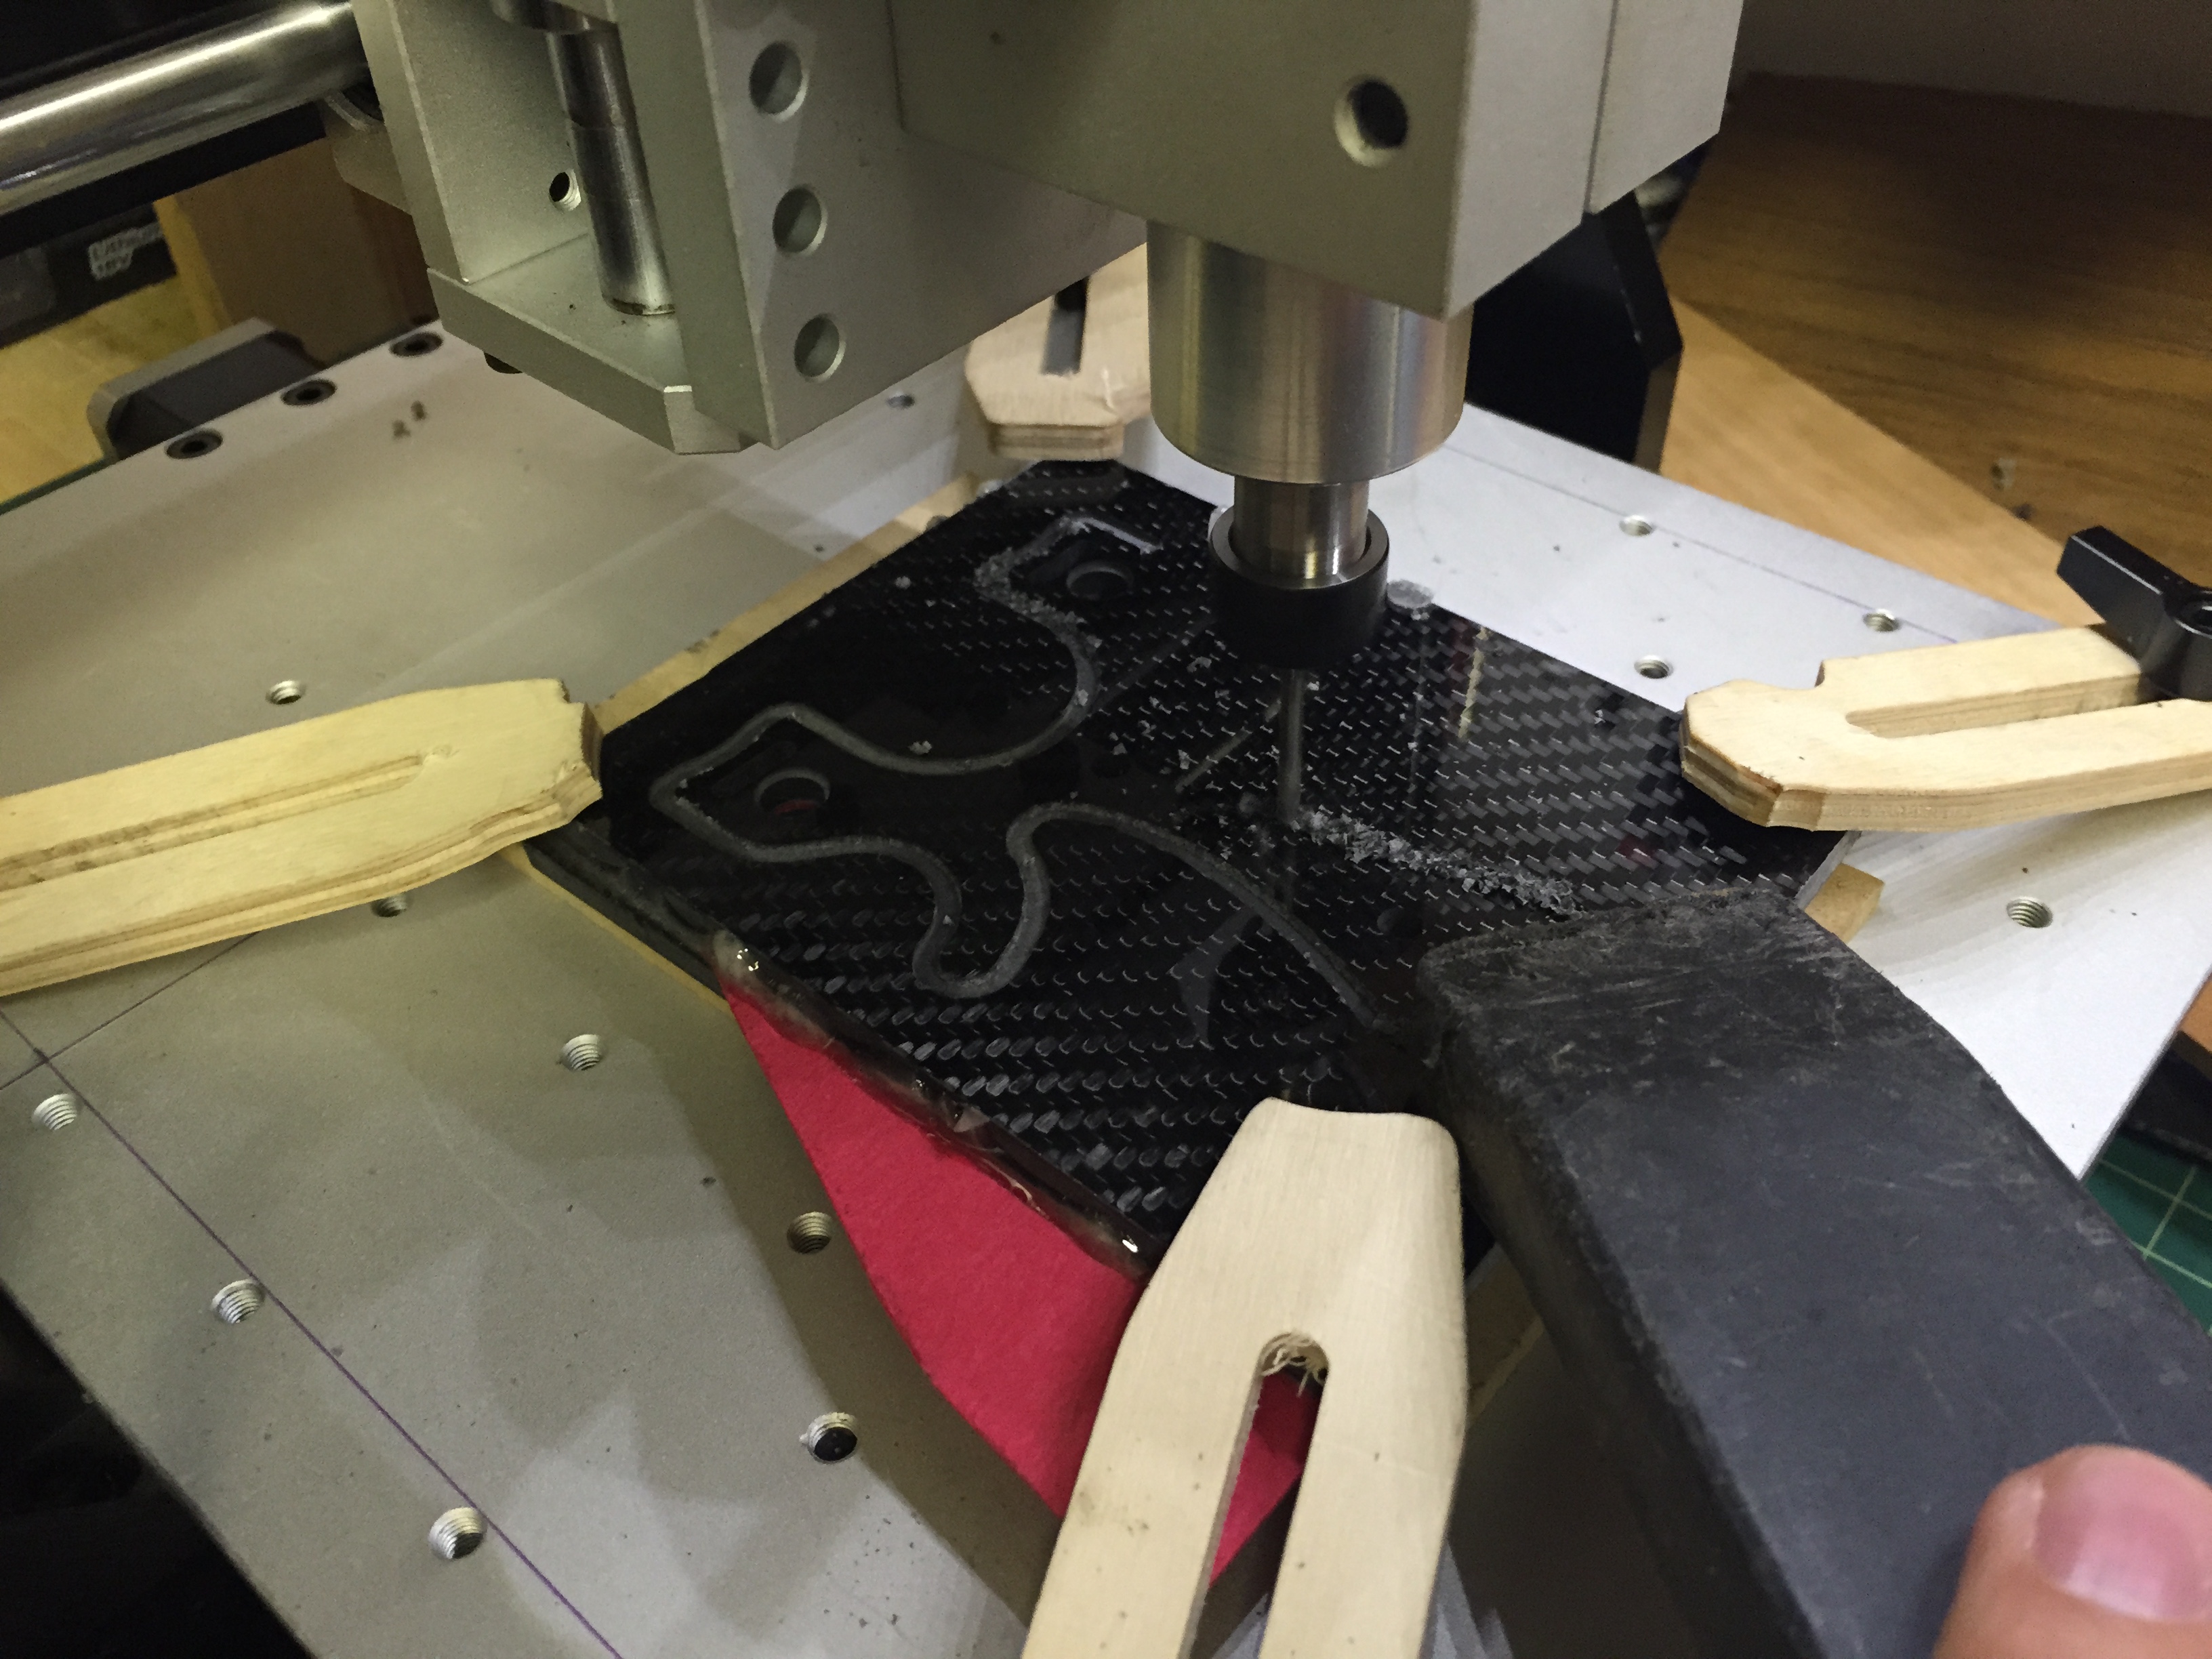
I used my LunchBox CNC to cut it out.
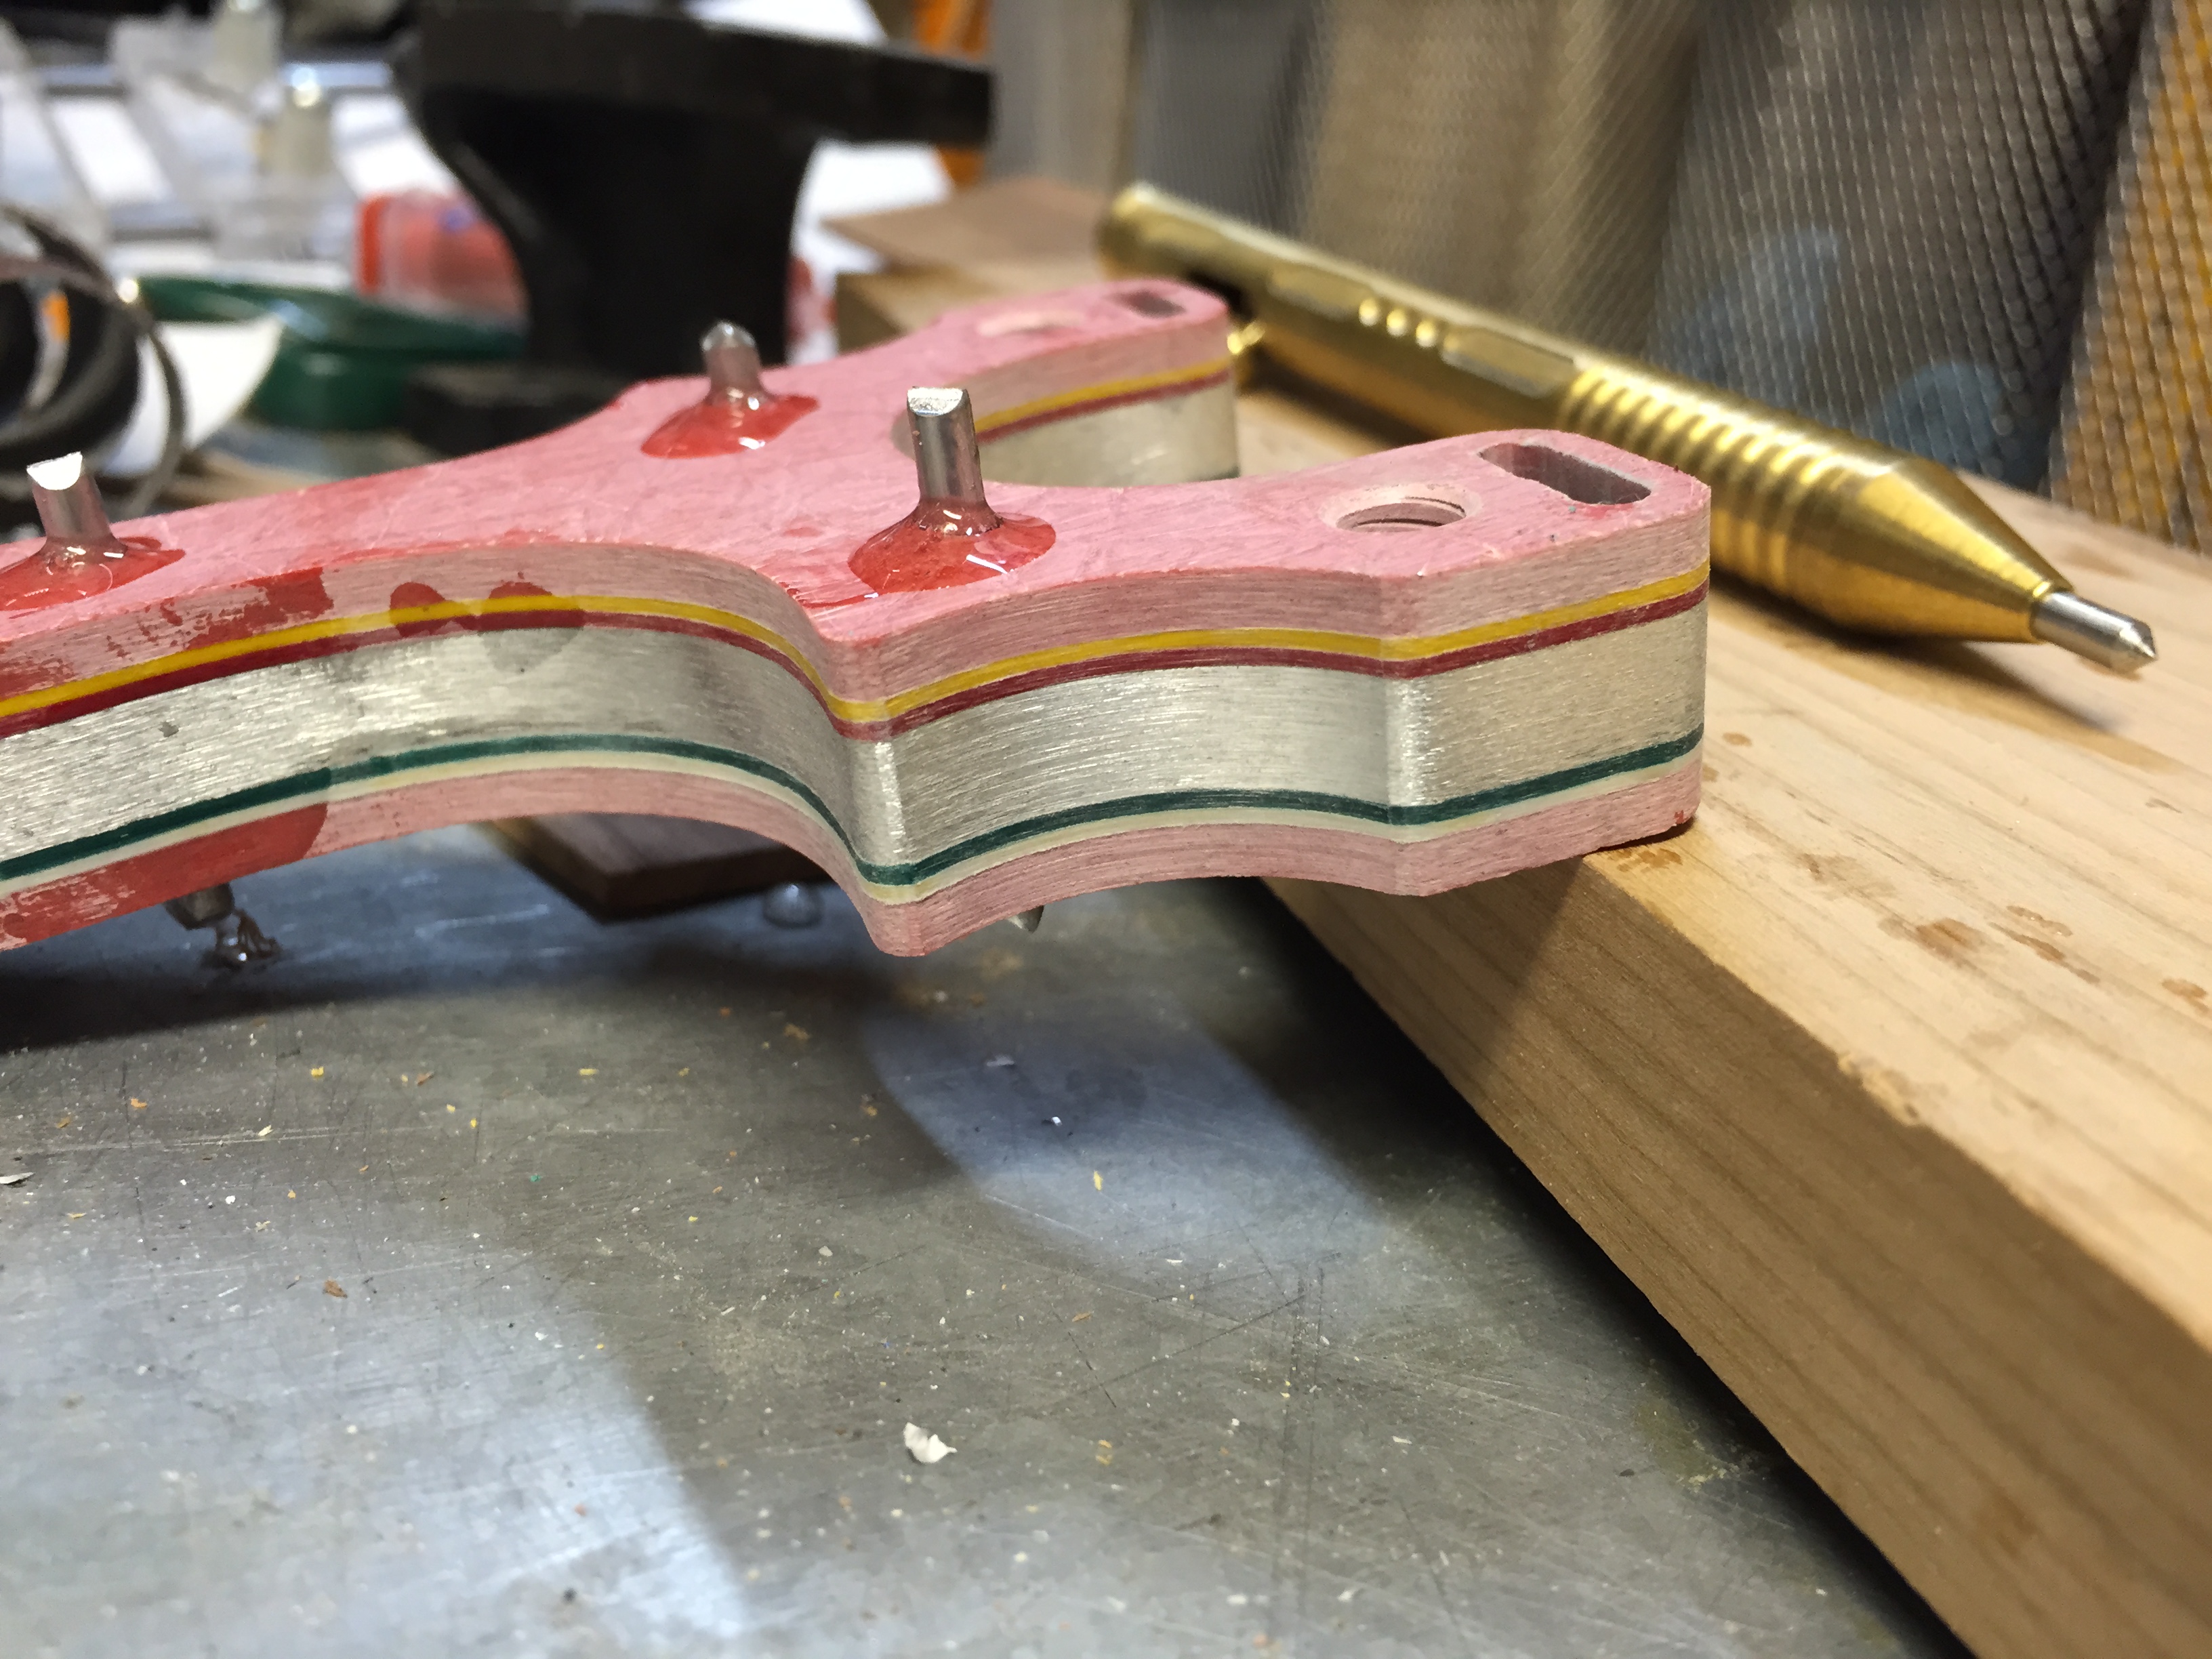
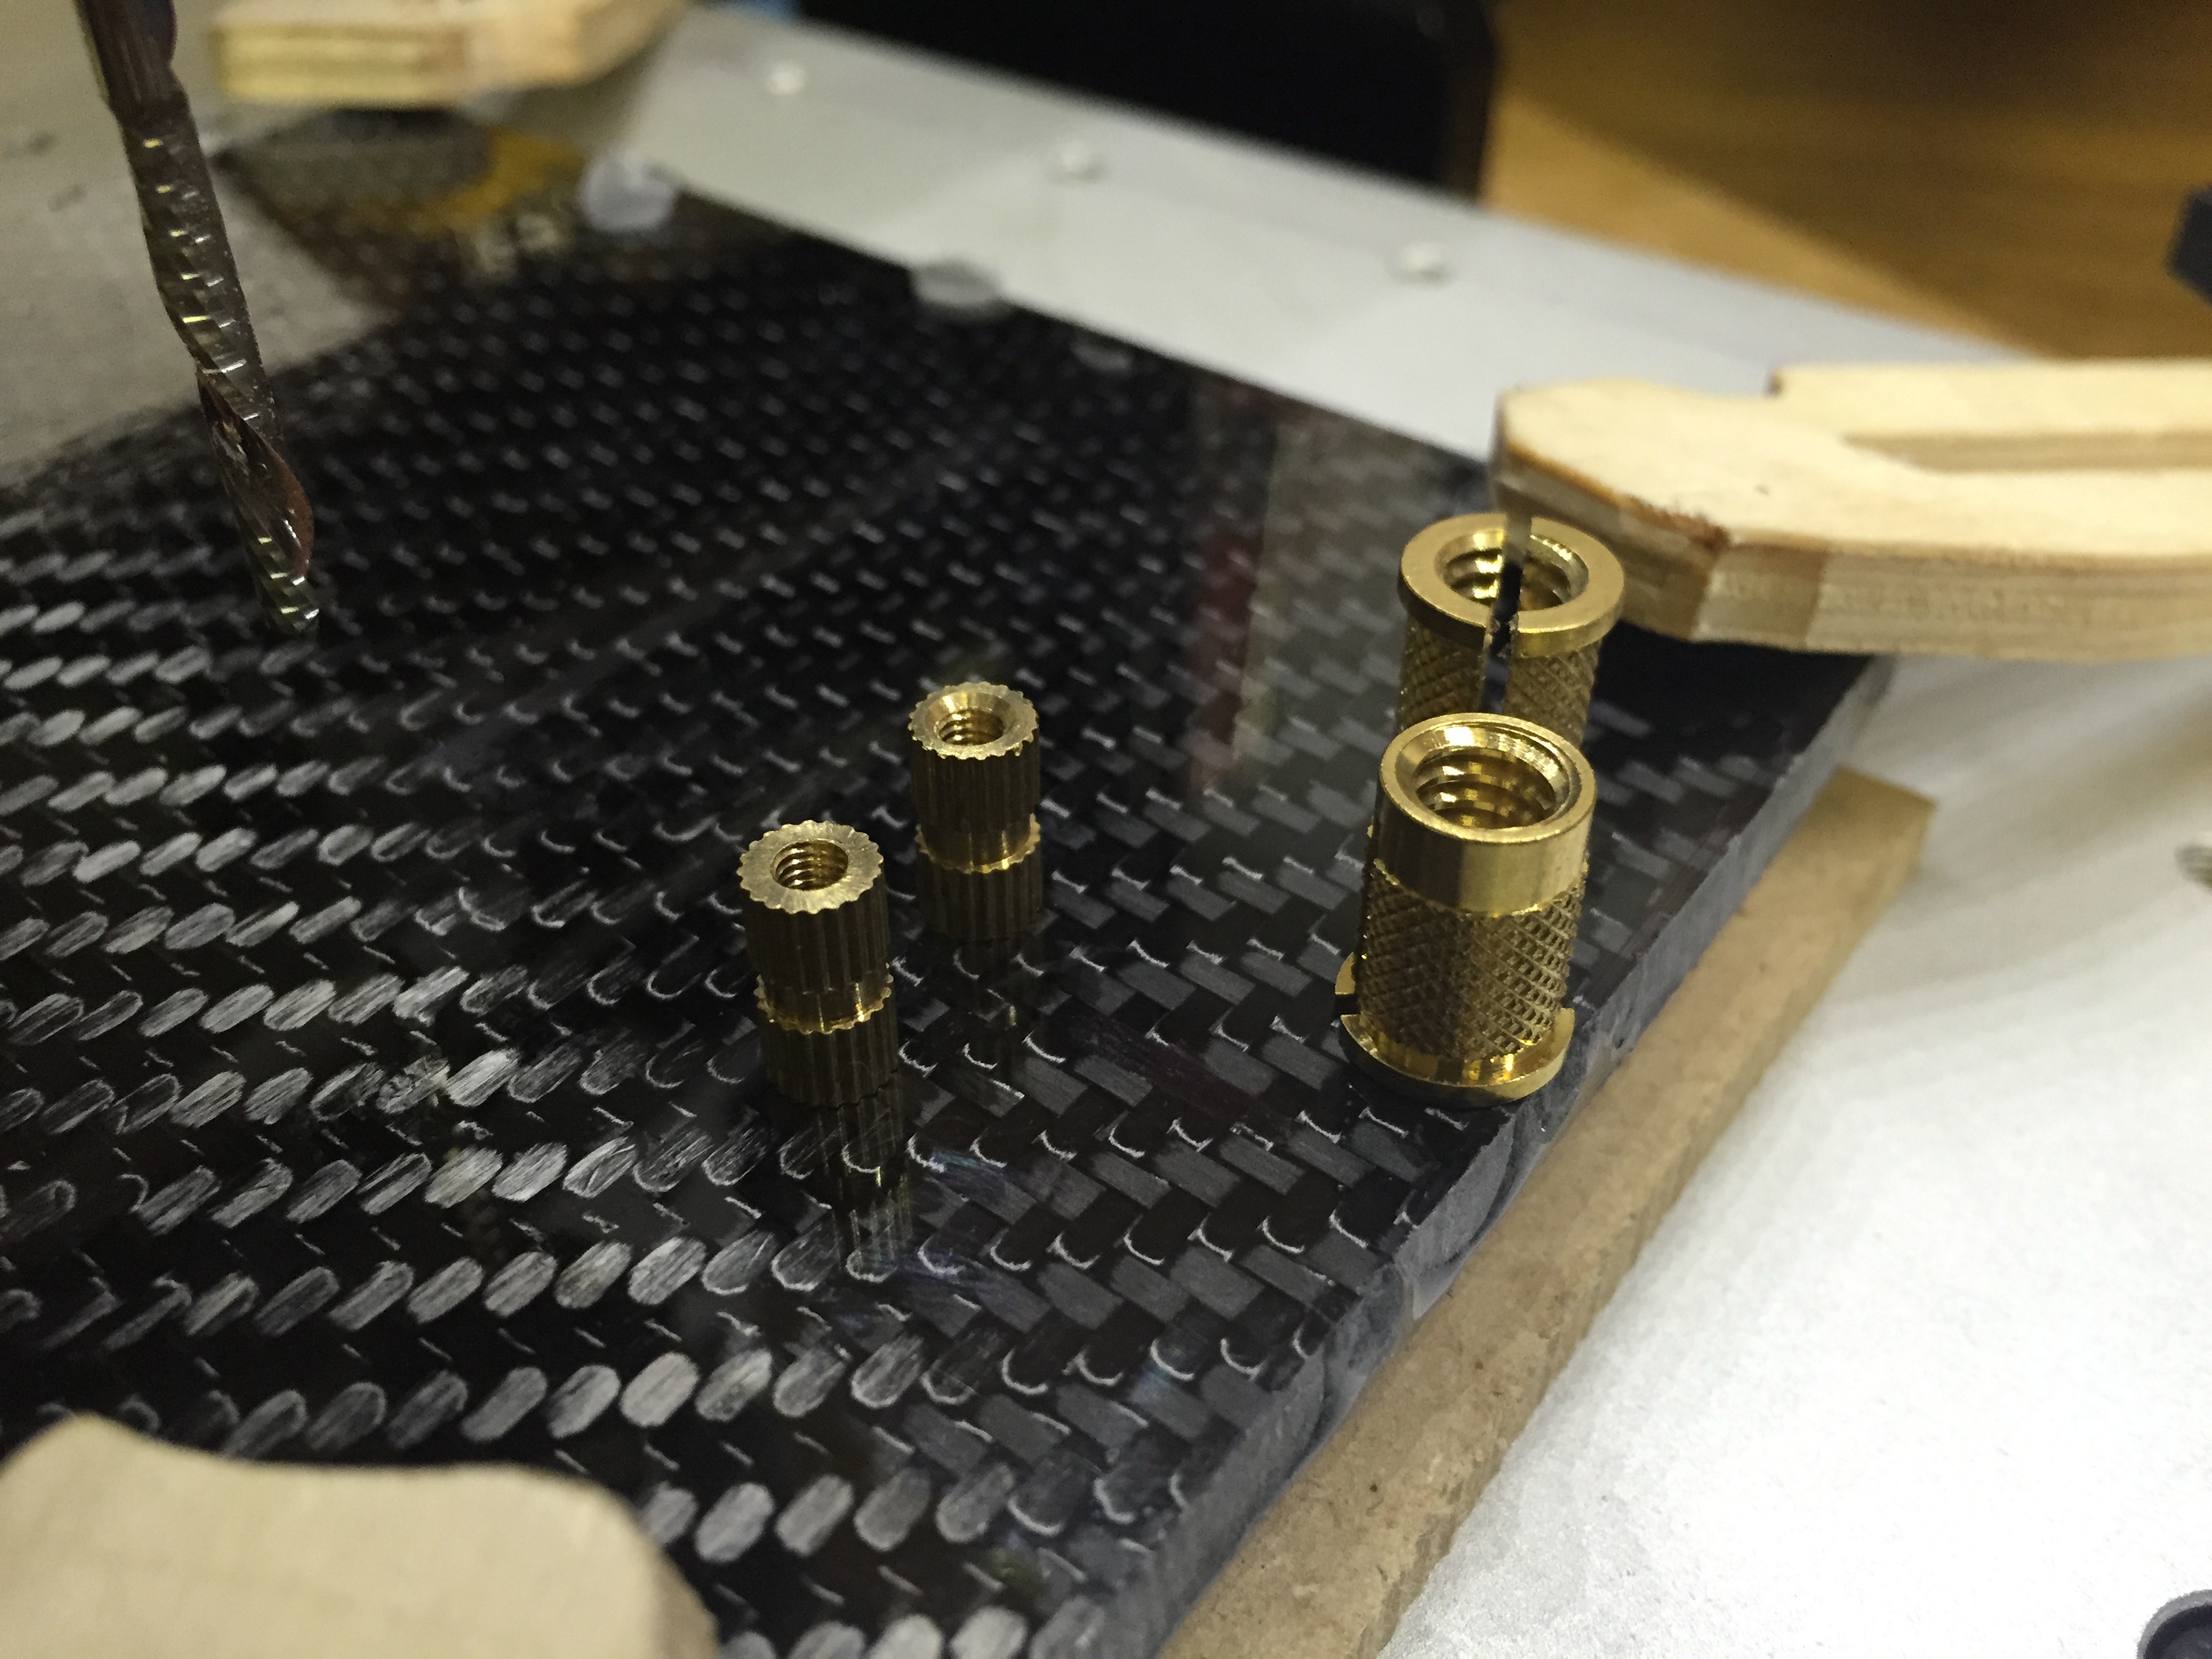
Instead of tapping the CF directly, I opted for a press fit threaded insert. I also made holes to accept a M3 threaded insert for attaching the handle scales to.
Then it was time to press ‘start’ on the CNC machine.
The bit used was an 1/8″, single flute, downcut carbide end mill. This gave the biggest chips and the downcut left the surface very clean.
I chased the bit with the shop vac hose to eliminate any carbon dust and debris that may fly away during the milling process. With the bit spinning at 10,000 RPM but taking very light .05″ cuts, the job took 23 mins. The result was a very clean and accurate representation of the 2D CAD model.

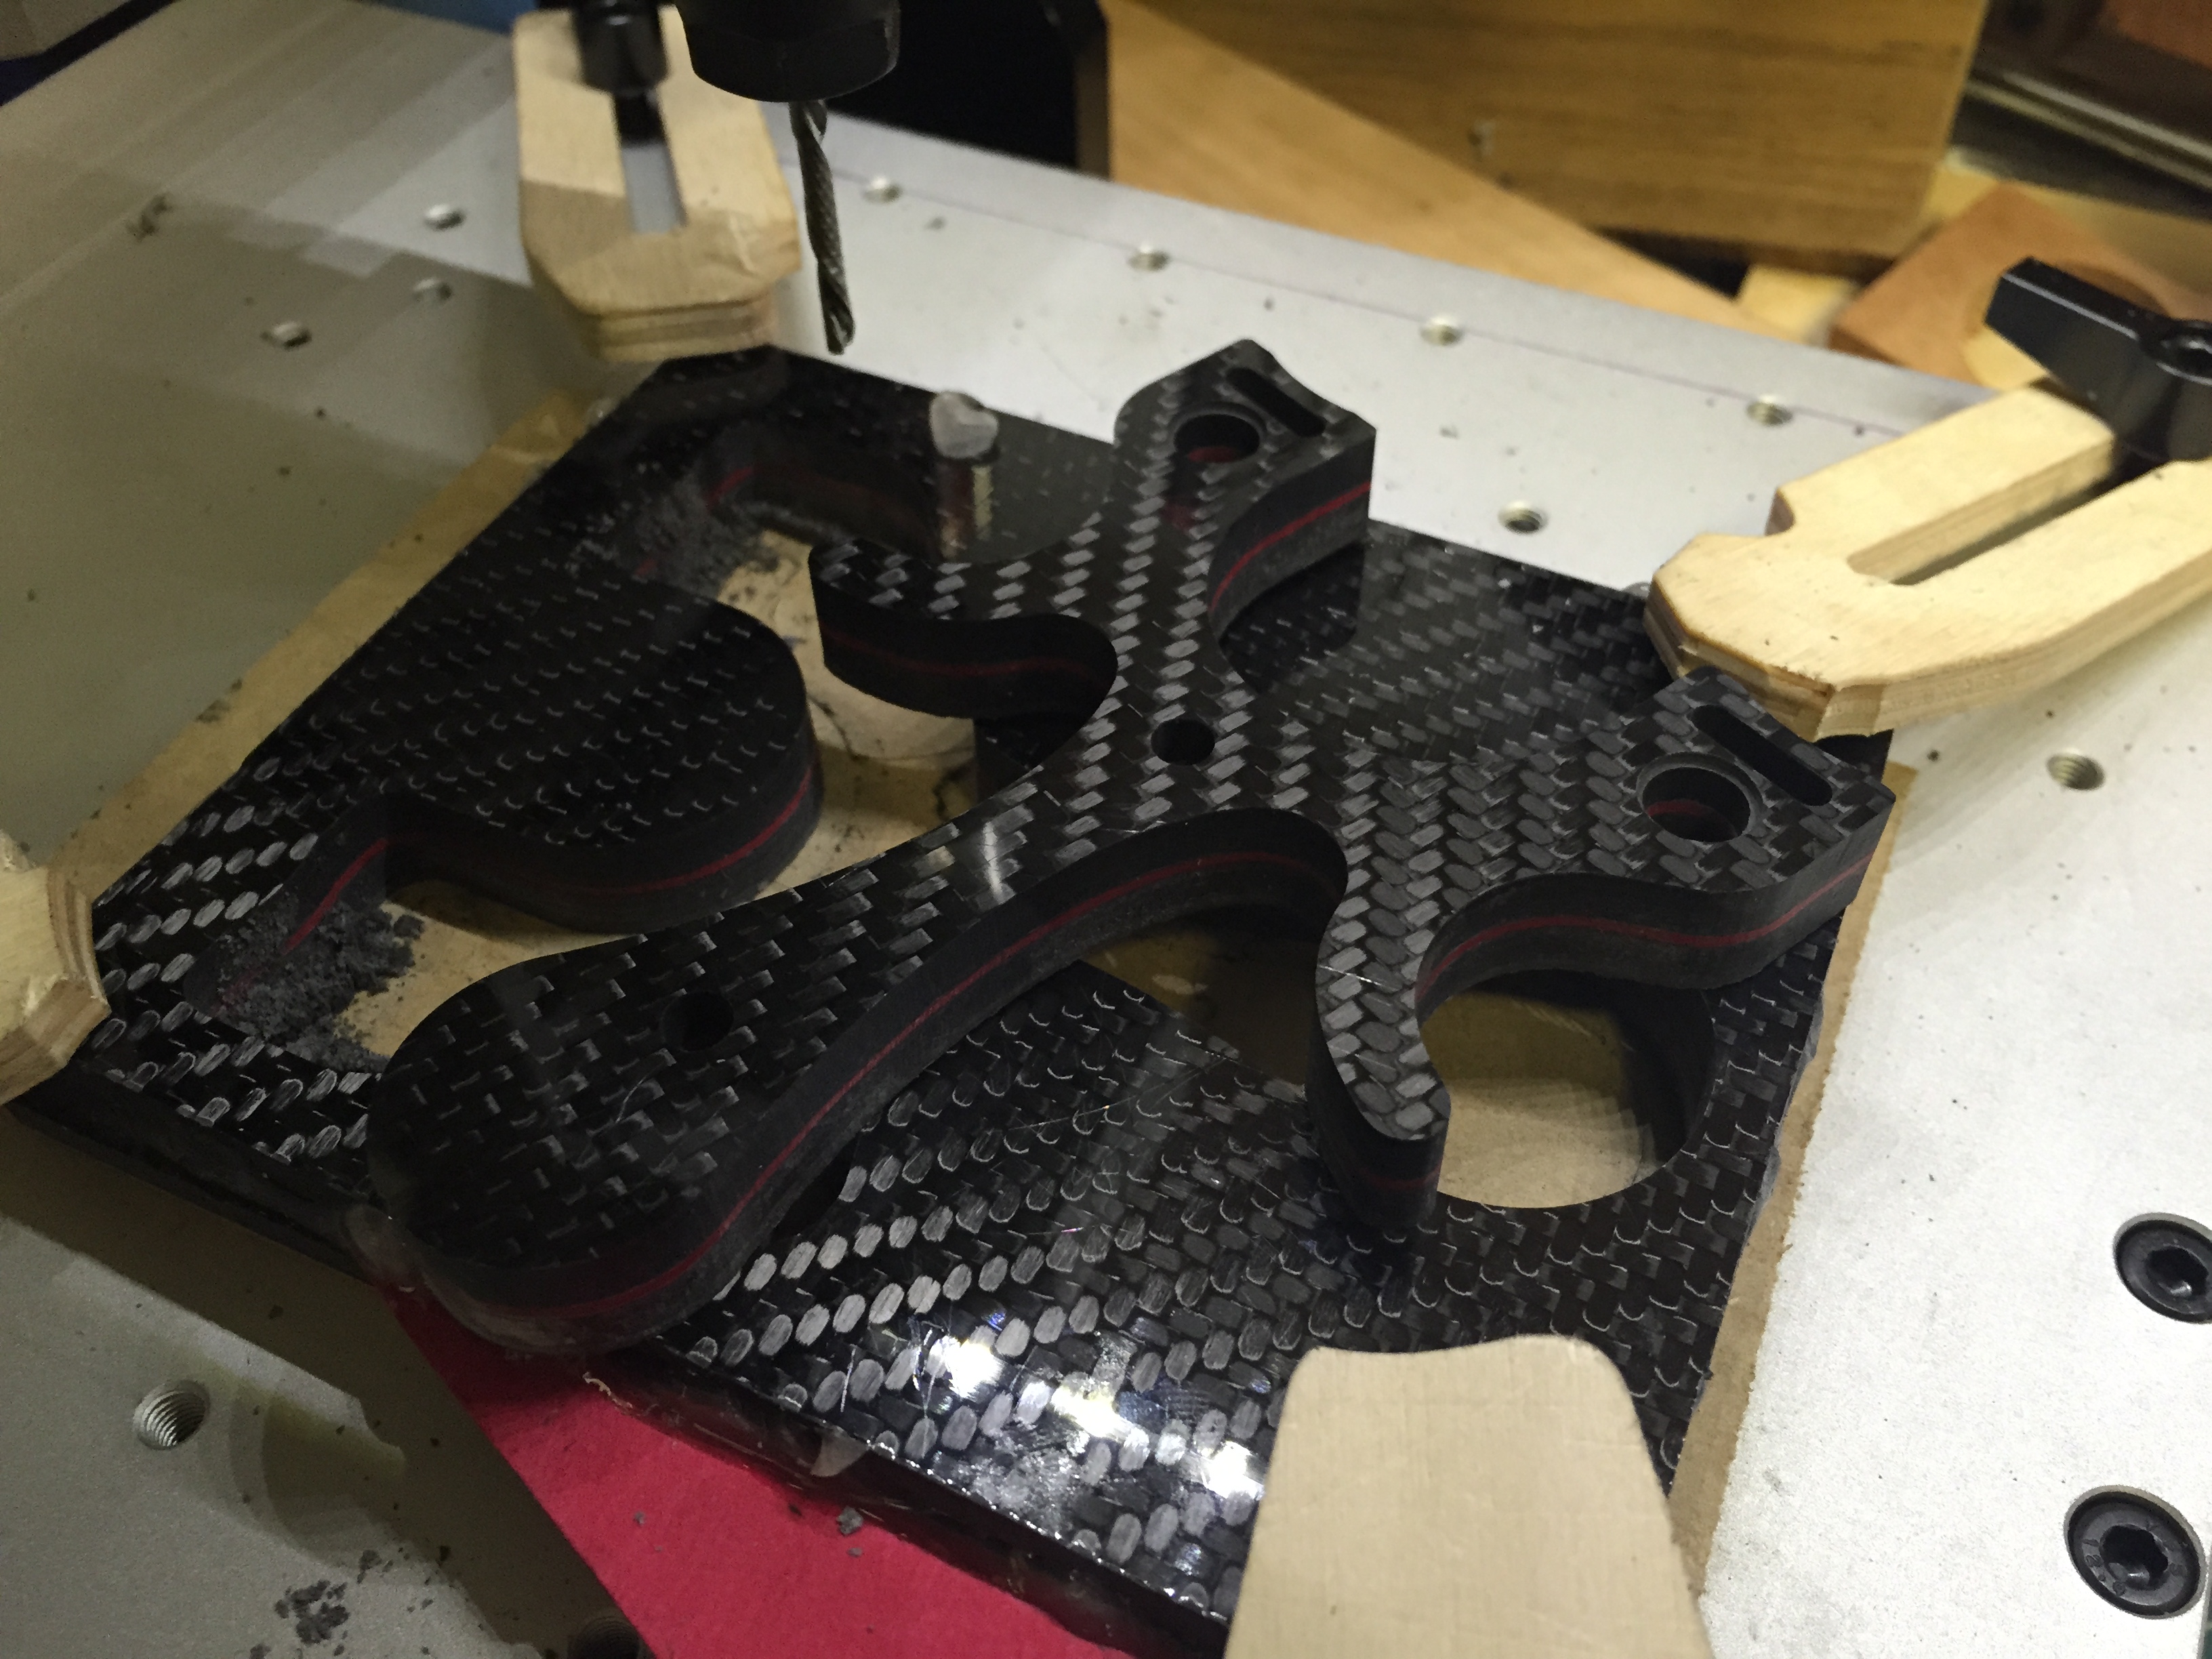
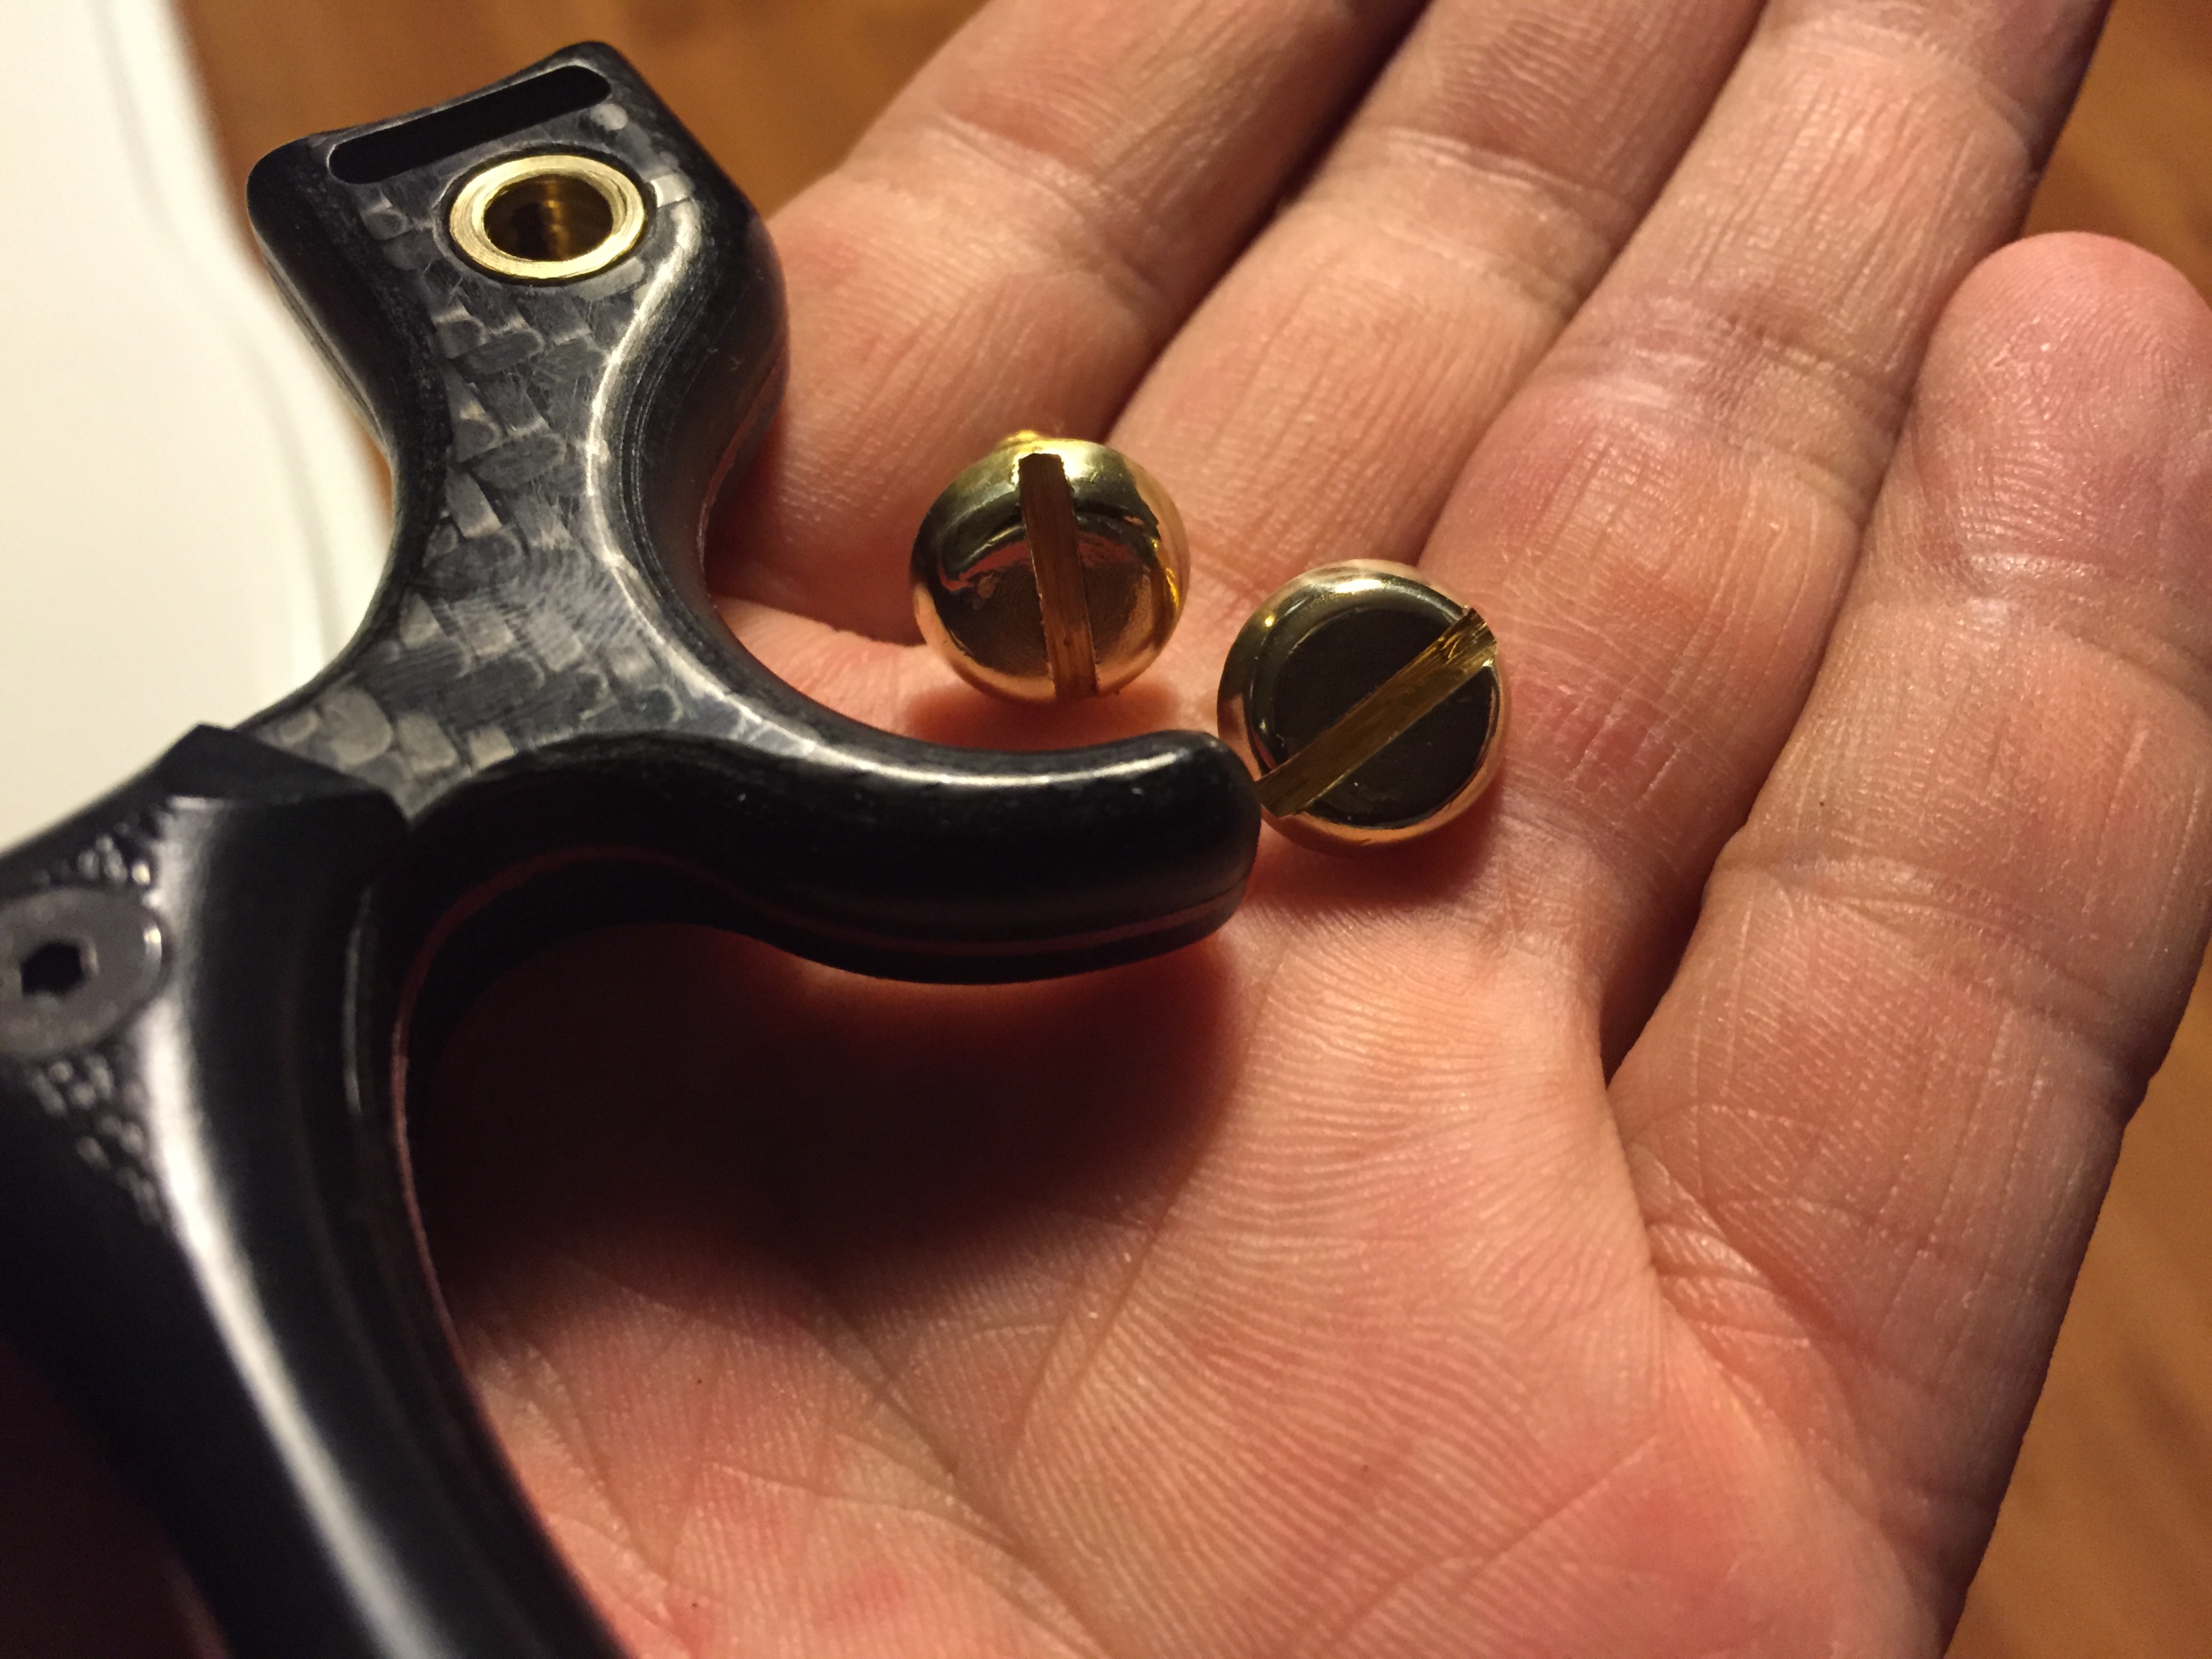
The final thickness of the CF slab was .47″ and the 1/4-20 threaded inserts are .5 so I had to shave off .03″ on with my lathe to get them to seat flush with the surfaces.
When installing these inserts, it’s easiest to thread a bolt into them and then press them into place. I added a bit of CA glue when it was 2/3 in to really set them into the hole.
The M3 inserts (can be found on eBay for a few dollars for 100’s) are 10mm long and were just pressed into place. M3 screws are very common as well as most electronics are assembled with that size screw.
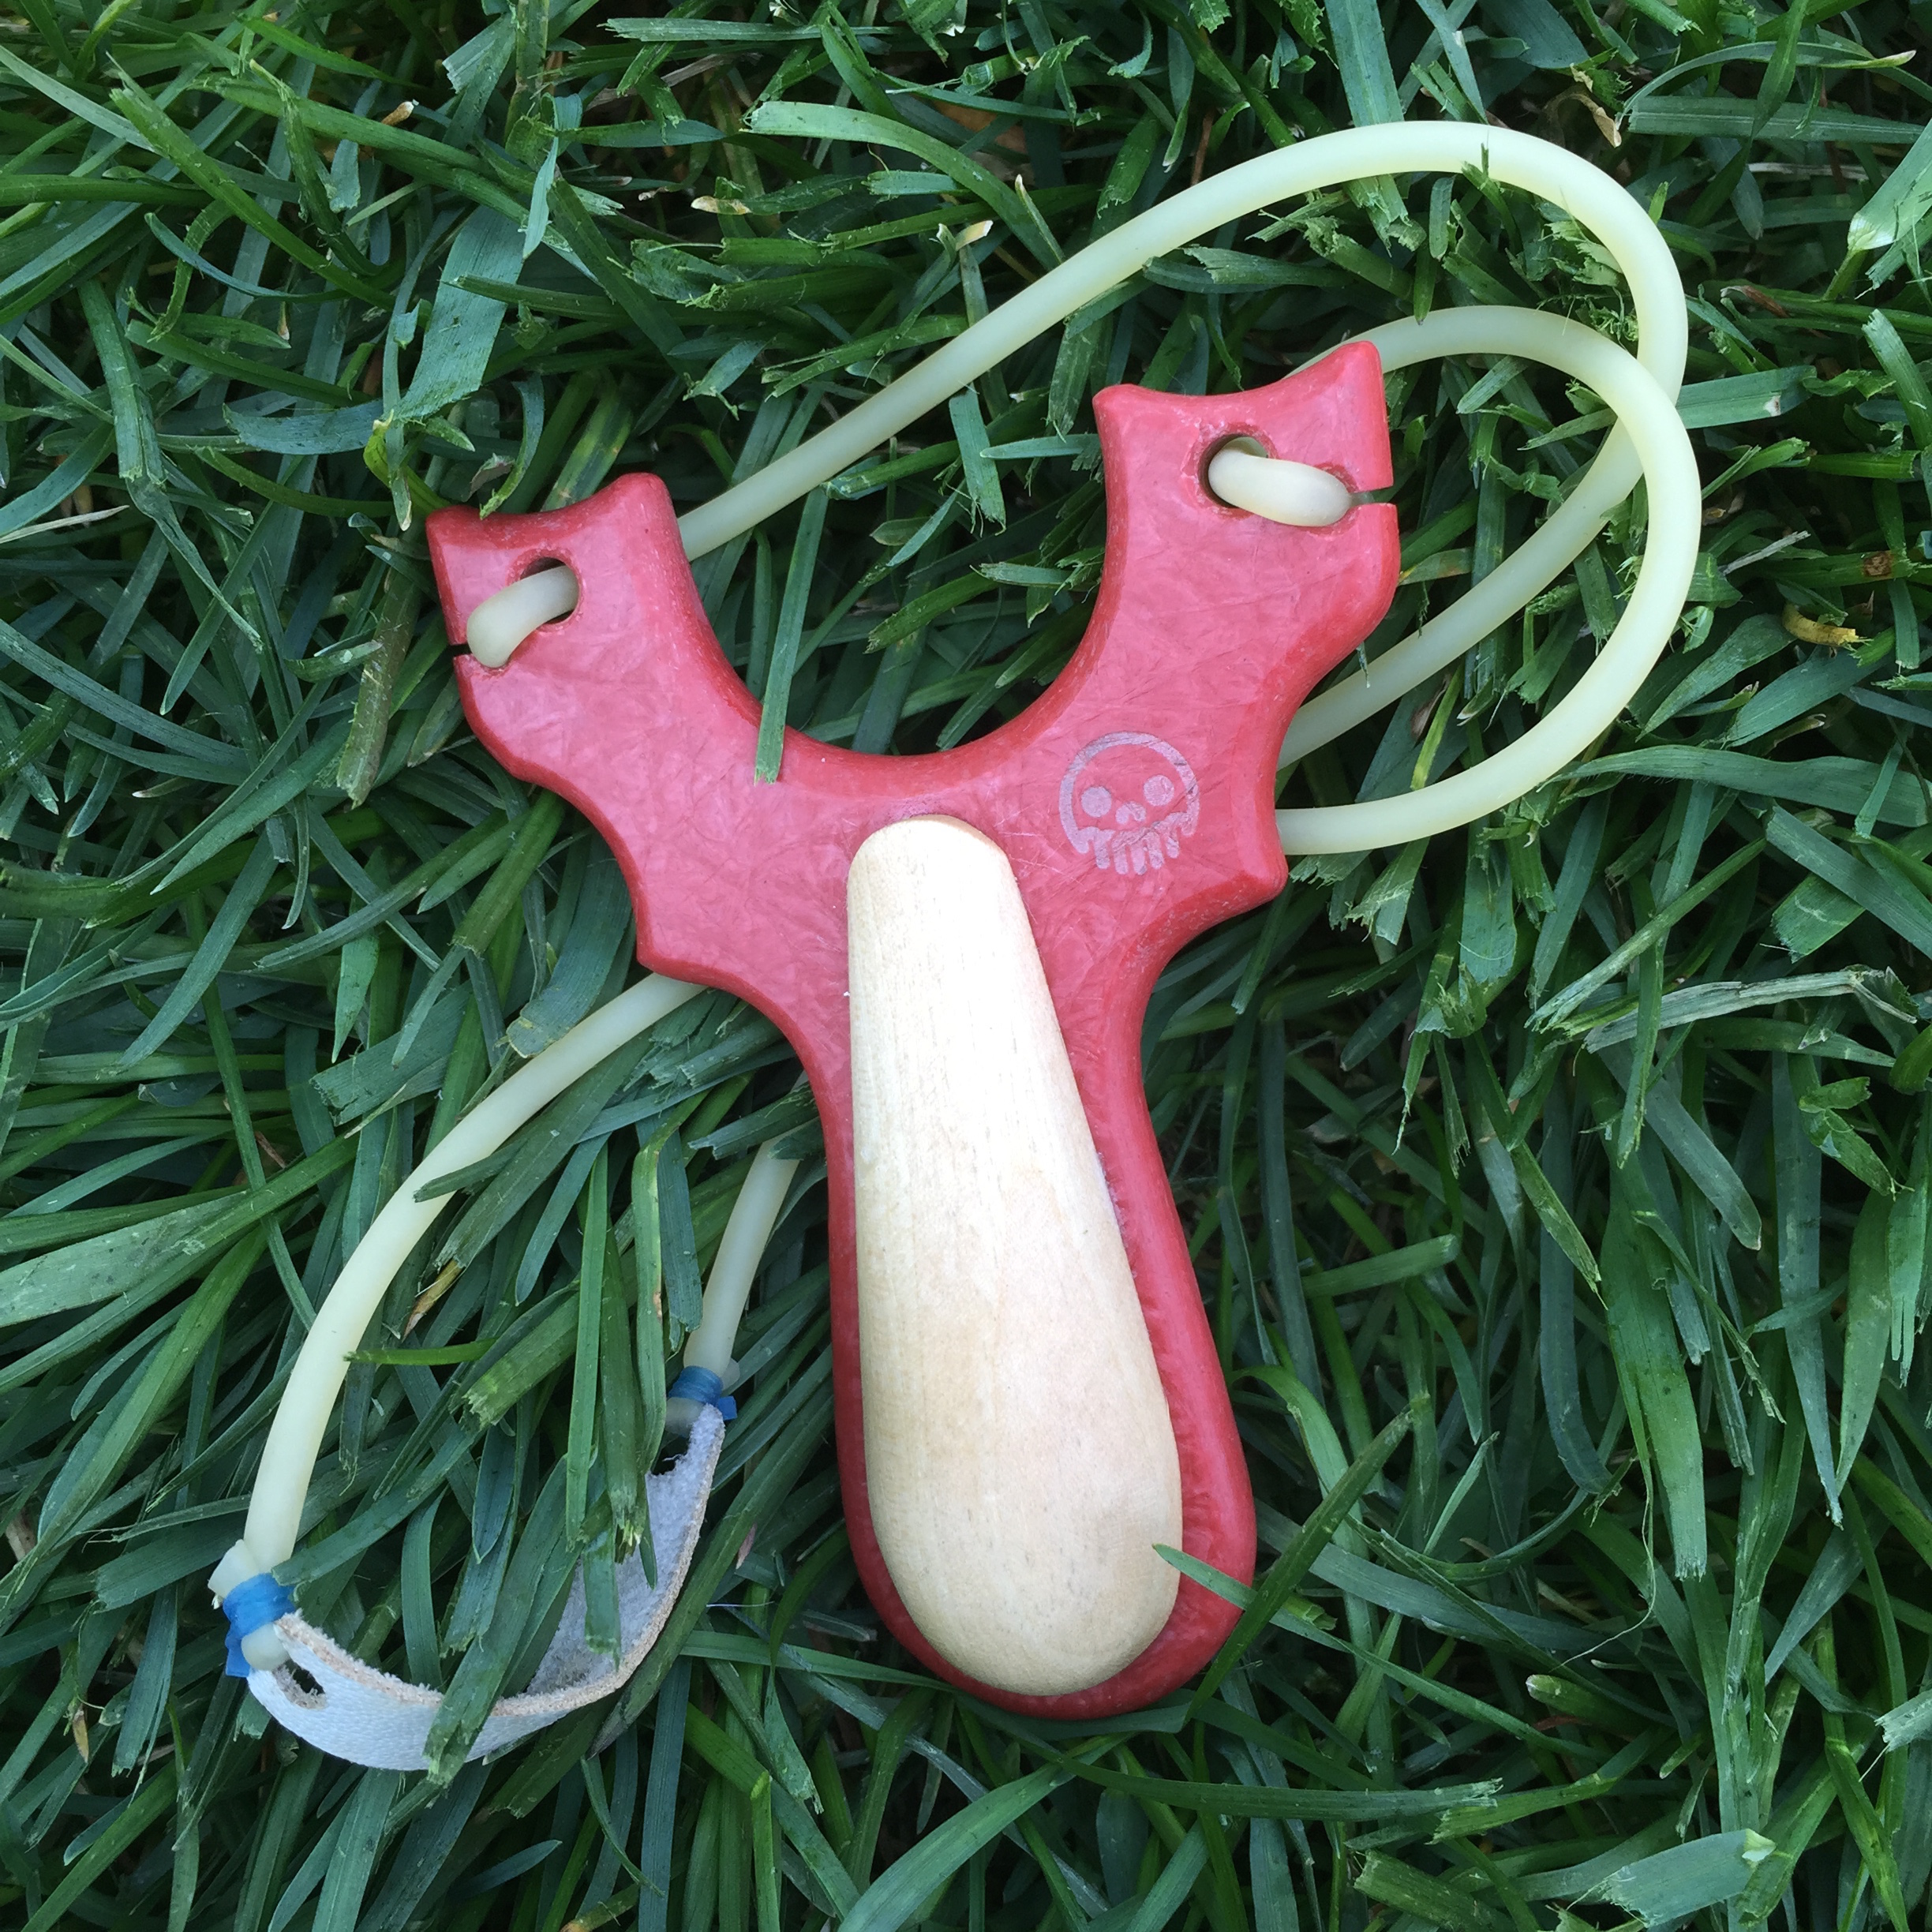
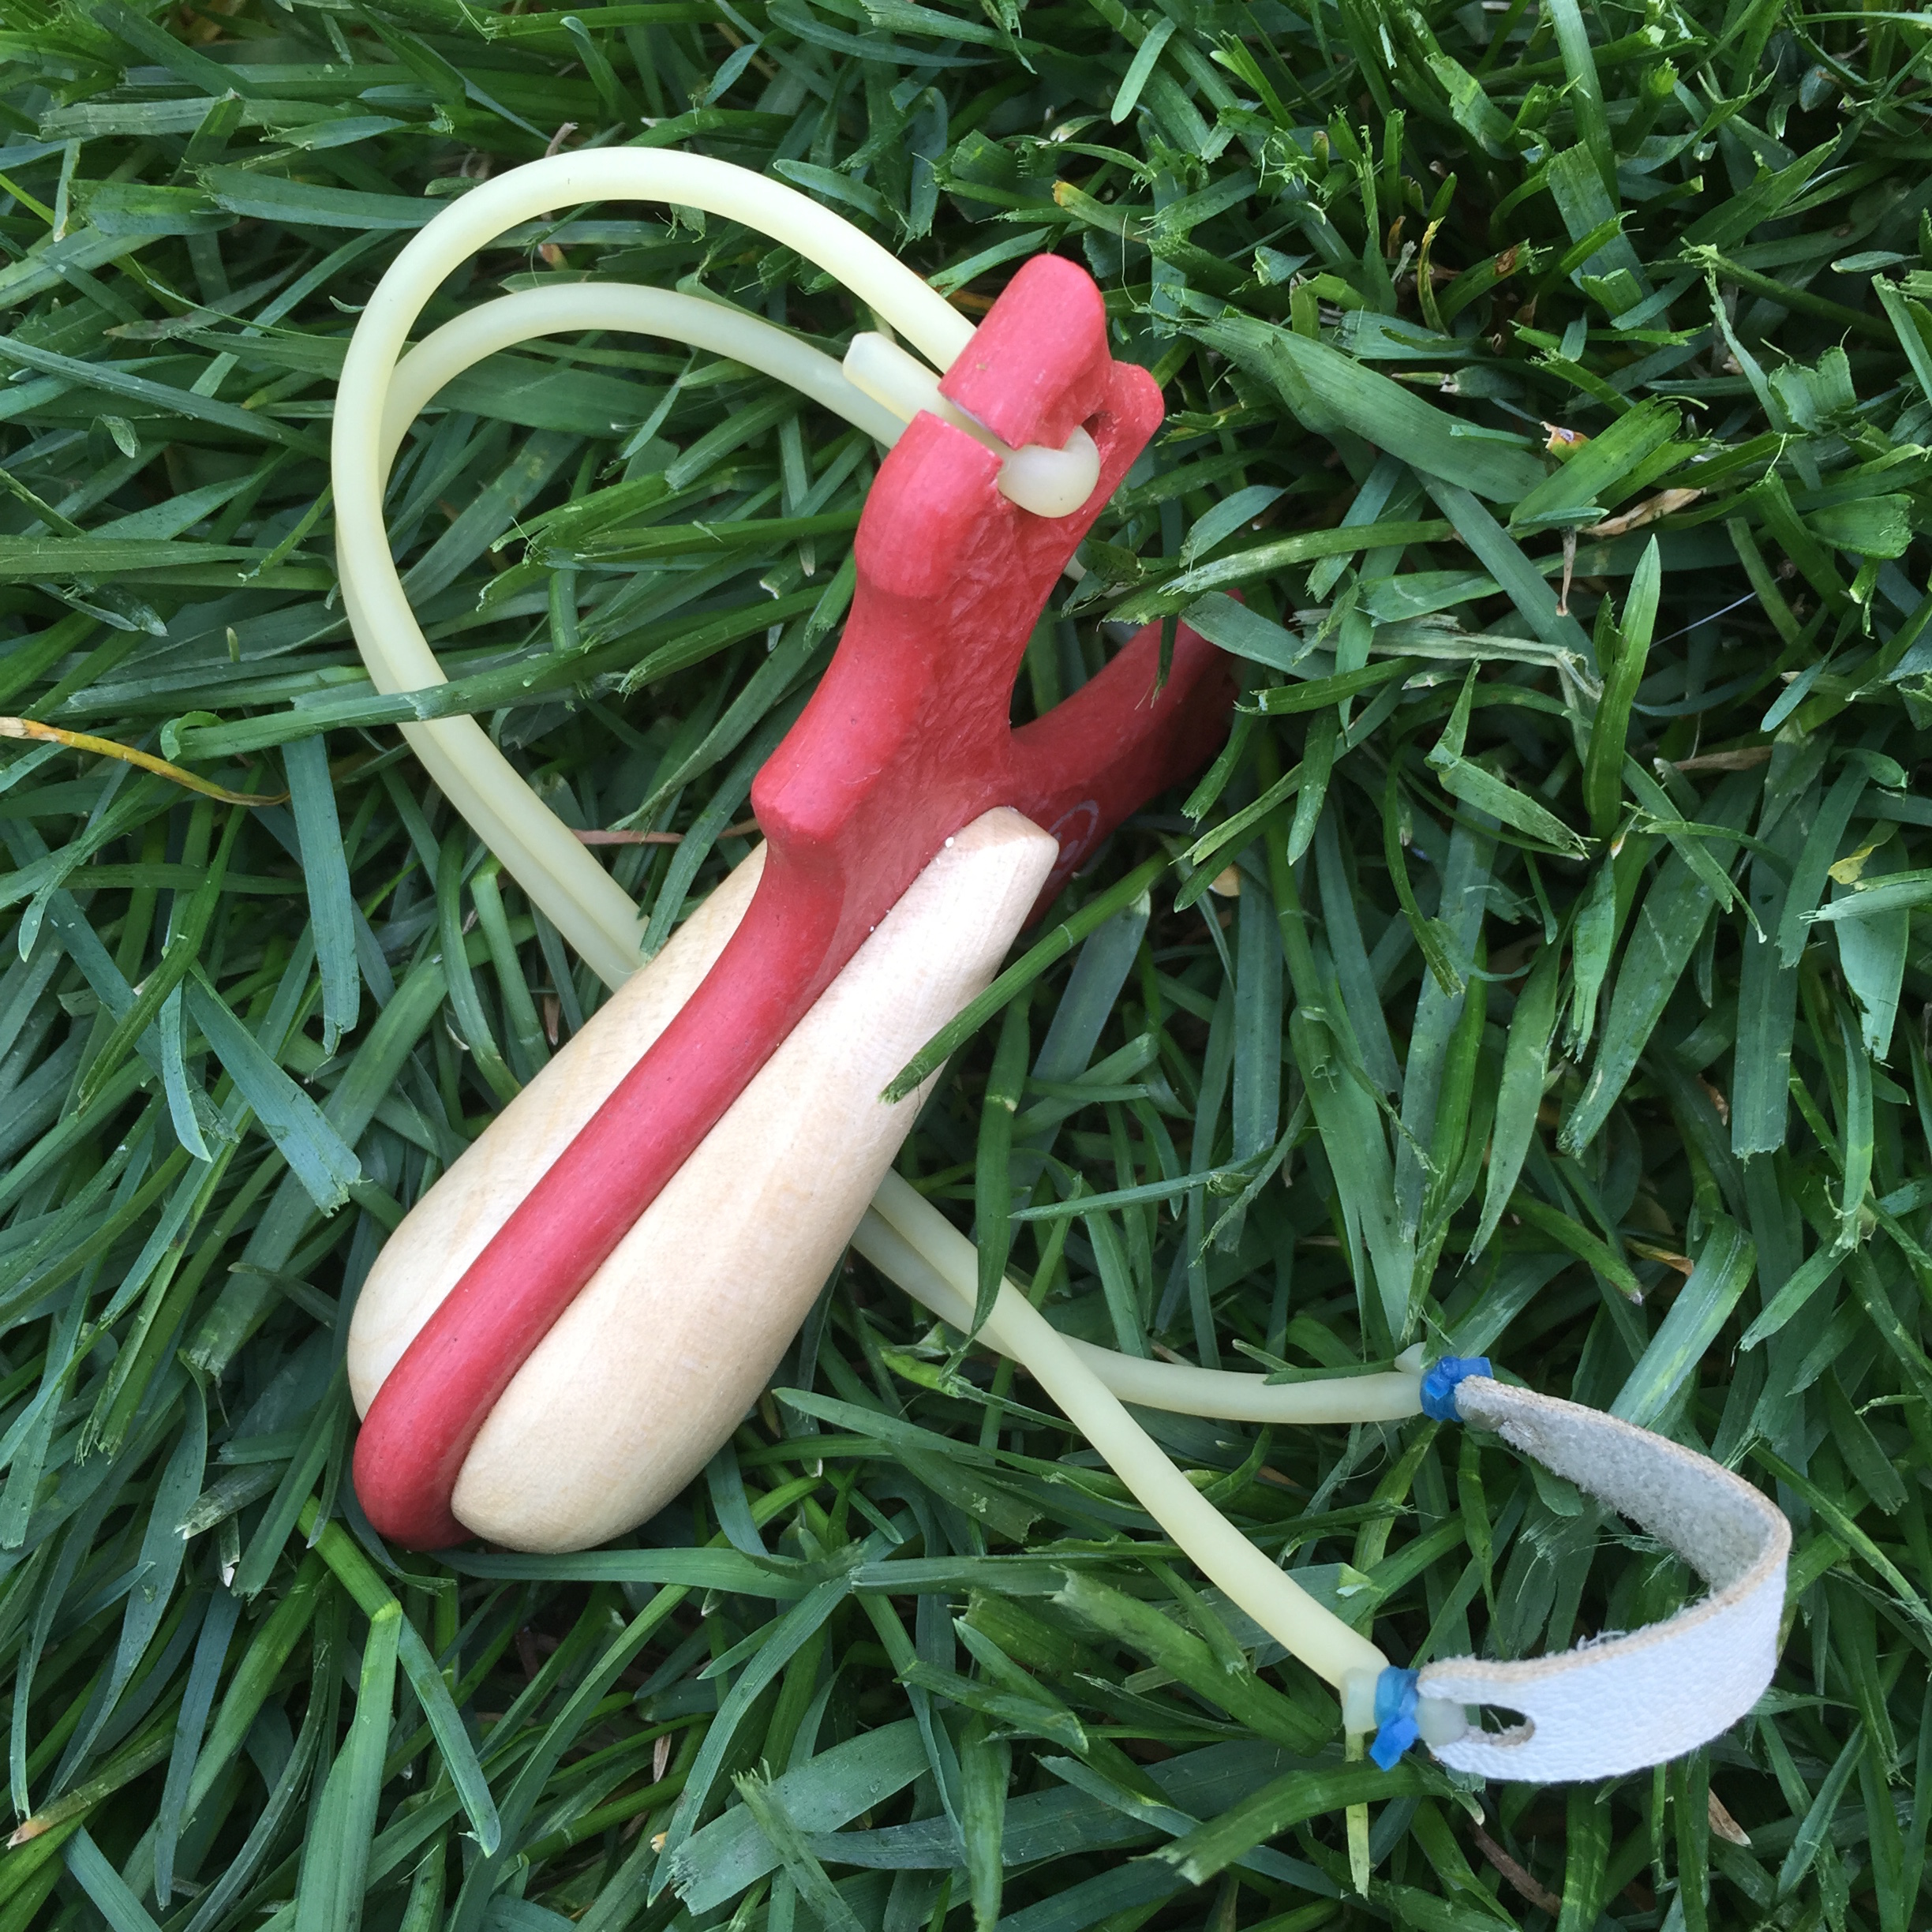
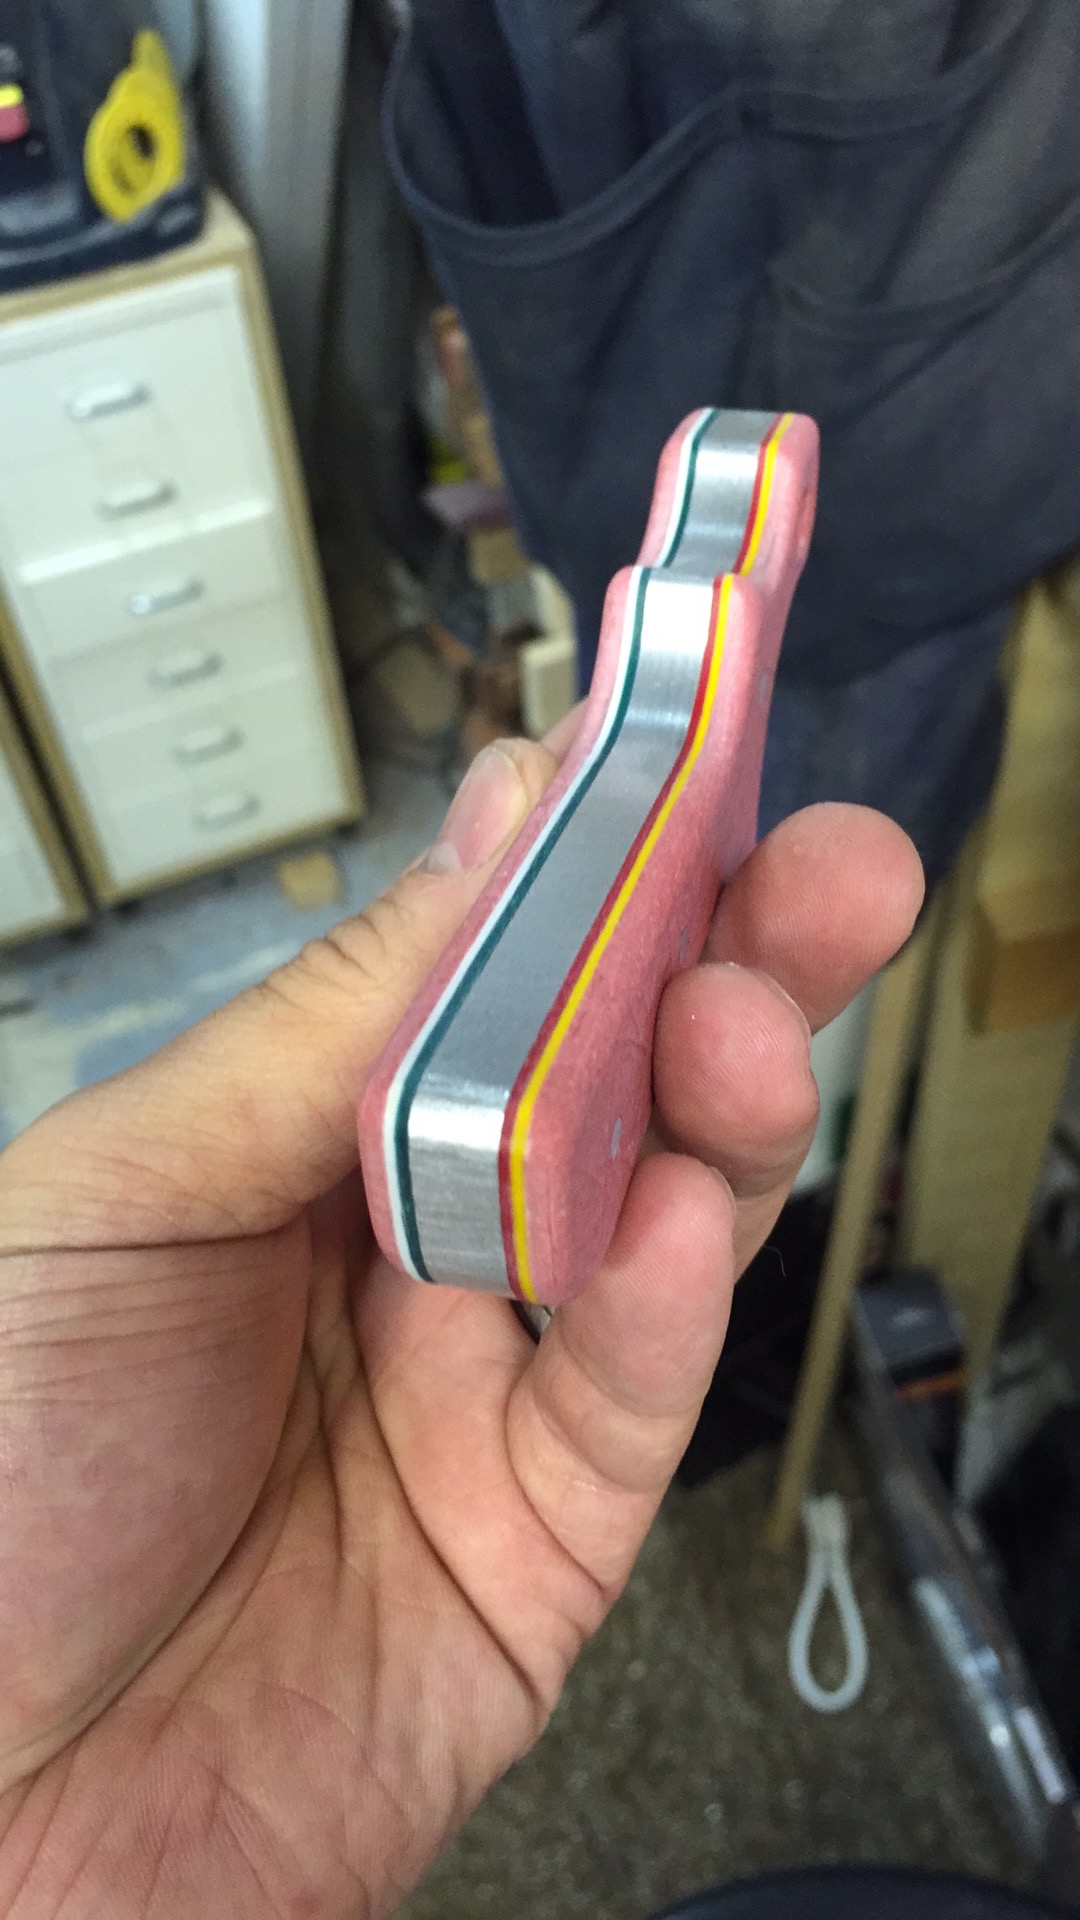
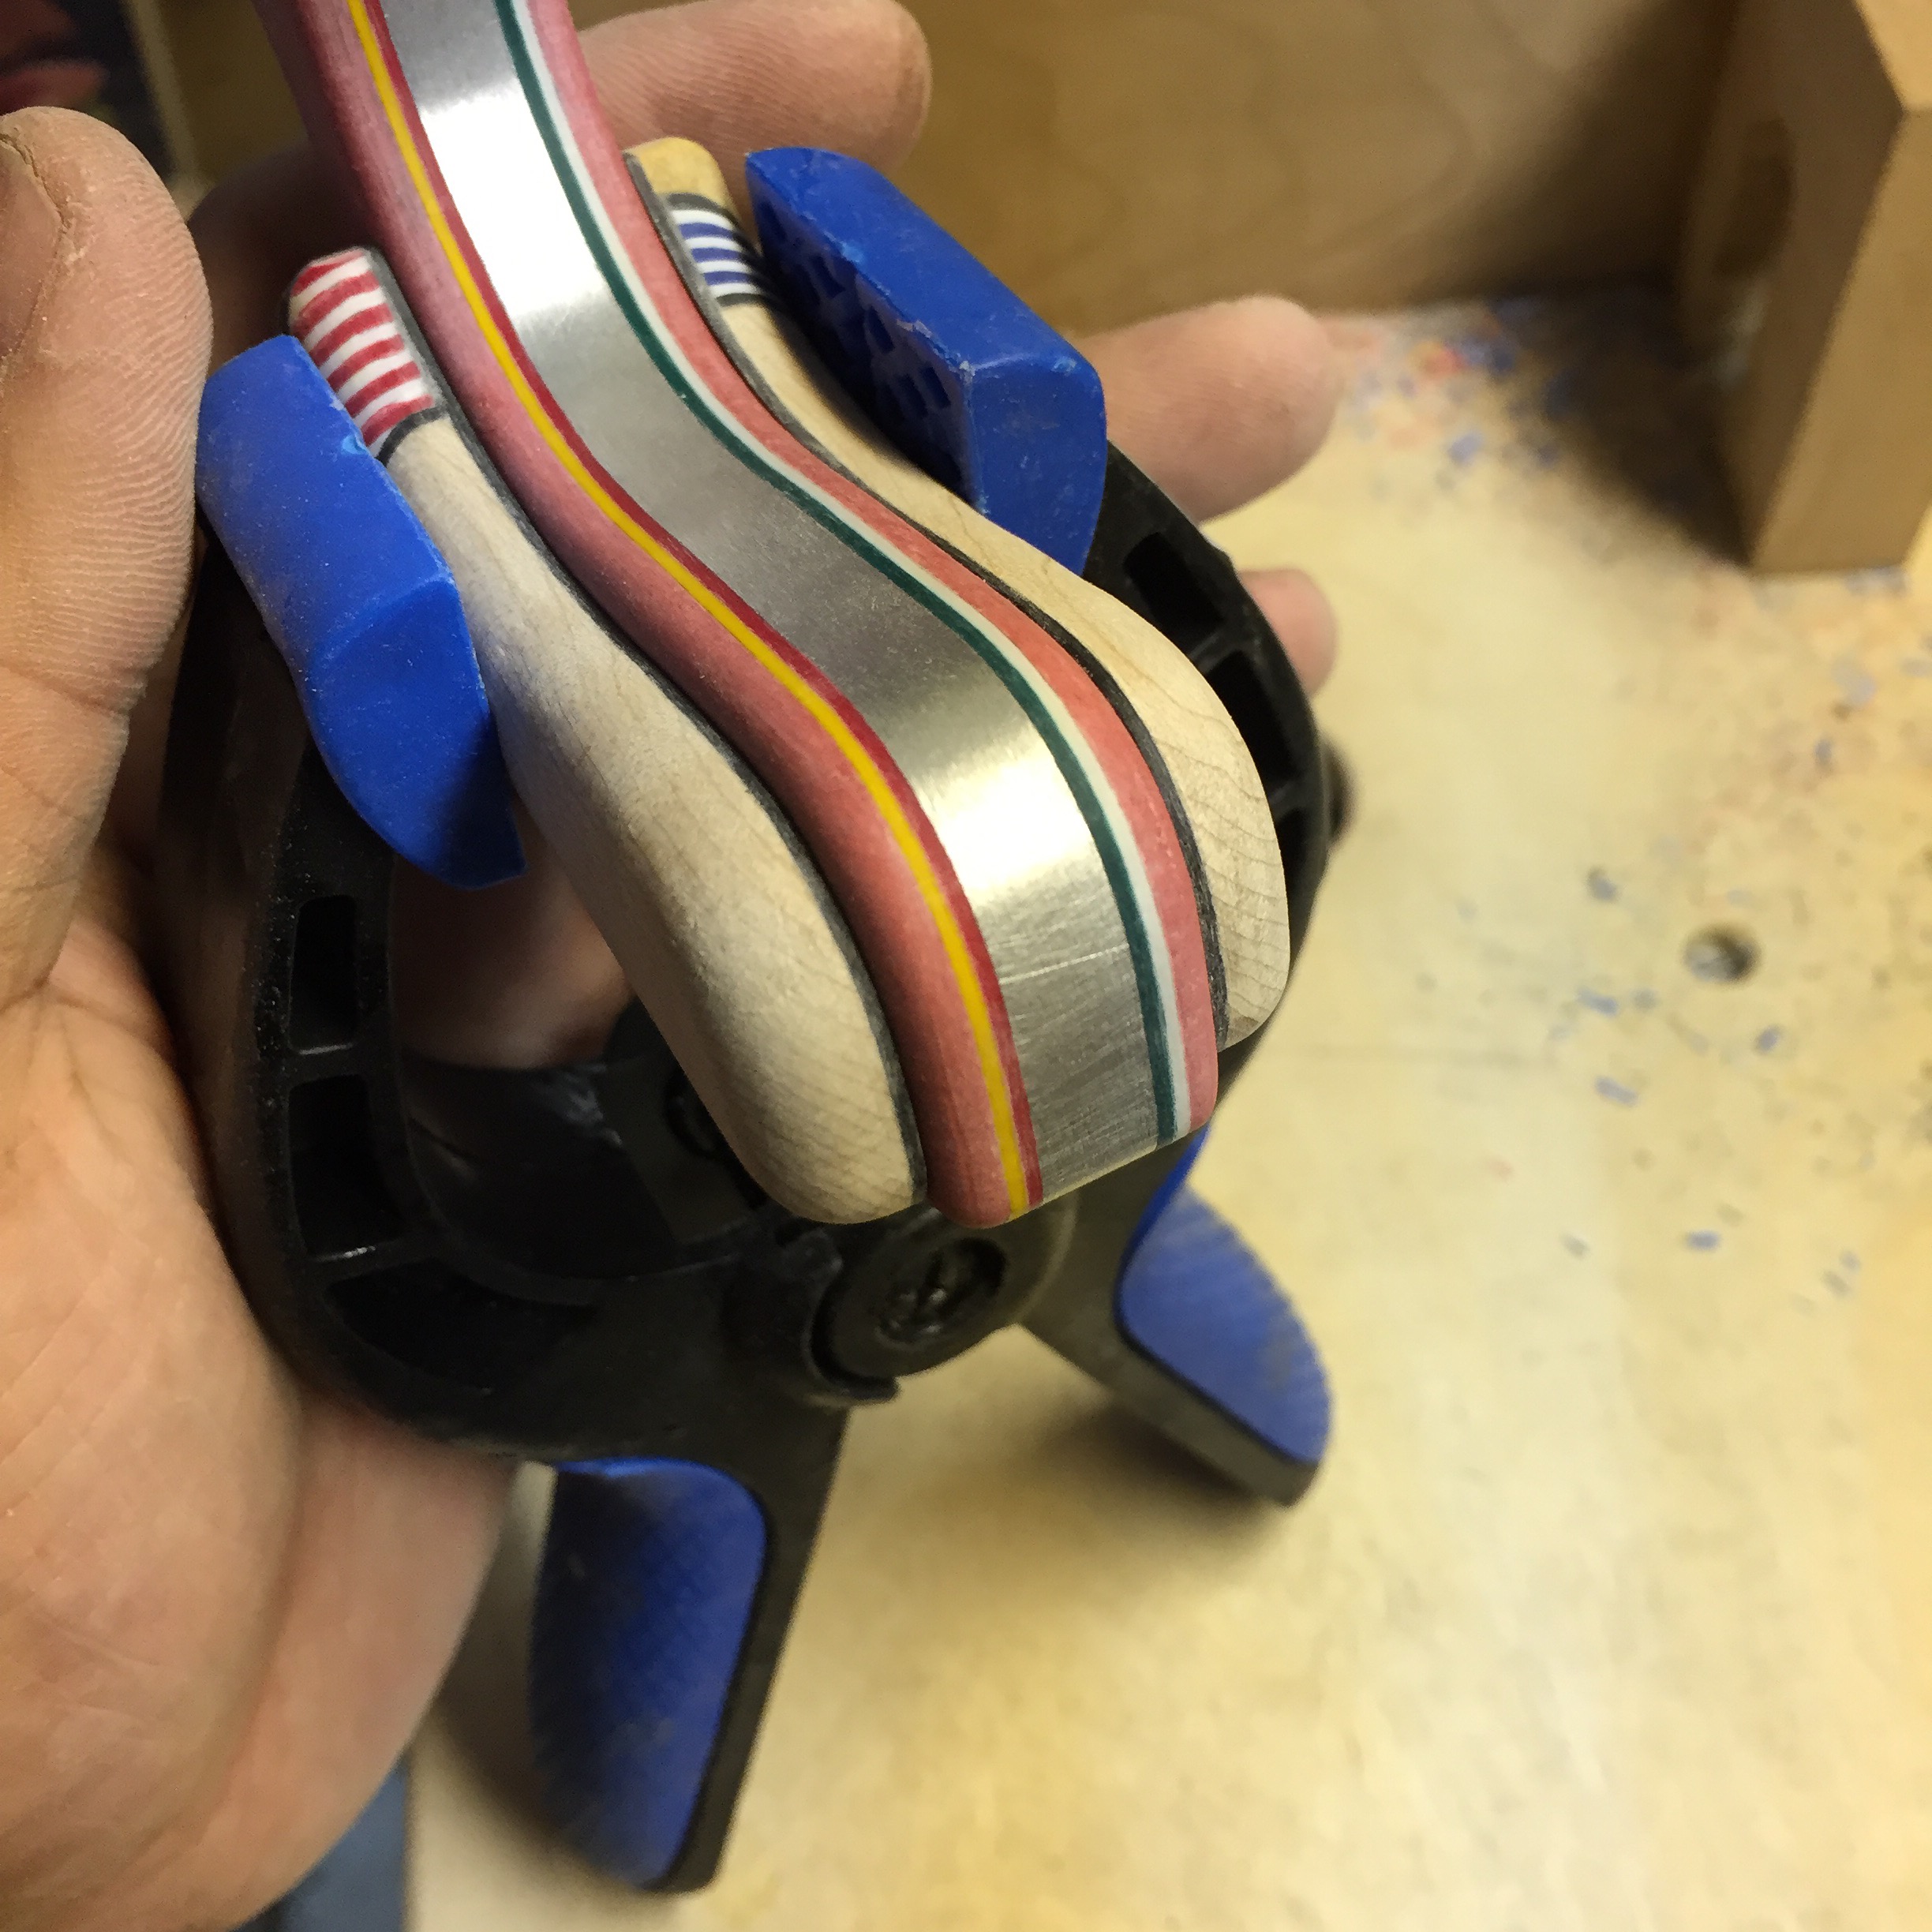
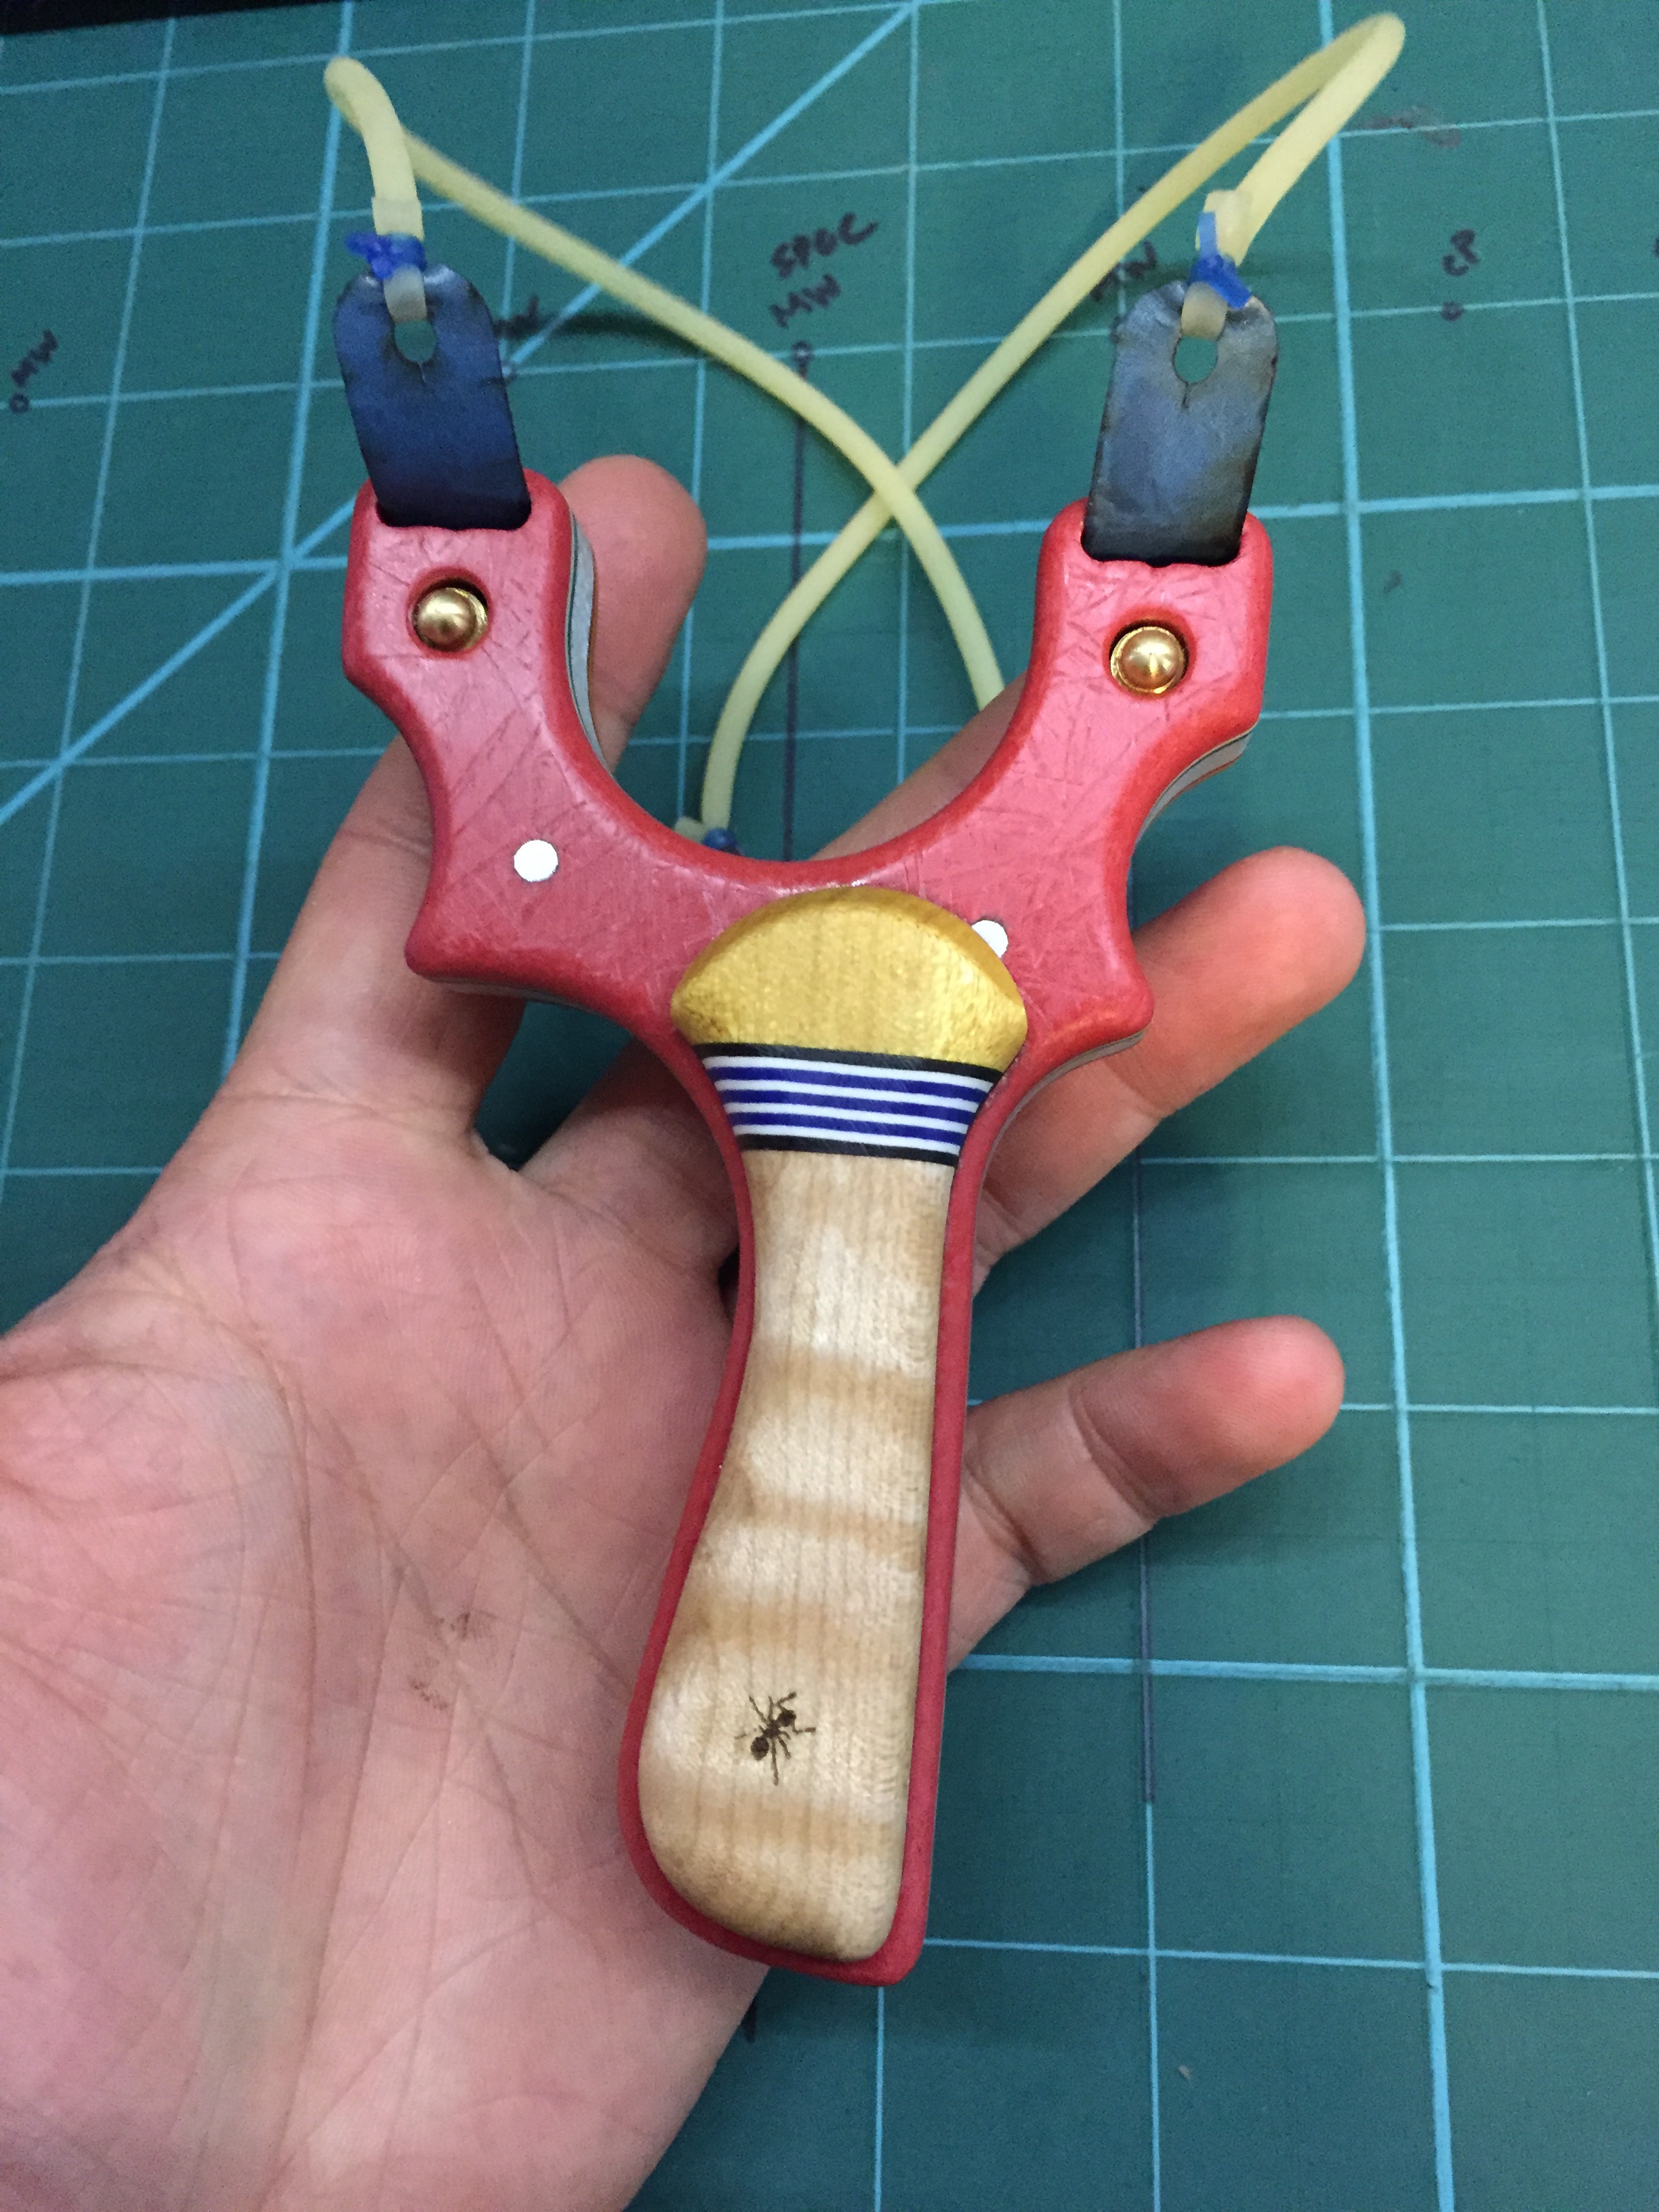
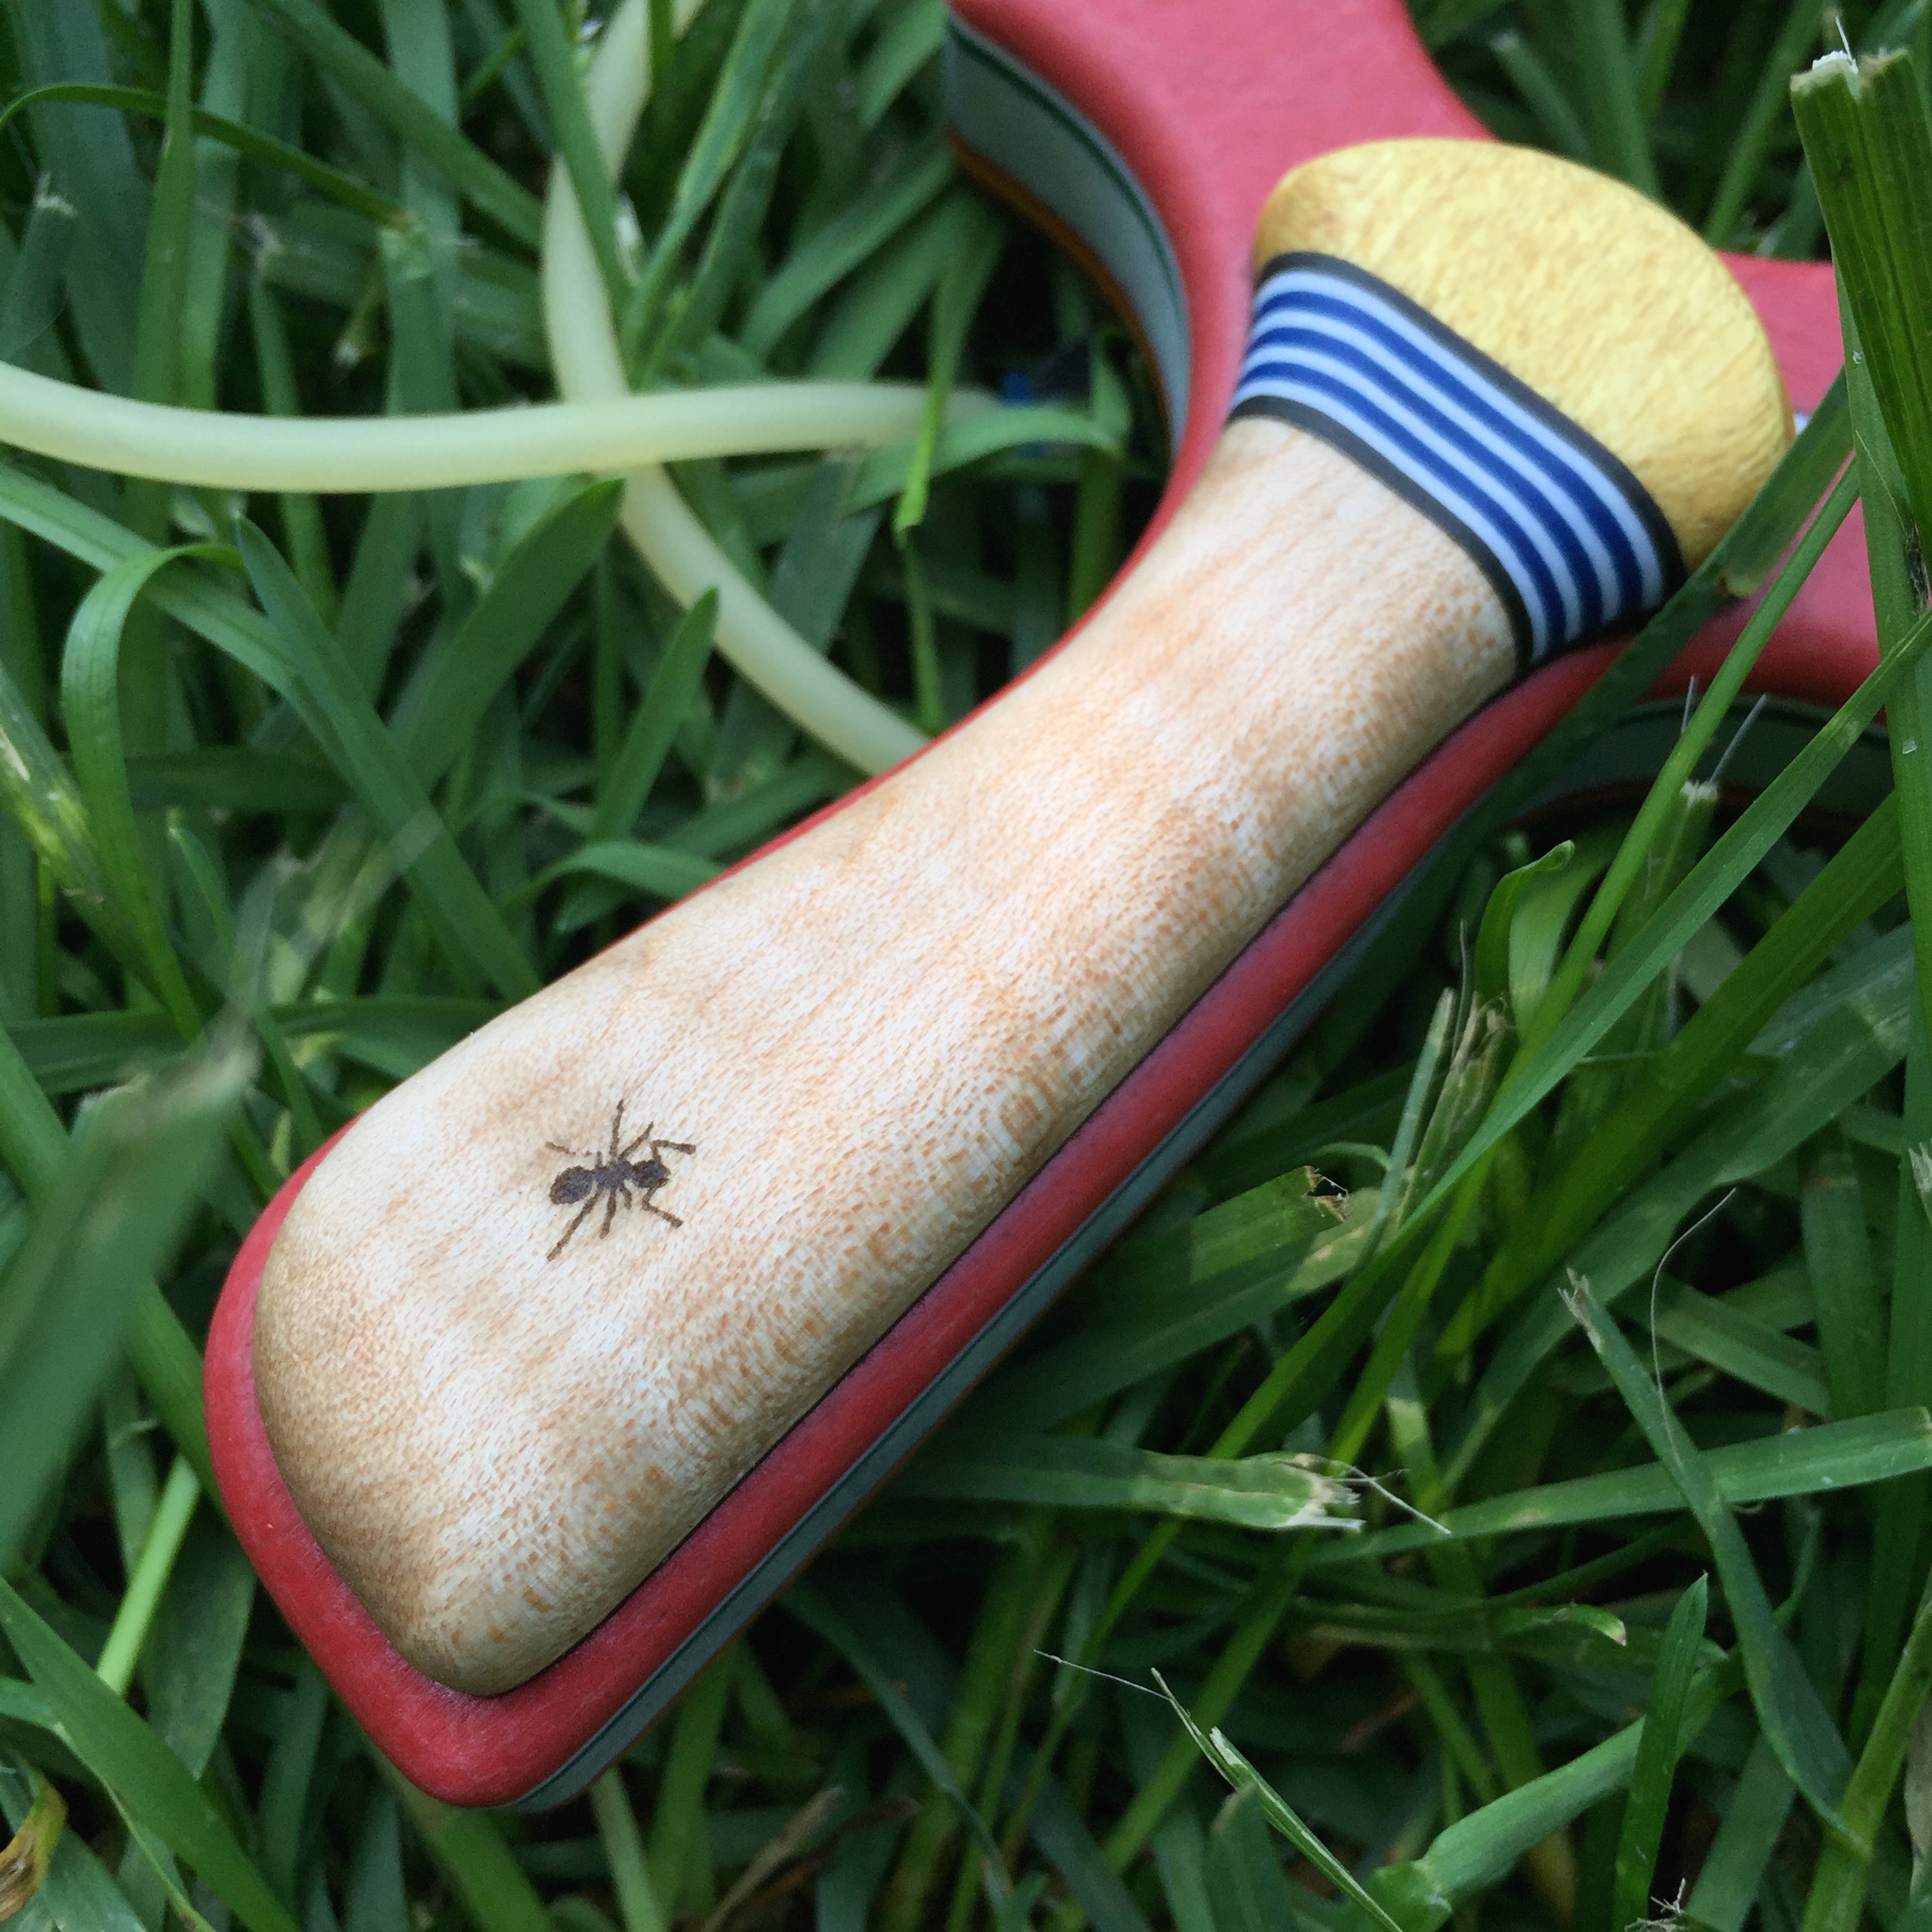
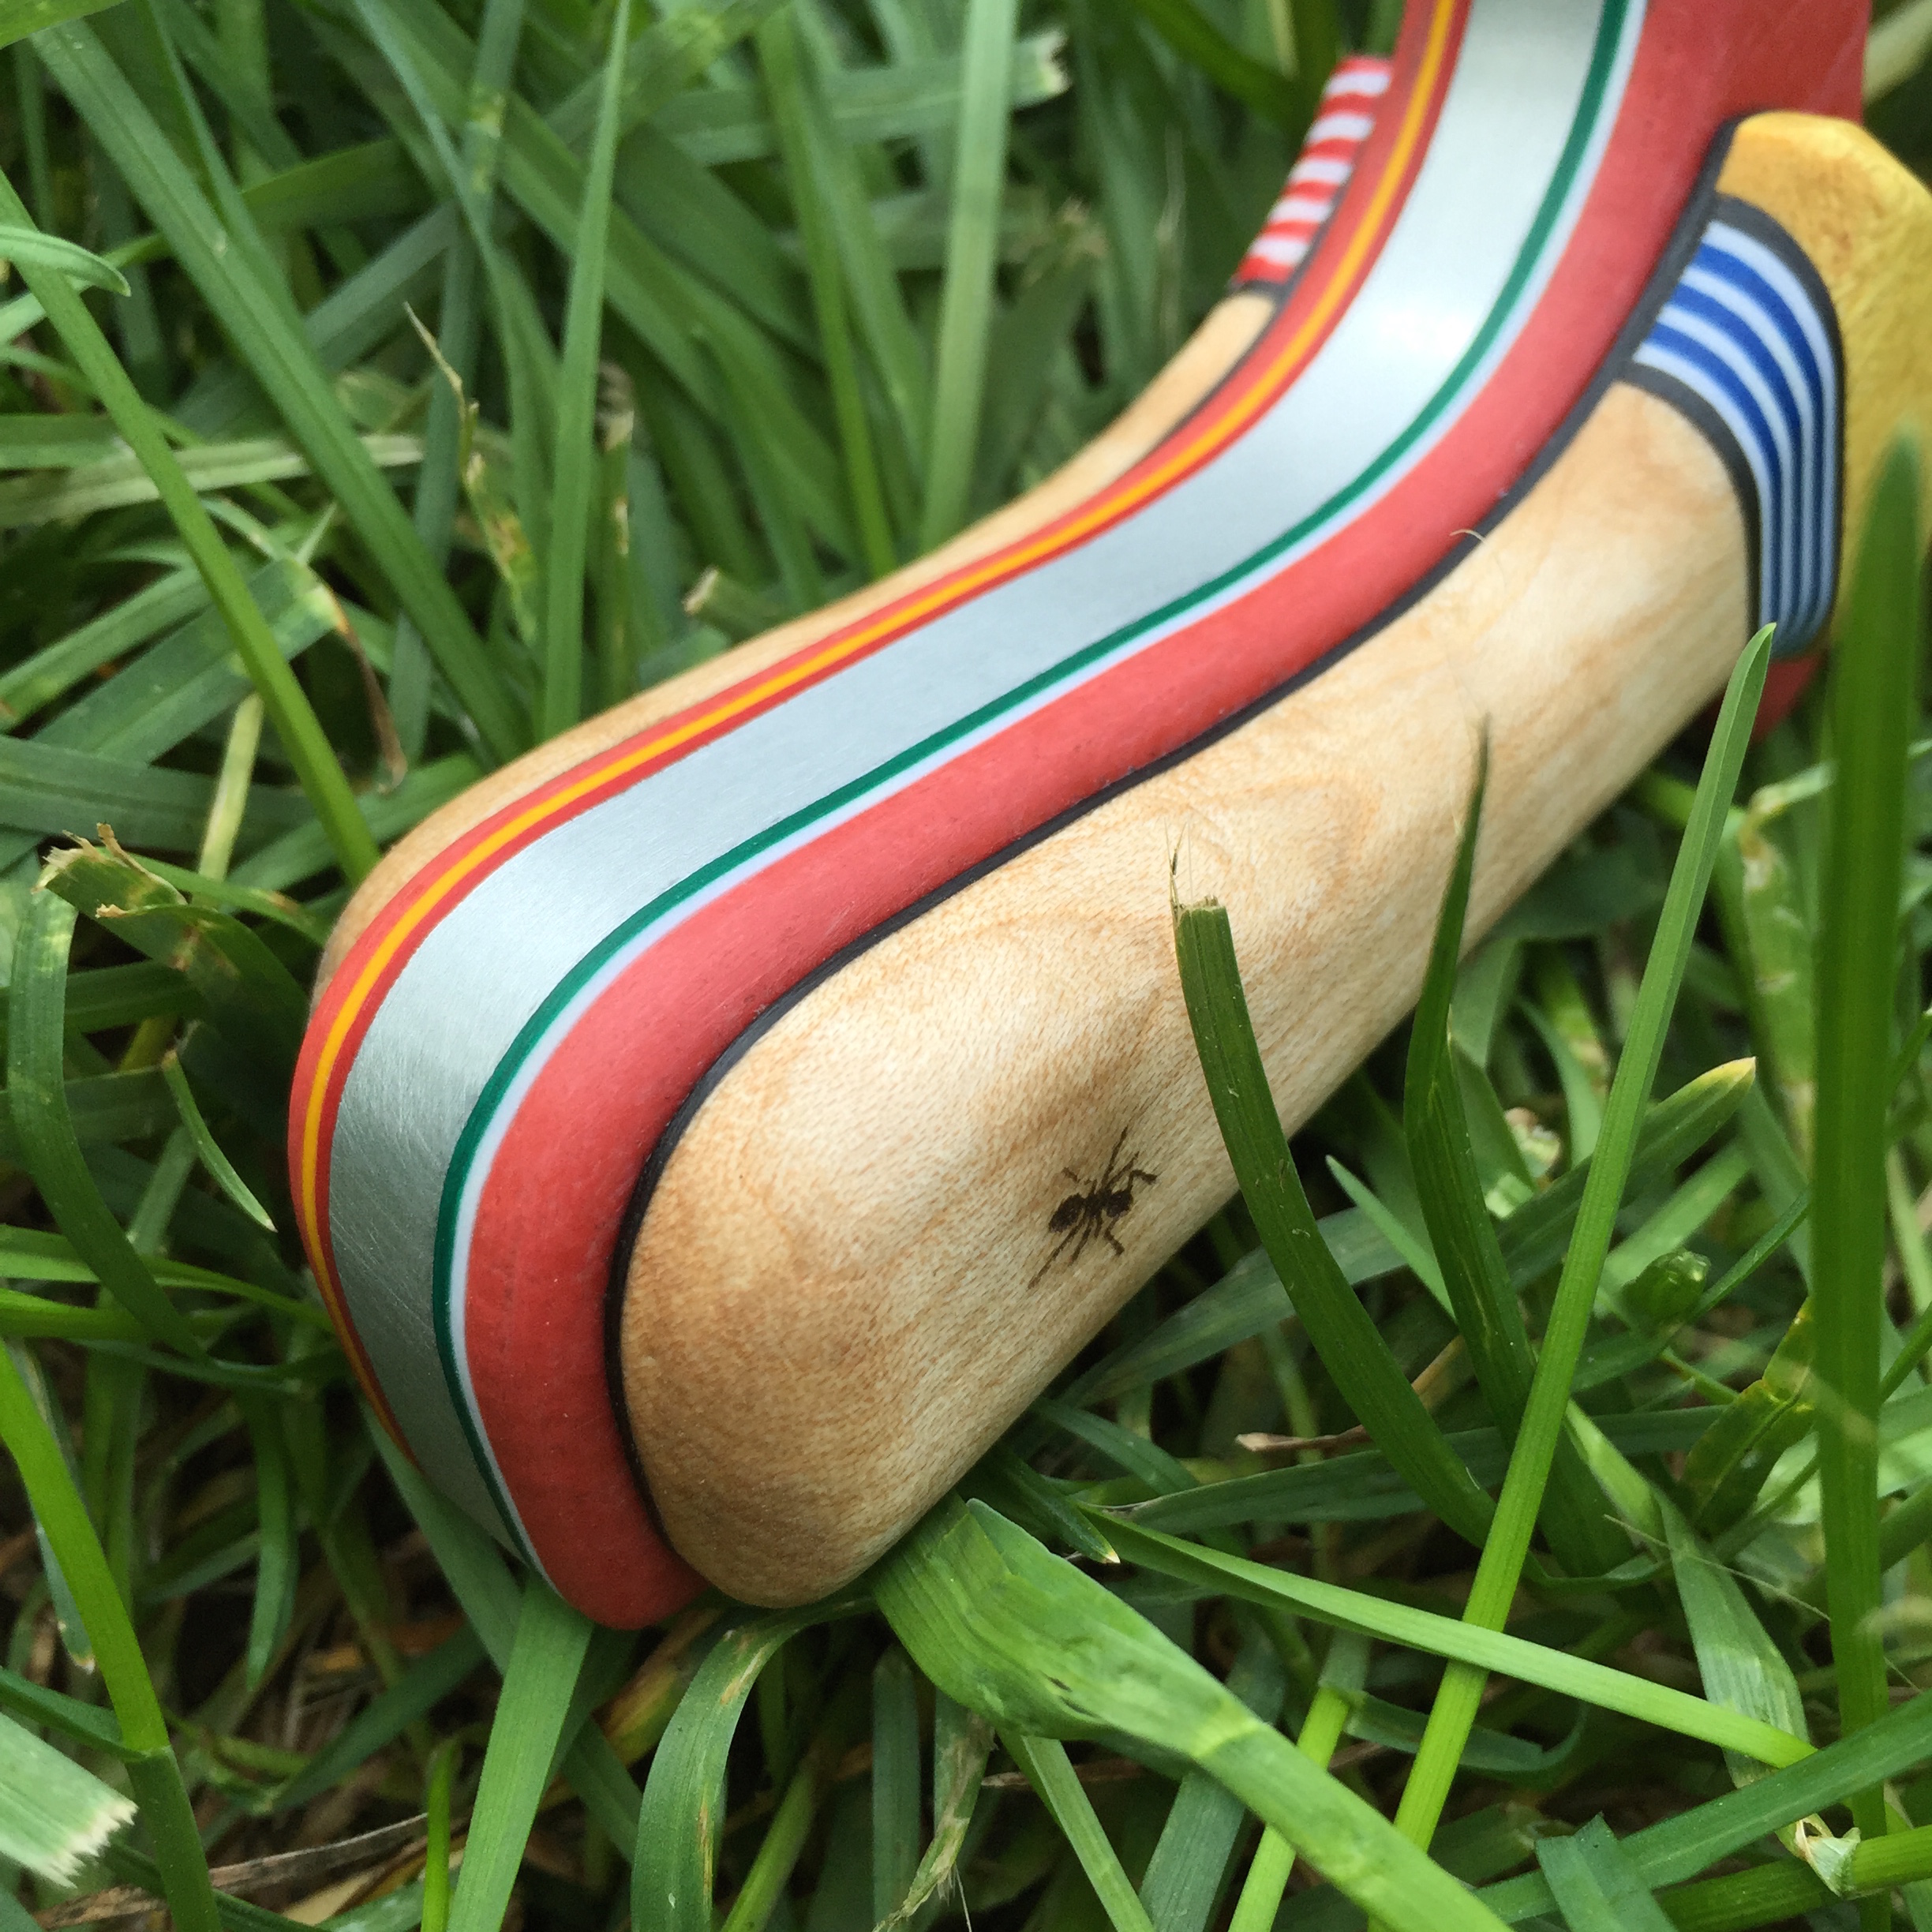
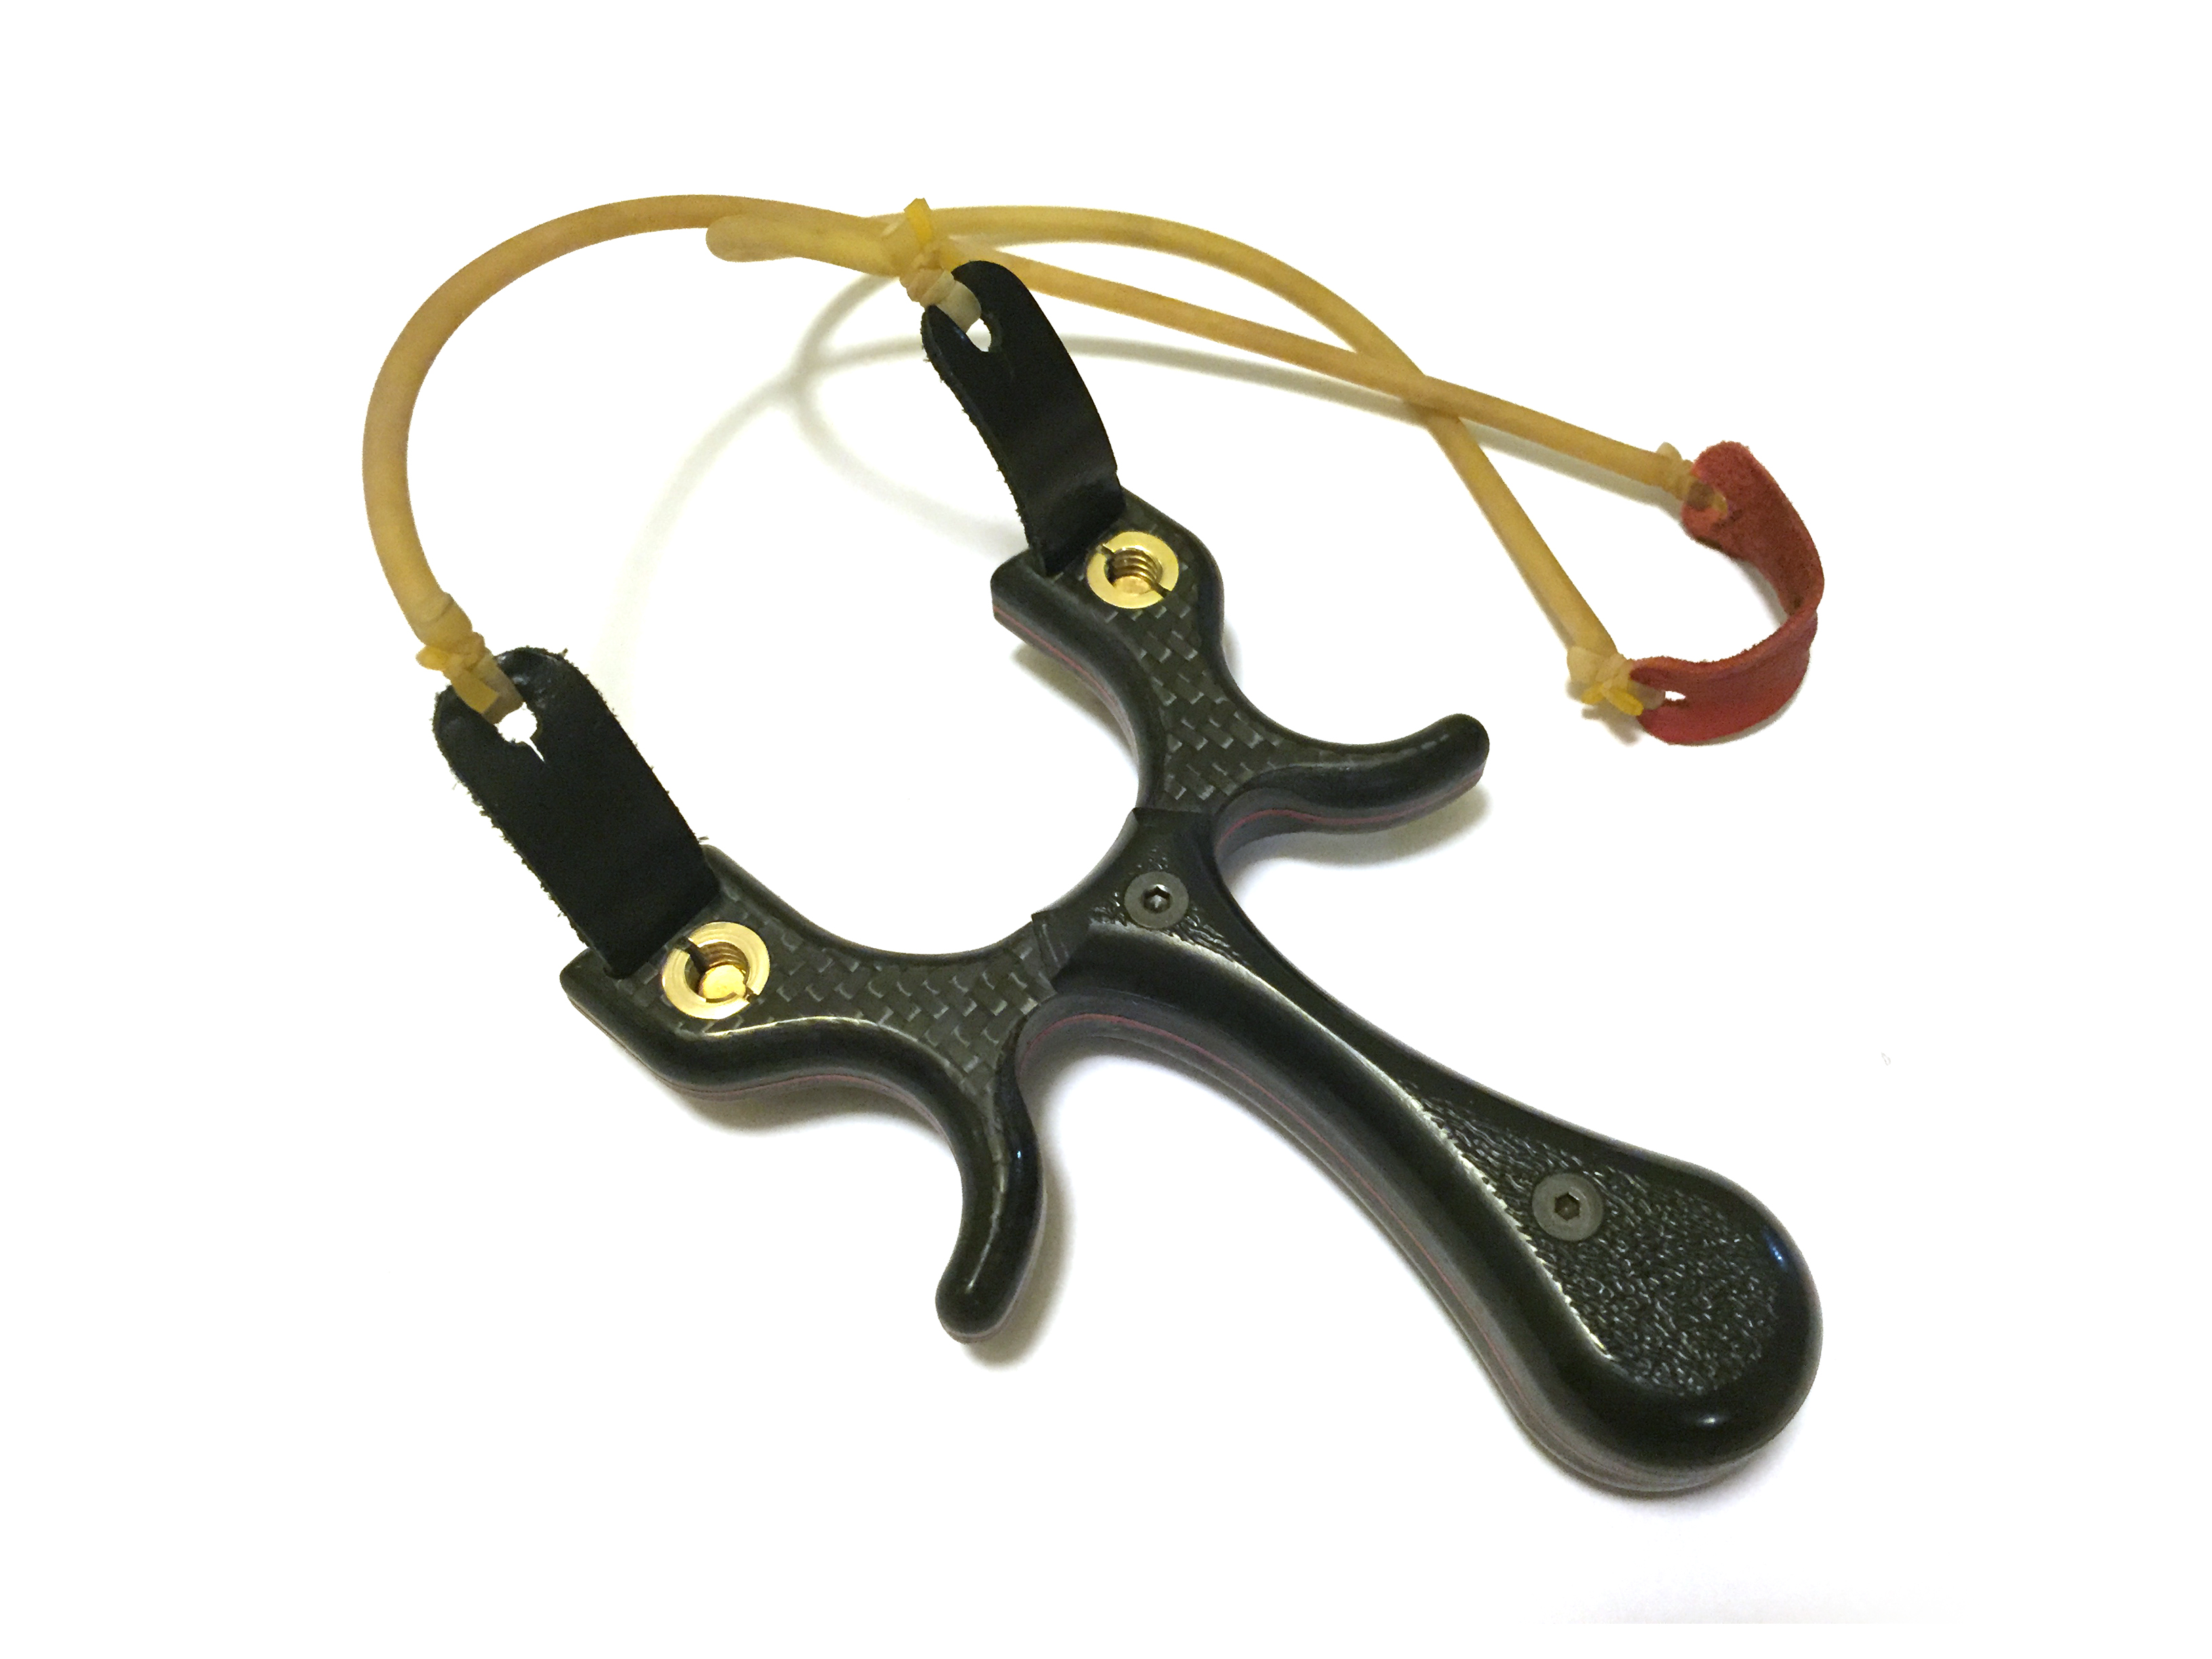
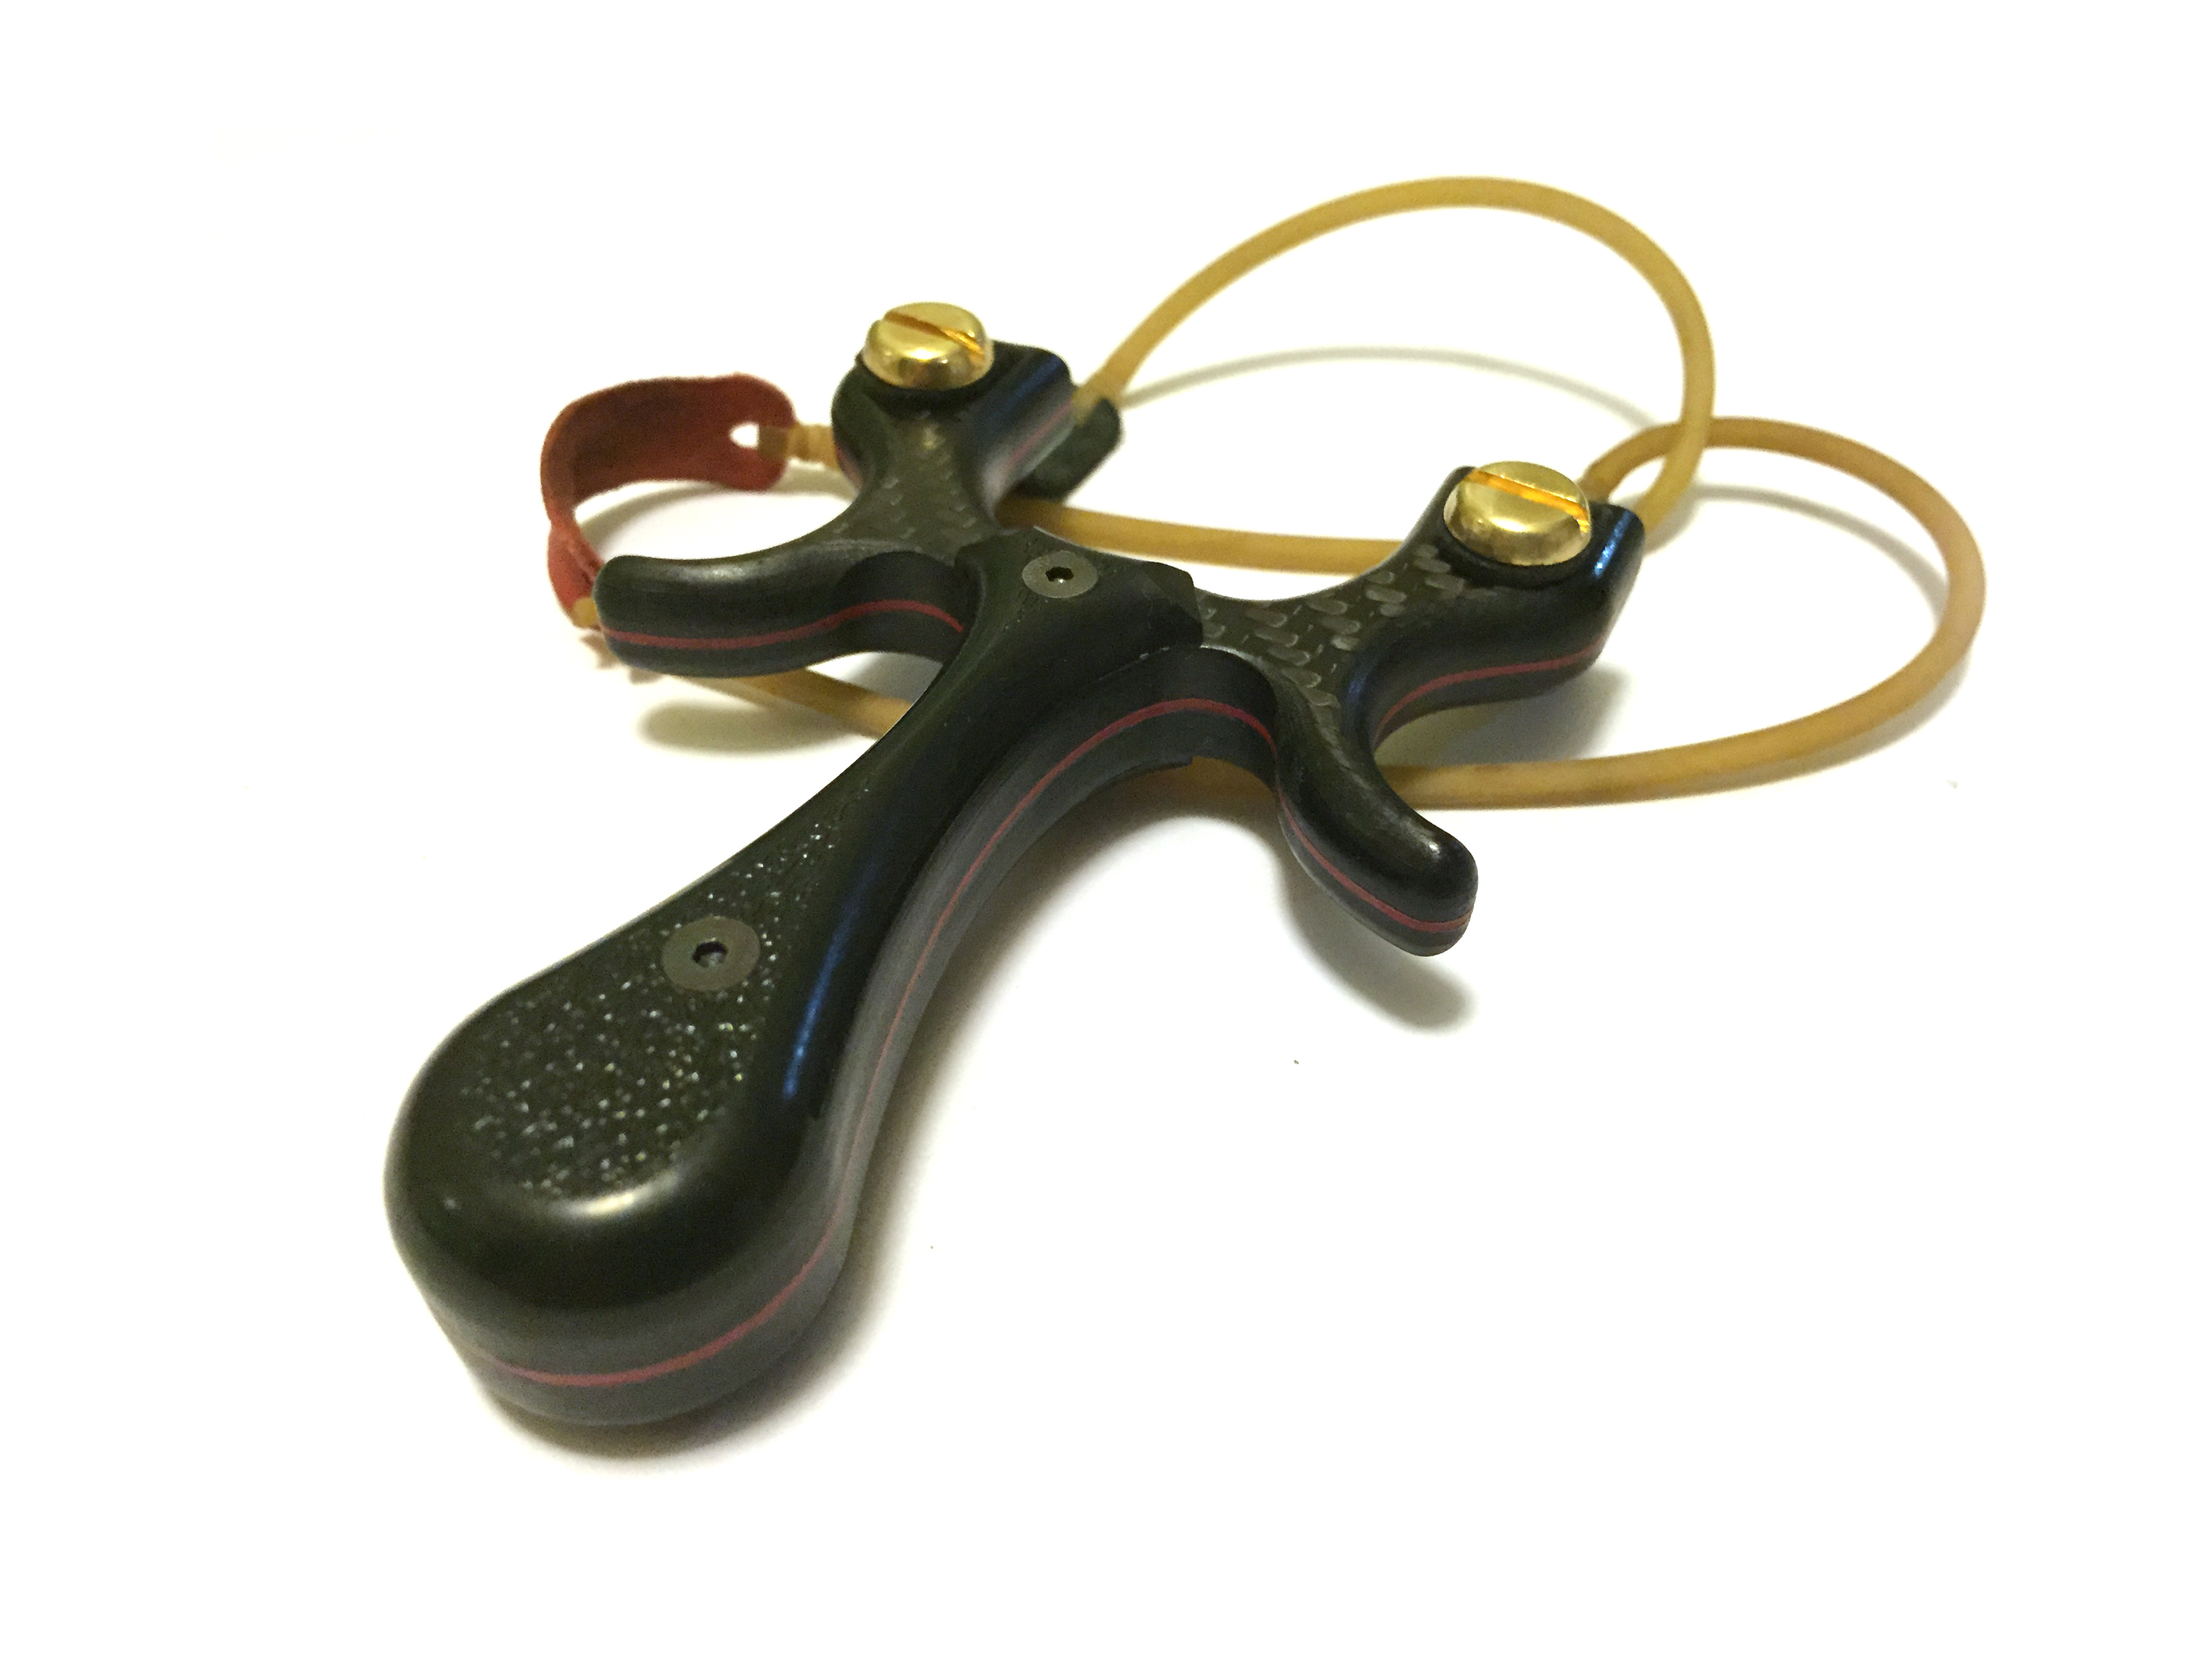
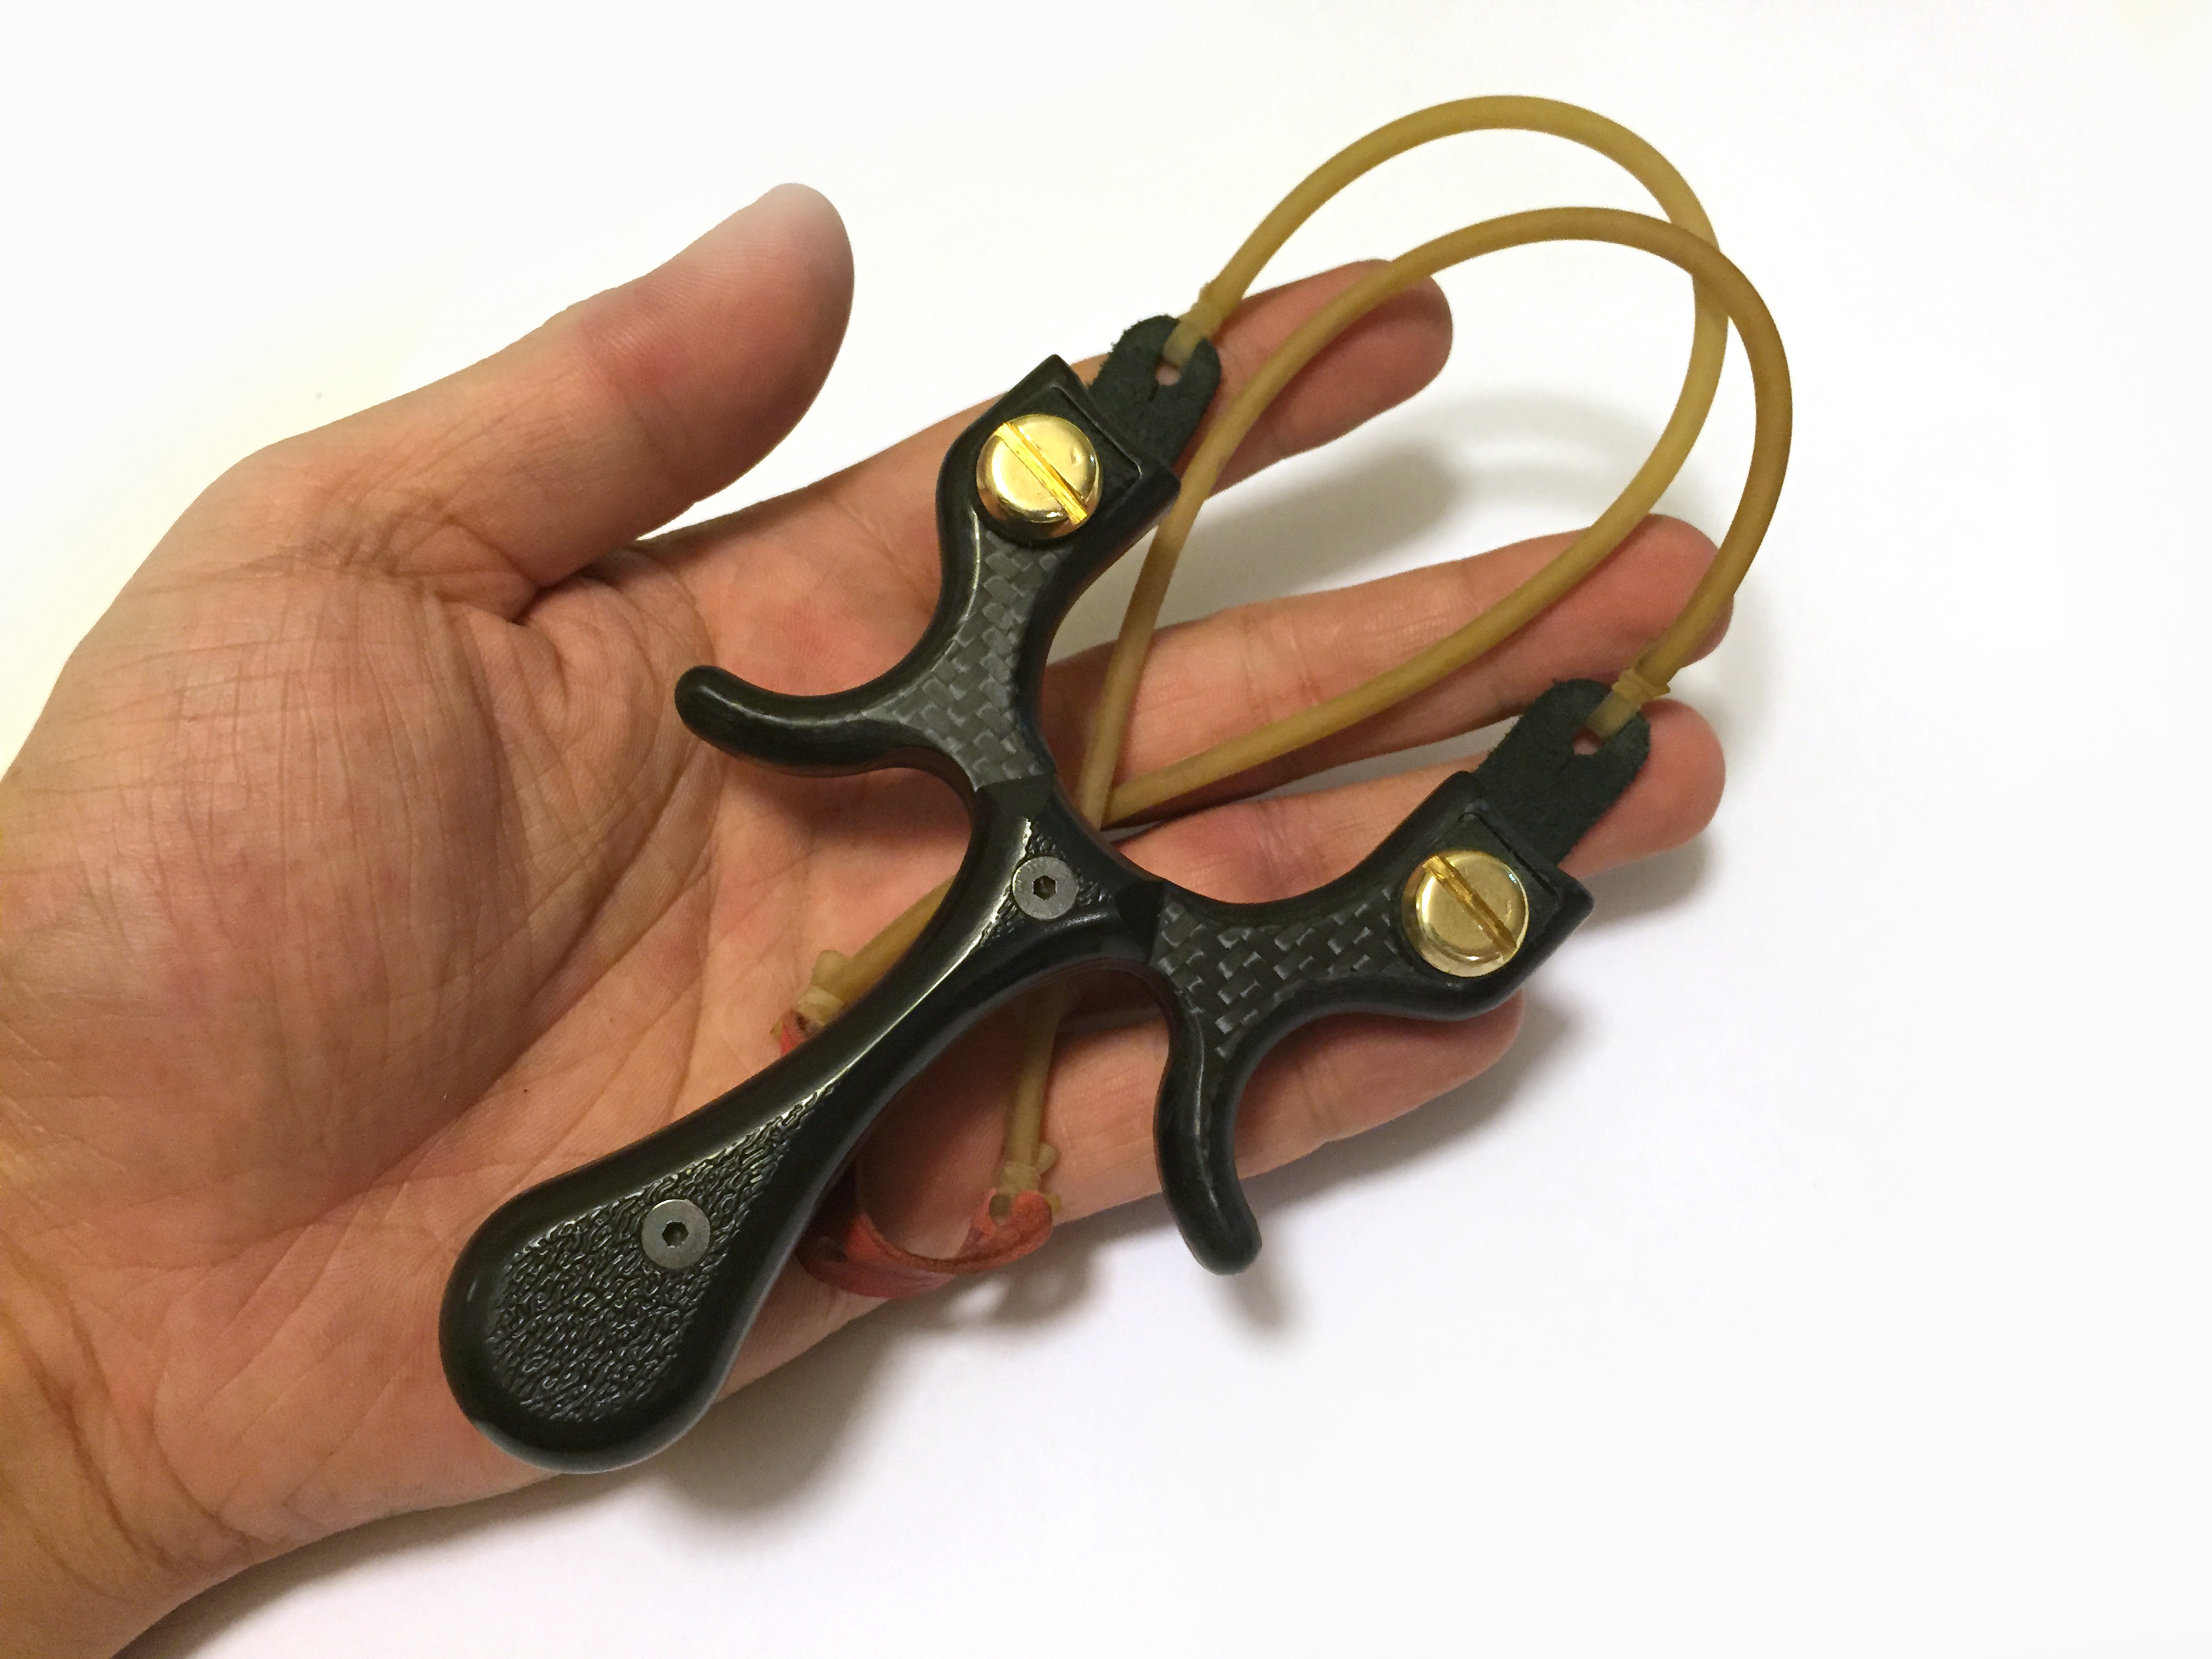
The Hydra is what is know as “pinch grip side shooter”, the deep round sections near the middle are pinched between the pointer finger and the thumb and the frame is held sideways (forks parallel to the ground). The slingshot is already looking pretty cool, but it’s a pain to hold. To make it a more comfortable shape, the edges need to be rounded and some more beef needs to be added to the handle area.
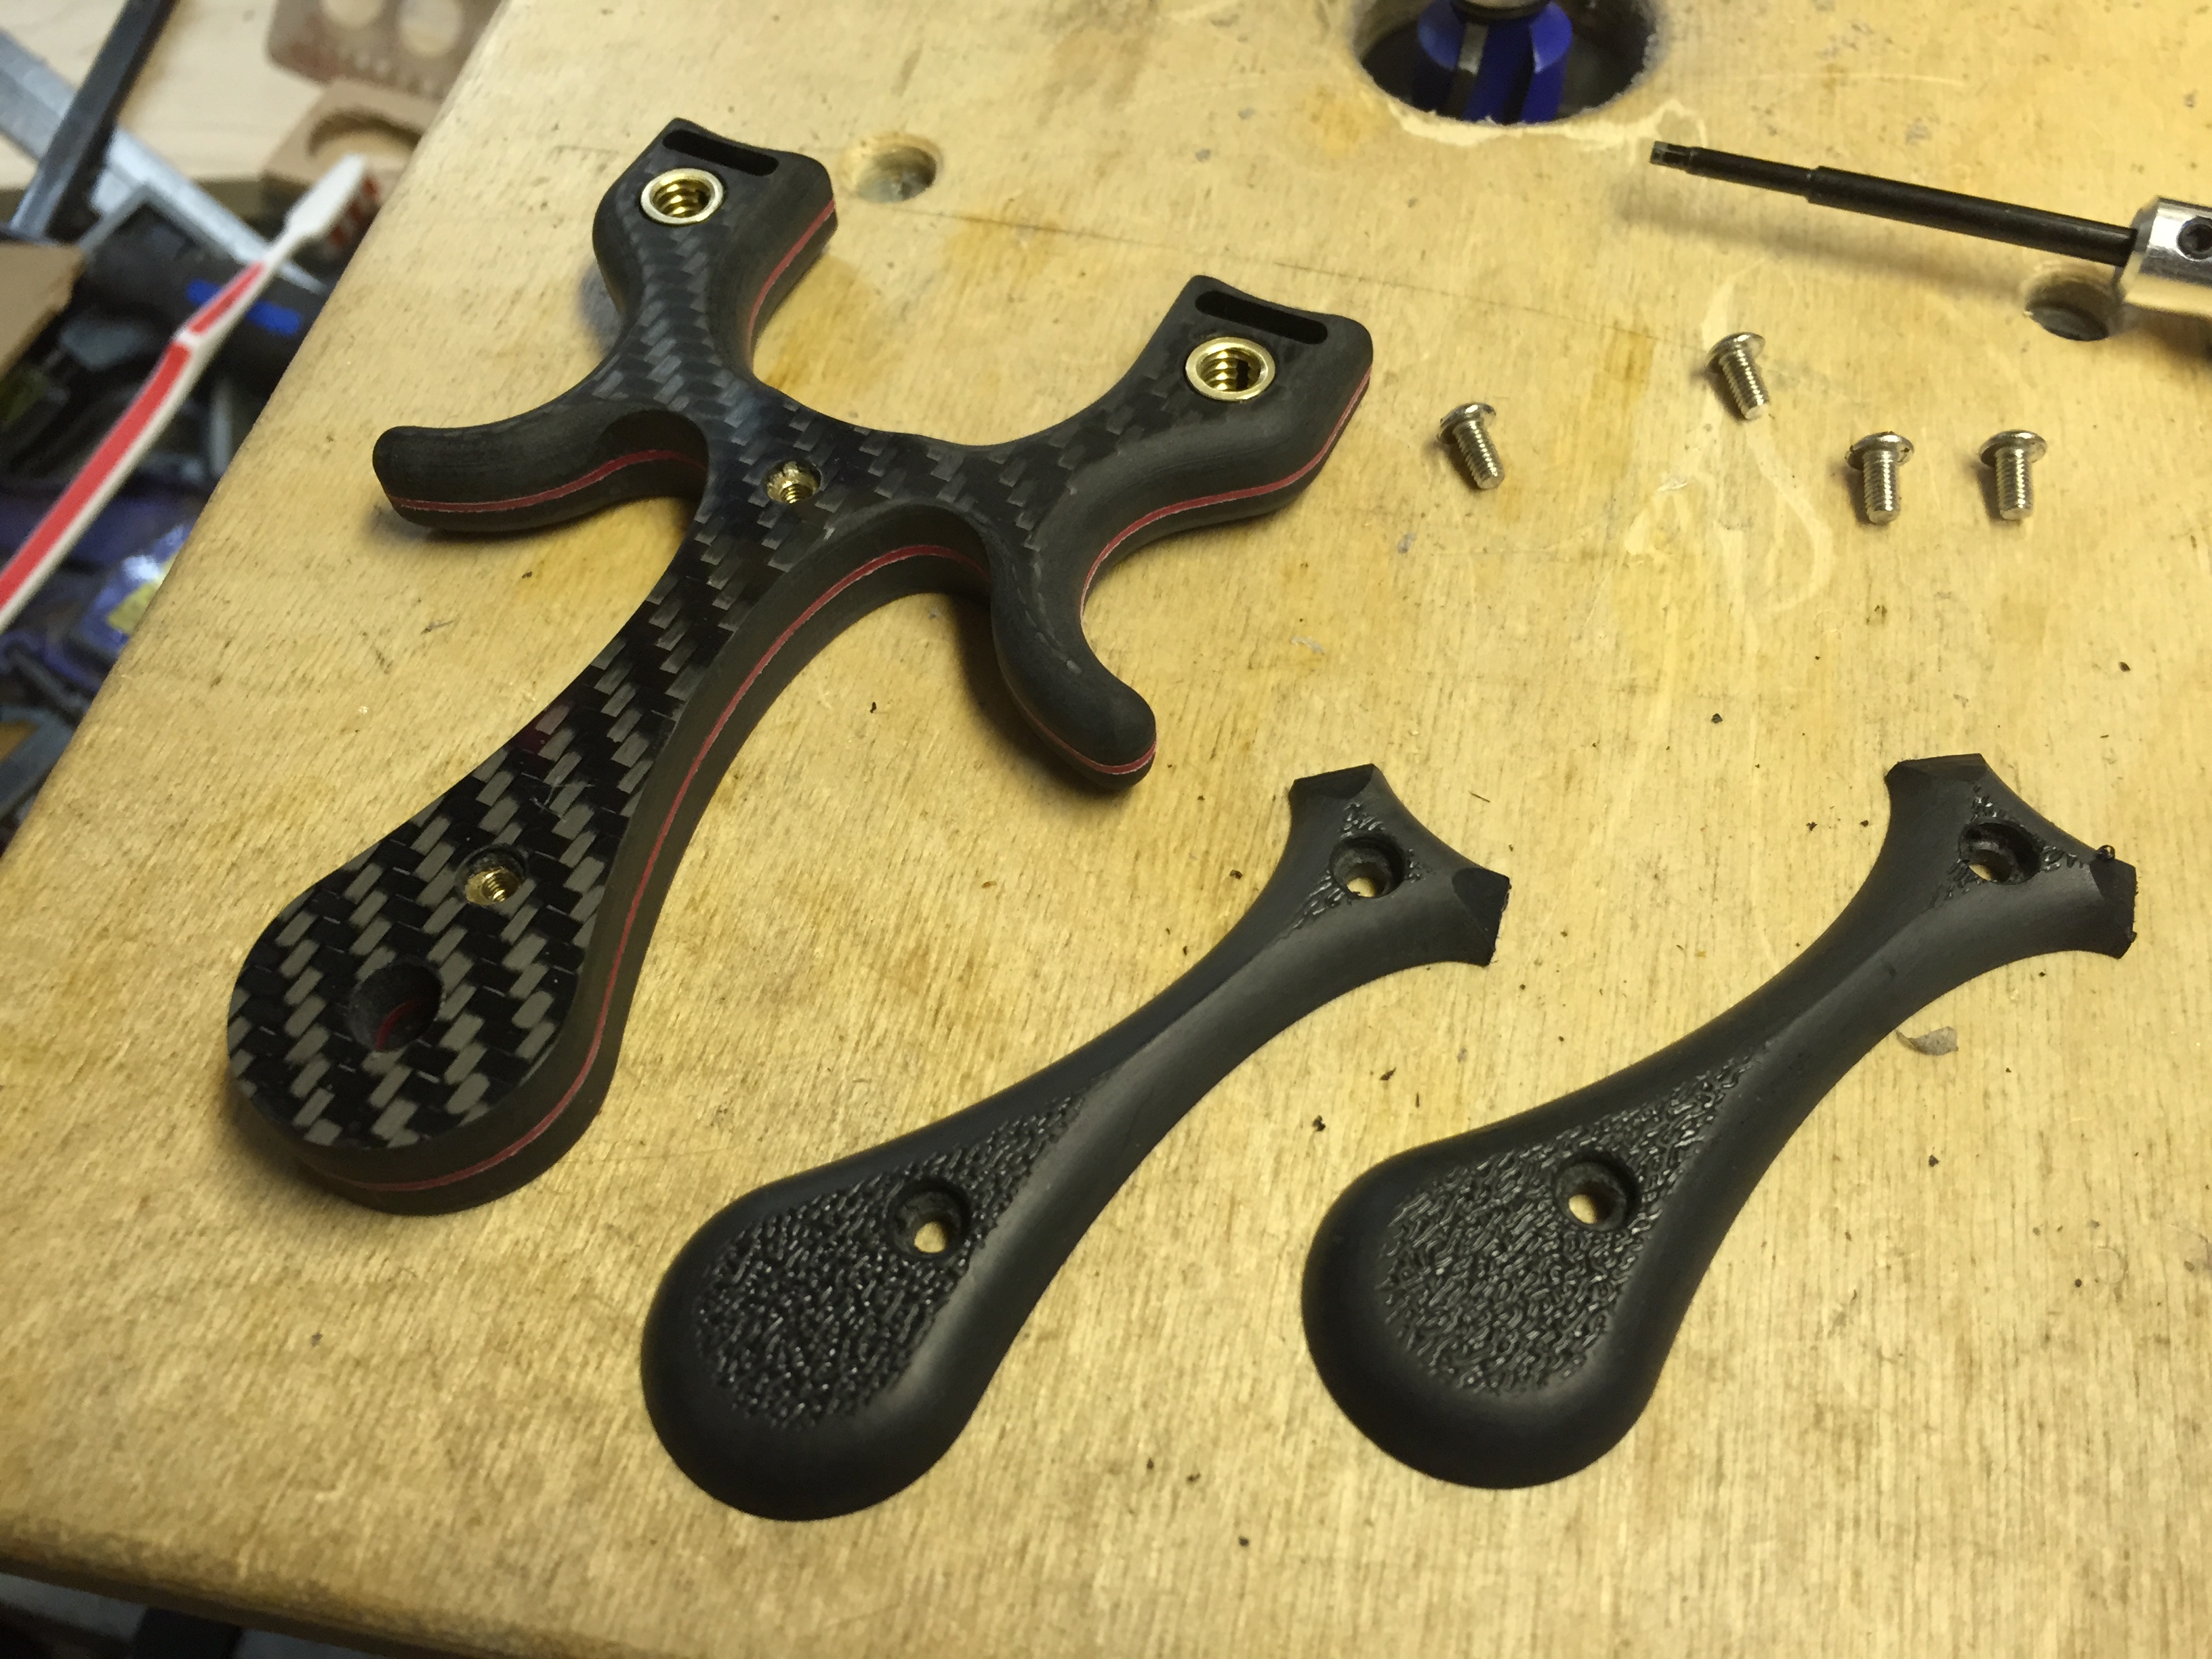
I didn’t take any pics of the CNC cut of the handle scales, but the process is essentially the same. The material is 3/16″ thick haircell texture ABS sheet. My previous incarnations of this design had 1/4″ thick scales, but for this special one off Hydra, I wanted the scales to blend into the frame.
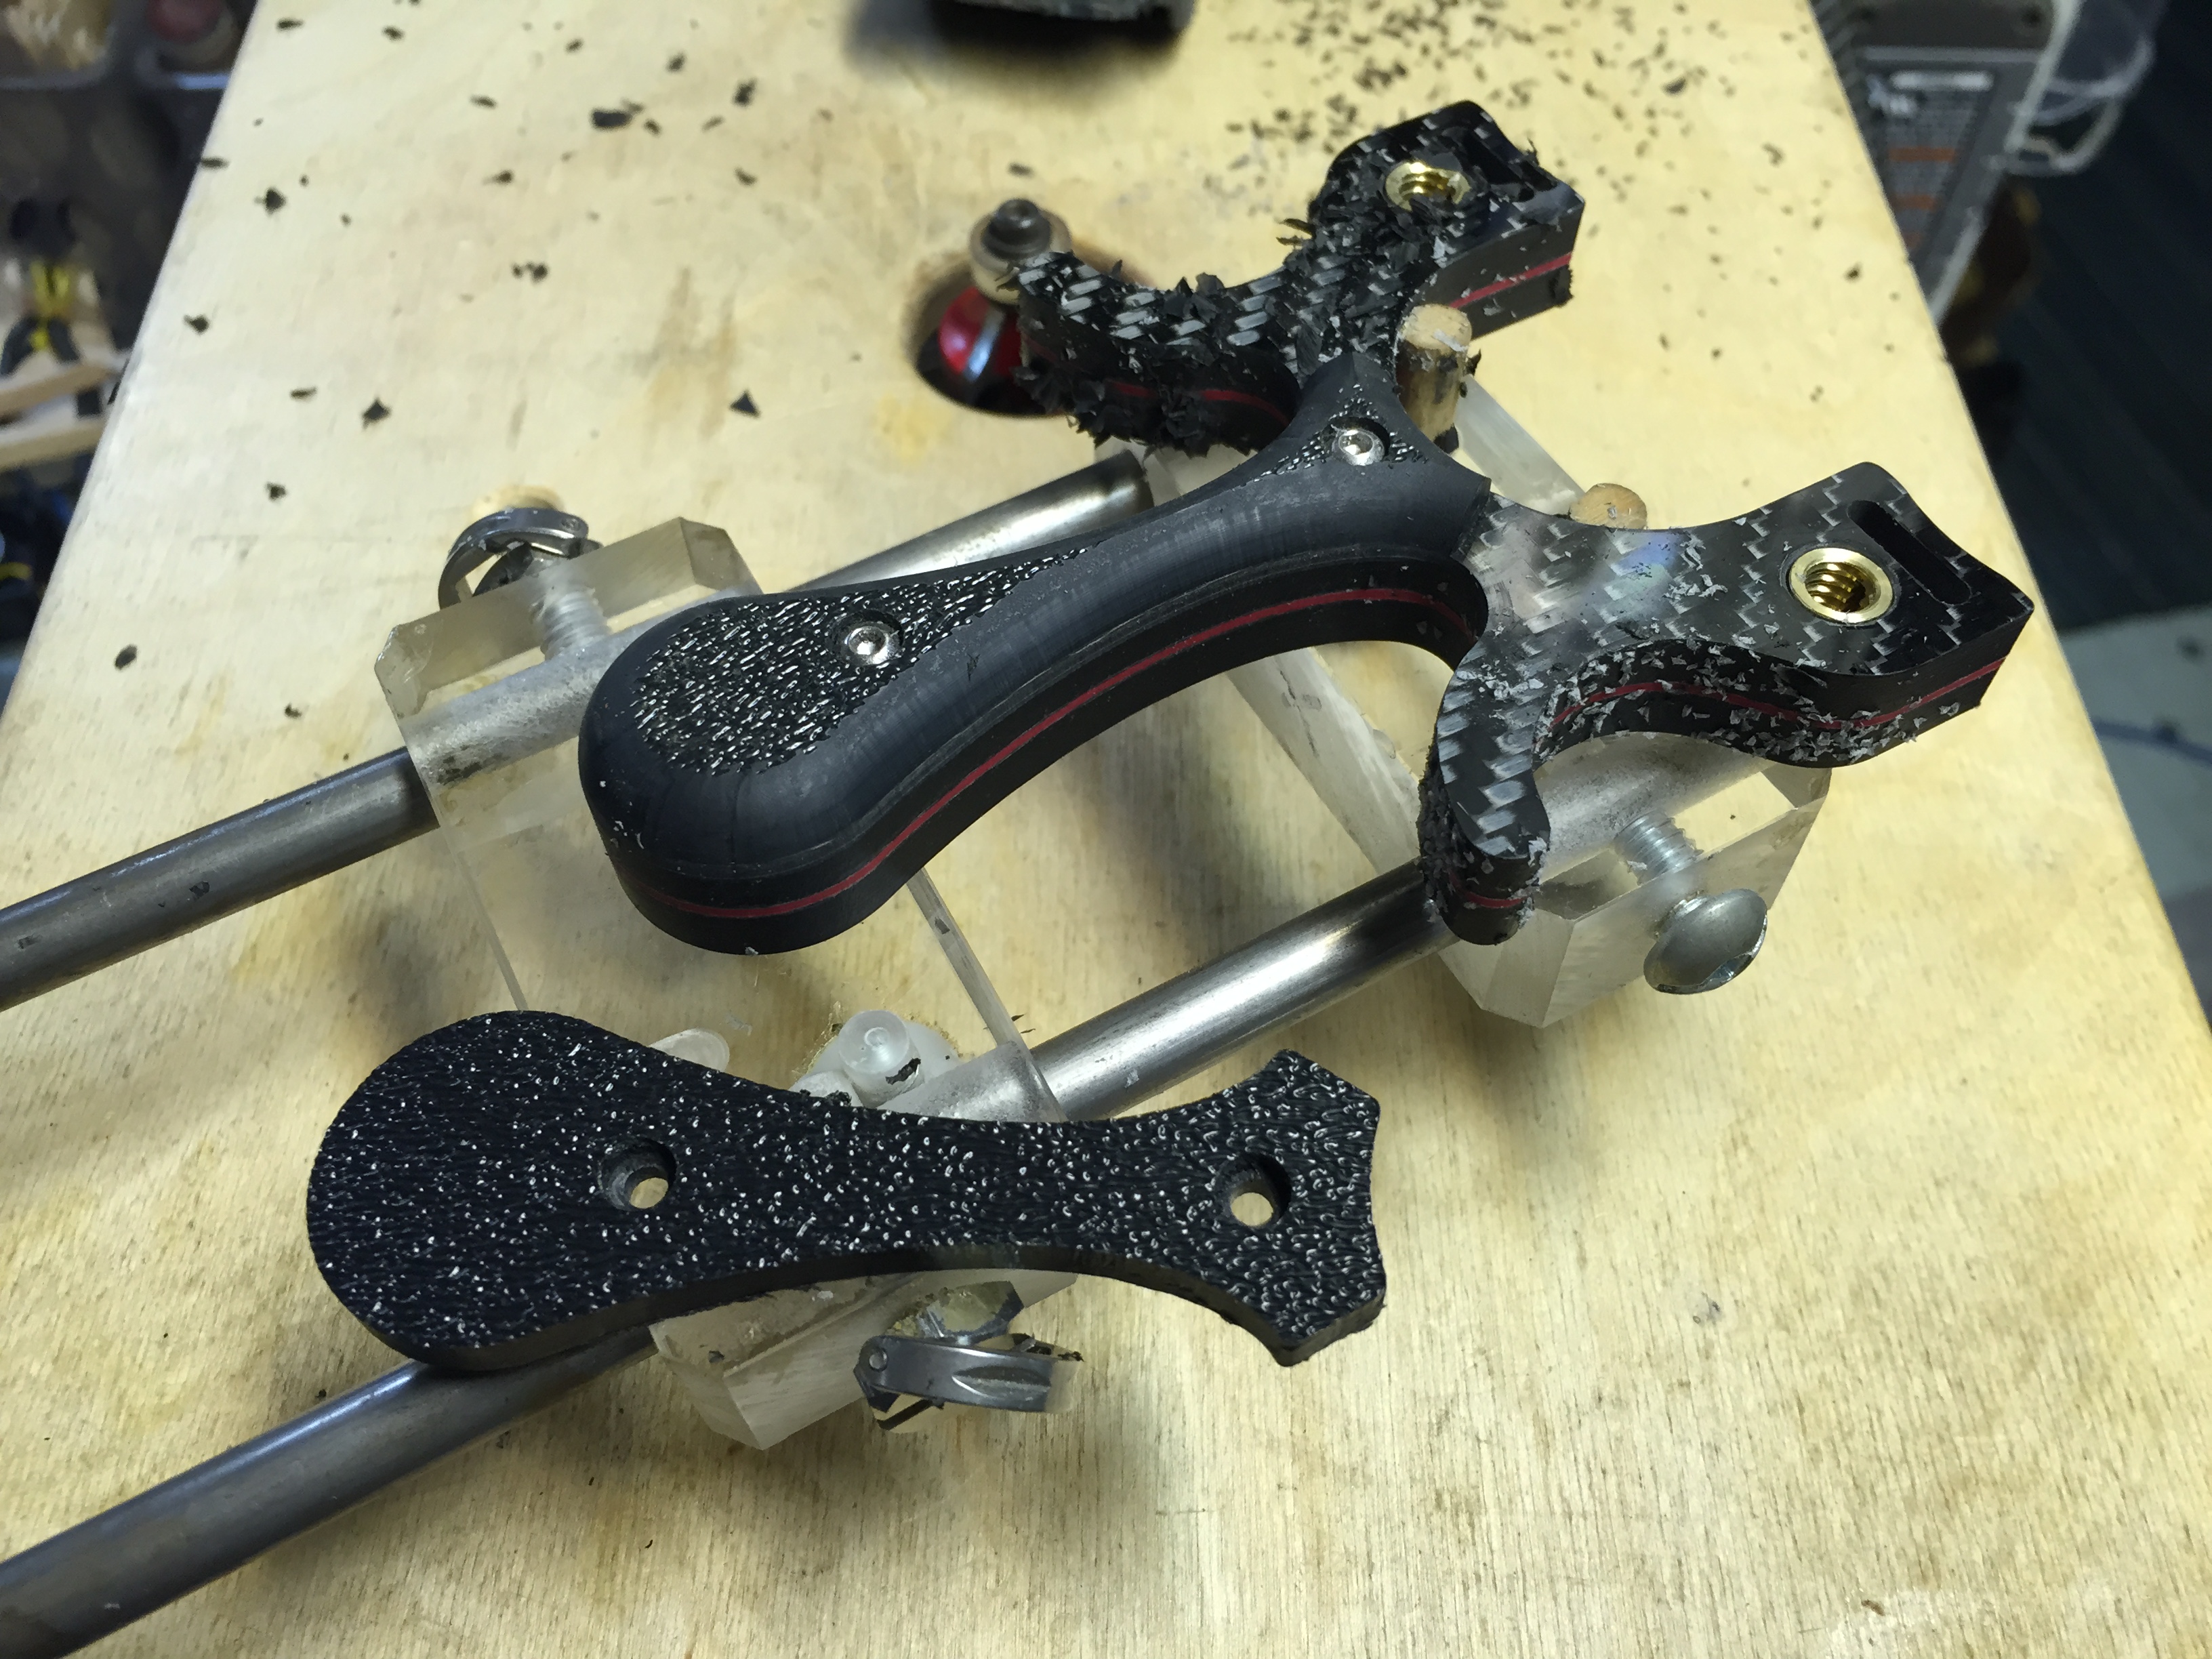
My though process about using the 3/16″ thick ABS was if I used a 1/4″ round over bit, the entire edge and a tiny bit of the CF frame would be rounded over, resulting in seamless transition between scale and frame. It worked out very well.
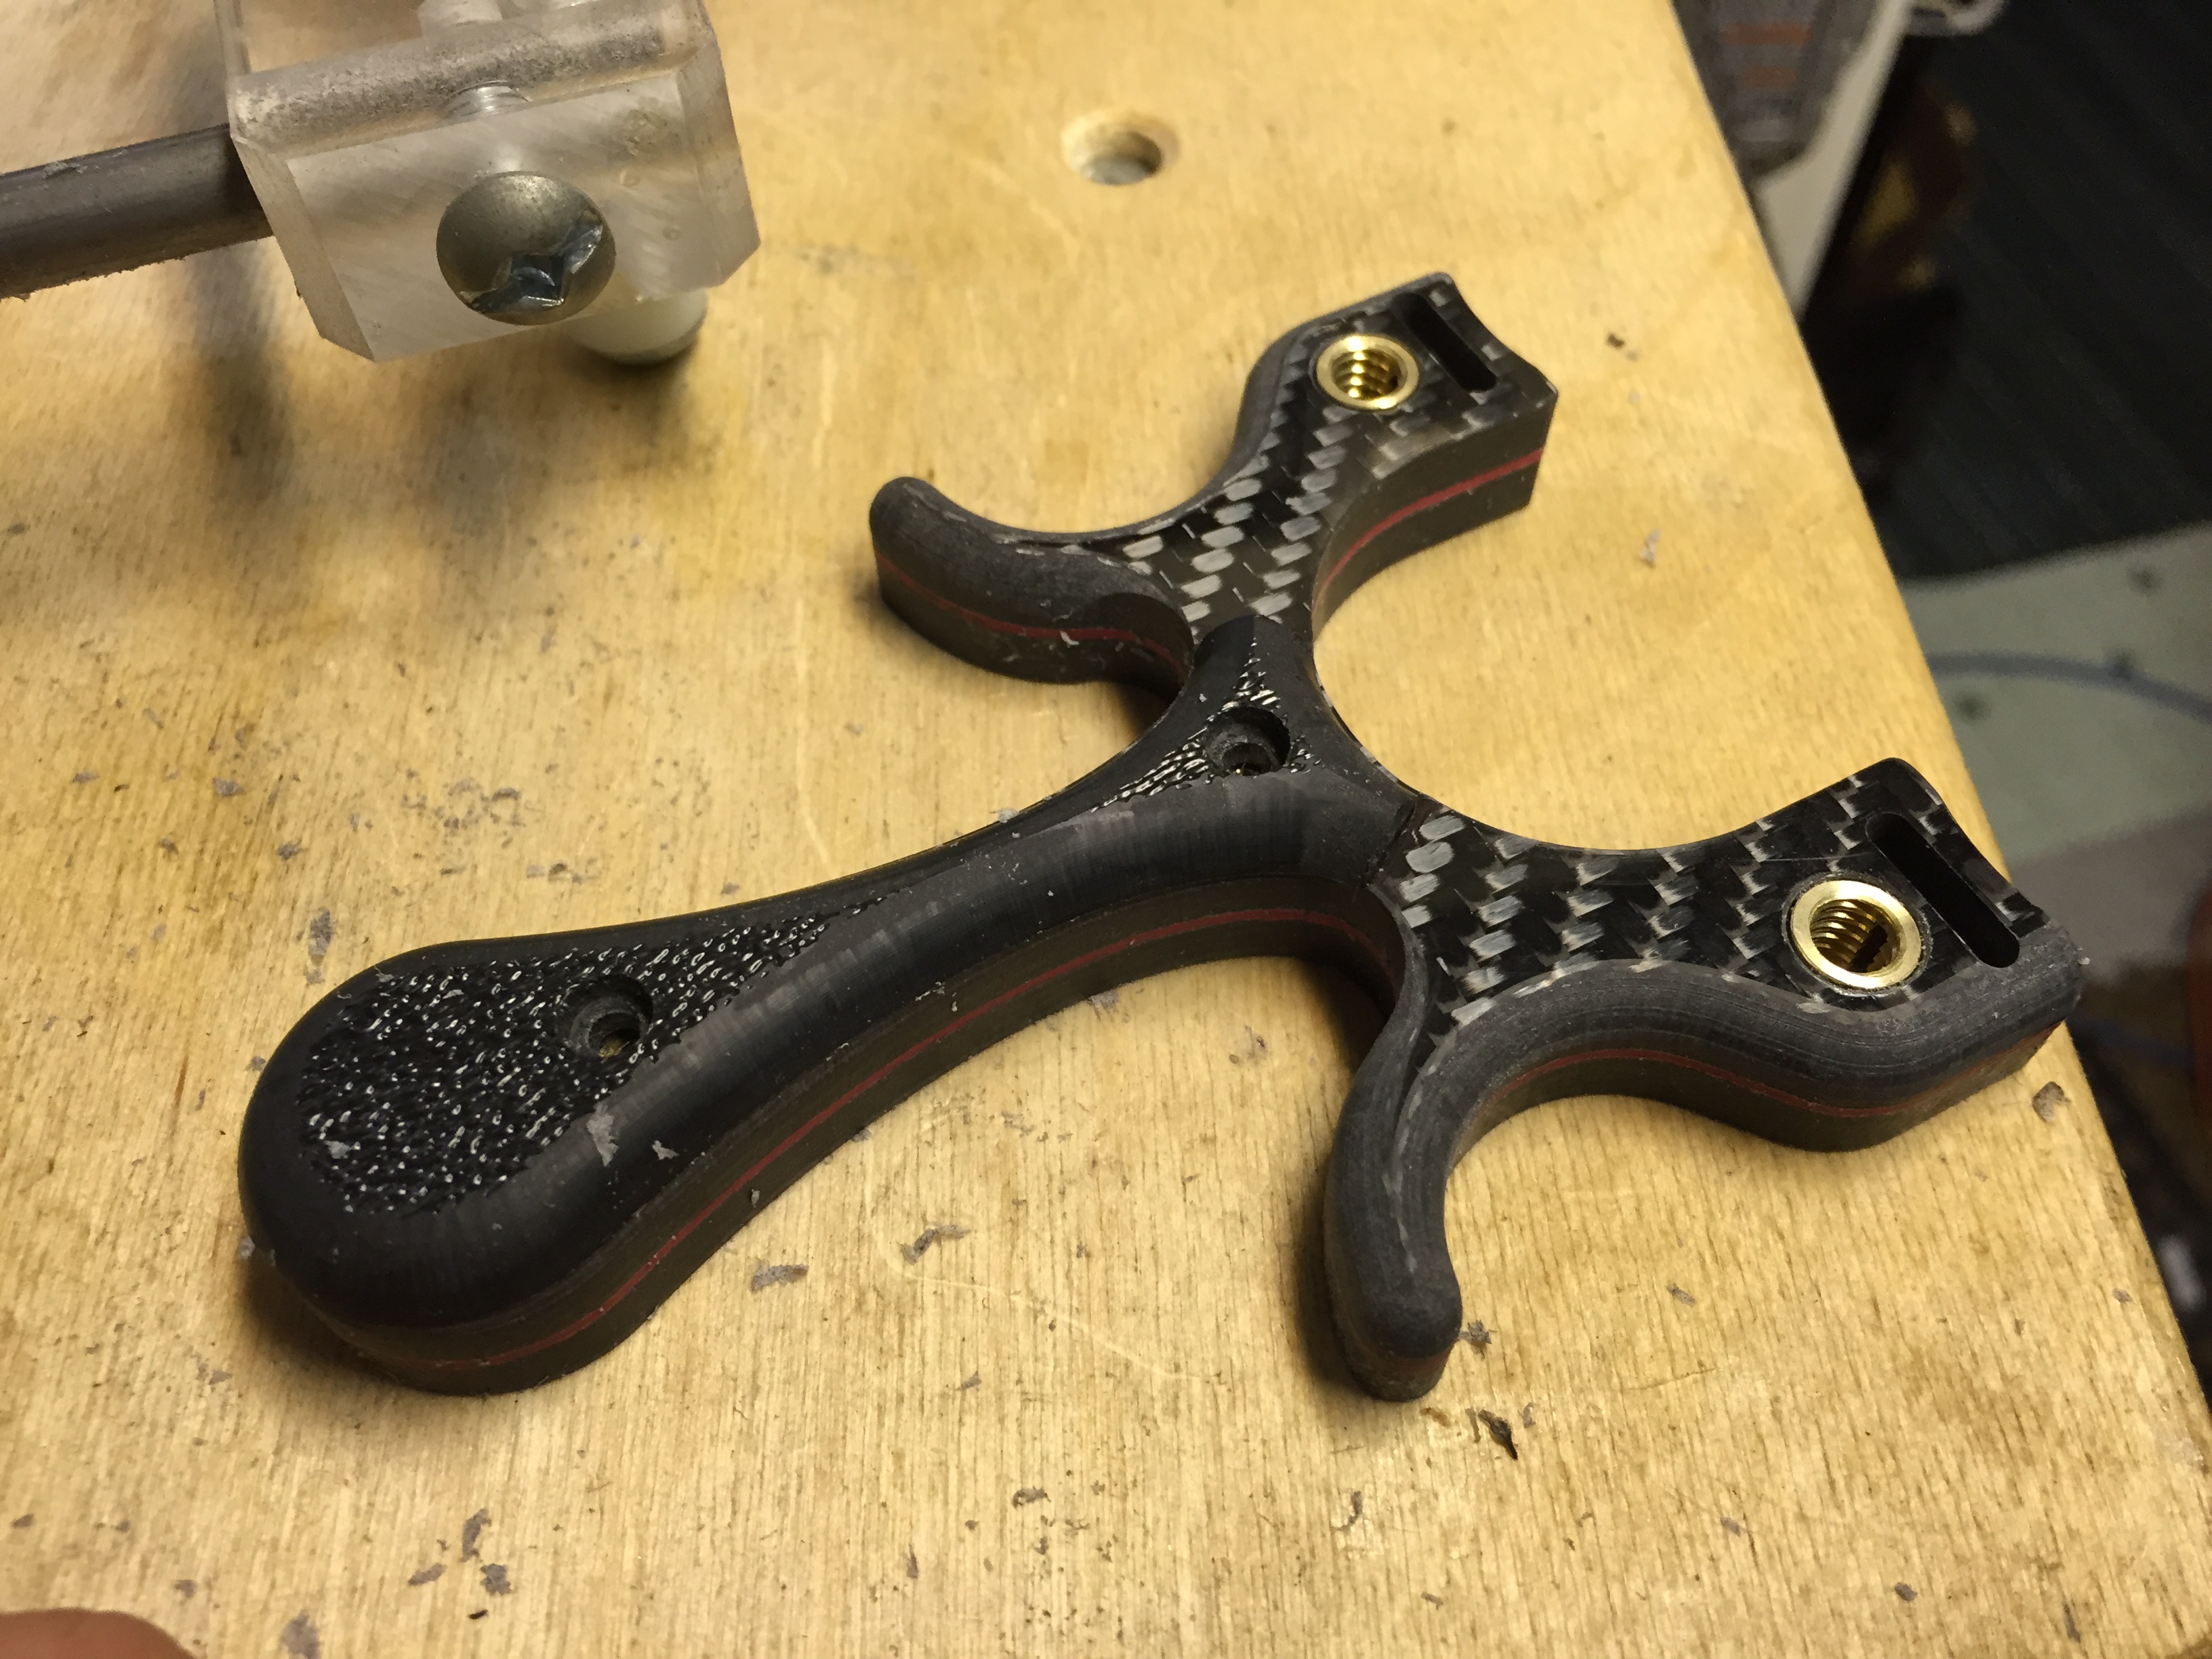
After shaping both the scales and labeling them to their mated side, I focused my attention to the frame. I switched to a 3/16″ round over bit and sped up the router speed. I took careful note of how far to plunge when machining the ‘arm pit’ areas so that the transition between the raised scale and the flat frame would be even and smooth. The same amount of attention was paid when I was machining the inner fork area.
CF is nasty stuff, if you sand it, it turns everything black and the dust is awful. To avoid this, you can wet sand. It takes a bit longer but the result can be washed away and the CF dust is virtually eliminated.
The CNC machine and the router left the surface pretty smooth, but really give it a nice finish, sanding it required. I wet sanded with 150, 320 and 800 grit papers. This evened out the surface and preps it for final polishing.
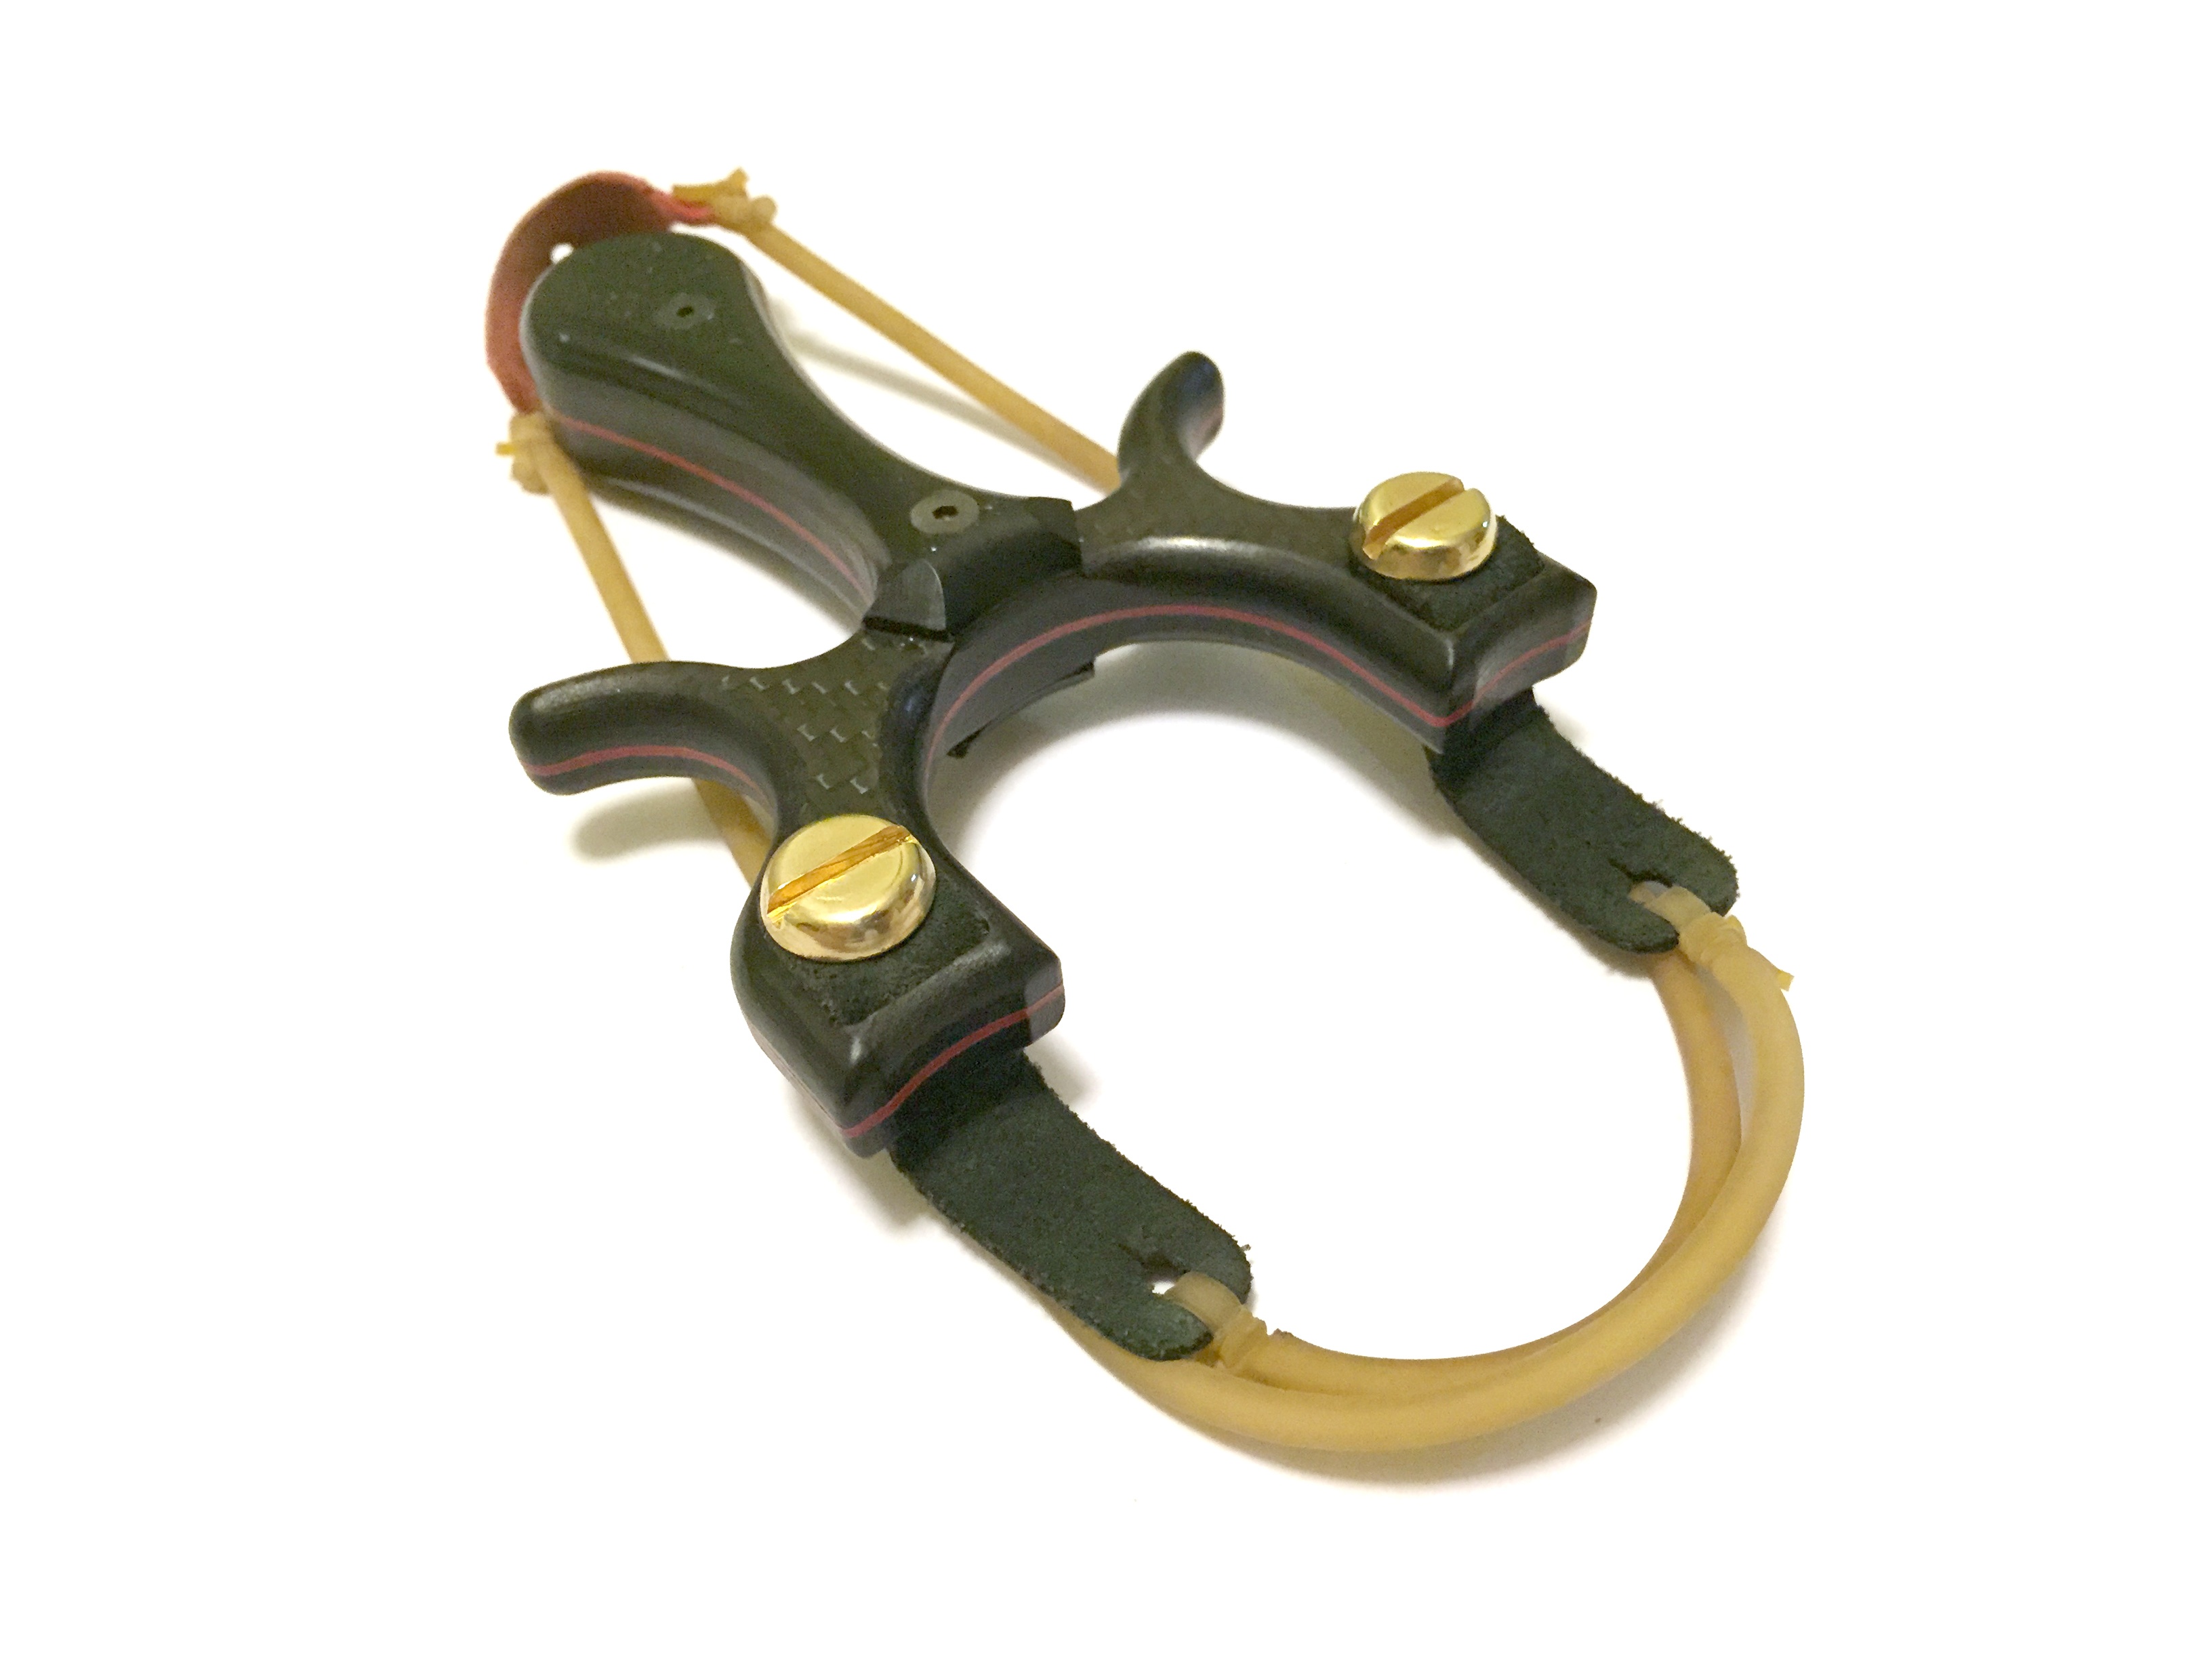
The scales will be attached with some counter sink 6mm long M3 black oxide screws.
We are almost there.
The ‘end grain’ of the CF is now exposed and to make it a bit more stable, I sealed the edge with some cheap, super thin CA glue. This is a pen maker’s trick. Be in a well ventilated area wear nitrile gloves. You just need to put a tiny drop of glue on the edge of the slingshot and rub it with a single finger till it dries. This should only be seconds.
Repeat the process until all of the edges are coated with a thin layer of super glue, BUT if you are using ABS, be careful not to use it on the ABS surface as CA glue reacts to it and will ruin any smooth surface.
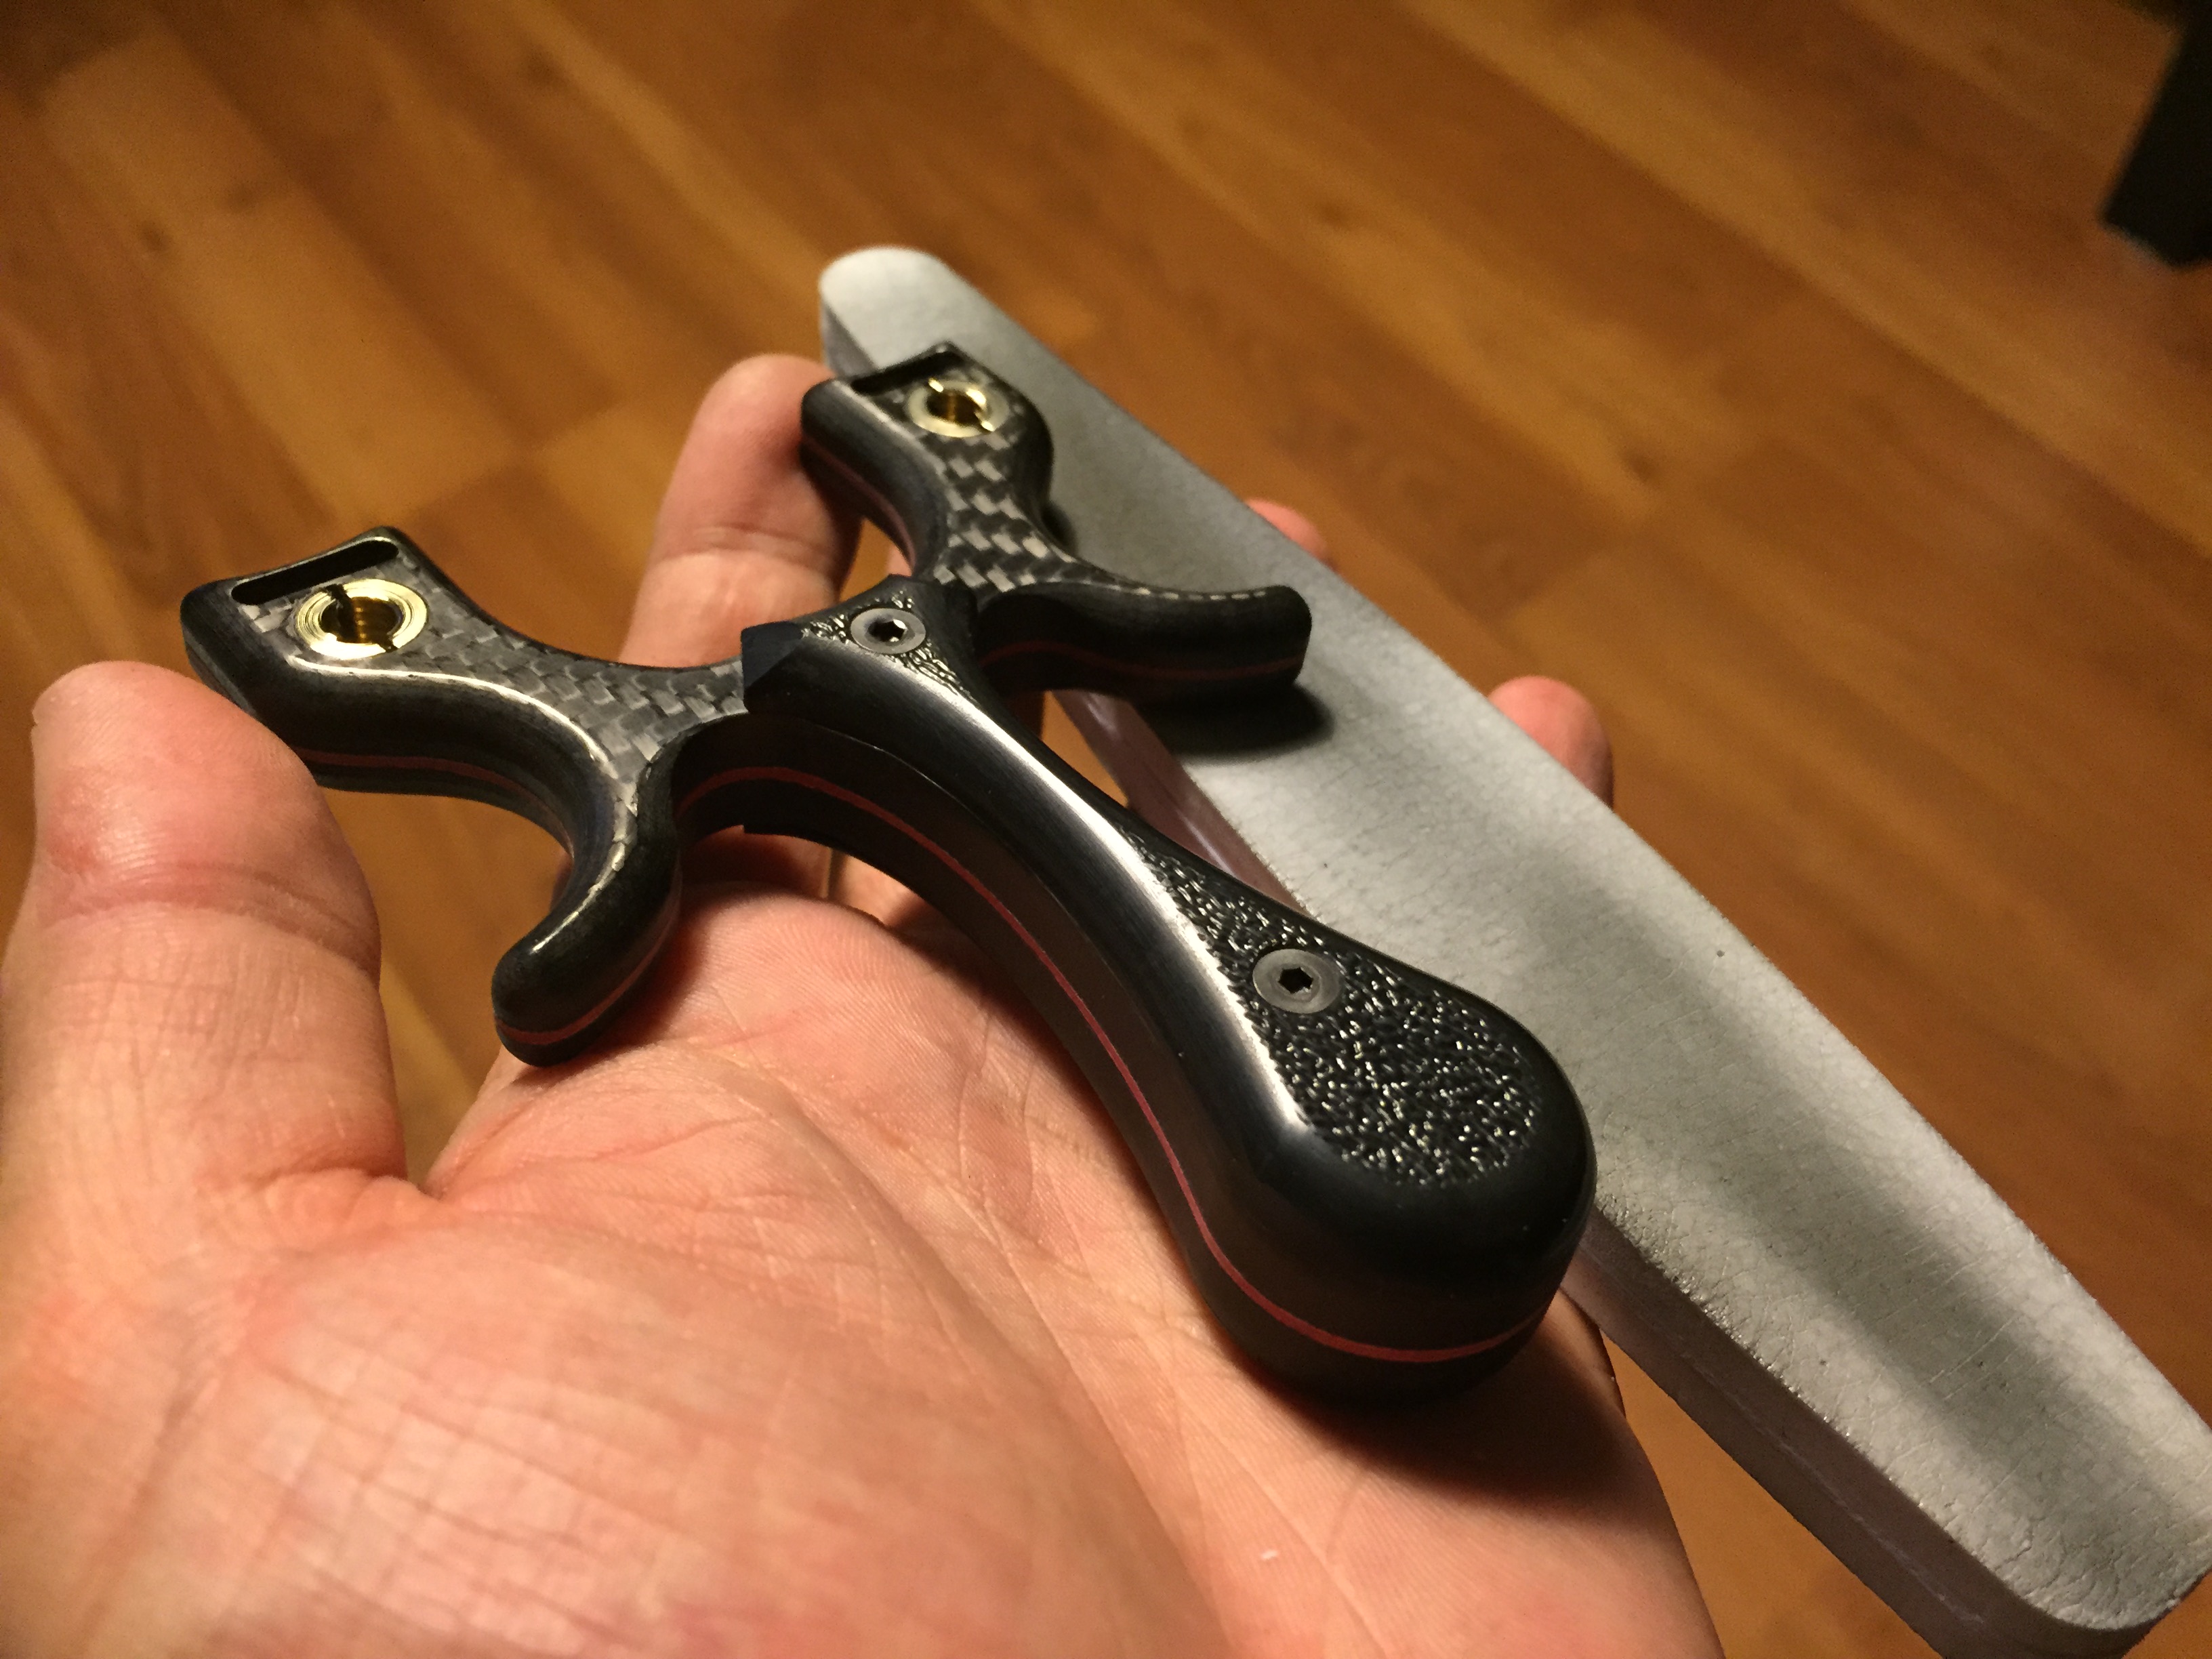
Now it’s time to really make it shine. I use one of my favourite tools, which isn’t even a proper tool at all, a nail buffer. With 1000 grit on one side and 4000 on the other, the foam backed buffing stick is the perfect low tech polishing tool. Slowly but surely buff the whole surface with the 1000 grit side and then follow up with the 4000 grit.
Once you’ve achieved the level of shine you like, take an alcohol swab and wipe off the slingshot. This will remove any transfer of materials and clean up any residues. DO NOT USE ACETONE, acetone will react ABS and just melt it.
I also shined up the brass screws I am going to use to attach the tabs, the same buffing stick was used
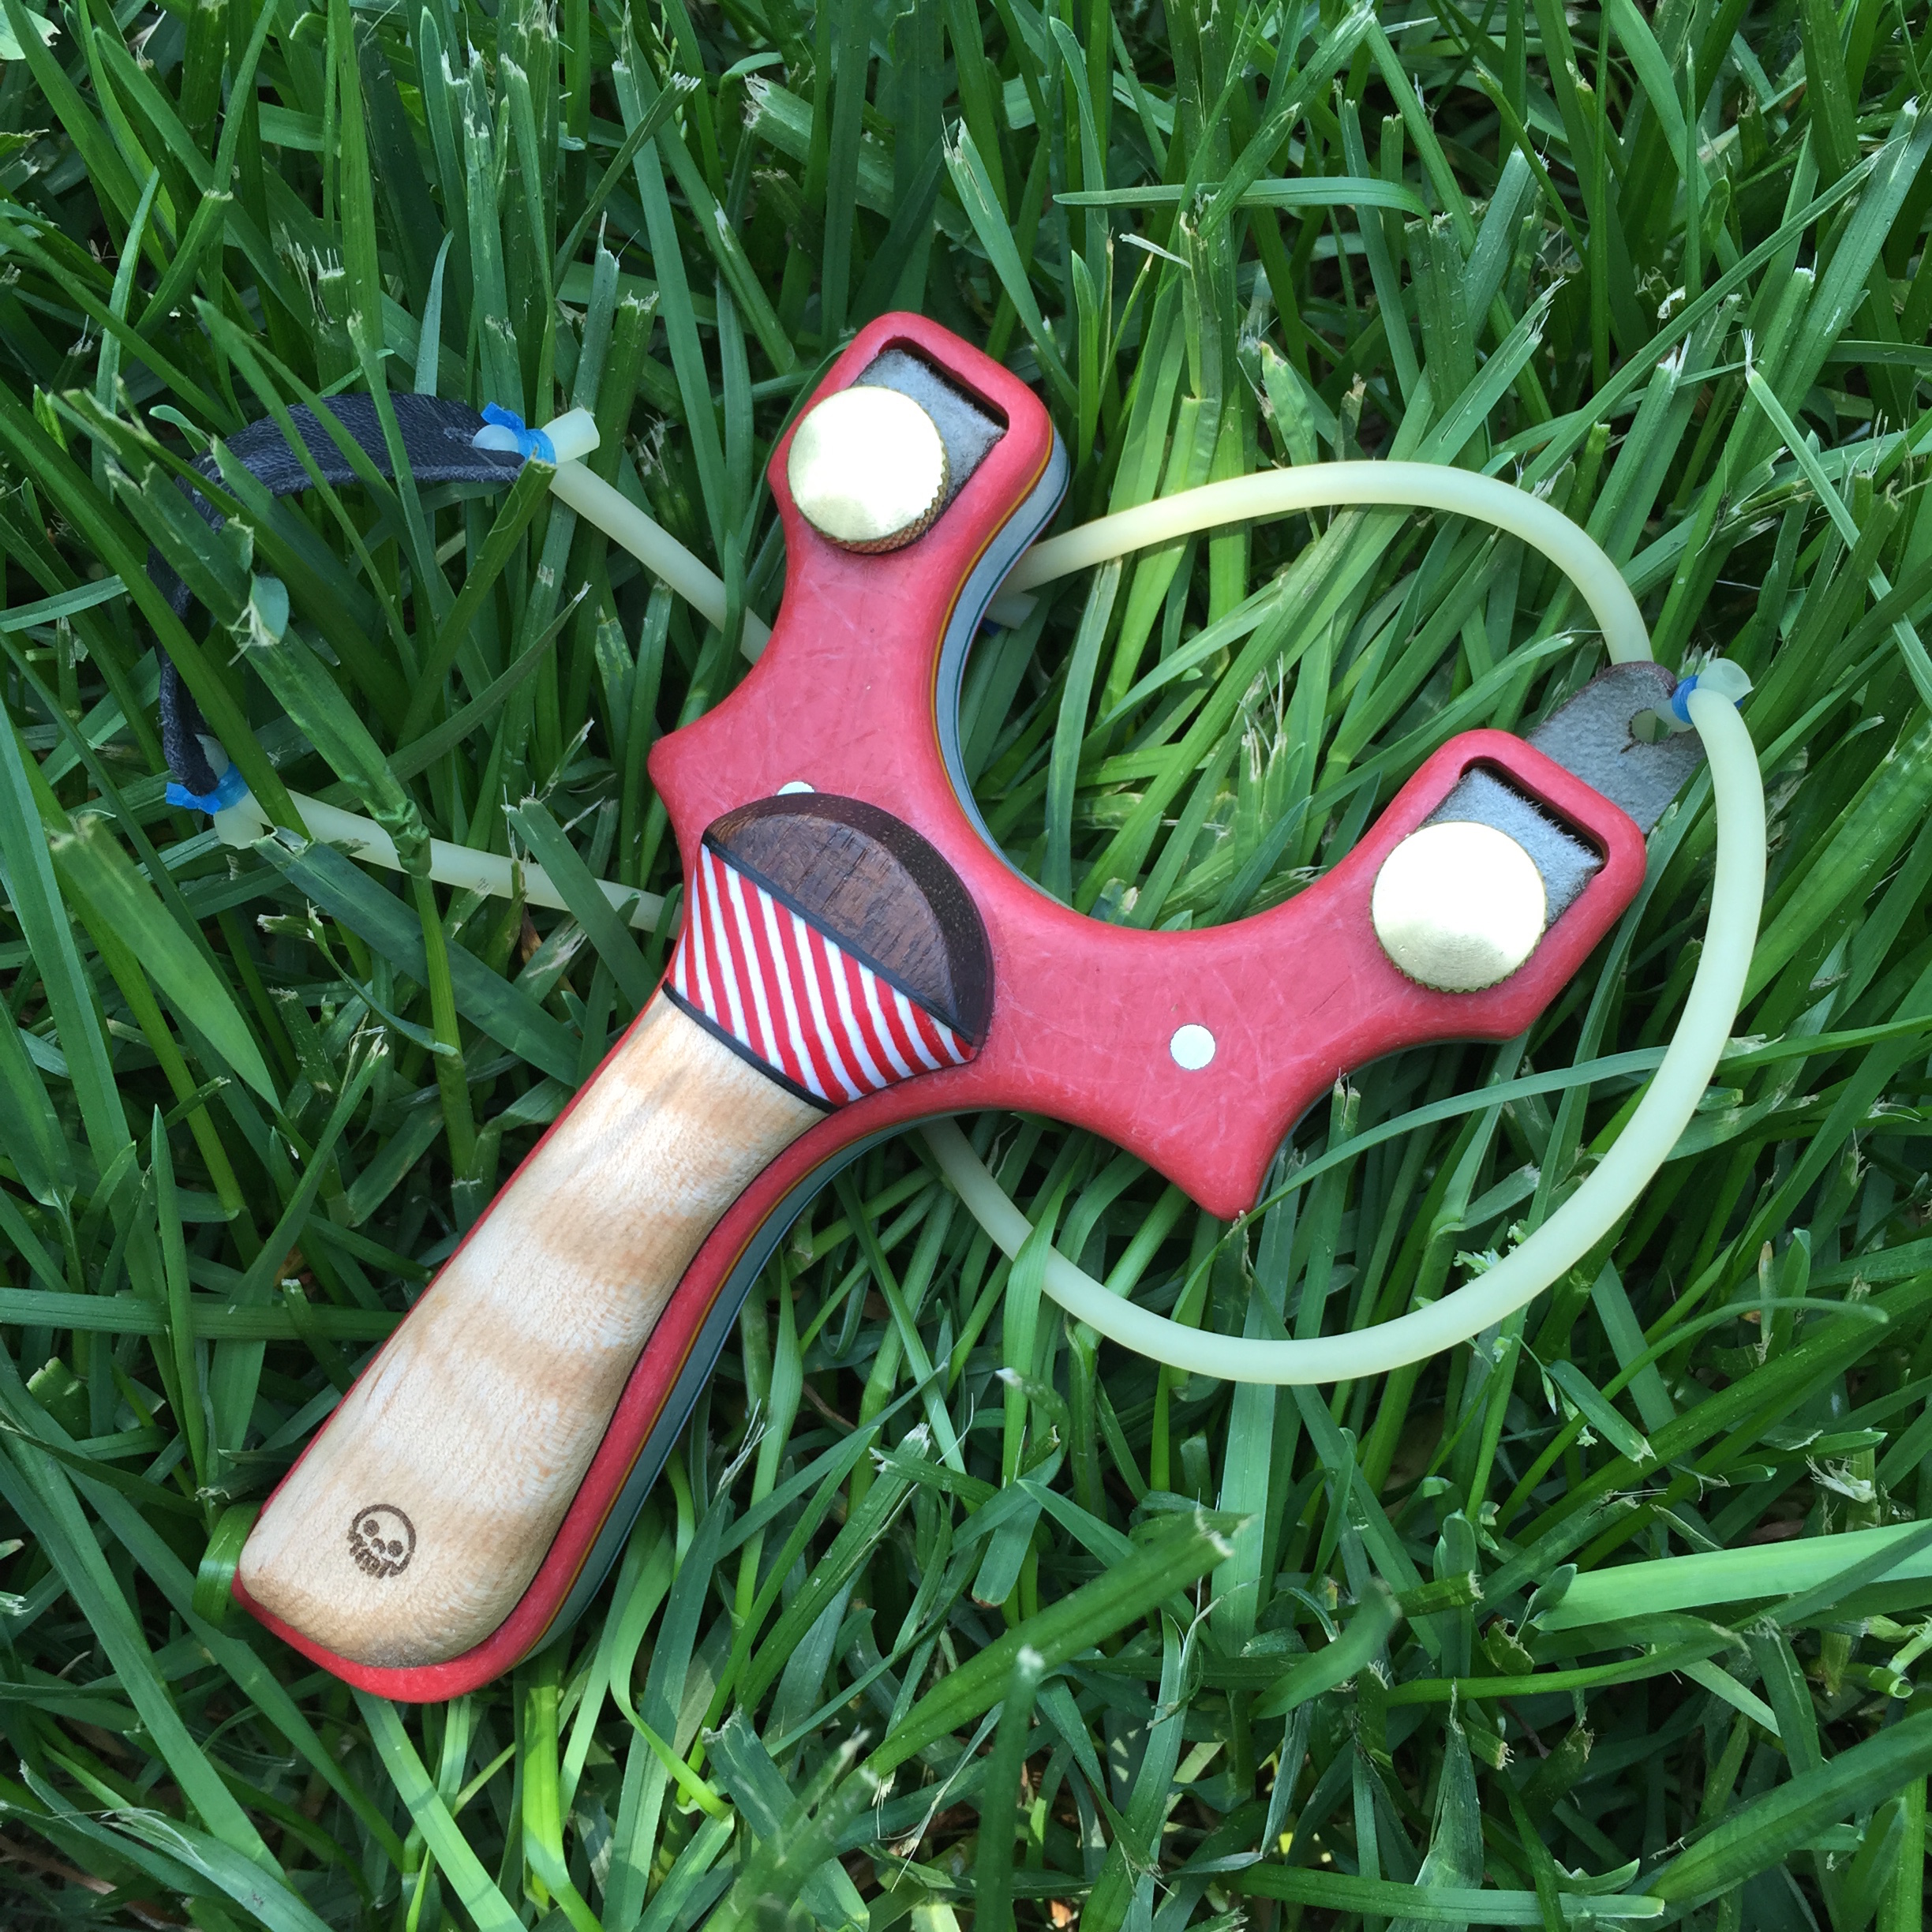
I don’t know about you, but I photograph my work as soon as I am done with it. This way, it’s in the best possible condition it can be in. This project was so much fun and it really tested my materials knowledge, having never worked with CF before, I relied on my previous knowledge of composites and plastics to inform my machining strategies.
I am quite pleased with the result and the heirloom quality combined with the high tech material and methods make for a great end result.

Thanks for hanging out and I hope you get something out of this.
-Eric/Metro