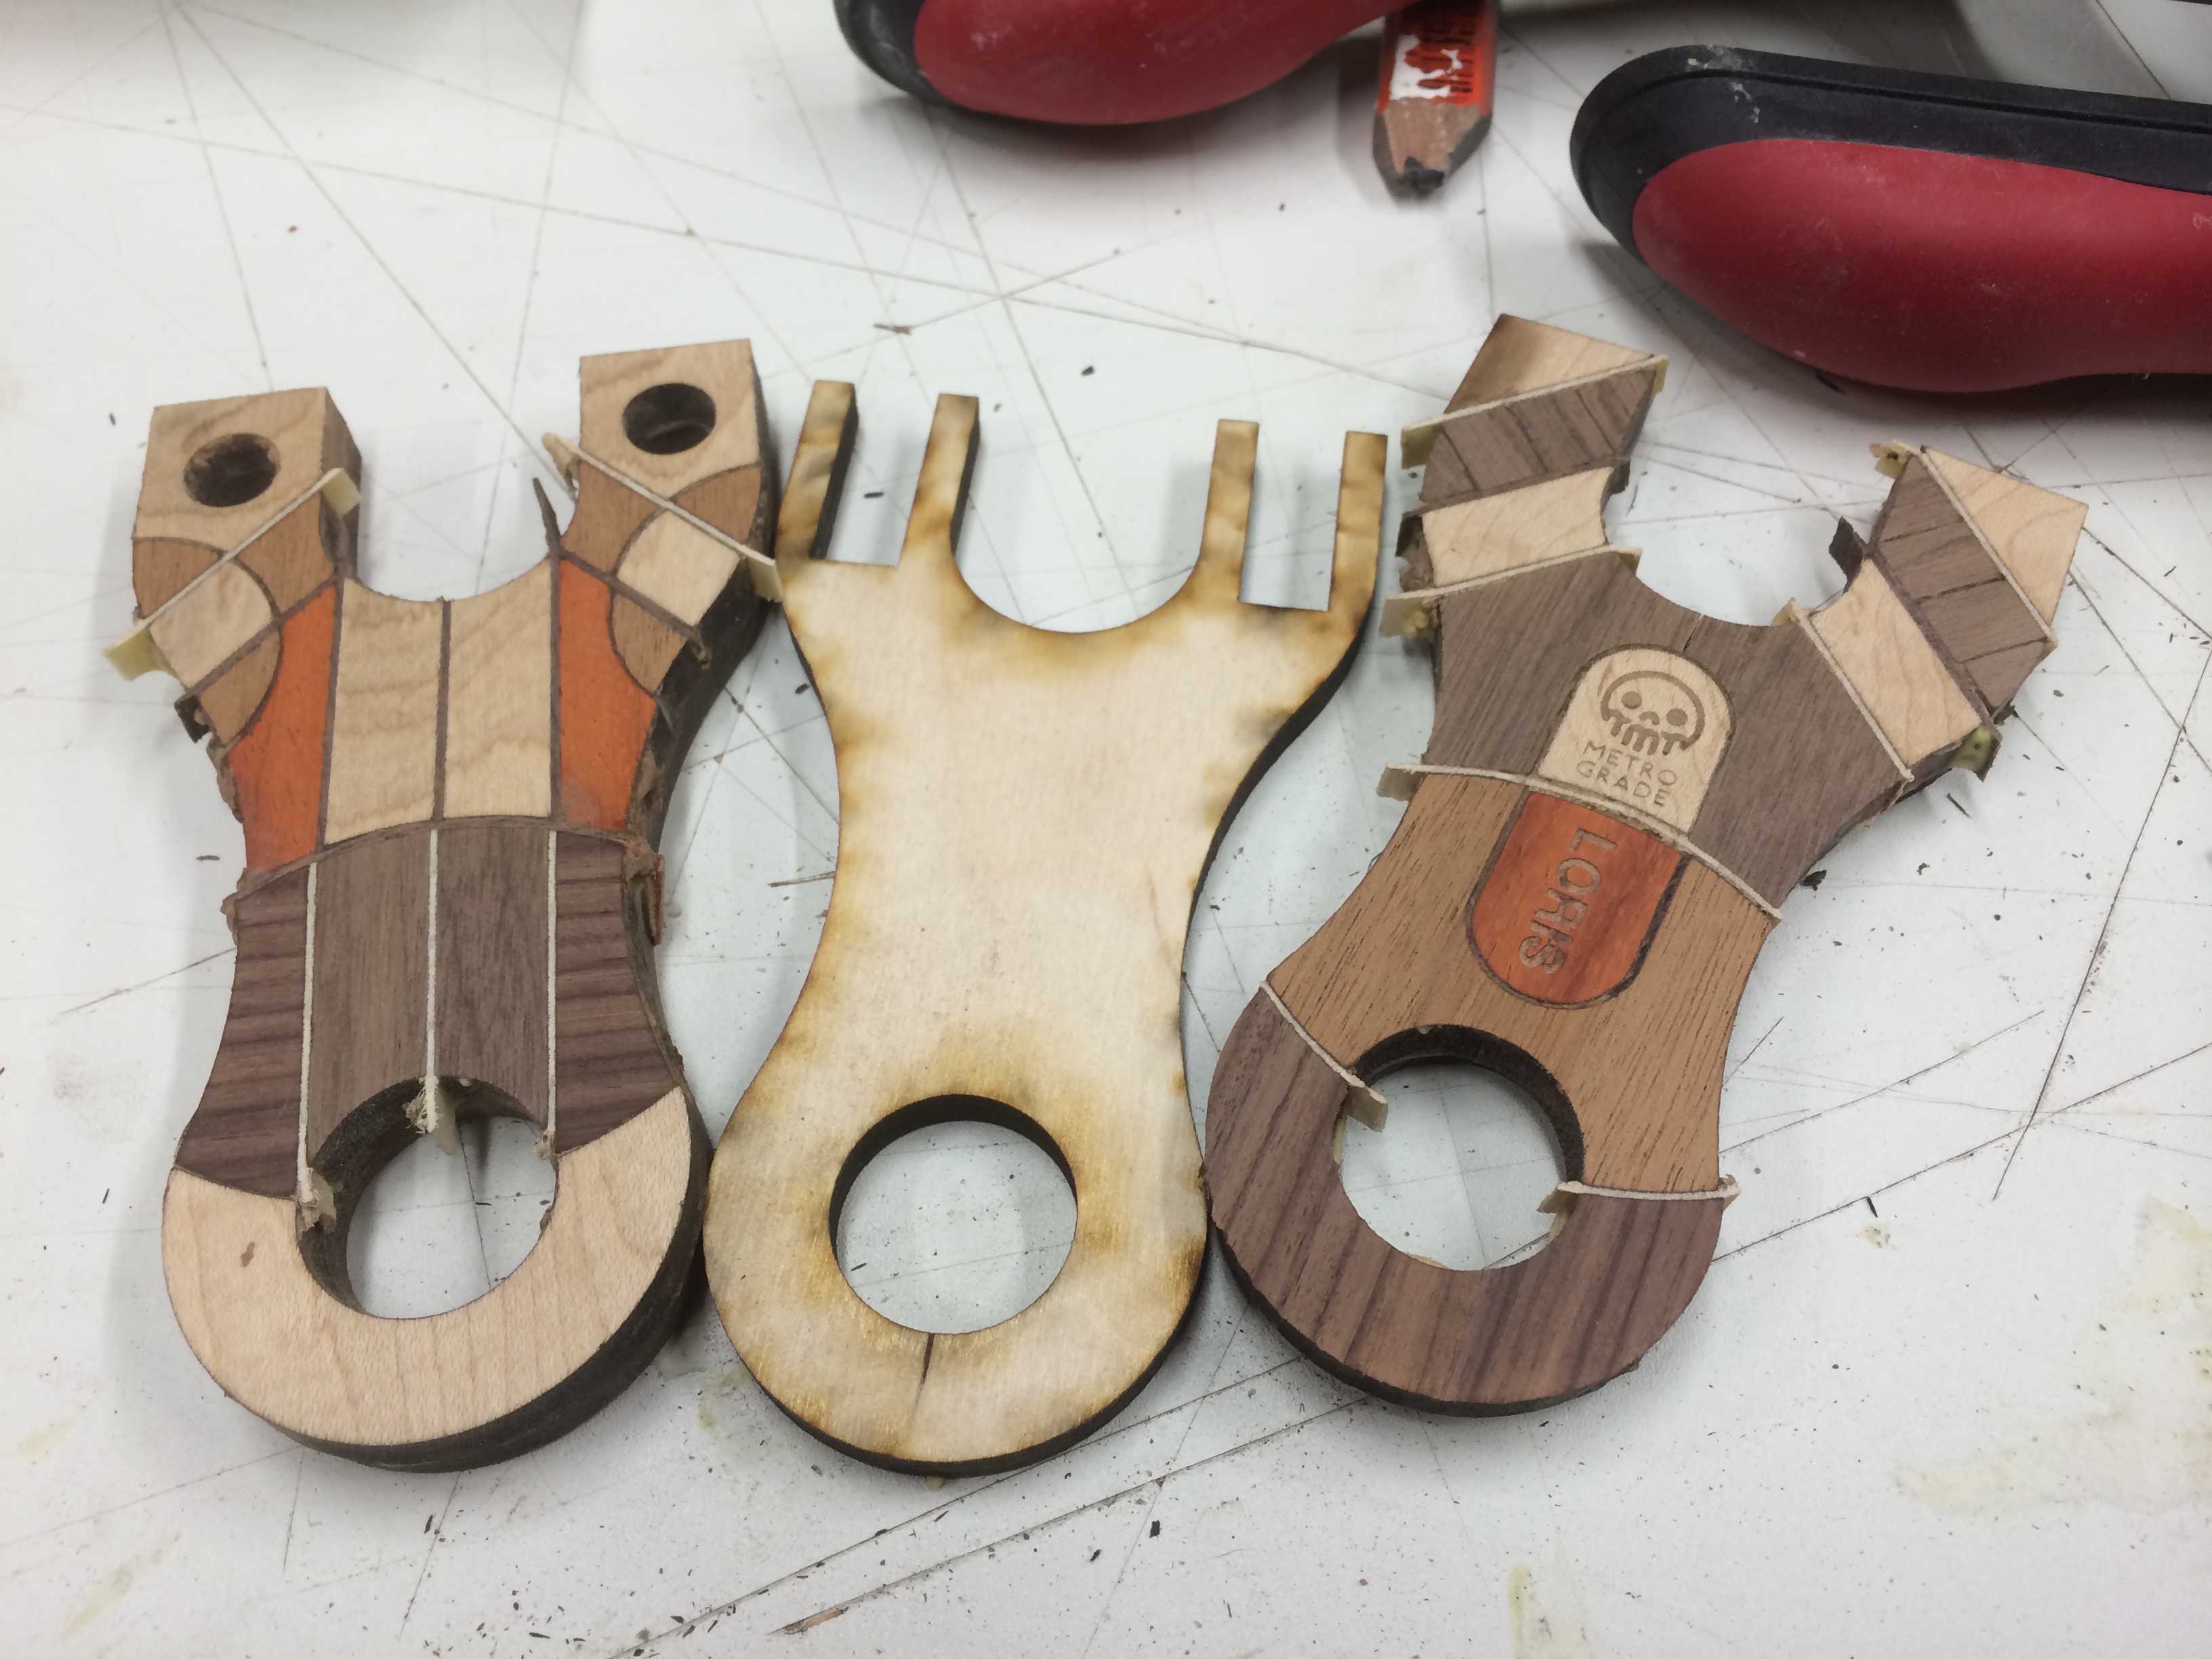
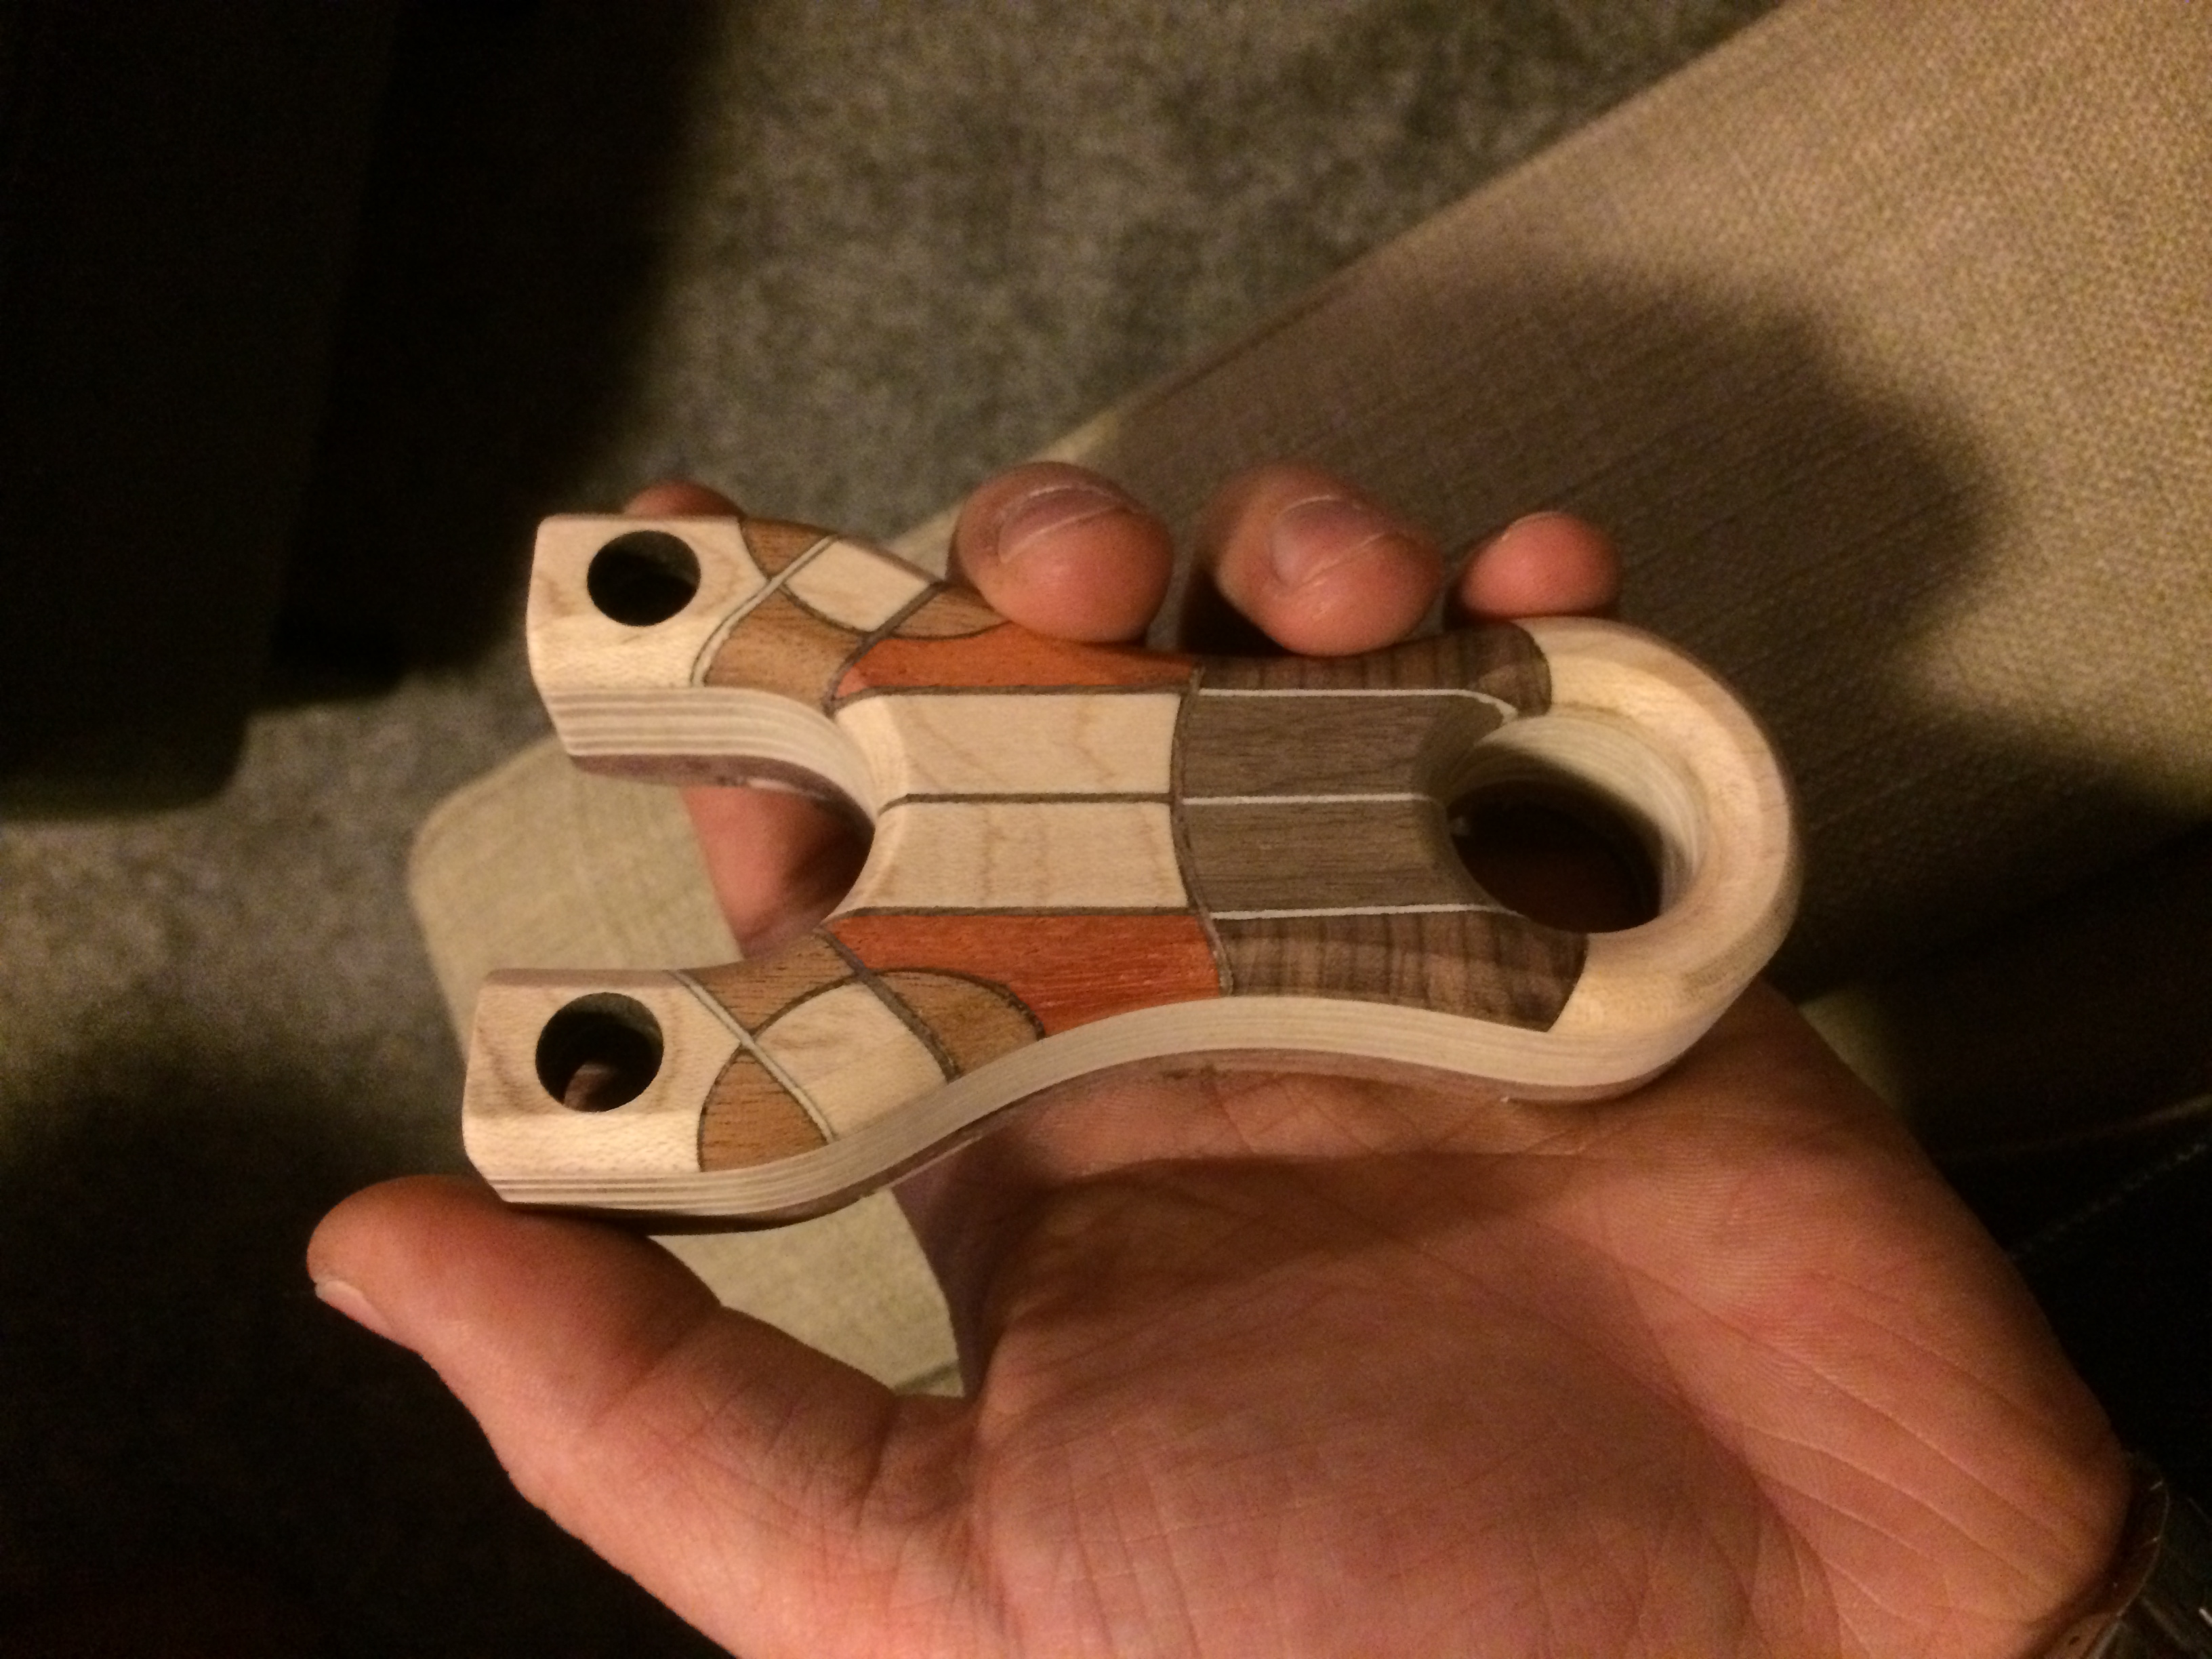
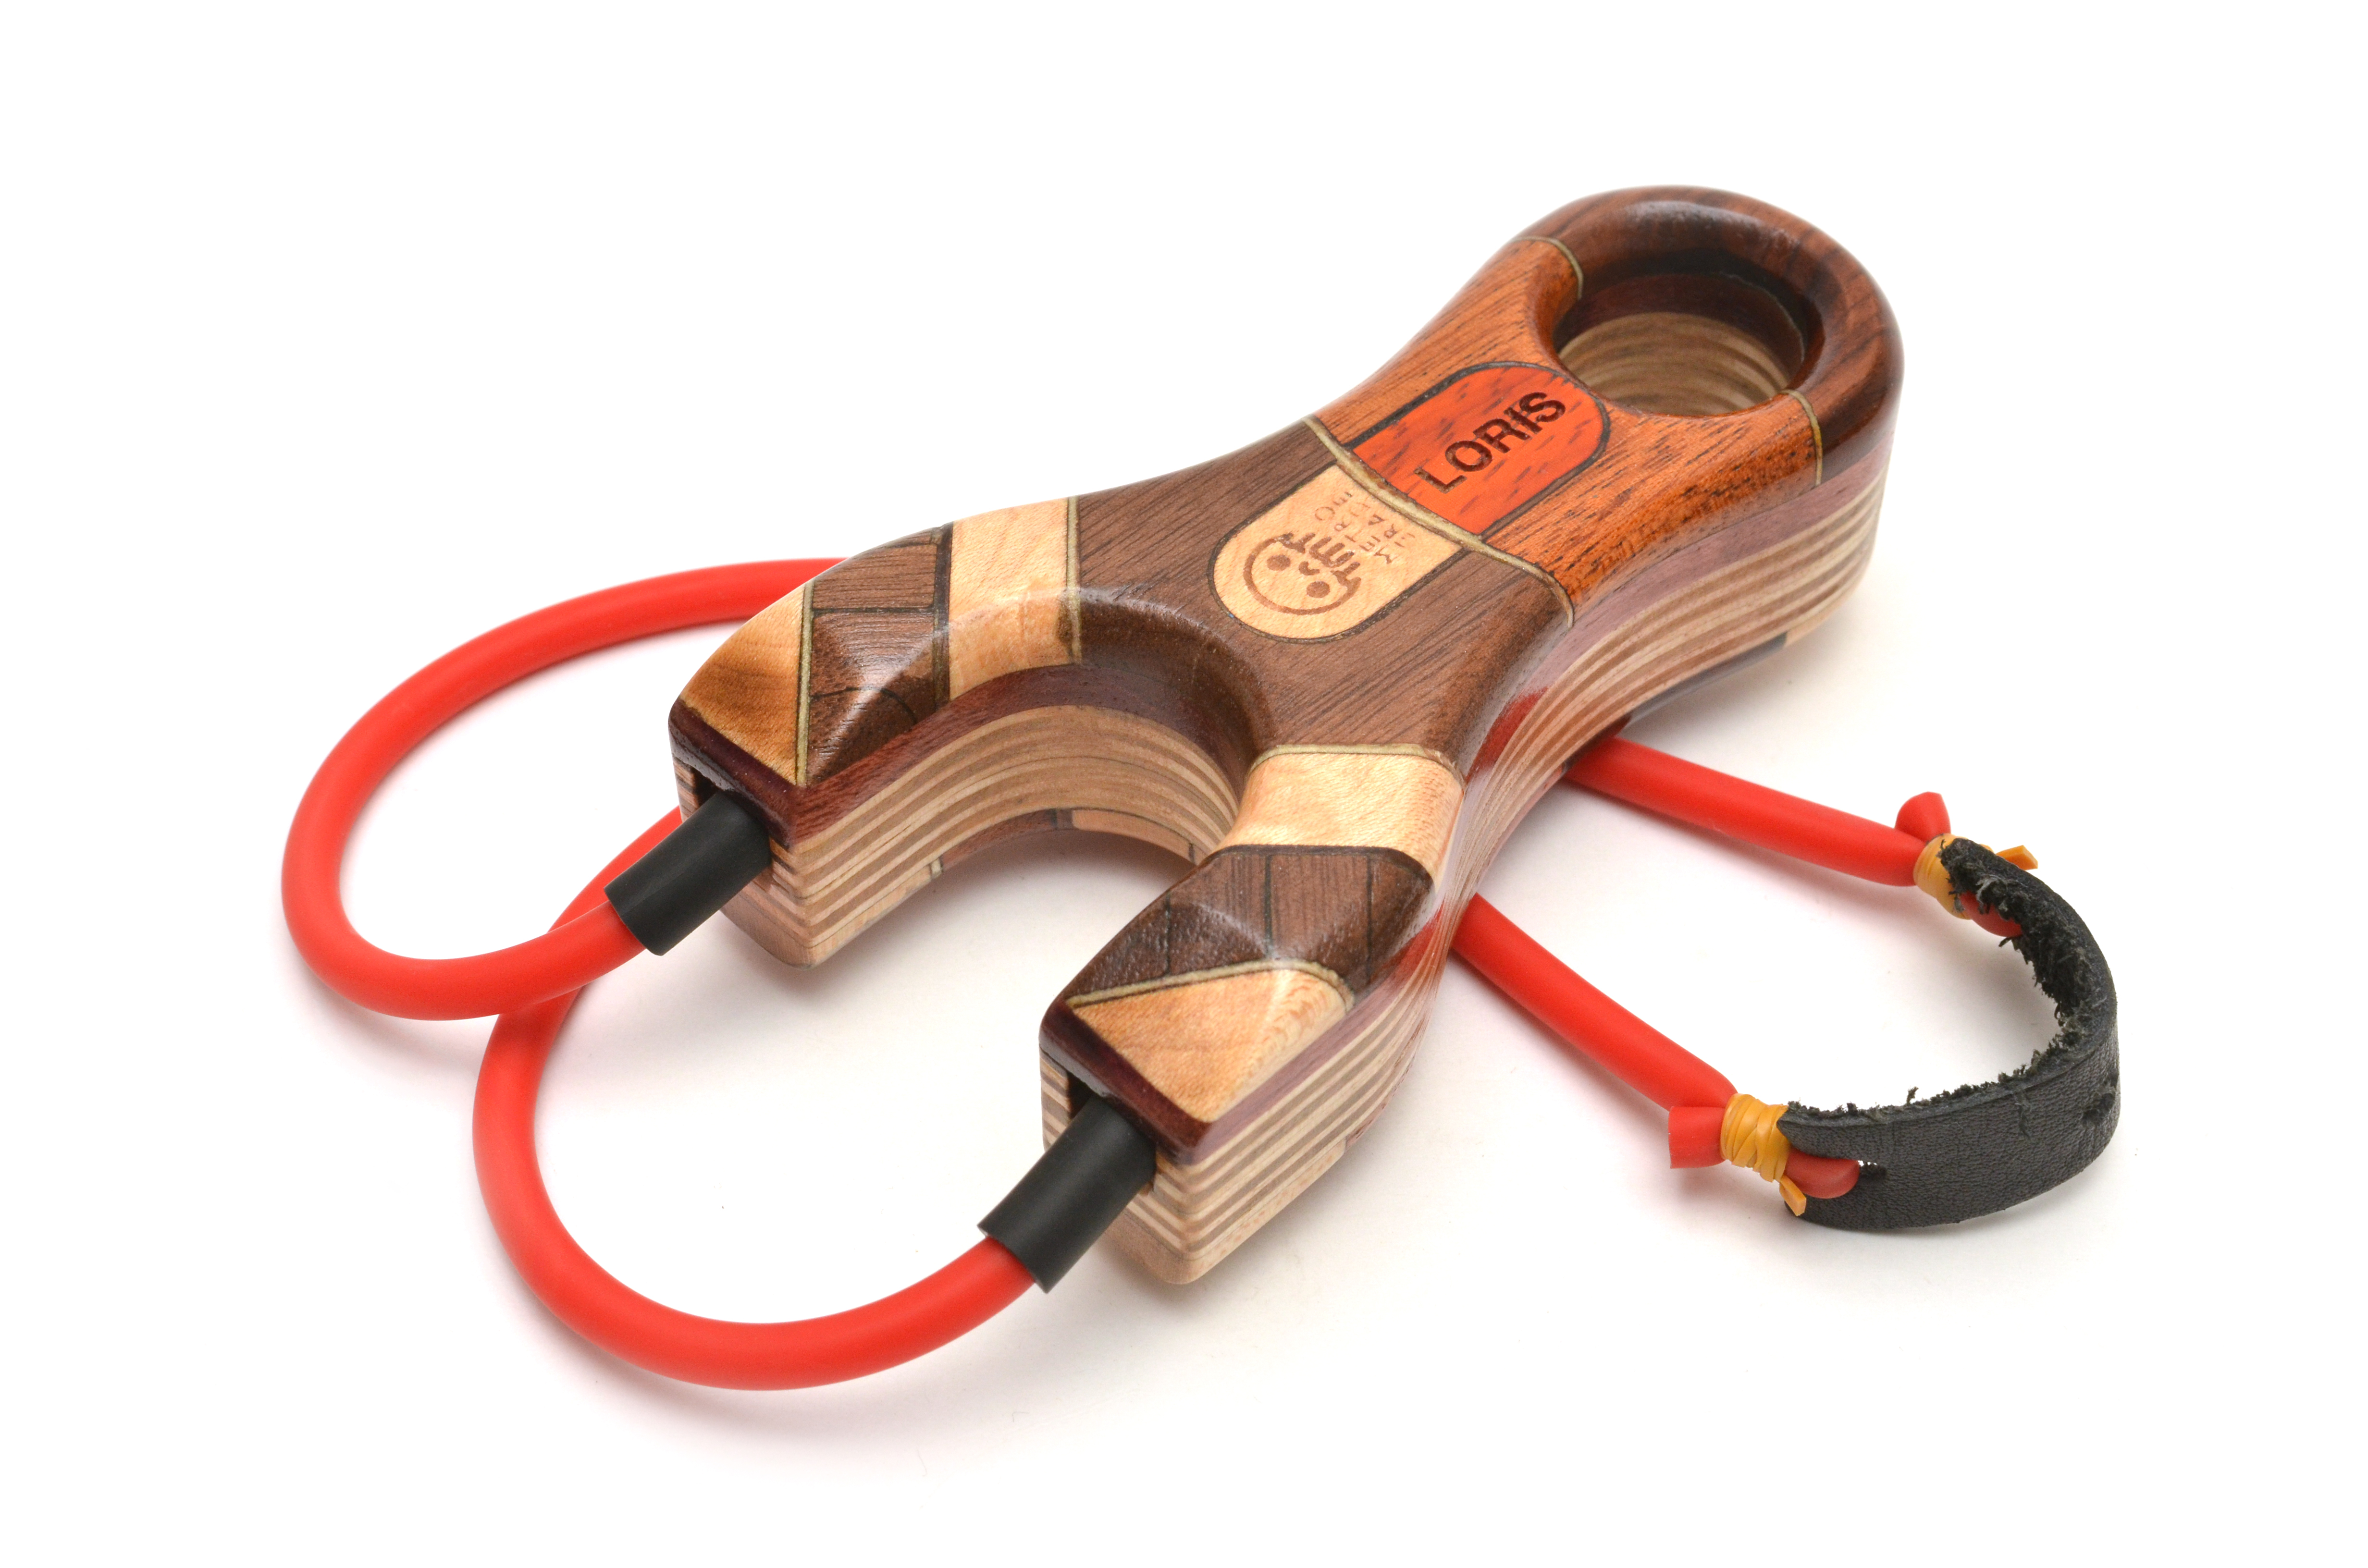
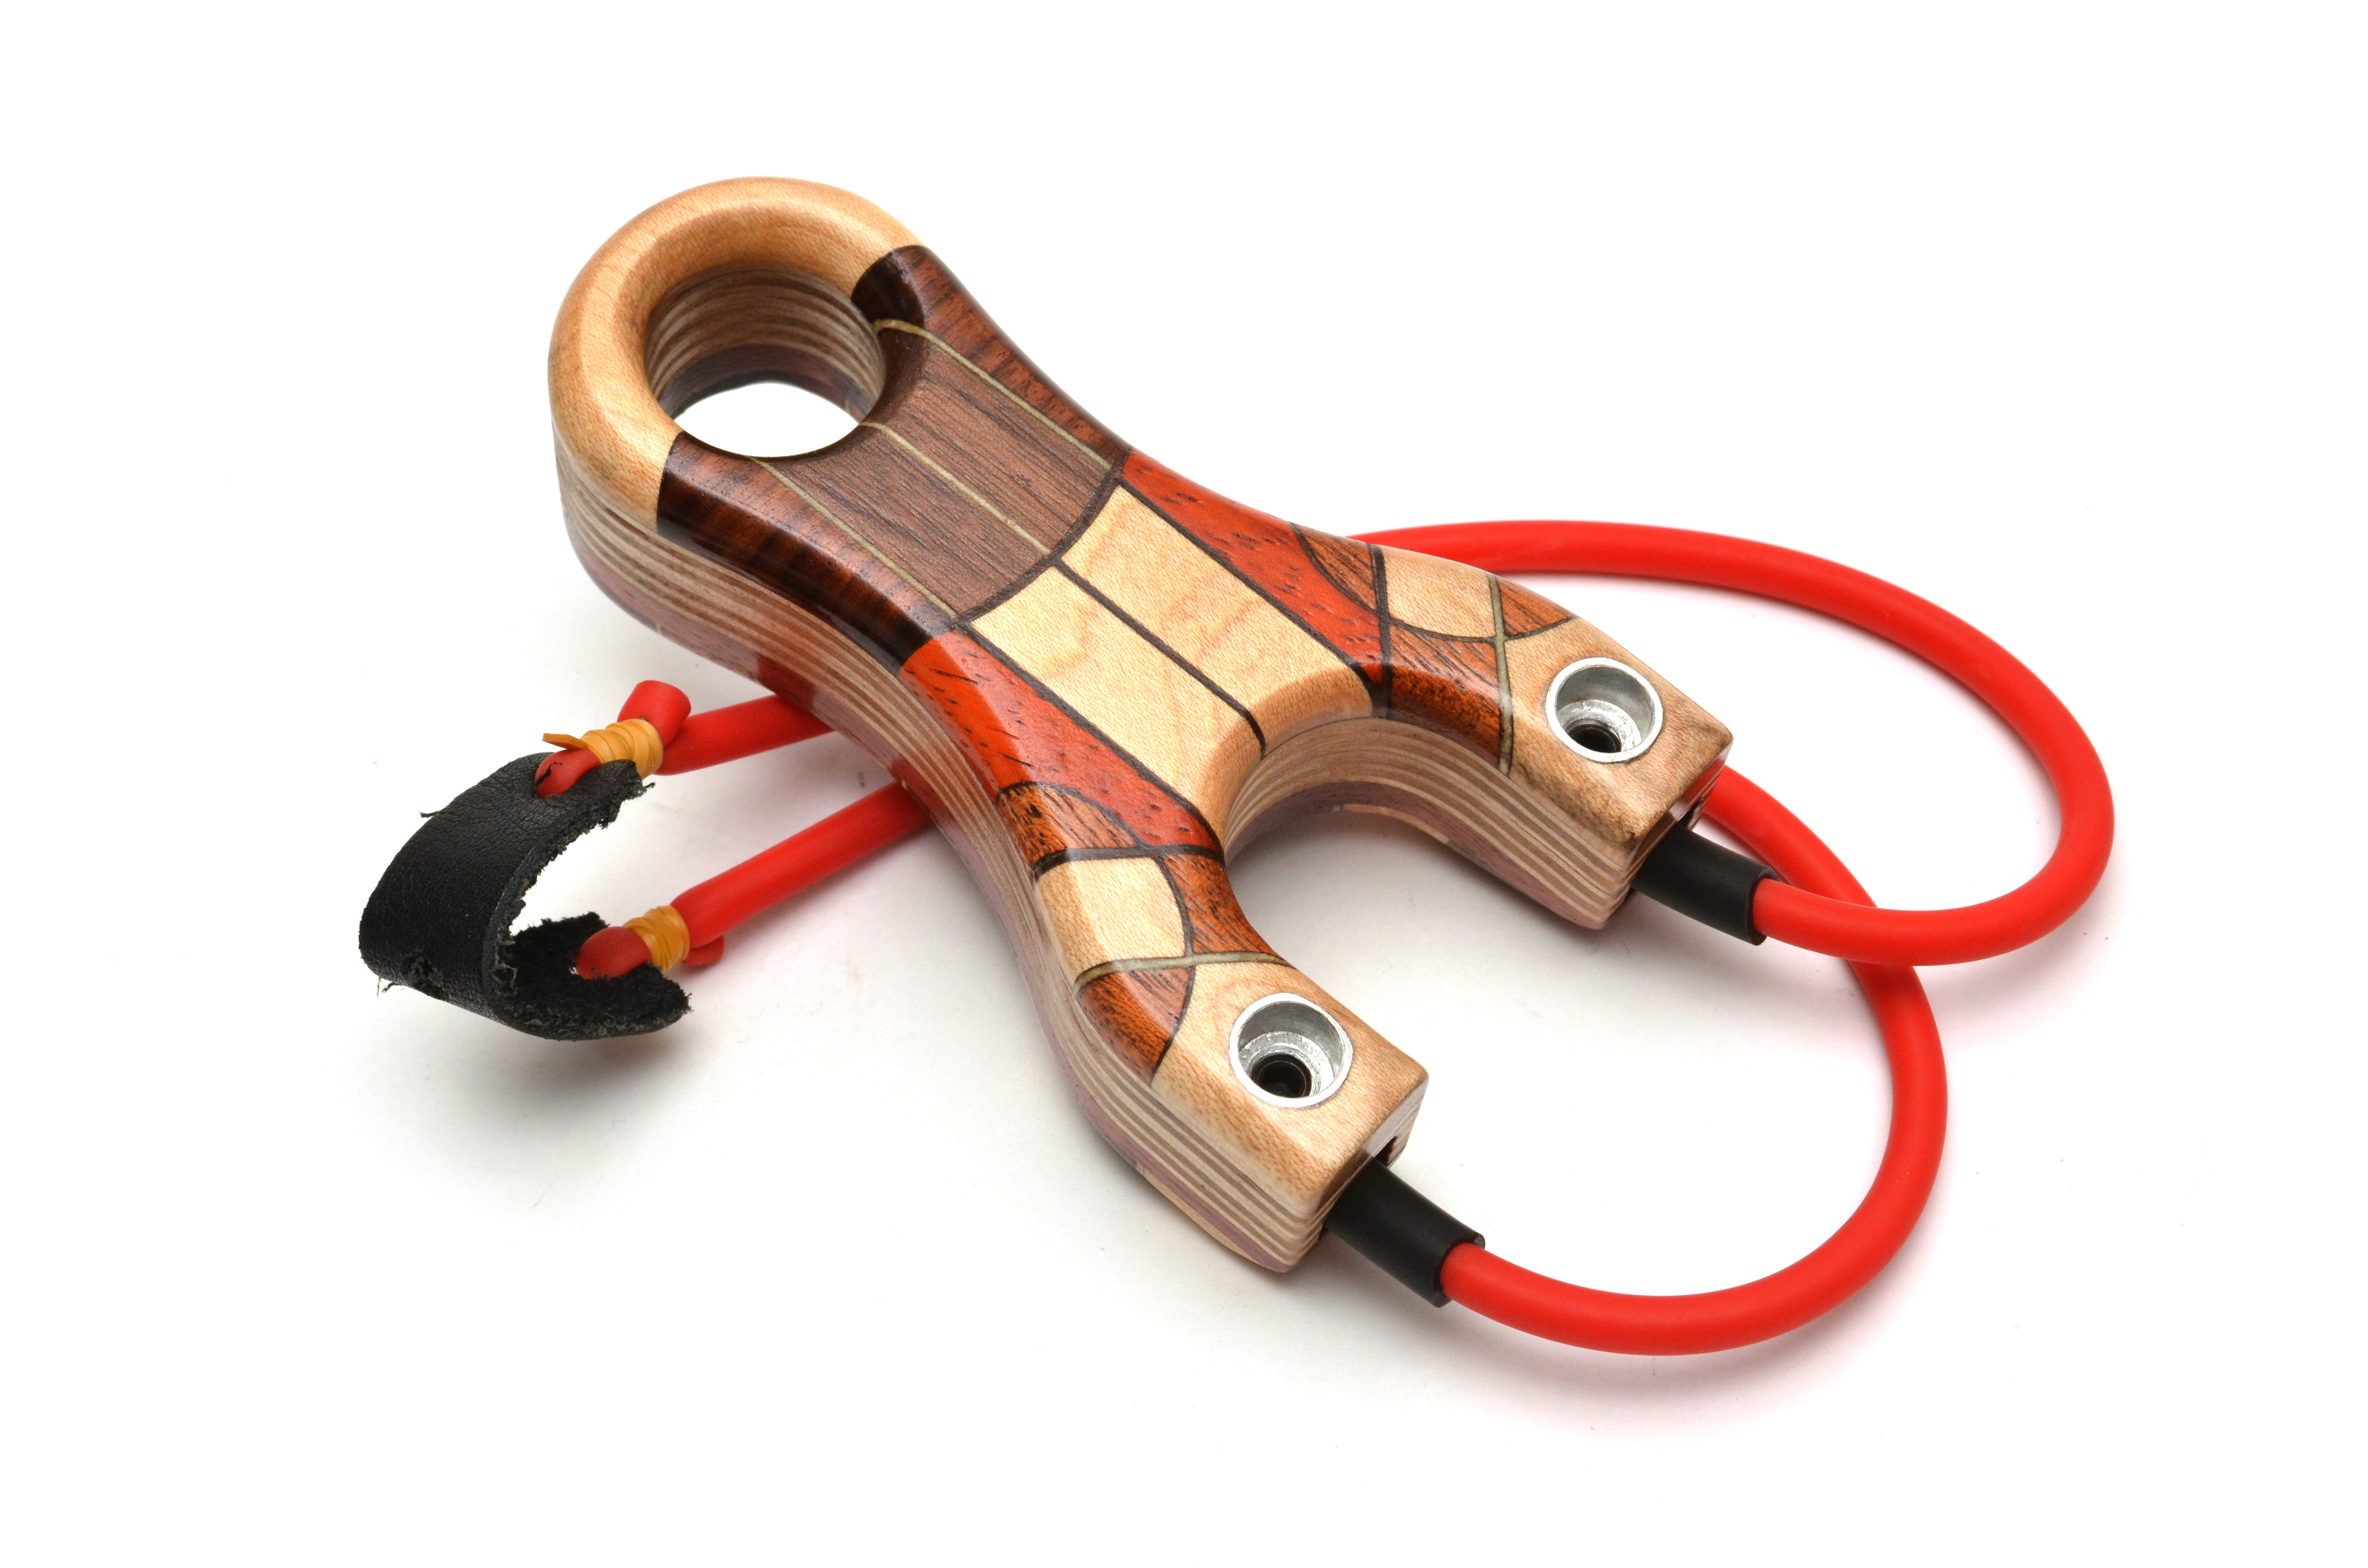
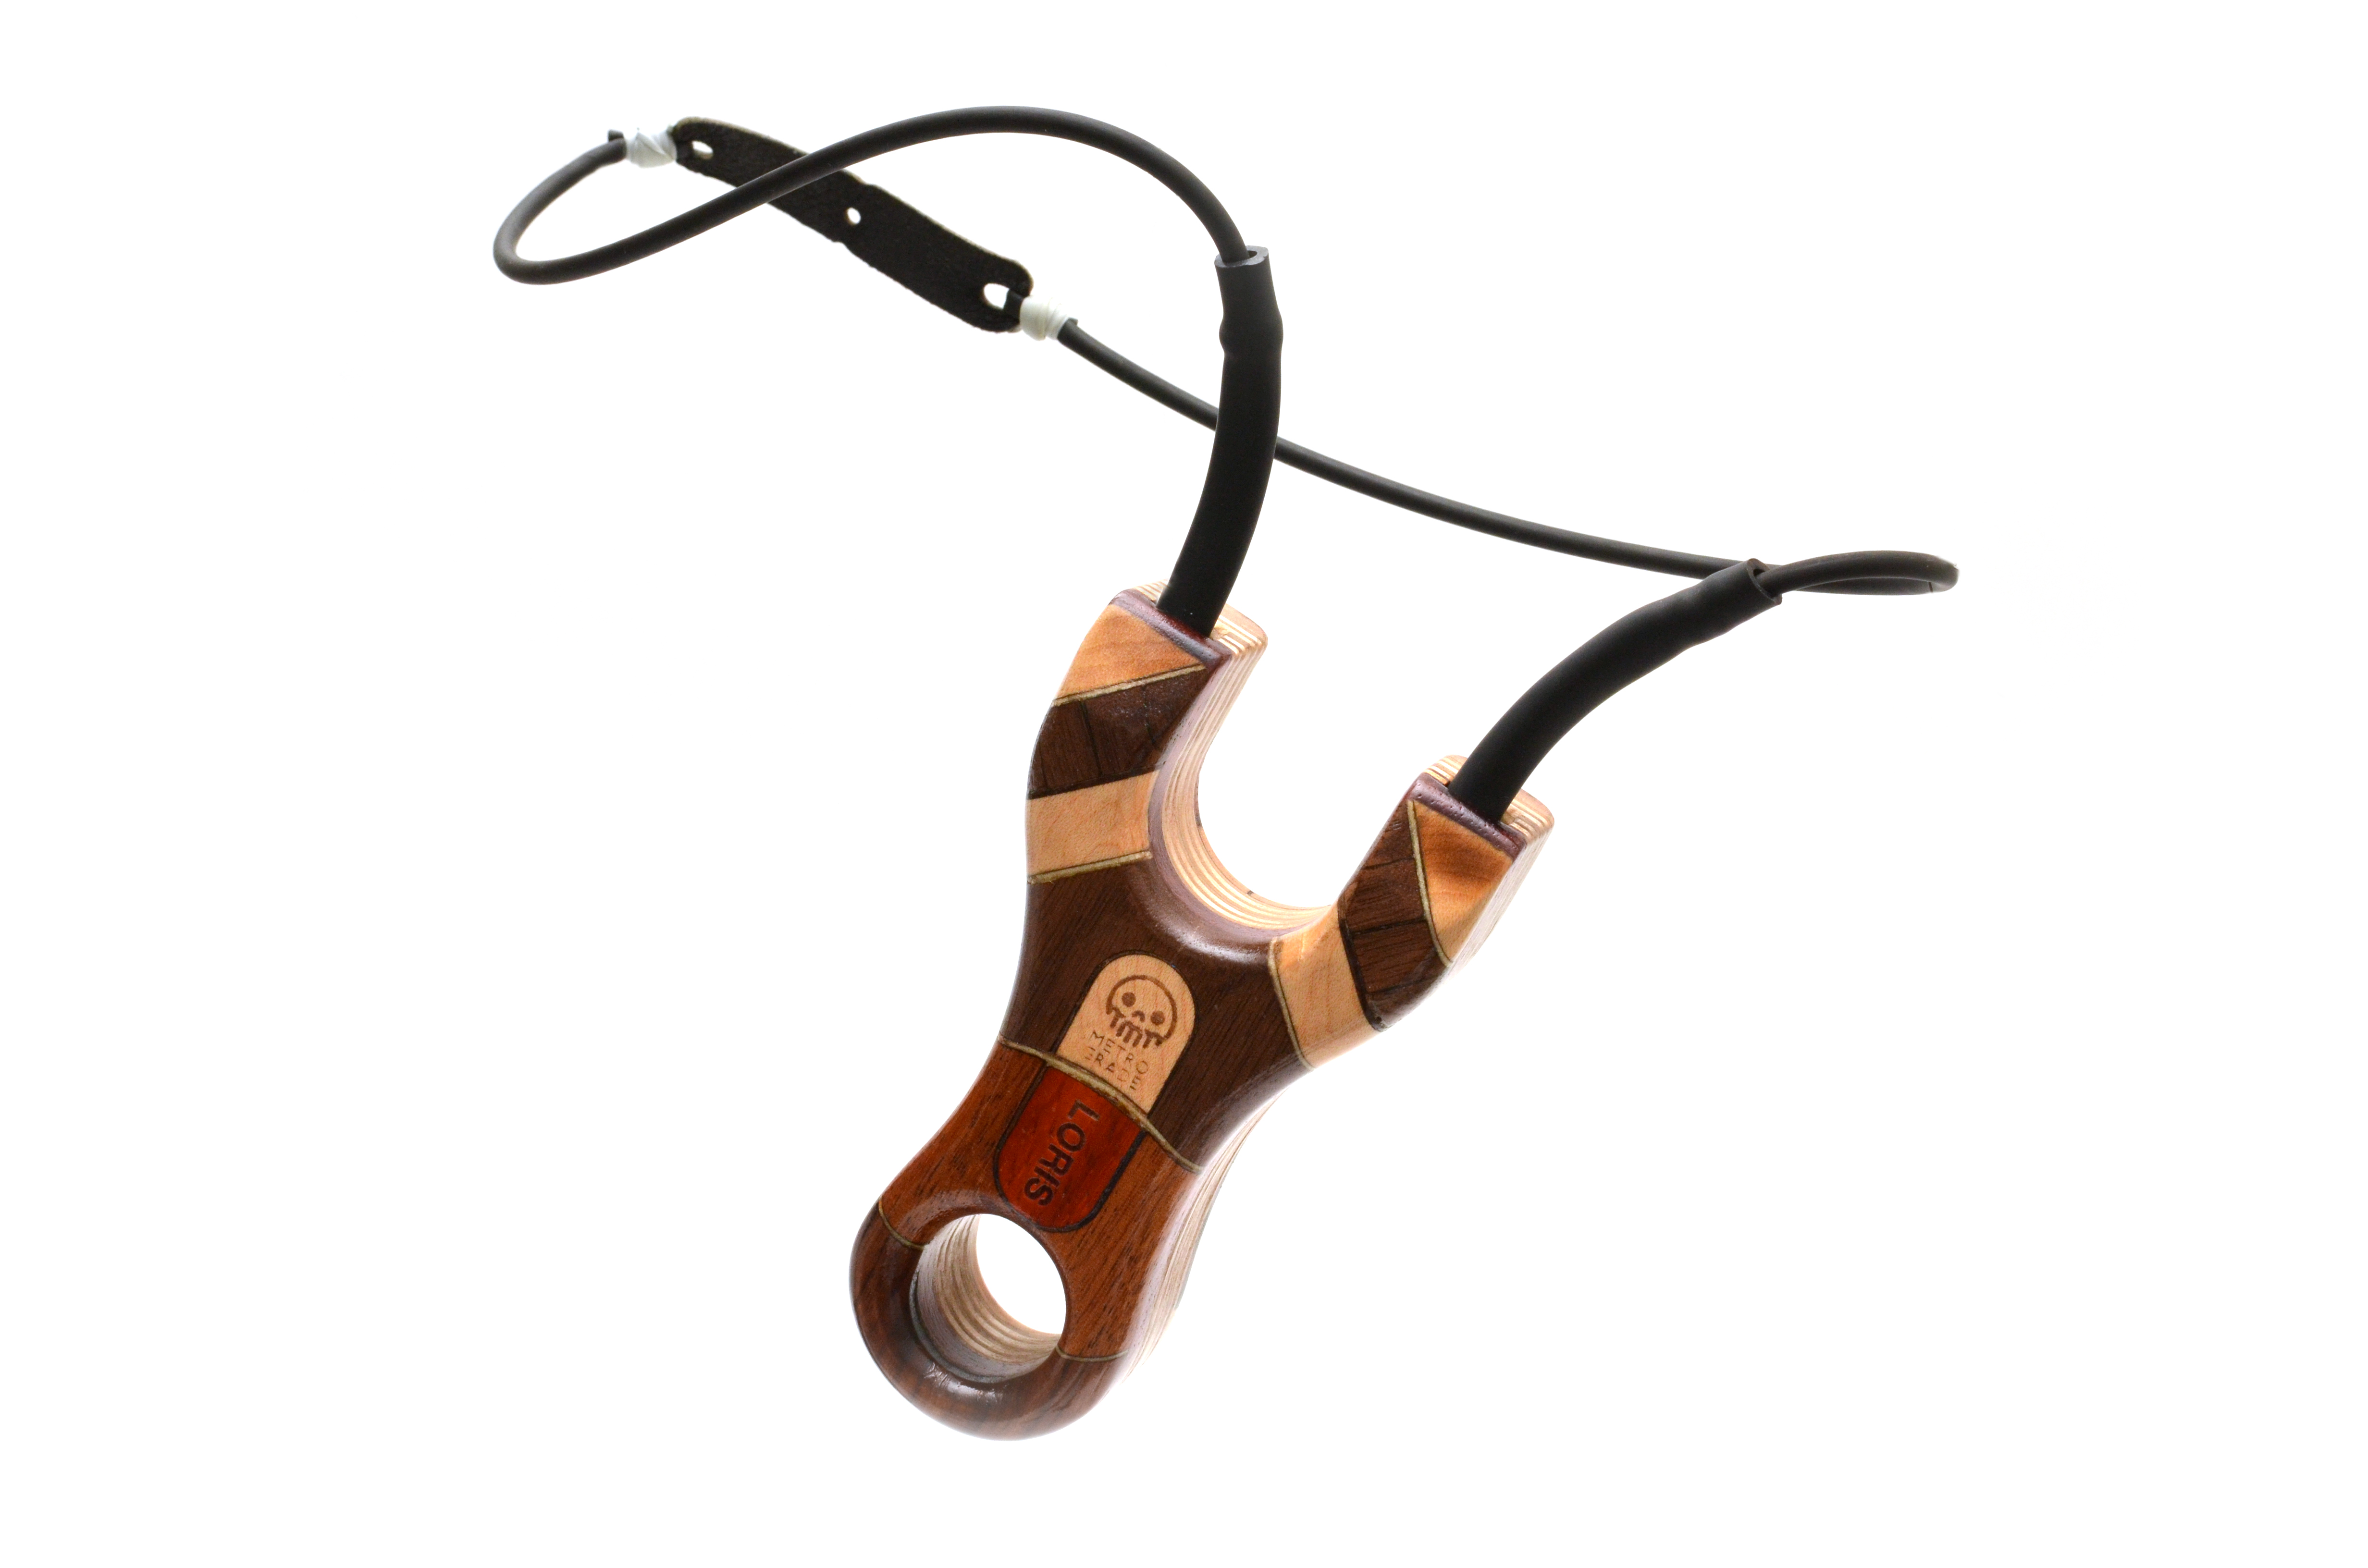
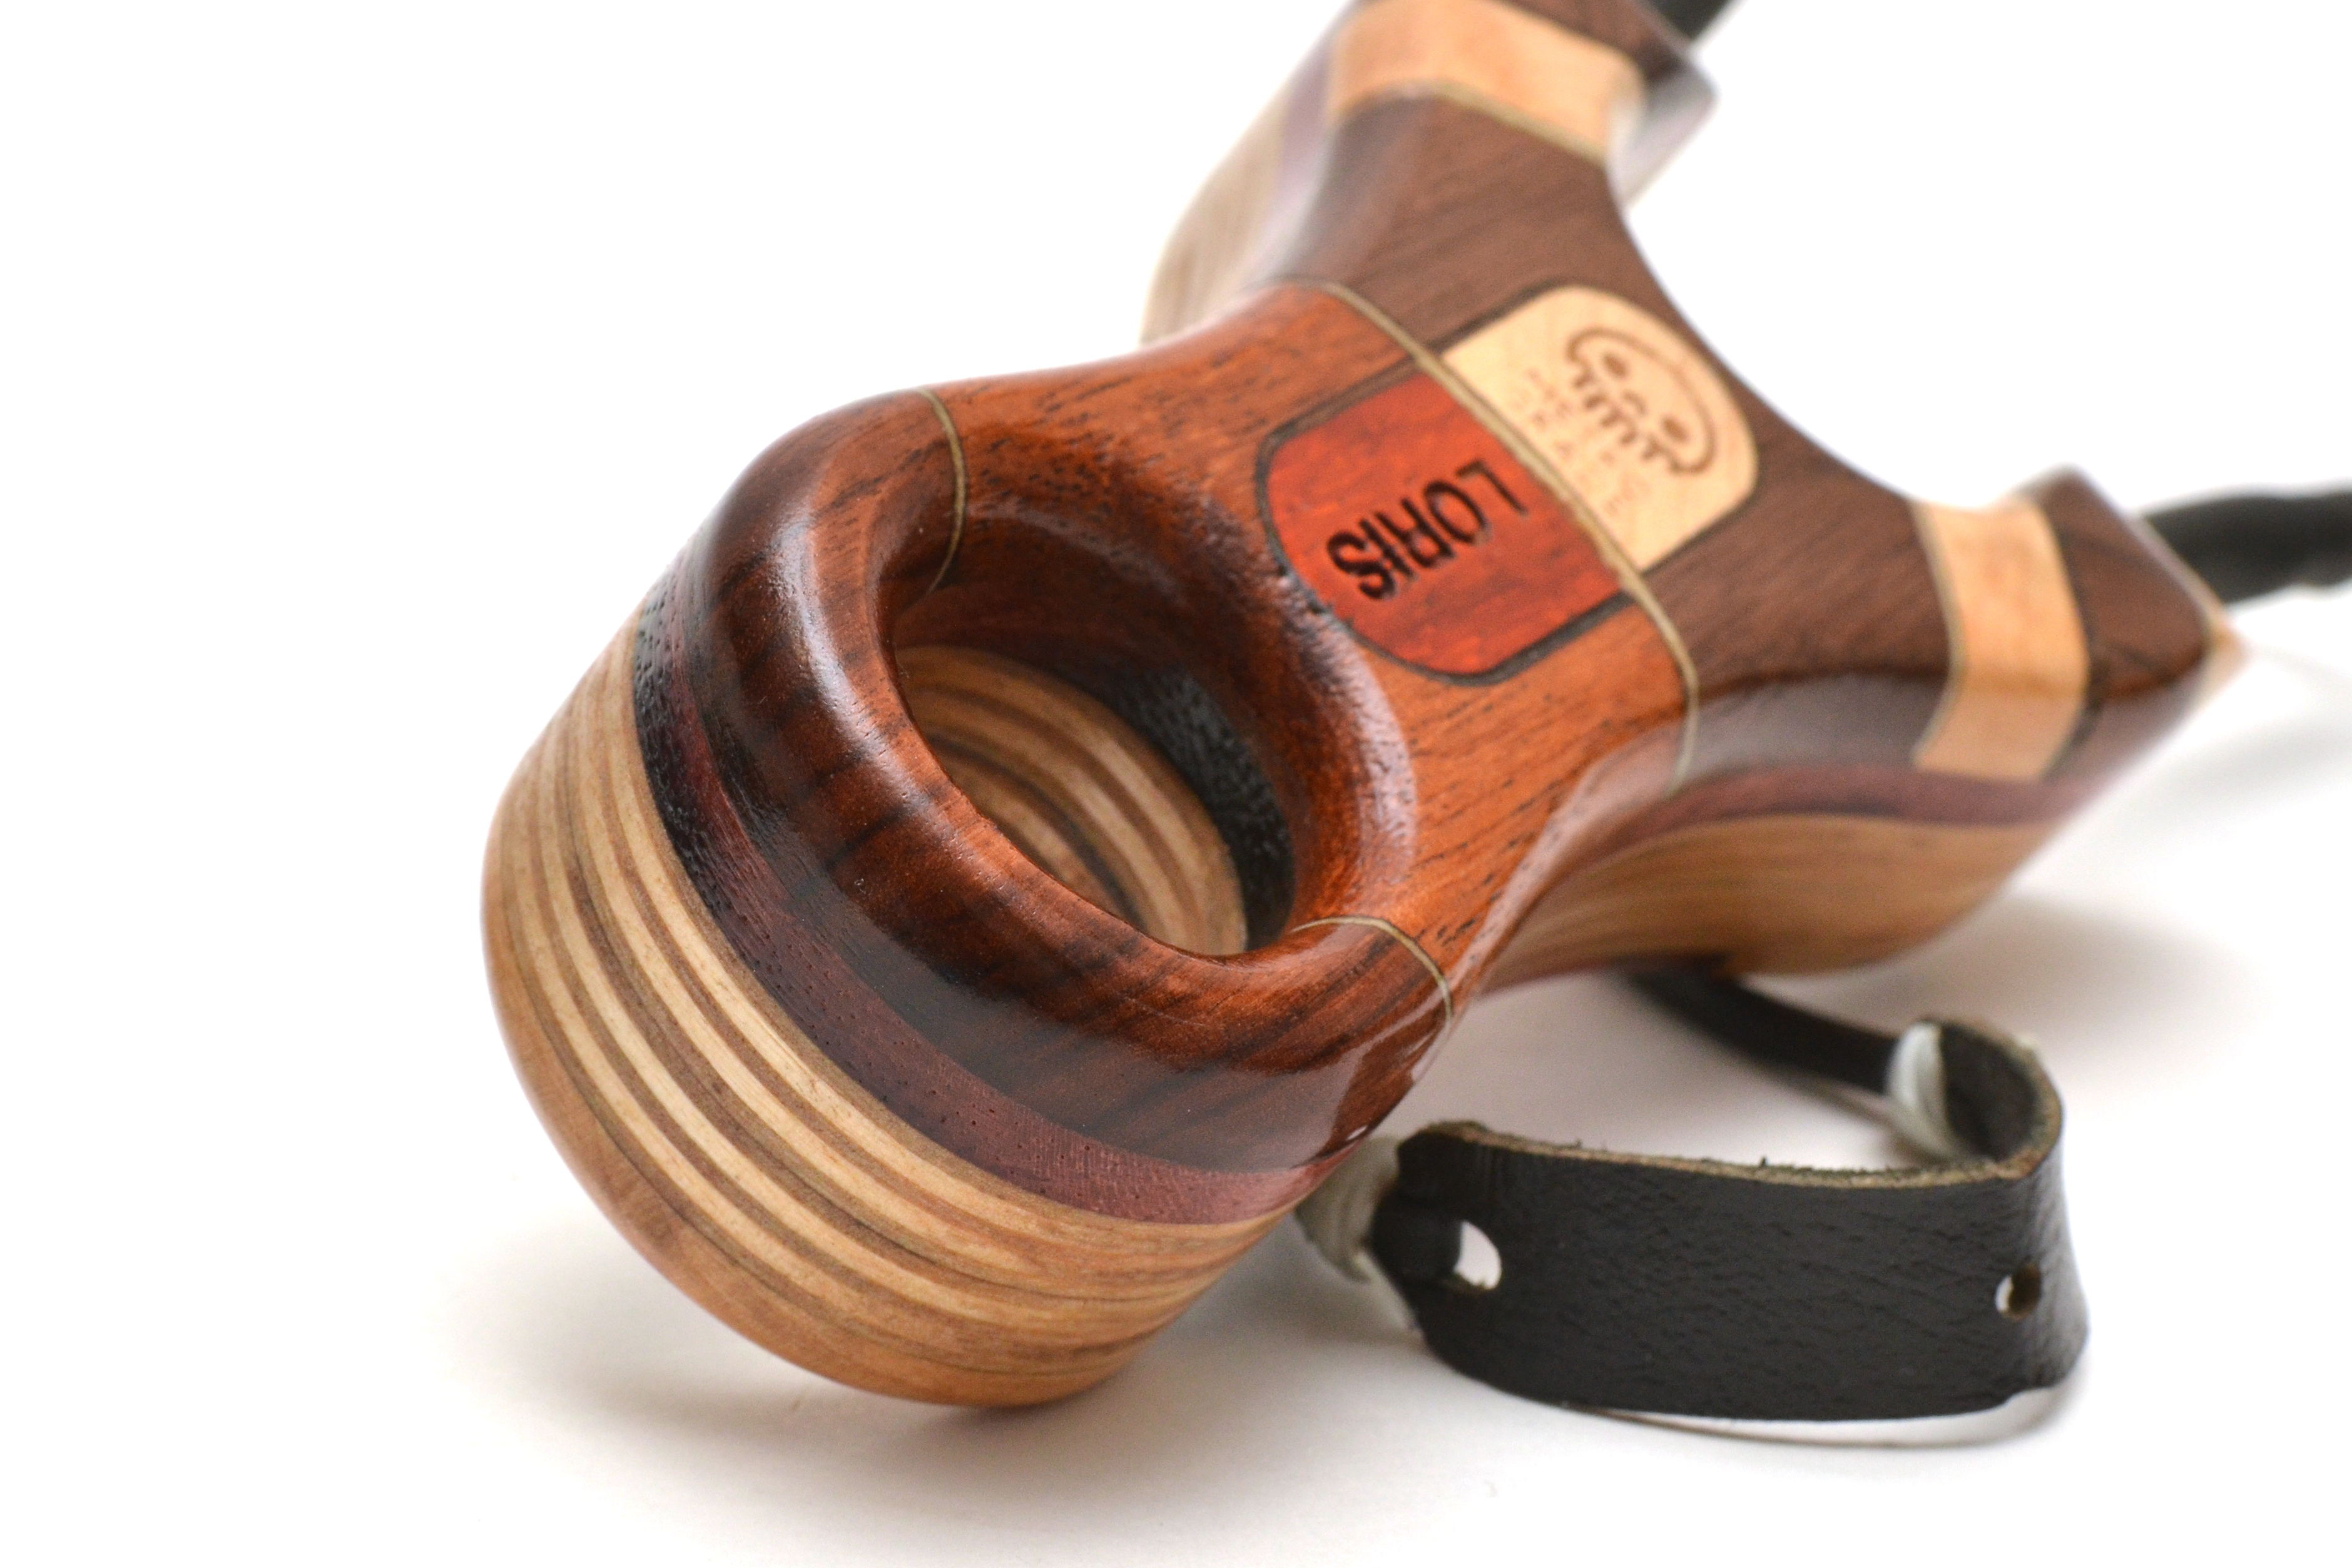
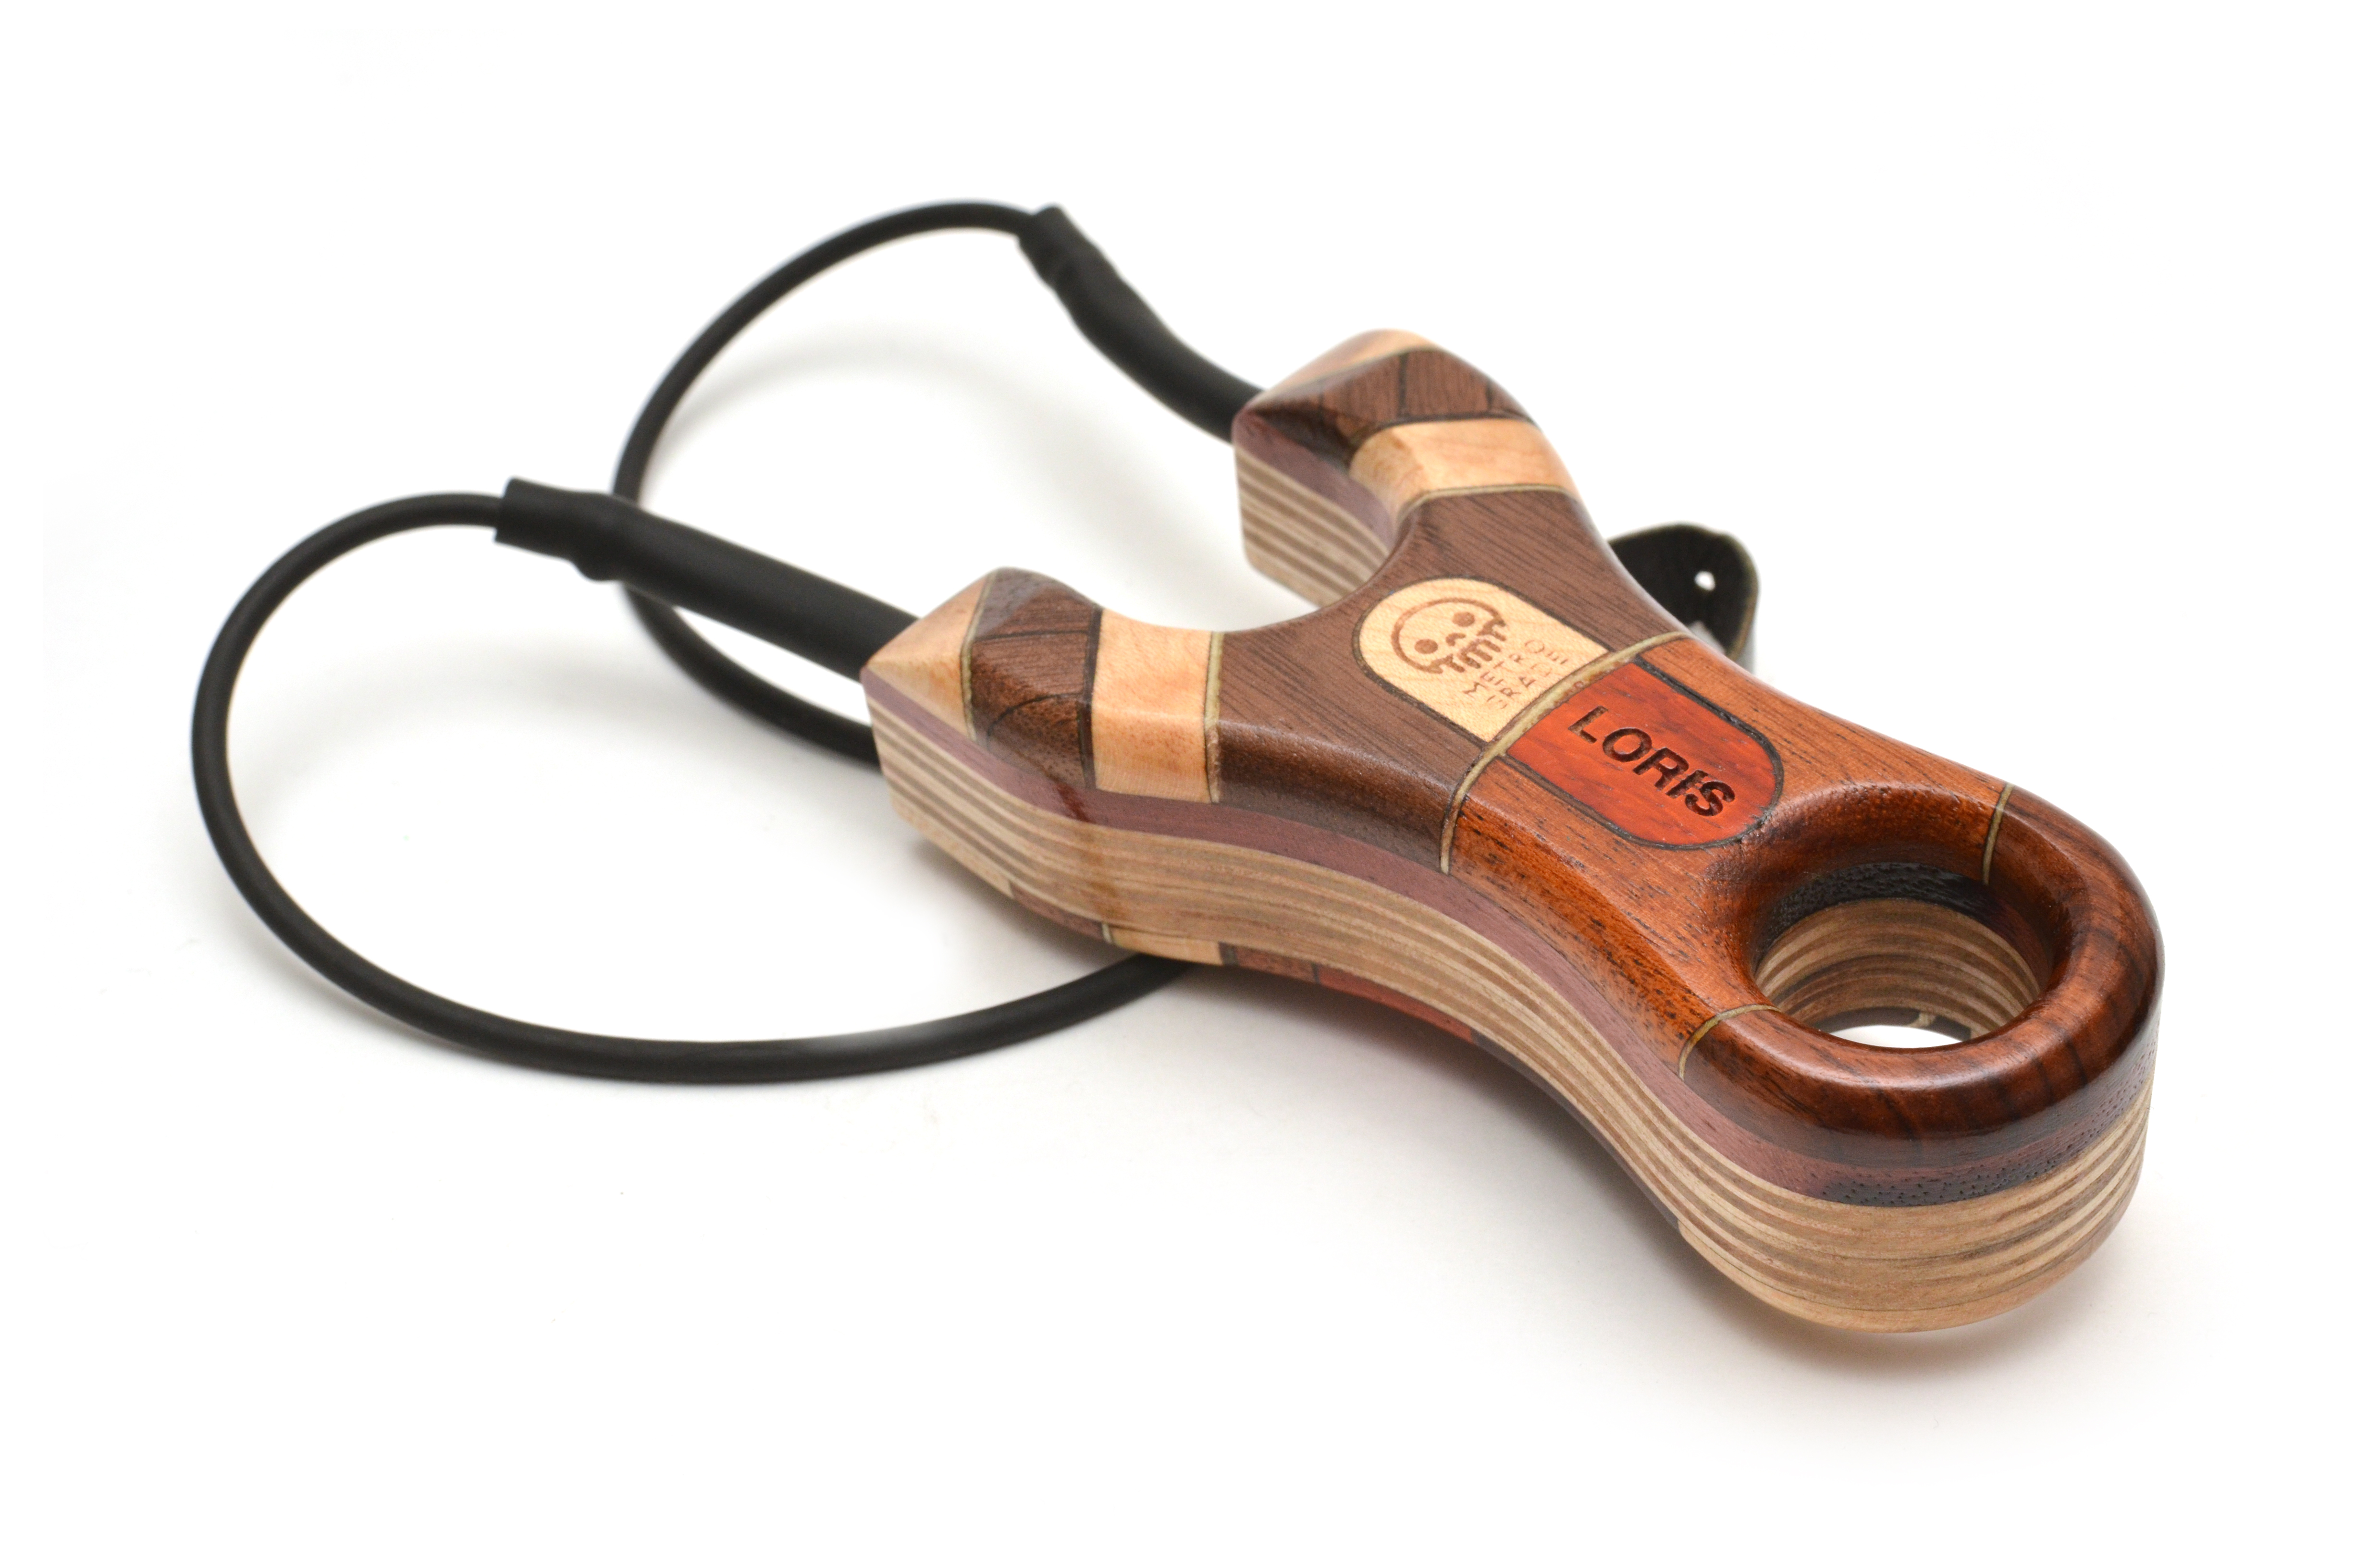
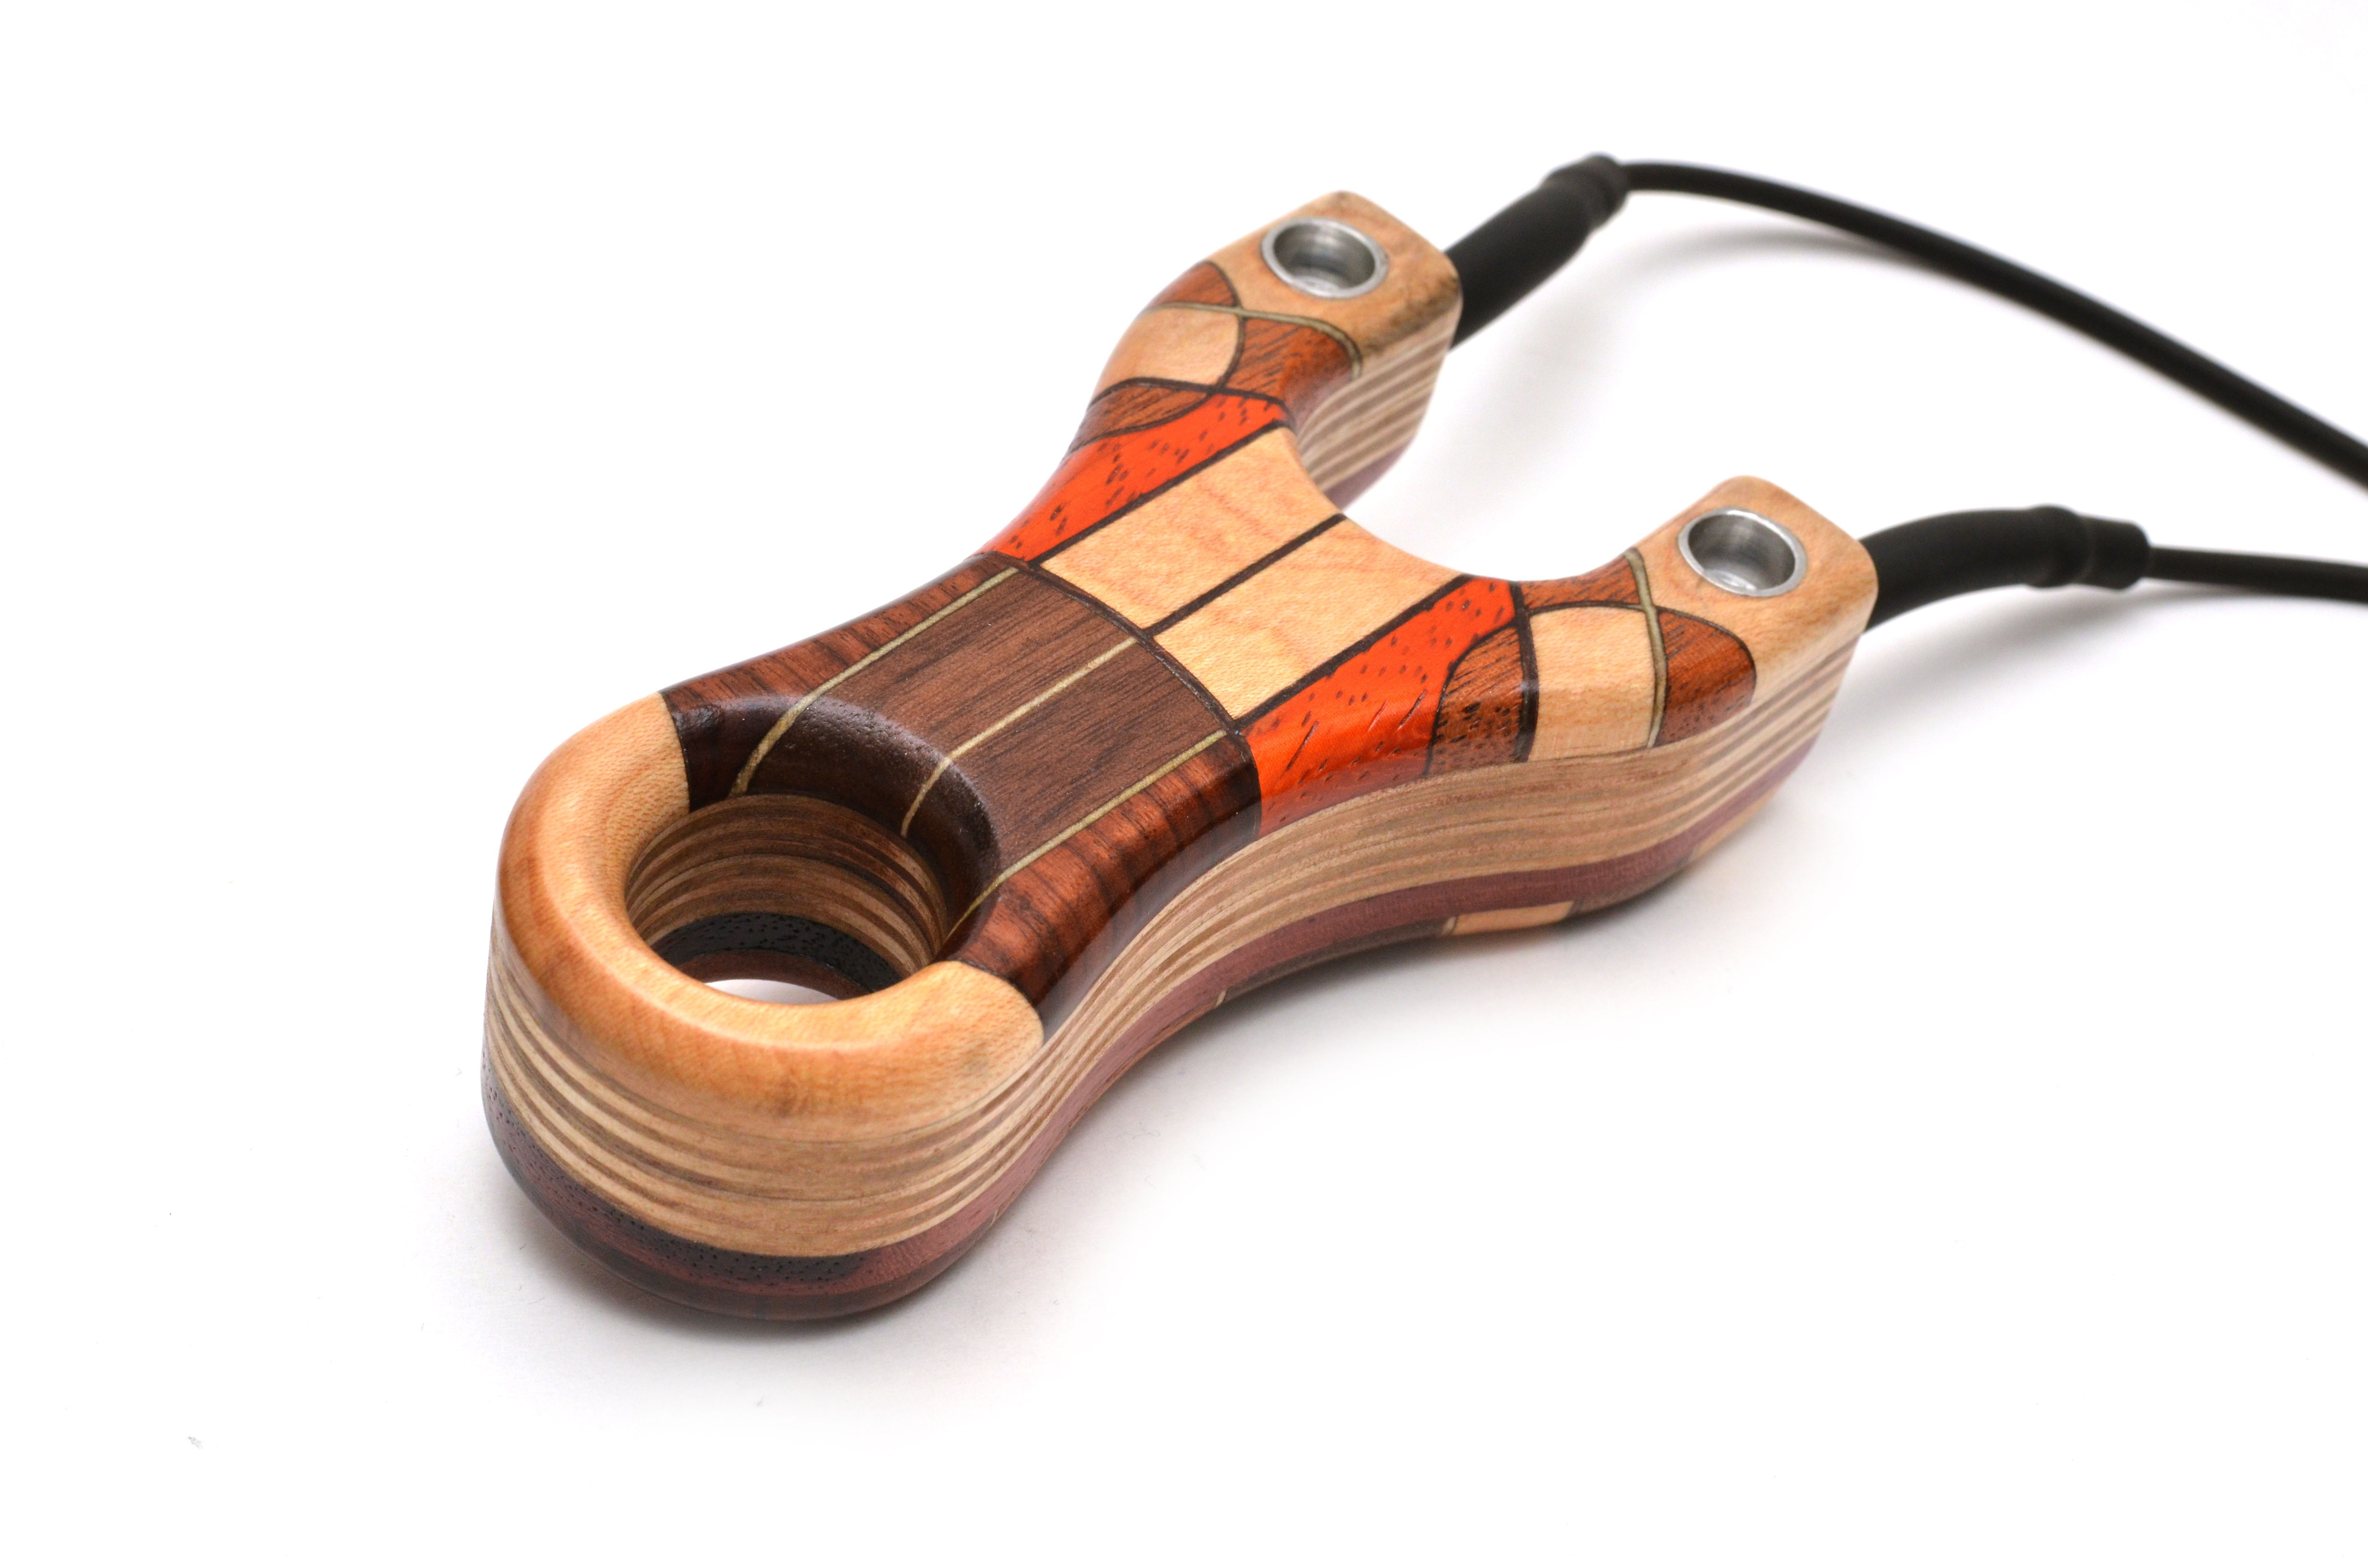
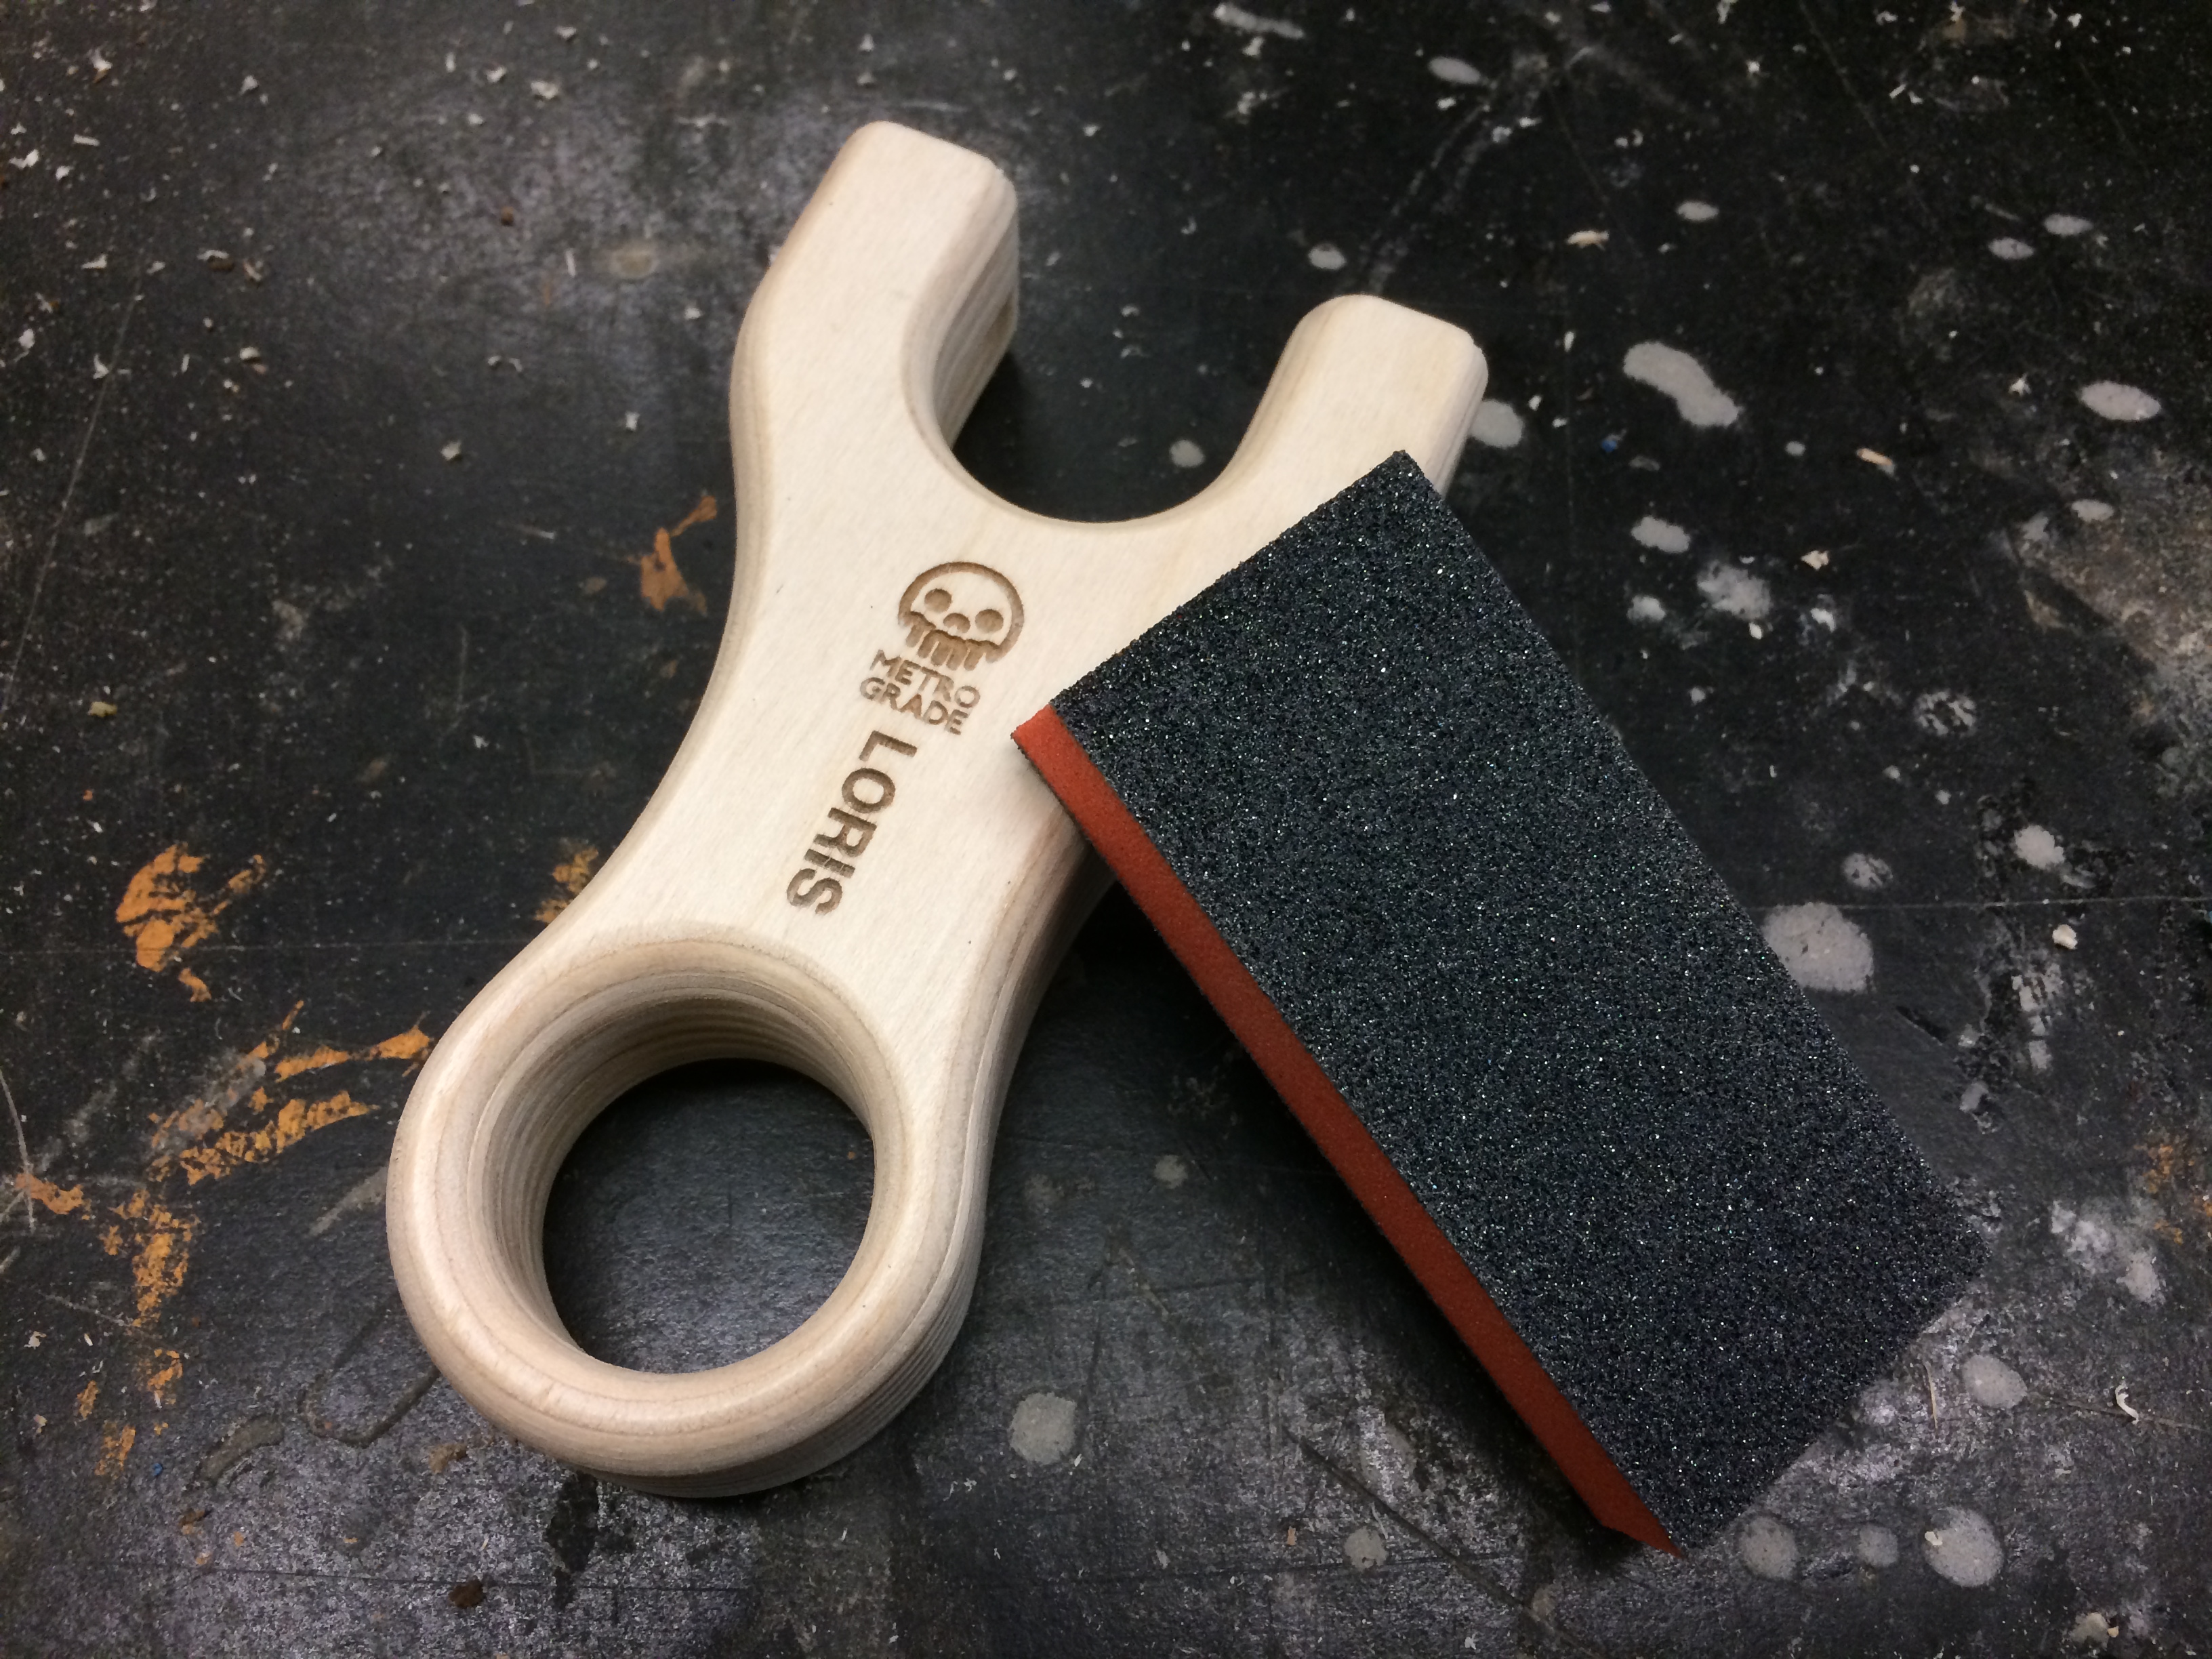
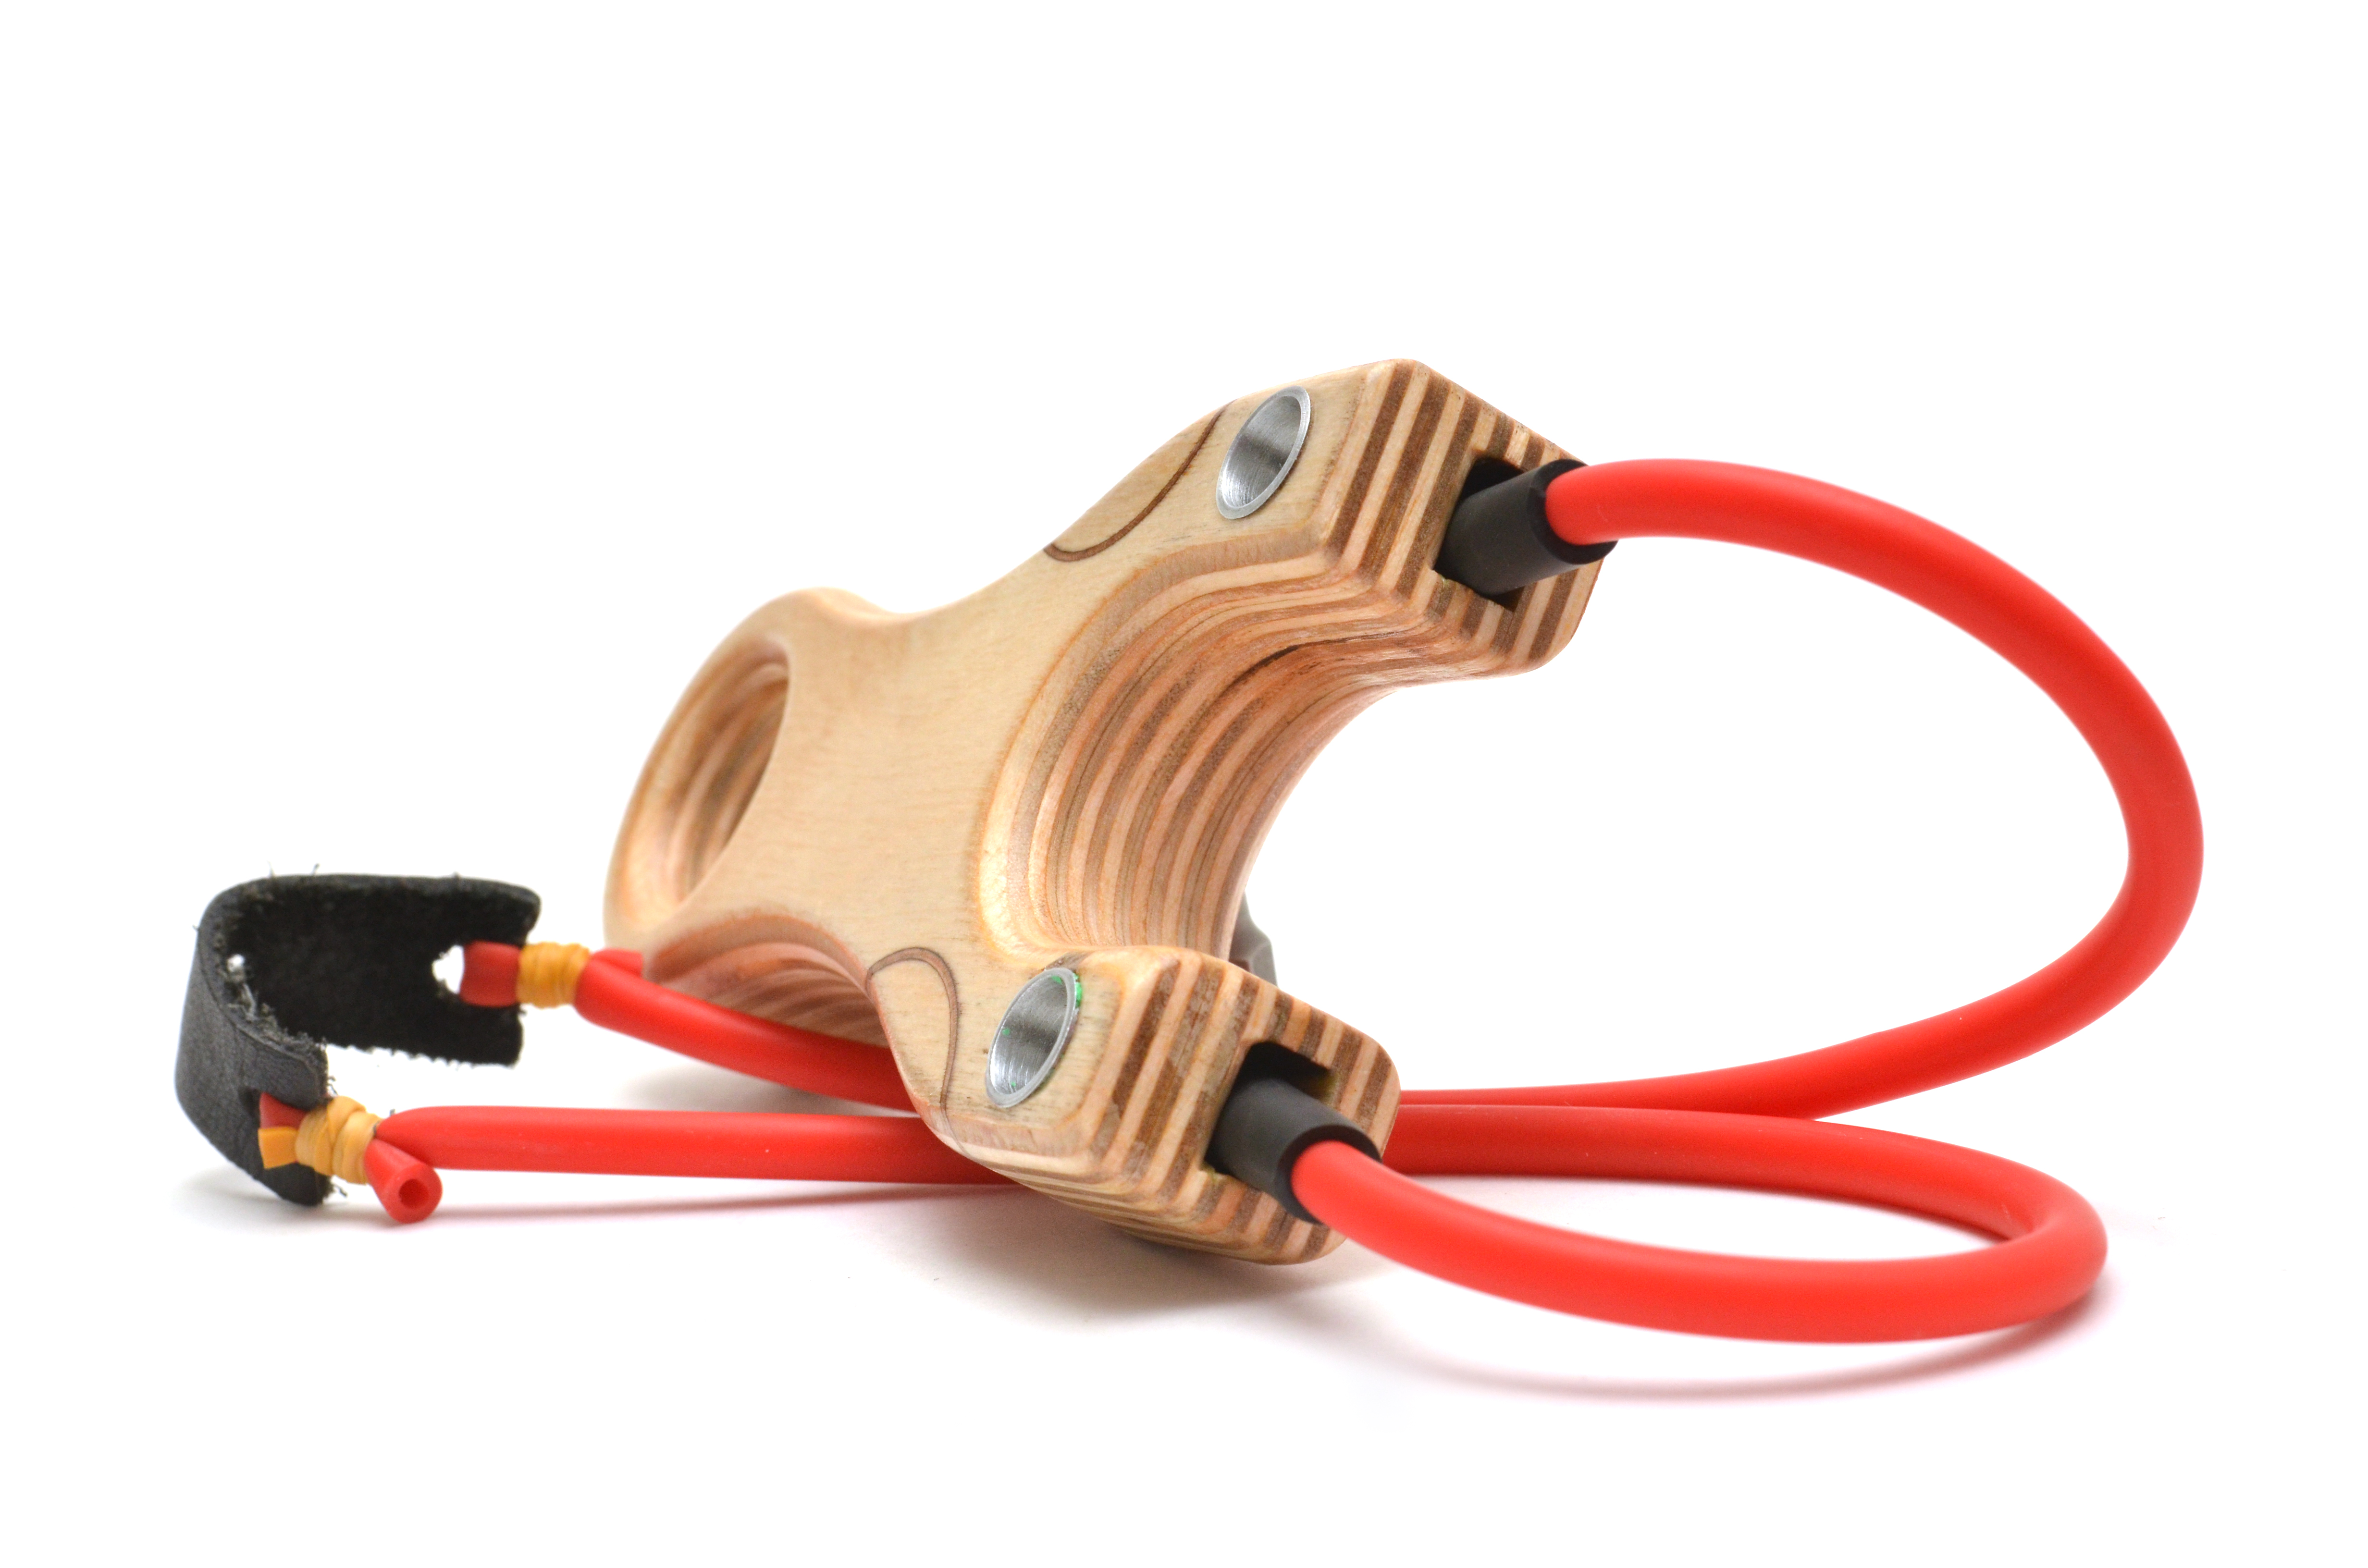
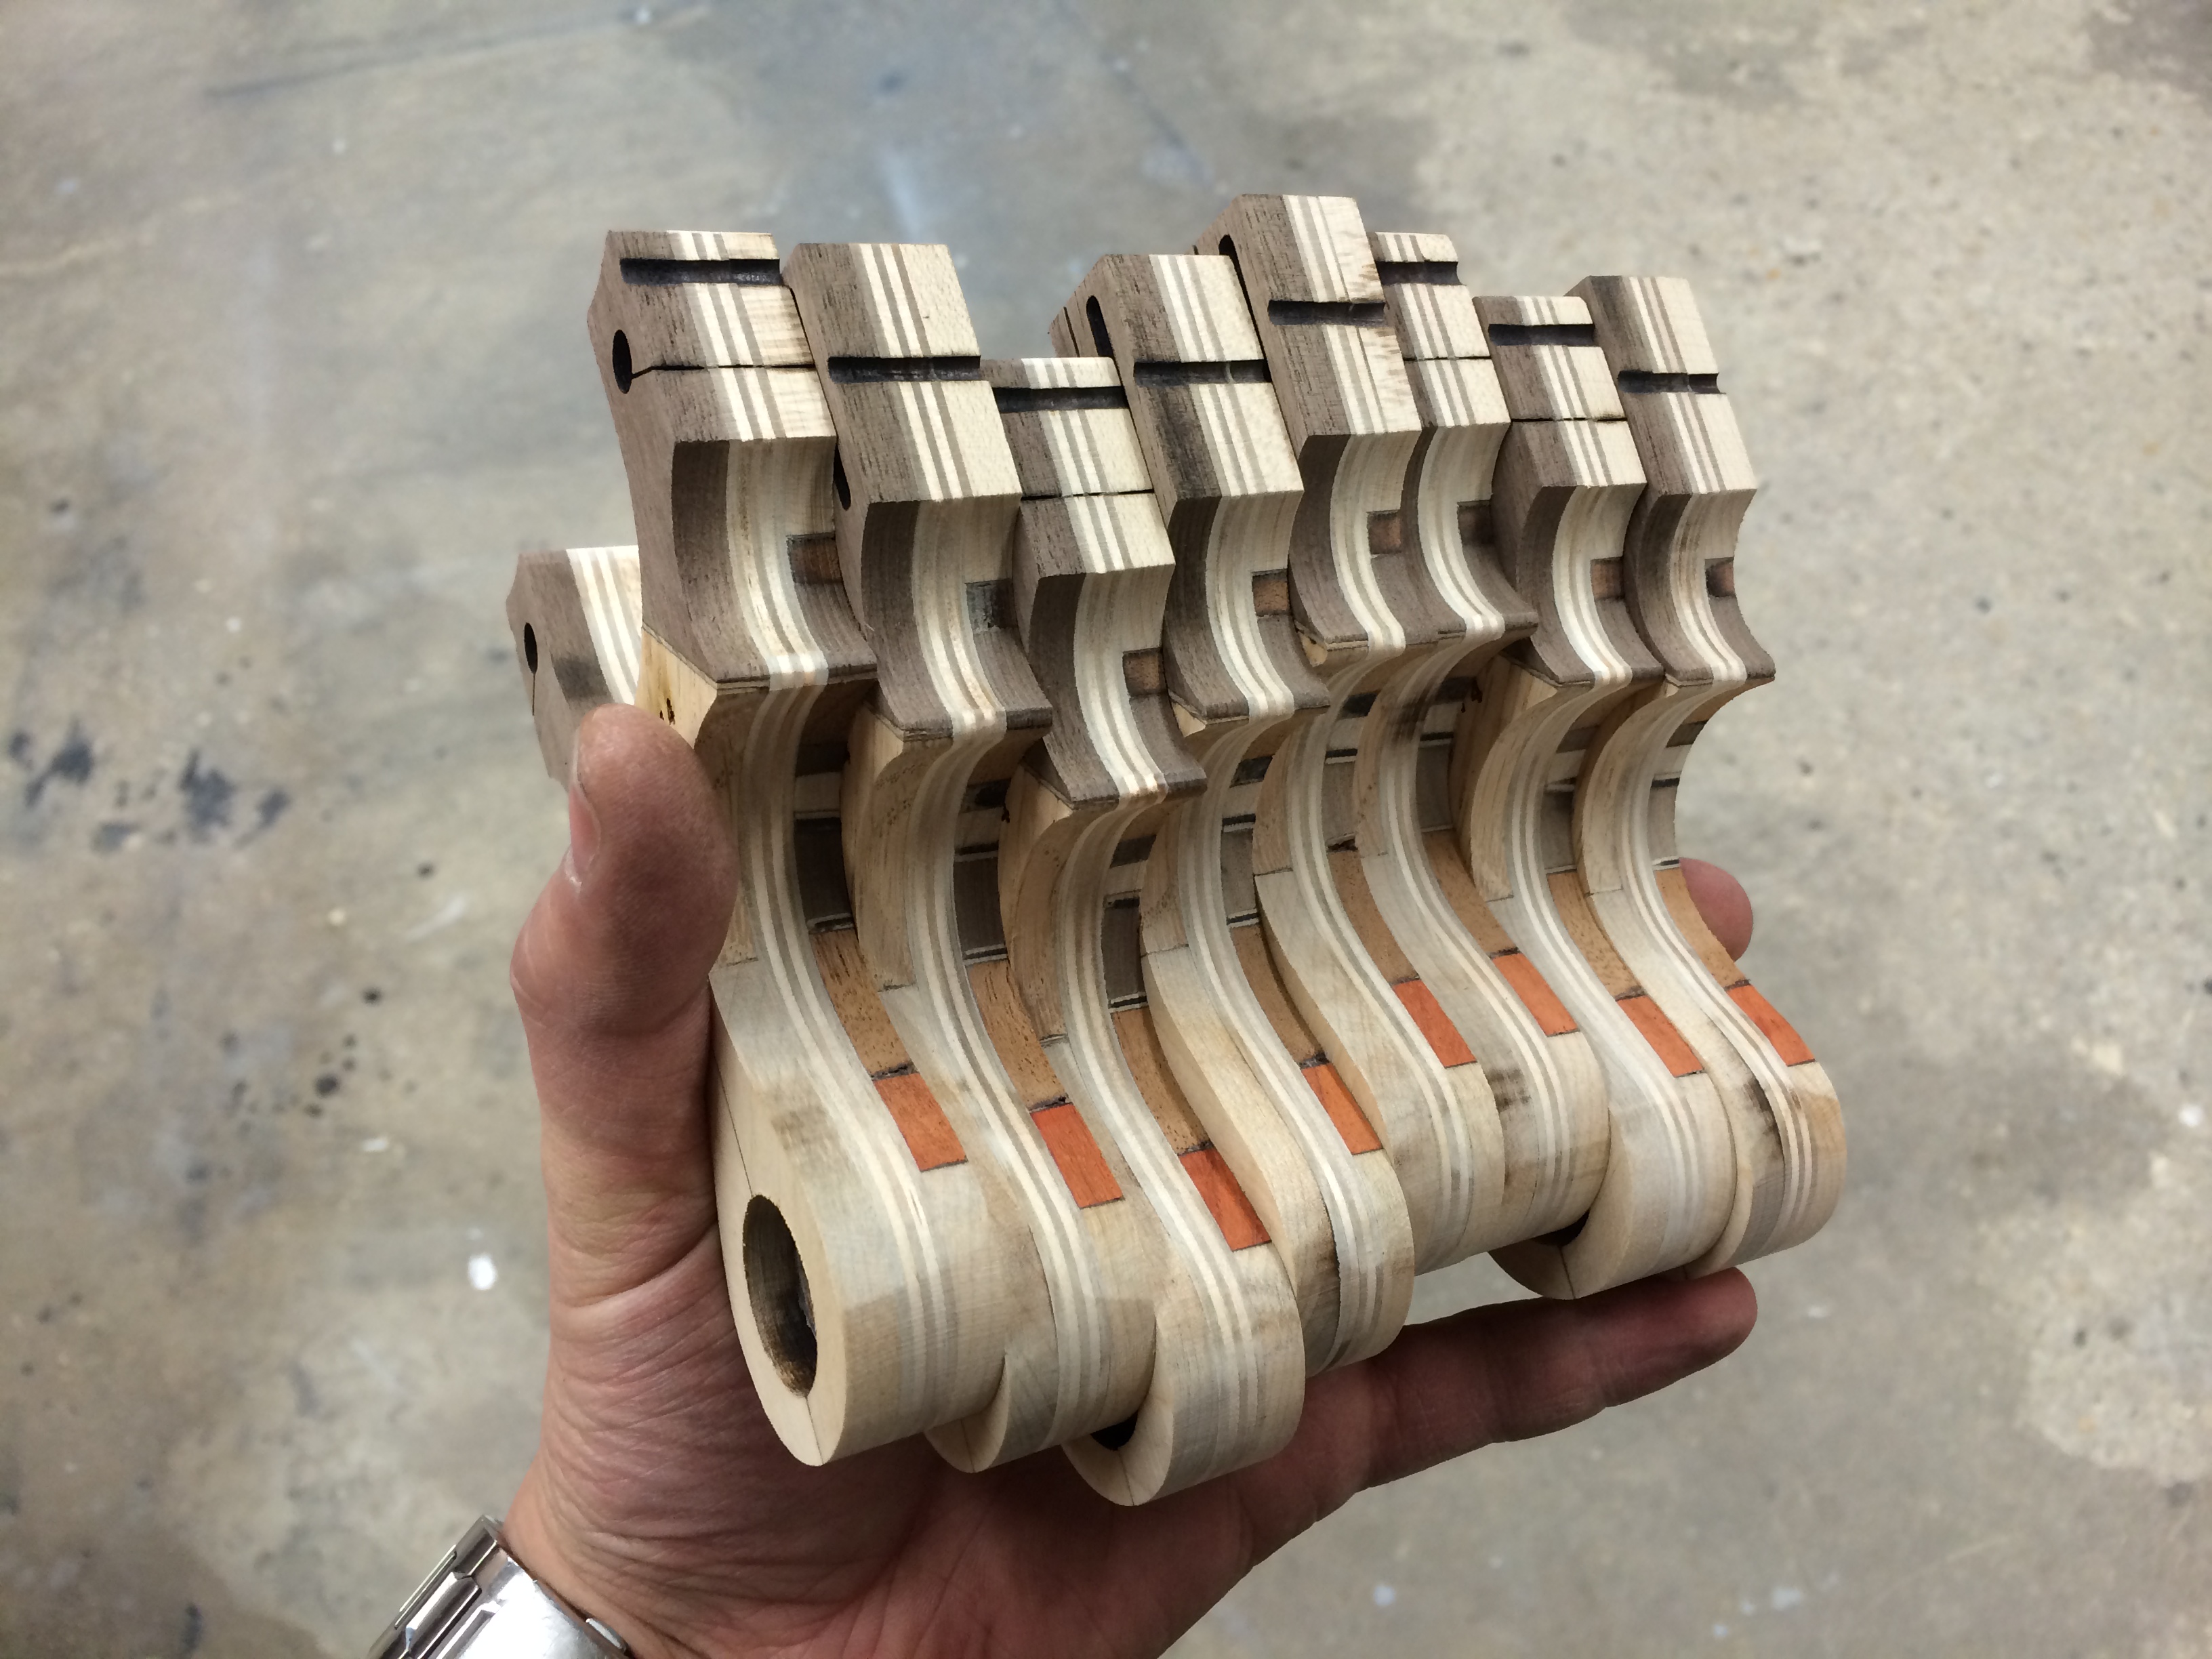
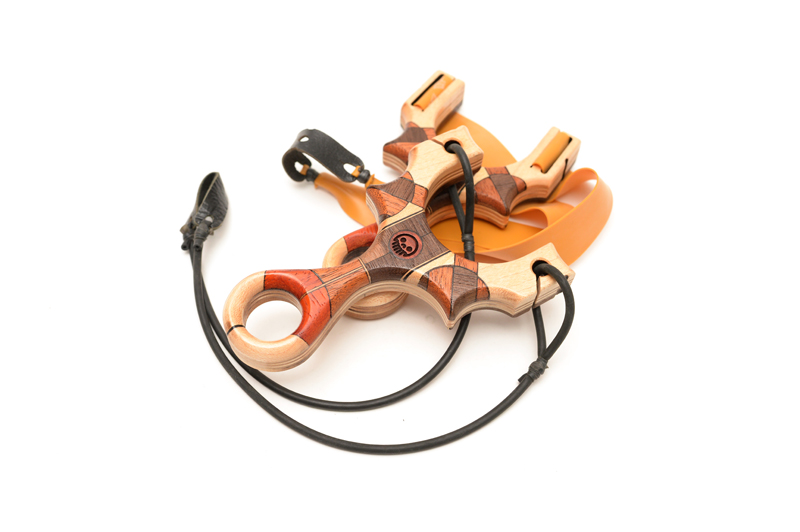
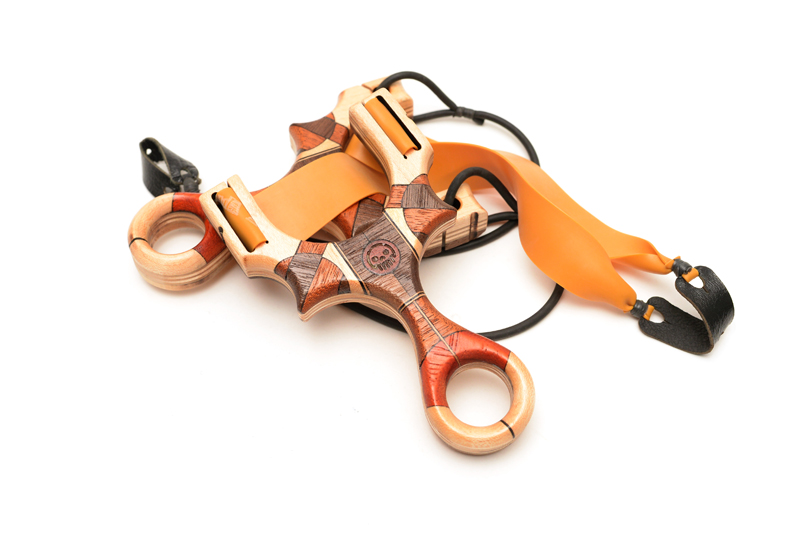
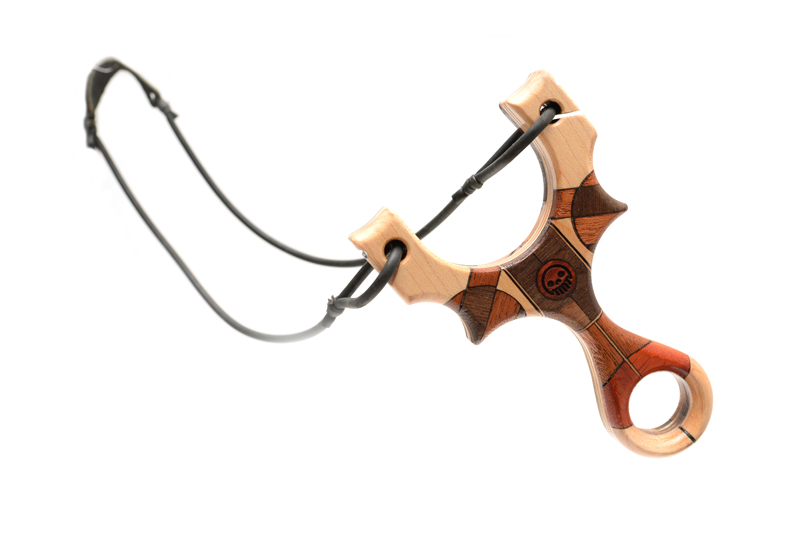
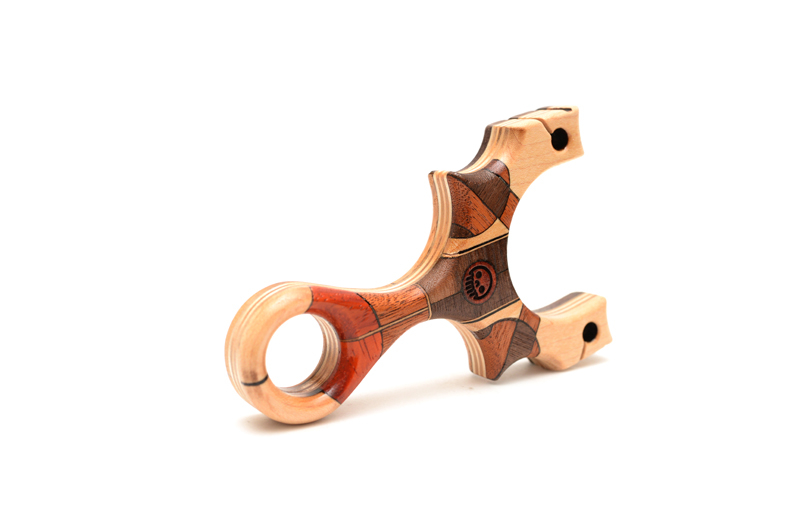
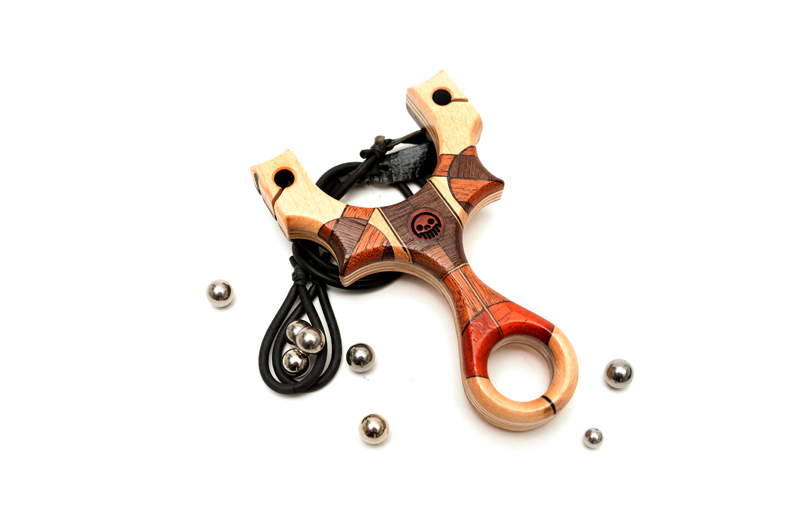
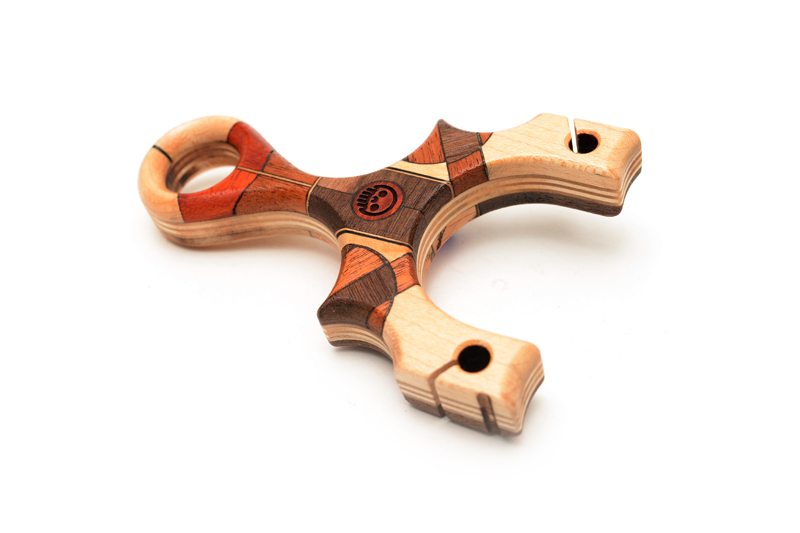
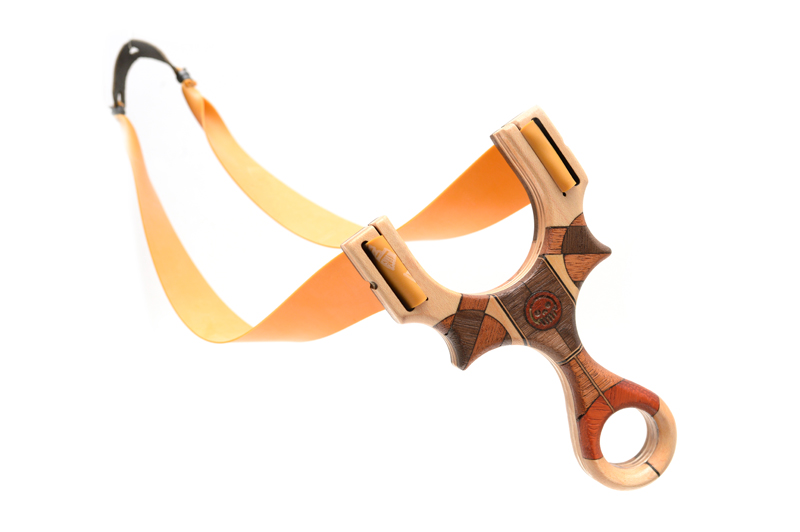
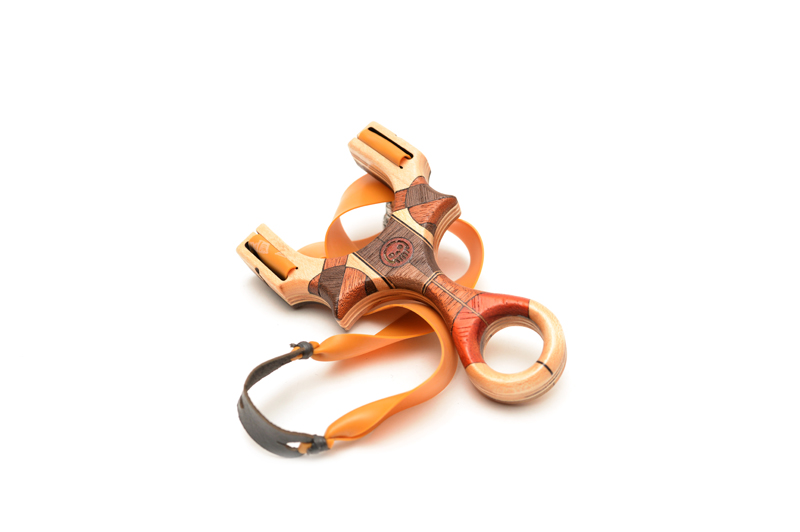
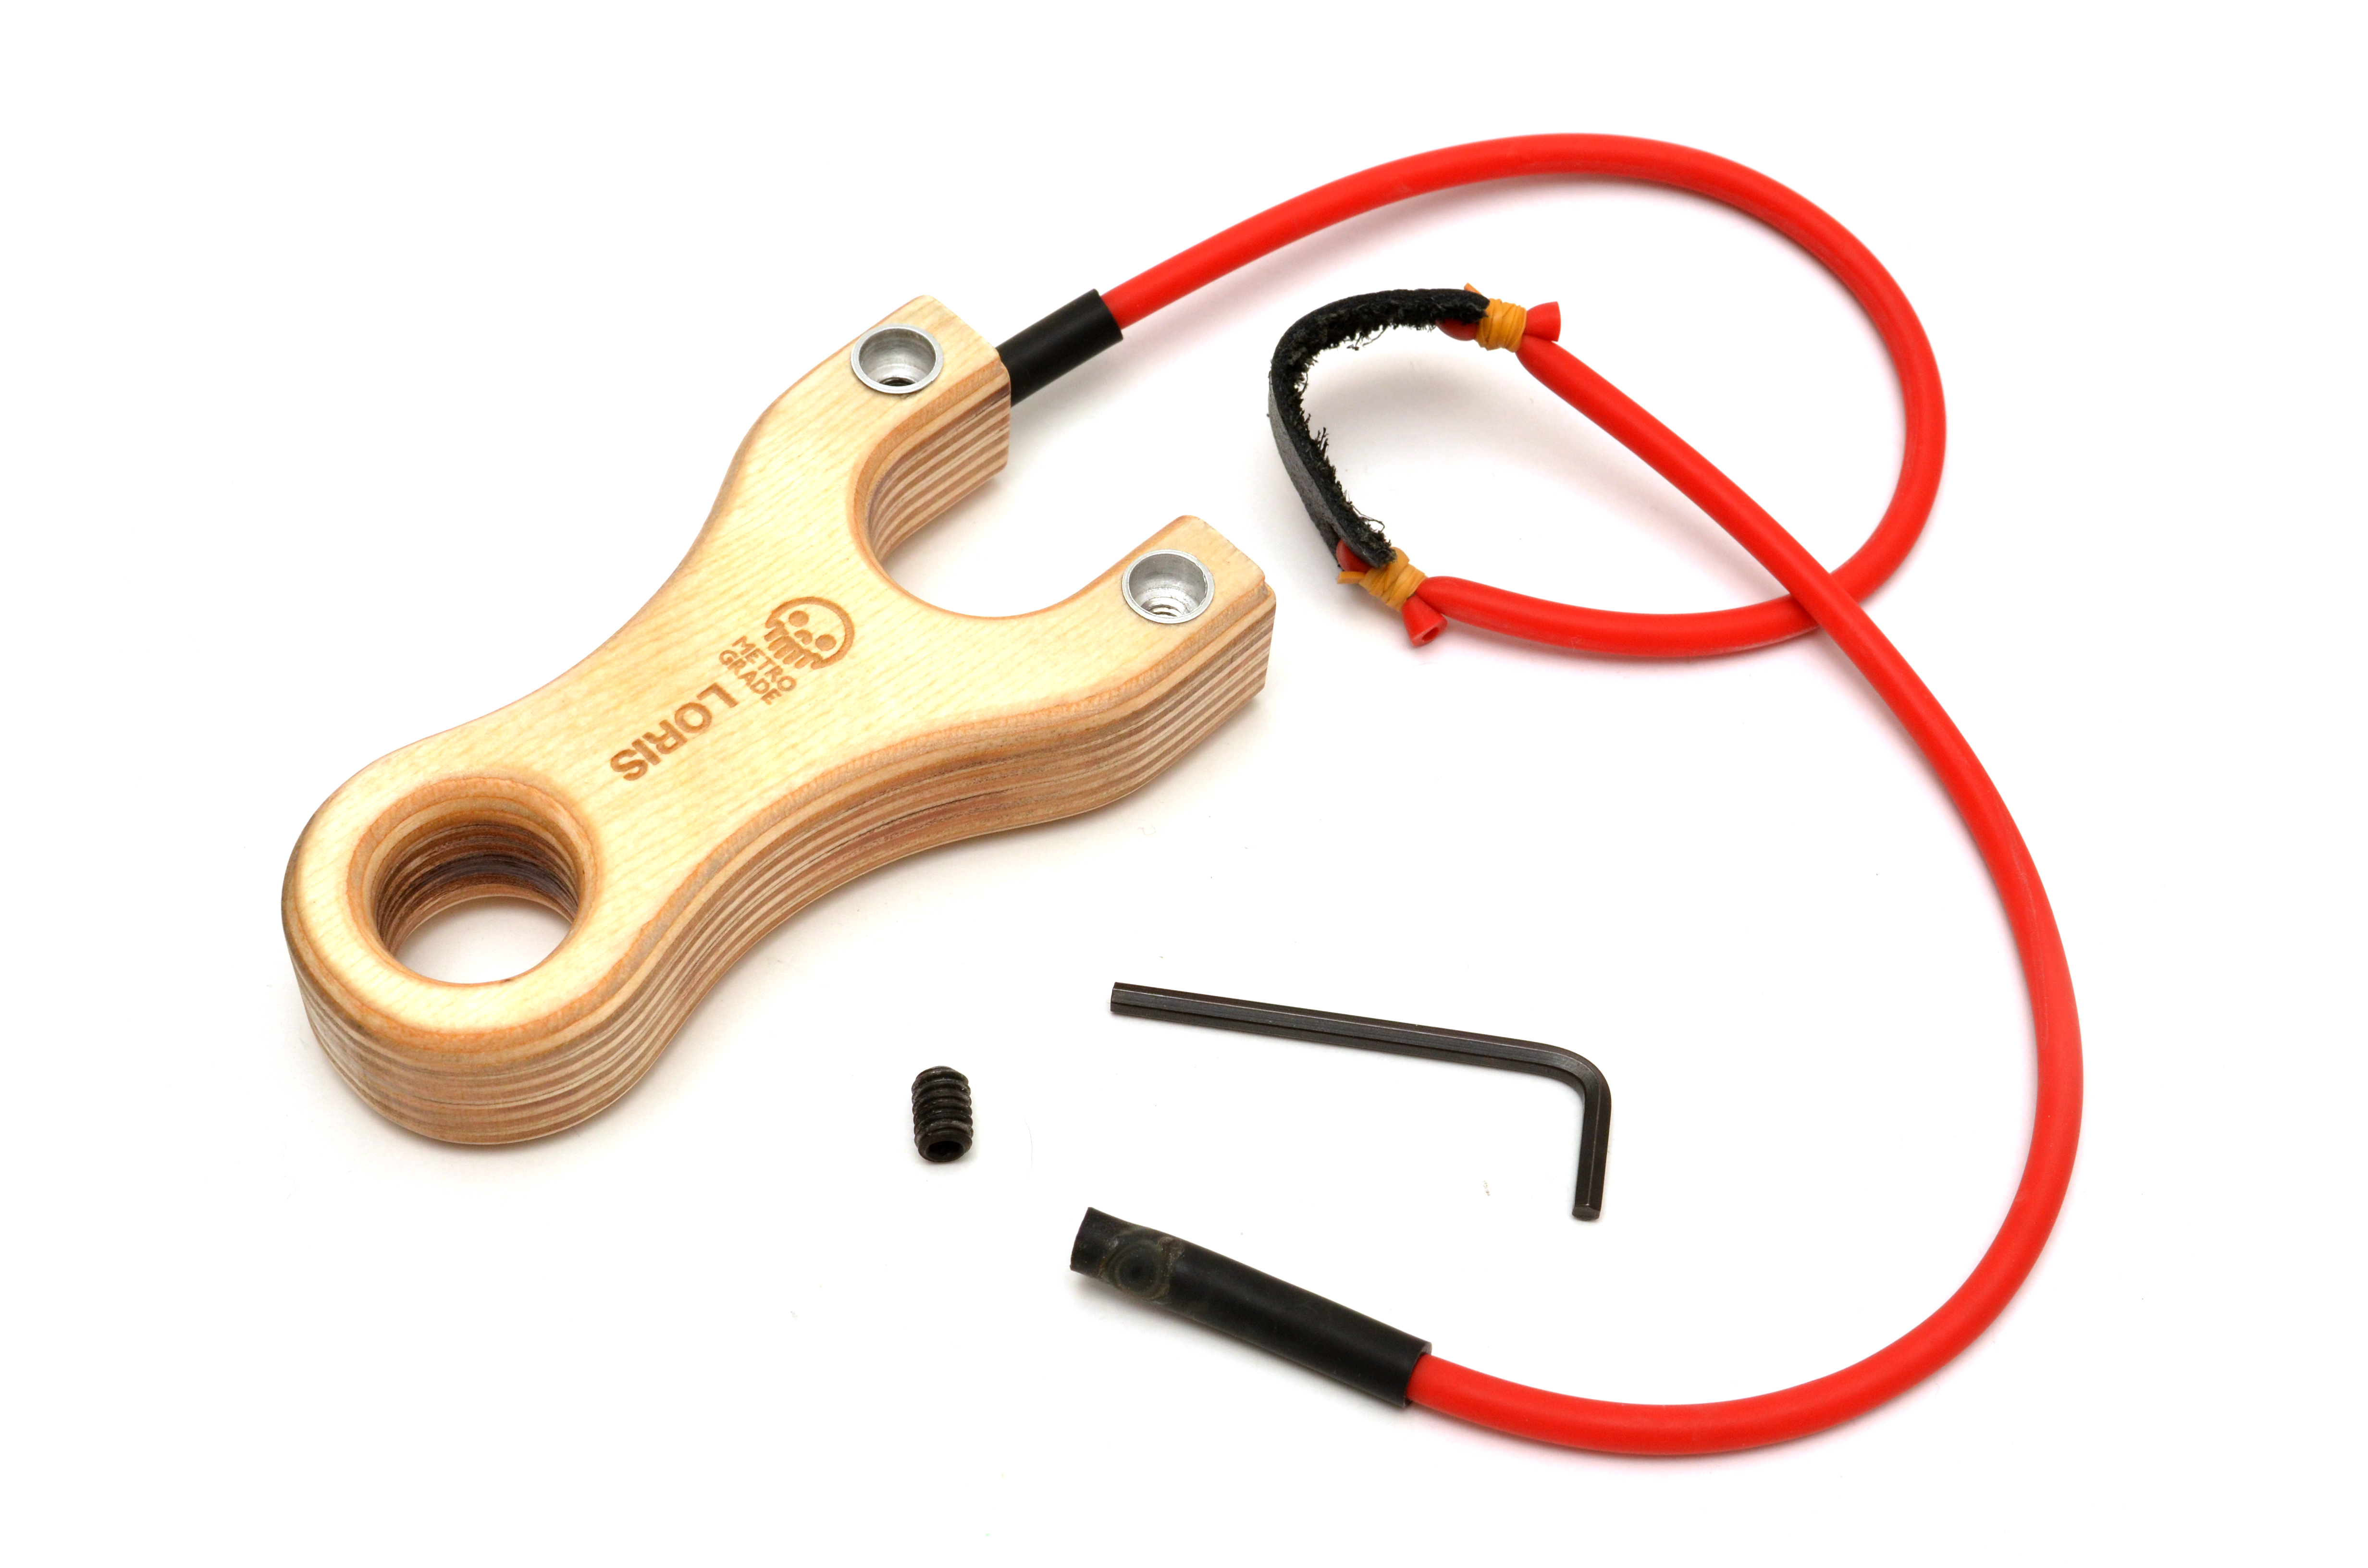
Sometimes you just gotta. Made from over 60 individual parts, the Art Deco Loris follows the visual lines and definition of colour of the art in the 1930’s and 40’s. Made from a variety of exotic and local hardwoods, the Art Deco Loris PFS was a labor of love.
Crafted from Rock Maple, Honduran Mahogany, American Walnut, Rosewood, Purple Heart, Paduak with Oak/Mahogany/Walnut/Birch Veneer spacers sandwiching a multilayerd Baltic birch plywood core, the Art Deco Loris PFS certainly was a complicated build.
This post is not really a build post but more of a showcase of both the final product and also the engineering behind the band attachments. To illustrate that much better, here’s a video on how it works:
Ok, so there was some build pics, c’mon, this was a lot of work!
As soon as the brass threaded inserts come in, I’ll make up some Lorises for sale!
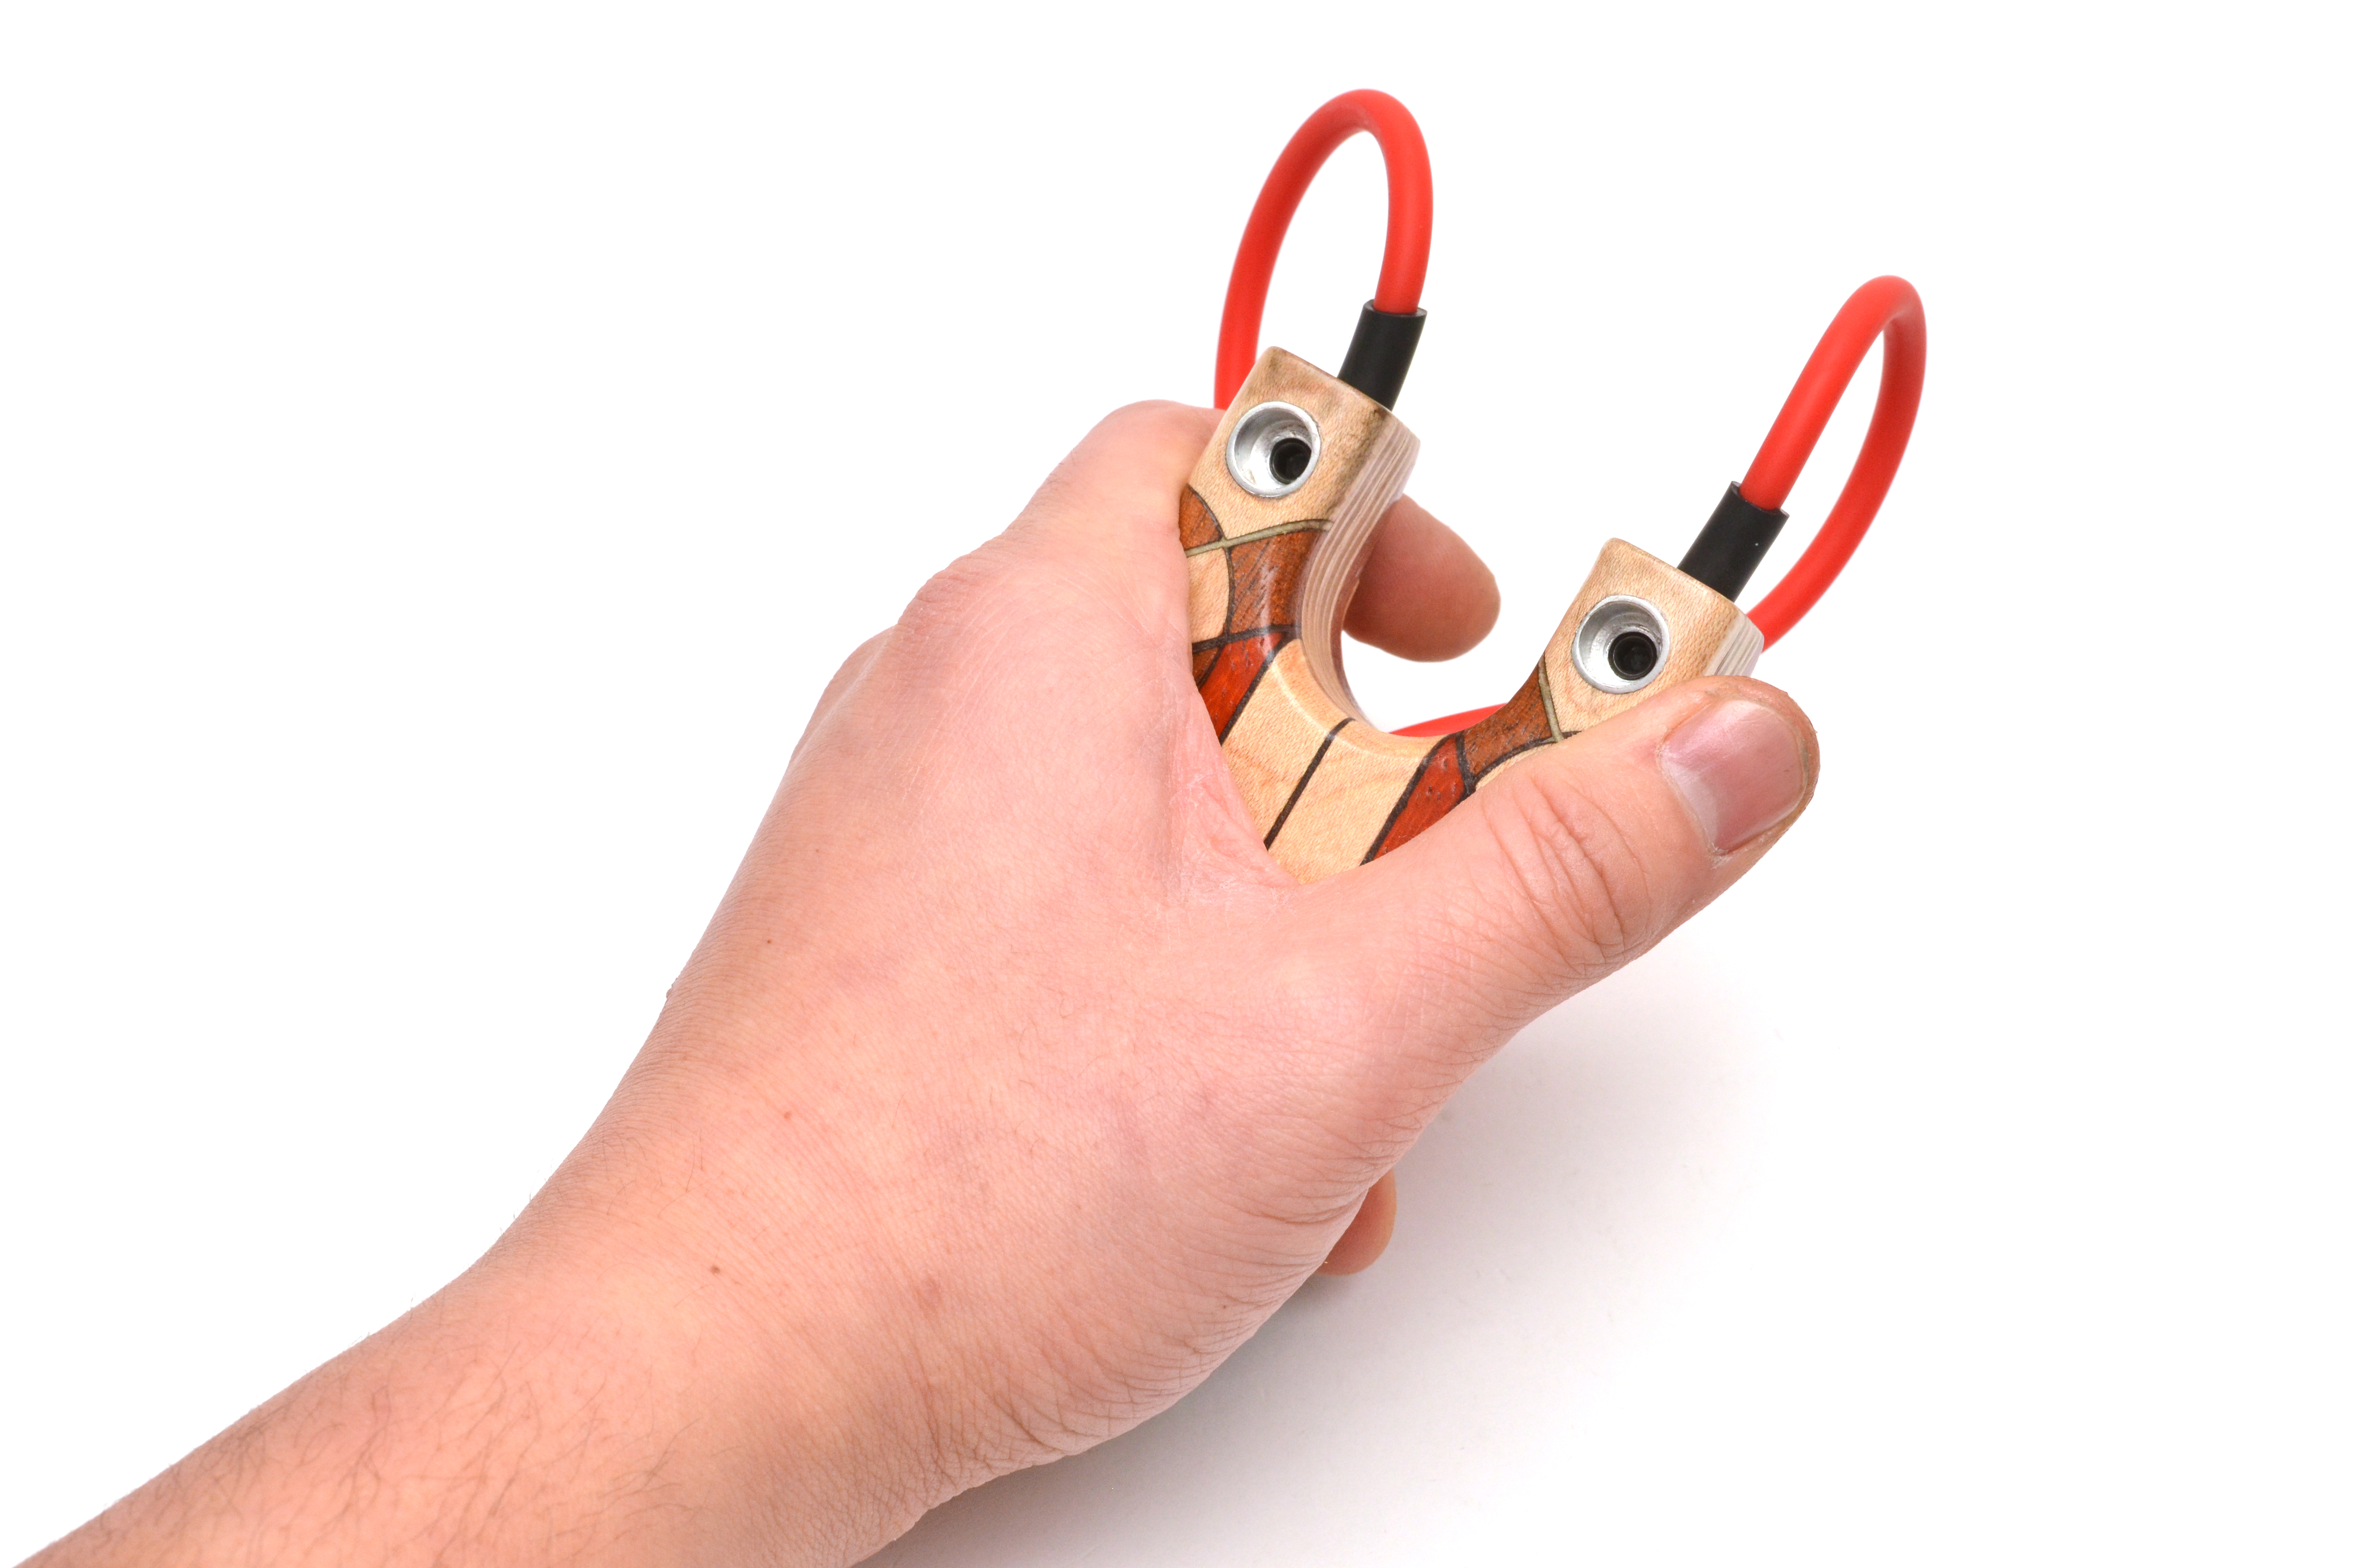
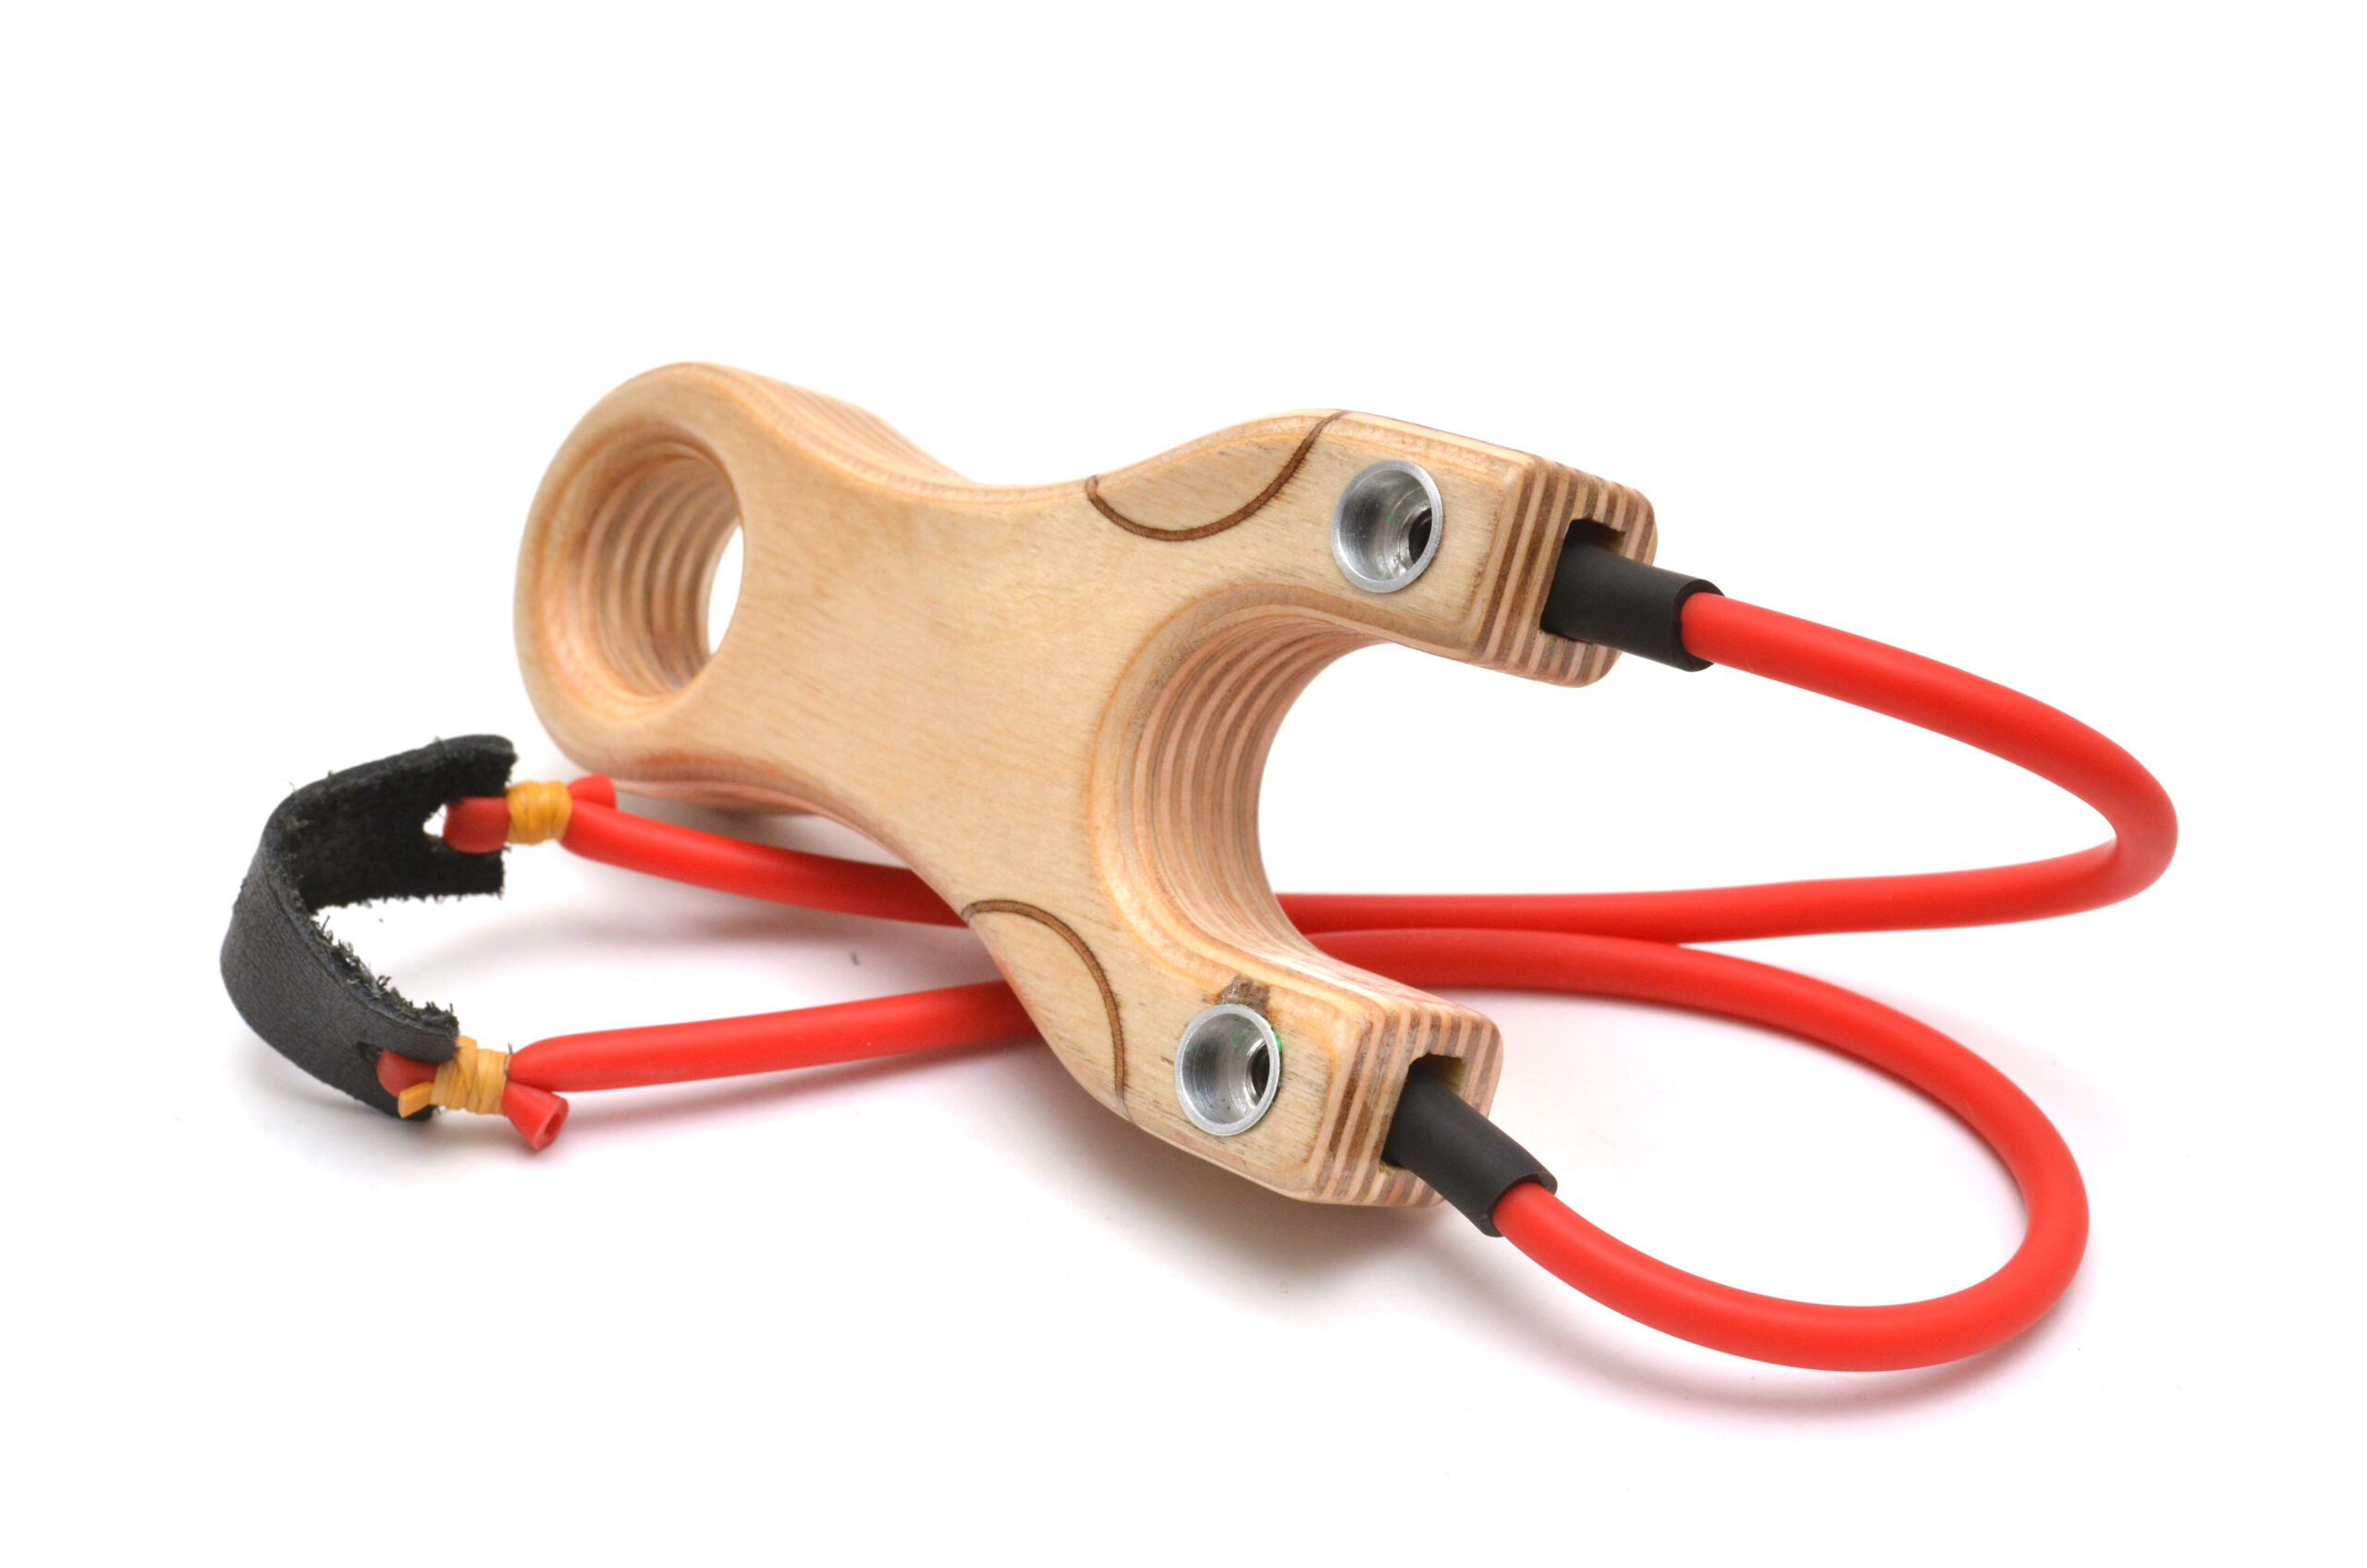
The hotly debated PFS (Pickle Fork Shooter) is a slingshot made popular by Youtube user pfshooter, whose skills with ANY slingshot let alone the one he prefers (PFS) are legendary. Abandoning the traditional concept of gap in the forks for the ammo to pass through, the PFS is a minimalist style slingshot that is shot over the top and flip style.
There is little to no gap between the forks and with the right technique, practice (LOTS of practice, practice, practice) and patience can be even deadlier than most advanced slingshots. They are extremely popular because they are simple to make and usually very small, making it a very easy slingshot to carry in your pocket. The PFS style shooter has been used over and over again since it’s conception but the concept is always the same, a simple, narrow gap fork with bands tied to it.
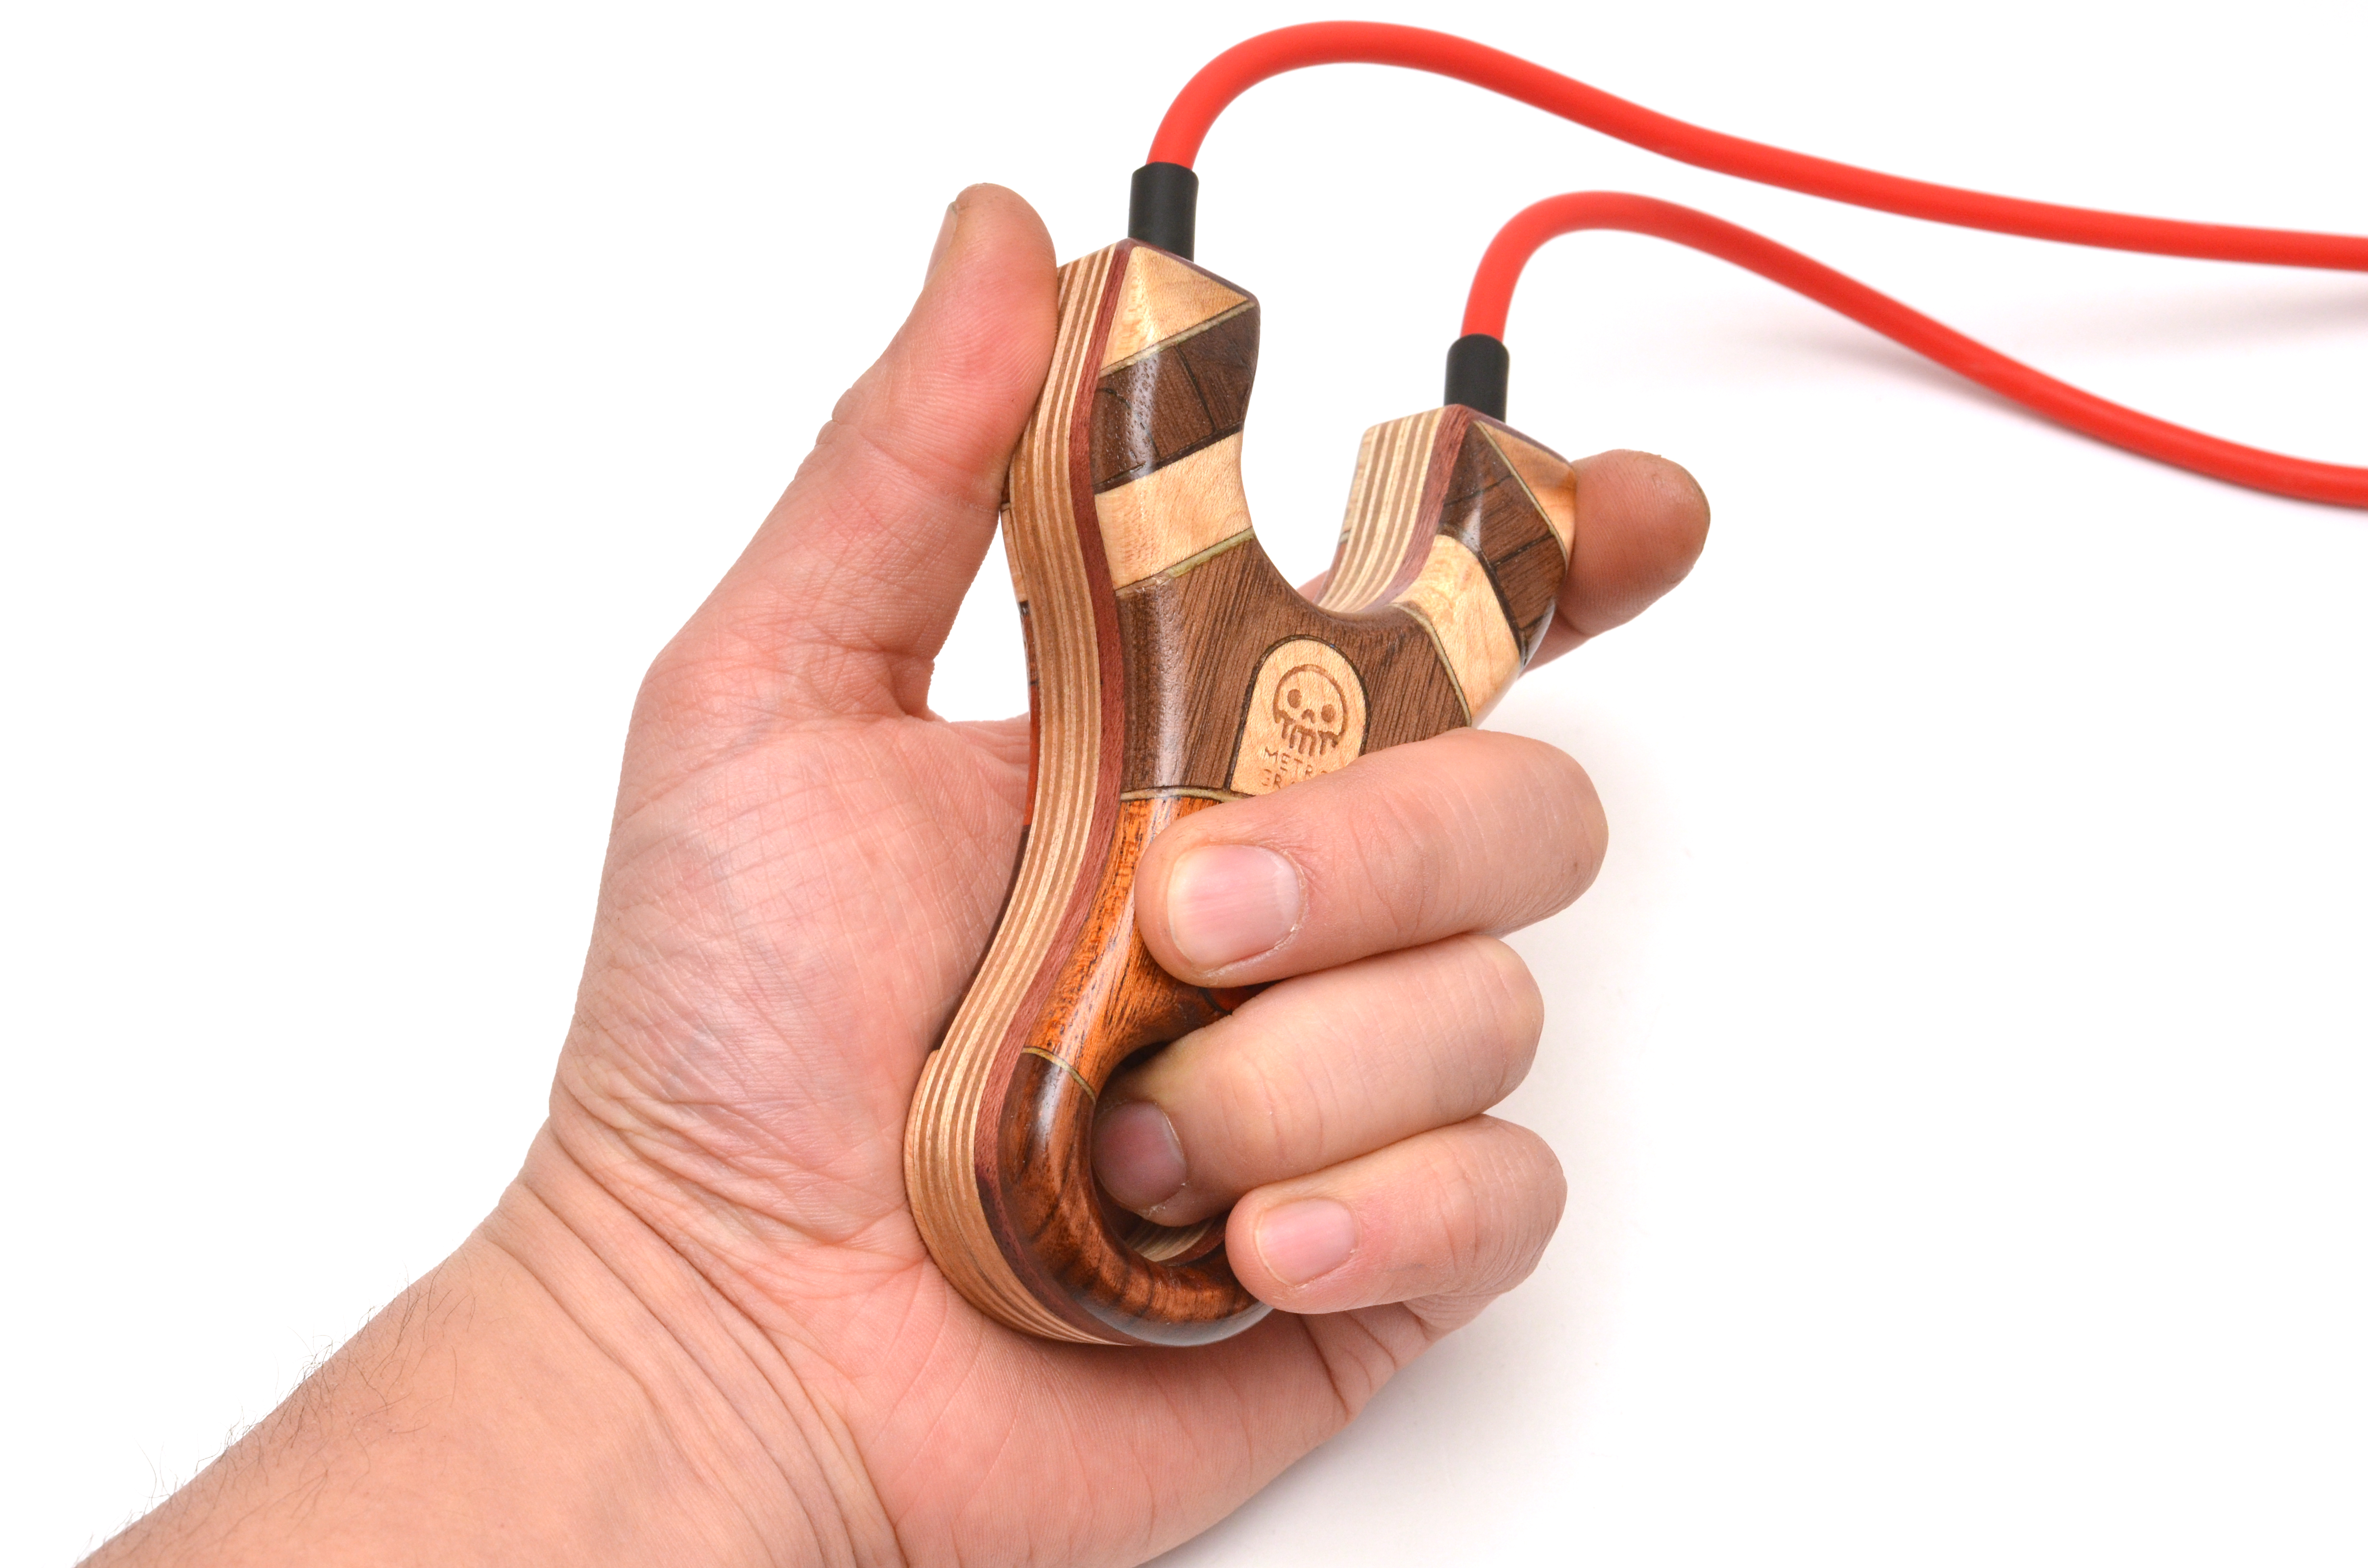
The wrap and tuck method of band attachment produces a less than desirable aesthetic appeal. I desired a more clean approach, a more Metro Grade approach.
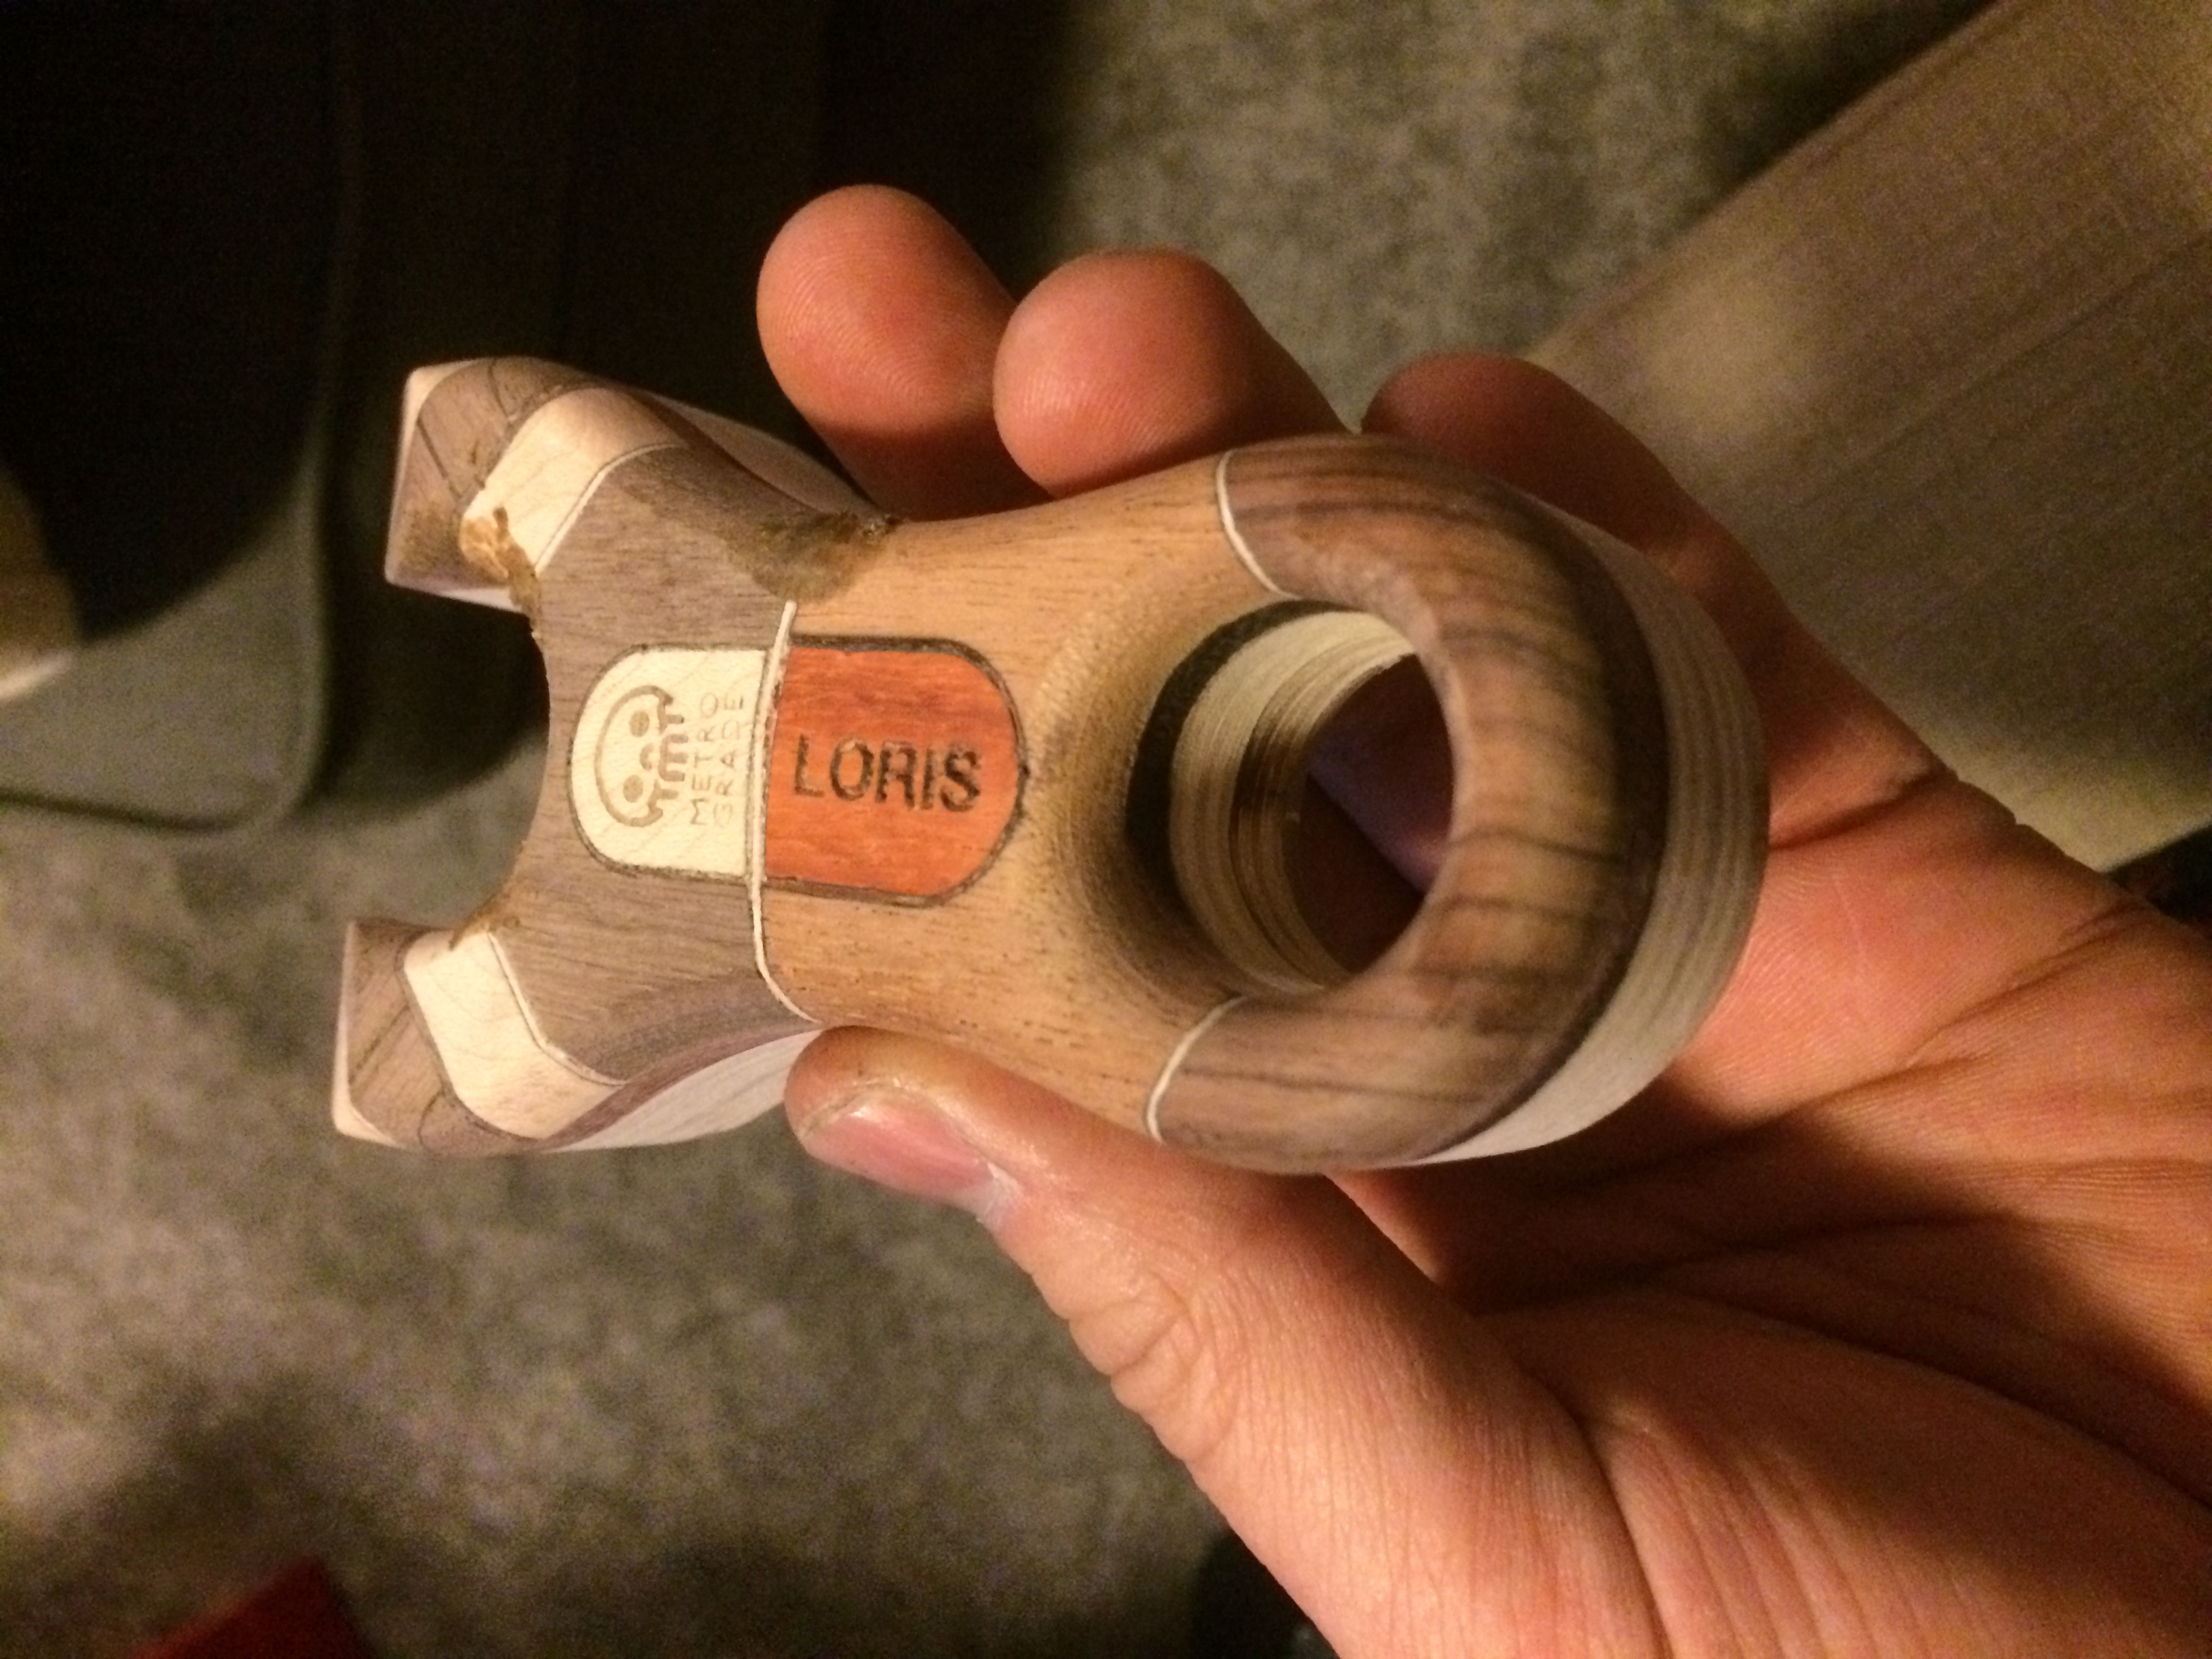
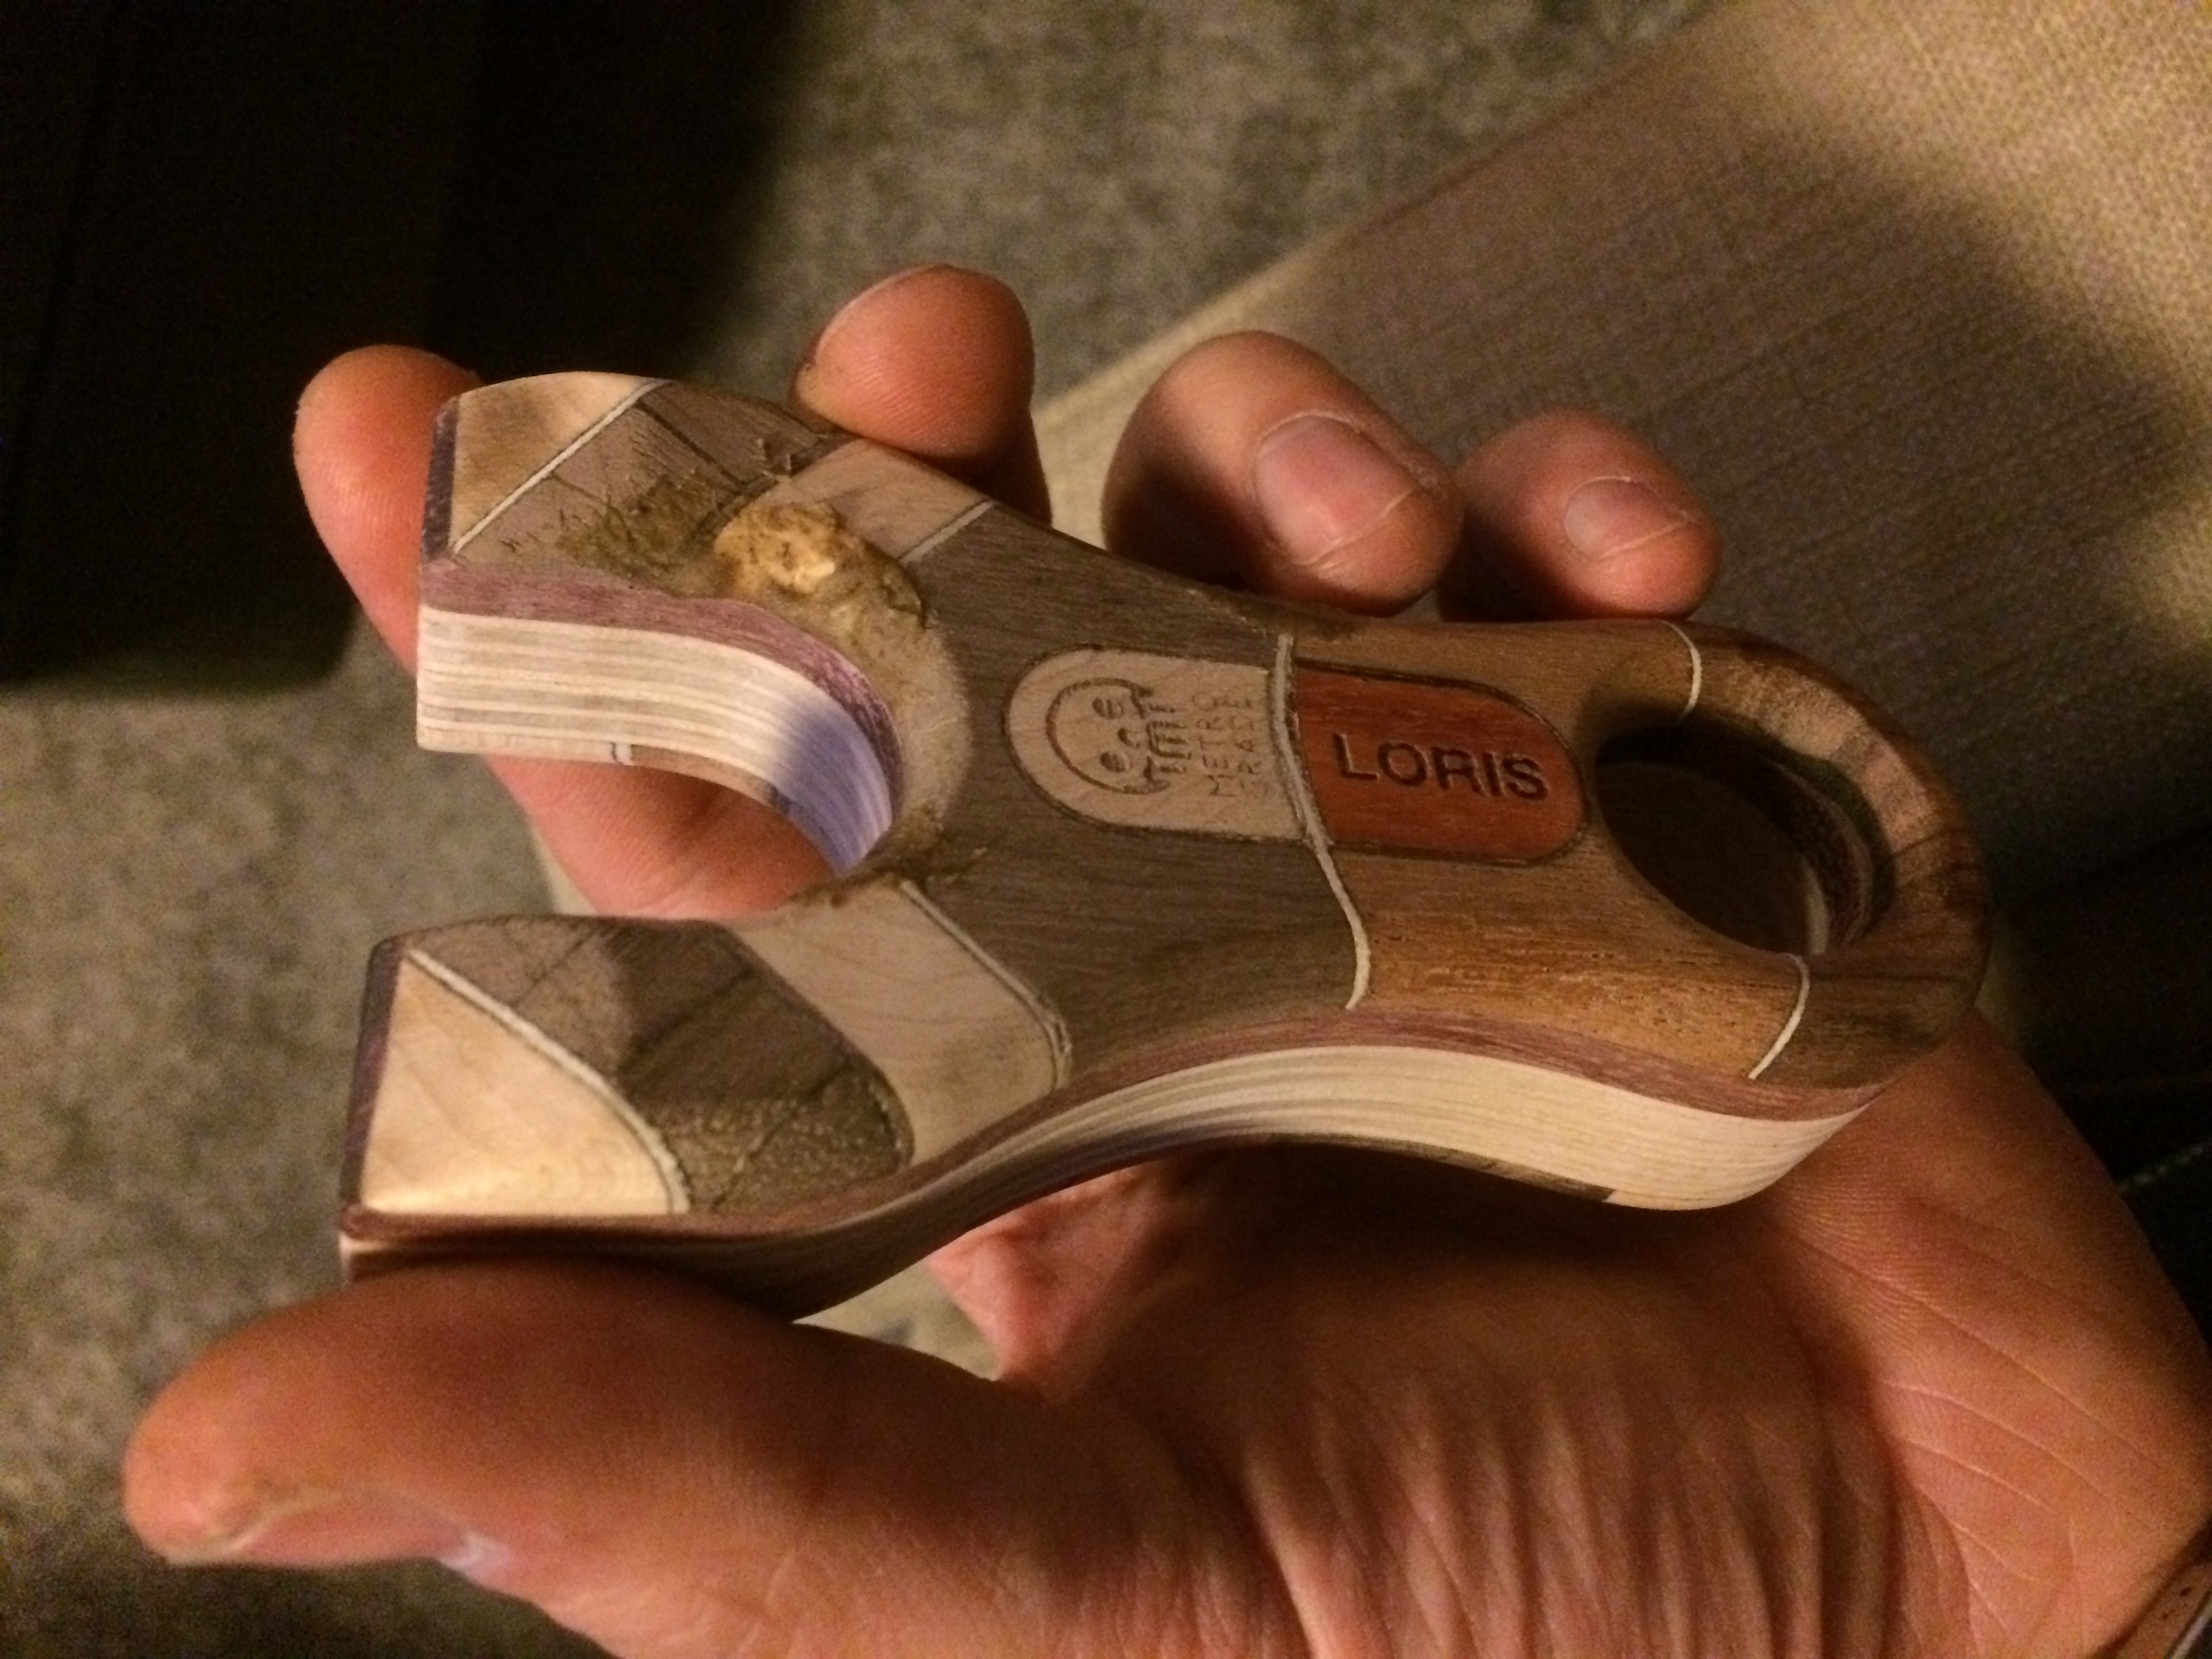
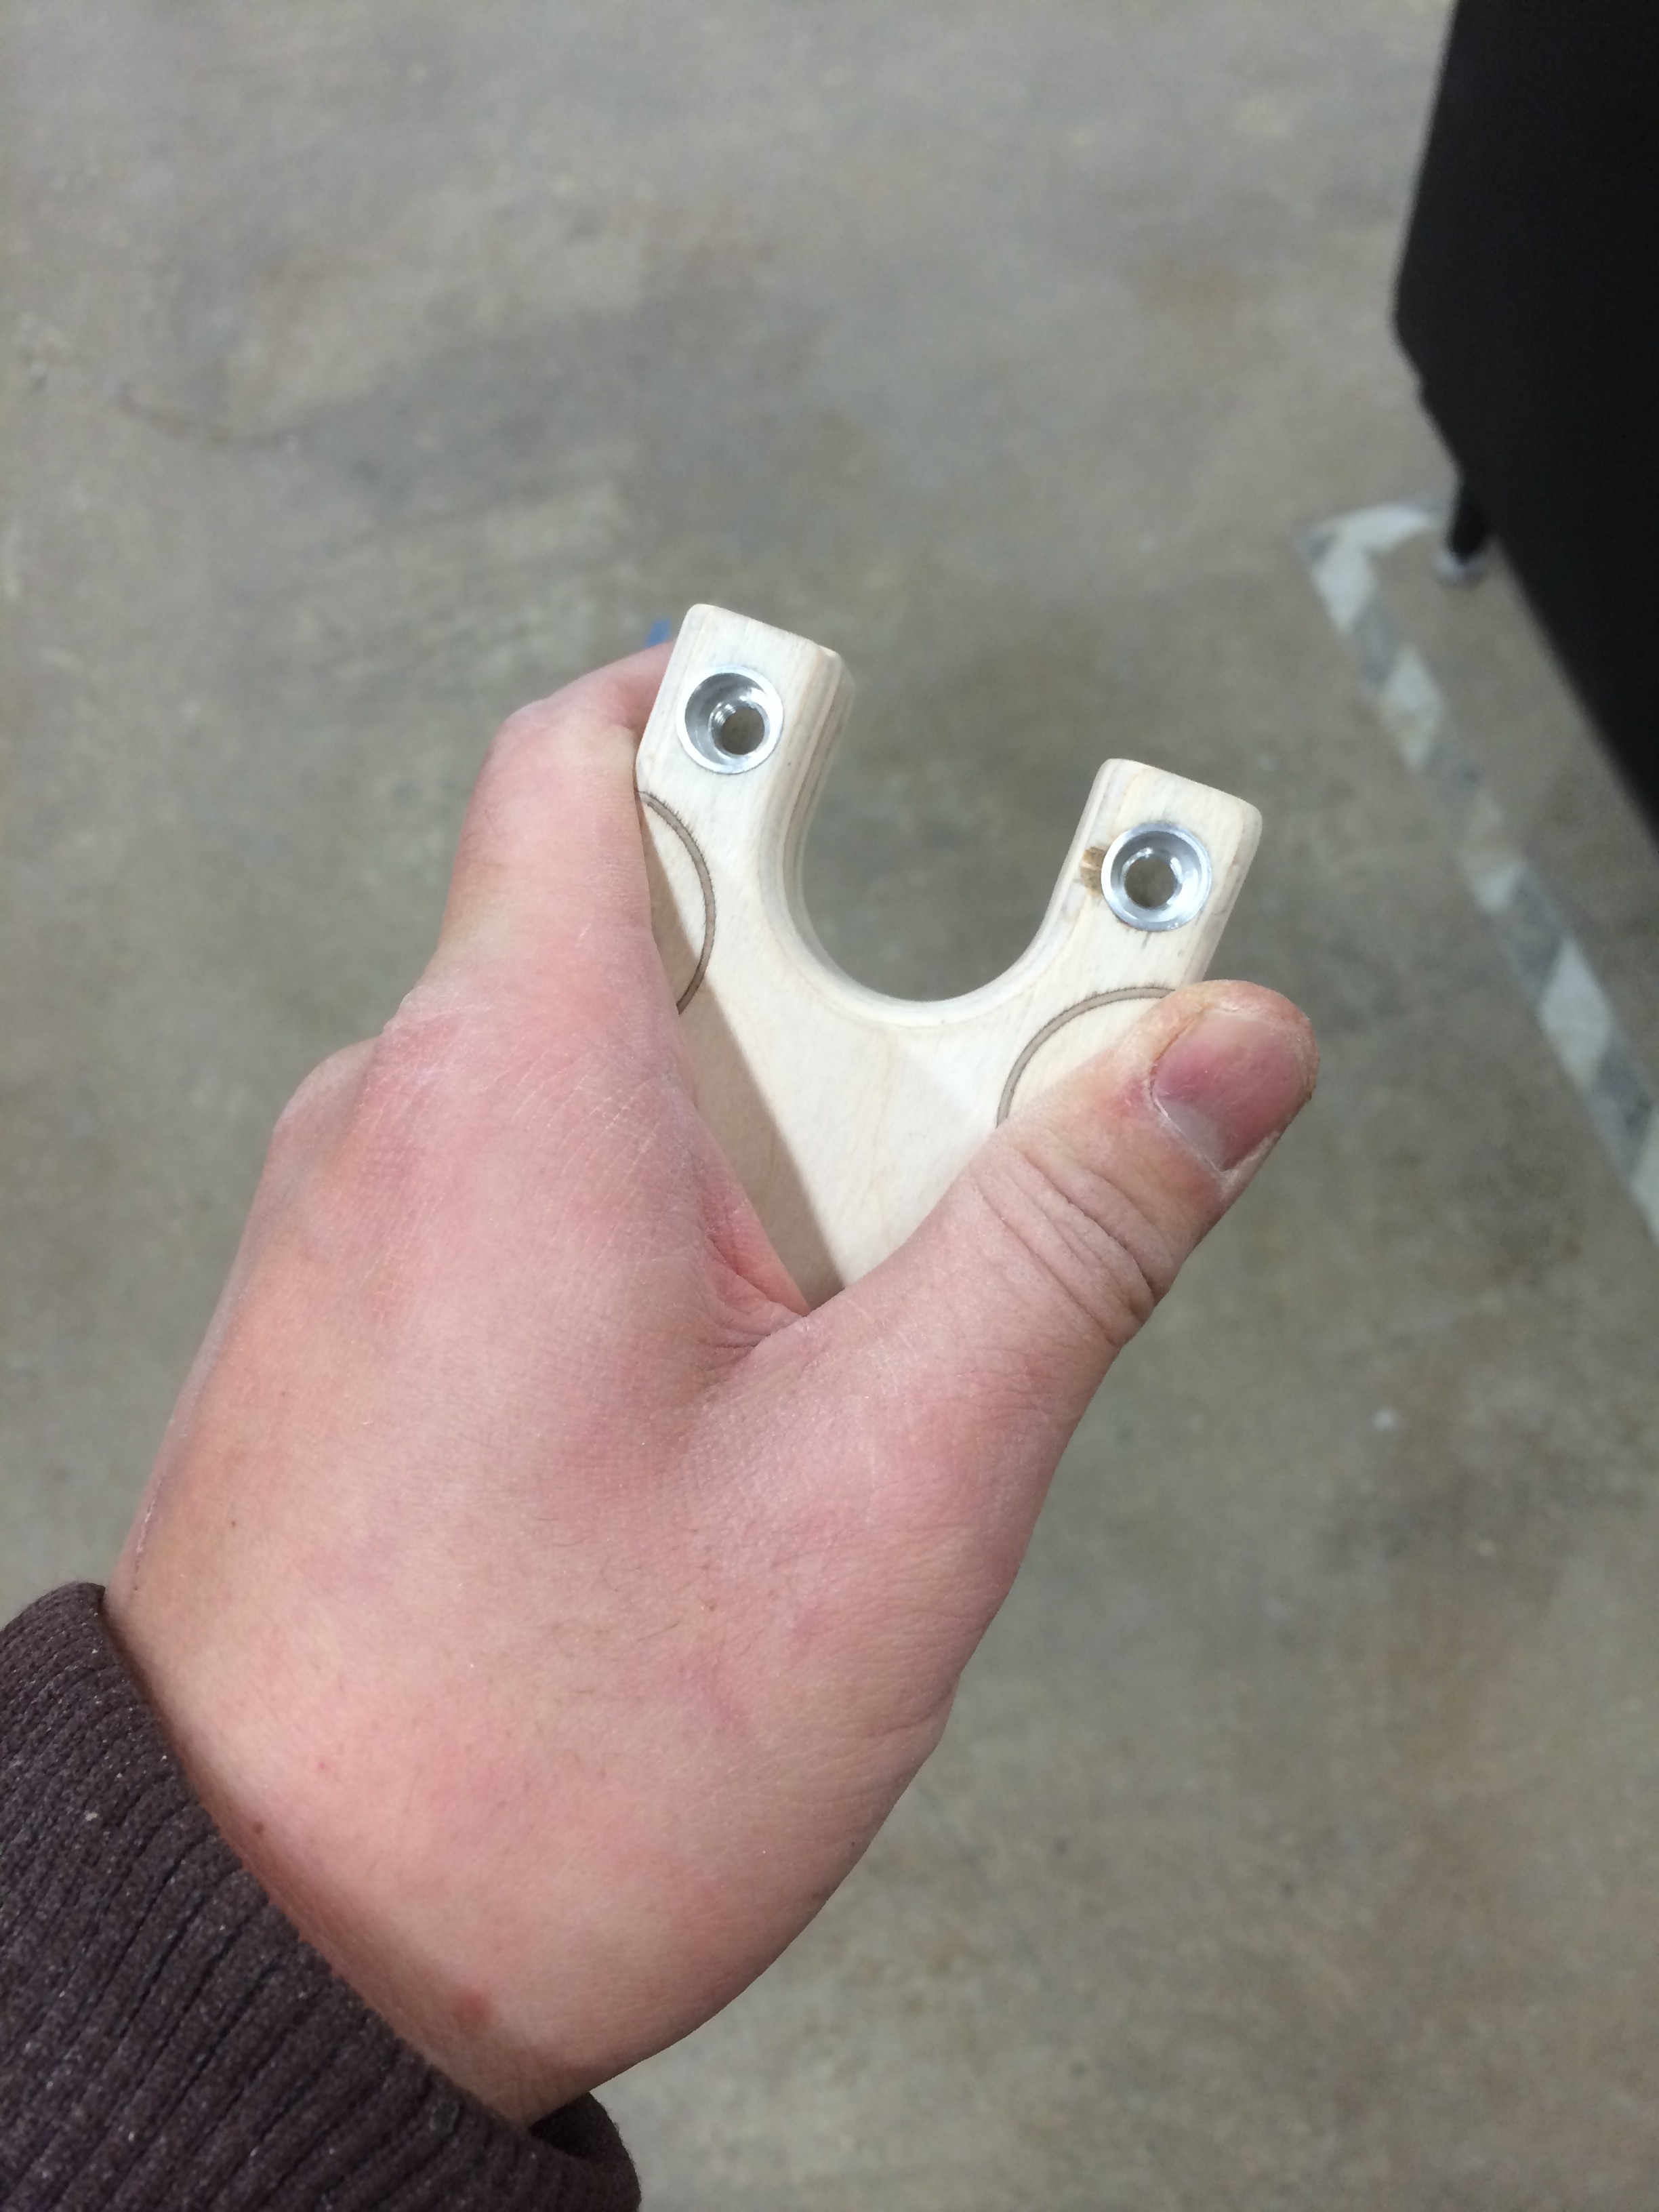
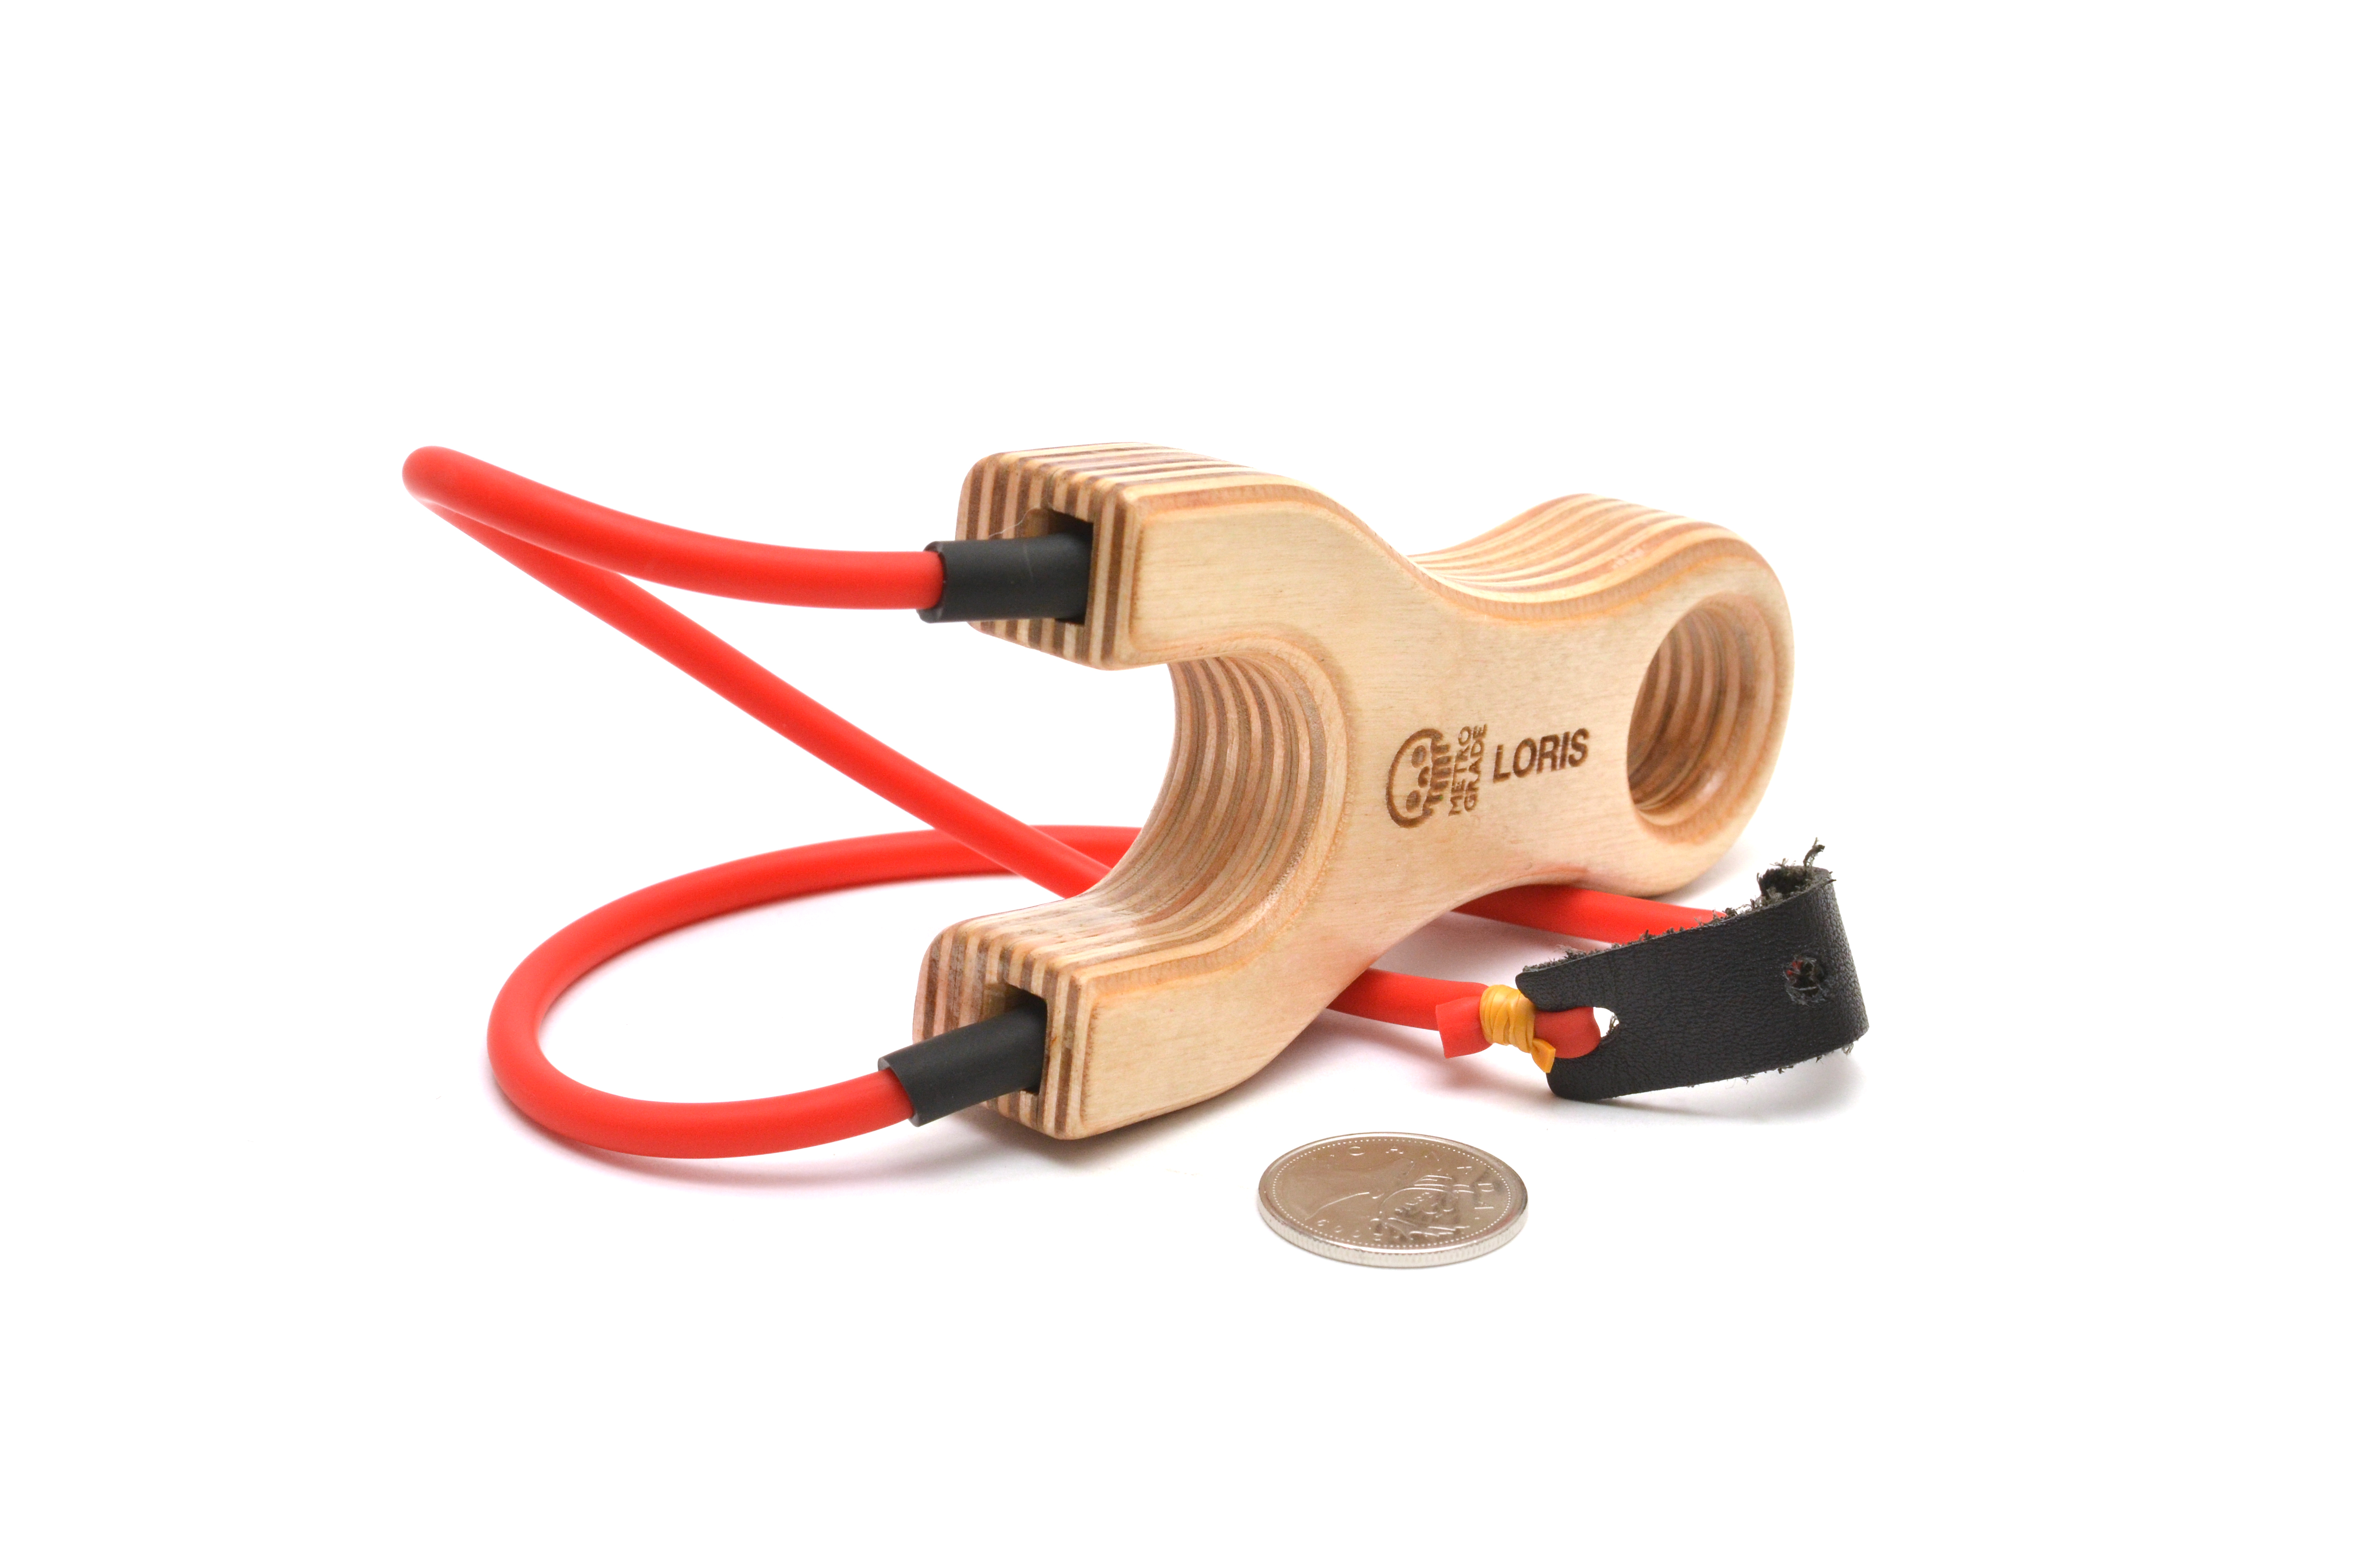
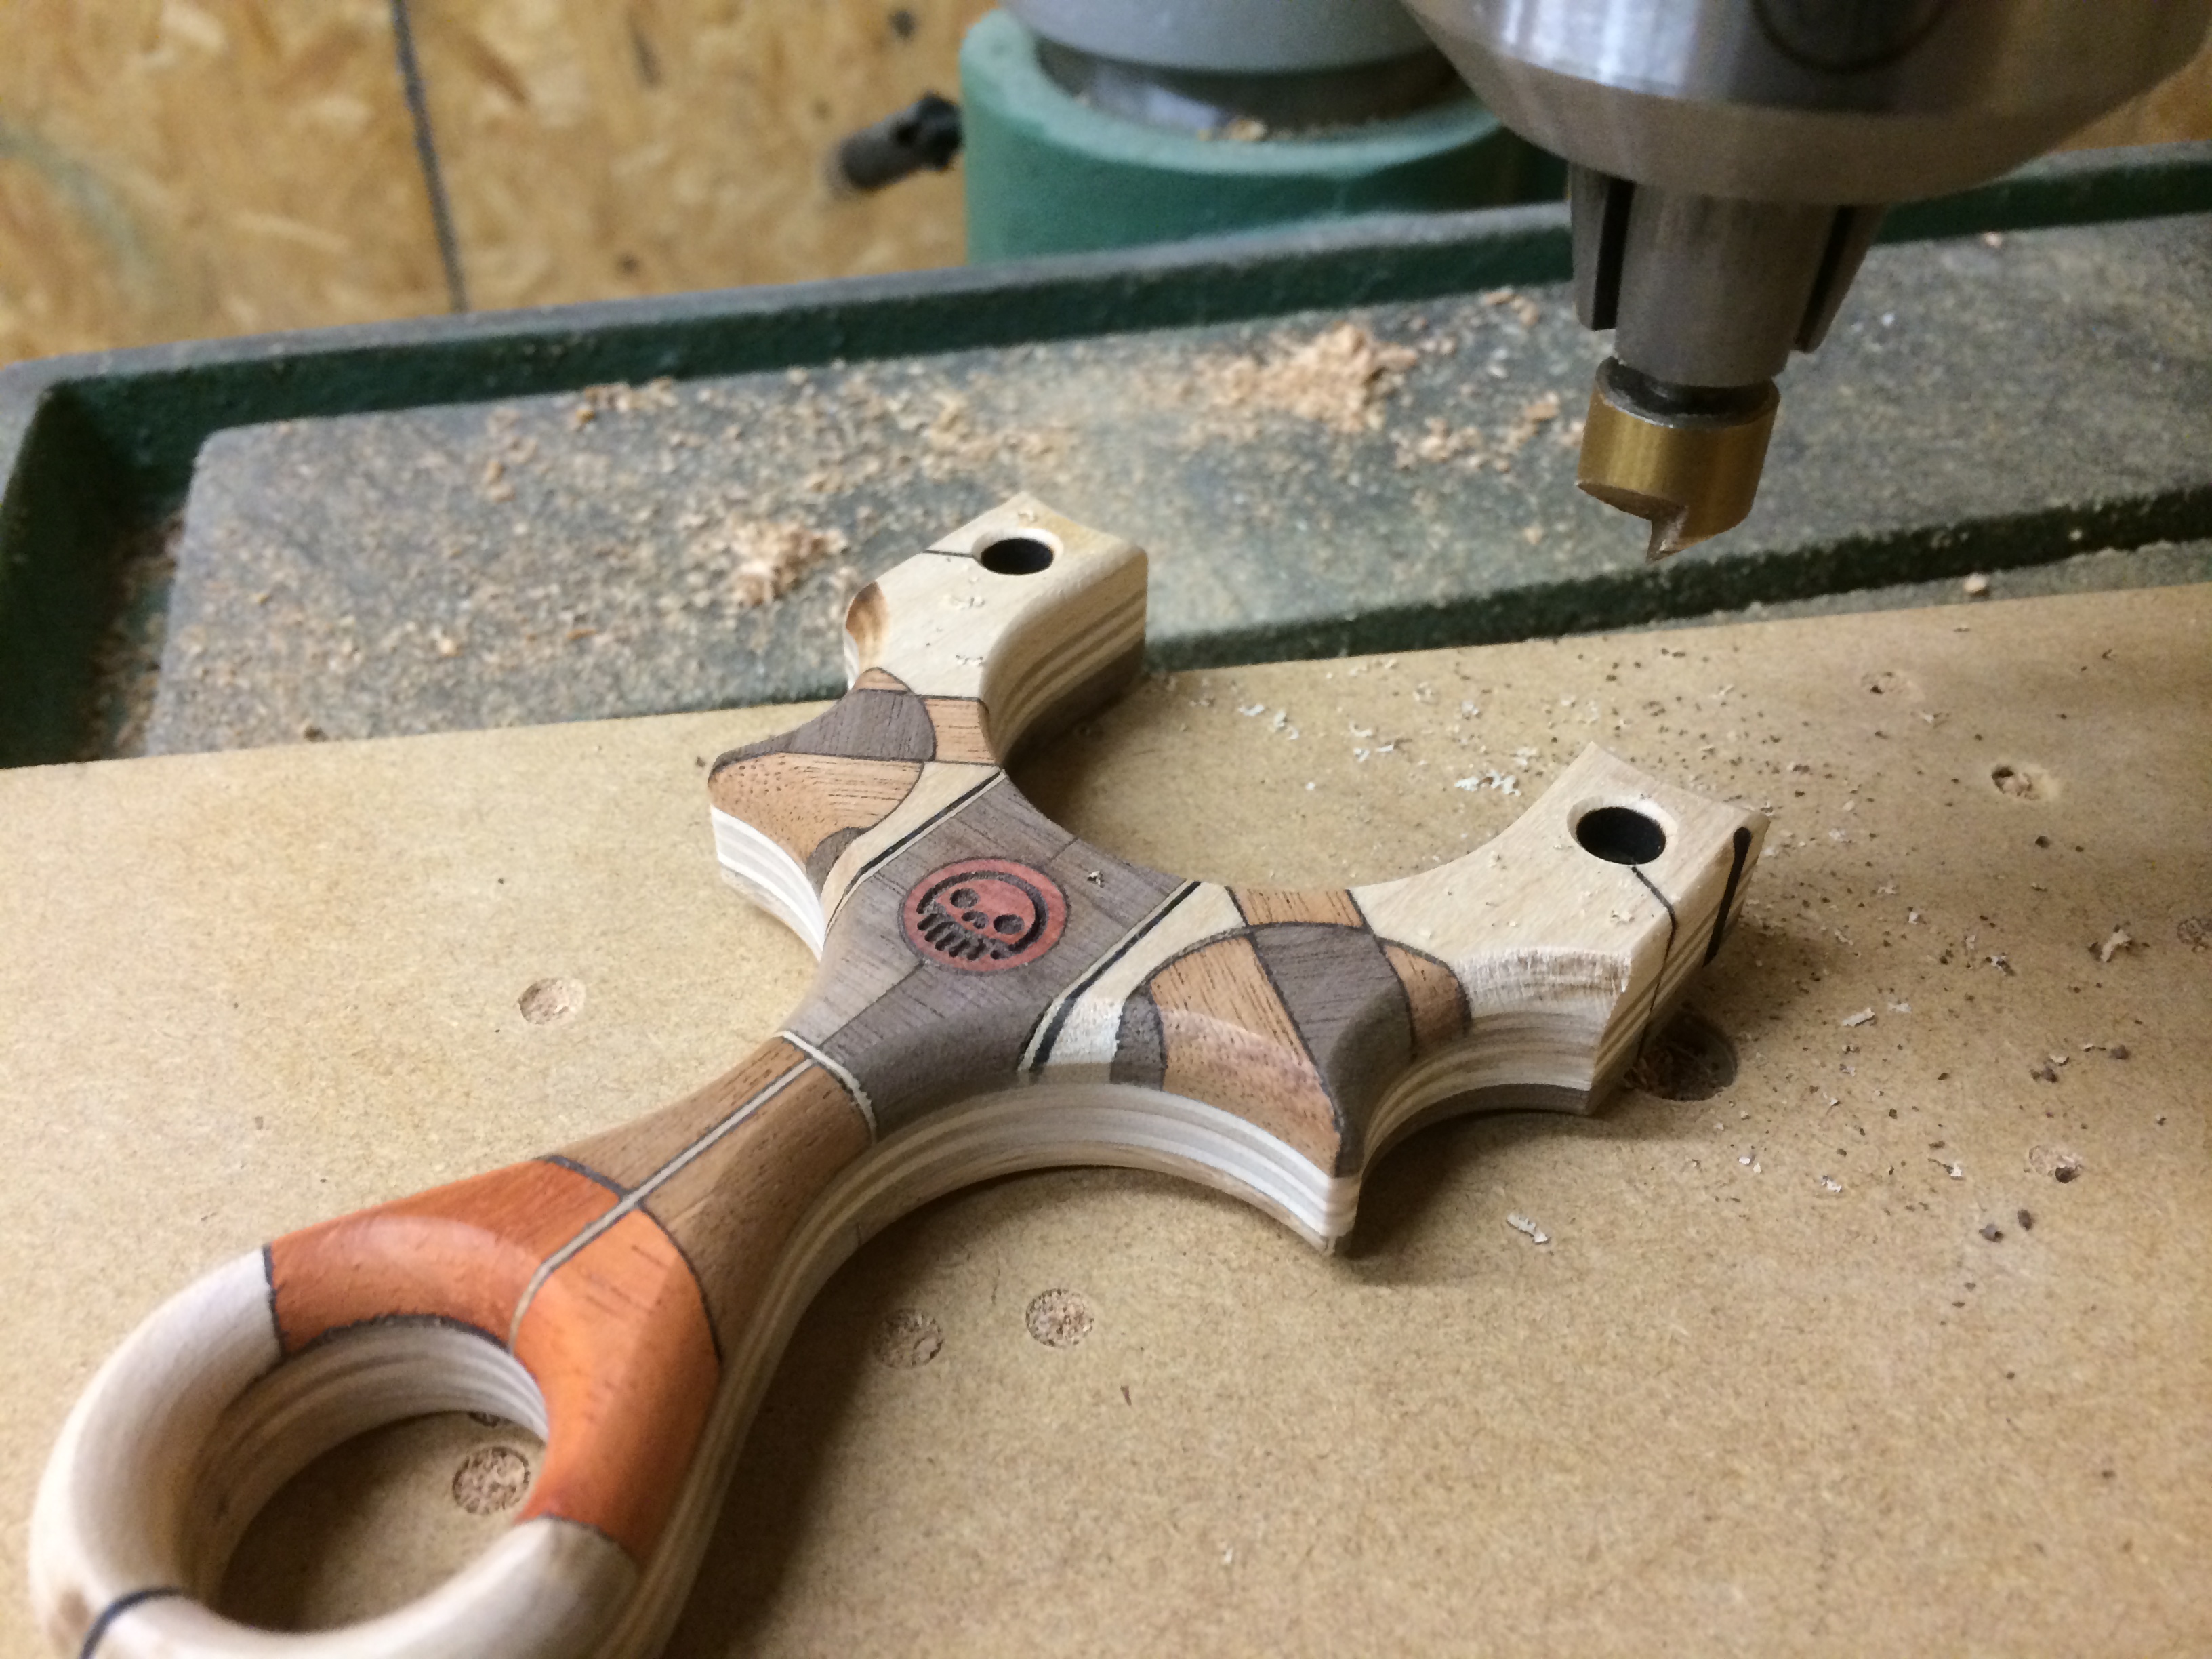
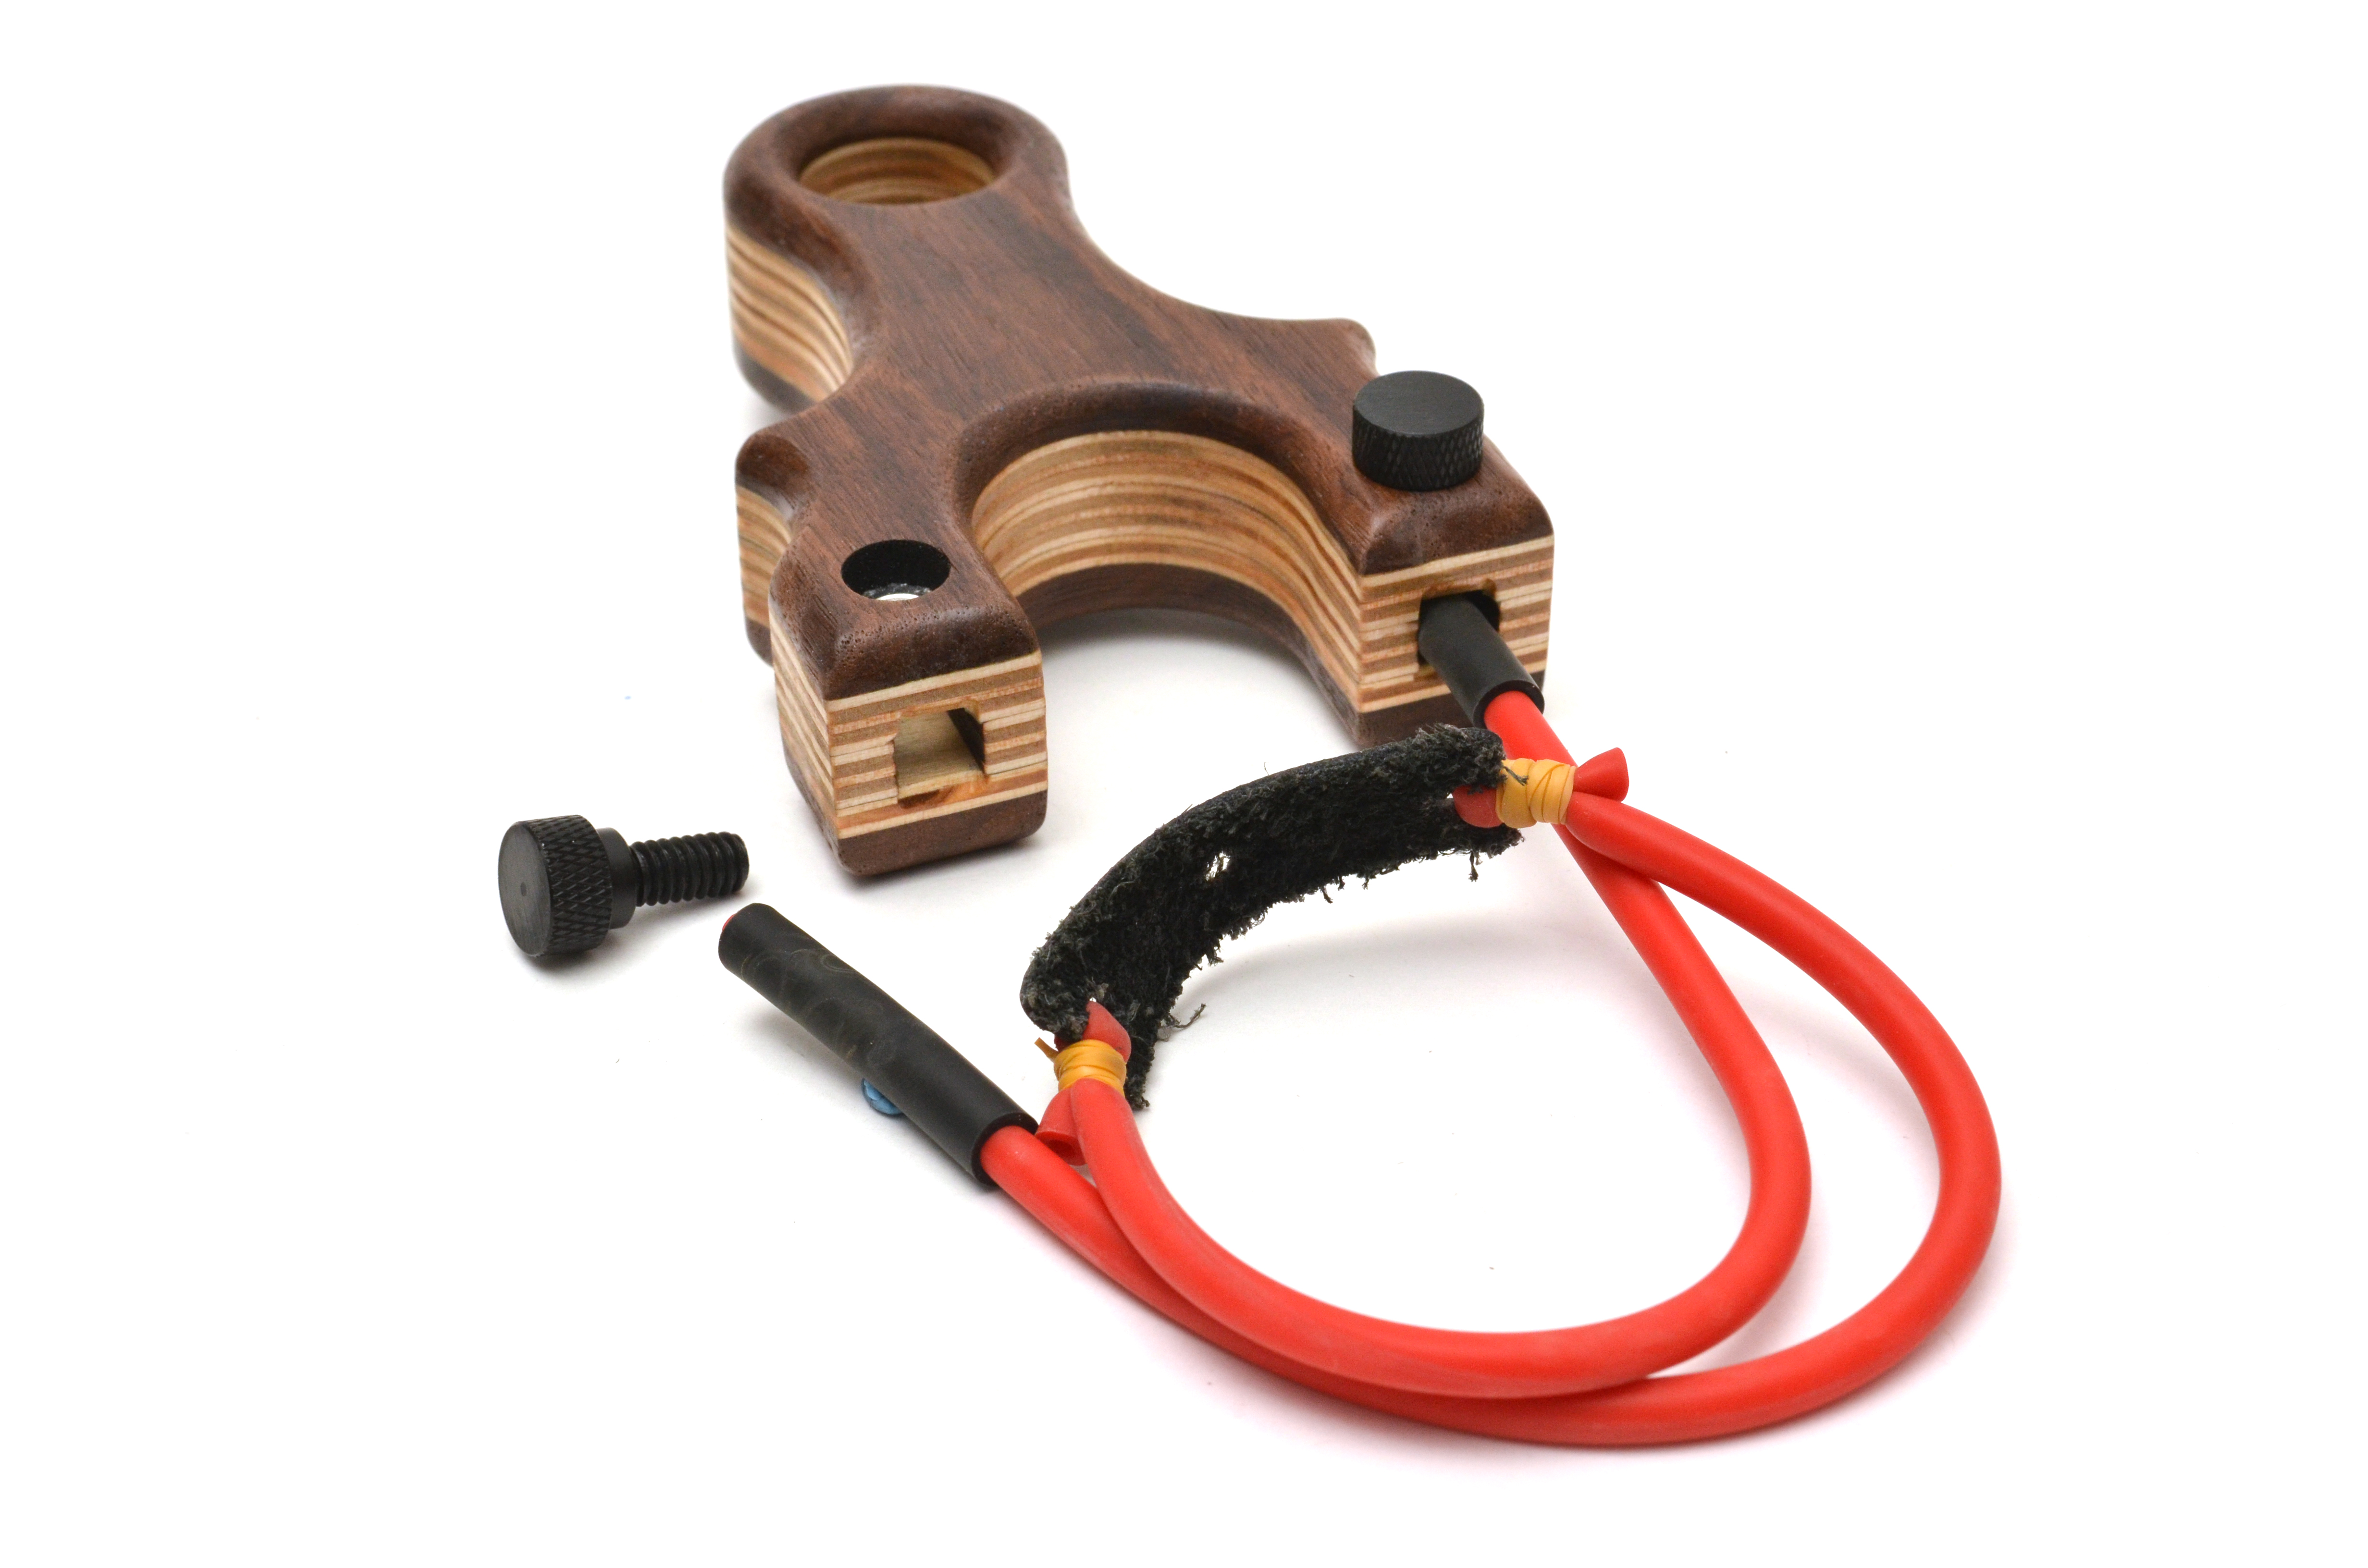
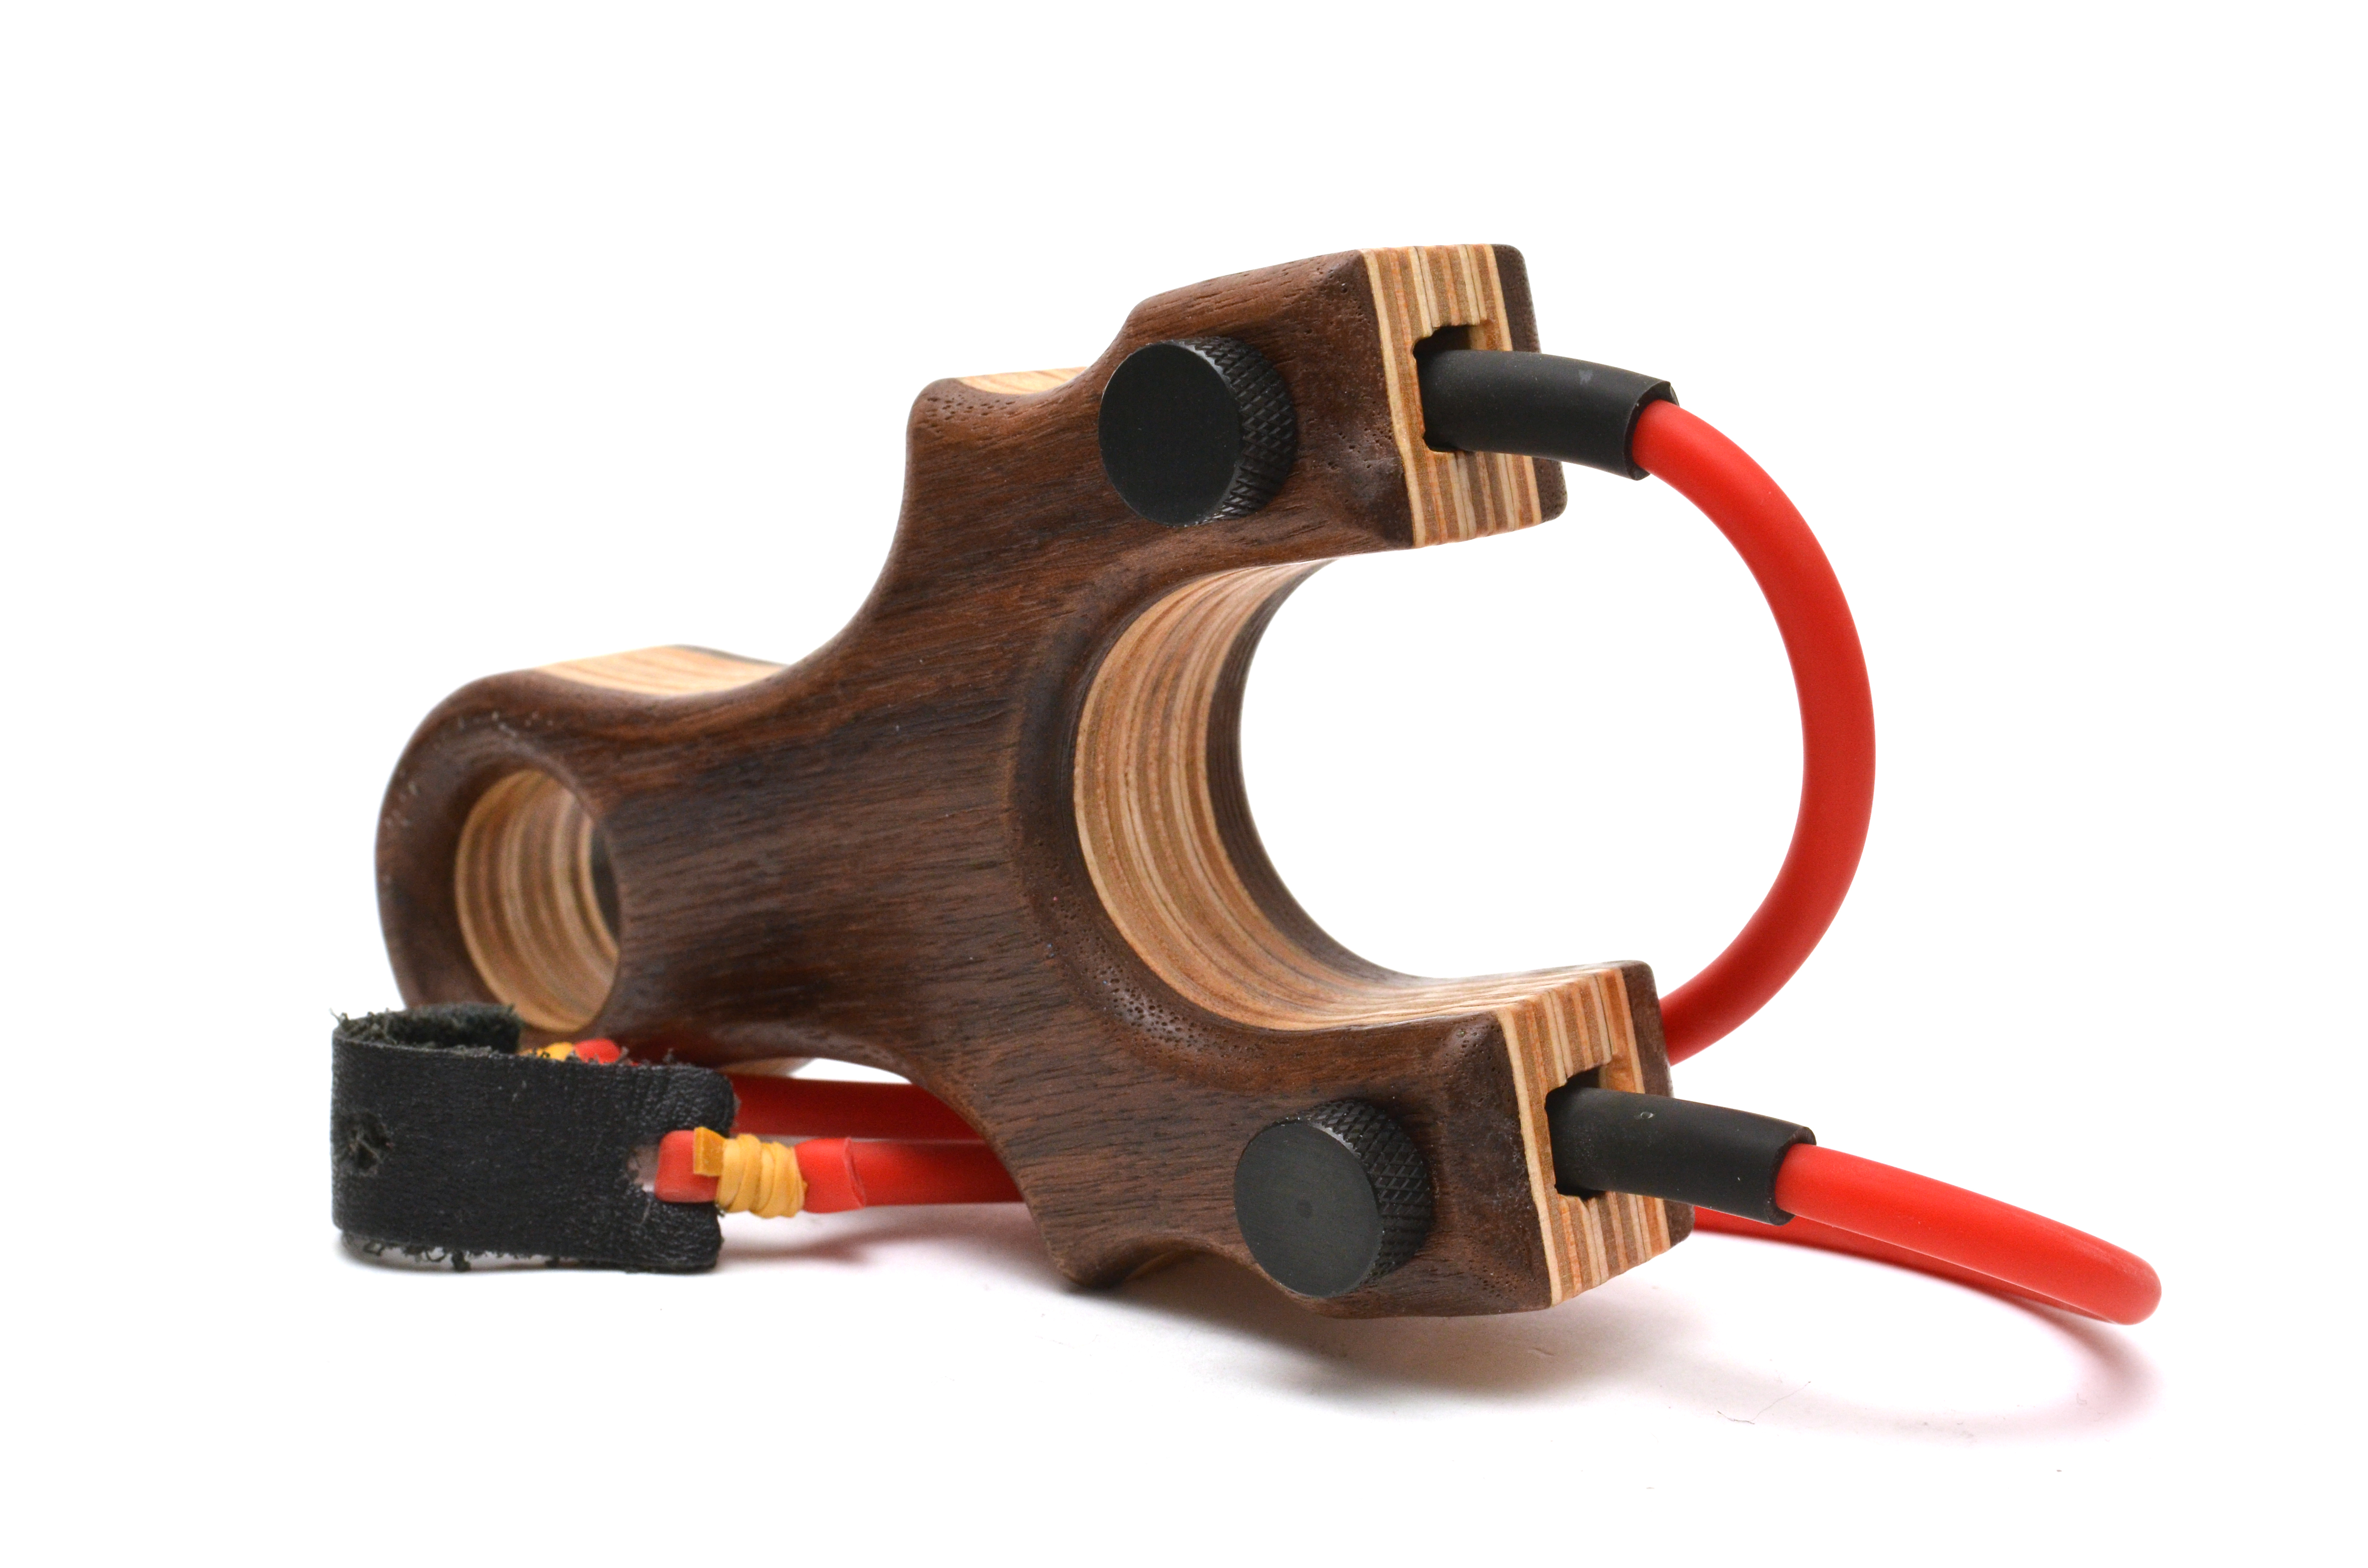
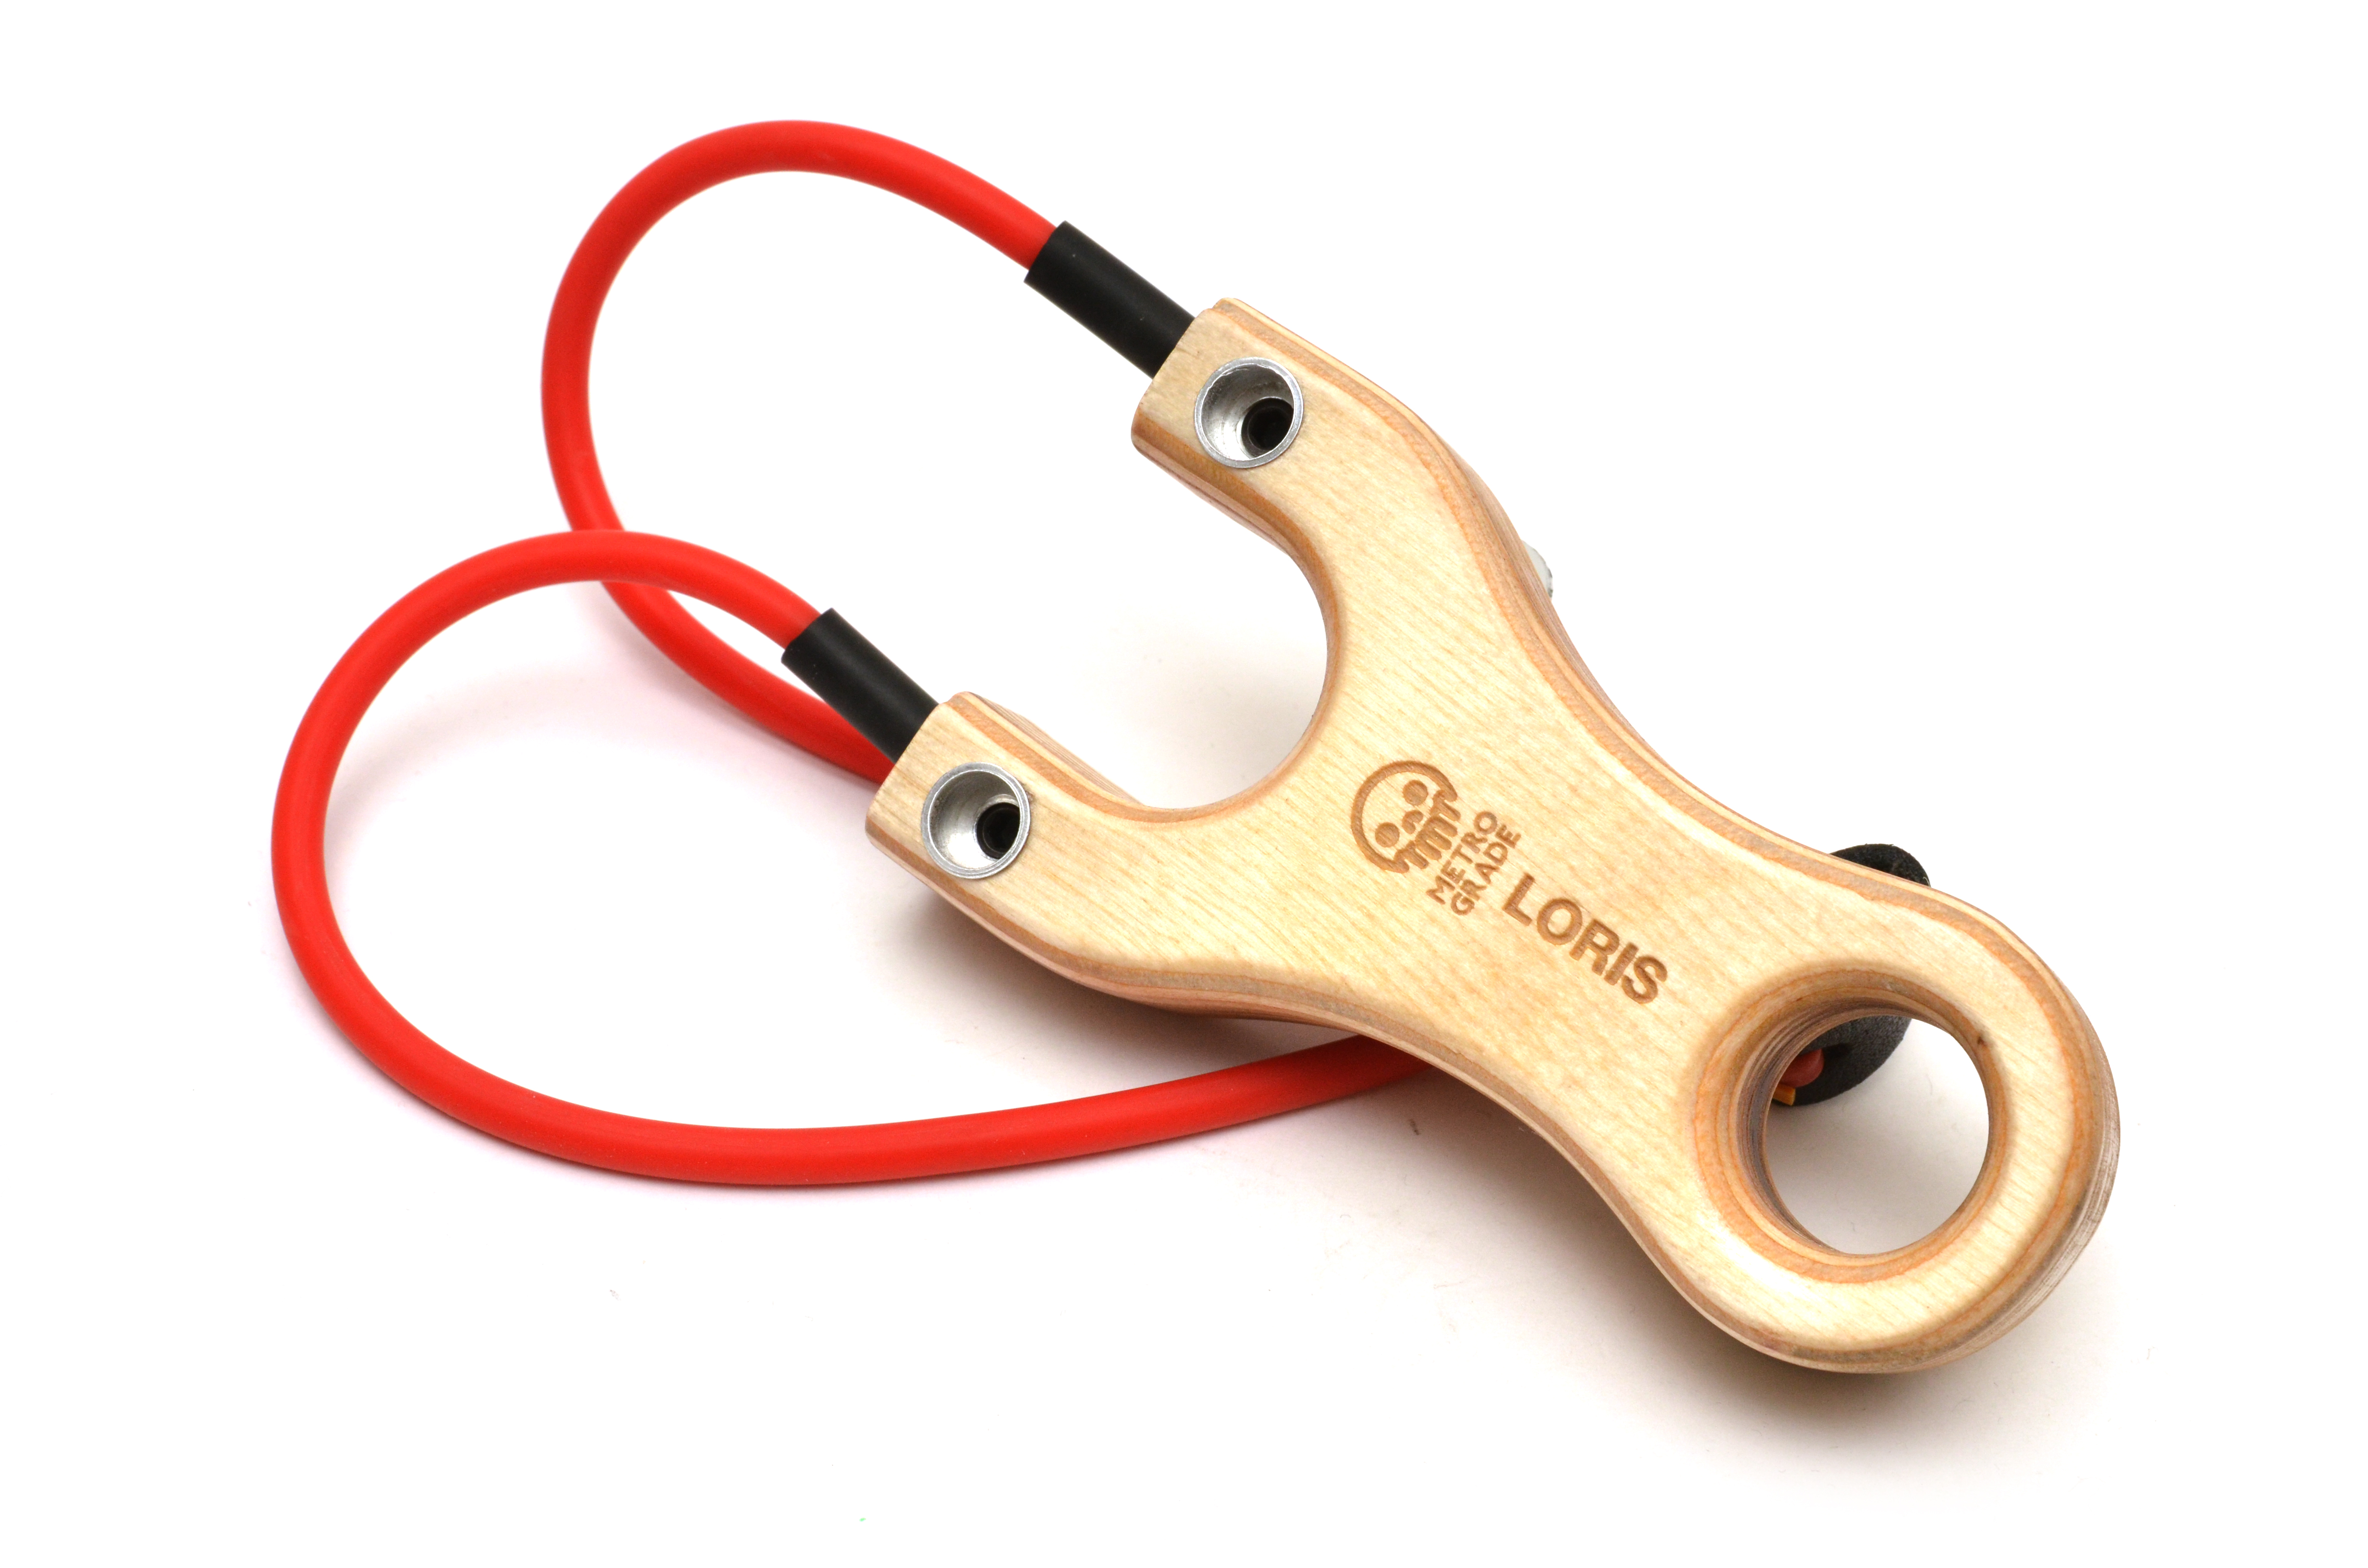
This is how we designed and made our version of pfshooter’s PFS, the Metro Grade Loris PFS. After rolling the idea in my brain bucket for some time, I finally decided to use a threaded insert and some set screws to pinch the band into the frame.
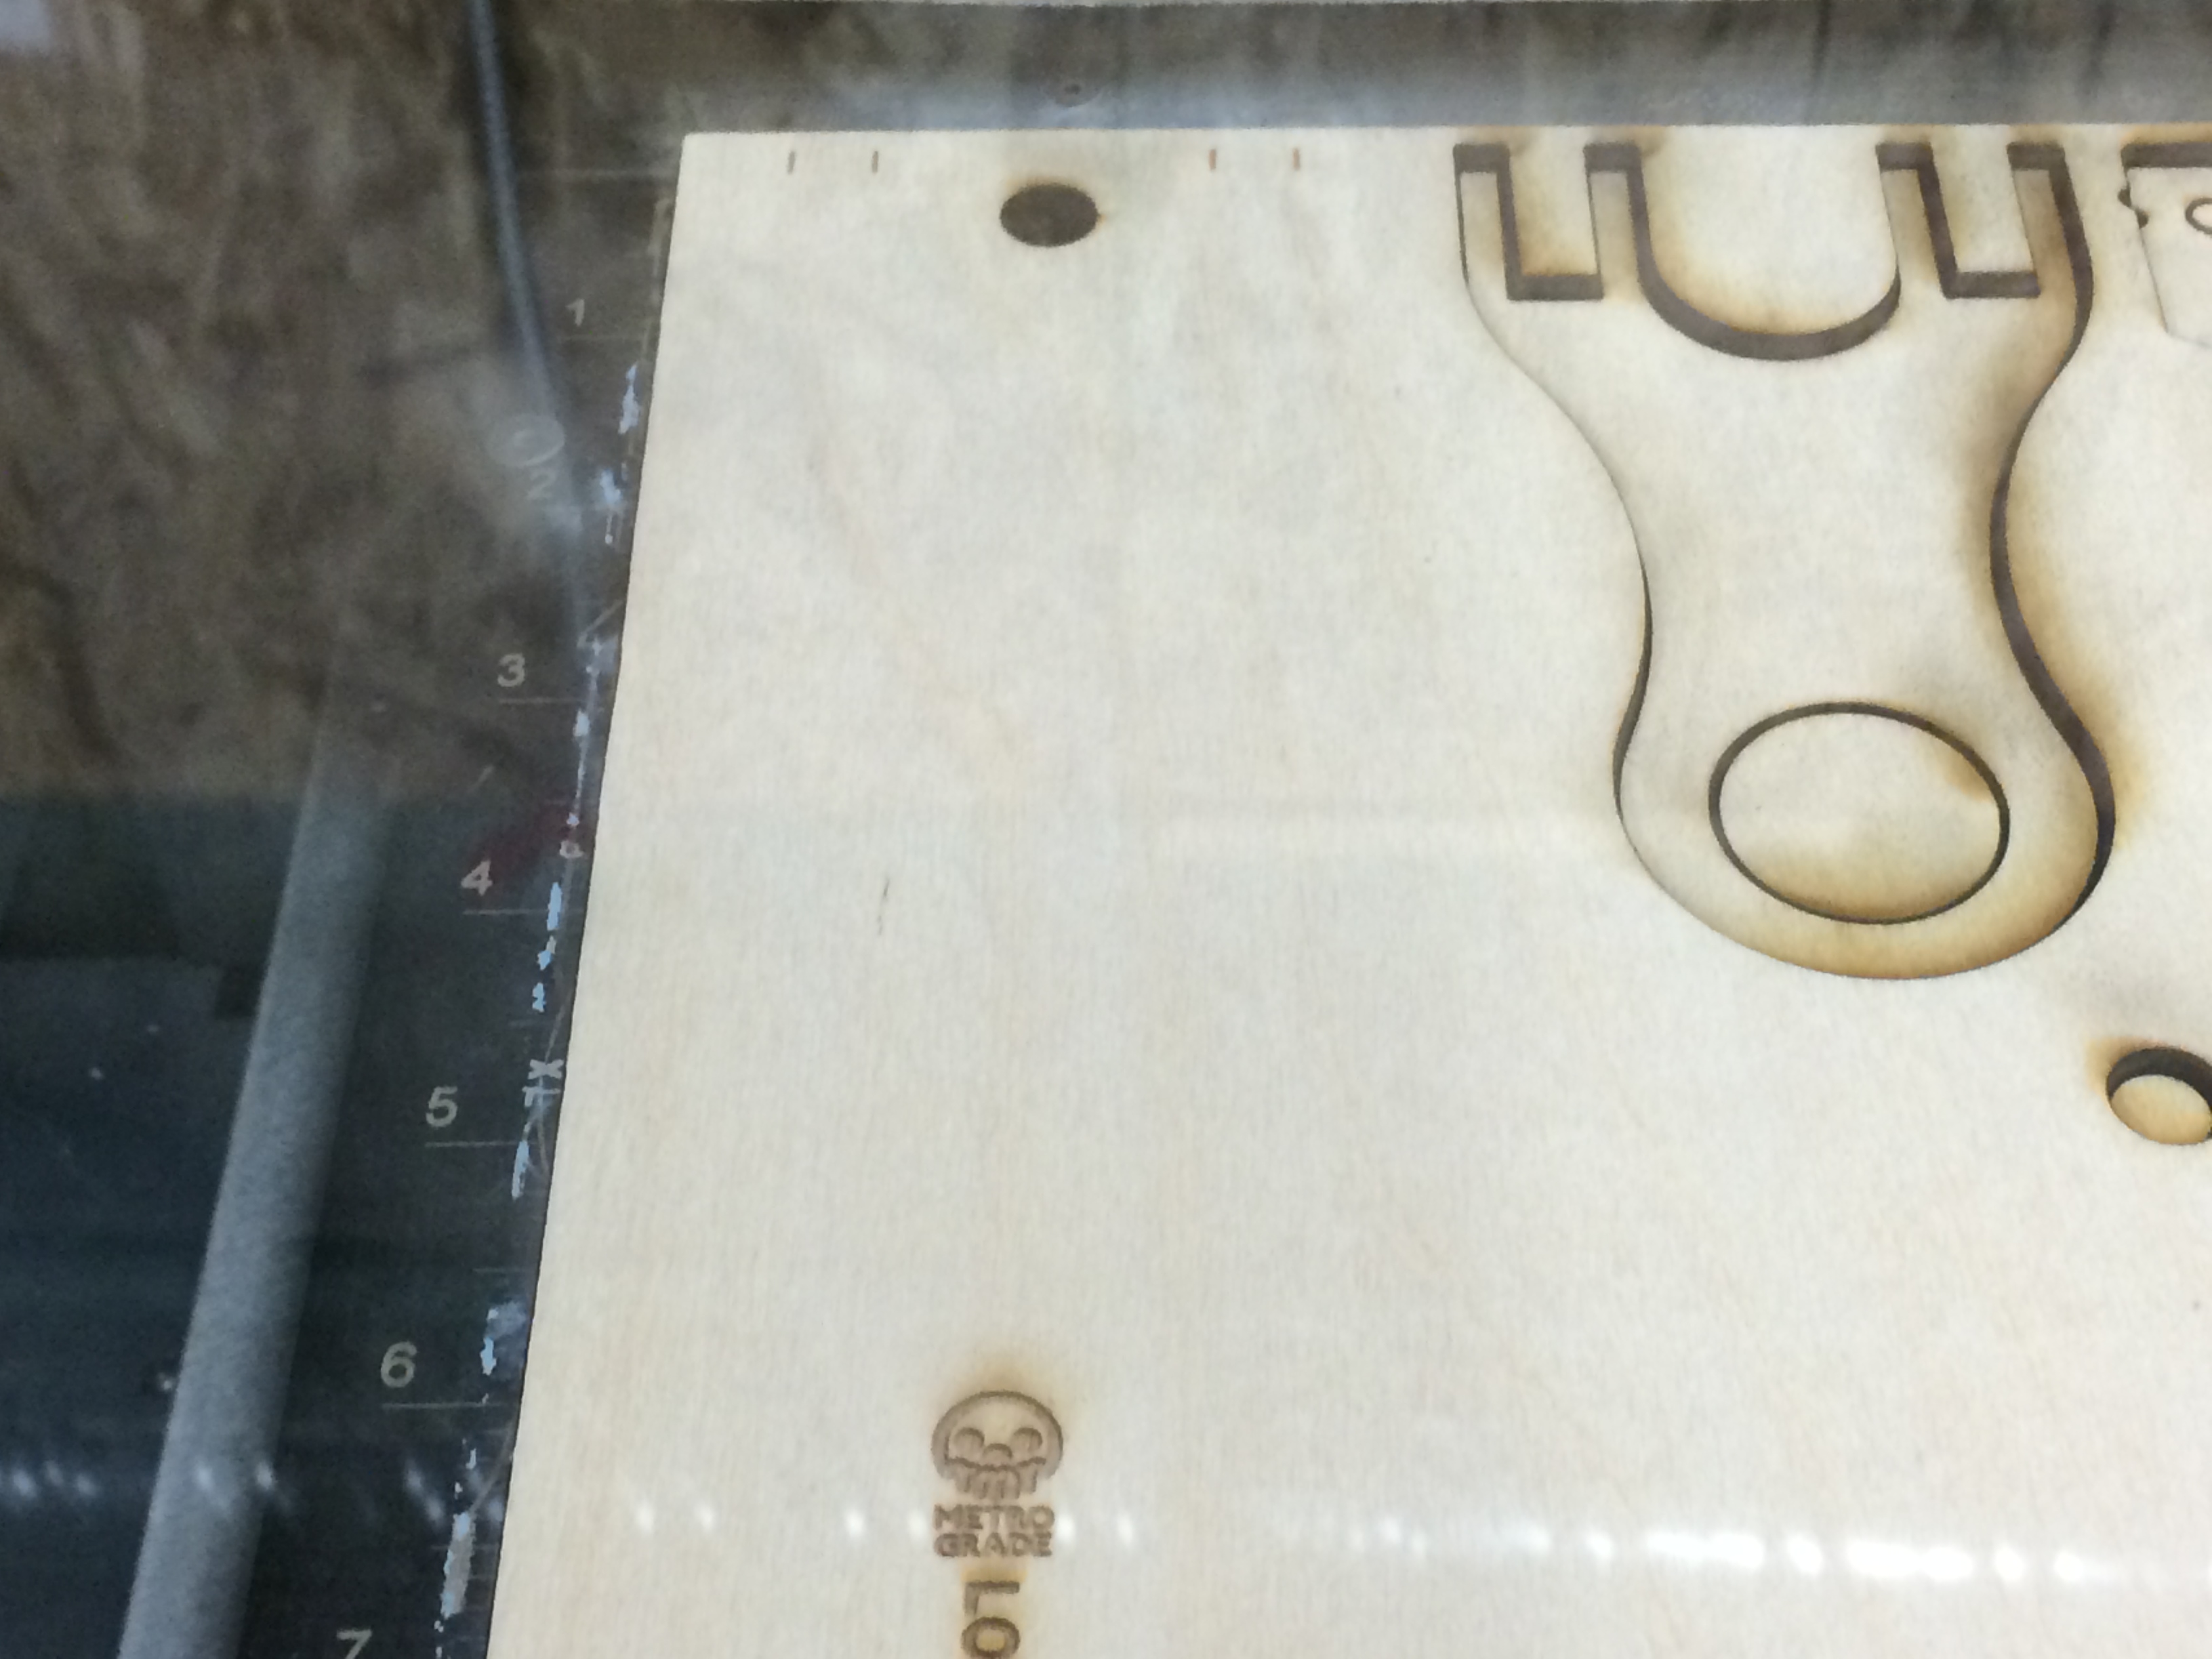
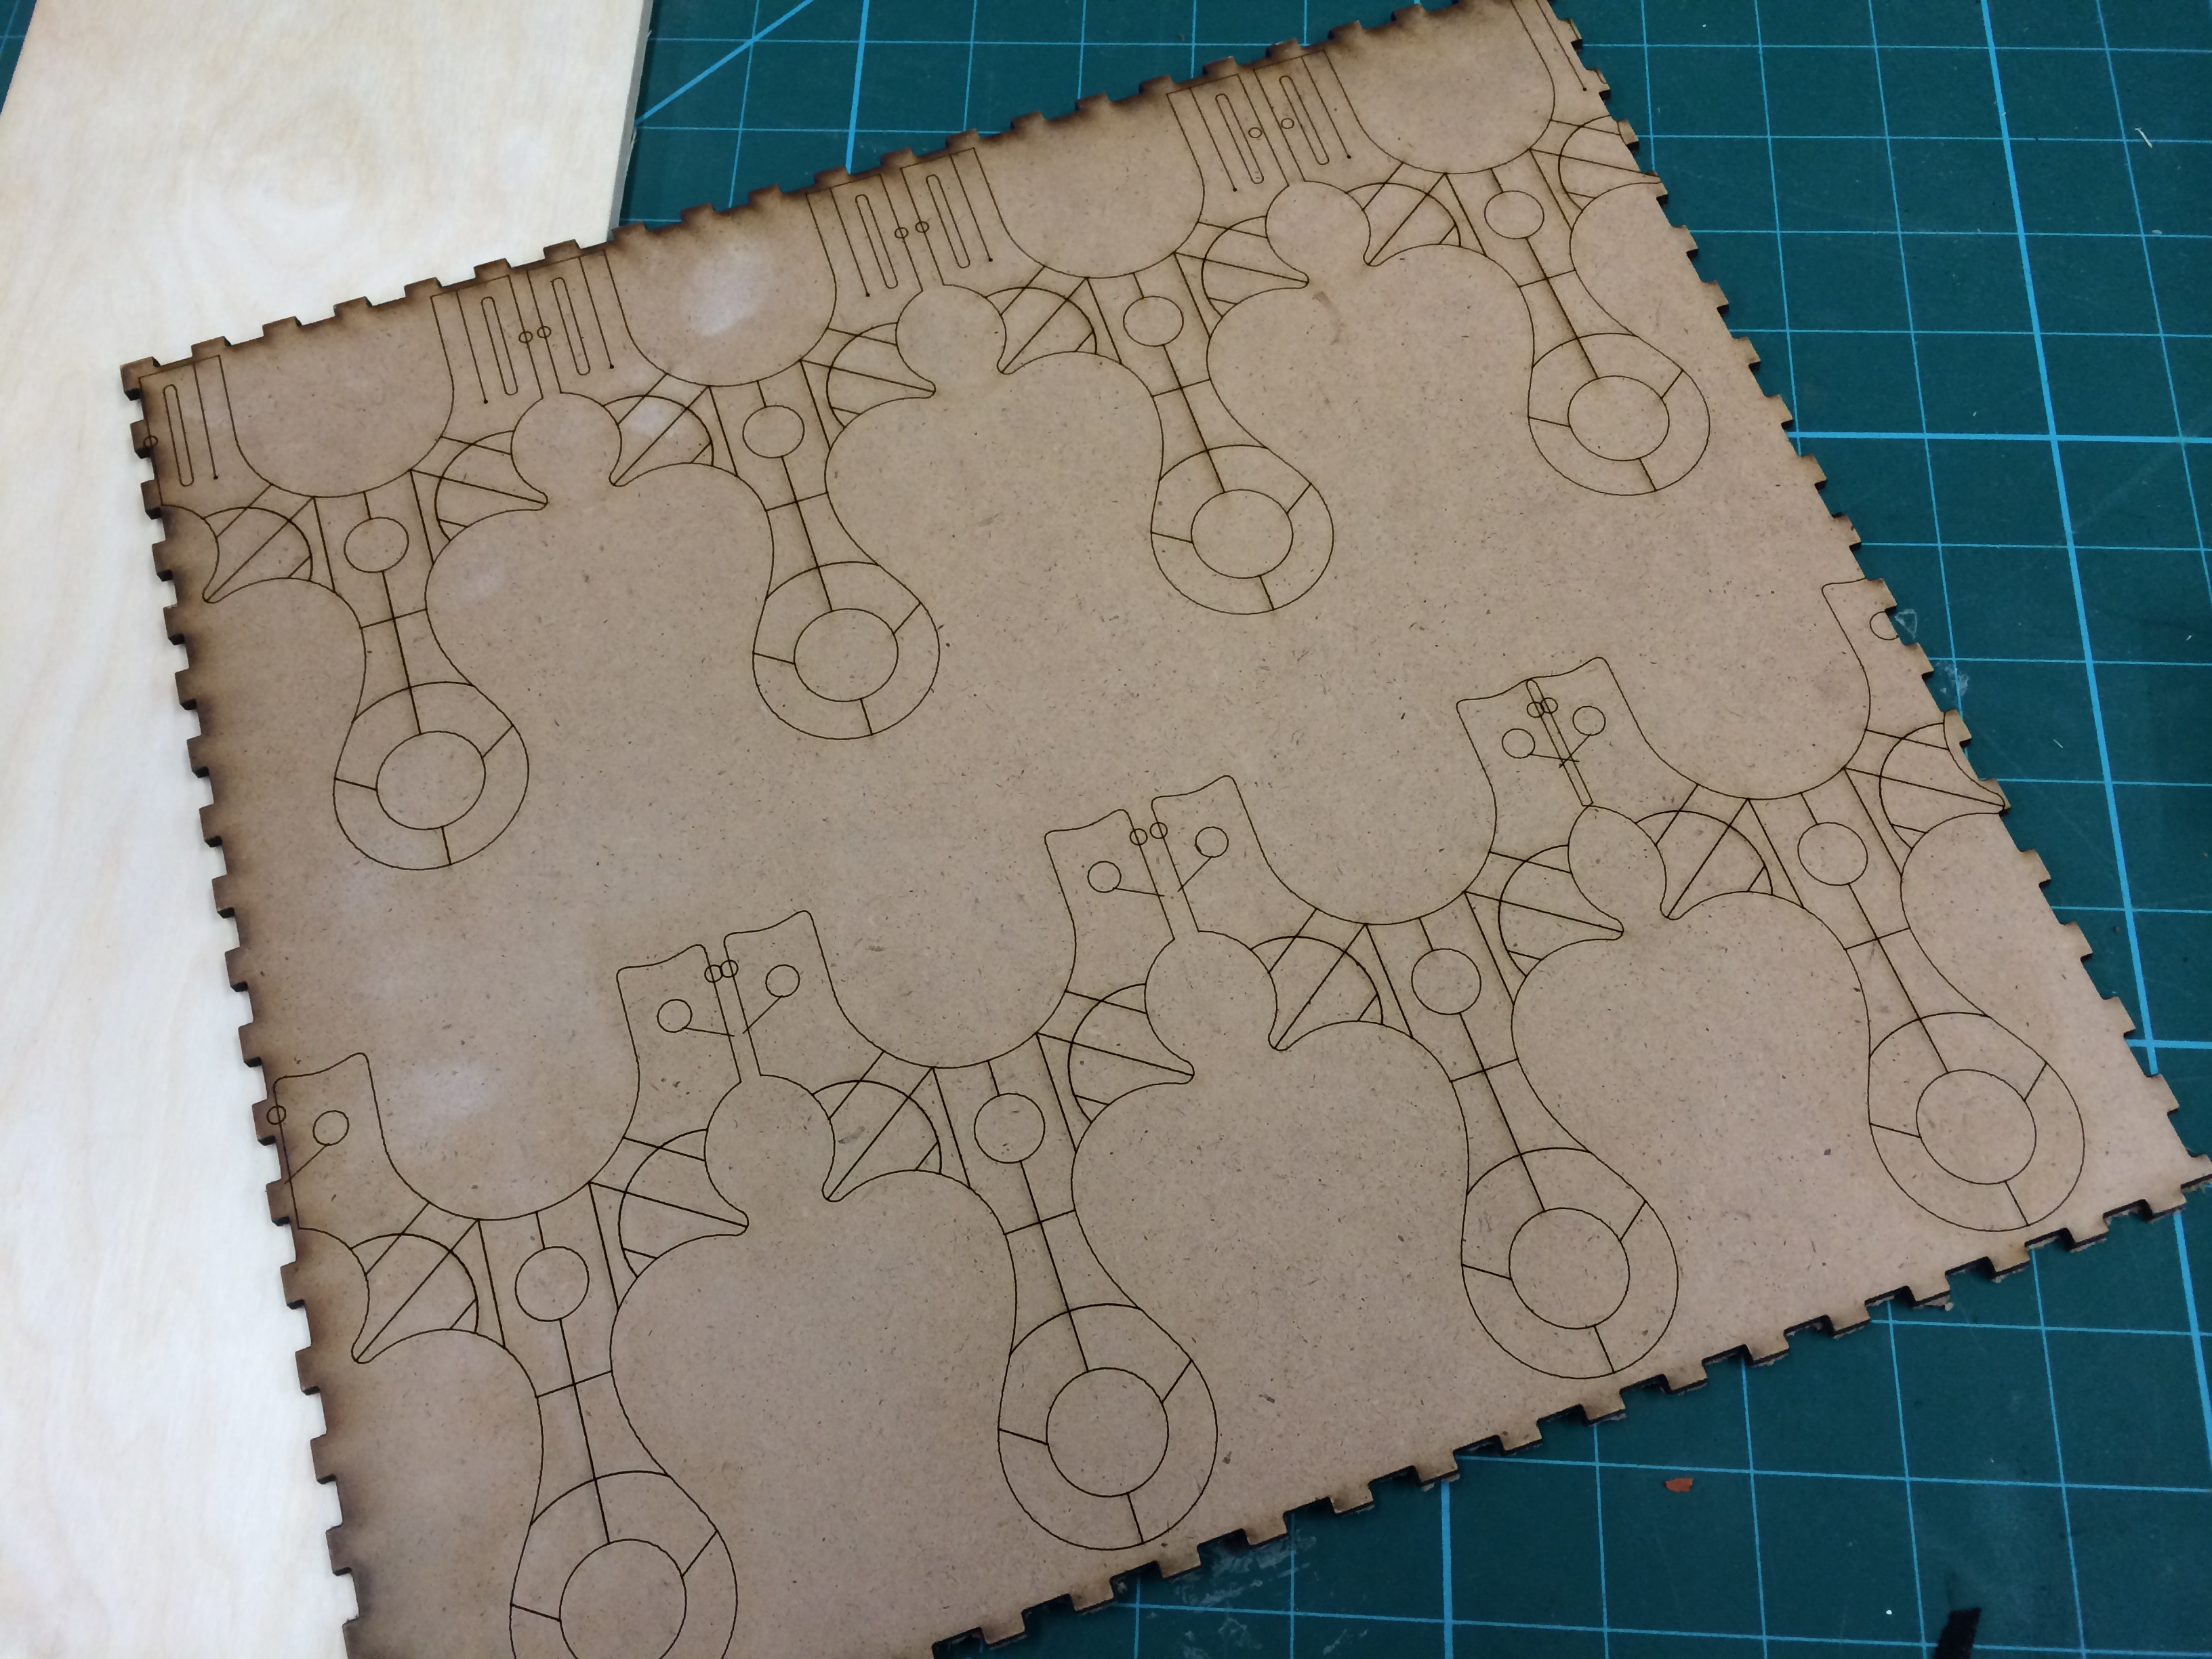
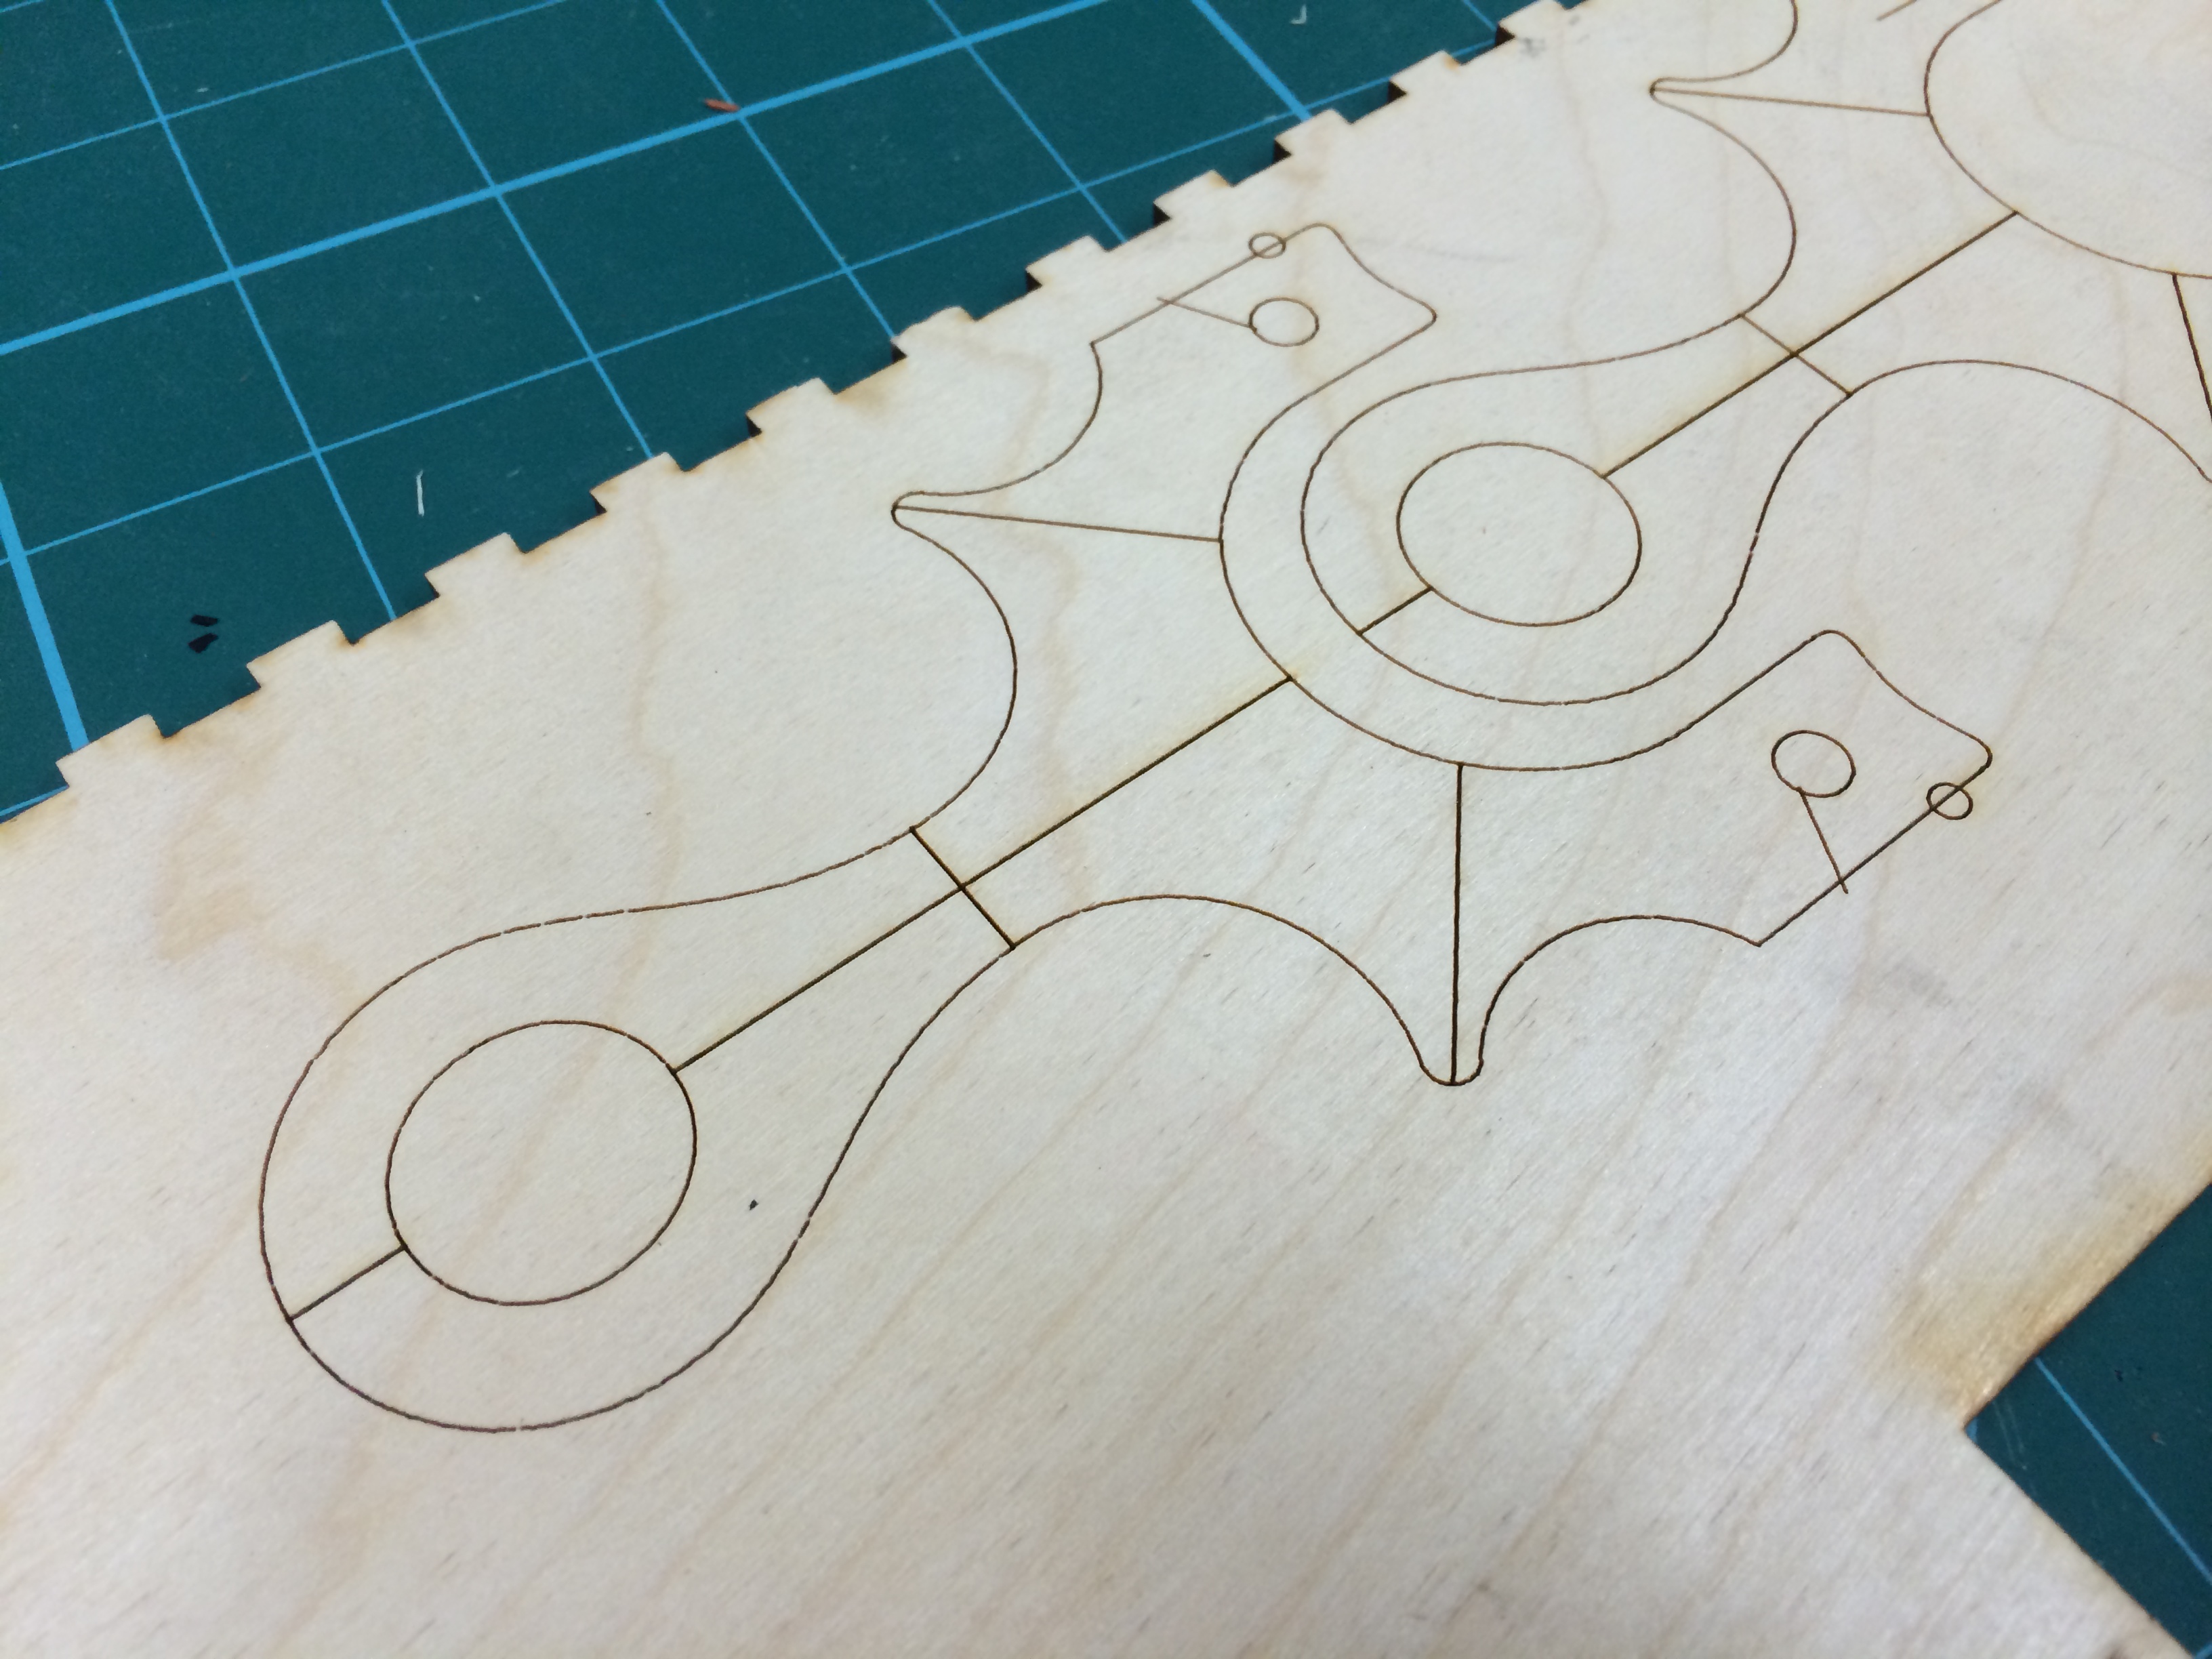
I started in Adobe Illustrator, building simple shapes and staying within the boundaries of the Original PFS dimensions (about 2″x4″). Also using some of my favourite scripts: Round-any-corner & Metaball (ARC)
Then it was off to the laser, which you can see here. One day, robots will rise up and rule the earth, but for now, they are happy to do our bidding.
The result is a nice set parts ready to be processed and glued up, the material is a 1/4″ Batlic birch plywood.
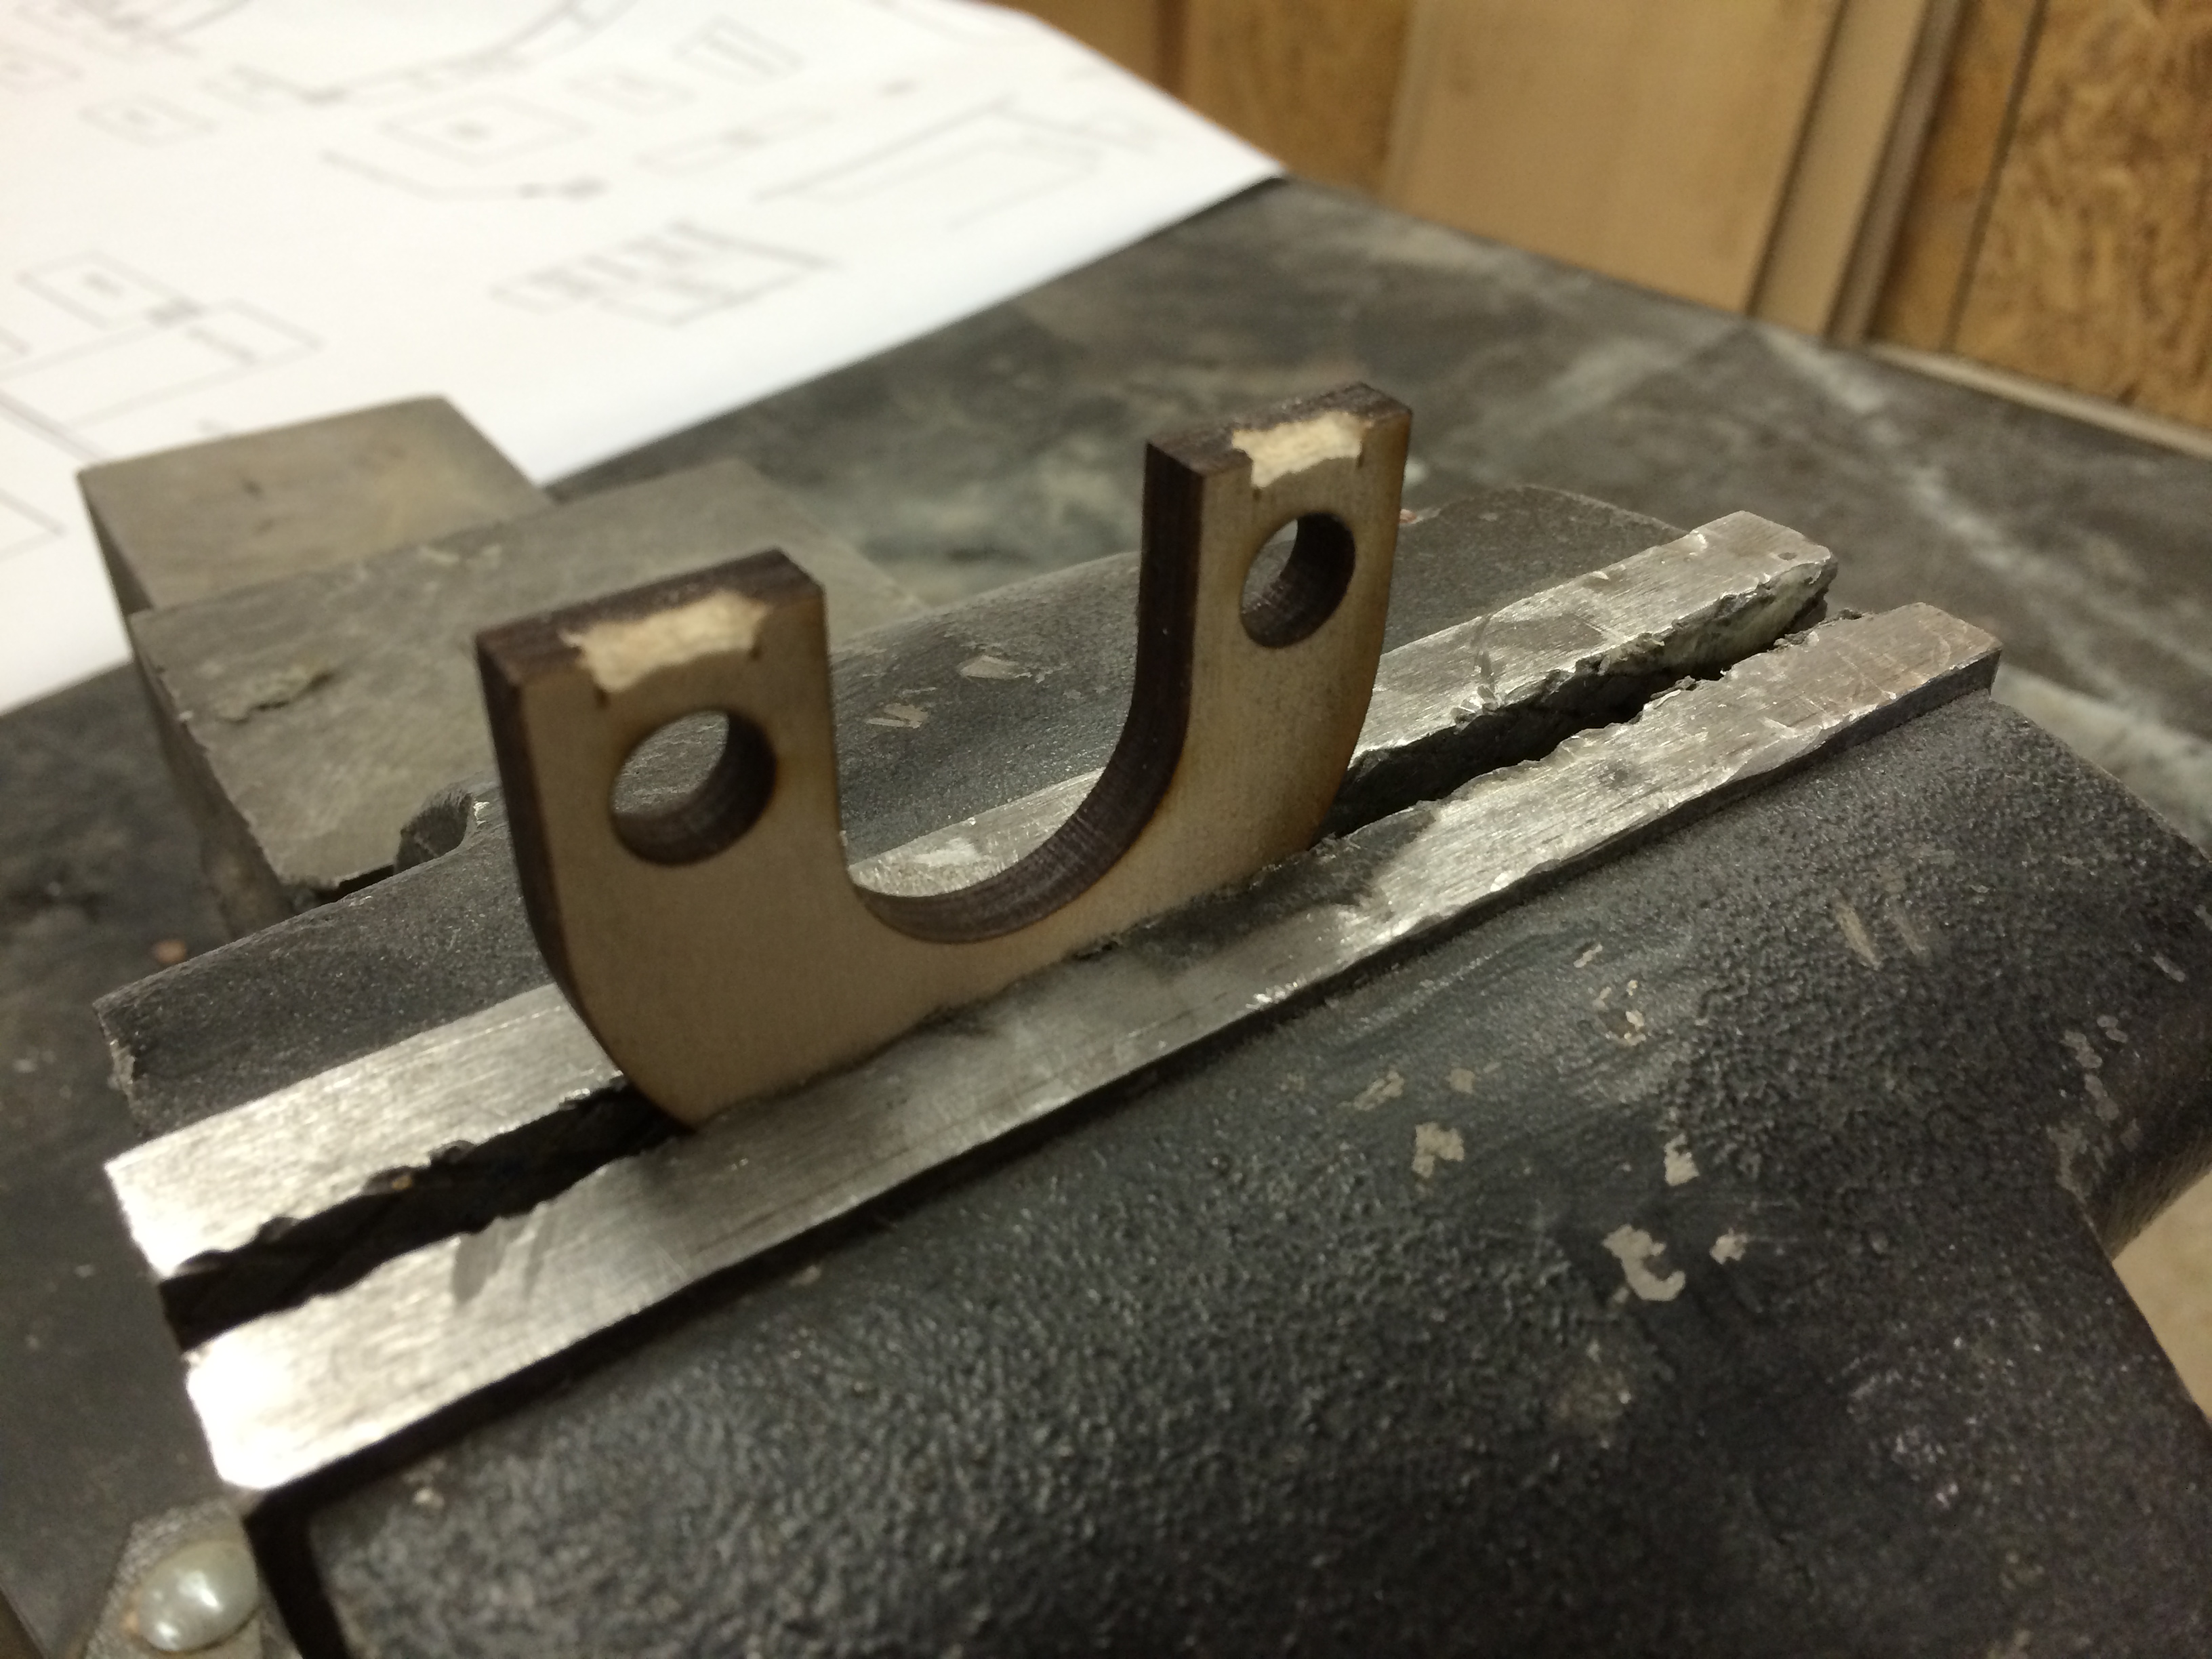
Before I glued anything together, I had to process the internal mechanisms. Like I had mentioned, I have been thinking about this for quite some time so it all came together pretty quickly and I had a lot of operations layed out in my head. The first operation was to roll the edge of the inside layer so that the bands would not be stressed out by a sharp corner. I had already marked where the edge needed to be taken down. A file and some sand paper made quick work of this.
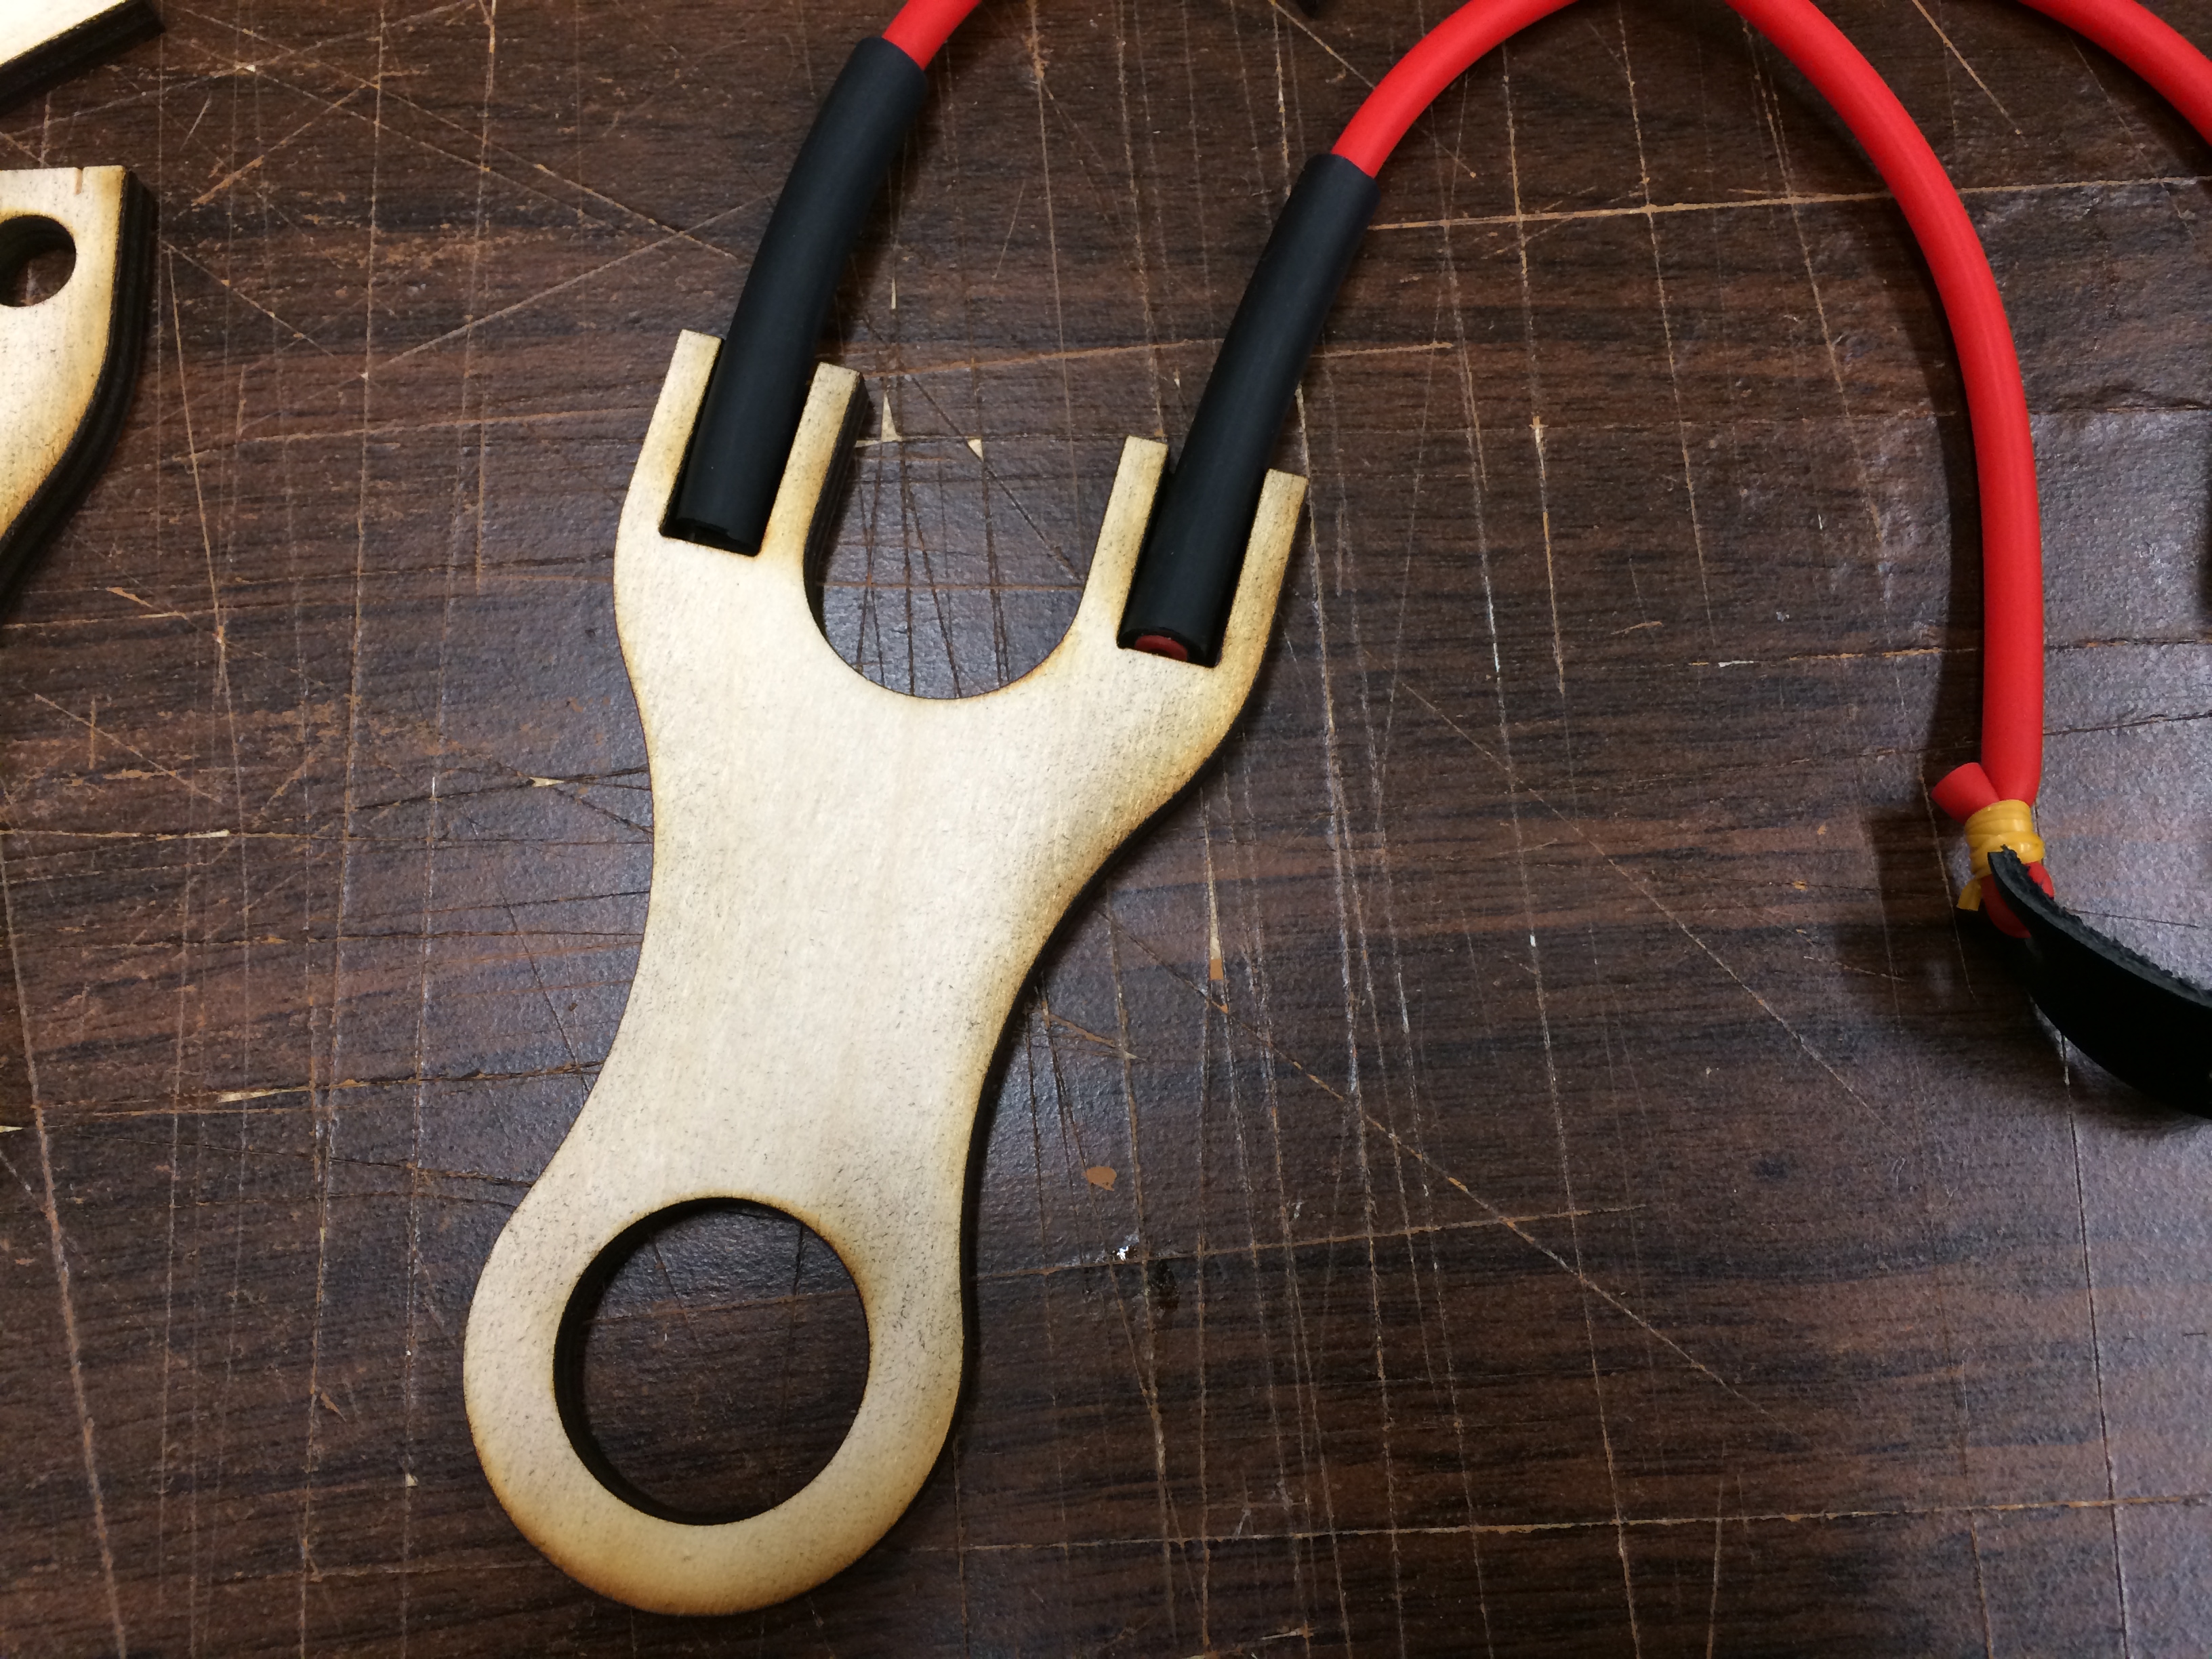
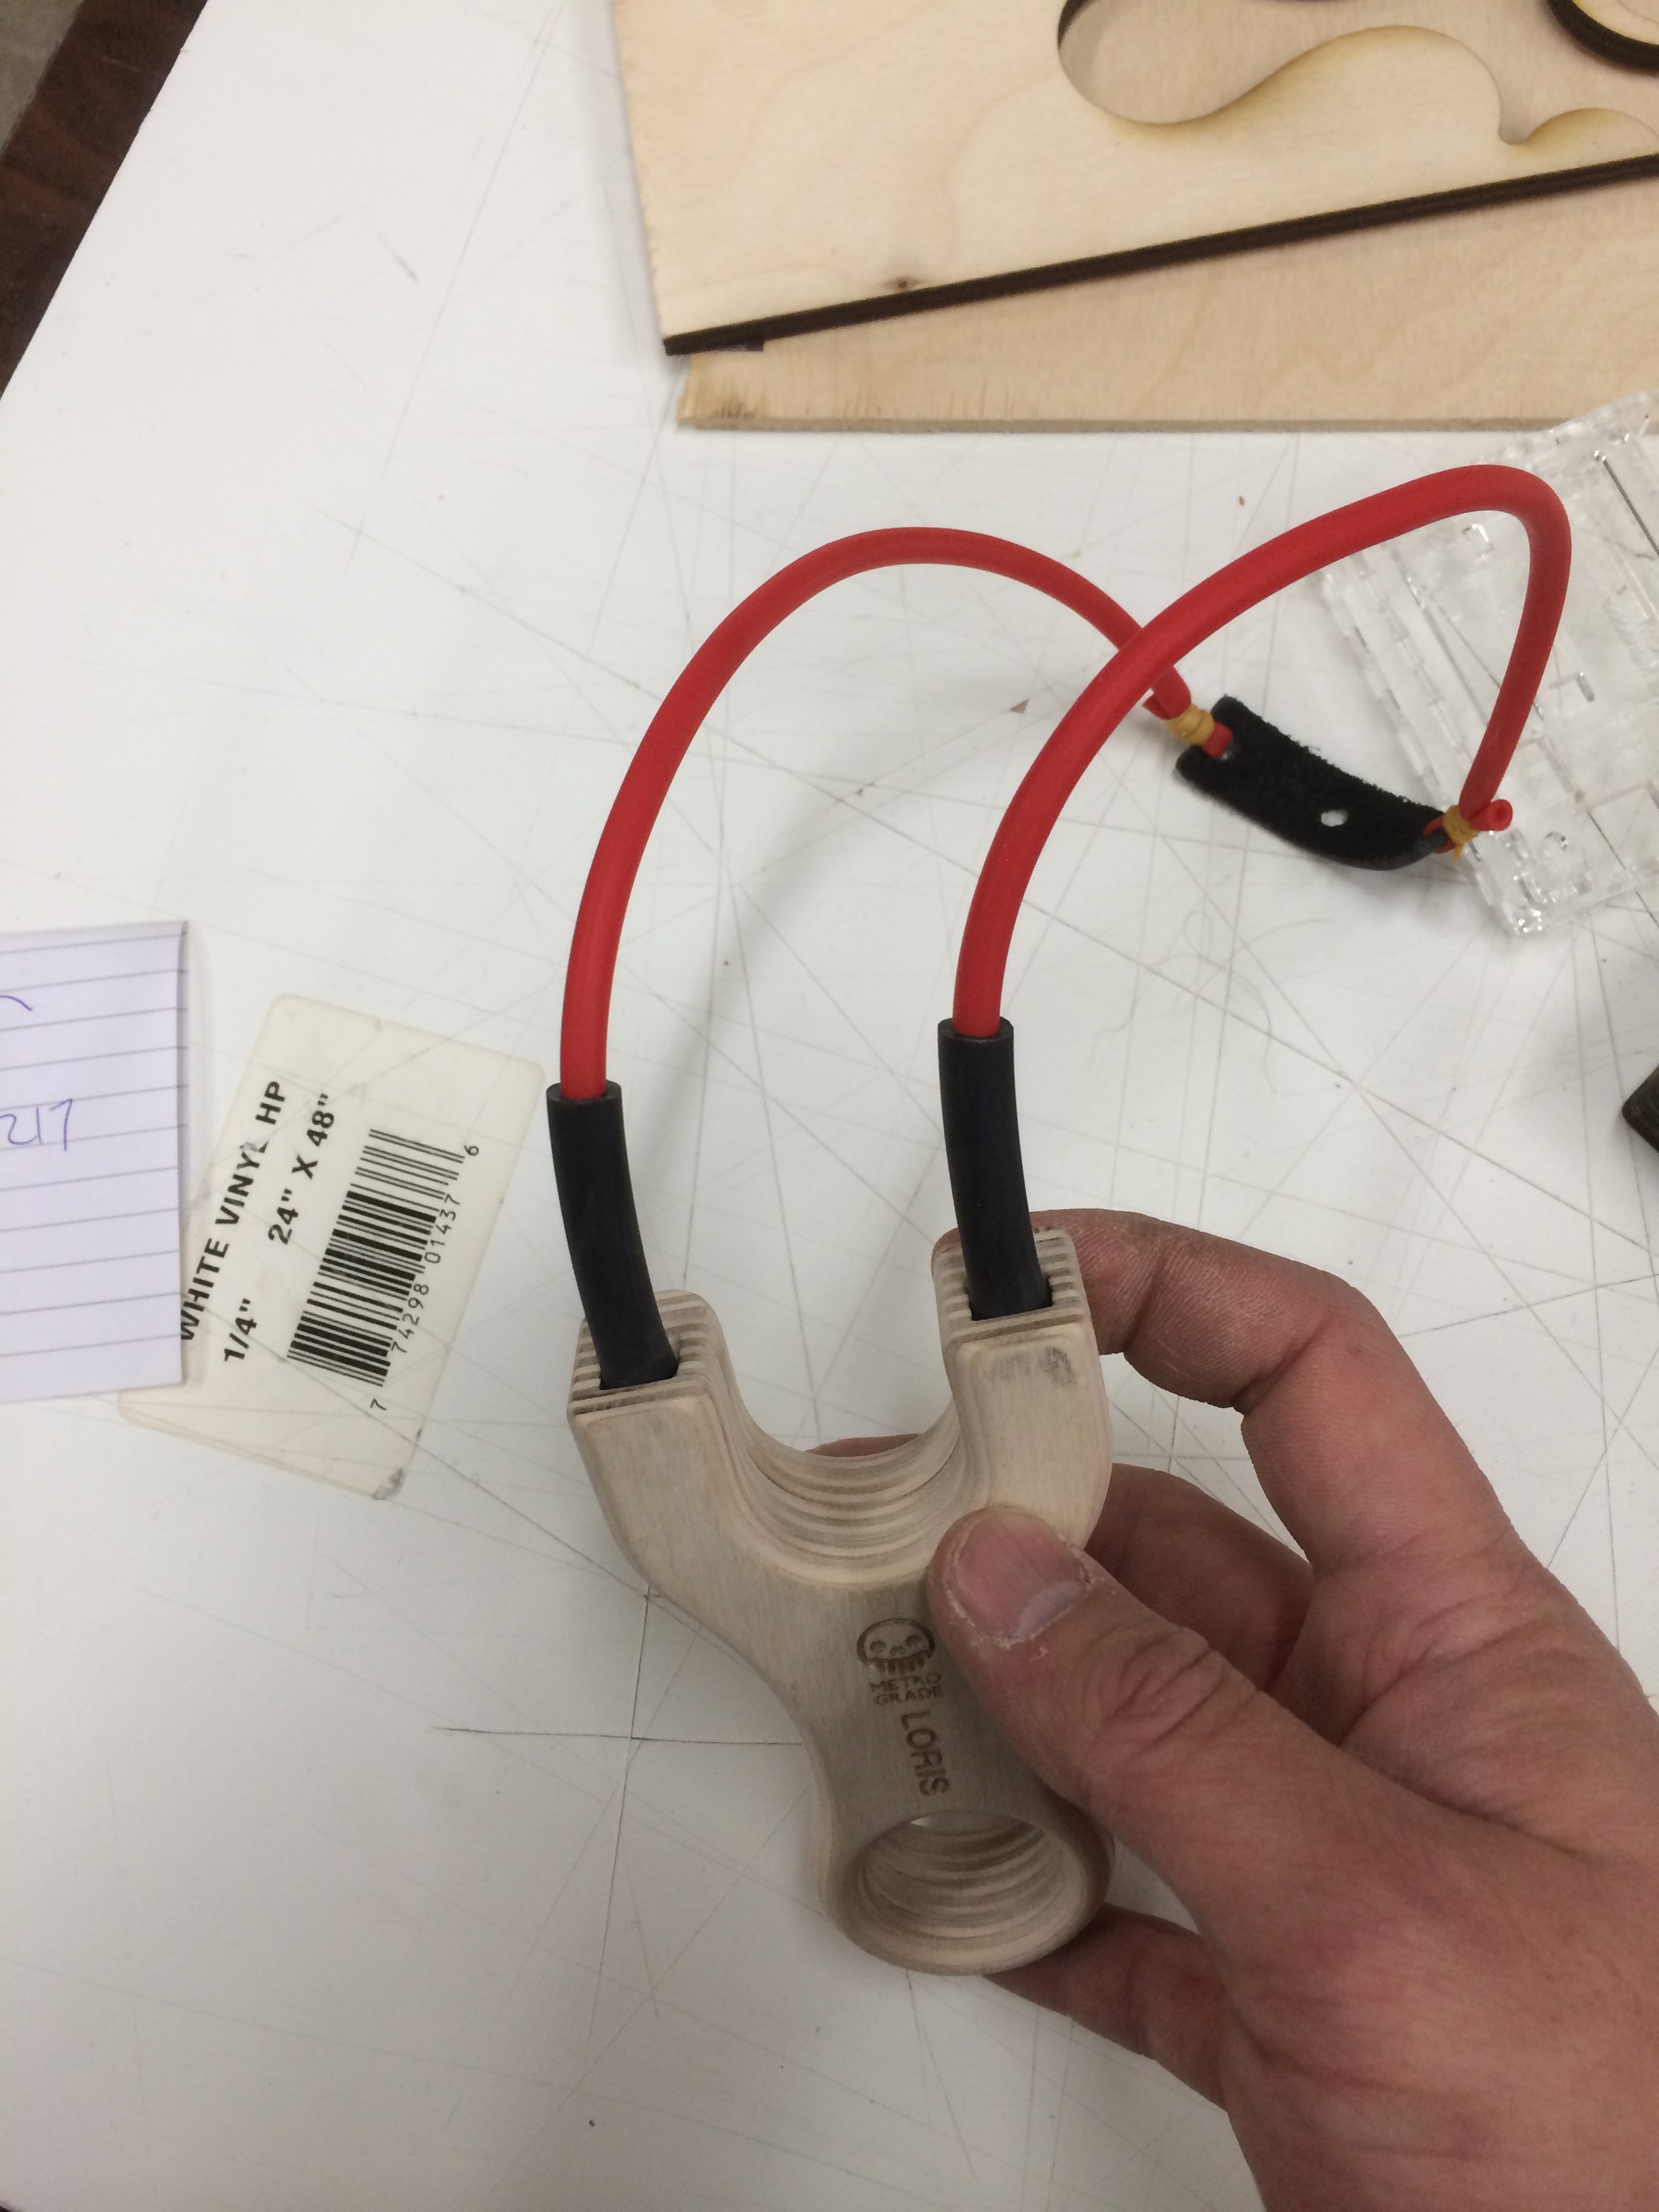
The rest of the internal slots got a quick 320 grit sanding so it would be smooth, the laser cutter sinters the wood so its generally smooth but just to make sure. My original plan was to use a band set I made up with red 2050 tubing with a 5080 sleeve, but I later changed the sleeve to a 4070 since it was a bit tough to get the 5080 into the slot after it was assembled. Here’s how the tube set would sit into the fork tips, and a dry fit of the other parts.
All of the layers were carefully glued together, take care not to have excess glue squish into the tube slot. This was clamped for about 10 mins for the glue to set up.
Then the scallops were adorned with an inlay shim of oak (cut cross grain to make it bend easier).
Once it set up for another 10-15 minutes, most of the finishing steps aren’t that much different than any other MGG slingshot.
Flush sanding all the sides and faces (my favourite state of a slingshot)
Then router the edge to 1/4″ (except the top) and edge sanding with a 100/140 block:
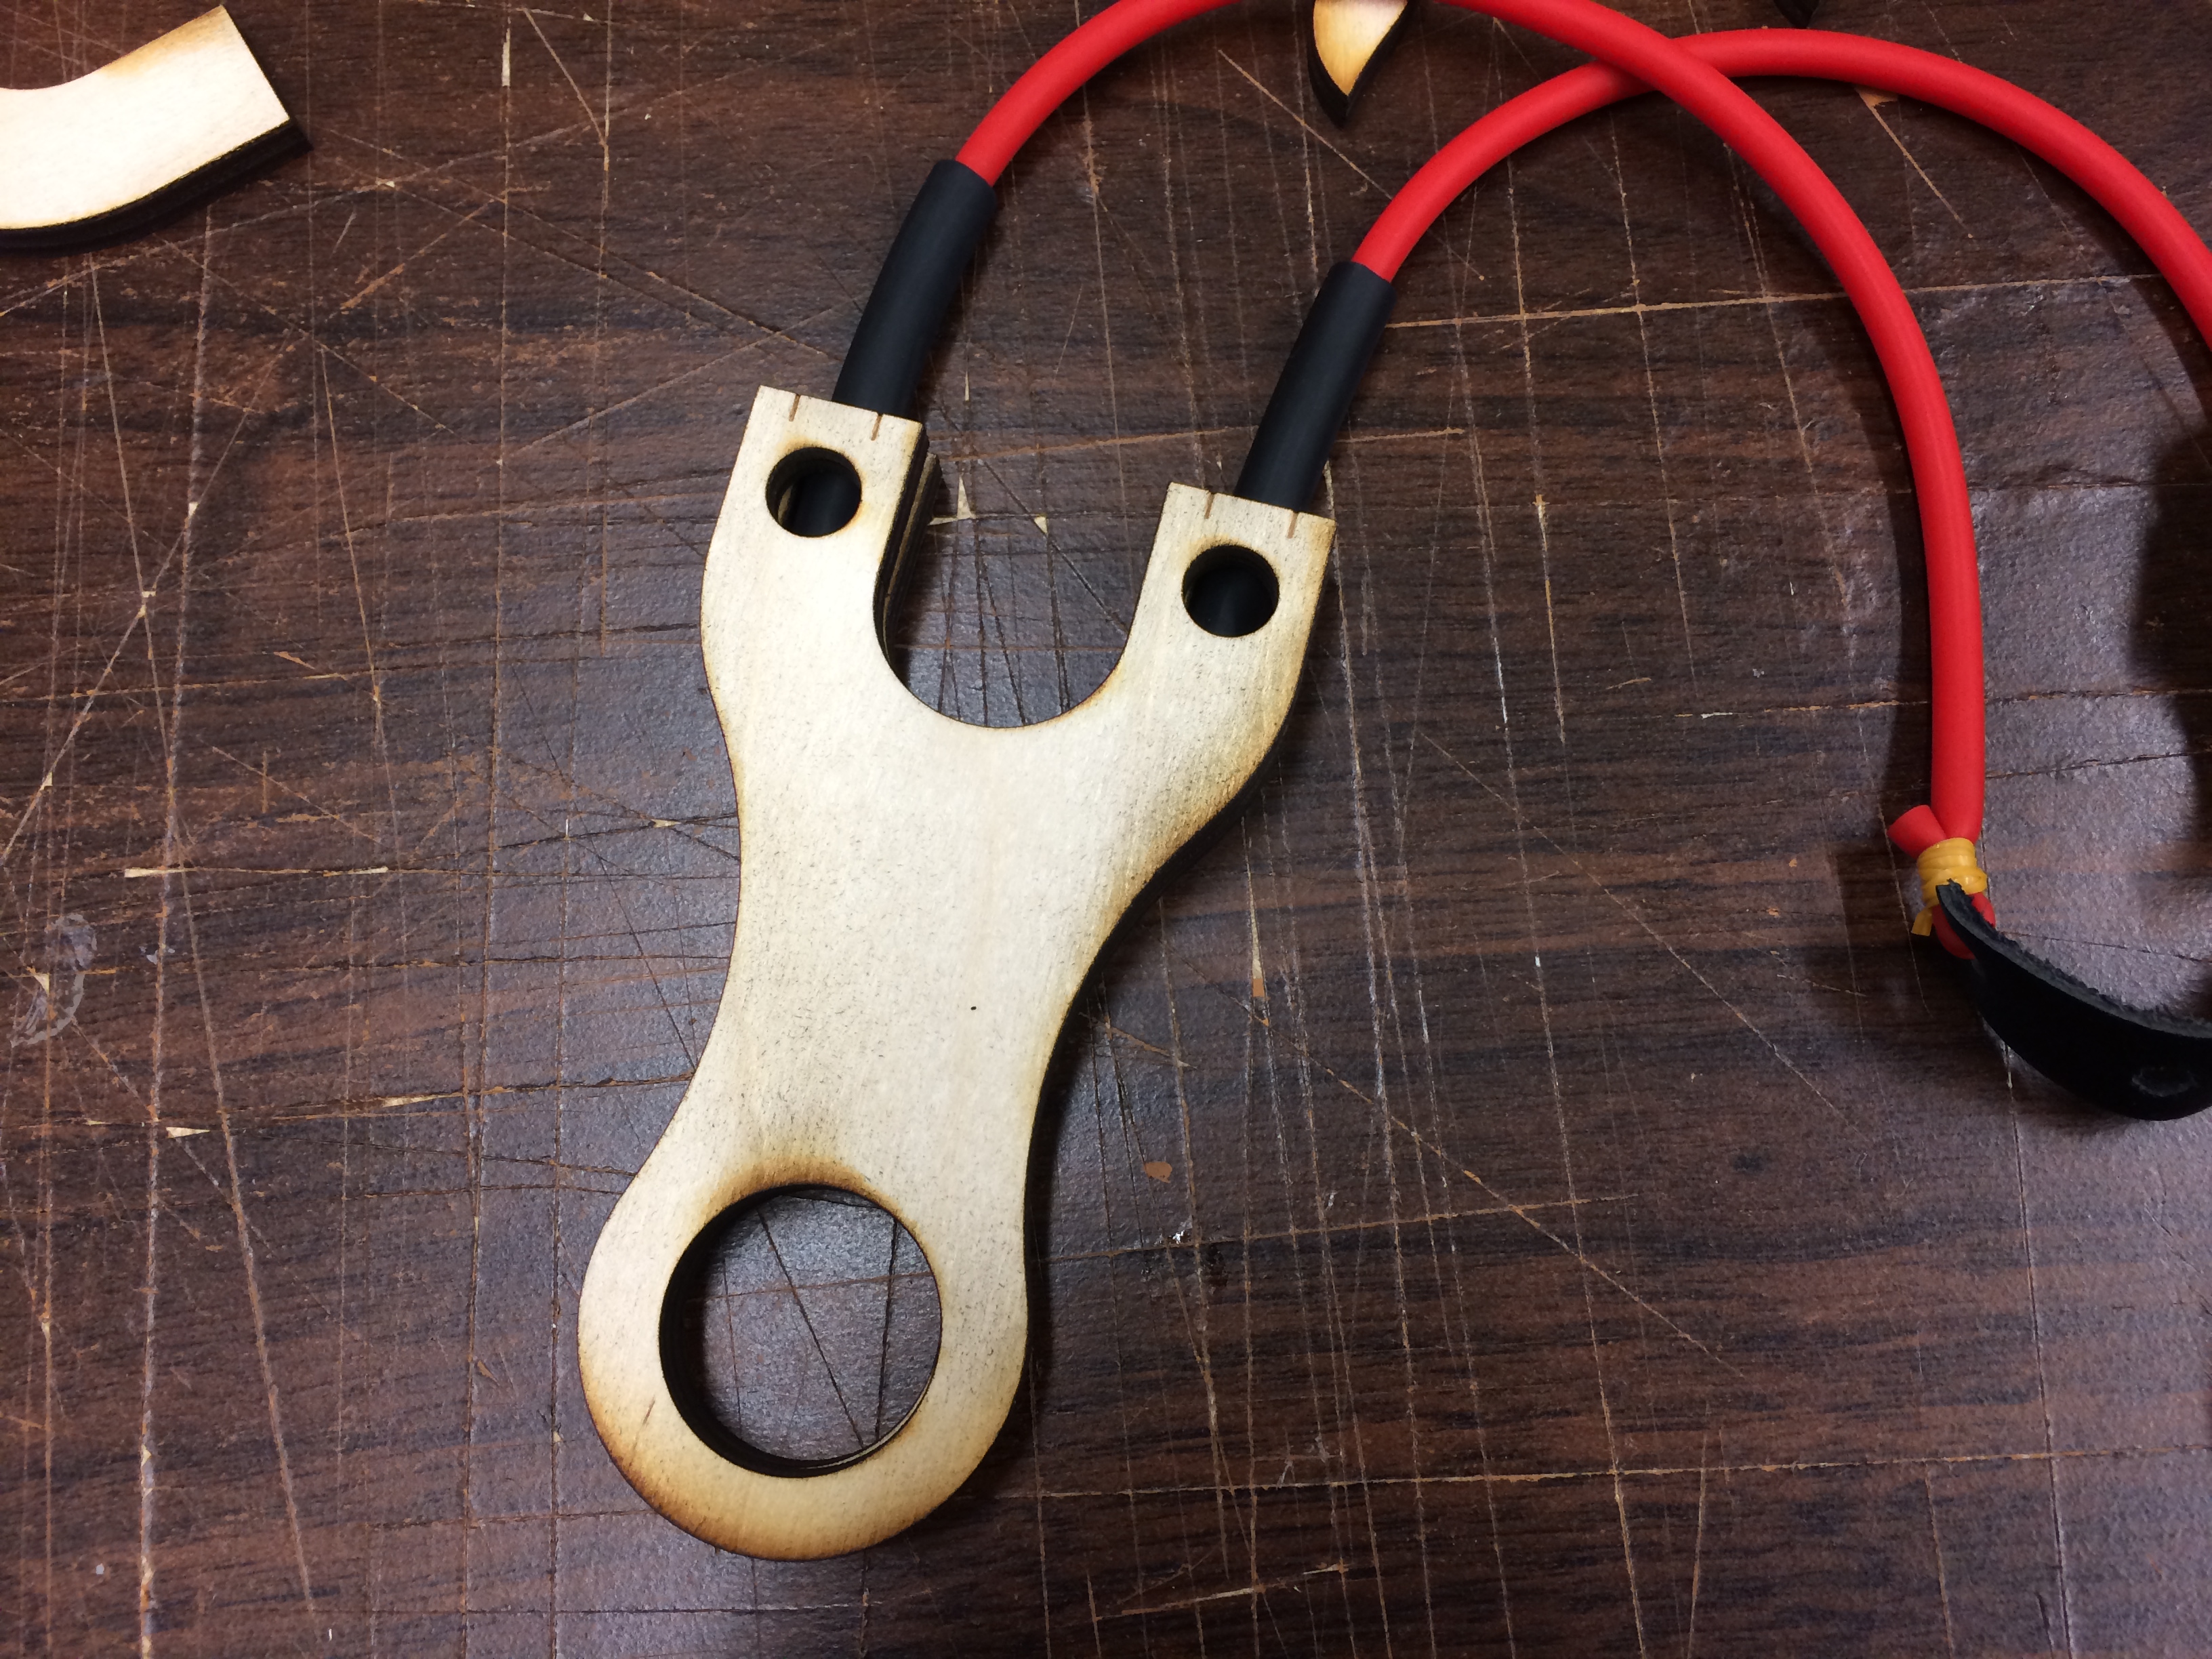
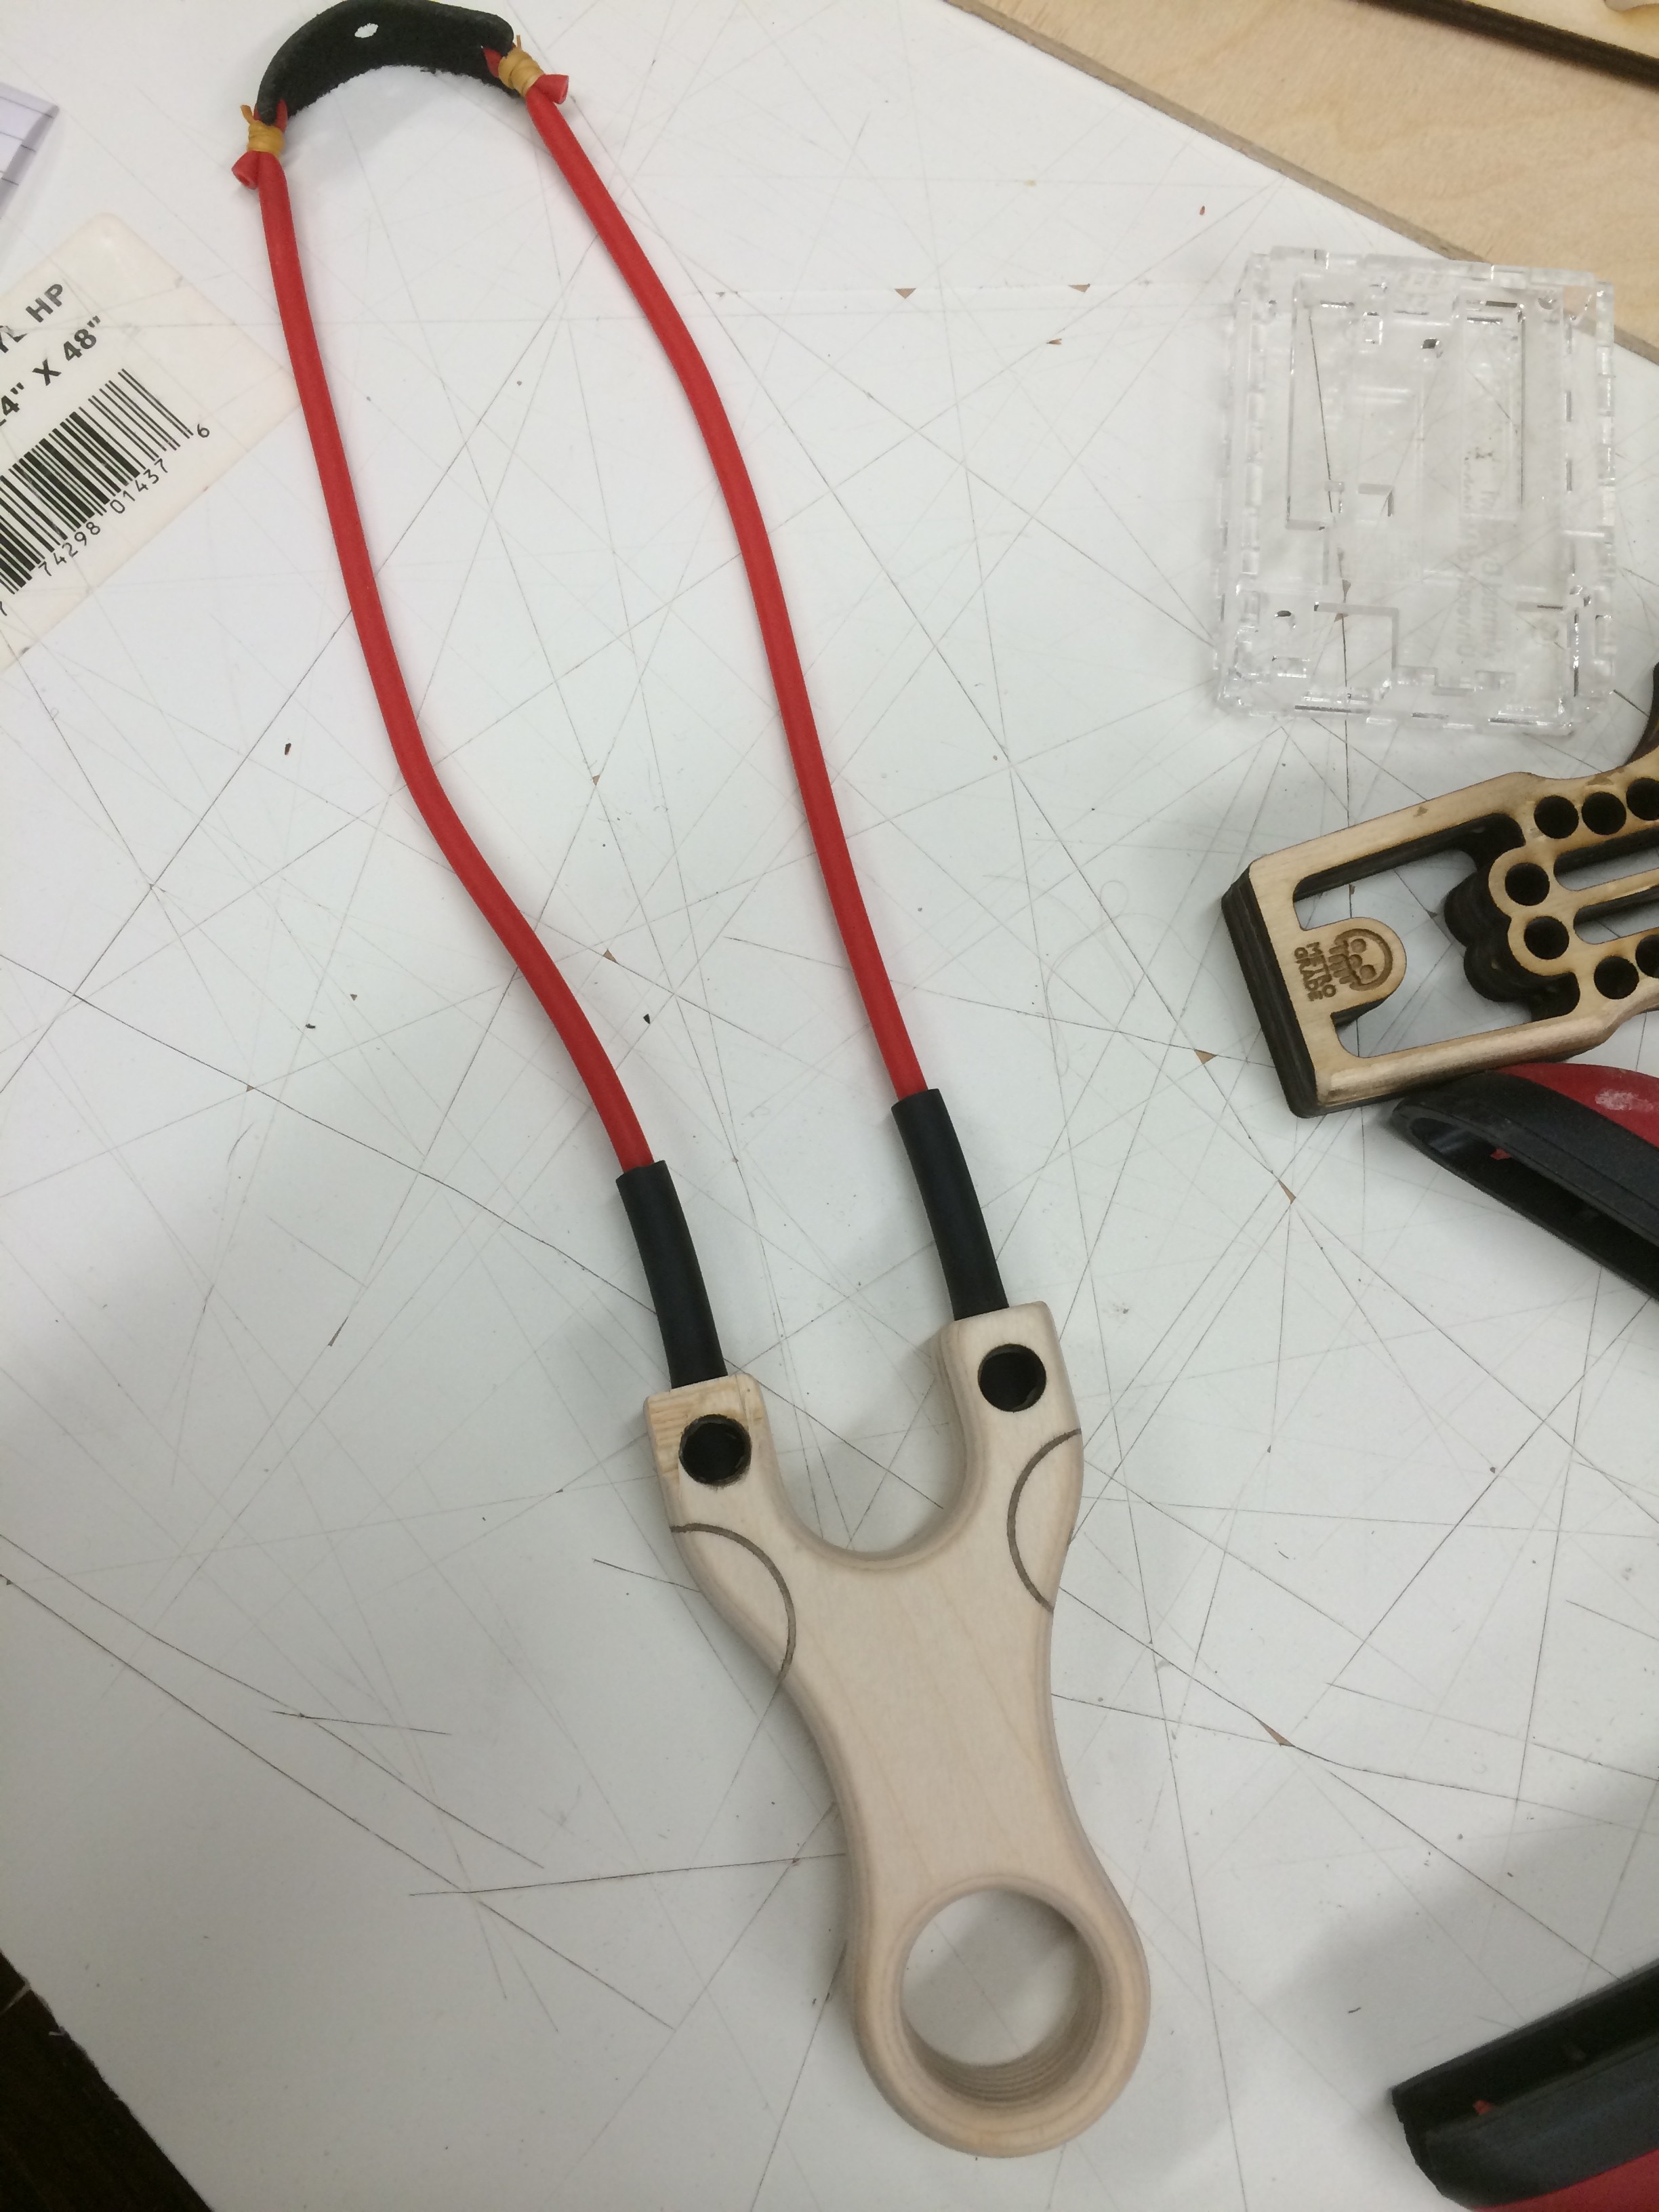
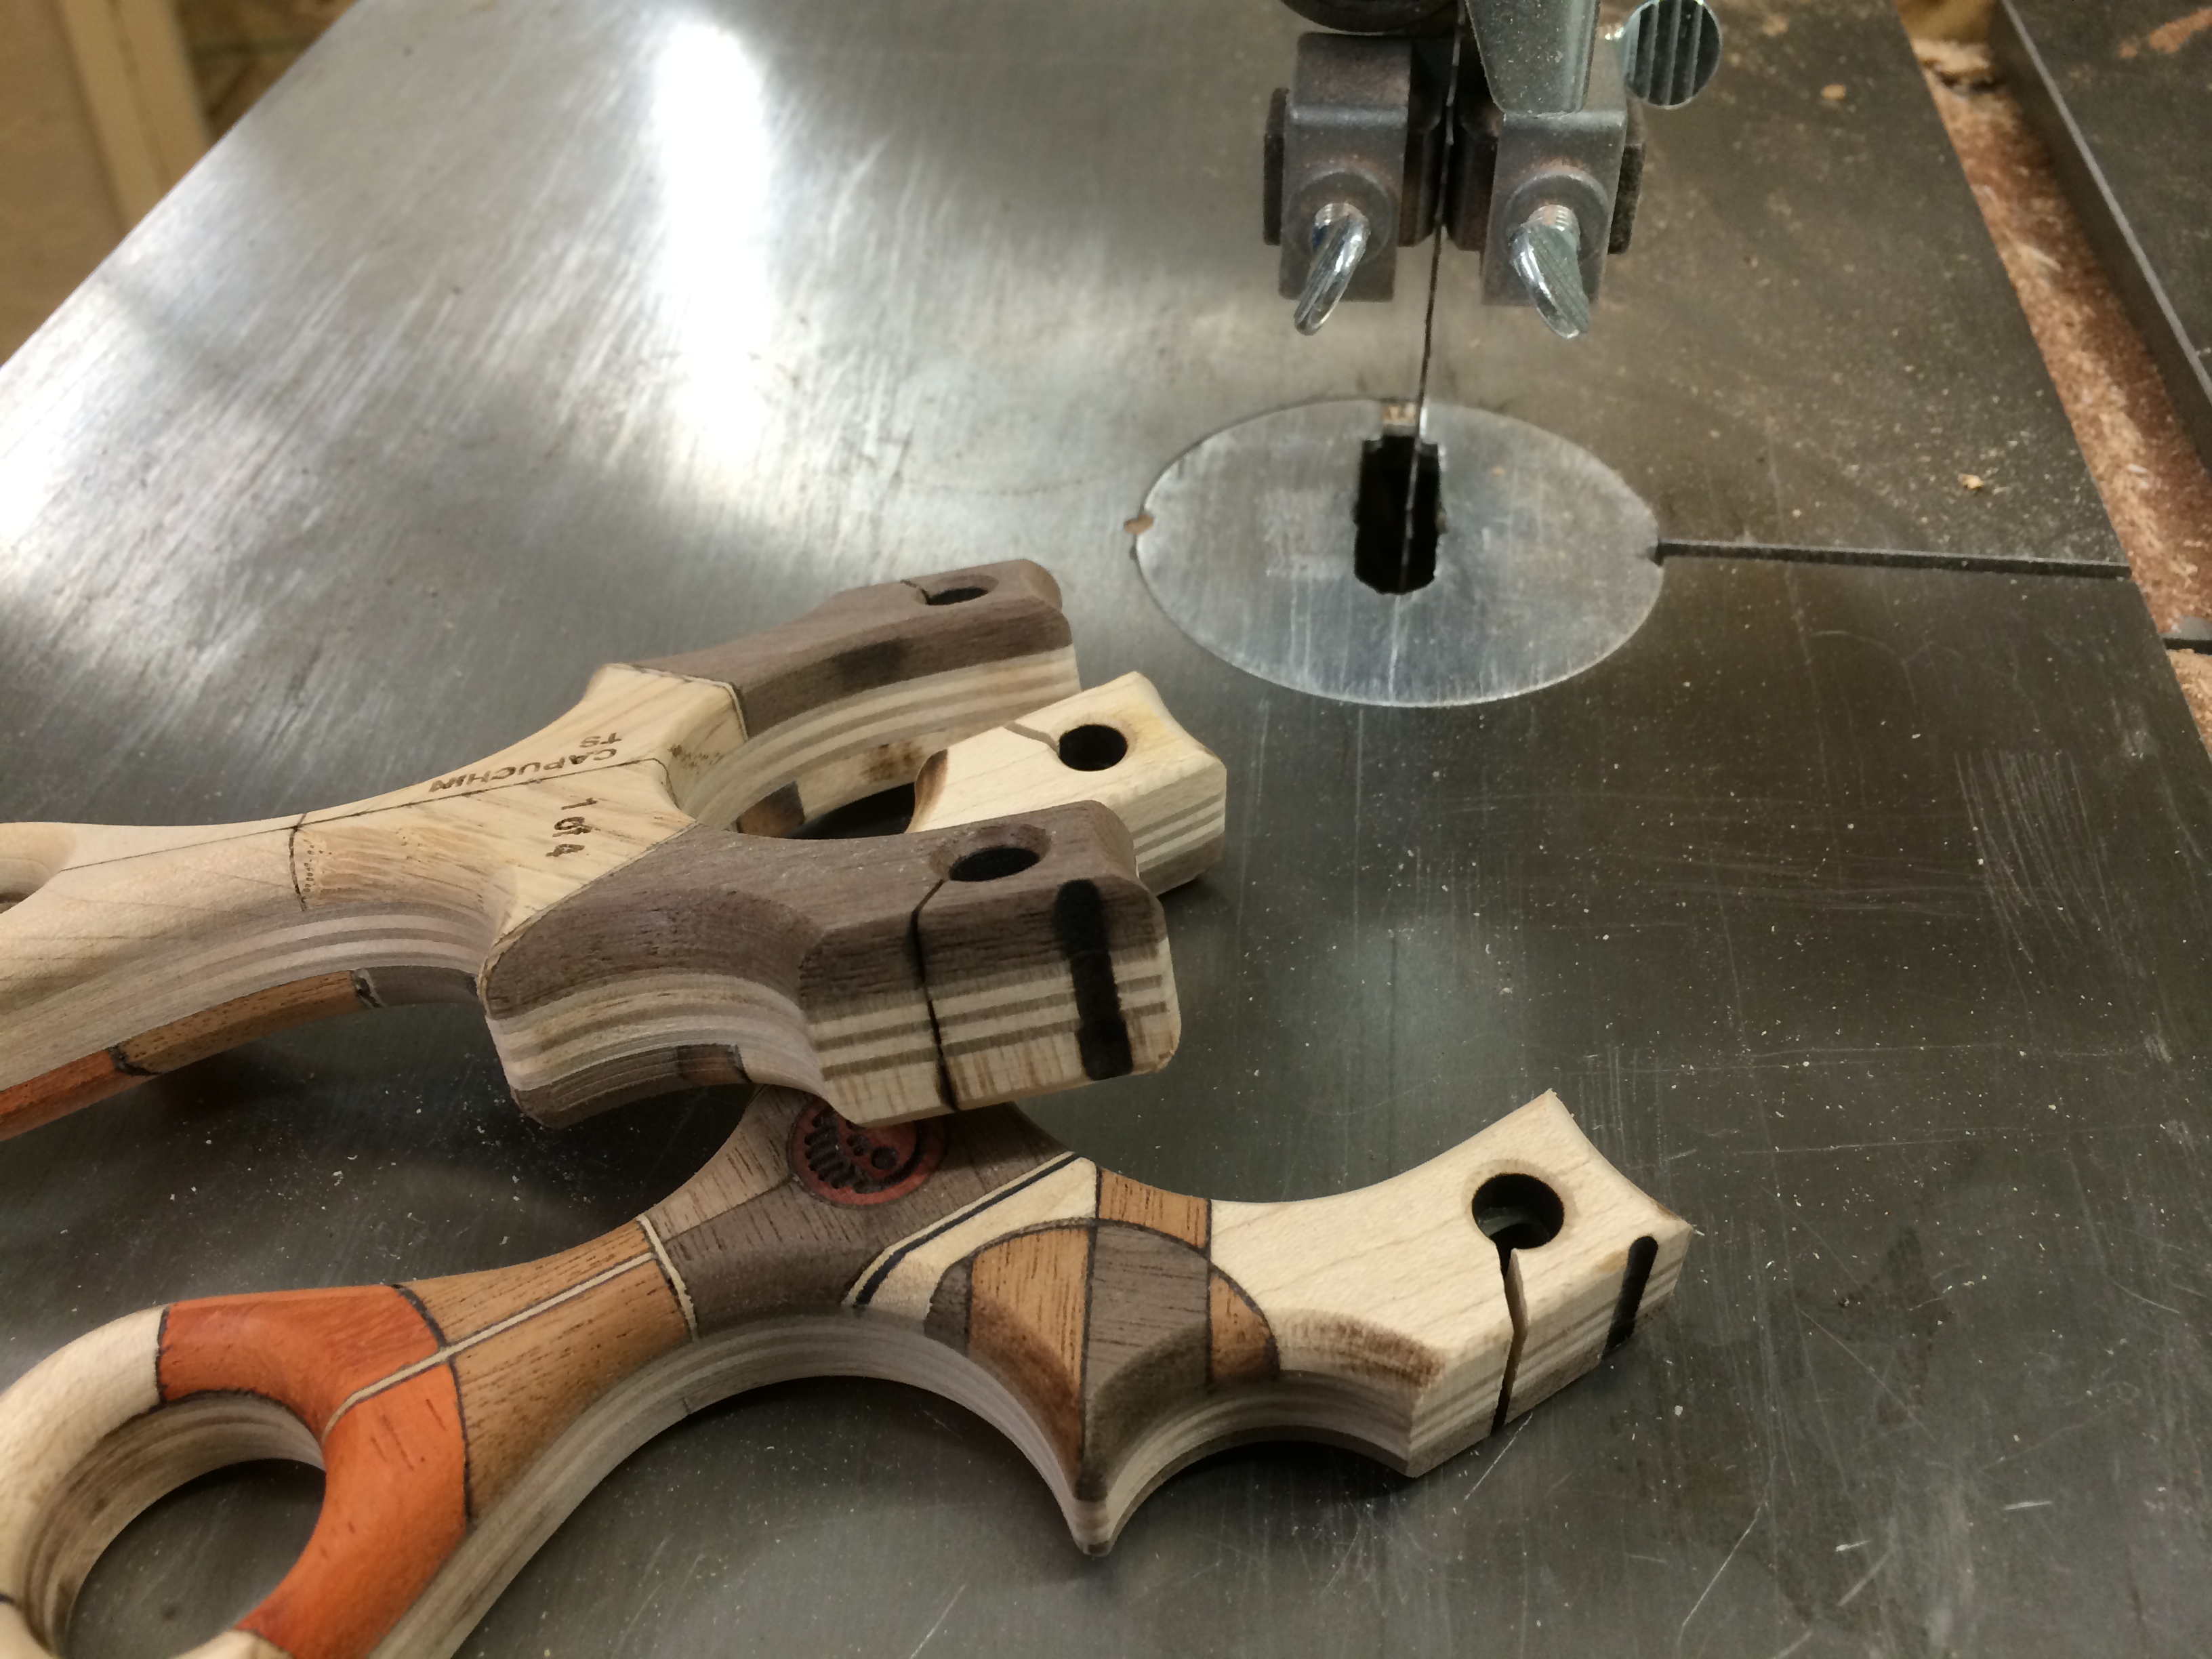
Dry fitting the tubeset.
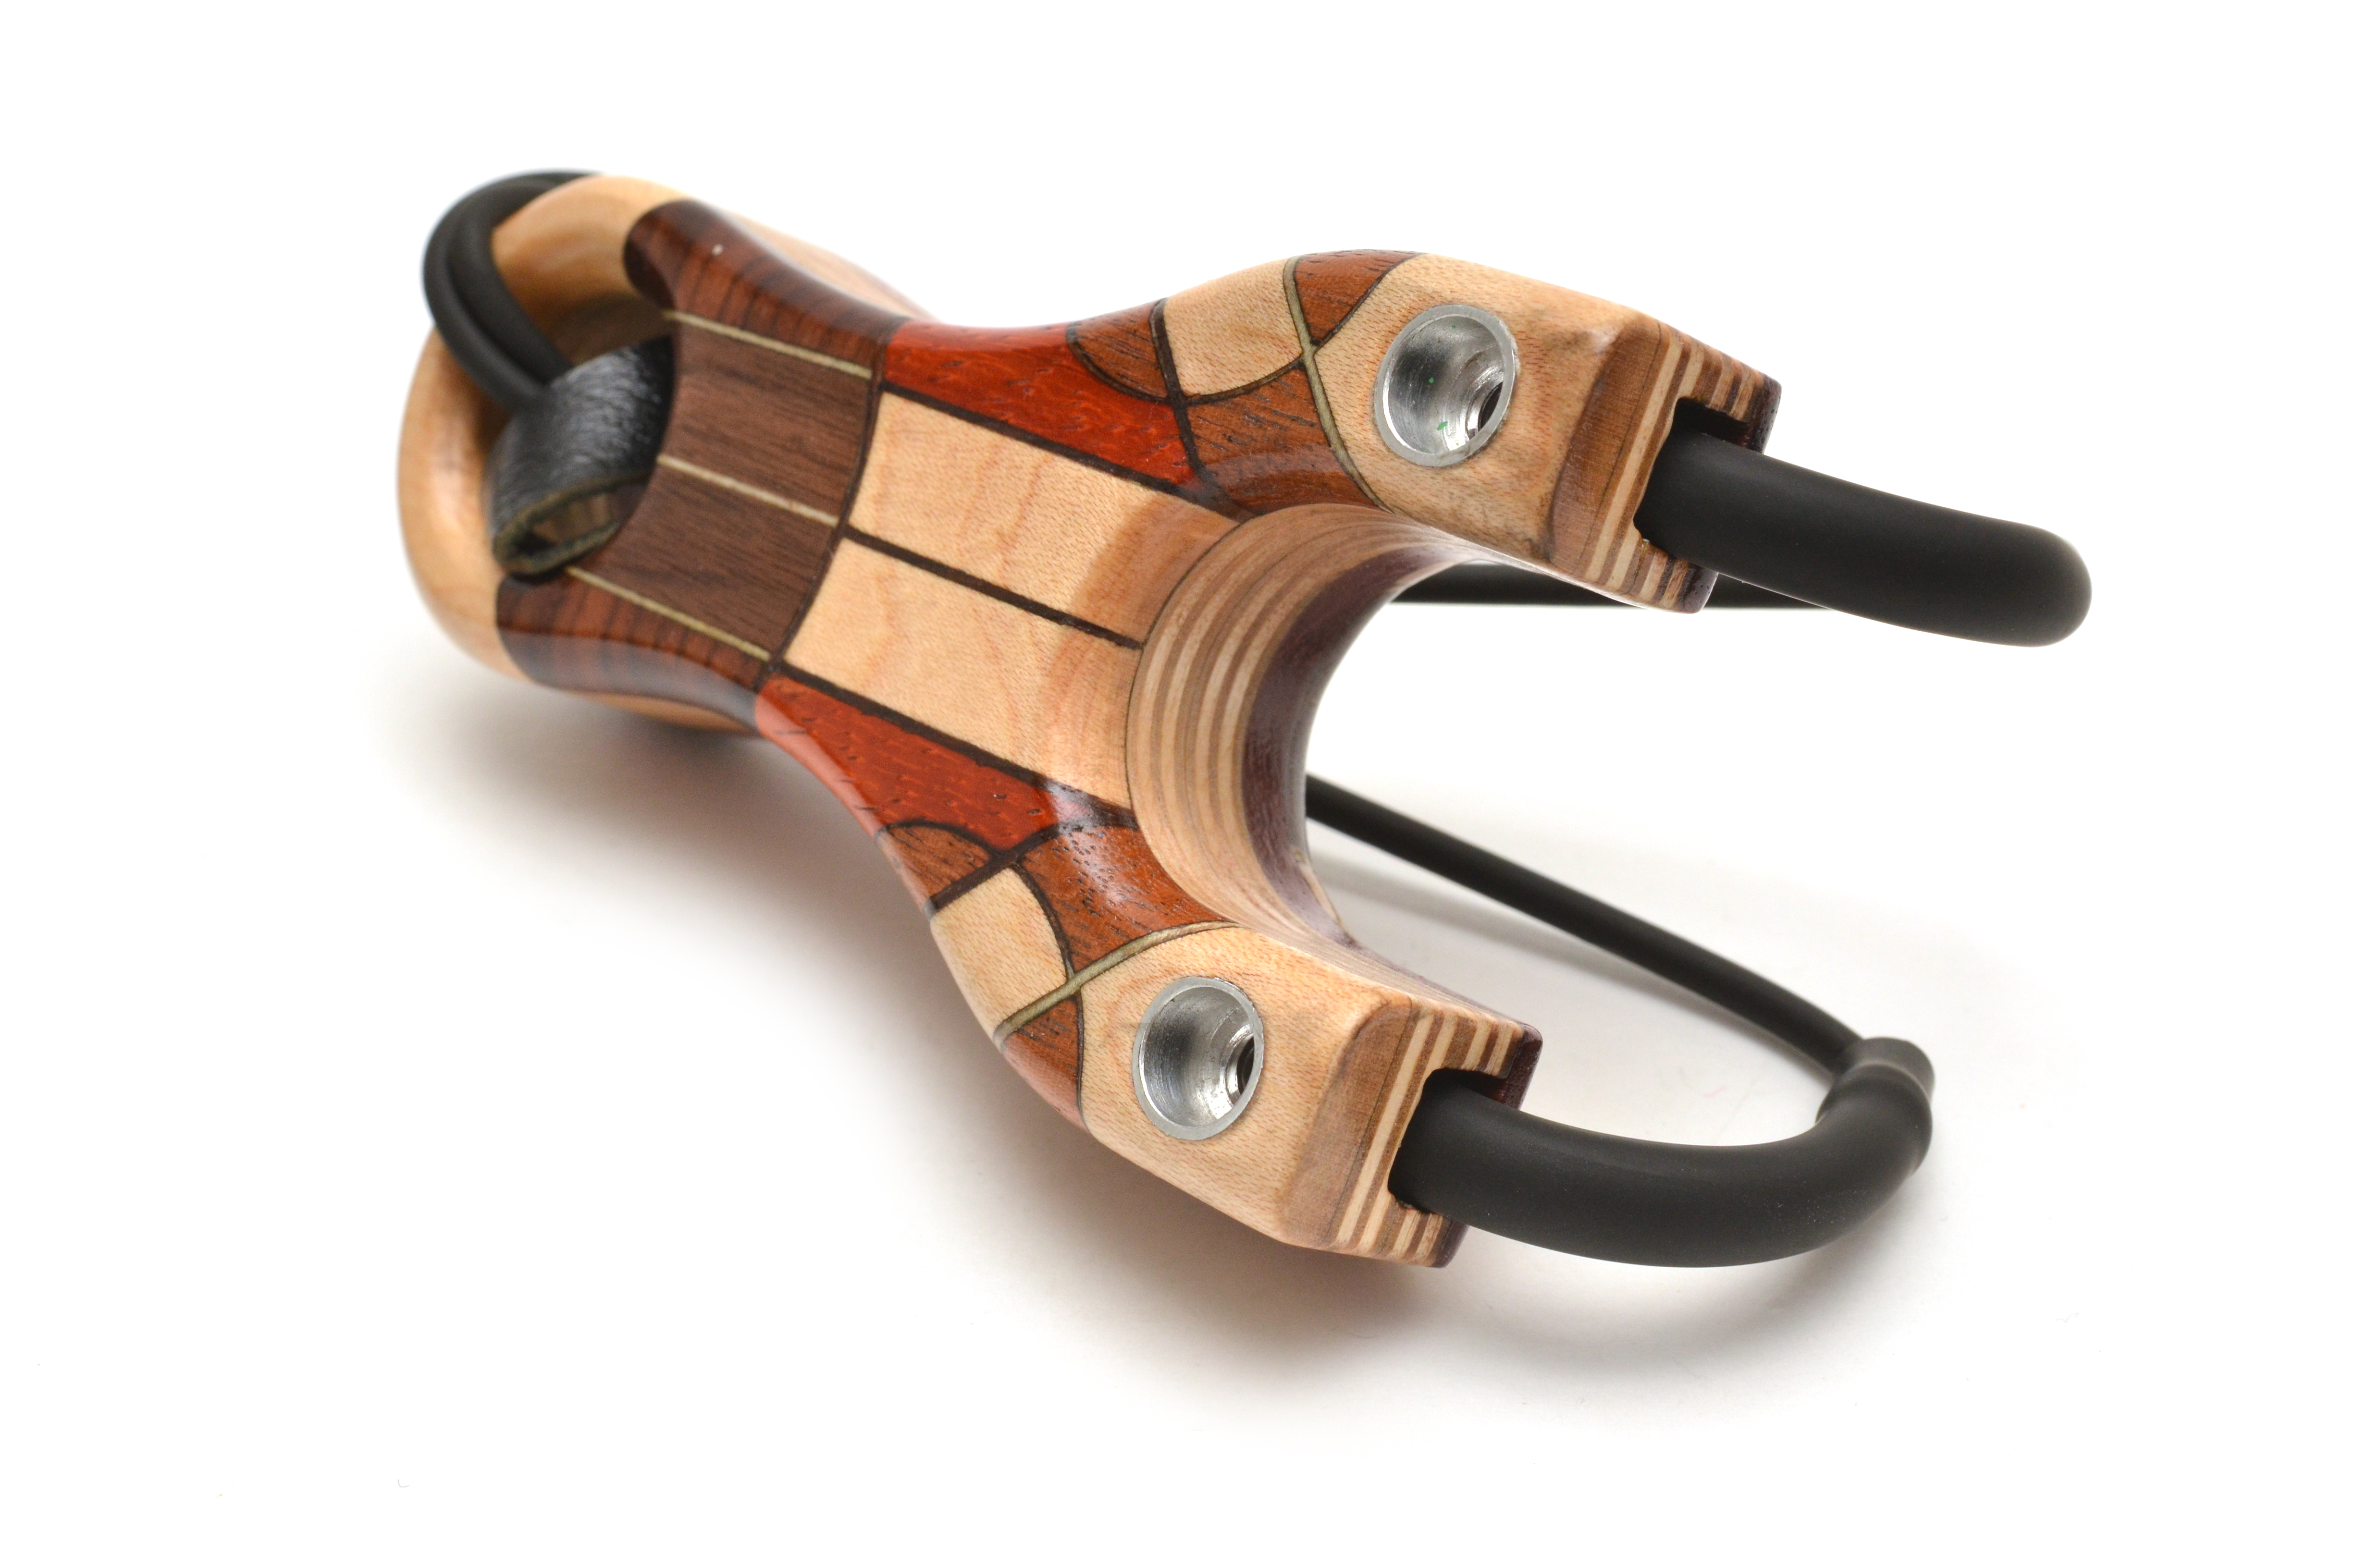
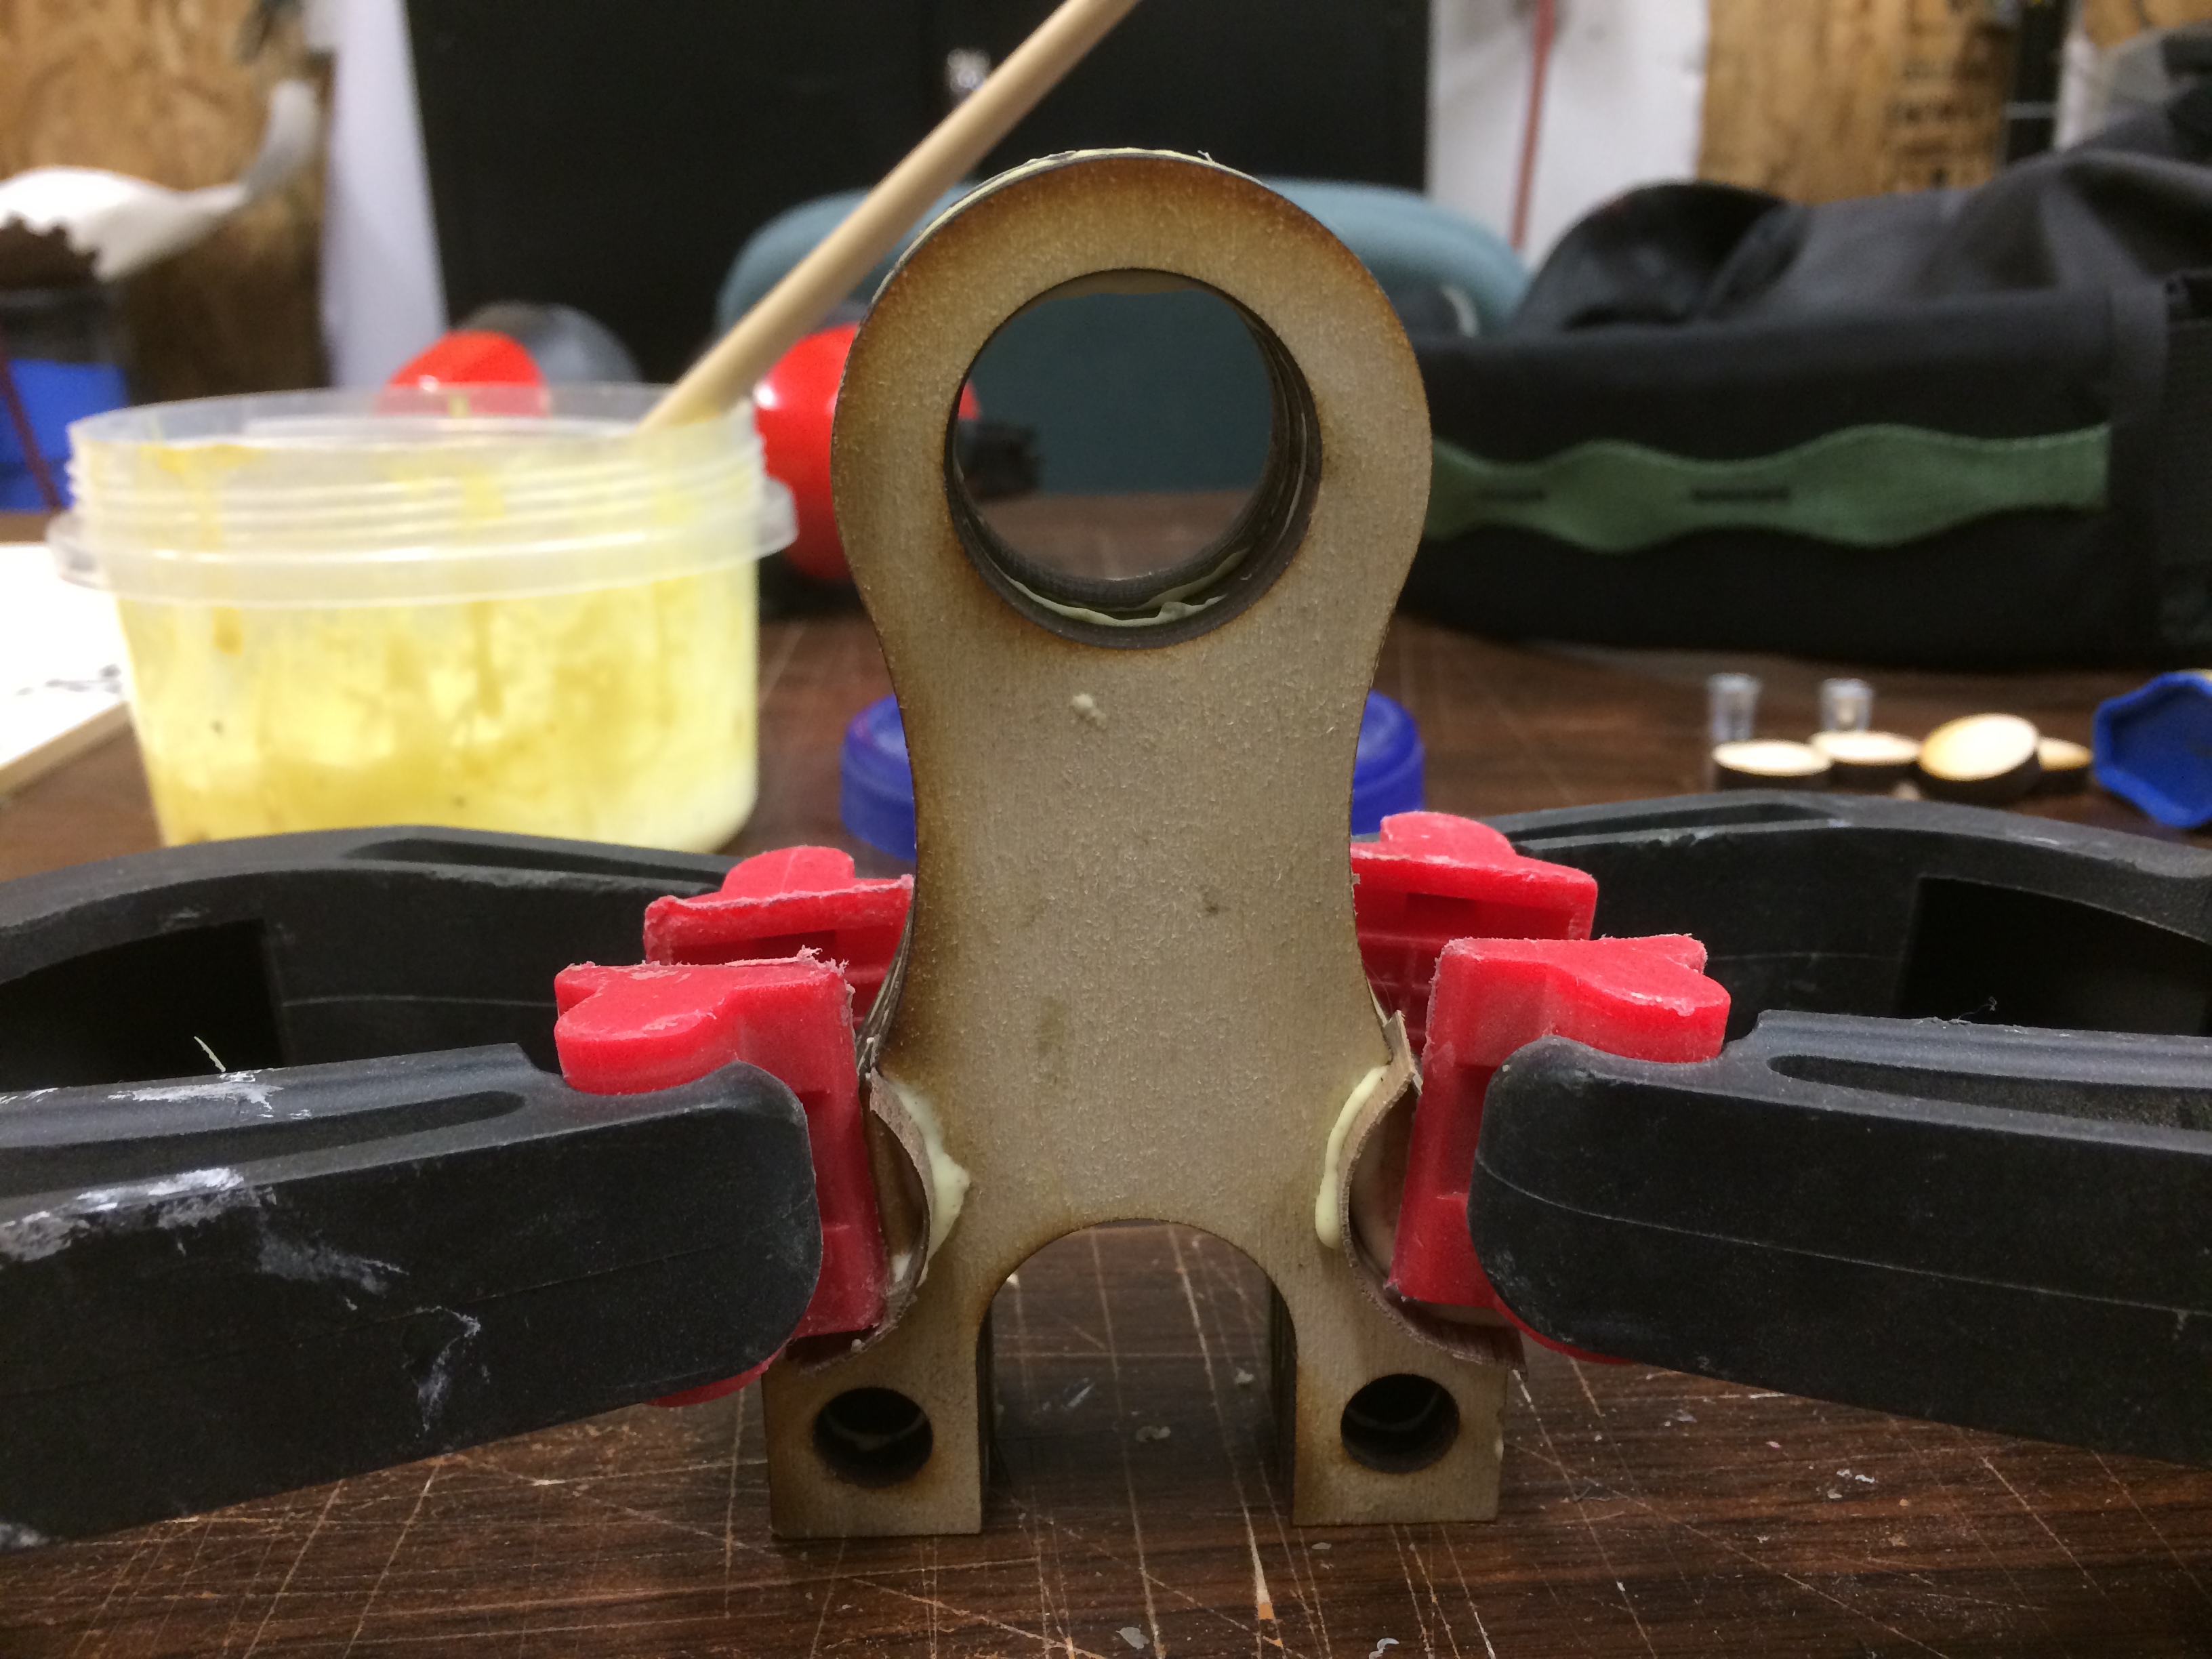
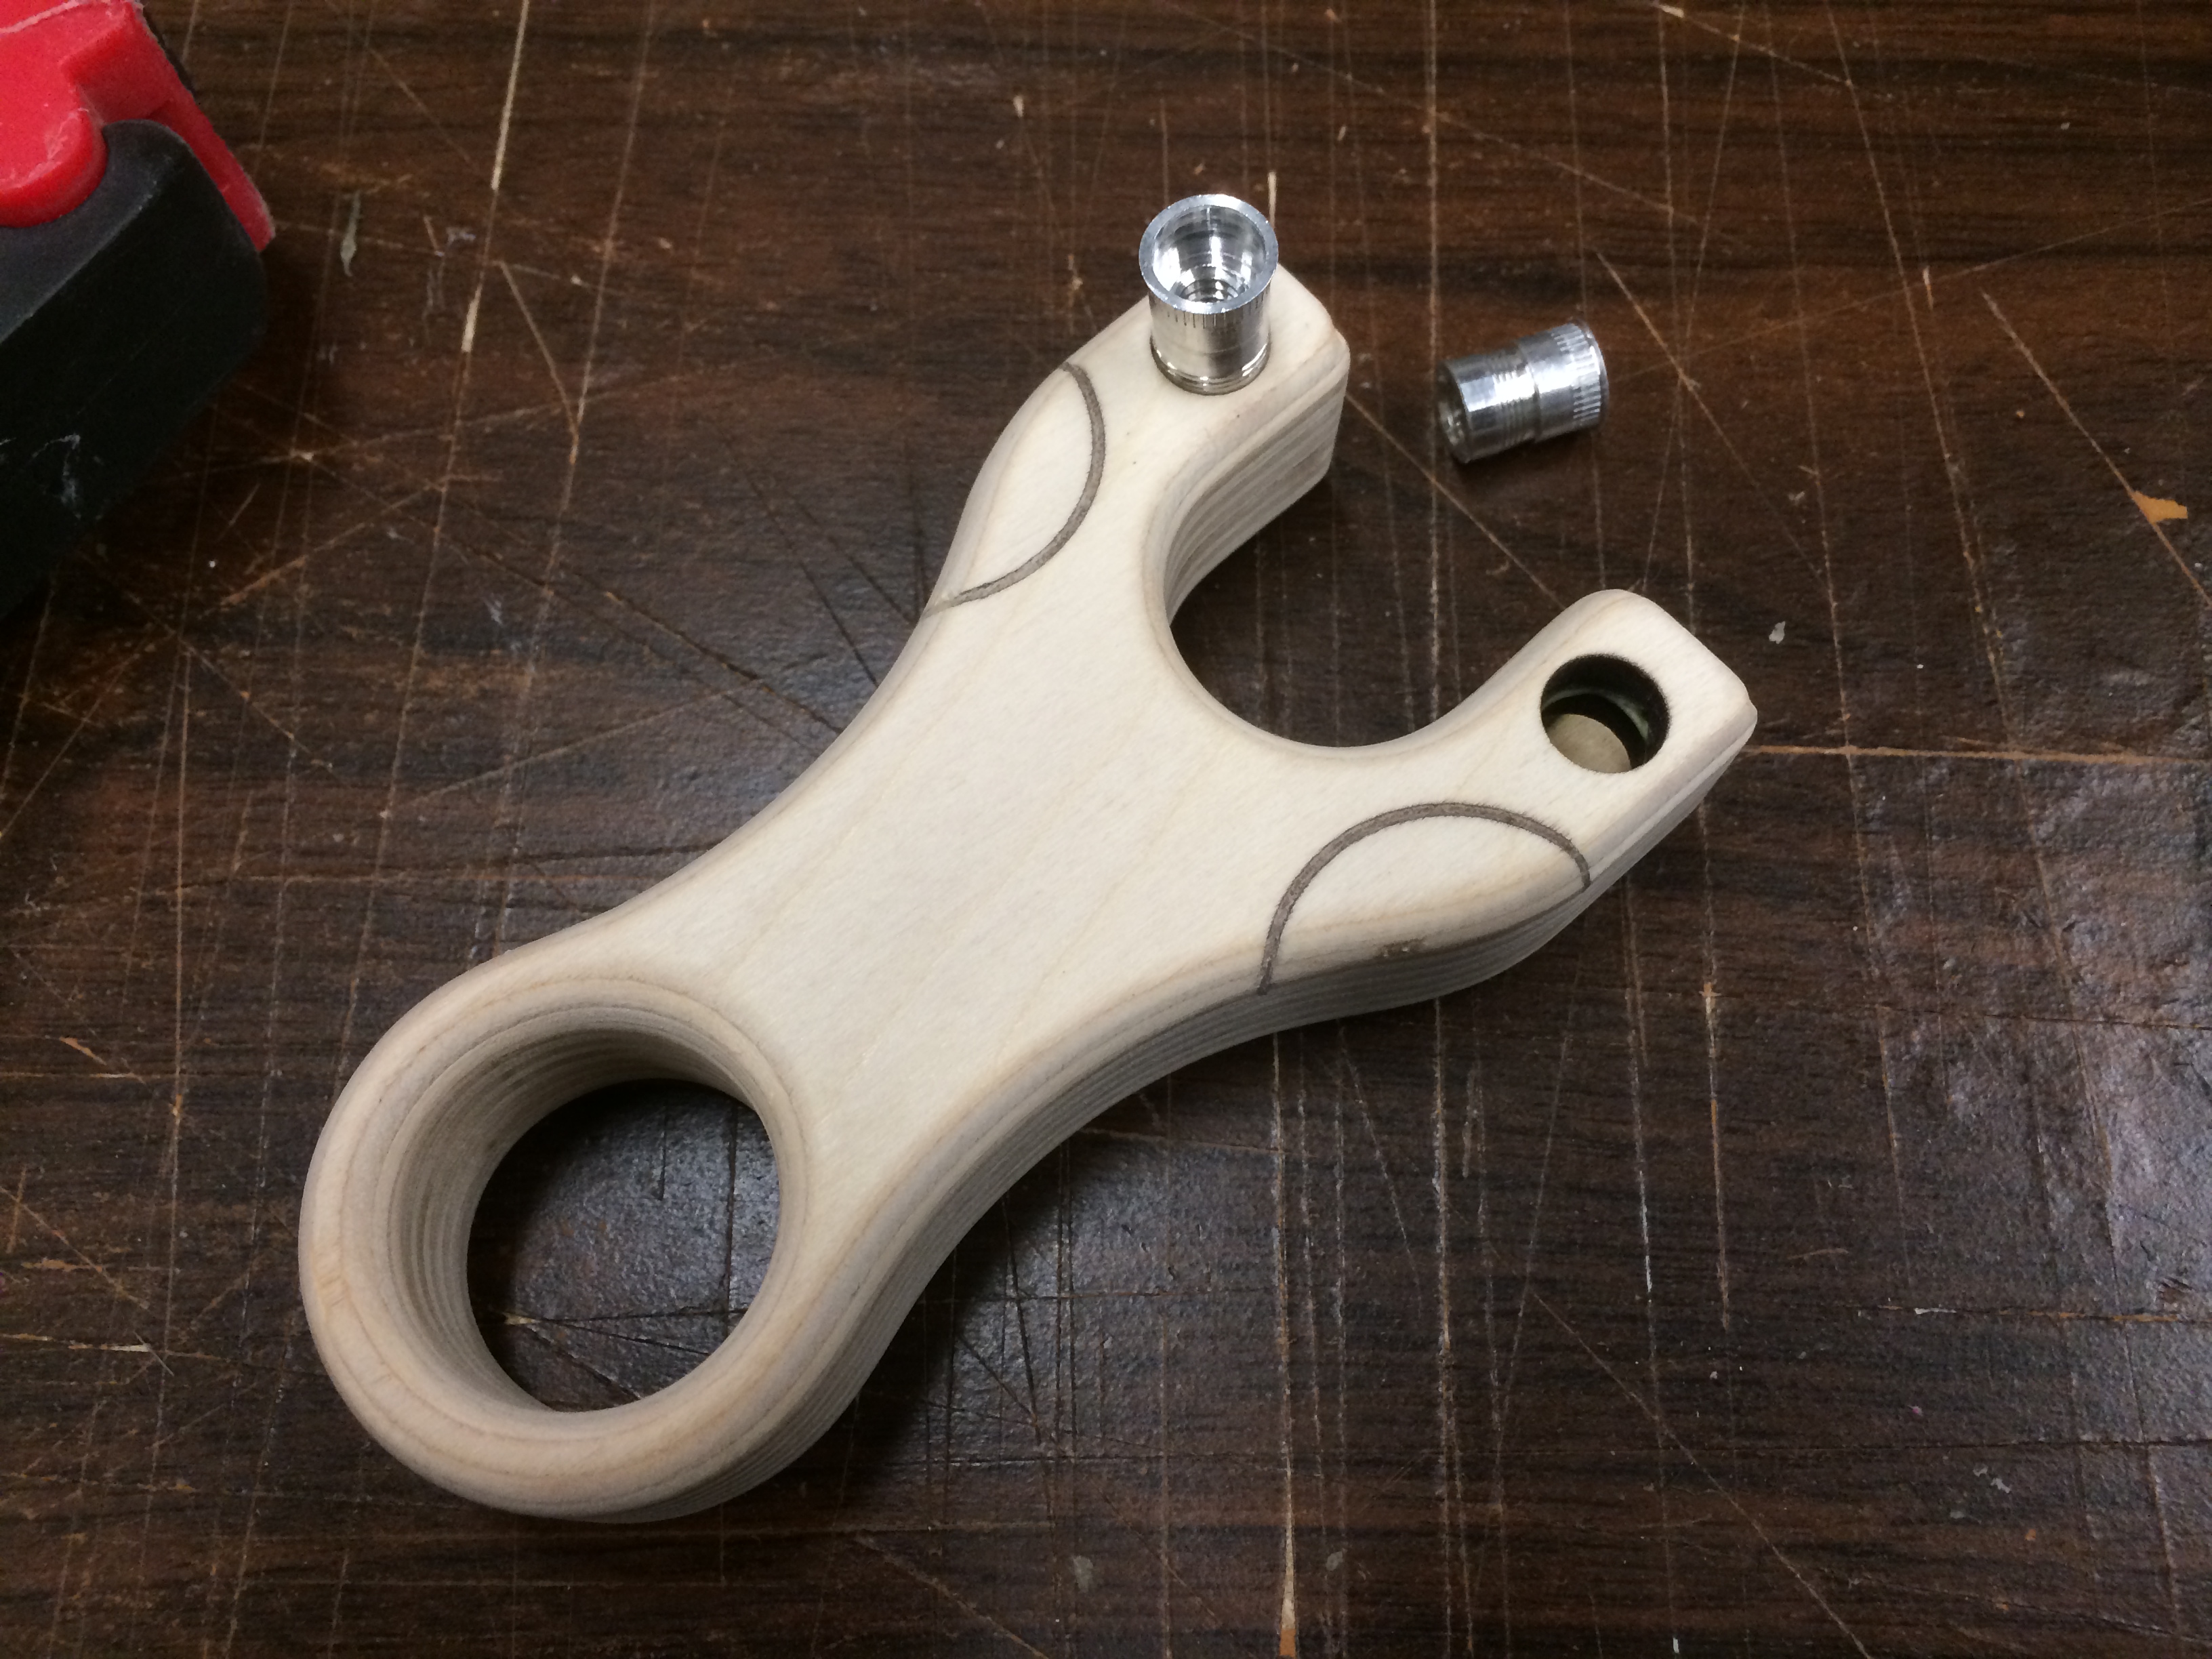
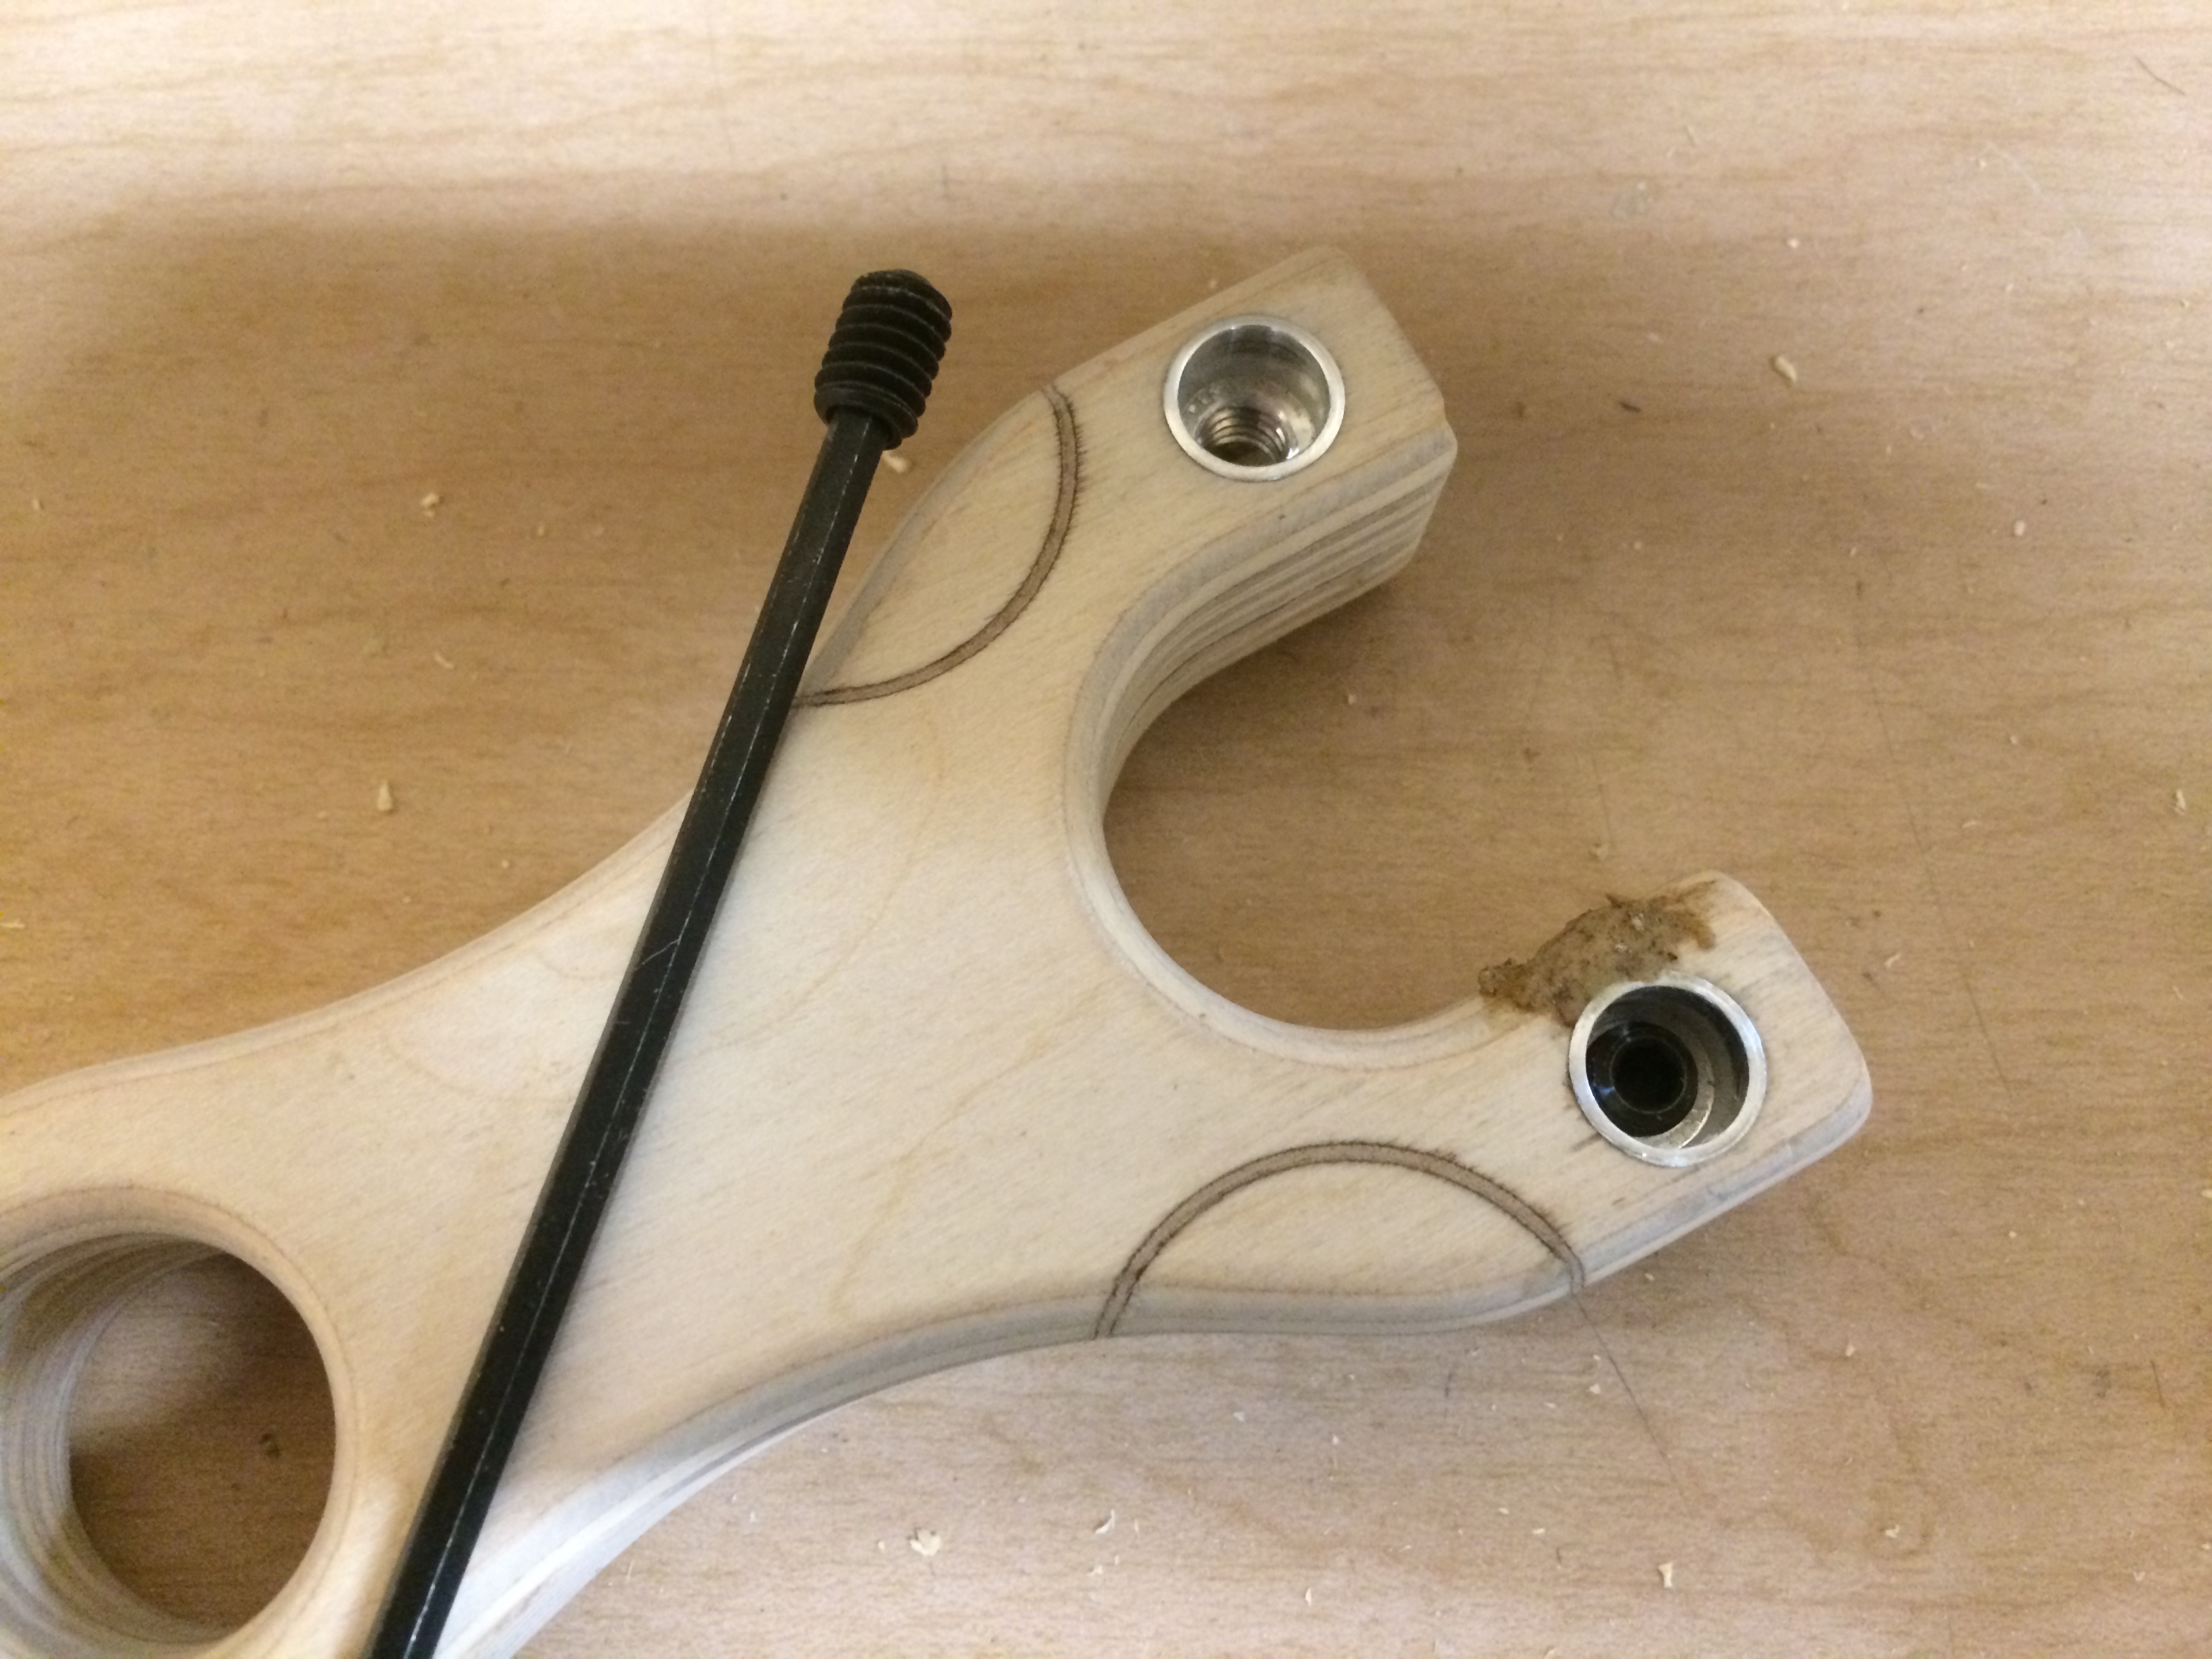
Dry fitting the aluminum 1/4-20 threaded inserts (I have brass ones on order, but for this prototype and proof of concept, these work great).
Then finally supergluing the inserts into their home.
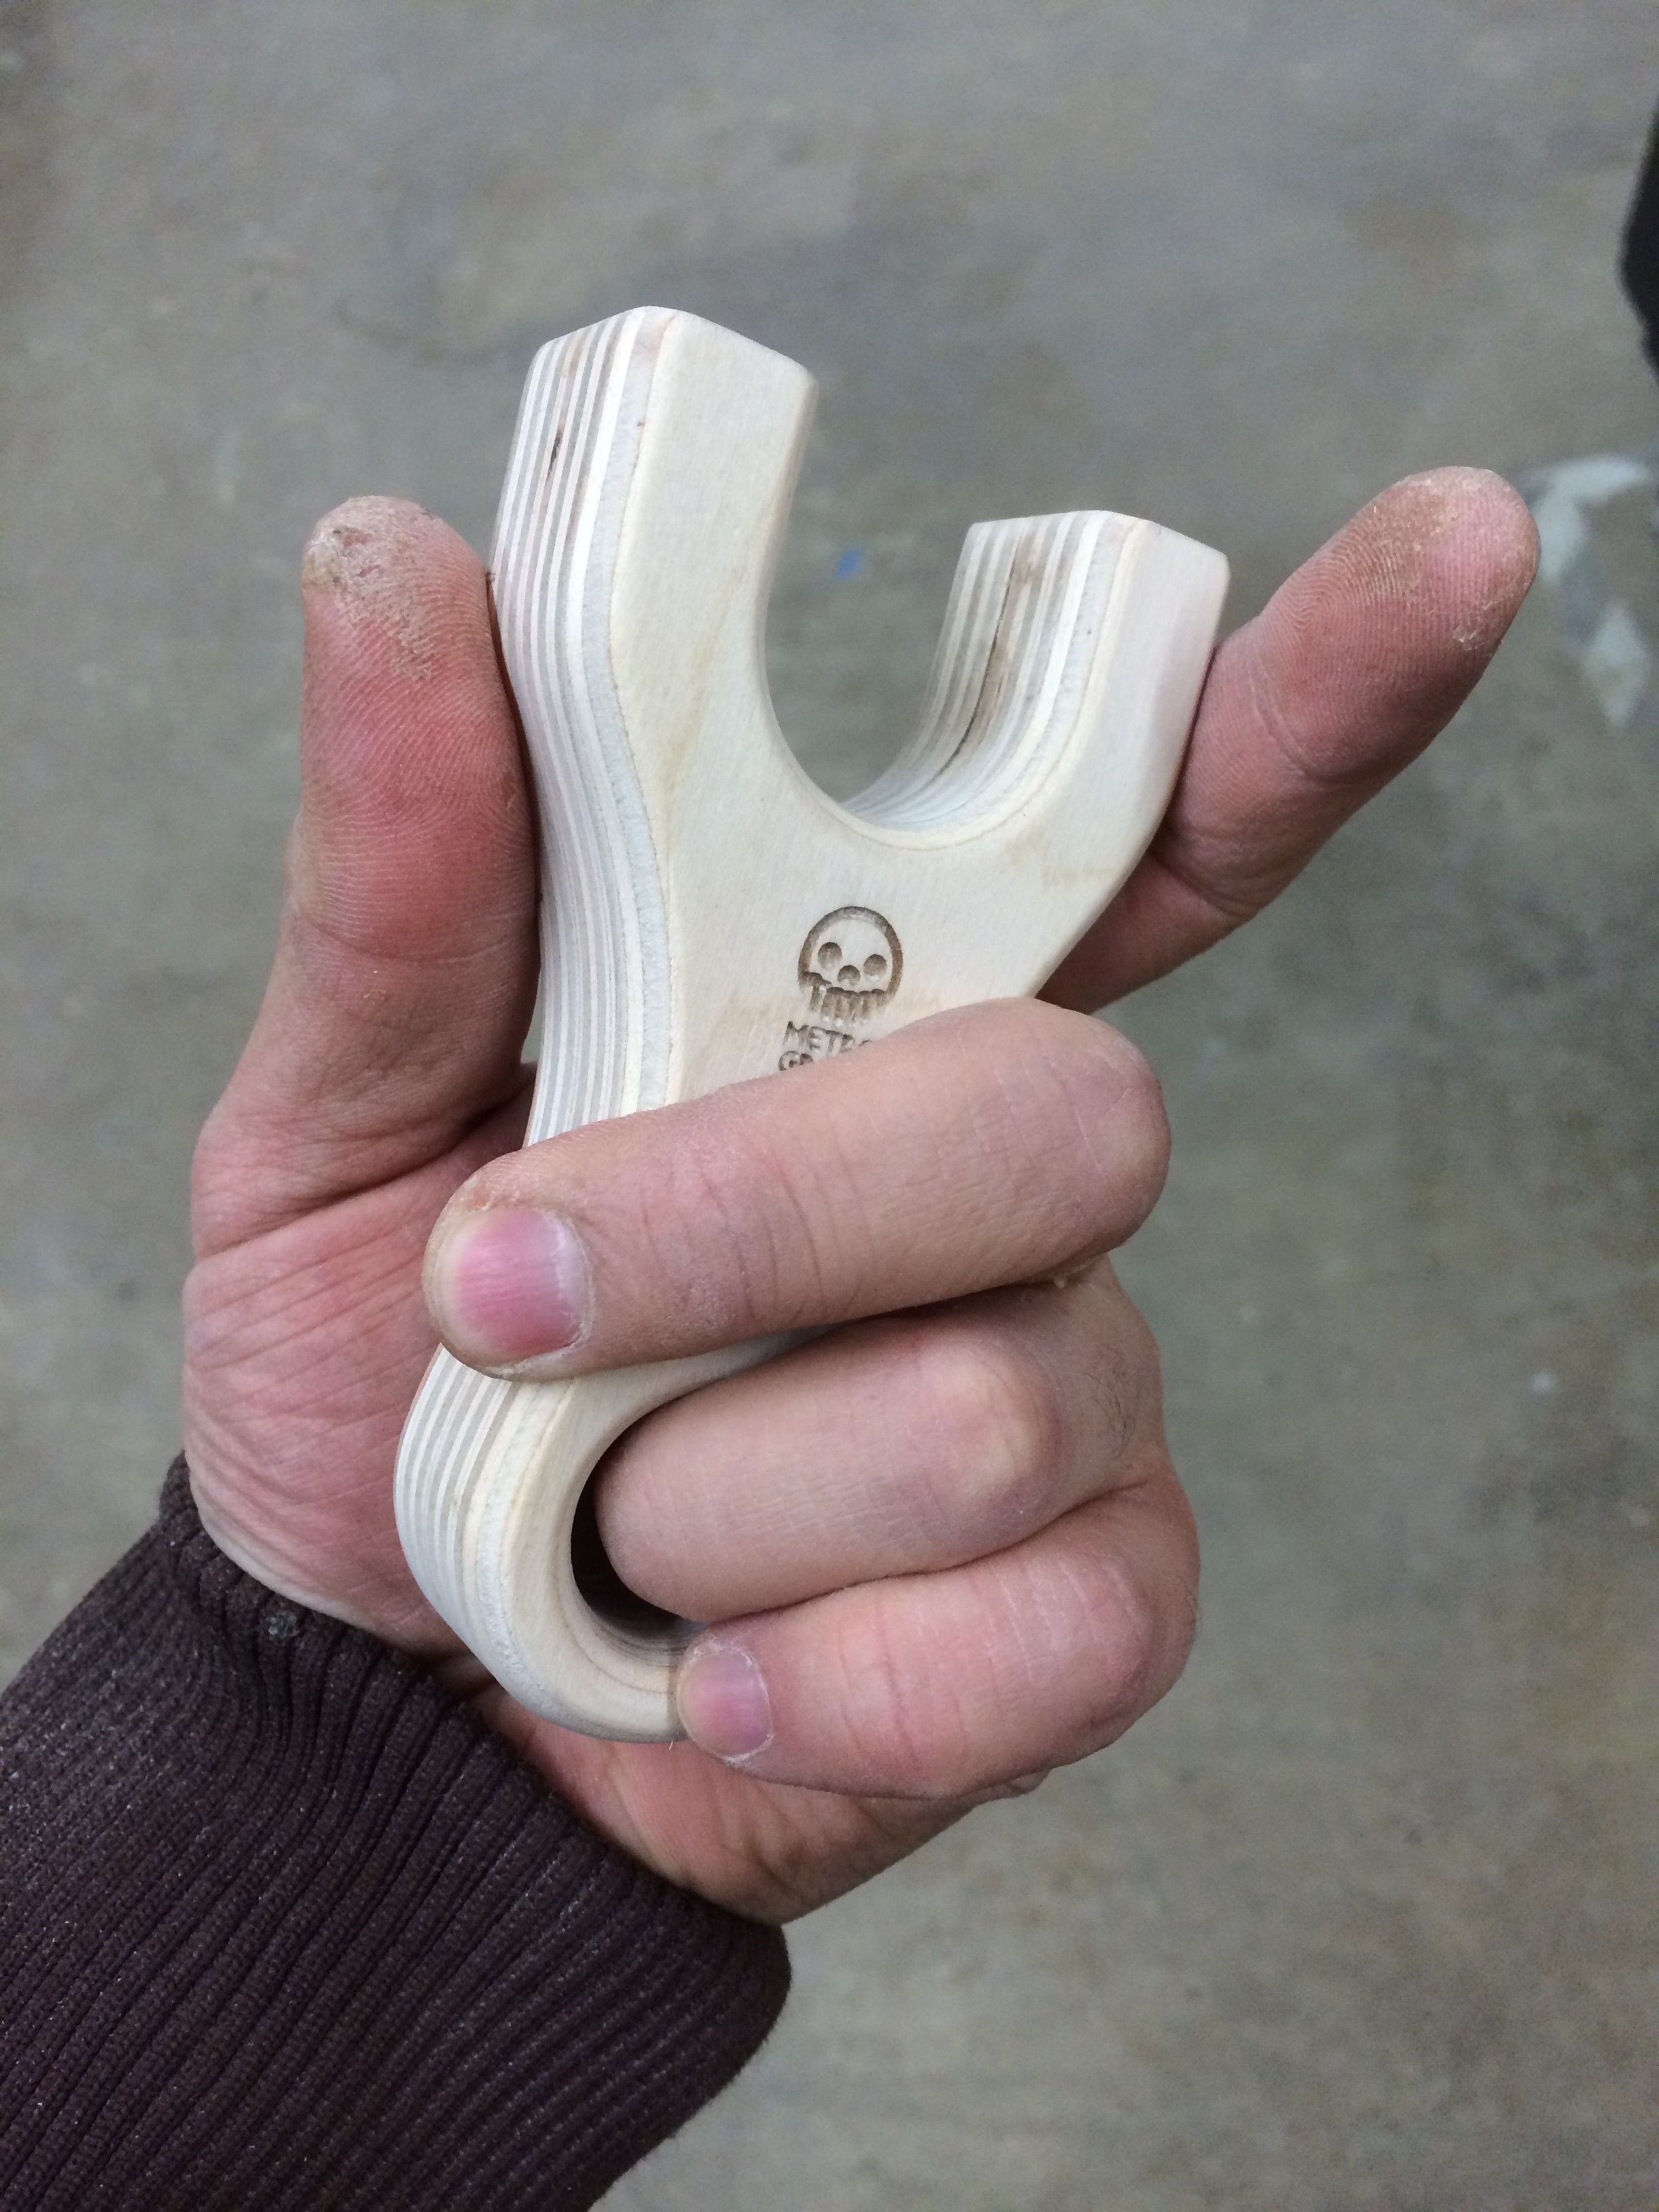
Check for grip and admire the pre-finished state: check.
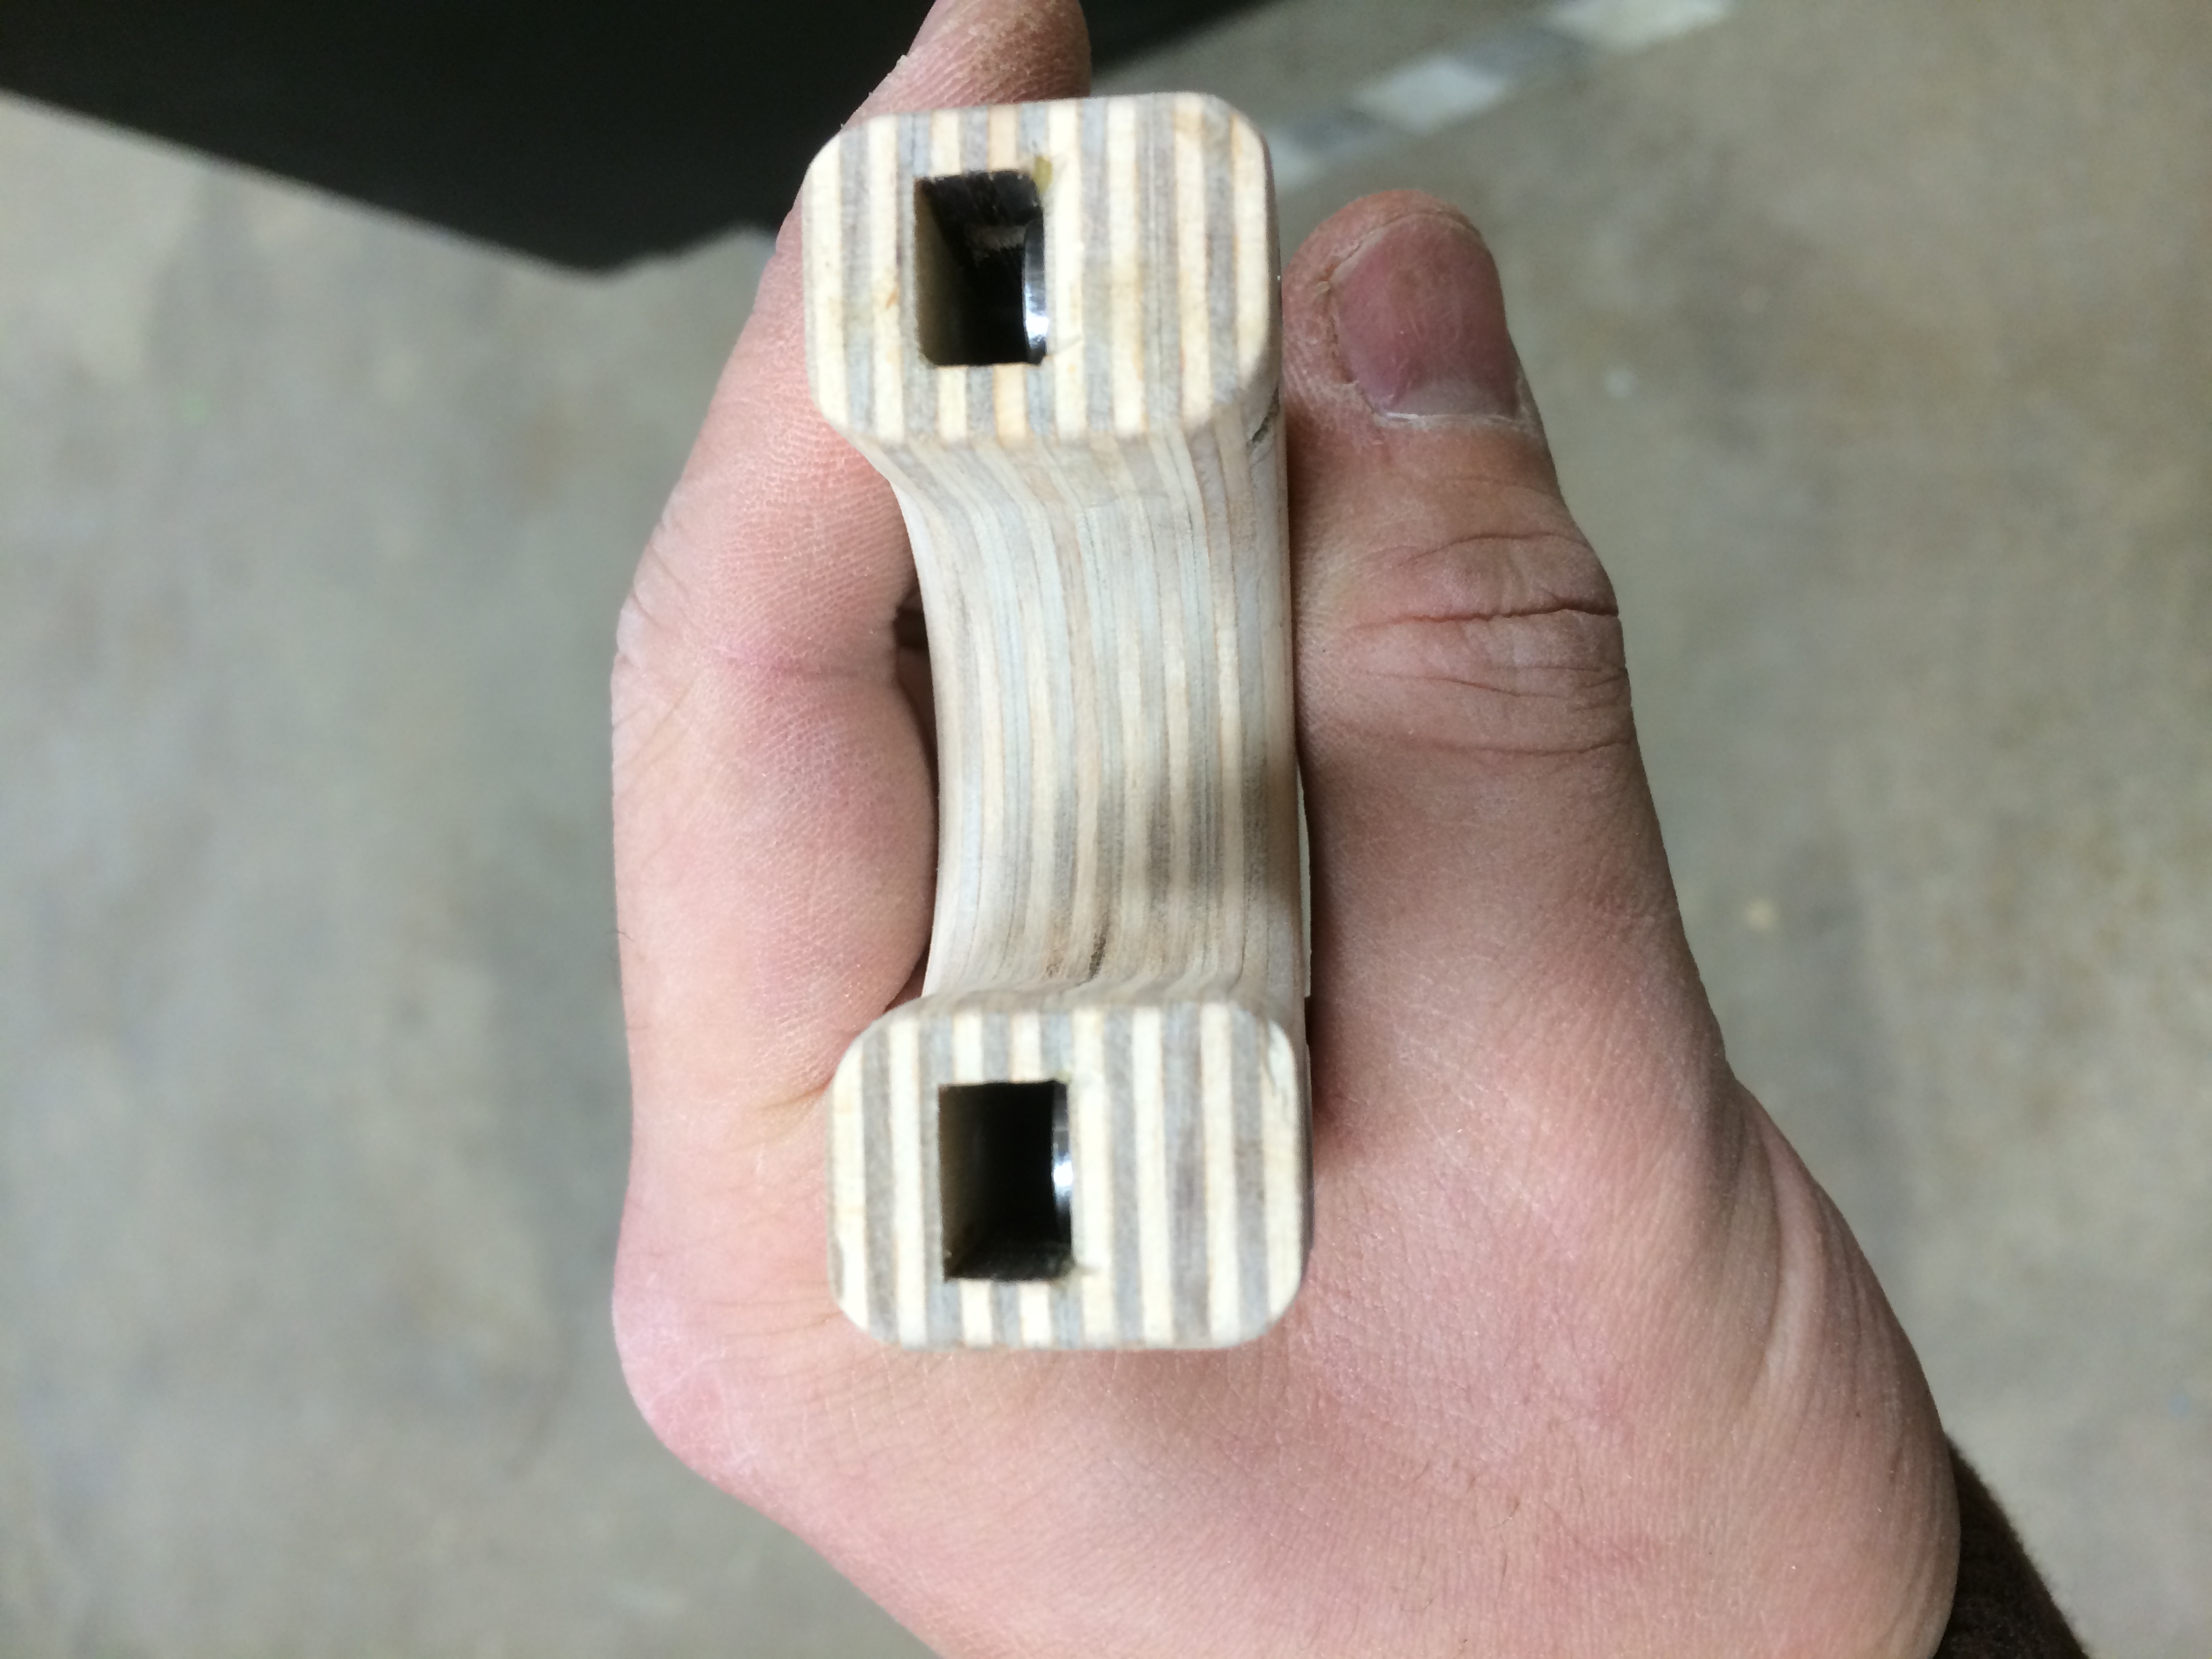
Check if the 3/8″ long, 1/4-20 set screws go in far enough…yup. The snot you see on the bottom fork is some glue and sawdust to fill in a chip that happen when cleaning out the hole with a drill bit.
Then throw some bands on it to see it actually works, it’s here you can see the 4070 tubing for the sleeve. Seasoned shooters will know why but for those reading about PFS’s for the first time, the sleeves do two things: 1. Protect the inner bands from receiving too much punishment when they retract back to their active state at the fork tip area and 2. They help protect the bands at the tube attachment area since they are bring compressed by a set screw.
Shoot 2 coats of acrylic spray on it, then sand with a nail buffer to get a nice flat finish. Then hit it again with ONE more final light coat. Then it’s off to the photoshop.
This was such a blast to make, and thanks to a LOT of forethought, no time wasted on a second prototype. The Loris PFS has so many layers of wood that it is getting a little past what the original intent of a PFS (extremely pocketable, thin shooter) but the clean band attachment and overall finish makes up for the beefy thickness.
Stay tuned for a more complicated, hardwoods version soon!
It’s been far too long and it’s time for another Metro Made post, this time around, something familiar to you returning Metro Made readers. If you are tuning in for the first time, welcome! Metro Made is the blog of Metro Grade Goods and how I turn raw materials in the stuff you see on the site. It is my way of letting you know where things come from and how they are made. Besides, who doesn’t love a good behind the scenes.
In this installment of Metro Made, we take a look at how I took the plunge and crafted 8 super laminated slingshots in one weekend. A pretty daunting task since a single unit took 5 hours to complete. If you are at all familiar to scaling up production, you don’t just take your unit’s build time and multiply it by the number of units you are making. There are always ways to save time. Despite the time savings, this oct-build still took 15 hours to complete. This one is a long one so take a potty break if you need to now, those of you joining me DURING a potty break, I commend your multitasking mindset.
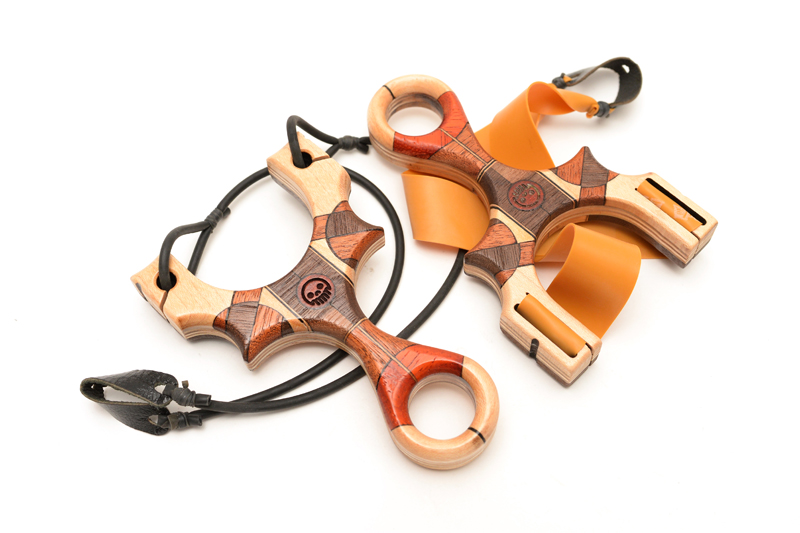
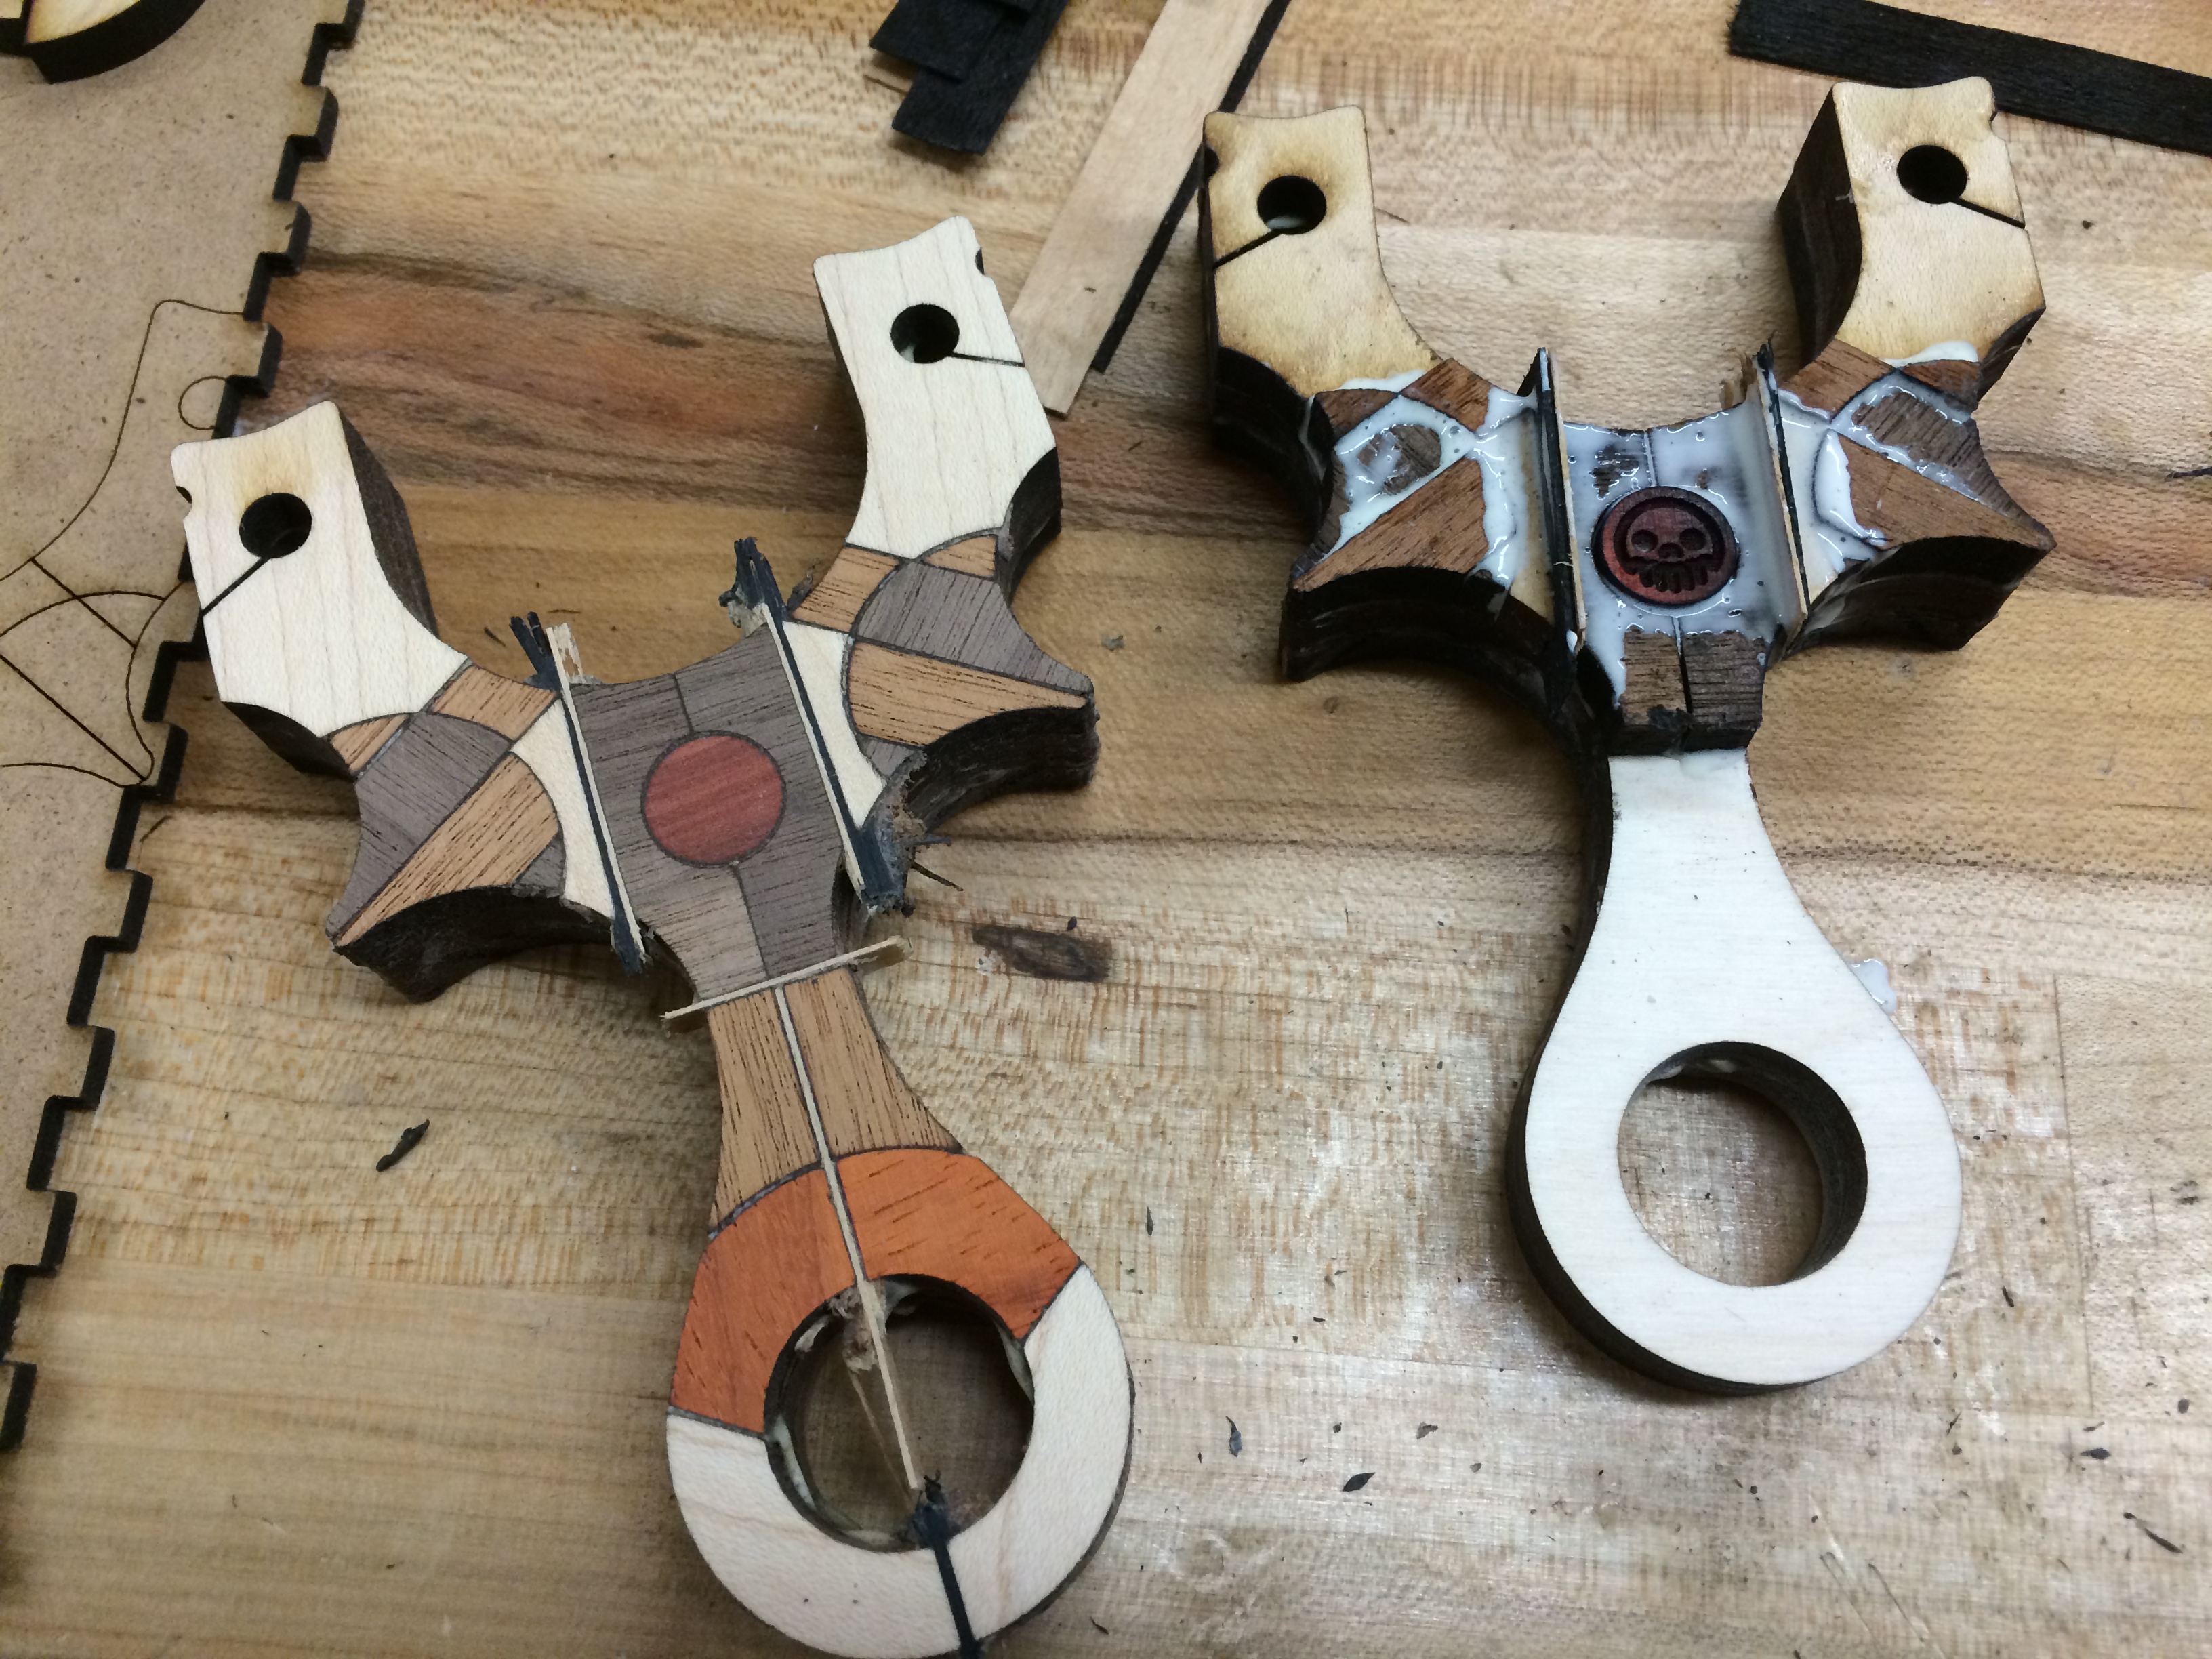
The Harlequin pattern is something I developed when I made another Metro Made project, the Art Deco Loris. It was my ploy to use up a lot of small, left over wood ‘sprues’ generated when laser cutting full frames from planks of hardwood. The results where a stunning selection of hardwoods arranged in a very pleasing Art Deco style.
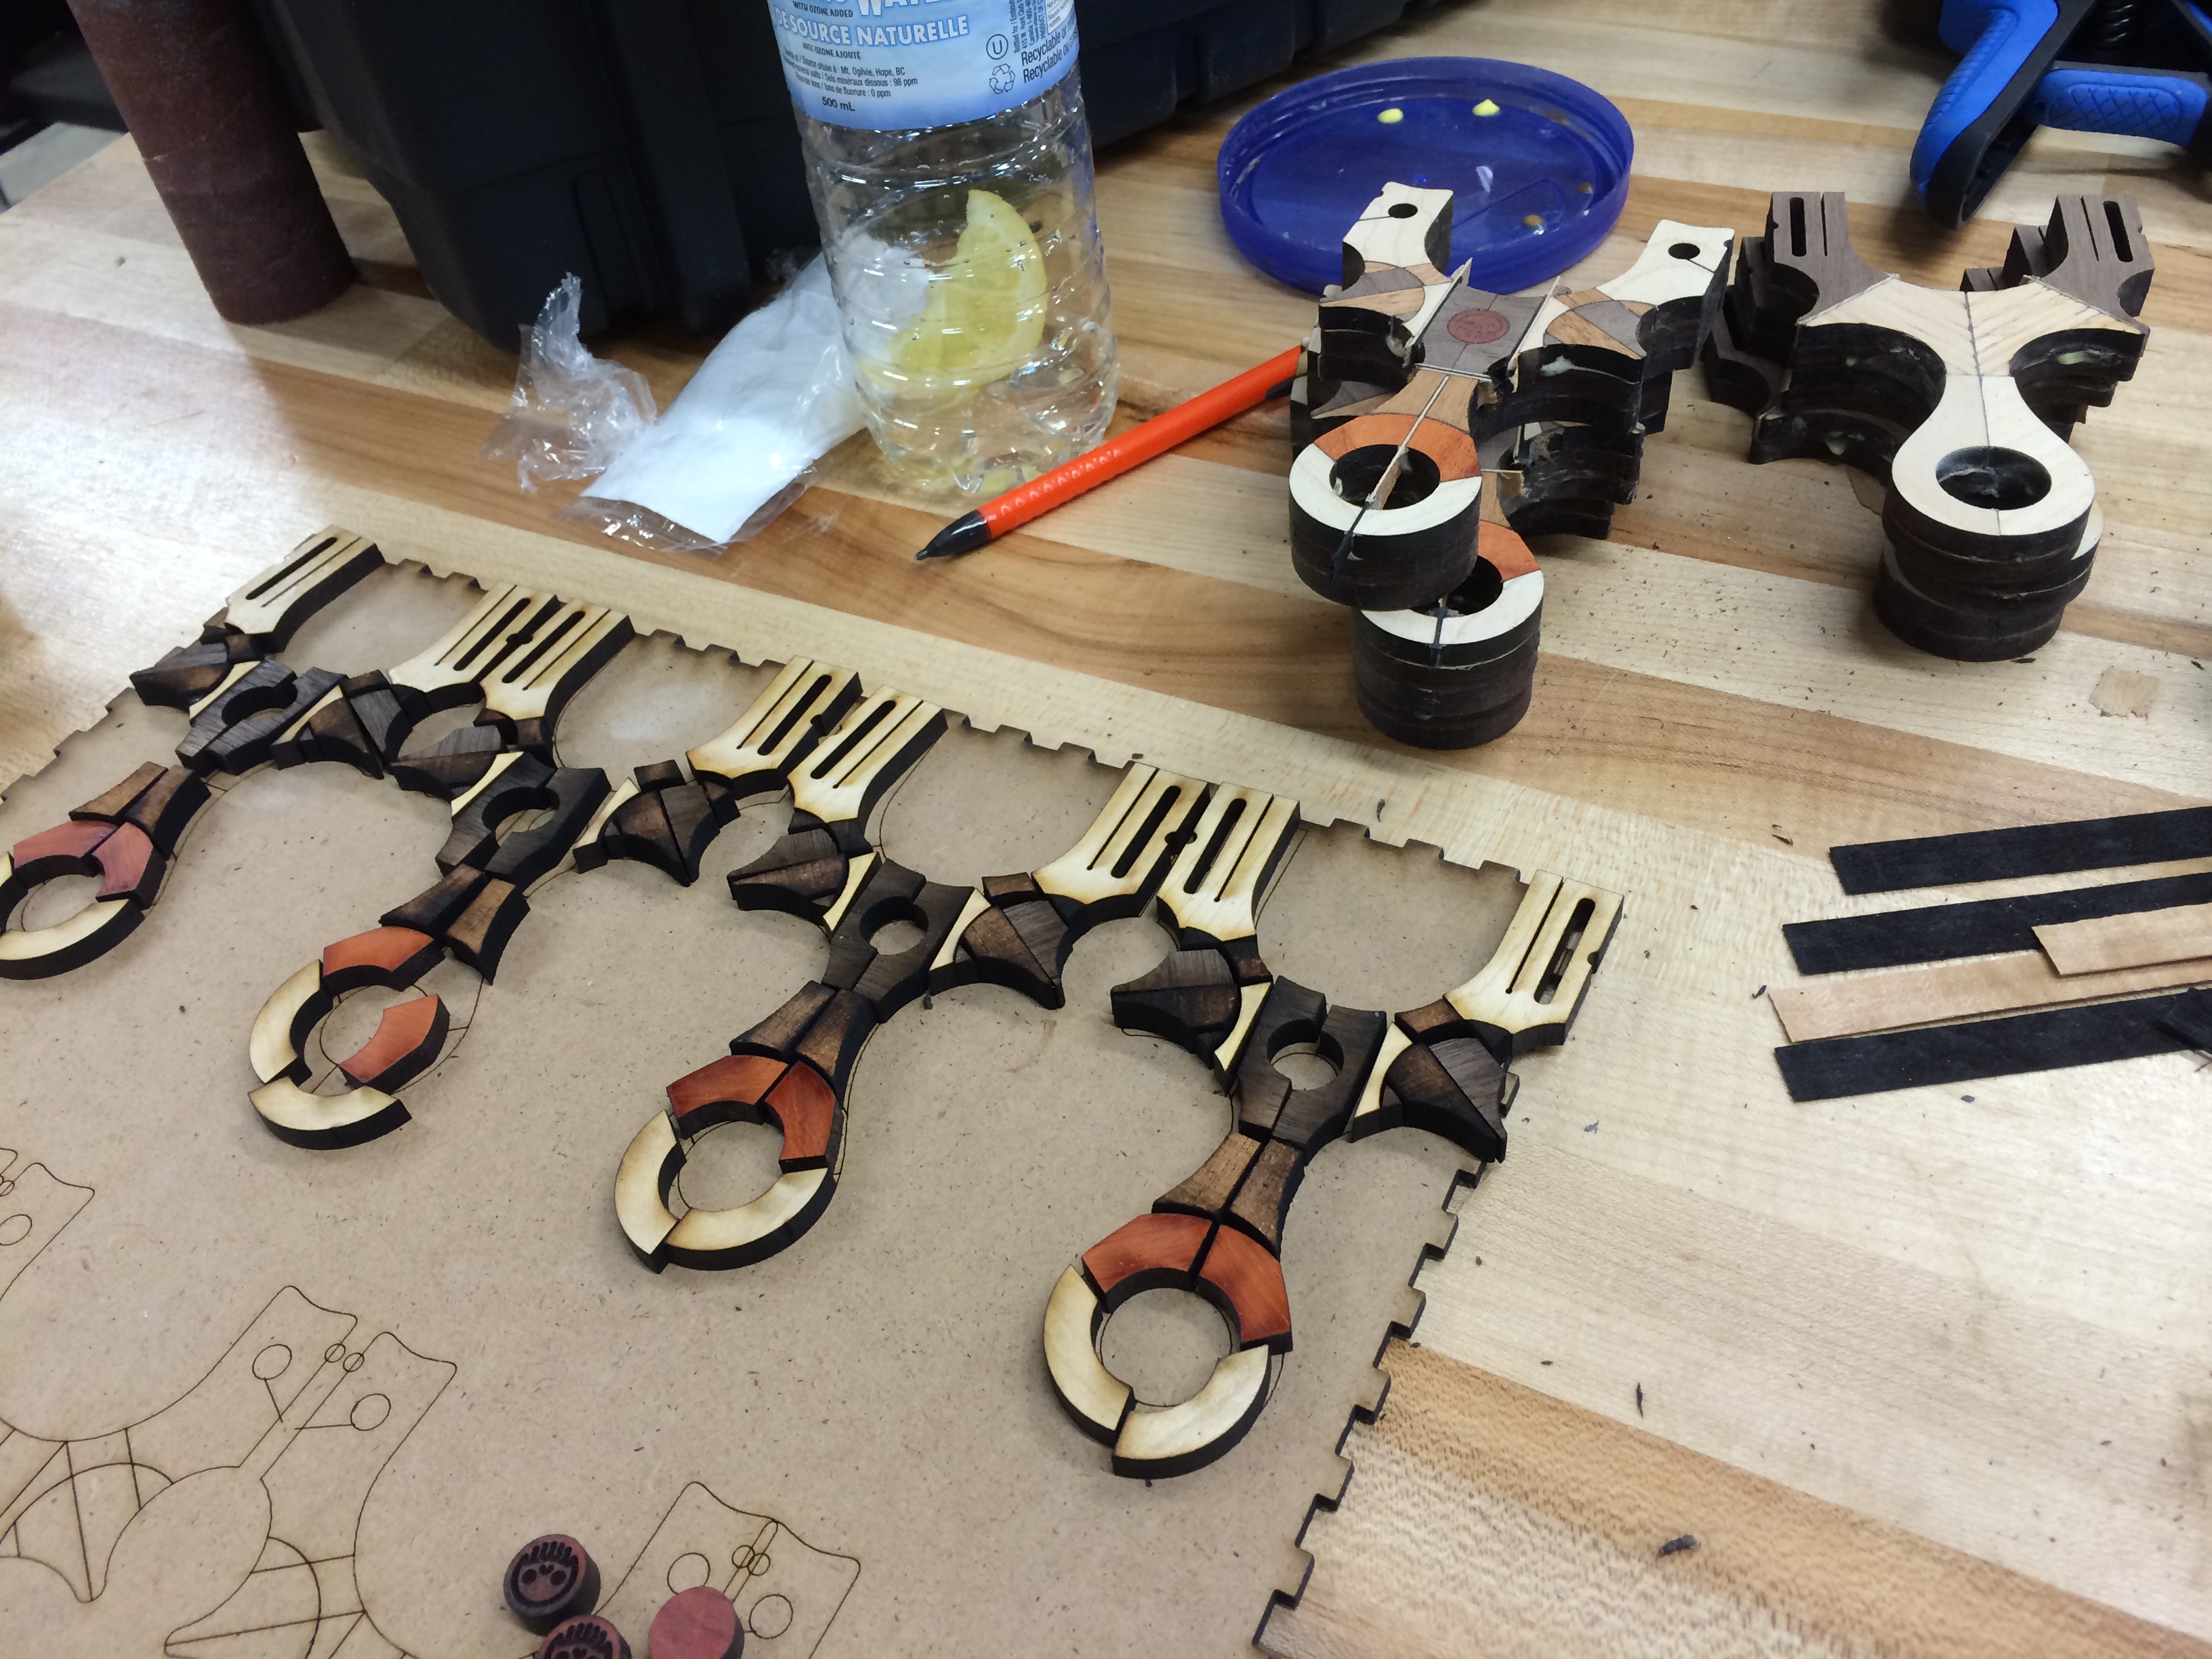
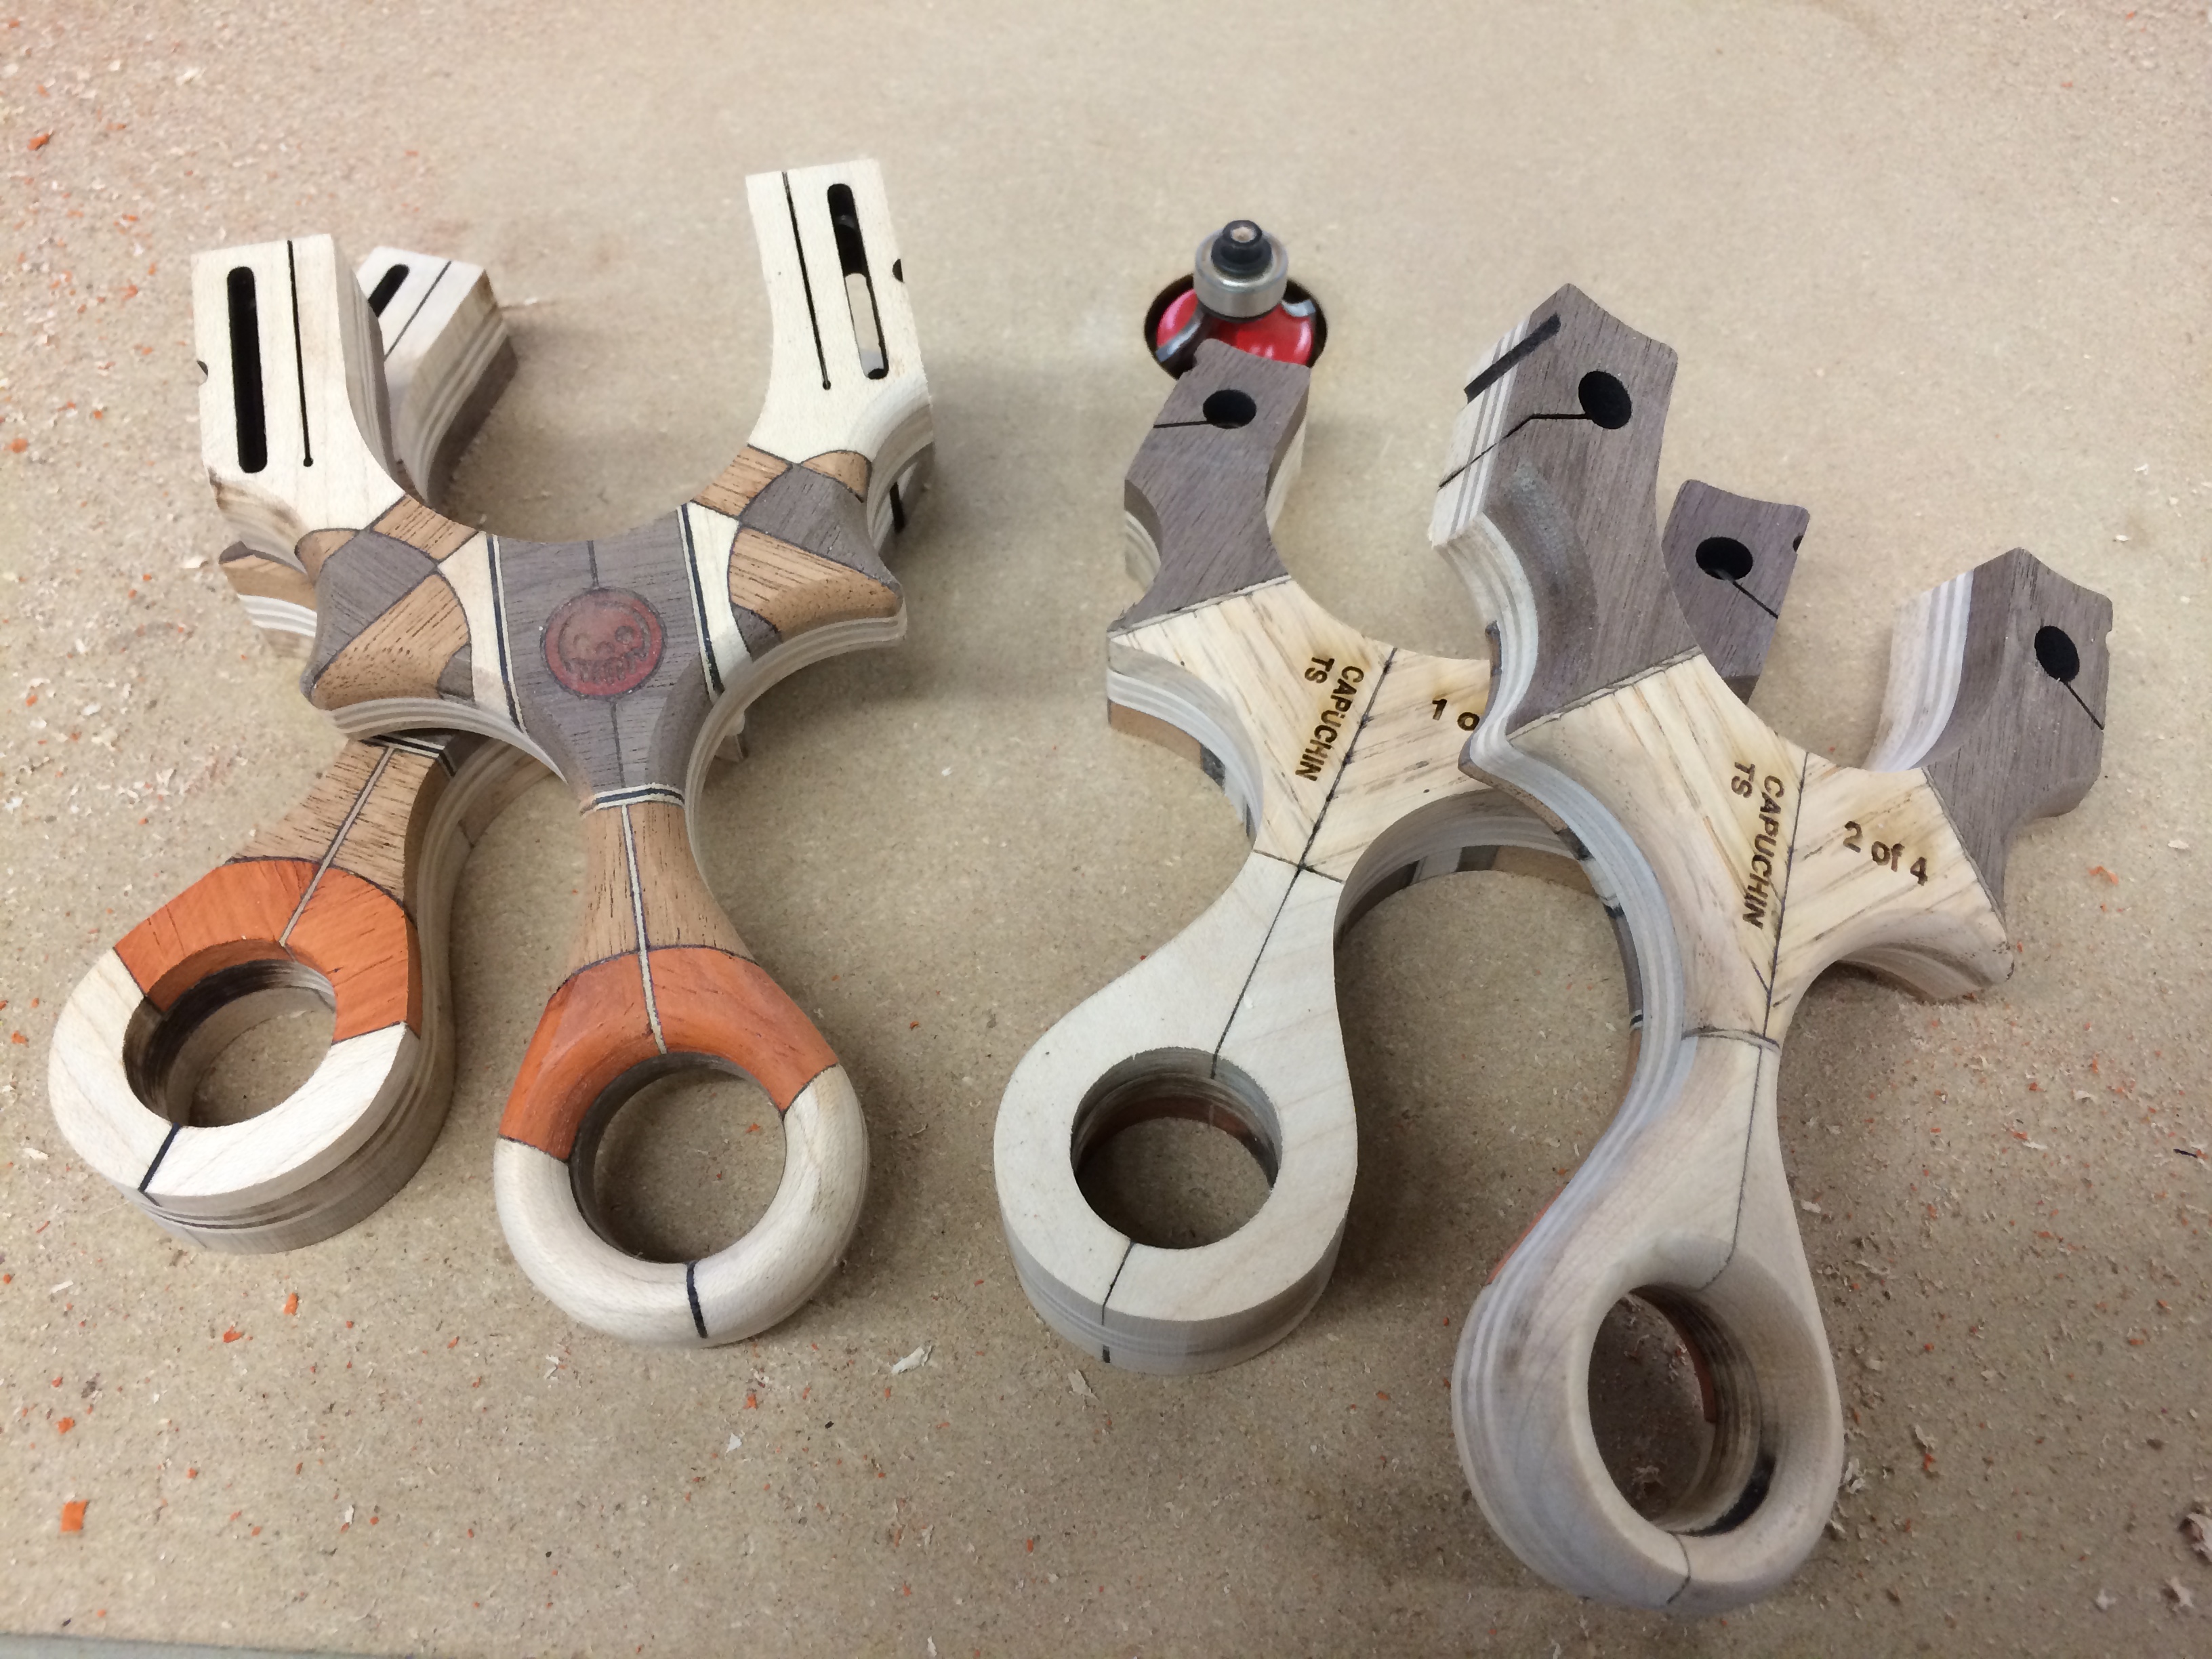
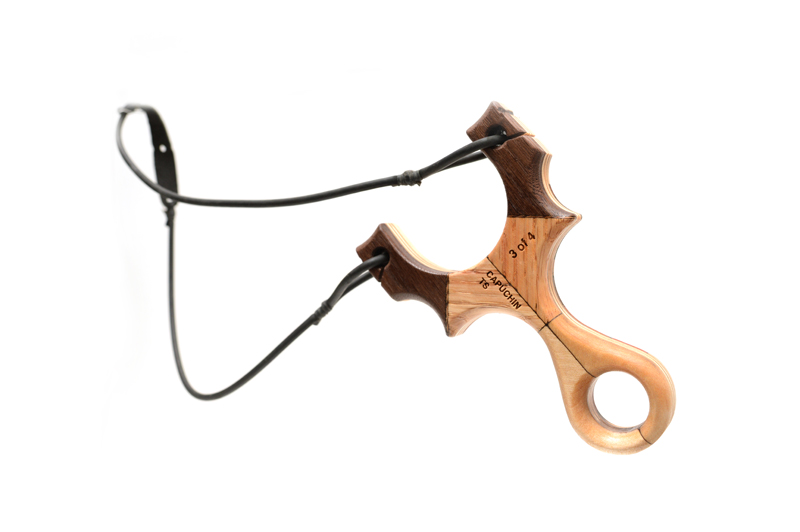
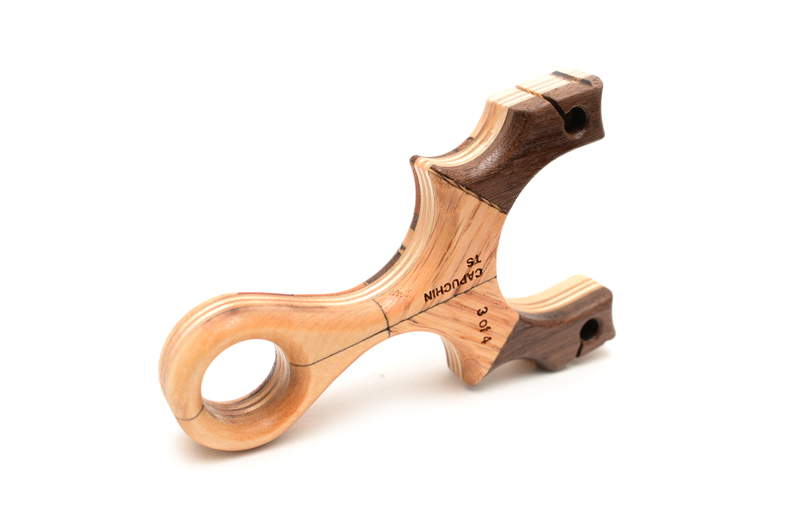
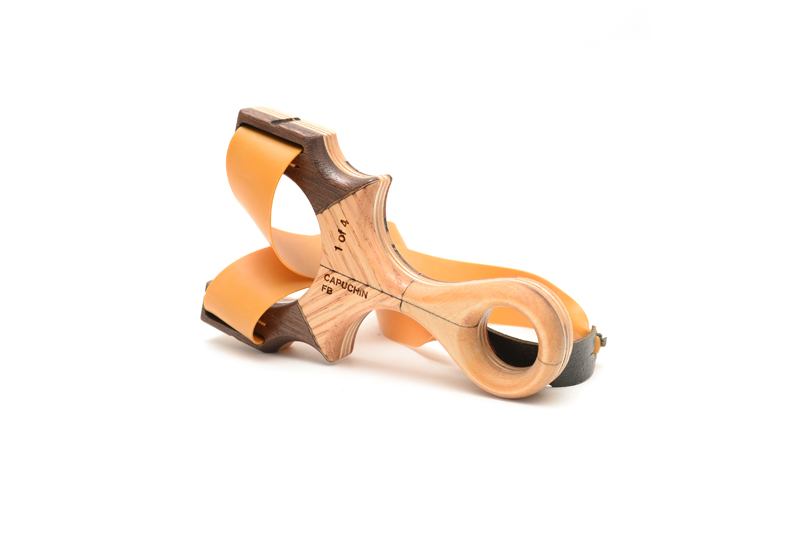
There were a lot request to have this available but the Loris was not the most popular slingshot to begin with, so I decided to go with a more universally appealing frame, the Metro Grade Capuchin. A smaller frame with a lot of potential for slicing and dicing for the Harlequin pattern, I went ahead and did that. I started by laser cutting the 1/4″ Baltic Birch plywood cores. I planned to make 4 Harlequin Capuchin TS’s (Tube Shooter) and 4 Harlequin Capuchin FB’s (Flat Band).
The biggest difference between making one of these versus eight is parts management. With 8 sets of near identical micro bits of wood (close to a 30 some odd part count per slingshot) something to keep them in order was necessary. Here’s what I used:
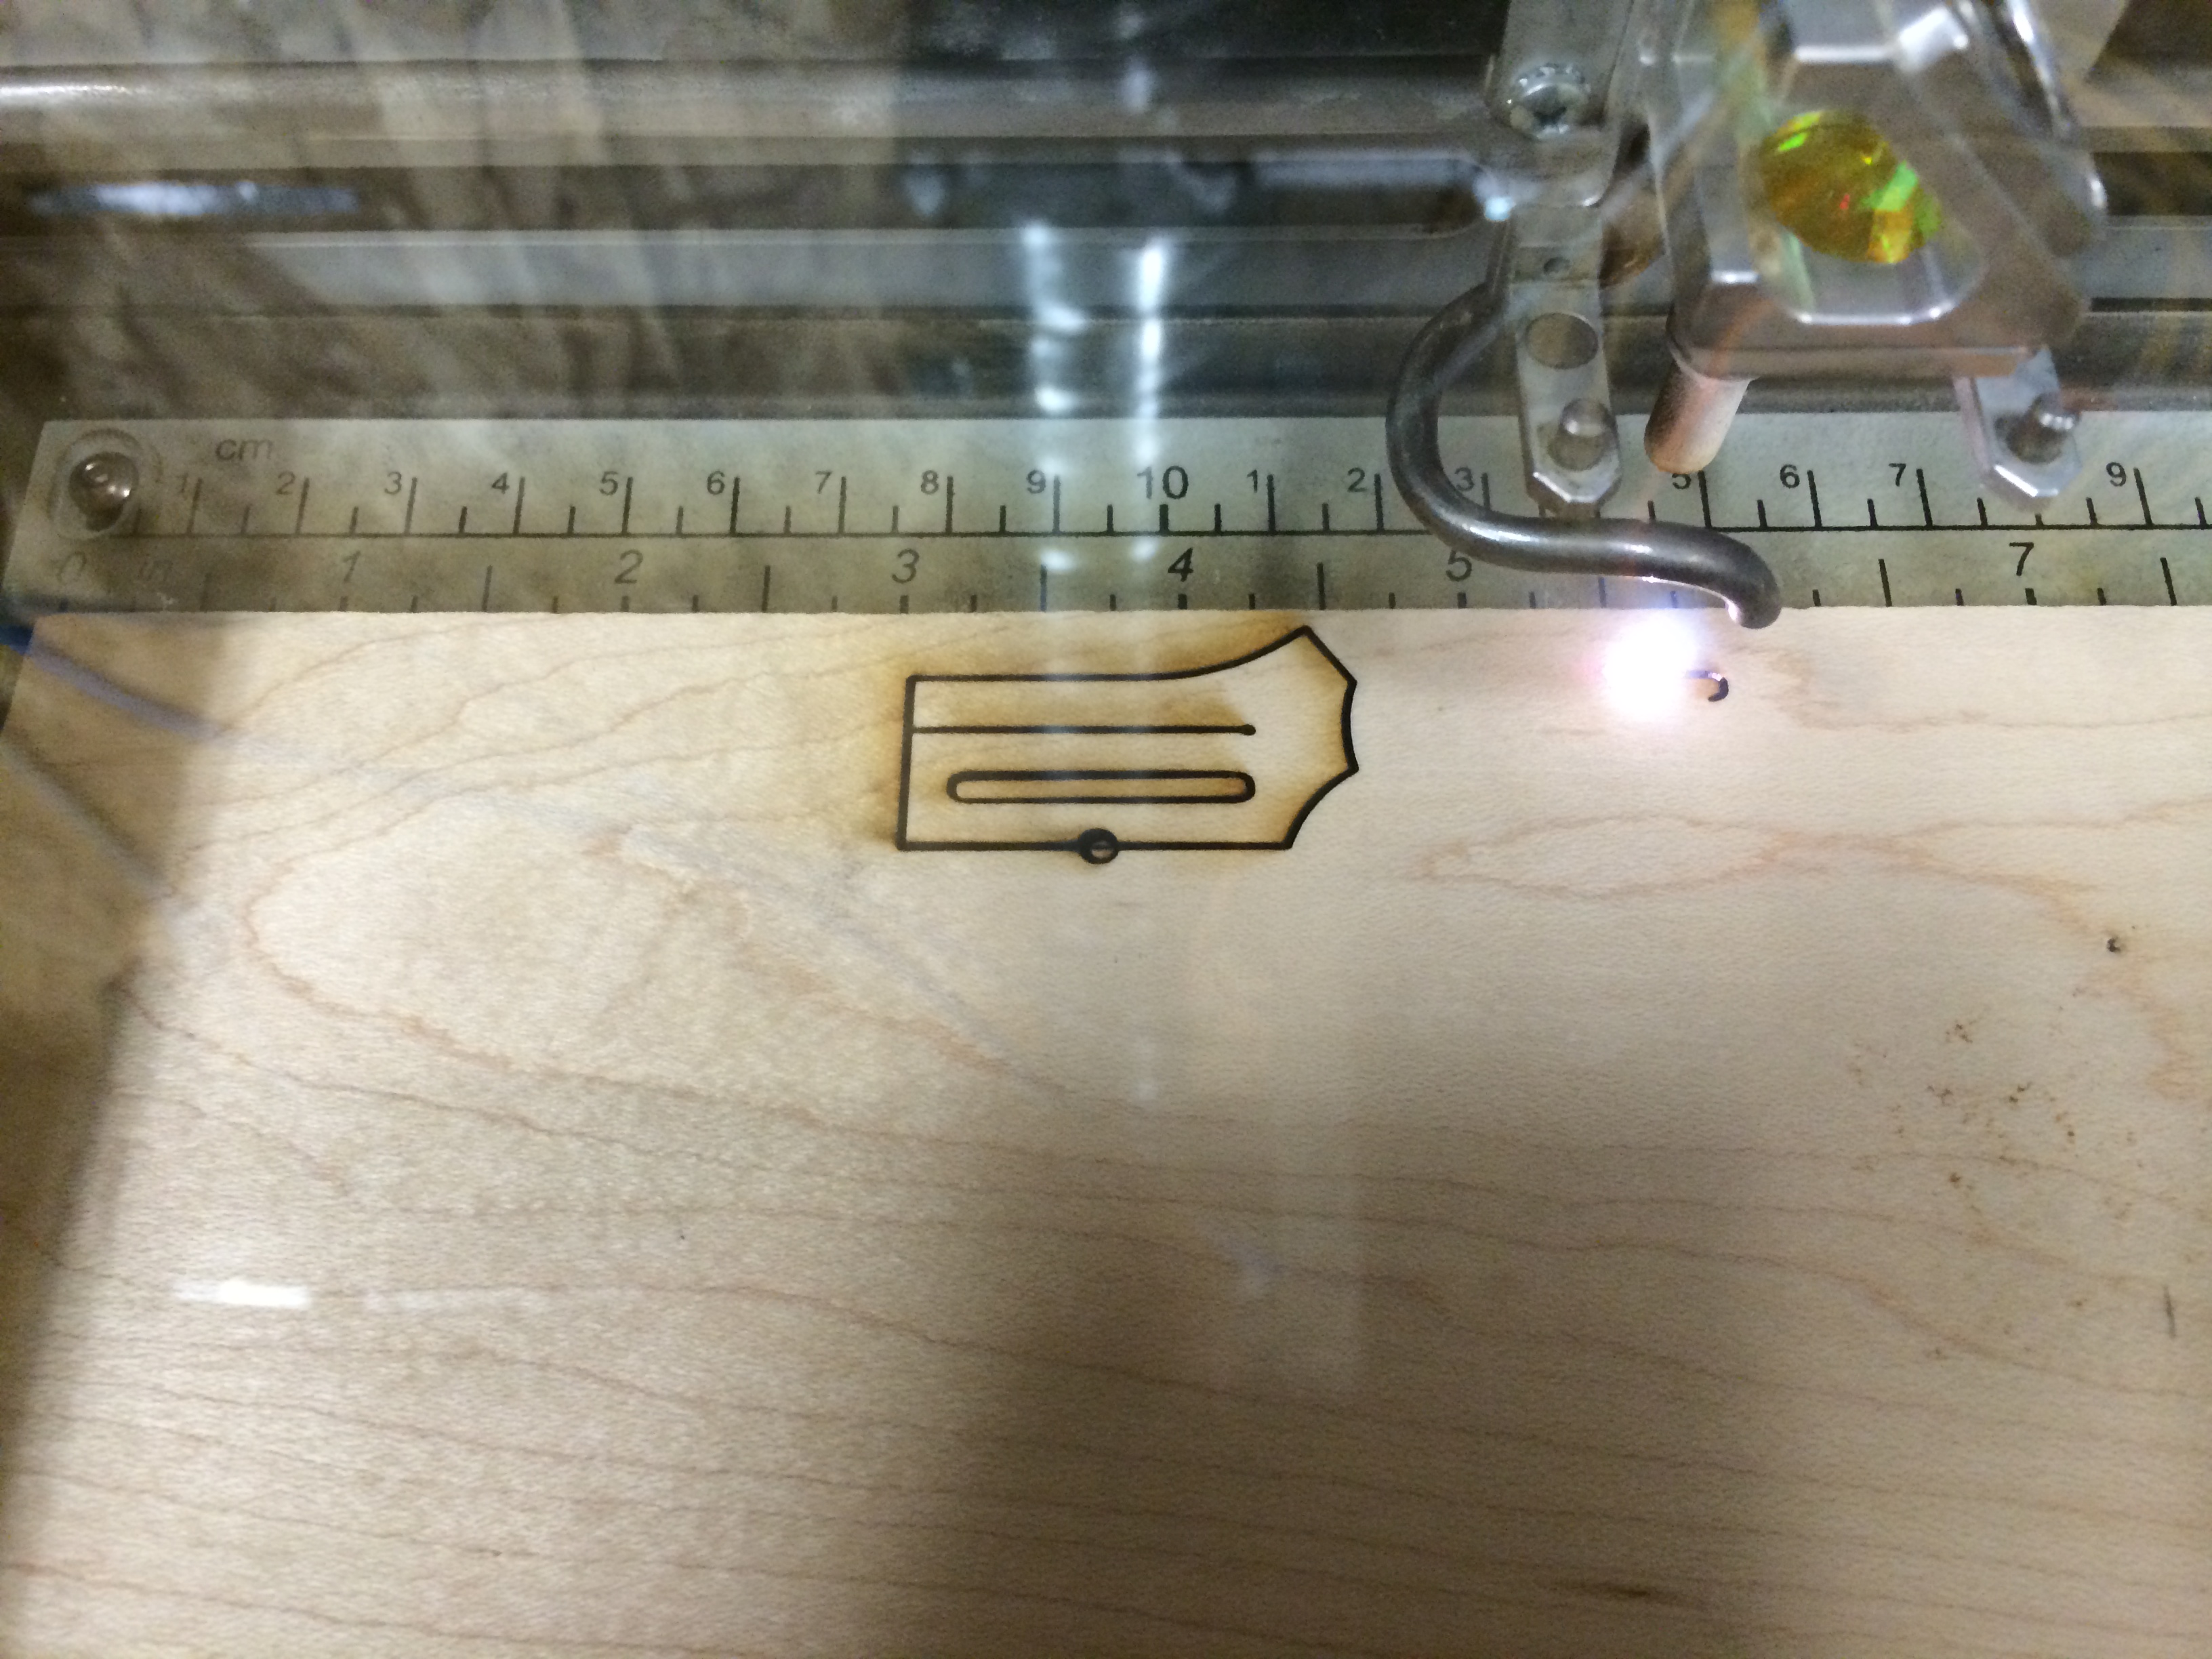
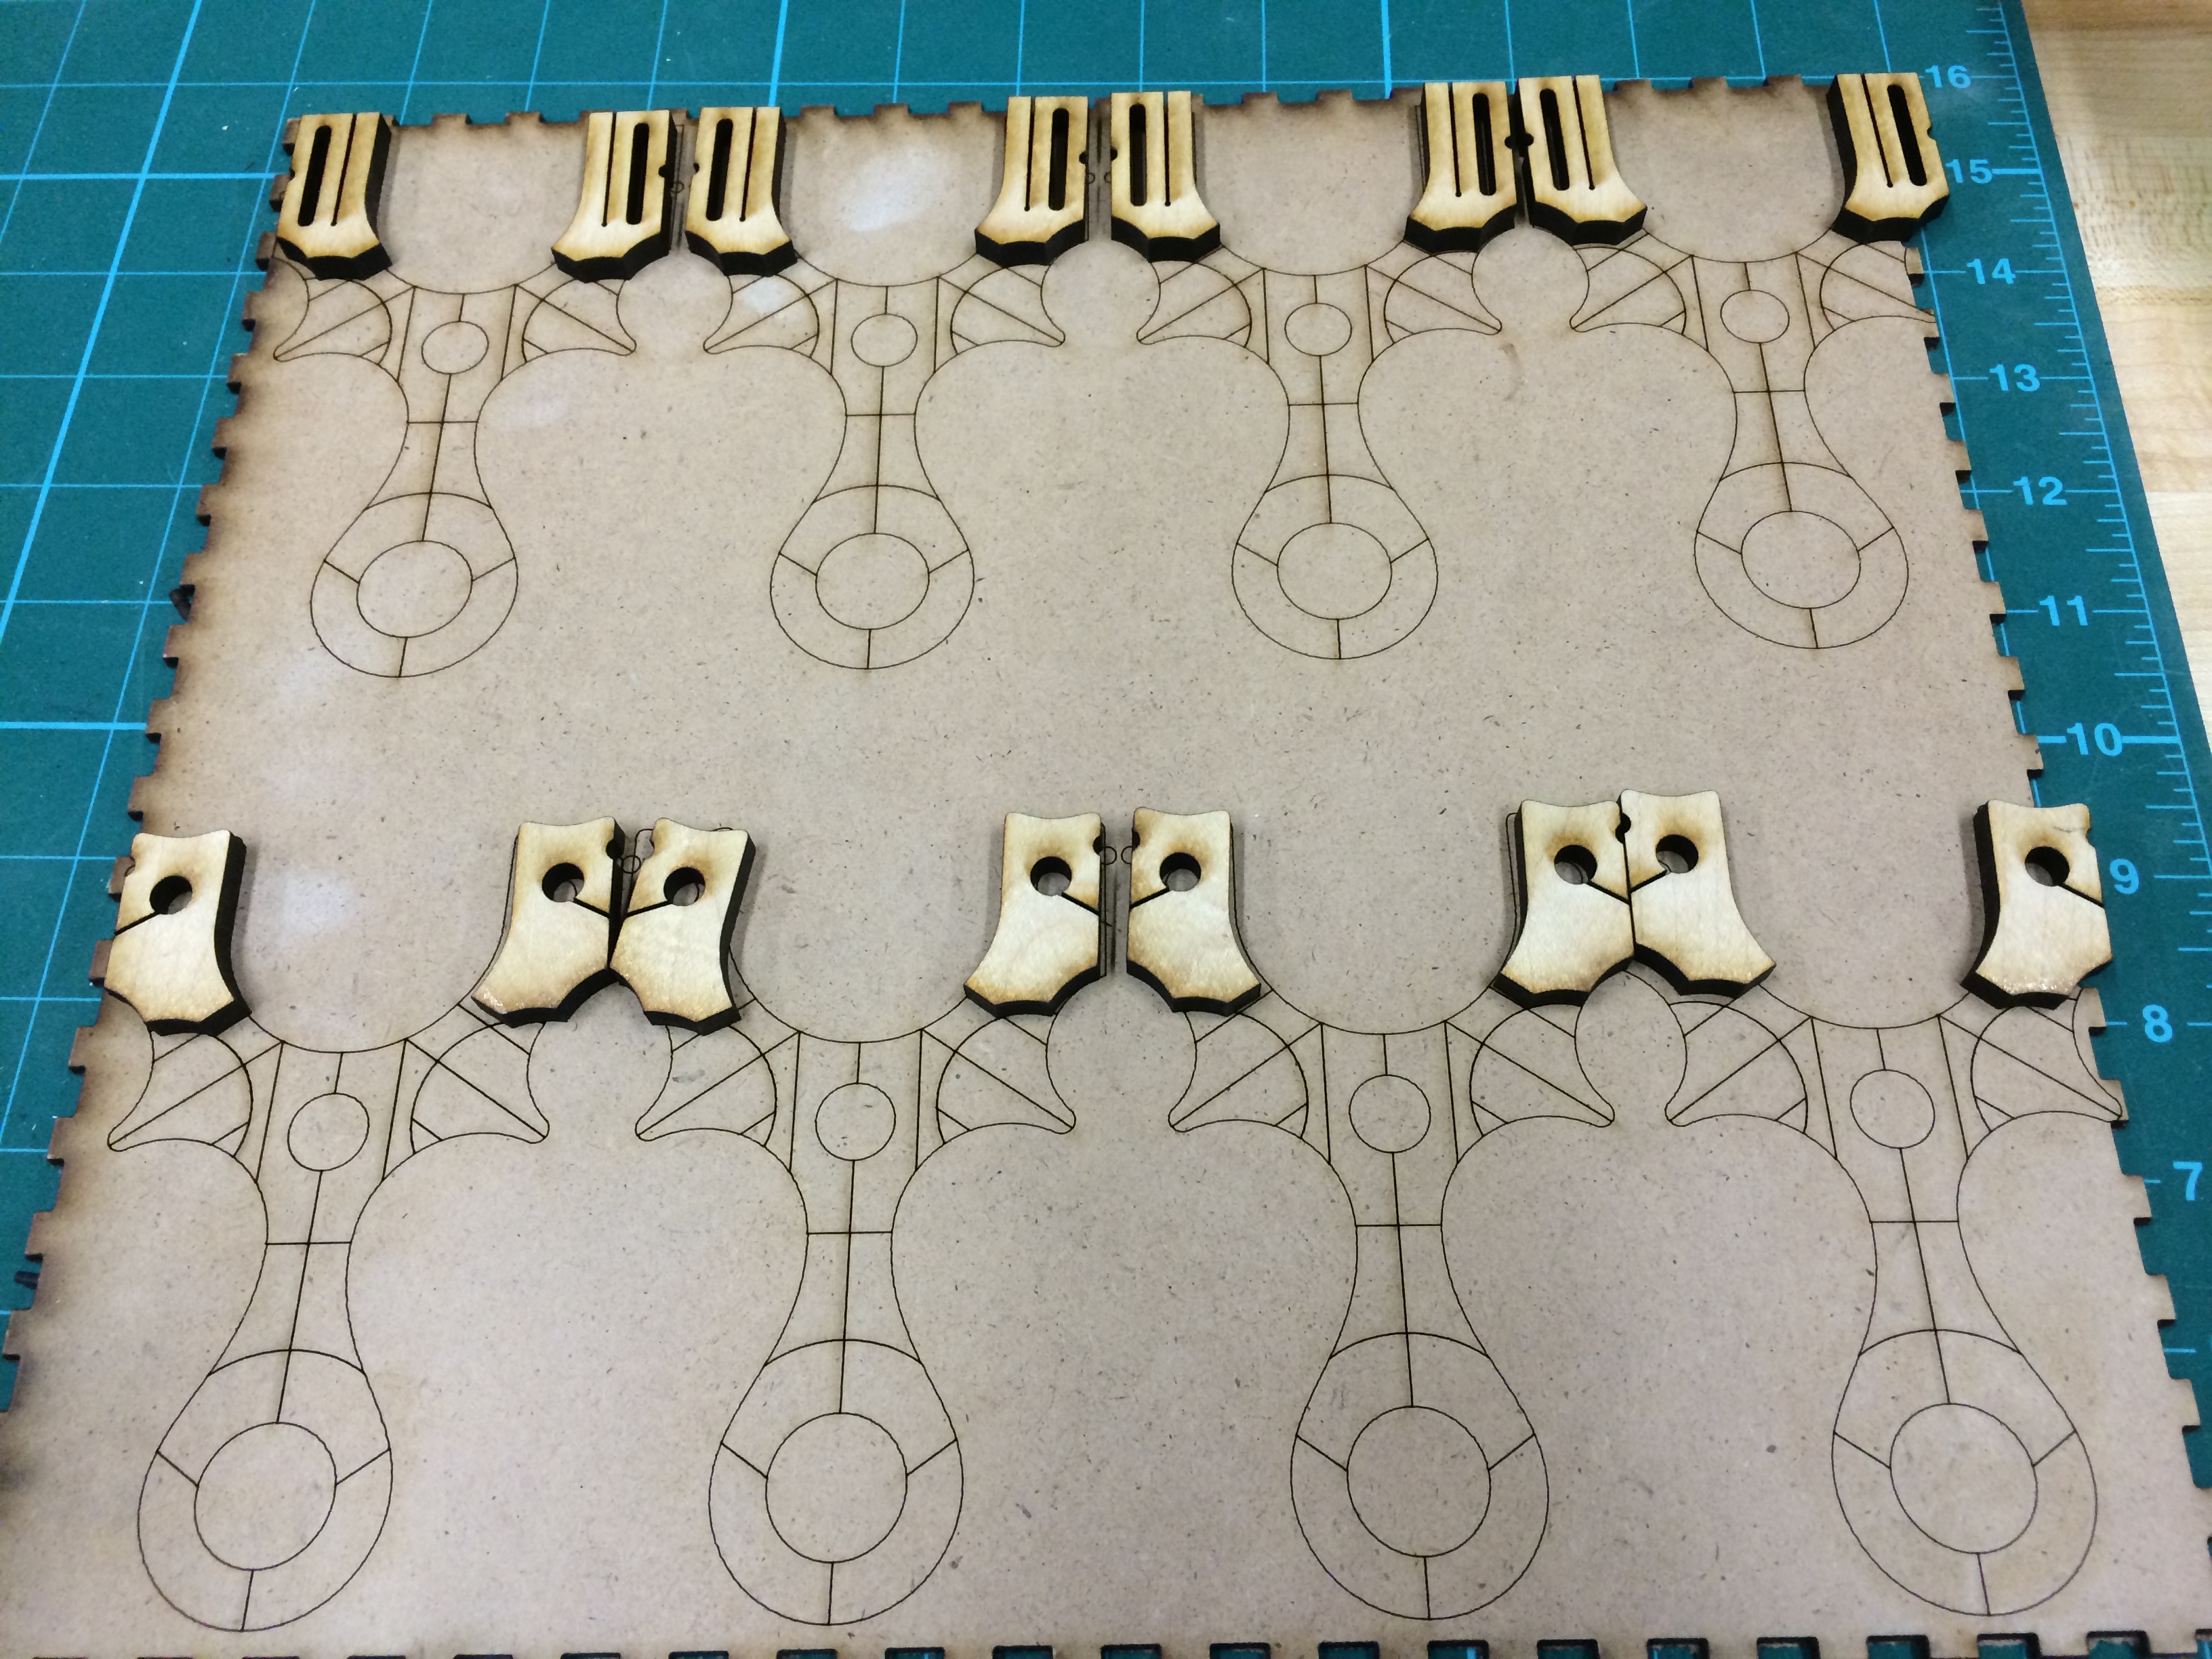
Adjusting the laser so it would only shoot out 50% of it’s 75 watt beam and speeding up to a max velocity, I made a template to organize the parts as they came off the laser cutter. The material is a scrap piece of hardboard. The next few photos show how the parts started to fill up the puzzle grid. I chose to go with rock maple for the fork tips since it is one of the hardest woods that can be laser cut and it is also readily available.
Not long after, the Honduran Mahogany, Black Walnut, Paduak and some more maple was laser cut and placed in their respective spots. You can see how the puzzle board is necessary now, and this is just one side.
The final pieces for that side were cut from maple, here’s the video to prove it.
Here are some shots of the backside puzzle board. That’s some Walnut and a piece of vintage Oak reclaimed from an ‘old’ friend (who is young at heart!). Meet Mervin, the most brilliant guy I know.
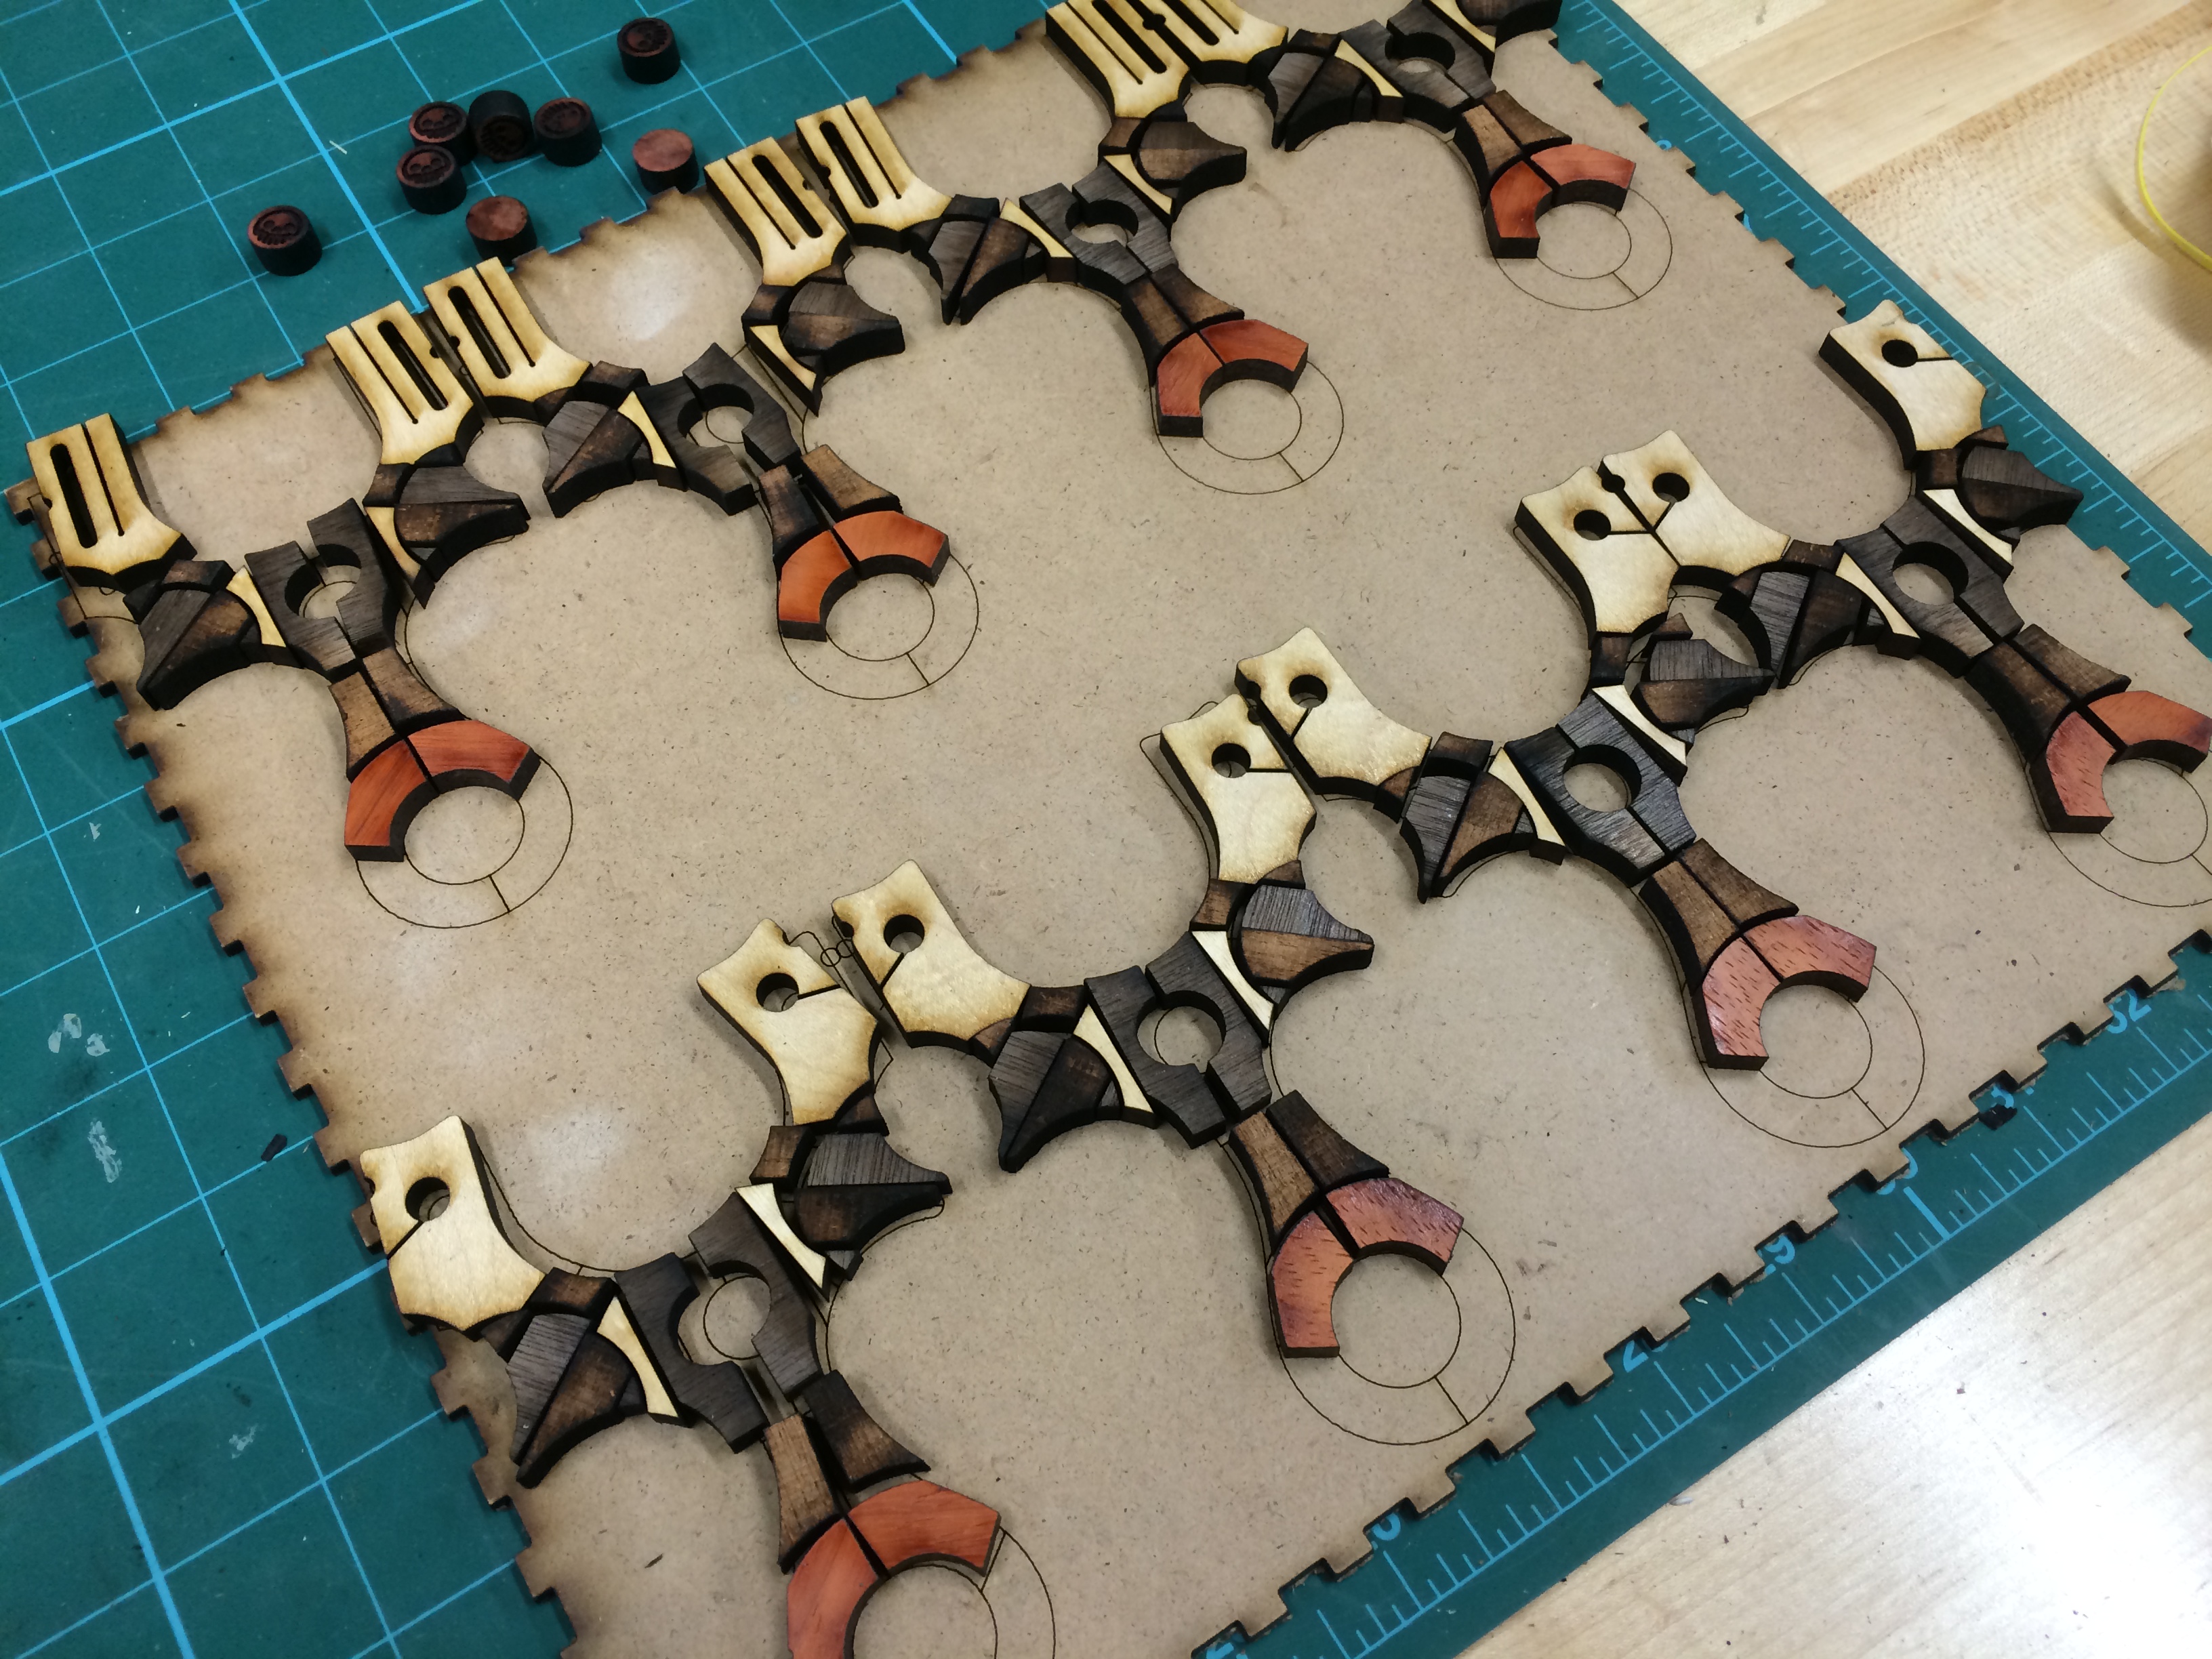
Once all the parts were cut out, it was time for the hardest and longest part of the build process; the lay up. I wanted to start positive so I began with the back side. With less parts, I would feel like I was accomplishing more and carry me through to the more complicated side. The forks get glued on first, since they are the only parts that need critical alignment, especially on the flat band version. The tips were clamped for 10 mins to ensure a good bond.
Here the Oak goes on but with a Zebra Wood spacer to fill in the laser beam kerf, this only fills the gap, but lens a little bit more pizzaz and detail.
The final bottom pieces were added (solid Birch) and left to set up a bit. Once they were more solid, the whole thing was flush faced on the belt sander. This is one of my favourite states of a slingshot build, revealing a built up pattern is pretty great.
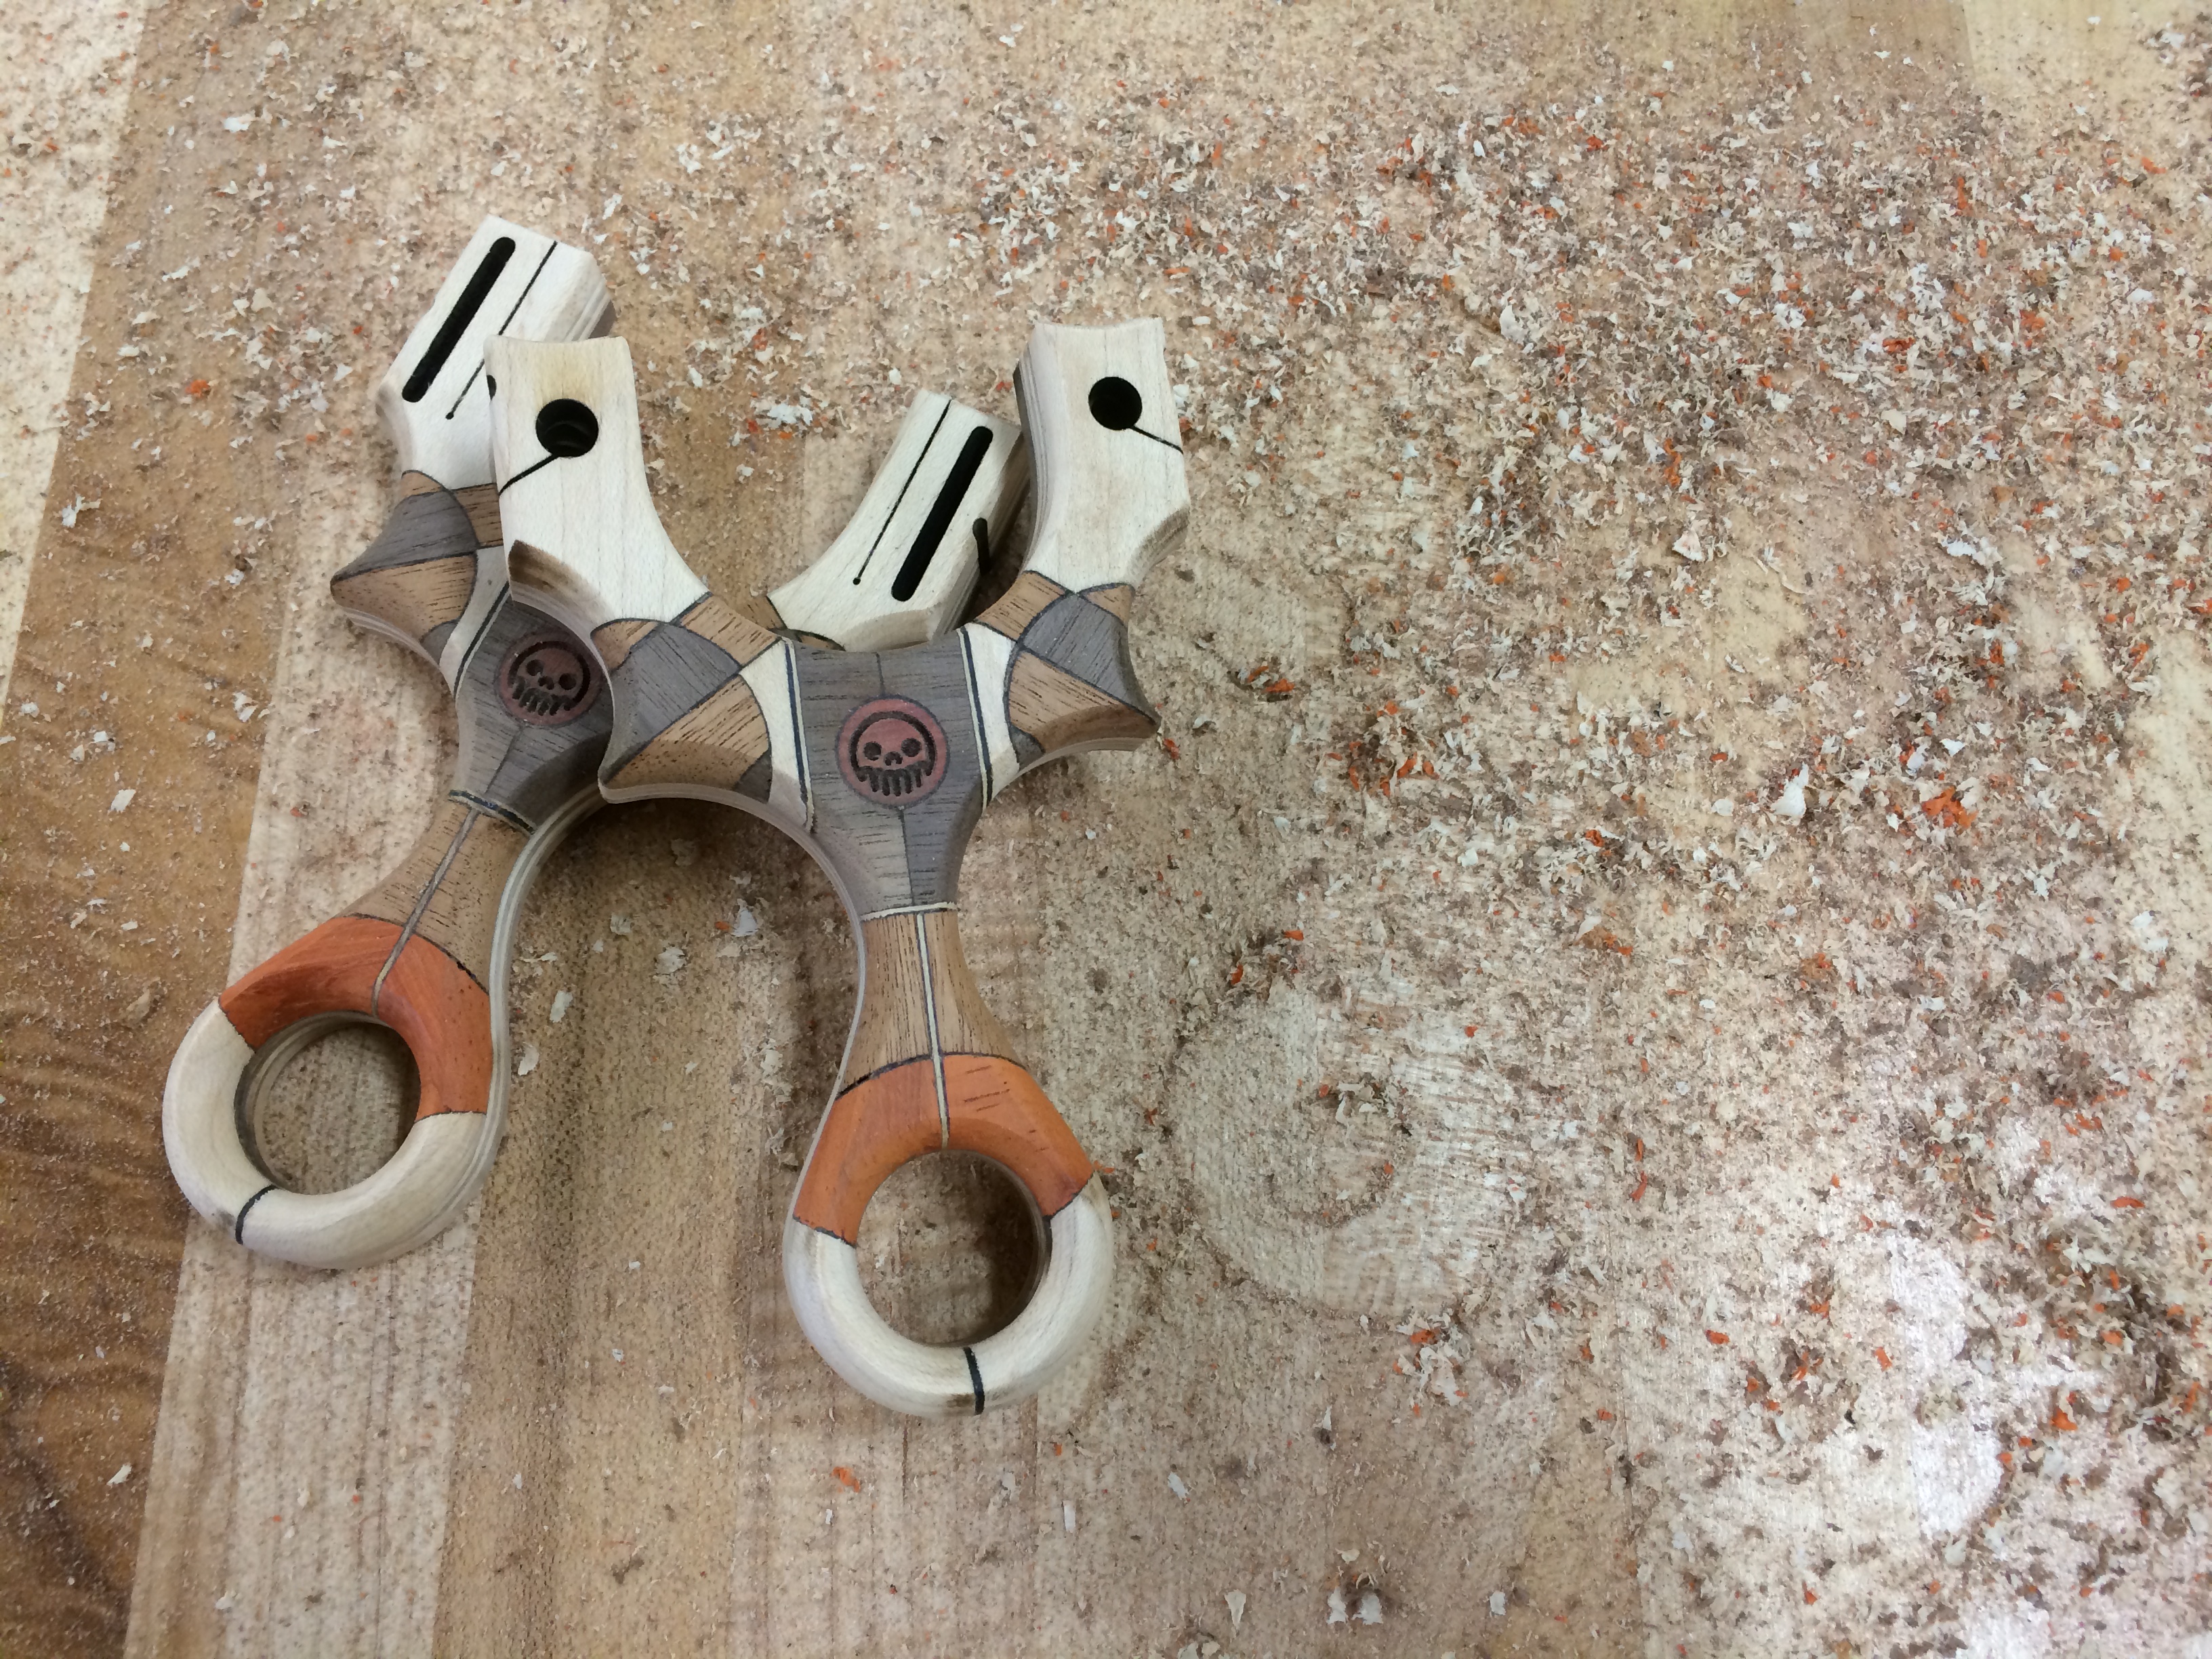
Now, the painful but rewarding part, gluing up the 30 some odd parts that make up the pretty face side. I didn’t take to many photos of this process but as you can see, this part required a lot of attention to detail. The detail I particular enjoy is the red heart wood (Chakte-Kok) I used for the Metro Grade skullthulu logo. Even though I know that the red will deepen in colour once it hits UV rays (natural properties of the wood), the dramatic red splice in between the slabs of Walnut are really something else.
You’ll notice the face sanded frame has the Metro Grade skull sanded clean off, this was a mistake on my part since the Chakte-Kok wood was thicker thank some of the wood so the etching came clean off. No worries, I had a plan to return the etching back on the face the Capuchin.
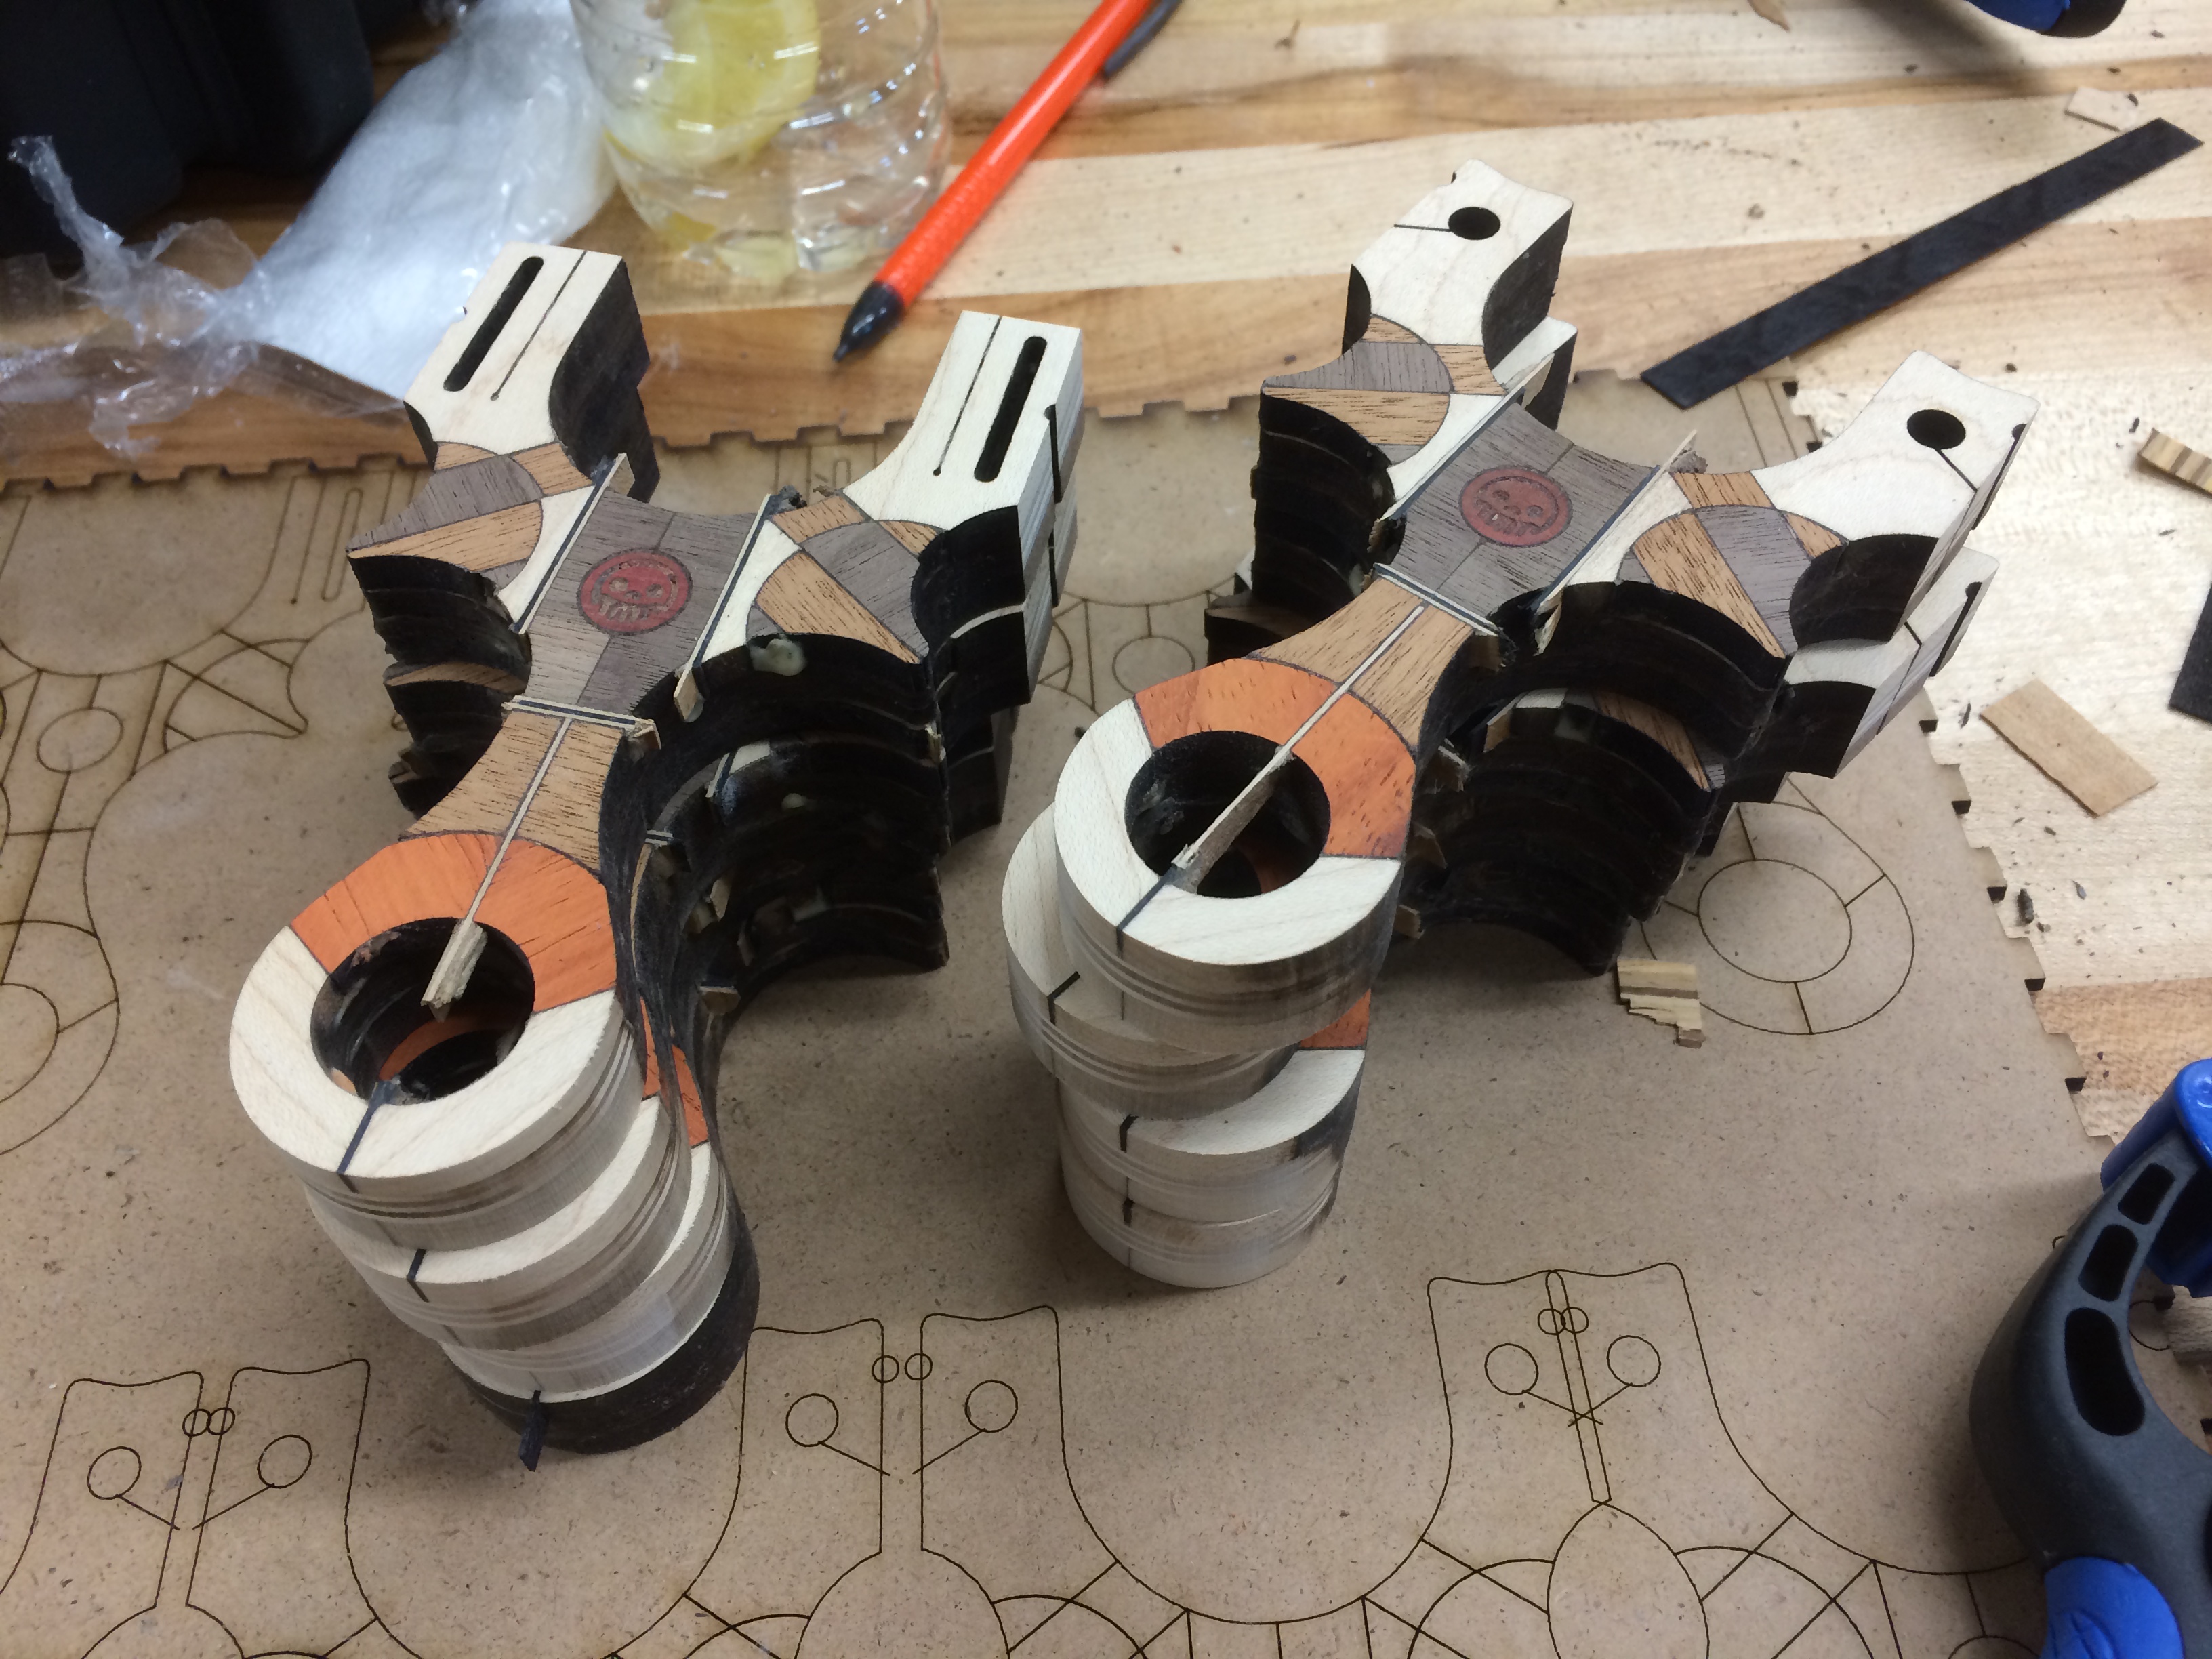
After many, many cycles of this gluing, sanding, fitting and more sanding, the result was a respectable stack of work, worth of calling it a good day’s work.
—
*One night later*
—
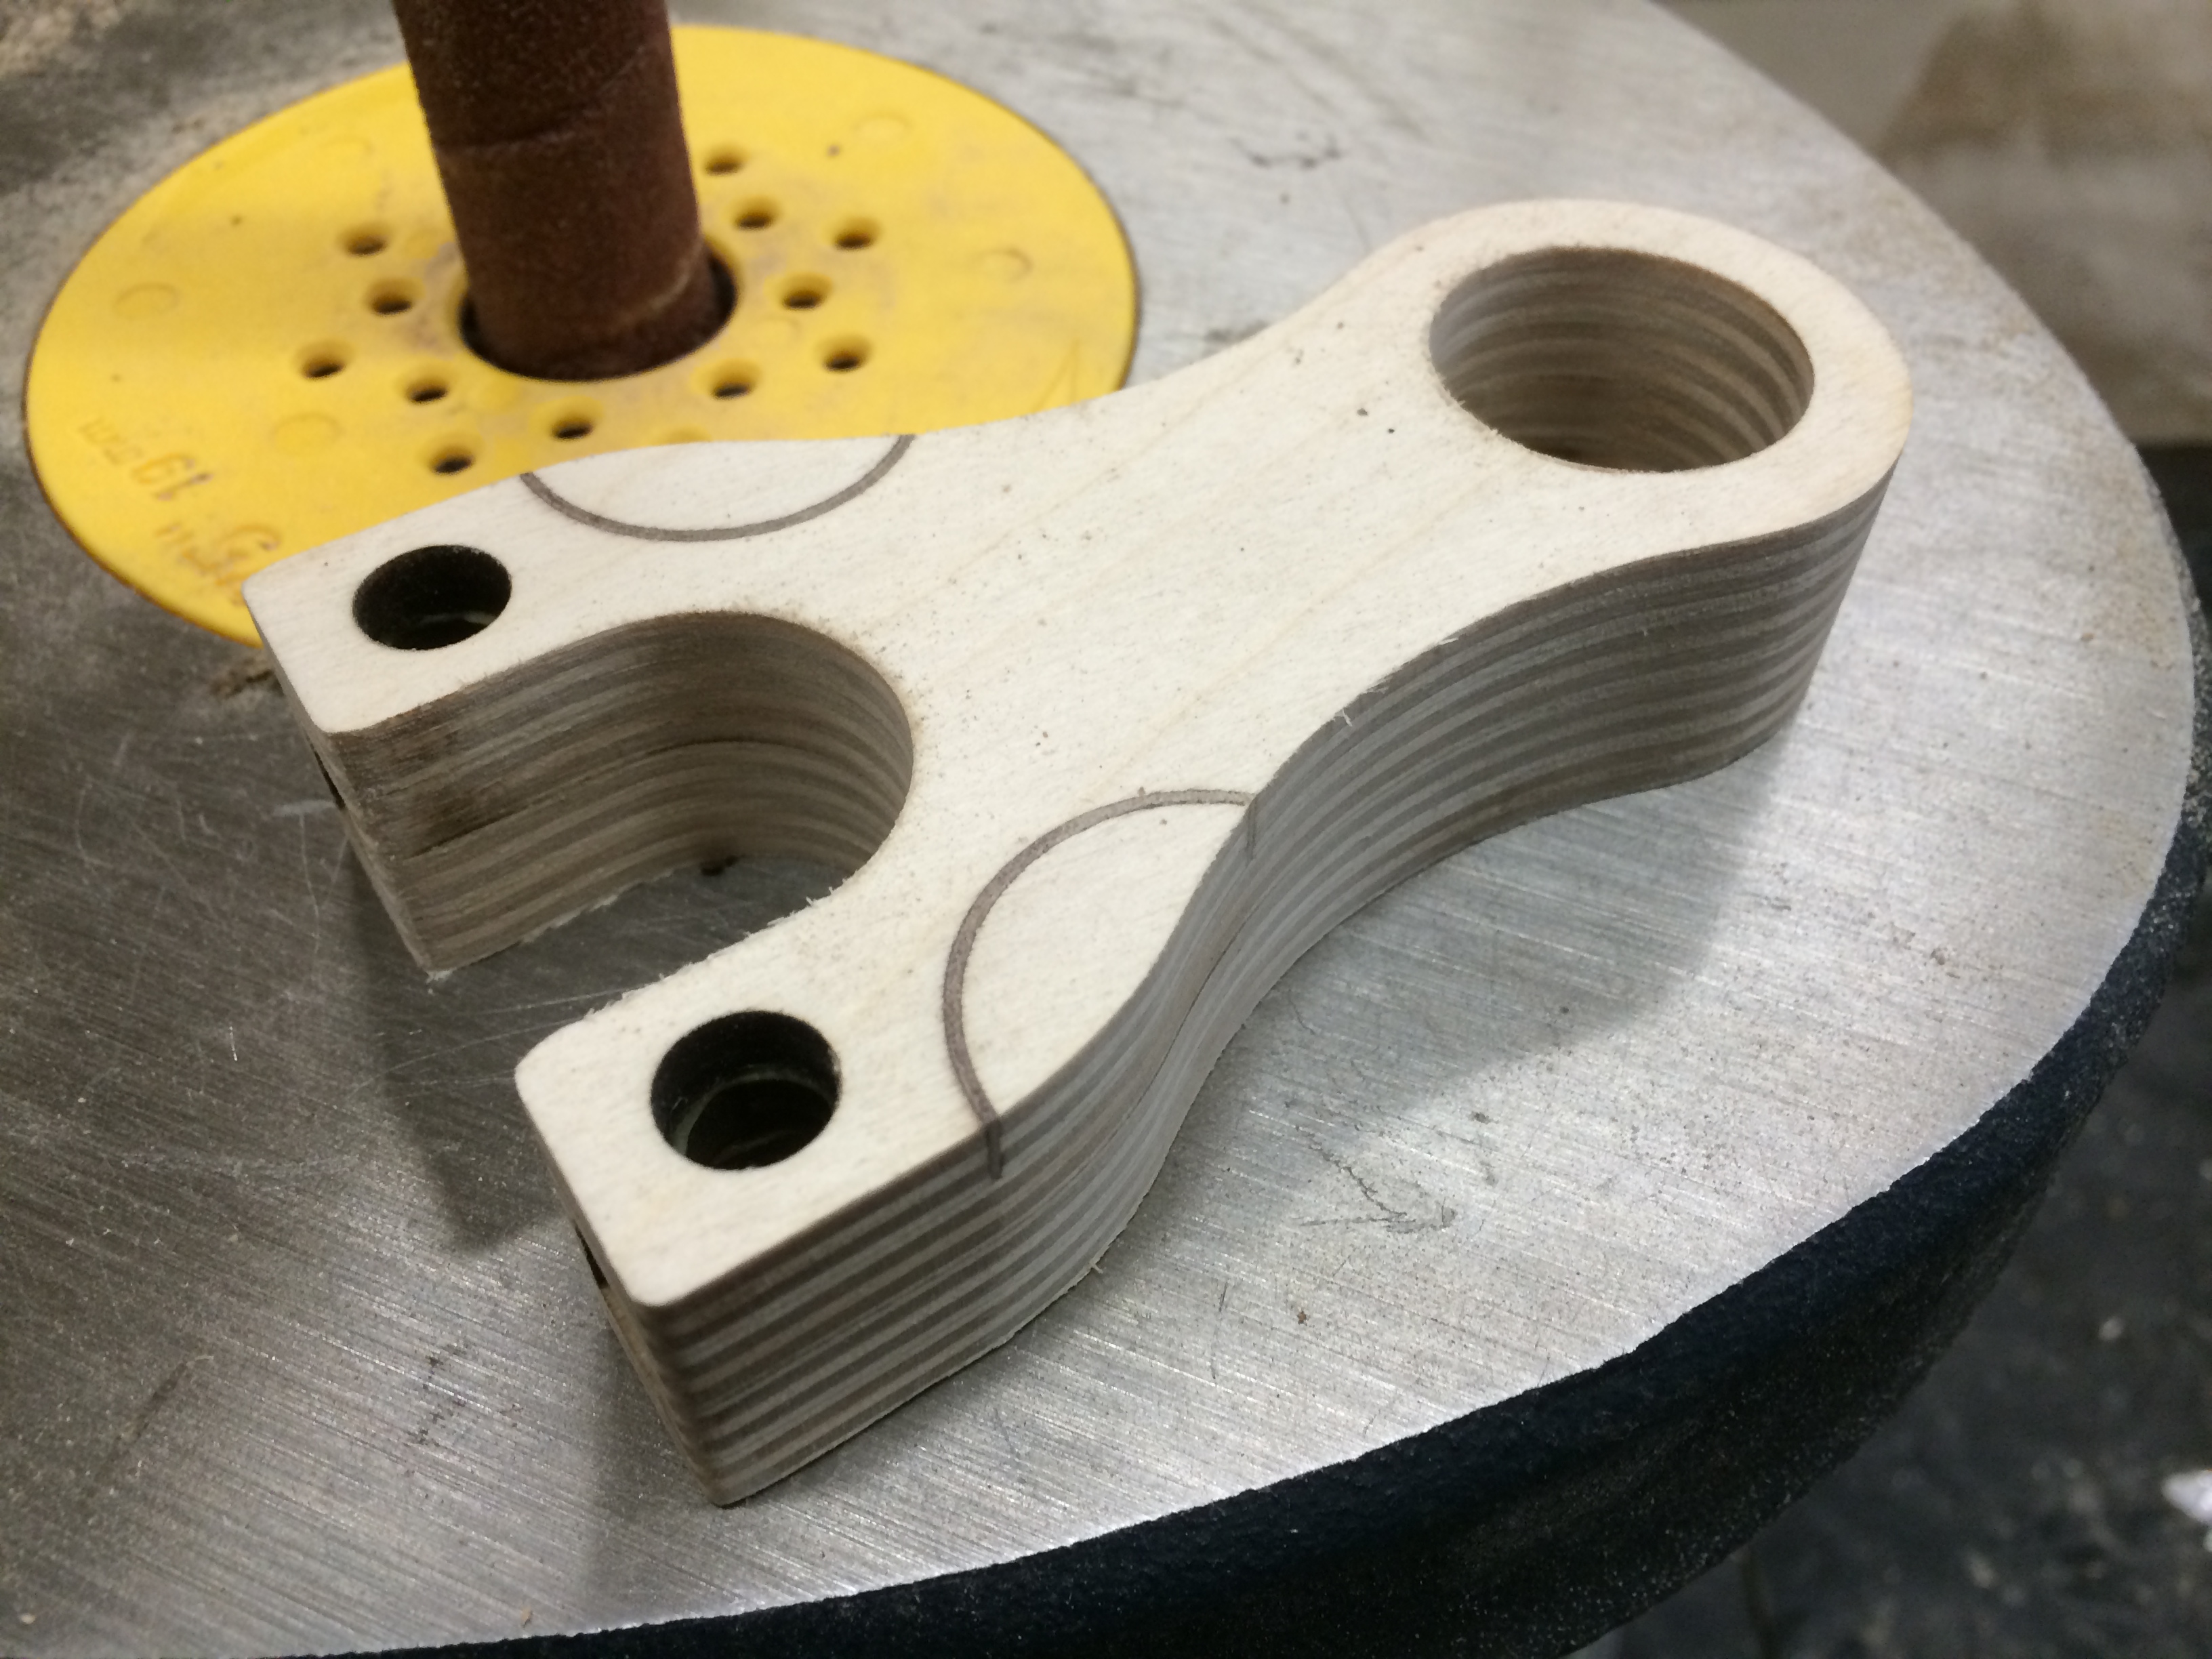
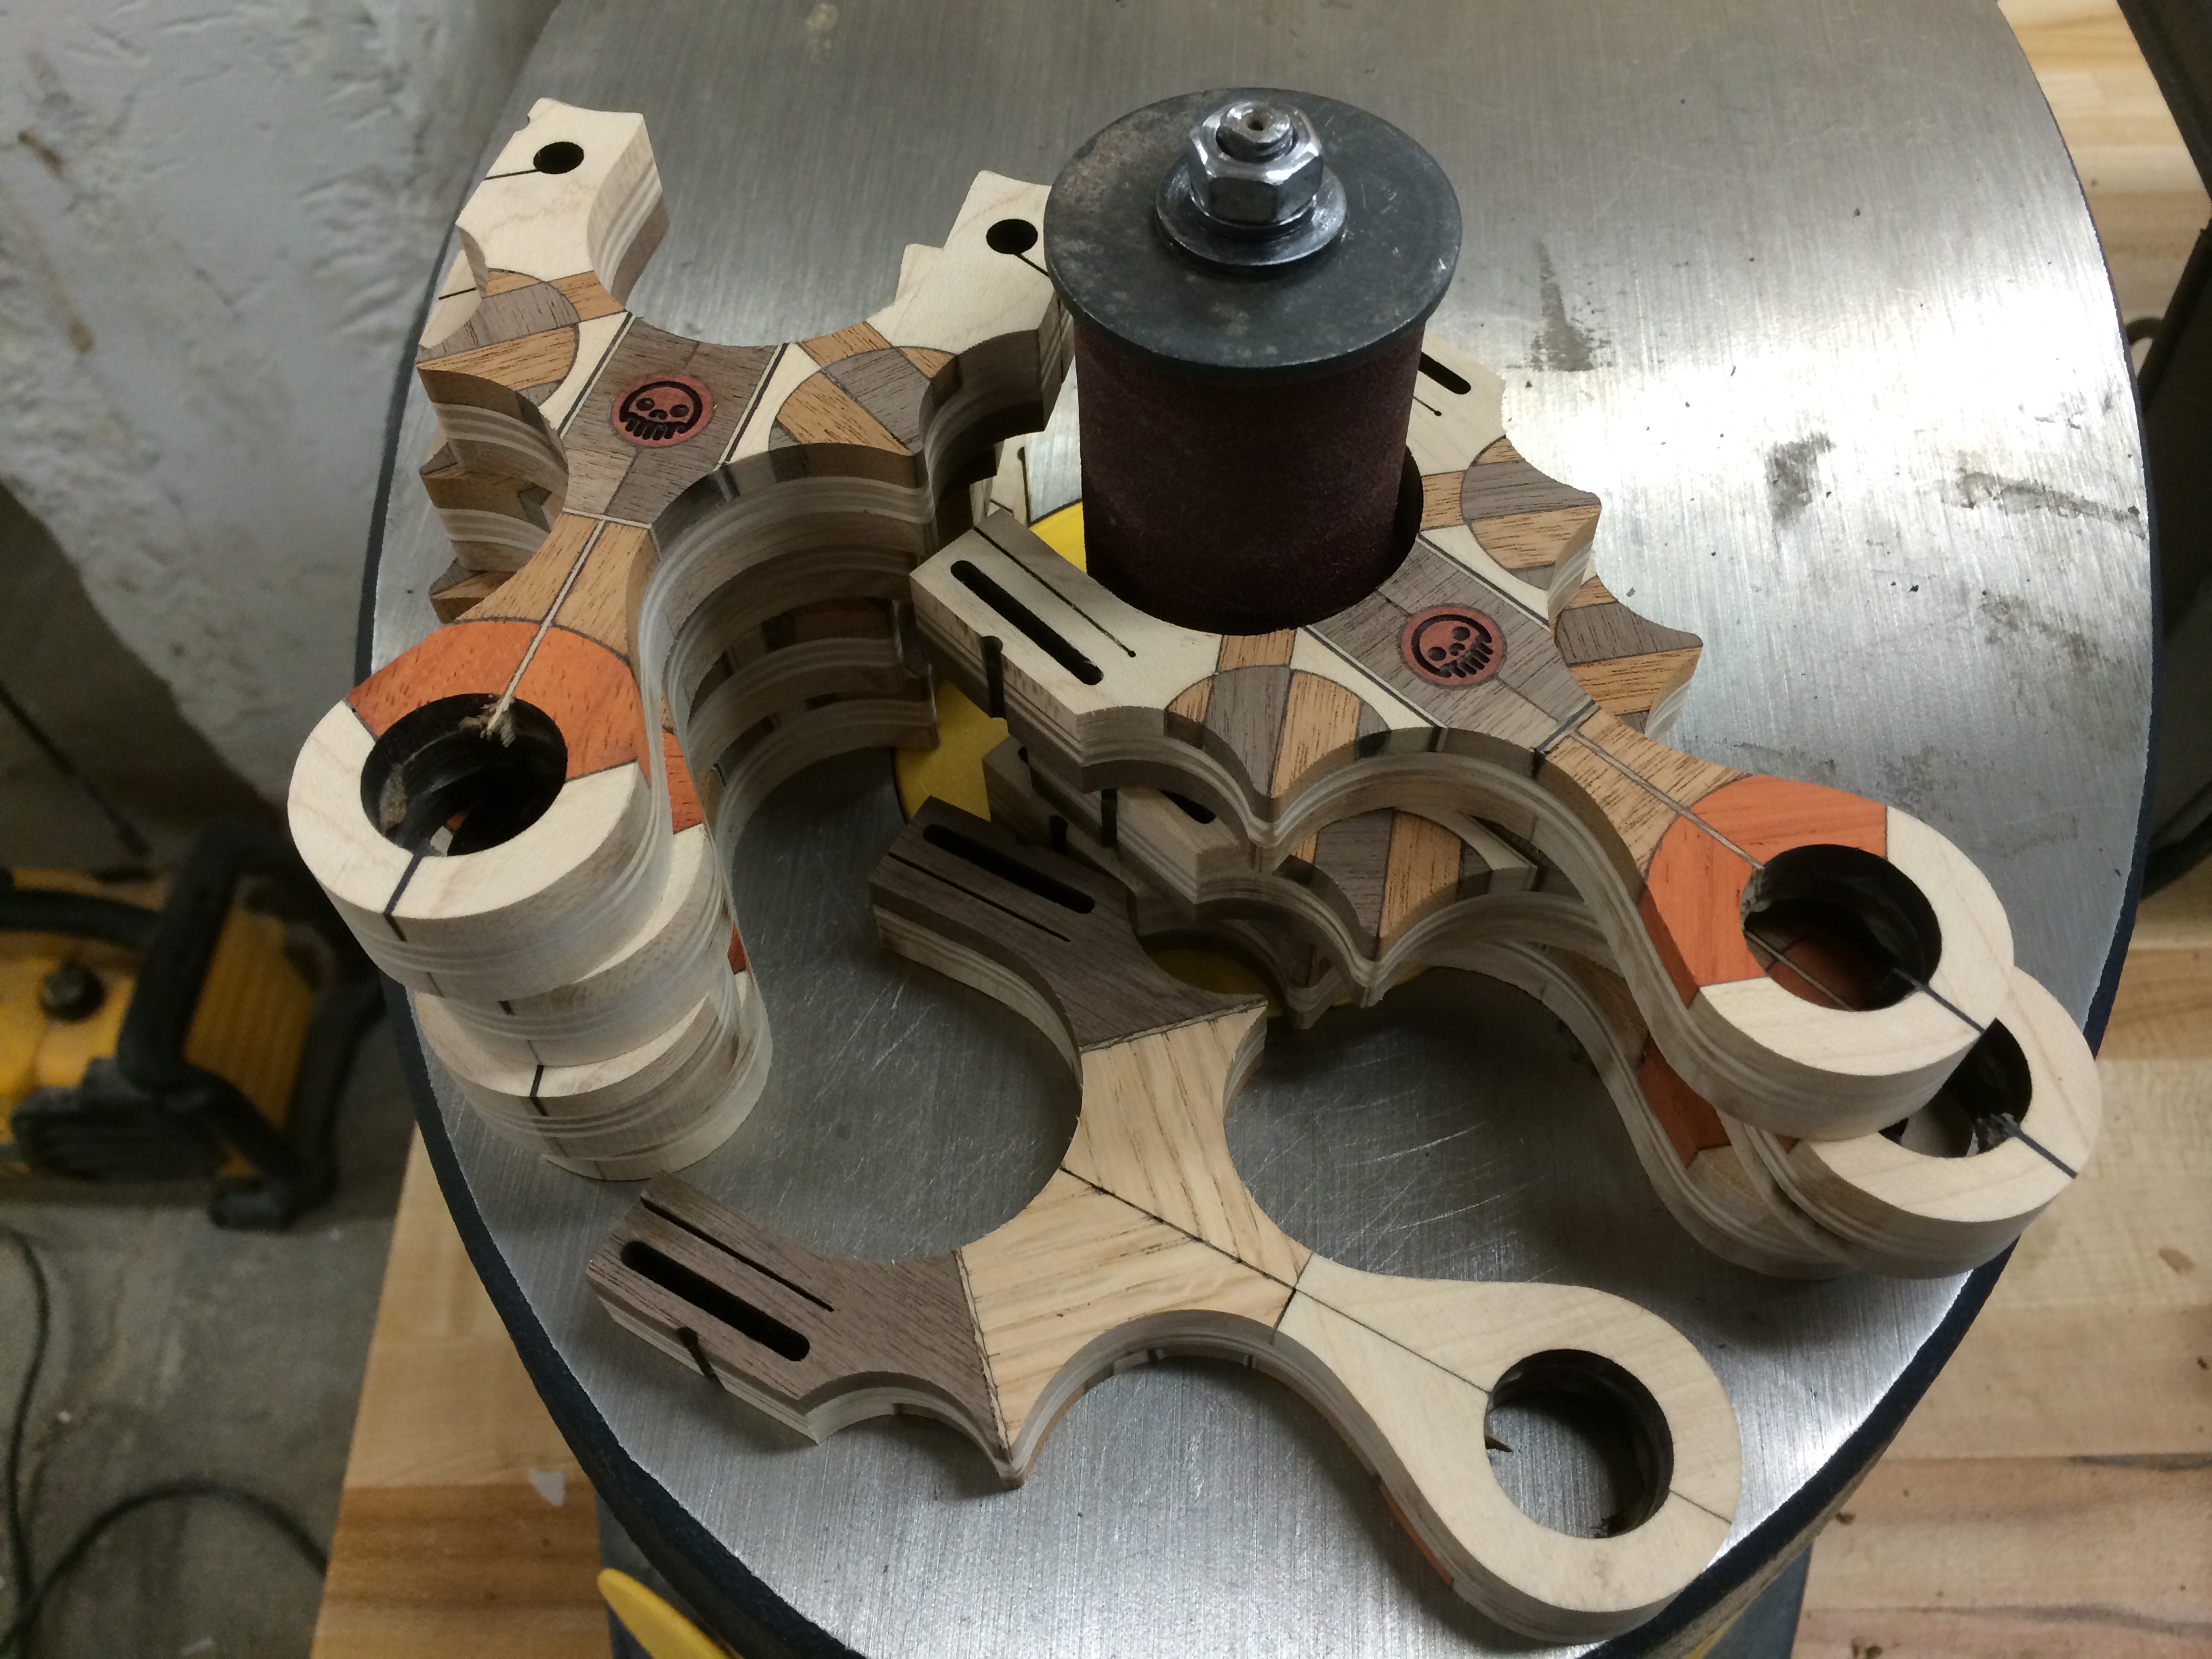
The next morning, it was time to get cracking, knowing the project would have some finality to it. First order of business, flush sand the sides of the Capuchins and remove the burned laser cut edge. Thanks to a fresh 80 grit spindle sanding drum, this was a mere 30 min job for all of them.
This next photo represents 10 hours of time, kind of crazy to think. I call it ‘Fist full of Awesome’.
Remember when I said I had a plan to return the Metro Grade skull back onto the Chatke-Kok wood circle? This is that plan. I knew I wanted to mark on it that this was a limited edition of 4 (4 TS’s and 4 FB’s) so I again used a scrap piece of wood and quickly etched the outline of the slingshot so I could realign the already assembled and glued slingshot back onto the laser bed. This technique is also what I used to realign and re-etch the skull on those slings that had the face sanded off.
Now the most dangerous part of any slingshot build, the router. Things can go VERY badly here and the entire sling could go to waste if there are any slip ups. Thankfully, I’ve had lots of practice with this model having made a limited edition of 10 plywood ones and various other hardwood versions. Despite my comfort level with this pattern and frame, I treat every time I turn on a switch to a machine a chance to die. It works, seriously.
This photo doesn’t show anything new, but I wanted to grab a pic of the router shavings. Such beautiful array of colours.
The Capuchin TS and the Capuchin FB both have things that still need to be done with them before the band attachment area are operational. The TS’s tube slot needed to be widened but not before the edges of the hole are chamfered with a 1/4″ counter sink.
Then it’s off the band saw with a fairly narrow, 1/2″ blade, the tube slot gets widened to a saw width. The existing tube slot was not really a tube slot at all, it was merely a guide for the alignment when gluing up the layers and subsequently, a guide for the band saw to slide into.
Then the notched ‘iron sight’ needed to be cleaned up too, so a round rat tail file comes to the rescue. Under the TS is one of sanding blocks used to sand the surfaces of the sling. These are 80/120 grit mini blocks meant for manicurists, but for those tight curves and hard woods, they are perfect.
I didn’t take any photos of the FB slot finishing as it’s a bit of a secret but essentially it just needed to be sanded out to improve the consistency in the width of the slot for Theraband Gold and pure Latex bands. Once they were all sanded with 600 grit paper, it was off the paint booth to shoot 3 coats of acrylic sealing spray.
Once they were cured (acrylic spray only has a 30 min cure time), they were buffed to a shine with another manicurist tool; the nail buffer. It was time to hit the photoshop.
BUT before you go ahead to the final product and images, I want to list the woods used in these slings:
– Baltic Birch plywood core
– Rock Maple
– American Black Walnut
– Honduran Mahogany
– Chatke-Kok
– Maple Veneer
– Ebony Veneer
– Zebrawood Veer
– Birch
– Paduak
– Oak
…ok enough stalling.
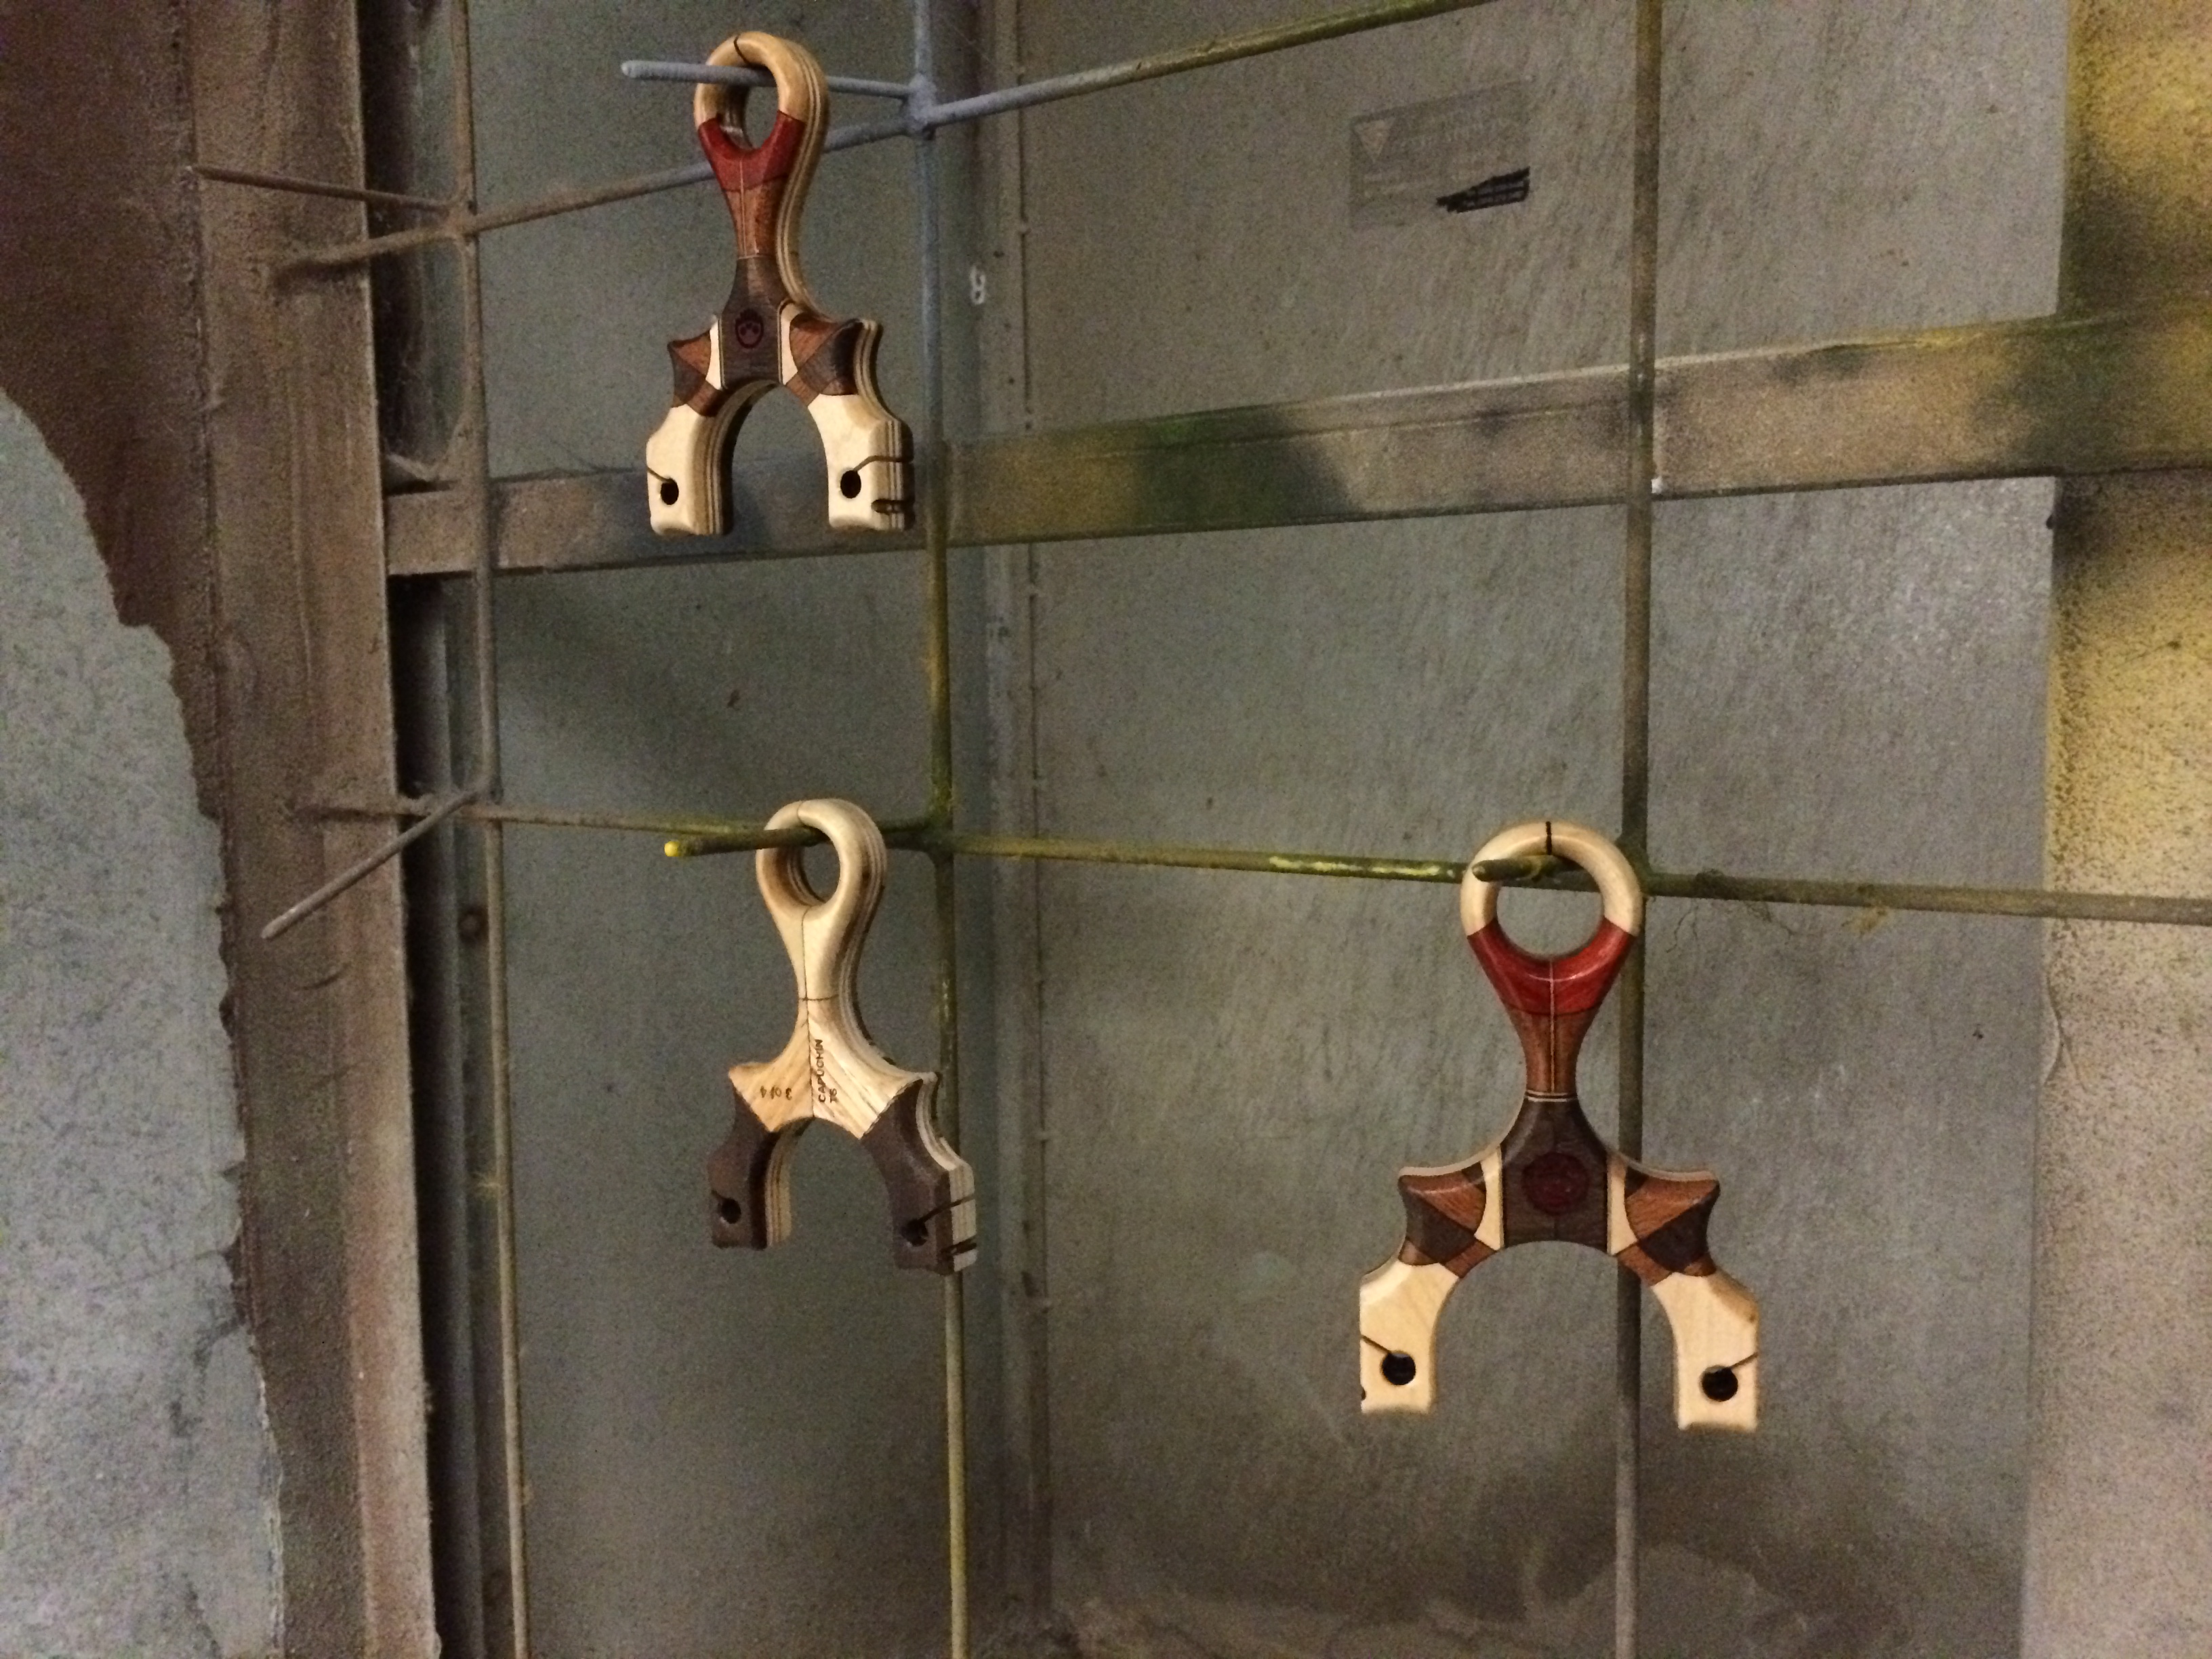
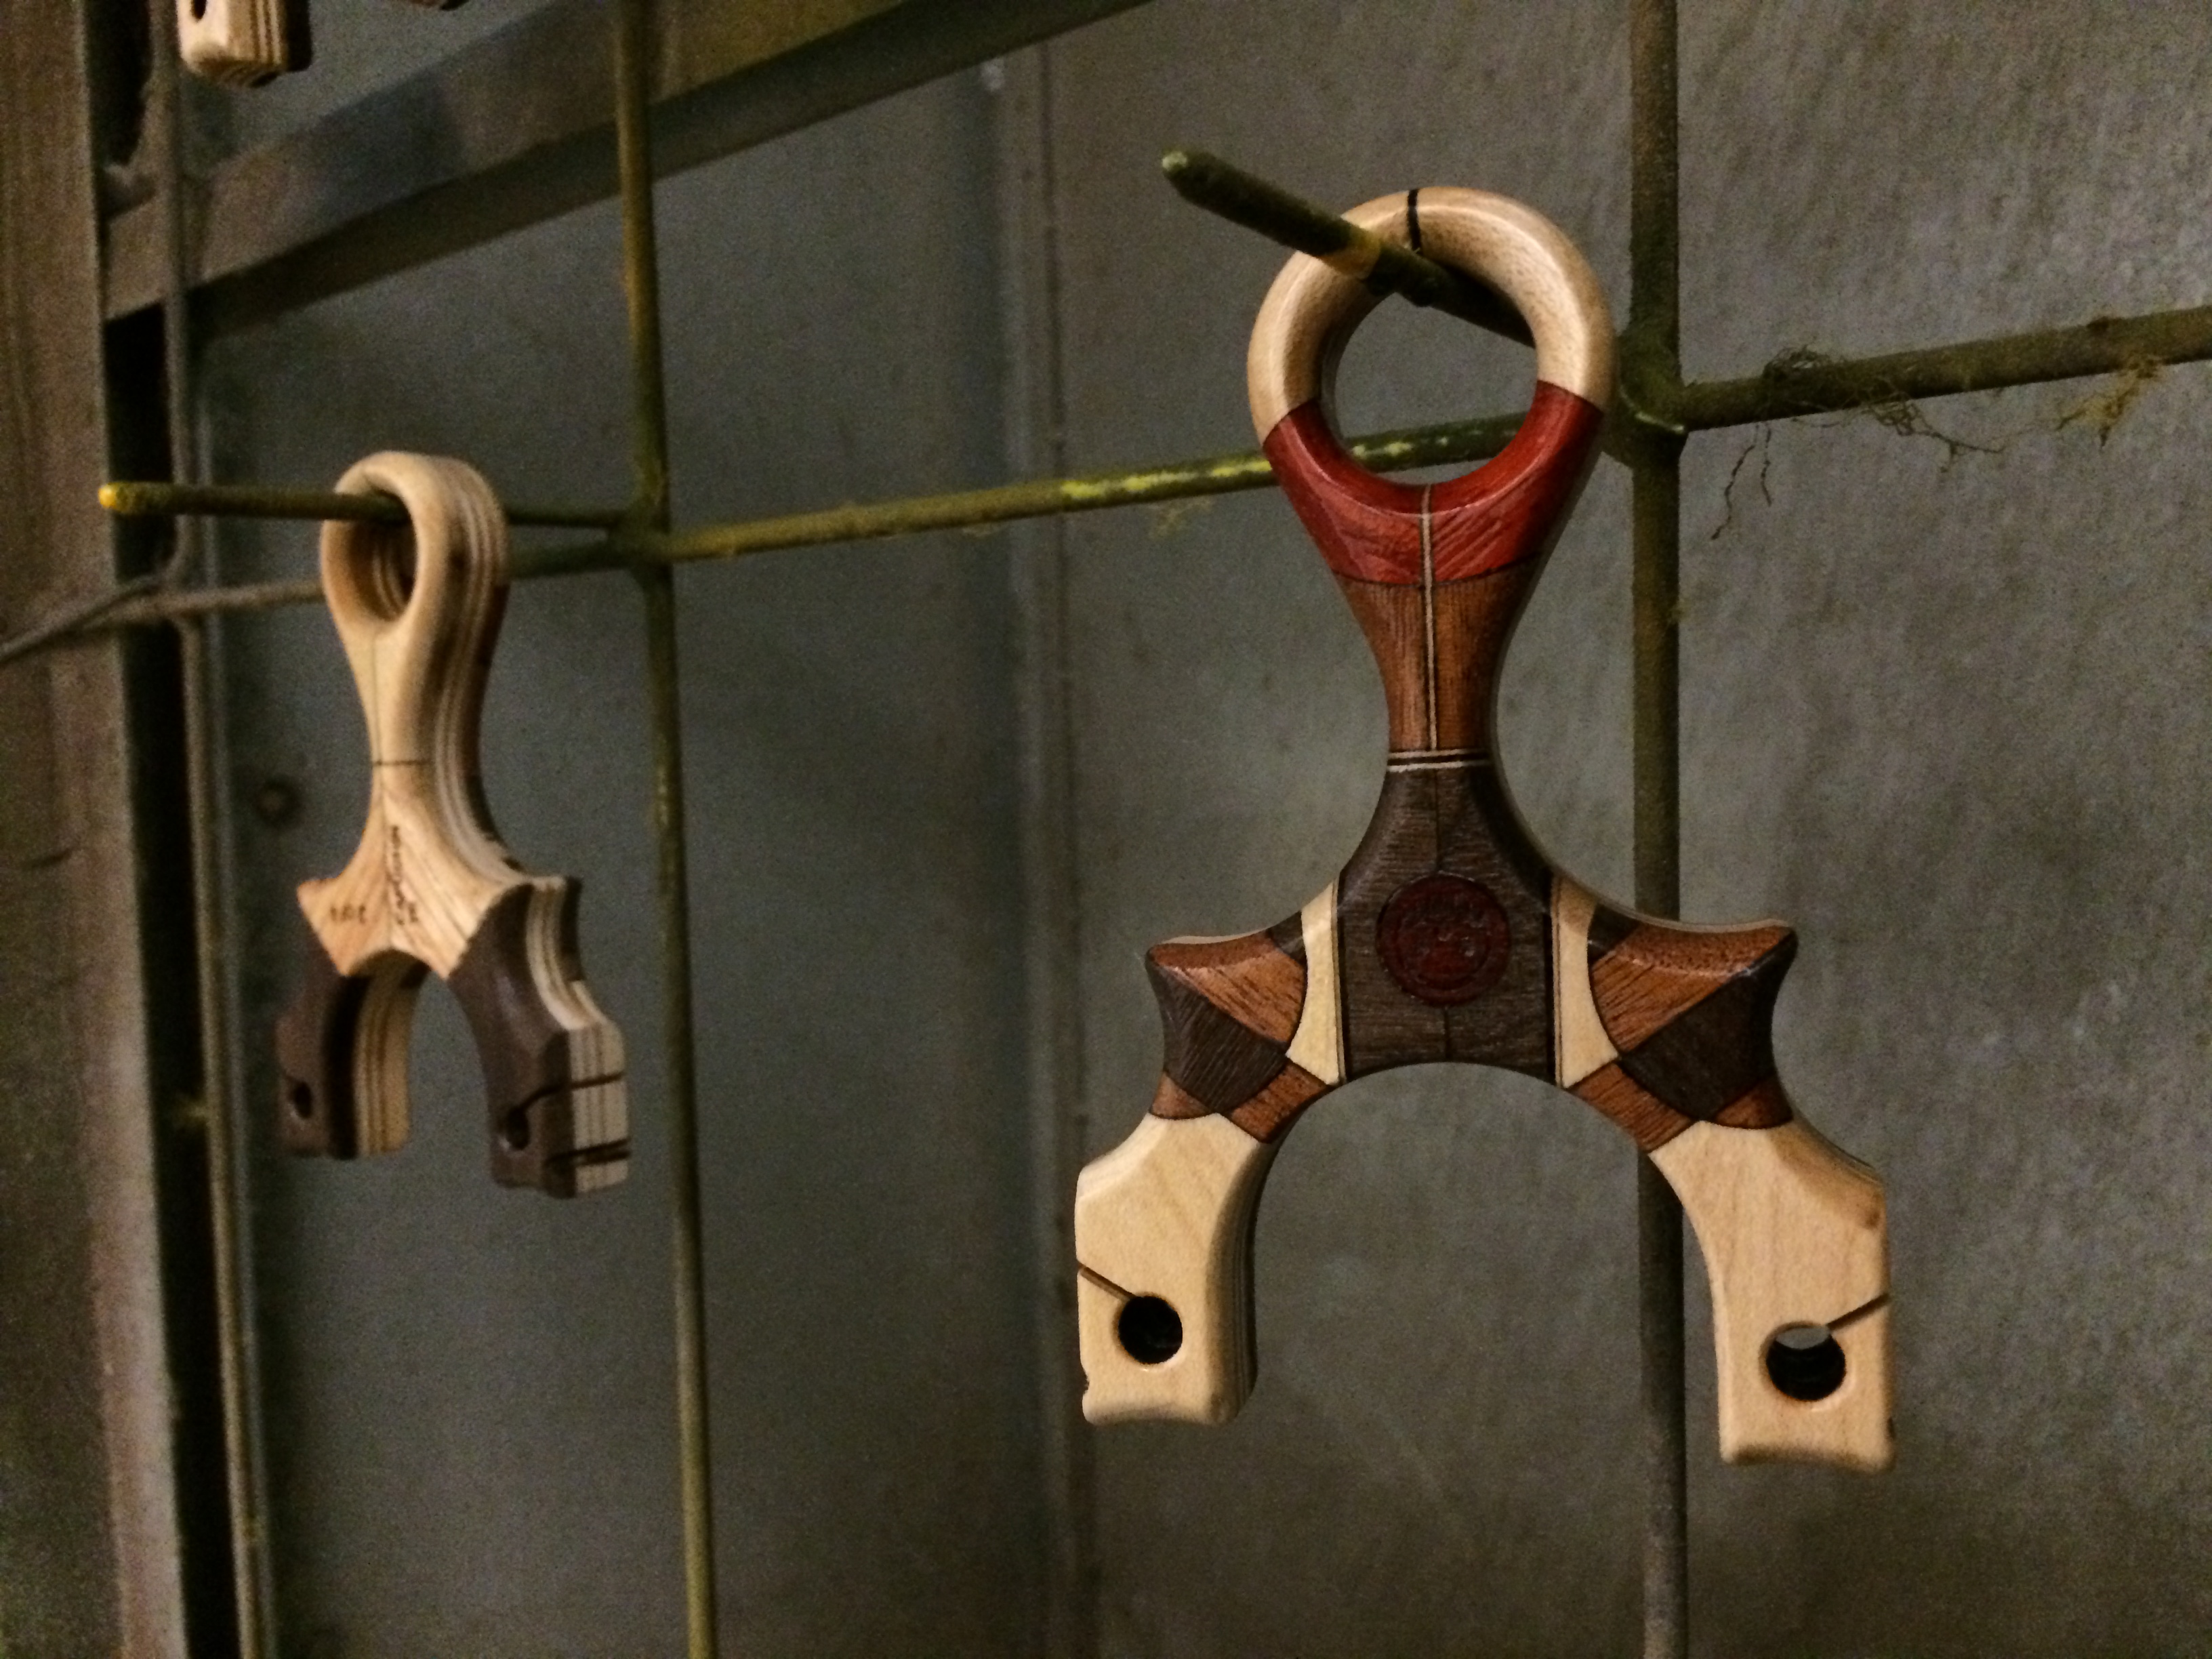
I am pleased to present the Harlequin Capuchin TS and FB.
Thank you for reading to the end, it’s not often I get to spend this much time writing about my process and methods, but I know it’s always worth looking back on projects like these.
I am also really happy (but with begrudgingly) to announcing that Metro Grade is now on Twitter, you can follow and reach me at @MetroGradeGoods
3 of each Harlequin TS and FB will be available at the Metro Grade Shop.
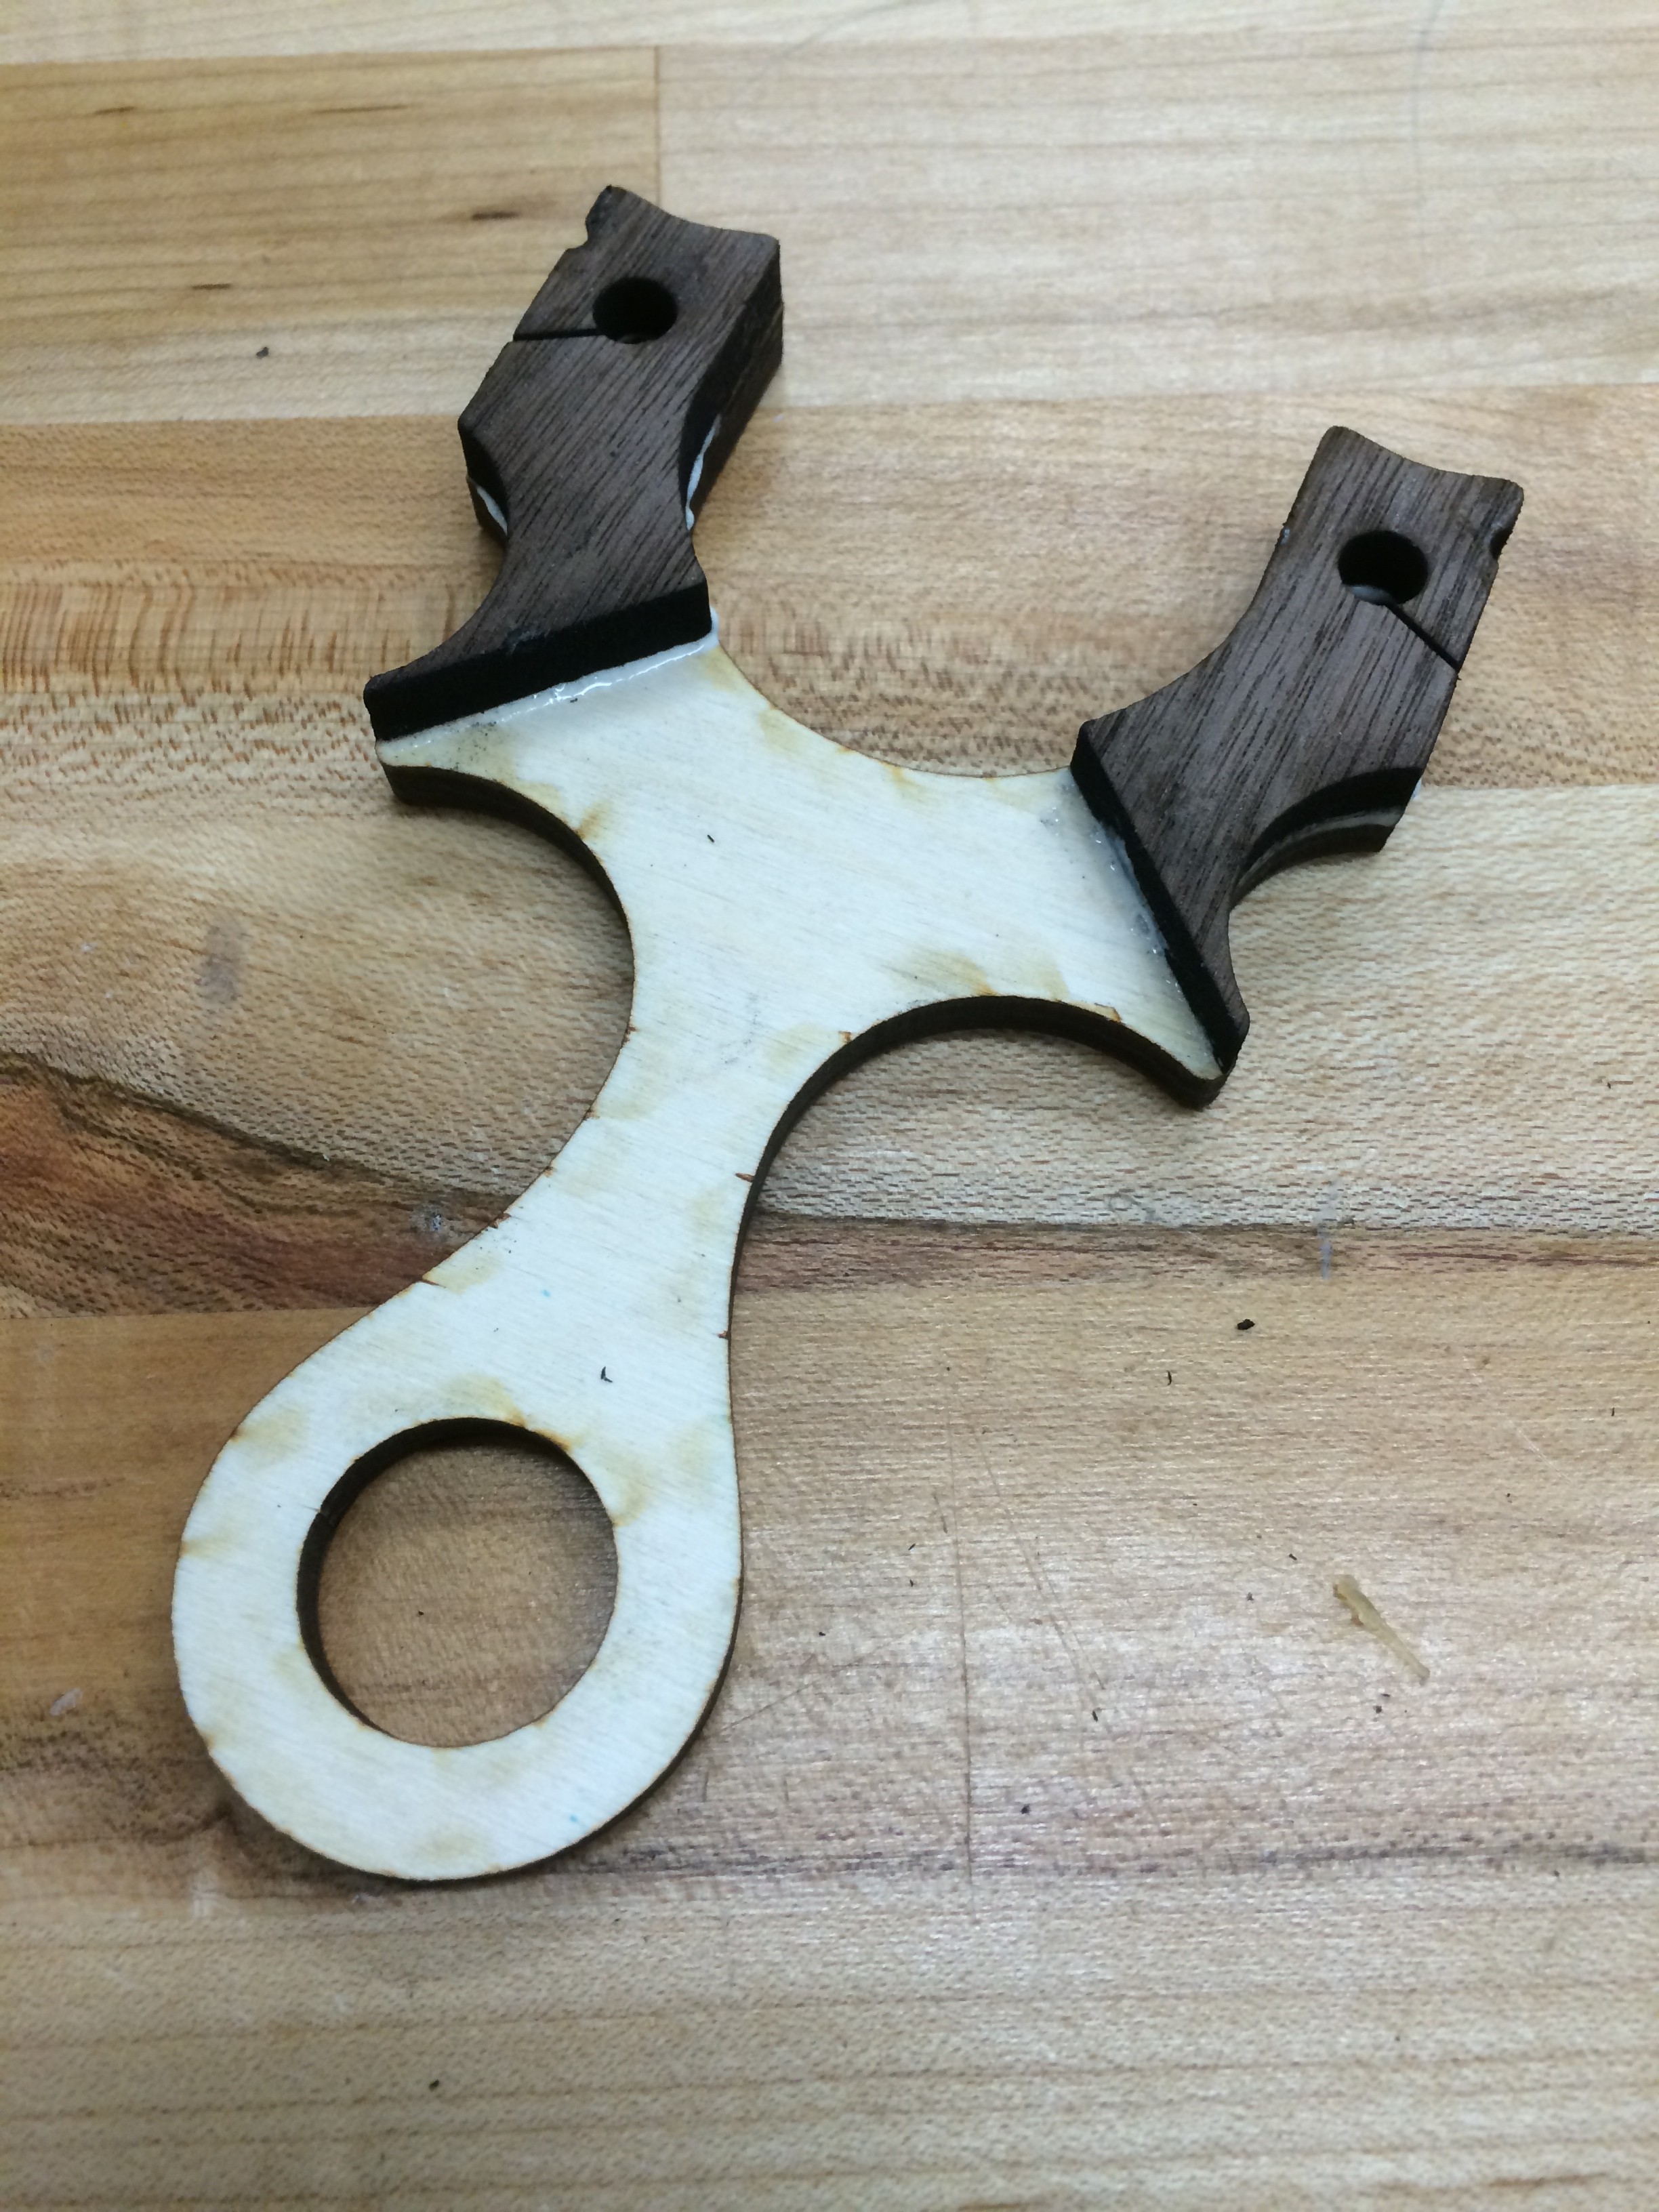
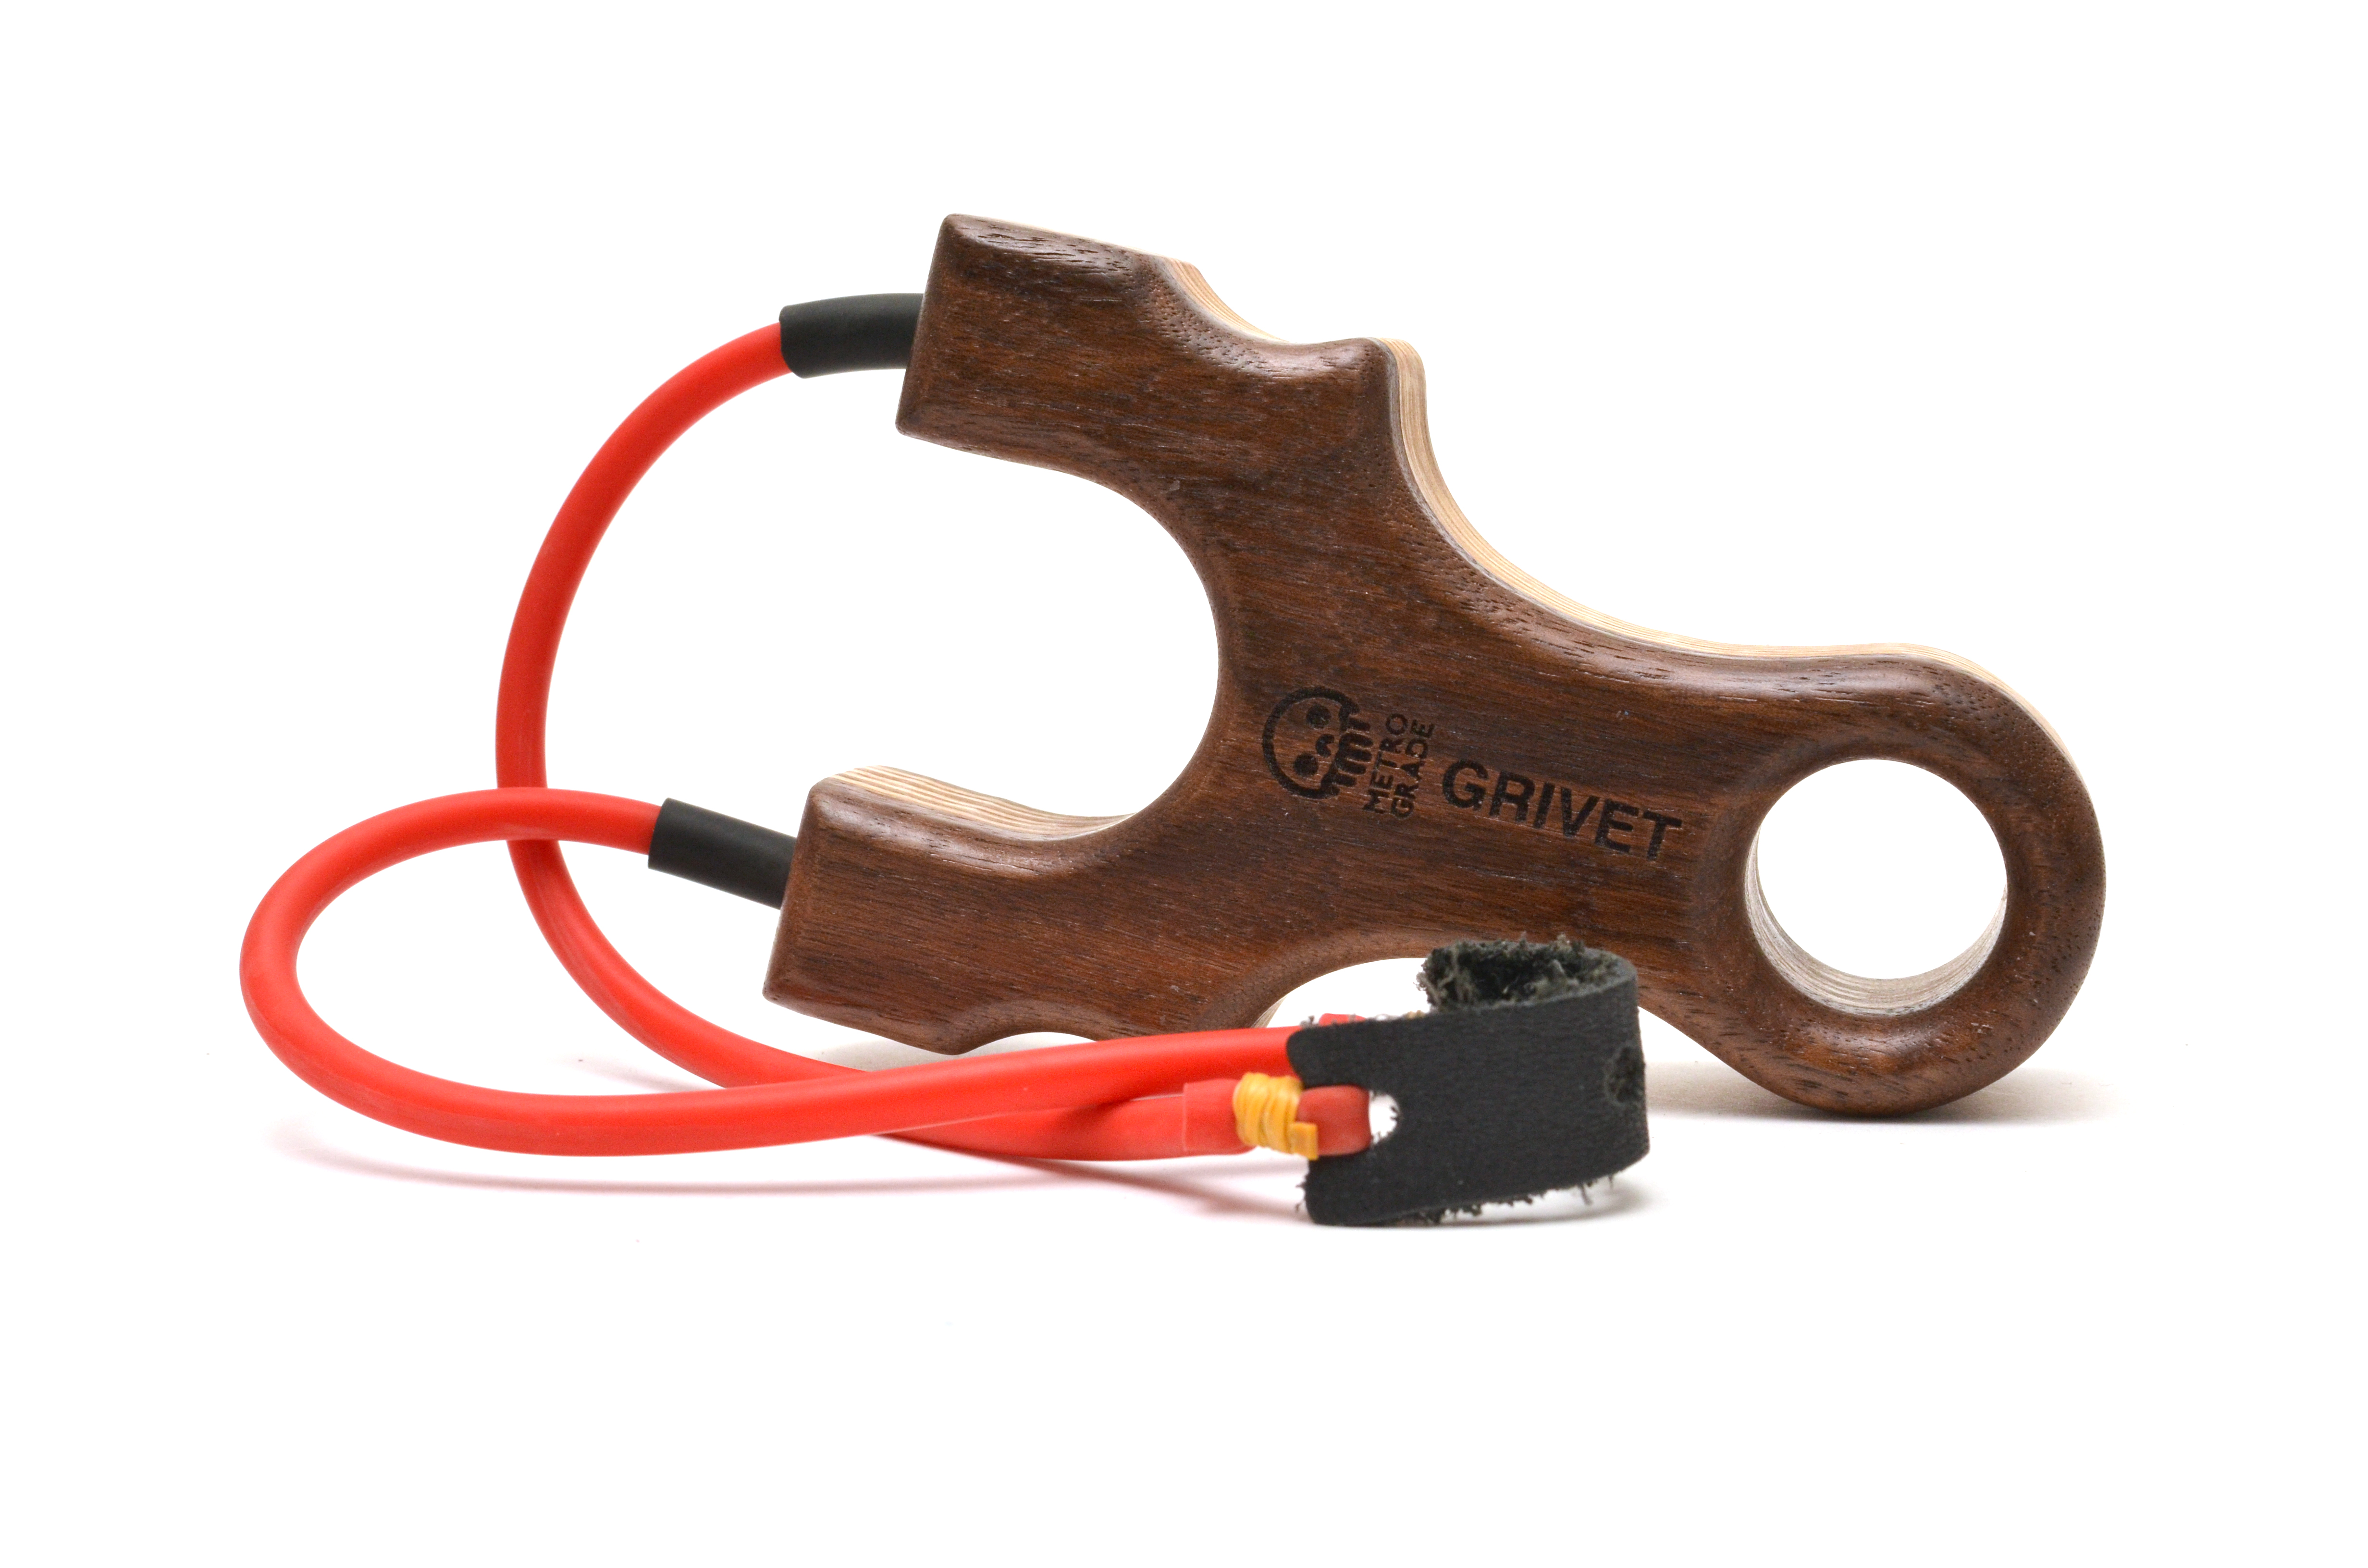
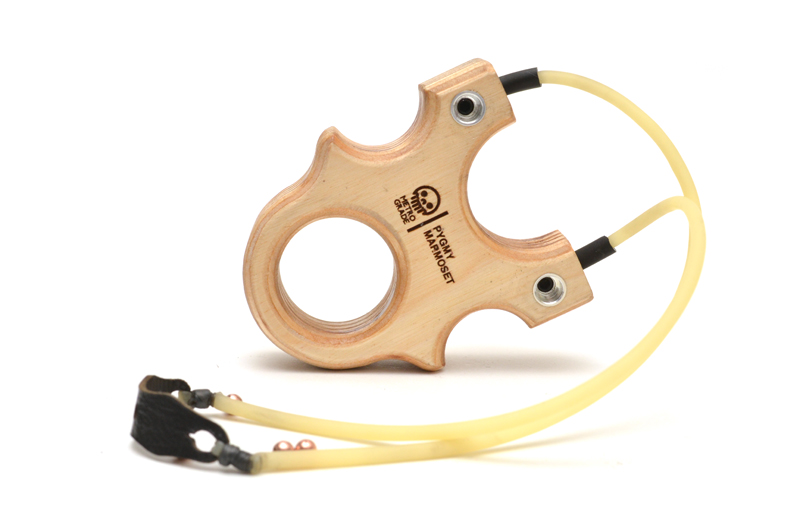
Been having a lot fun with the whole idea of compression tube/band attachment. In this post, we’ll go through a quick iteration and evolution of the mechanism. While the set screws are great for attaching bands, it still requires an Allen key. This new build method achieves a tool less adjustment.
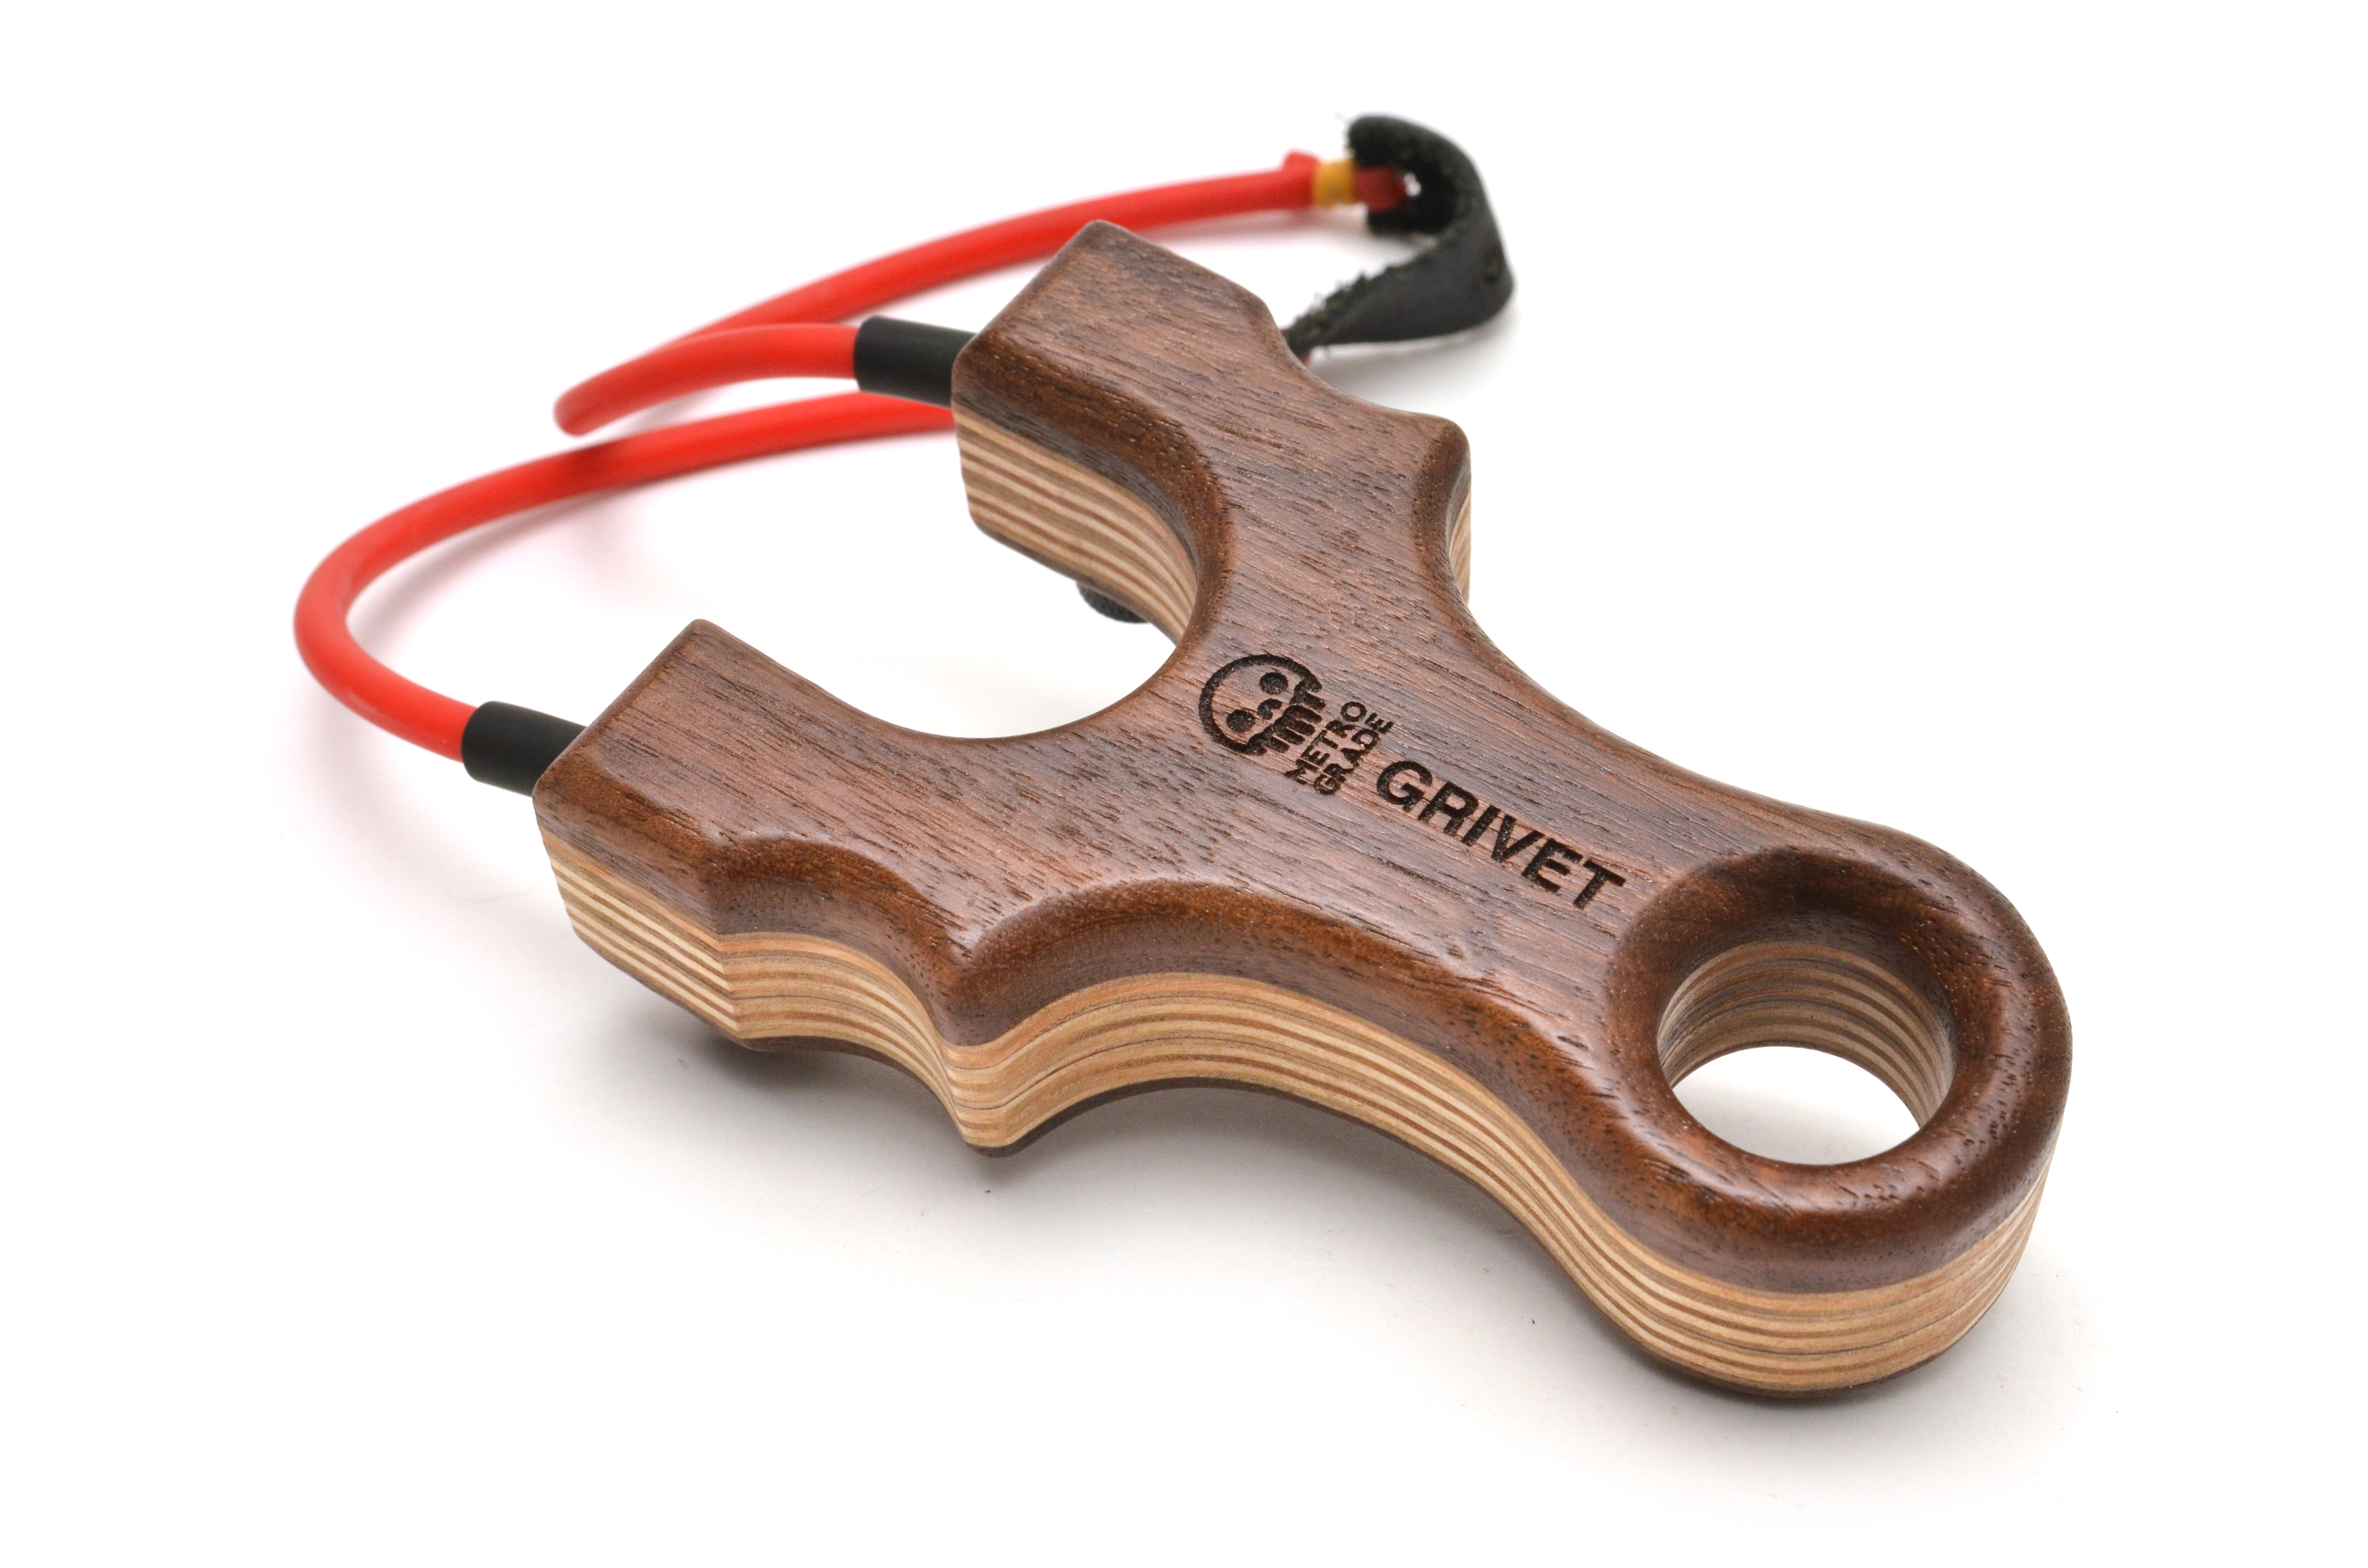
The Grivet slingshot is named after the Grivet monkey, found in Ethoipa, Sudan and surrounding areas. They are noted for having tufts of hair protruding alongside their faces. When designing the the shape of the Grivet slingshot, the ‘tufts’ of hair were pulled from the forks, which double as finger and thumb grip areas.
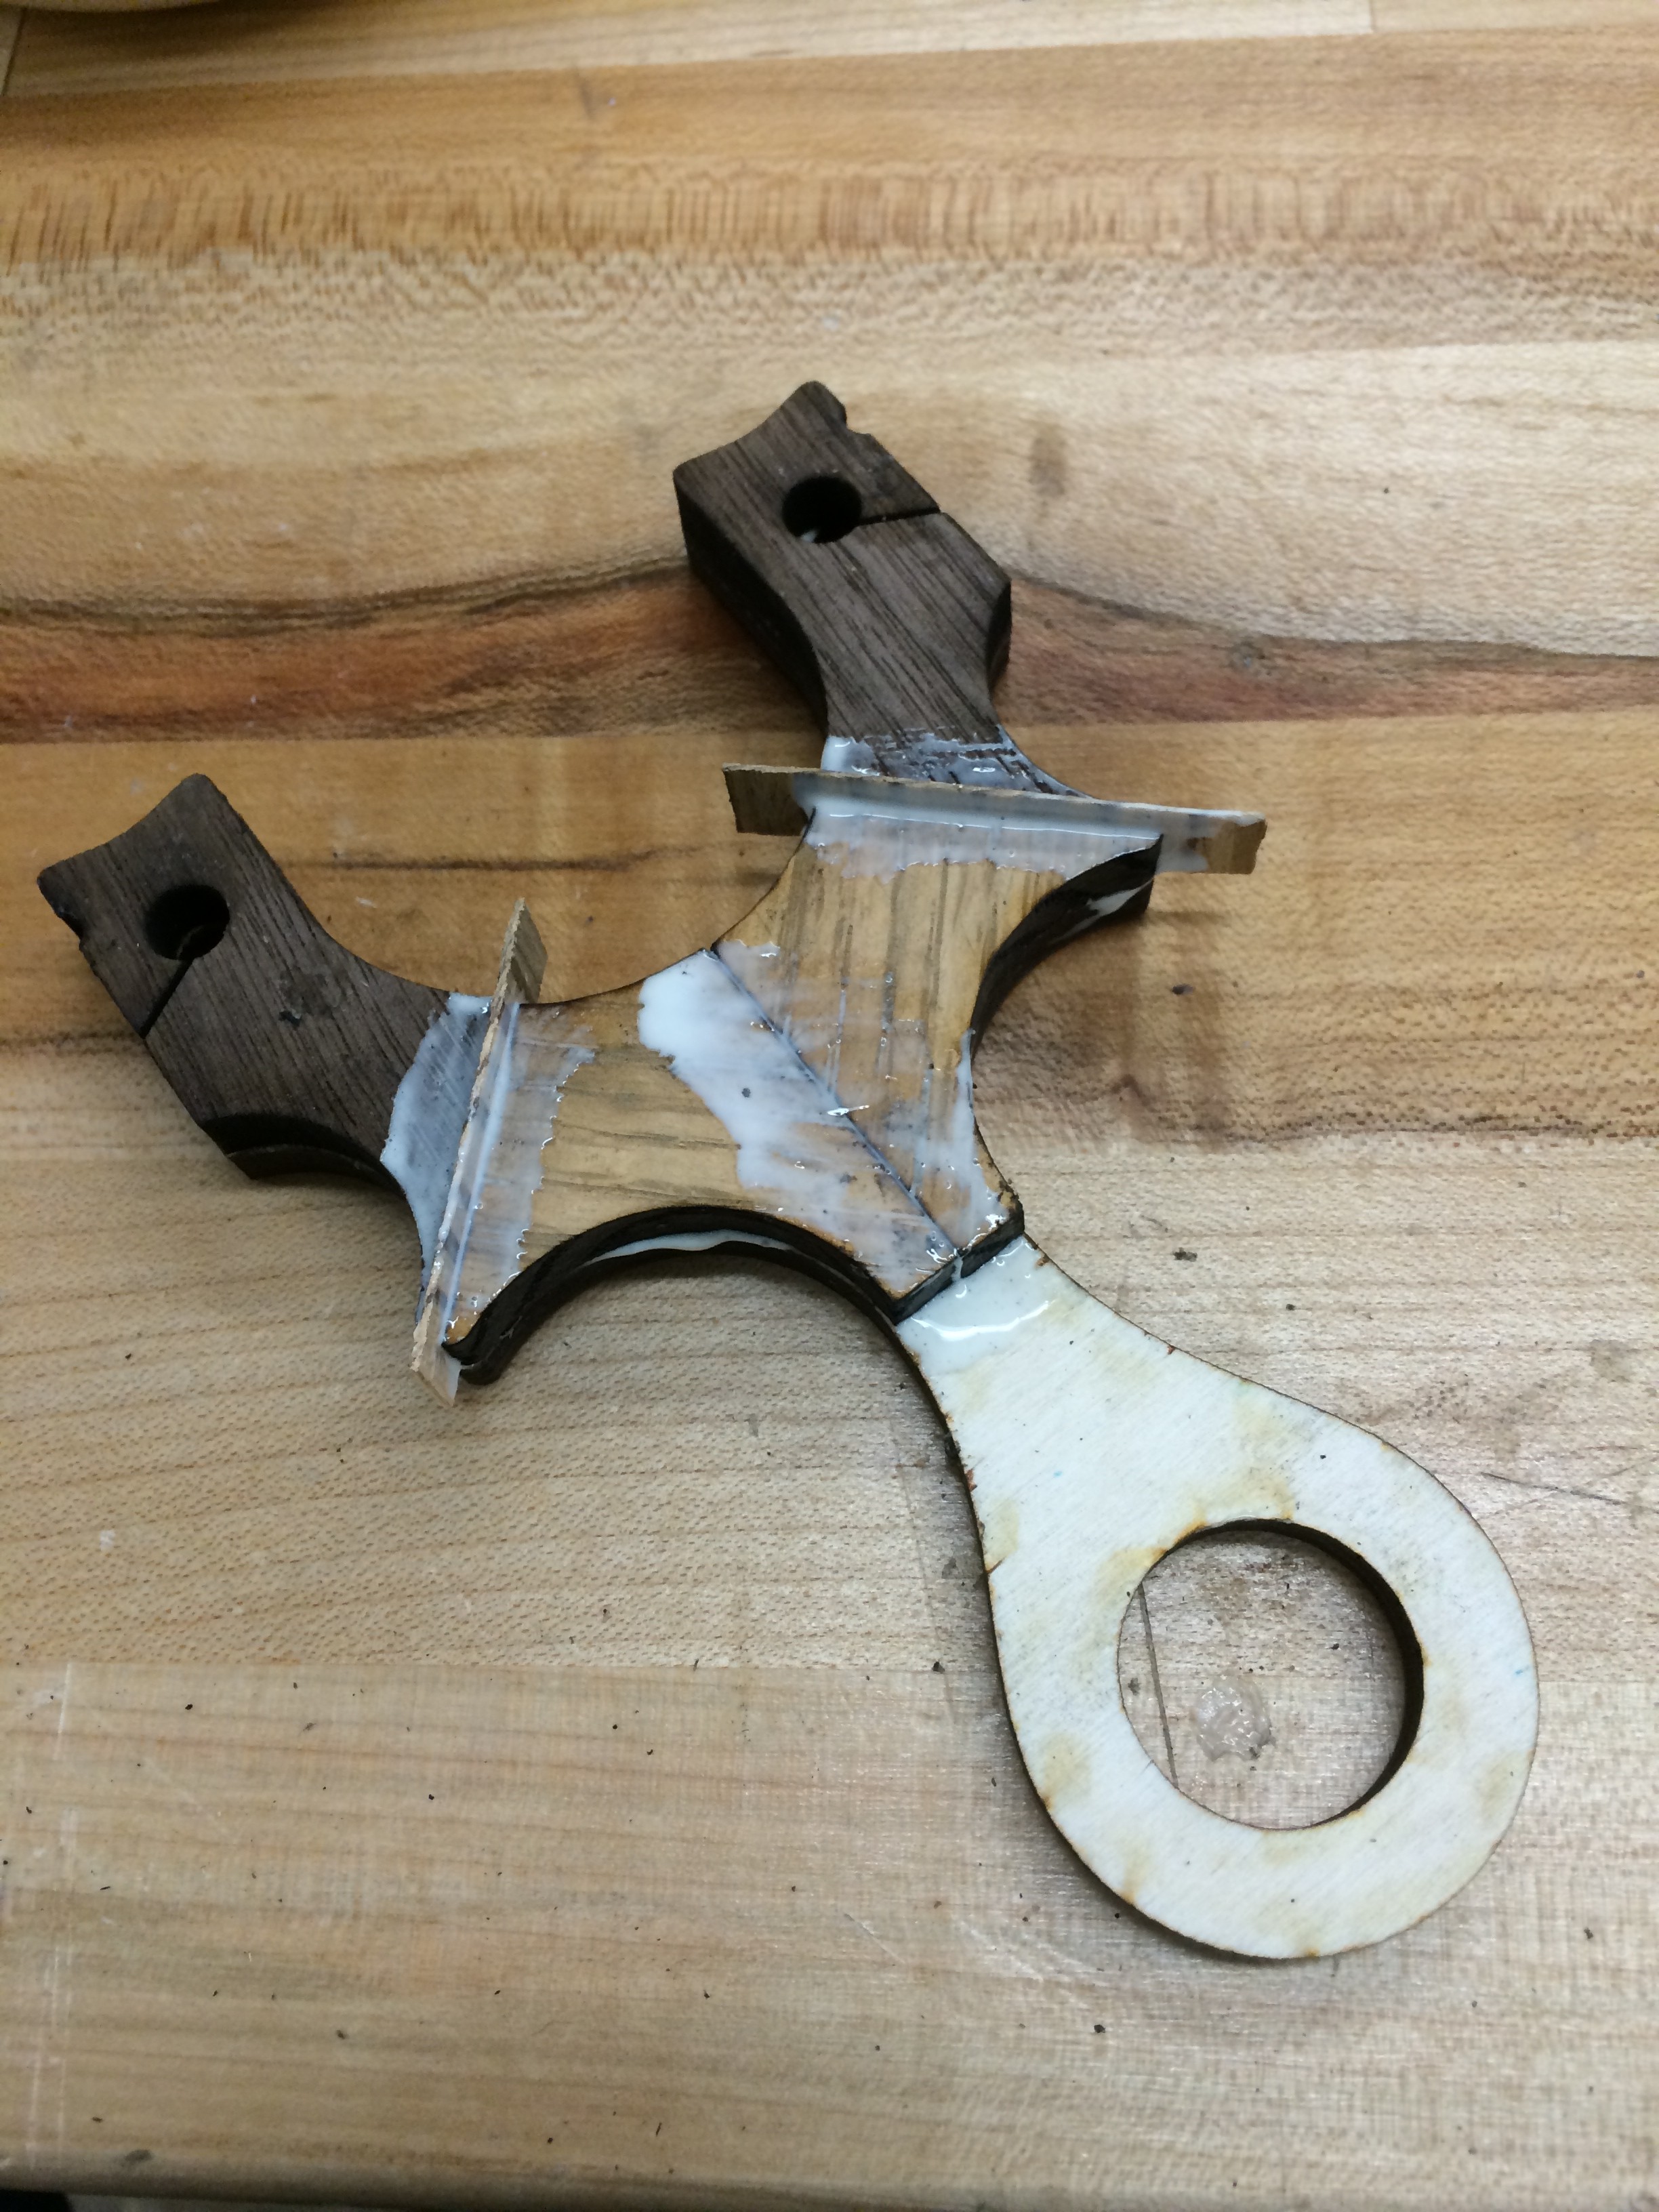
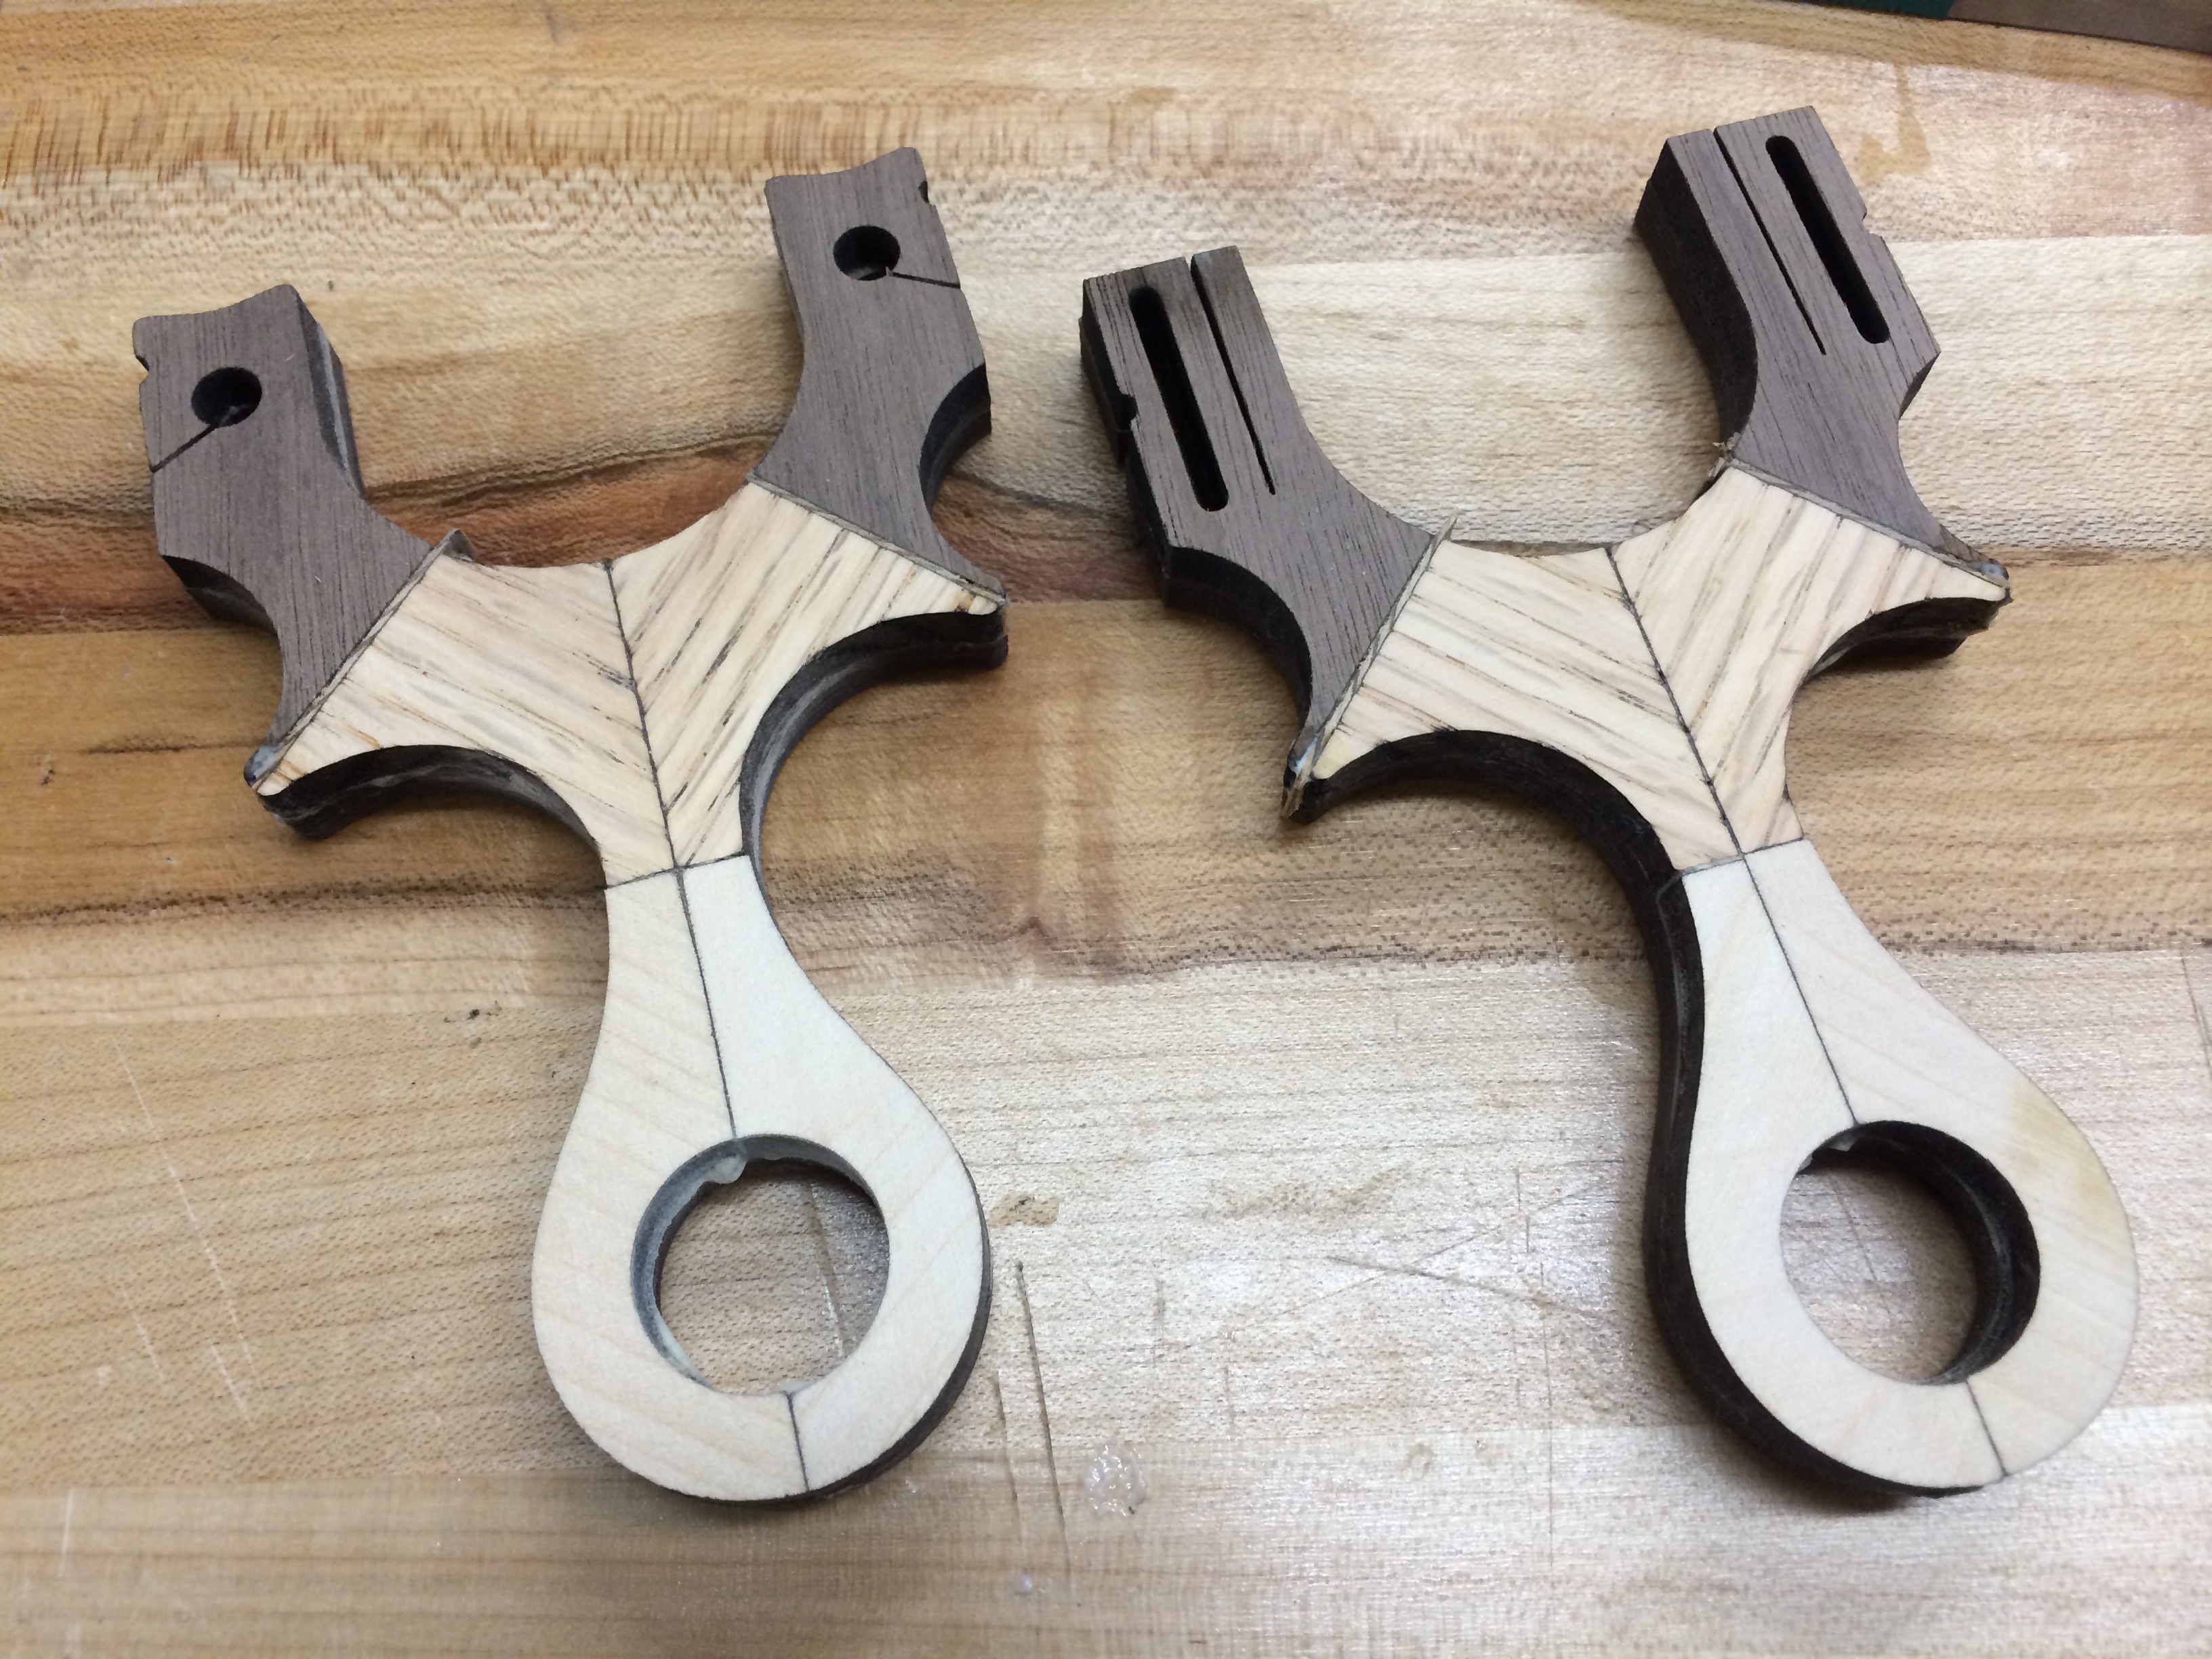
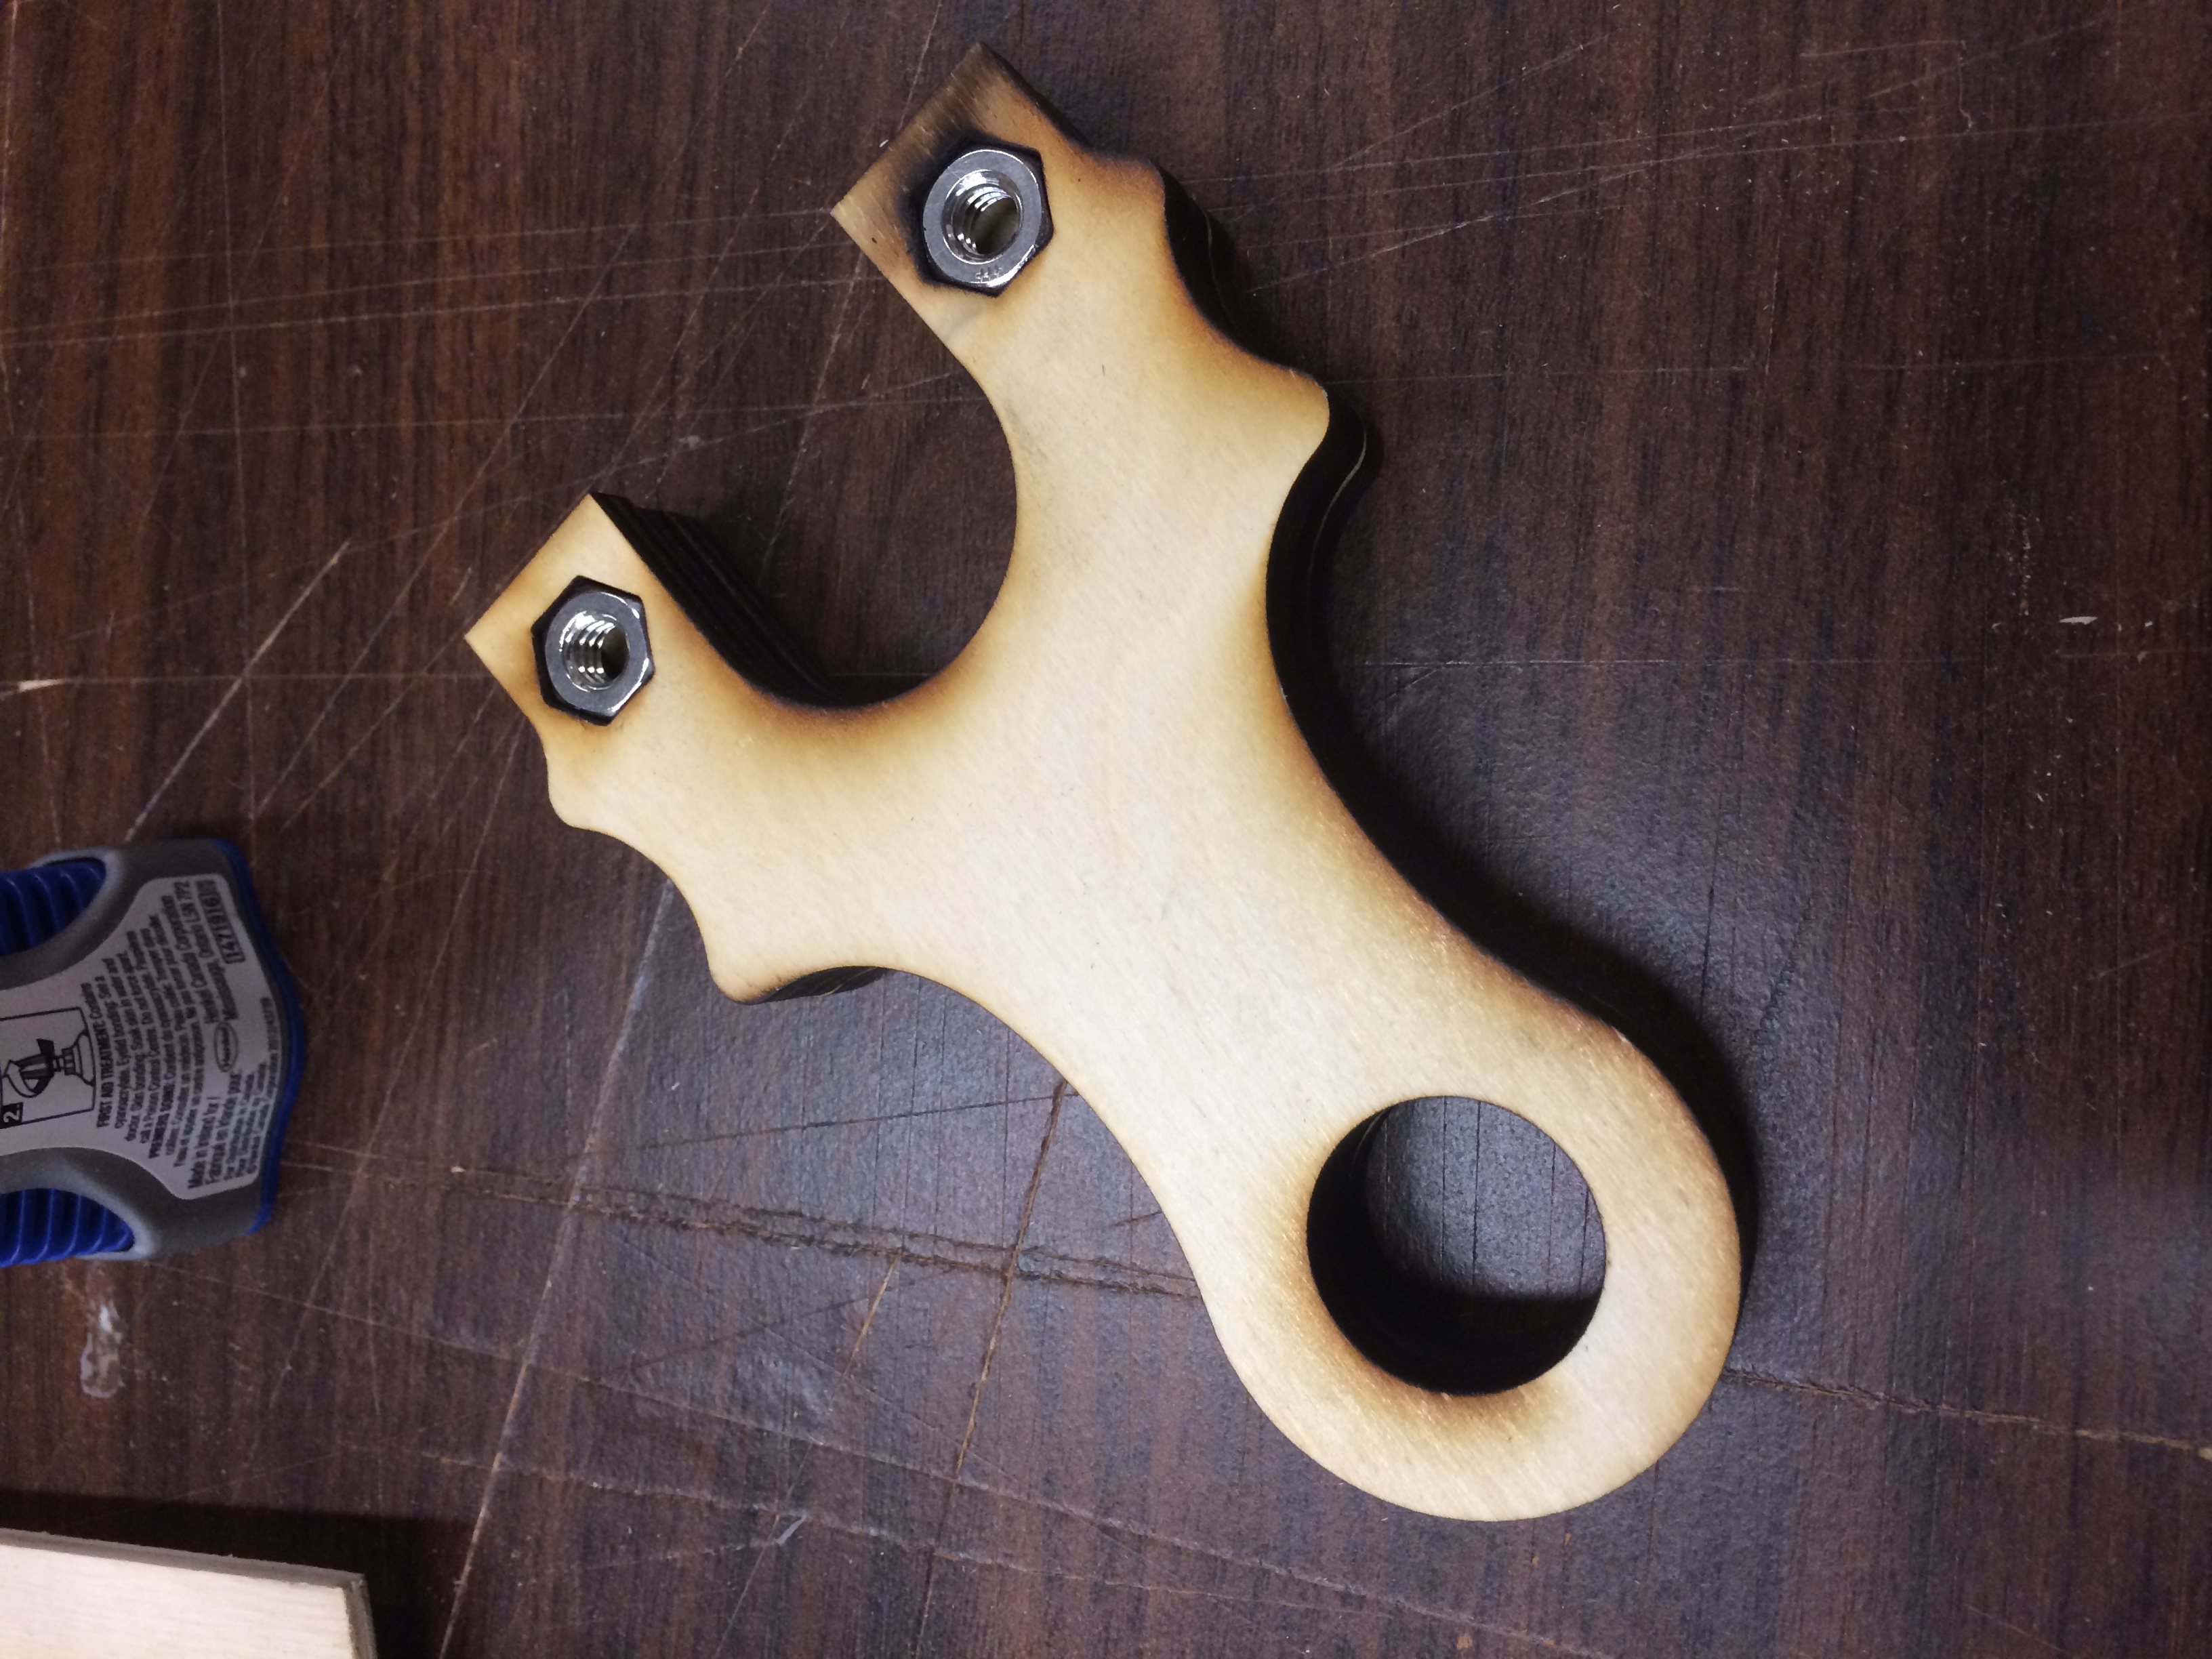
The Metro Grade Loris uses a recessed threaded insert (1/4-20) and set screws for the attachment. The new Grivet slingshot is a simplified version of this. Instead of using aluminum, stainless steel hex nuts are captured into place via some strategic laser cutting and layer of materials. In this photo, you can see the 2nd layer (the first being a backing layer). The 2nd layer contains the slots for the bands/tubes to slide into. The are about 1″ deep.
The 3rd layer, is where some precision cut hexagonal shaped holes where laser cut to accept the 1/4-20 stainless hex nuts. These nuts are a little less than 1/4″ thick, which is perfect for the a thickness of 1/4″ Baltic birch.
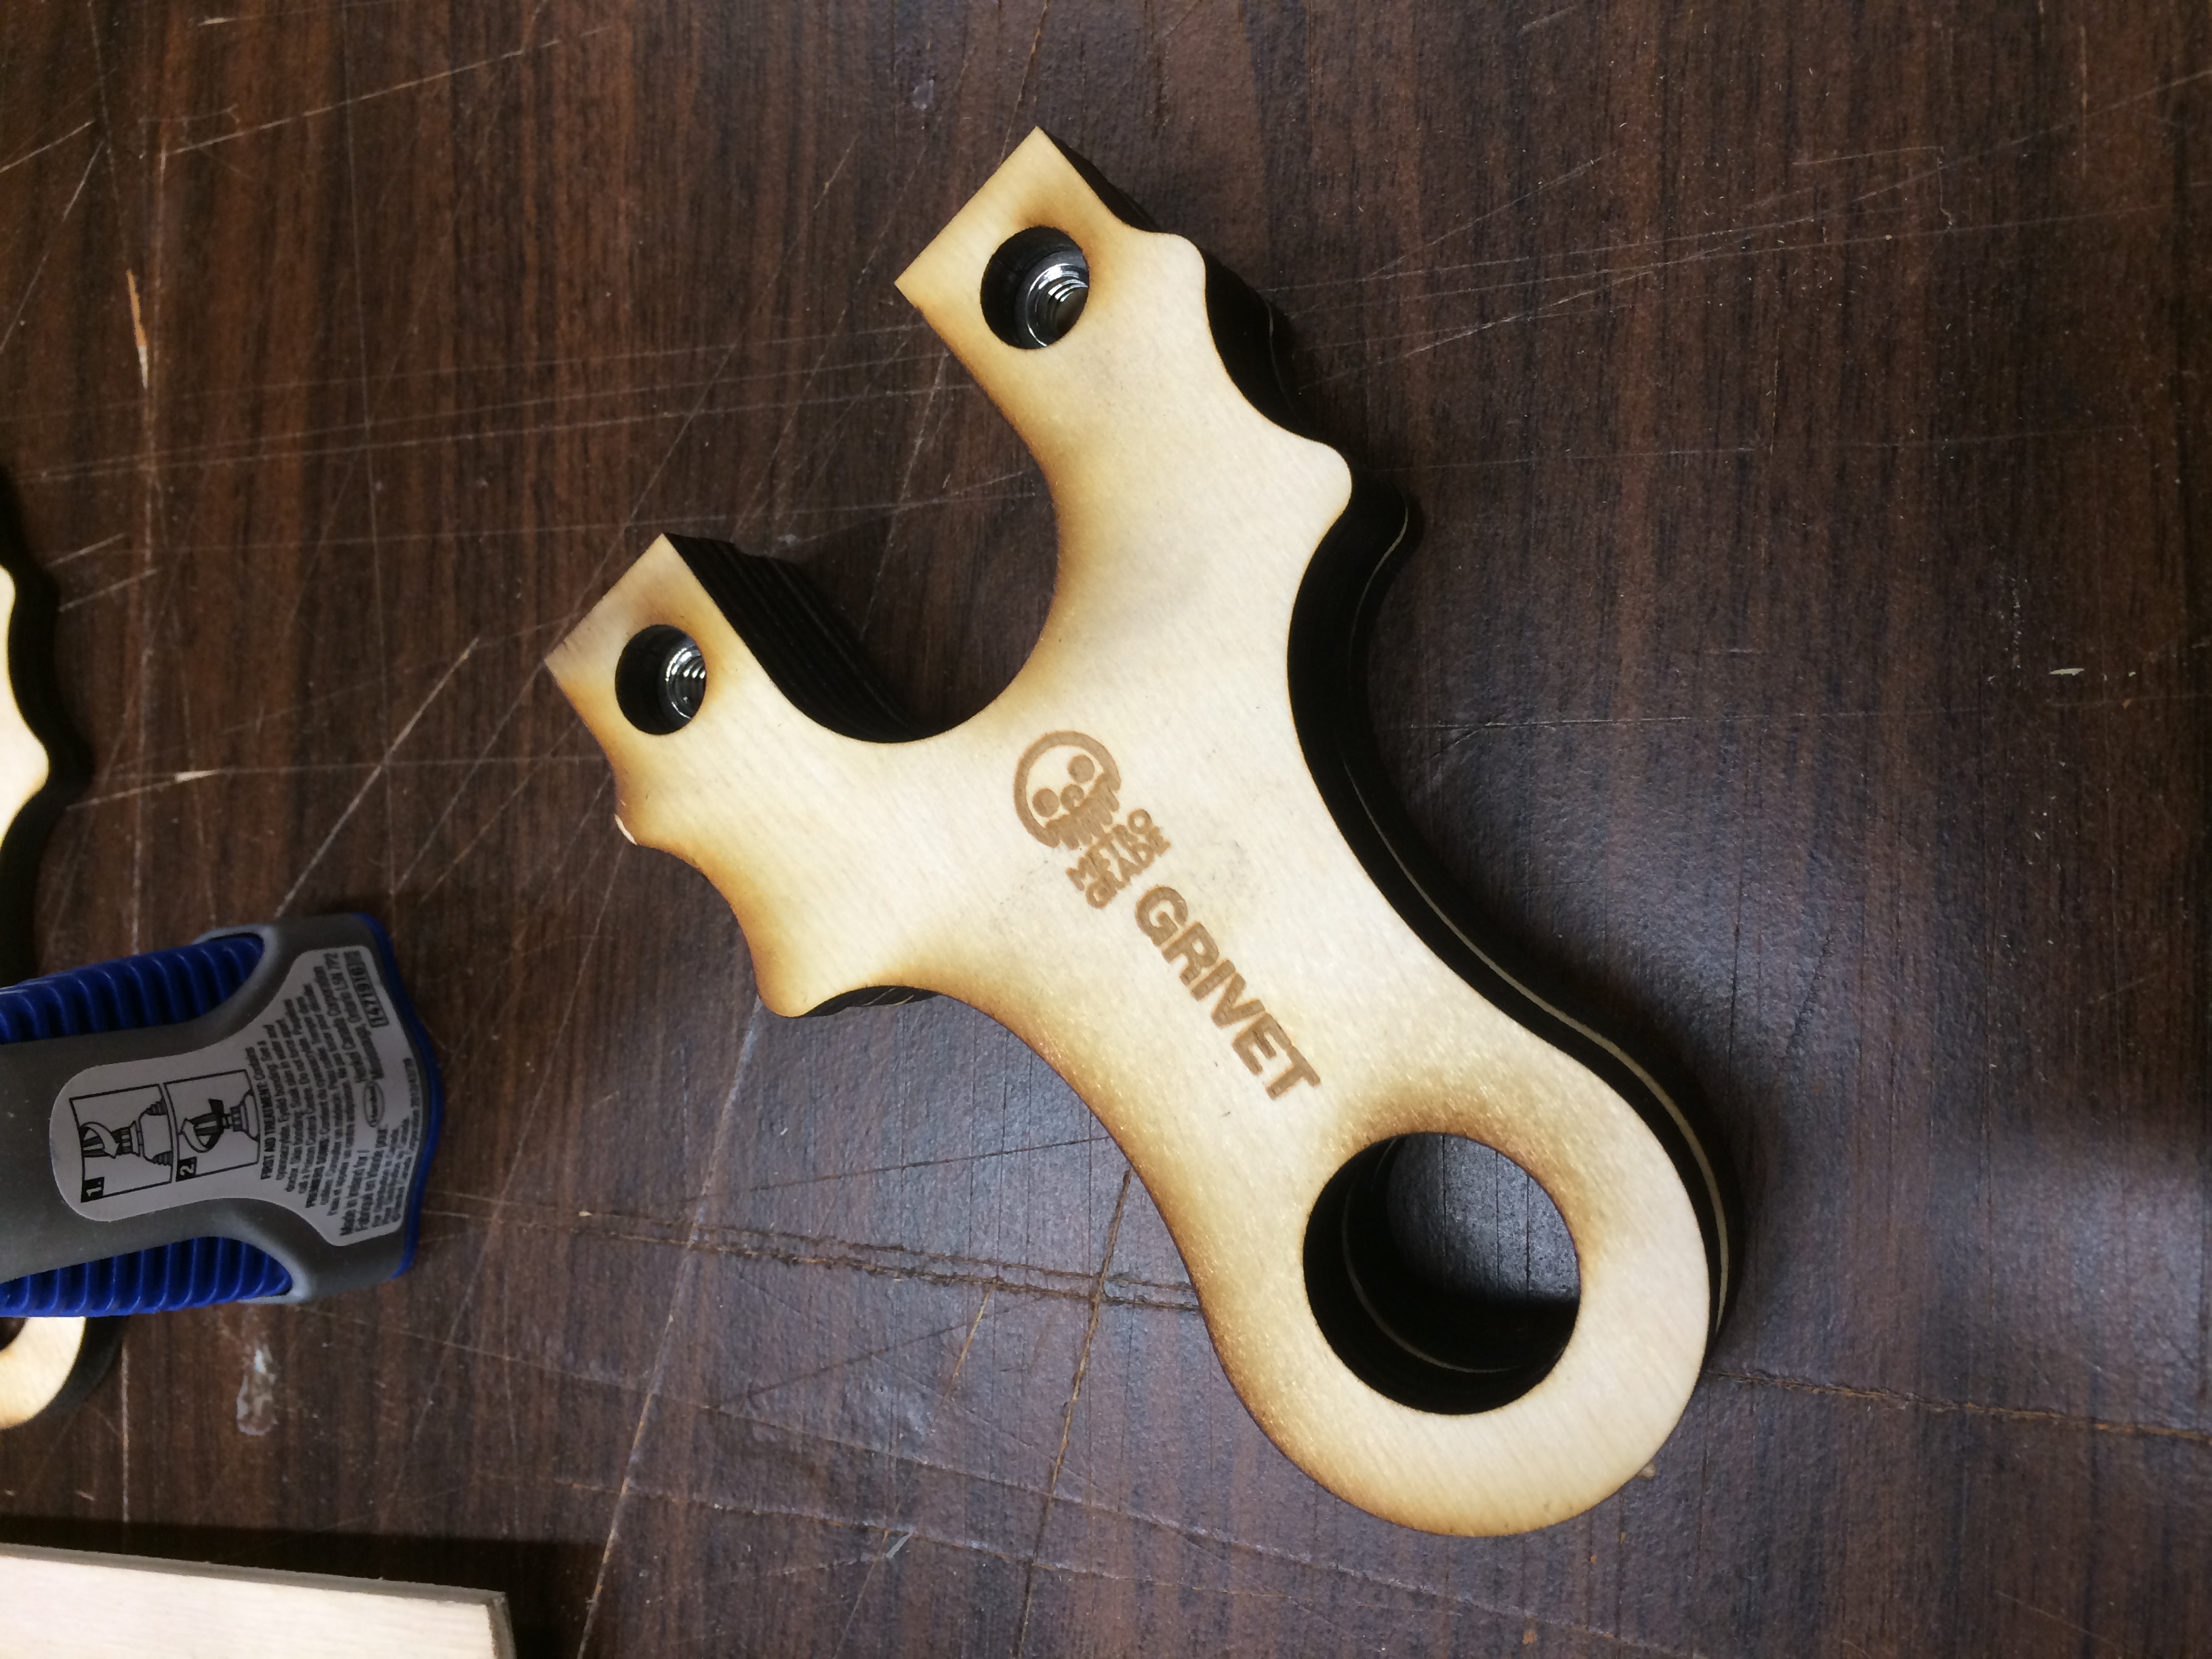
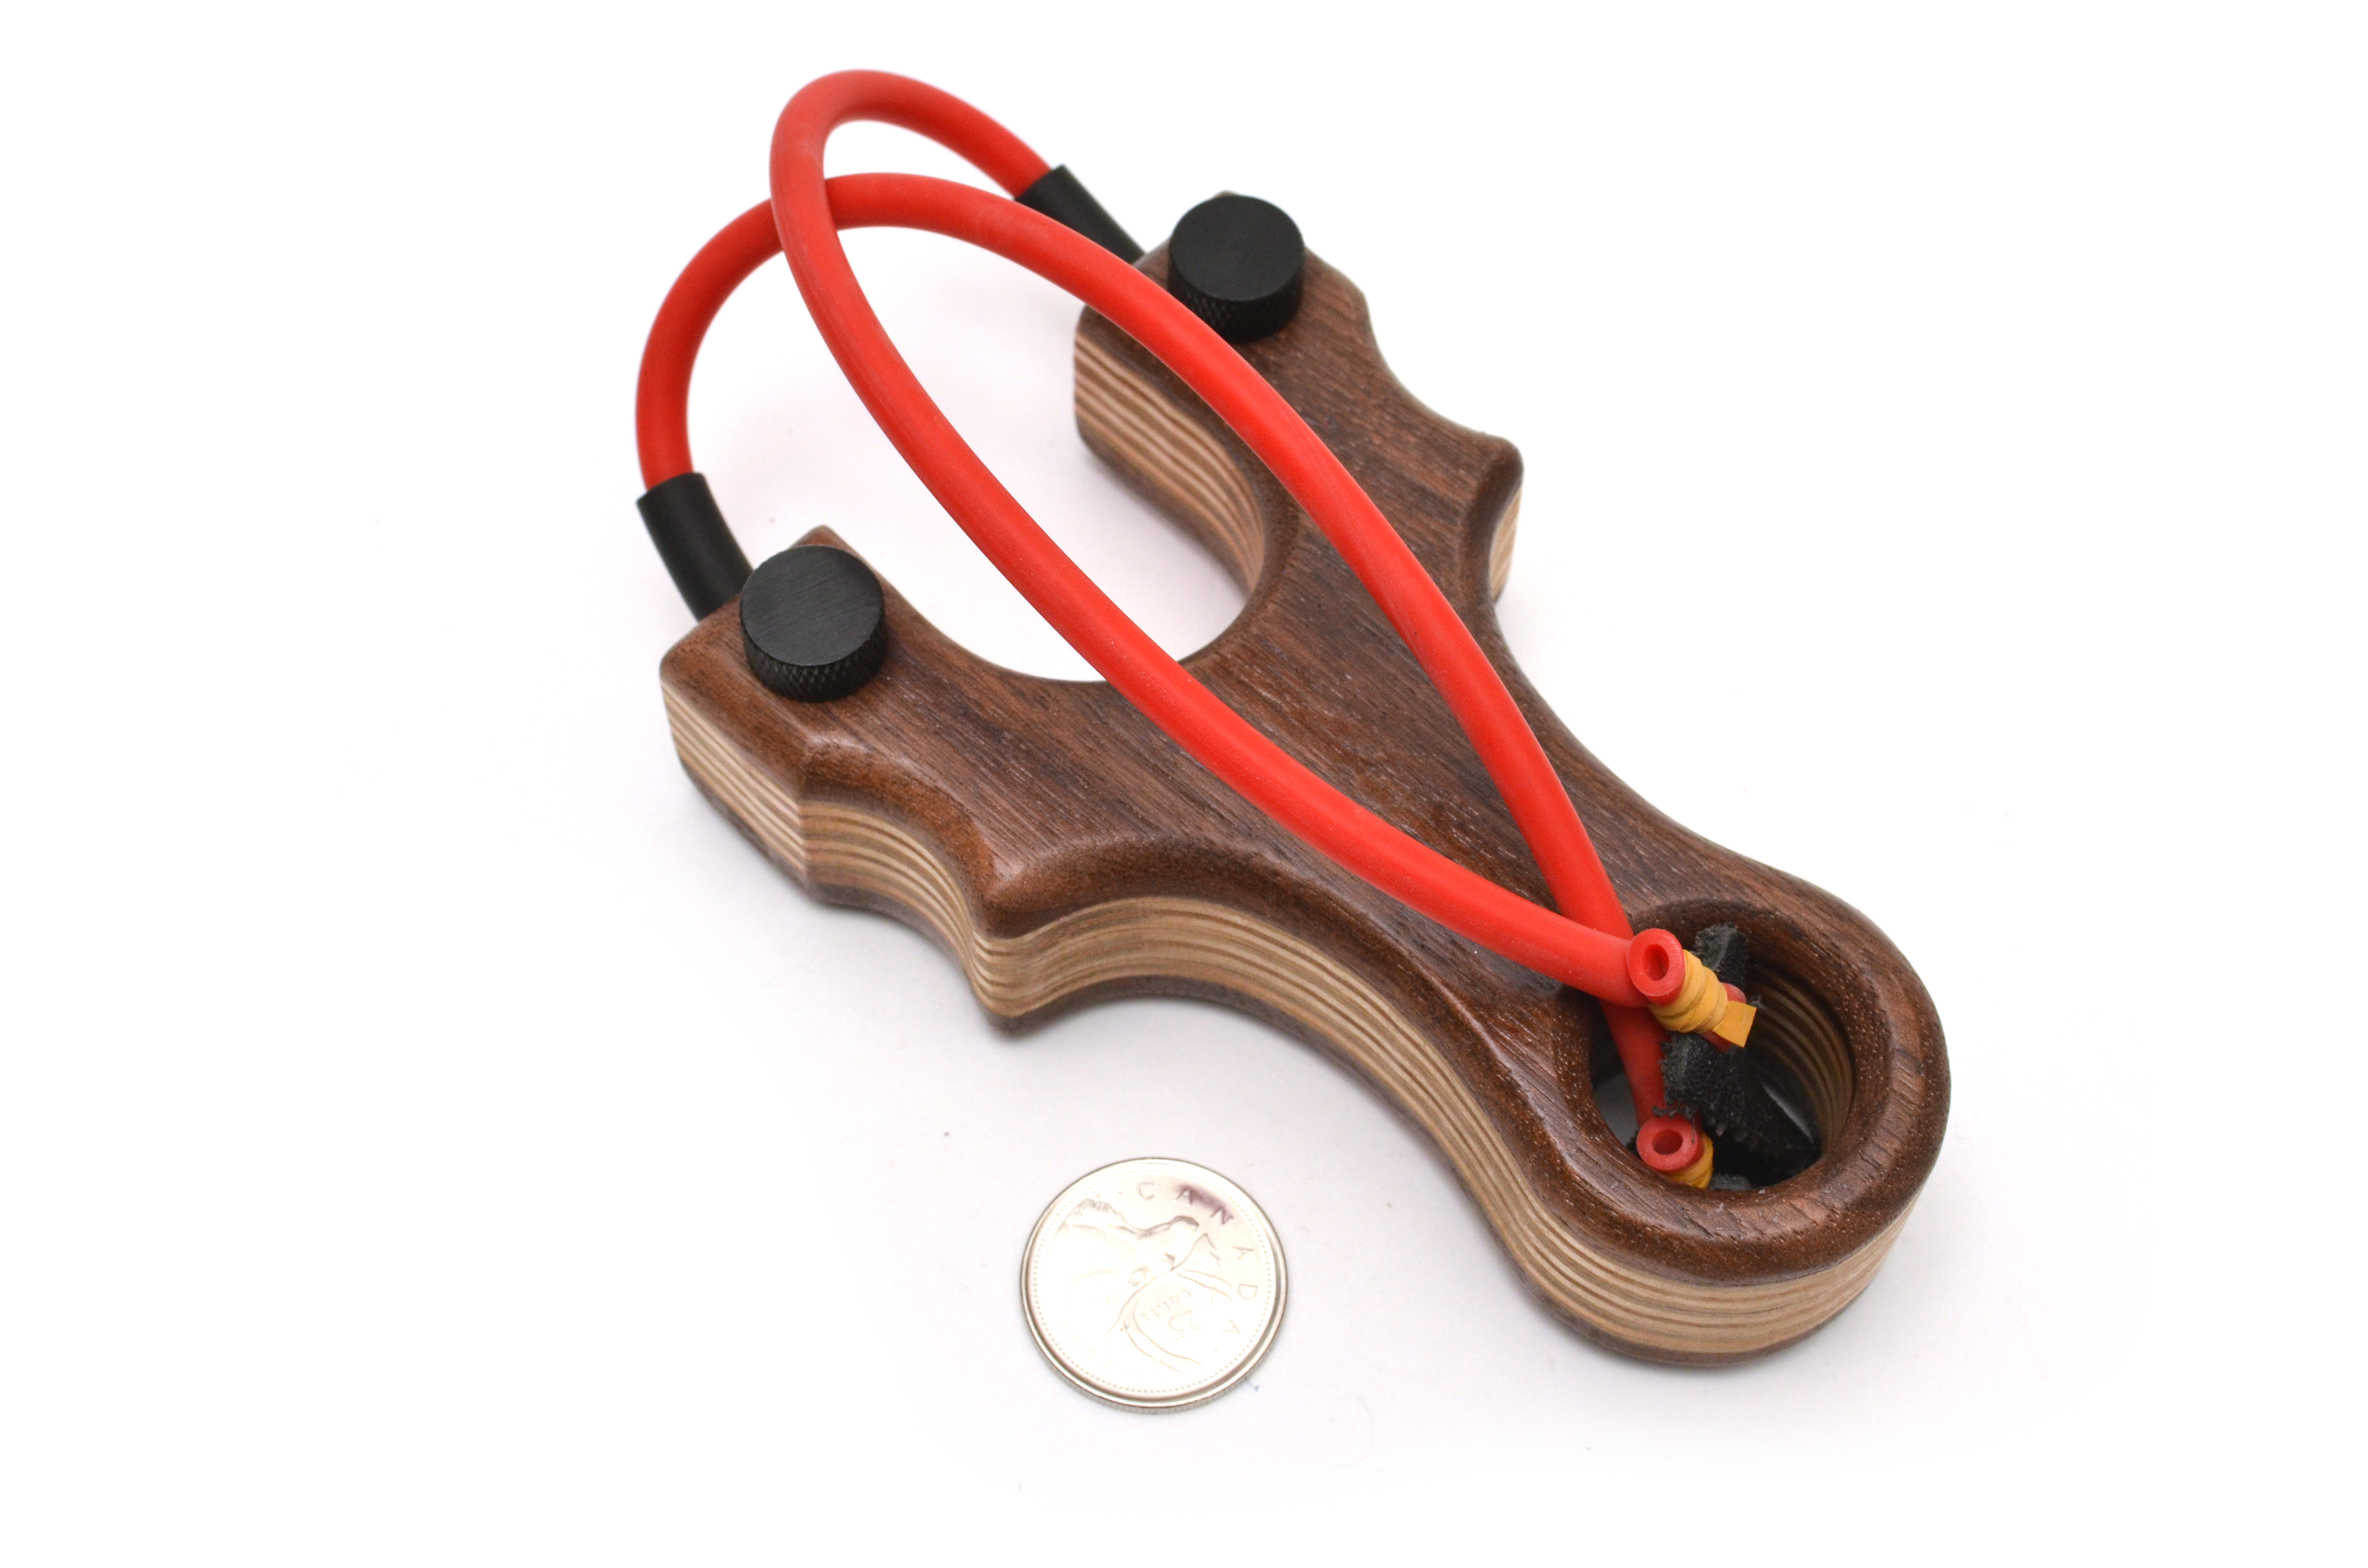
The final top layer is where the branding and face sits, this also where the nuts get captured by centred holes which will also accept the pricey black anodized thumb screws.
The holes are larger enough for the shoulder of the threads to sit in, but the head remains out. The one BIGGEST advantage of using thumbscrews (besides the tool less function) is that you cannot over tighten the band set, risking delaminating the outer backing layer.
Once it was all glued up, all the same procedures on finishing a slingshot were done. To see exactly what is done, check out the Metro Made Loris post. Three coats of acrylic spray and some light buffing, this Grivet prototype is done!
Currently, it is banded up with 8mm Linatex bands attached to a Metro Grade Heifer GP pouch. A couple slices of the same suede cowhide was used to buffer the screw and the Linatex, preserving its integrity.
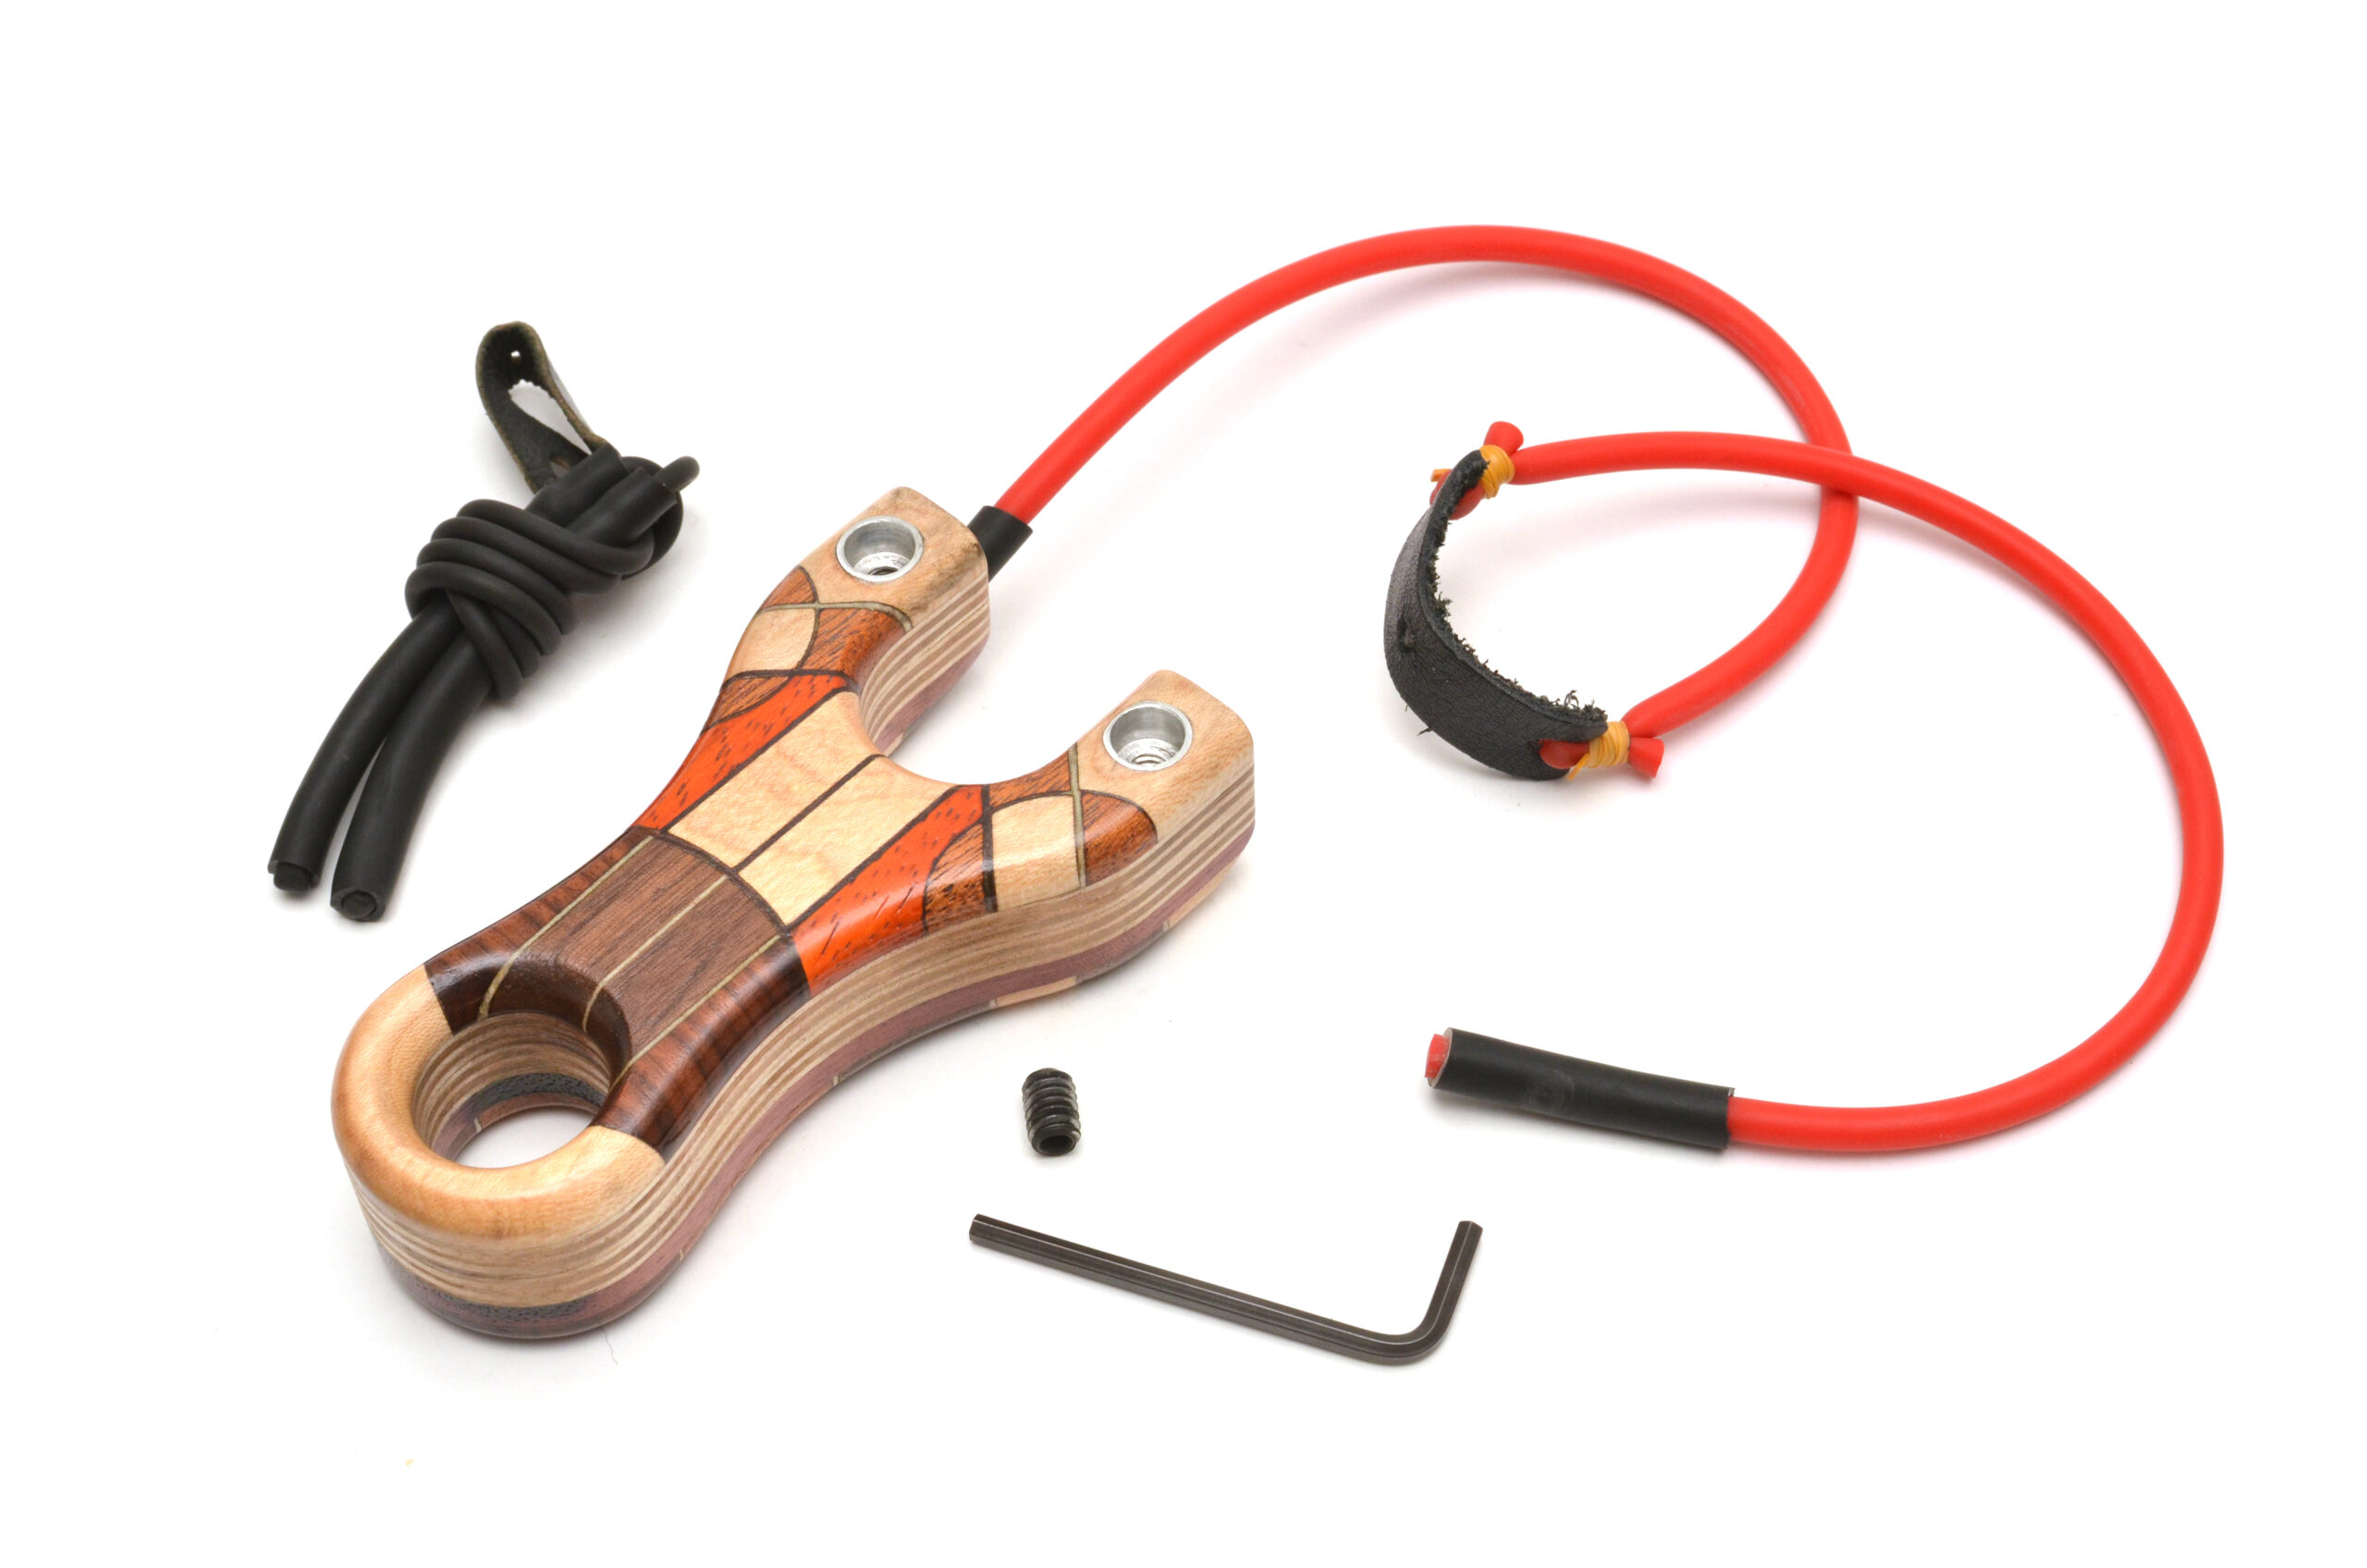
This post doesn’t stop here. You may have noticed in the feature image a walnut version of this….you weren’t mistaken. After confirming that the mechanism worked, it was off to the laser cutter once more to cut up a set of parts for a walnut Grivet.
Probably doesn’t much explaining, but the only difference is the fork tip shape. About 3mm is added to the outside edge to clean up the profile and add a bit more strength to the tips themselves.
Wanted to make a quick post about our new compression tube attachment method found on some of our slingshots, The Loris PFS and The Pygmy Marmoset. A short video of how it works and some images of tube detached.